
Behind the Scenes: Natabata Interior Project
Hello, my name is Andri Iskandar. I’m a 3D architecture visualizer that currently works and lives in Dubai, United Arab Emirates. I’ve been in this industry for about 18 years now. I’m a self-taught 3D visualizer with an architecture background.
This project was actually a challenge held by one of the largest Indonesian CG Communities, called Kampoeng3D. Natabata or bricks bond is the name of the house that I used for the challenge. I took this opportunity as a challenge to myself to understand Blender better.
Being a 3ds Max user for more than 15 years has opened my eyes that the latest Blender version (2.8) is more intuitive and more user friendly compared to the previous one. Hence, I decided to continue this project even after the challenge had ended. This was my first serious, finished project using Blender, and I’m really proud of this.
The Inspiration
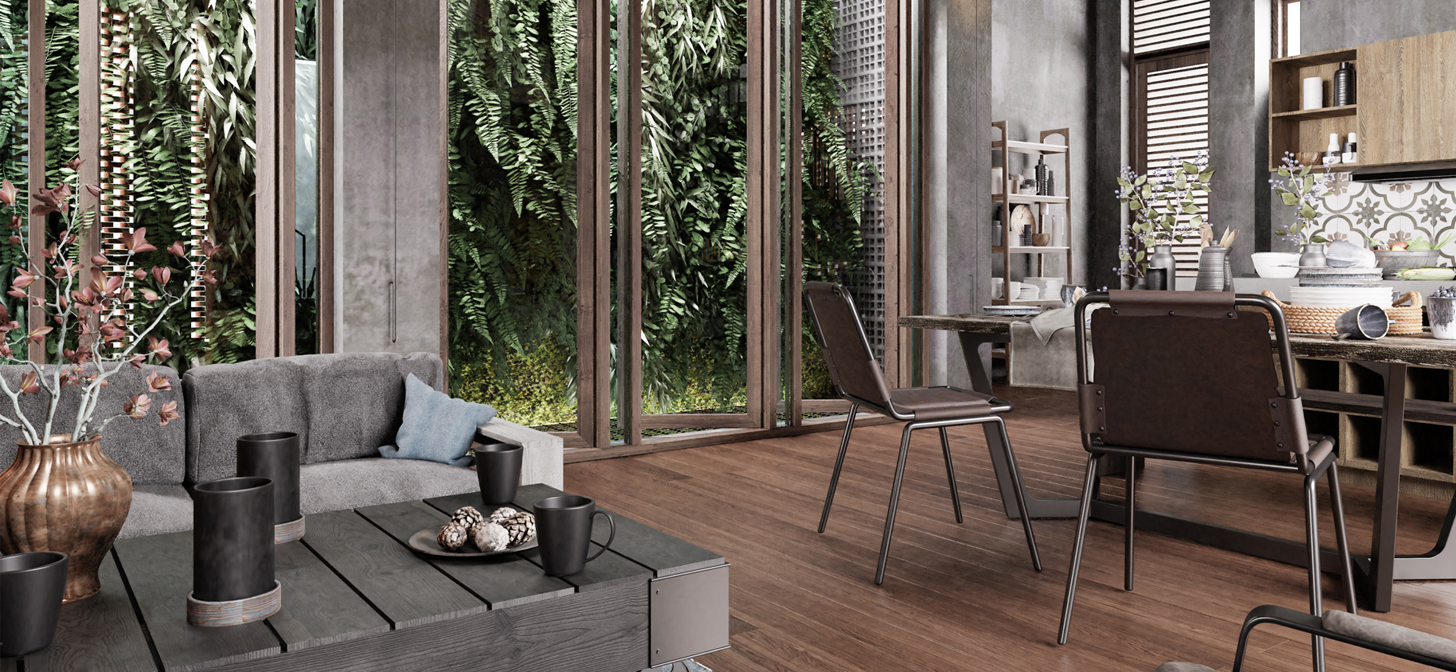
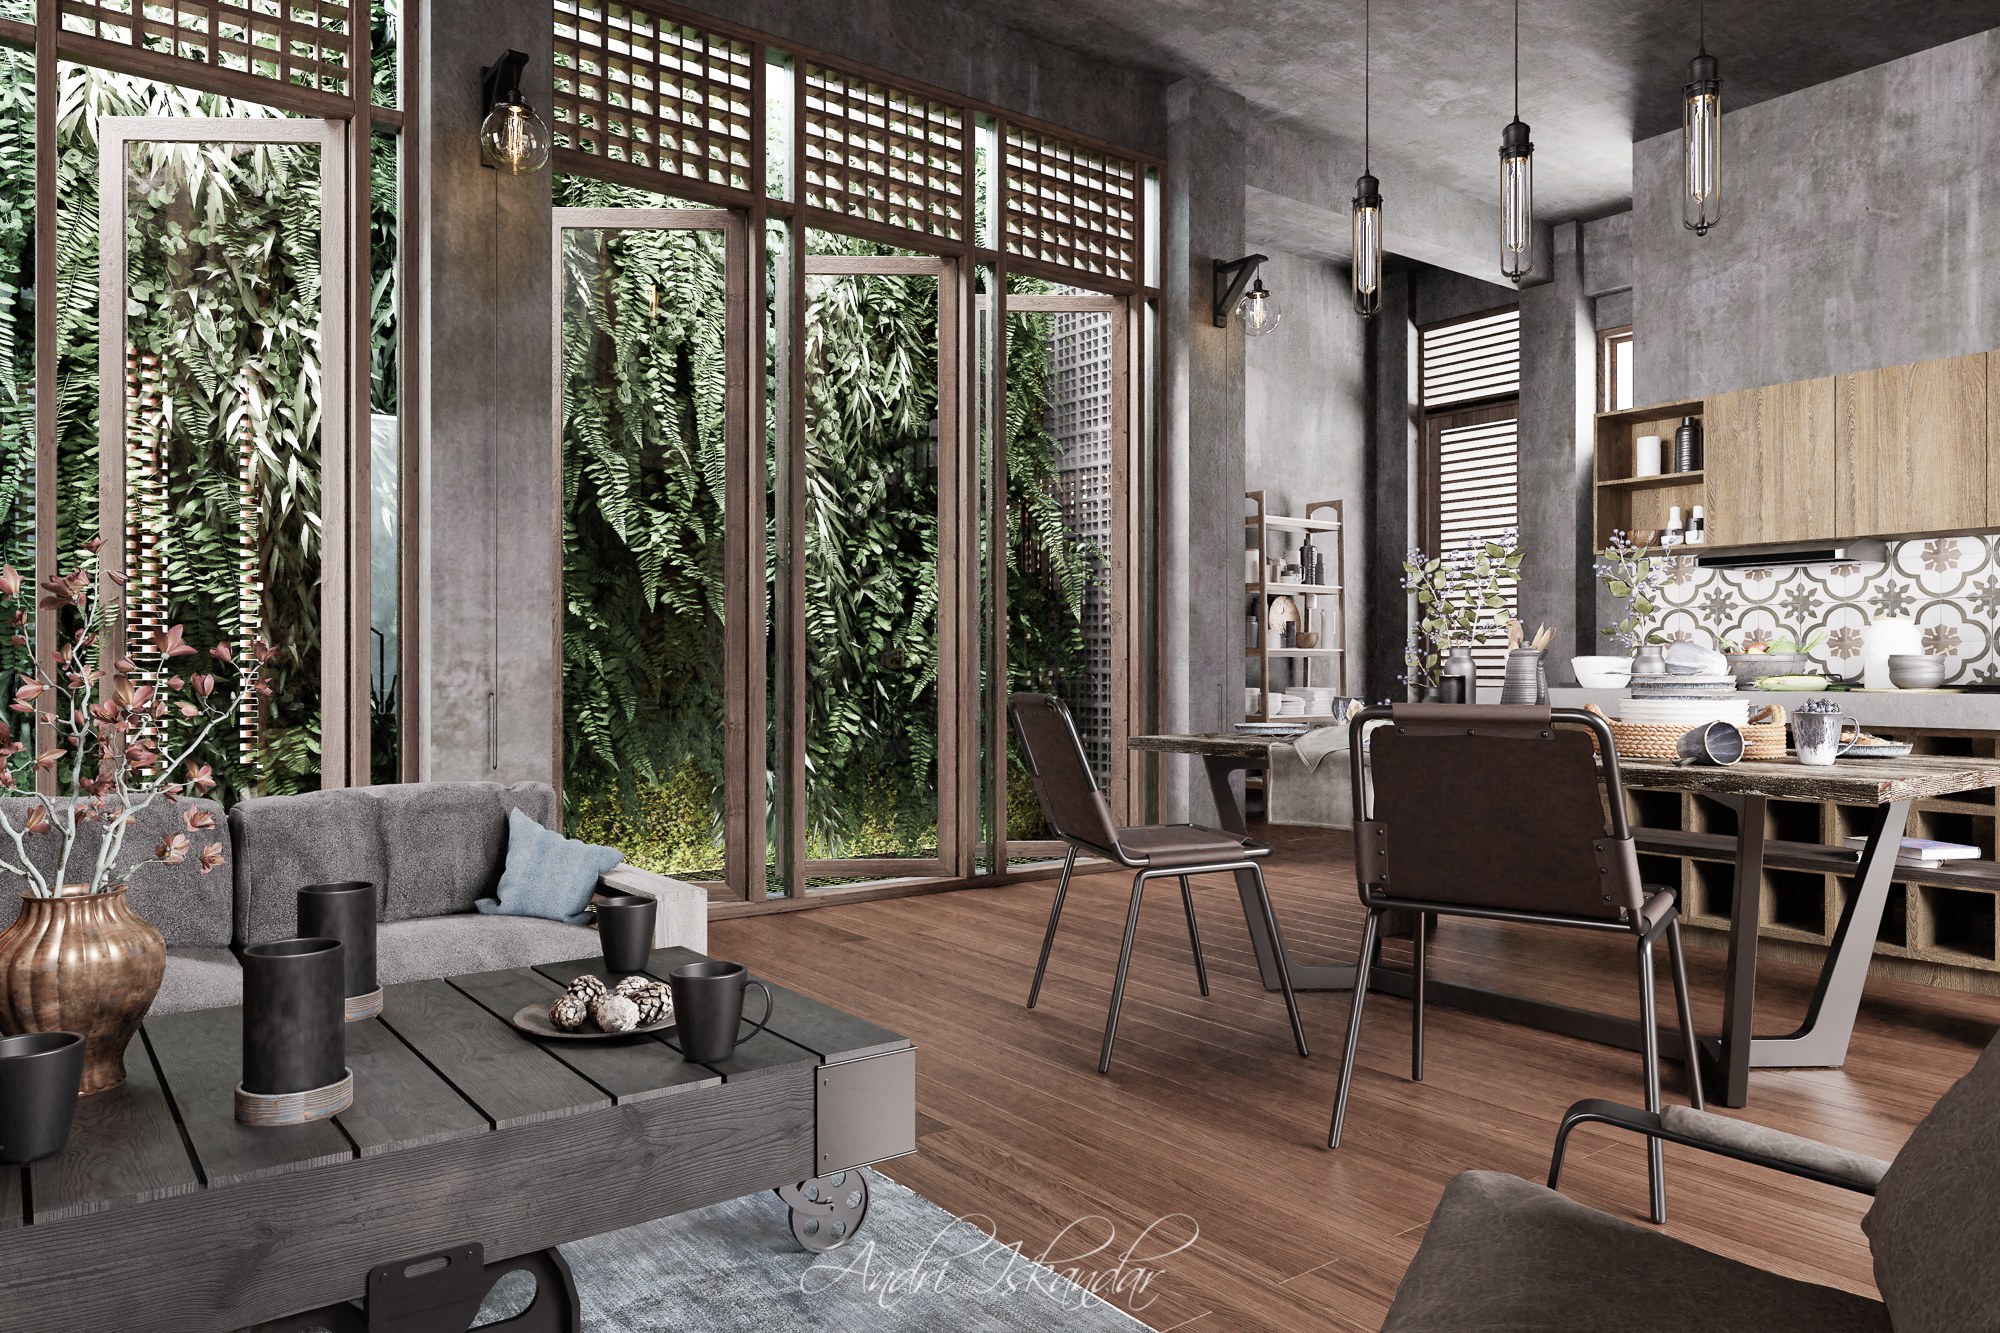
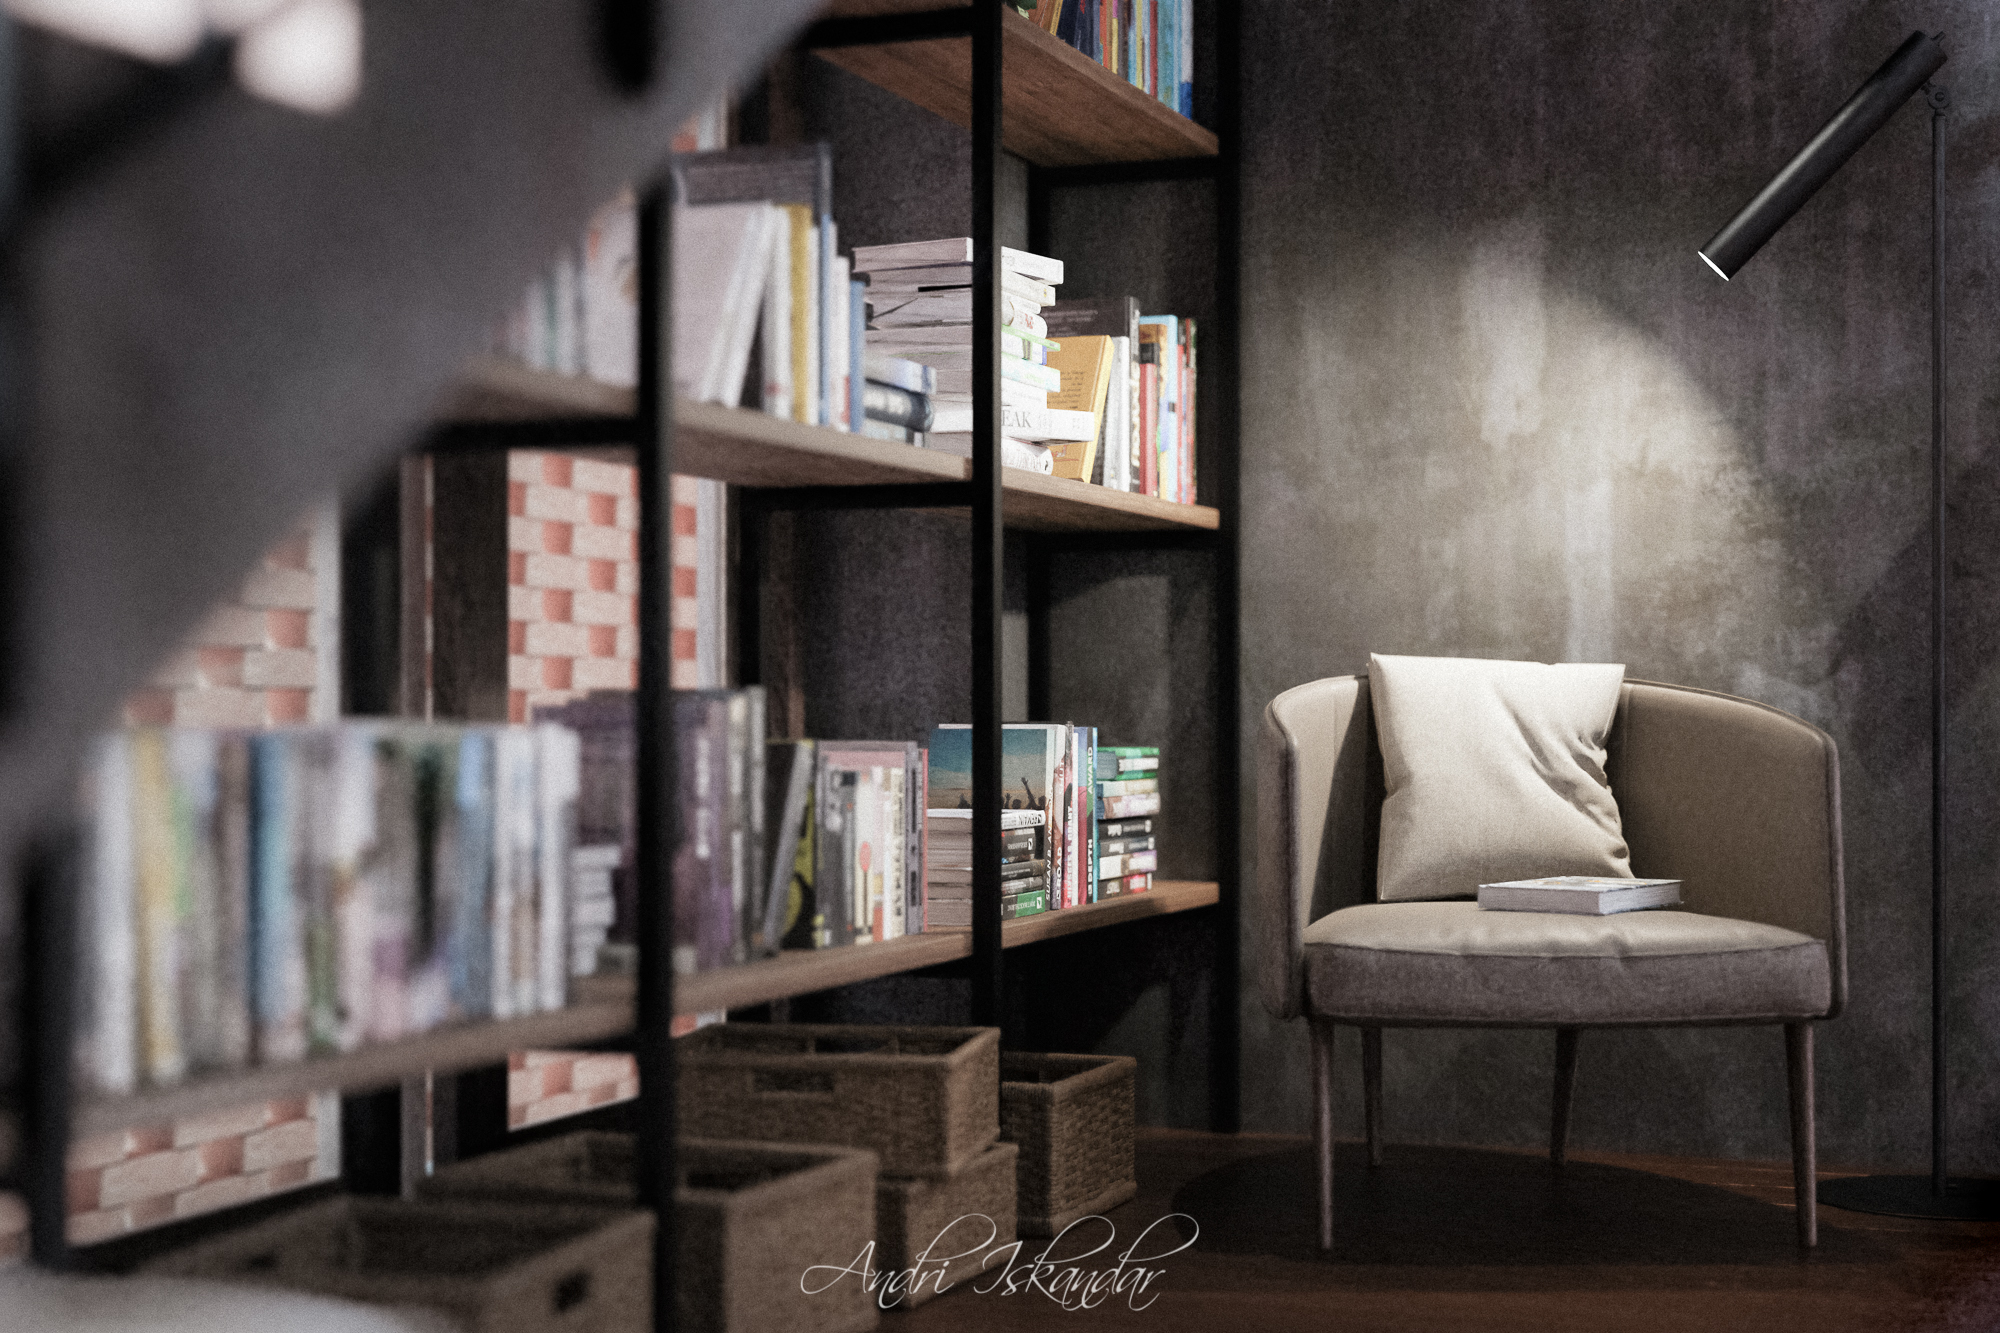
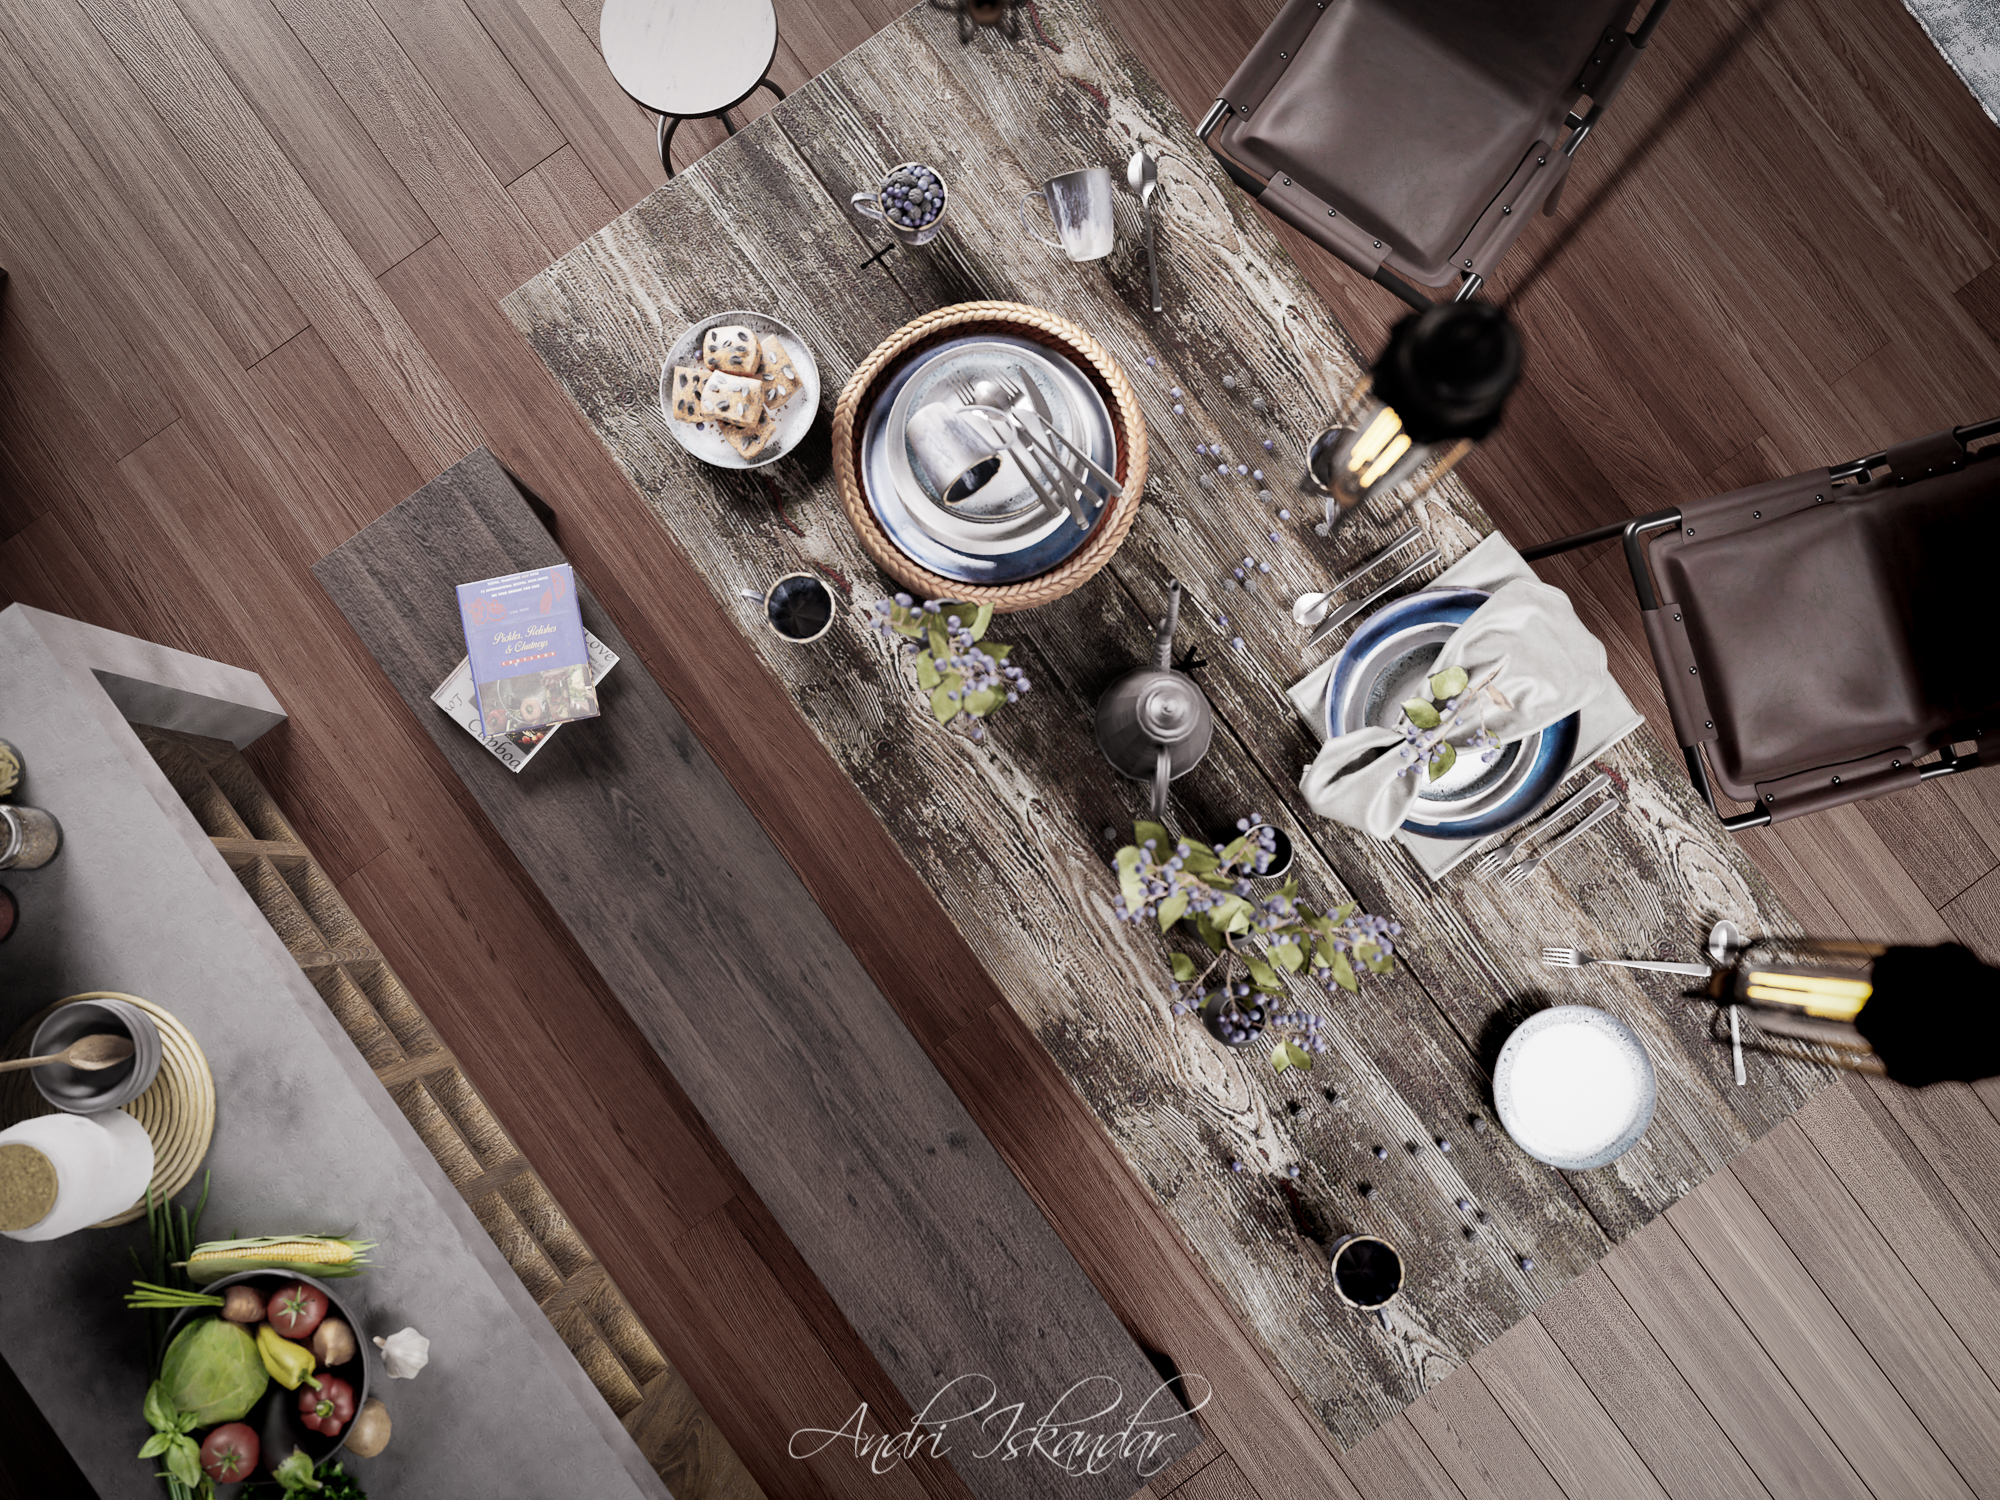
I’ve been doing some different interior projects with industrial themes for the last few months and I really like the style. For me it’s a combination between a modern sleekness and old fashioned design. Exposed brick walls, concrete mixed with rustic woods and matte finished metal are something that I wanted to explore here. Also the house design somehow matches with the industrial theme. So I started to find the best ideas for this project by collecting some reference images.
The Process
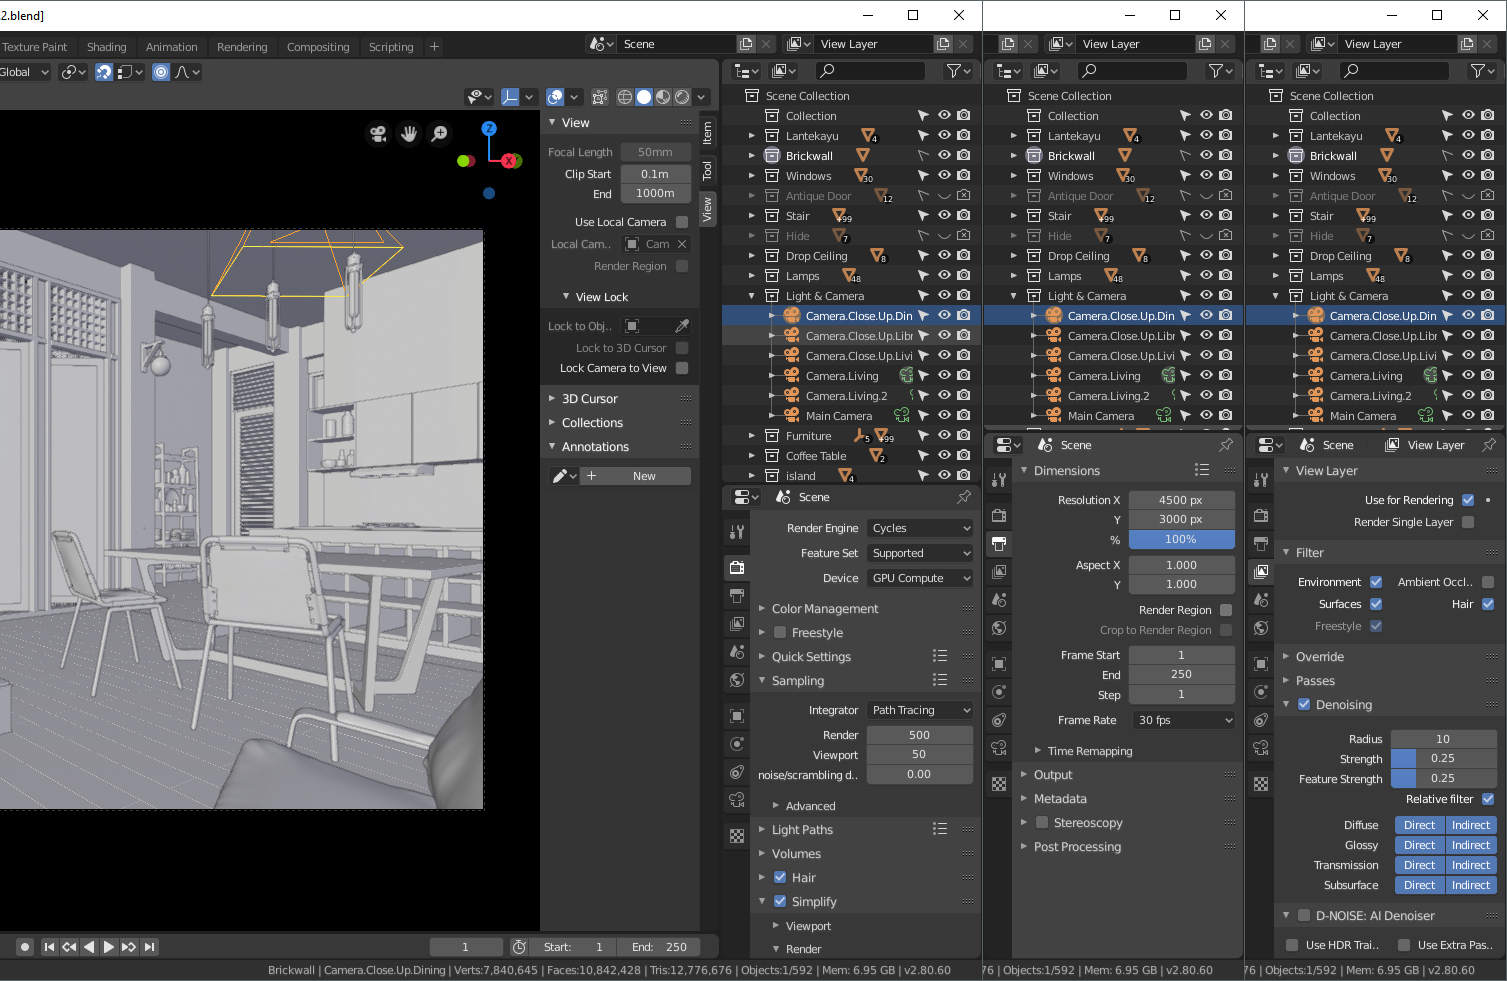
After getting the provided base model, I exported it from 3ds Max to Blender using fbx format with the materials still intact.
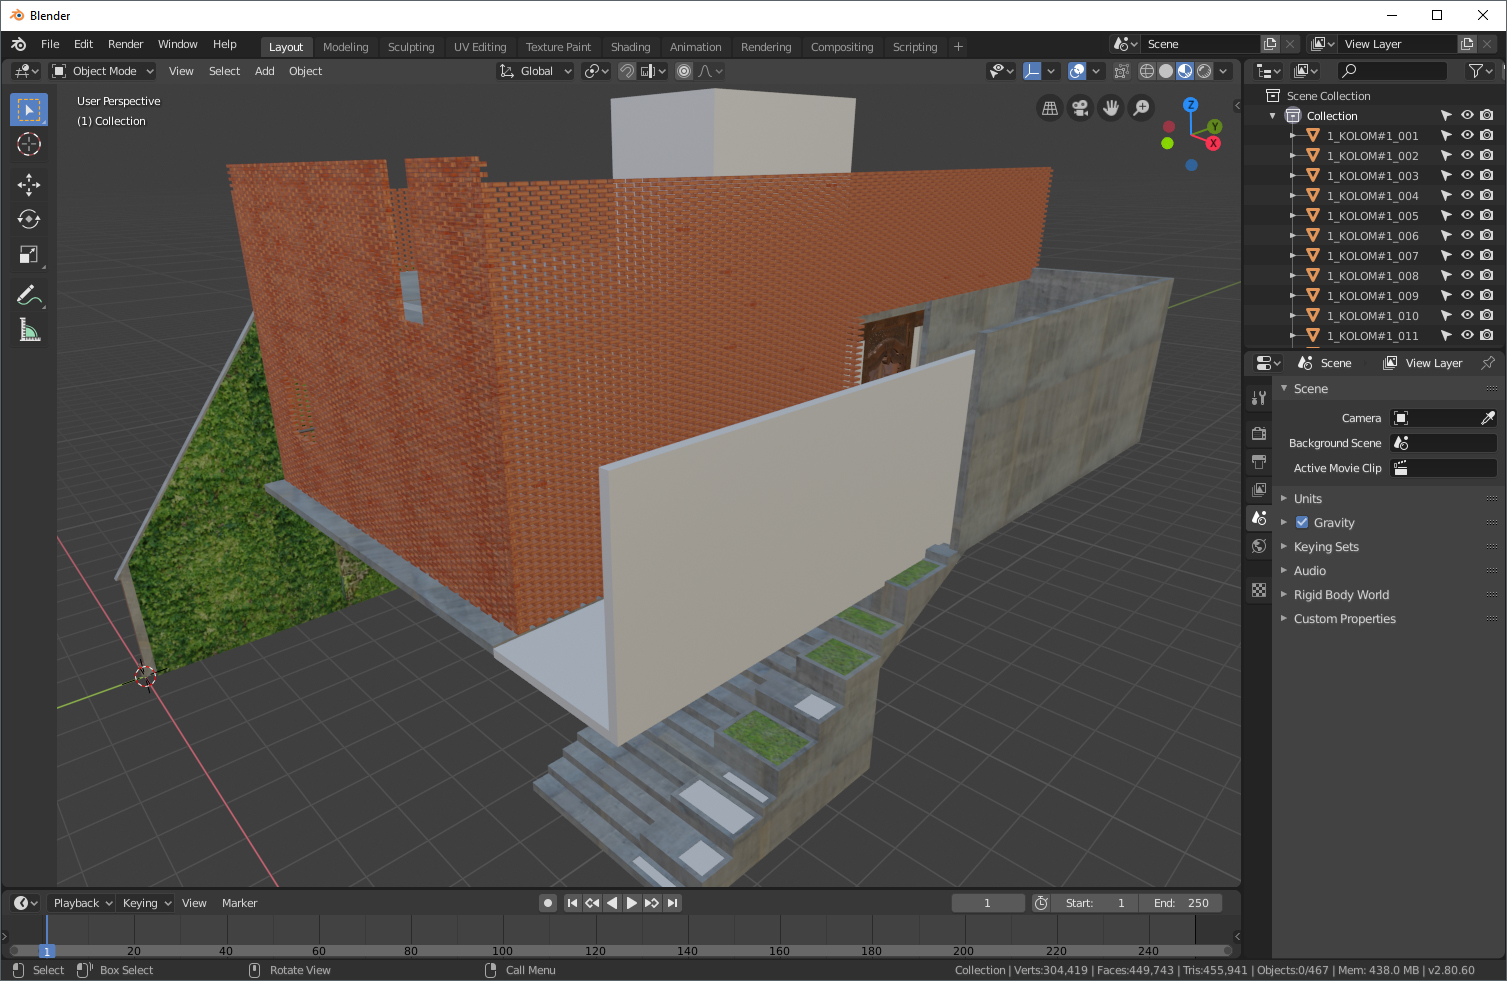
Next, I separated the model by materials (to make the texturing process easier) and put them into different Collections.
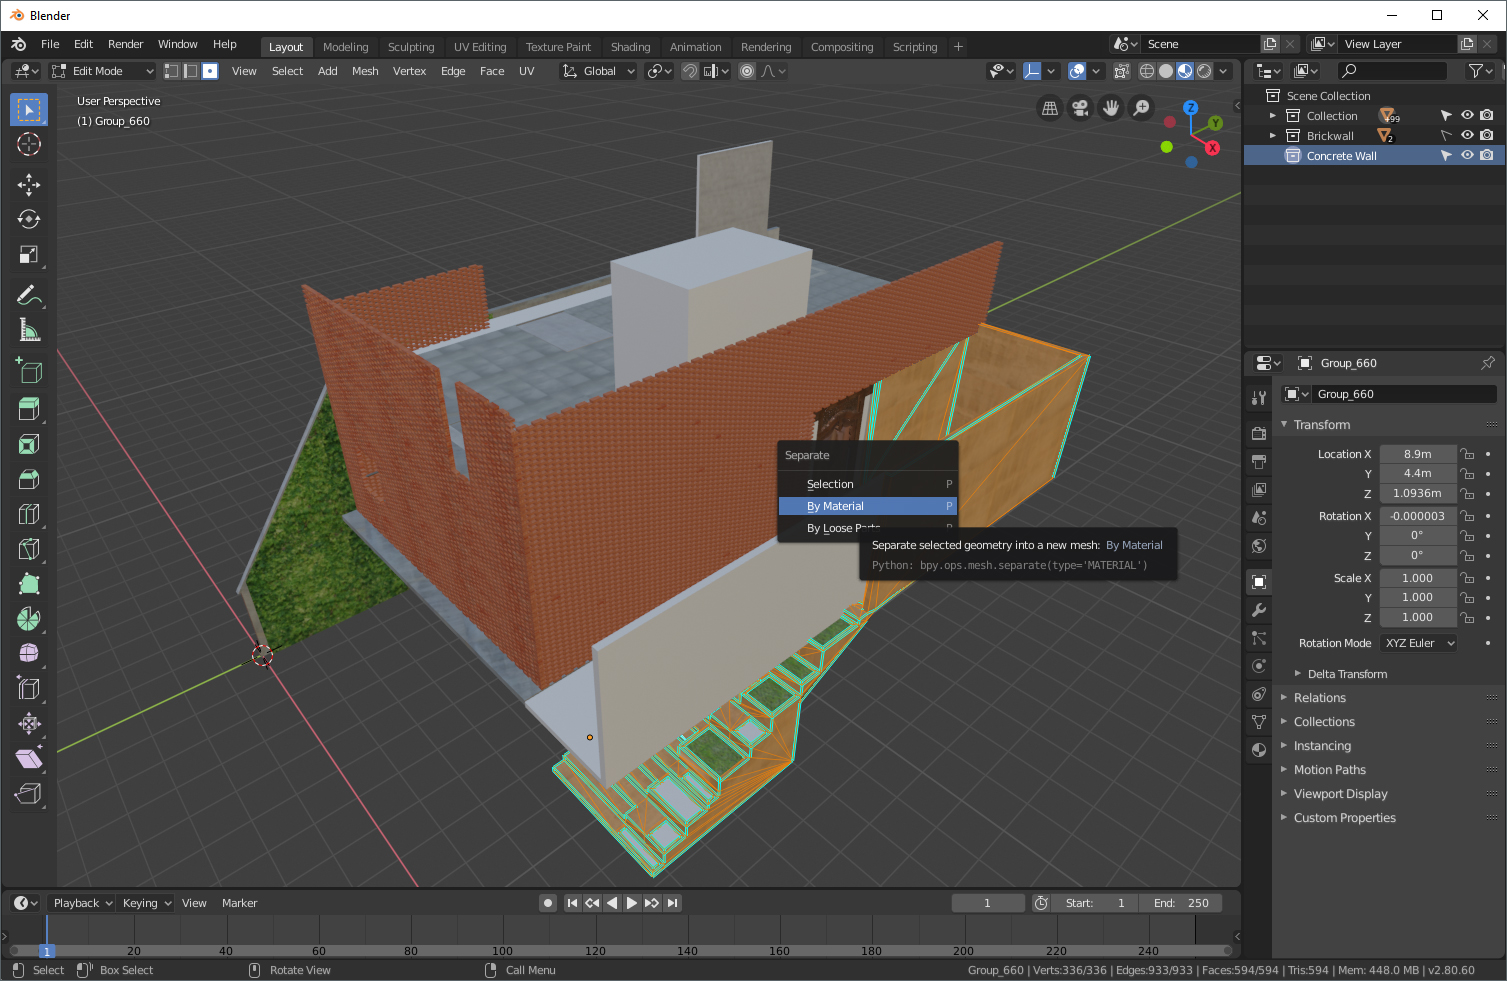
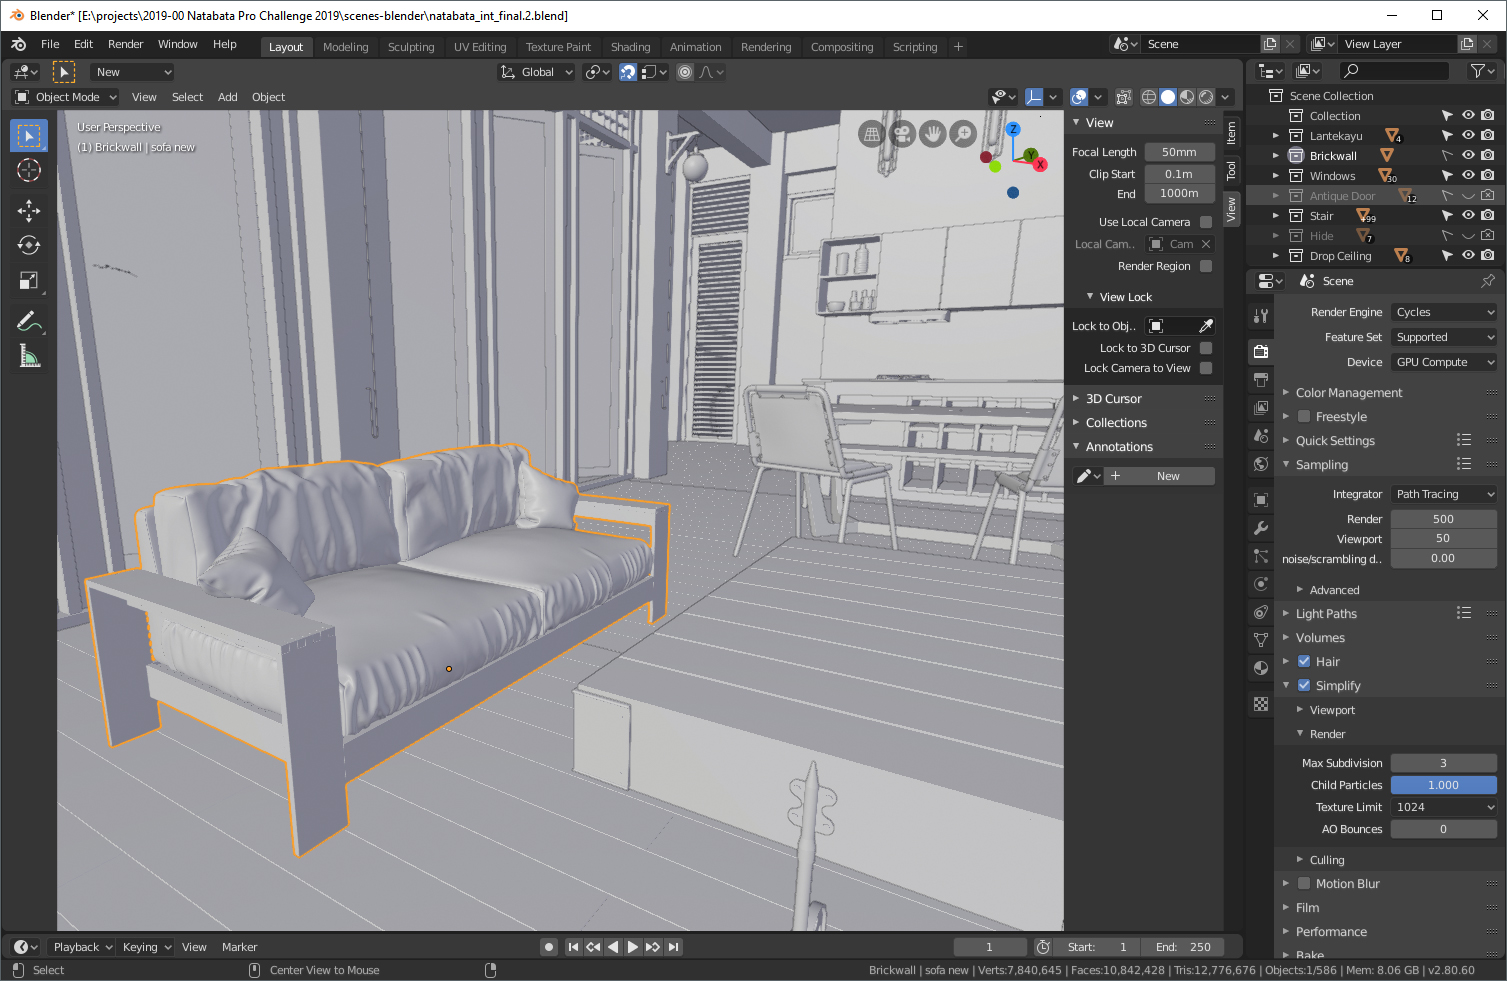
I started to clean up the base models using Tris to Quads tool, remodeled some of the complex shapes, and removed unnecessary objects.
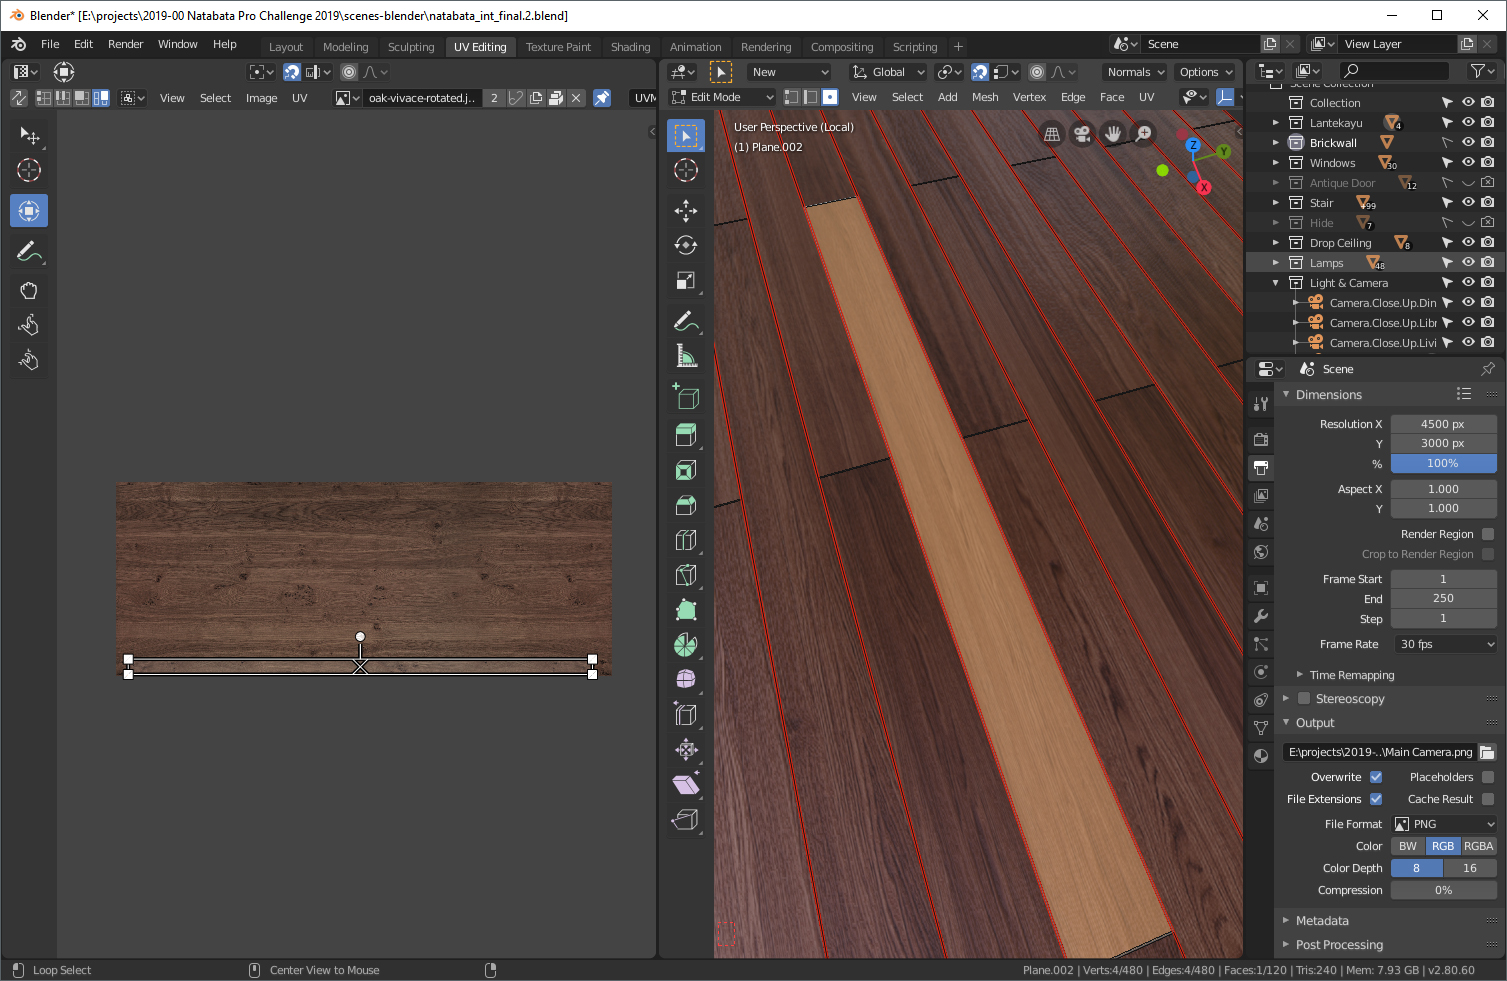
After I finished the modeling, the next step was shading & UV editing. I used a principled BSDF for most of the shaders, with Glass BSDF for the glasses and Glossy BSDF for metals. I tried to make the shaders as simple as possible.

I used Cube Projection or Cylinder Projection with appropriate size for simple objects. For the special objects like the wooden floor I used Unwrap and edited them in the UV Editing workspace.
I began to fill the space with furniture and accessories. I modeled some of them in Blender, the rest were taken from my past projects and some were downloaded models from a 3D stock company.
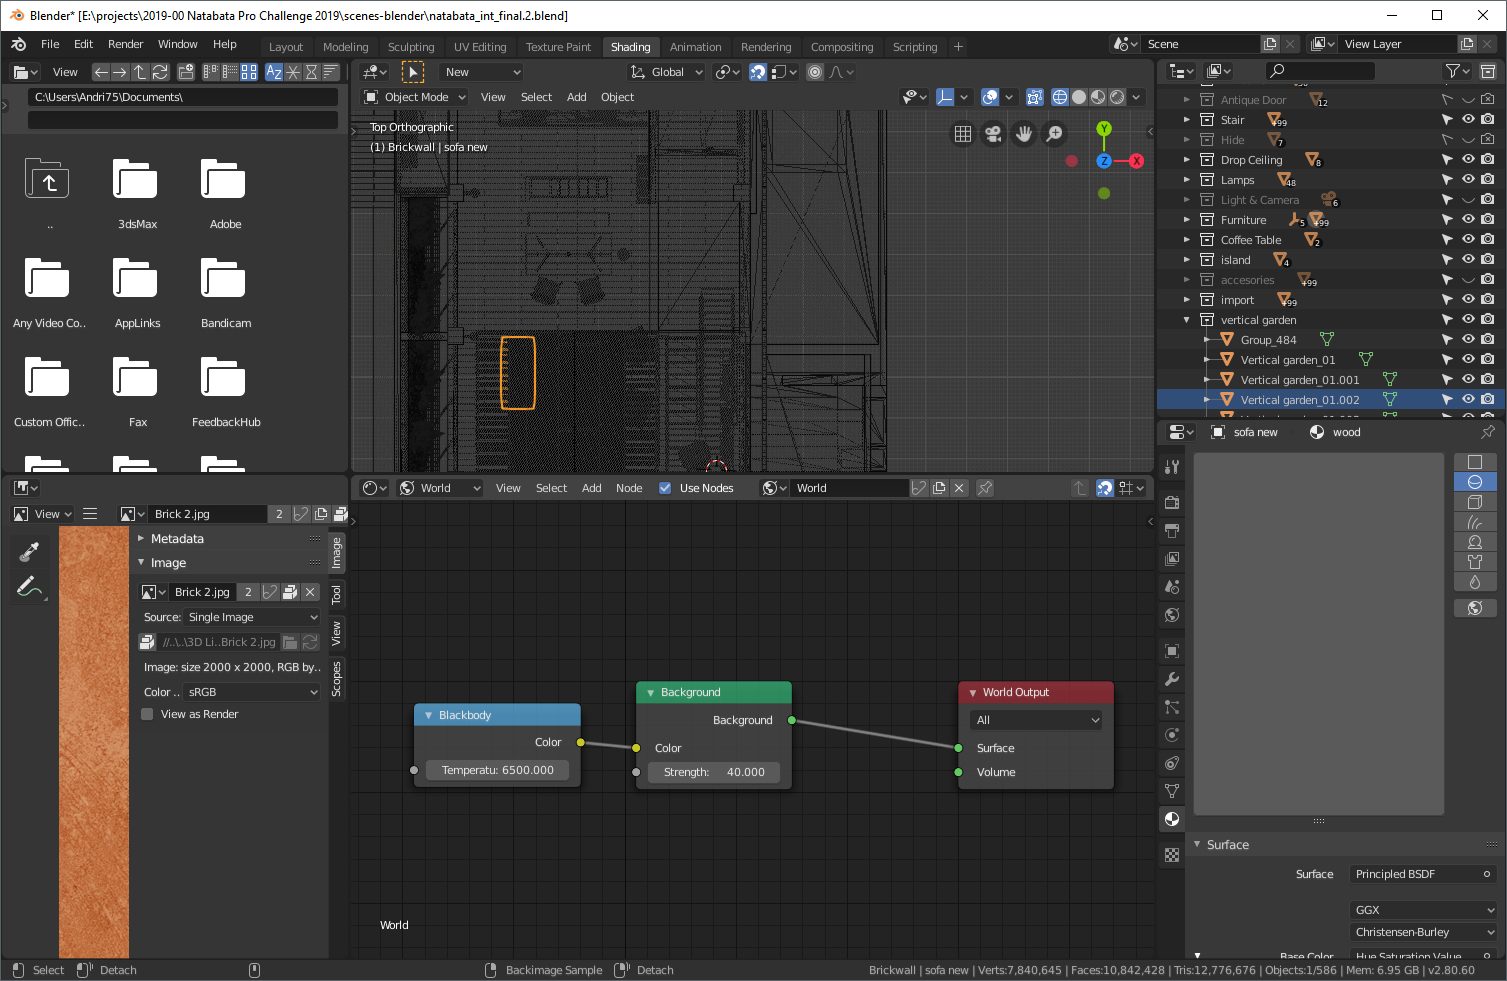
For the World, I used Emission with Blackbody. I set the temperature at 6500K to get the daylight color. Since there were plenty of openings coming from all sides I decided not to add extra lights (except the one in the reading corner, only to give a nice accent to that area), in order to make it look natural.
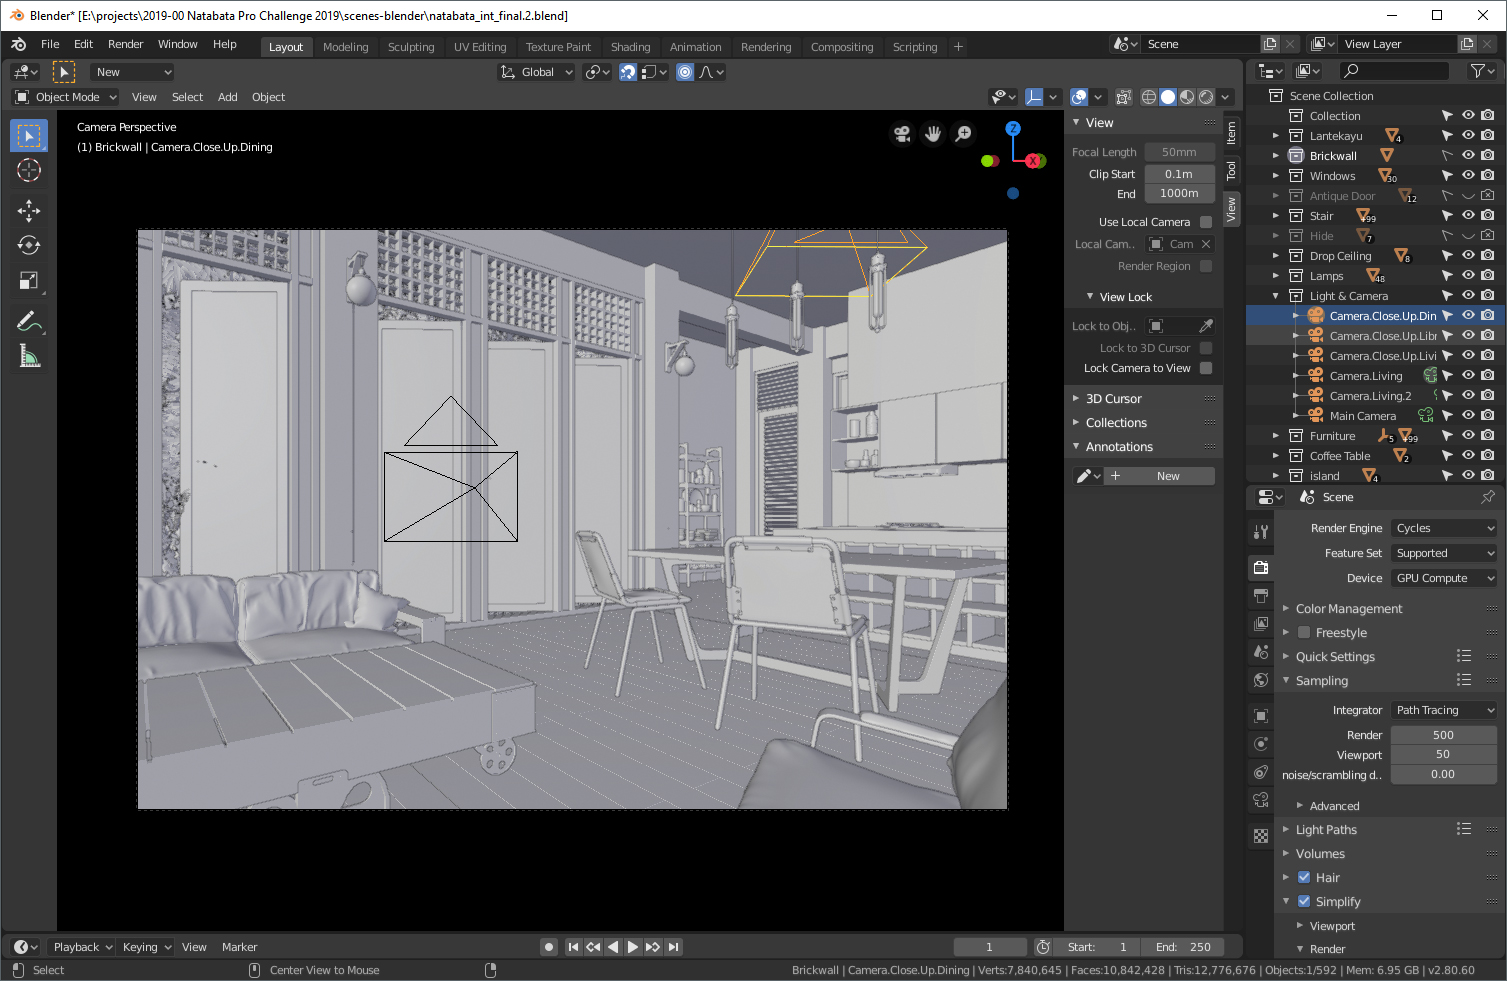
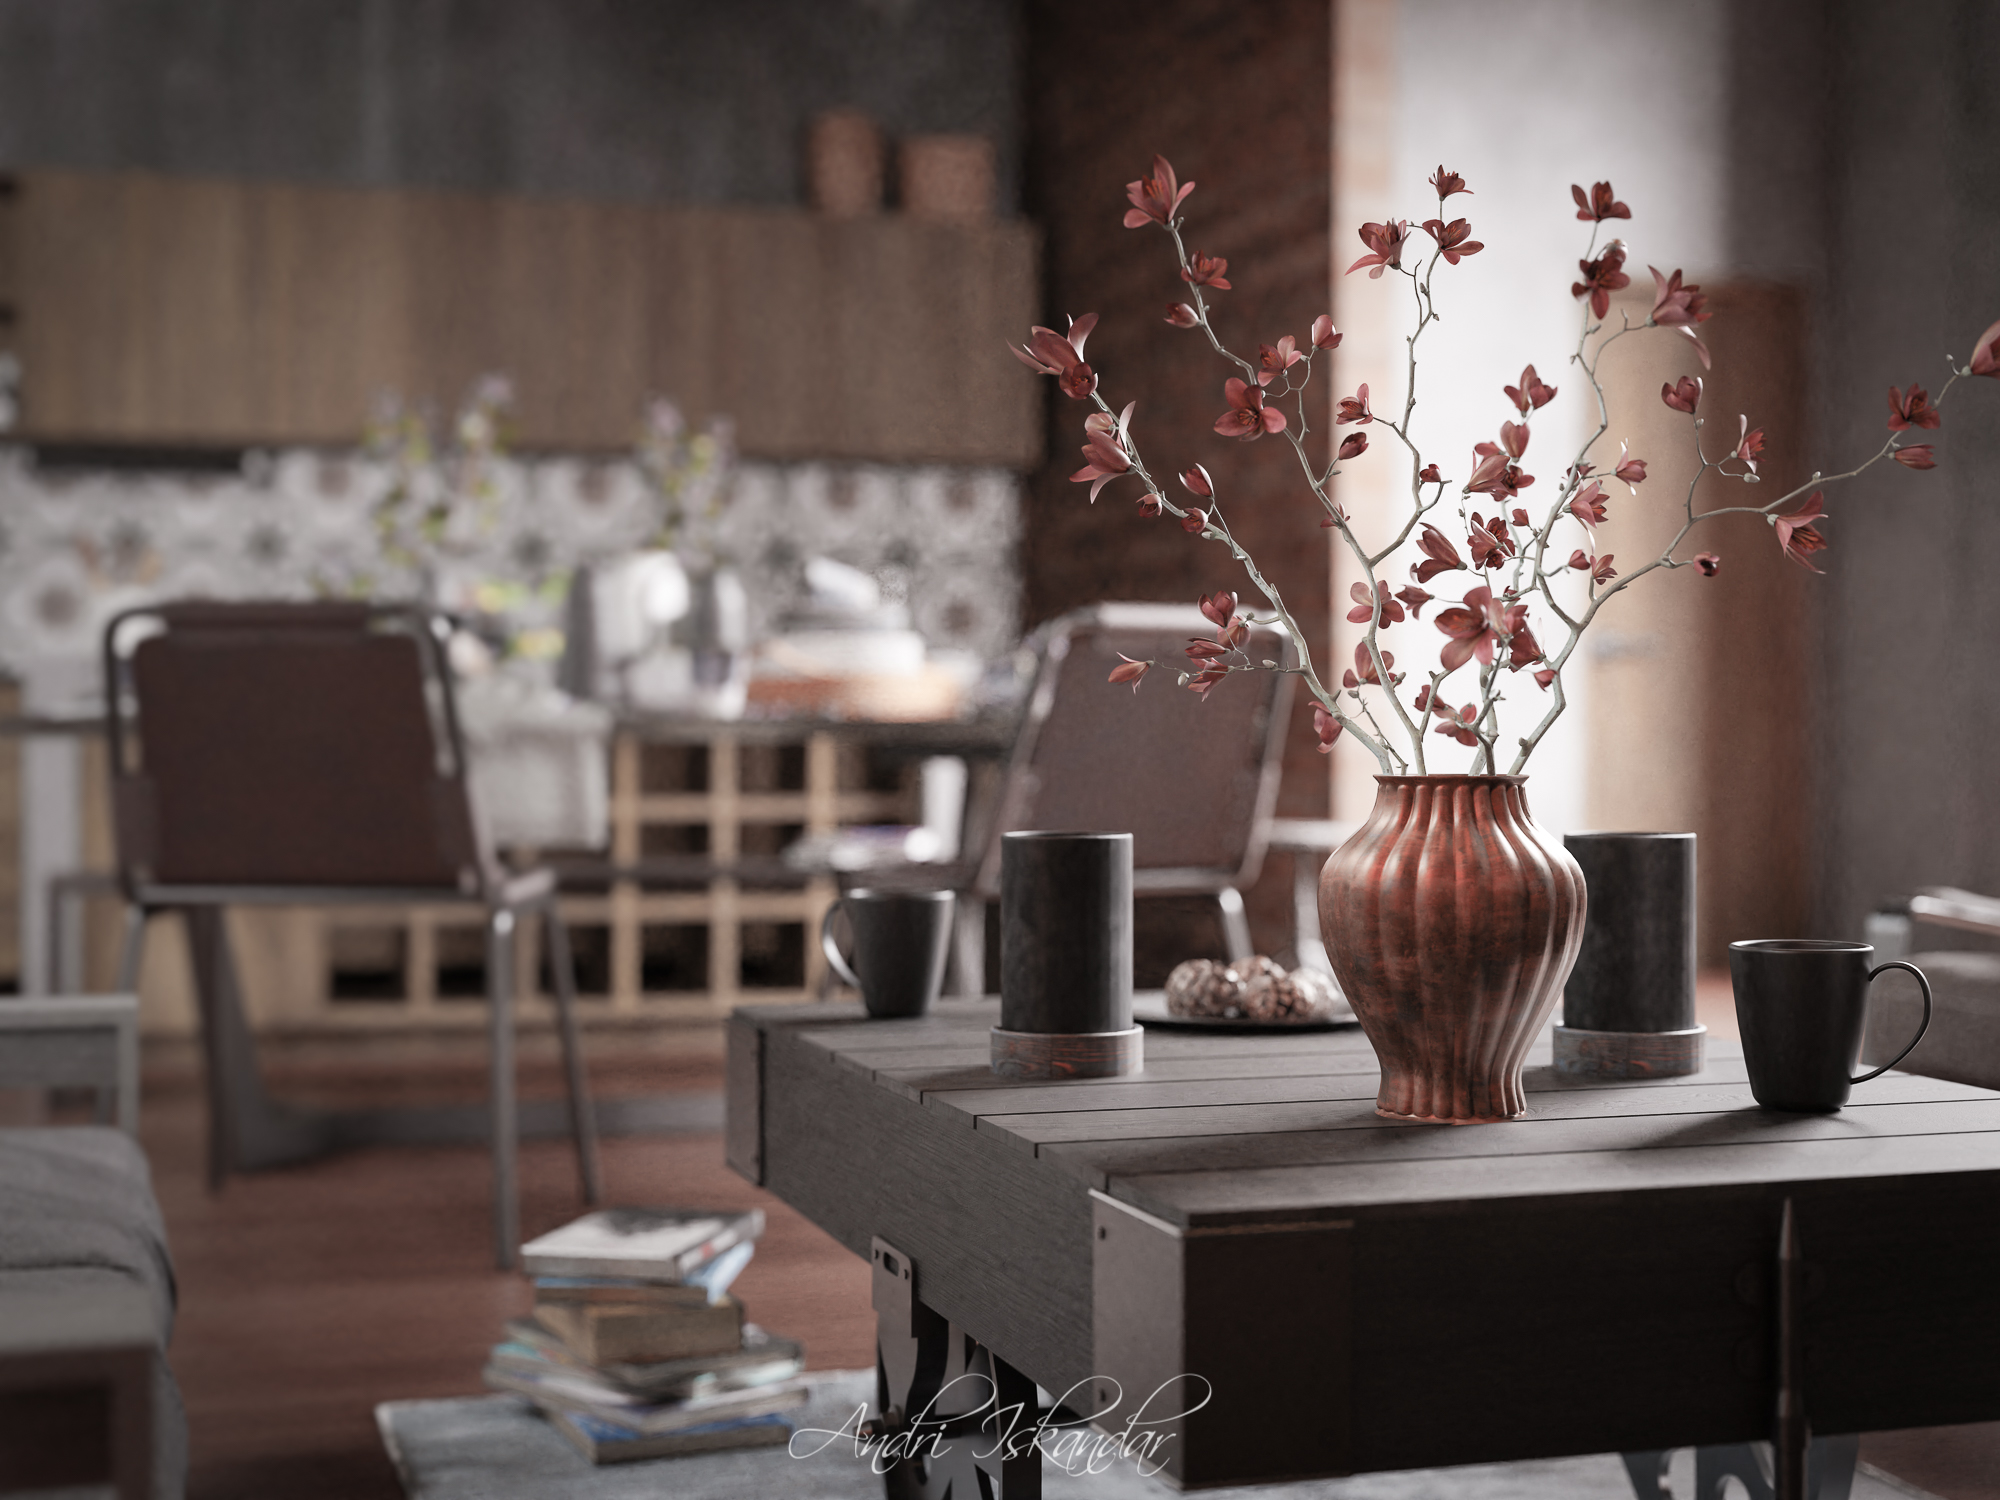
Once I finished with the models, shaders and lighting, I started adding some cameras, playing with the compositions, DOF and adding more stuff into the space if necessary.
I used Cycles for rendering. The initial final size was 6000 x 4000 pixels but I reduced to 4000 x 3000 to cut the render time.
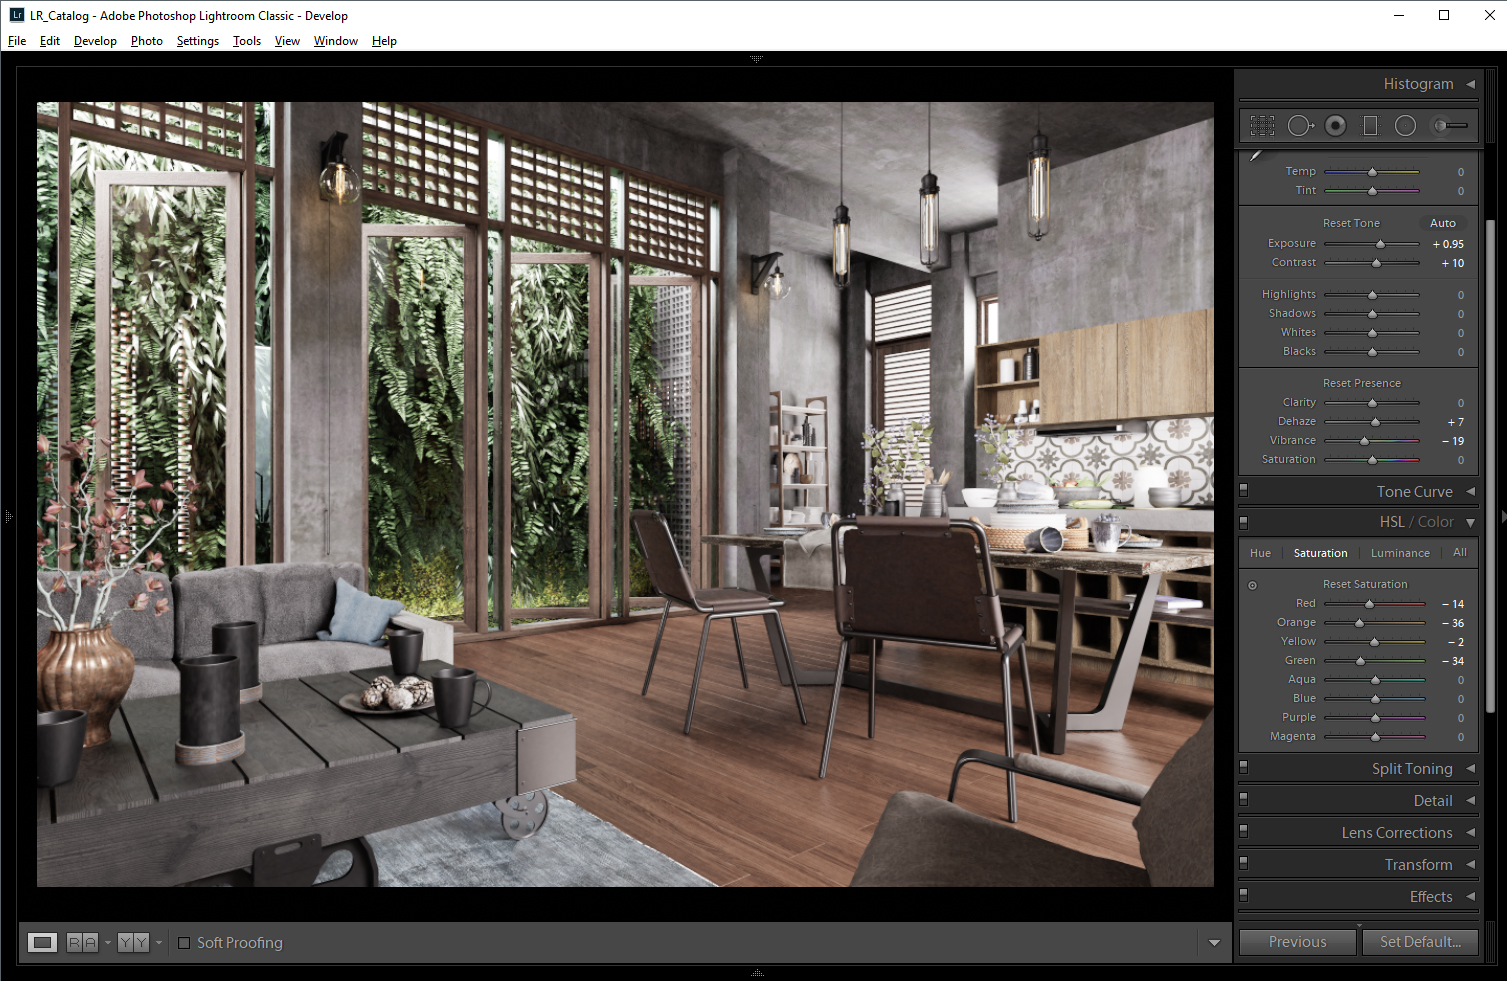
I brought all rendered images to Lightroom to adjust the exposure, contrast, color corrections and sharpness.
The tools
I’m using Blender 2.8 + Cycles & Lightroom running on i7 5820K with 32 GB of RAM and GTX1080 8 GB + GTX1060 6 GB for this project.
You can find the finished images below. Thanks for reading, I hope you enjoy this article.

About the Author
 Andri Iskandar, Senior 3D Architecture Visualizer, Dubai, United Arab Emirates & Jakarta, Indonesia


Really inspiring work sir! Much love from the Philippines! <3
Salam kenal dari Depok, Jawa Barat.
Hasil karya yang bagus, sangat menginspirasi.
Saya pengguna Sweethome3D untuk mendesign rumah kecil dan sedang, yang baru mulai belajar Blender 2.8 1 minggu yang lalu untuk membuat model2 yang bisa digunakan ke Sweethome3D. Melihat hasil kerja ini, jadi tertarik untuk mencoba membuatnya di Blender 2.8. Sangat menginspirasi, ternyata blender bisa digunakan untuk hal ini.
Saya sudah coba import model Sh3d ke blender, tapi hasilnya belum memuaskan. Kalau export object dari Blender ke sh3d menggunakan dae sudah berhasil berikut texture dan mappingnya.
Terima kasih postingannya, kalau boleh minta, ada tutorial untuk cara membuat daun2 yang diluar jendela itu bagaimana caranya, saya tertarik untuk belajar membuat tanaman menjalar di dinding luar dalam foto.