Behind the Scenes: Caught you little thief
About
Hi, my name is Jean-Paul, alias Jean-Paul K. I live in France, near Paris, and I’m a teacher for pupils (10 years old kids).
I started to learn Blender four years ago, I tried to learn it only with tutorials. I’m very grateful for people that are sharing their knowledge and take time to explain it with videos.
I tried different sorts of art and creation but creating 3D characters and worlds is the thing that I love the most. It’s so powerful to create when our only limitation is our imagination. That’s why I go on the Blenderartists site and Pinterest very often, to find my inspiration. I looked very carefully at Blender Guru’s (Andrew Price) tutorials, because I find them pretty clear, but also other ones.
I don’t think that I will work in this industry in the future but I hope that I will be animated with the same passion and that I will share my work as often as I can.
The Concept
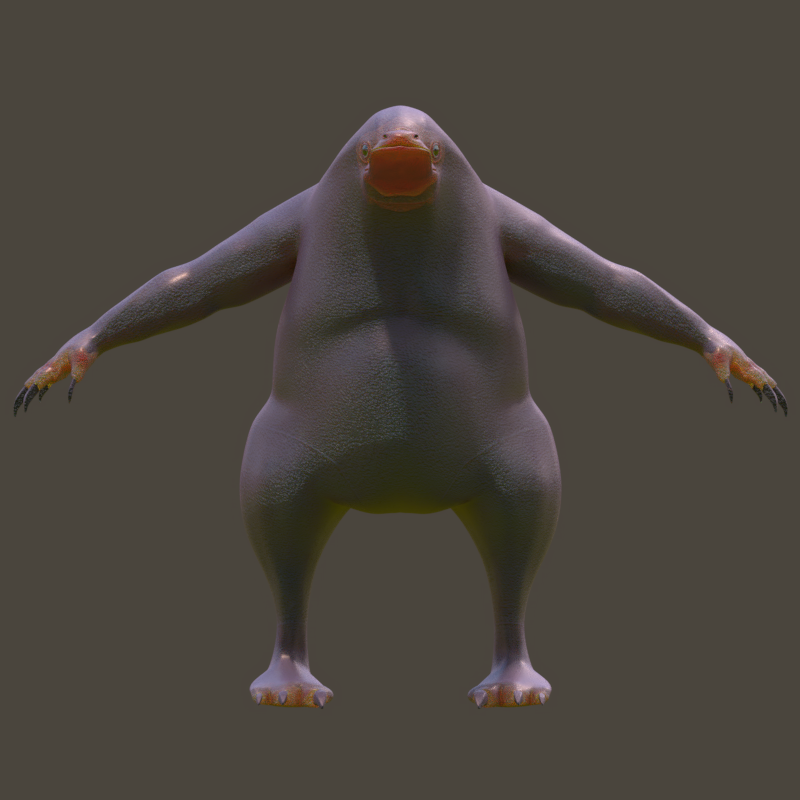
I like to work with characters. I like horror characters and scenes, but for this one I wanted something cute. I just saw the Fantastic Beasts movie and fell in love with this funny cute Niffler character. So I searched reference images on the net and I started to create. A part of me always wants to make it realistic so I try to work with this idea, to make the character as realistic as possible for my current skills.
Tools & Hardware
I only used Blender for all the whole process (modeling, texturing, compositing).
My hardware setup isn’t too bad and allows me to do things quite fast. I only use the keyboard and my mouse, no tablet.
Modelling
As I said, I used Blender 2.79 for the the whole process. I really want to switch to Blender 2.8 but I’m a little scared. I hope I will be able to use it at least as easily as I use the 2.79 version.
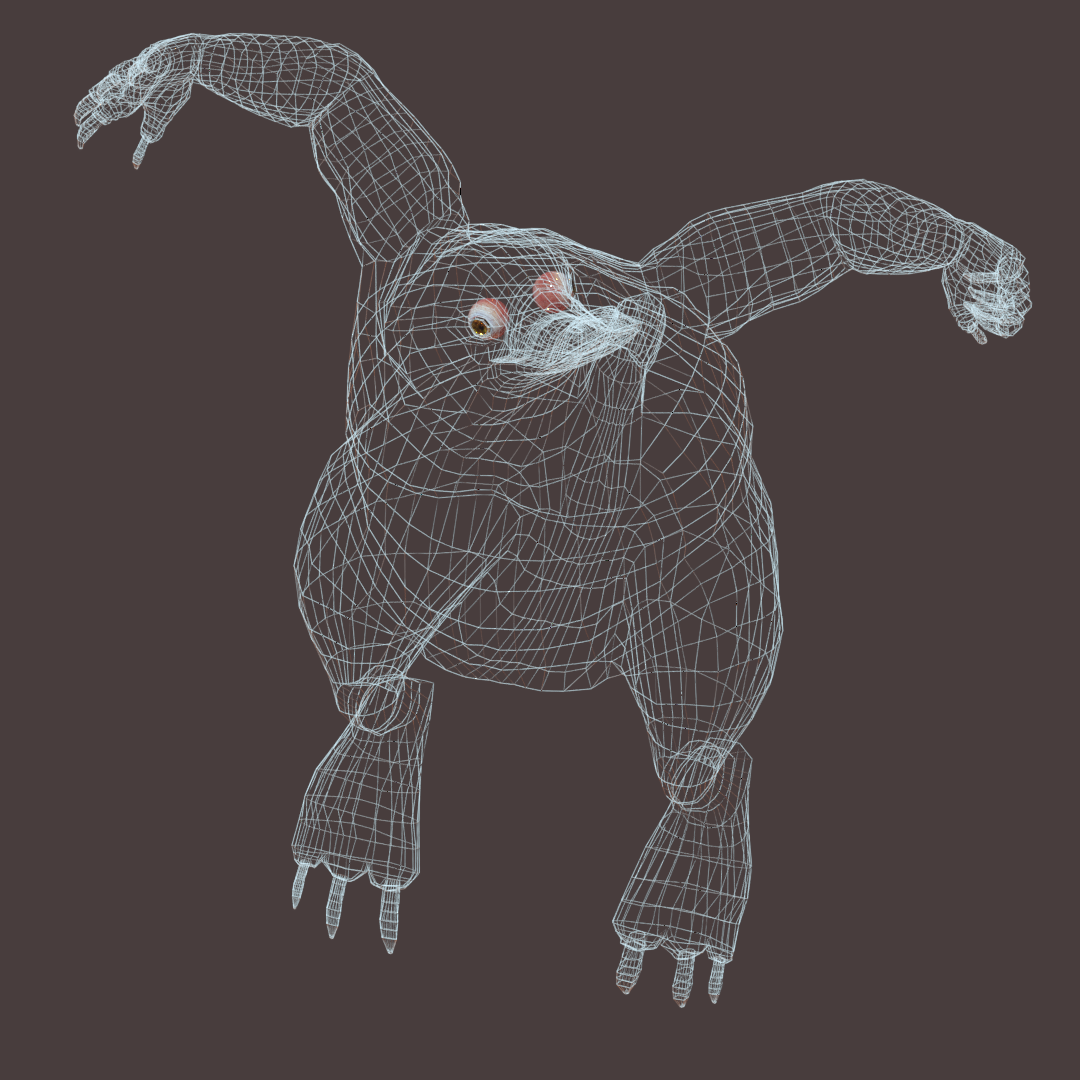
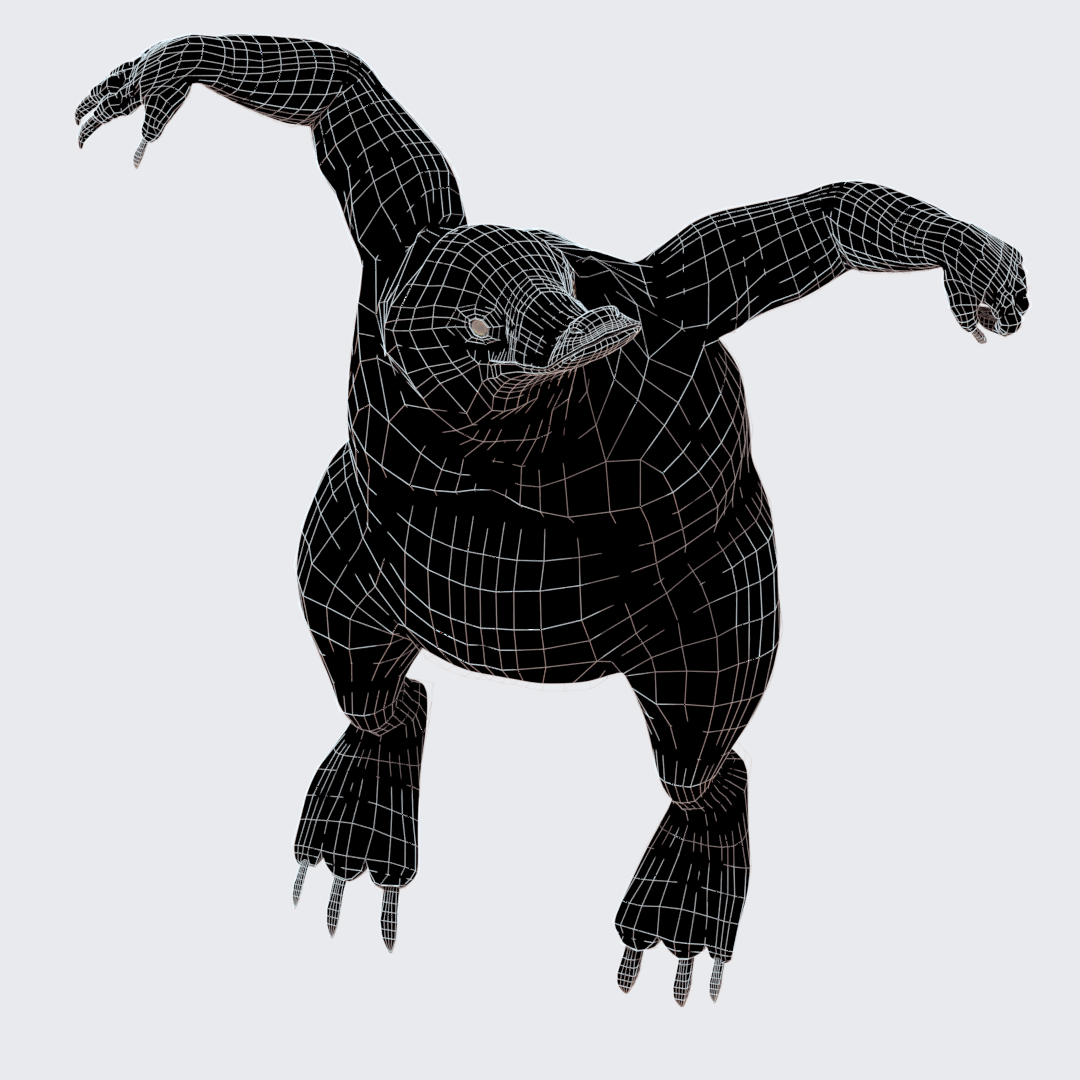
My modelling workflow begins with a plane that I extrude till I get the shape of my character. I use common tools such as mirror, subsurface, and so on…. I always work with photos or sketches because I’m not comfortable with proportions, I need a template. I find Blender very powerful, I don’t know other softwares, such as 3ds Max or Maya, but I find Blender easy to use (after a while) and quite intuitive.
At first, I did the creature and then I added elements to enrich the scene (The key, coins and hands).
For the the creature I used two images of Niffler: A front and a profile view.
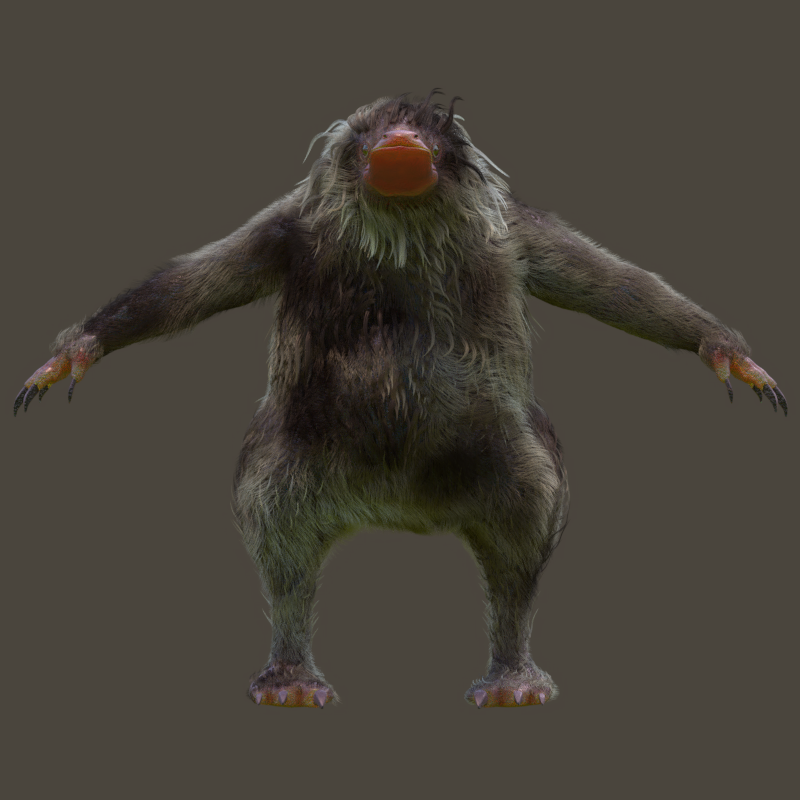
Then with extrusion I made the shape. I used Poliigon for some of the textures, but also used textures that I found elsewhere on the net. I rigged the character with Armature (I’m not very proud of this part in general because I always have issues; it’s difficult to make it very fluid and to have things not to collide with the body and clothes, for example).
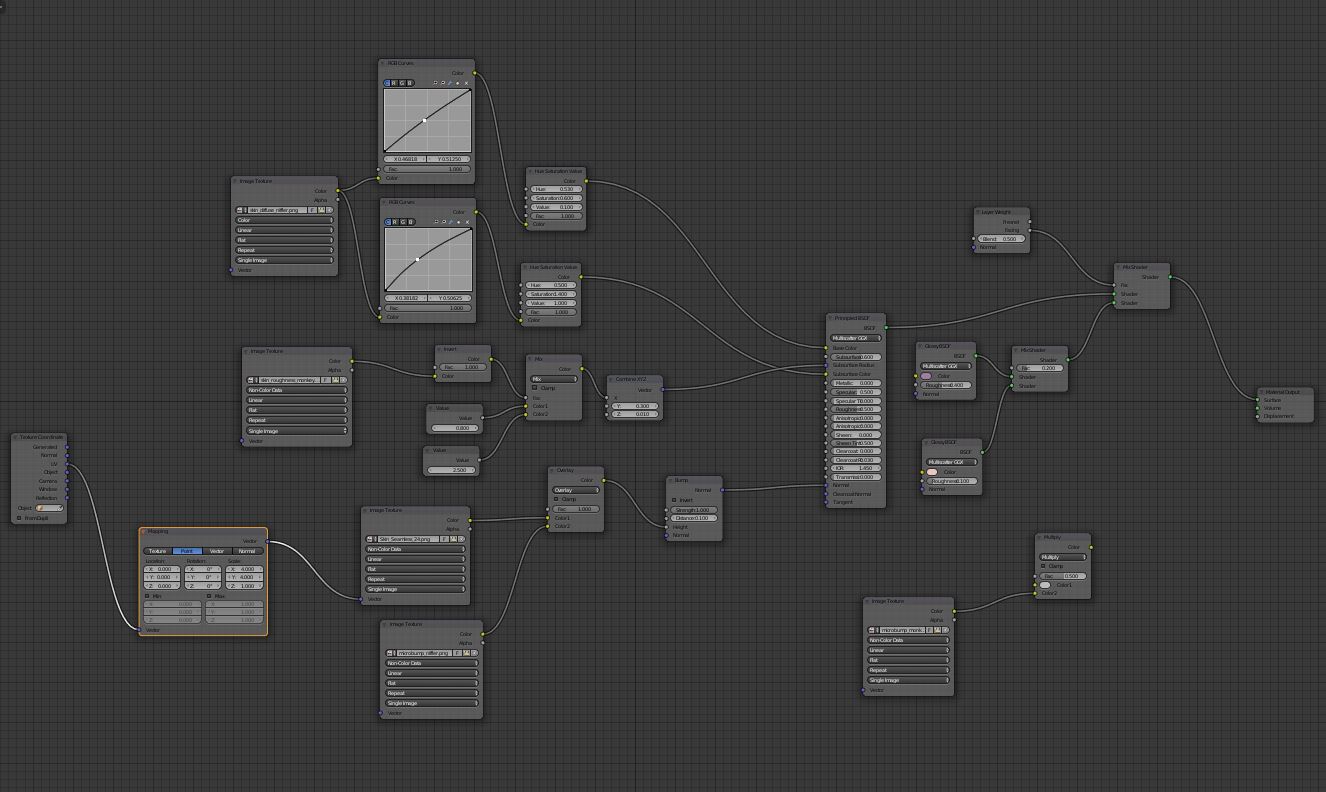
Here is my texture node for the hair texture, thanks to Nazar Noschenko’s tutorial
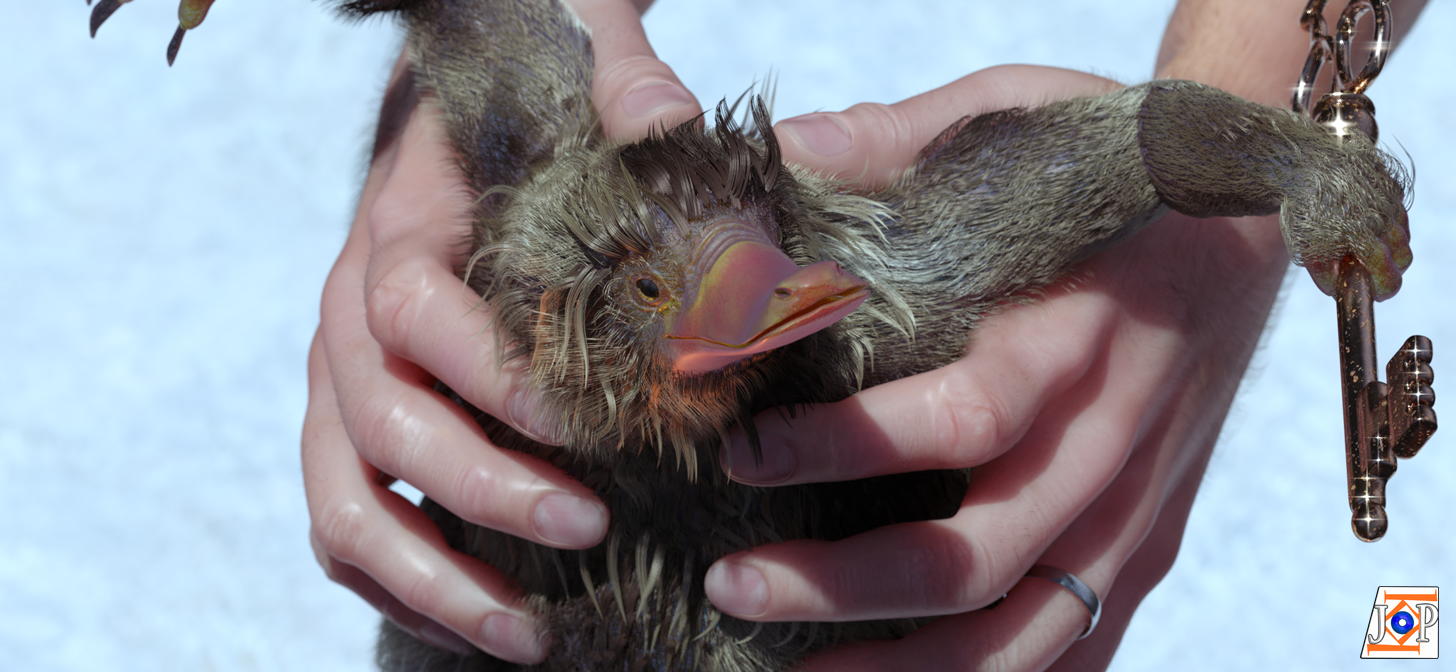
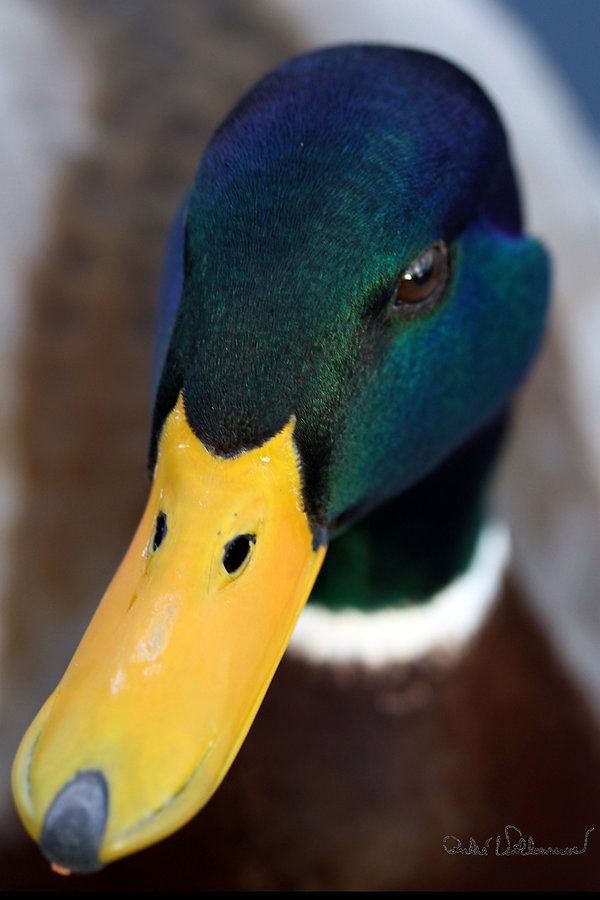
For the colors of the beak I used this charming duck picture. I just had to rework the colors because they didn’t match with the idea I had for my creature. I work with texture painting and I paint on my unwrapped UVs, as much as I can.
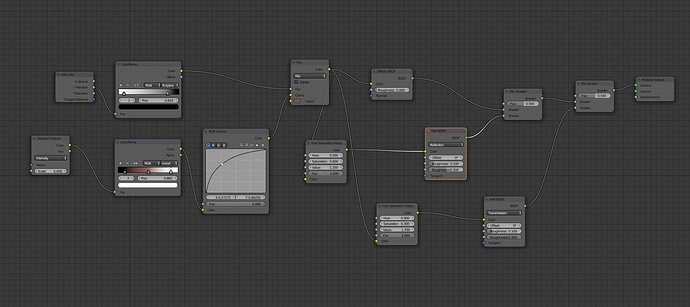
Below is the node for my skin texture. Fur is fully covering the beast, except for hands and feet, so it’s more for me to work on it, than for the render itself.
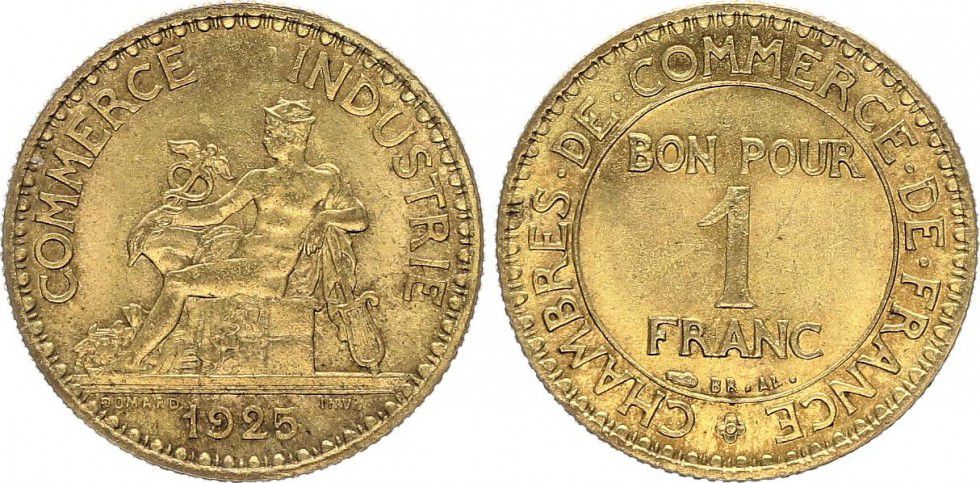
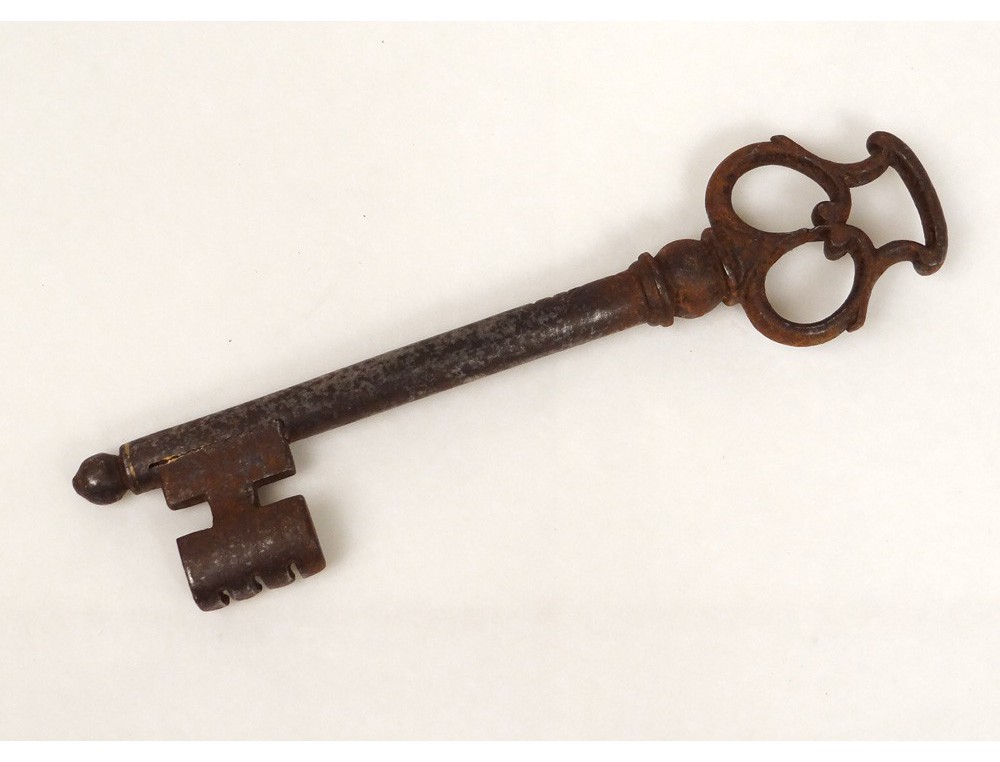
For the coins and the key I used images found on the net and I worked with extrusions. I don’t sculpt because I’m not good at it.
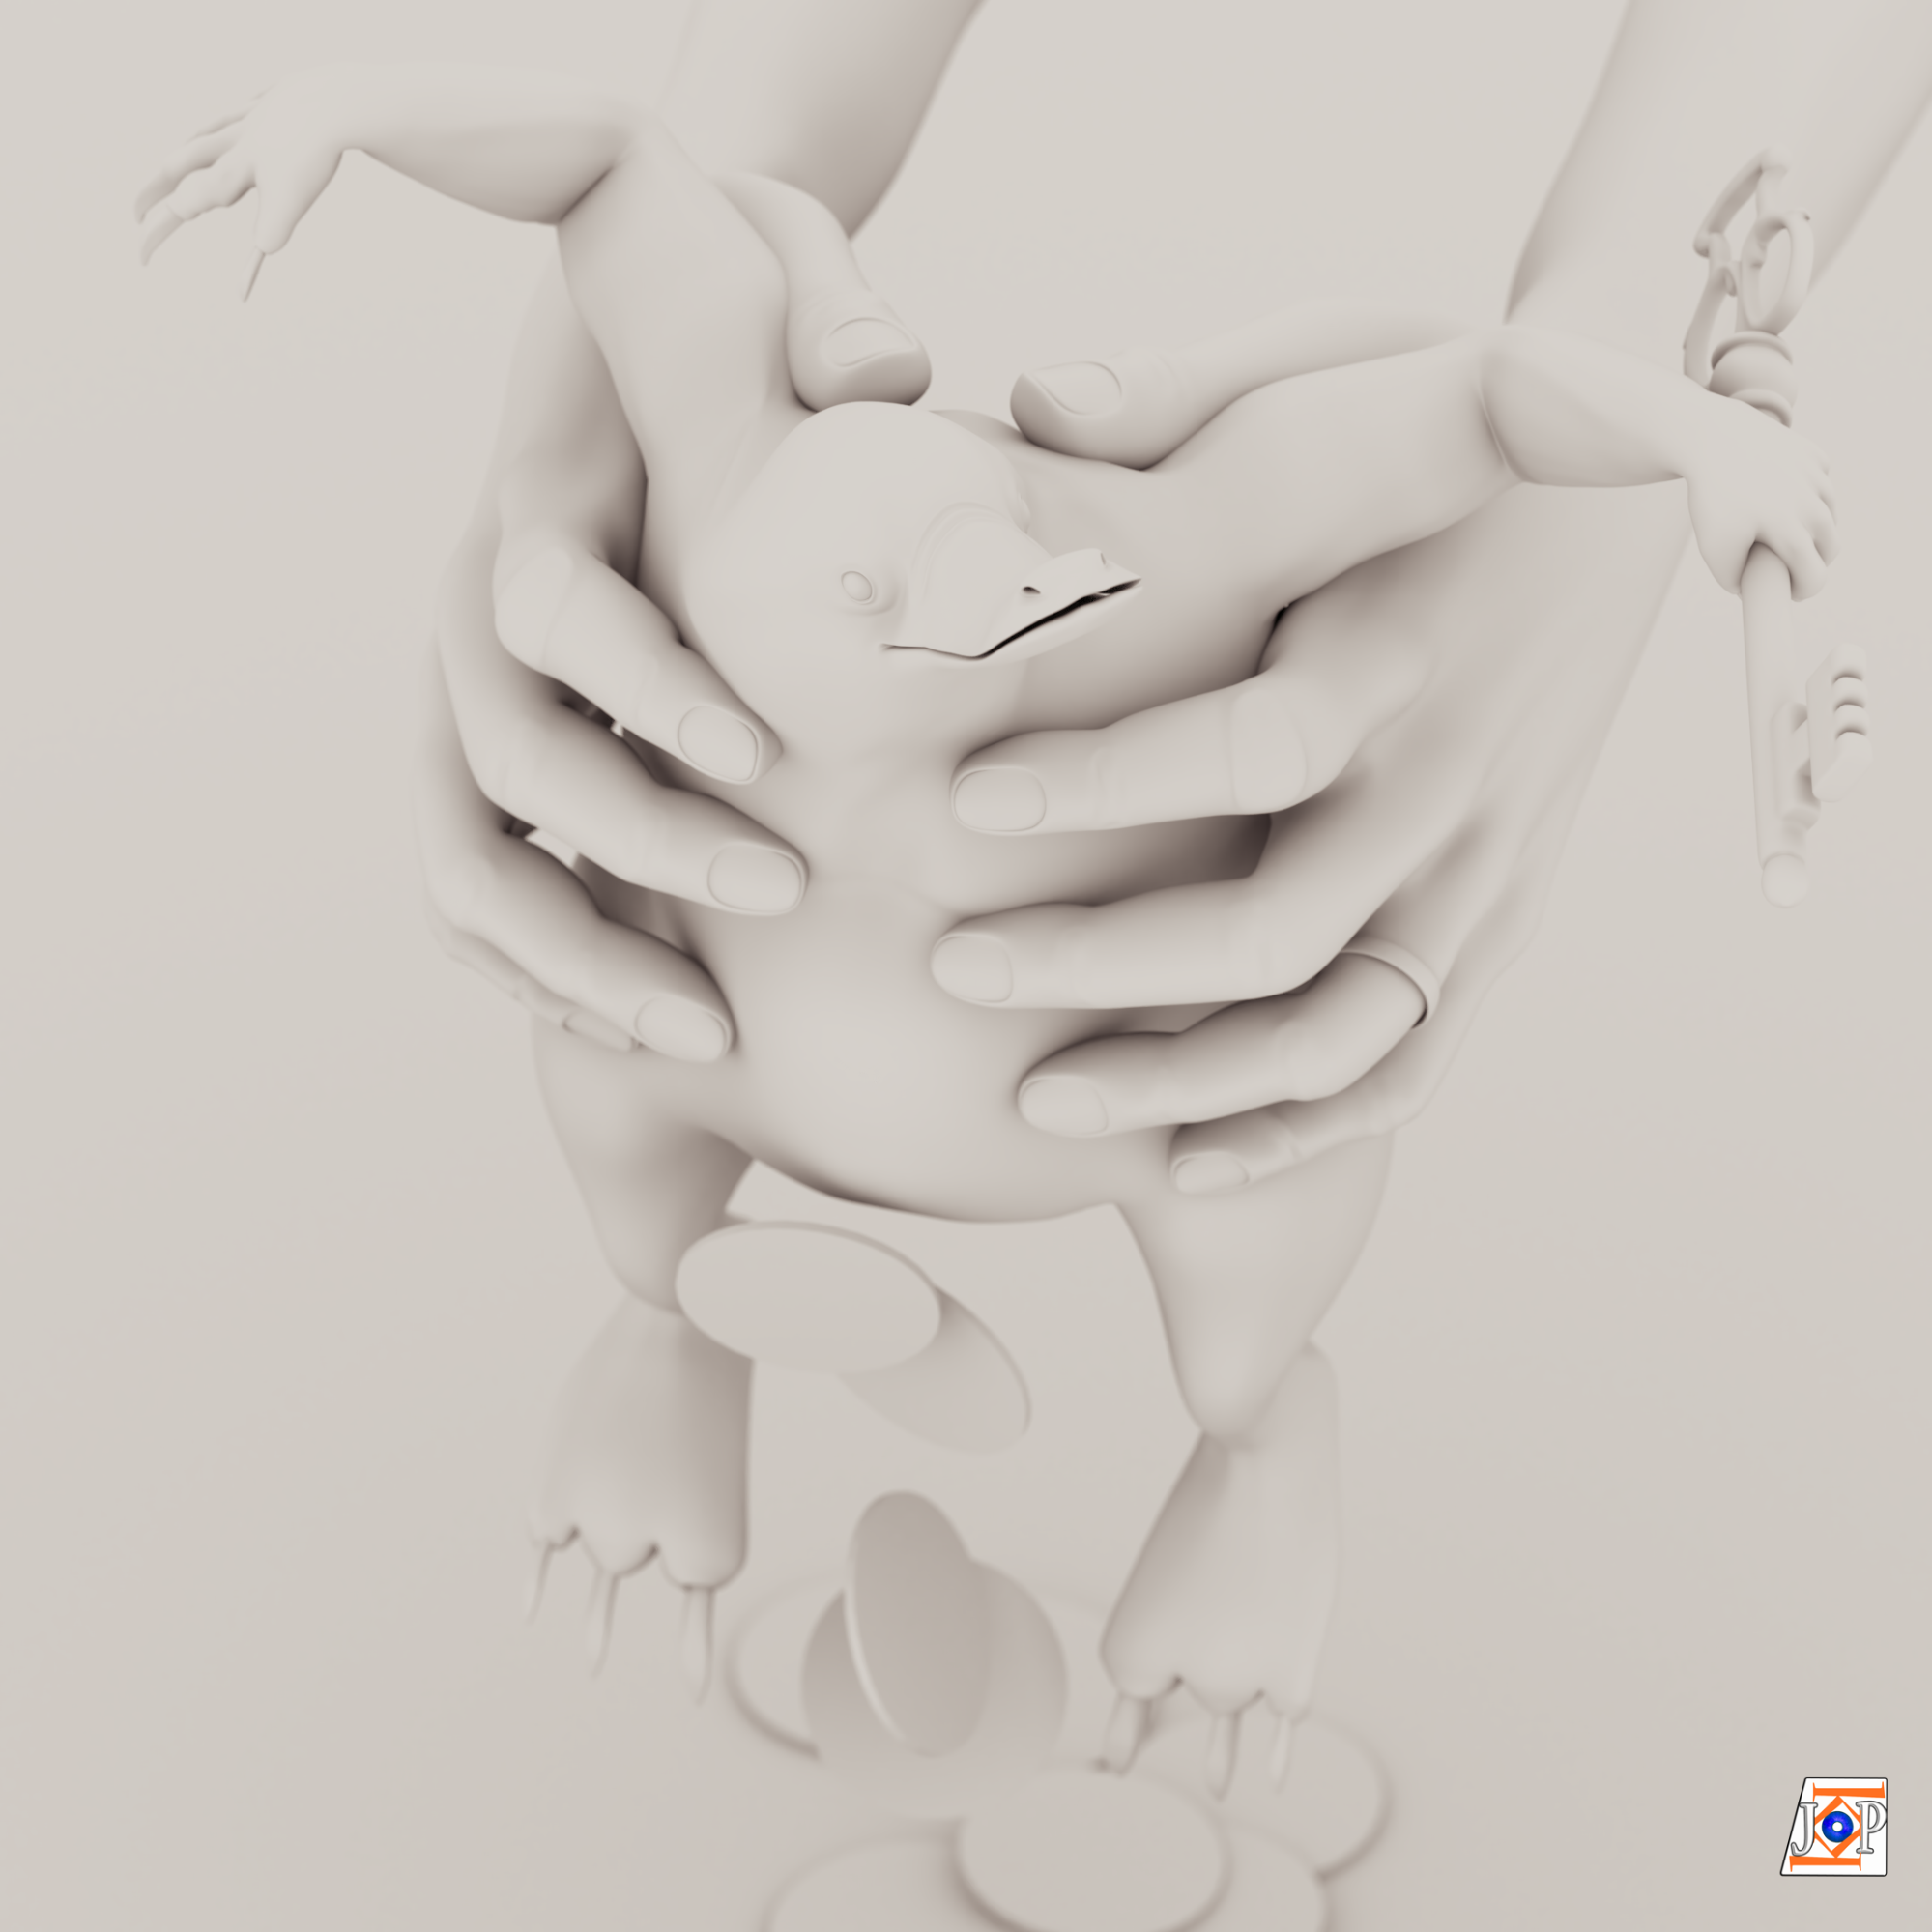
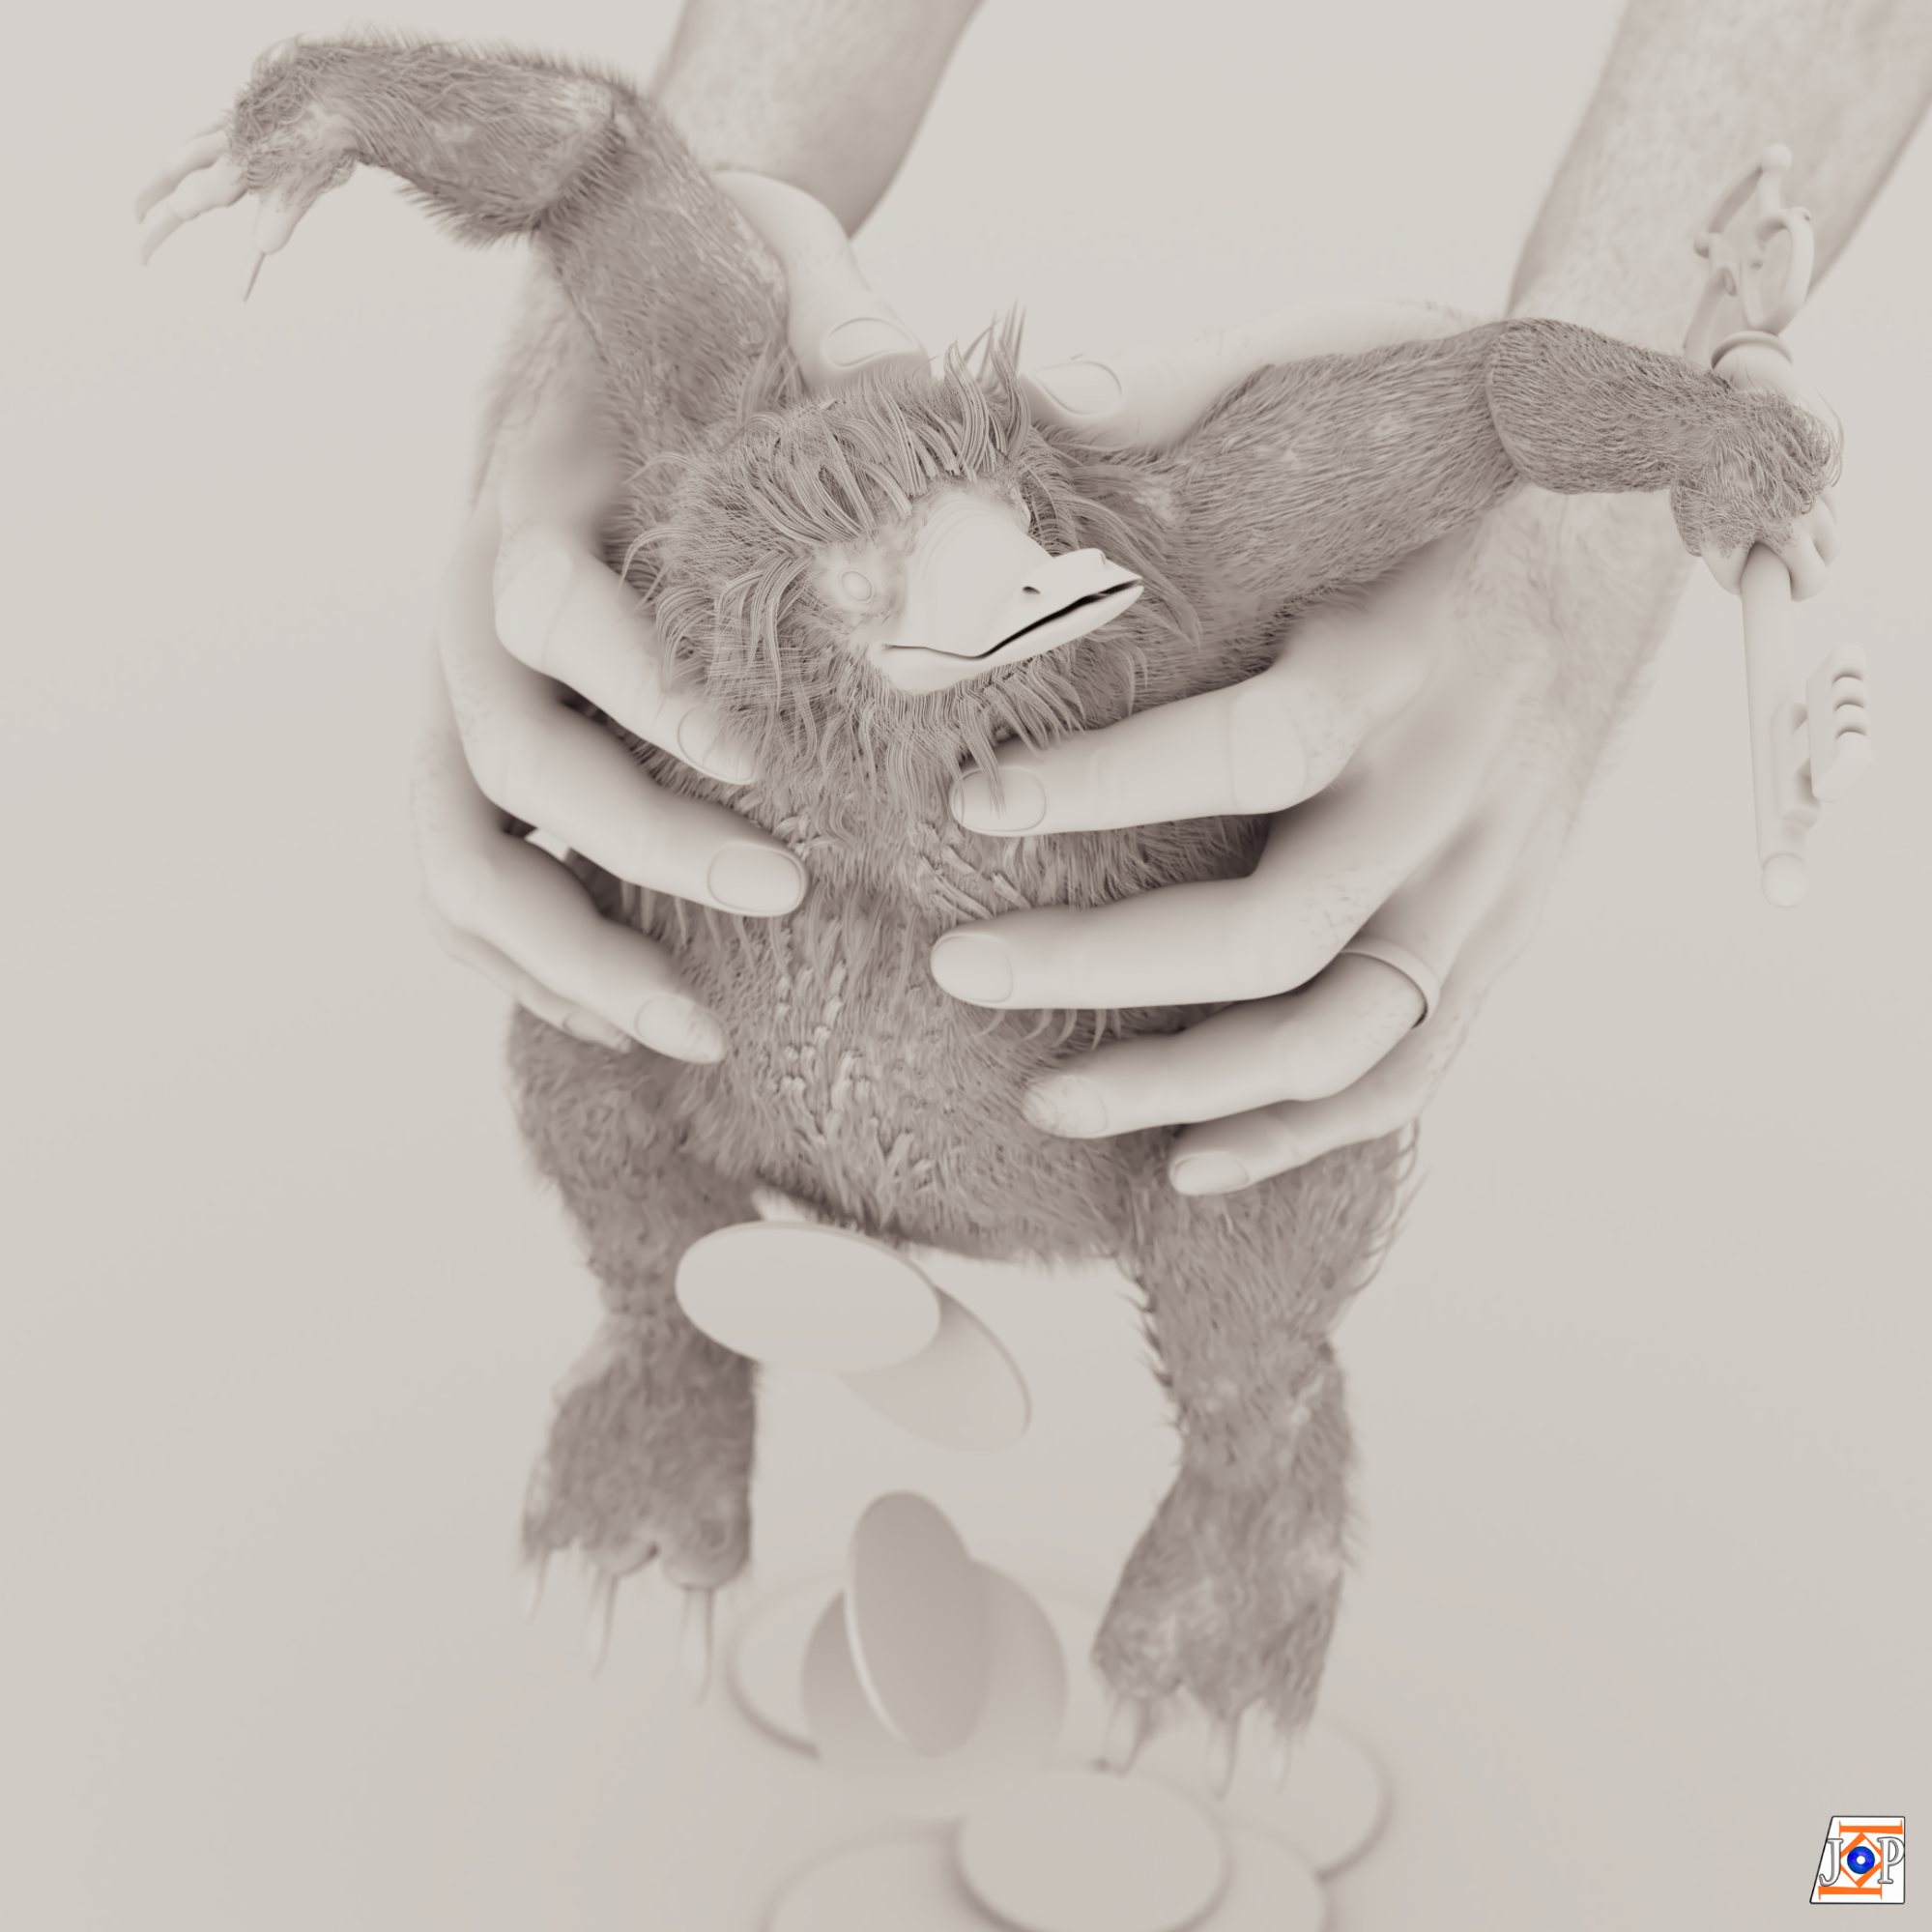
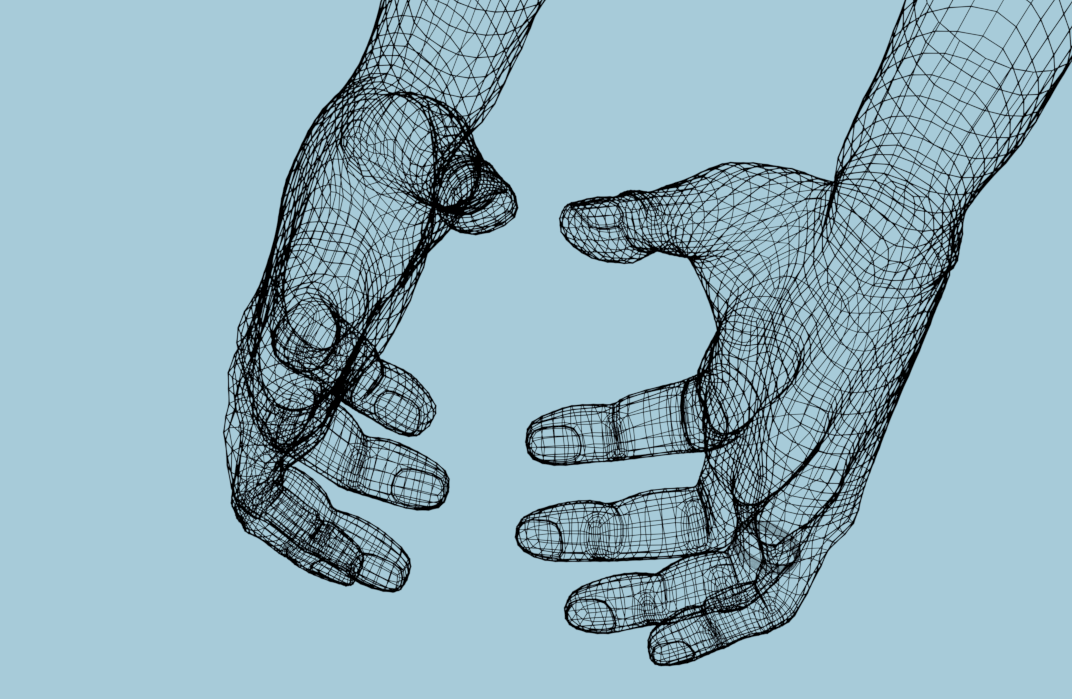
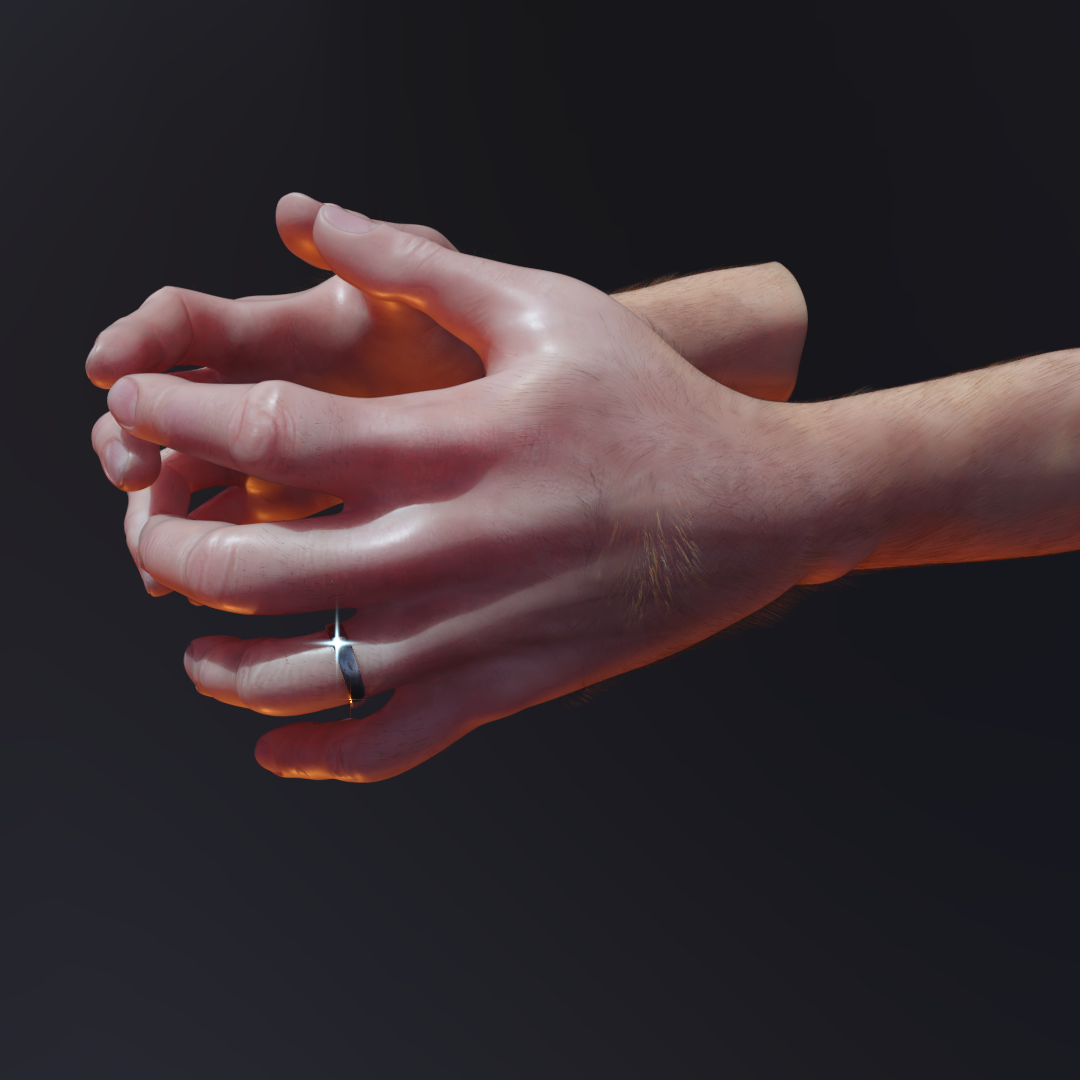
For the hands, I didn’t create them for this project. I had made them before and reused them. I worked with texture painting.
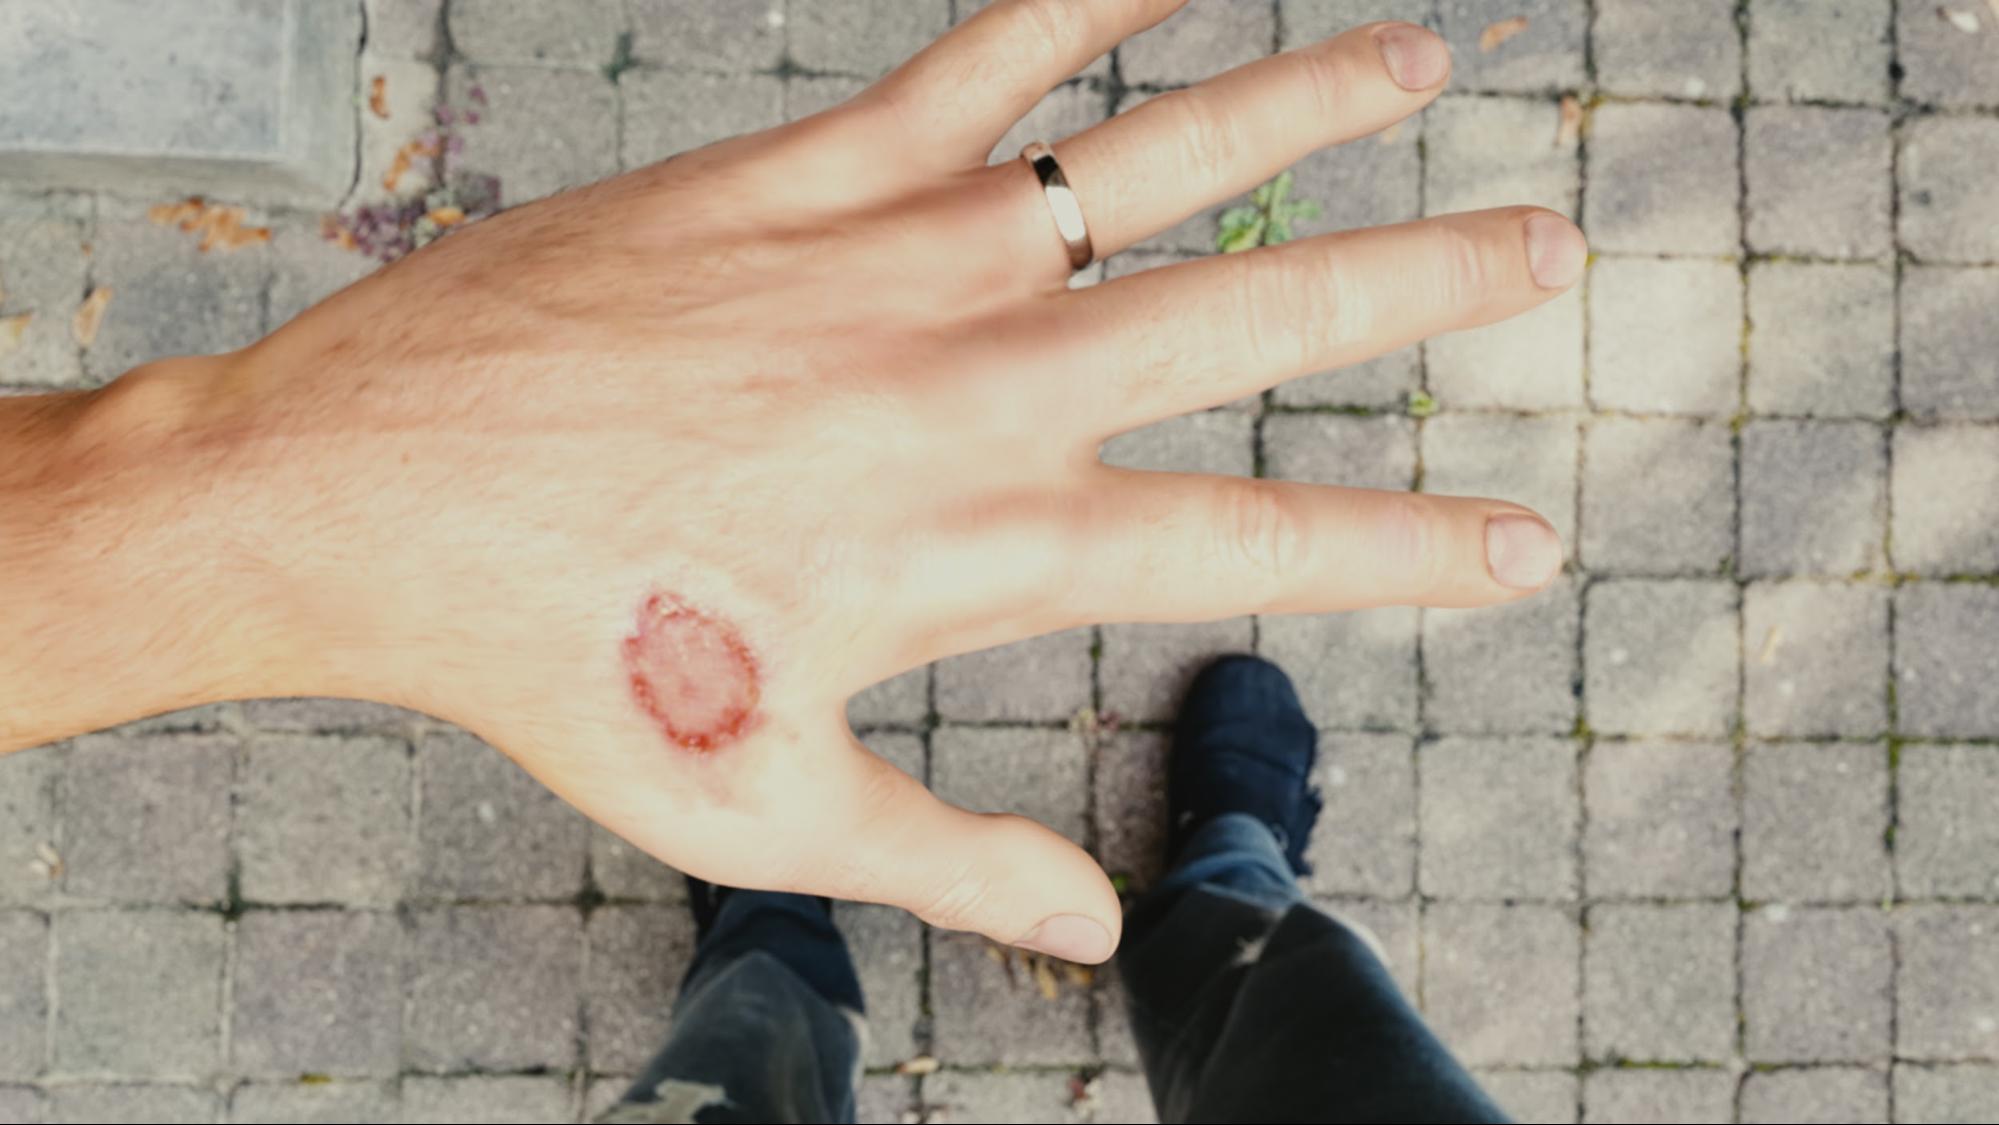
I created this image for Halloween (only the hand is CG but the rest of the photo is real), to scare my friends. I used texture paint for the bite. I textured the hand by painting on it. Then I added hair.
Then I integrated the hands into the project. Here is a picture from another angle:
About the lighting and the render settings
Nothing extraordinary in my settings; I added two sun lights, one coming from the top (bluish) and one coming from the bottom (yellowish). For the environment lighting I used an HDR image (ice lake envir).
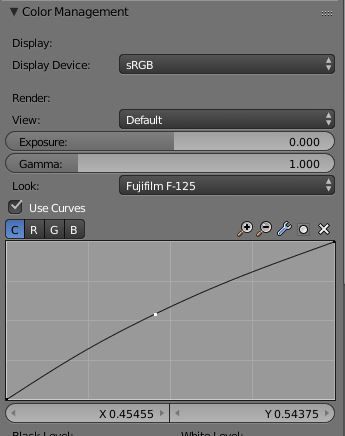
For the render settings, it was a 2160 x 2160 image, with 500 samples. I added a slight depth of field effect to keep attention on the creature. I used a film effect (Fujifilm-125 with a curve correction) as color management.
I made an animation with my little creature, here is the link :
For the animation, I used After Effects to add effects.
I had a lot of fun creating this. I’m pretty proud of the result. It’s the best I can do at this moment. I hope that I will I progress more. When I remember my beginning in Blender and when I compare it with today I see that there have been a lot of changes. It takes time to improve our work so it’s worth going on and on.
If you’ve got any questions, I will try to answer, if I can.
About the author
 Jean-Paul K, 3D lover.


That first picture is in the valley for sure!