
Behind the Scenes: Hagrid – Harry Potter Fanart
About
My name is Jhonatan Lechar, I’m 21 years old and I’m from Rio de Janeiro, Brazil. I’ve completely stopped trying to learn 3D a lot of times, but I started using Blender when I was 12 and started taking it seriously about 8 months ago. I am self-taught (mostly through YouTube tutorials) and my background is in 2D art, character design, and animation.
I don’t work as a 3D artist (yet). I mostly make animations, 2D illustrations and 3D models of stylized characters.
Inspiration
I had never seen the Harry Potter films until one day I saw the first half of the first movie on TV and instantly liked Hagrid’s characterization and personality. For this fanart, I decided to make a reimagination of his character. What would he look like if he were an even tougher guy?
Process
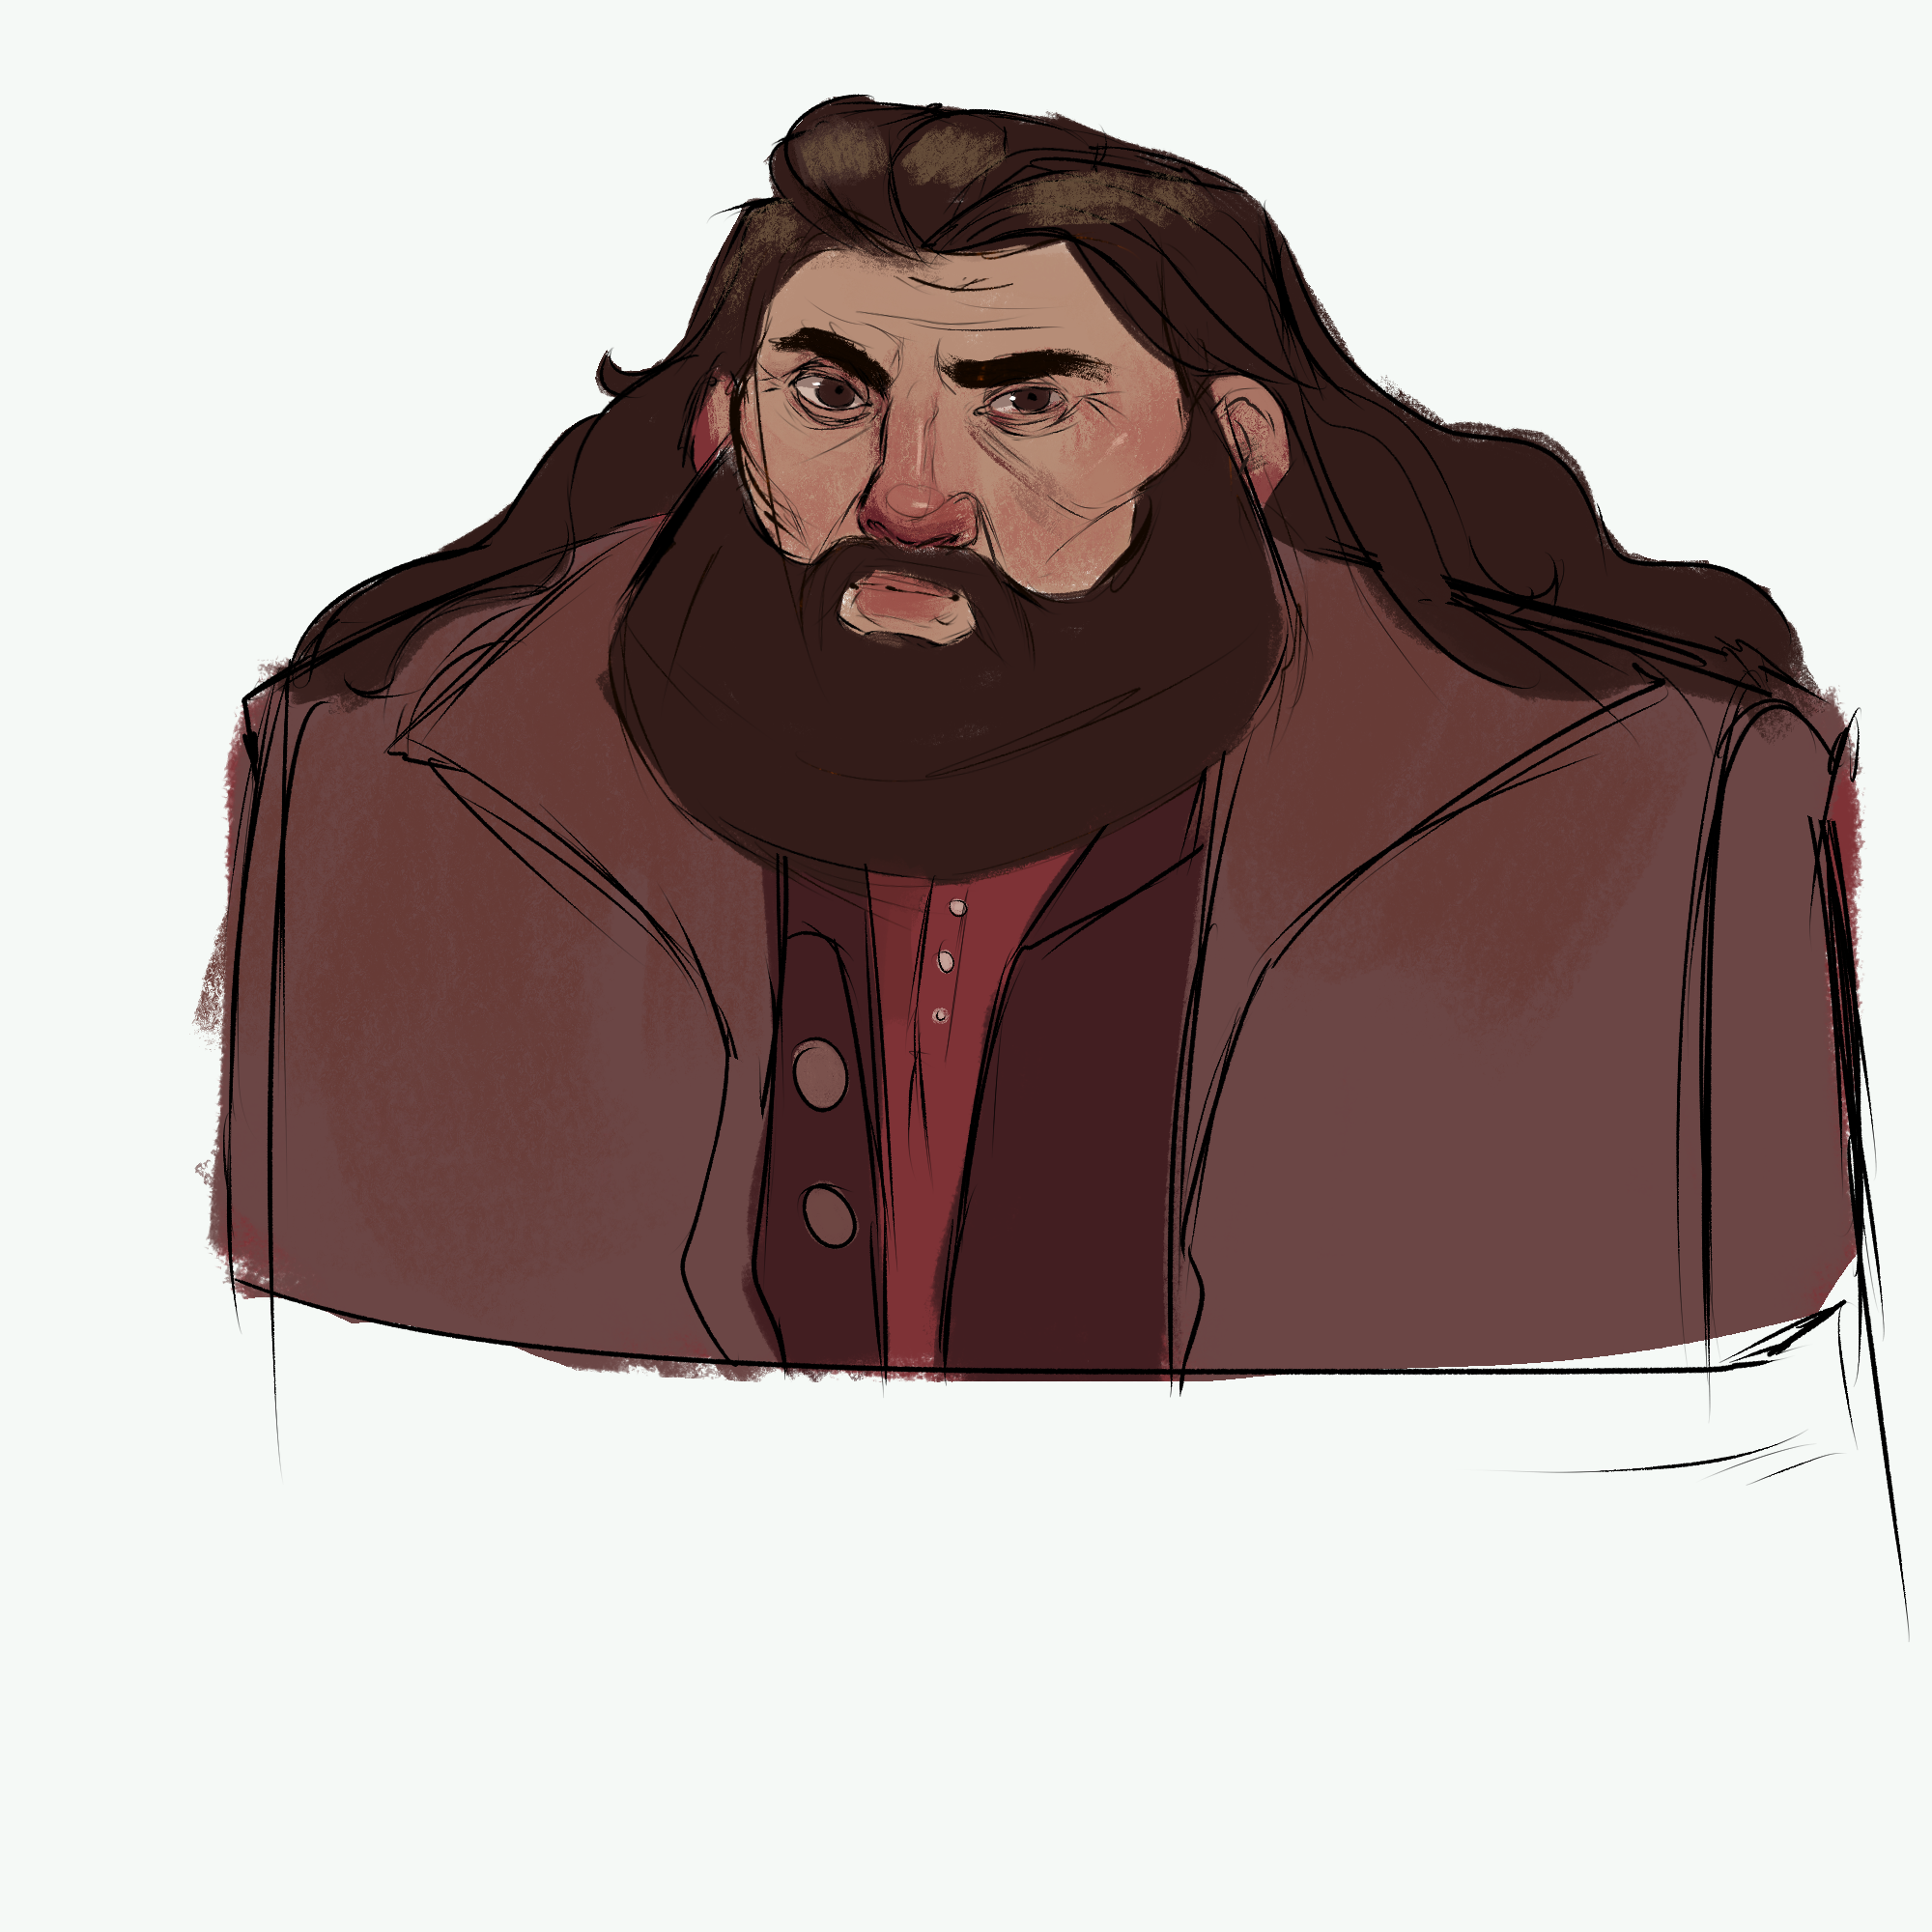
As I said before, I wasn’t planning on making a likeness sculpt or a very realistic model so I started by drawing a basic concept only from what I remembered from watching the movie, no reference used. It was very rough and quick as I mainly wanted to think of a style that wasn’t too cartoony or silly, but still different. The concept was only used as a guide, I wasn’t too worried about making the model match it.
Initial Blocking
After that, I went to ZBrush. A very important thing to mention is that I have a very weak computer (no graphics card, 4gb RAM), so my whole workflow is based around only detailing what is extremely necessary and saving computer resources.
I learned how to sculpt characters watching Shane Olson’s livestreams on YouTube and the approach he teaches is to use simple shapes to find a character’s likeness and silhouette. I used ZBrush for the sculpting, but the workflow can easily be translated to Blender.
I started by blocking these main shapes:
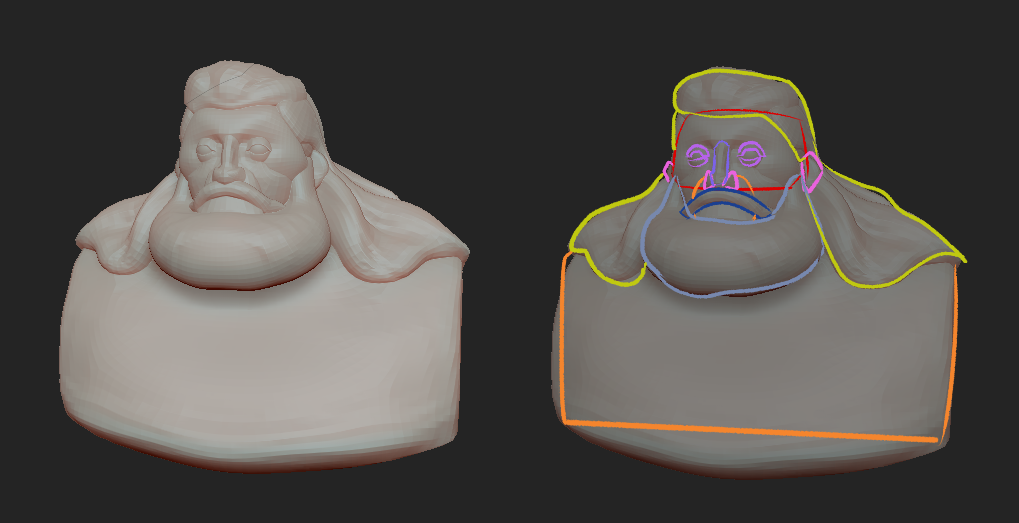
This is a very important stage! The shapes are what makes the appeal of the concept so if you get this wrong, your final model will probably not have the same appeal, so take your time! This version of Hagrid is made out of a lot of squared shapes (to show stability and strength) with some soft/round ones (to show softness, kindness).
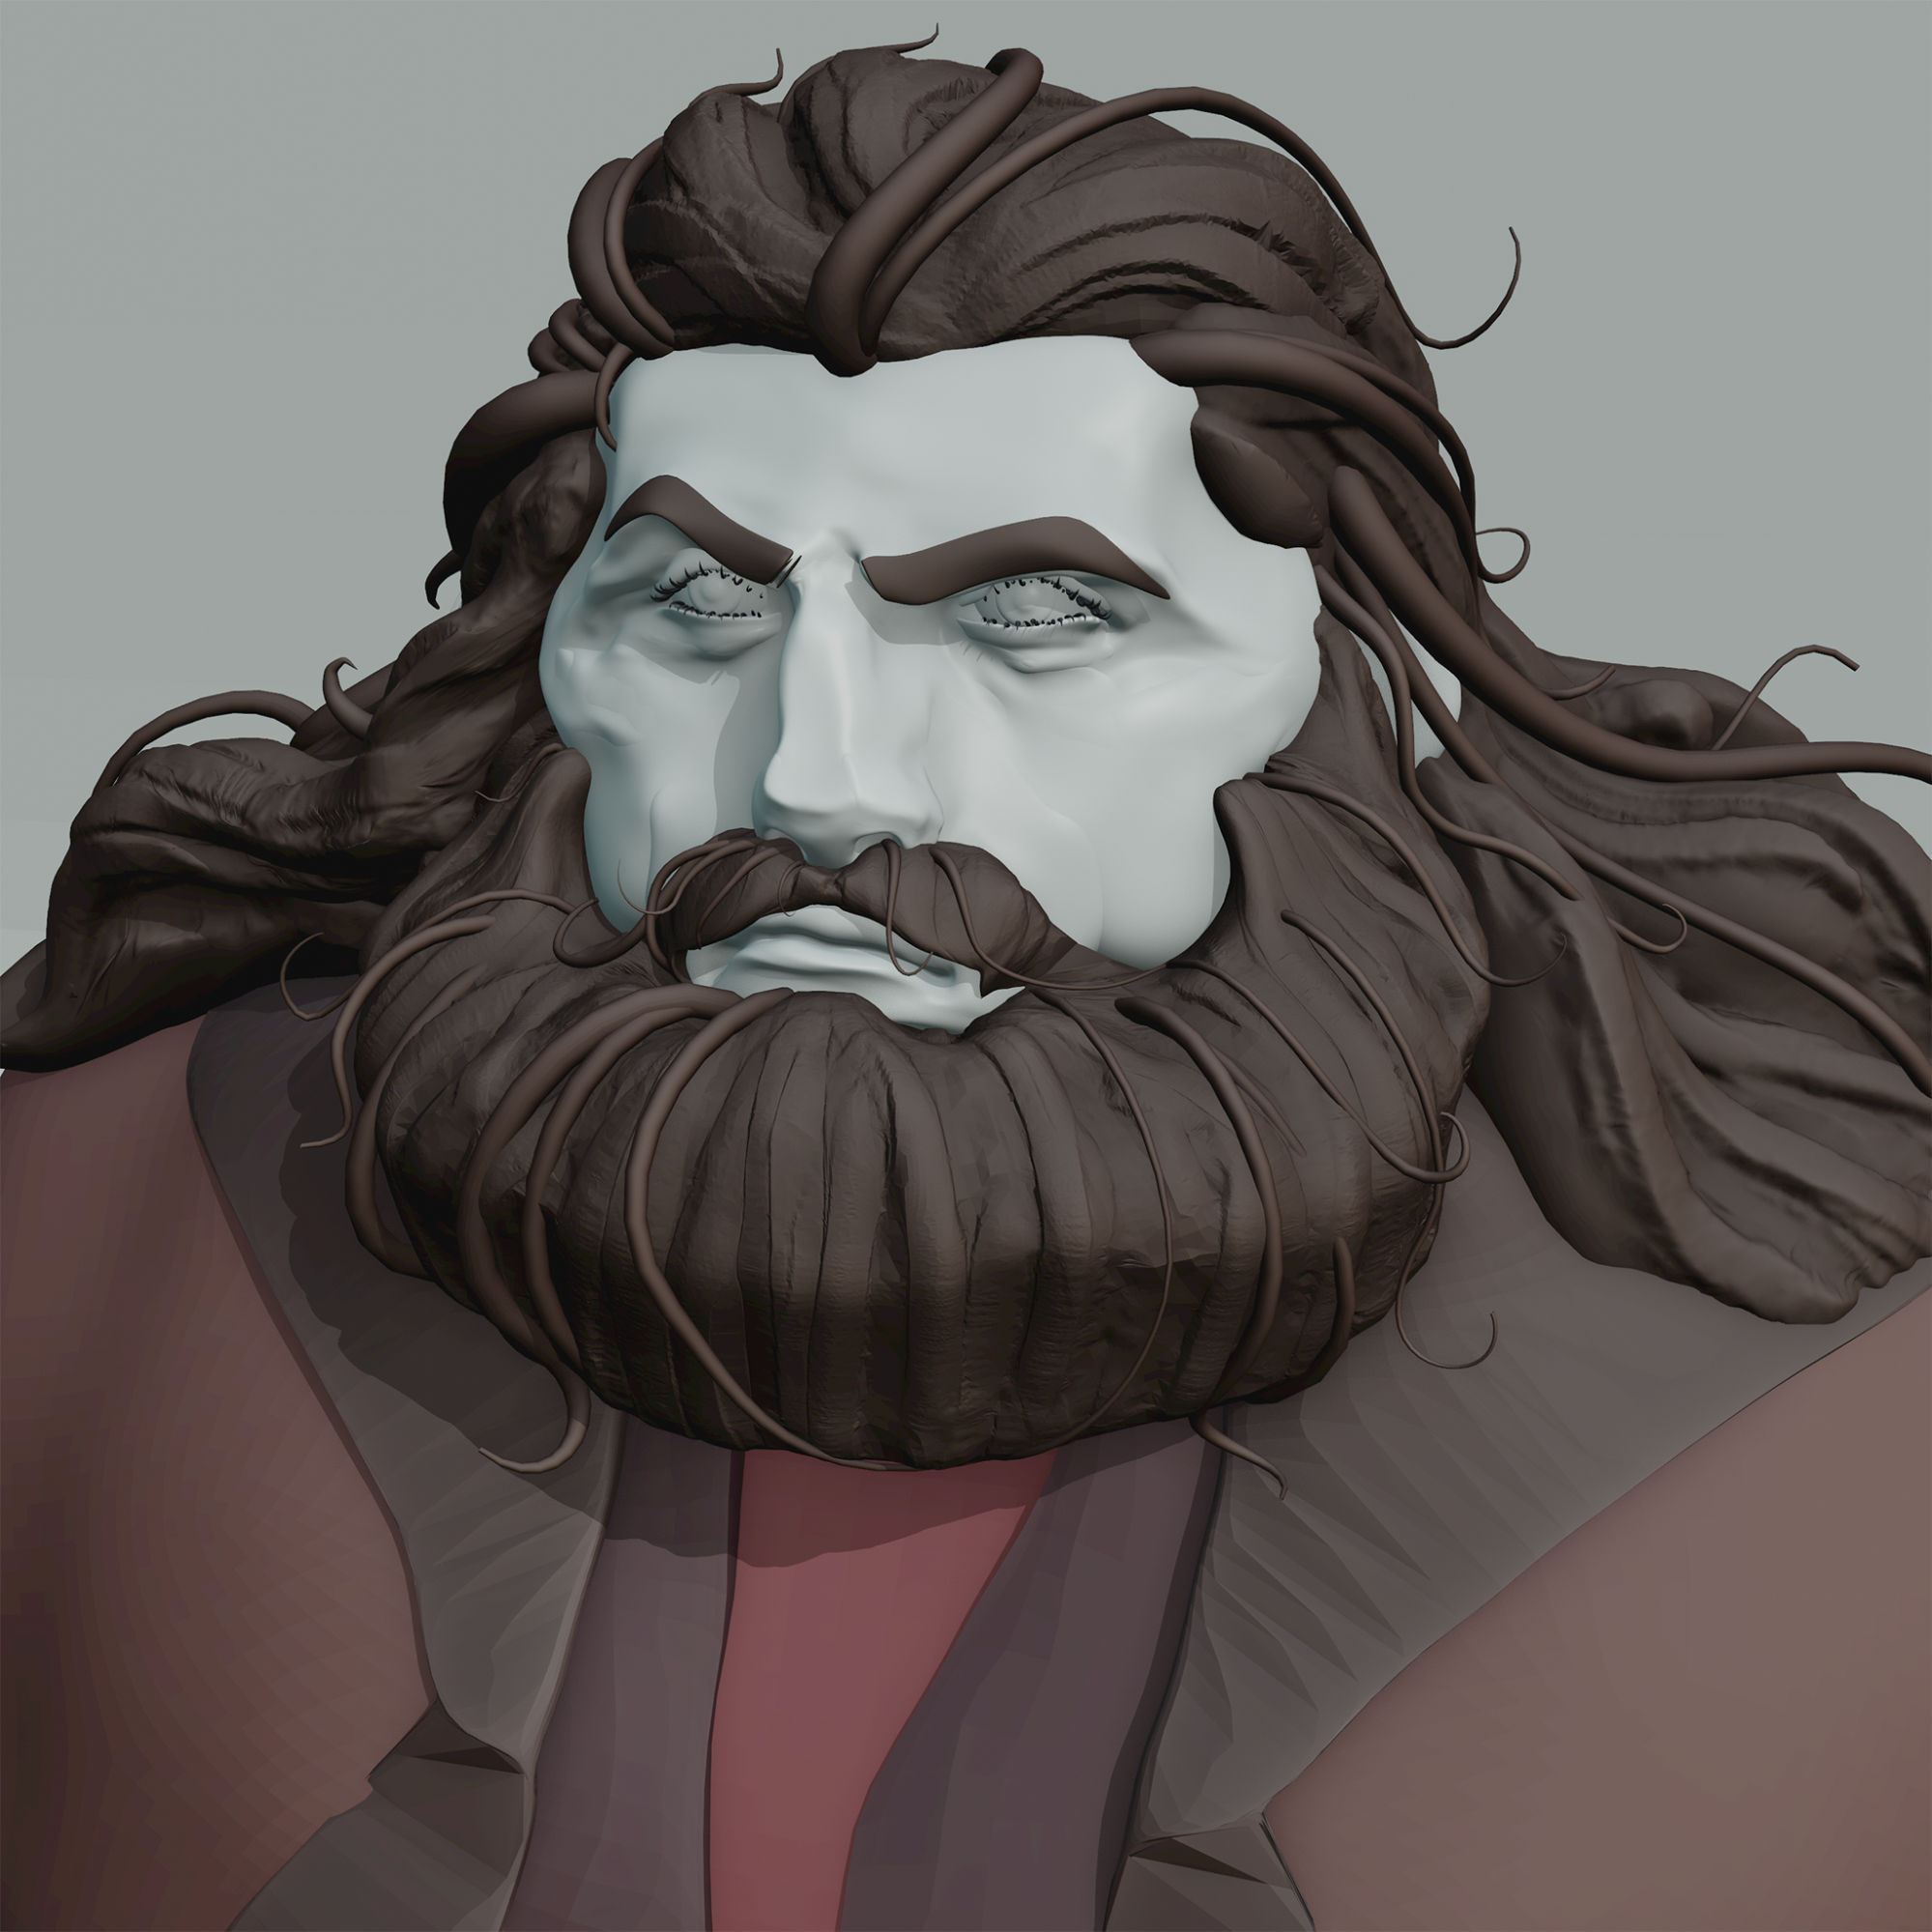
Sculpting
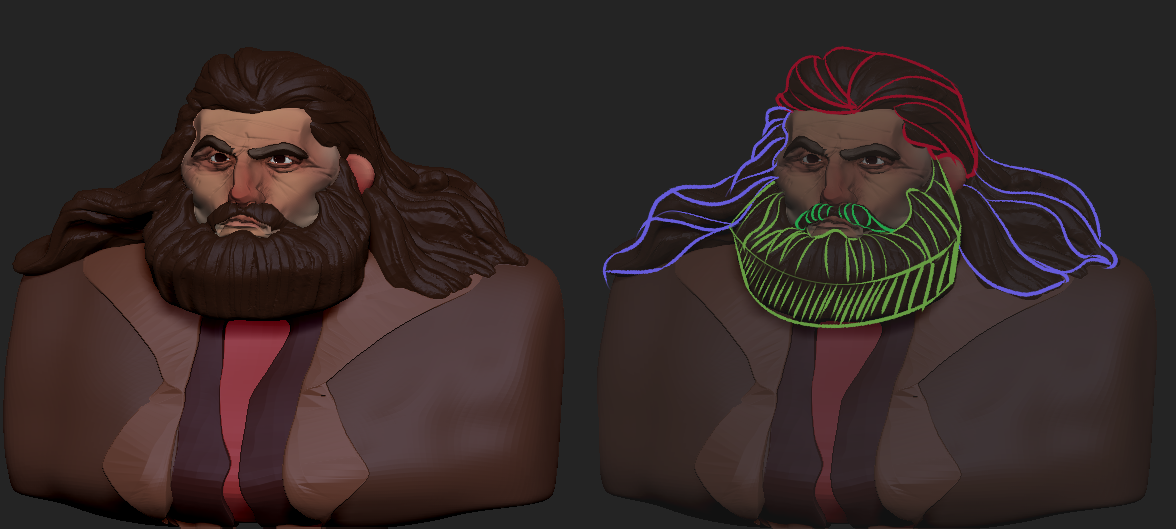
Then, I added more details and refined the shapes I had. Even with the details, you can still see and get the feel of the shapes I laid out earlier.
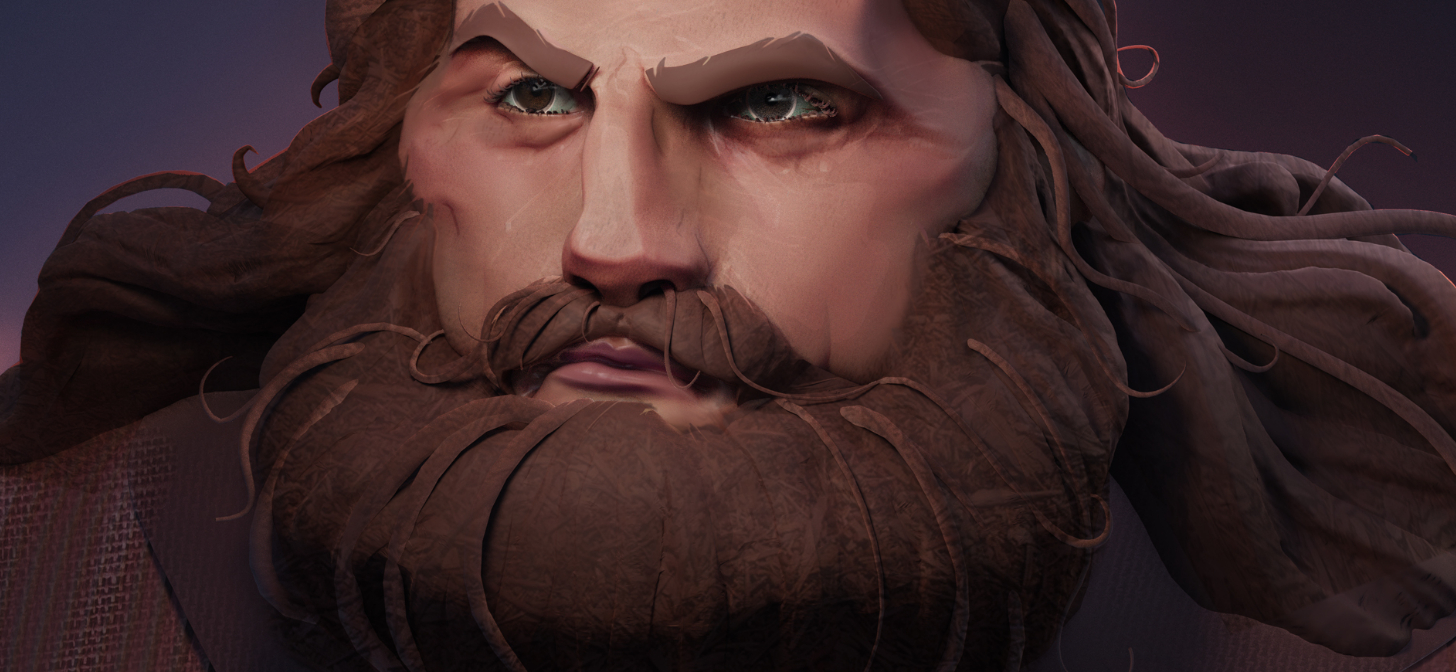
I knew my computer wouldn’t handle particle/realistic hair so I took my time when sculpting it, trying to find the gesture and the right rhythm for the strokes to get the mesh feeling like hair. Doing paintovers of the model helped a ton! This is when my 2D background comes in handy!
When I was satisfied with the sculpt, I ran ZRemesher to get a low poly version, auto-generated UVs and baked the Polypaint (ZBrush’s Vertex Paint) and displacement maps. I wanted this project to be quick so I didn’t make the UVs or retopologize.
Blender
After that, I brought the model to Blender to create the shaders and render everything. In this step, I made the eyelashes and added a few more details to the hair and beard using curves. Again, I was thinking about the gesture and trying to get nice flowy shapes to simulate strands of hair.
I used Blender 2.8 because the viewport is faster than in 2.79 and I needed to see the highpoly version of the model to add eyelashes, and to get a feel for it before rendering.
Shading
I used a simple SSS shader on his face and everything else was done using diffuse/principled shaders. Nothing too fancy, no special textures.
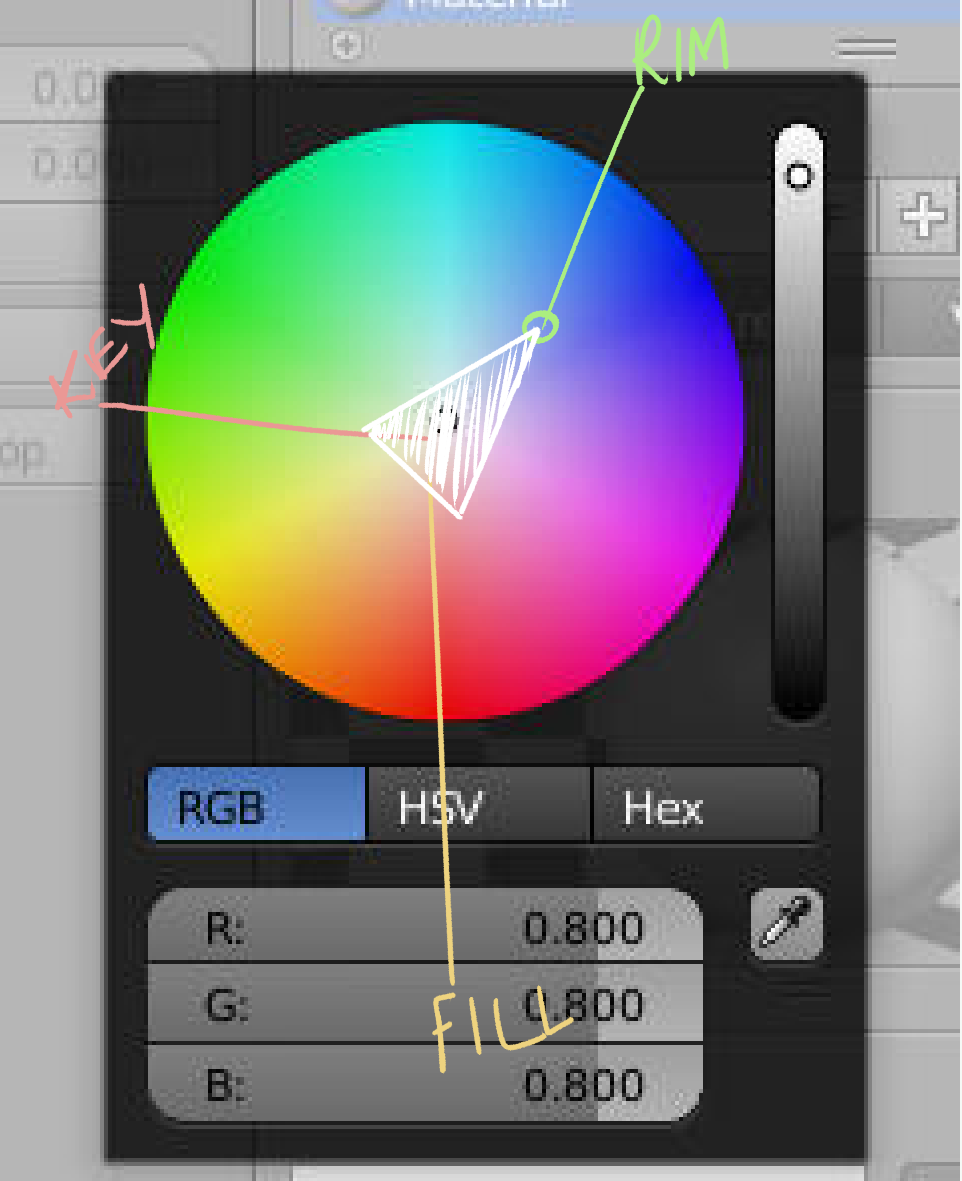
Lighting
The scene was set up using a regular studio setup as reference: a ramp as a background to get some bounce lighting (diffuse shader, blue color, roughness set to 0.8) and a three point light setup. The lights were all colored. I used a blue color for the rim light and warmer colors for the Key and Fill lights.
Colors
A good “rule” I follow is to use a “triangle” when picking the colors (see example image). These colors influence not only the lighting, but also the colors I paint on the textures.
Rendering
I rendered the model with Cycles and exported all the passes to composite in Photoshop. This is what I had before compositing (beauty pass):
You can see there are some problems with the displacement map, but I couldn’t render it again so I fixed it in Photoshop.
These are the passes I used to composite the image:
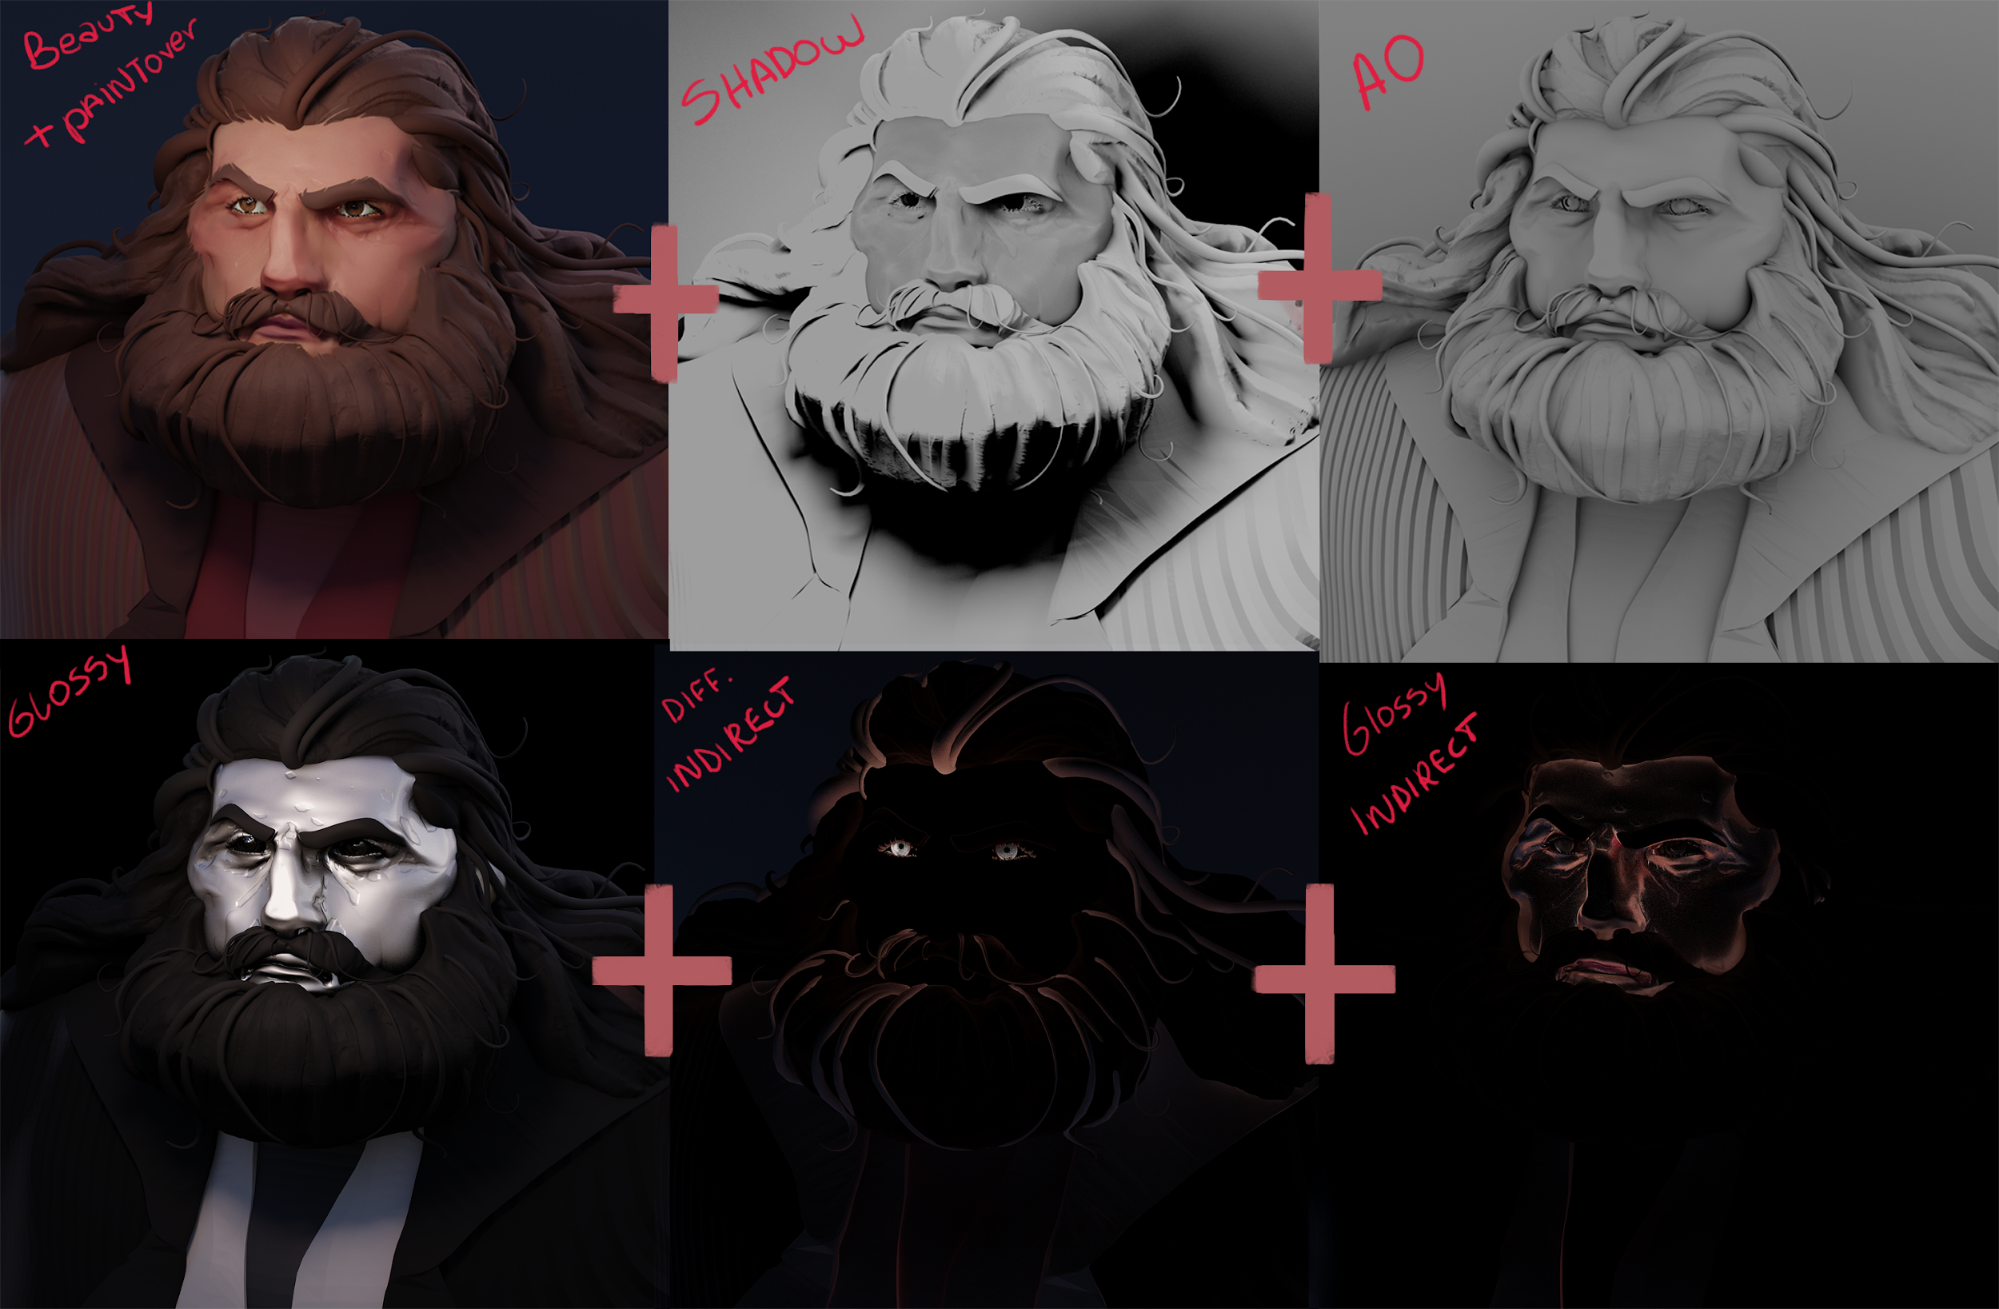
The paintover process was basically fixing the issues I saw on the beauty pass and breaking up the shapes on the eyebrows and hairline. Another very important thing is to add is some eye reflection. If your render didn’t give you enough of that shine in the eye, add it in post. It really helps to sell the idea that the character is alive (as well as adding asymmetry to the face).
After all of that, I applied some basic textures to the image to get some more noise and avoid the kind of plastic look I ended up with since I didn’t spend a lot of time texturing the actual model. This is useful when you have to get something done quickly or if your machine struggles with texturing in general.
Here’s what the textures look like without using layer blending modes (linear light/multiply/overlay):

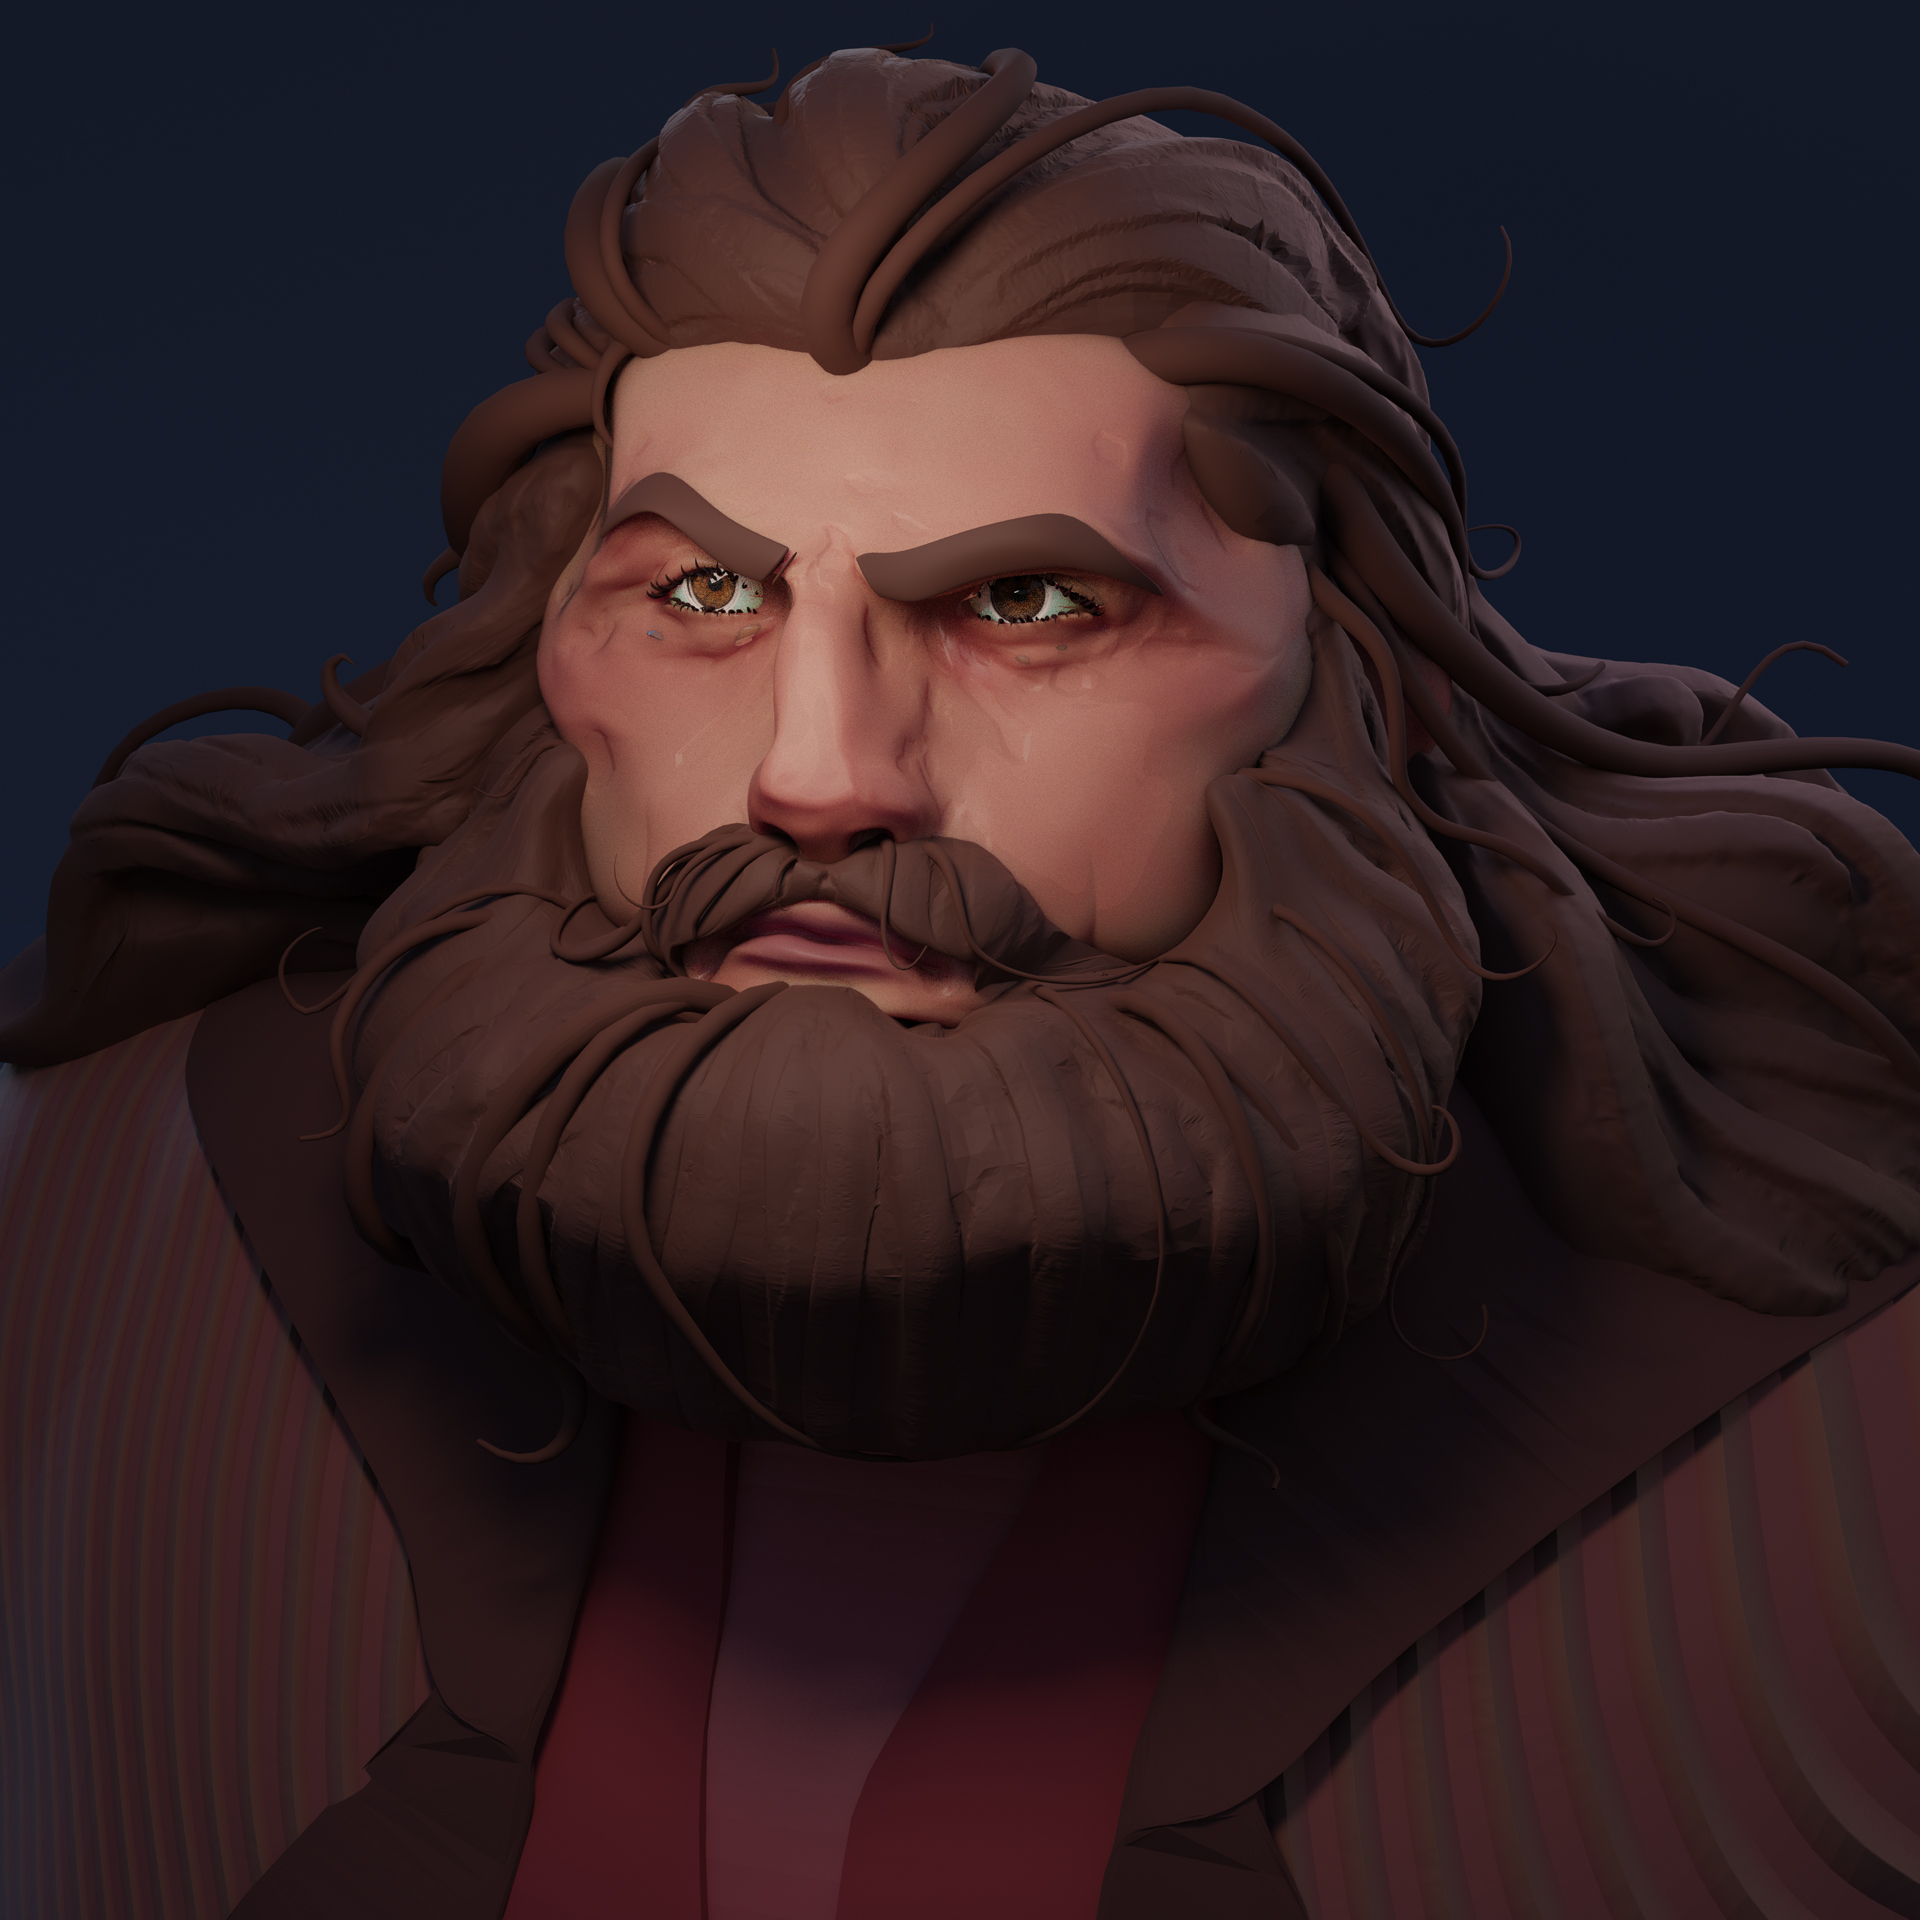
Final Image
Now I have the final image!

I hope this was helpful! This is my workflow as of now, but I’m relatively new to 3D in general so it might change quite a bit later.
If you have any questions or would like to contact me for work, feel free to send me a message!
About The Author
 Jhonatan Lechar, 3D modeler, Character Designer and Animator.


Nice work! Although, the beard looked fine to me at first, but once I read it was a picture of woodchips, I can’t unsee it. Perhaps if a little something was done to streak the texture in the grain direction of the hair strands?
Keep the great content coming, Abby!
How can you use 2.80 and say viewport is faster? Do you mean for sculpting only or for everything. I find 2.80 actually slower because for me on OSX it uses way more resources. I got a macbook pro 2015 with 16gig ram. 2.79 is way faster for me than 2.80?!
Hi, Jhonatan, the author, here. I would suggest trying out different versions of the beta. I wasn’t even able to move the camera around this model in 2.79 and had no problem doing so in 2.8. It sounds like a issue with the version of blender you have. Hope you can fix it easily!
Very weird, ive been doing since last November. BEfore that i didnt bother because to many things still broken or not working. It doesnt improve its just how 2.80 is. Its slower and needs more hardware.
Ive tested quite some scenes now and especially particles and many models (big) suffer a lot.