Johnson Martin writes:
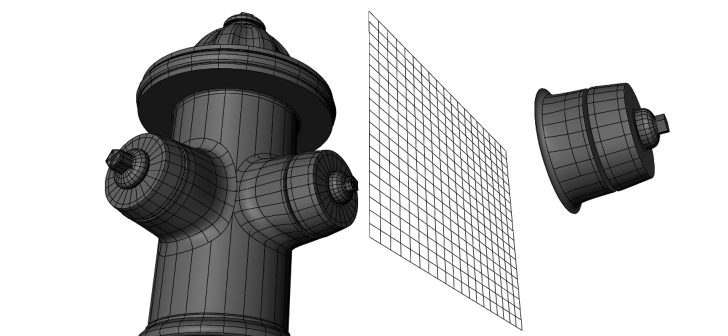
I’ve talked quite a bit on Topology Guides about integrating shapes into meshes. But until this point, I’ve overlooked a surprisingly adequate workaround to traditional modeling practices for integrating shapes onto a surface.
This workaround is the process of using “decal” meshes that hover over the surface of a primary mesh, yet seem to be fully integrated once shaded. The method I’m about to show you works mainly for protruding convex parts of an object. Such as a door handle or a button on a workstation.


6 Comments
Only usefull for people who don't render or try to seamlessly texture such models
I would disagree. In my experience, this method works perfectly for both offline and realtime rendering. As for texturing, it does create some difficulties, but nothing that can't be fixed in professional texturing workflow.
This is perfect for people like me that want to make seamless modular models. Also works great with rendering and real-time rendering.
yeah thats a good technique. I teach that to my students since the beginning as I find this a much more flexible approach than getting decals into the main shader/texture
in realistically a decal is glued onto the surface anyway ;)
Indeed. It seems like a lot simpler and flexible workflow to me that most of the parallax texturing options out there. Although some automated add-ons do seems to work well for more generalized usage.
It seems inspired by this:
http://polycount.com/discussion/72805/blender-mega-thread/p71
It is very clever technique