Learn how to achieve 'physically based' rendering in Blender.
Addicted to CG writes:
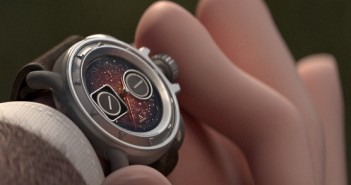
PBR stands for Physical based Lighting and King trammel has done some great job on introducing the Blender Community to PBR. So I would like to make a tutorial on PBR so that you can get a better feel of what it is. PBR is when you are rendering something in real time and it is physically correct. So in this tutorial you will learn how to make a coca cola can in Blender 2.74. Also in this video tutorial you will also learn how to make cloth as well as learning how to add scratches to a material. And all those will be done using Blender Internal! I hope that you will all like the tutorial and that you'll learn something new!


28 Comments
Missing link?
The video is at the top of the page
"PBR stands for Physical based Lighting"
"P" stands for "Physically", not "Physical"
"B" stands for "Based". If you're gonna capitalize the other two initials, you should probably adhere to your style standard and capitalize the only word you got right.
Since when does "R" stand for "Lighting"? "R" stands for "Rendering".
So much fail in the first five words of the first sentence alone... Why would I want to learn anything from these people?
just because there's an mistake here doesn't mean that it's not useful, if everyone criticizes a tutorial for a simple mistake as this then nobody will learn
Why so arrogant? You could have invest the time you spent writing your comment reading the rest of the article.
But it seems that you're just here to offend people.
Not all the people speak English, so the mistakes are normal.
I think "these people" are not here to teach you grammar. My English is really bad too but i leant a lot from people who talk and write even worst than me... if possible!
learn and let learn :)
" learnt alot "
as i said.... :)
oops sorry. I will fix that.
I just realized that you were talking about what I said on the video. I realized it too late though.
Great video, although you connected the normals vector node instead of the dot node. When doing a fresnel factor you should use dot which wont give you a flat one color result.
Well done other than that!
Thanks for the advice! I'll try that!
Ripped off from CgCookie and so many mistakes throughout the video that I don't think author understands what he is doing..
I mentioned in the video that there's not a different way (At least as far as I know) to make fresnel in Blender internal and making it look realistic. Also you could take a different perspective of the tutorial so if you already knew what I was going to show maybe view it as a practice or something.
Very nice and simple to follow demonstration of a shading setup using a combination of materials and nodes, with real time feedback in the viewport. The choice of basic models so as to concentrate on materials design is a plus. Thanks for sharing this video!
Thank you a lot for your positive comment.
Hey we are all fond of kent, but "king" trammel? Careful you'll give him a big head. :) nice work btw.
Thanks.
This was the worst tutorial for Blender I've seen in a while, it took this person 30 minutes to explain + mistakes. It could have been explained and done in 5 minutes.
Well I do know that but I do not really like scripted tutorials. I'd rather make one which has a personal sort of feel to it. Although I understand your point is and I know that there are quite a lot of people that do like scripted so I will try to be more specific next time and put a bit more effort to it.
This isnt really PBR though....
Well another guy told me that as well and explained to me the reason why. I will try to study a bit more on PBR and hopefully my next tutorial will be better.
Blender's viewport is petty powerful. It's certainly under rated. It has most of the capabilities engines like Sketchfab have. I hope more development is done with the viewport, as its a great thing that Blender can offer.
Lets try and keep the comments constructive guys! Saying "Horrible Tutorial" doesn't help anyone. ;)
You're joking.... right?
I'll definatelly agree with you on that. Blender has a great viewport.
Half an hour to explain something already explained by a well known, and shorter, and clearer, tutorial.
But the worst thing is that behind all the "nice" "vvvery nice" said in the video there are some trivial error that even make its main purpose fail. As pointed earlier, from the normal node "dot" should have been connected. And the guy in the video even pretendes to see differences in the PBR style, while it's clear that the effect that he's looking for, is not showed on screen. Nice!
Nobody wants to sound rude I guess, but this kind of content shouldn't make its way on this blog, for the sake of community education. Did anyone check the quality of this misleading and useless tutorial?
I have to second this. The quality overall is really poor and the end result is also...not good.
Better to put again Kent Tramell's video than this misleading "tutorial".
You are actually right. I do say a lot of times "very nice" and "nice" on my videos. Also I acted very stupidly when i tried to see a difference. Although there was a study done on this subject and found out that if you think that something is actually different then you really start to believe. Although there comes that moment when you find out that nothing was happening and you just look dumb. Finally the reason for this tutorial is to do some more stuff into PBR and such because I believe that it can be covered quite well. Yes I do know that Kent Trammel did a great tutorial but also think of it like that; If you are going to watch this tutorial and you already know what I am about to do then try it as a practice.