
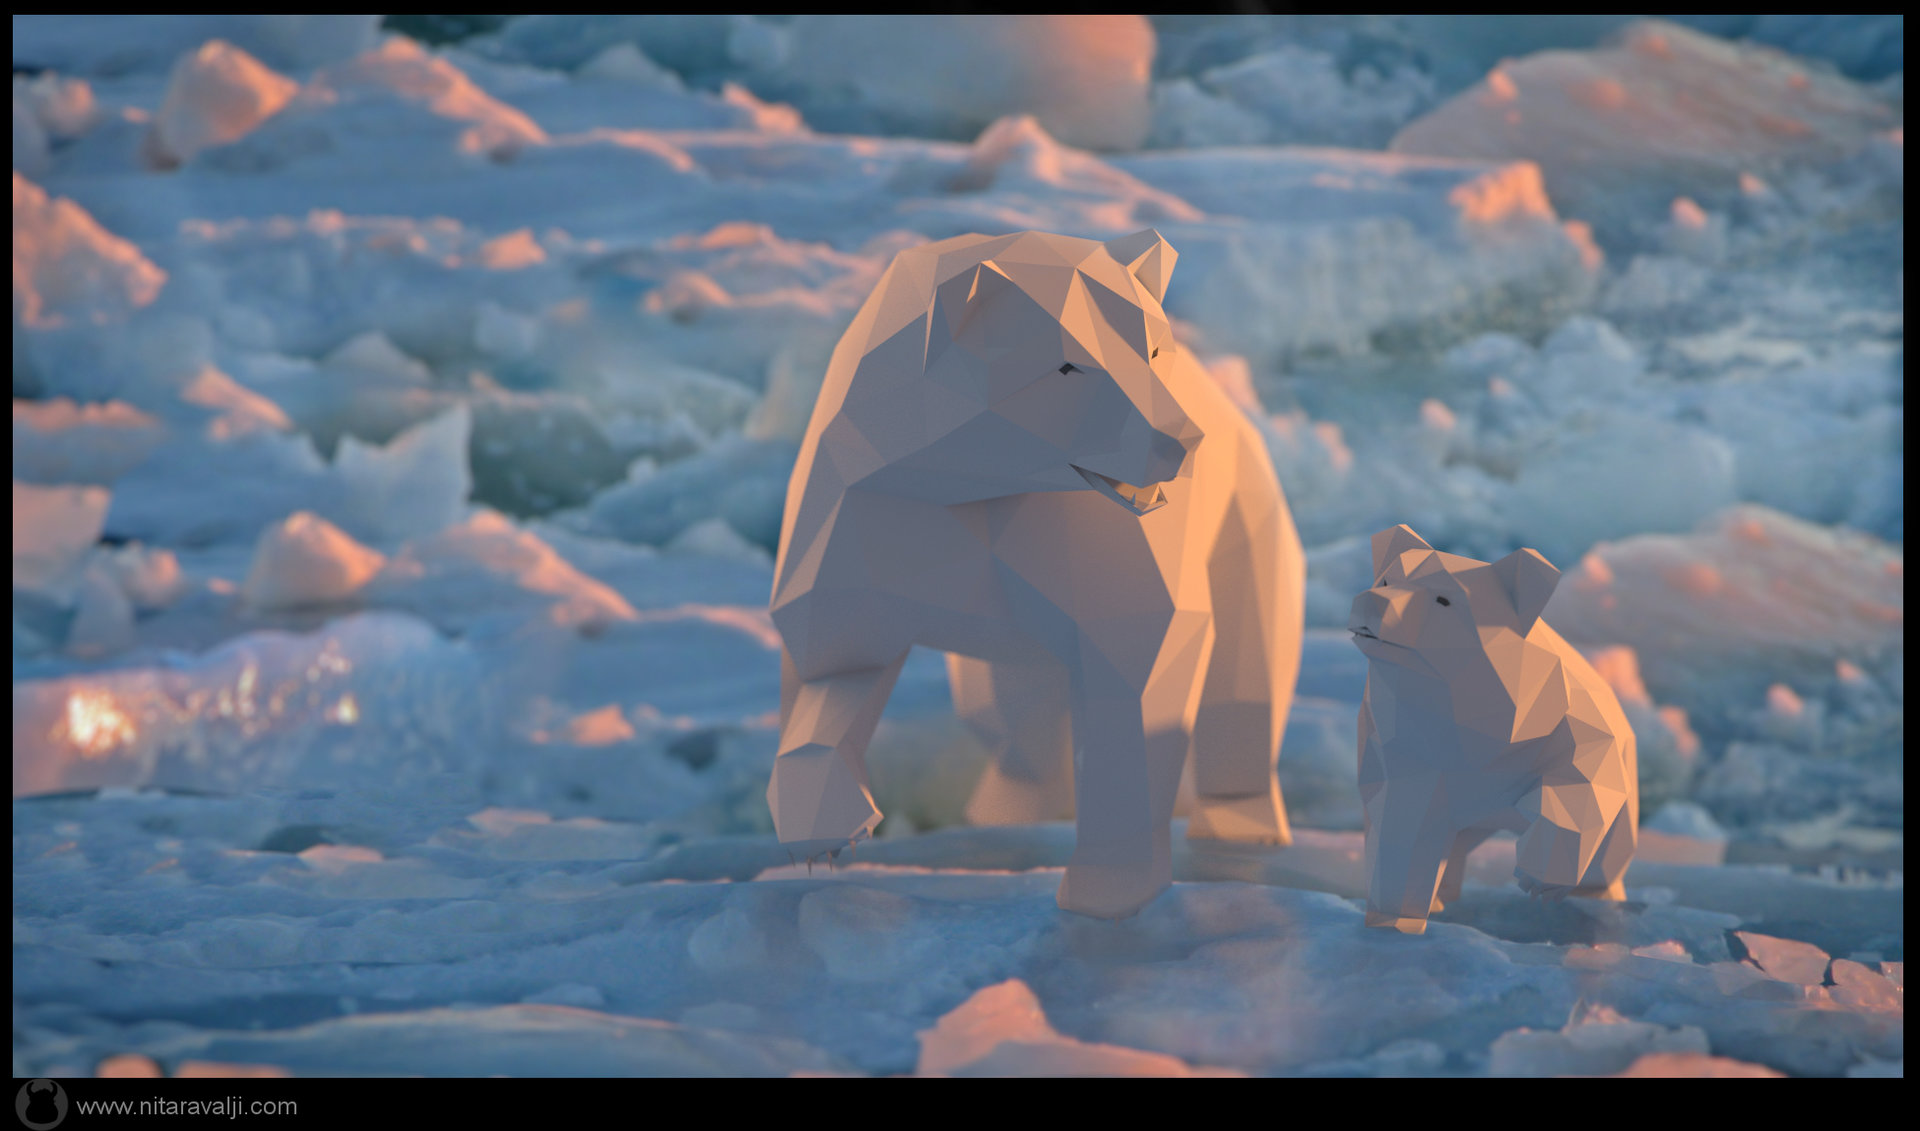
Behind the Scenes: Melting Home
In the Behind the Scenes series, I’m inviting artists to talk about the creation of one of their works. Today, Nita Ravalji talks about ‘Melting Home’.
Hi everyone, I am Nita Ravalji (nitz) and I will be showing you the breakdown or making of the “Melting Home” artwork.
Inspiration
I always find low poly art works so interesting and beautiful – I wanted to make one. The global warming topic has been on my mind for a very long time and I wanted to make it in different style. So I combined camera projection mapping and low-poly style.. which worked fine. I choose a photograph from flickr, you can find CC0 photographs from there which can be modified.
Modeling
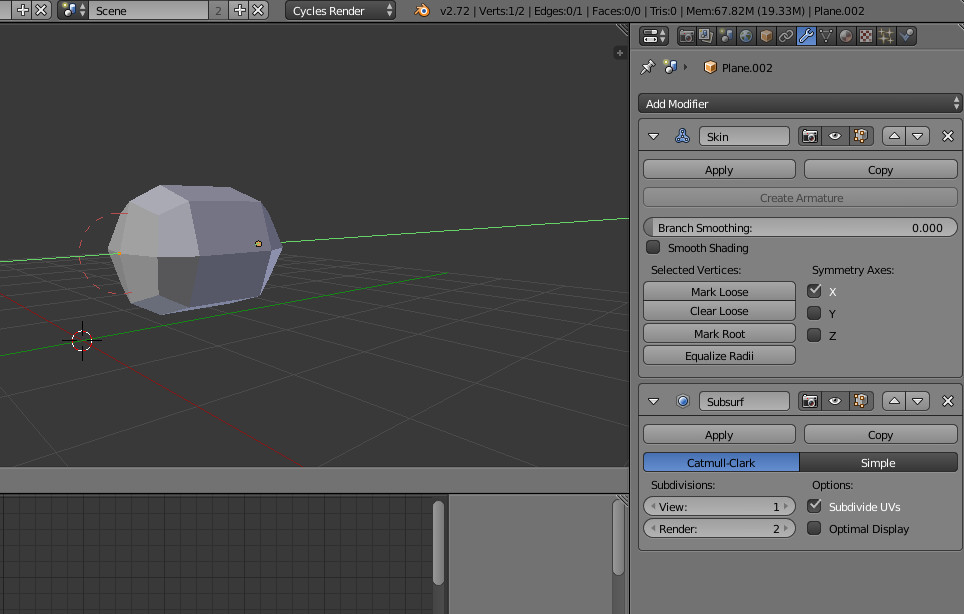
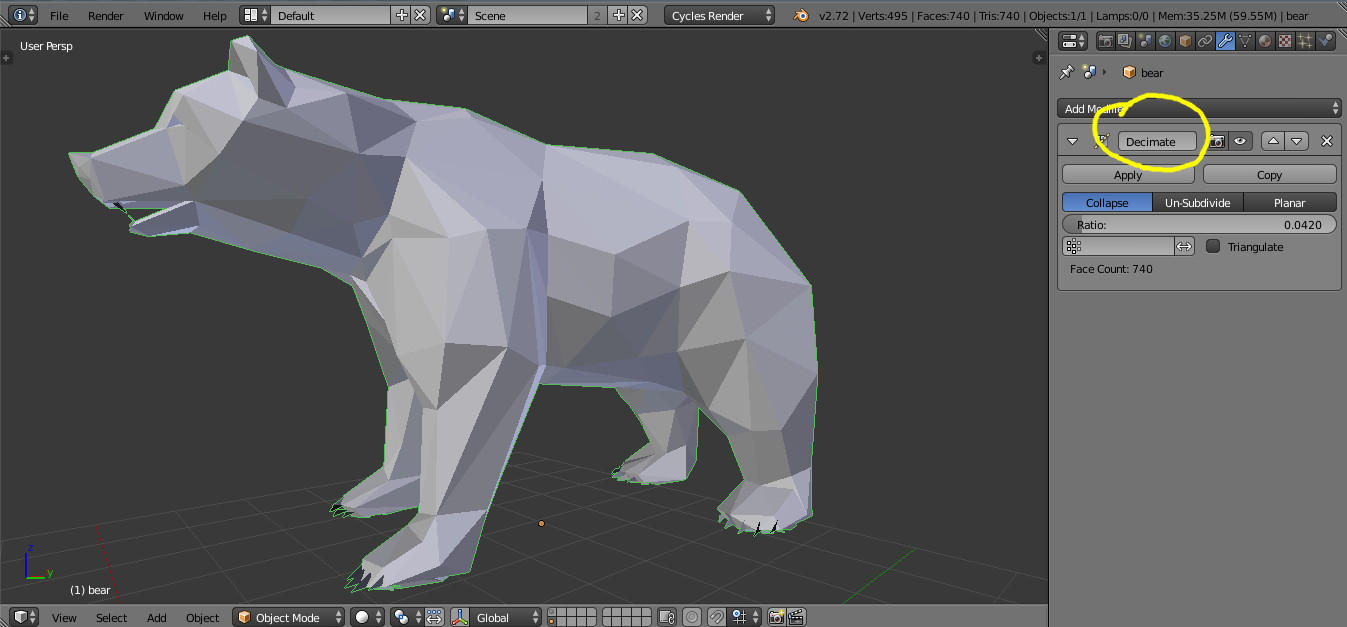
All I needed to model was a bear.(just a basic shape).
- I used a skin modifier to create a base mesh.(pic.1)
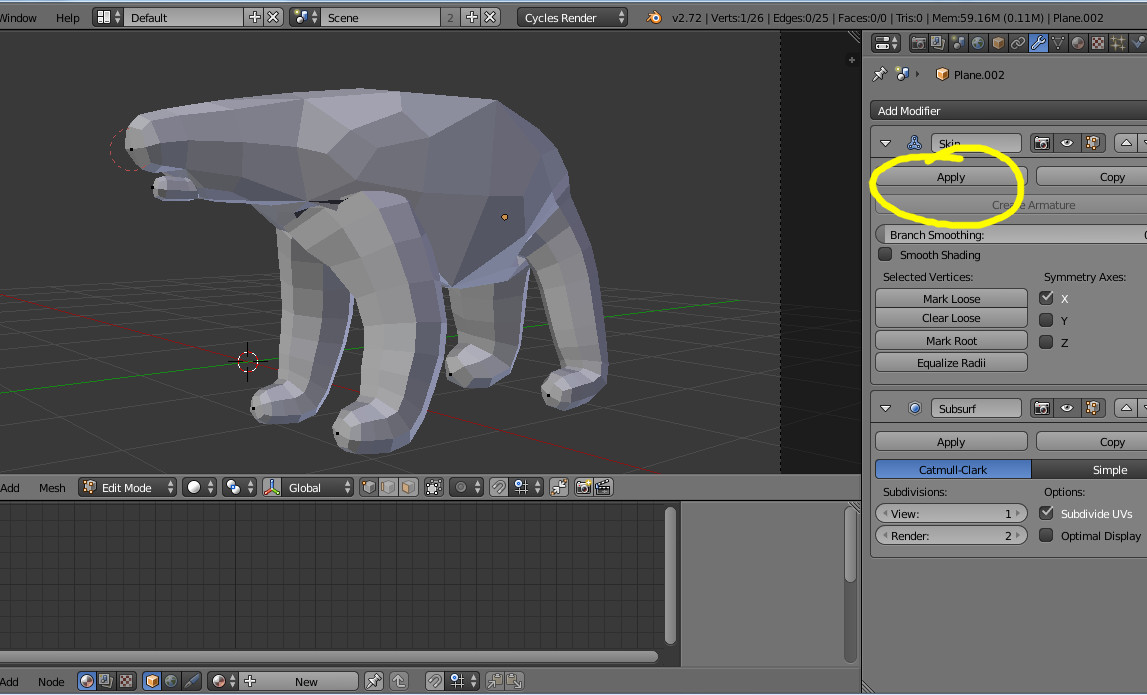
- Once the base mesh is ready and nearly looks like the bear, I applied a skin modifier.(pic.2)
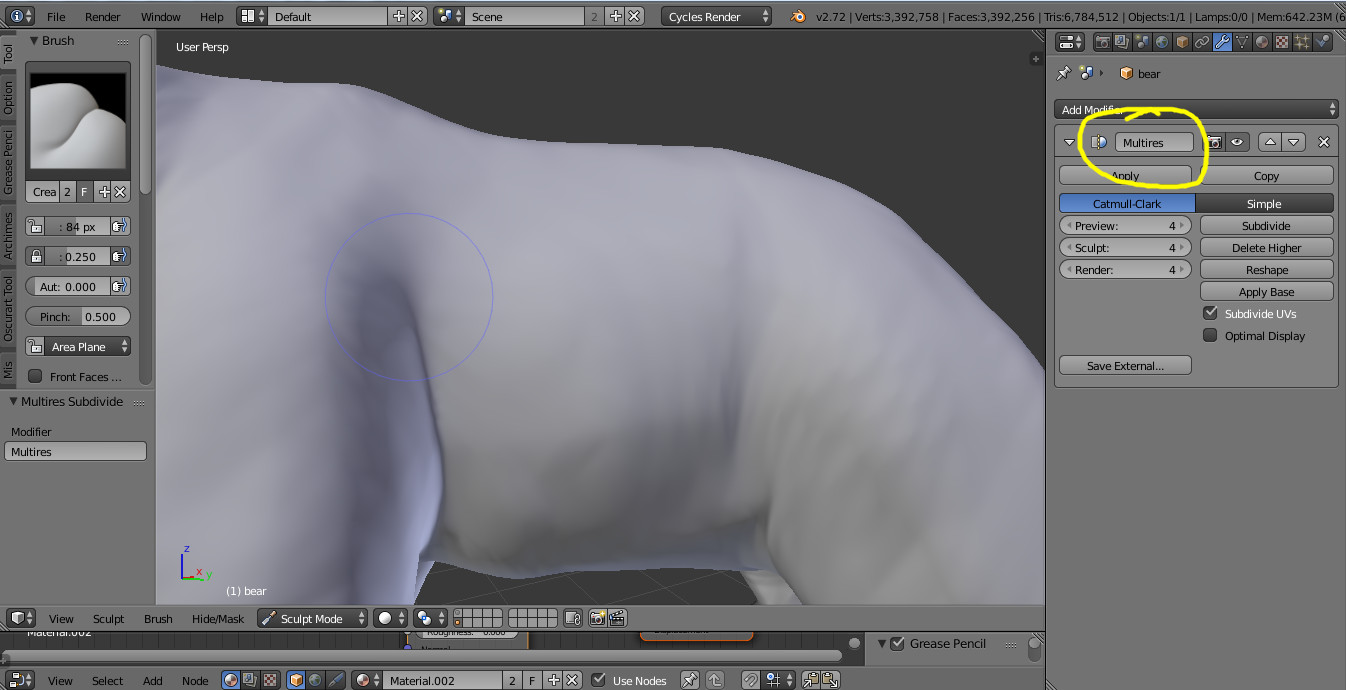
- Then gave Multires from modifier’s list and sculpted the basic details, like nose, mouth, eyes, claws, shoulder bumps, ears.(pic.3)
- Then gave decimate and adjusted the low poly level..(pic.4)
- For posing I used simple armature set up..
Materials
It’s a default diffuse color. just made nose and eyes little darker.
Background
The photograph I used is by Marko Kivelä from flickr.
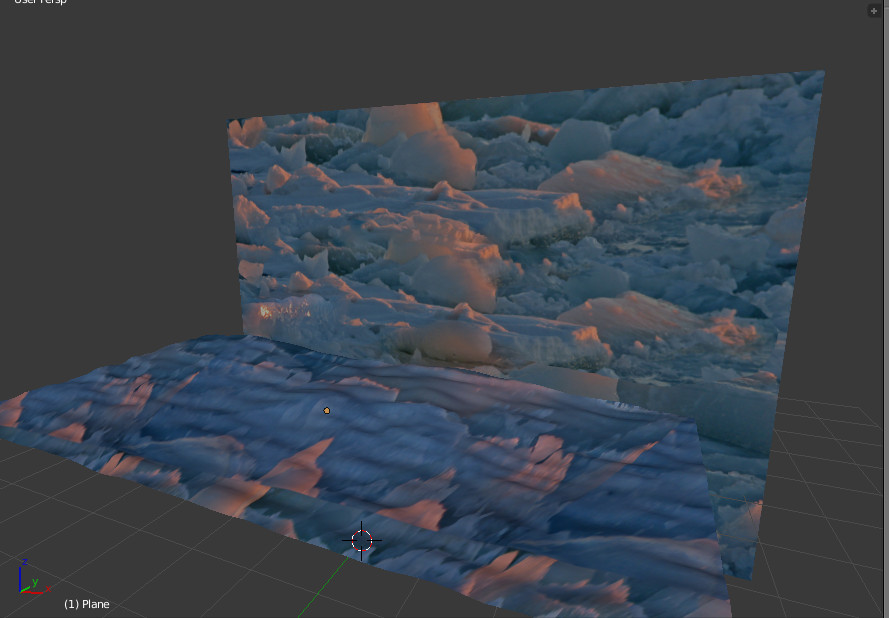
- This is the scene set up. (pic.5)
- I separated the base and the background ,then opened UVs of base from camera angle by using project from view in Unwrap.
- also gave it little bit reflective surface.
Lighting

I used 3 point lighting for this.
- Used same image in the environment texture(intensity :1). You can also use HDRi .
- So the source light here is from bear’s left side, which is a very strong sun light. It is also important to choose the same color as your background light color. I used a sun light with 5 intensity.
- I used a blue fill light from the bear’s right side, to get a fake blue bounce from the snow surface.(sun intensity : 0.2)
- There is little bit light from back. I used simple planer as an emitter for back light.(intensity : 8 , color same as source light)
- Did little color correction in GIMP.
That’s it :) it was a very simple and fun project to do. It always looks good when you Blend 2 mediums like real world and virtual world. so keep blending.
Thanks Nita!

Bart, this is cool! I really like these behind the scenes to get a glimpse from different creators.
This is just a personal observation, but it seems like there isn’t very much interaction on BN anymore because disqus comments still don’t seem to be working. At least for me in firefox. It’s like it has completely given up- it doesn’t even come up with the spinner and try to load them. (When I REALLY want to see a discussion I copy the URL to IE and read it there.)
I know there may be someway to clear my cache, but I have tried in the past and it’s still an issue. I imagine that most people won’t/can’t do this, and for them it becomes too much work just to add some quick comments or encouragement.
Maybe I’m wrong, but that’s just how it seems to me. All other websites work fine, and I’ve never had to do anything for them to work. Hopefully something will be fixed soon.
Thanks. :)
Hey, thanks for the reminder! Disqus has been a thorn in my side for a long time and also thanks to your comment I decided to take the plunge and look for an alternative:
http://www.blendernation.com/2015/02/03/an-experiment-using-discourse-for-comments-and-forum/