
Blend That Film Episodes 3 & 4 Camera Shake and Green Screen Keying
 [post introduction here]
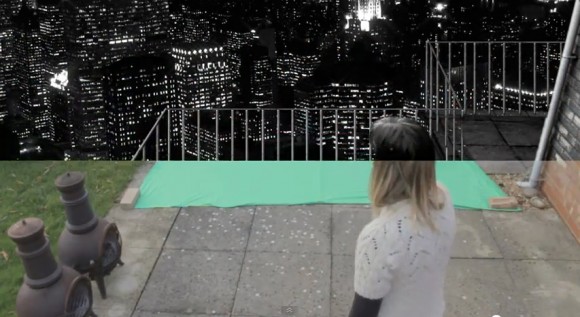
In the latest episodes of Blend That Film we look at creating Camera Shake to add some energy to your shots and we take a look at keying out a green screen.
Episode 3: Camera Shake
Episode 3 VFX Breakdown
Episode 4: Green Screen Keying
As always : very very good stuff! Thanks a lot for those tuts!
Hope you’ll do many more!
It looks very cool. The mask for the dust cloud is quite crude though and not very well animated. The hole in the dust doesn’t move with the actress.
excellent work,I’m impressed!…if I may,only,suggest > “War reporter” ,01:49 ,the addition of a keyframed blur node (i.e. fast Gaussian) controlling the bluriness of the “dust clouds envelope” animated mask?….perhaps even combined with a slightly scaled down (using a “Transform Node”),copy of the original mask overlaid through an “add” operation (“Color>mix” node) ,serving as a “fac” input ,so that the “blur effect” is “clamped” and limited (mainly) in the area “outside” the initial matte area?…and also keyframed in such a way that its (blurriness) value pumps up just a moment before the dust cloud is being occluded by the tank and the reporter ?…could this,perhaps,allow for a smoother “transition” and a better mix of the moving dust with the “occluded” area just in front of the tank and the reporter?
I really don’t know…I should have tried this out first!
but yeah…overall…this is a five stars work,I think…I’m impressed with the result,perhaps,you have even tried something like this somewhere in the node tree,again,this is just a friendly reminder.
btw >>> awesome tutorial as well!!!…Thank you for sharing! :-) Peter