![]() Here are two scripts that will add a nice enhancement to your workflow and your ability to graphically document the progress of your projects.
Here are two scripts that will add a nice enhancement to your workflow and your ability to graphically document the progress of your projects.
Render History script
Created by Victor Barberan, he writes:
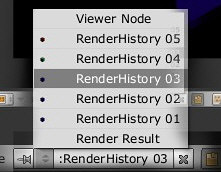
I made a little script for keeping a number of renders inside the image editor, as a form of 'Render History'. I think this is very handy to compare the changes in your render.
This way every time you made a render the script automatically saves the image, load it in the image editor window, assign a name to it, pack it inside your blender file, and then remove it from the drive.
You can have your render history inside blender without doing anything, even if you save your file and open it later you will have your render history.
There is a variable in the script called 'NumRender', you can modify its value to set the number of images you want in your render history.
AutoSave Render script
Created by macouno, he writes:
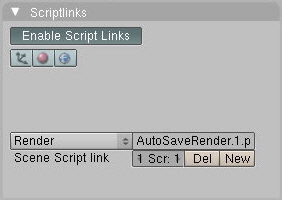
This script will automatically save every render you do as a separate version. I wrote the script because I do a lot of test renders when working on a project. With this script every test render is automatically saved, which makes for a nice progress storyboard.
You can find the AutoSave Render script, along with installation instructions, at macouno's website.


15 Comments
Blender should really really have a nice way of doing this out of the box. Most, if not all major packages do.
OMG i have been needing something like this!!!! Thankyou!!!! :D :D :D
actually blender has this but only for 2 renders at any time, and not the best of ways, but indeed, id like to see something like maya's render manager/window.
Yeah, a simplified version of this functionality would be the render buffer feature in Blender. In the Render window, press the J-key and then do another render. The new render will appear but, you can then press the J-key again to toggle between the two renders to compare them. It's a very helpful feature but, like Felix mentioned, it's limited to just two renders.
the script should automatically set a script links to itself when run
and it could be ran from the scripts windows's menu, in the Render entry maybe.
also, I don't know if there's a functionnality in Blender to automatically run certain scripts
at startup. For now what could be done is make shortcut (in windows) or shell/otherlanguage script to run the script :
-P Run the given Python script (filename or Blender Text)
(from blender --help)
That's funny-- I just lost an image I rendered half an hour ago, along with the camera angle I shot it from... This script would have been perfect.
a 3rd story on a saturday, wasn't expecting that. both scripts are great and are very handy.
It would be good if the Render History script would allow you to not delete the original renders, that way you could have it in your .blend file and in your files so you can use them elsewhere. AutoSave may be useful!
btw, thanks for writing these!
Ha! I think this was one of the first things I saw on that new feature request site that was posted a couple days ago. :) I wonder if it had anything to do with this.
Even if this doesn't significantly increase the memory overhead, this would cause a steep increase in the size of the .blend file. Of course, that's up to the end user who might well consider the extra filesize an acceptable detriment compared to the ability to see many renders at once. However, I believe that you only need one render in memory for comparative purposes.
DramaKing, then set the NumRender variable to 1, and then you have your "one render for comparative purposes." But, to each his own.
DramaKing,
I want as many renders to compare as possible.
Awesome scripts guys :)
Also, 2.46 will have a Stamp panel. http://wiki.blender.org/index.php/Reference/Panels/Scene/Render/Stamp
There's also this script: http://blenderartists.org/forum/showthread.php?t=94275&highlight=metadata
which prompts you for a description that's saved in a text file.
I like the metadata idea but I just did a test with todays build of svn and couldn't find where my "Notes" were saved. I viewed the jpg with gthumb, GIMP and brought up the gnome/nautilus properties window.