
Behind the Scenes: New Dawn
INTRODUCTION
Hi, my name is Olawole Adaja, and I’m a 3D artist based in Nigeria.
I started my 3D journey in 2017 as a self-taught 3D artist and started working professionally in 2019.
I had the privilege in 2021/2022 to learn 3D animation at School of Motion through multiple Scholarship programs, and I acquired 2 certificates in Intermediate 3D animation (Cinema 4D Ascent By E.J. Hassenfratz) and Advanced 3D cinematography (Lights, Camera, Render By David Ariew) respectively.
I am presently working as a freelancer and a full-time 3D artist with a B2B and B2C tech start-up company in Nigeria. I have experience using other 3D software but I find myself using Blender more as my main tool.
INSPIRATION
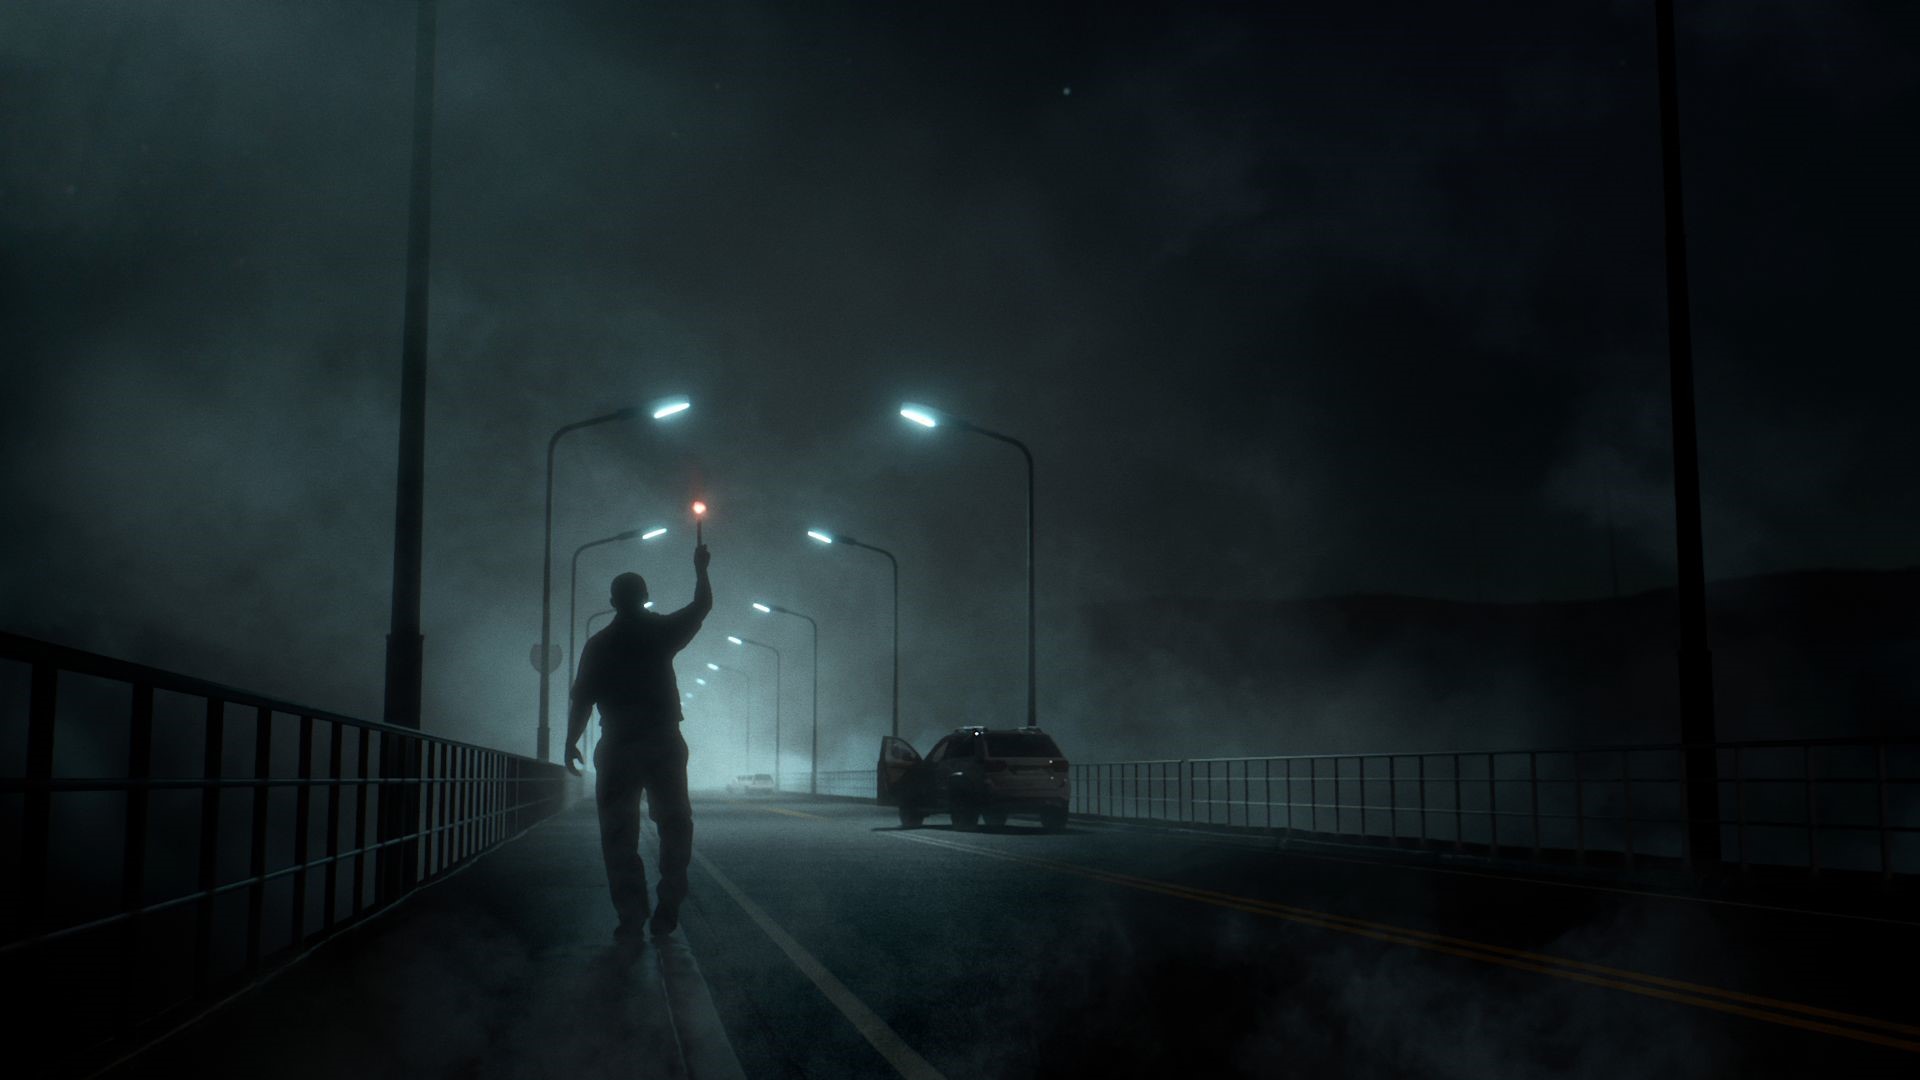
This art was inspired by one of the frames from Apple TV series “Invasion” Season Two’s title sequence, especially the bridge in the scene, but I also wanted to create something abandoned and at the same time give a feeling of hope and beauty, definitely not in the night hours.
PROCESS
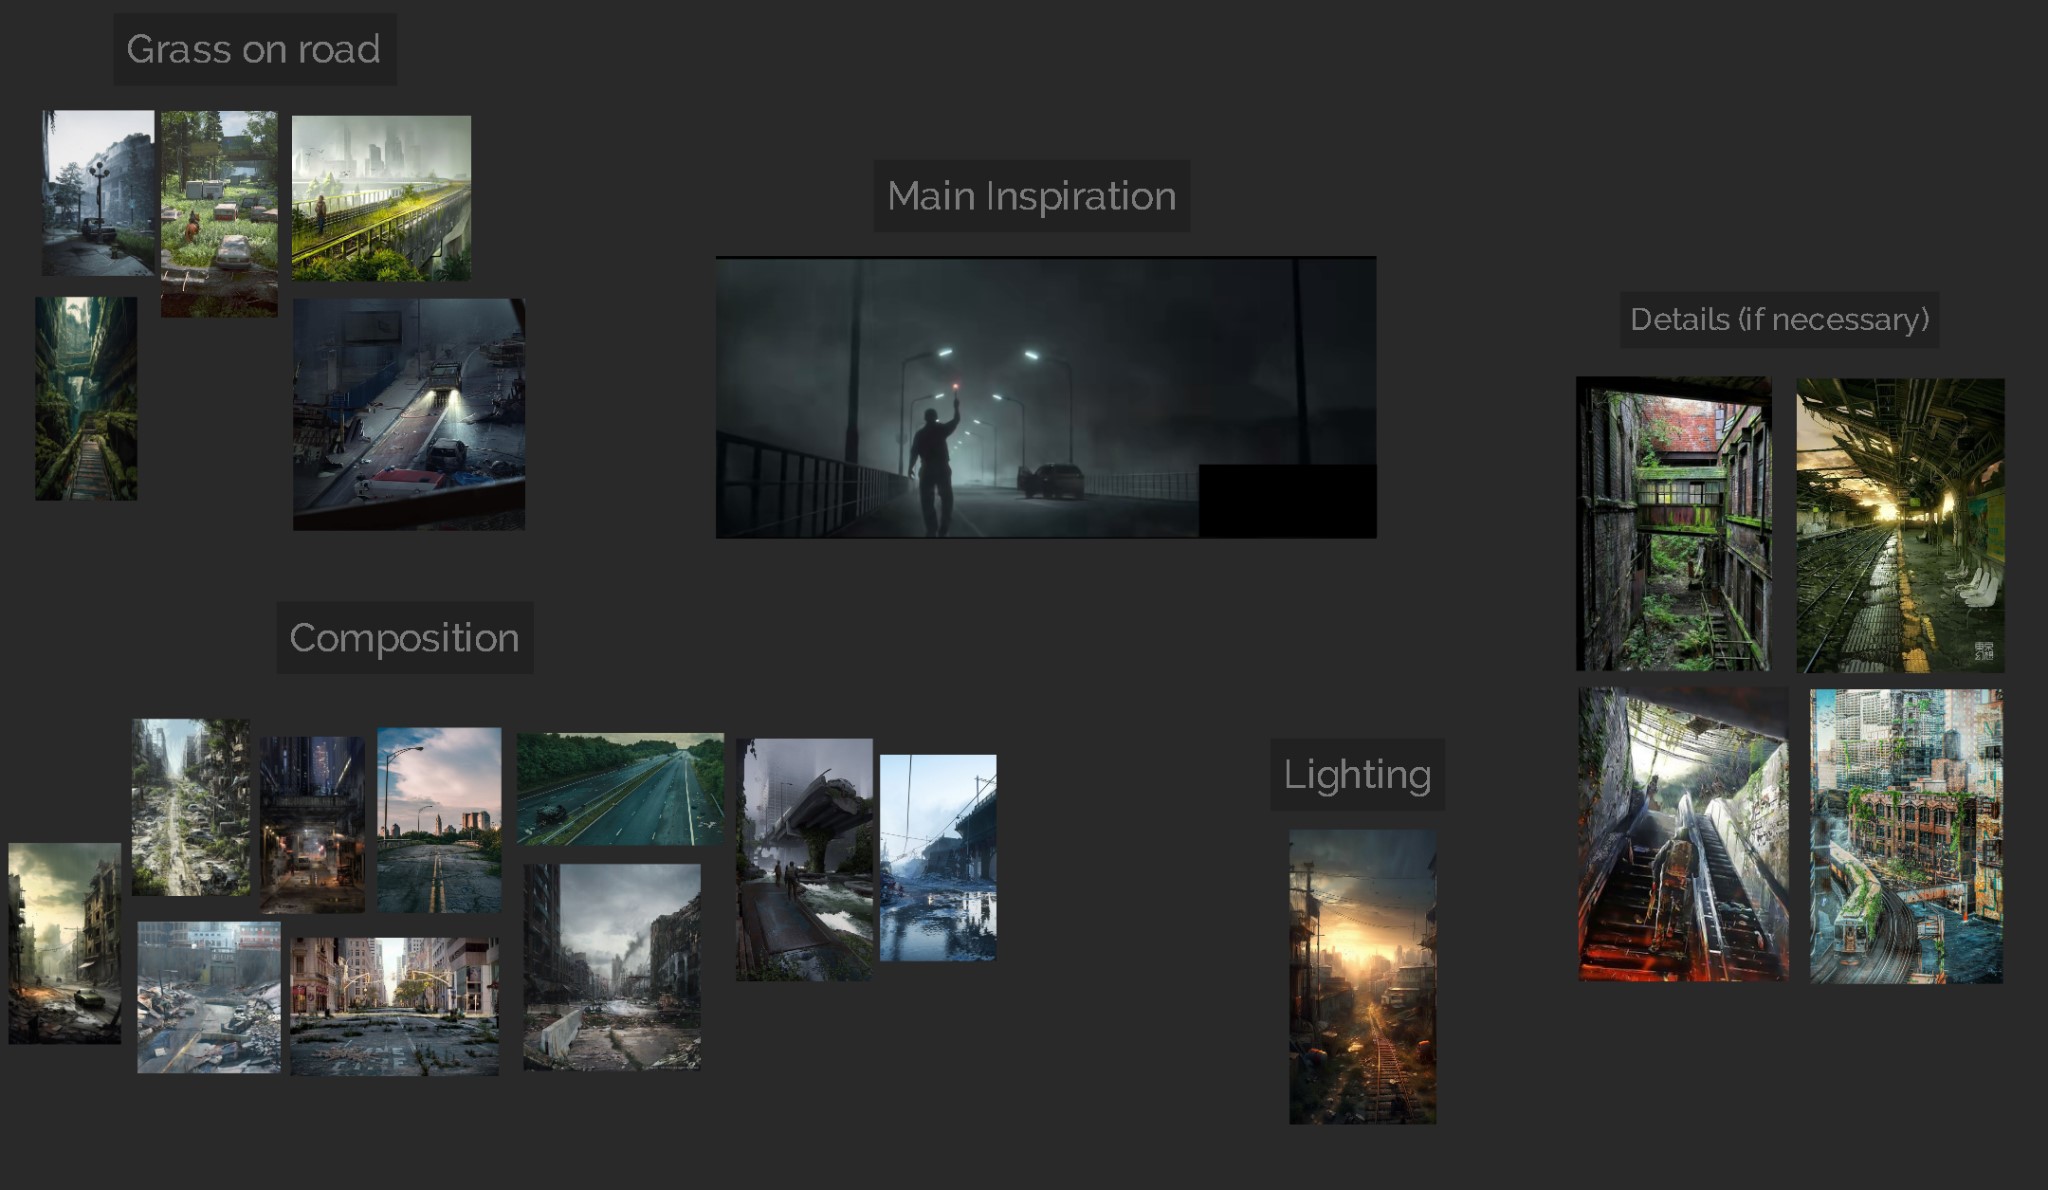
After getting inspired by the sequence, I started gathering more related references from Pinterest, ArtStation and Google using PureRef to create a form of collage.
Modeling
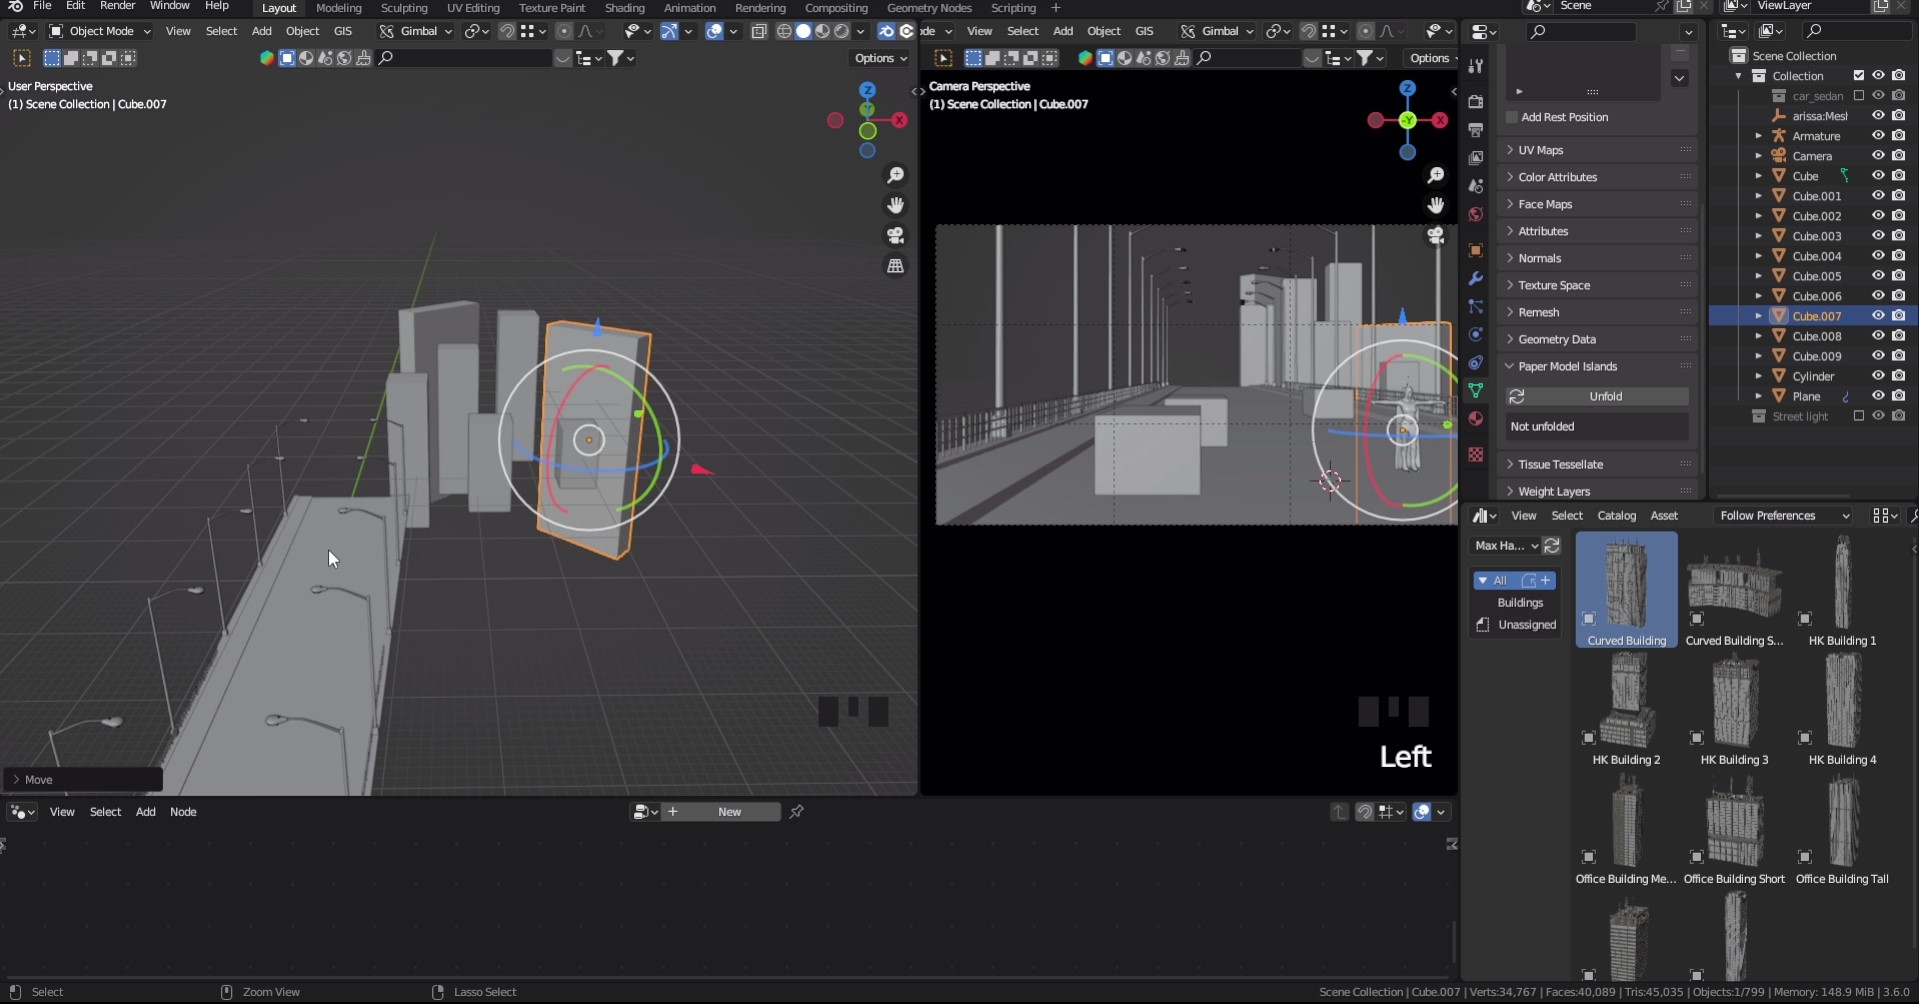
After I was done with reference gathering, I jumped into Blender and started blocking out the scene. Assets were mostly used, except for the modeling of the bridge.
Texturing
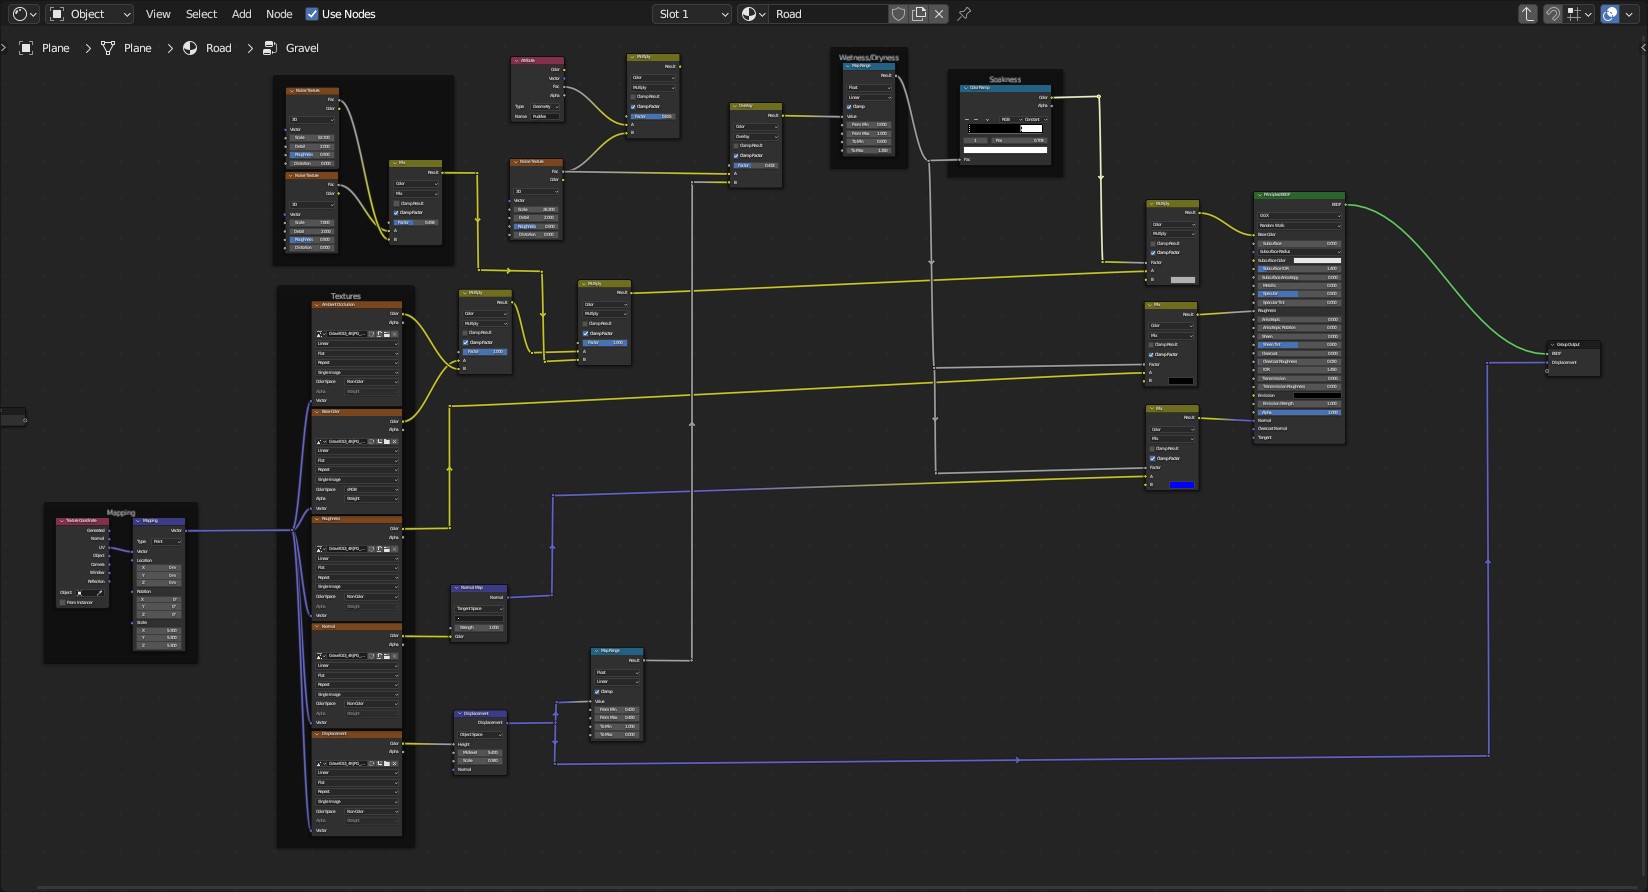
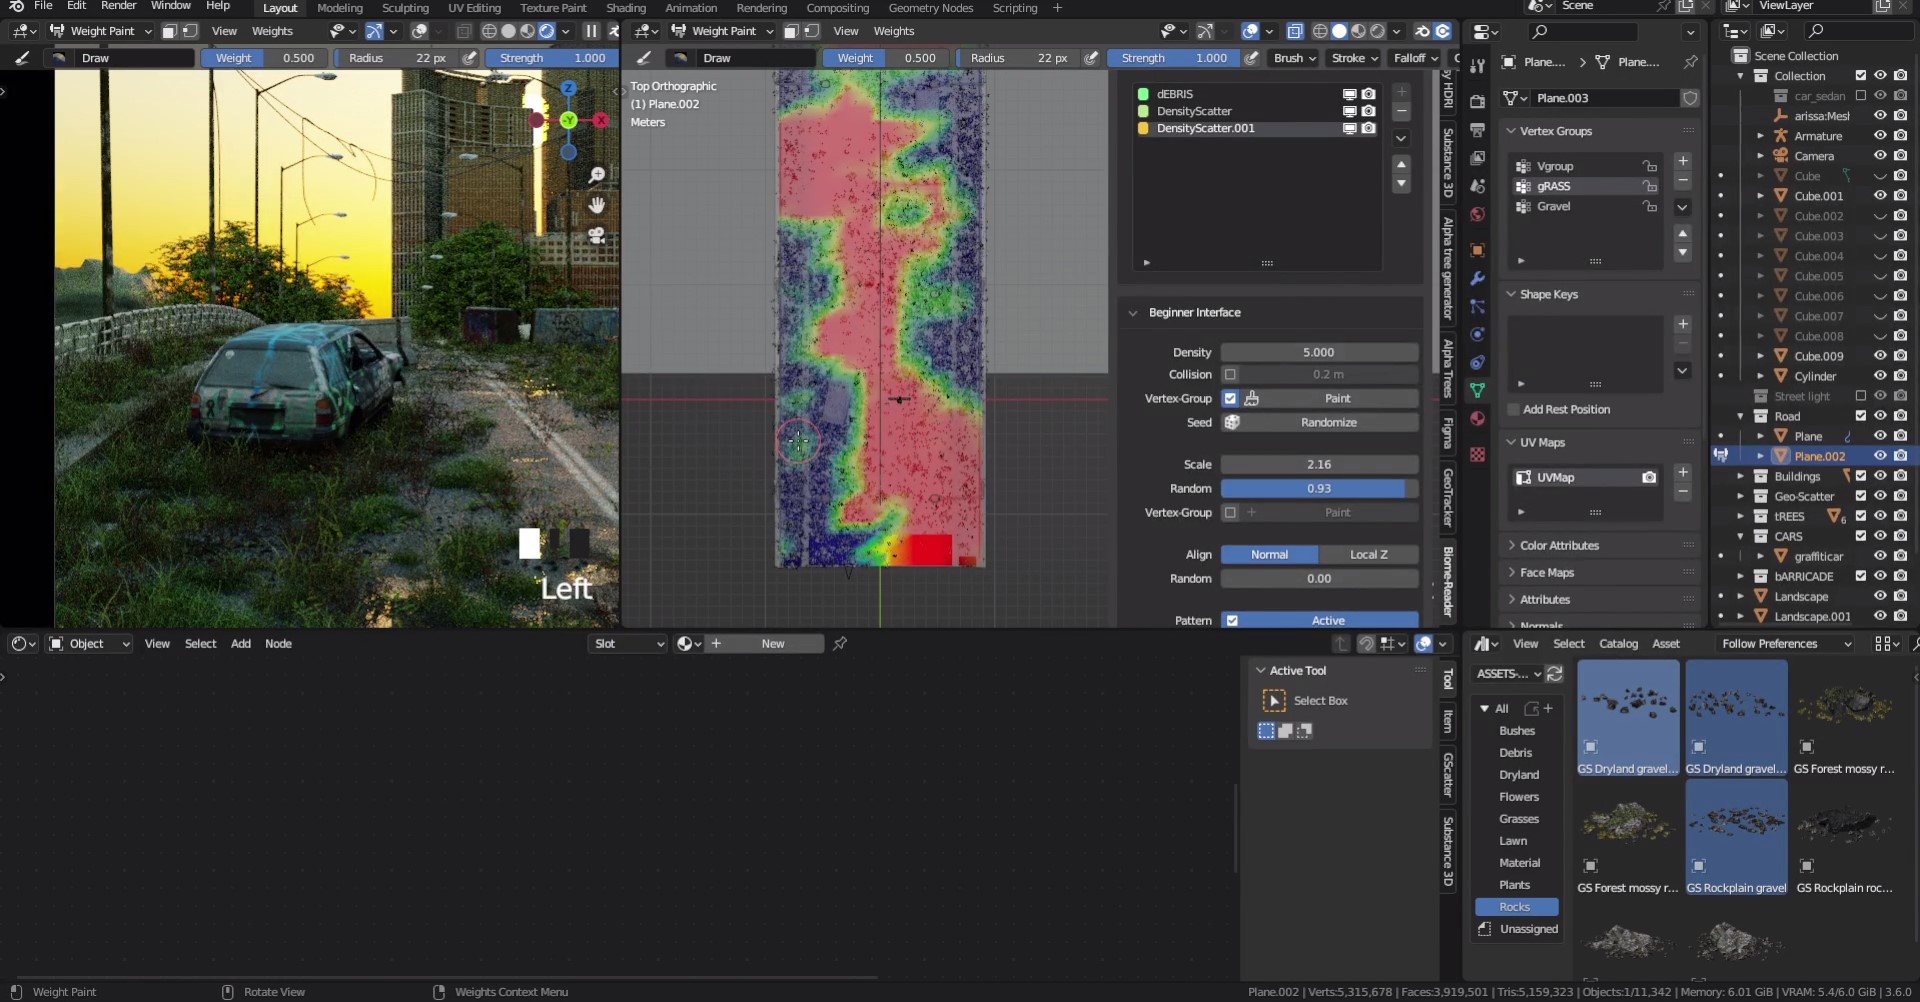
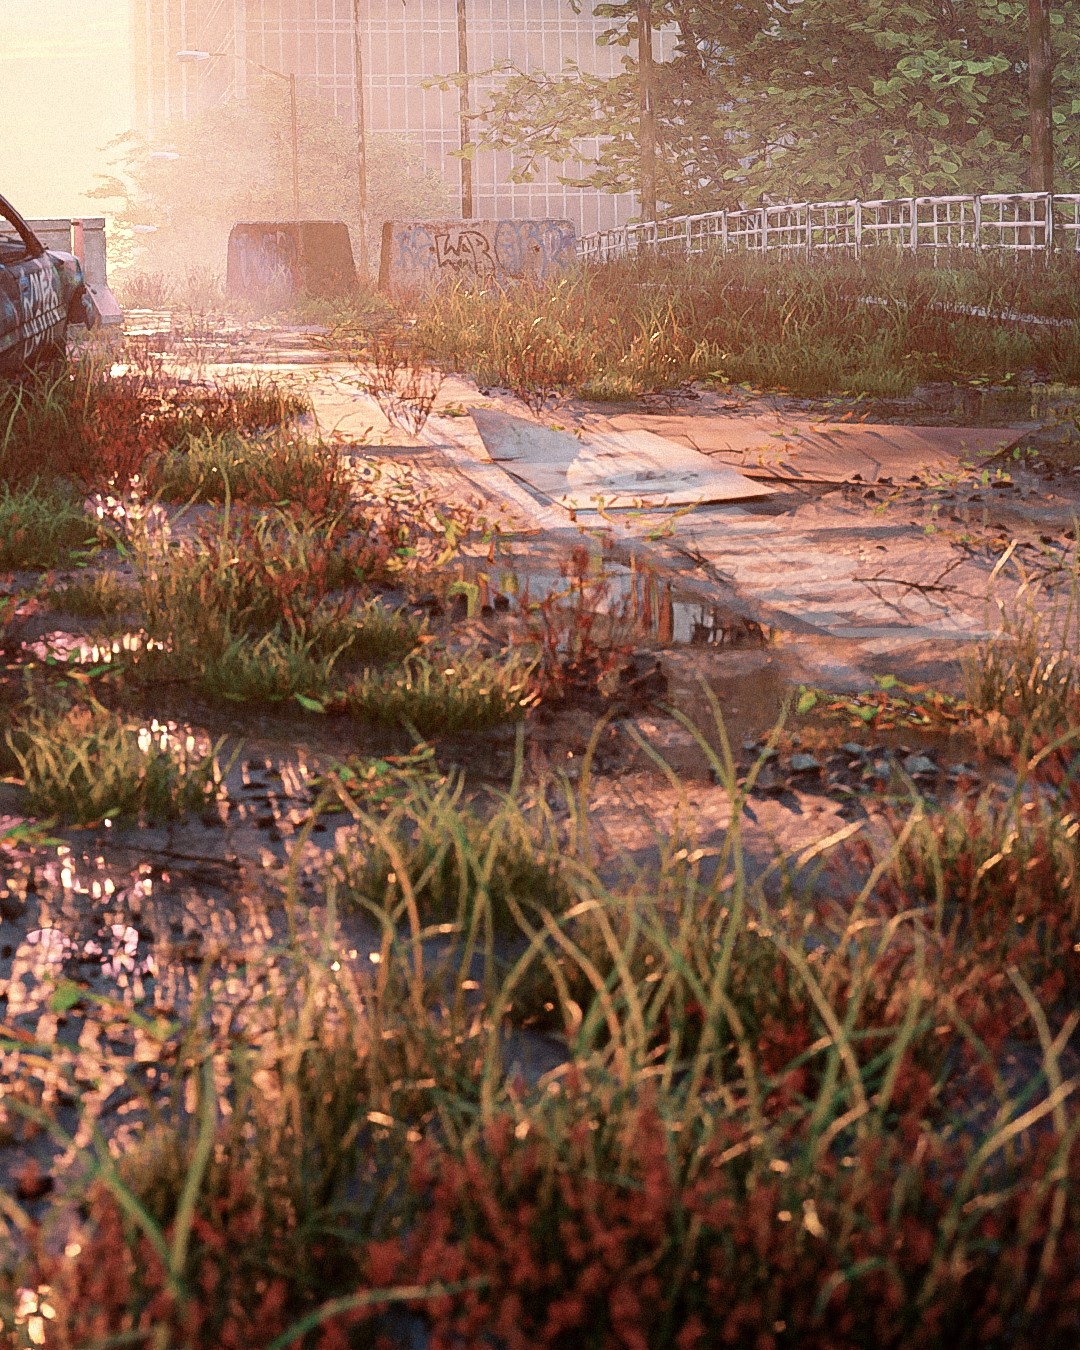
After blocking out the scene, I started texturing the road which was a bit complex because I wanted a road in which some sections were cracked and some not cracked, or the cracks not really prominent. Also, I wanted to depict potholes filled with water, dry potholes, and puddles that I would paint later.

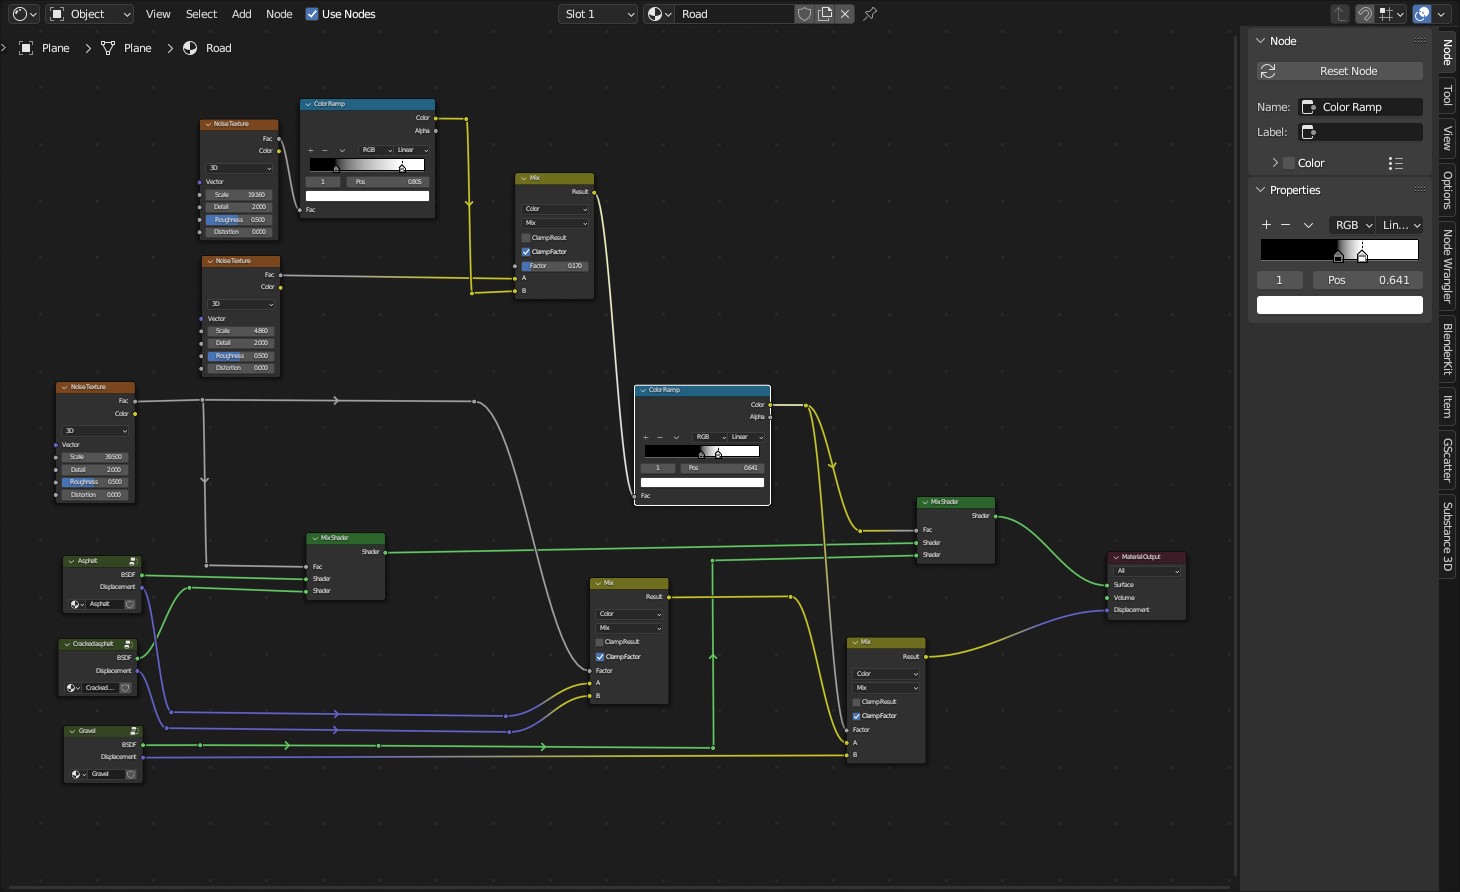
So, all I did was use three different layers of the material system by creating three different node groups: Asphalt, Cracked asphalt, and Gravel using PBR materials downloaded from AmbientCG. However, the gravel served as the base of the potholes.
These node groups were mixed using the mix shader and a noise texture plugged into a color ramp as the factor. Their displacements were mixed using the Mix color node and controlled by the same noise texture and color ramp, thereby aiding the depth of the potholes on the road.
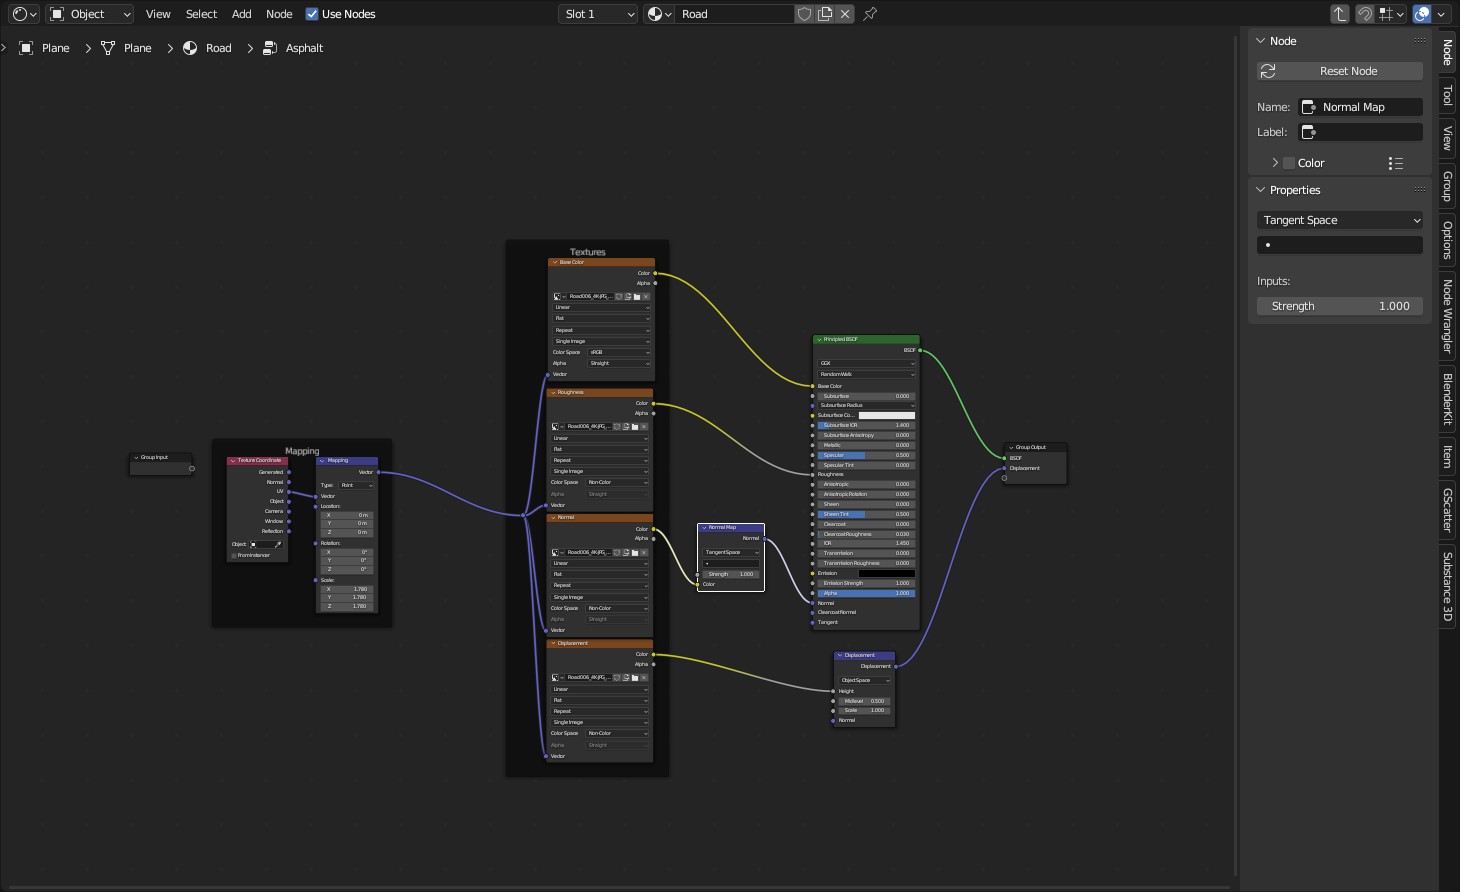
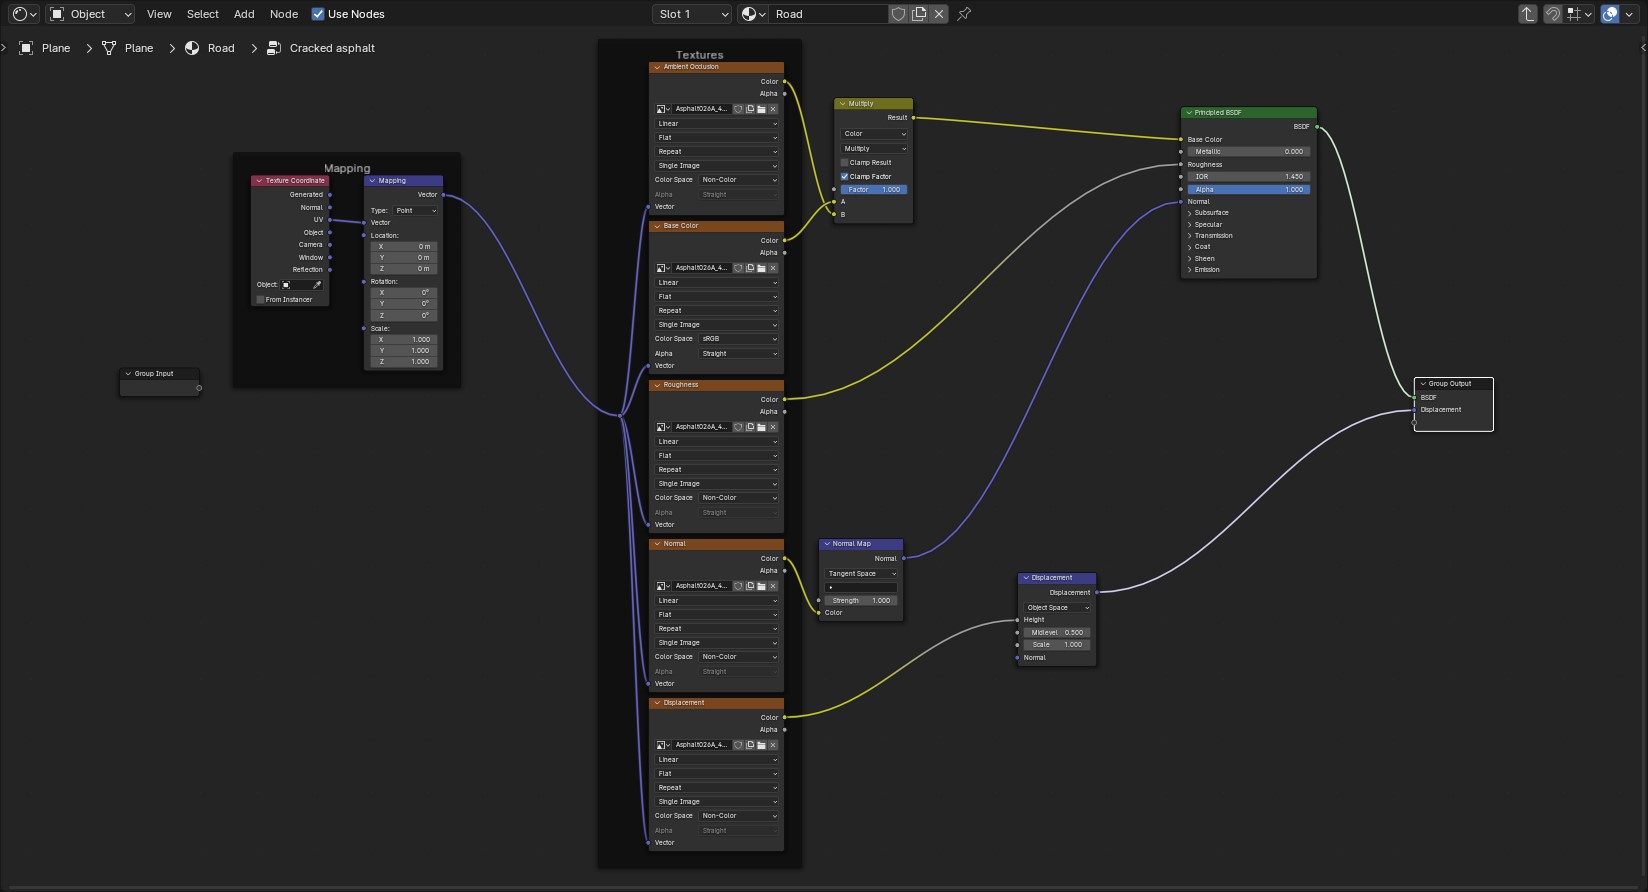
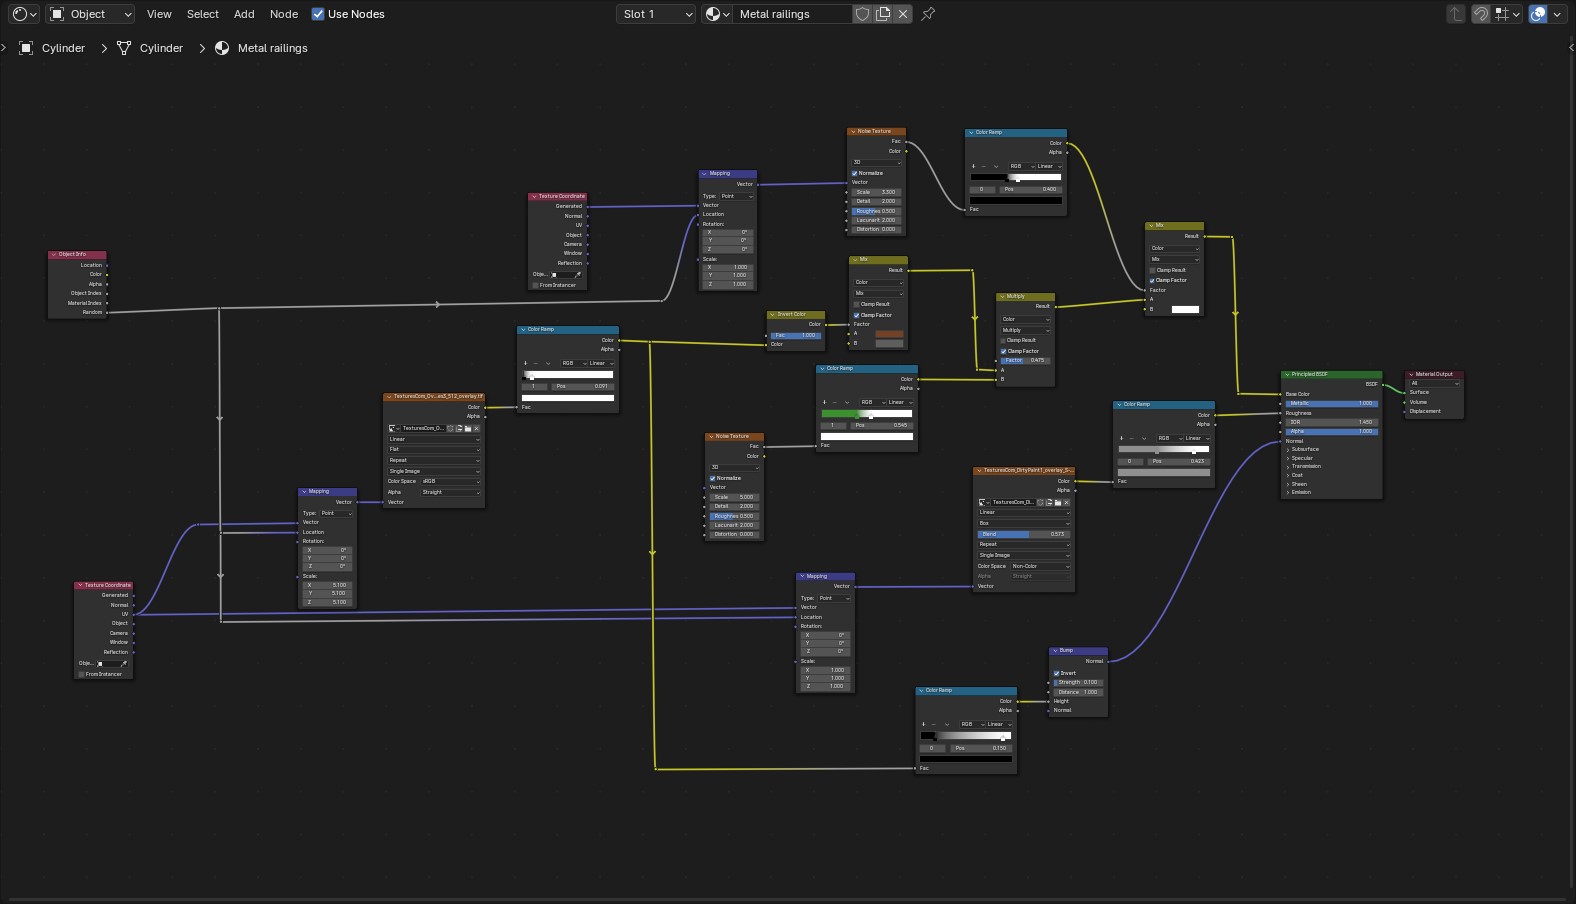
The Asphalt and Cracked asphalt node group has a similar node system, which is just the normal PBR image texture plugged into the principled Bsdf, while the Gravel node group is more complex since it would drive the main displacement to emulate potholes (see images below).
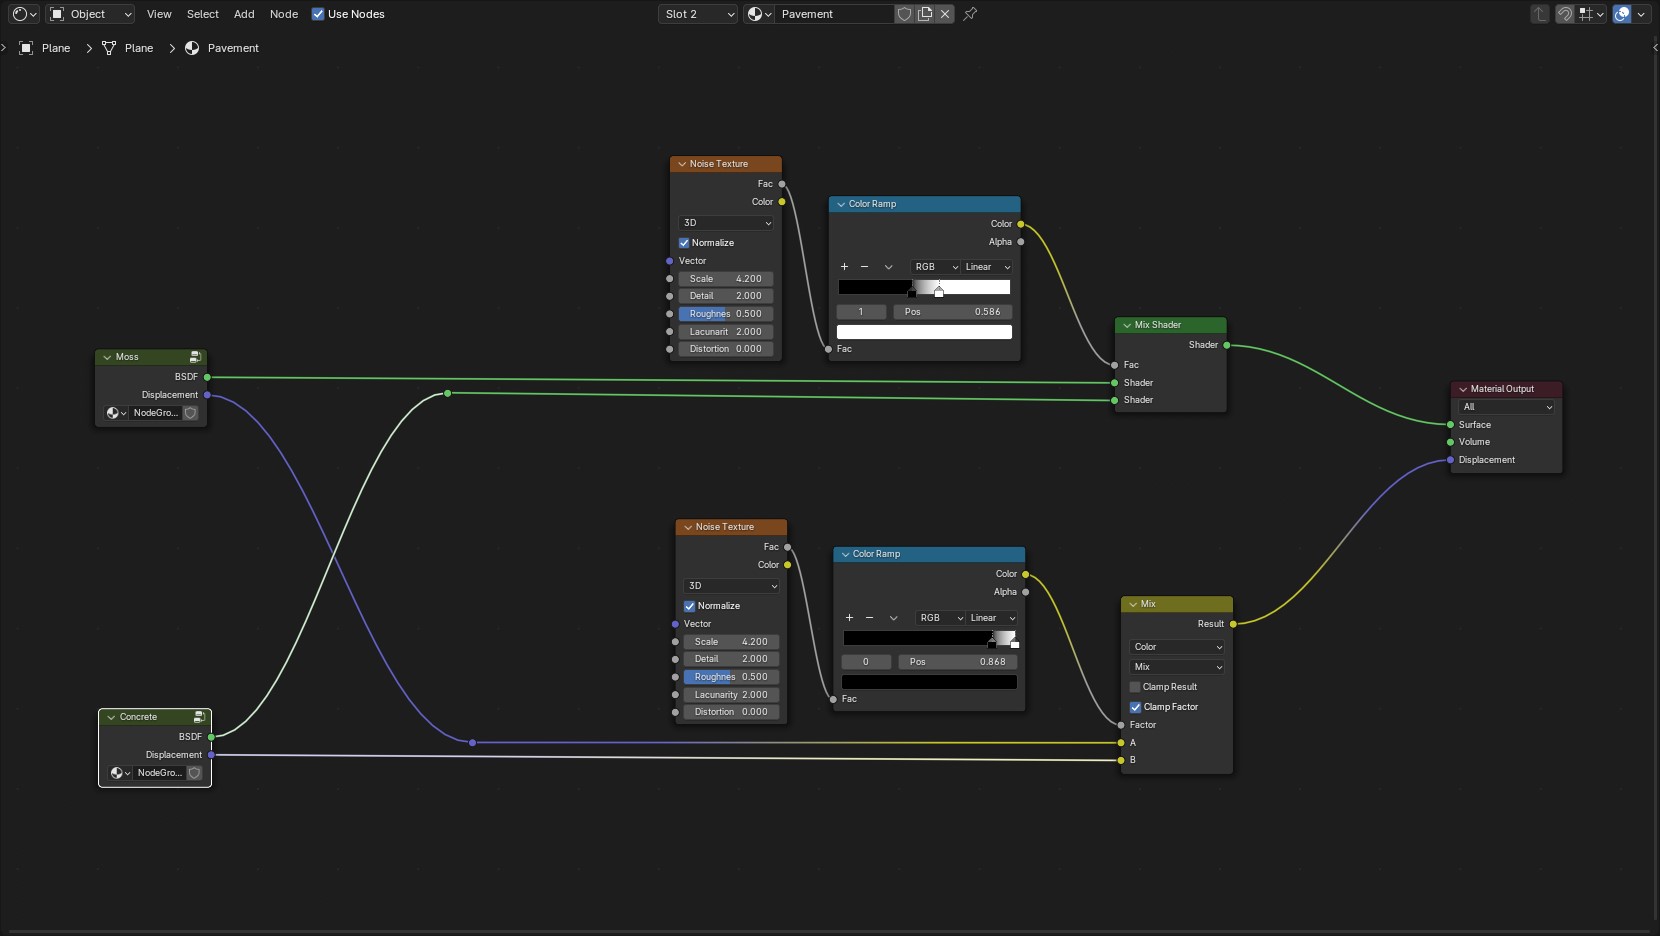
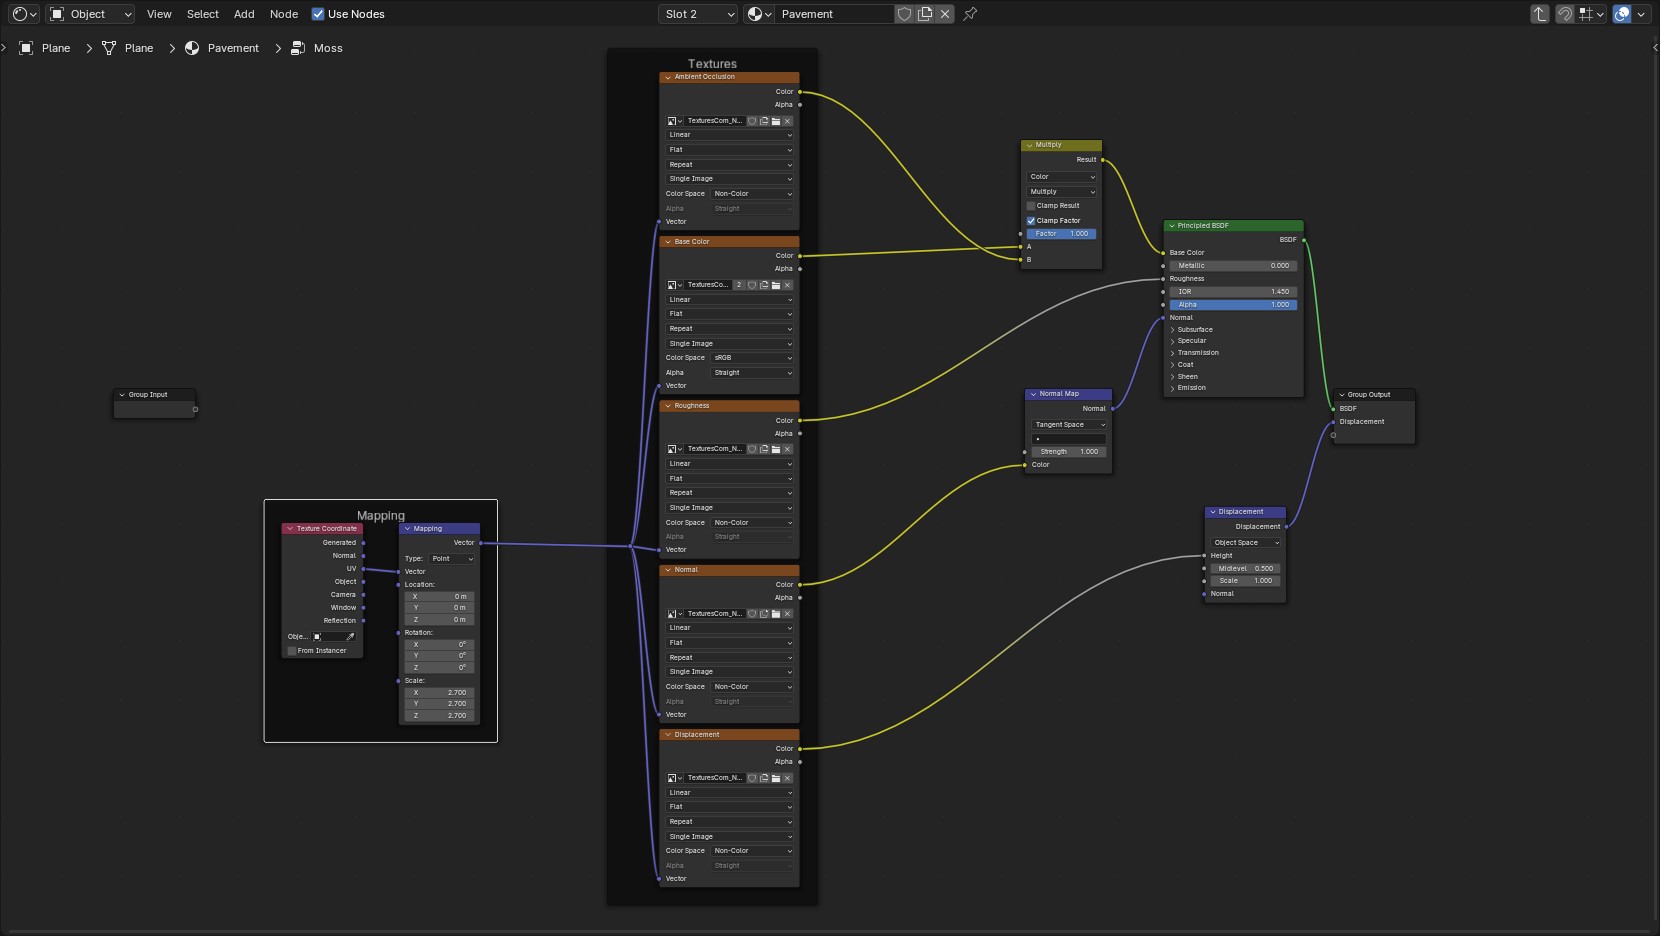
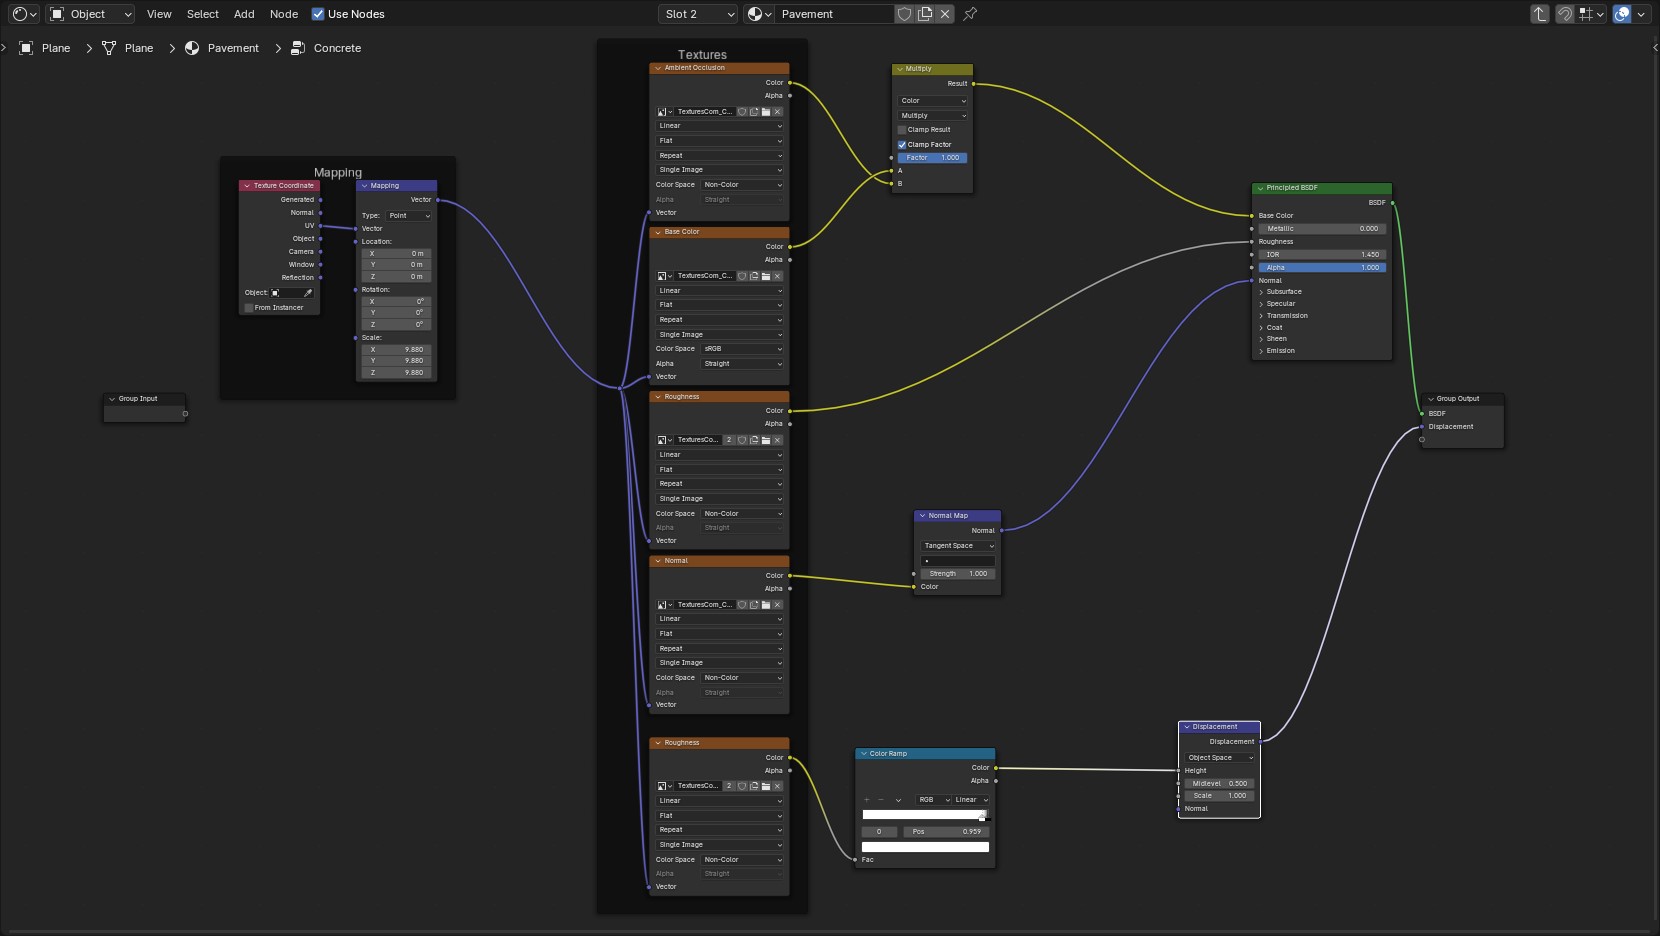
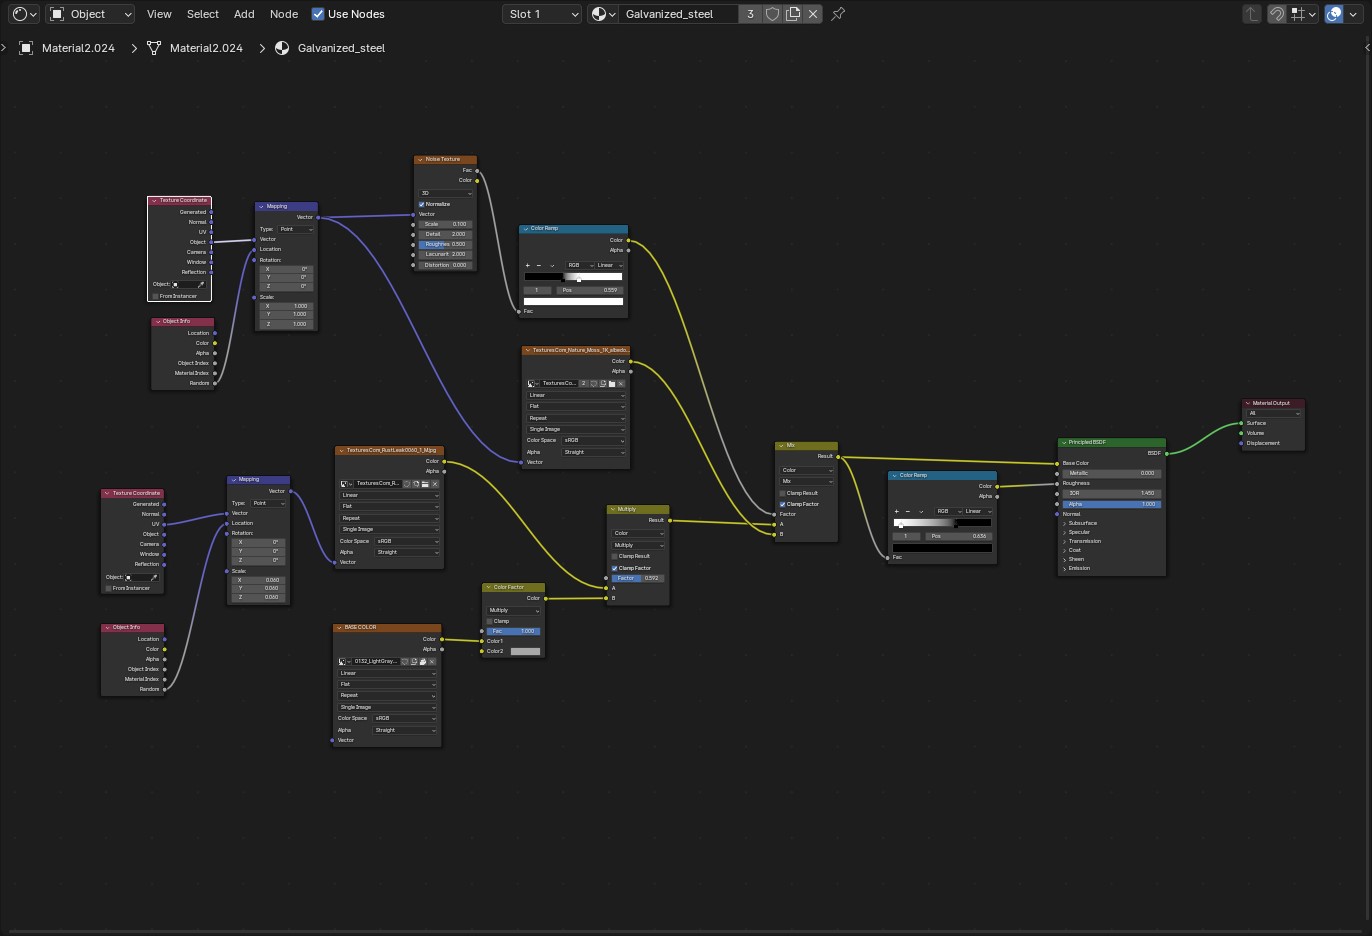
The texturing of the pavement uses a similar approach to the road texture by mixing two node groups together. Bridge railings and street lights textures were also created using image textures from Textures.com.
You can check out the tutorial on how I made the road, How to Make and PAINT Realistic Potholes and Puddles in Blender (Tutorial).
Asset Placement
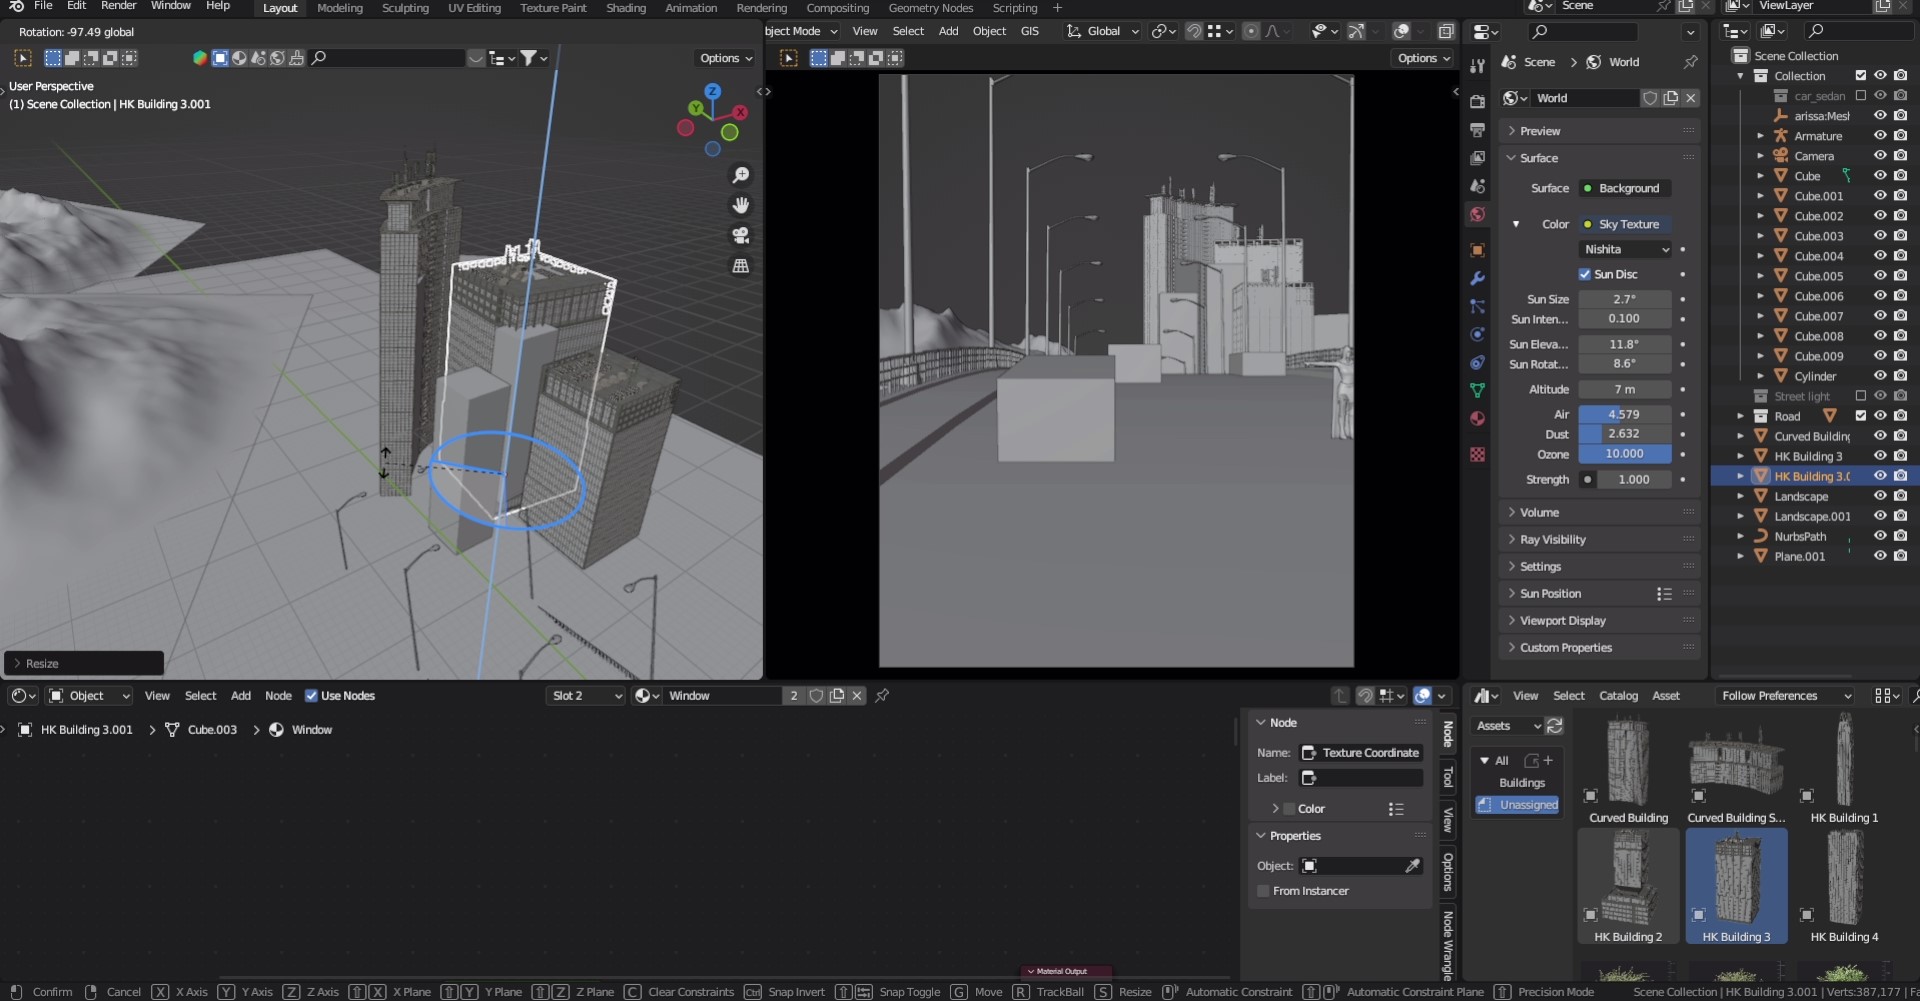
Assets were placed in the scene based on the block out. Later on, there would be a shift of concept on the left side of the scene from using mountains to using abandoned buildings.
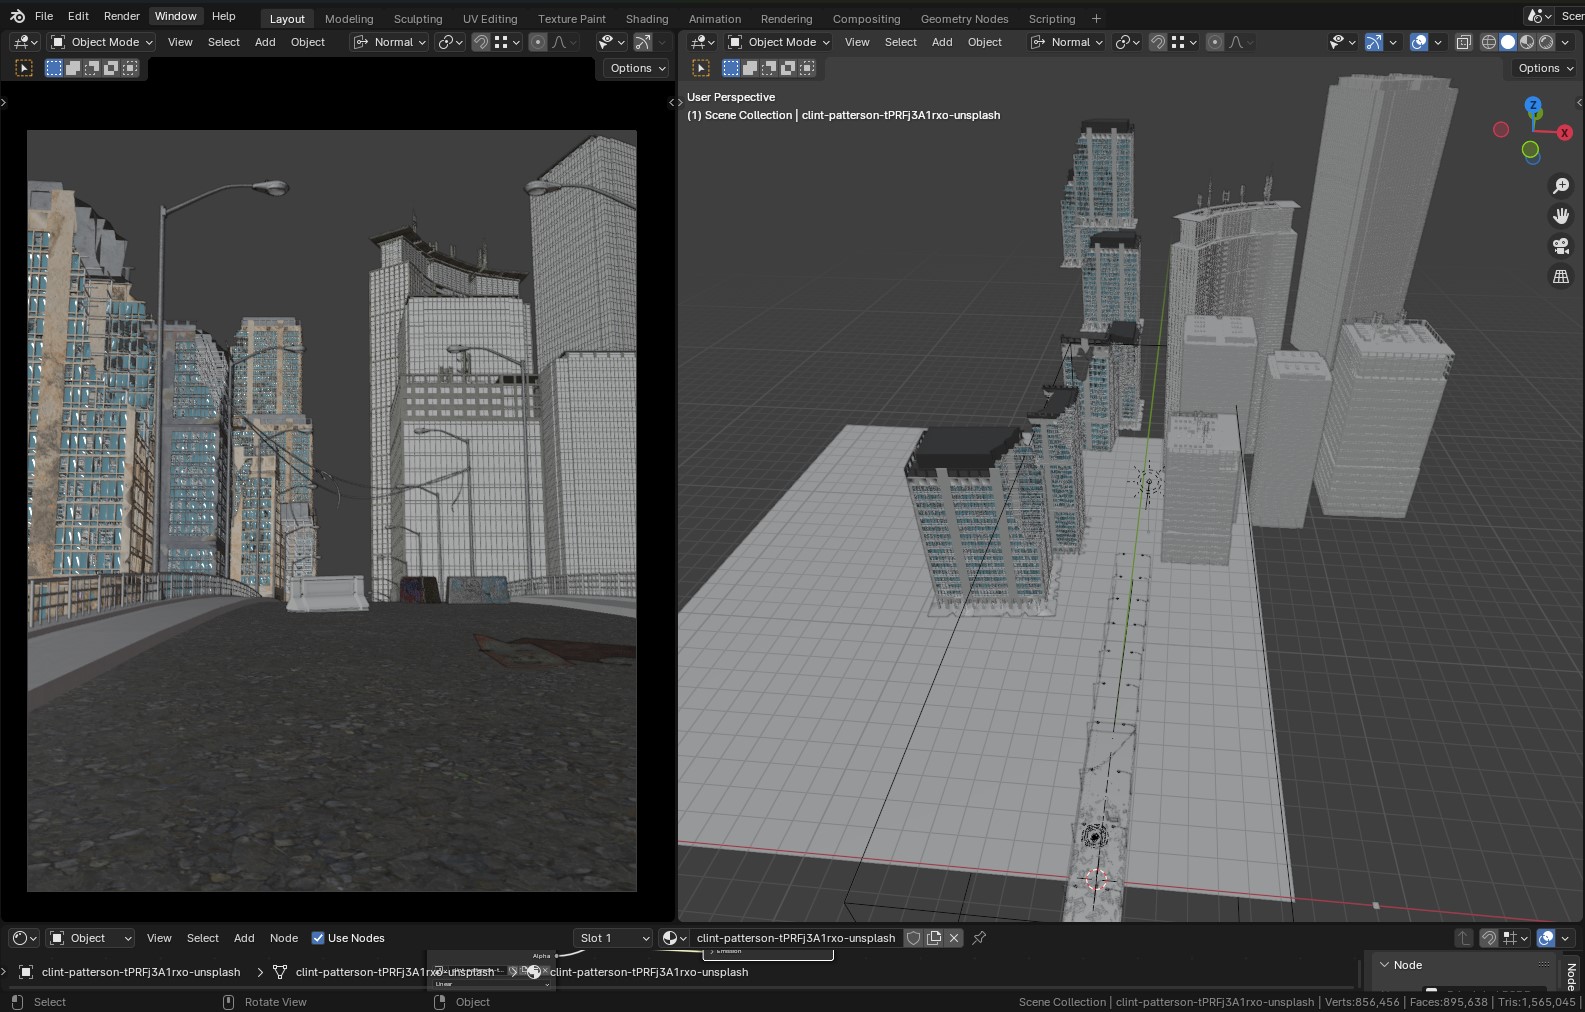
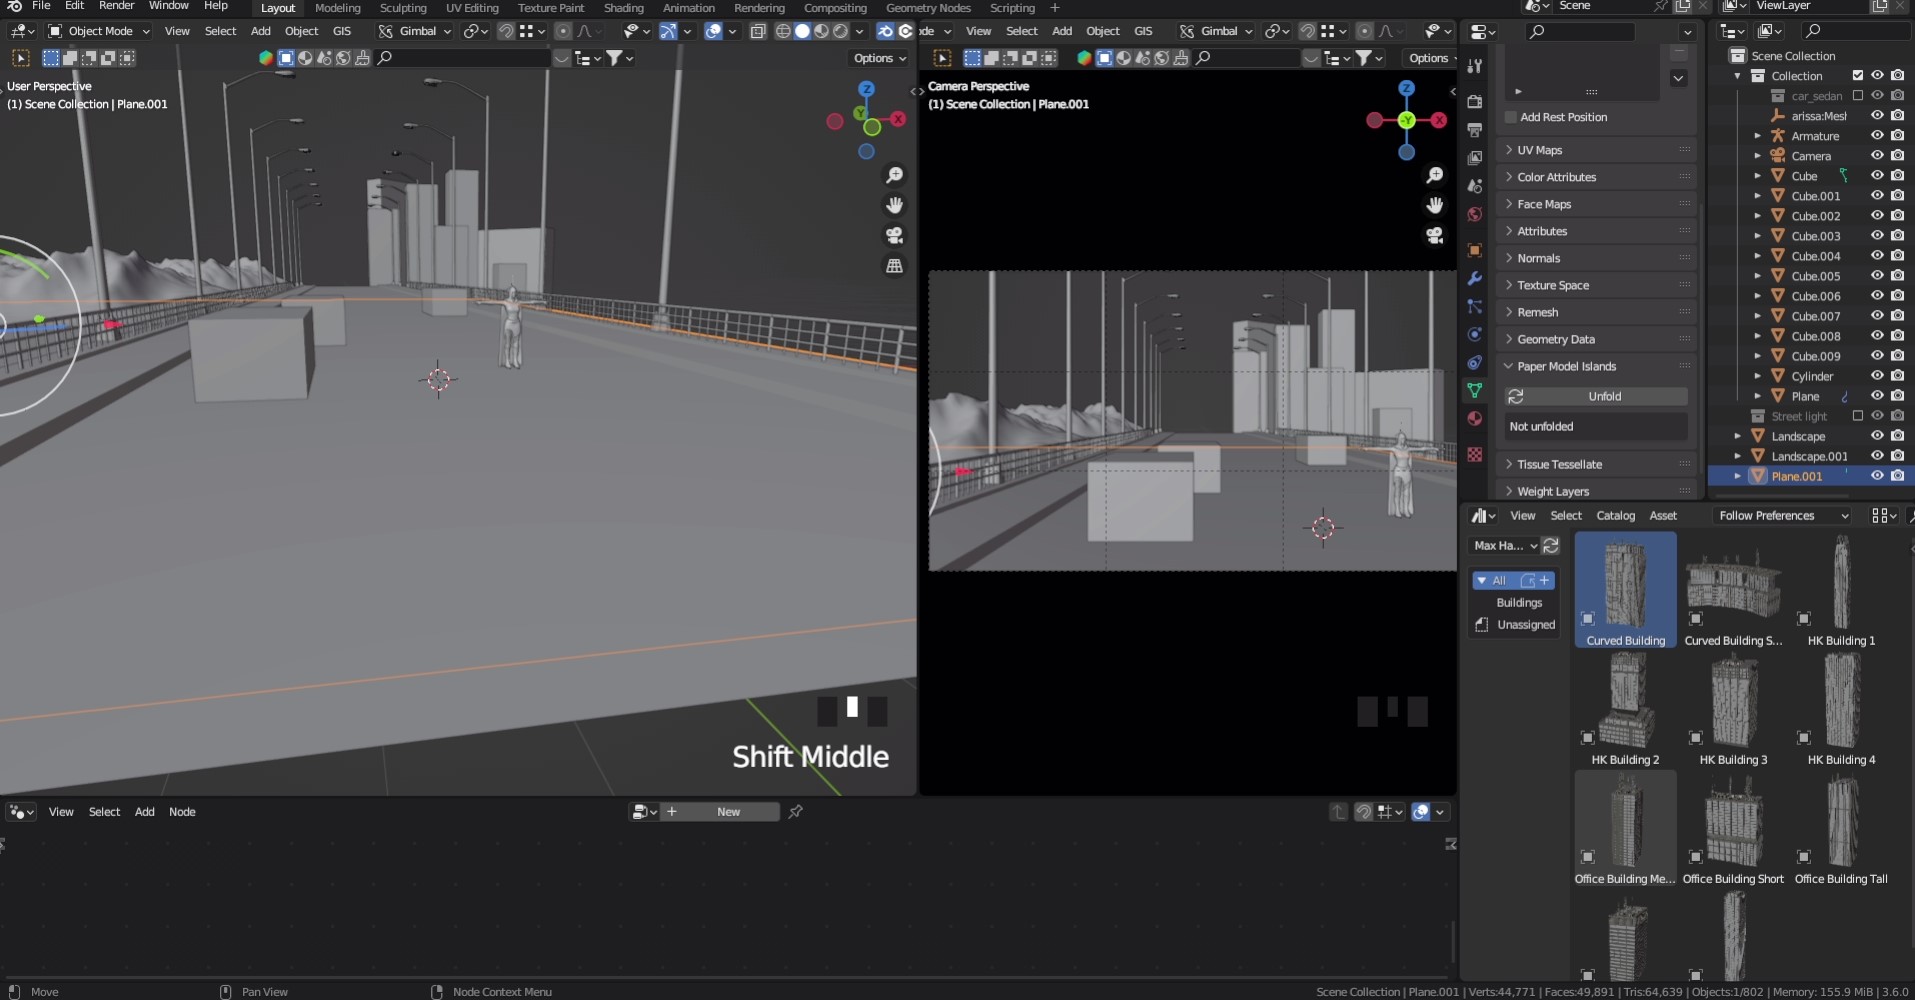
The assets, such as the buildings on the right, were from Maxhayart Free Building Pack, and the abandoned buildings on the left, the car, the barrier, and the streetlight were obtained from SketchFab.
The vegetation was from Geoscatter Free Plant Library and scattered using the free Biome Reader add-on. The trees were obtained from Maxtree Free Pack.
Camera
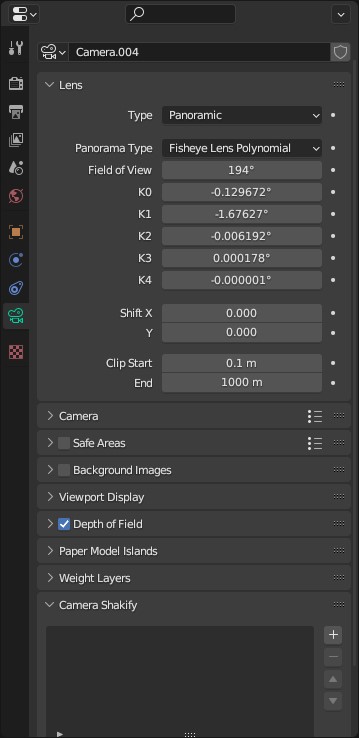
At this stage, some adjustments were made to the camera. I used a Panoramic camera using a fisheye lens polynomial, which only works with Cycles at the moment.
Lighting & Composition
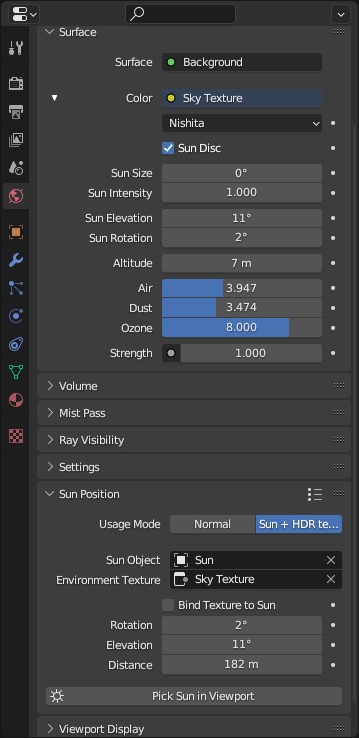
I used Nishita sky textures for the world and used a sky image from Unsplash.com as the sky. The image was imported as a plane and I unchecked the shadow under Object properties > Visibility > Ray visibility > Shadow to avoid it from casting shadows and blocking the already done environment light setup.
I also used the sun position add-on to align a sun light to the sky texture.
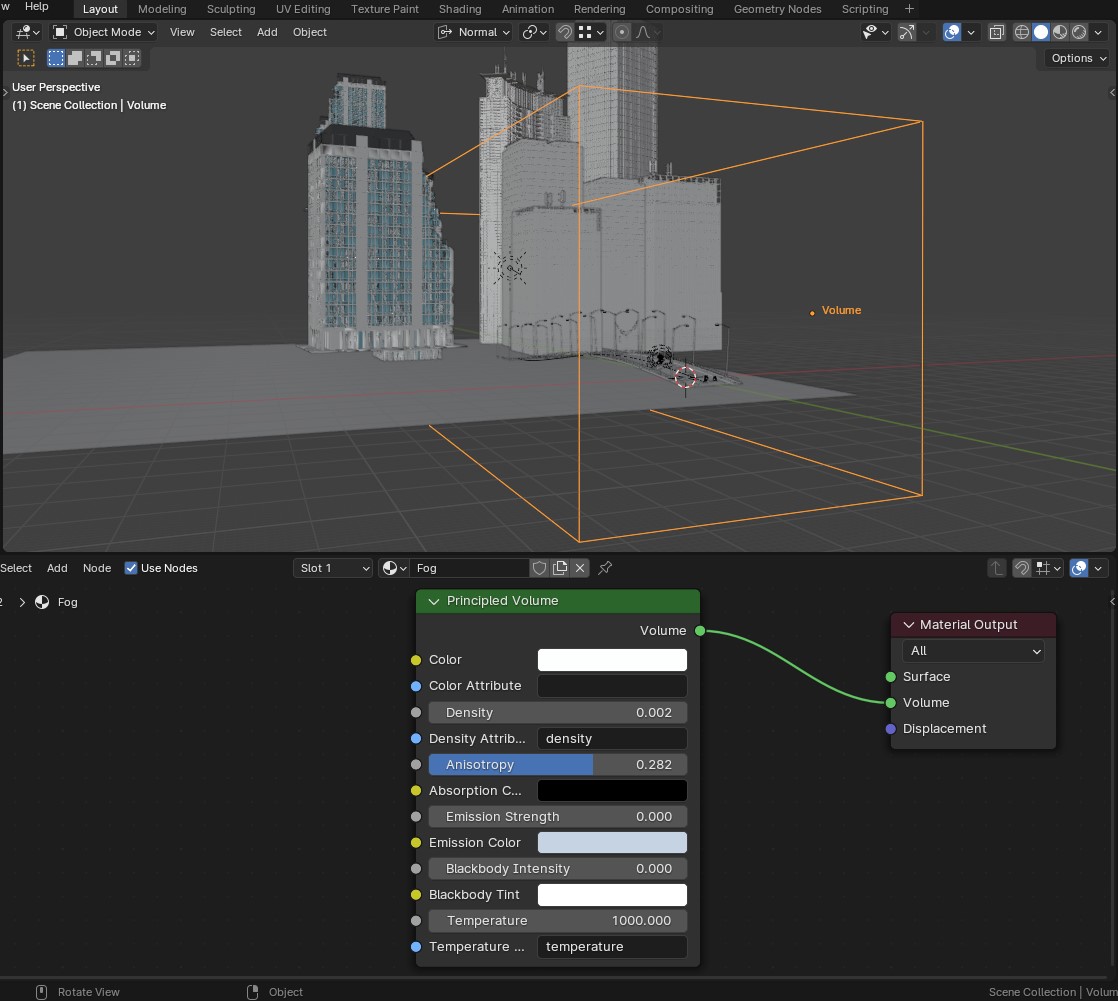
I used a cube scaled up to cover up a part of the scene and applied a principled volume shader node to create a fog to add depth to the whole scene.
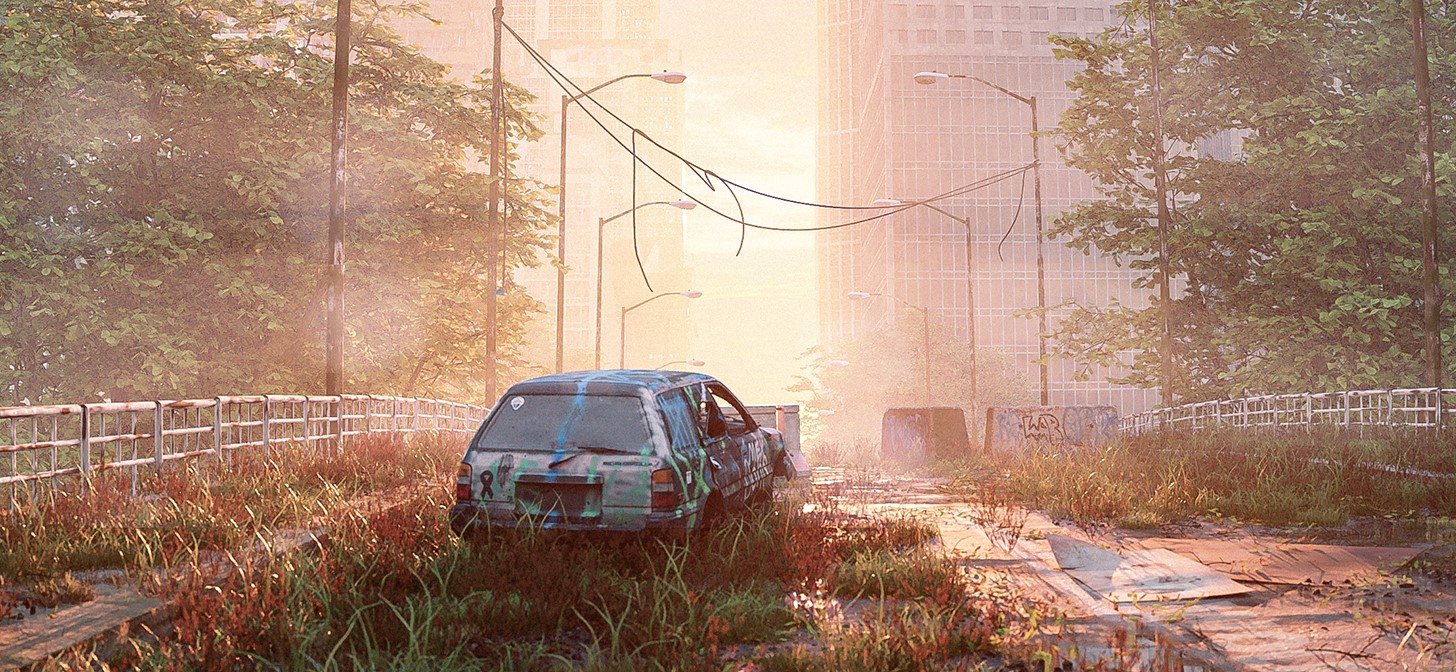
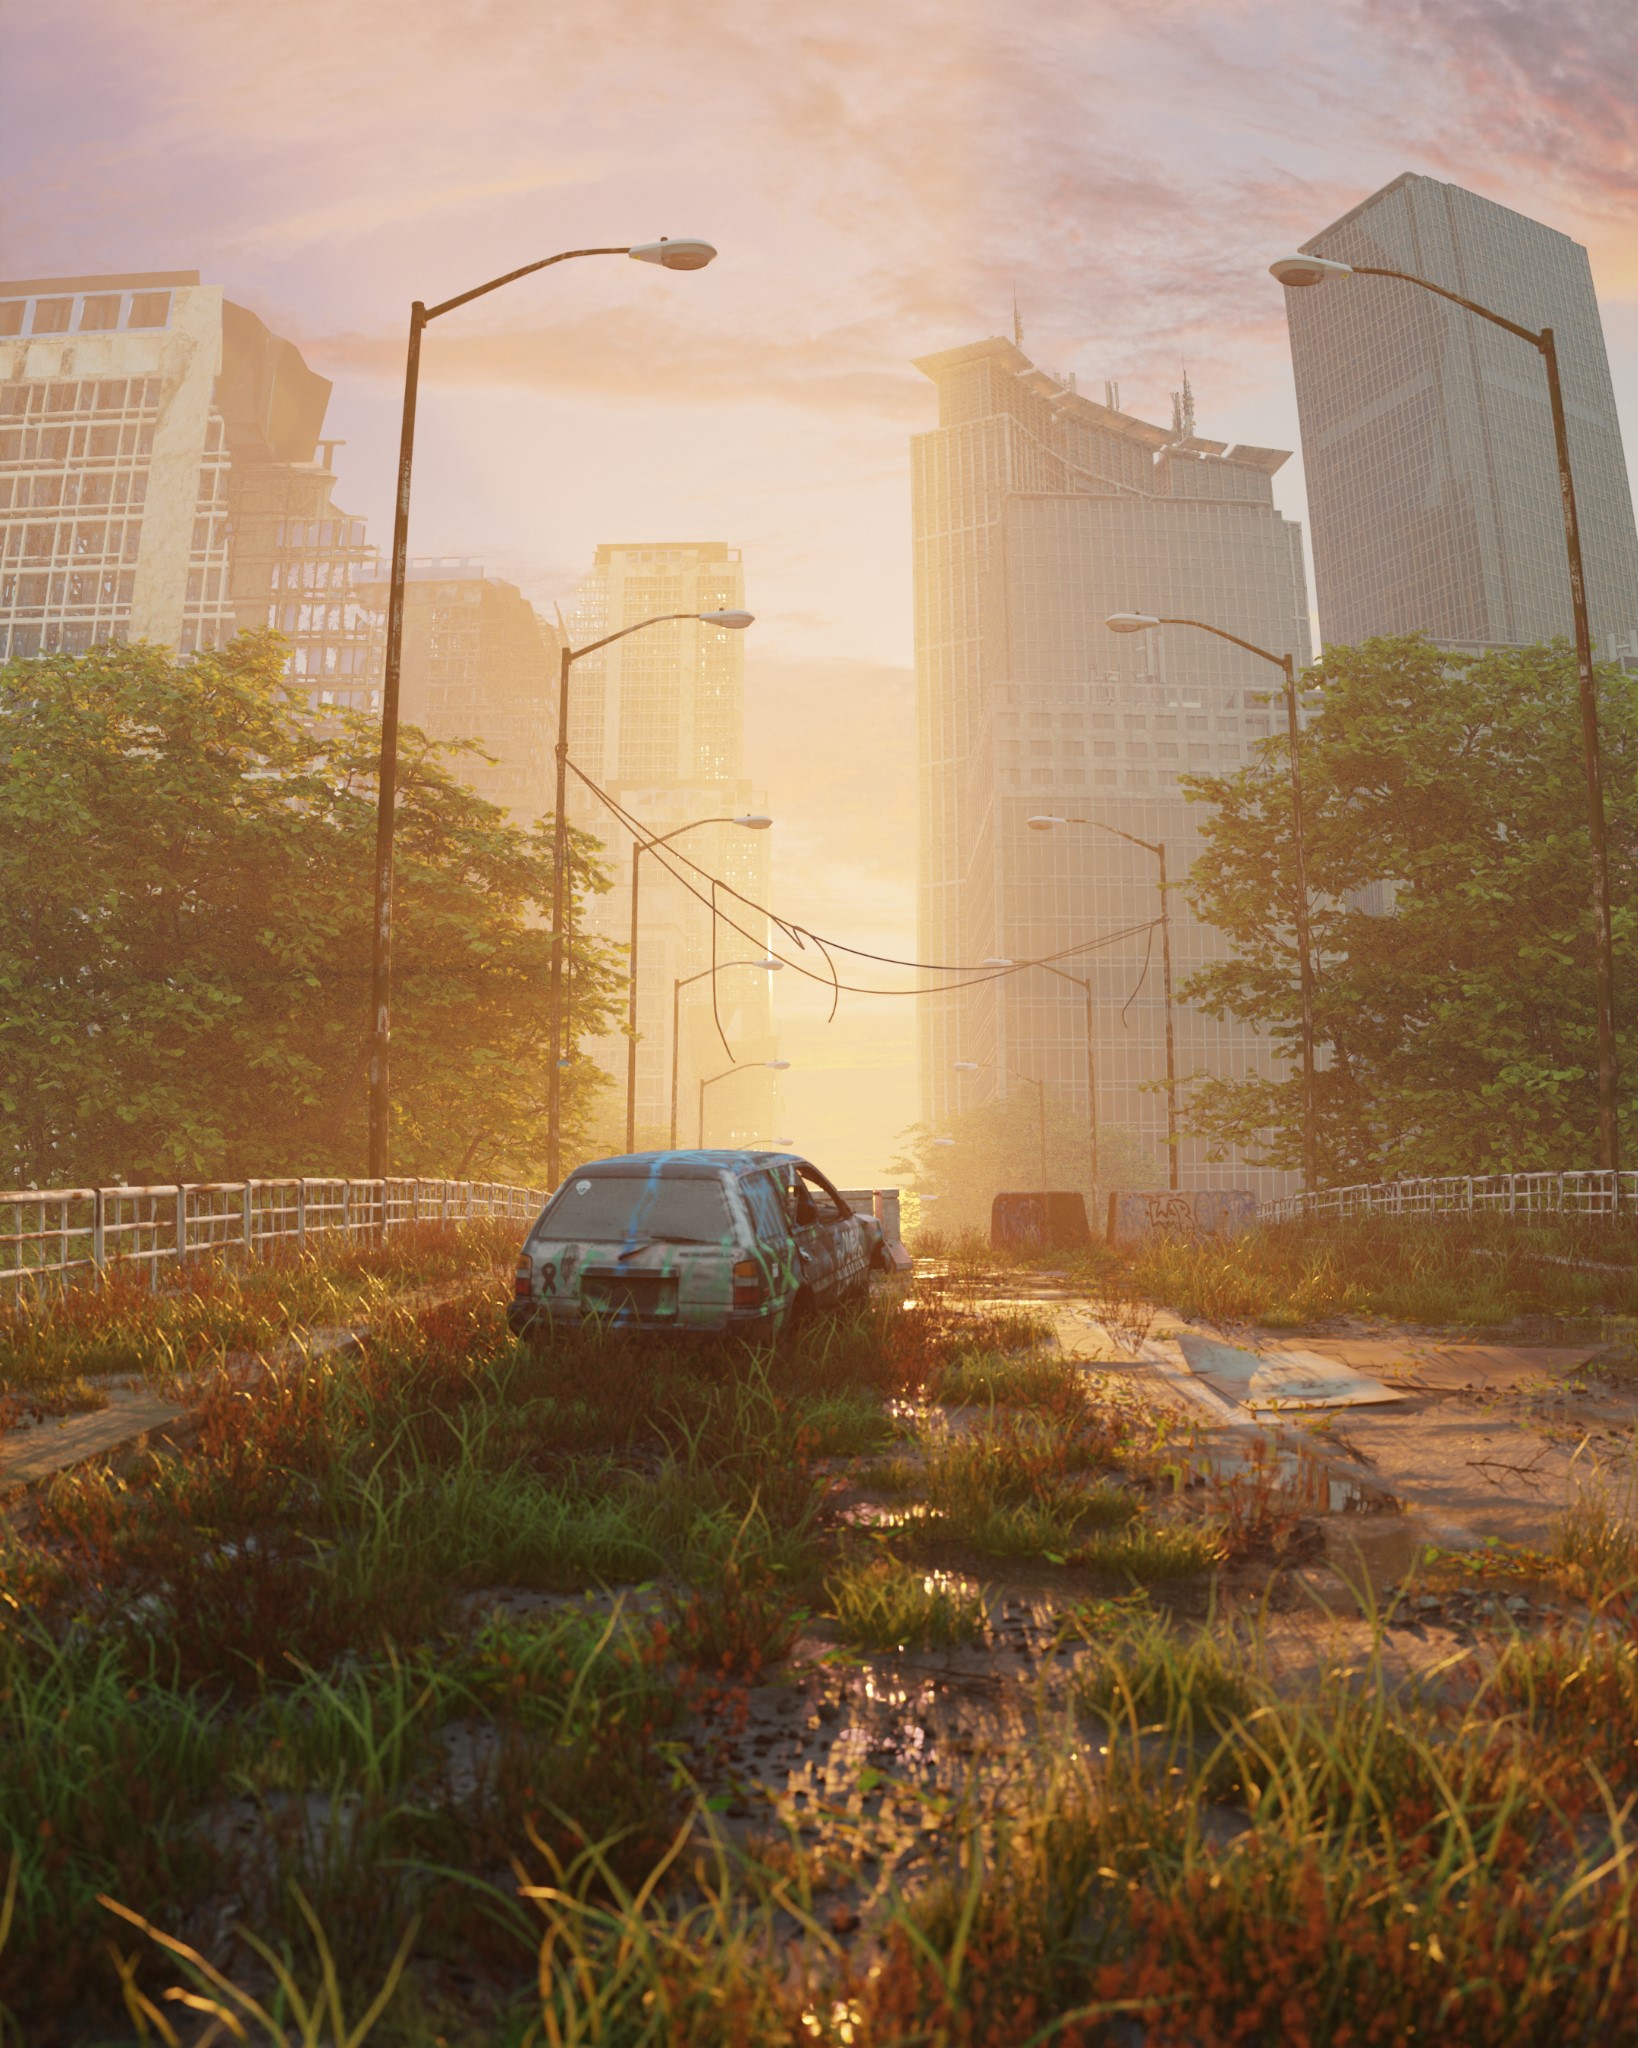
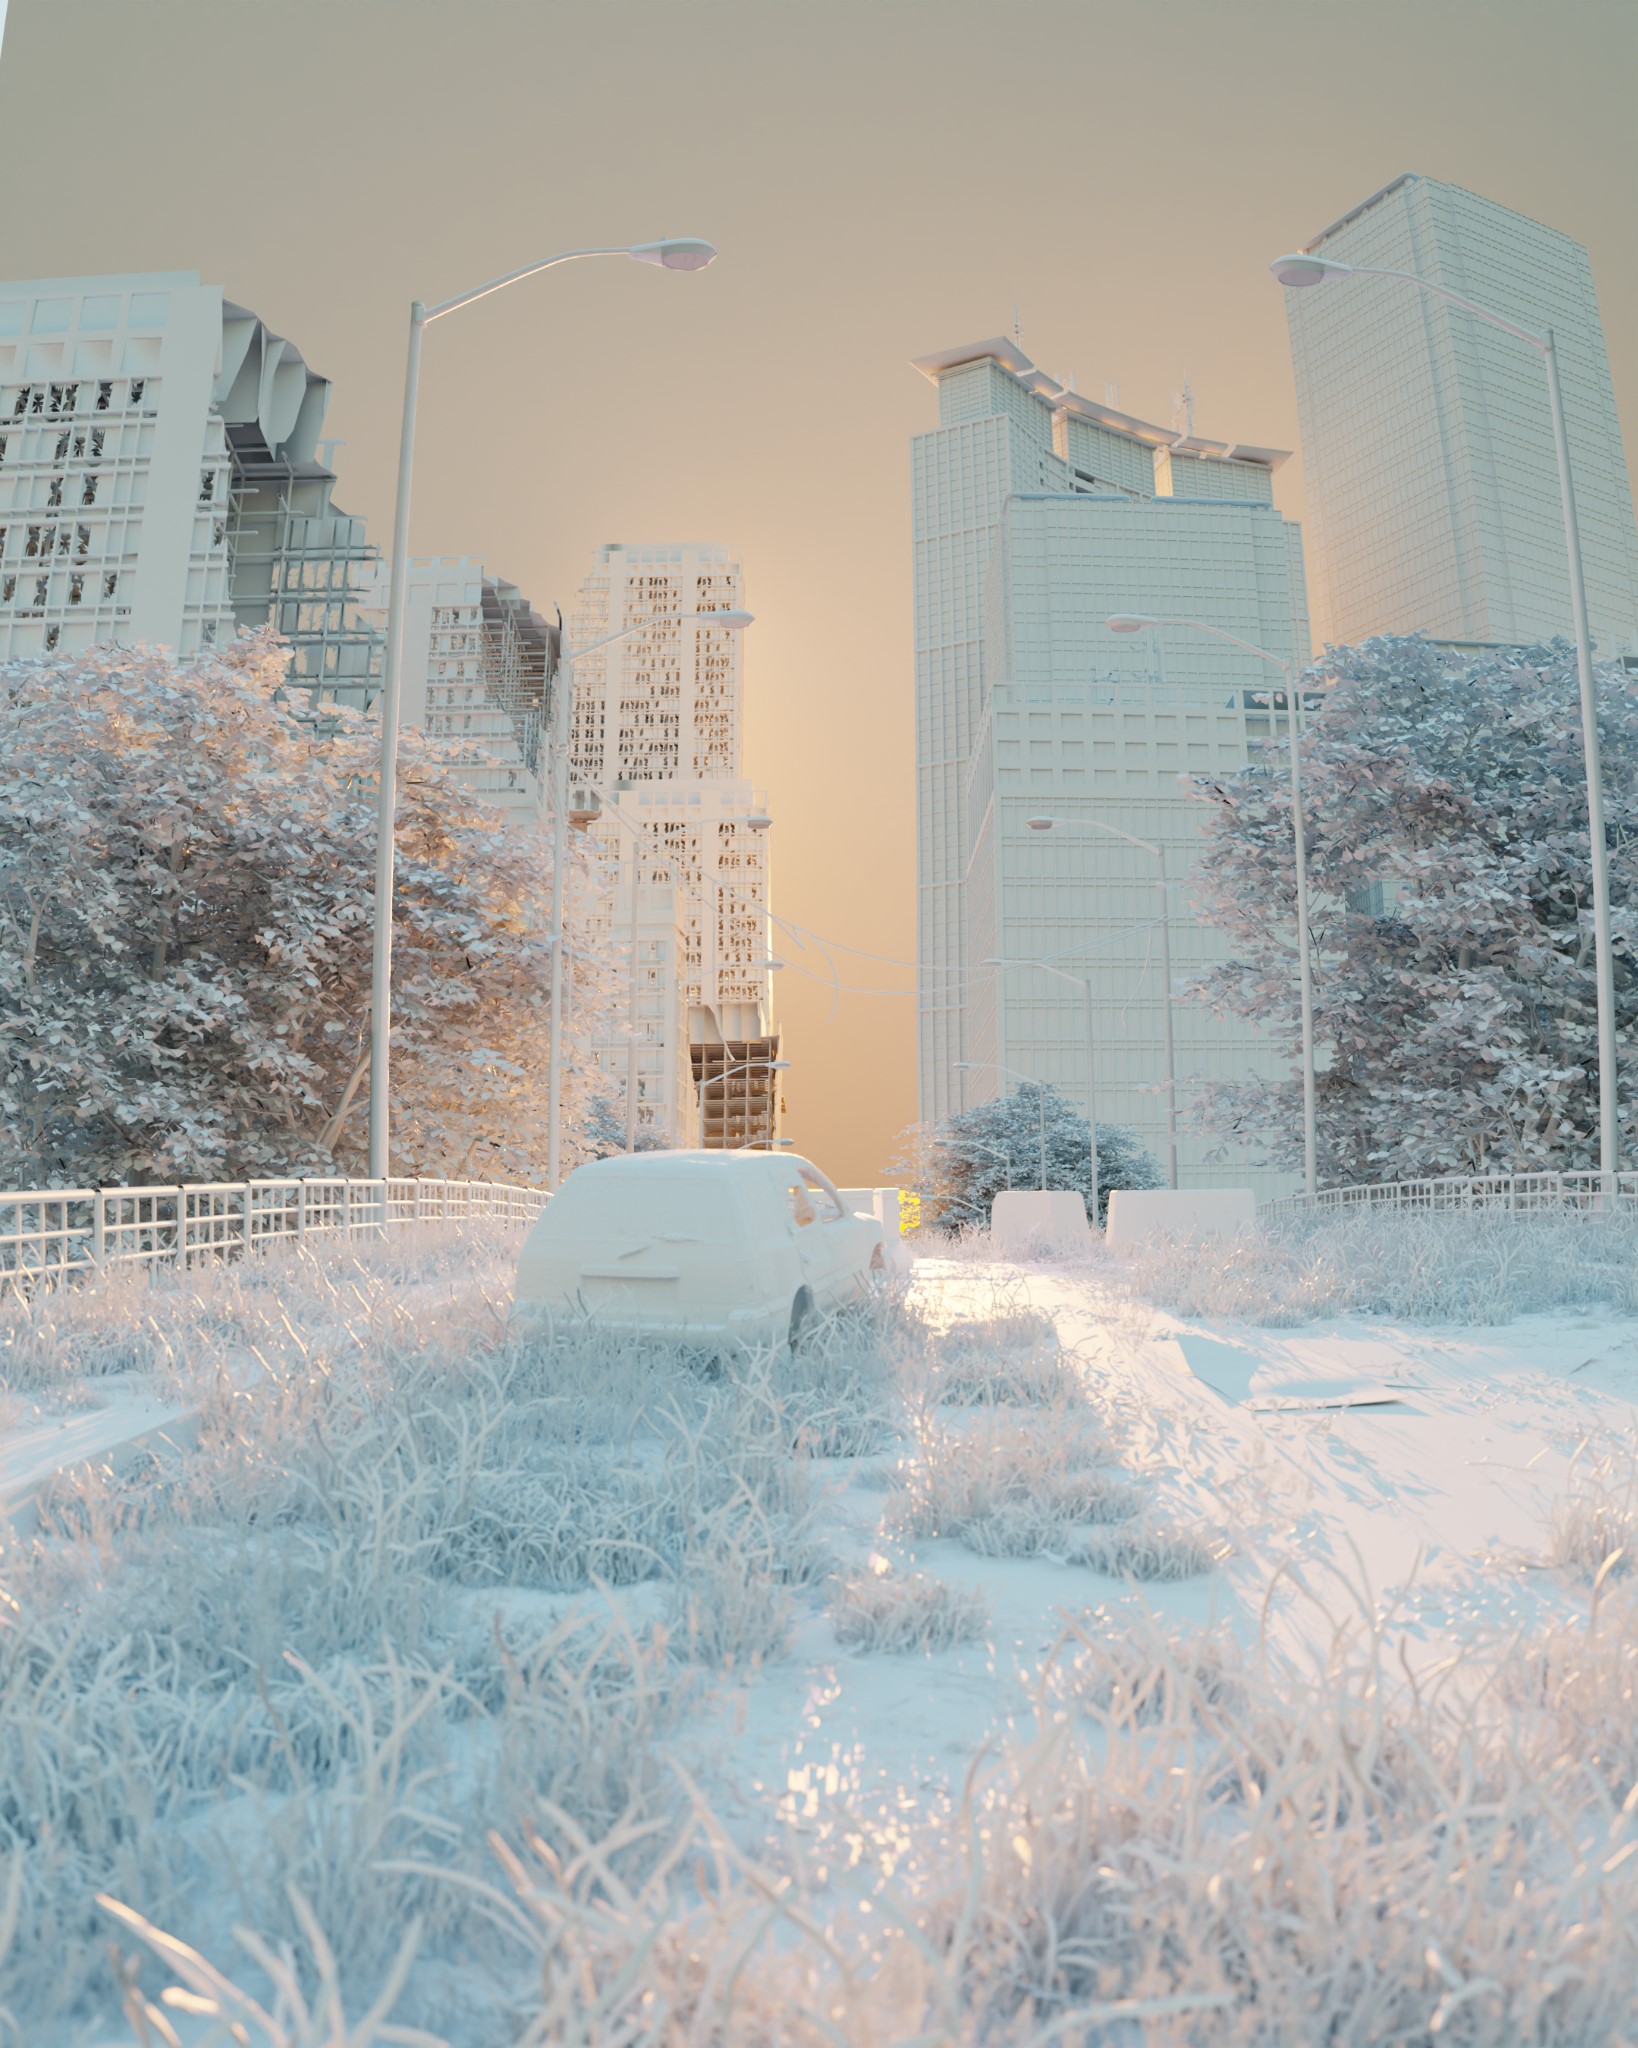
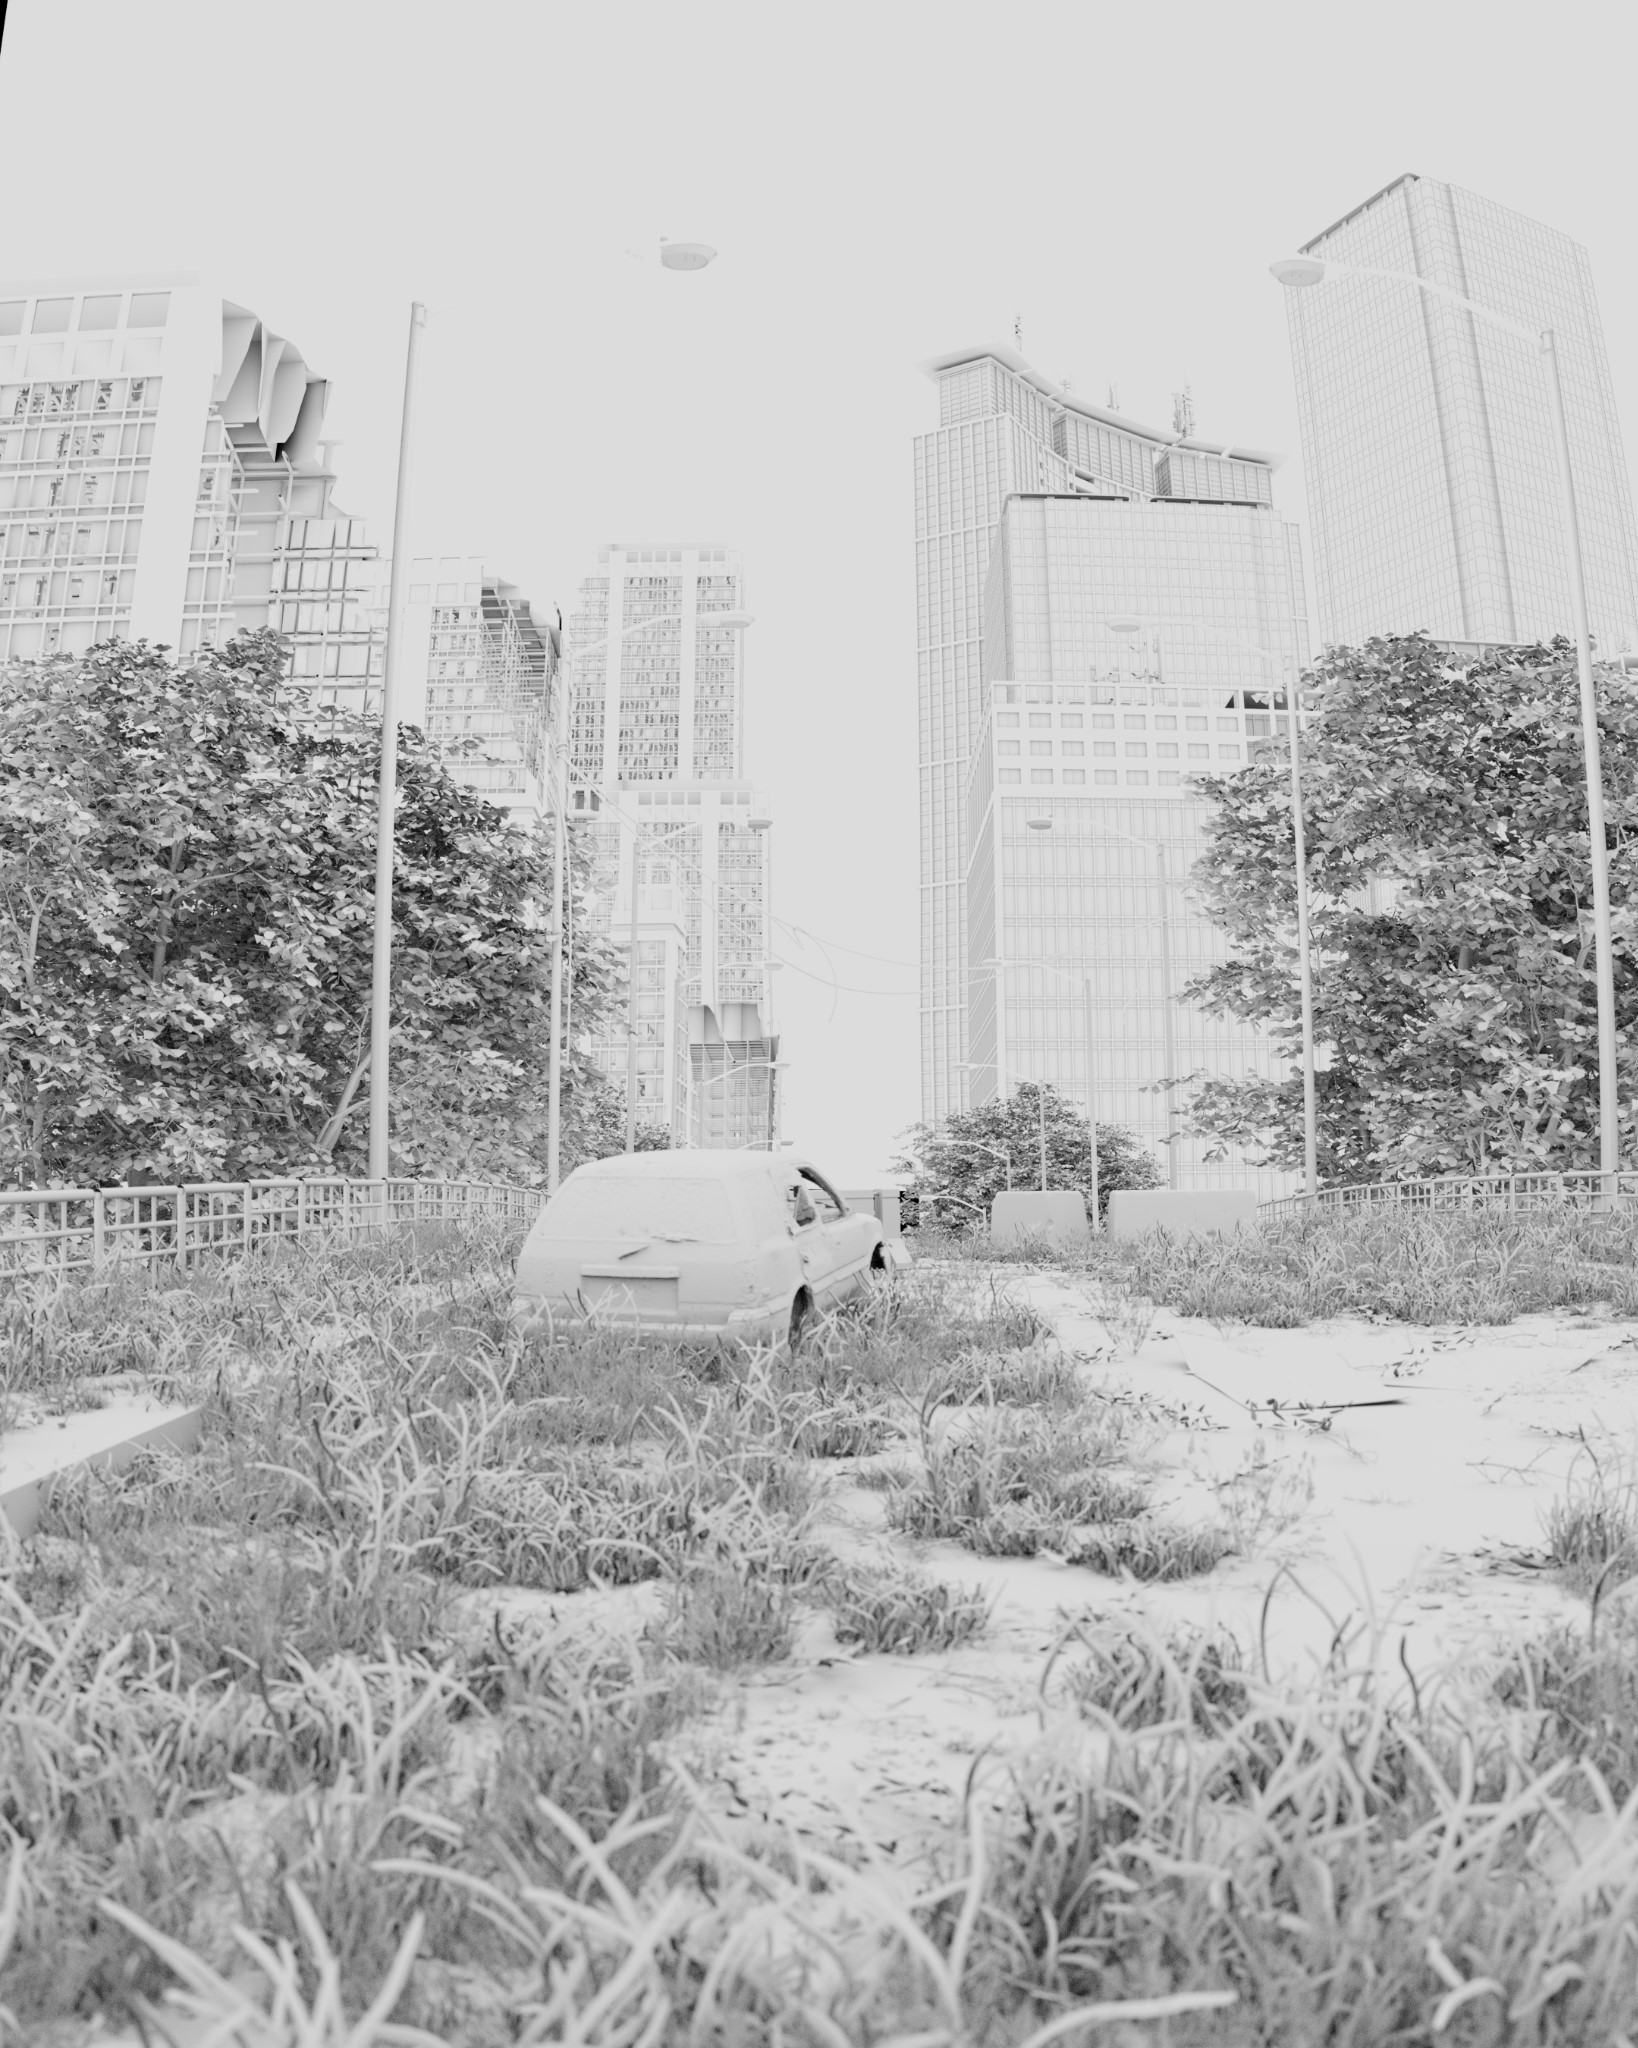
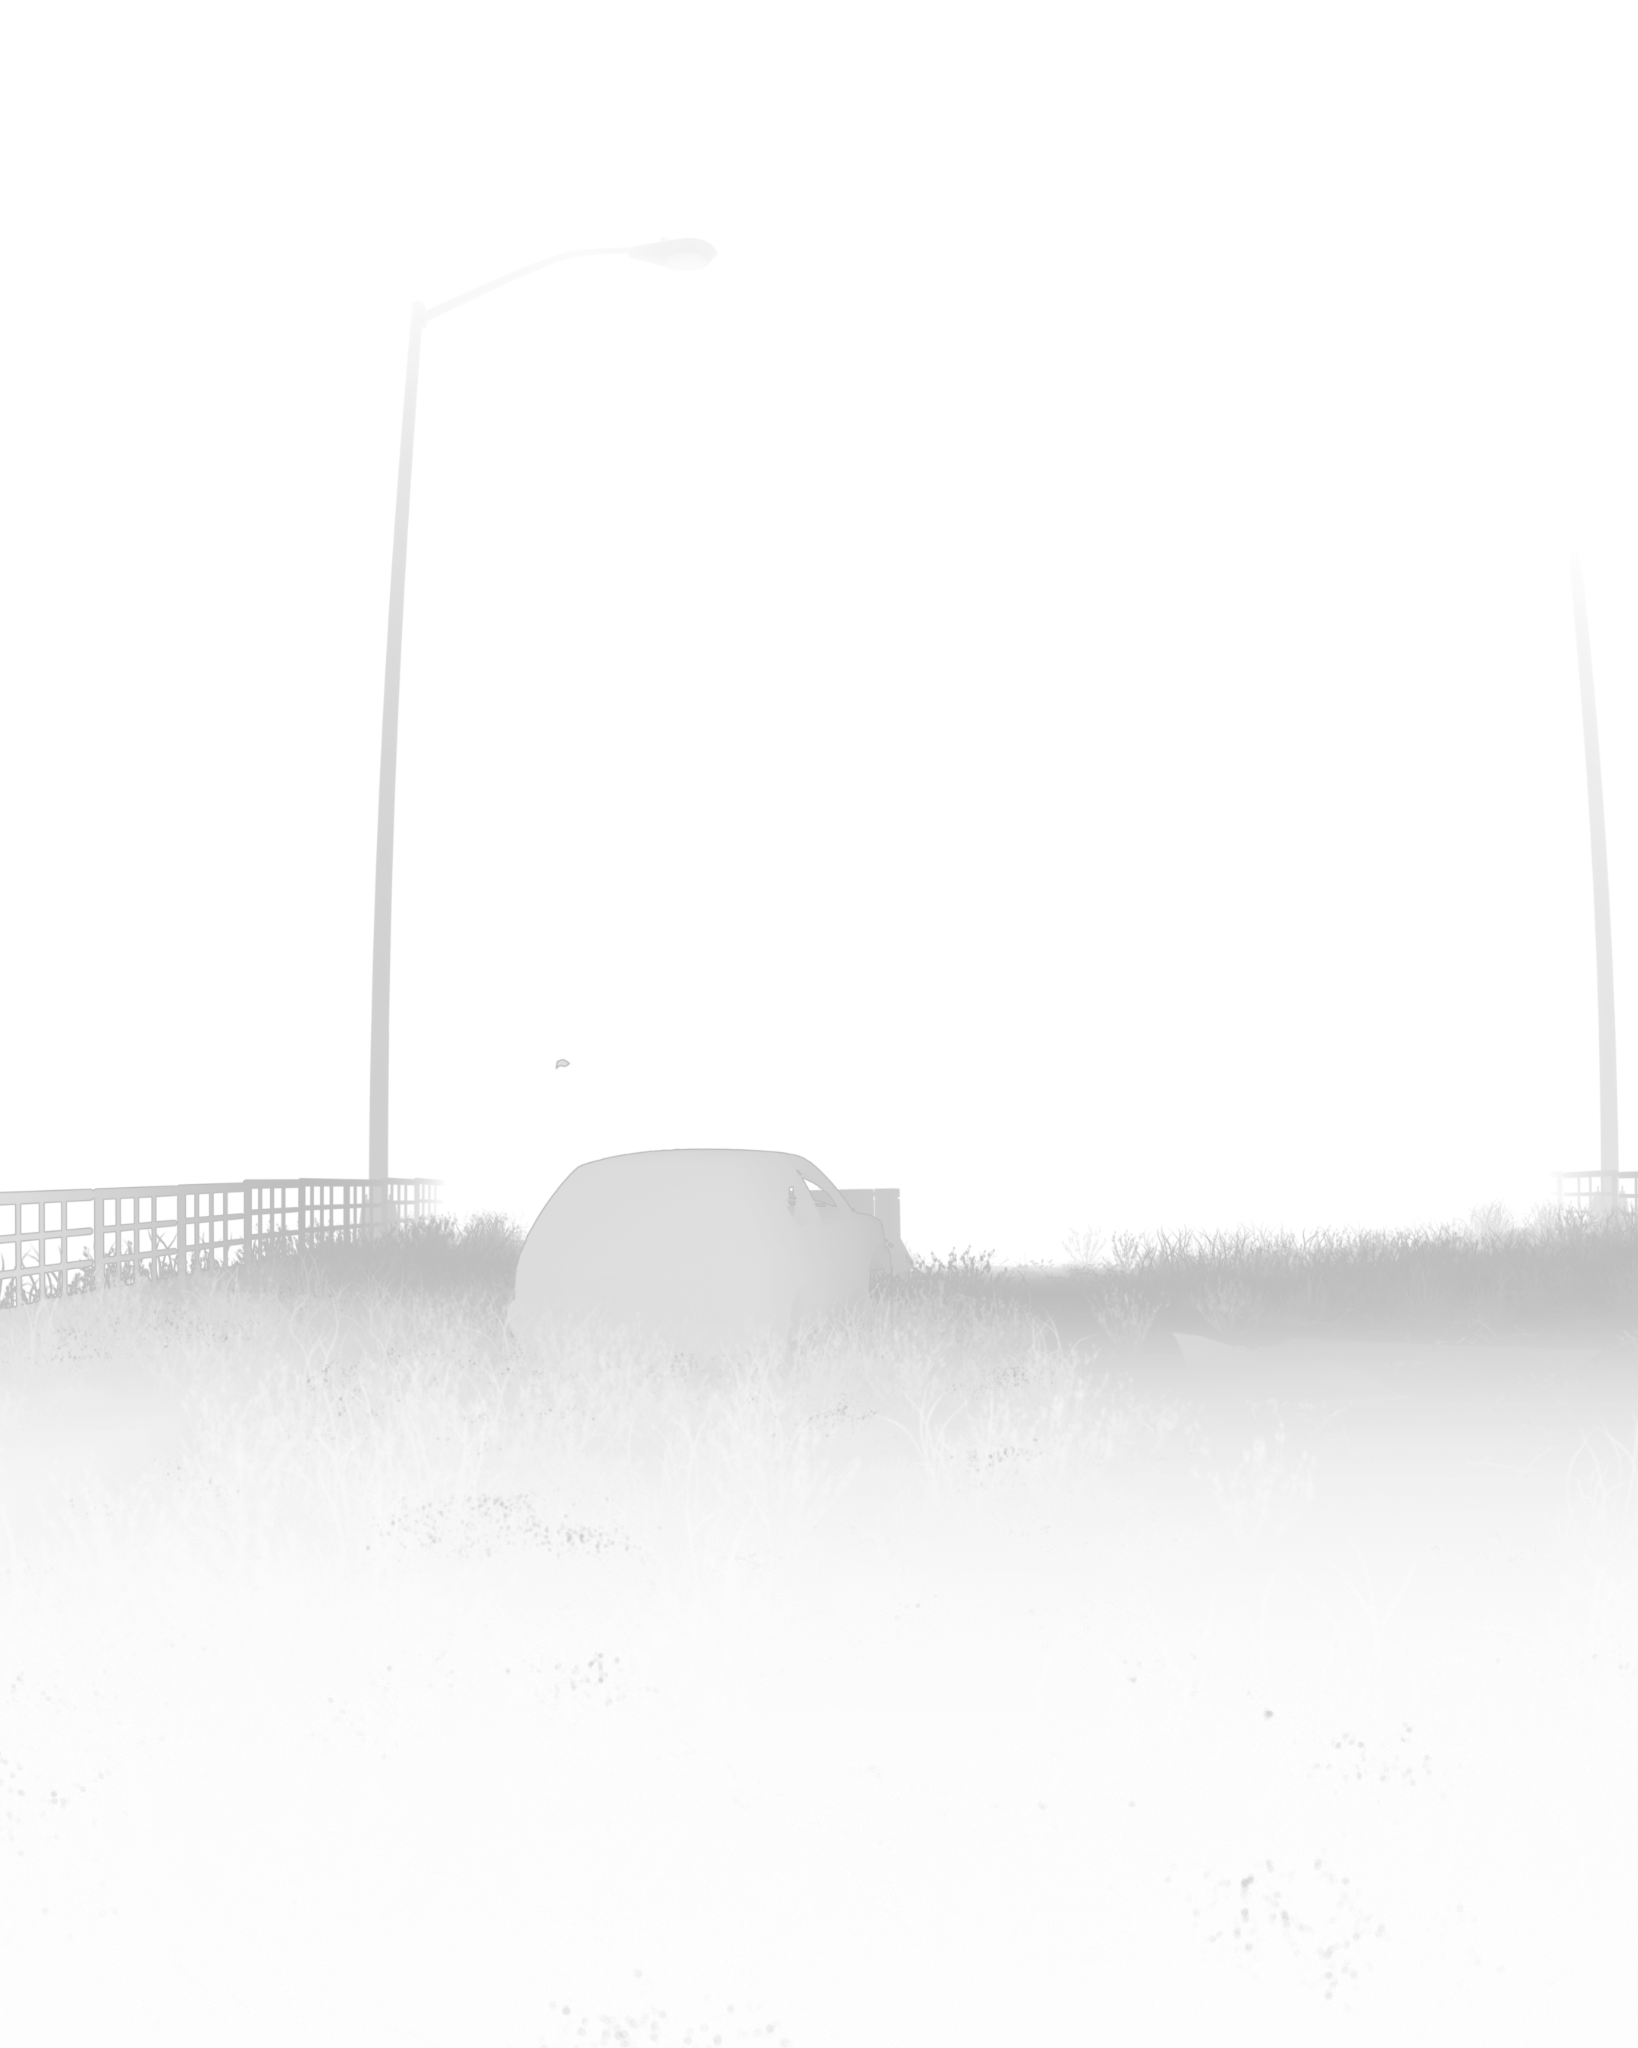
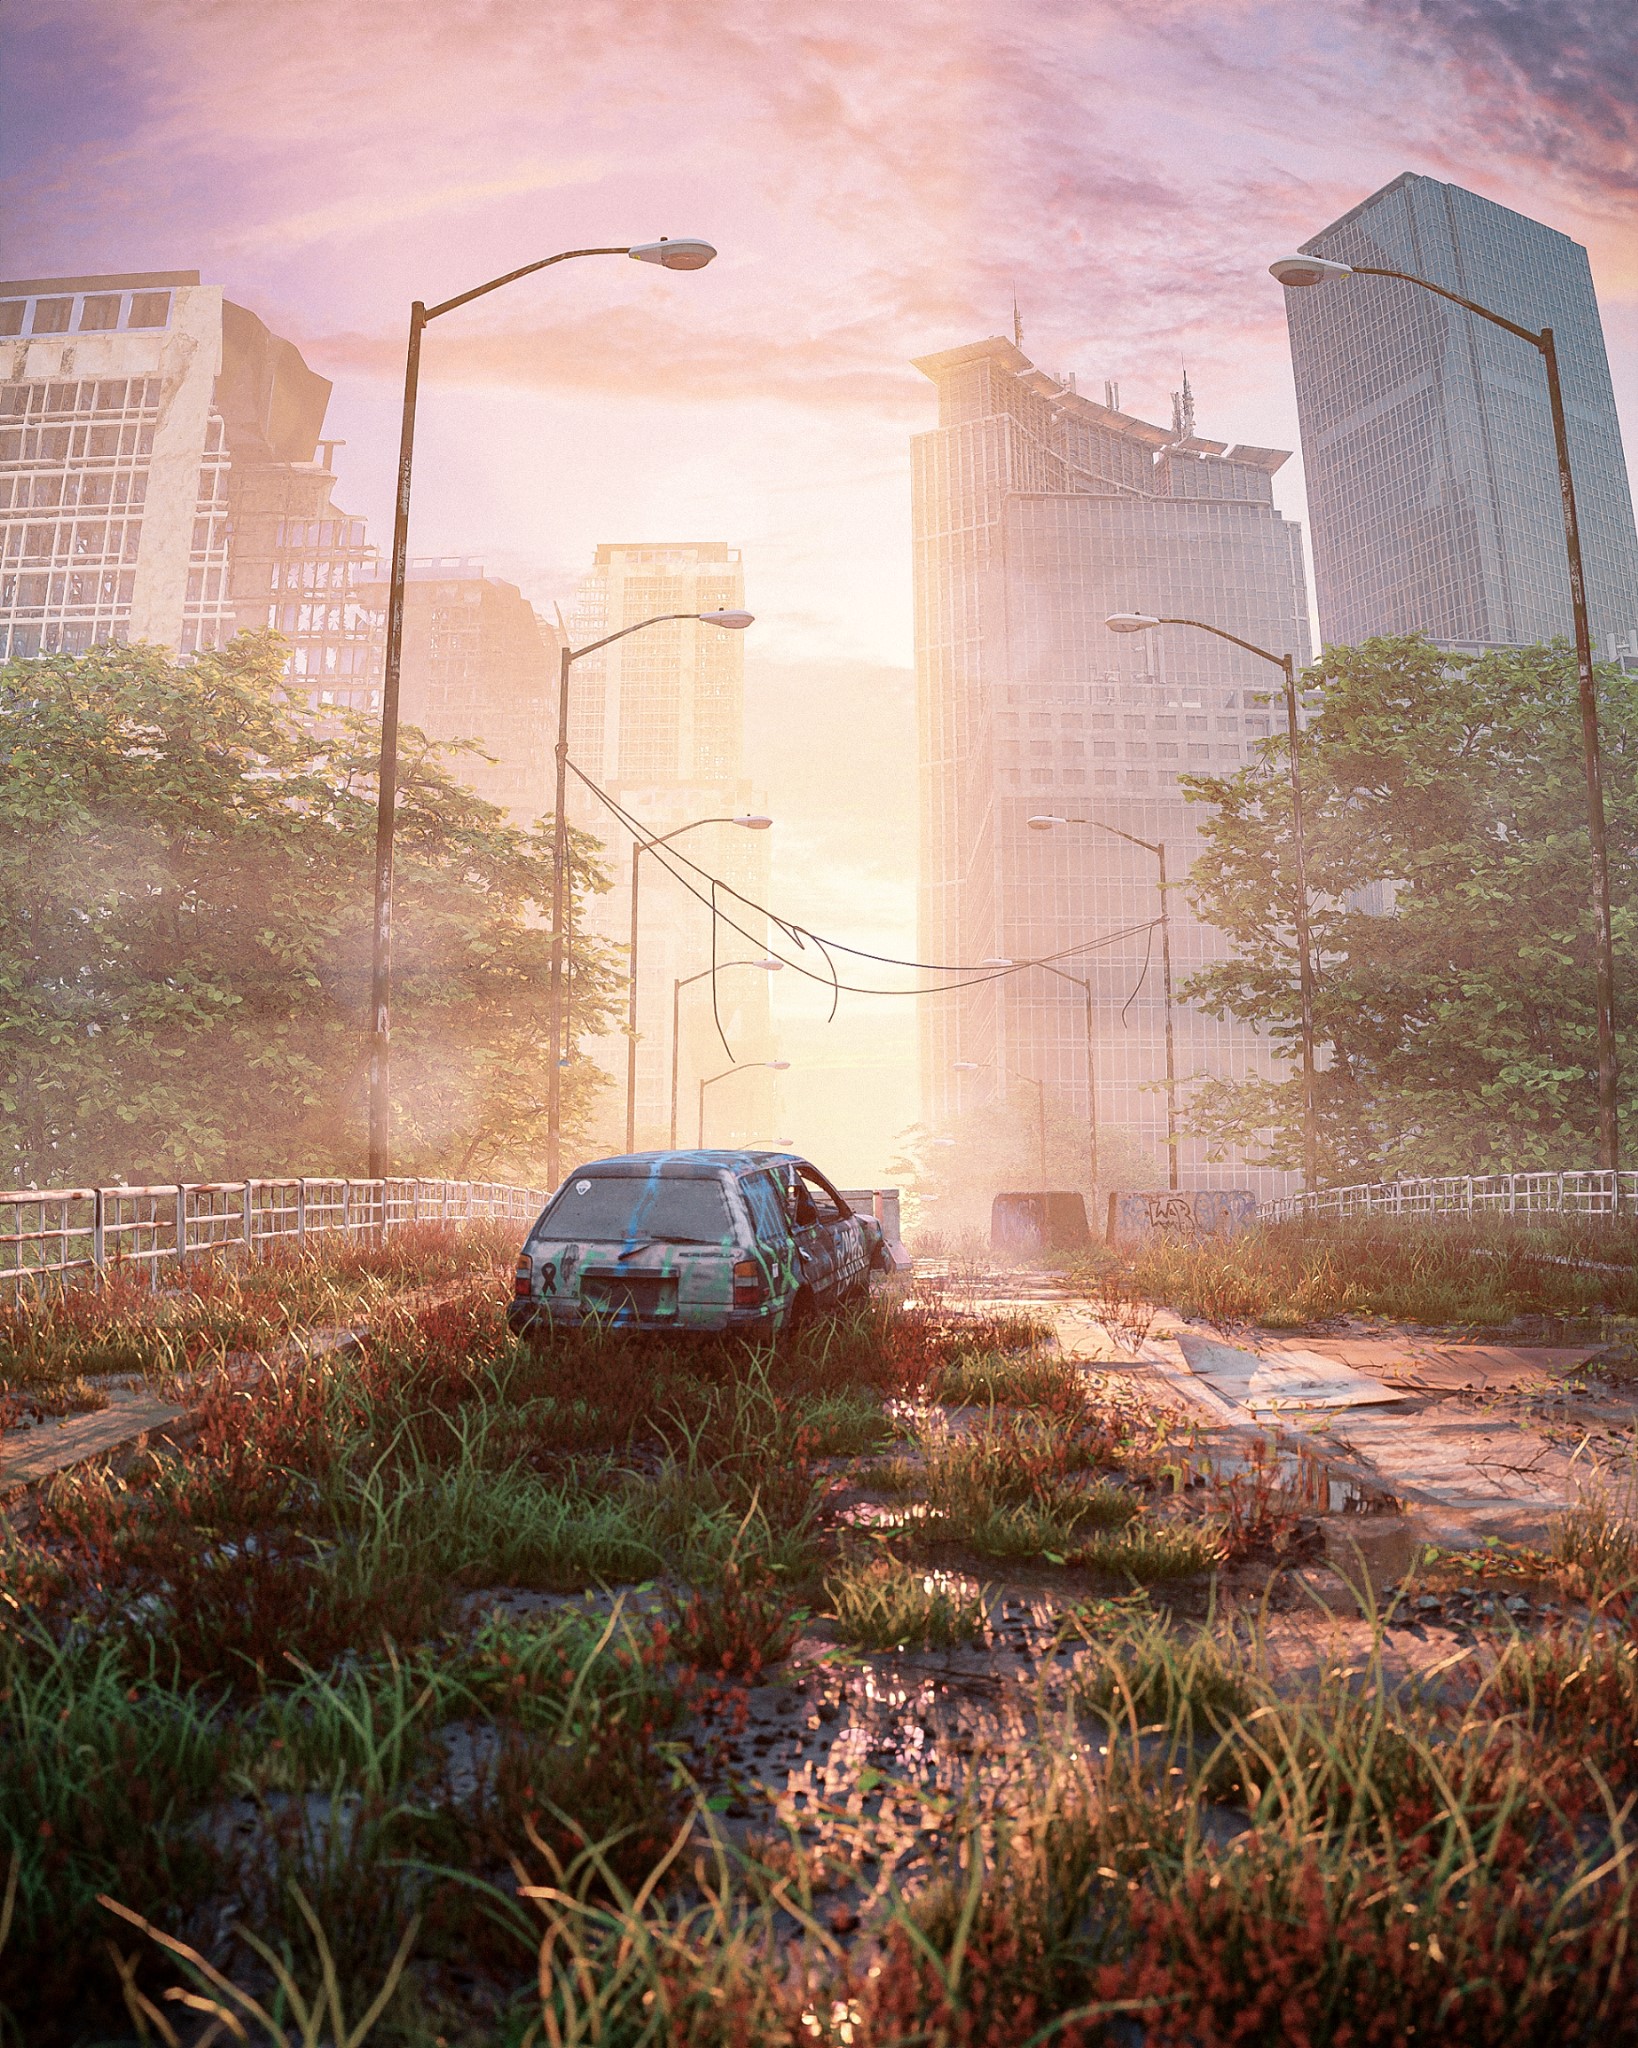
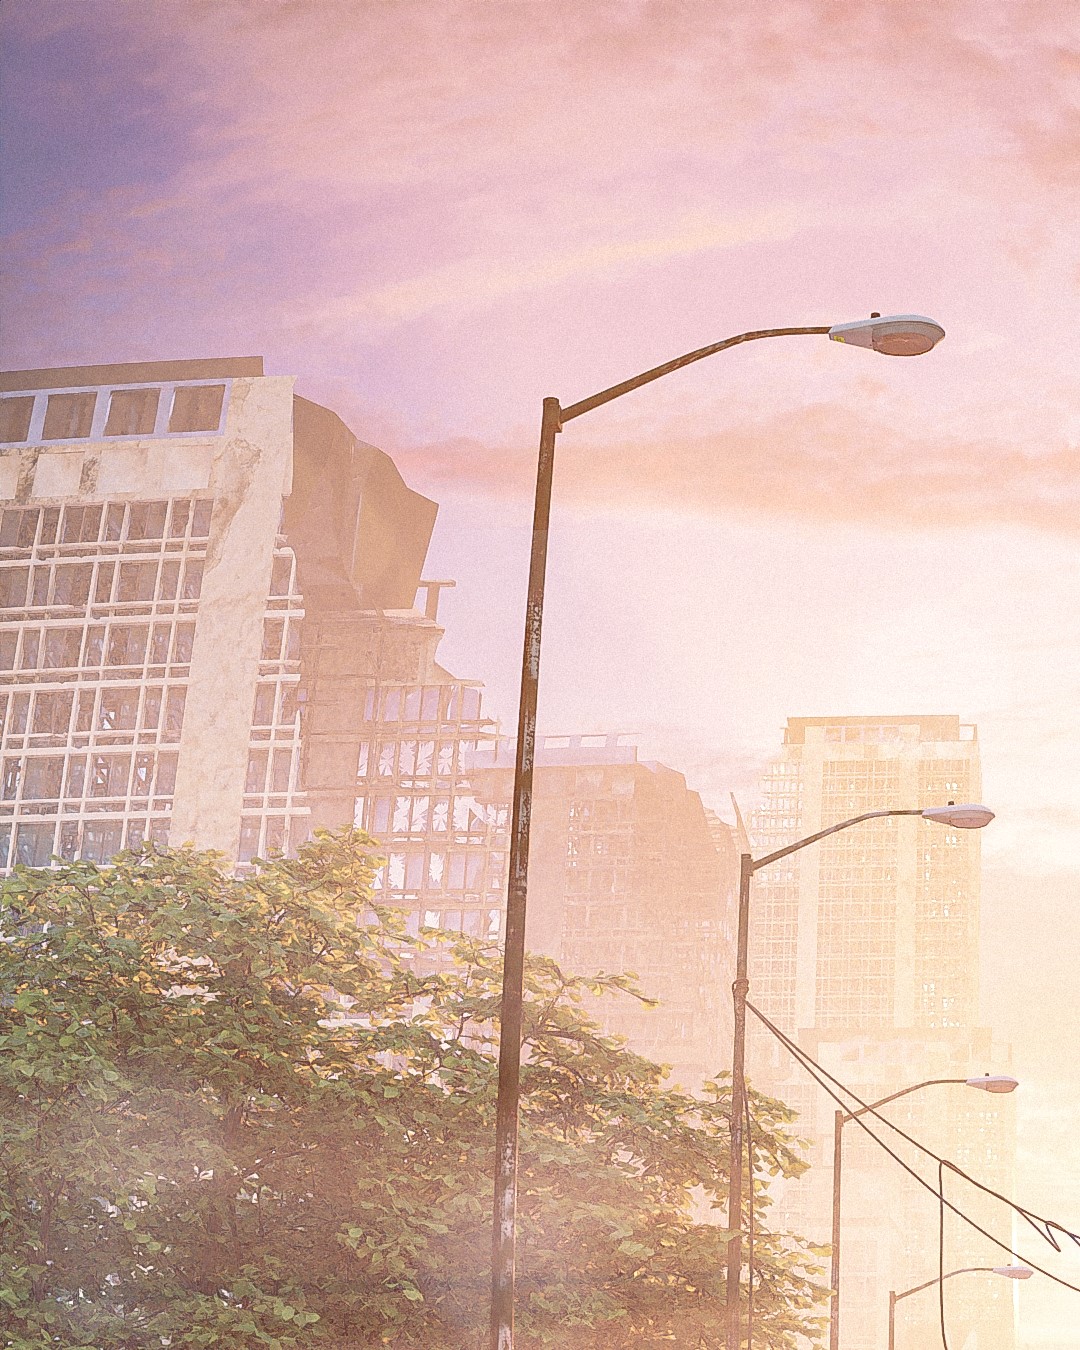
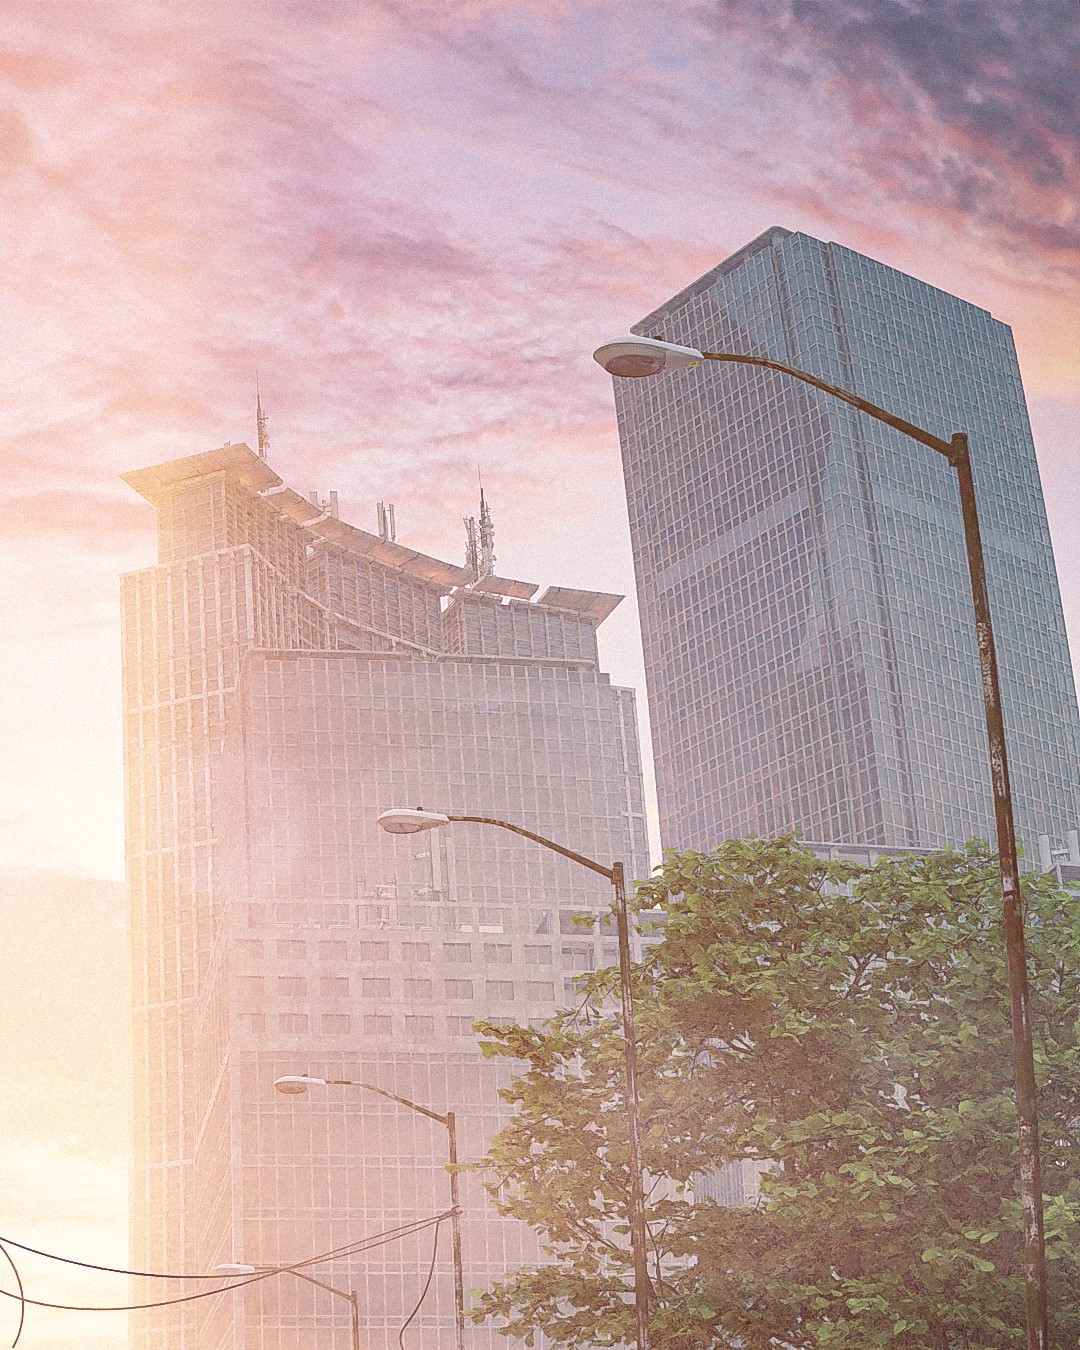
Below are the final renders from Blender using Cycles, which include the RGBA render, clay render, AO, and Mist Pass.
RENDER: New Dawn
Post-Processing
Post-processng was done in Adobe Photoshop with major editing done using camera-raw filters. I also did some brush painting of fog and light rays using a mist pass rendered from Blender.

I have a timelapse of this design on YouTube, Creating an Environment Design In Blender.
Thank you for your time. Feel free to ask questions on my social media. Have a great day!
About the Artist
Olawole Adaja is a 3D artist and animator from Nigeria, currently working as a freelance and full-time 3D artist.


My man Weldon, you really talented, keep up the good work
Thank You So much, Man.