Behind the Scenes: Dr. Sniggles

INTRODUCTION
Hi! I am Mátyás Belina, a 27-year-old residing in Sweden. My interest in CG started around 2010 when YouTube was trending with tutorials on how to recreate every kind of billion-dollar Hollywood effect at home in After Effects. I imagine that was how people got their interest sparked for VFX. At least, that did it for me. I was hooked!
Thus, I started with After Effects. Soon, I thought it would be cool to integrate some shots with 3D elements, and so, I learned 3D. I played around in the nice little program Anim8or for a while. Then, I leveled up to Blender and have stayed there ever since.
Now, after being a hobbyist for the latter 10 years of my life, I’ve been blessed to also have graduated as a CG artist and look forward to working in the field that I love!
INSPIRATION
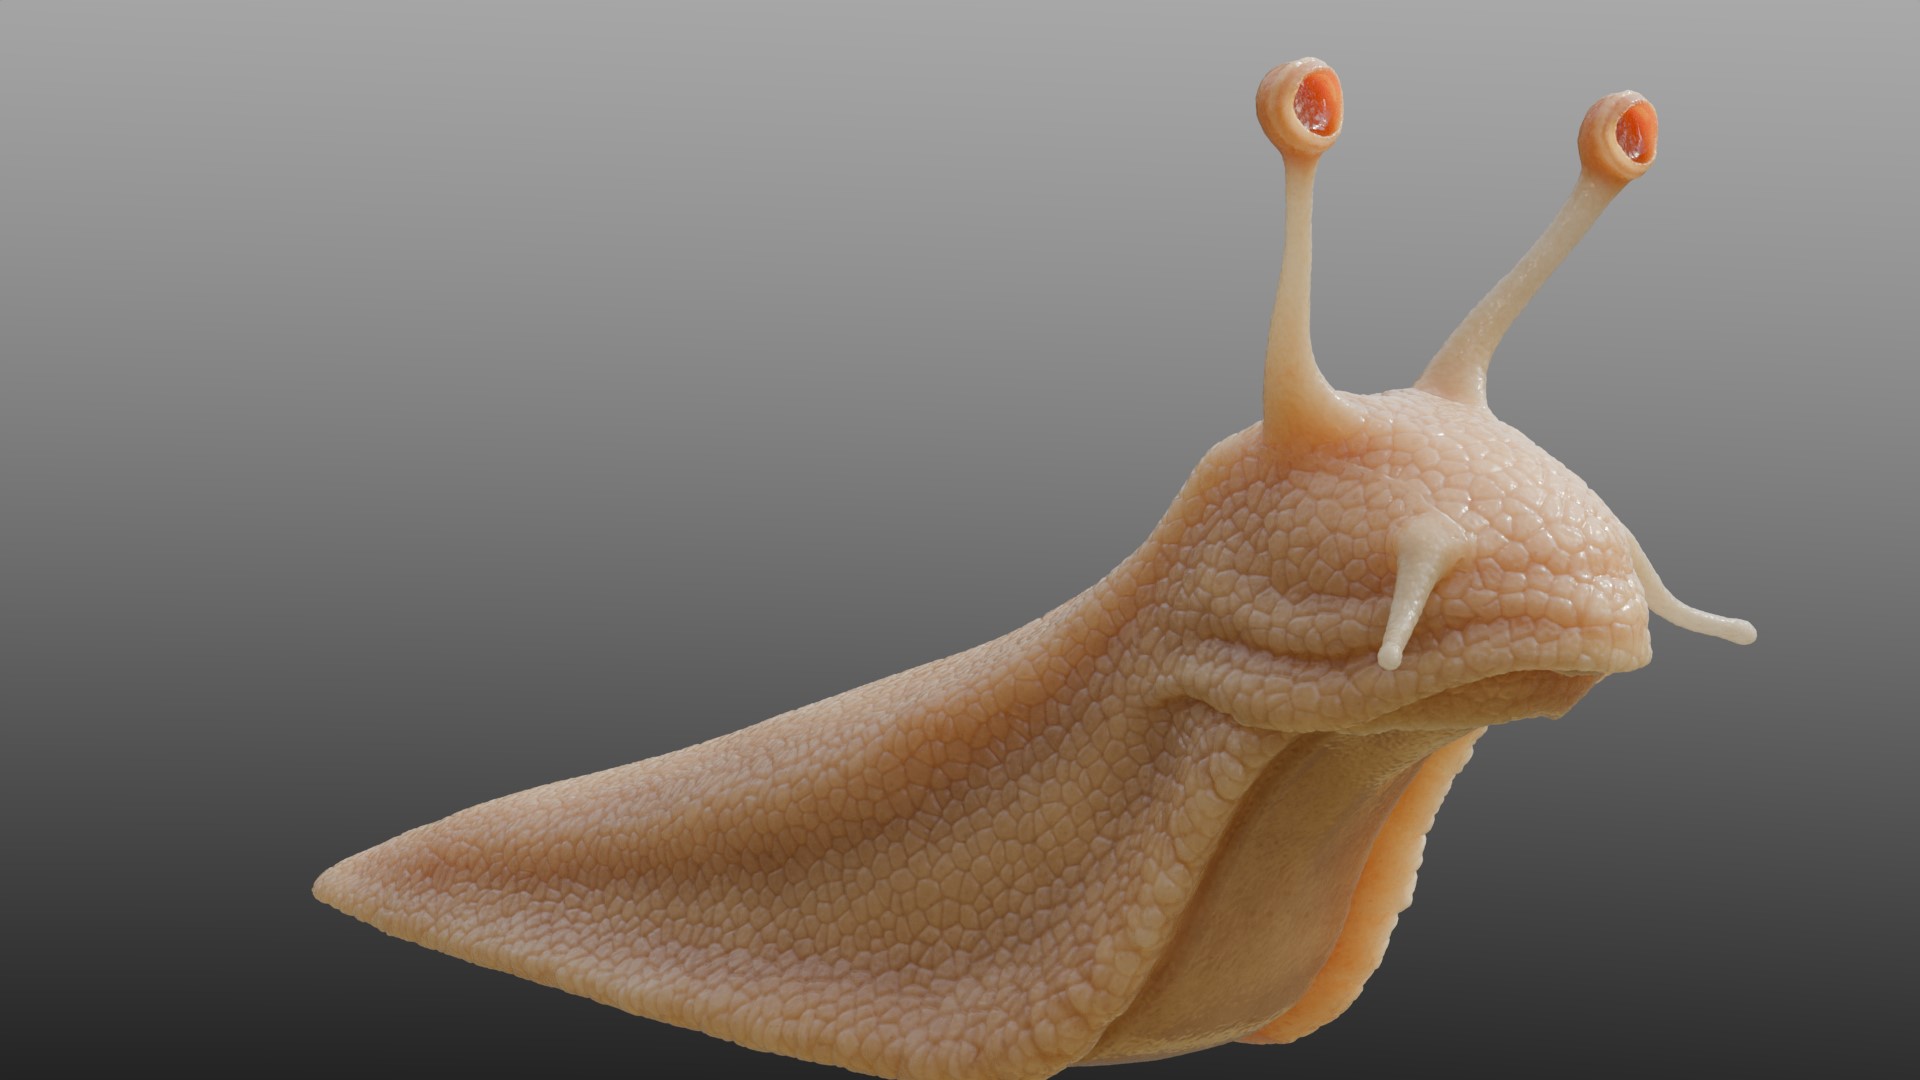
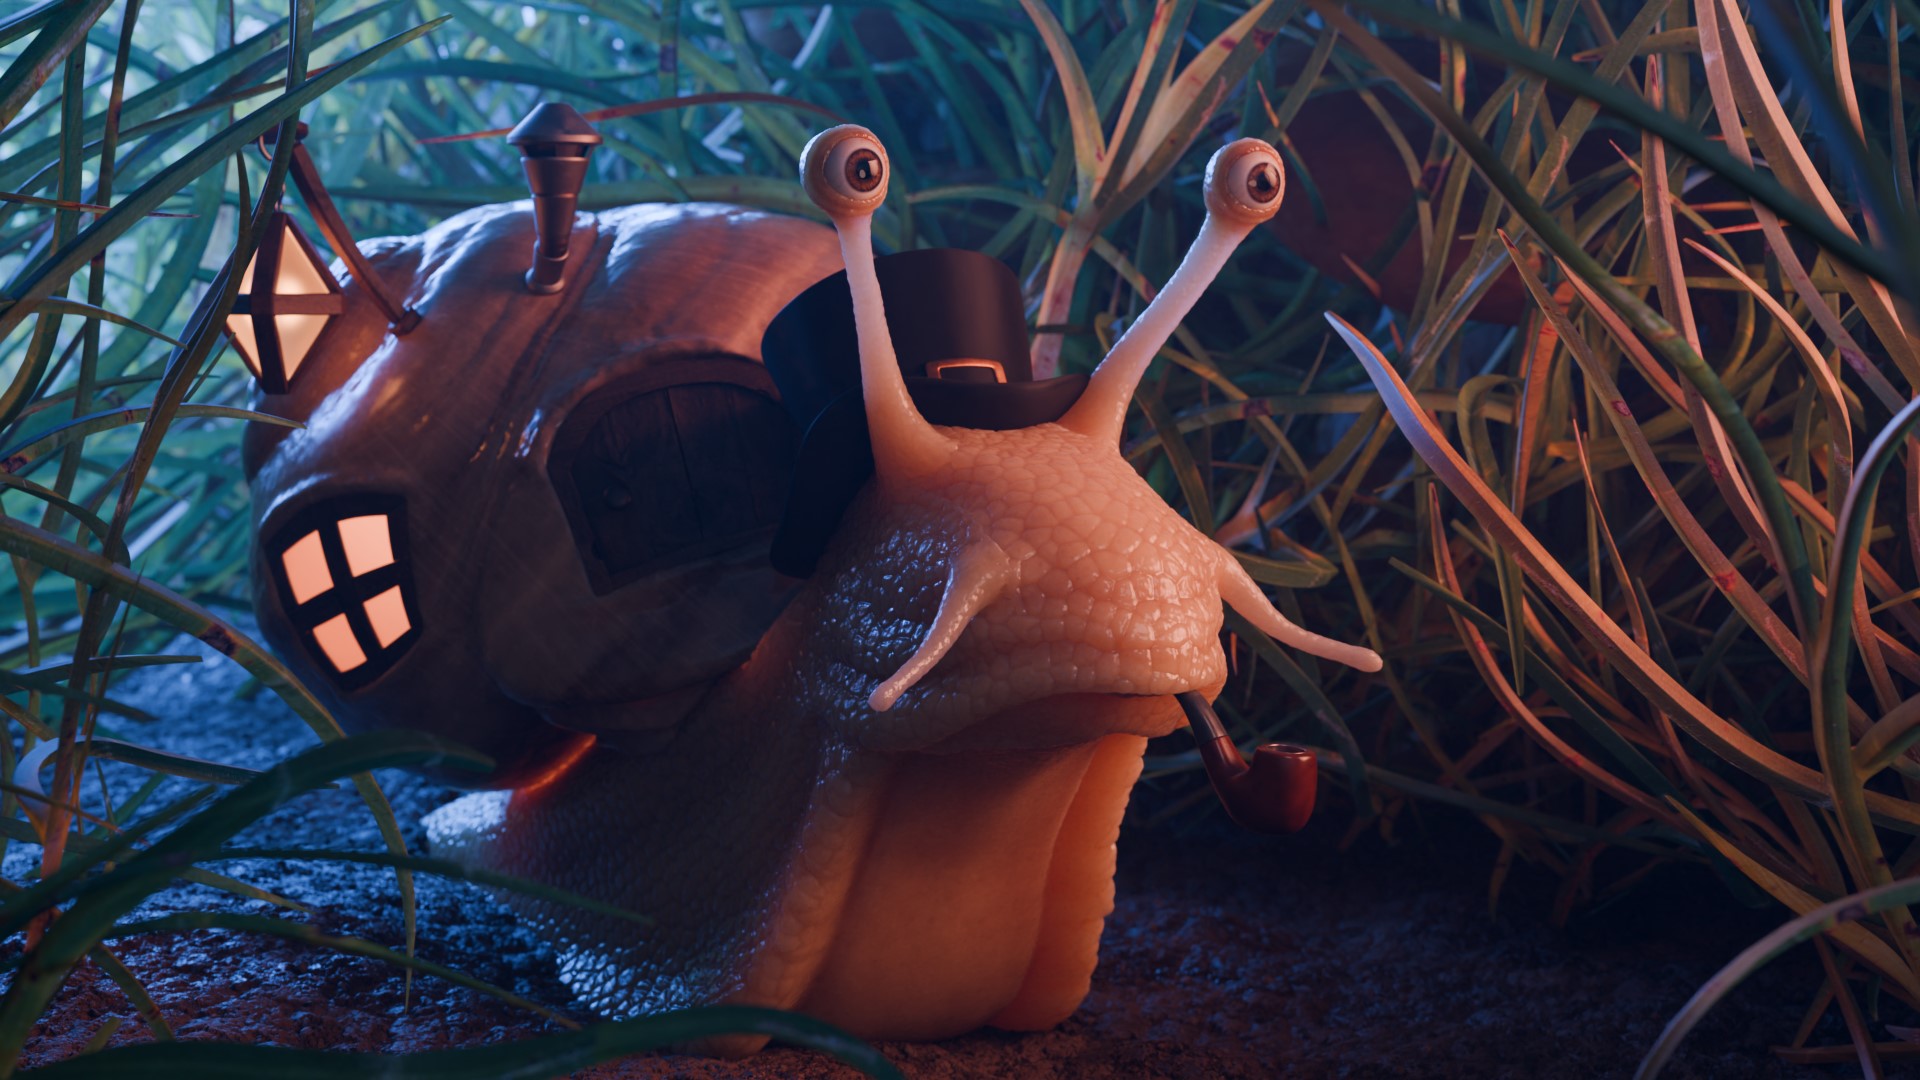
The idea for this work really started to form last year in September. I wanted to try out some organic stuff and play with realism, like taking some simple ordinary organism to a new level by giving it an anthropomorphic touch and some weird accessory. I ended up with two ideas: a Steampunk Tortoise that was a tortoise with a steampunk machinery in its shell, and a Racer Snail that was a snail with eyes, racing goggles, a window, and a chimney on its shell. In the end, I went for the Tortoise but I always lamented that I didn’t do anything with the snail. Until now, when I finally did.
The end product ended up a bit differently than my original idea though: instead of daylight, it became a magical night-time and instead of a racing-snail, I dressed him up as a snobby academic. Reason is that I thought the latter would have a stronger visual appeal. Plus, it paved the way for the pun of the name, Dr. Sniggles: a combination of “Dr. Snuggles” (a cartoon) and “Snigel”, the Swedish word for snail.
PROCESS
For this project I, almost exclusively, used Blender with huge reliance on its procedural workflow, and its Geometry and Shading nodes’ workflow. I also used Leonardo for reference images and Gimp to help make the textures.
As for my hardware, I had/have a PC with AMD Ryzen 9 7950X 16-Core CPU and a Geforce RTX 4070 GPU (a bit of an investment for a newly-examined artist but man was it worth it!)
Modeling
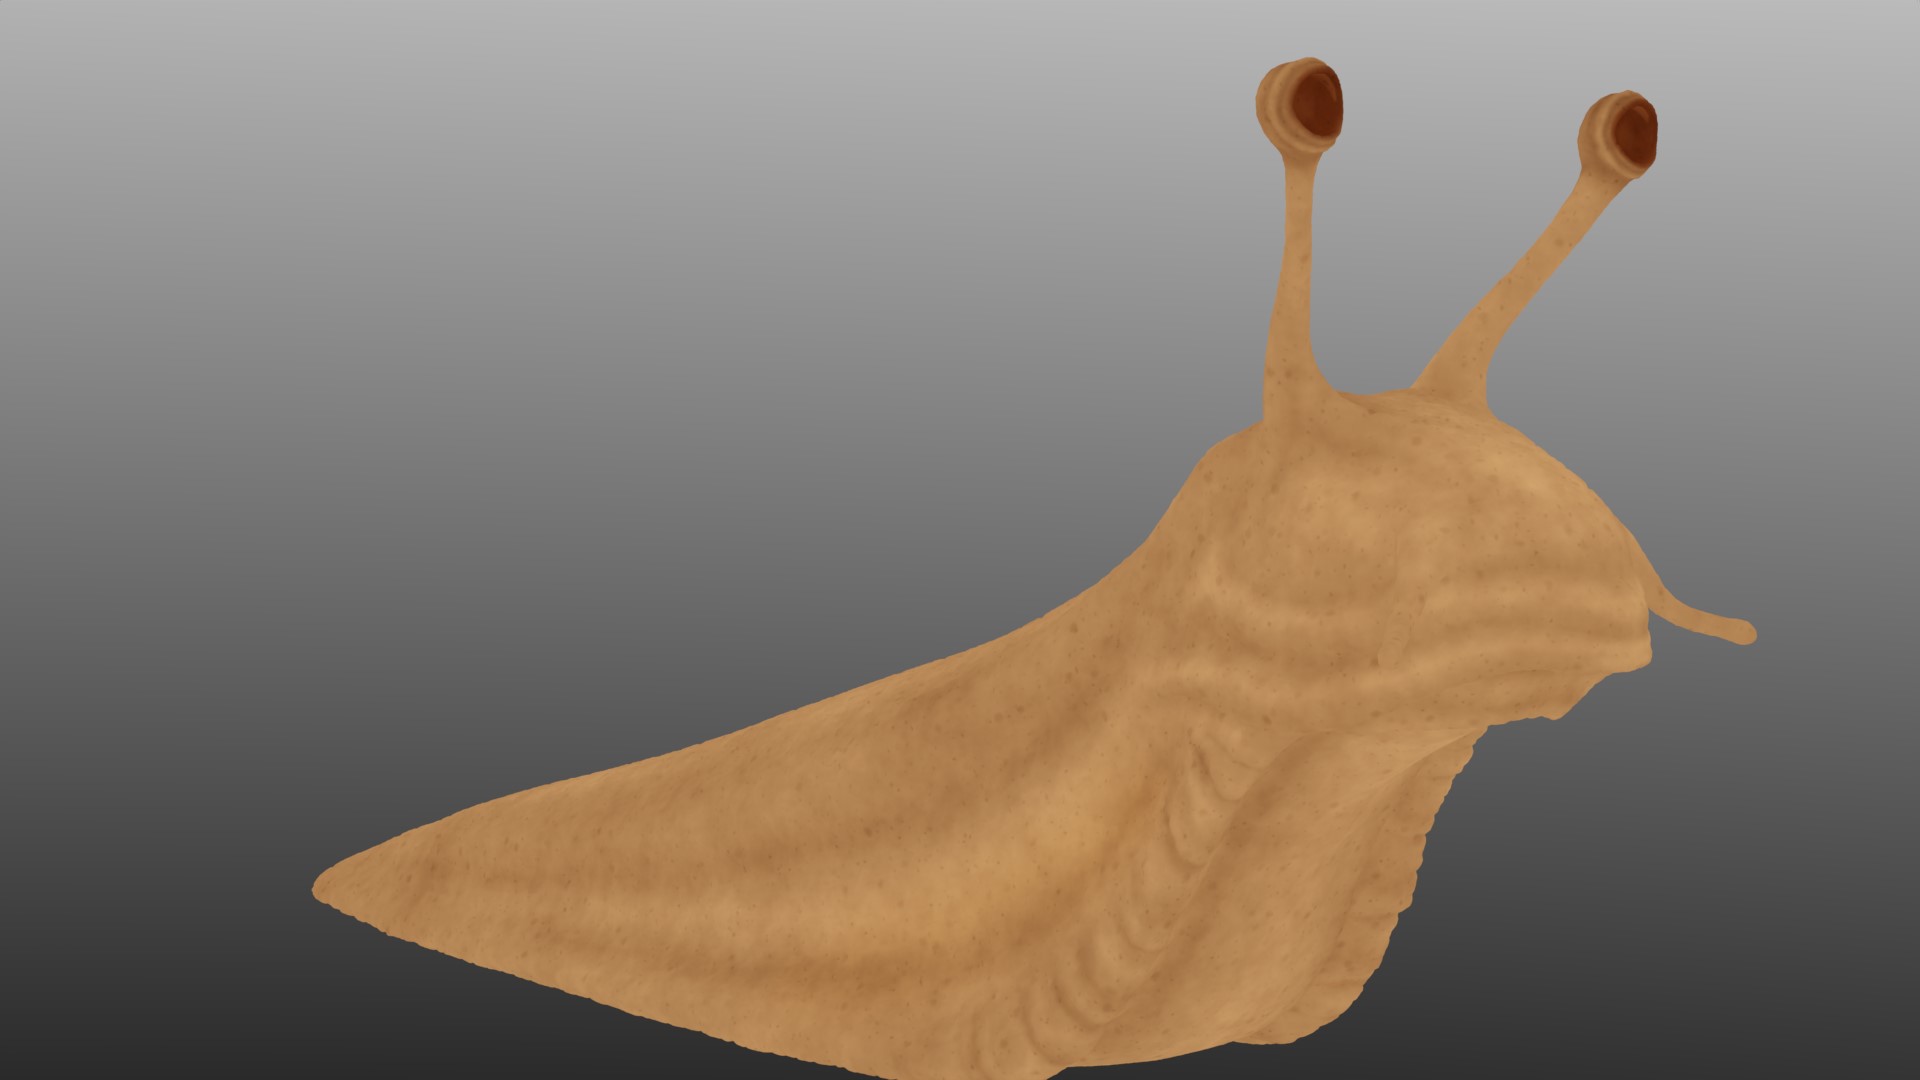
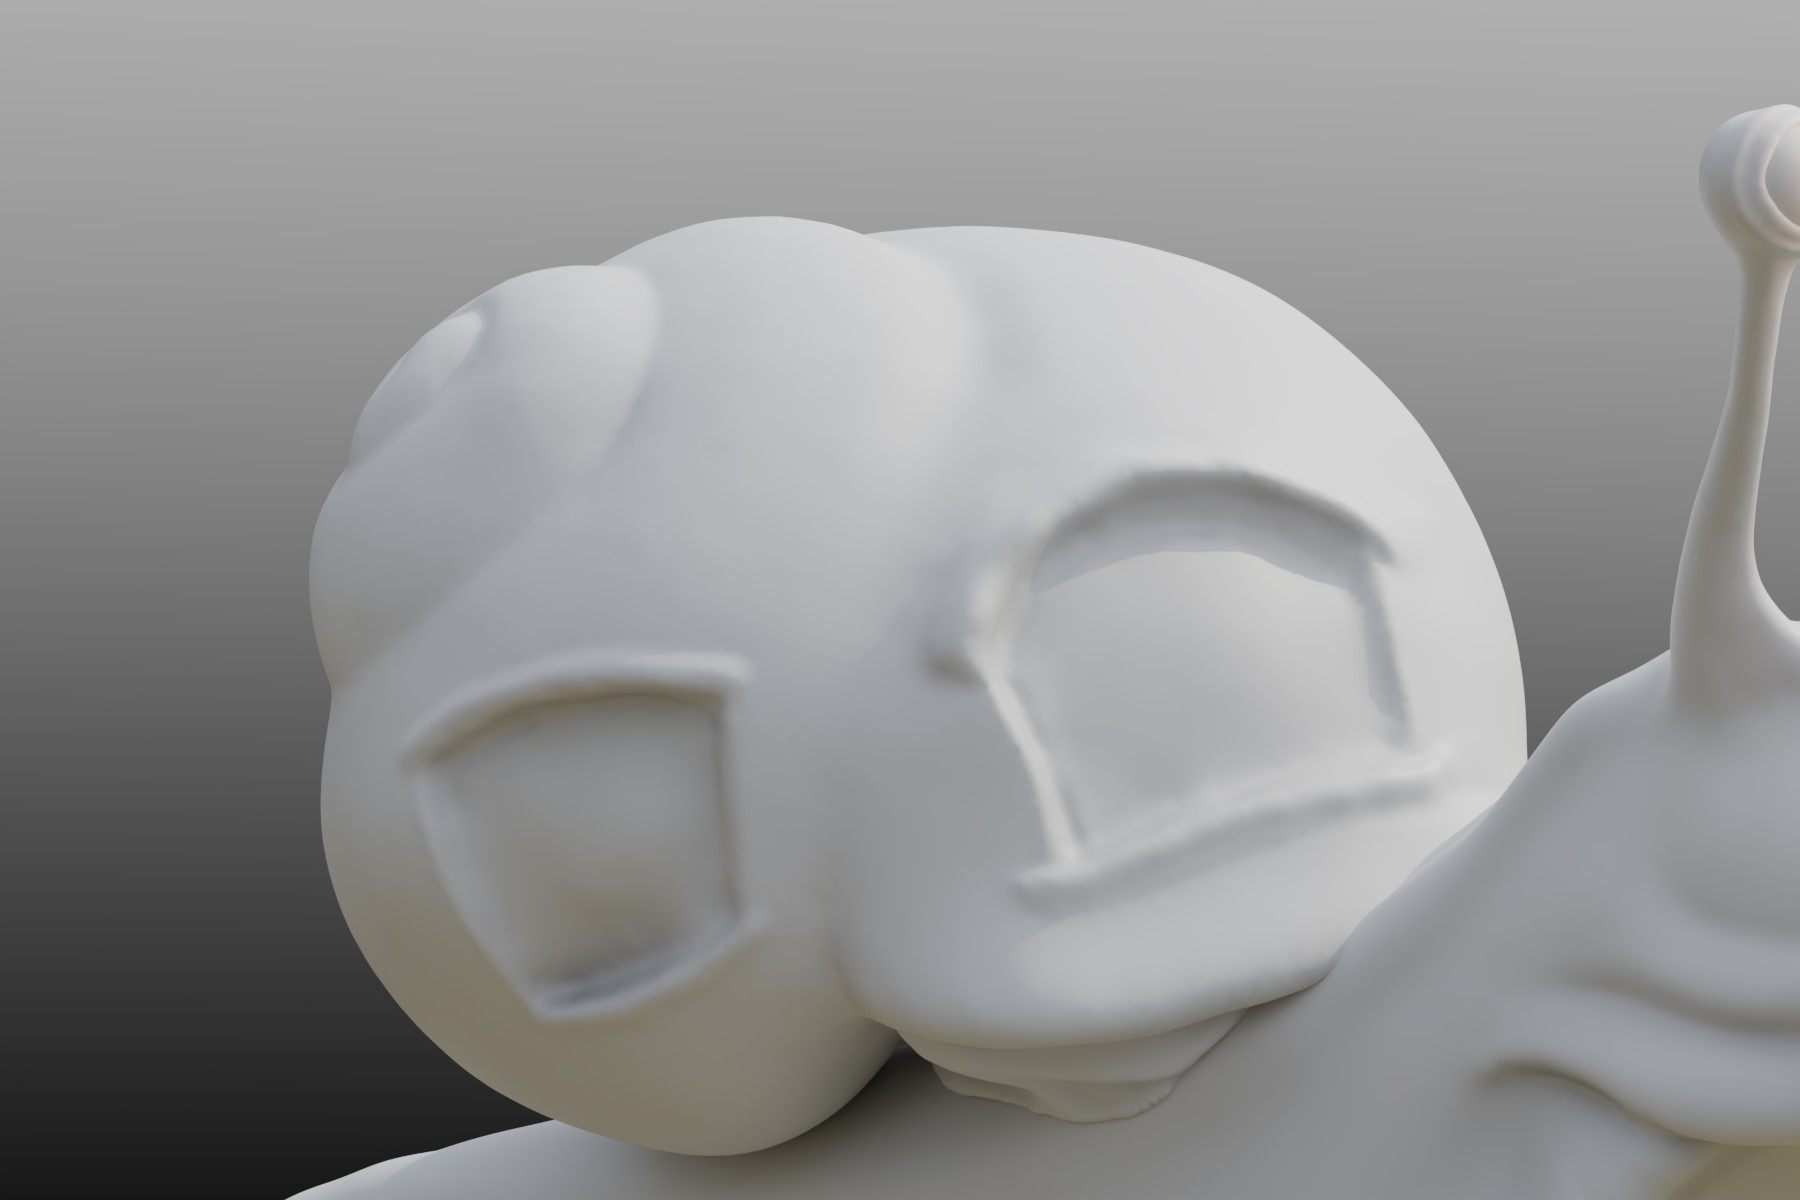
I started out with modeling the snail. Something I quickly realized was that (a) I was in dire need of reference images and (b) browsing “anthropomorphic snails” (or the like) gave no abundance of pre-existing acts as reference, and even less so images that fit the vision I had in mind. So what was there to do? Well, image generating AI has been on the rise lately, so I gave it a shot.
I made a simple Eevee render of the model I had so far, used Gimp to piece it together with a hat, pipe, eyes, and a grassy background. I wish I could show you that image here but somehow it seems like it has gone missing. I loaded that image into Leonardo as an input image, switched on the “photoreal” option, and voilá! Out it popped exactly what I needed!
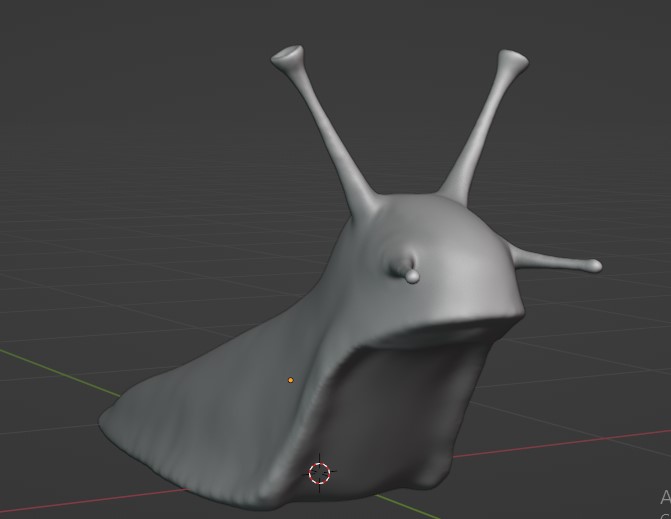

With these, all just suddenly clicked in my mind. The semi-slimey wrinkles, the way the subtle shapes of the face convey character, the indication of age, the look of the eyes, the details on the edge of the body, etc. I knew precisely how to proceed and soon enough, I had refined my sculpt like this:
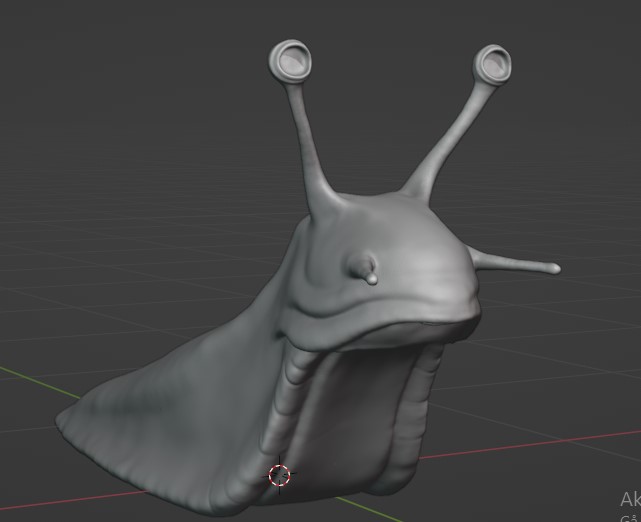
Needless to say, using Leonardo played a crucial role in making the final look of the snail.
Texturing and Materials
OK, let’s get into the, by large, biggest part of the work and the central focus of this article. 90% of the skin and shell textures were procedural and made with Blender’s shader nodes, something produced through a long series of trial and error which I won’t cover in this article for your sake as well as mine, haha. But to make a quick run-through of the resulting node tree, it’s at the root a simple base color with an overlaid noise pattern:

At the next level, lies a tone shift. It’s a grayscale texture I painted in the Texture Paint editor and overlaid the result of the preceding nodes.
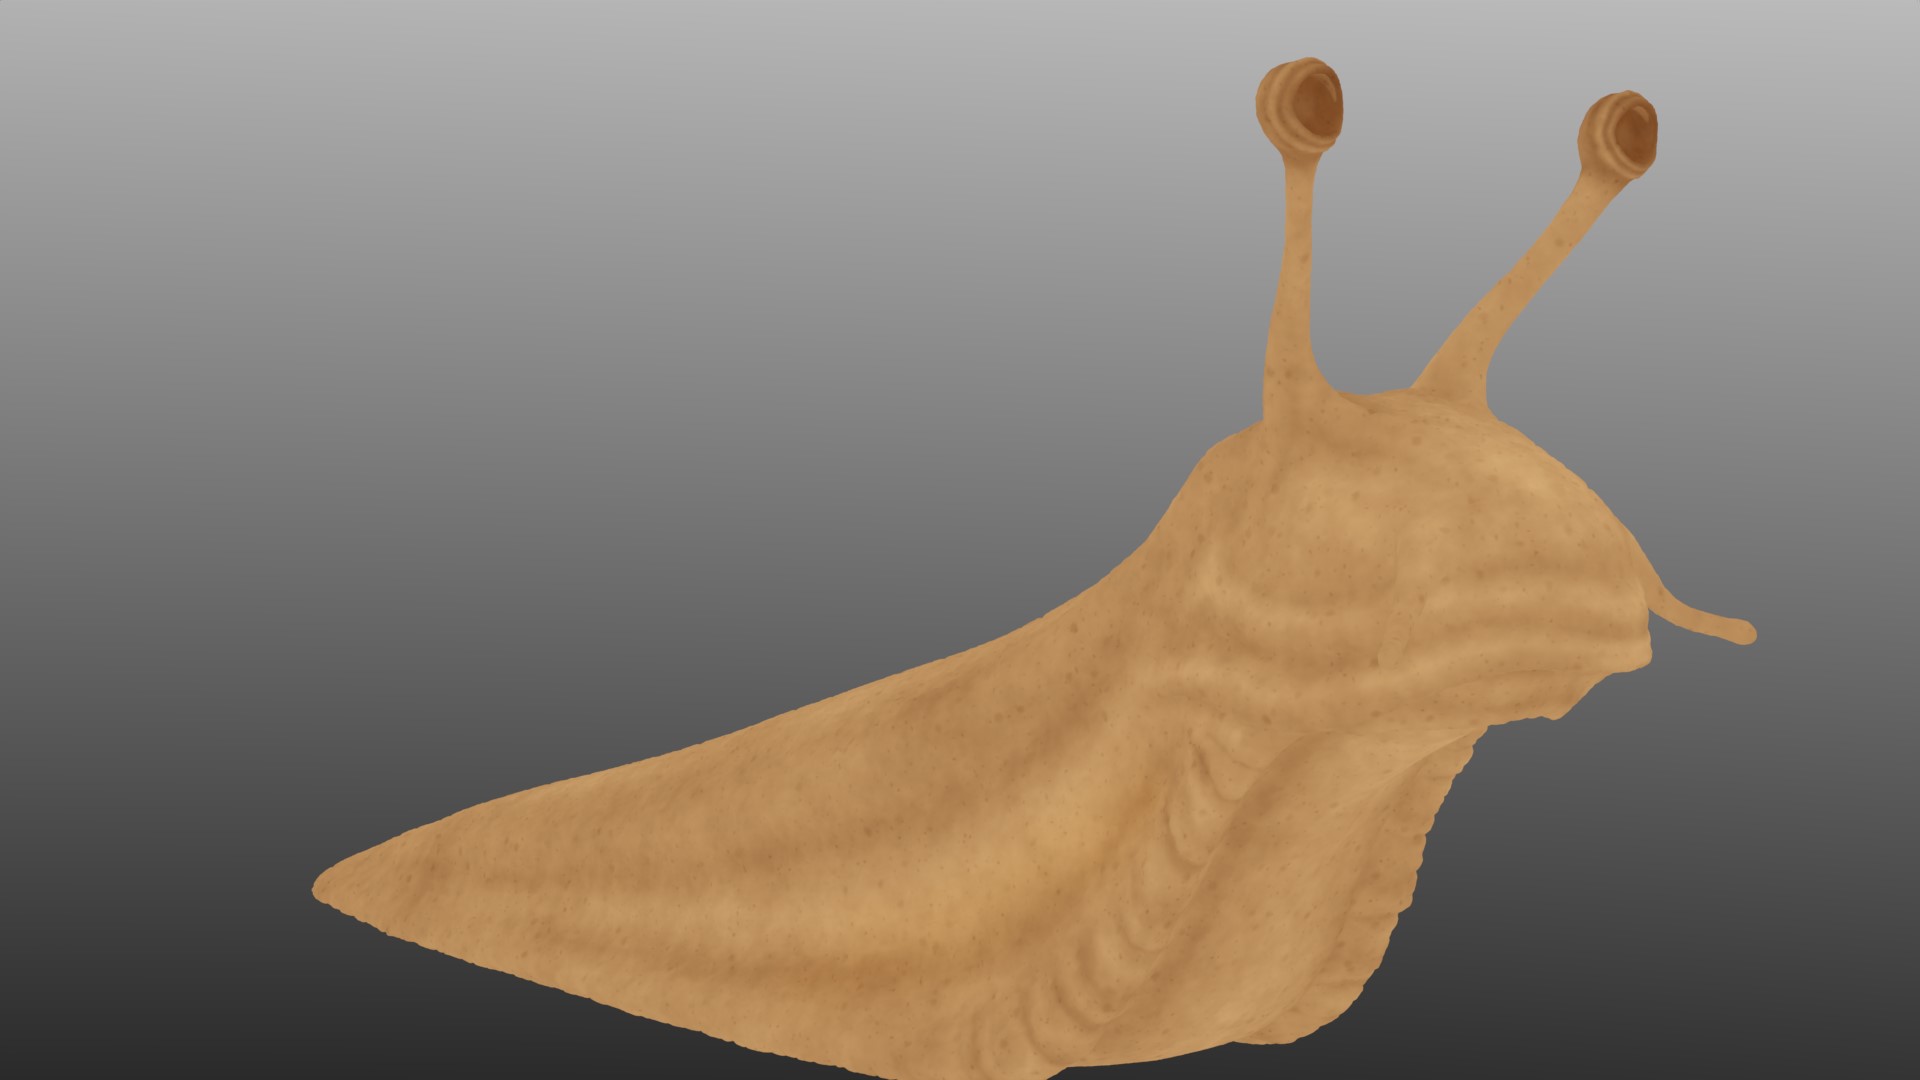
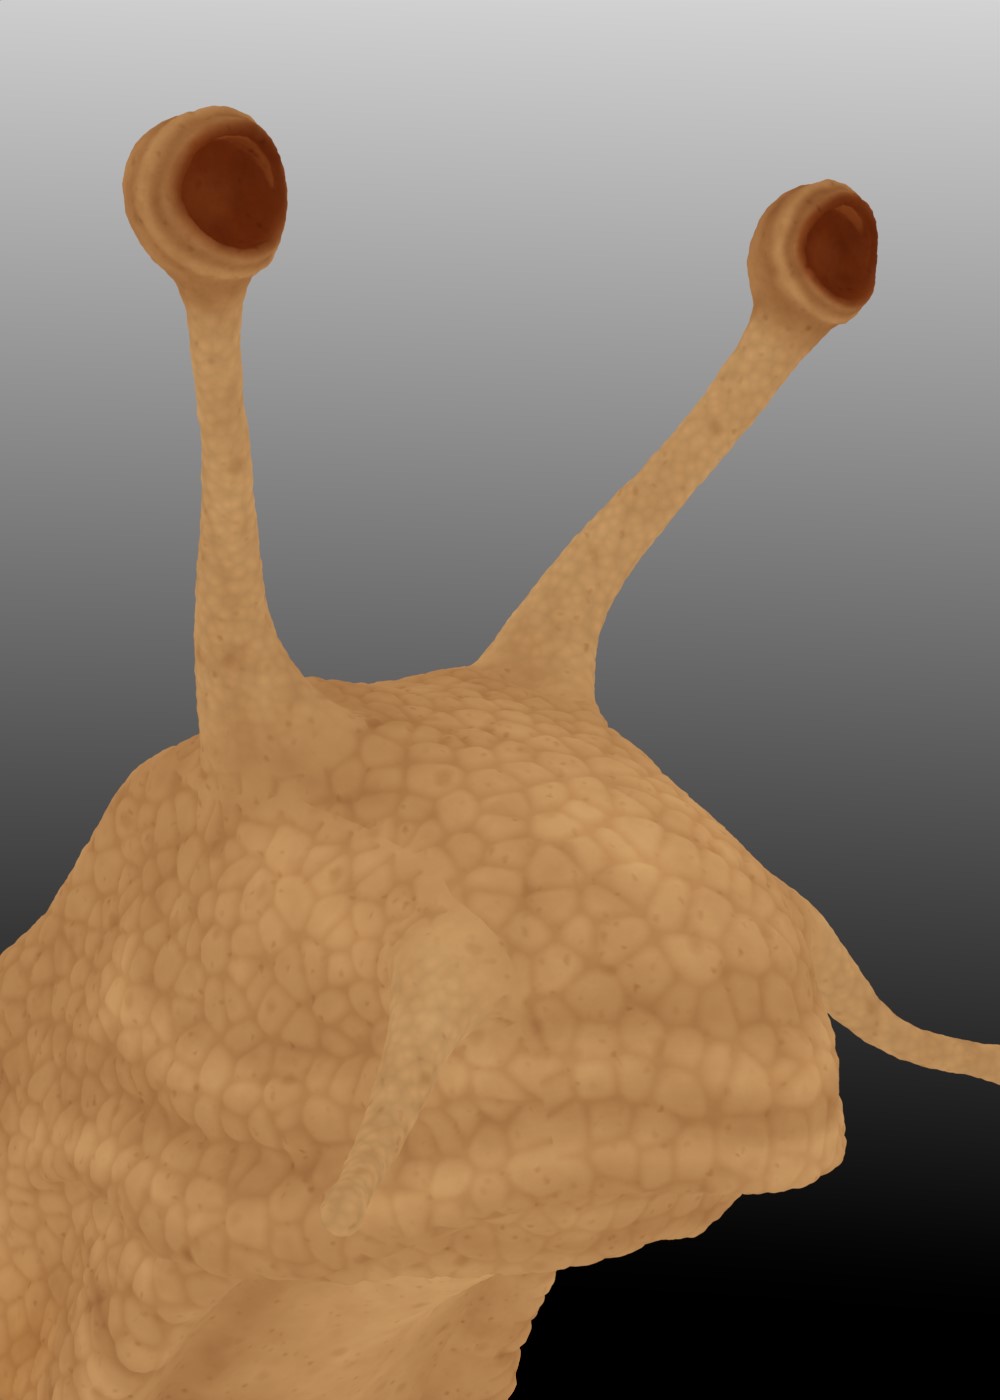
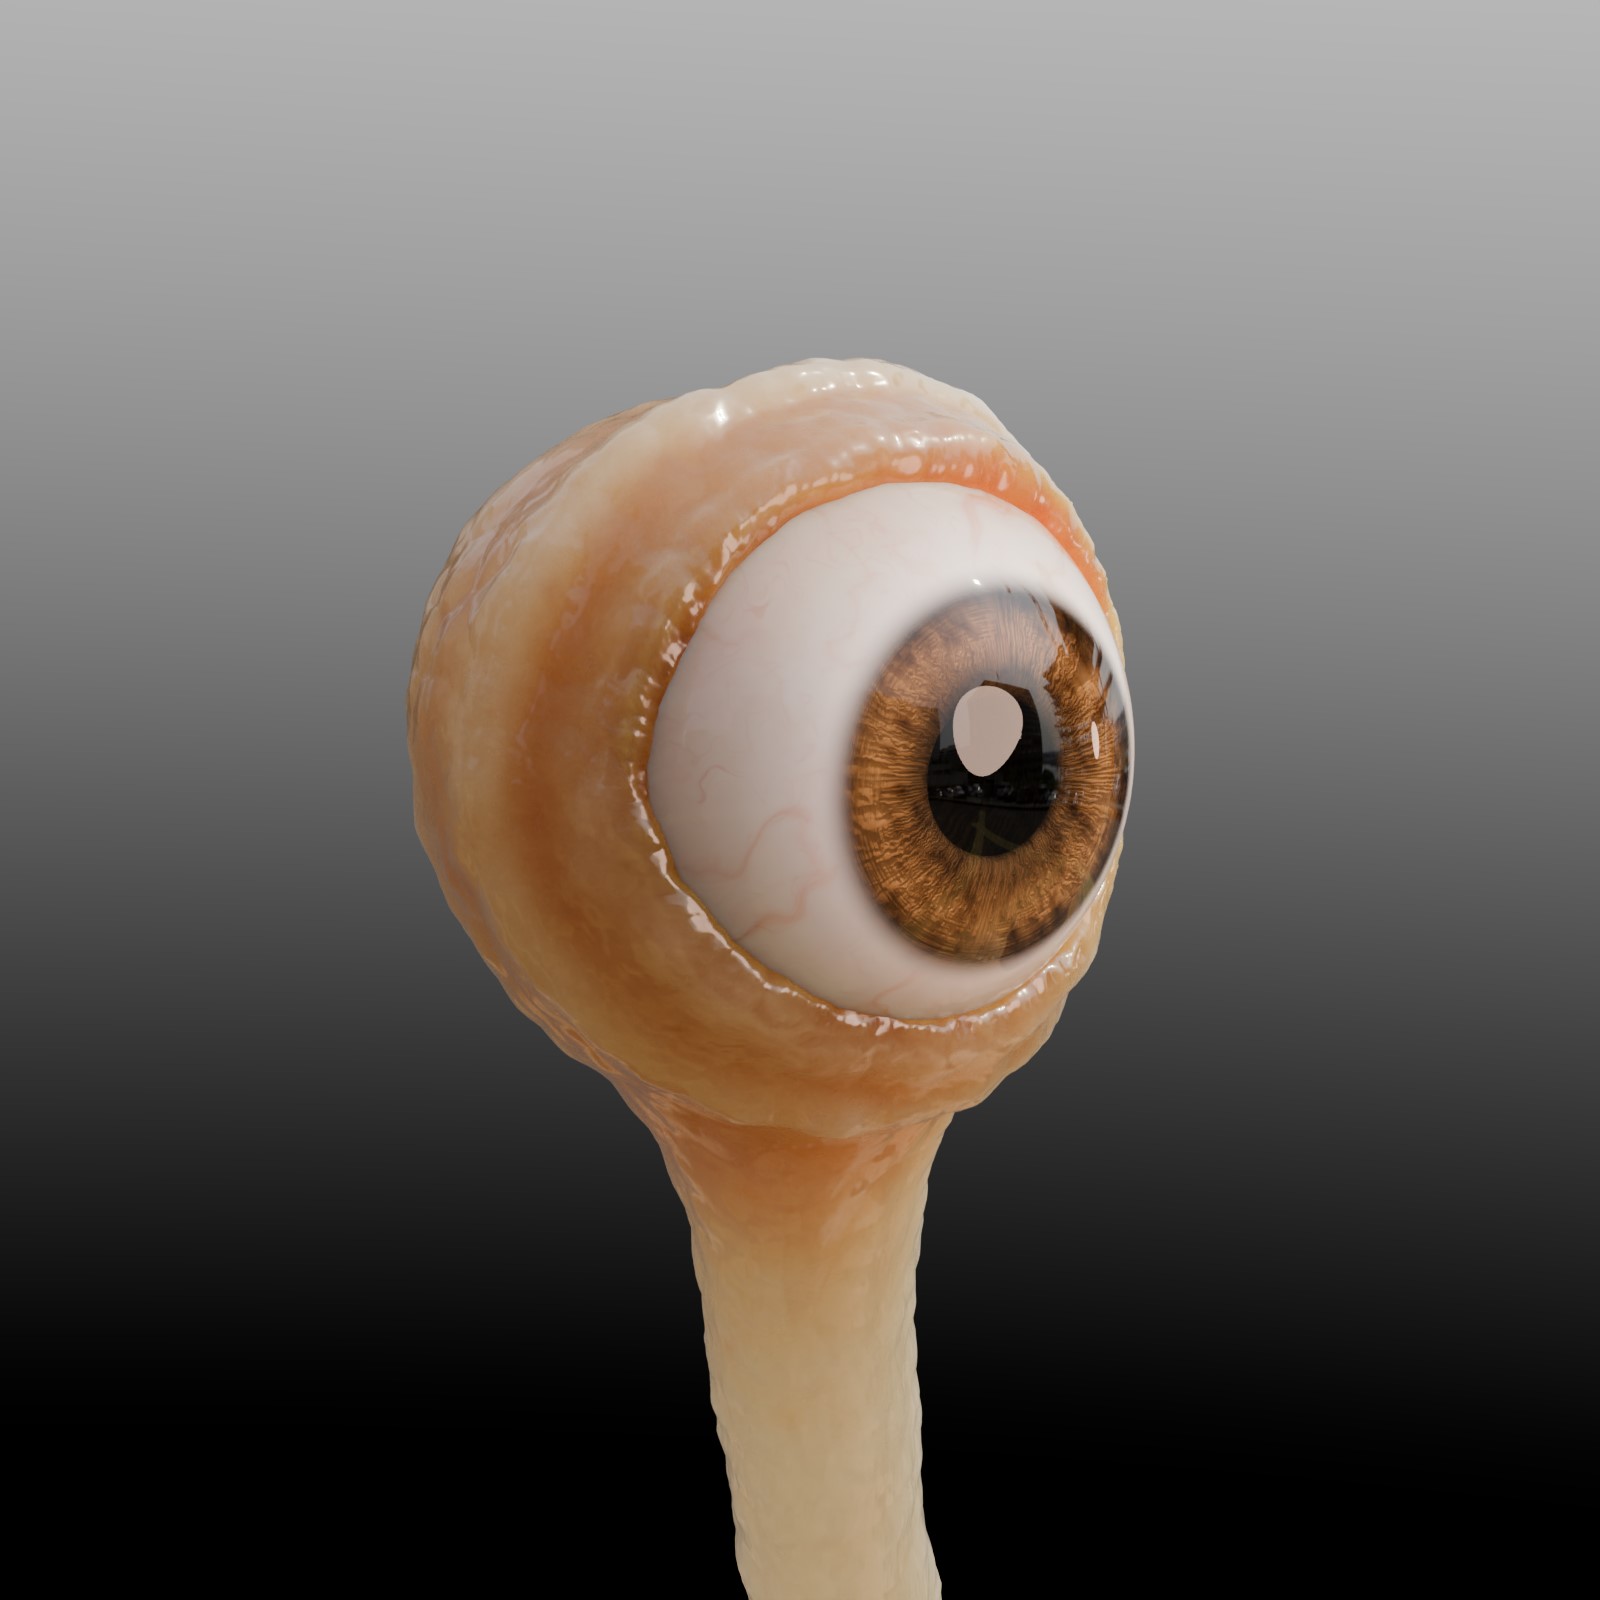
Next was some redness for the eyes. I painted a luma map as Vertex Colors and used it to drive a MIx node.
A spotted pattern for the antennas is next up. This is one of the fine details that may be hard to catch but still make an impact when coupled with the rest of the whole. Here, too, I used a vertex color mask to apply the procedural pattern. I also brightened up the same area.

At last, I applied a crackly sort of pattern. It’s essentially a Voronoi texture I baked out and blurred out in Gimp, re-imported and adjusted with a color ramp.
Texture done! How ‘bout the material? With only the texture as it is, it looks a bit… flat.
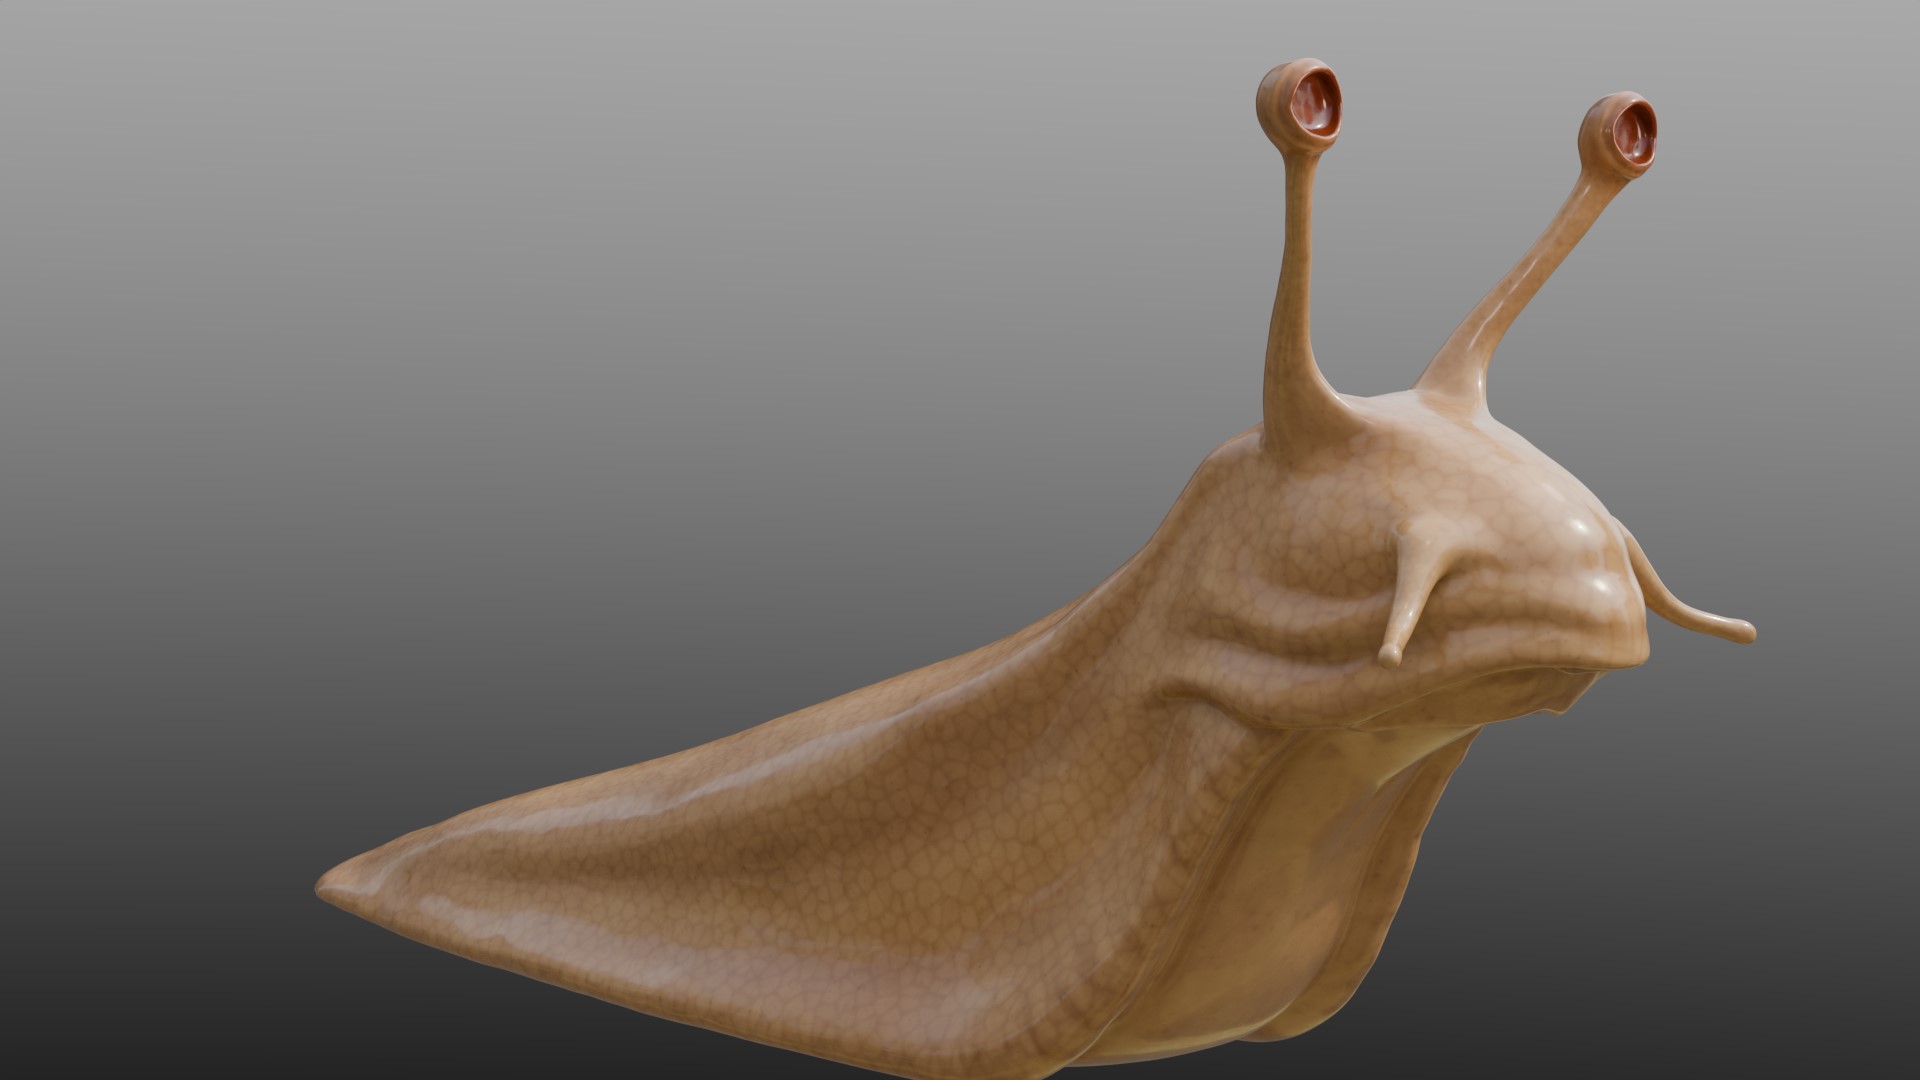
Luckily, the mentioned crackle-texture is just up to solve that task! I plugged it into the displacement and set the displacement type to “true” so that it changed the actual geometry.
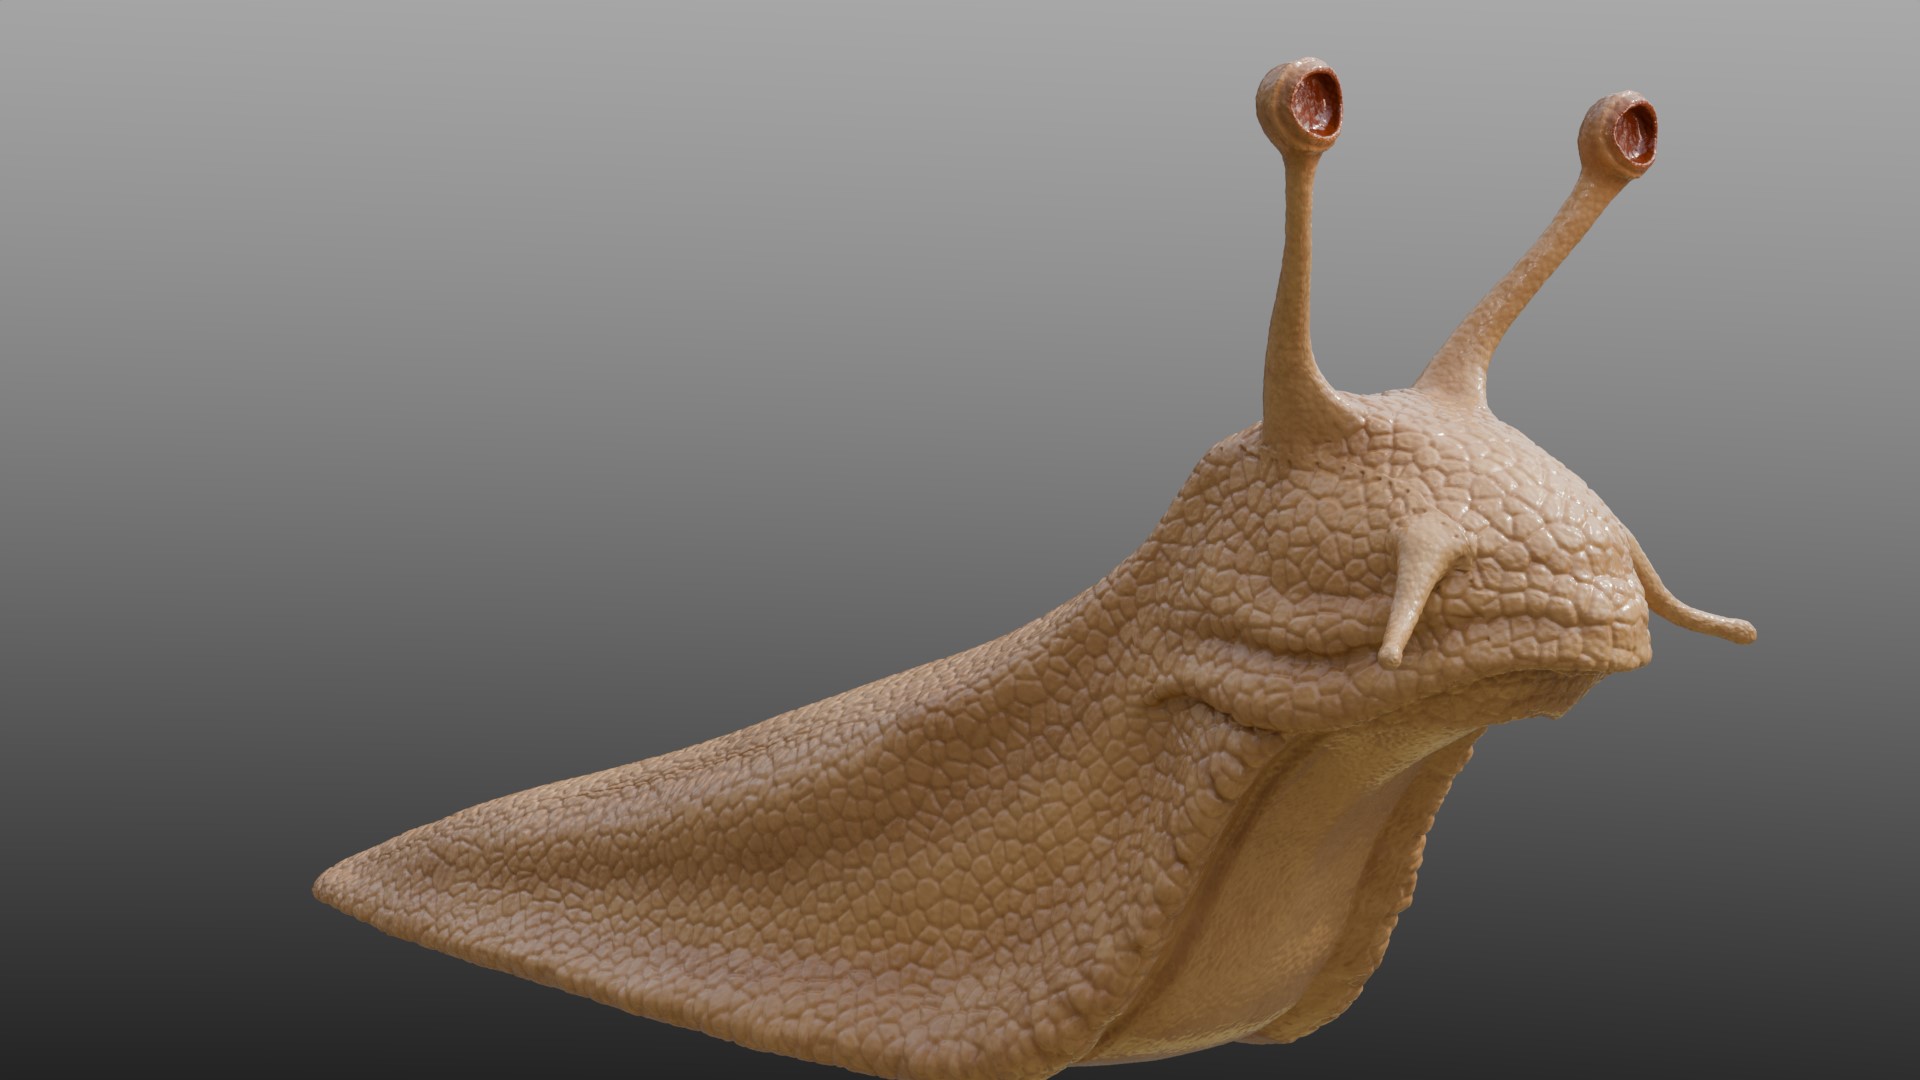
All that was left was the magical touch of Subsurface Scattering which the whole snail the much needed SSS, mixed in a cool translucent shader for the antennas, and voilá!
Last but not least, the eye. Here, I found and used some amazing procedural shaders shared on the web. I wish I could make a shout out to the artist, but I can’t seem to find now where I found this amazing asset.
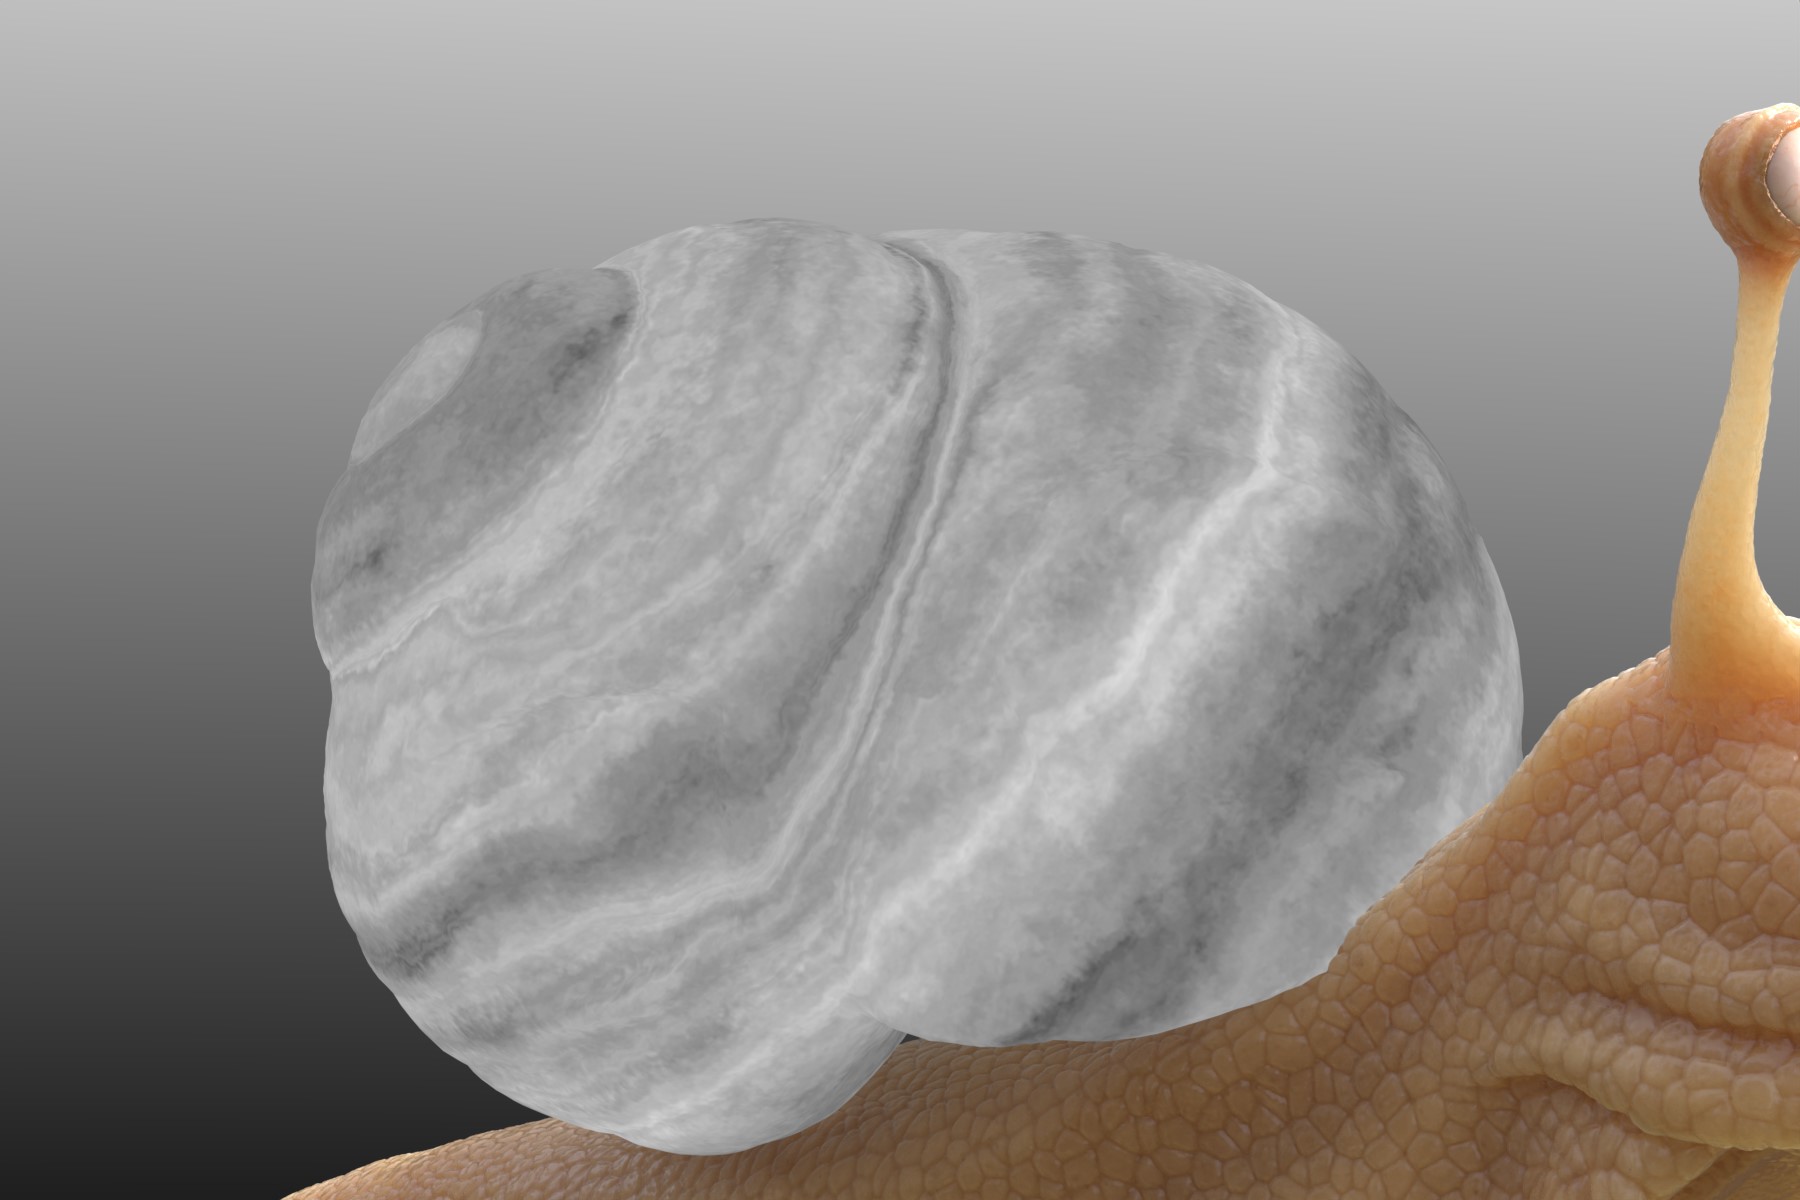
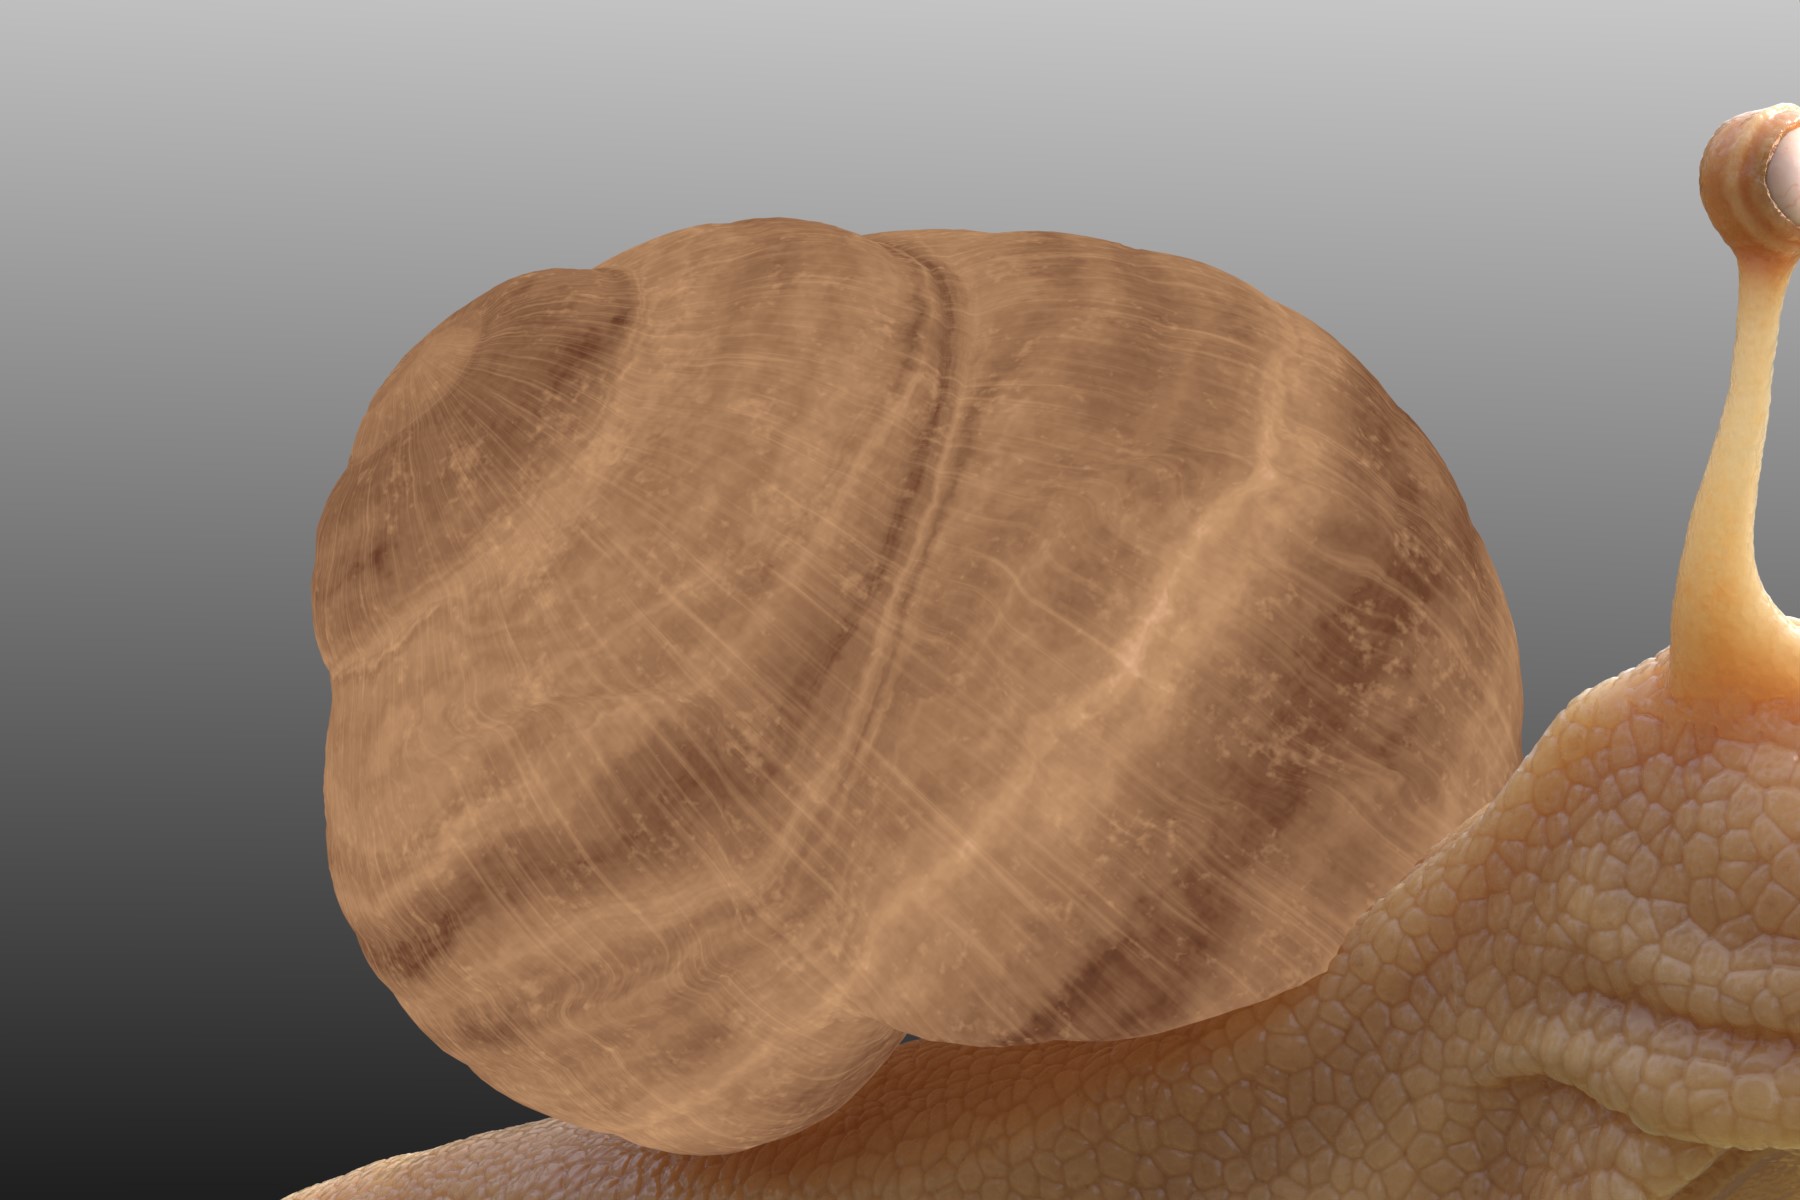
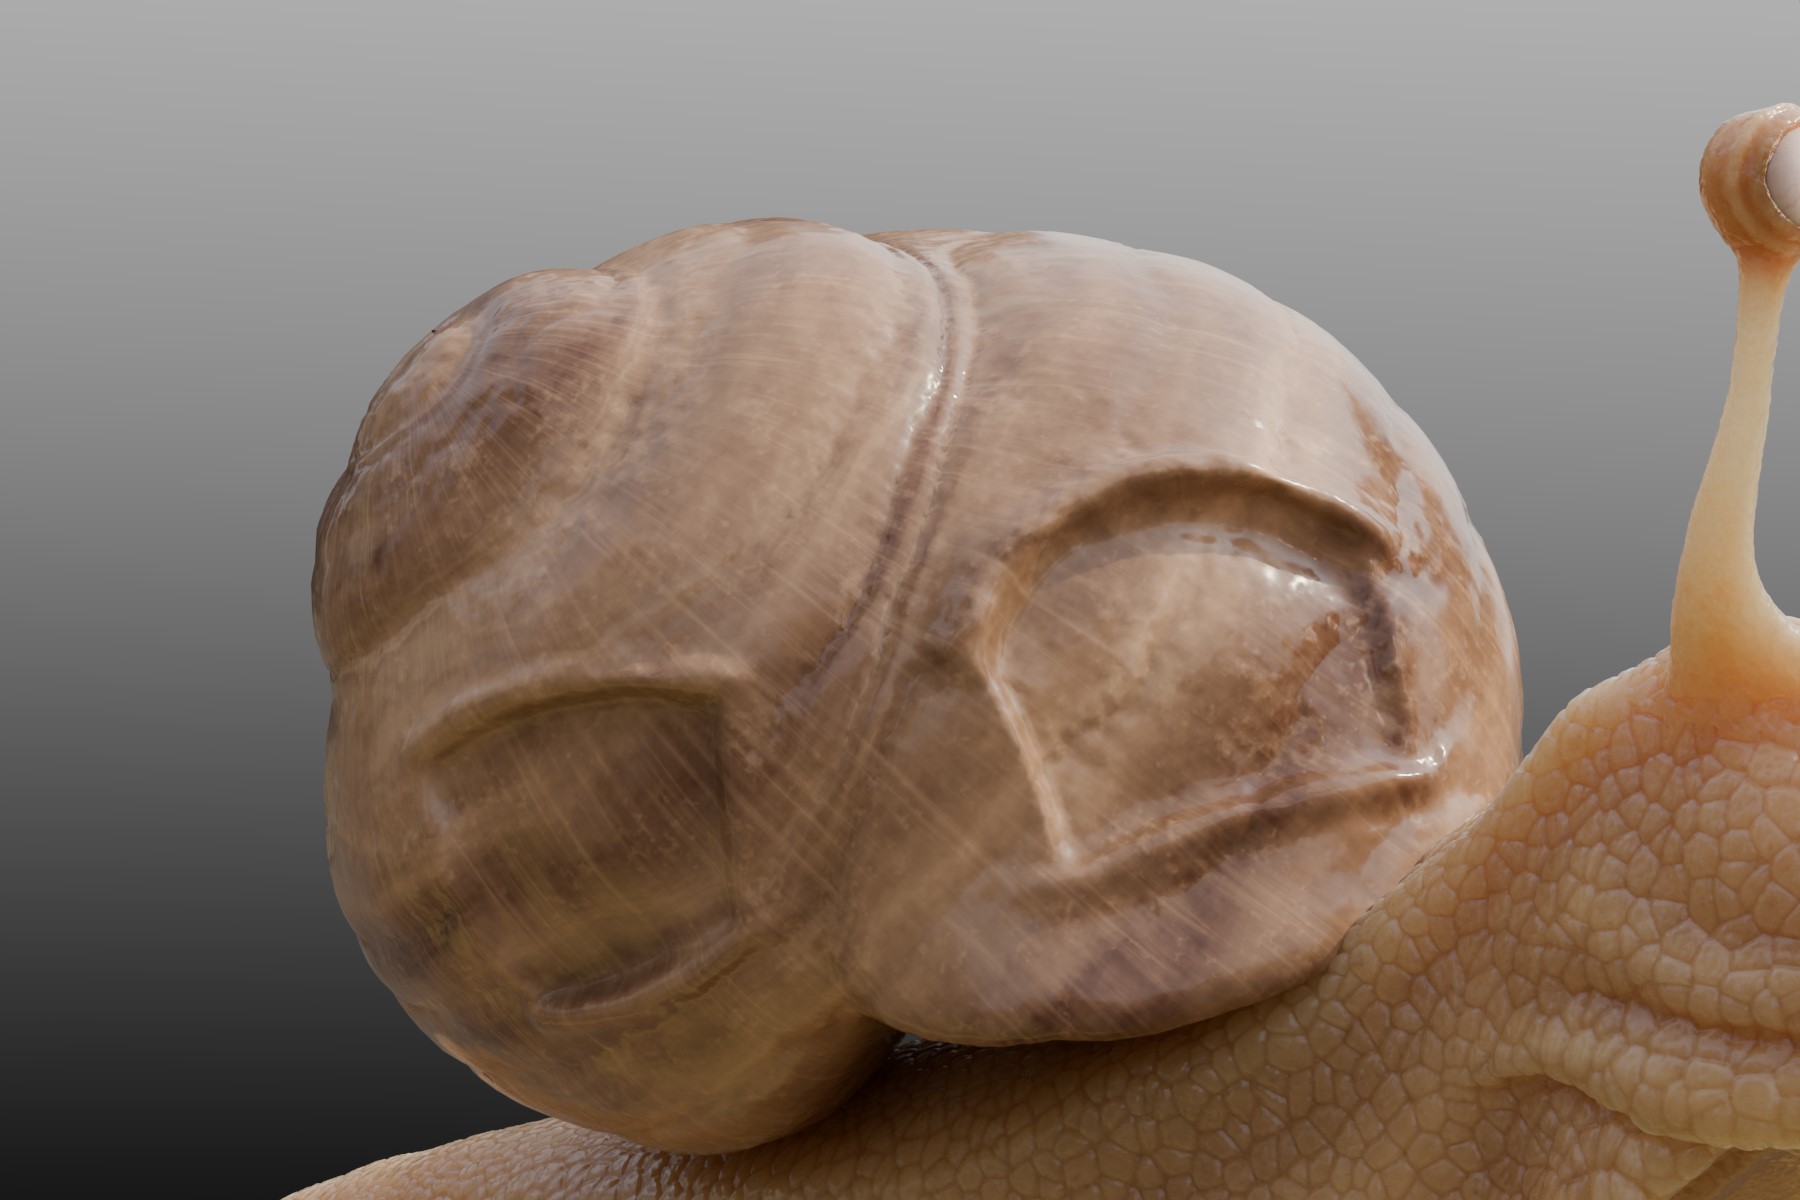
What about the shell then? Well, to start with, I sculpted it (and also forgot to retopologize it, but being static and procedurally textured, it doesn’t really matter either, haha). I found a nice, fairytale-esque image on the web of a sort of shell-house and used it as a reference.
When testing around with different looks of the texture, I ultimately found that what I really was going for wasn’t a snail-shell at all, but something more akin to a seashell:
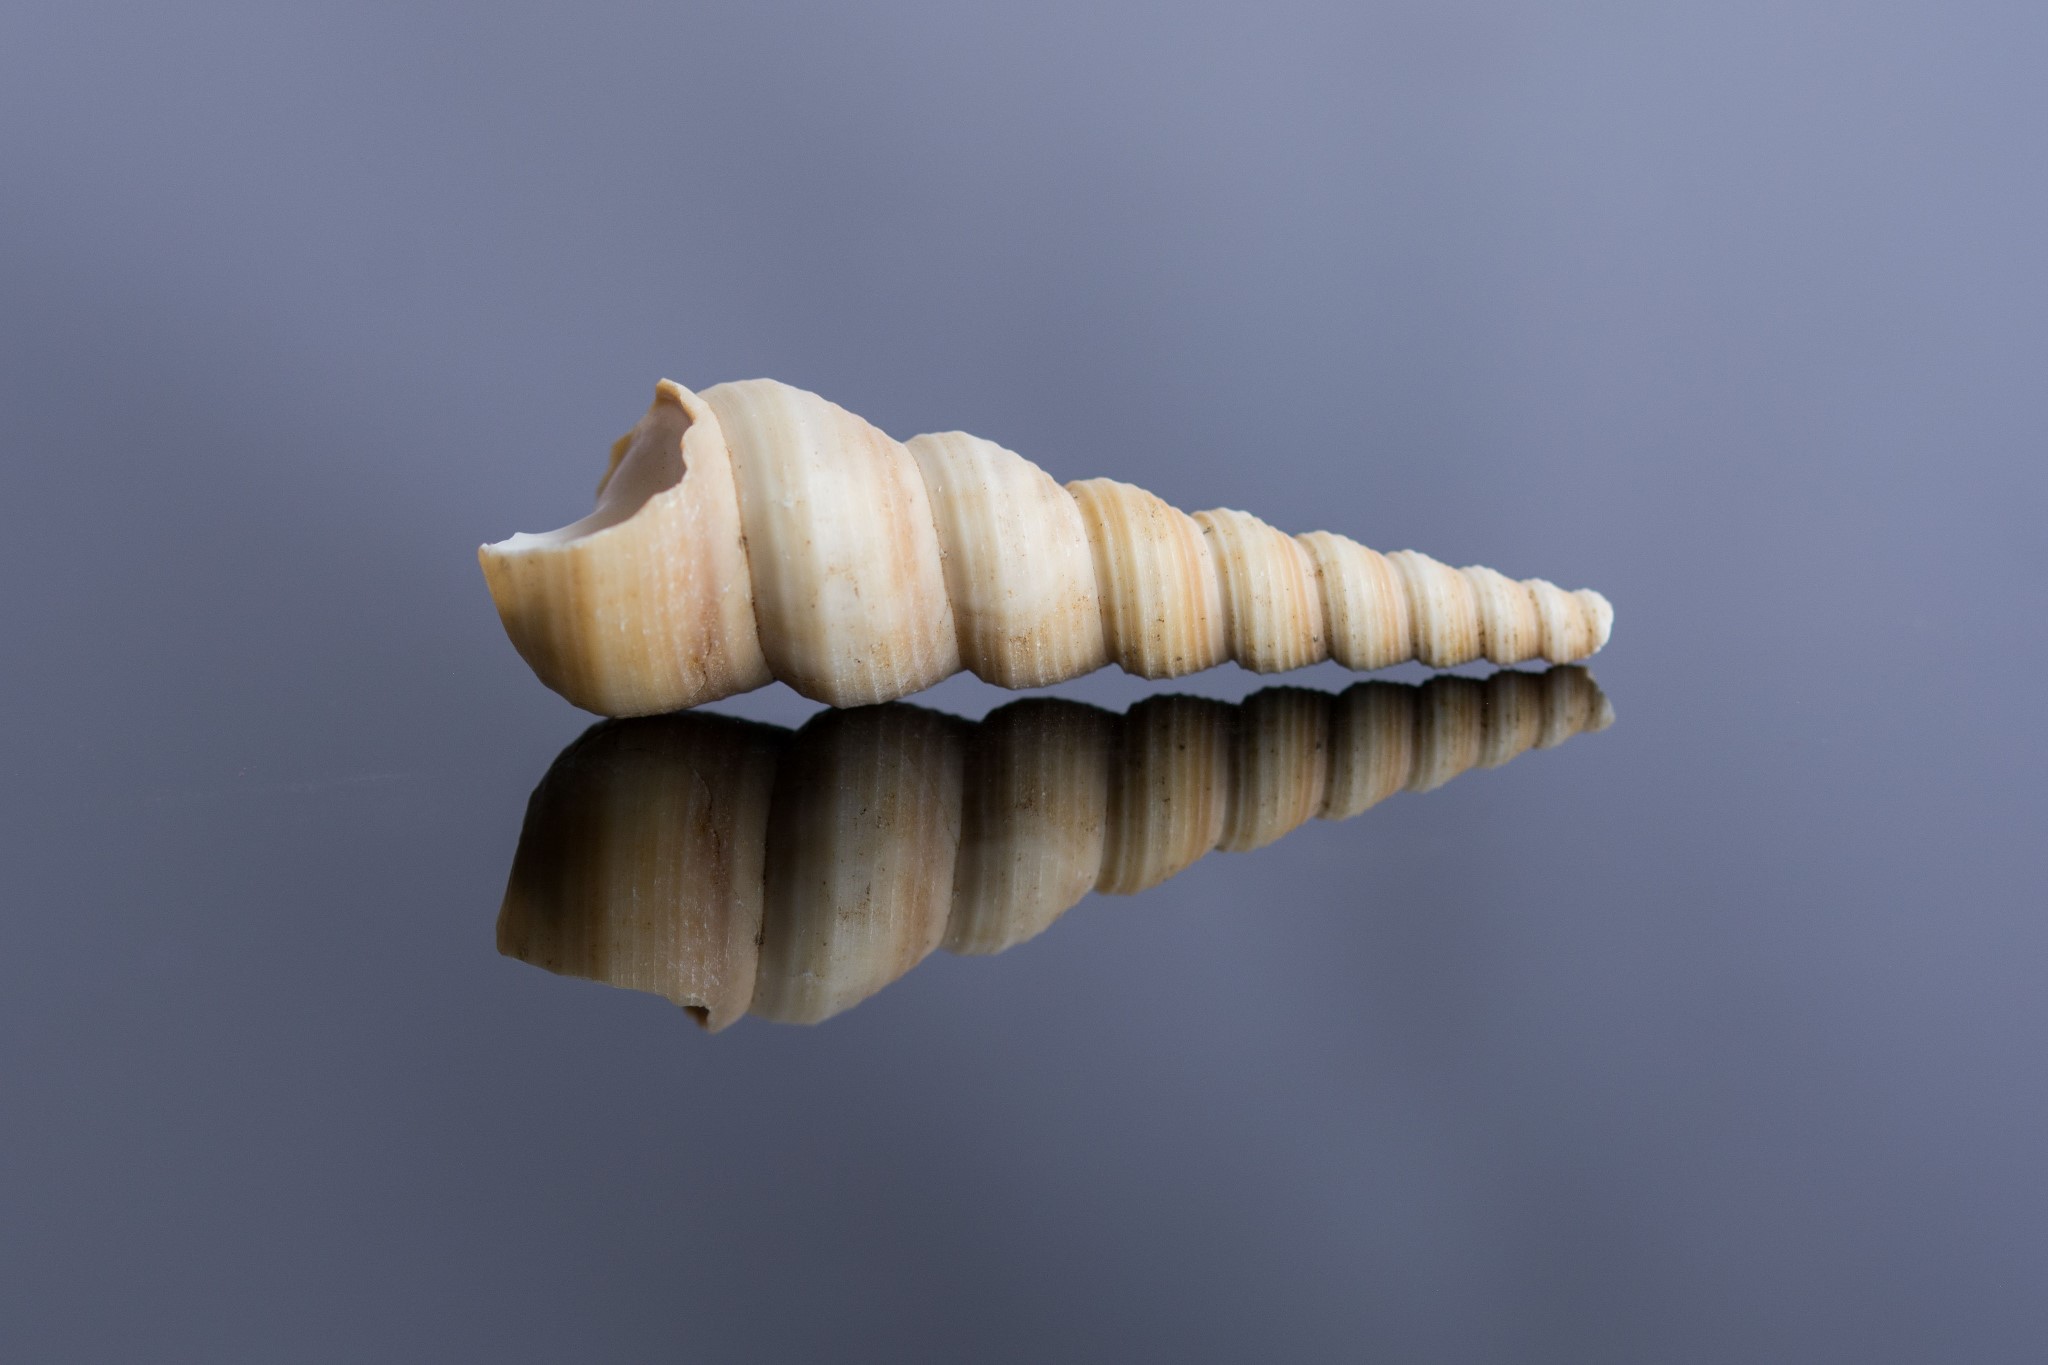
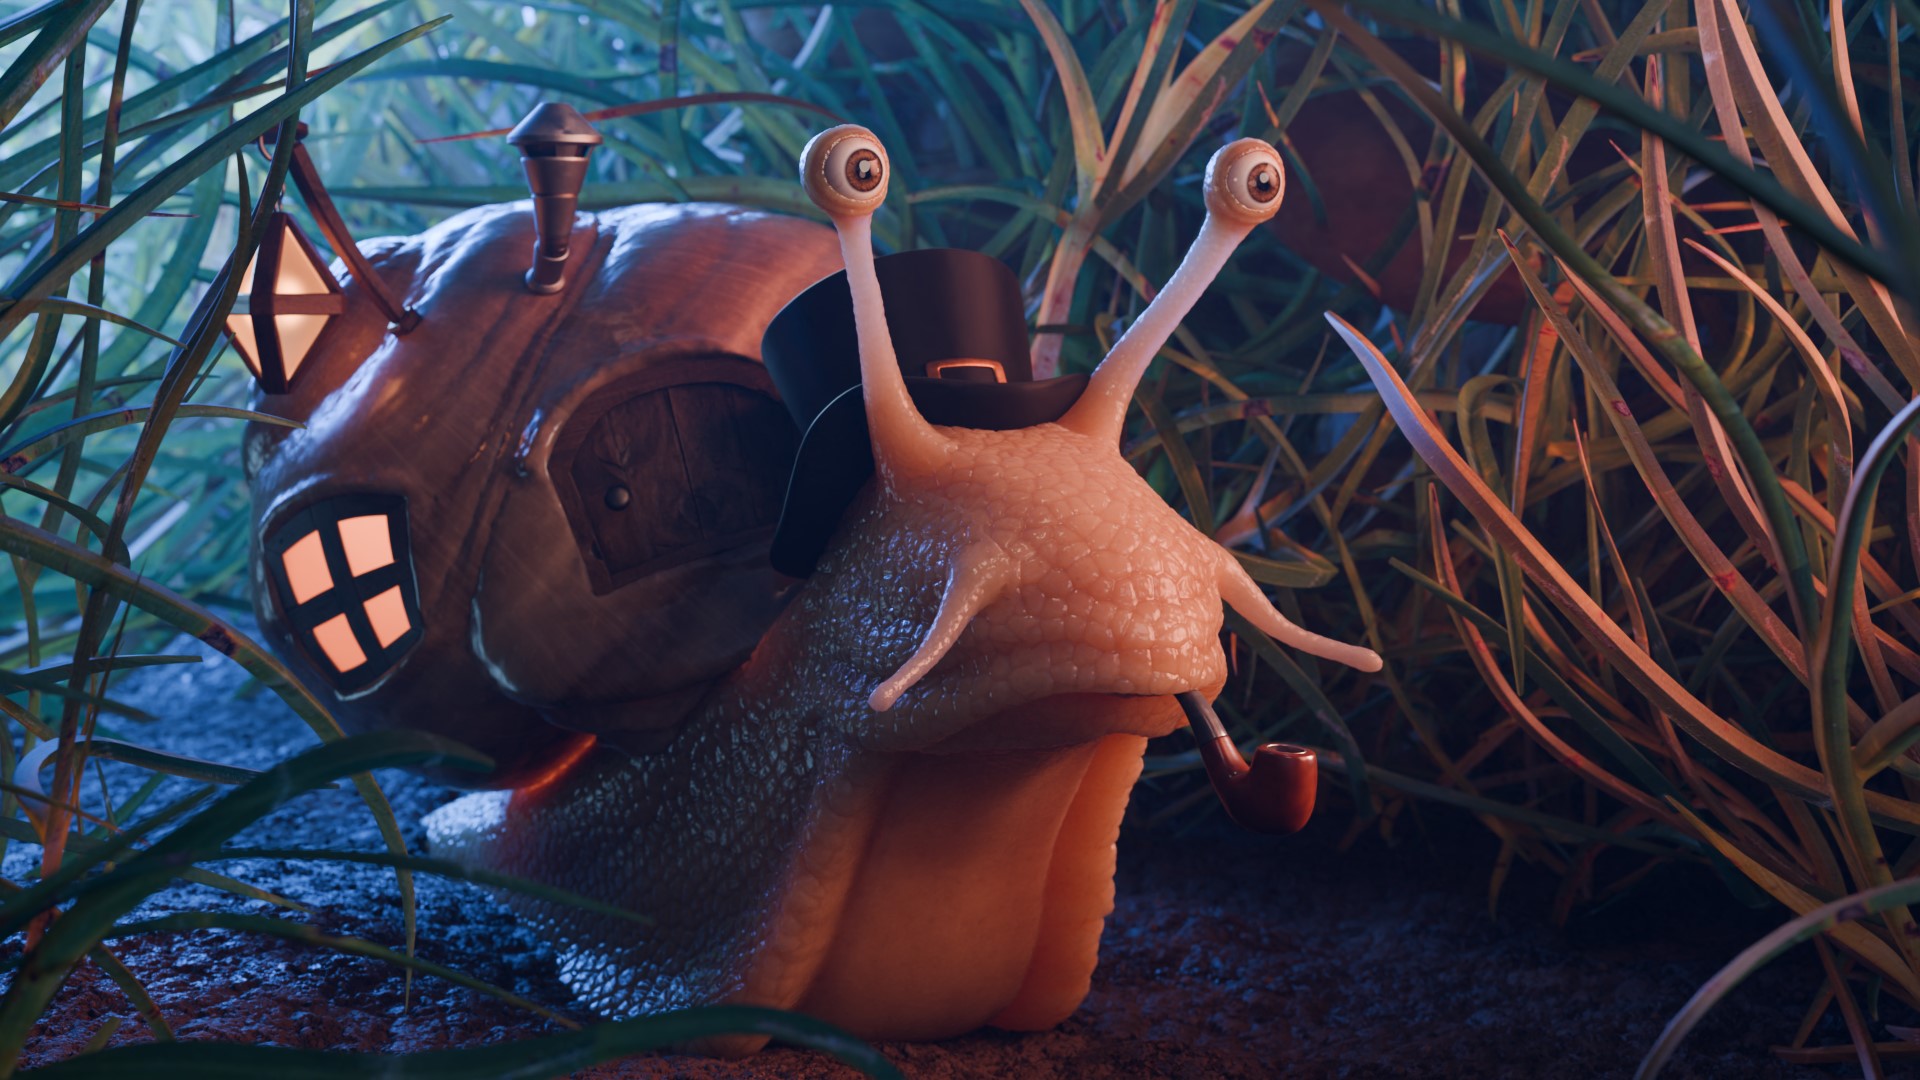
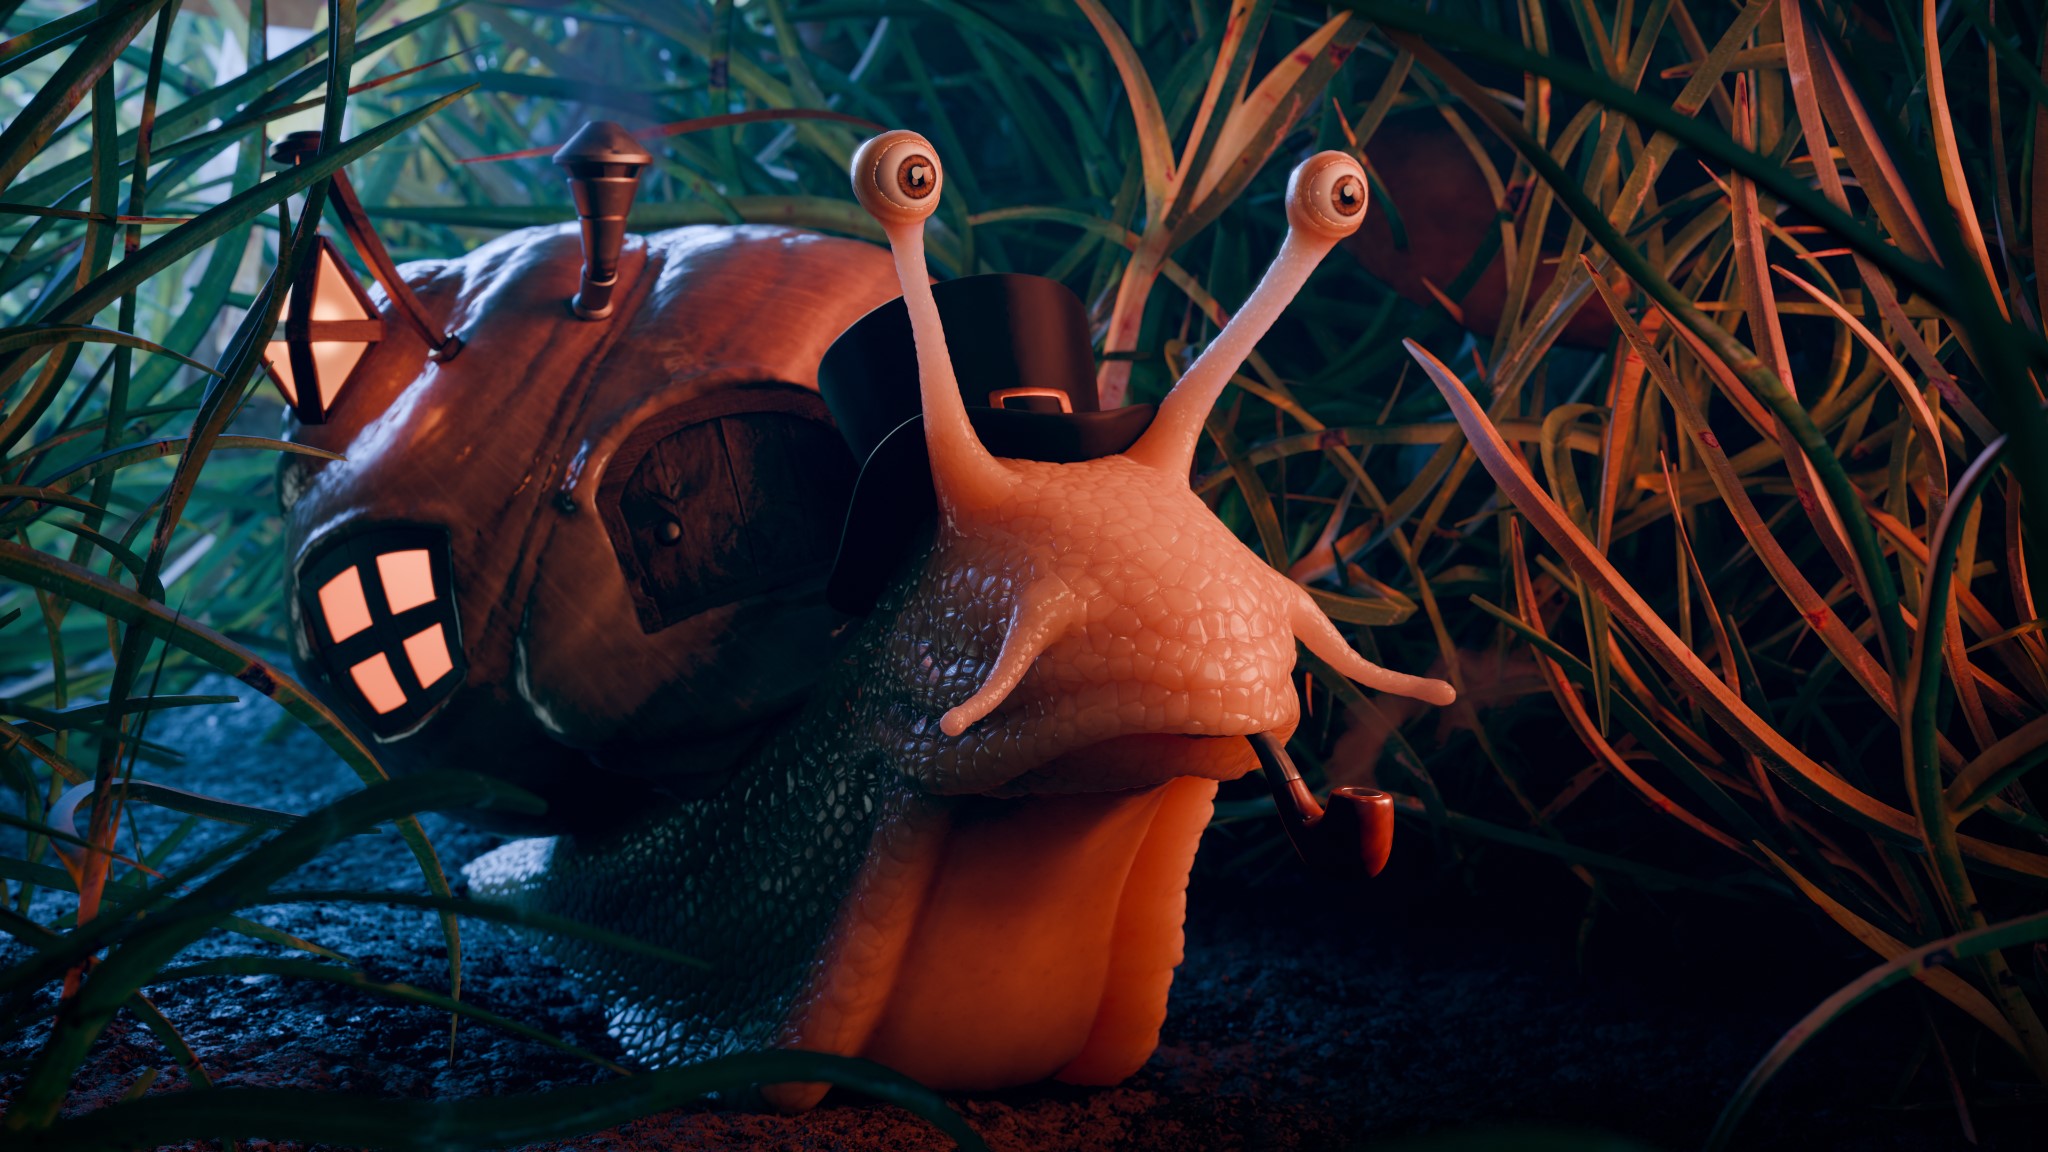
Just look at that beauty! Perfectly elegant and sort of magical to fit with the setting. I figure that, in the world of anthropomorphic snails, these little fellows regard shells as we do with clothes, and these kinds of shells are considered classy and stylish. Dr. Sniggles doesn’t settle for anything less, oh no!
What I basically were up to task with seemed to be layers of slightly distorted spirals, variances in colour, displacement of geometry, and a fine grain on top of it all. The spirals seemed like a good start, and to kick off the node chain, I had to make some sort of mapping to make the spirals follow the shape of the shell. That was solved by positioning an empty inside the middle of the shell and aligning its Z-axis to the flow of the spirals of the mesh. Accessed via the Texture Coordinate node, it gave me just what I needed.
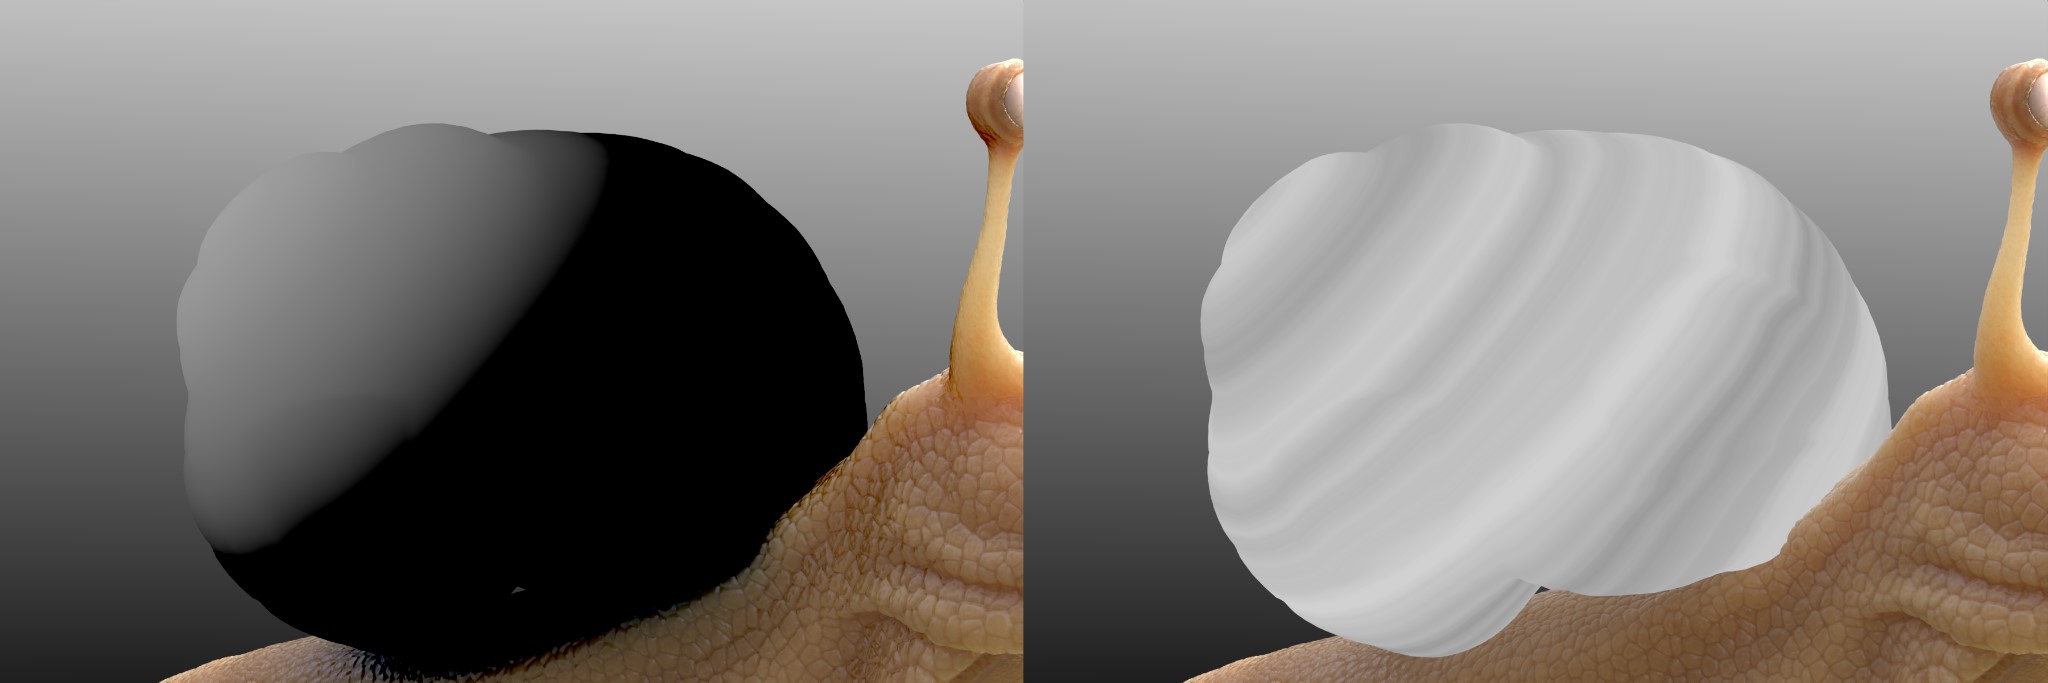
The left picture shows the Z-coordinates gained from the empty. The right one shows the coordinate plugged into a noise texture, giving some nice waves circling around the shell. But circling around the shell wasn’t enough; they are supposed to make spirals, and on top of that, follow the shape I had already sculpted!
After some thinking with no great ideas, I did the last thing I wanted to do:
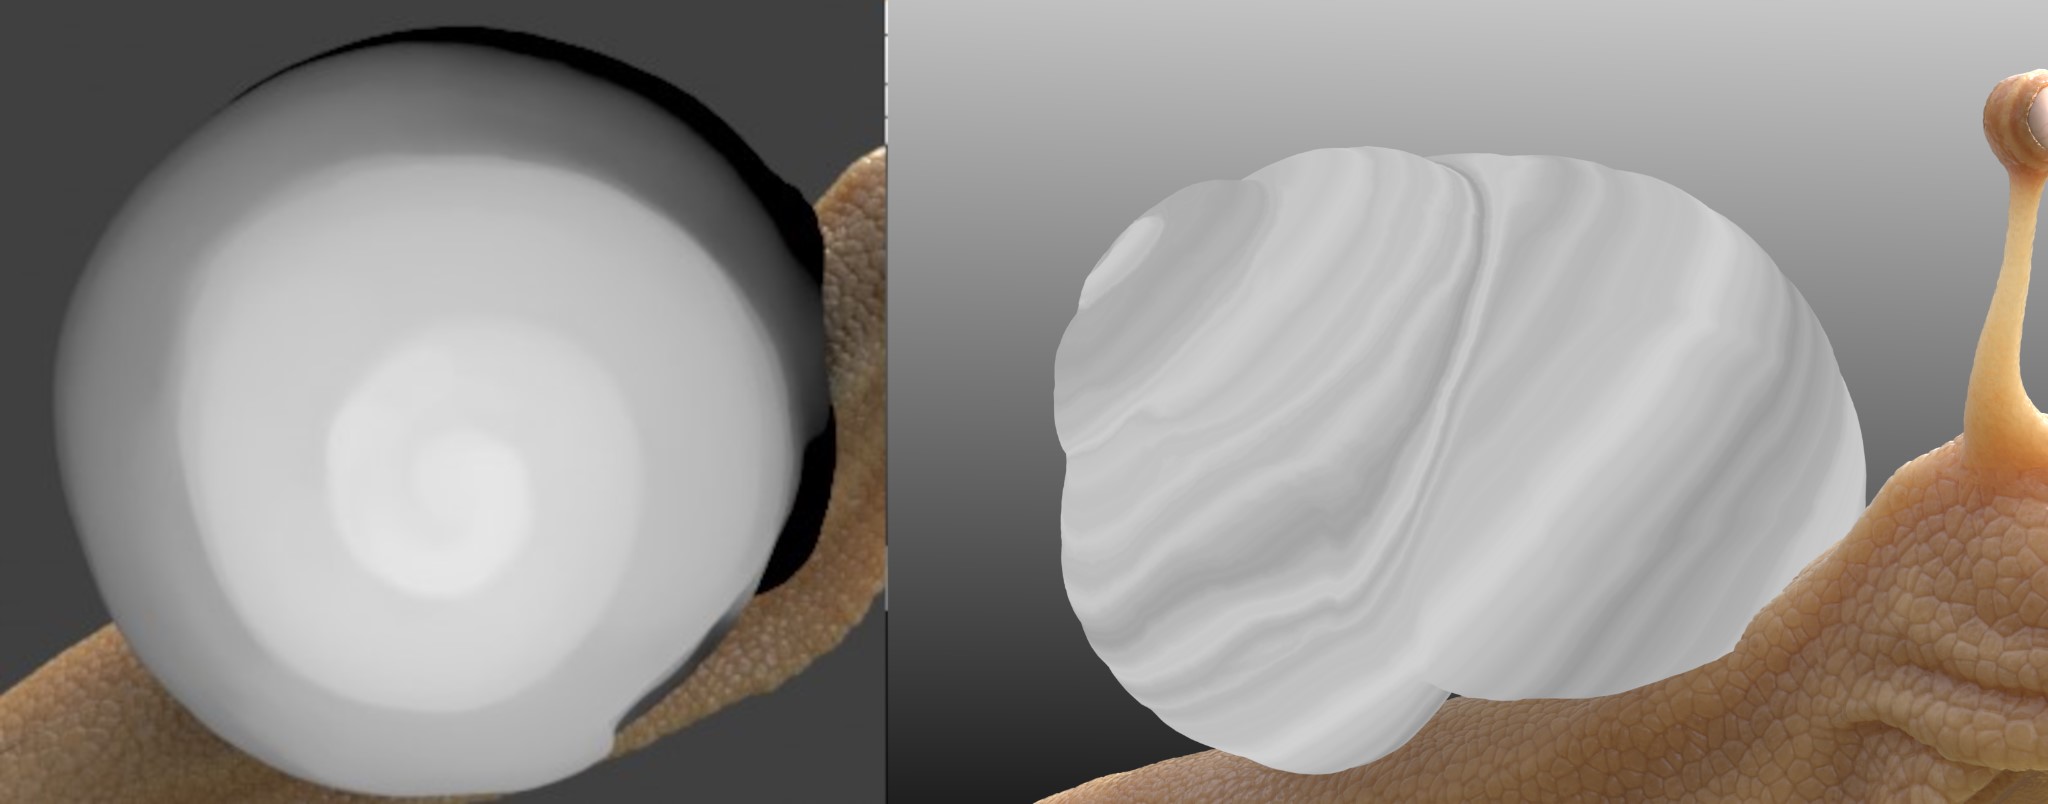
I painted the flow the spirals were meant to follow (left). This, added to the Z-coordinates from the empty, to my surprise, actually kinda worked (right)! Not perfect but definitely workable. Topping that with some noise-distortion to the coordinates, it gave this:
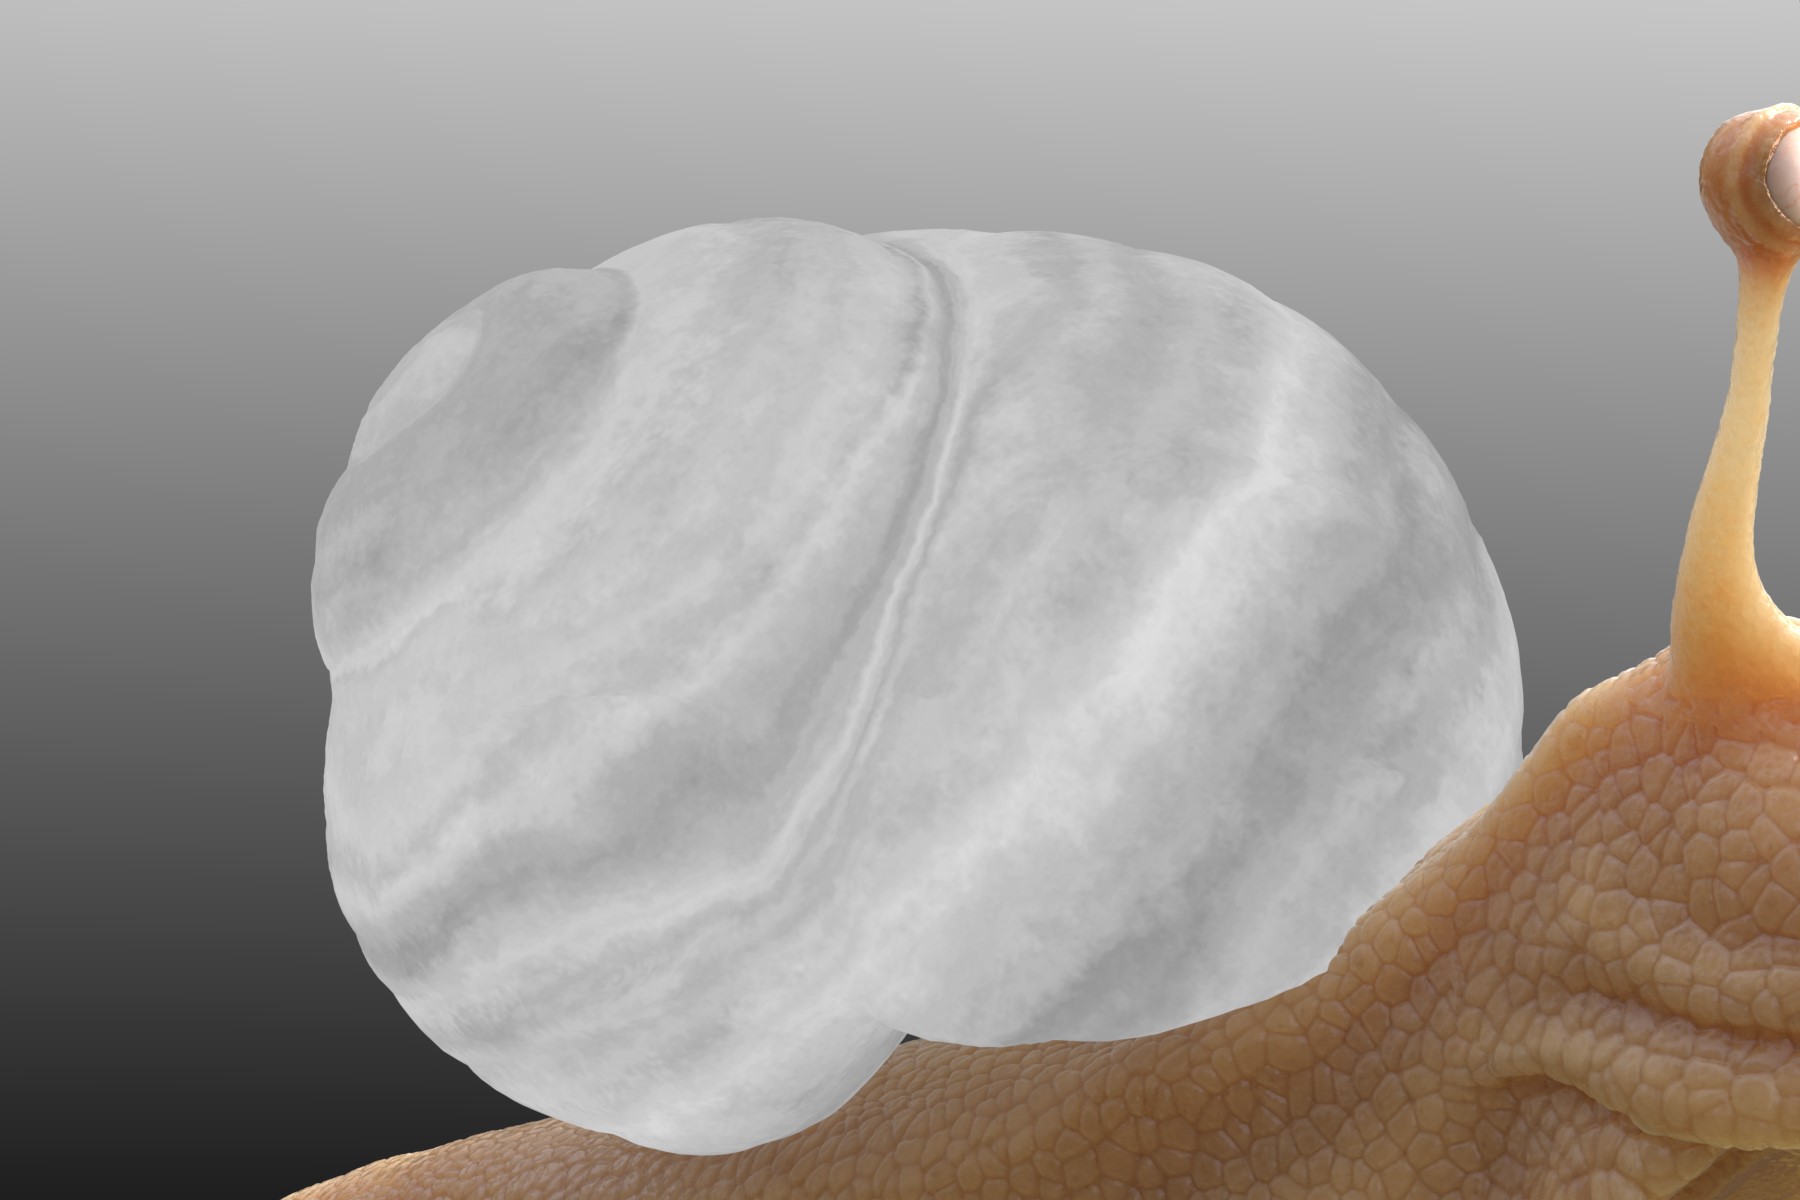
Now, I did a separate set of spirals using a similar setup for the coordinates. But this time, I didn’t make them via a noise texture but a wave texture instead. This, too, was distorted:
Mixing the two sets of spirals together:
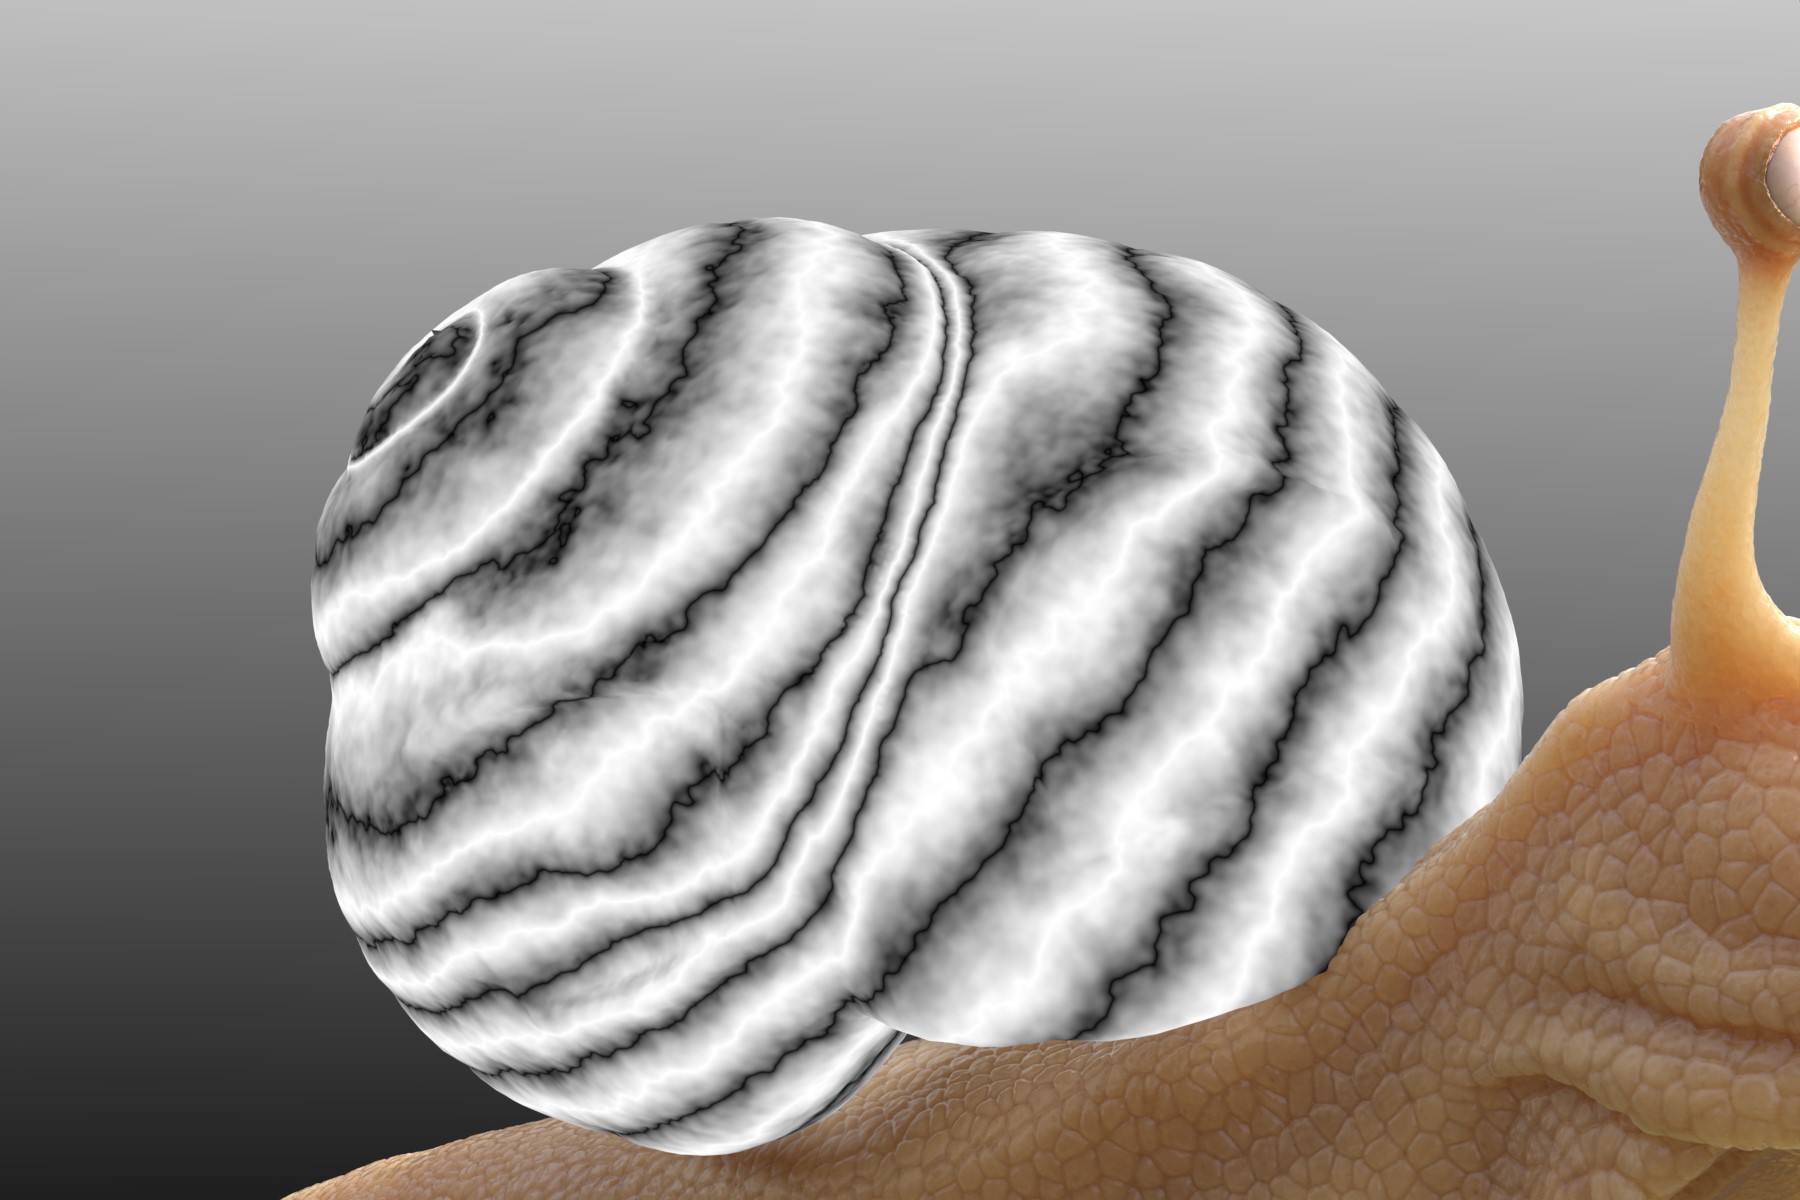
All left before colouring are some fine grain and stripes:

Aaaaaand the colouring done with the old and trusty Colourramp:
Adjusting some of the noise patterns, they served well for the roughness and displacement data of the material.
Building upon Dr. Sniggles as a snobby and classy character, I decided to give him a pipe, top-hat, and a monocle (a friend called him a snail version of the monopoly guy lol). The monocle obscured the eye though and harmed the composition of the overall render, so I removed it. As for the shell, I wanted it to feel elegant, vintage, and cozy; a country-side sort-of door, window, and lantern should suffice to that. And the chimney just felt like the cherry on the cake:
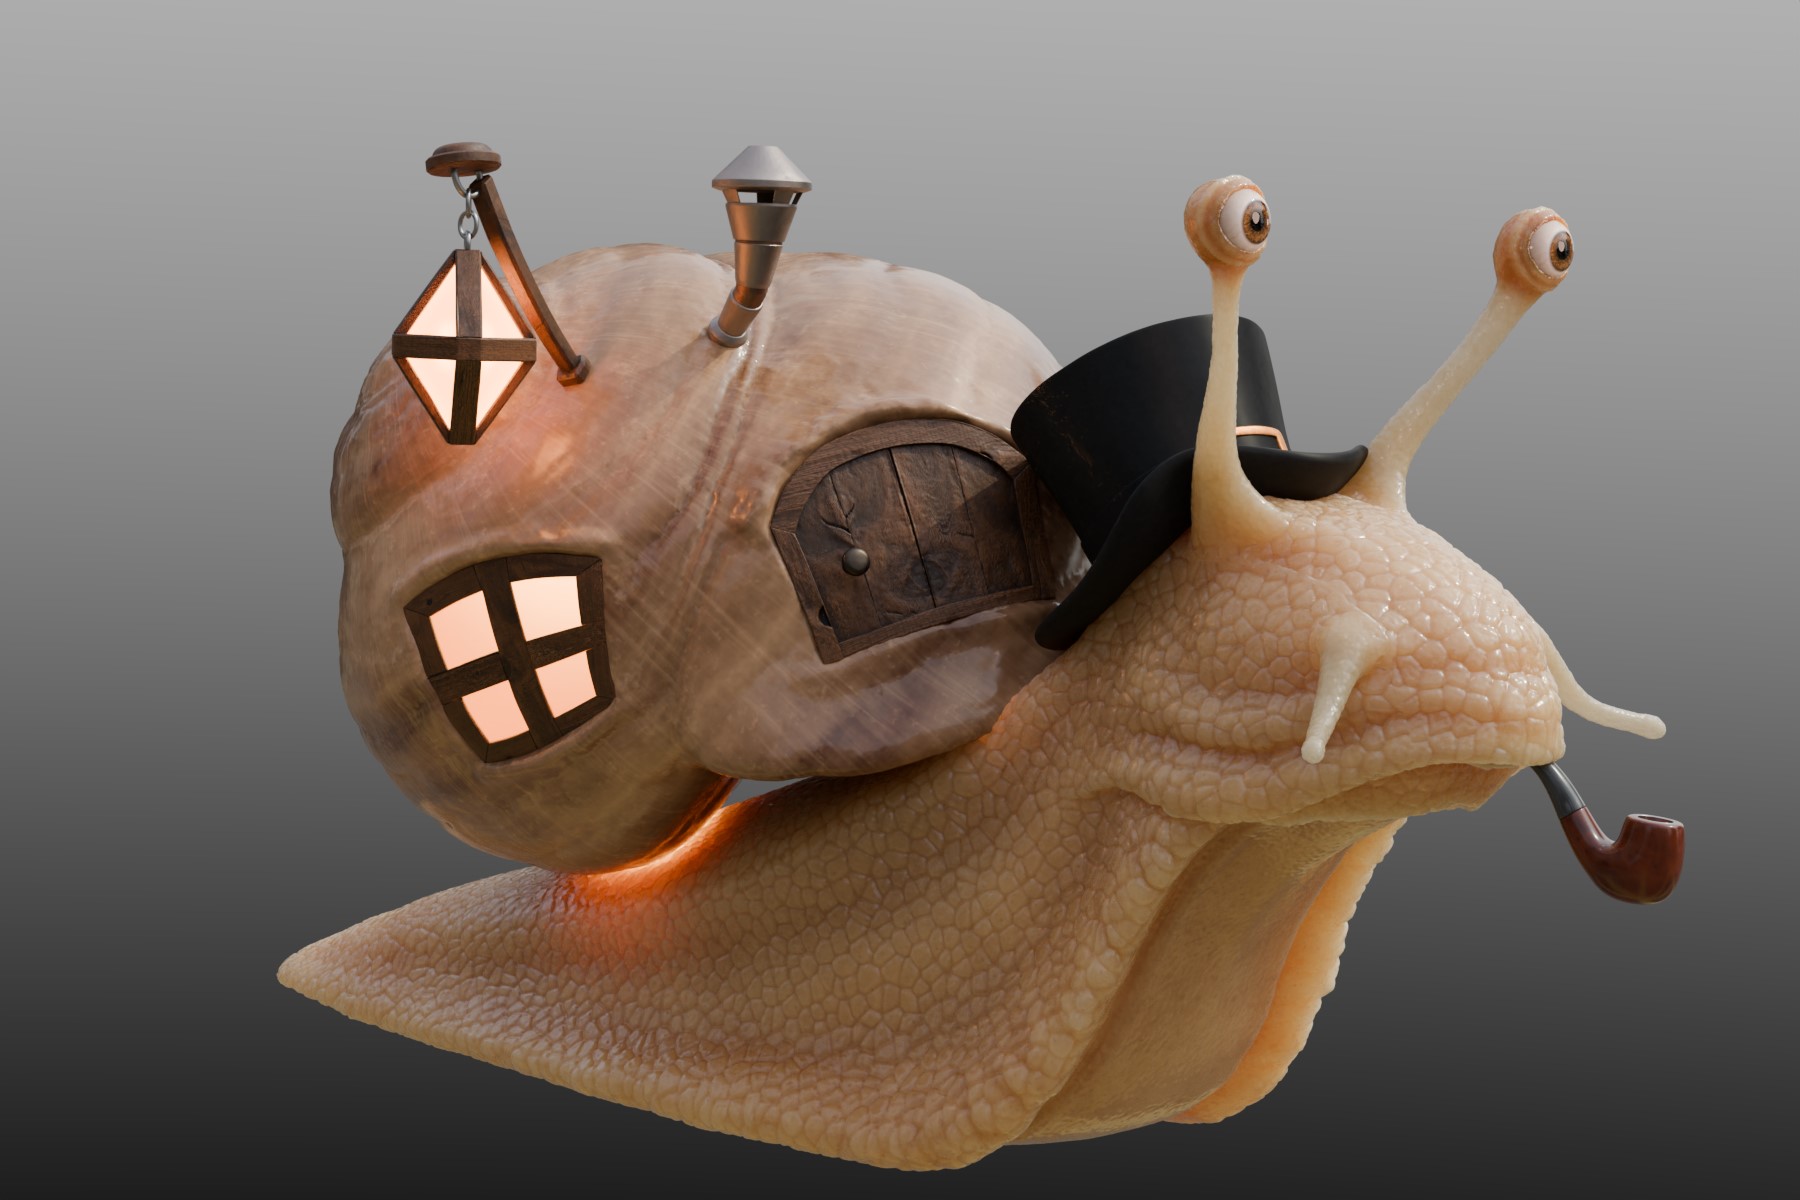
As you probably notice, there are some weird light spills beneath the shell. This seems due to the SSS of the skin being too close (though not intersecting) with the shell material, making the light inside affect the SSS of the skin. Confused? I sure was, and still am. I never really solved the issue but instead rendered the whole thing out twice: one with the light on and one with the light off, later masking the lit window over the other render.
Environment
My initial idea was that Dr. Sniggles would be rendered in a natural, simple daylight with all the lush greenery around. Still, I tried some other lighting scenarios and soon enough, I changed my mind to instead go for a magical night lighting. Cold and blue from behind, while warm and red from the front.
Having spent so much time on procedural shaders already, I relaxed at the thought of just using a simple PBR material for the ground. Well, that was until I realized none of the materials I could find had near the resolution to work at that close distance, and neither did they really look right. Nothing to do but go with the proceduralism once more! Luckily, it ended up as a much simpler setup this time, honestly not near enough to deserve how good the soil ended up looking. Scattering around some grass, rocks, and mushrooms (all premade assets) made the scenery, and I also added some fog and smoke to the pipe and chimney to make it all feel more alive:
Looks kinda dull though? Let’s add a dozen of custom lights, giving rim light to the hat, pipe, the shell, and chimney, some reflection to the skin and glint in the eyes! Blender 4.1’s Light linking came to great usage here as it prevented unwanted objects from being lit by the custom lights, including the fog, which previously has been prone to make ugly halos around lights that should be subtle and close to invisible.
This is honestly one of my favorite parts of lighting the scene. The difference all these small light sources make never ceases to delight me.
Time for some CC and welcome Dr. Sniggles into the world!
RENDER : Dr. Sniggles
Thank you for reading this article. If you have any questions, please feel free to reach out to me through any of my social media accounts. Have a great day!
About the Artist
Mátyás Belina is a 3D artist from Sweden. He has just recently finished his studies as a 3D artist at Xenter. His previous article on BlenderNation was A Quiet Place.


Impressive texturing on the snail!