INTRODUCTION
Hi, I'm Nick Sinclair and I’m a 3D artist from Winnipeg, a mysterious and obscure city in Canada. I started using Blender when I got hired to work at Tangent animation, the first studio to make feature animations with a Blender based pipeline including Next Gen and Maya & the Three. This began what I affectionately refer to as my Blender fanaticism.
INSPIRATION
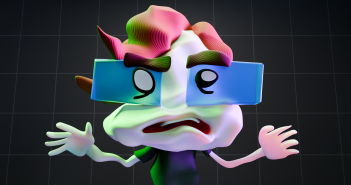
It all started with a friend commissioning me for a modeling/3D printing project of Jason Funderburker, a character from the cult classic Over The Garden Wall.
After finishing that project, I thought it would be fun to see him dance so I grabbed the thriller mocap from Mixamo and started learning how to transfer animation from one rig to another.
The pumpkin man dancing to spooky scary skeletons was my greatest inspiration and the set is heavily influenced by the backdrop he used. “He walked so I could run.”
PROCESS
This project used: Blender 3.6 , Houdini, Substance Painter, and Marvelous Designer.
Animation transfer
I used Auto-Rig Pro to transfer animation from the Mixamo rig to my rig and it was a pretty straight-forward experience because it detected most of the correct bones to transfer to and from, and only a handful of bones needed to be manually set.
Cloth Sim
In production, people usually limit the simulations to the targeted areas of the cloth but when I saw the simulations from Marvelous Designer, I was very pleased to see so much movement on such a complicated set of clothes and the set-up was relatively easy for someone with limited experience with this tool. I think in the future I would like to make it work in Blender to avoid going back and forth between softwares.
Layout
As soon as I had a working cloth sim, I did a first pass laying out the graveyard set. I did some quick and dirty modeling for the grave stones, the moon was only a disk with a texture, the tree was a bunch of extruded edges with a skin modifier on it, and the ground was a procedural noise pumped into a displacement modifier with a vertex mask to flatten out Jason's path and avoid his feet penetrating through any high points in the ground.
Originally, it was a single camera that moved along with Jason, but when I began editing the early playblasts to music, I felt that the energy of the sequence was a bit dull so I started looking at the thriller music video for inspiration and added several other camera angles to cut between.
At this stage, I started grooming his hair; no special tricks here, just using his geo hair as my reference point and breaking down every clump into its own hair system. His hair sim went pretty well since I knew I wanted it to be very stiff, mostly bouncing a bit to stay on model since his hair is so iconic to his character.
I used Grass Essentials for the foliage which consisted mostly of sparse grass, dead leaves, and tall background grass. It came with an easy set-up for simulating wind that I used only on the tall grass in the background.
Once I saw the low-quality rendered animation, I was confident that all render issues and bugs were solved so I knew I could move forward with sinking in more time on the background details like punching up the gravestones, adding vines growing over some of them, and a jack o’lantern.
Face and Skull
I made three versions of Jason's skull. One was extremely simple for doing simulations fast, the other was a smoother and simpler version of the skull for shrink-wrapping the skin to it because I wanted his face to become sunken-in as the animation progressed, and finally the high-detailed skull you see in the render.
The latter two skulls are all driven from the simulation of the simple skull using a constraint which also drove the jaw bone so his skin would match up with the jaw.
Final Touches
I remade the gravestones with much more detail like engraved stupid jokes, and used crack alphas to stamp on a bunch of damage around the edges.
I took a lot of inspiration from extremely old gravestones that have a lot of weathering on them.
This jack o’lantern was a bit overkill for a distant background prop but I was really in the halloween spirit at the time. I used a point light with a noise modifier on the light intensity as well as the location to help simulate the flickering and movement of a flame.
Houdini (special guest Brando)
Hey, I’m Brandon, a 3D Generalist from Vancouver, and I’ve worked on a bunch of television and film projects both live-action and animated. Nick and I met at college in Winnipeg a million years ago. He’s a mega talent and I’m stoked he asked me to help out on this project. I’m a total beginner when it comes to Blender but for the effects I worked on, it was an easy job for Houdini. Using Blender (as in I don’t know how) but that’s alright.
Face Deterioration
The face deterioration was done in Houdini using the very versatile Vellum framework. It’s a multi-physics solver capable of simulating many types of materials like cloth, hair, soft-bodies, and liquid, it’s also GPU accelerated! Perfect for this kind of effect.
Nick delivered Alembic animation caches of Jason for me to work with. It was helpful that he provided a handful of frames of pre-roll which started with Jason in his bind pose. It’s much easier to do the bulk of this effect on static geometry in a neutral position. This effect is broken down into a few key stages.
Remesh/Fracture
Jason’s head was remeshed into a uniform triangle mesh and then separated into 2 sections, one that would be simulated as cloth and one that would simply follow the animation cache. The section that was destined to become cloth was fractured using a simple edge fracture. The two sections were then fused back together at the original seam, while the seams between cloth pieces remained separated.
Growth Solver
With a more dense and uniform mesh, I used a basic growth solver to create an animated point attribute that would then later be used to “activate” the cloth during the solve.
Animation transfer
With the main setups done, it was just a matter of transferring the animation to this new mesh. There are several ways to do this in Houdini, my preferred method is to use VEX and the very handy xyzdist() and primuv() functions.
Simulate
The newly animated sim mesh can now be fed into the simulation. Aside from configuring some basic cloth properties, a custom condition was added to check the value of the animated “activation” attribute defined earlier. This essentially acts as a switch to inform the cloth whether it should follow the animation or become active in the simulation.
Post-Process and cache
This is just a final cleanup step that happens after the simulation. Extruding thickness, new UVs, smoothing, and subdividing all happen here independent of the simulation. The final mesh was then written back out to Alembic and sent back to Nick.
Eye Sim
The eyeball sim was also done using Vellum but was quite a bit simpler than the face.
The eyeball was converted to a tetrahedral softbody and attached to the face using a single glue constraint. Since constraints in Houdini are not special and are simply polygon lines, I was able to easily convert the constraint into geometry for the optical nerve after the simulation.
Ground Fog
We talked about doing a bit of simulation for the fog to get some nice interaction with Jason and some key set pieces but eventually opted for a more simple solution due to time.
I created a simple Houdini setup where one can define the shape and movement of the fog while visualized as a color attribute on the ground geometry. Once the look is dialed-in, particles are scattered in areas of color and then displaced from the surface by any amount. These particles are then rasterized to a fog .vdb and cached out for rendering. I sent this setup over to Nick so he could generate the fog to his liking.
And that’s the end of my contribution. Bye!
Lighting and Rendering
The lighting was inspired by dark, atmospheric scenes from 80’s horror movies. My original plan was to render this on a render farm service. However, I then experimented with various services, and found the costs for CPU rendering was too high even after aggressive optimizations and GPU rendering causing new render bugs; I gave up on these services.
At this point, the render times were low enough that I could render it on my computer in time for my October deadline. It took one month of rendering 24/7. One trick was to separate the ground fog into its own render at much lower samplers with denoising to smooth it out.
RENDER: Over the Thriller Wall
Progression video:
Zombie Jason Turnable:
Thank you for reading. Feel free to ask any questions, and if you like our work, follow us on social media. Have a good day!
About the Artist
Nick Sinclair is a 3D artist with a fist full of sandwiches and strong opinions about Blender. His previous article on BlenderNation was Touring Bicycle.


