Behind the Scenes: The Northman
INTRODUCTION
Hello, my name is Anestis Eralidis. I’m a 3D artist from Athens, Greece. I started using Blender from a young age, focusing mostly on organic modeling.
In 2022, I graduated from film school and throughout my college years, I delved into the world of filmmaking as an editor, director, VFX, and 3D artist. Also, I worked in advertising for 3 years for a production company. There, I had to wear multiple hats and was responsible for every post-production related aspect of the company (video editing, 2D motion graphic design, vfx, etc.).
Over the past year, I’ve decided to shift my focus towards 3D production and concentrate on improving my portfolio.
INSPIRATION
So, in my effort to improve my knowledge in character design, I made the choice to revisit the fundamentals by studying human anatomy. I wanted, however, to make a piece that I could use on my portfolio and not just a human ecorche. So I knew I wanted to create a human figure with an emphasis on human anatomy and proportions.
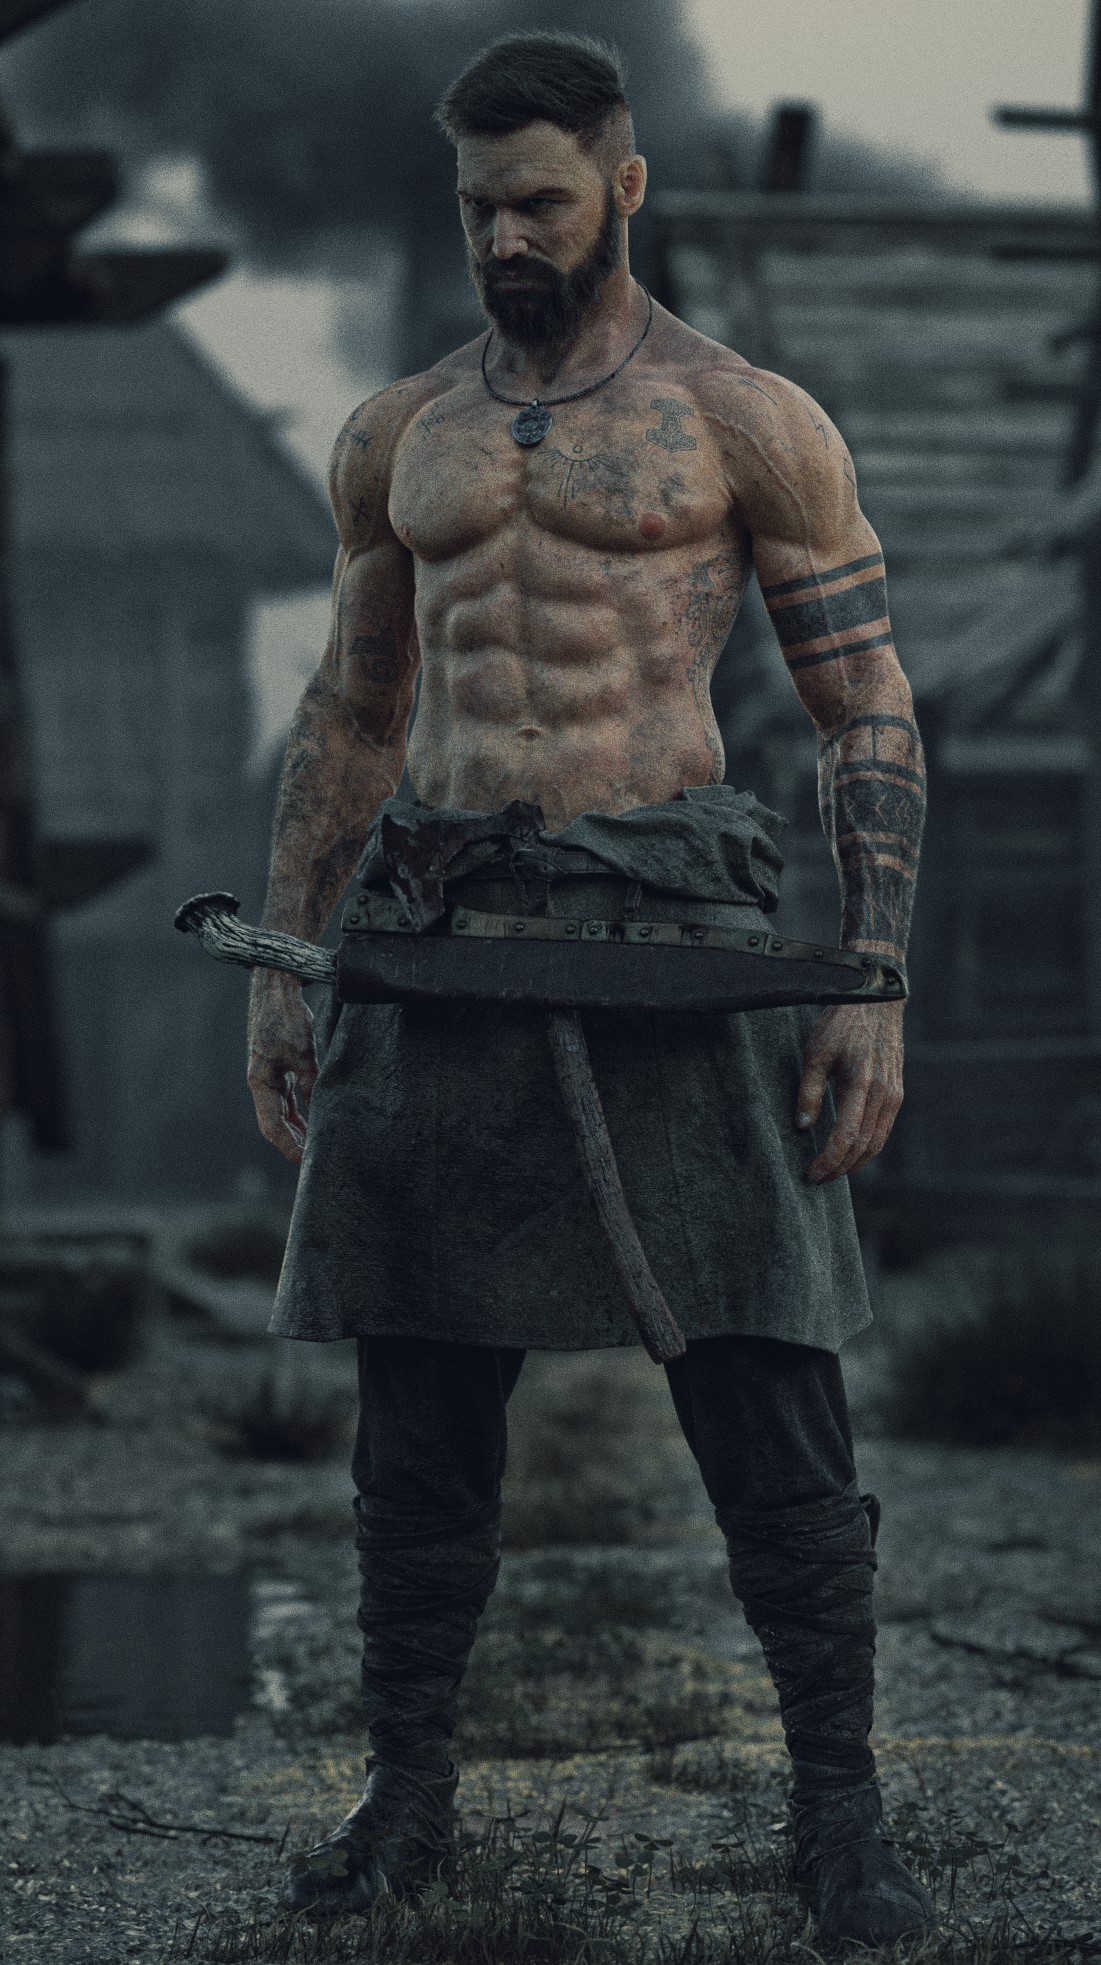
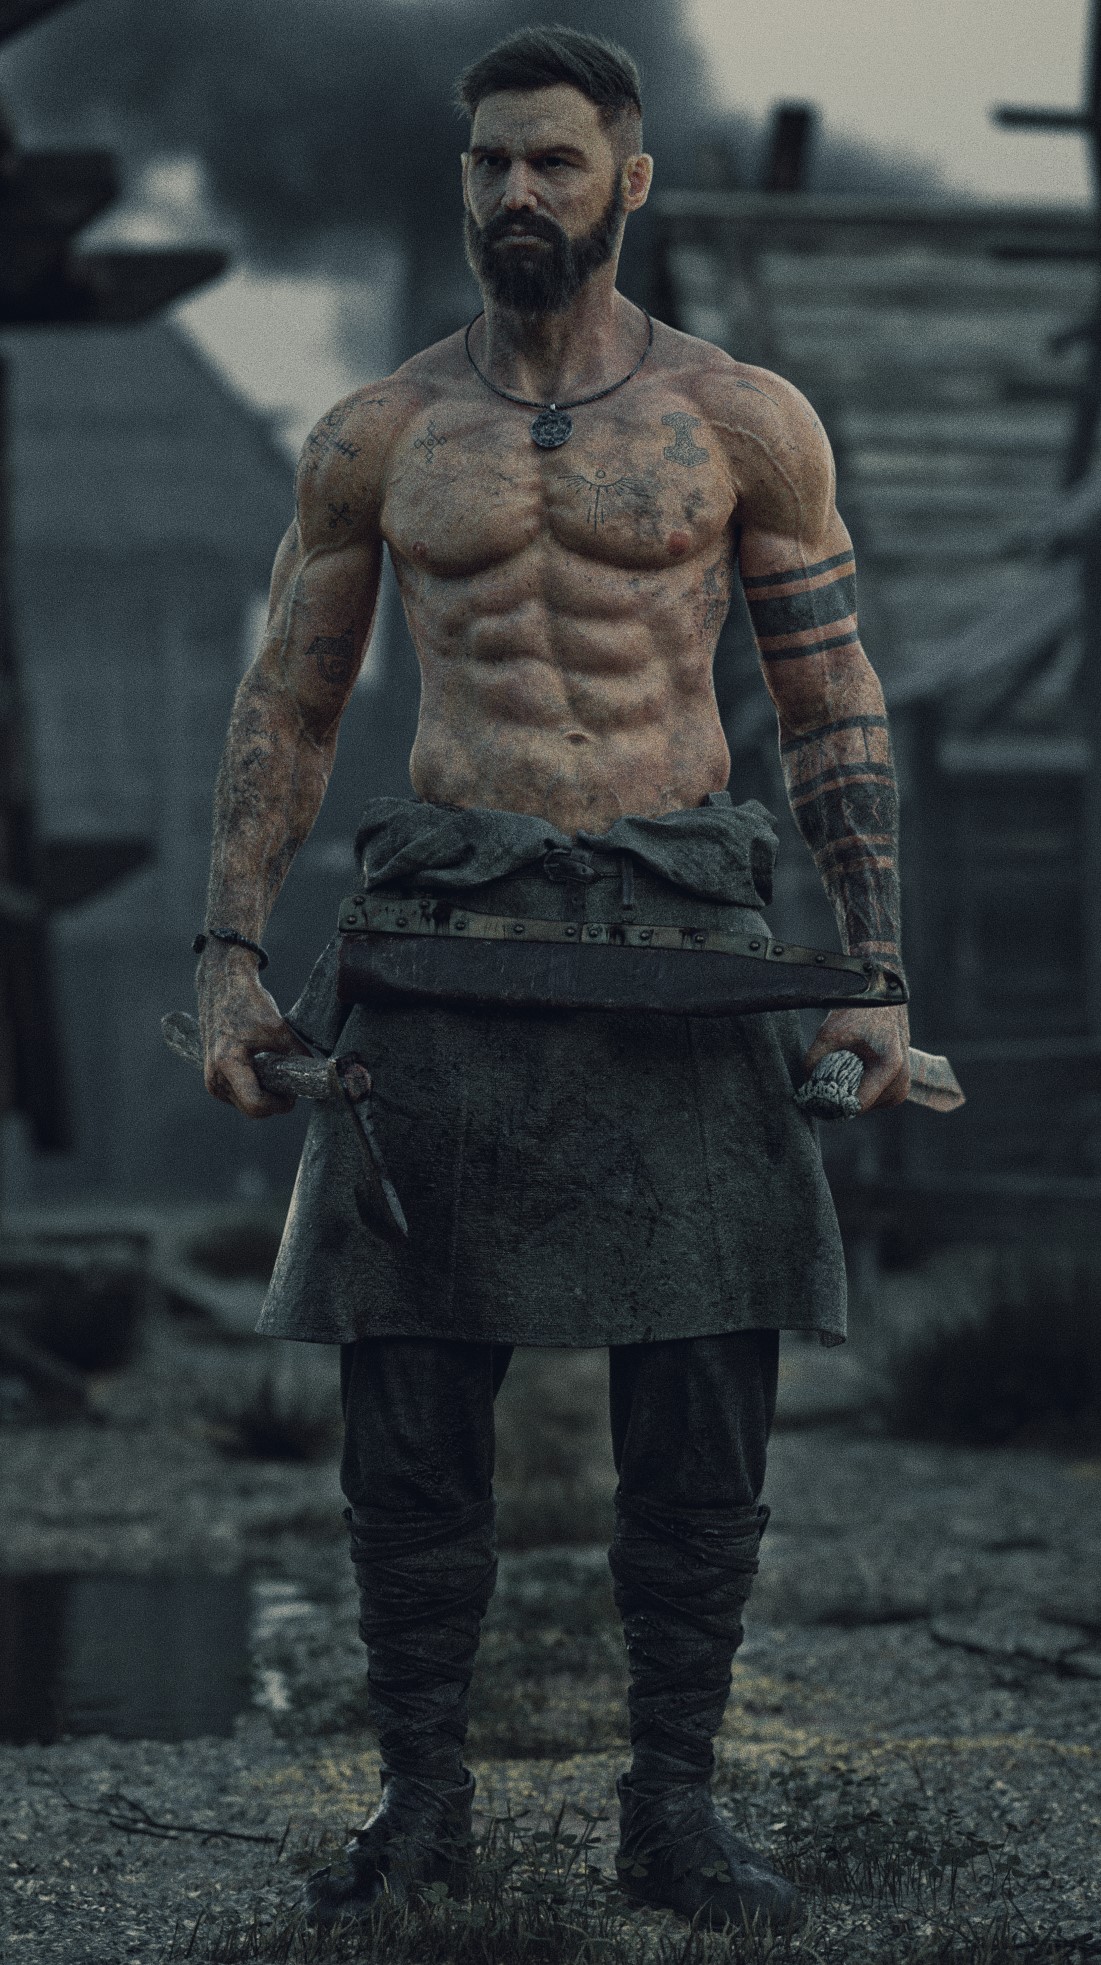
Around the same time, I found myself drawn to the visual aesthetics of the film “The Northman” (2022), directed by Robert Eggers. I thought it would be cool to try and recreate the main character from the movie in 3D. I wasn’t trying to make an exact copy of the character; instead, I aimed to capture the same vibe and feel.
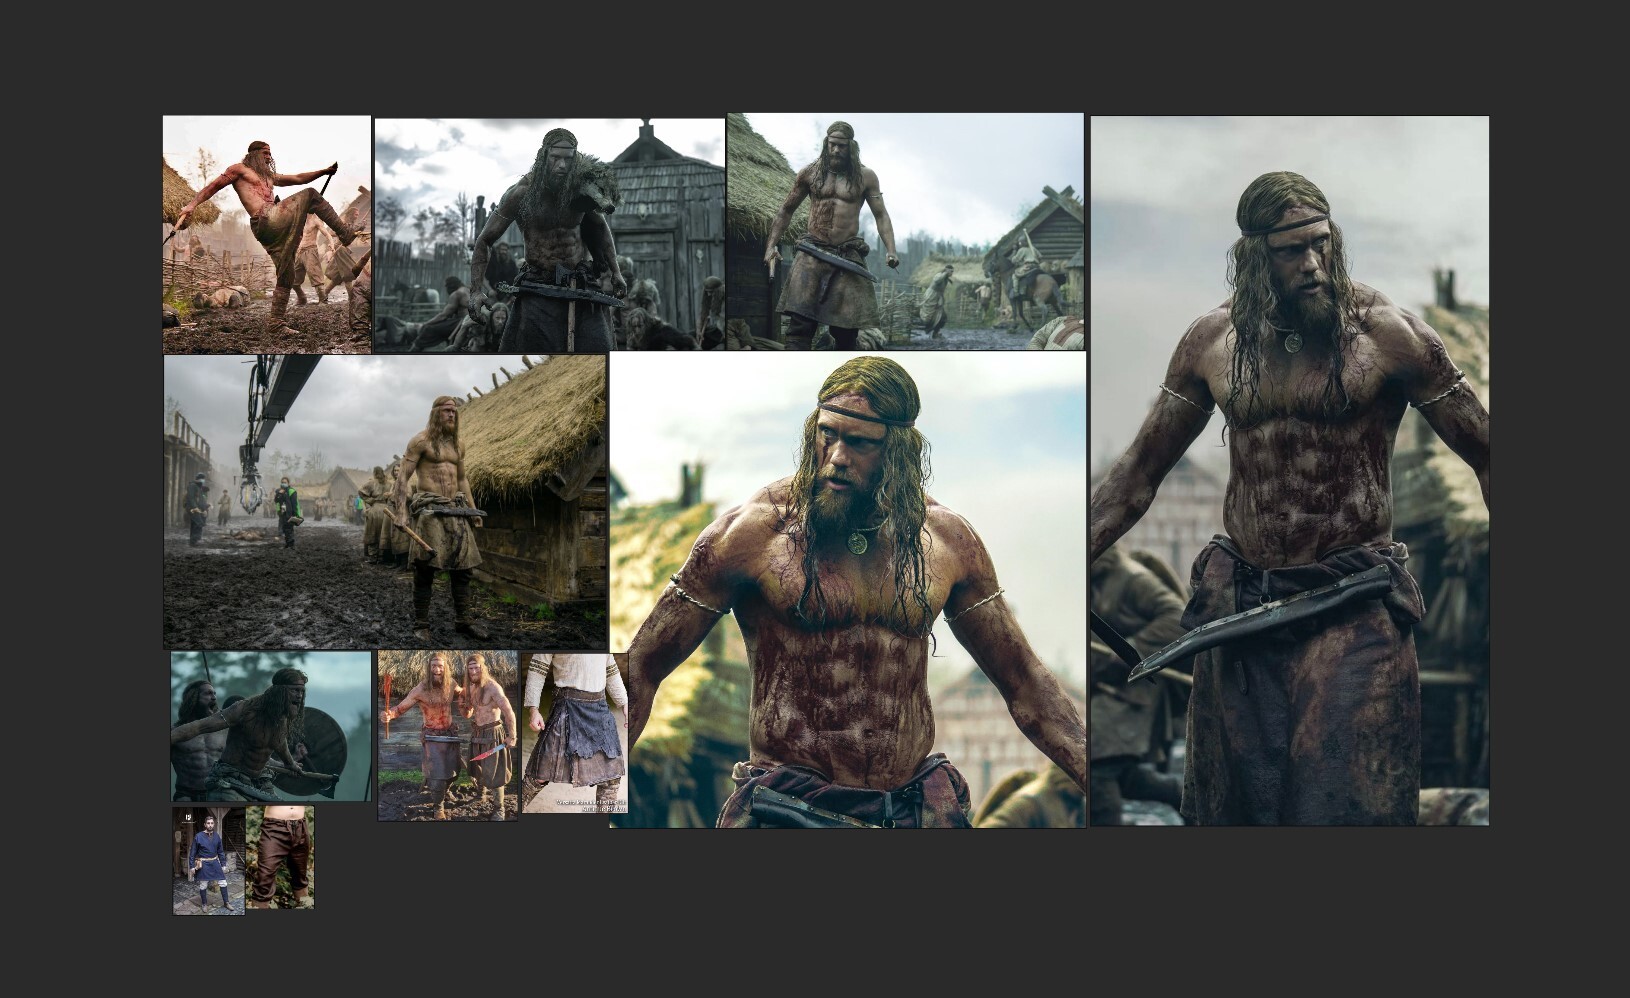
Of course gathering all the references I needed was an extremely important step and I took my time during this stage. I used PureRef to create the reference board.
PROCESS
The system specifications used in this artwork are:
Hardware:
- CPU – Ryzen 7-1700
- RAM – 16GB
- GPU – GTX 1070 8gb
Software:
- Blender
- ZBrush
- Substance Painter
- Mari
- Marvelous Designer
- Photoshop
- Maya
- WrapR3Ds
Addons:
- Geo Scatter for Blender
- Mesh Data Transfer for Blender
Main Character
I will present the process of creating the artwork linearly so as not to make it confusing. However, the process requires moving back and forth through the different software. Establishing a non-destructive workflow was crucial to work as effectively as possible.
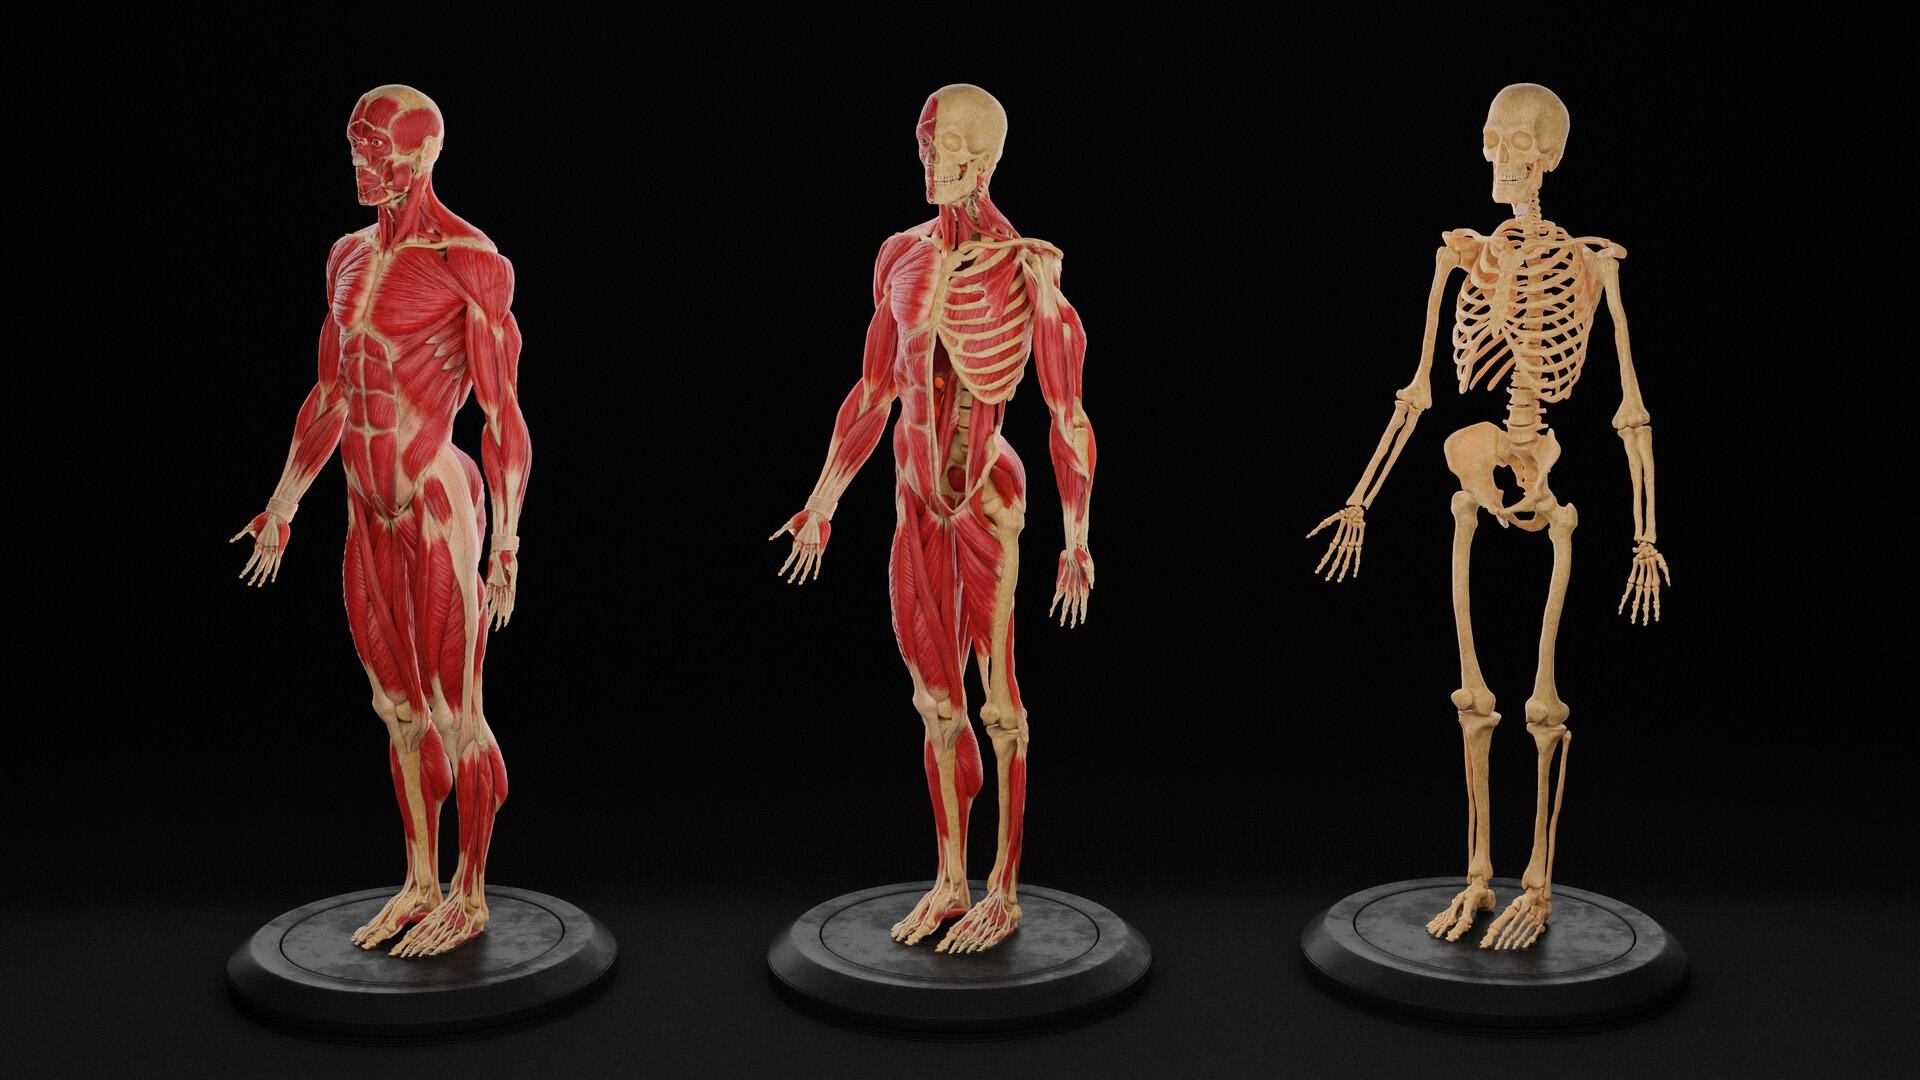
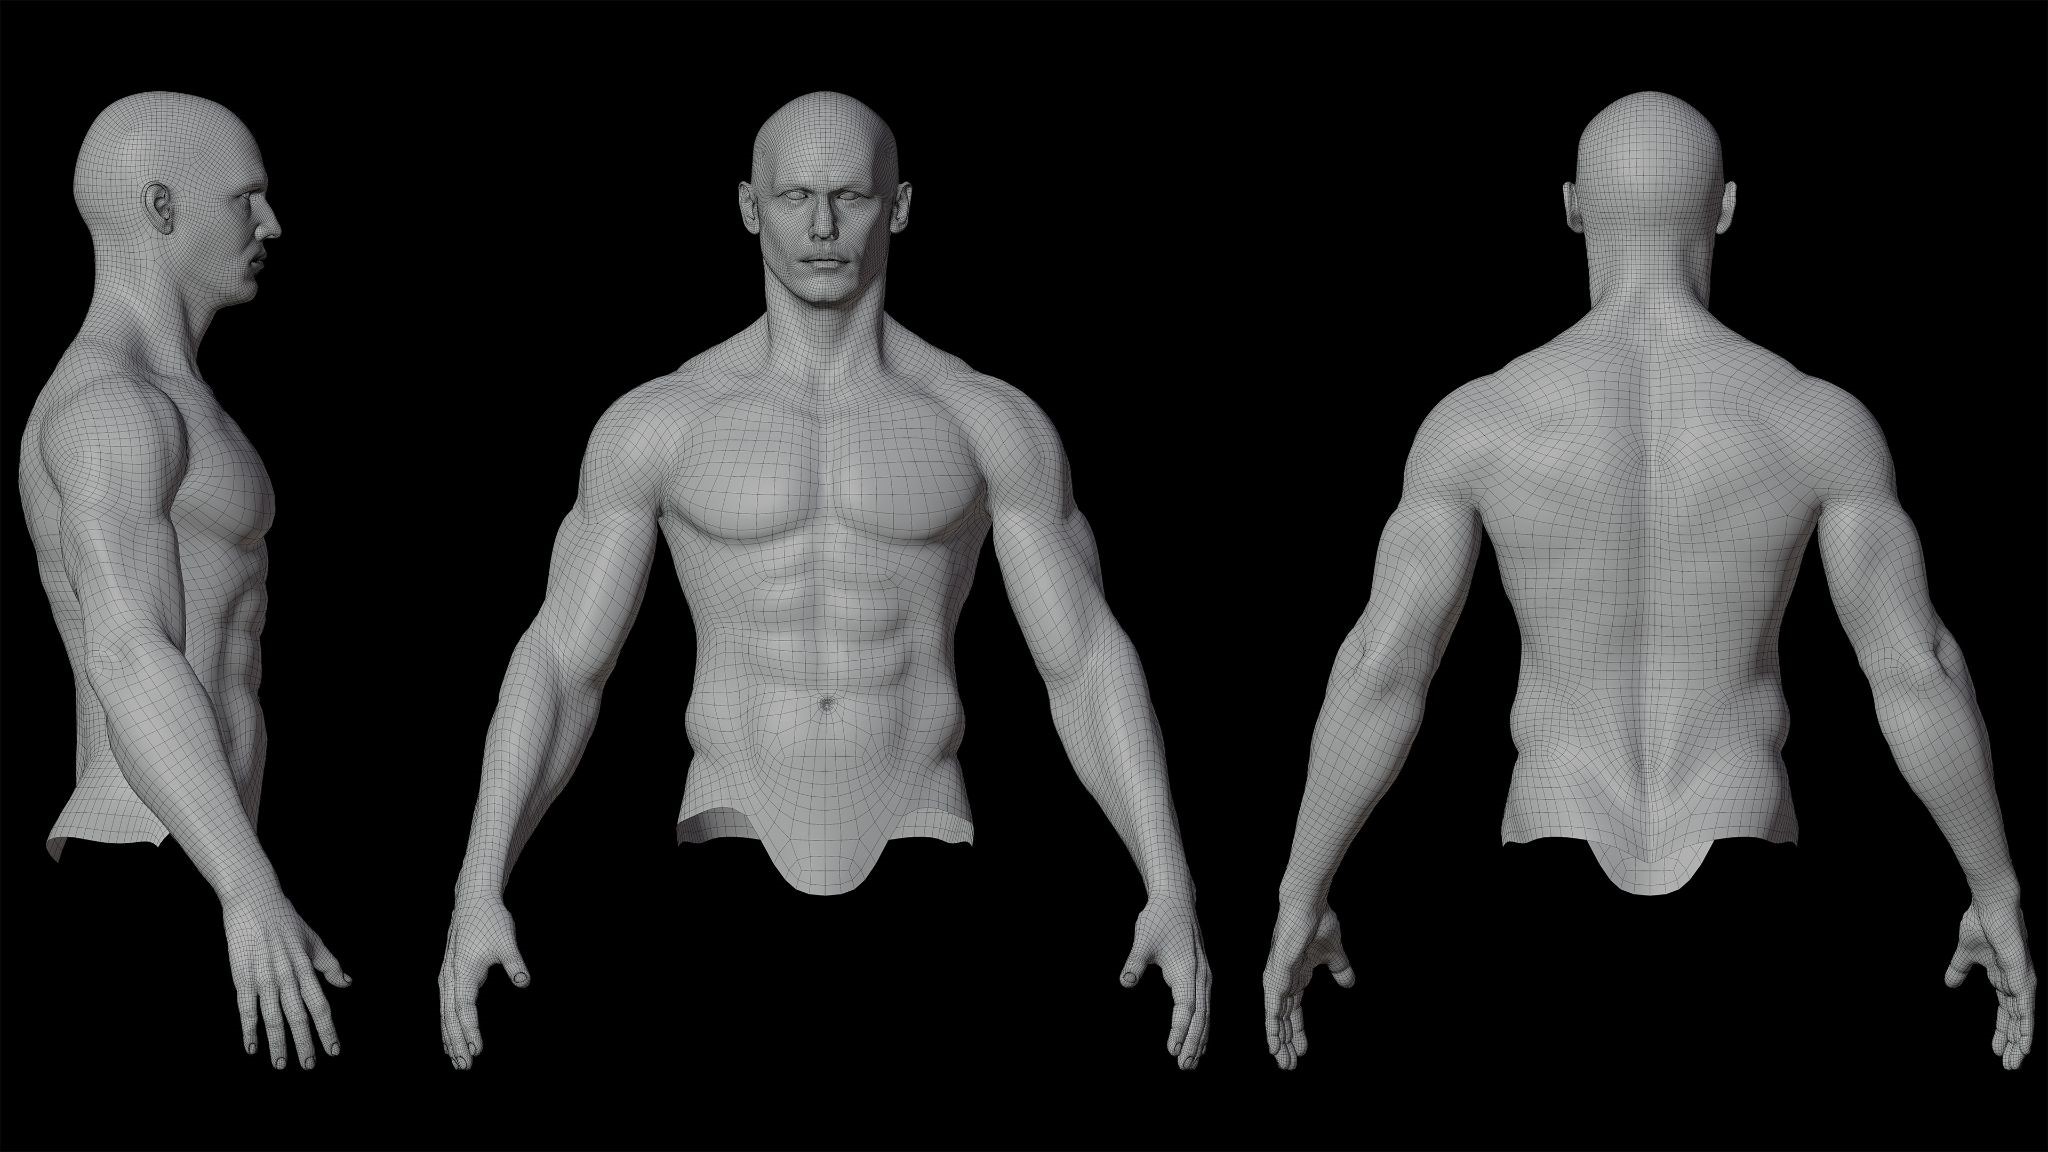
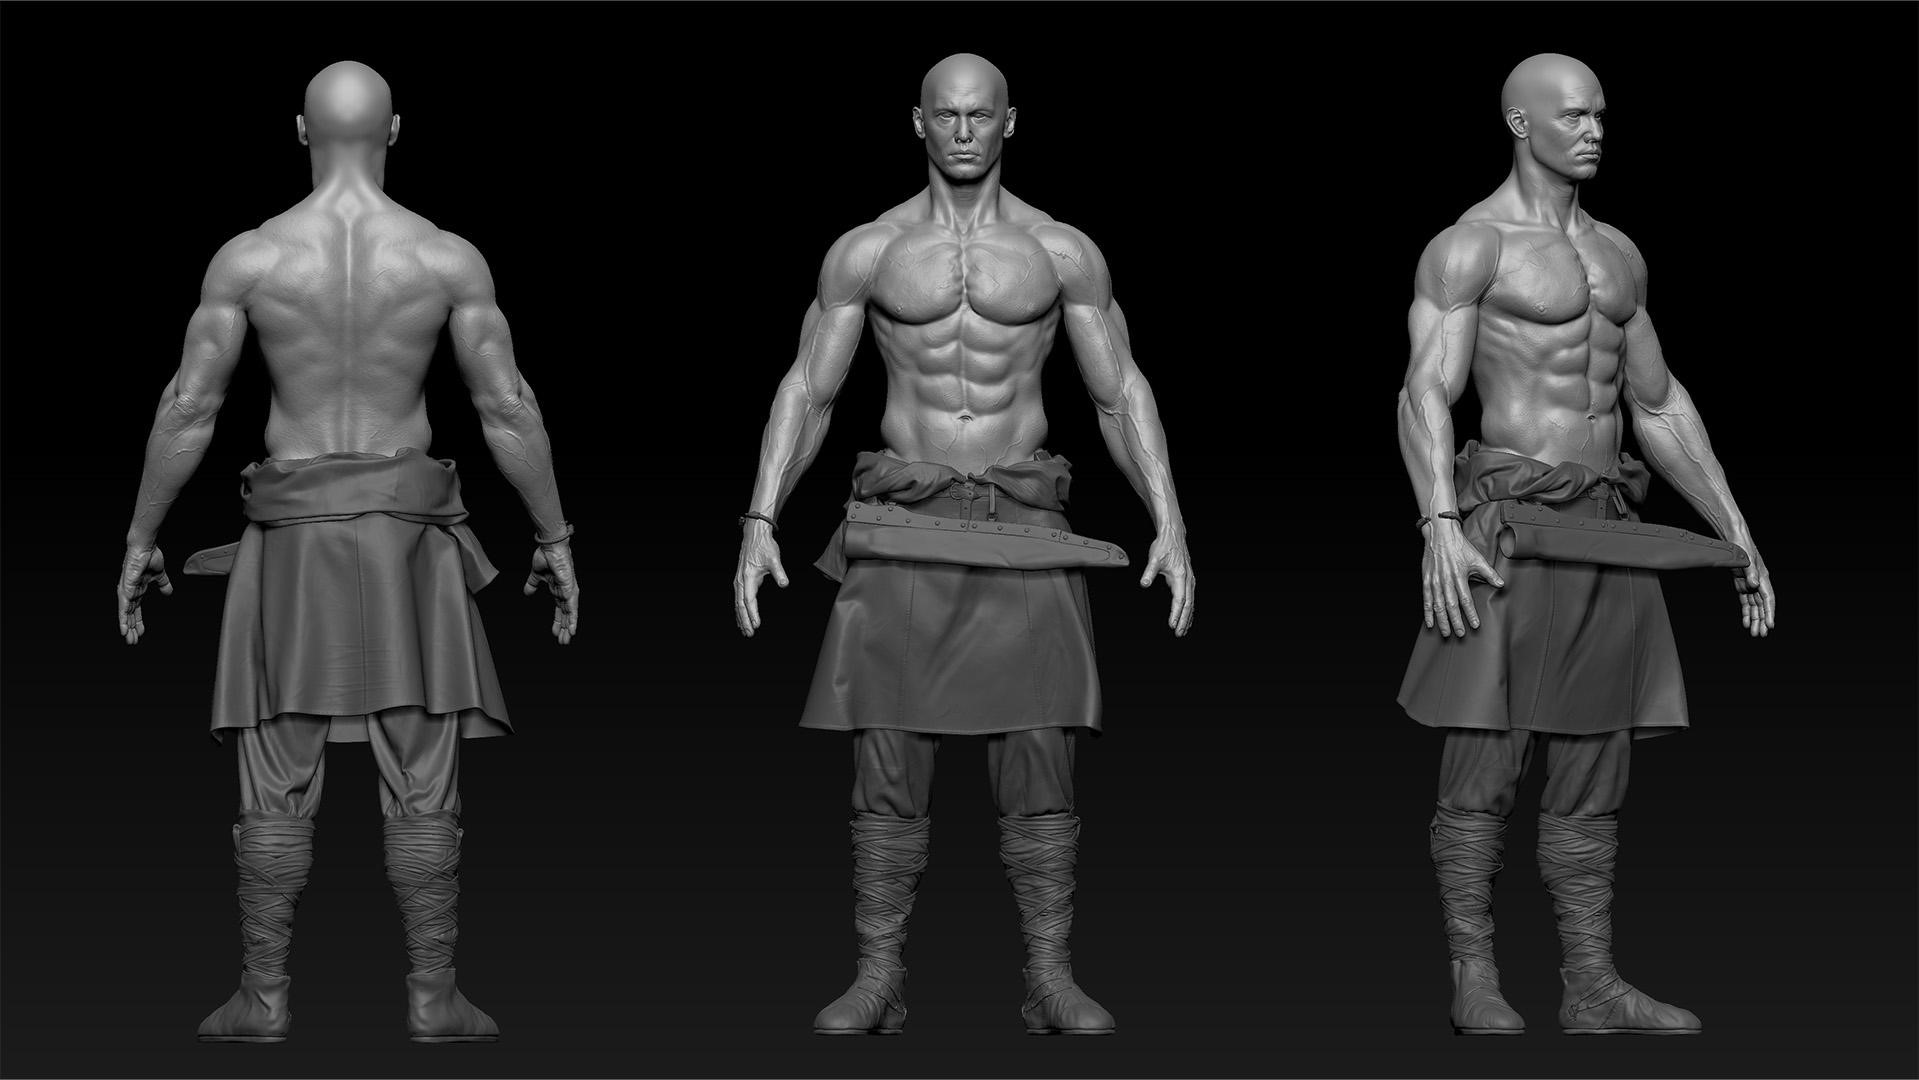
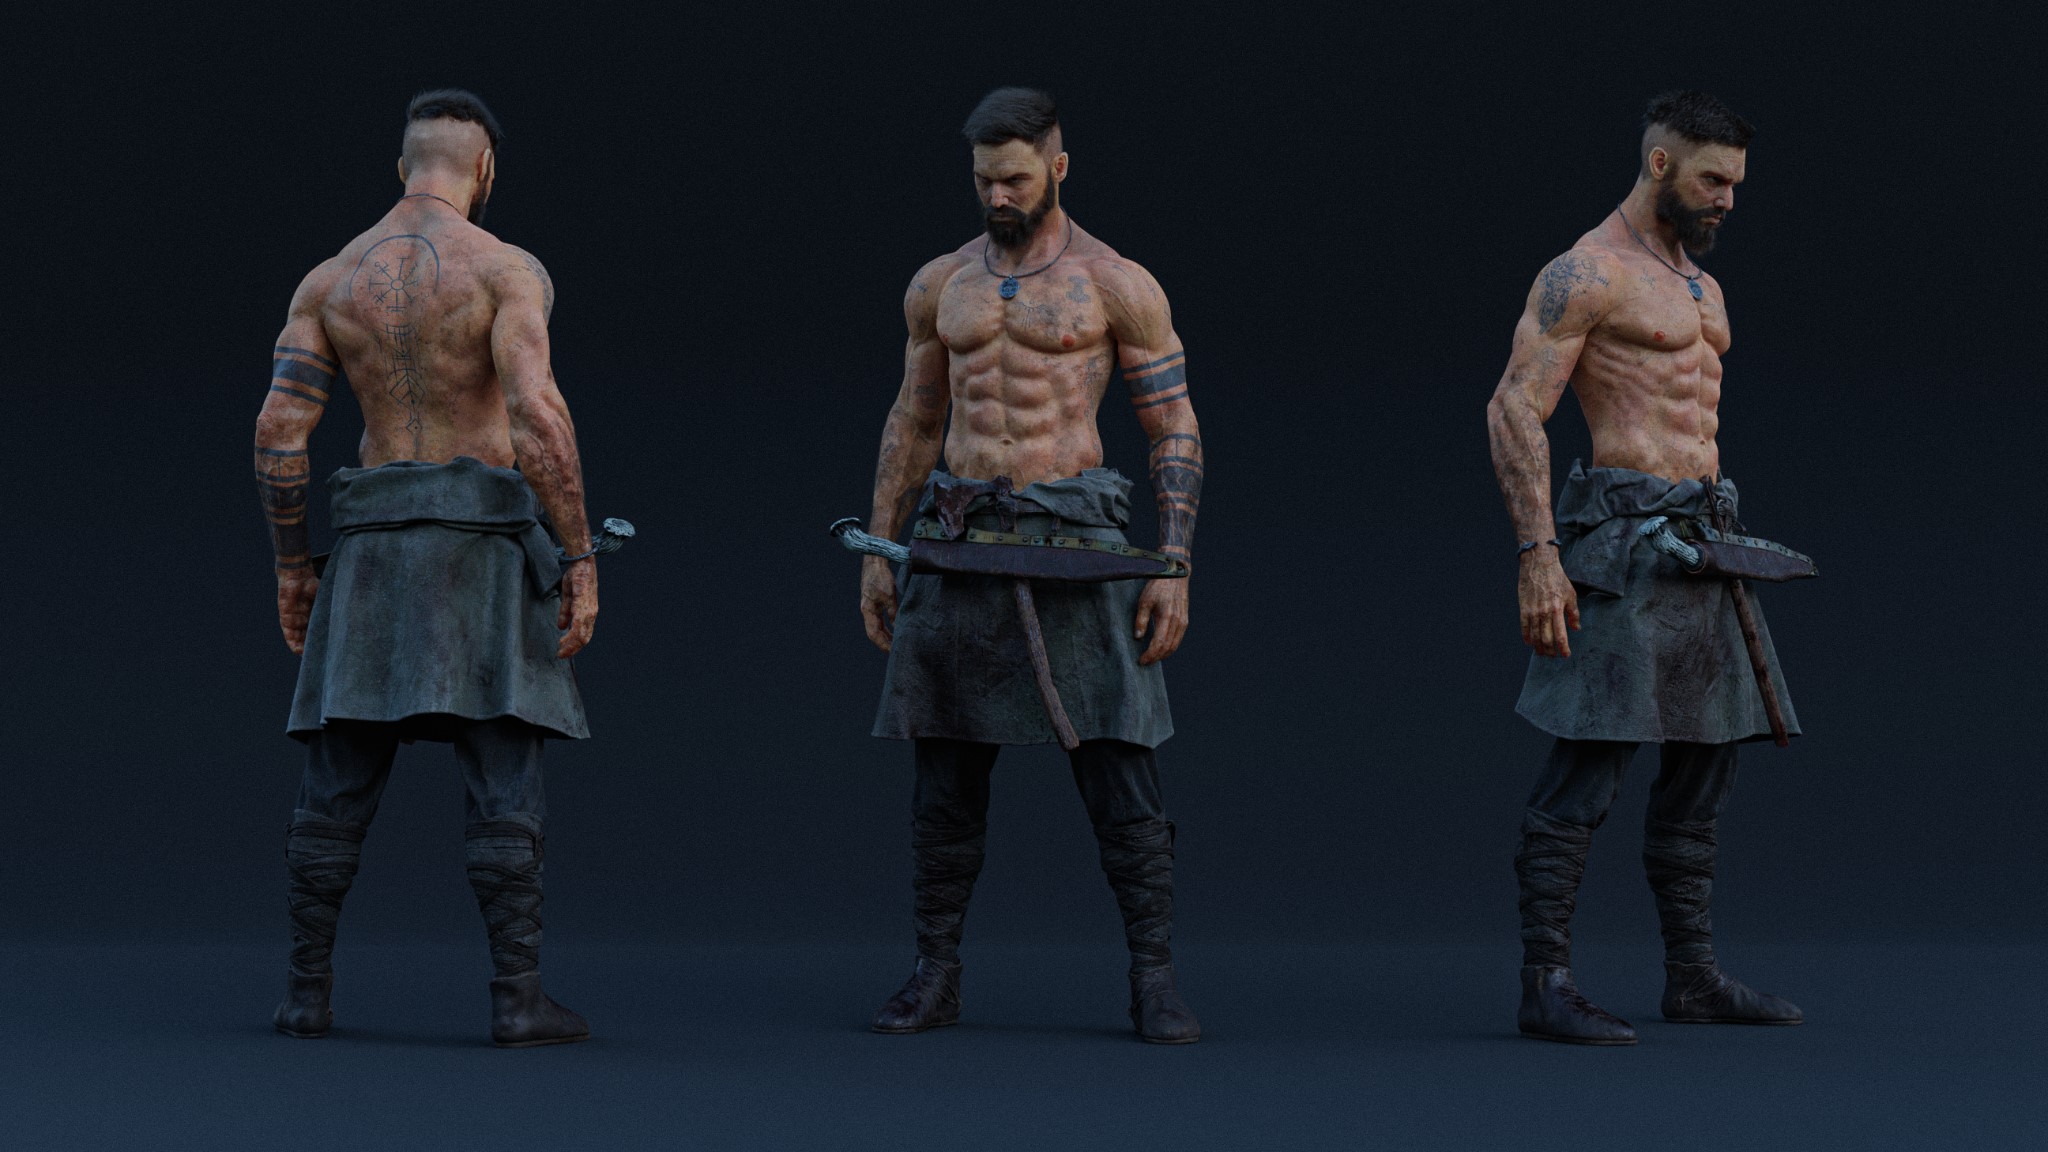
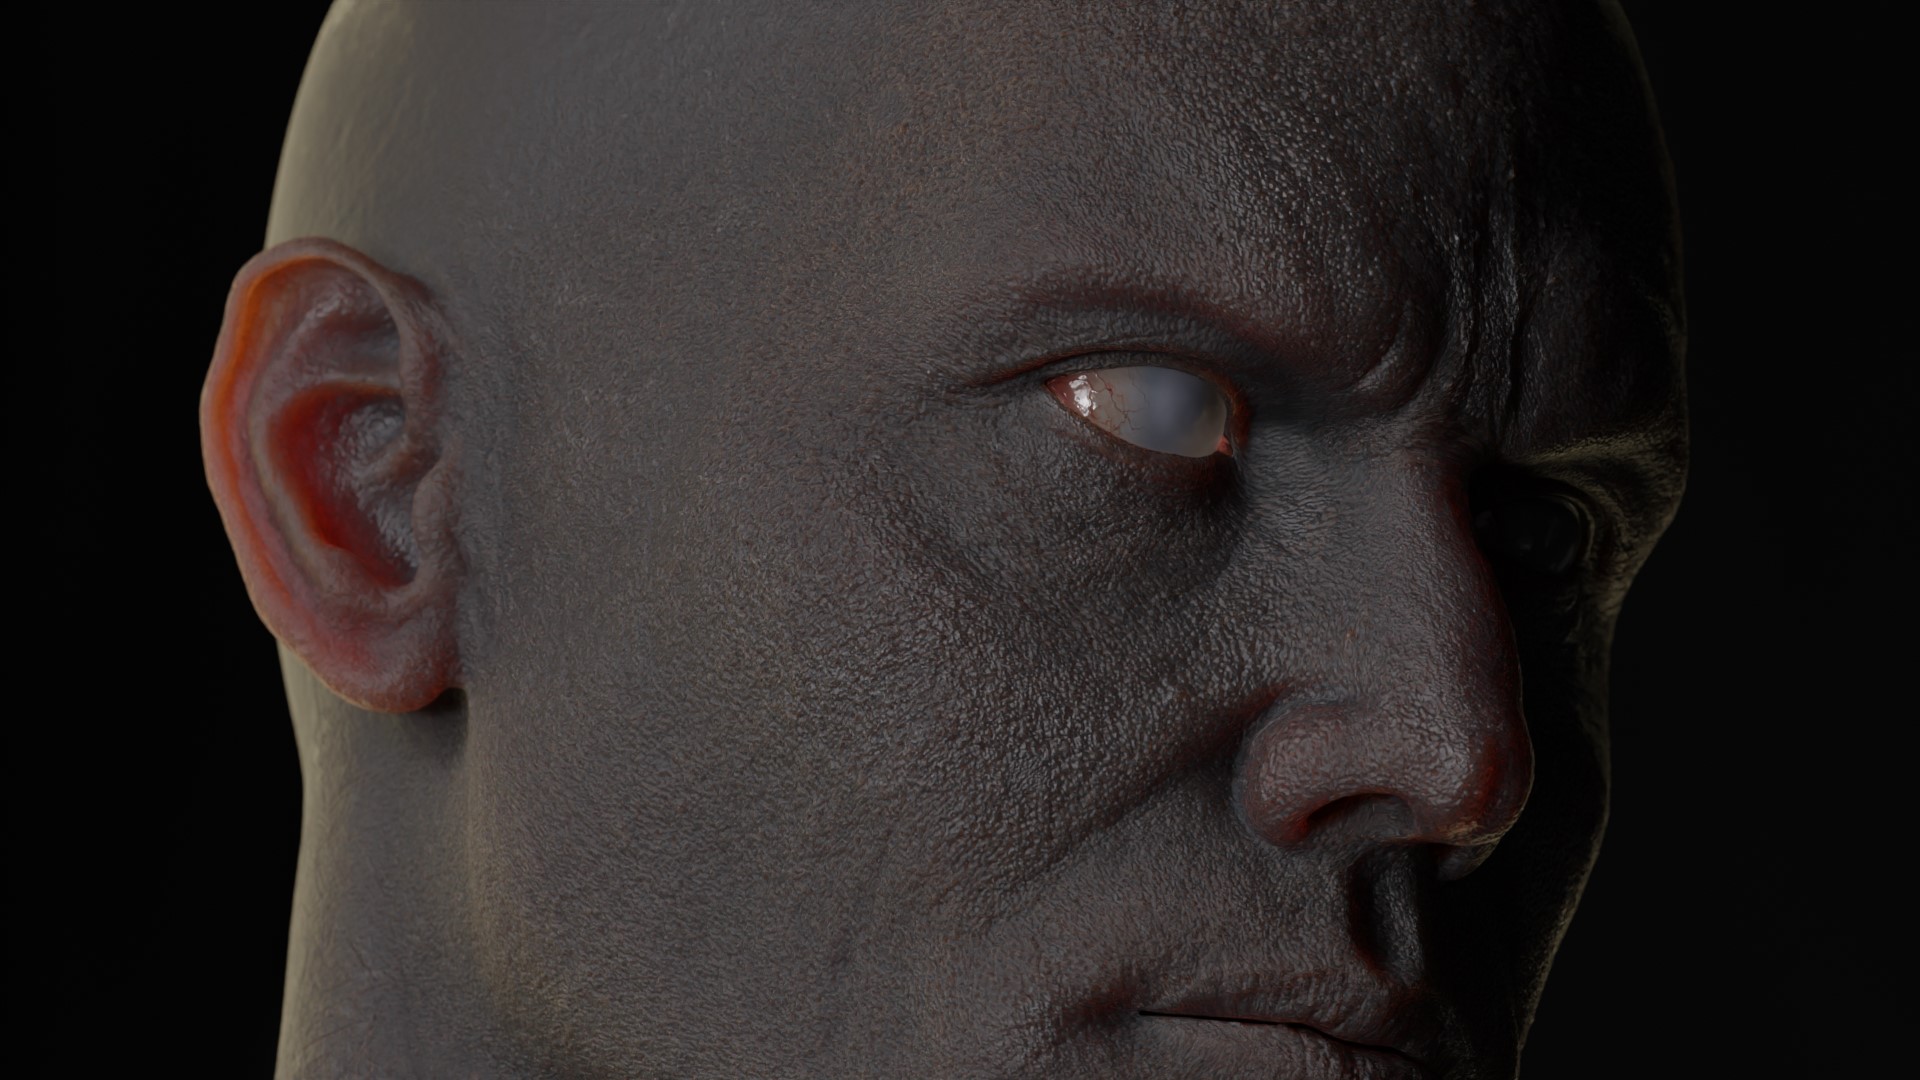
As I mentioned in the beginning, anatomy was the main focus of the project. So, I started working from “inside out.” I modeled the skeleton and all the muscles that contribute to the silhouette of the human body. It’s not a necessary step, but I wanted to better understand the way things work.
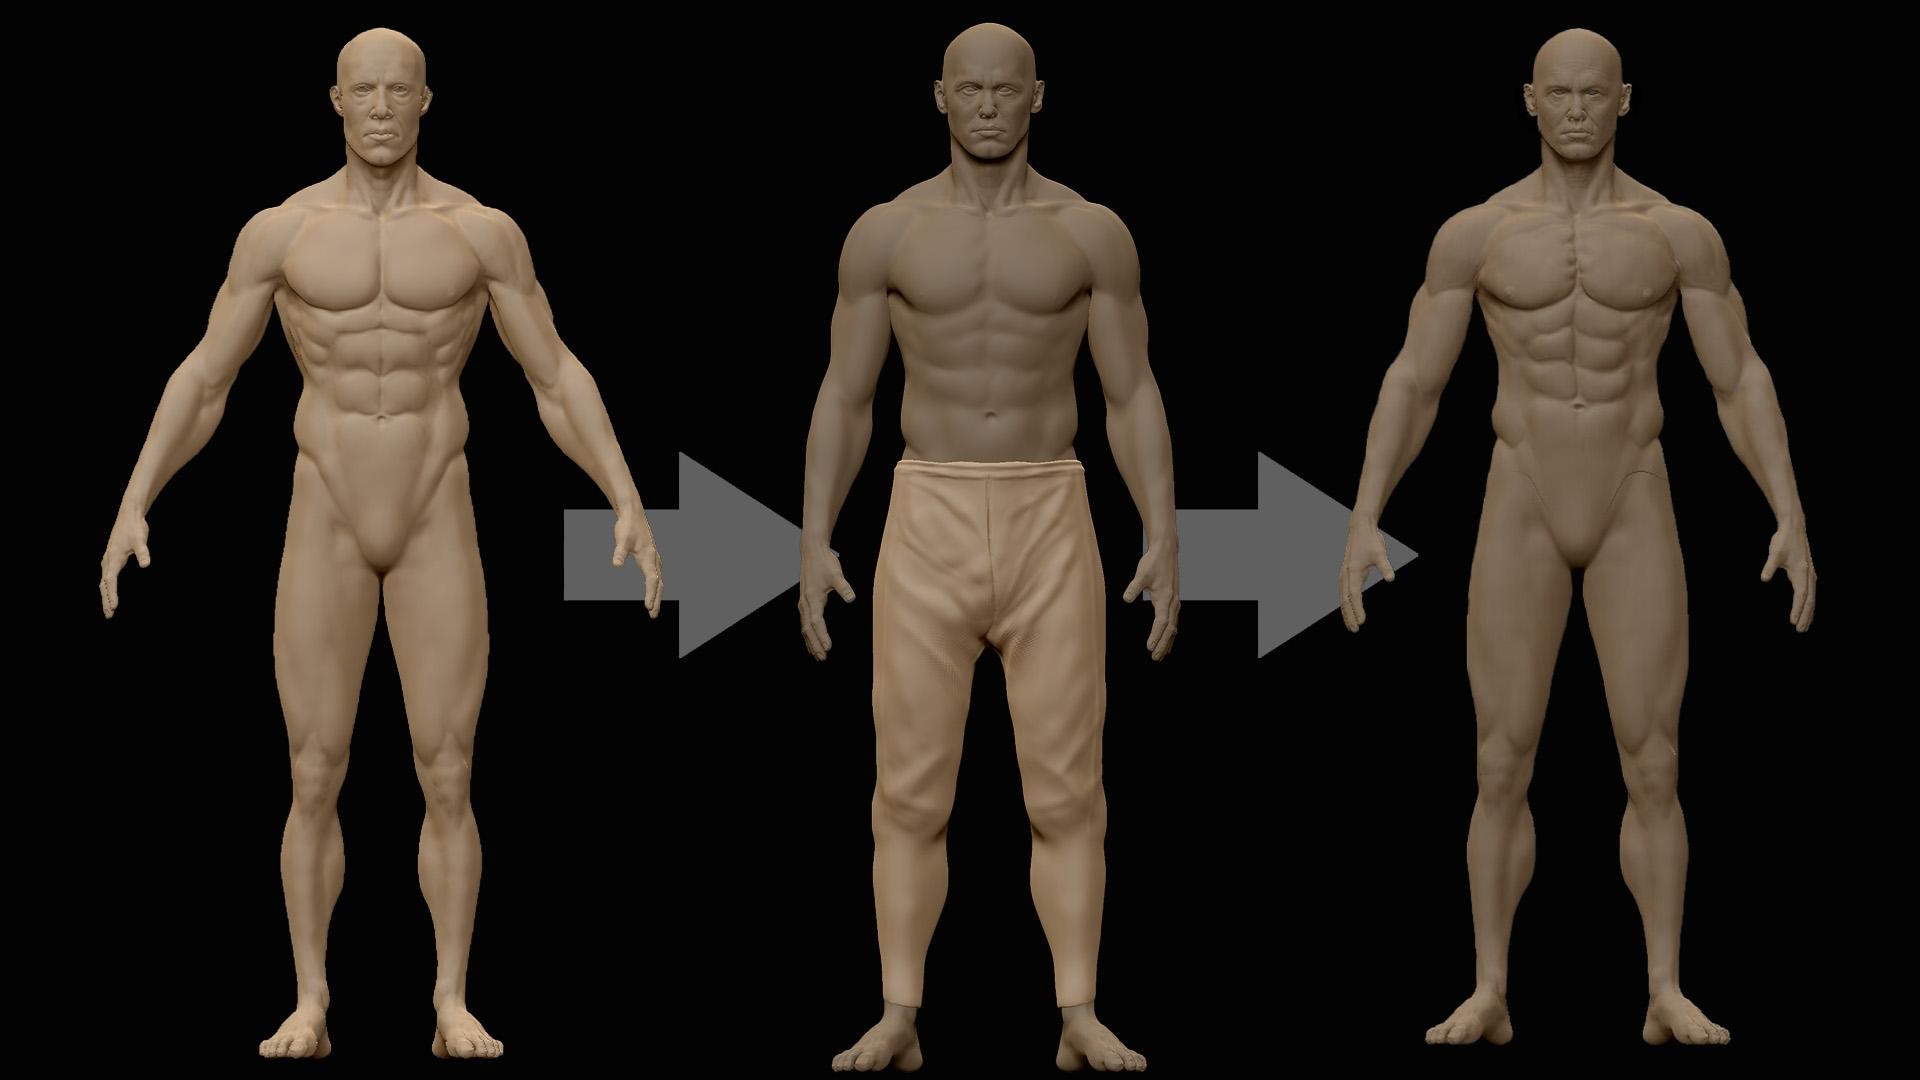
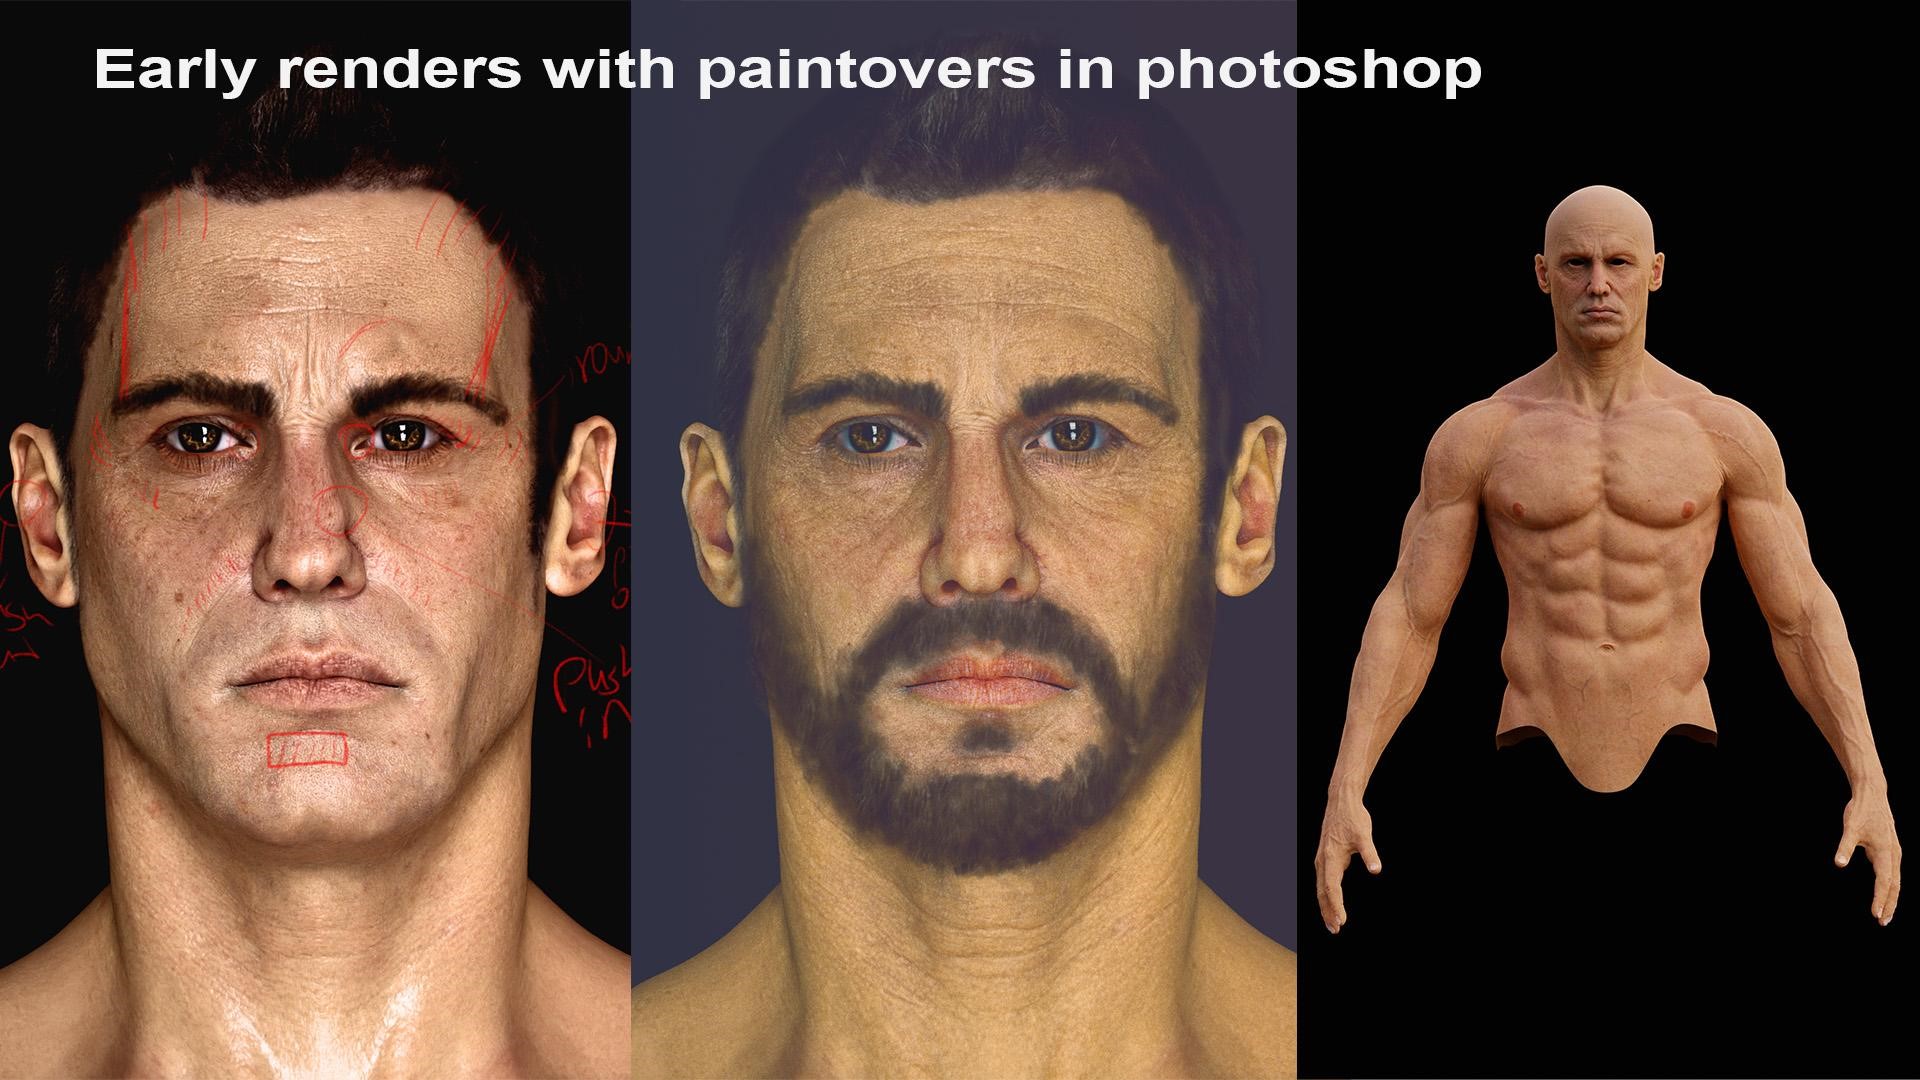
After that, I smoothed everything down in ZBrush and as a result I had a generic base model. Through multiple iterations, I reached the desirable result.
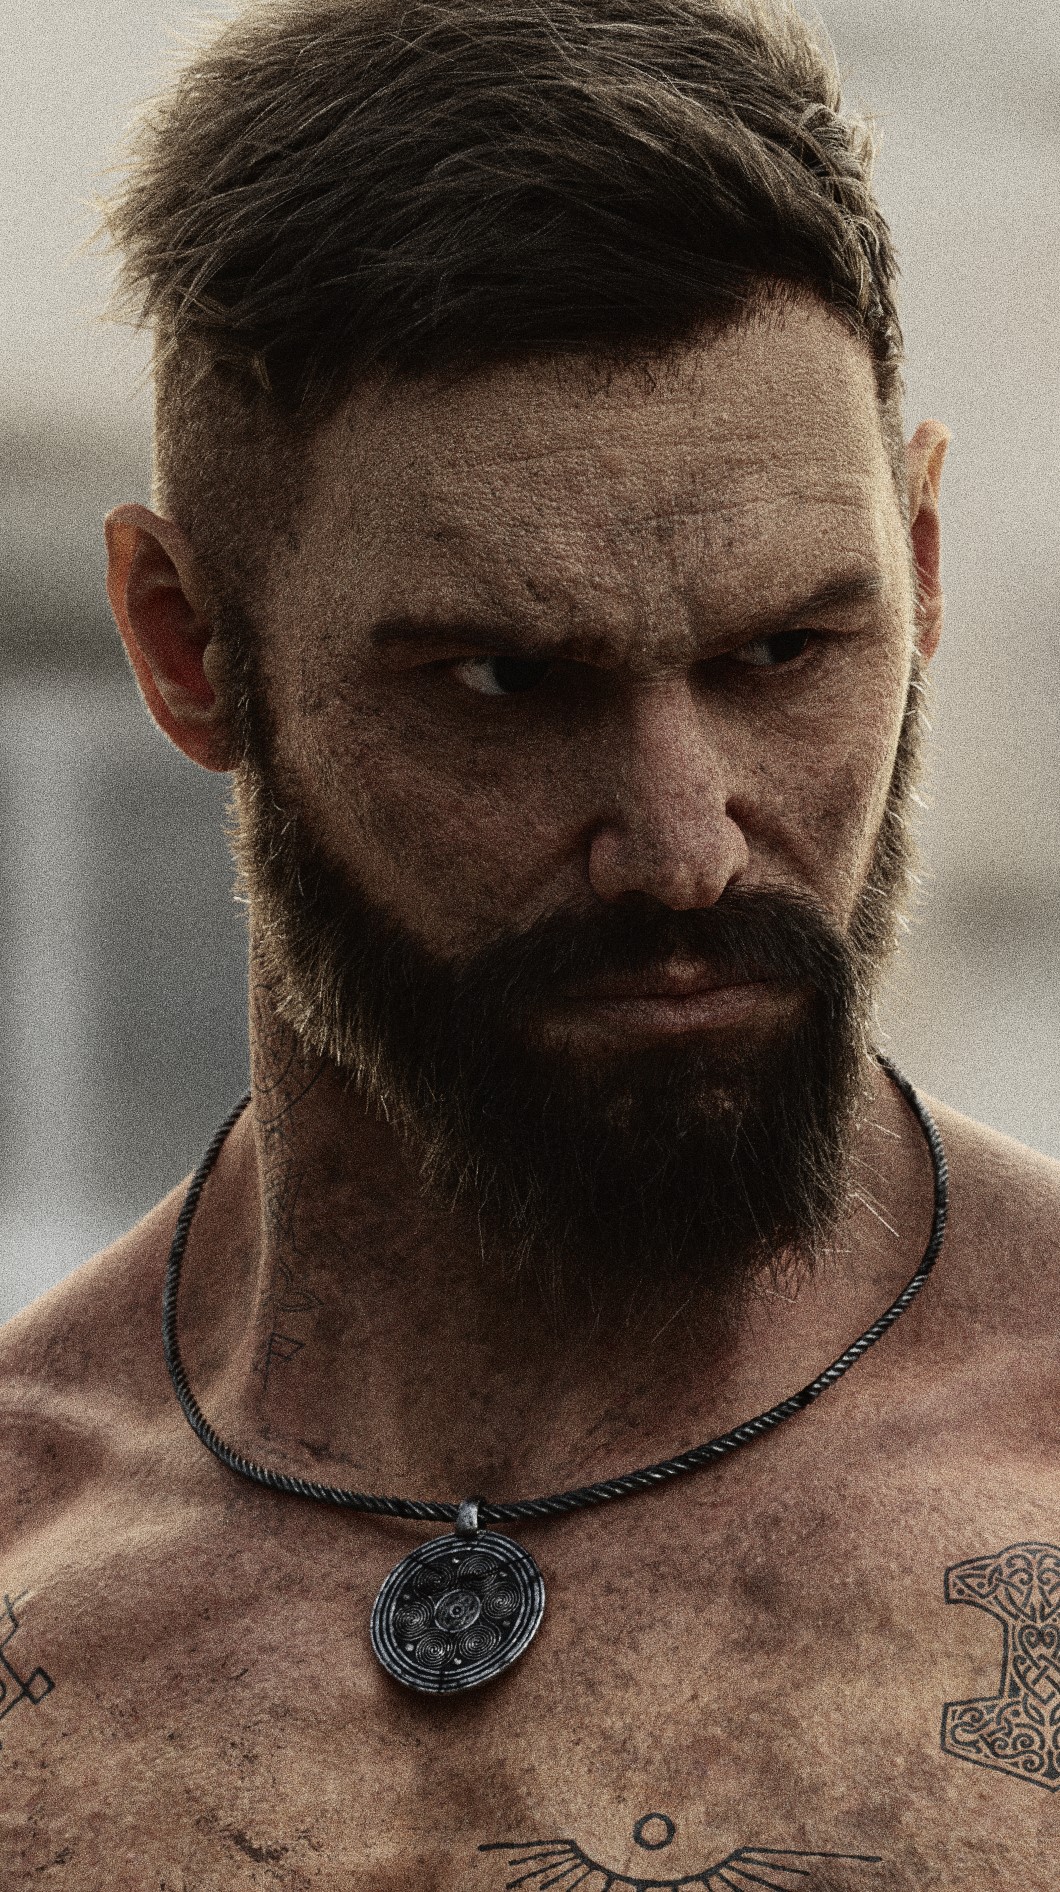
Having finished with the primary and secondary shapes, it was time for the tertiary details, which included wrinkles, muscle refinement, and skin imperfections. Of course, in order to add details to the model, I needed clear topology. For the details on the face, I used a Vface from texturingXYZ, which was wrapped on my model using WrapR3Ds. This would give me clean UVs and topology on the face, allow me to utilize all the maps and textures that come with the package, and modify them accordingly in Mari. Here is a breakdown of the process required to wrap a Vface to your geometry. For the body, I had to do a manual retopology in Blender.
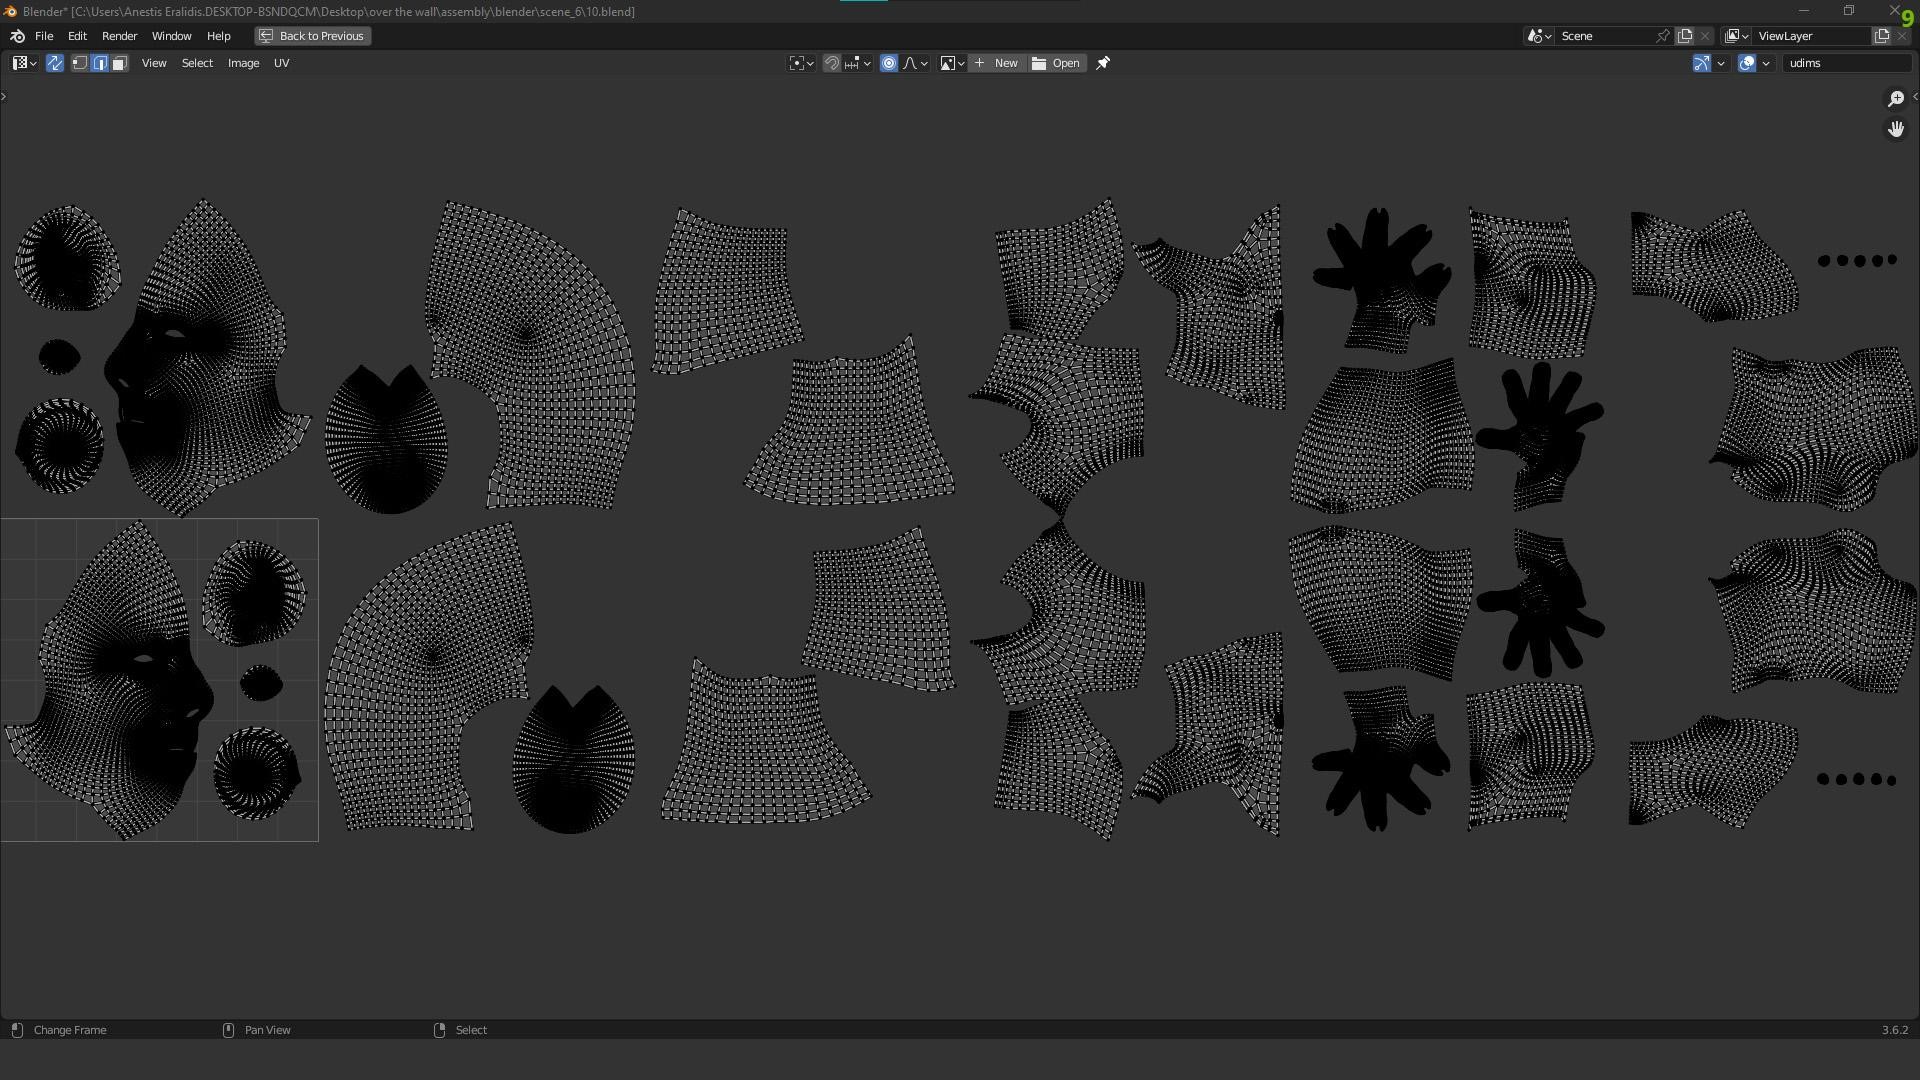
Uvs are in the UDIM format.
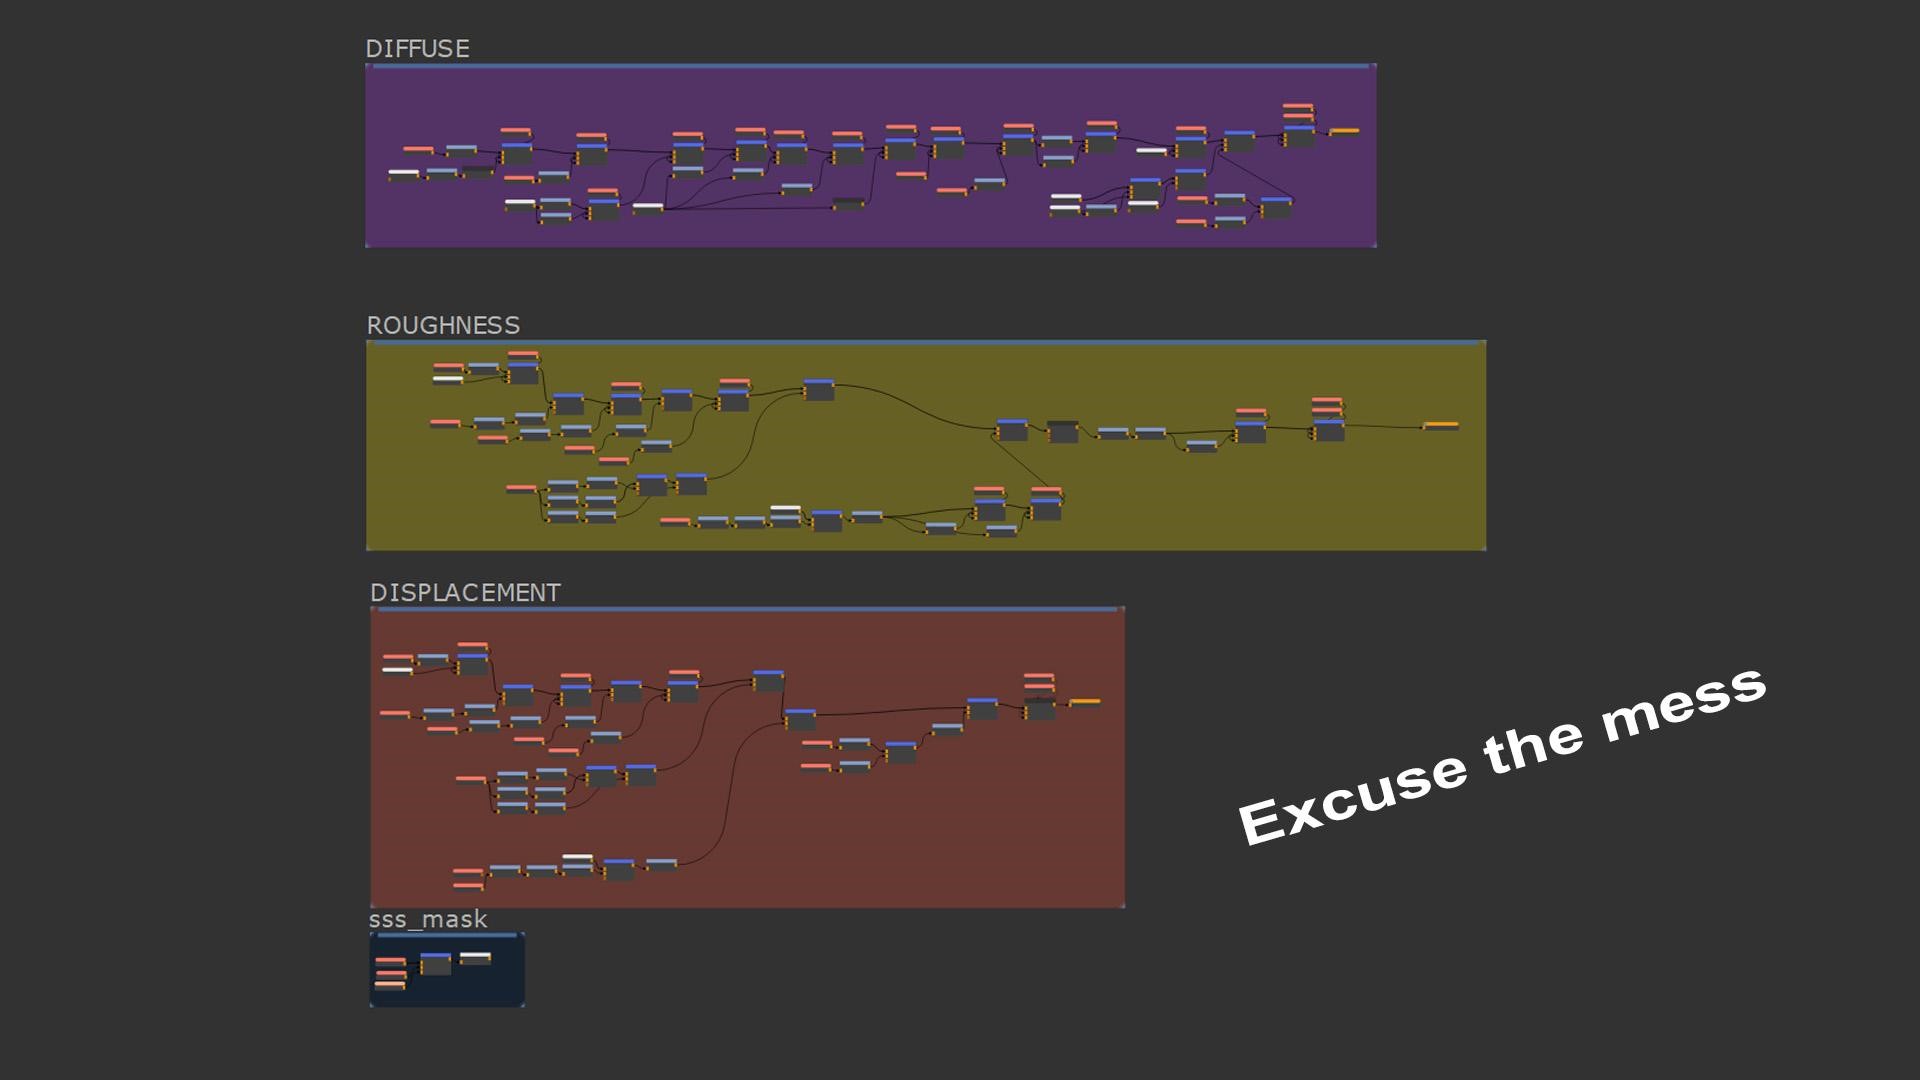
Texturing
After I transferred the textures, I brought the model into Mari to work further on it.
Textures:
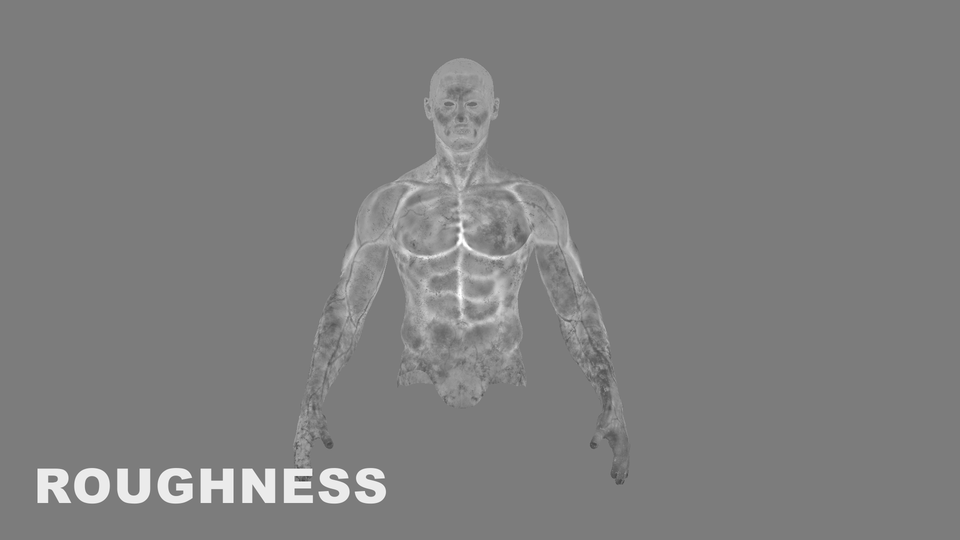
The tertiary details were done both in Mari and ZBrush.
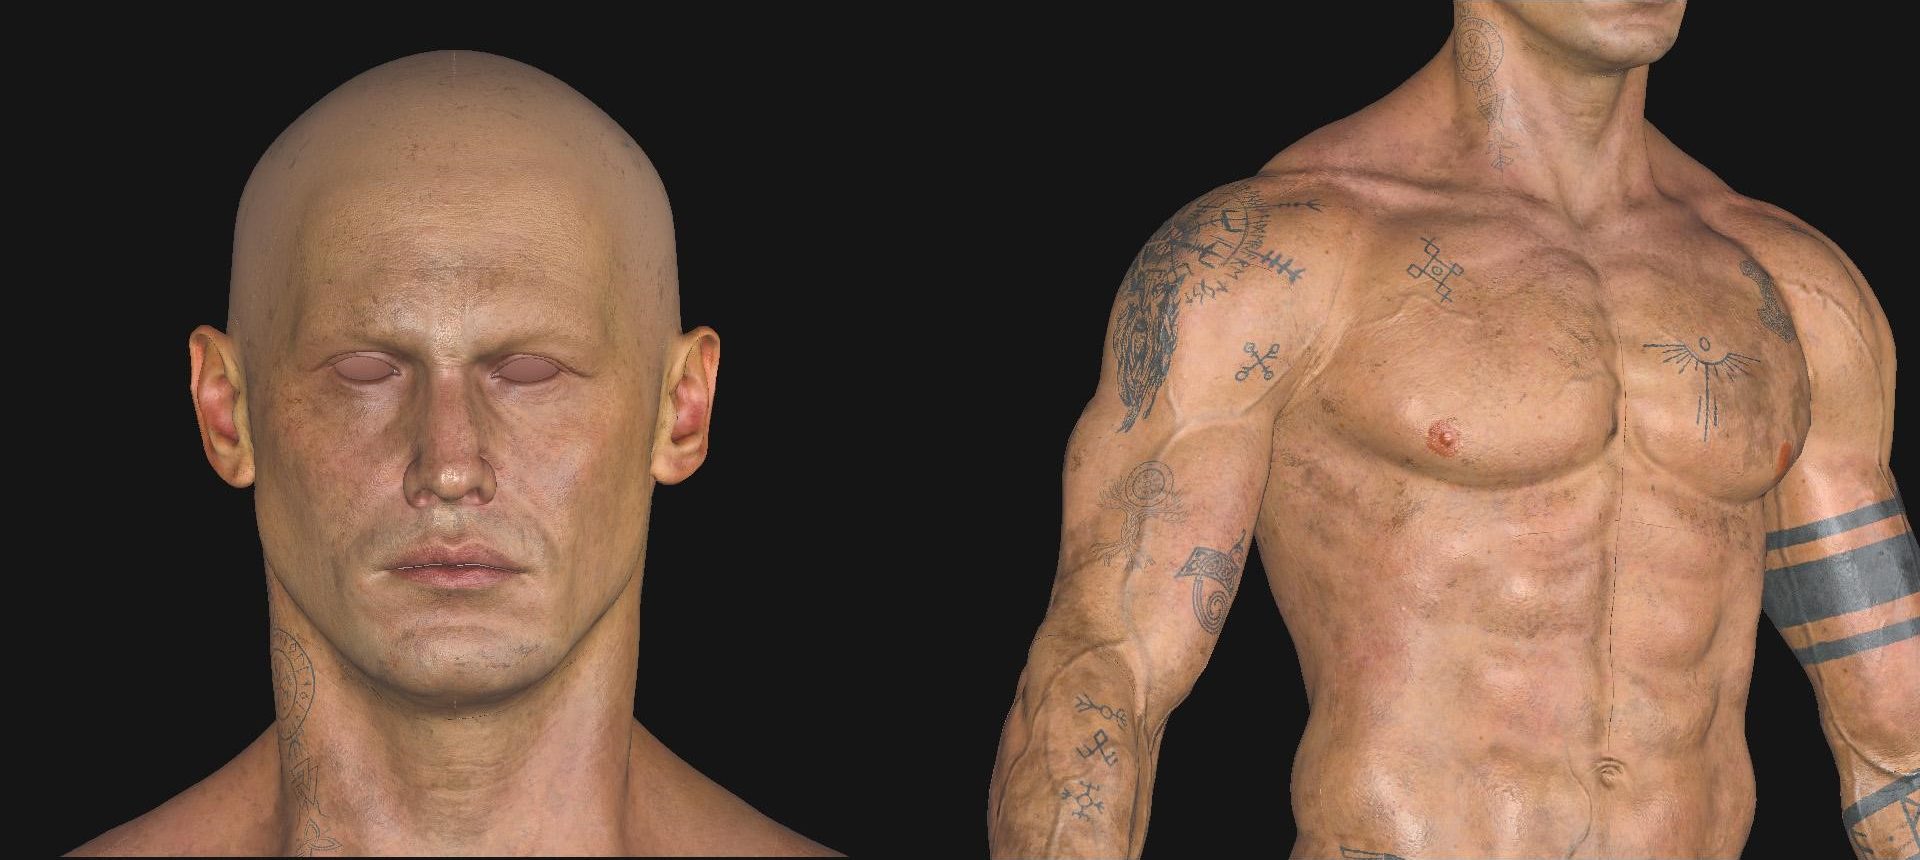
I bring the textures into Blender very often to do a few test renders, and then back to Mari or ZBrush for corrections. Remember, you can always adjust the sculpt and version up in Mari.
Grooming
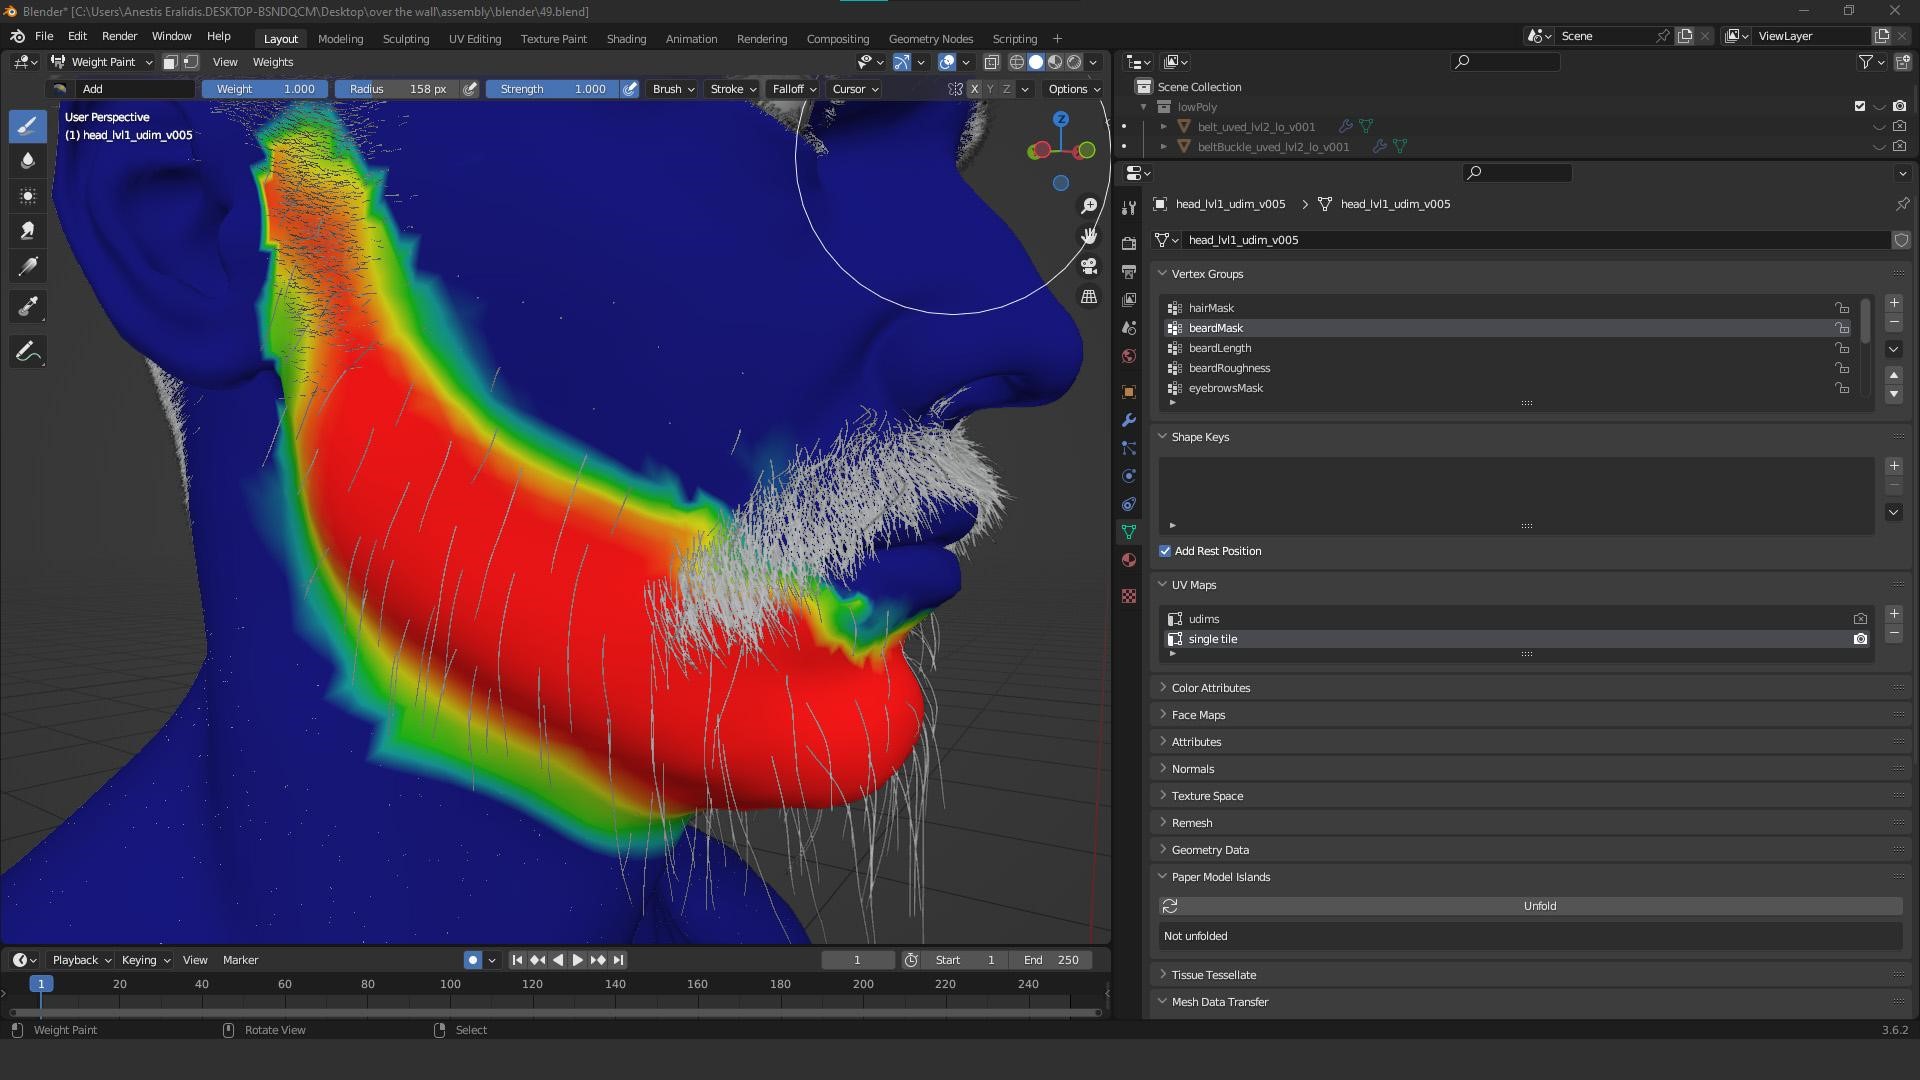
For the hair, I used the new hair system in Blender. I really enjoyed the new workflow. The grooming includes: main hair (split into long and short), eyebrows, eyelashes, beard (split into beard and mustache), chest hair, arm hair, and peach fuzz. I will focus on the beard because the process is similar to all of them.
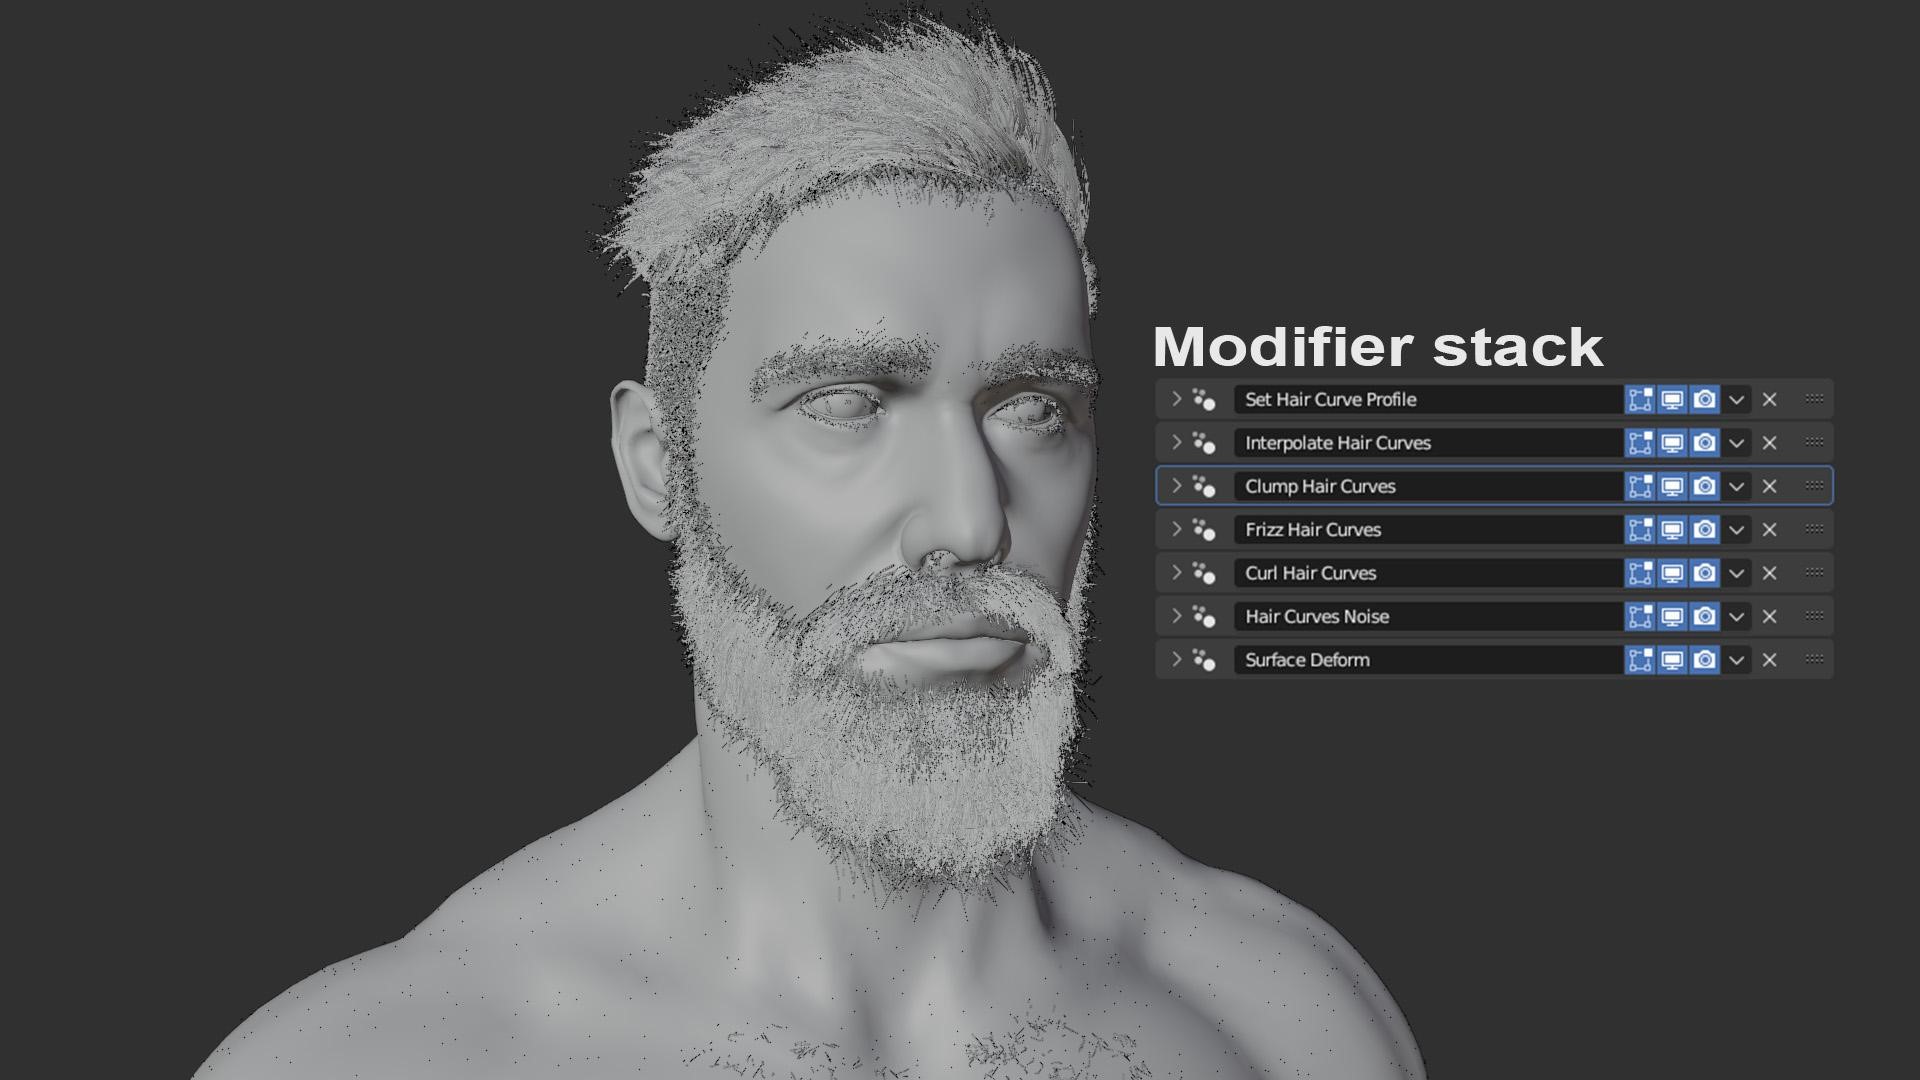
Using weight paints, I painted the density, roughness, and length maps.
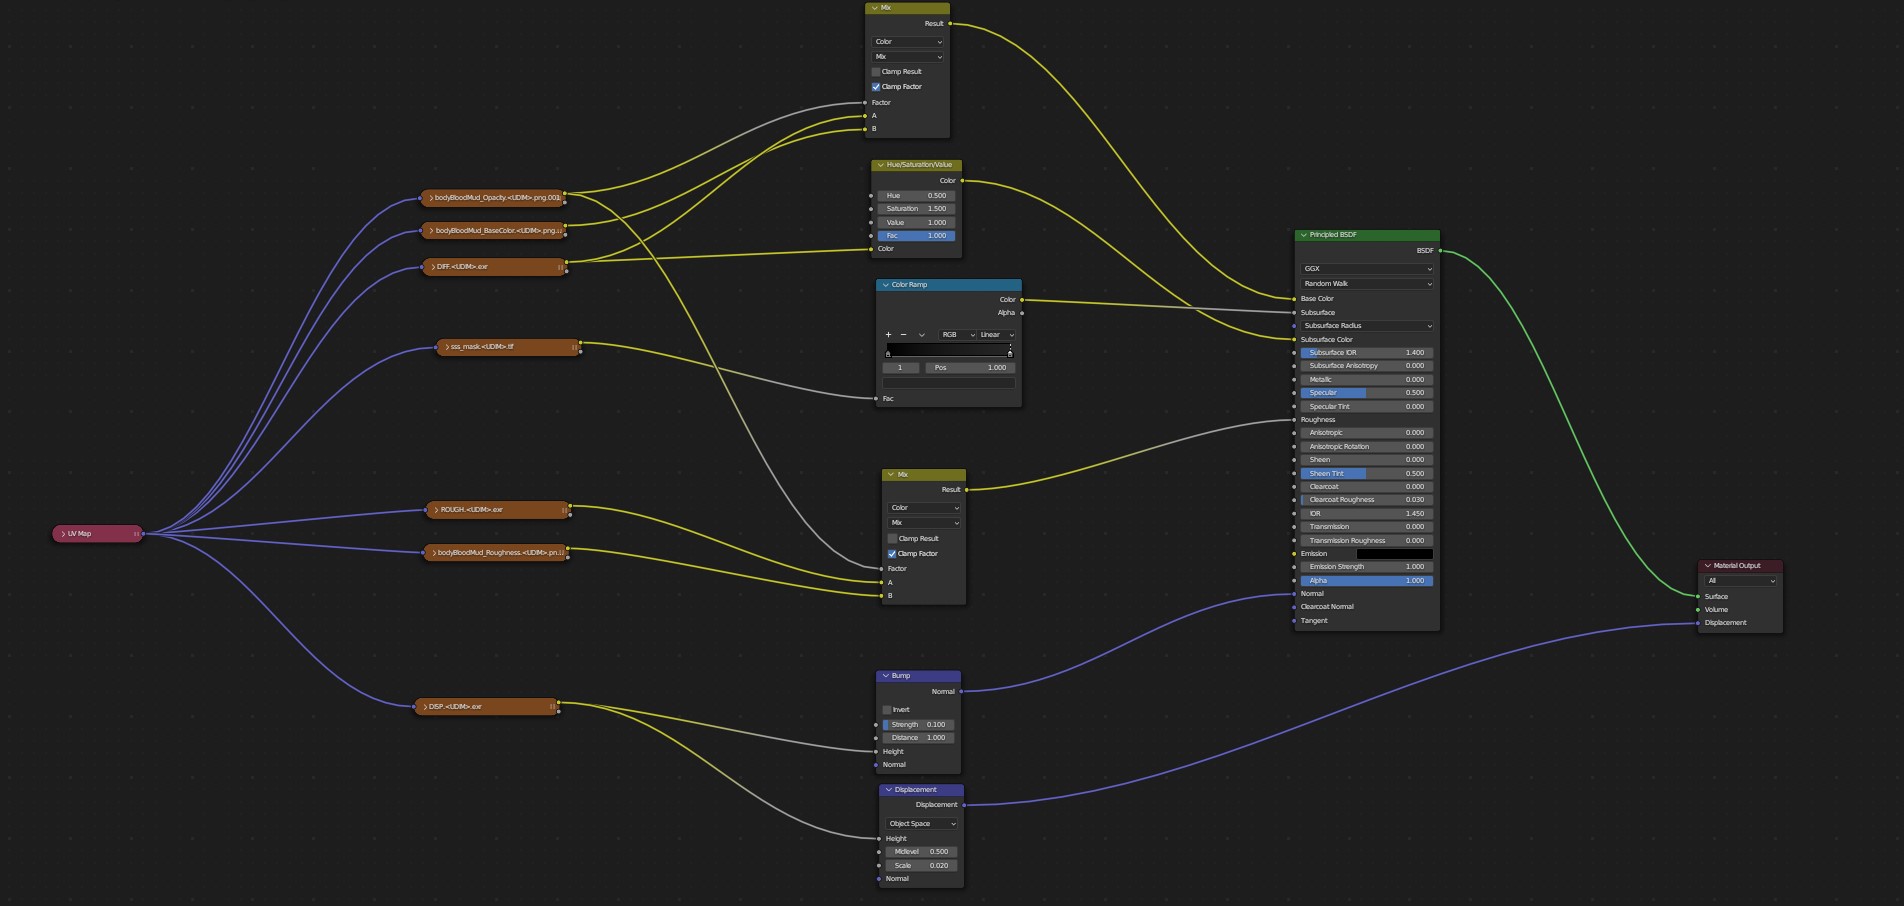
The hair shader is very basic. Something to note is the “curves info” node. Plugging the random parameter into a color ramp allowed me to add some random gray hair. I think the principled hair BSDF was adding a cool look.

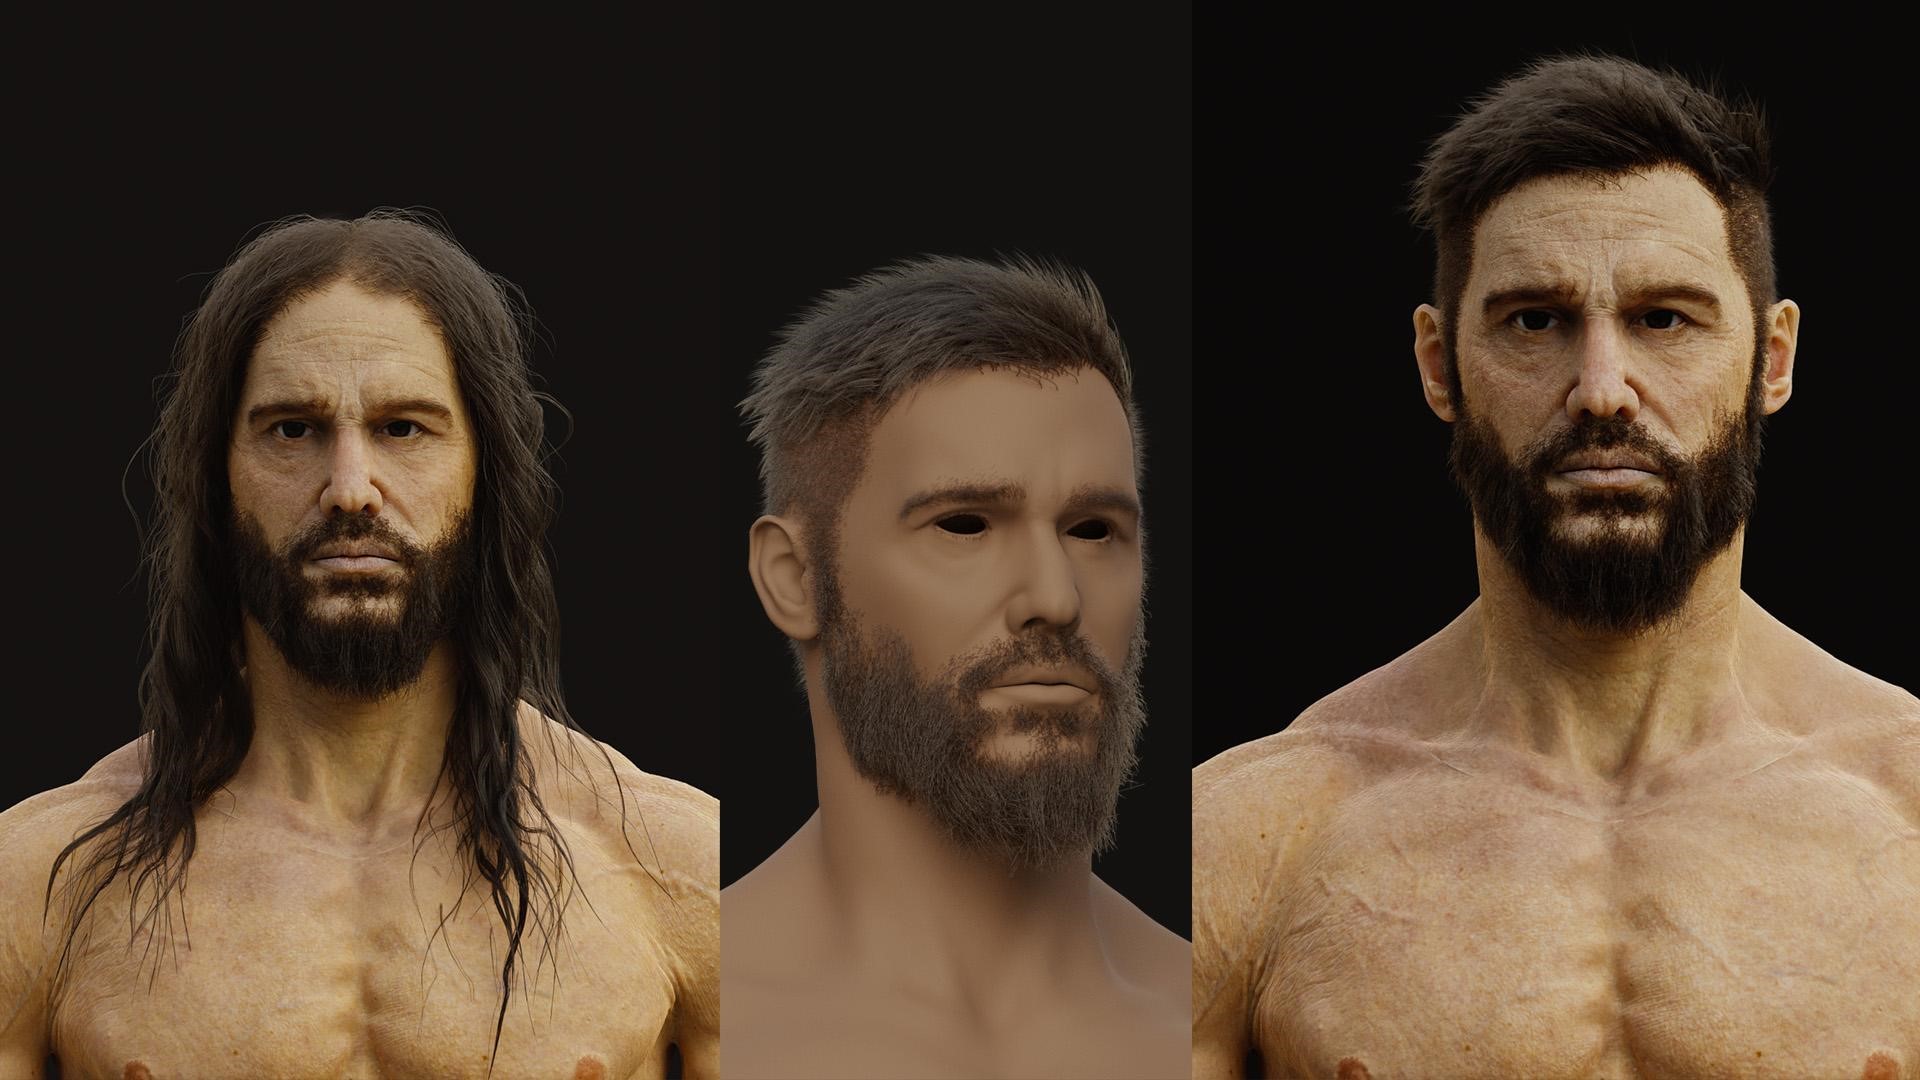
Some work in progress renders with the grooming (with a failed attempt on creating long hair).
Look Dev
Once I was satisfied with the hair, I moved into look-dev in Blender.

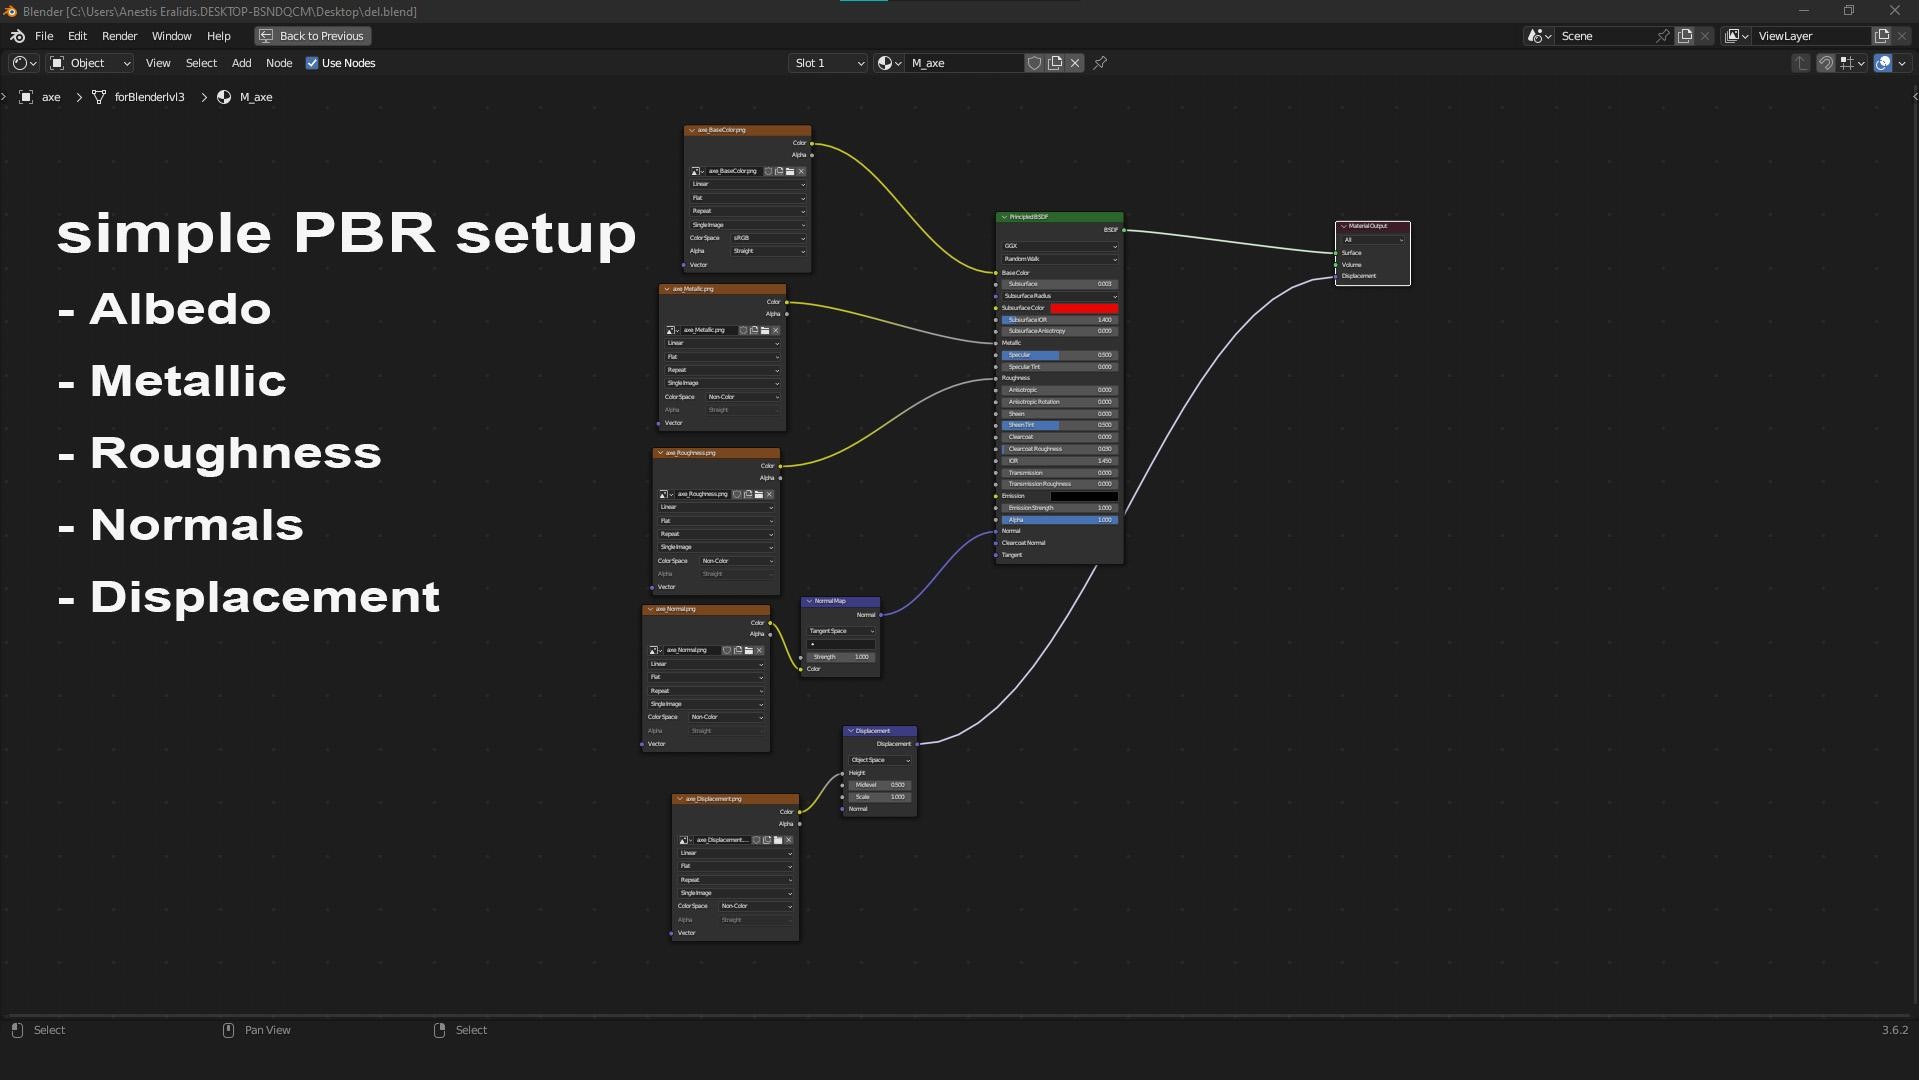
The shader is simple.
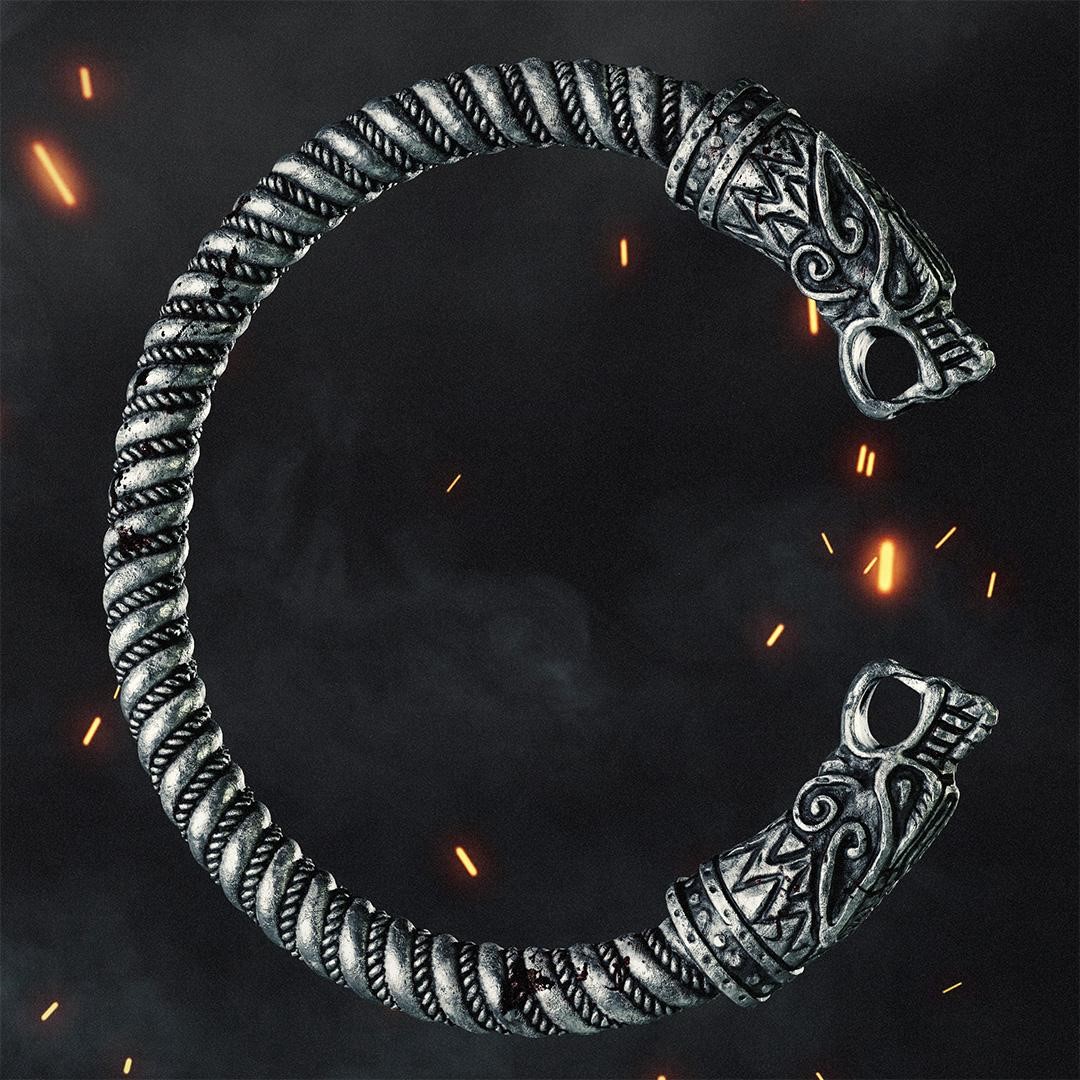
Accessories and clothing
Everything hard-surfaced was modeled in Blender and brought into ZBrush for detailing. This includes the sword, sword case, axe, jewelry, and belt.
After that, I textured them in Substance Painter and did a few test renders in Blender.
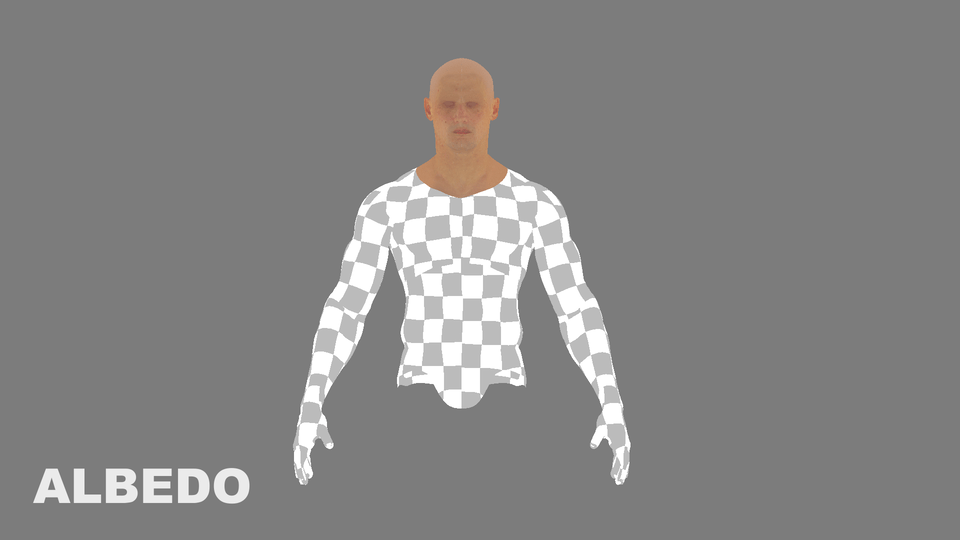
For the clothing, I used Marvelous Designer.
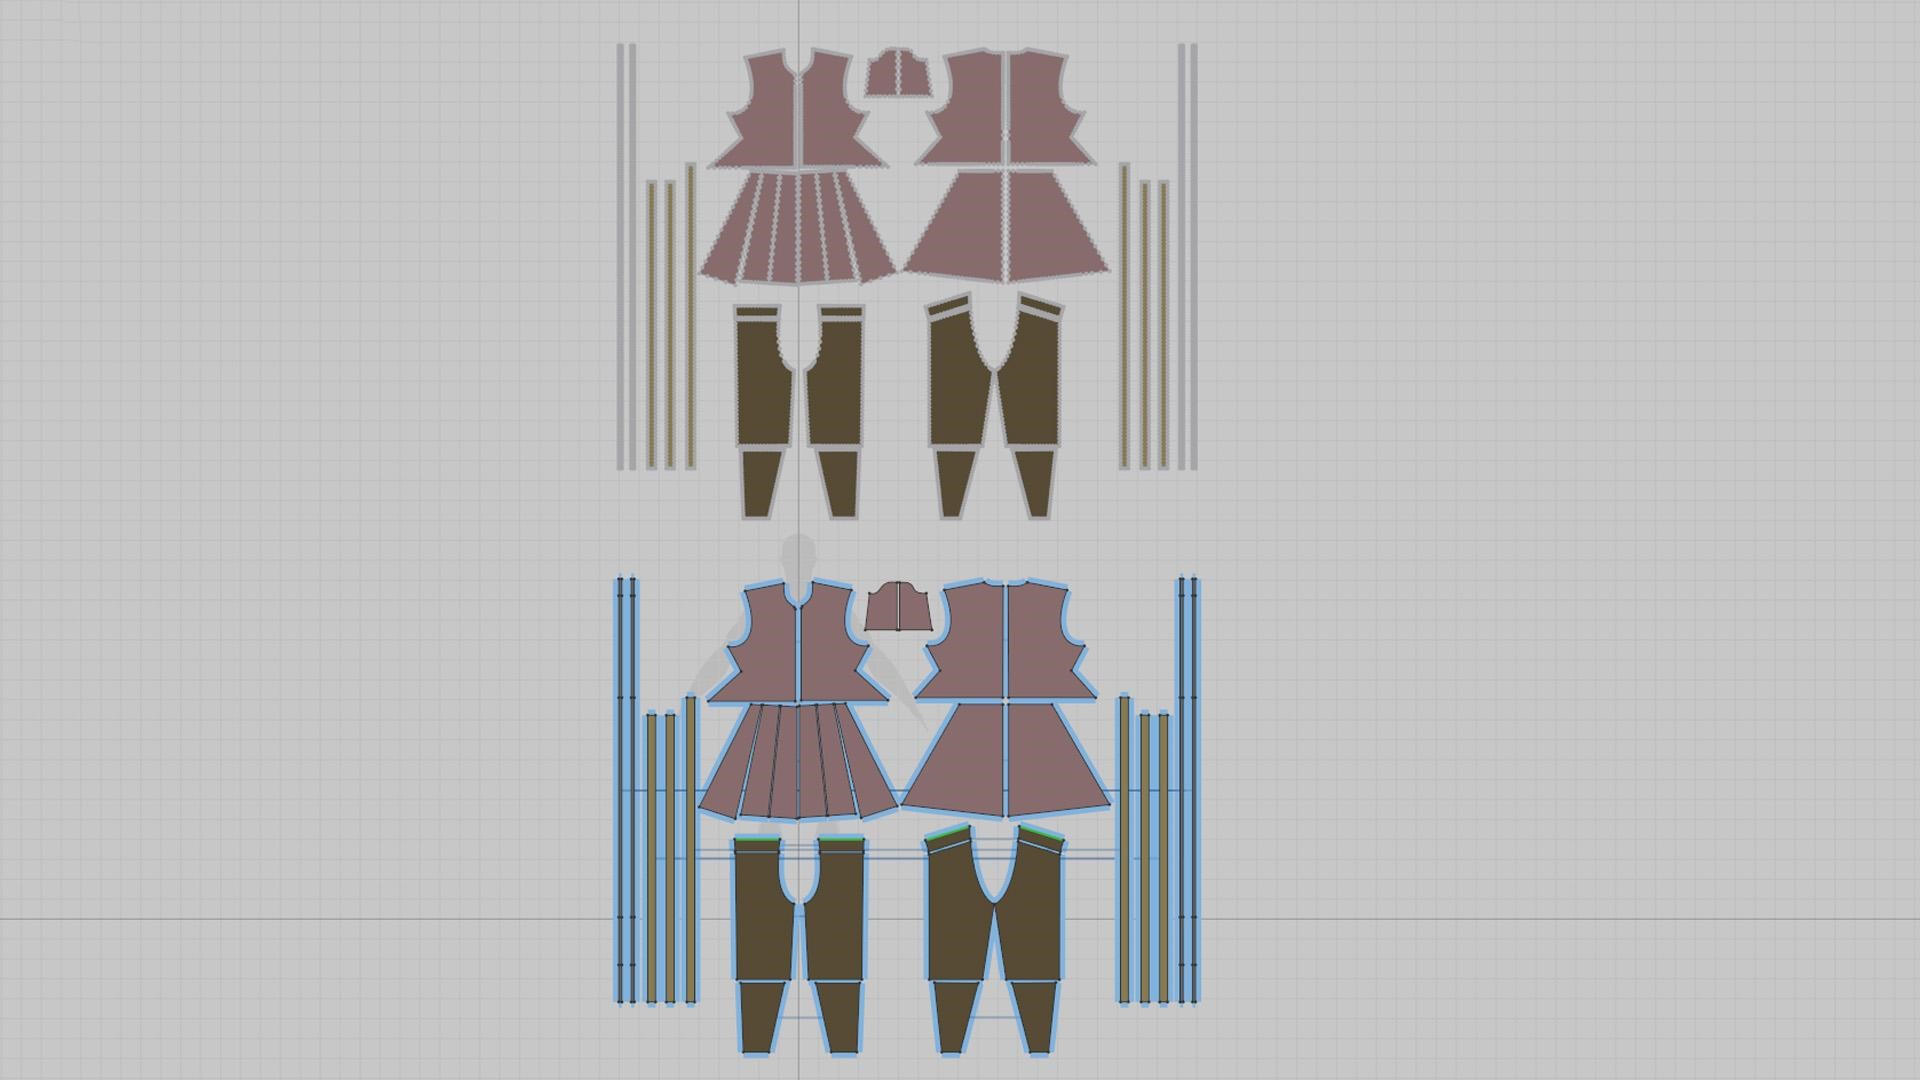
Once I was satisfied, I exported them to Blender for retopology and then to ZBrush for extra details such as folds and imperfections.
An easy way to get good topology on the clothes is to export the geometry from Marvelous Designer both “flat” and “3D.” This way, you can do the retopology on the flat geo and transfer the UVs from the flat geo to the clean geo. Now, the clean geo and the 3D geo from Marvelous share the same UVs, which will allow you to transfer attributes based on the UVs using the Mesh Data Transfer for Blender addon.
All parts for the main character were ready.
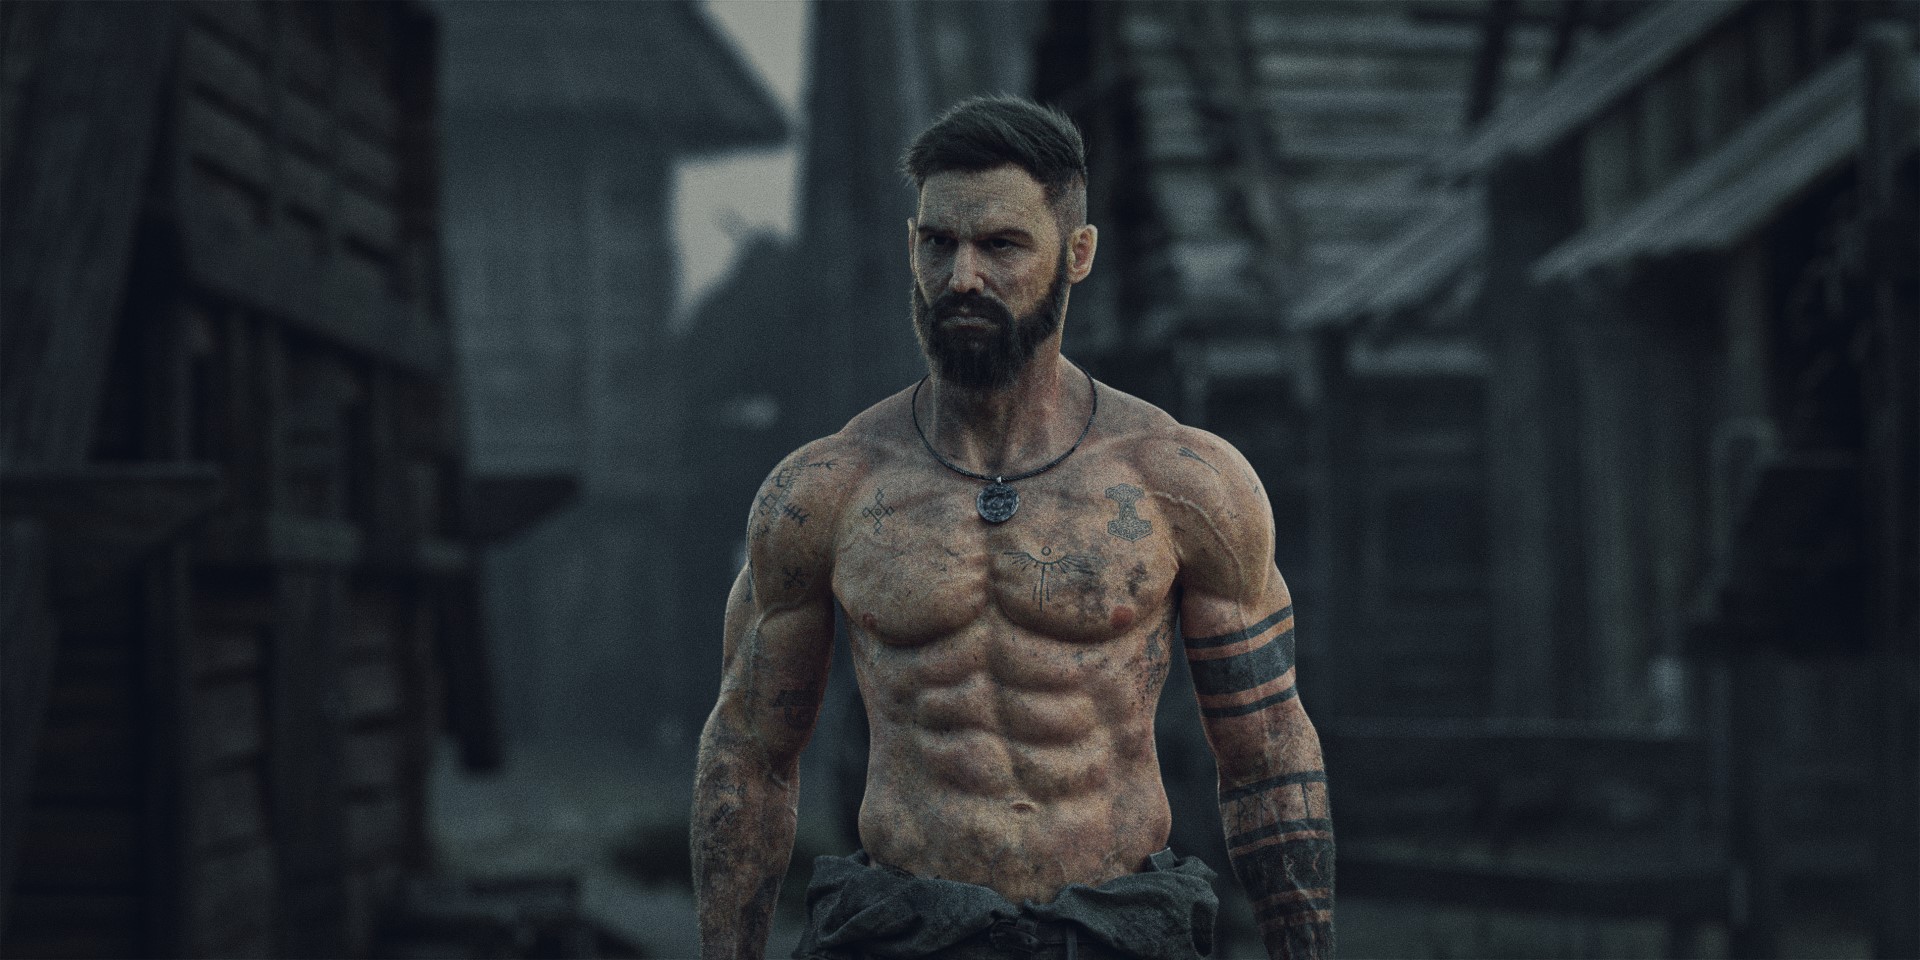
Background
The background consists of kitbashed elements. Basically, I gathered some free assets from CGtrader, Polyhaven, and Blendswap, and I put them together in a small village street. For the vegetation, I used the free assets that come with Geo Scatter. Textures were from Polyhaven as well.
Lighting
The light comes mostly out of an HDRi from Polyhaven with some extra lights to make the model pop out more.
Bringing Everything Together
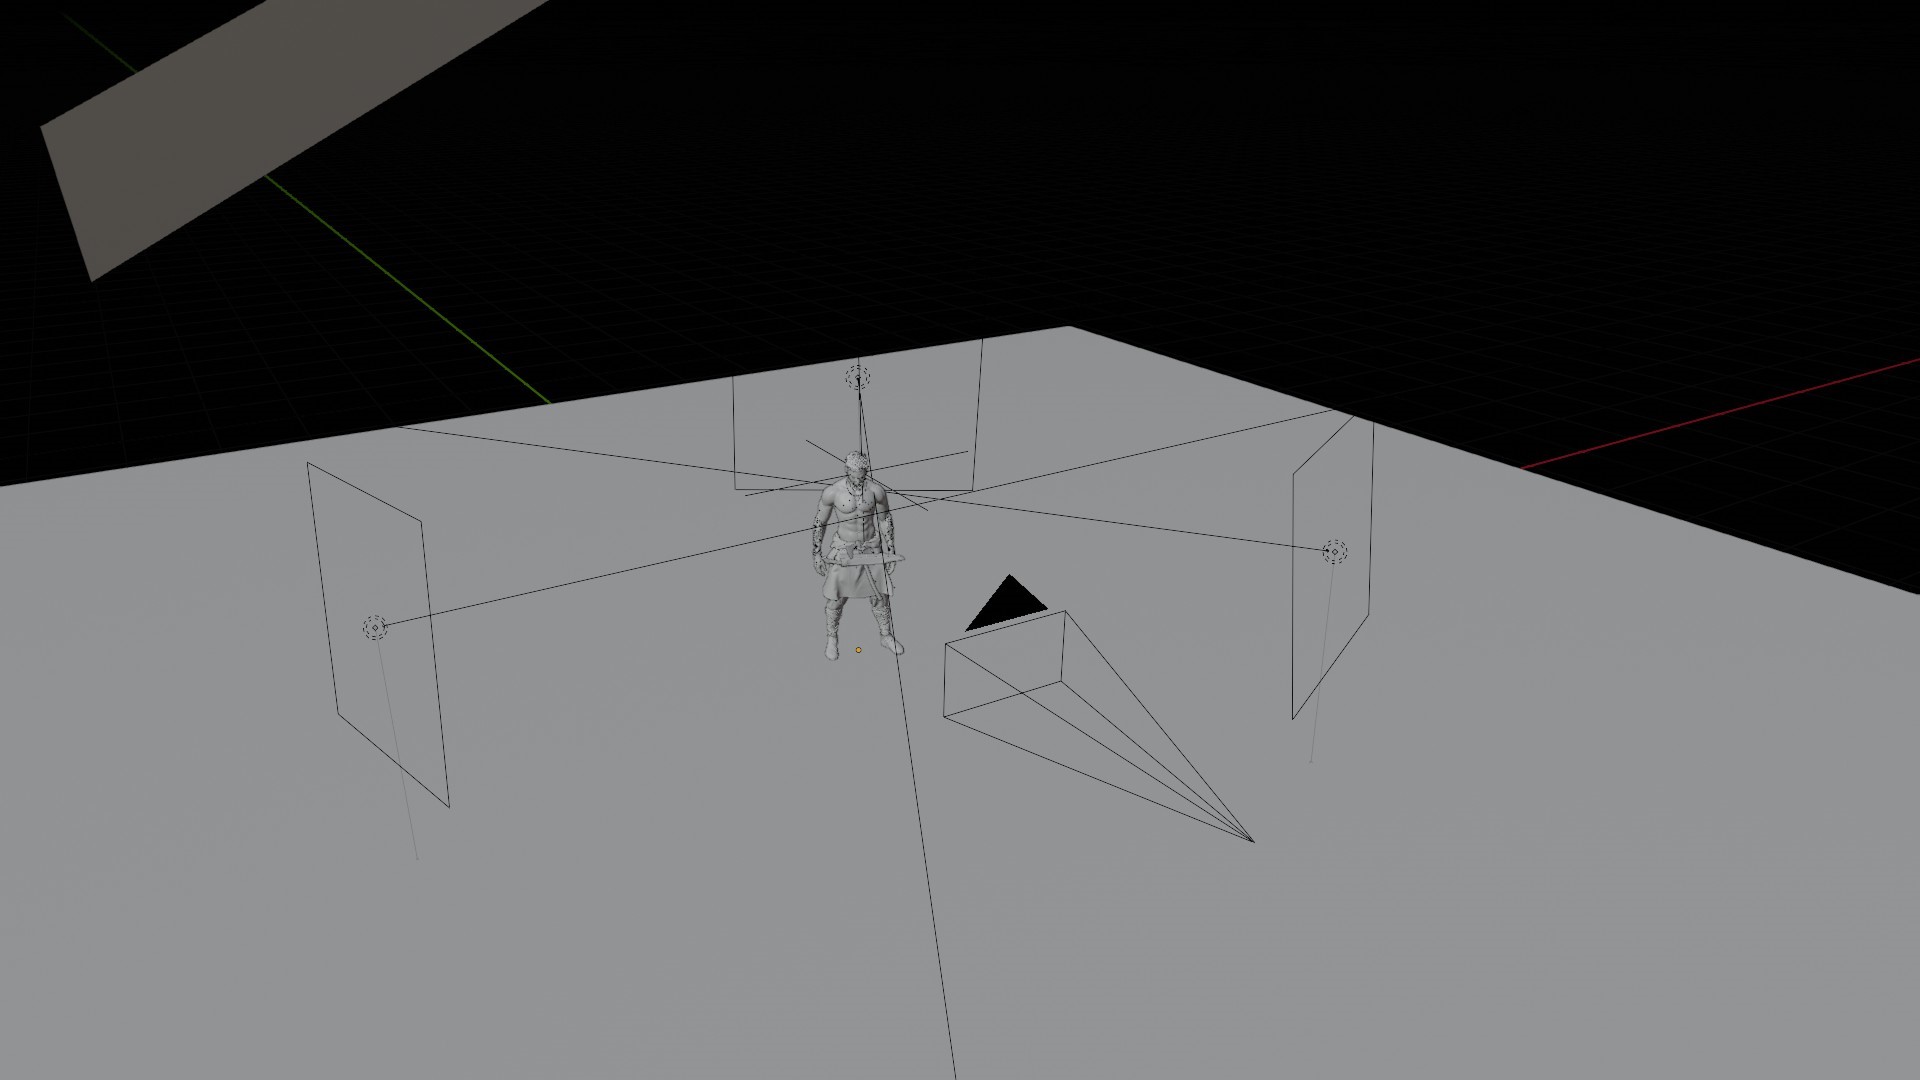
Now that I have everything, I put together a few scenes with different compositions, poses, and lighting scenarios to present the model. To pose the model, I used the Human Metarig that comes with Blender.
Lastly, I did some post-processing in Photoshop to get a cinematic look.
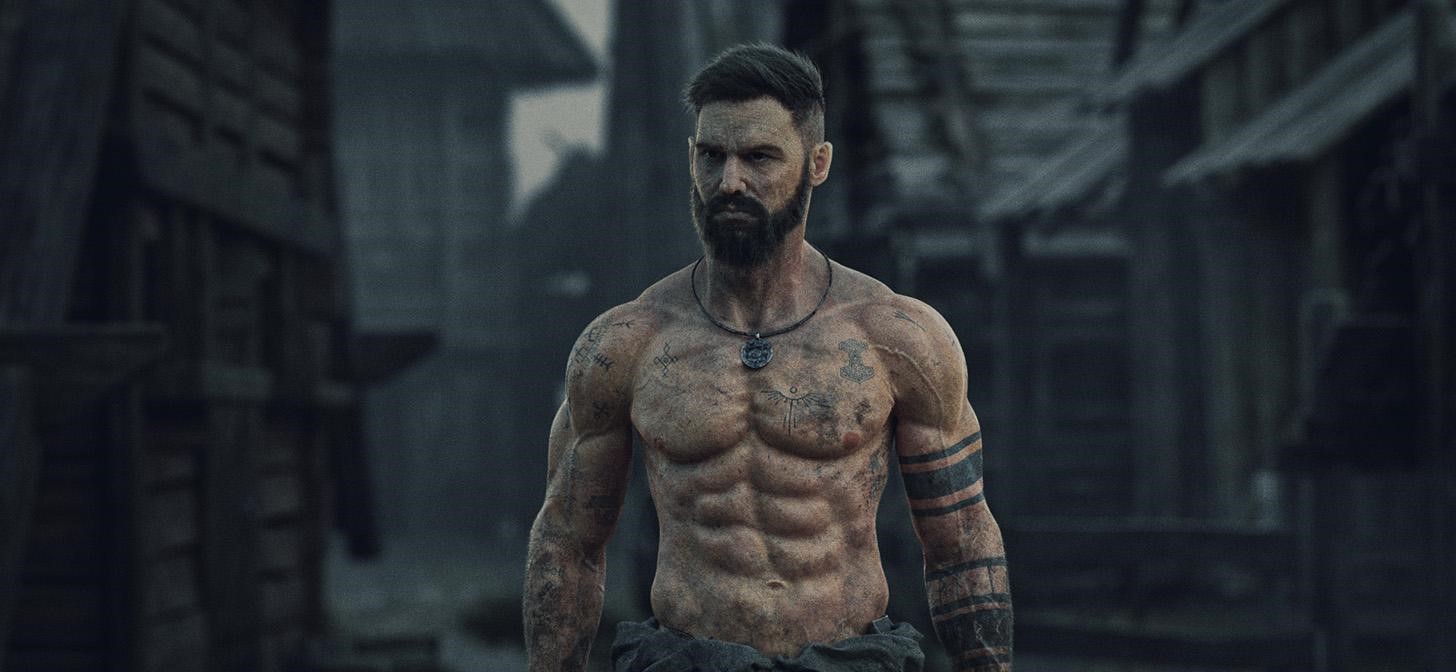
RENDER : The Northman


Thank you for reading this article. If you have any questions, feel free to reach out on any of my social media accounts. Have a great day!
About the Artist
Anestis Eralidis is a 3D artist from Greece, working as a freelancer in character design.