Behind the Scenes: Emperor Cat – Just Donate
INTRODUCTION
Hello, my name is Andrii Karpylenko, and I am a 3D character artist from Ukraine, currently working at Ubisoft Kyiv. I got acquainted with 3D about 15 years ago as a hobby, and have been working for almost 10 years. I think I started to use Blender around 7 years ago or so. Soon, it will be my 5th anniversary since I started to contribute to the Blender development fund, and I recommend everyone to support it. At work, I’m known as the Blender guy who convinces everyone to try it, and I’ve convinced more than one person to switch to the light path—the Blender path.
INSPIRATION
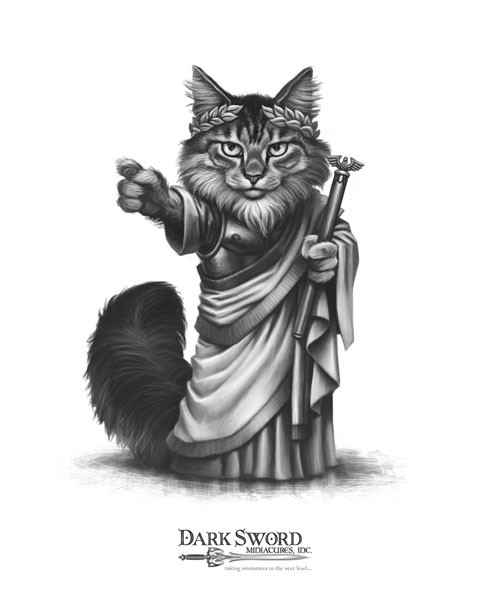
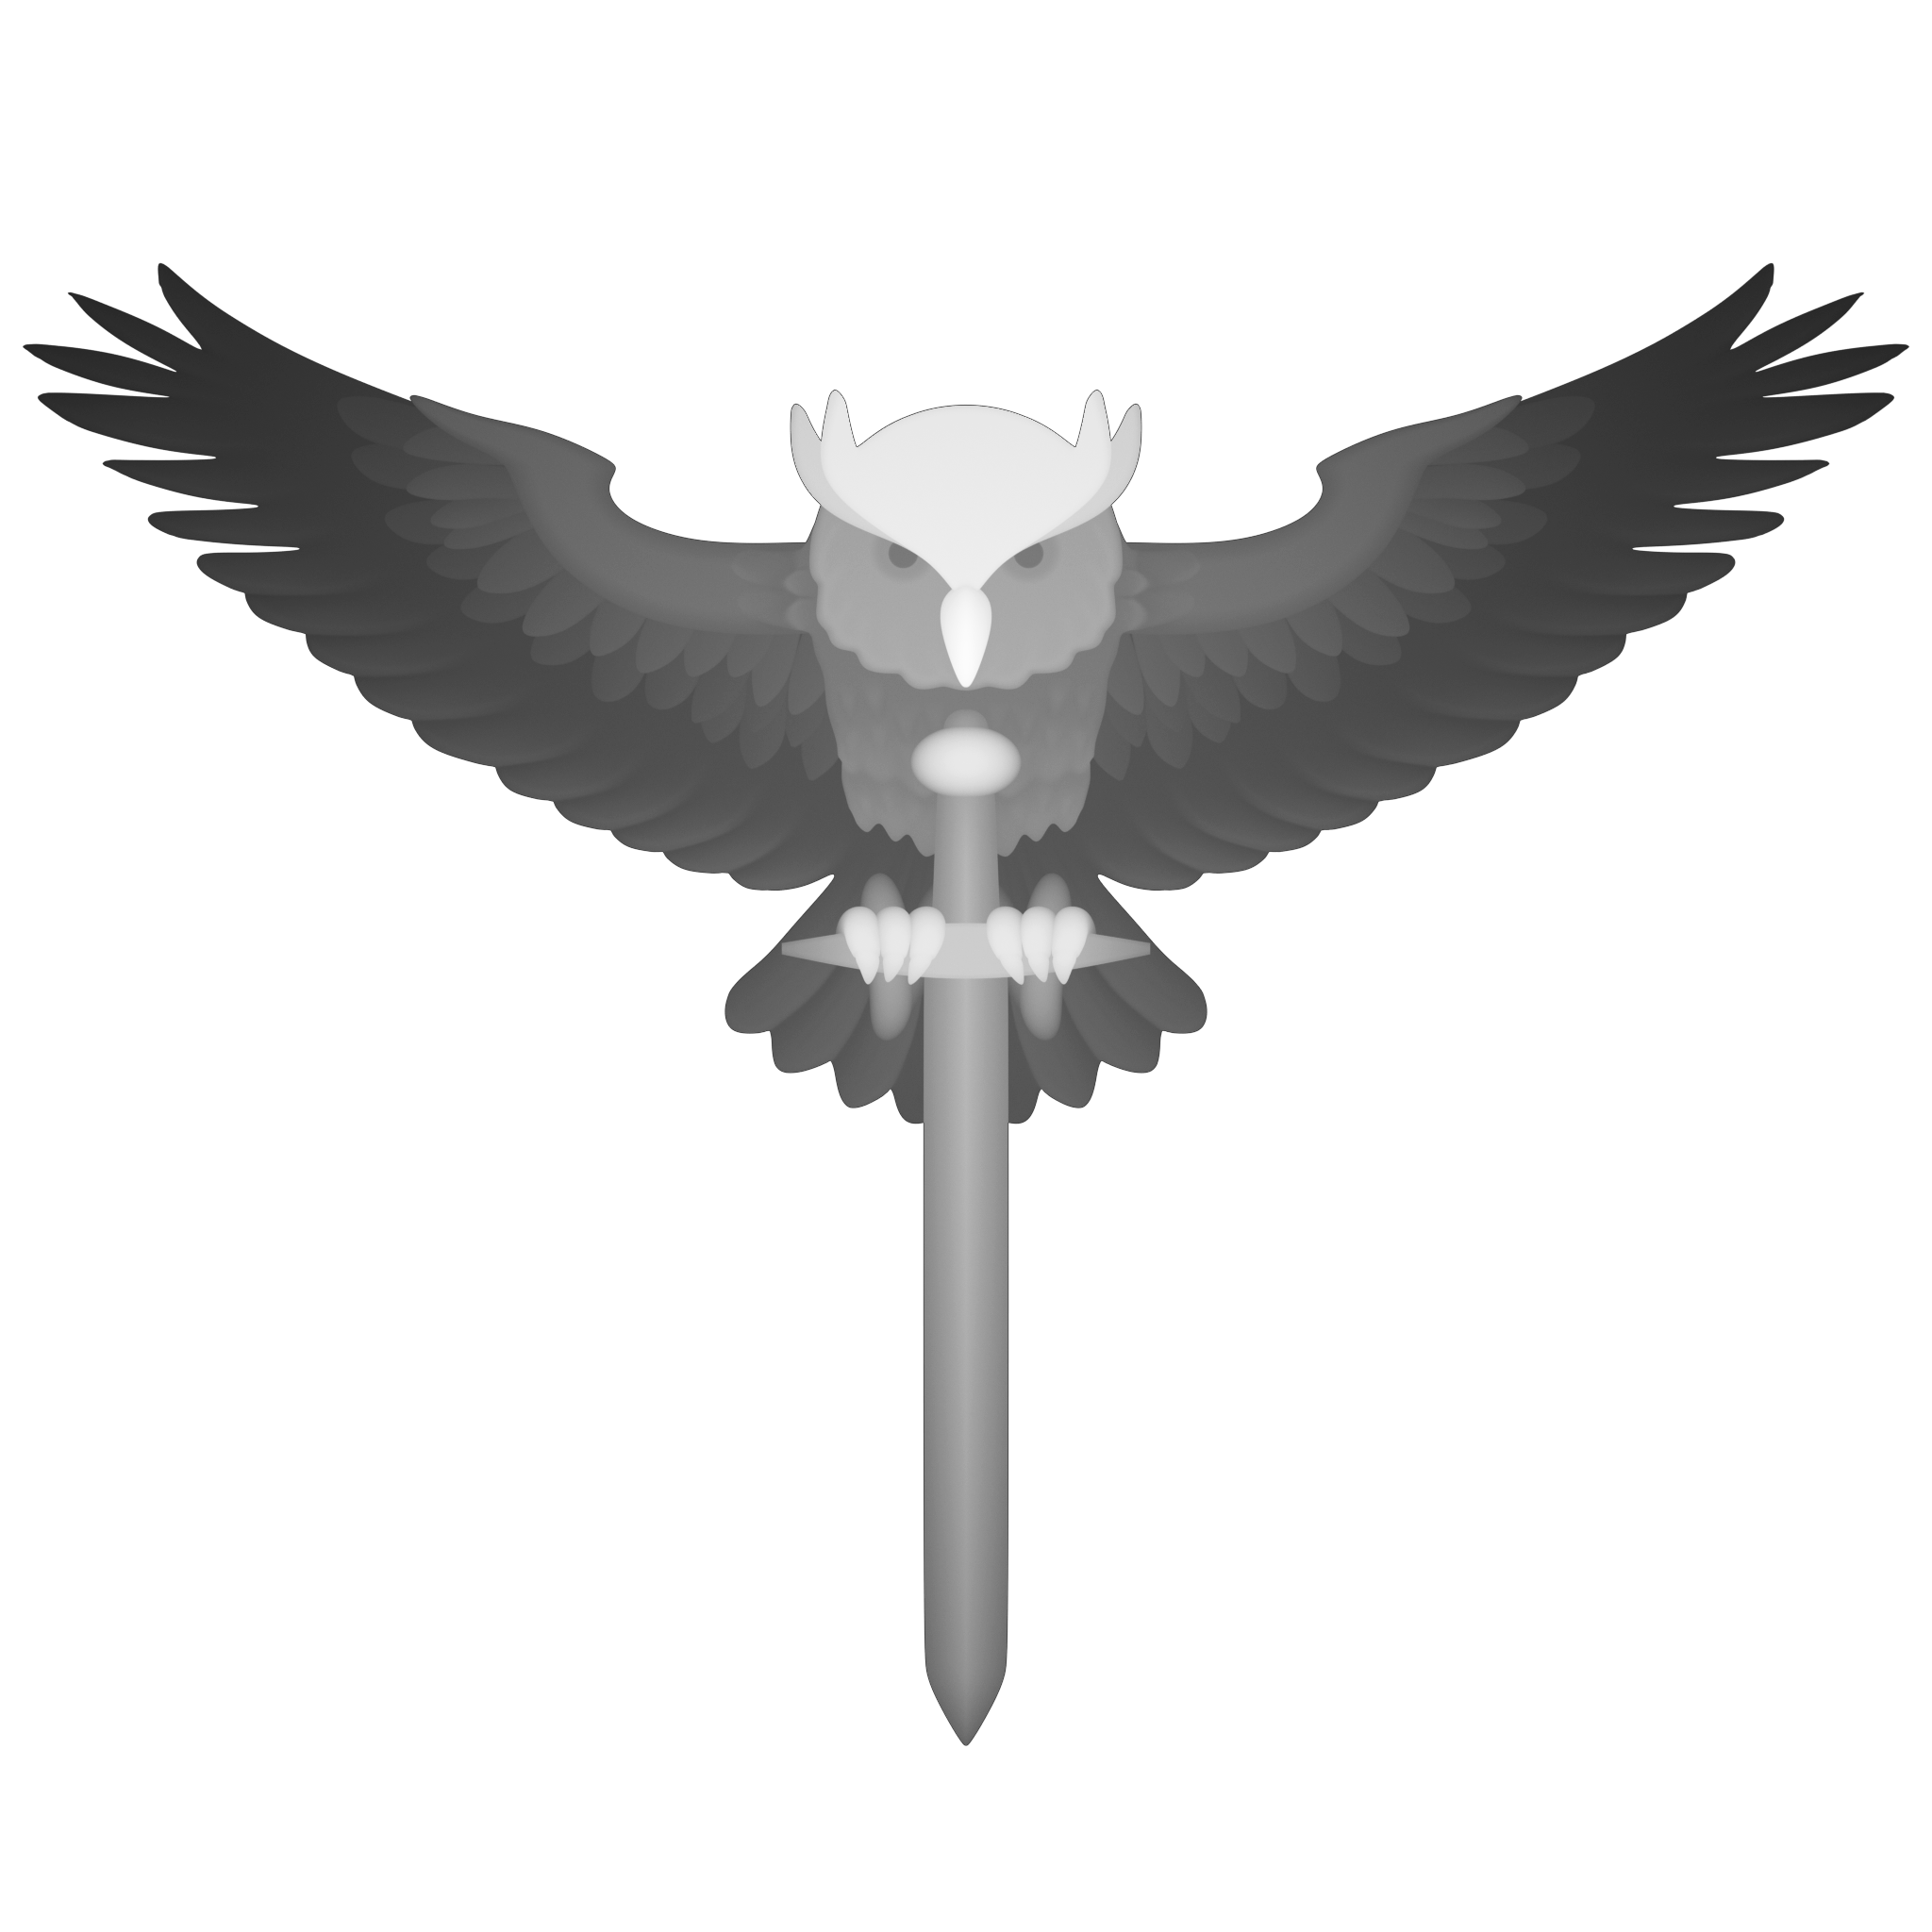
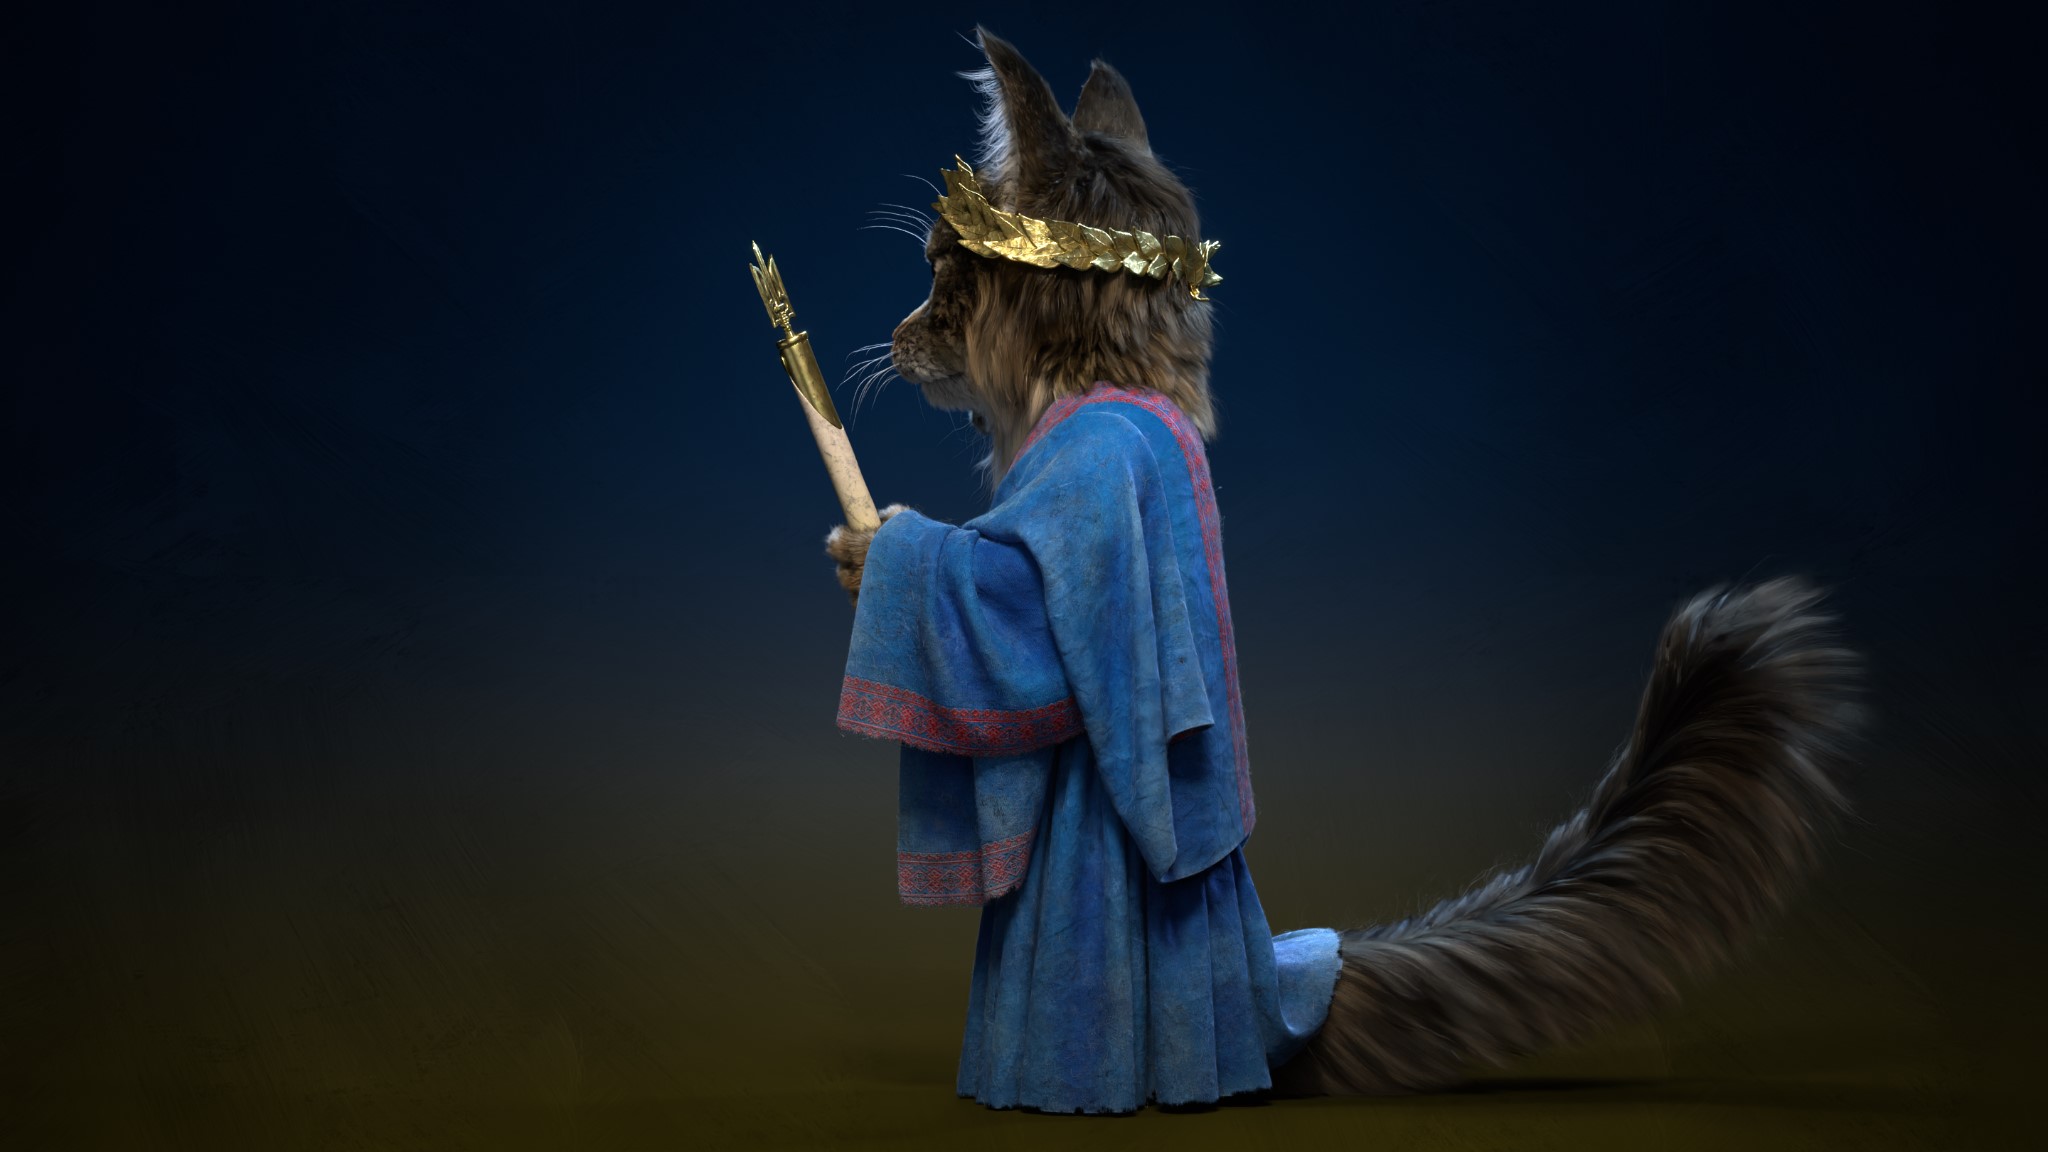
This project is based on this concept art by Mr. Des Hanley from Dark Sword Miniatures.
My parents-in-law had a cat, Sima, of this breed which unfortunately passed away. And the moment I saw this concept art, I knew I should do it.
Also, I wanted to make some artwork with fur in Blender for a long time. I had experience in creating fur in Maya Xgen for the movie “Mavka,” so I already had some knowledge about fur. Now that Blender has a new hair system, this moment has come.
Adding to that, I wanted to raise the topic of the importance of donations. It can be donations to open source companies like Blender, Krita, and Godot, or donations to your local animal shelter. It can be donations to help Ukraine, or to charitable funds such as United 24, Come Back and Alive, and Serhiy Prytula Charity Foundation.
Even the tiniest help matters. Together, we can make the world better and safer. This is the message I want to bring to people.
PROCESS
For this work, I used Blender as the main program.
Modeling
First, I modeled the blockout in it. I created proxy objects and then, using it as my guide, I simulated the cloth in Marvelous Designer.
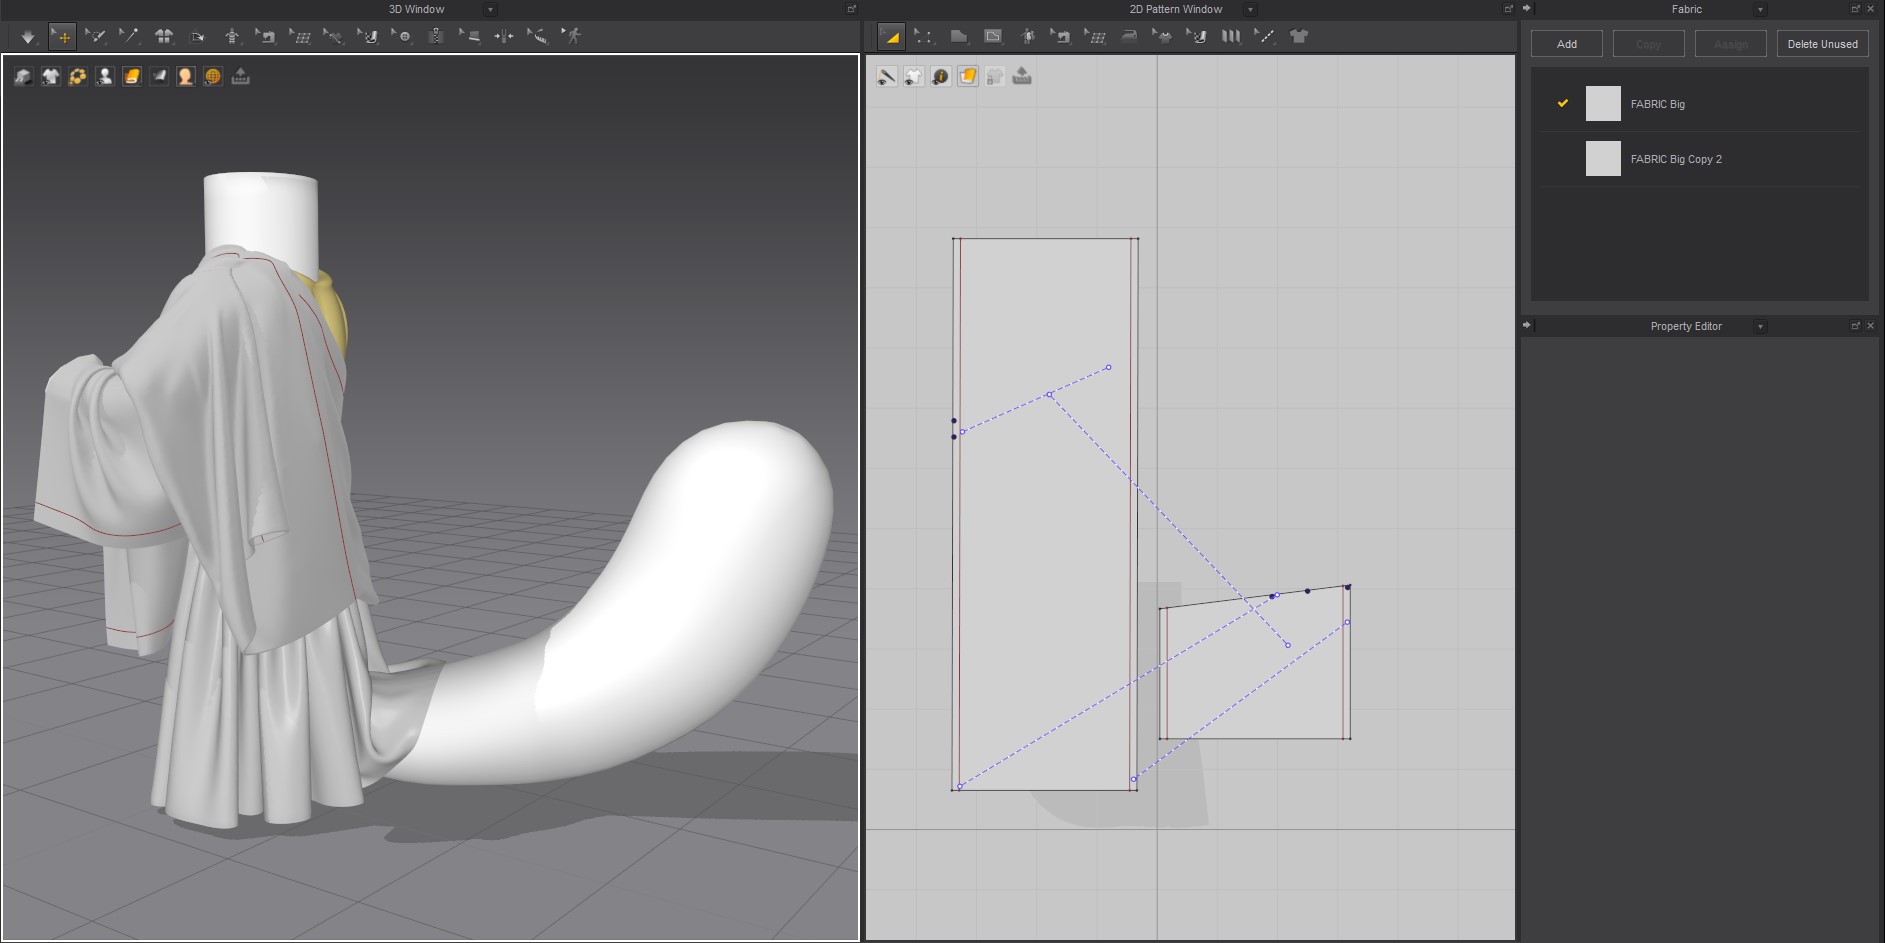
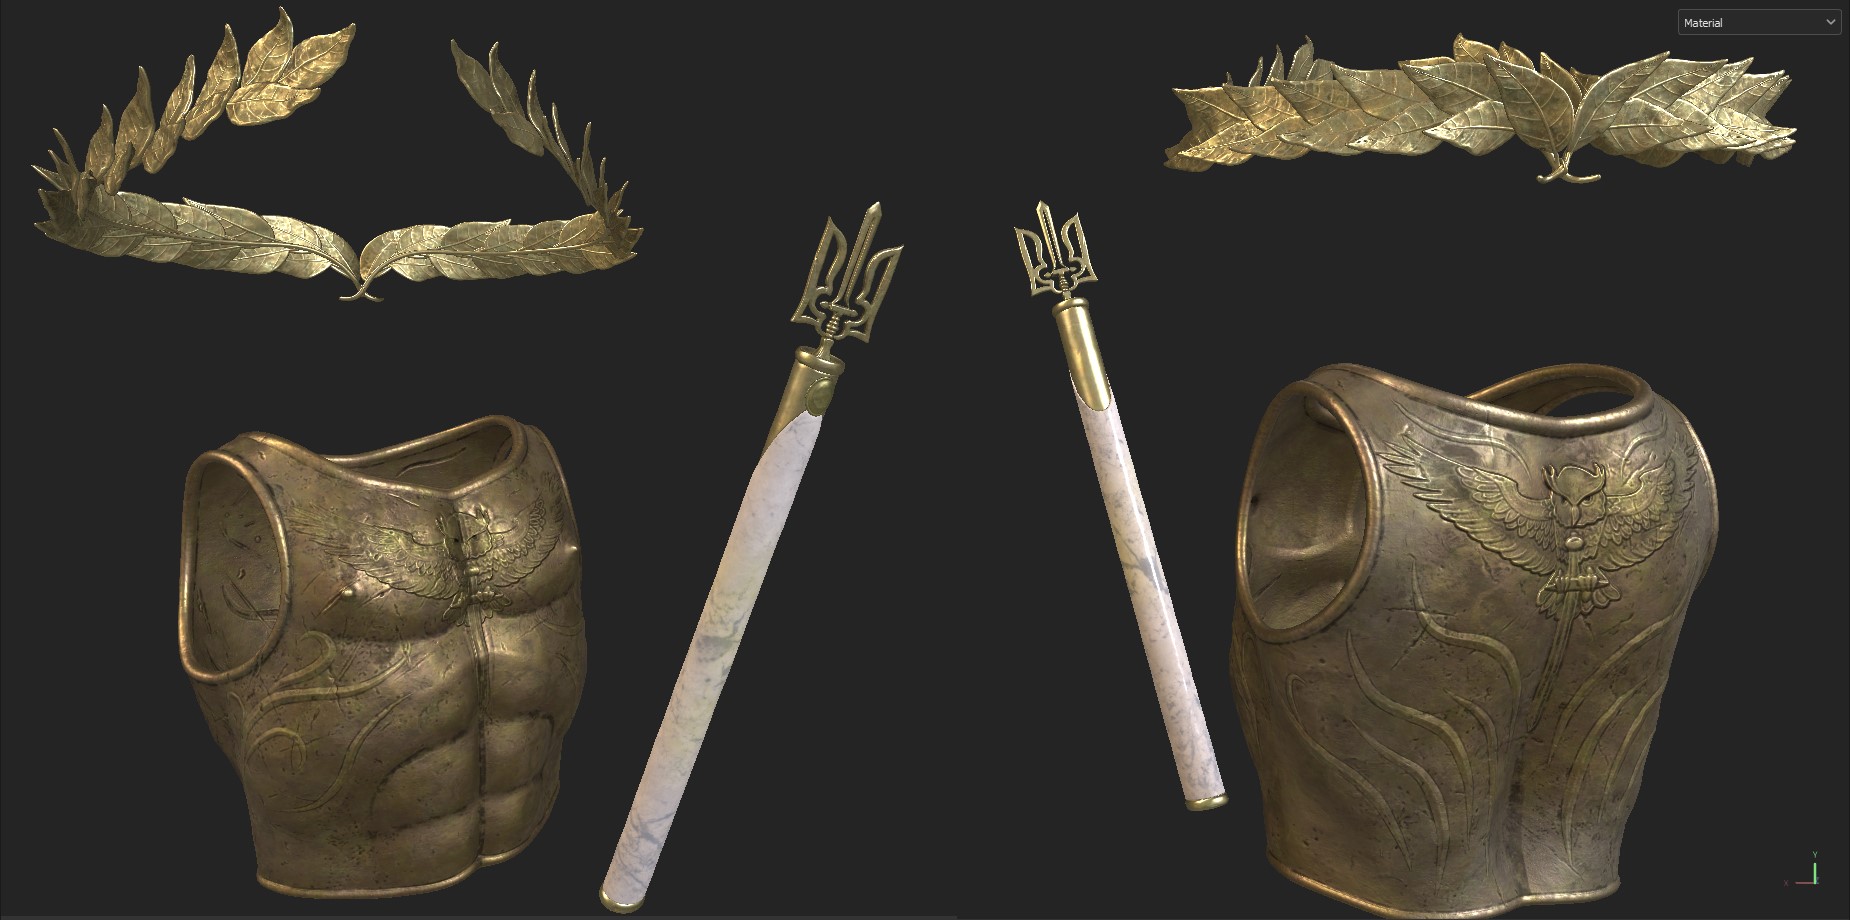
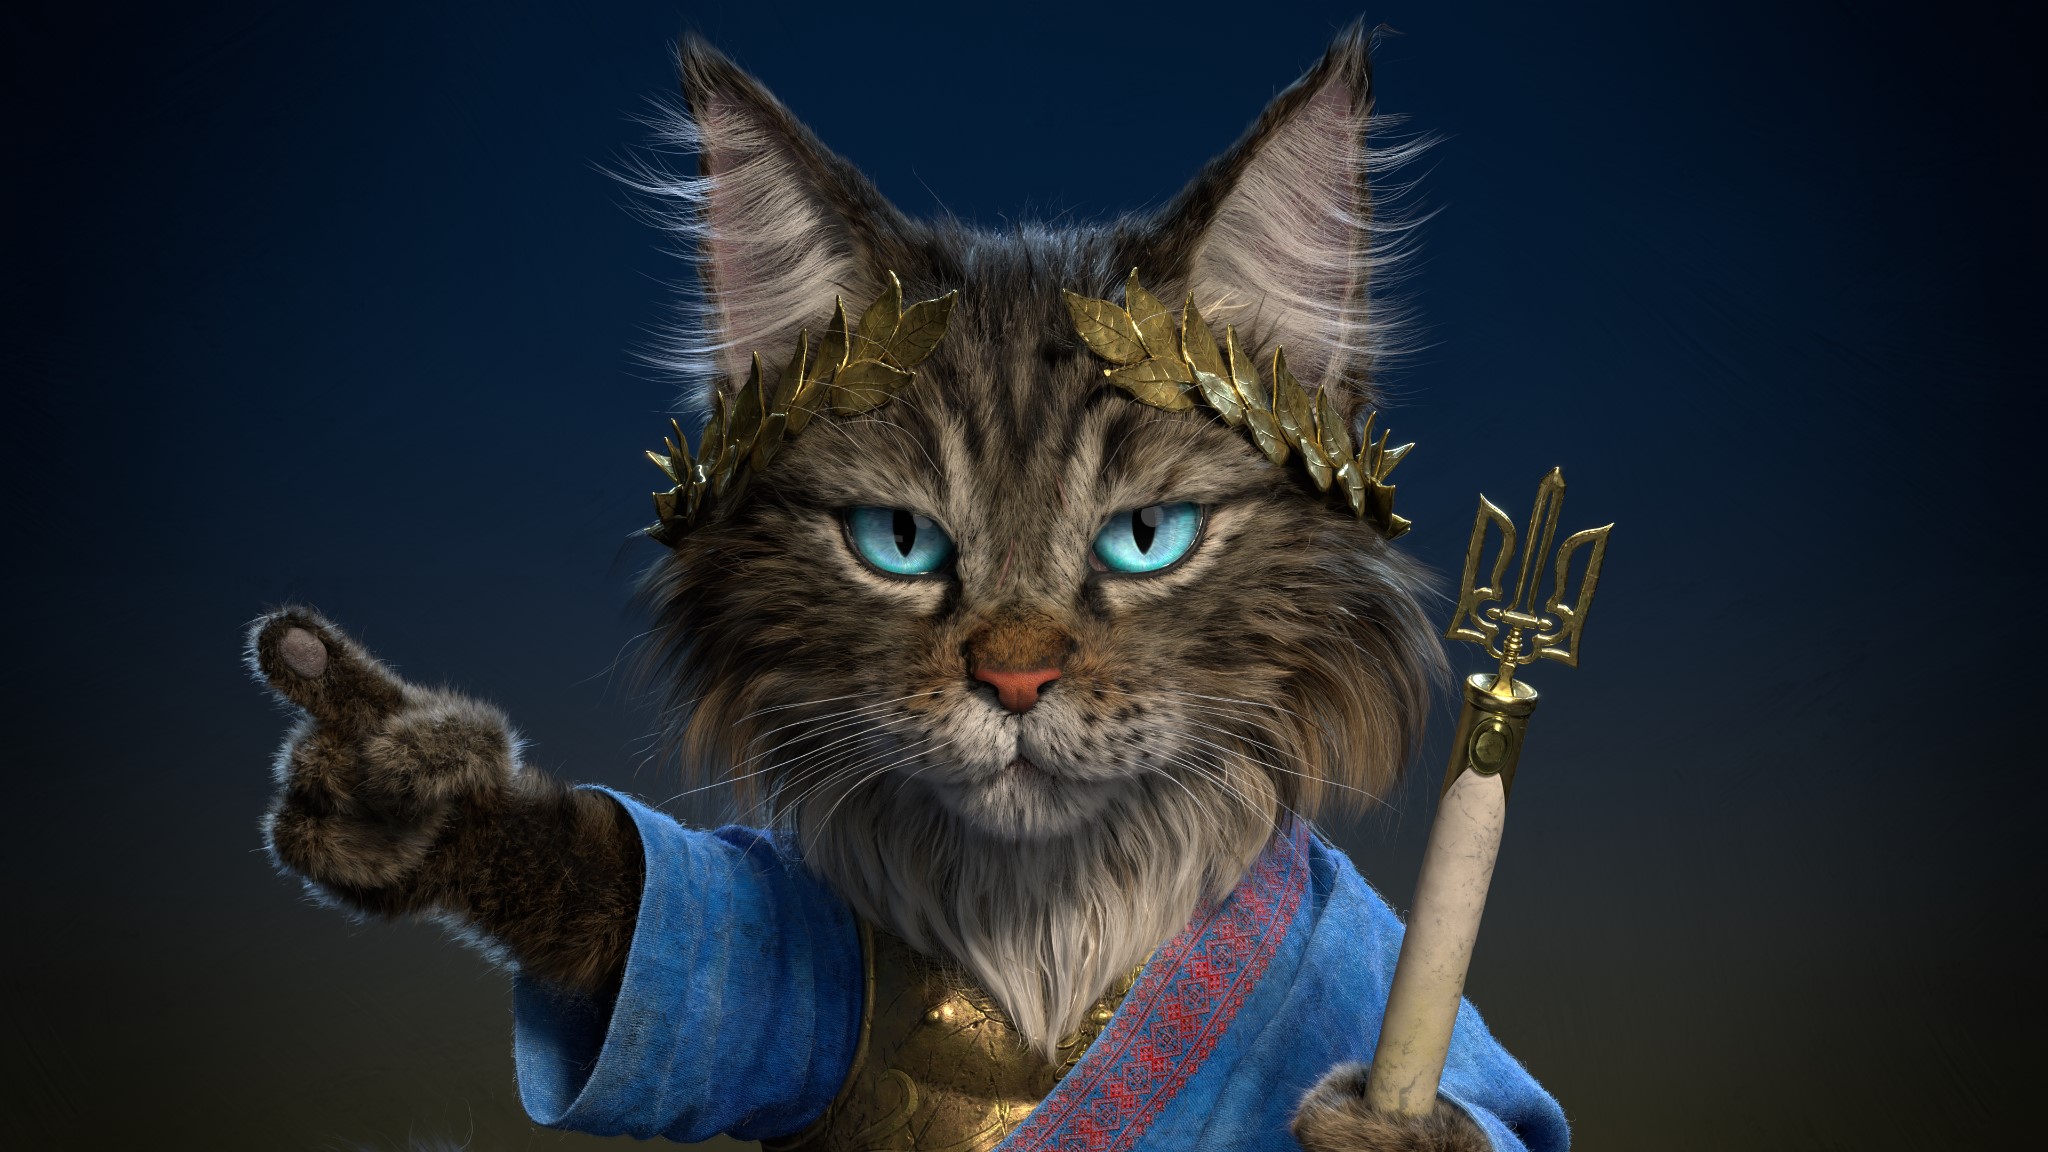
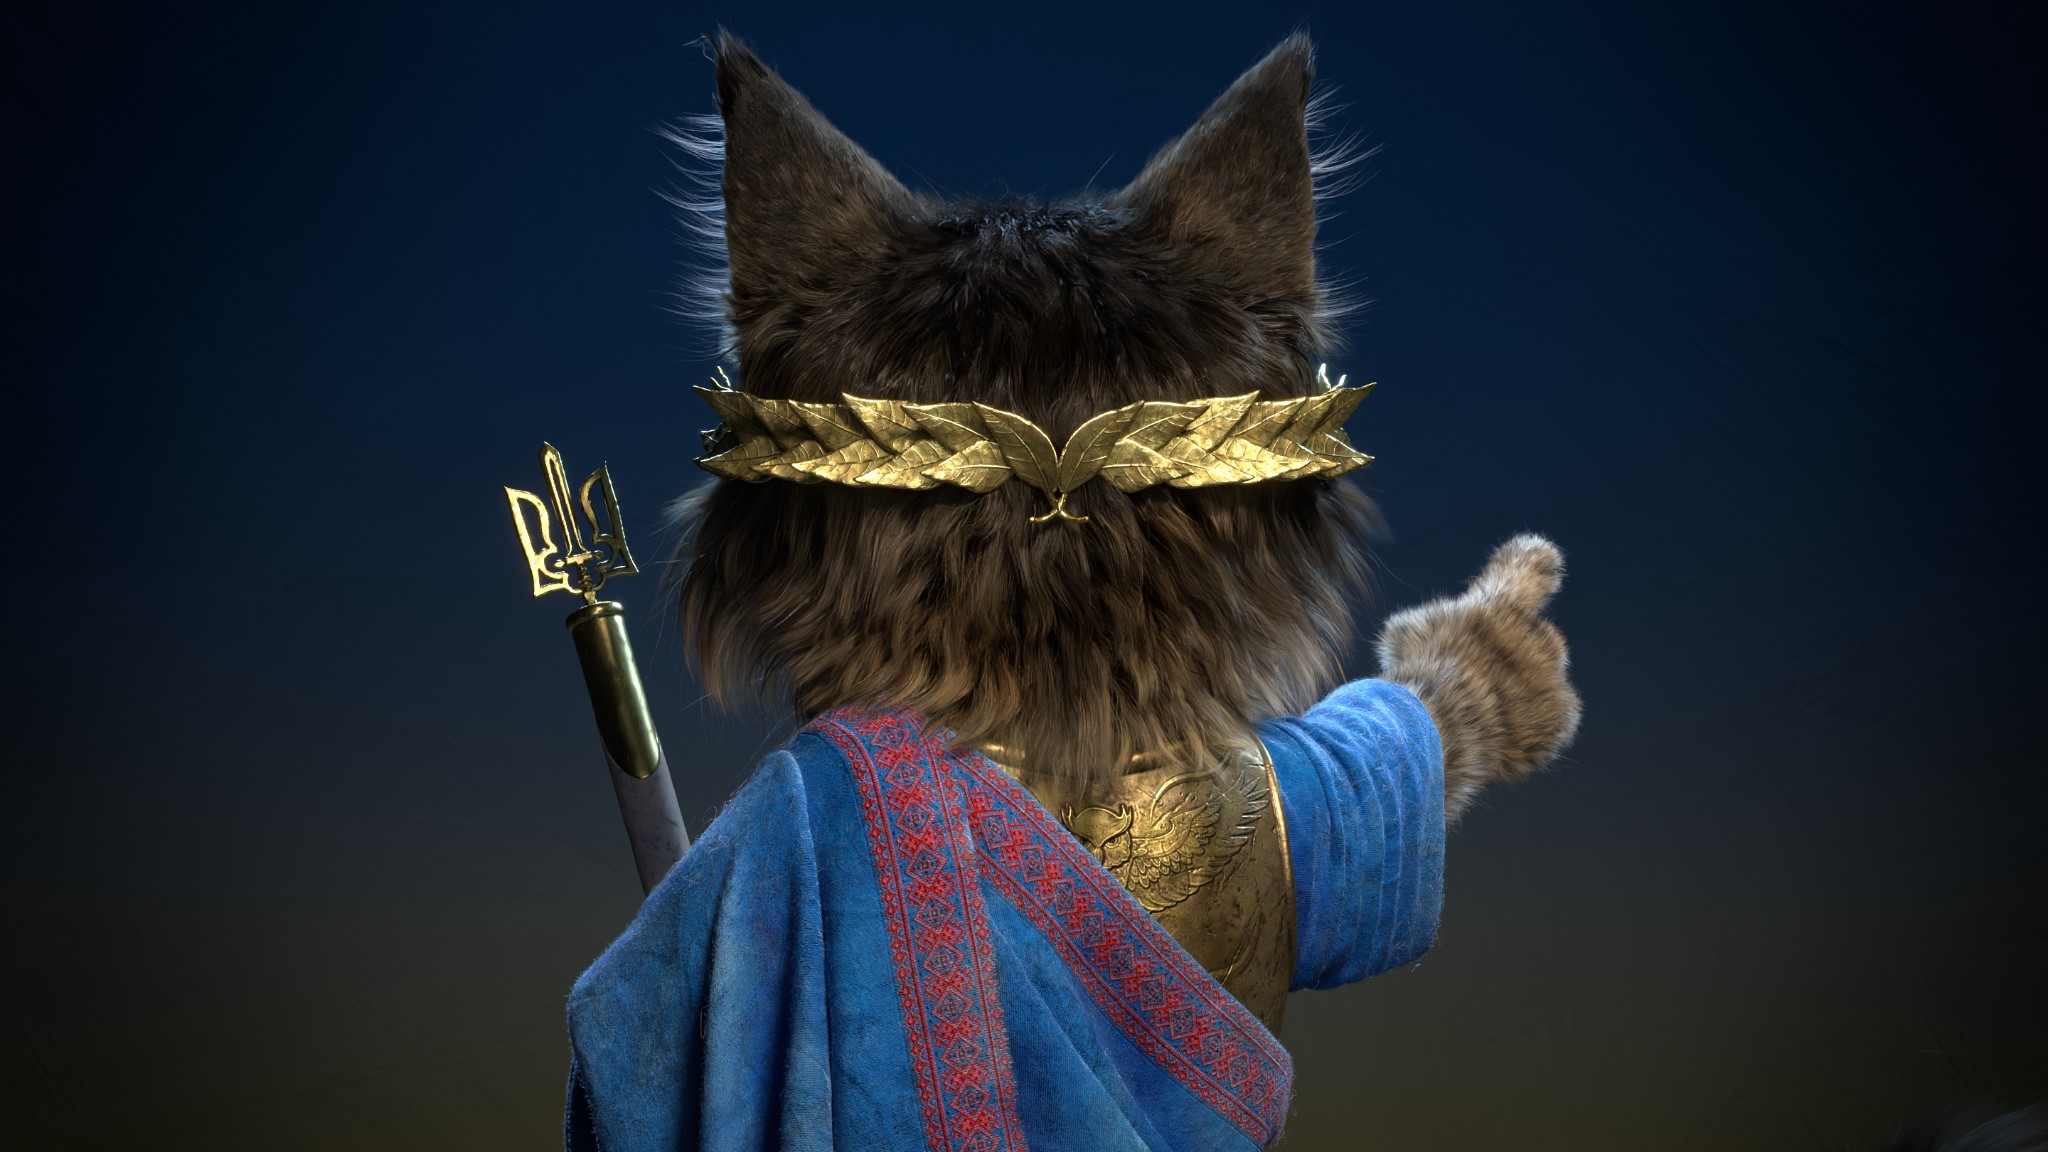
I sculpted the armor and did retopology in Blender. I also created the alpha ornament for the armor using Blender. I modeled it and rendered a depth view.
Later, I used this alpha in ZBrush. I used ZBrush for detailing, adding some scratches, damages, and ornaments.
Texturing
The texturing for the armor, cloth, and skin was done in Substance Painter. Nothing special.
Hair
And now, we come to the main part of the work—grooming. First, we need to place a good foundation with curve control guides.
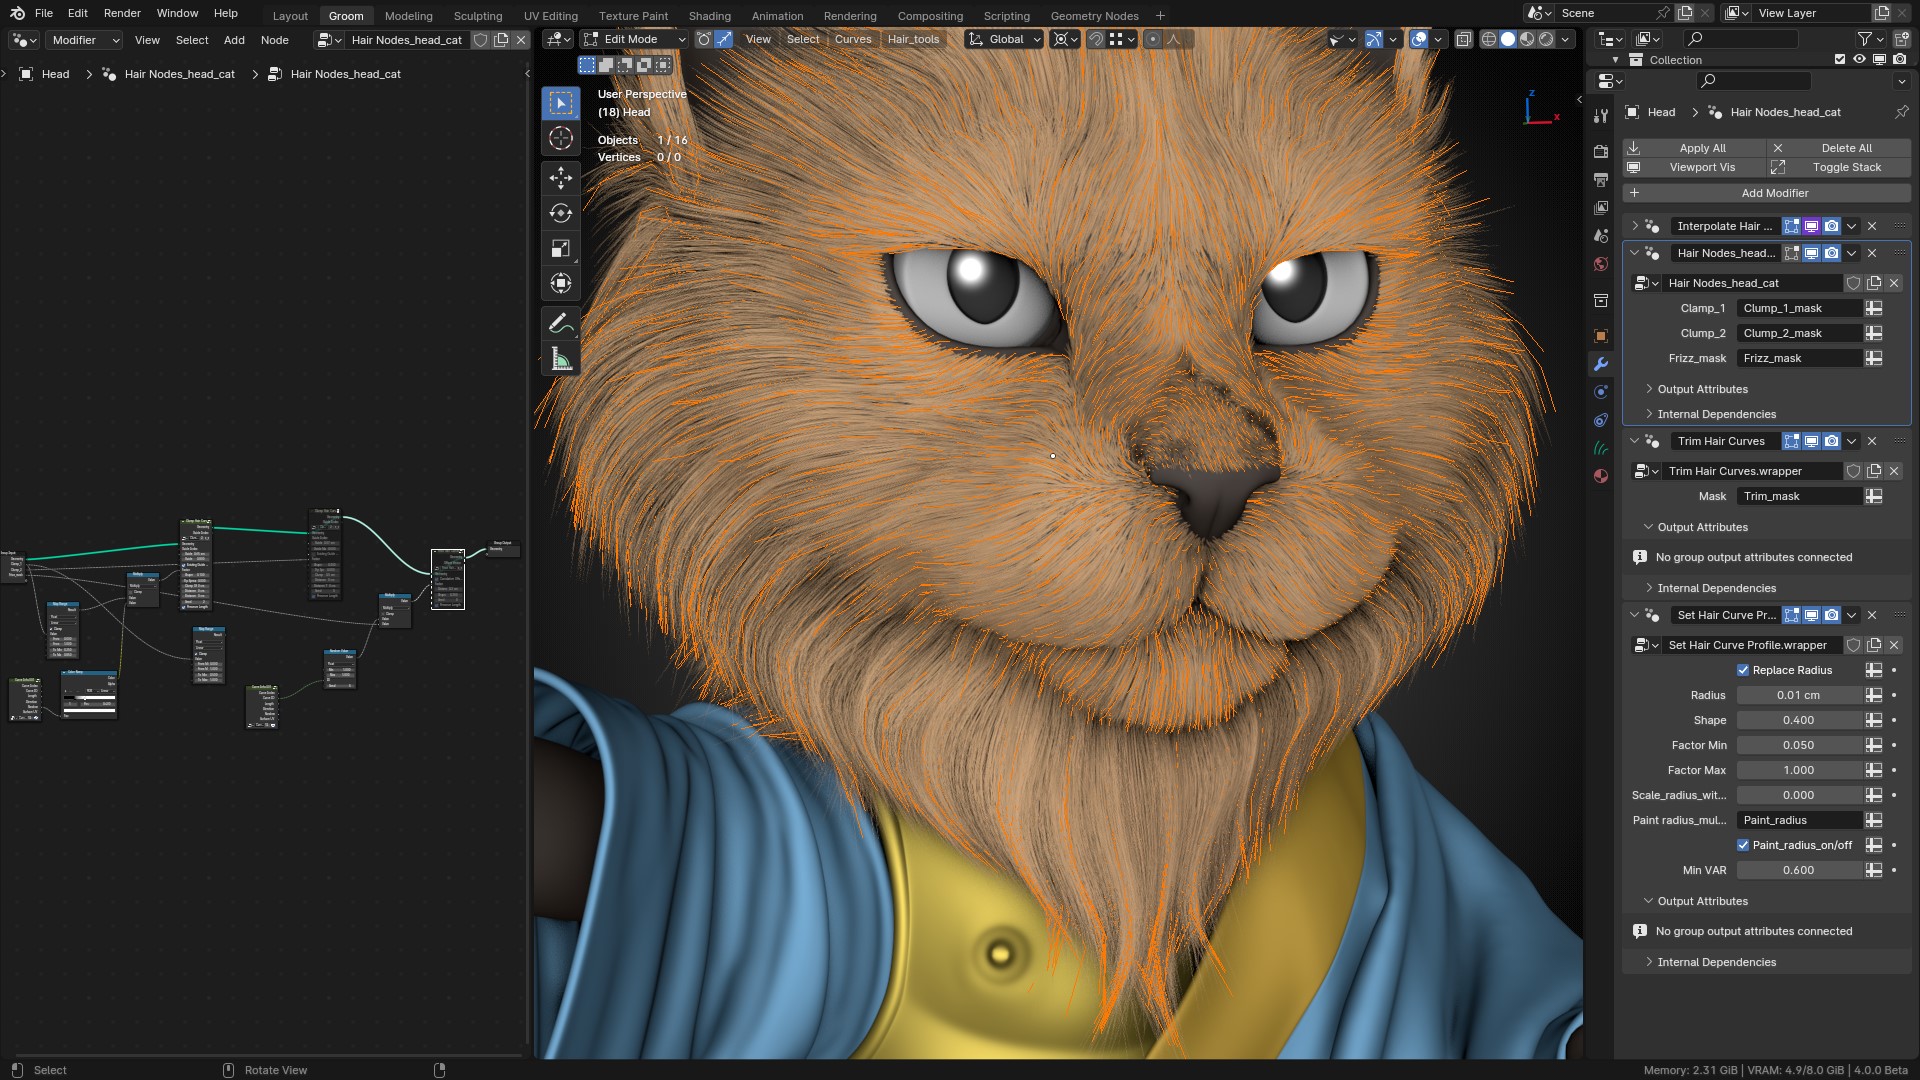
This is not the final result. I added an interpolate modifier and some clamp/noises. After that, we need to continuously go back and edit curve guides and modifiers.
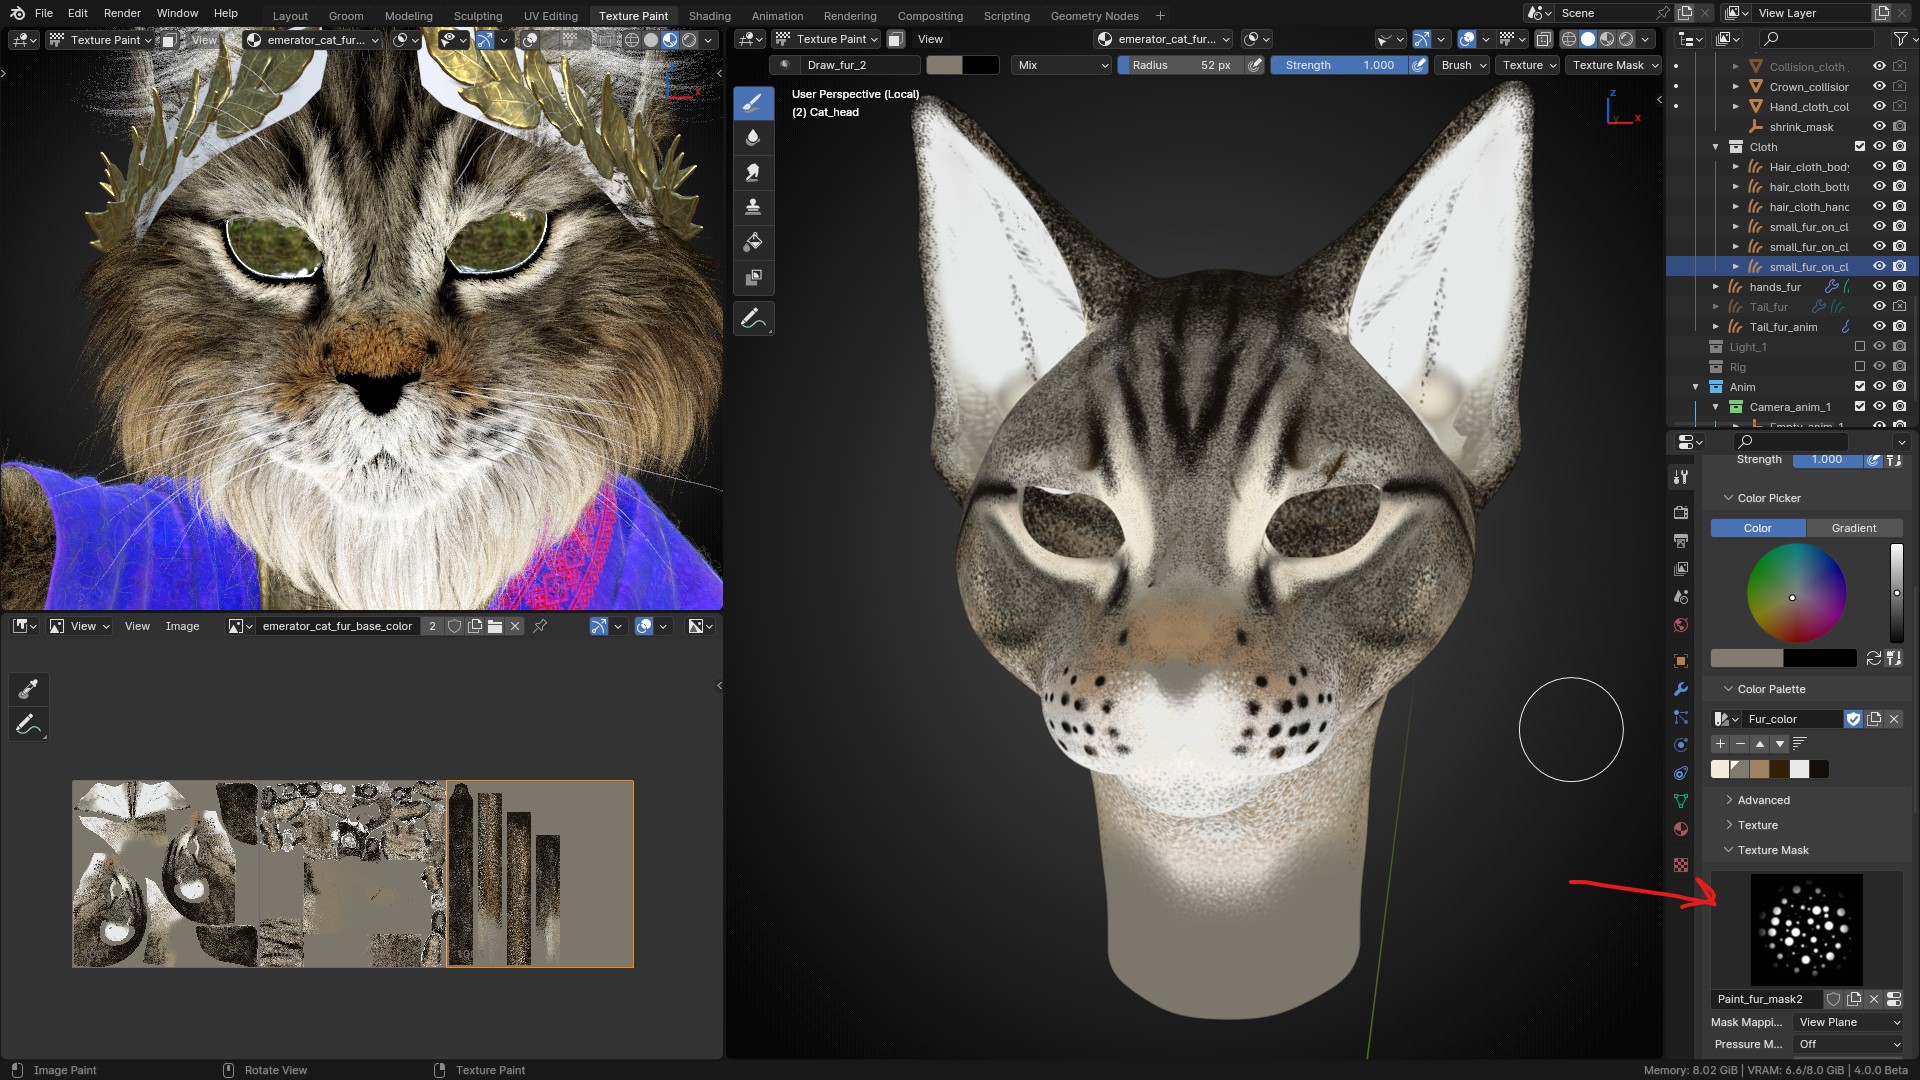
I painted some masks for clumps, fuzz, and noise via vertex paint.
I constantly rendered fur with material, which is quite different in render and you can see some errors you don’t see in viewport.
After some time, I got a final result.
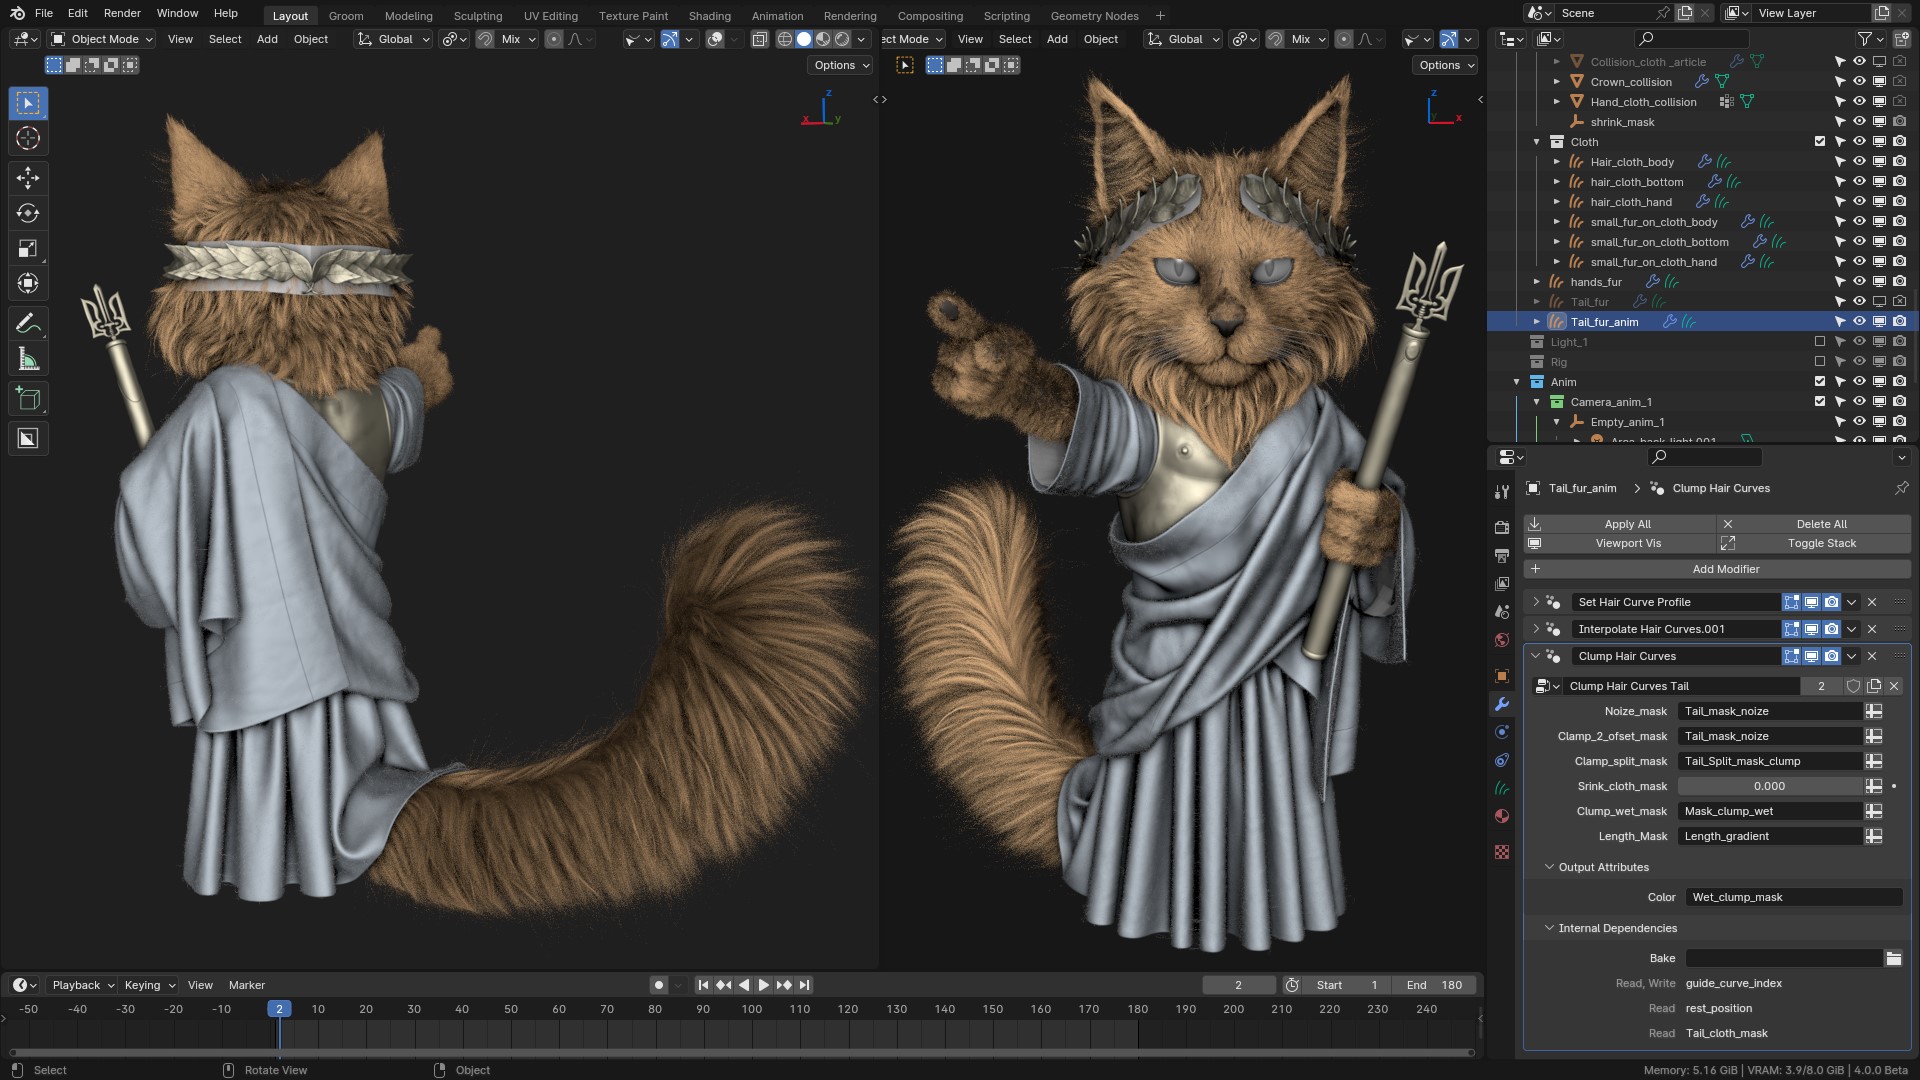
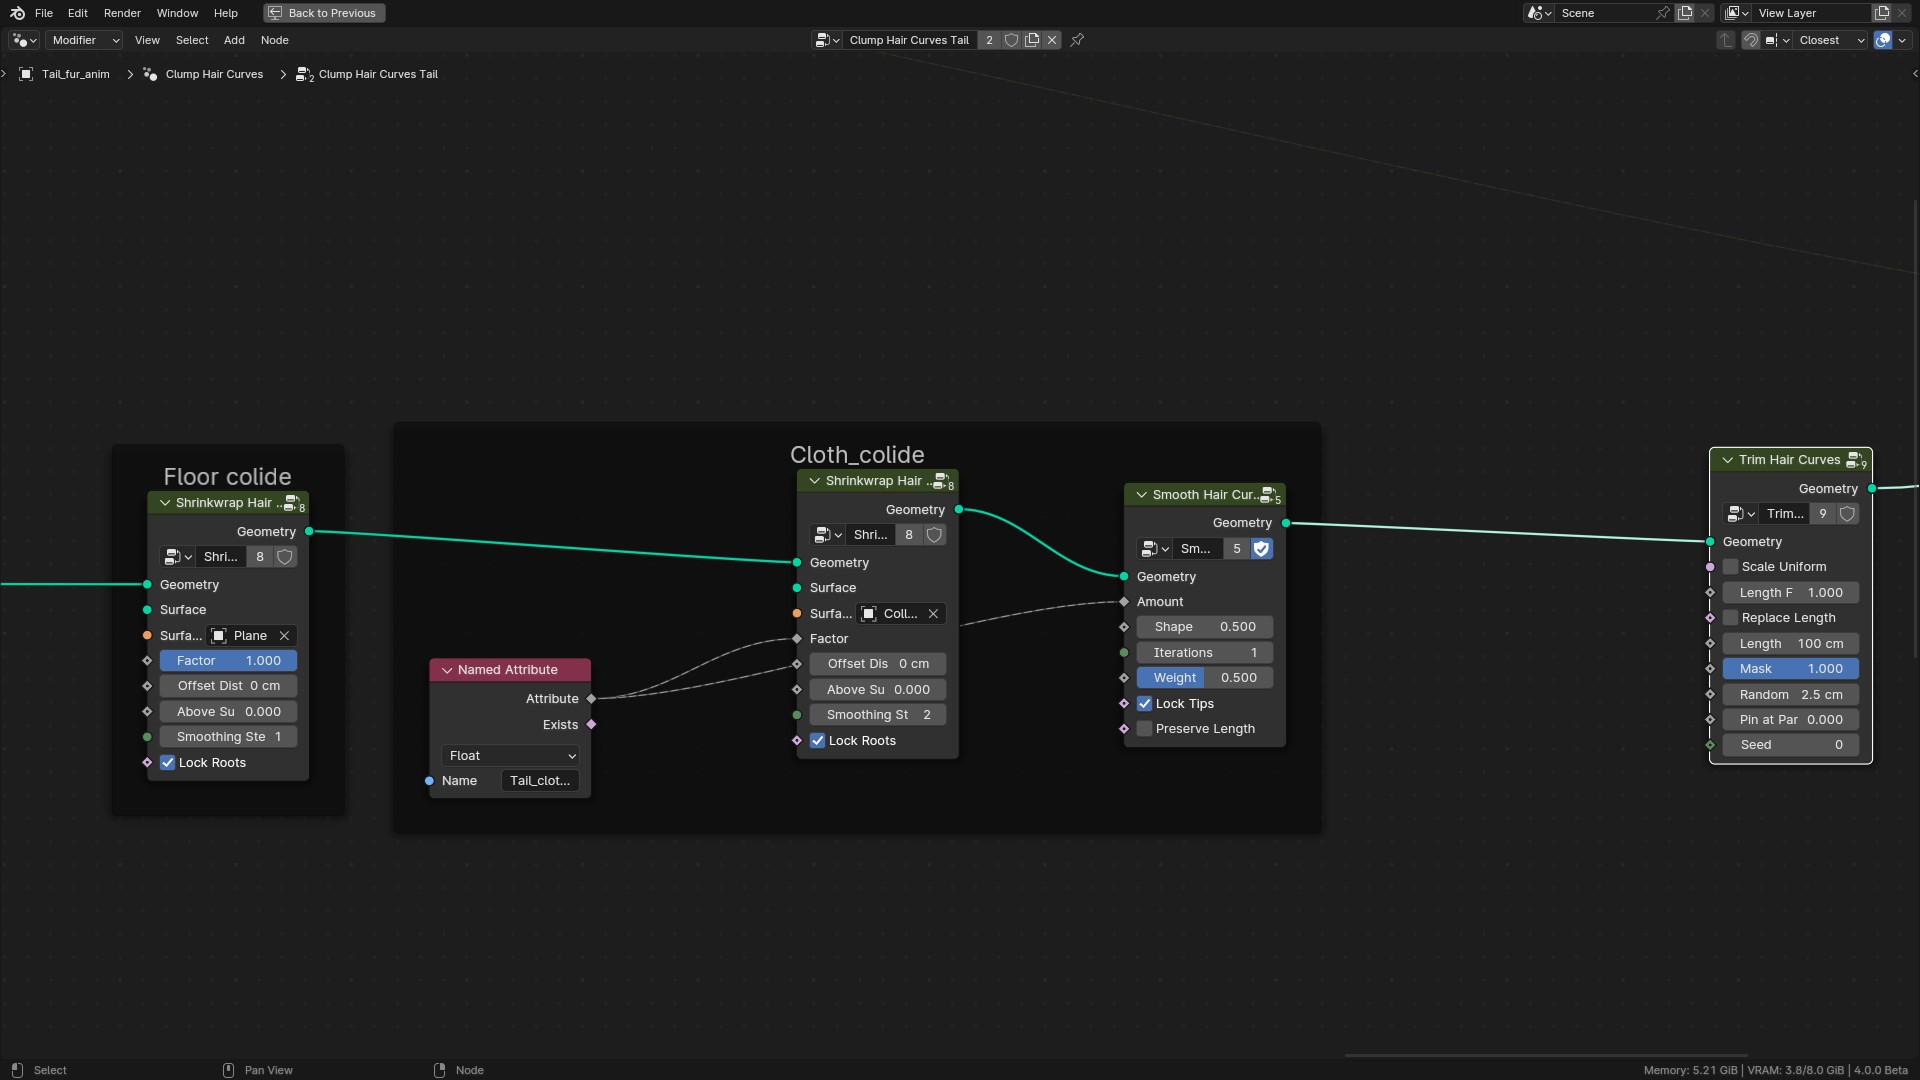
I used a shrinkwrap modifier in the fur to make a hair collision with the crown, cloth, and floor.
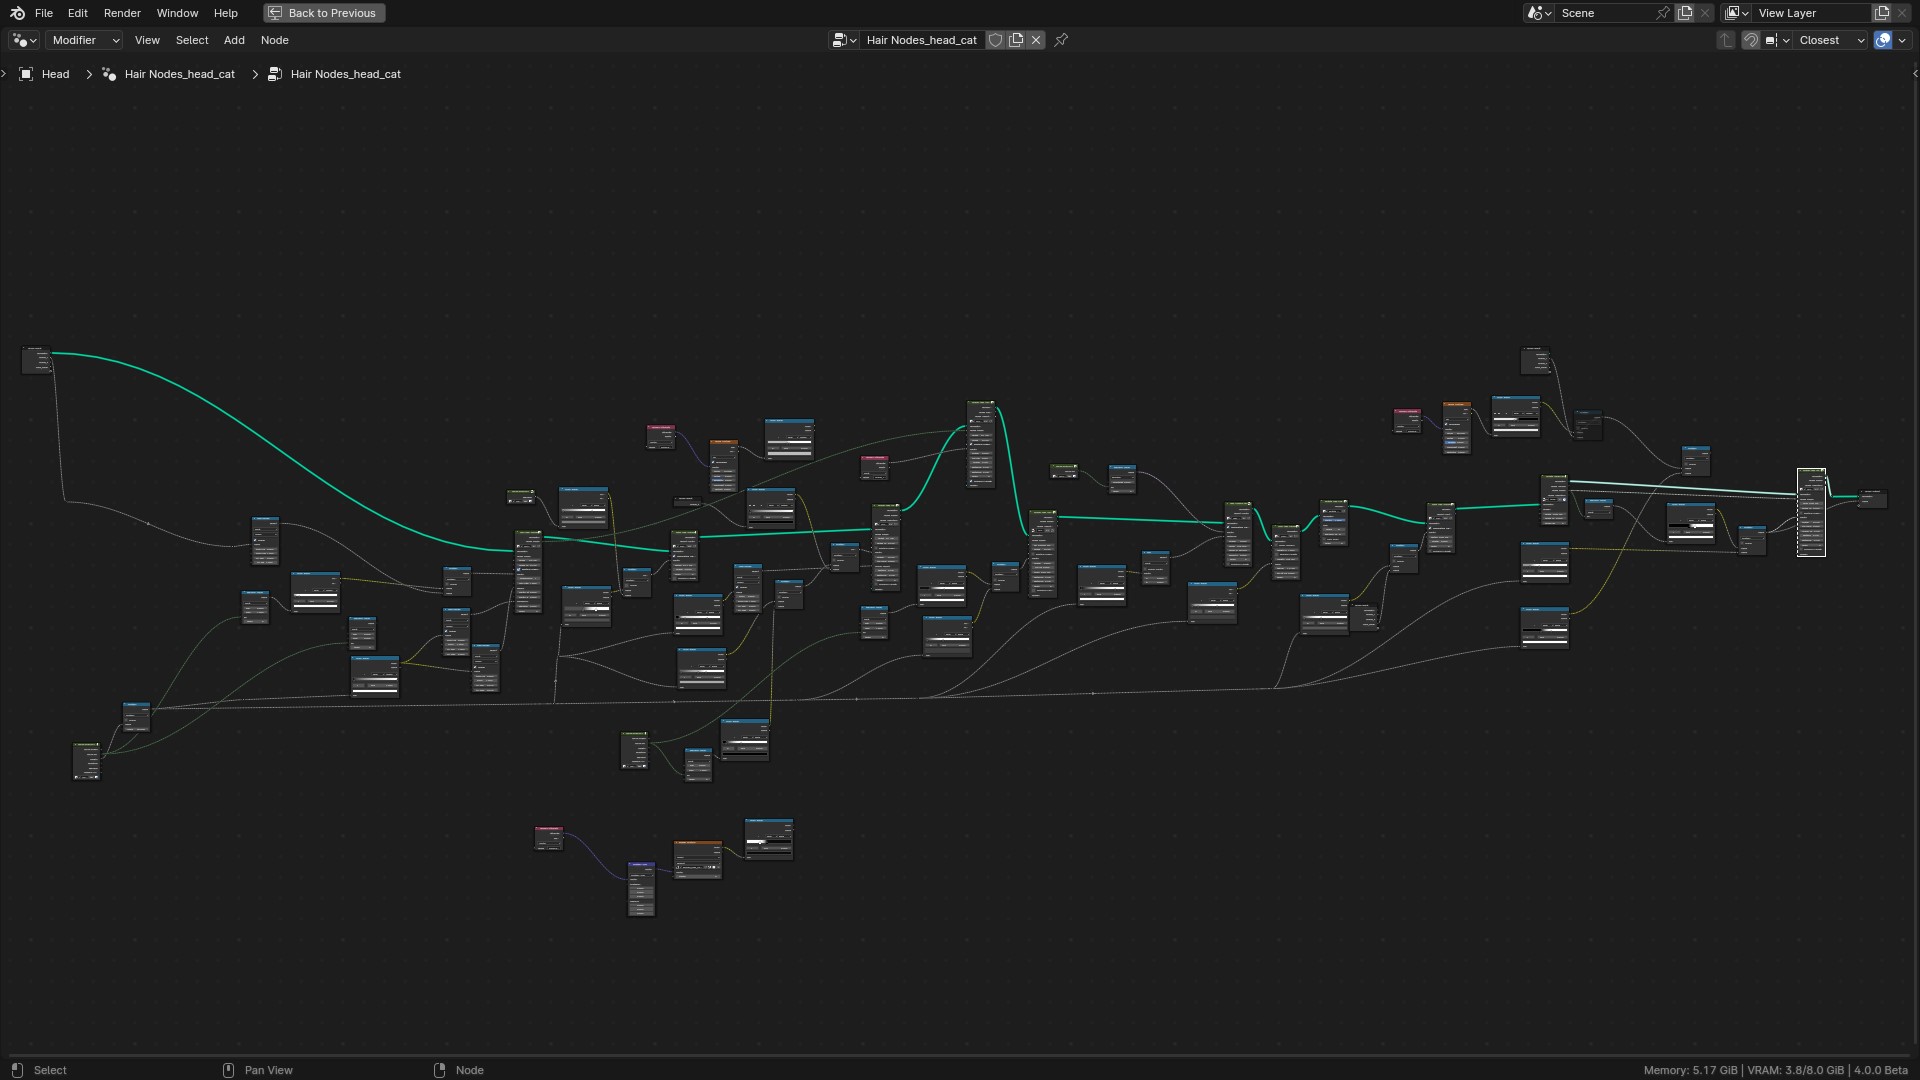
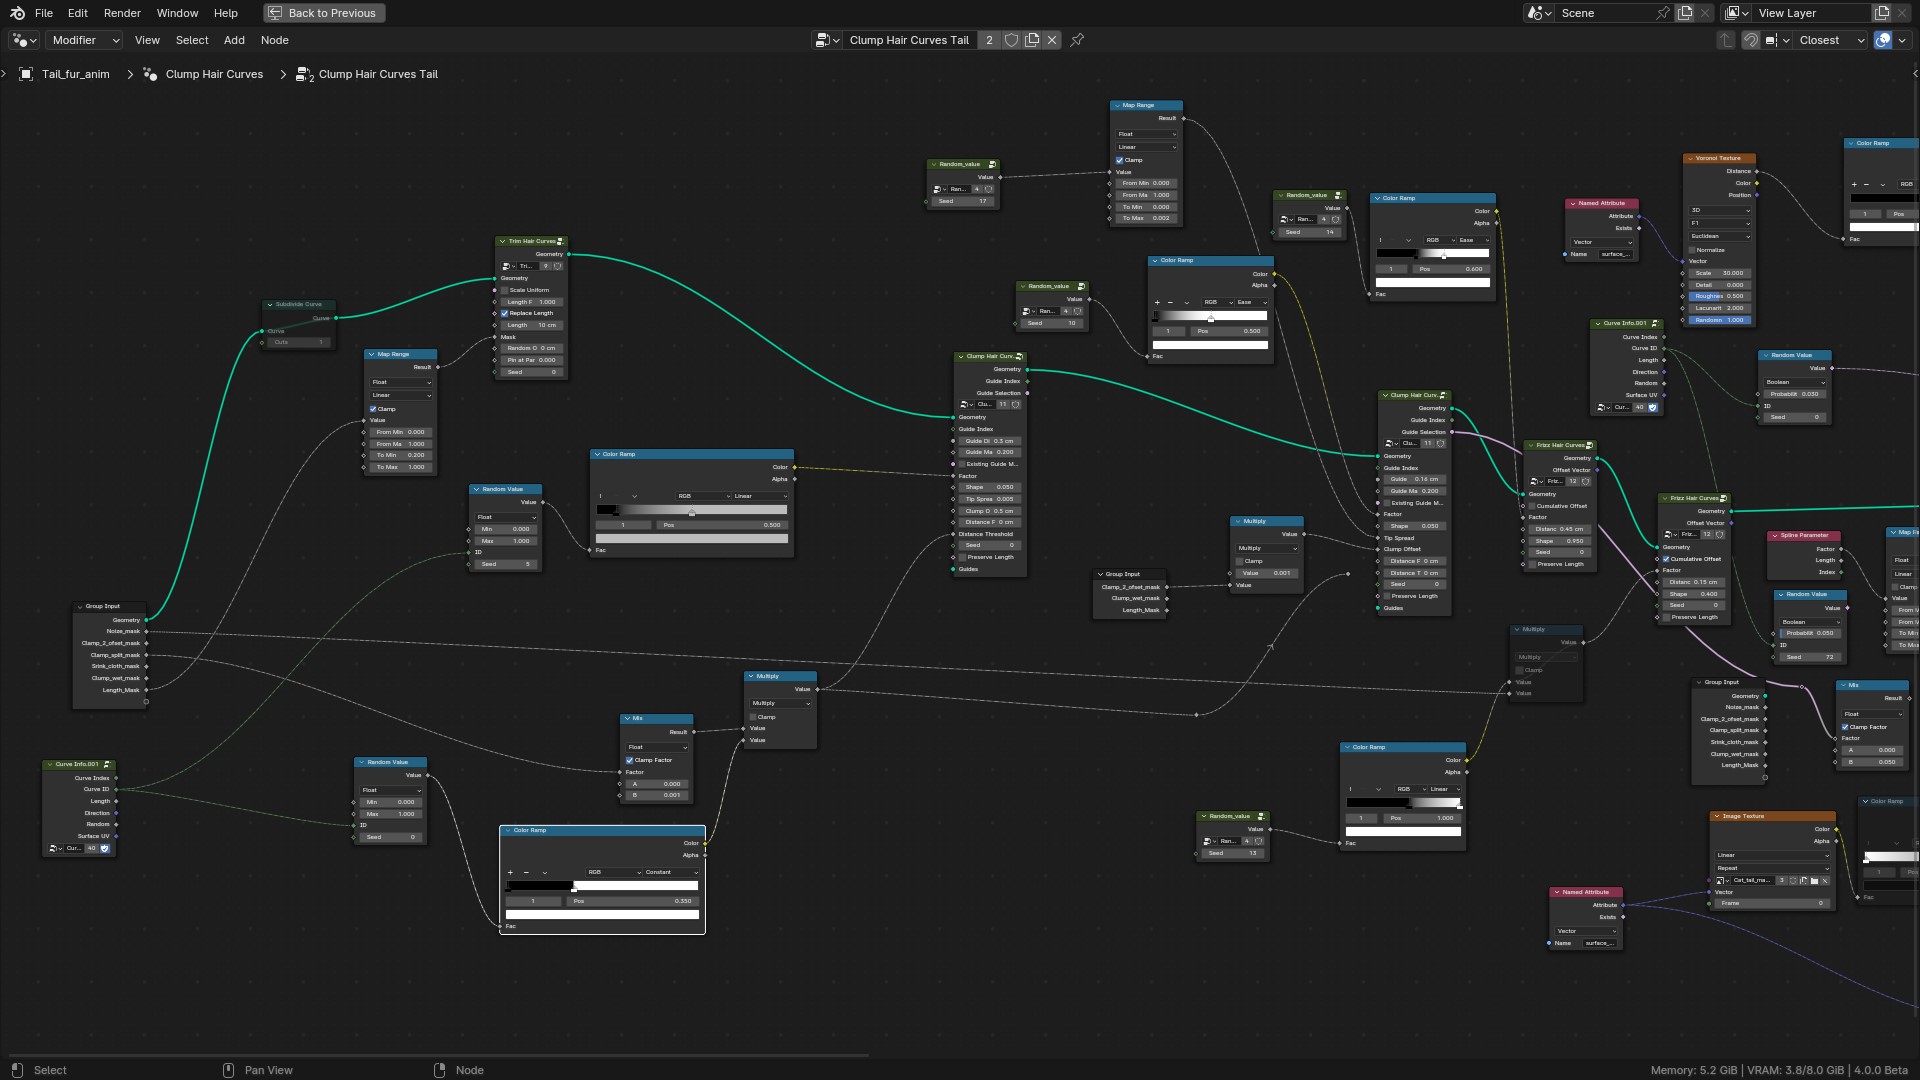
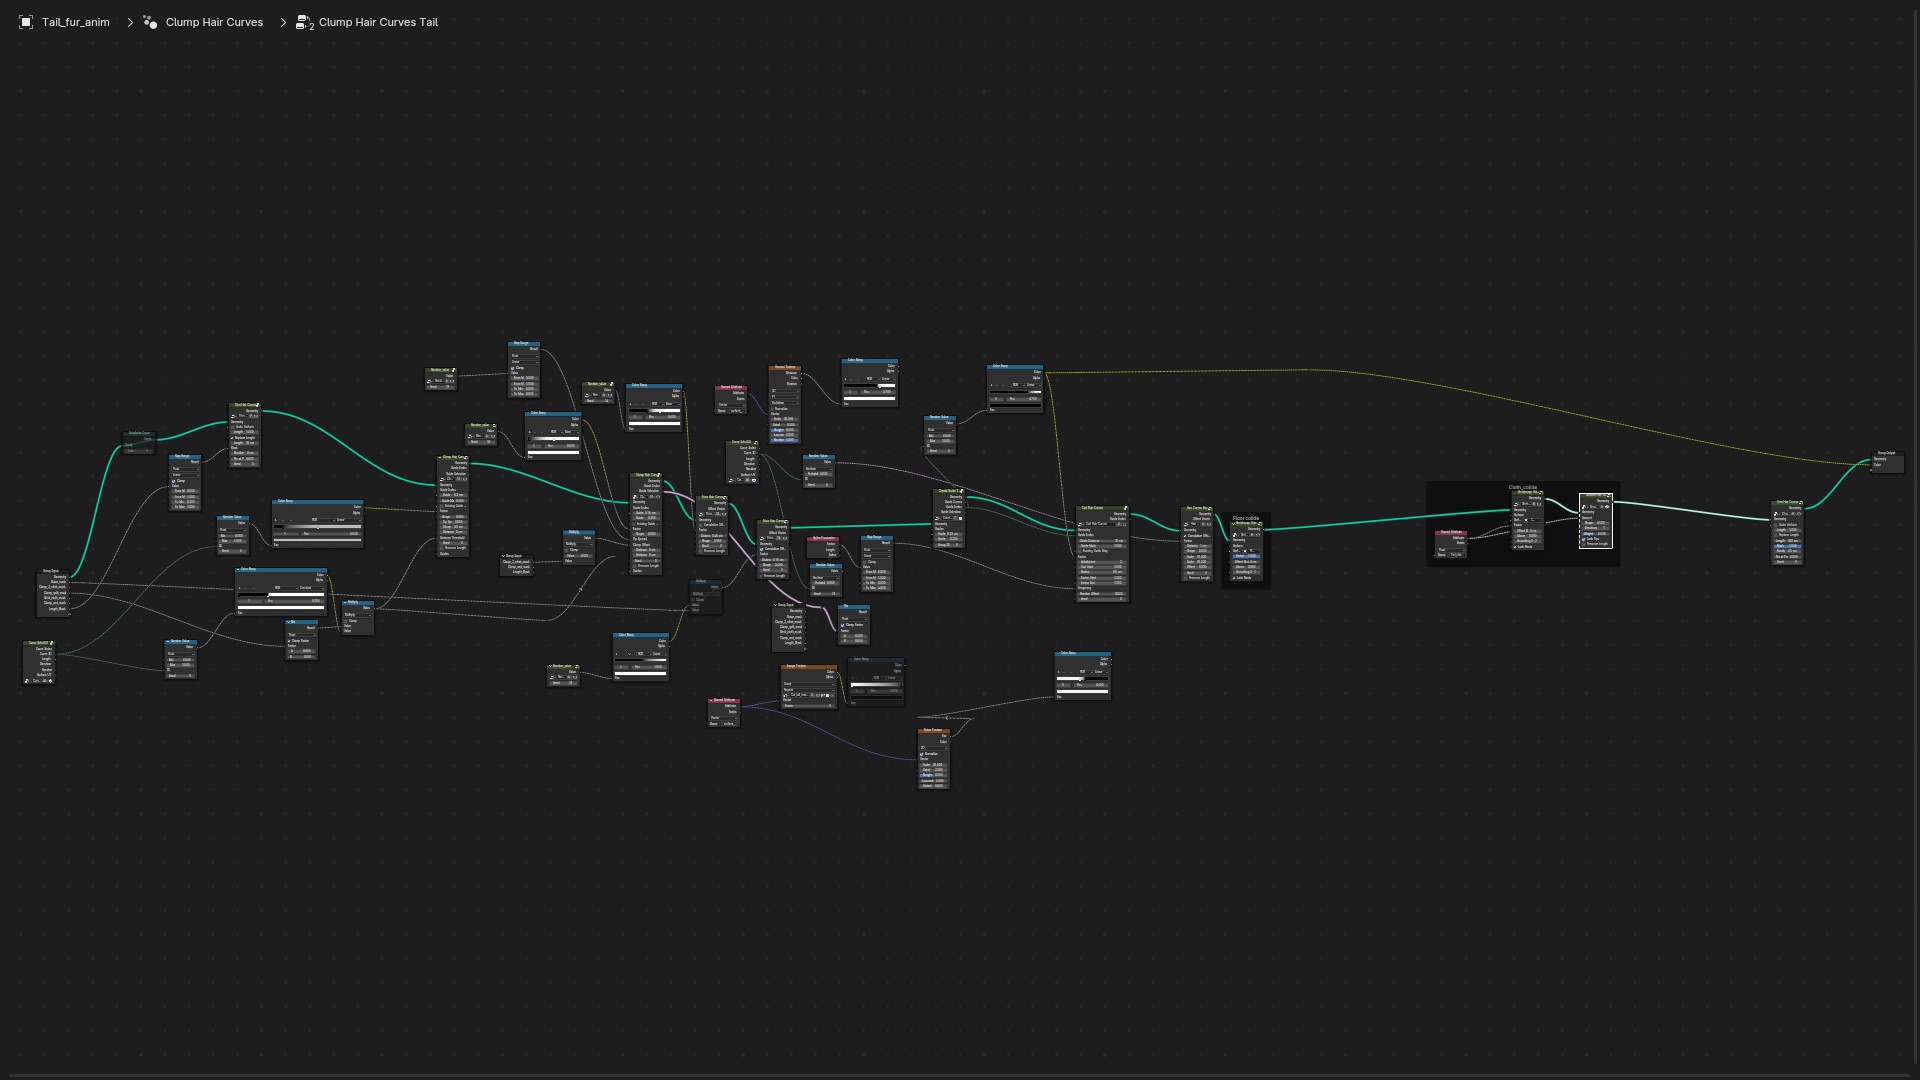
I prefer to have a separate interpolation modifier and clump with noise—I have them in one modifier, and add all the masks and edits in nodes.
Here are some examples:
Hair Texture
Also, a few words about color textures for the groom.
I split the view, and had 2D and 3D viewports. One has a groom with material view on while the other has an isolated head with a solid view of textures. On the head scalp, I have material that shows only on Eevee render with black color so it does not distract me from the fur color (for Cycles, it has other material). With this setup, I can paint in both views and see the result on the scalp and fur at the same time.
I also used a brush with a dots mask.
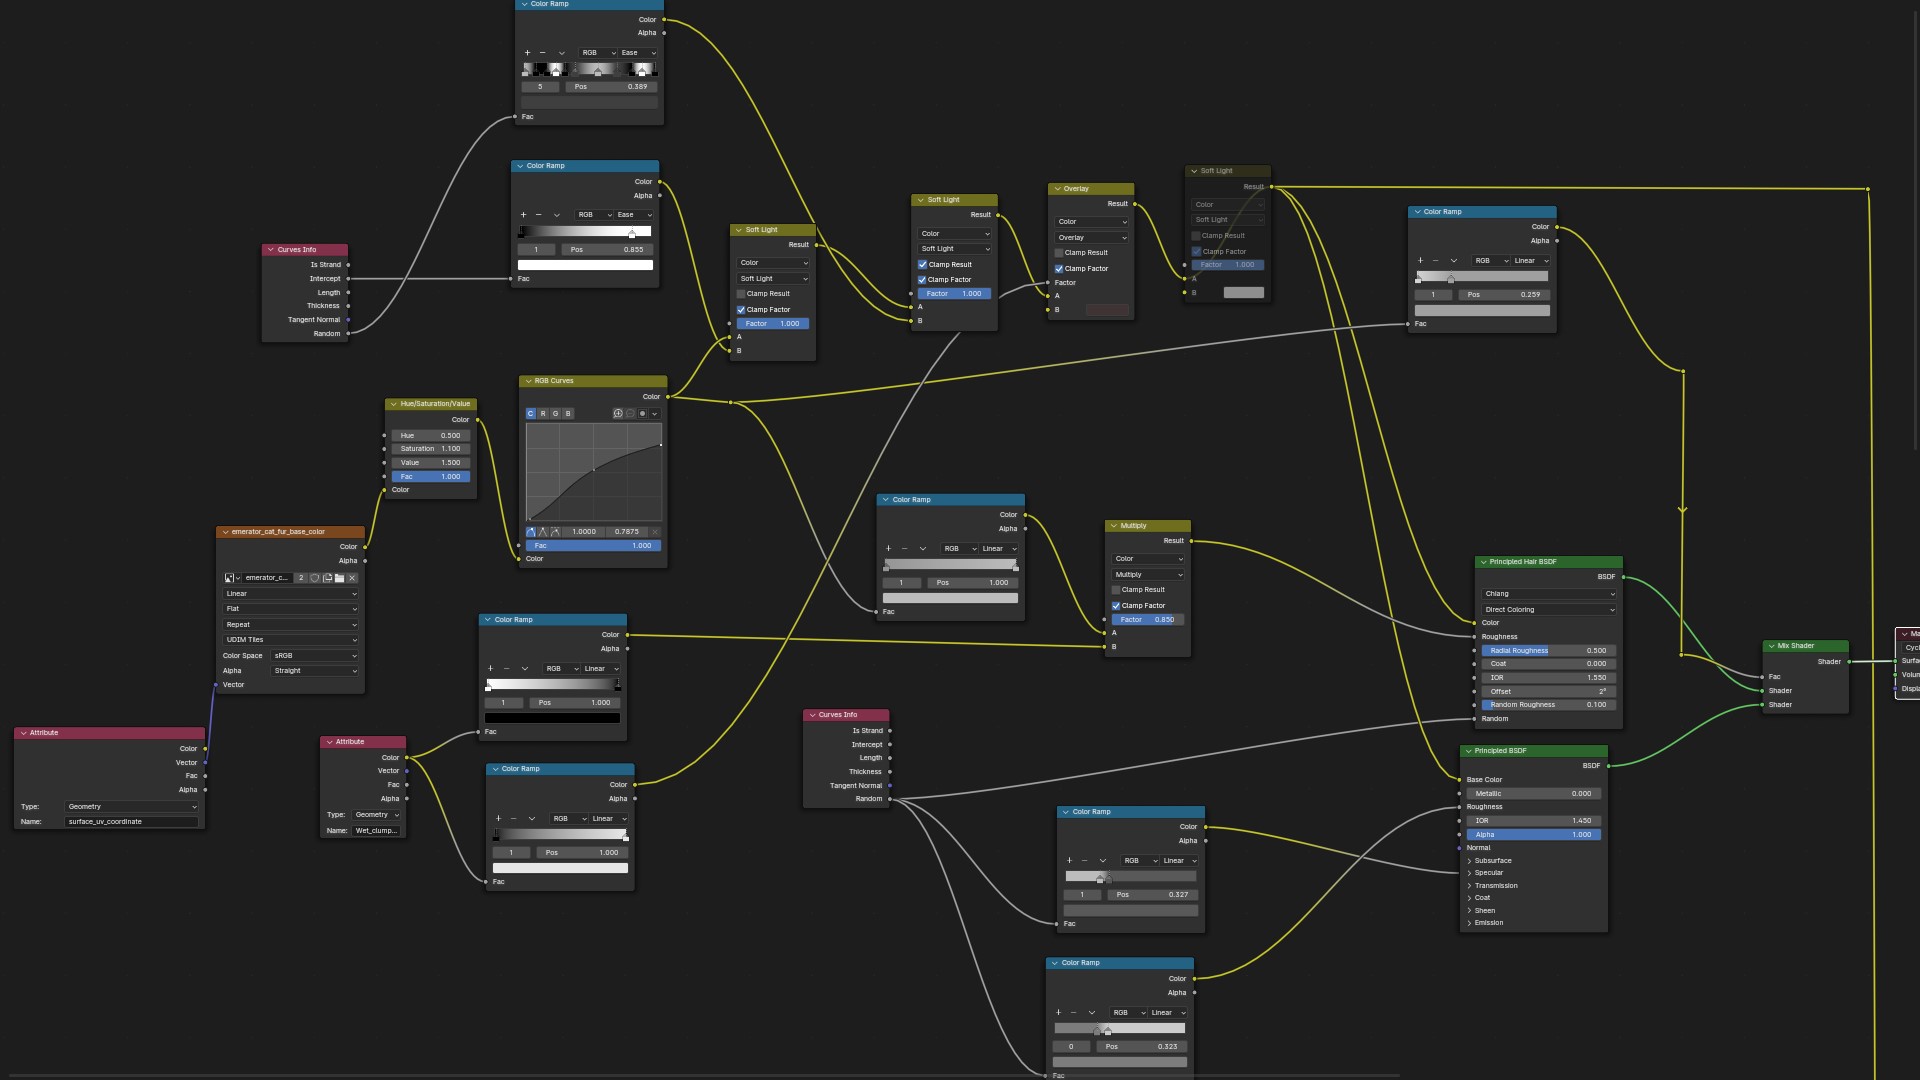
Here is my fur material:
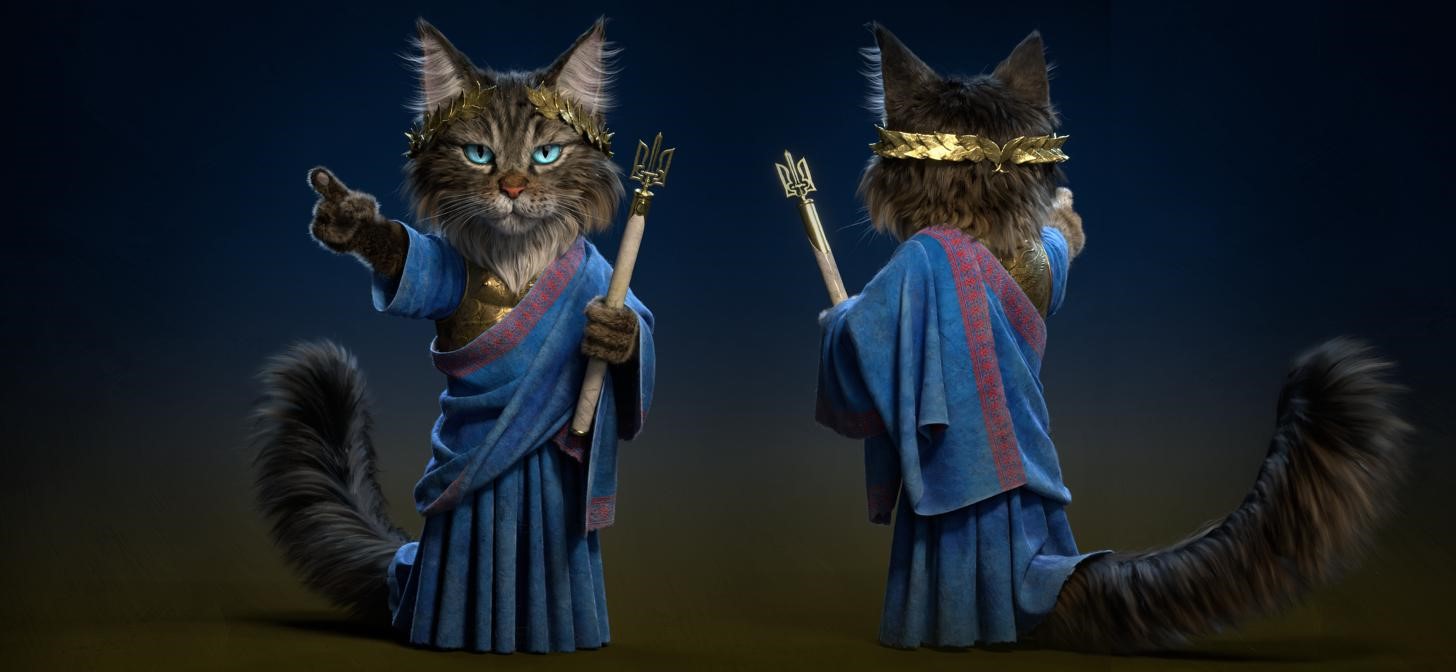
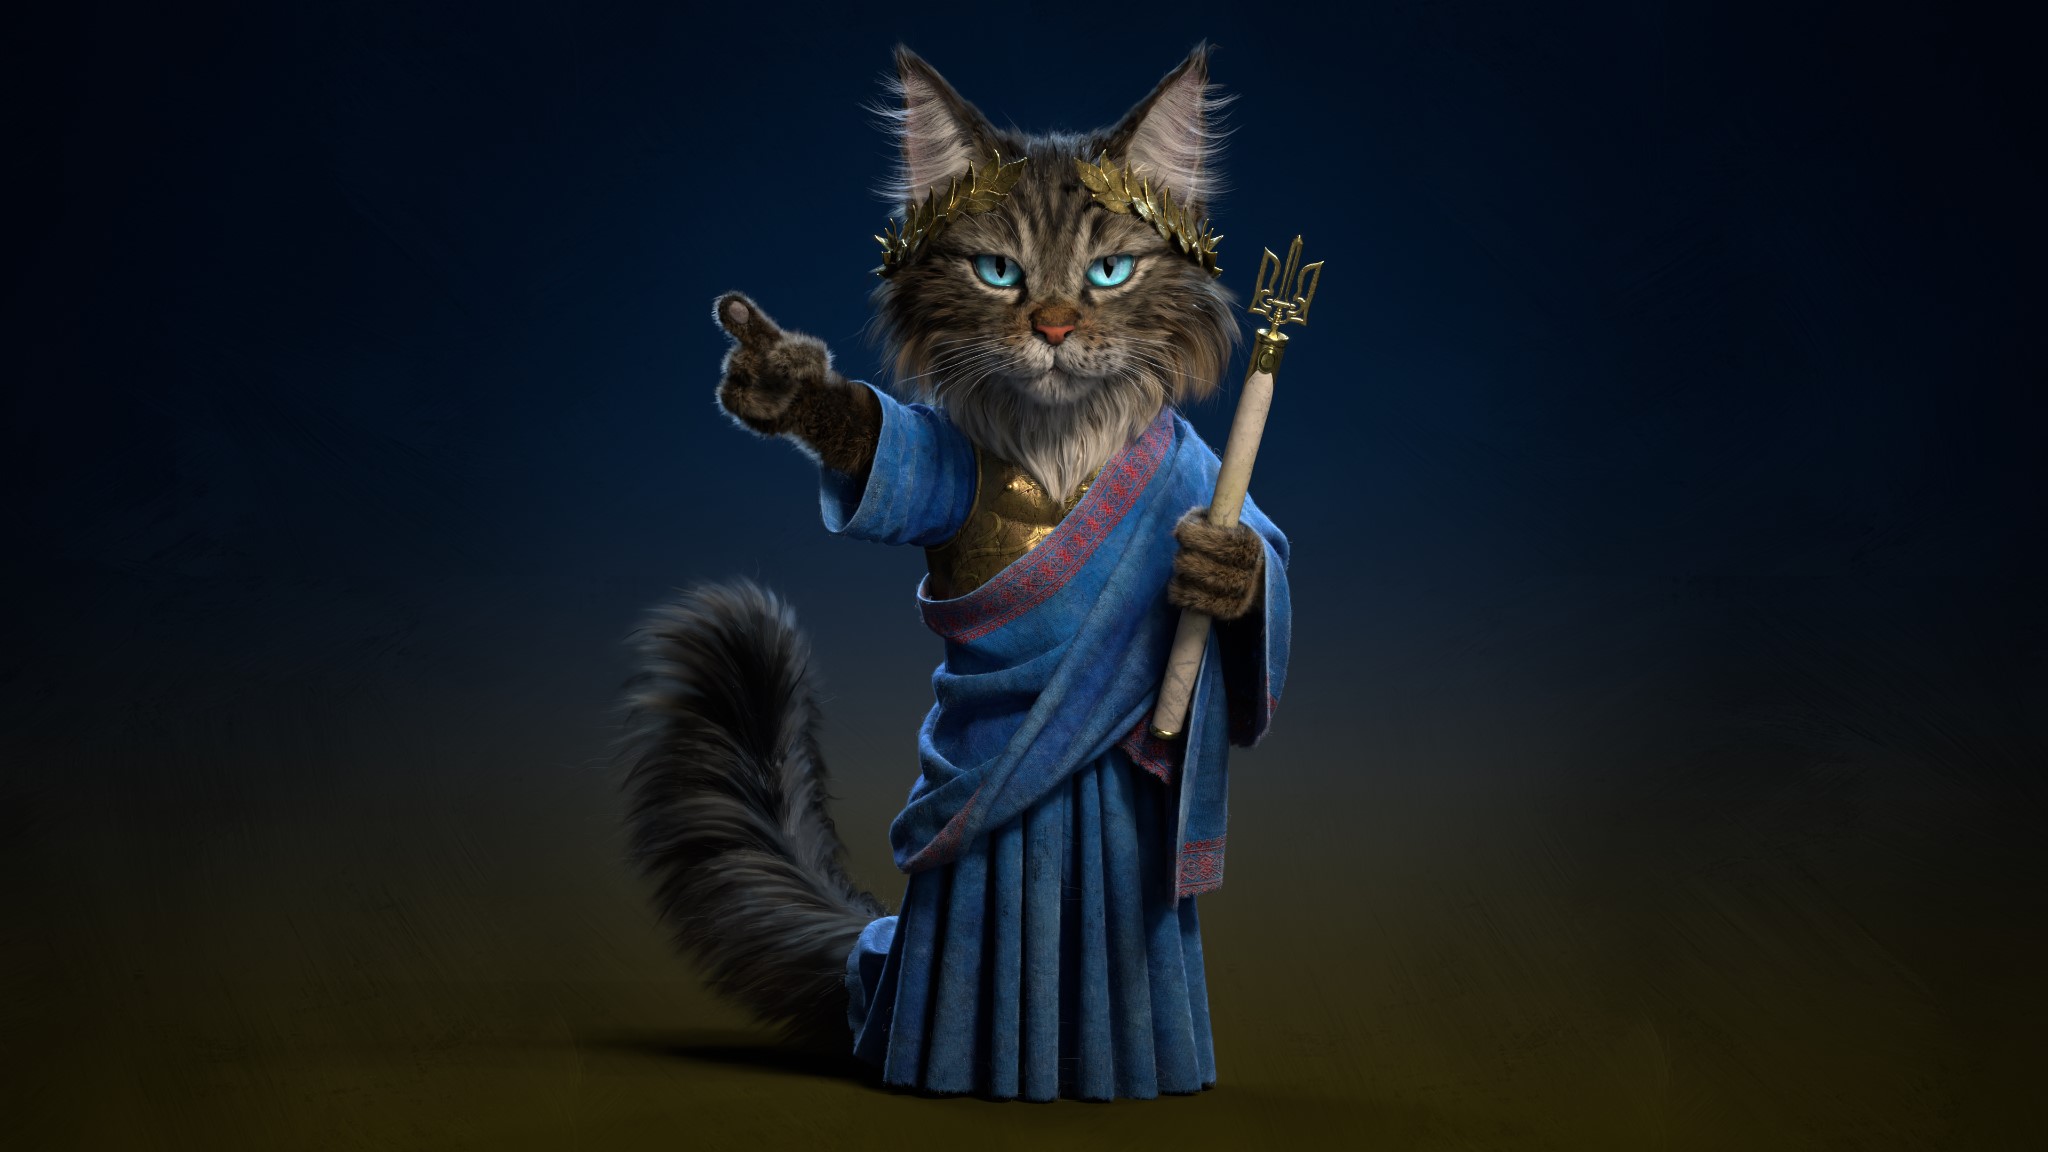
RENDER : Emperor Cat – Just Donate
Thank you for all the support. Feel free to ask any questions, and if you like my work, follow me on social media. Have a good day!
About the Artist
Andrii Karpylenko is a 3D character artist from Ukraine, currently working at Ubisoft.


Great idea!