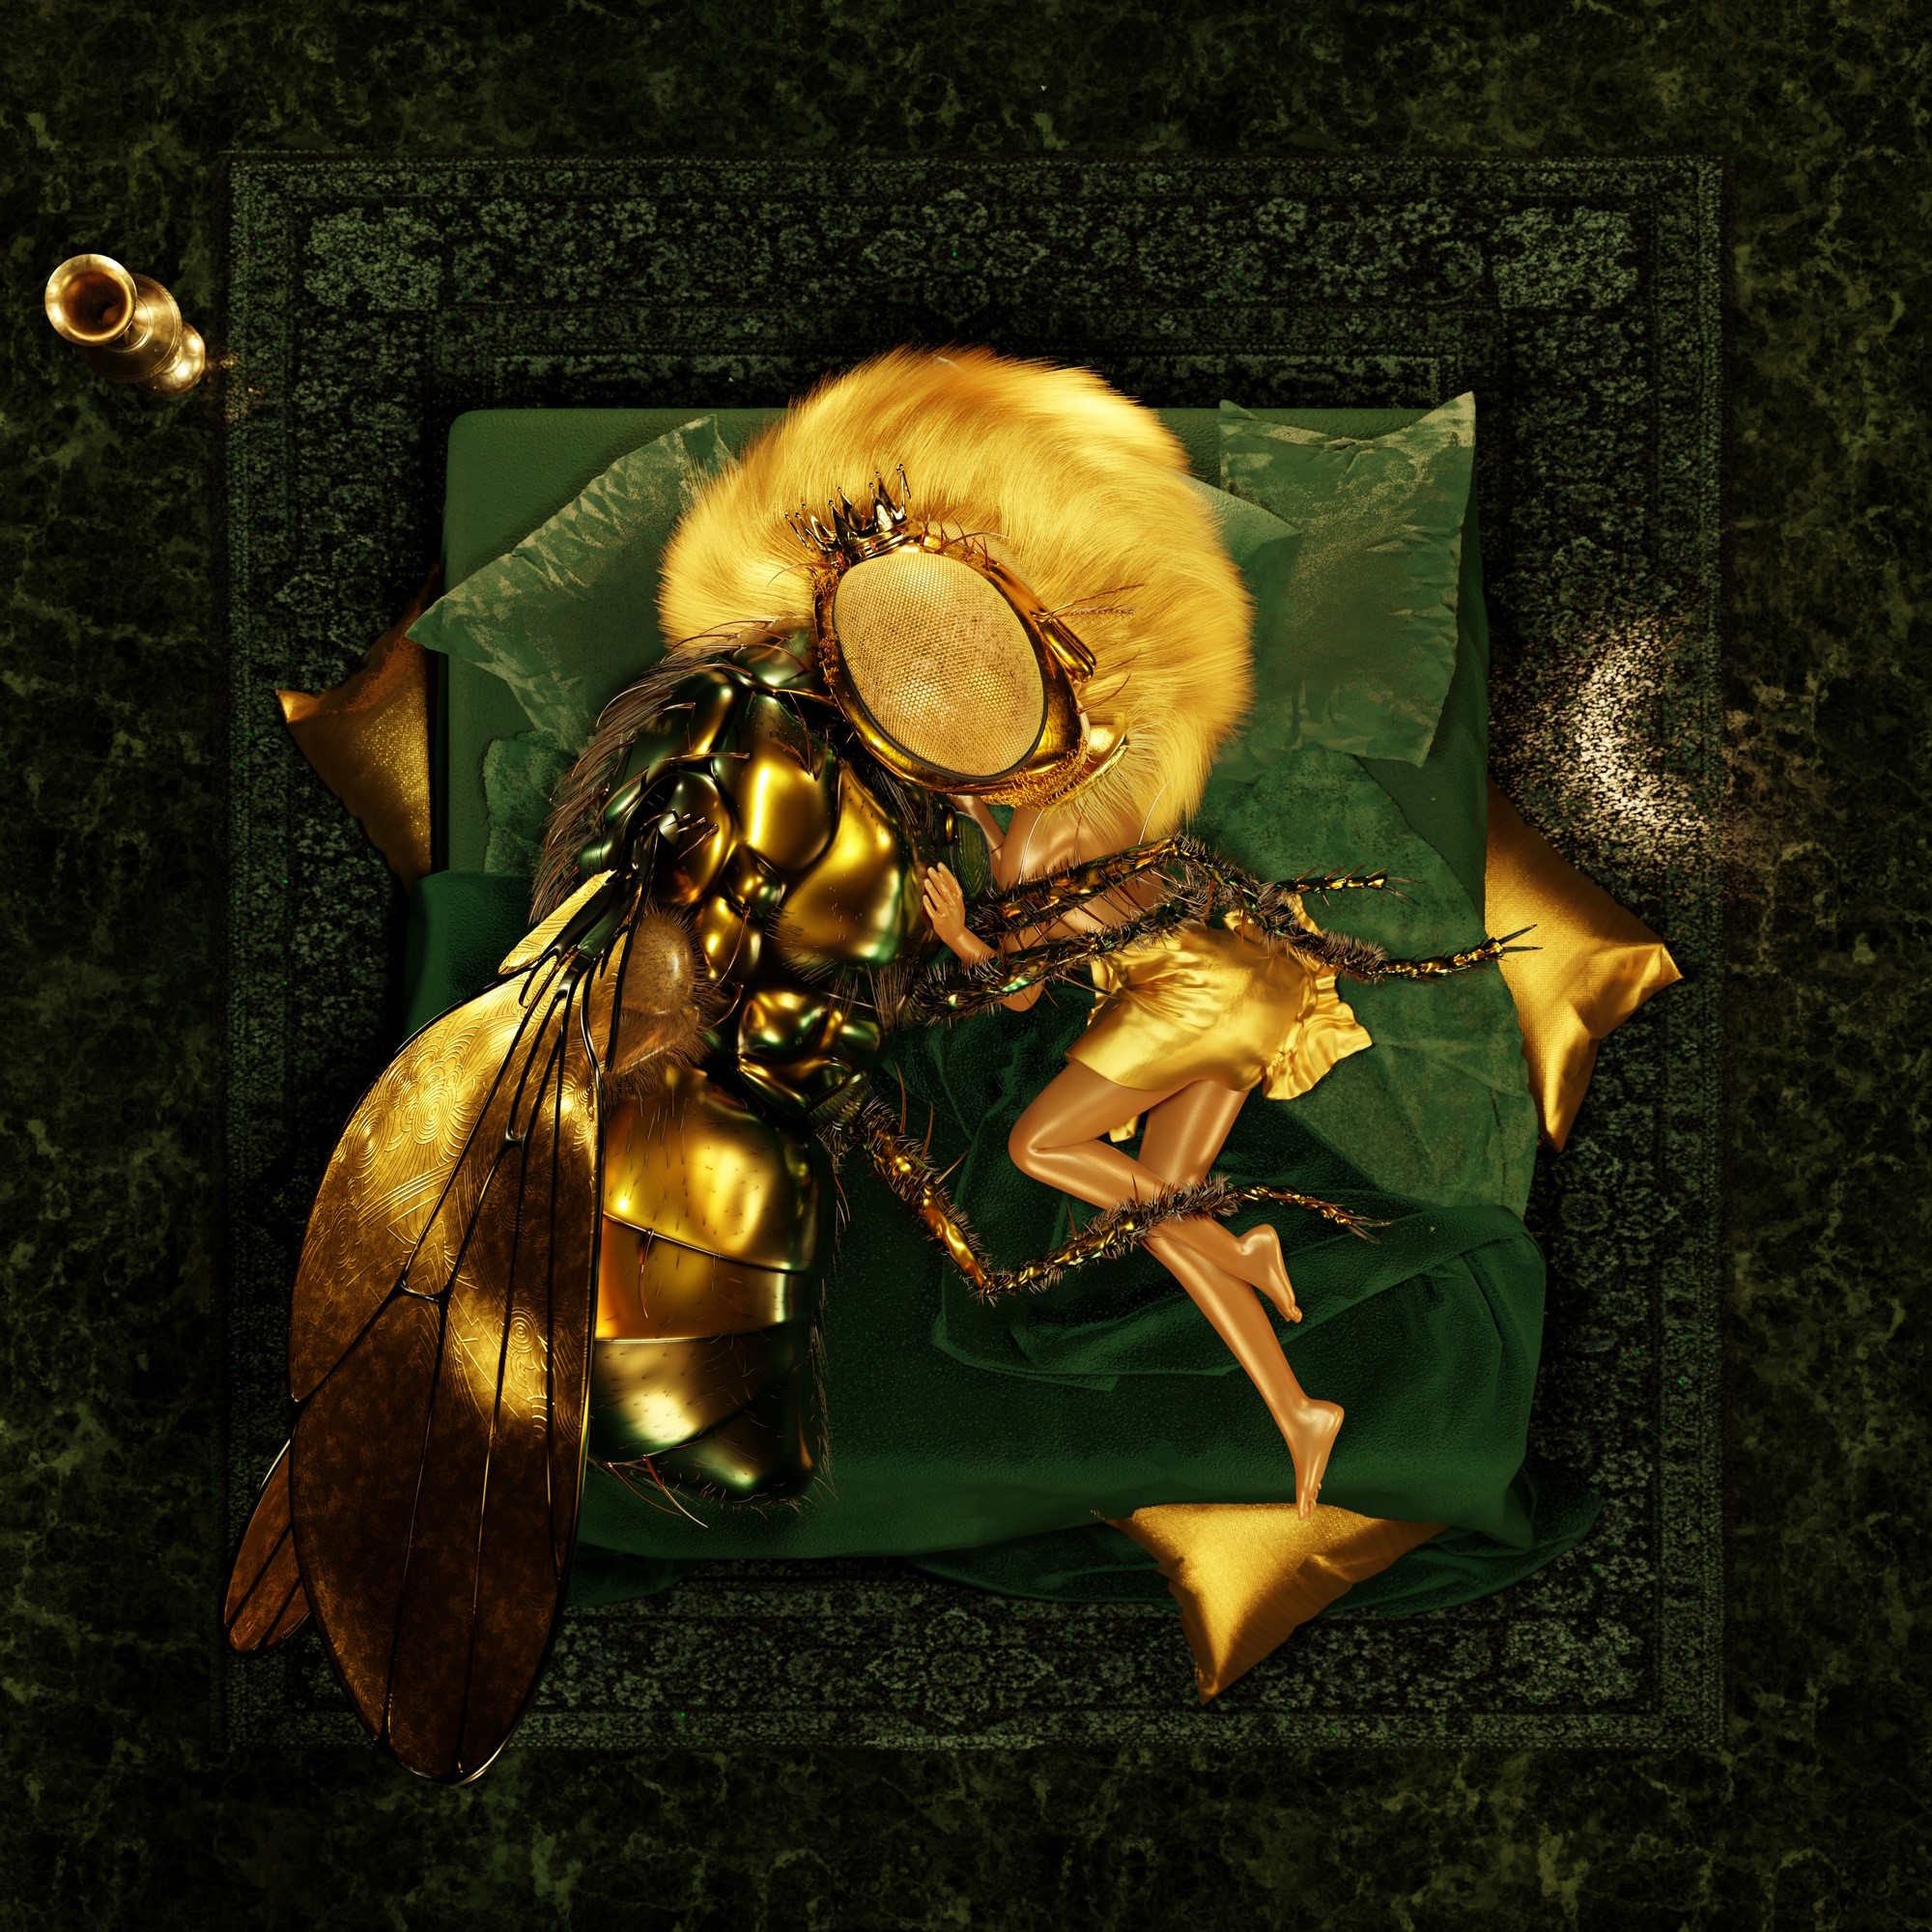
Behind the Scenes: Embracing Demons
INTRODUCTION
Hi, I’m Denis from Belgium. I started my journey with 3D and Blender as a teenager, and it has been pursuing me ever since. I’m no longer a teenager…
After spending some time in the real-time world, I have decided to focus on the illustrative side of 3D and the ability it has given me to create disturbing images.
INSPIRATION
In most of my work, I like to showcase opposites and challenge established perspectives by portraying things in a different light.
In this piece, I wanted to illustrate the struggle against one’s demons. I did not want to represent the fight against them, as it is a theme that has already been well developed. Instead, I thought that accepting these demons would be a more subtle way of addressing the topic, potentially offering more interesting interpretations.
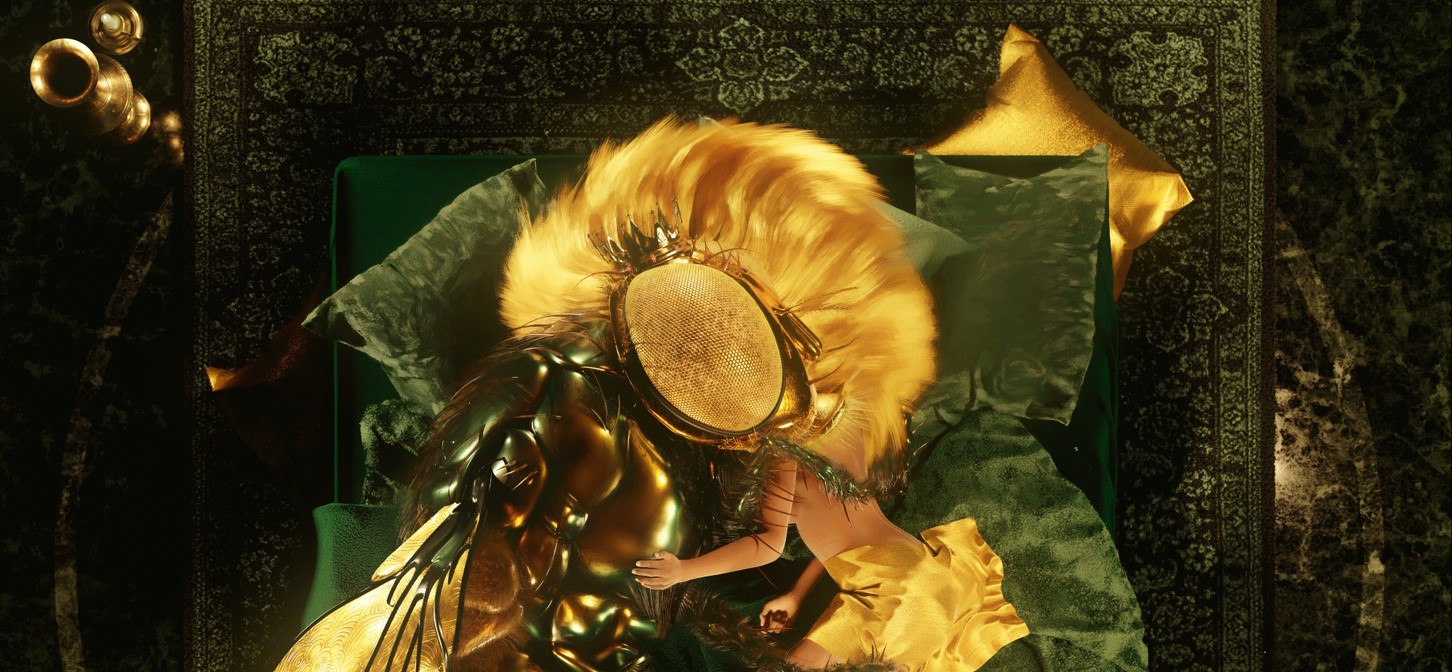
CONCEPT – Theme
On top of the internal struggle against one’s demons, I wanted to invite the viewer to question this unlikely relationship, which is a theme I will continue to develop and explore. Is it love, or is it profit? Perhaps a bit of both?
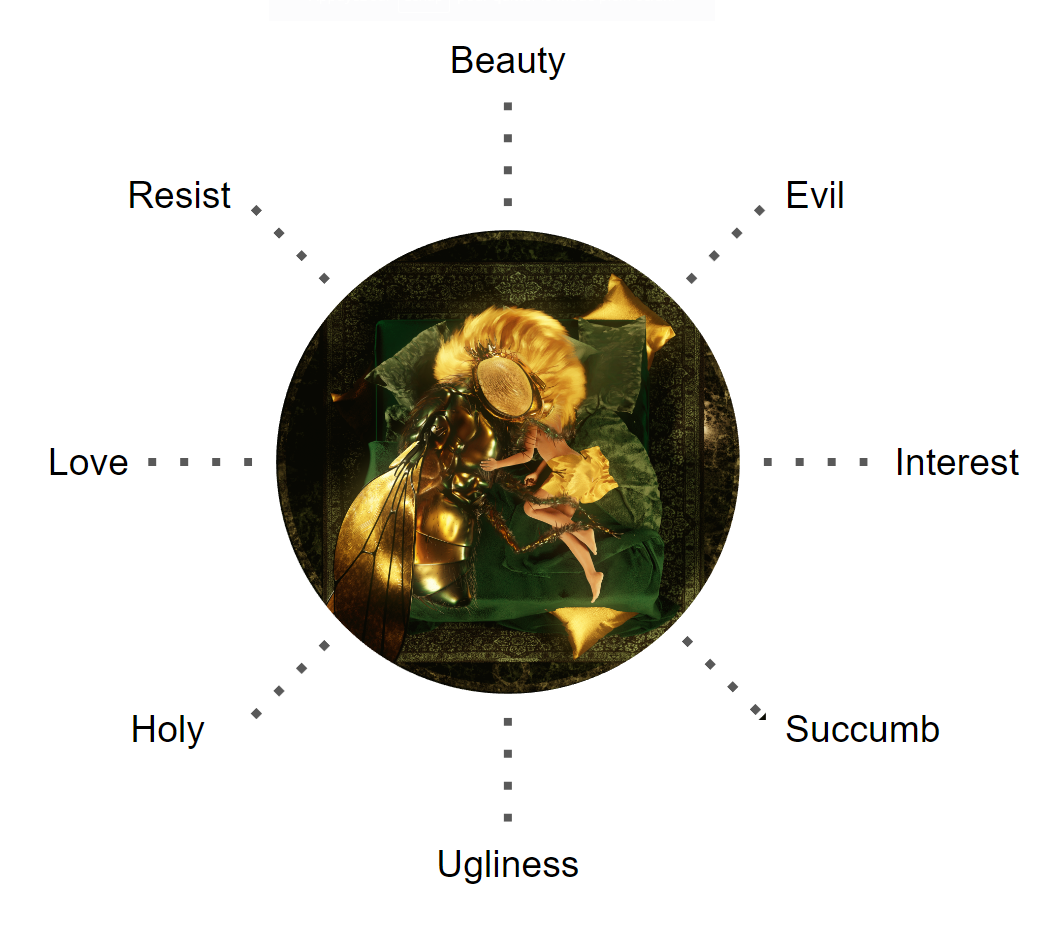
Overall, I tried to position the piece as an intersection of opposites.
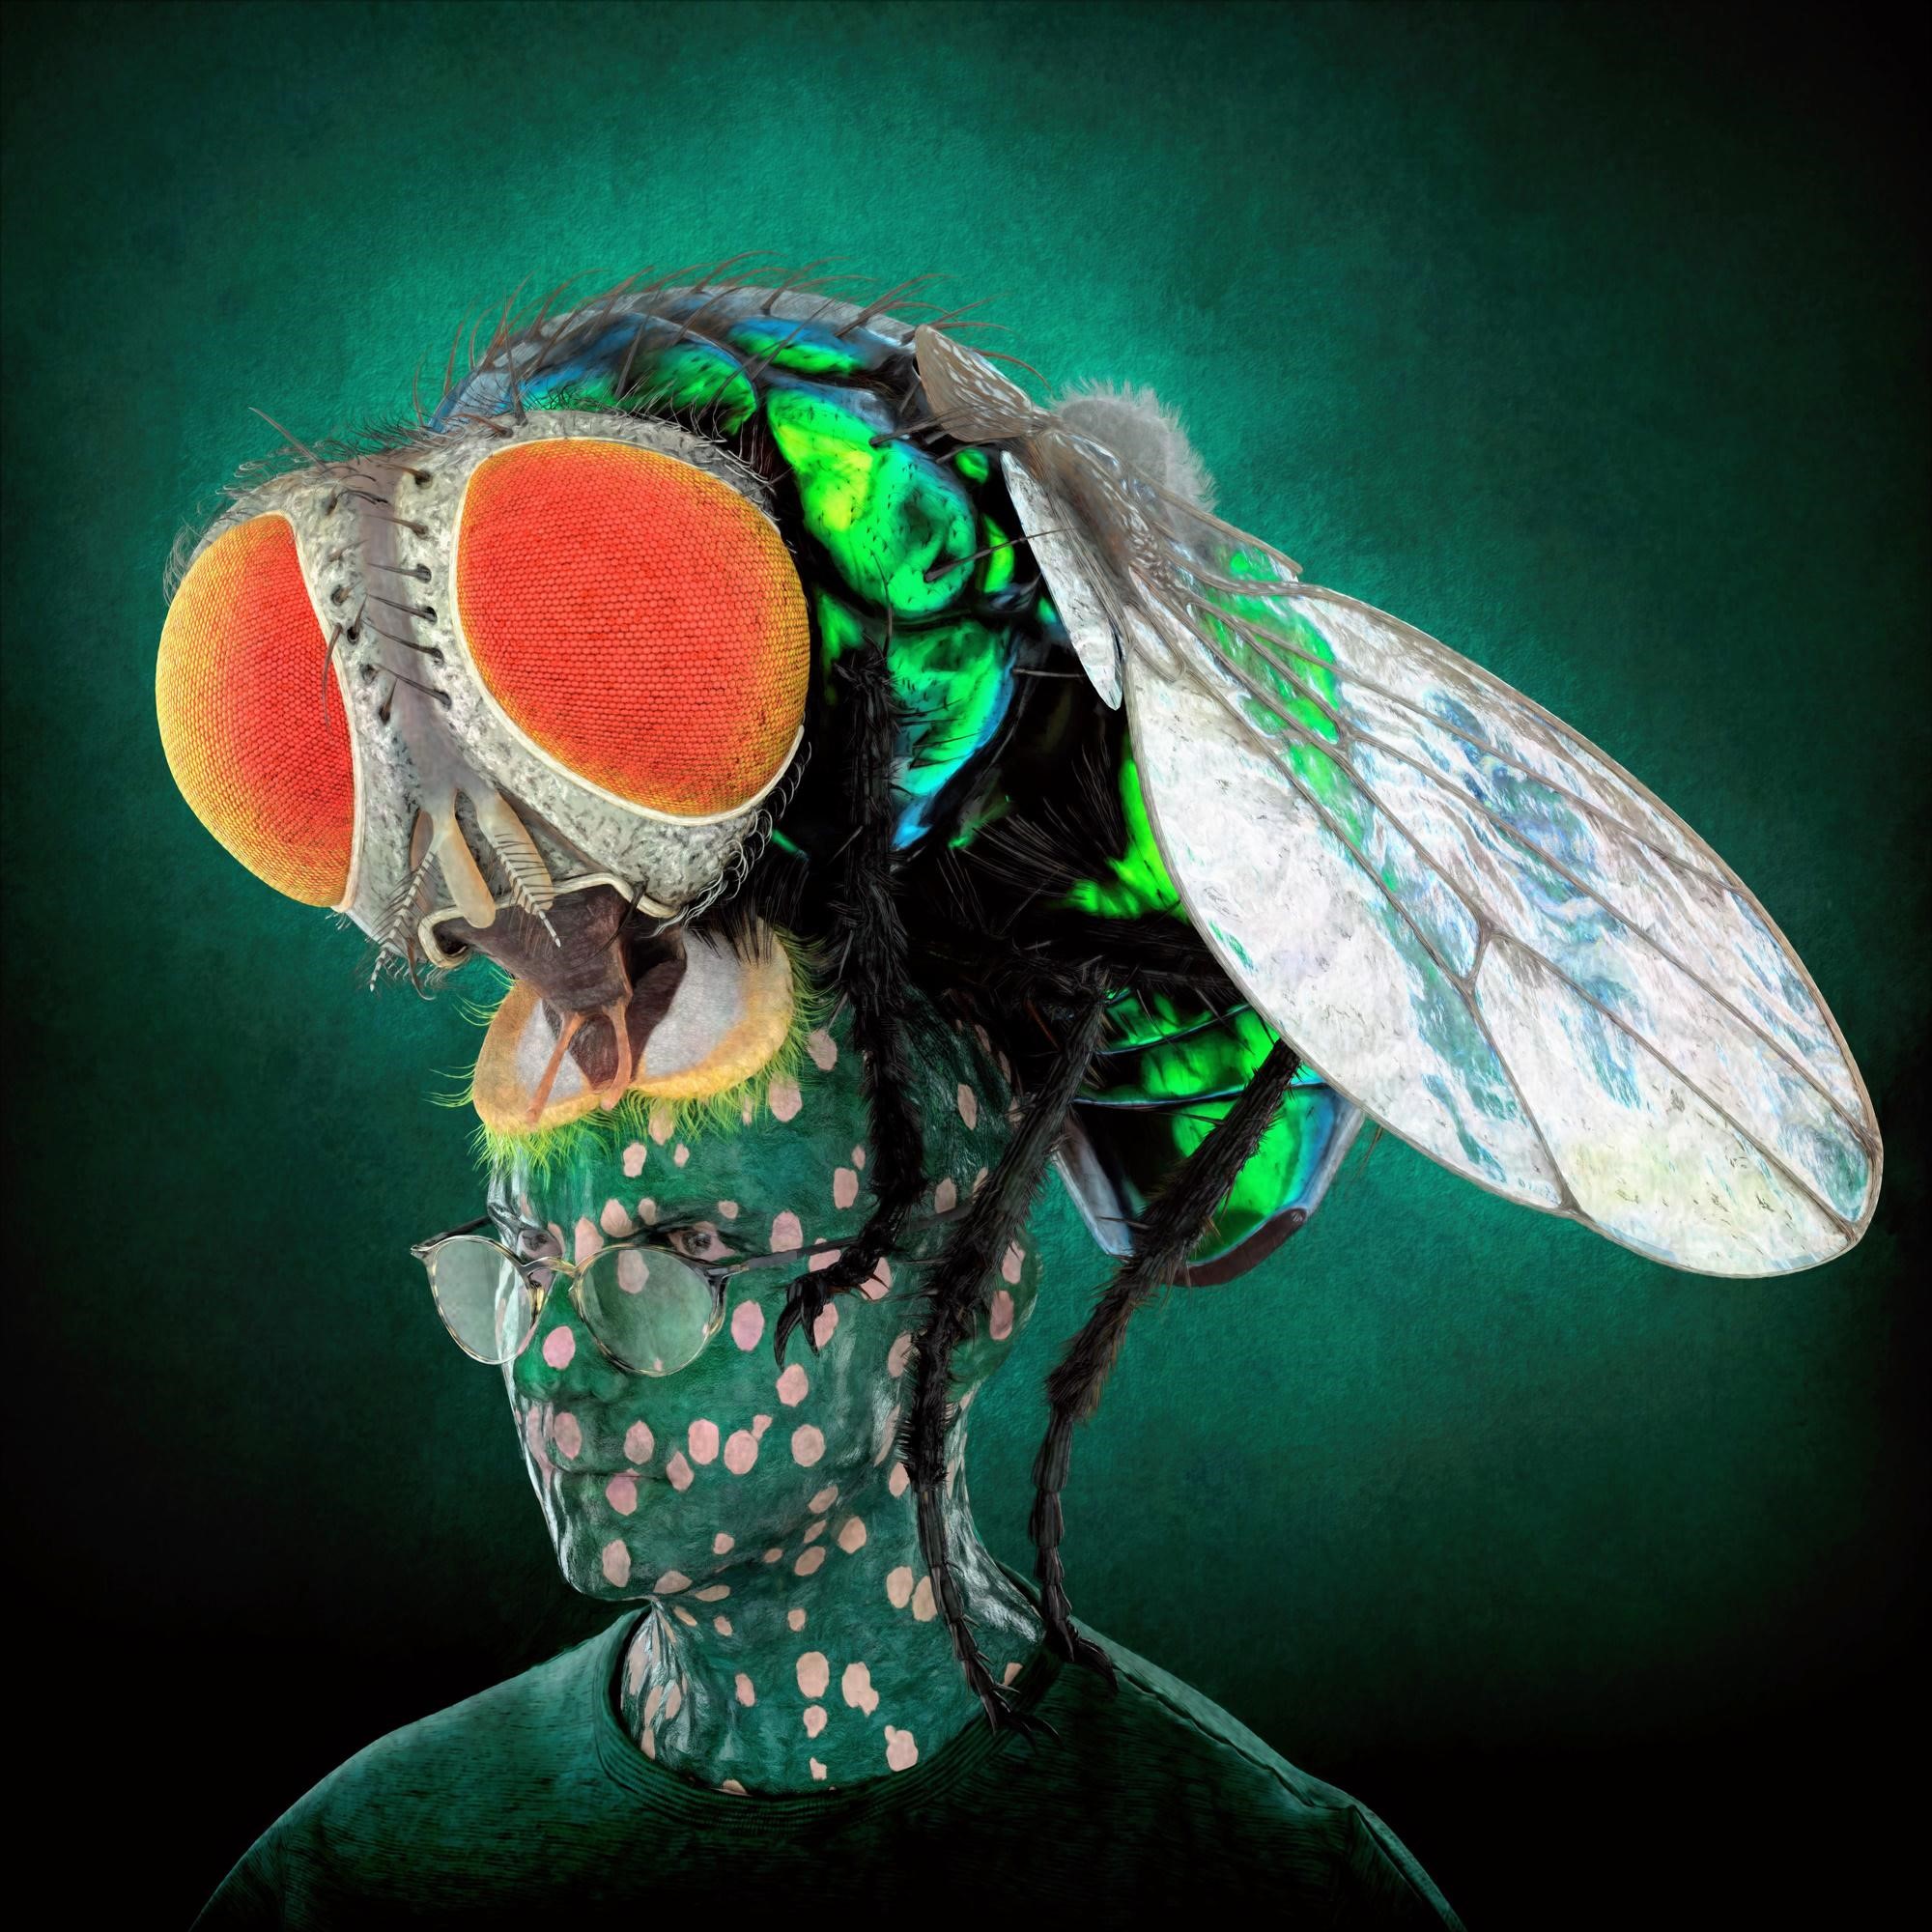
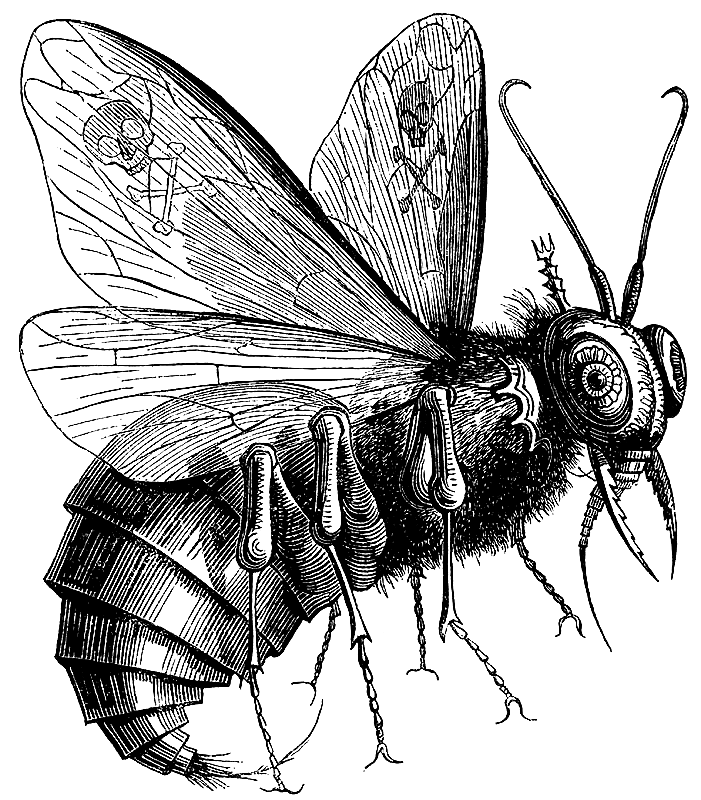
CONCEPT – Fly Inspiration
The fly is heavily inspired by the traditional representation of Baal-Zebub (or Belzebuth). Therefore, it embodies power, evil, and perceived ugliness.
Belzebuth, Belzebub, or Beelzebuth, according to the scriptures, is the prince of demons, ranking first in power and crimes after Satan. His name means Lord of Flies, as mentioned in JAS Collin de Plancy’s “Dictionary Infernal” (1863), which is in the public domain.
CONCEPT – Female Inspiration
On the contrary, the woman is portrayed with elements reminiscent of the Holy; her golden hair resembles halos, her beauty, soft posture, and the golden tones evoke angels.
Yet, they seem to connect, blend, and fuse together, blurring the lines between evil and holy, the yin and the yang, serving as a reminder that nothing is truly black or white.
CONCEPT – Midjourney
Sometimes, I can clearly see a picture in my mind, while other times I need to think further about the details to complete the picture.
In this case, I had clear ideas about the camera angle and the relationship between the characters, but I was unsure about the color scheme, lighting, and overall composition.
I asked midjourney to generate “A woman with dark, long hair spooning a human-sized fly in dark pajamas, with gold and emerald tones.”
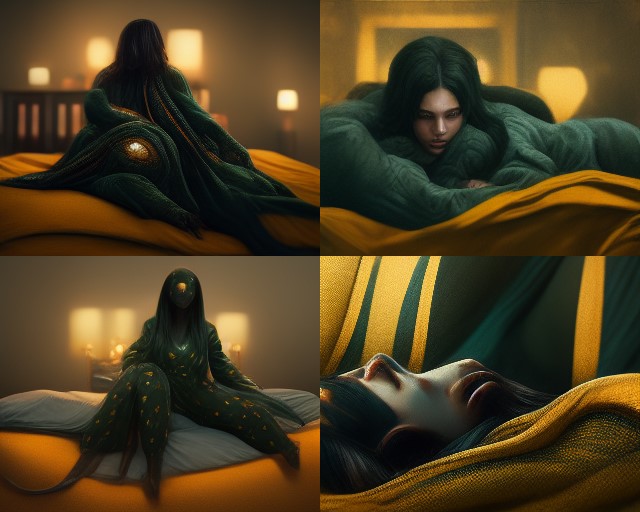
The results are presented above. I did not further refine the concepts (as I find it discouraging), but it was enough to narrow down the overall atmosphere, color tones, and grasp the cozy yet dark feeling I aimed for.
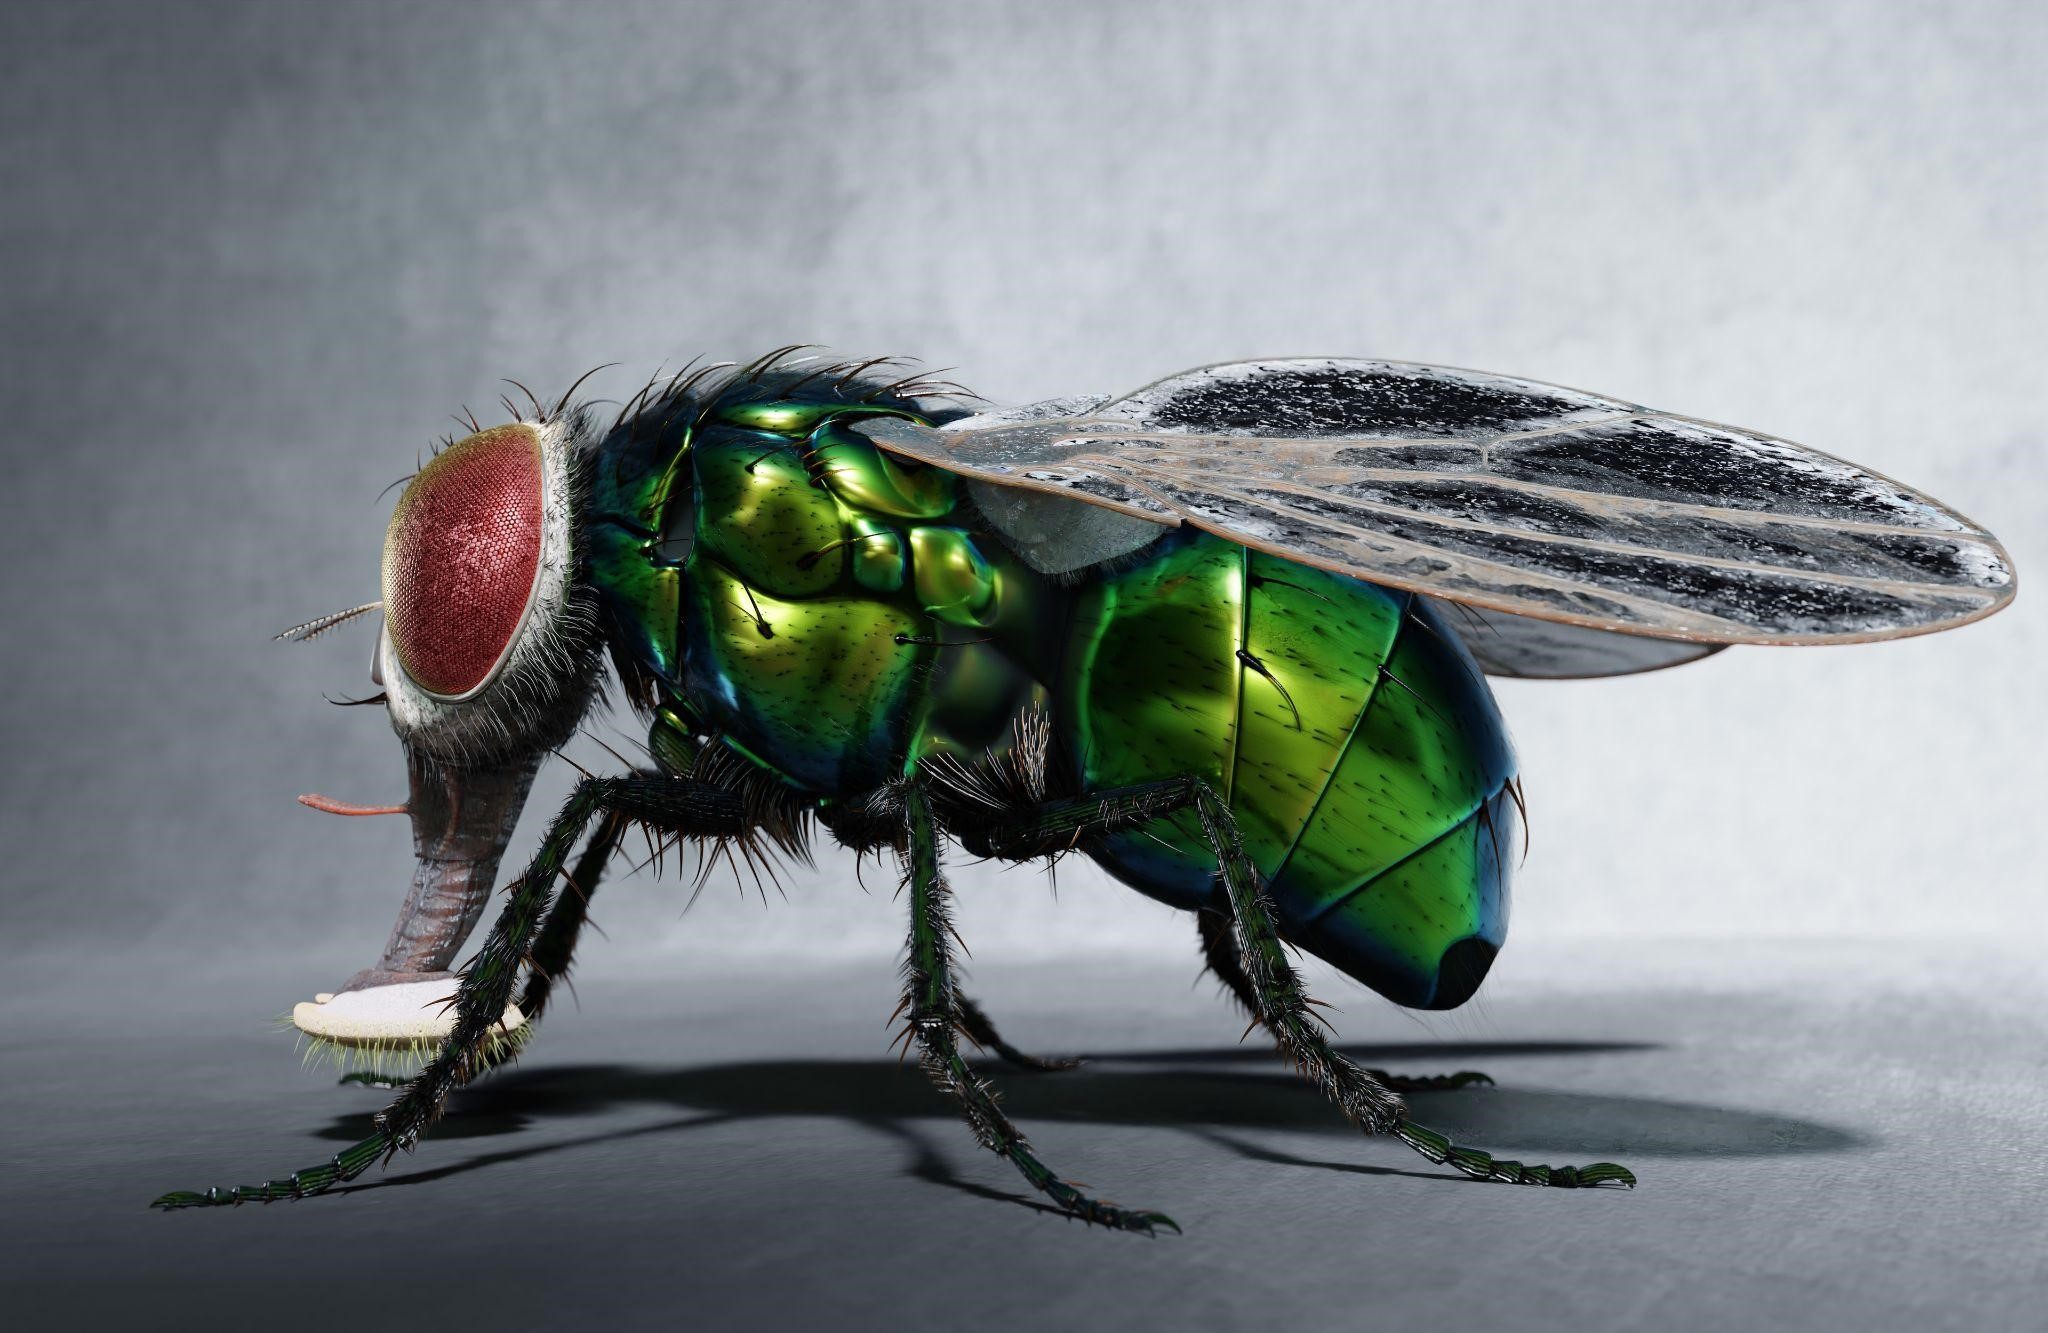
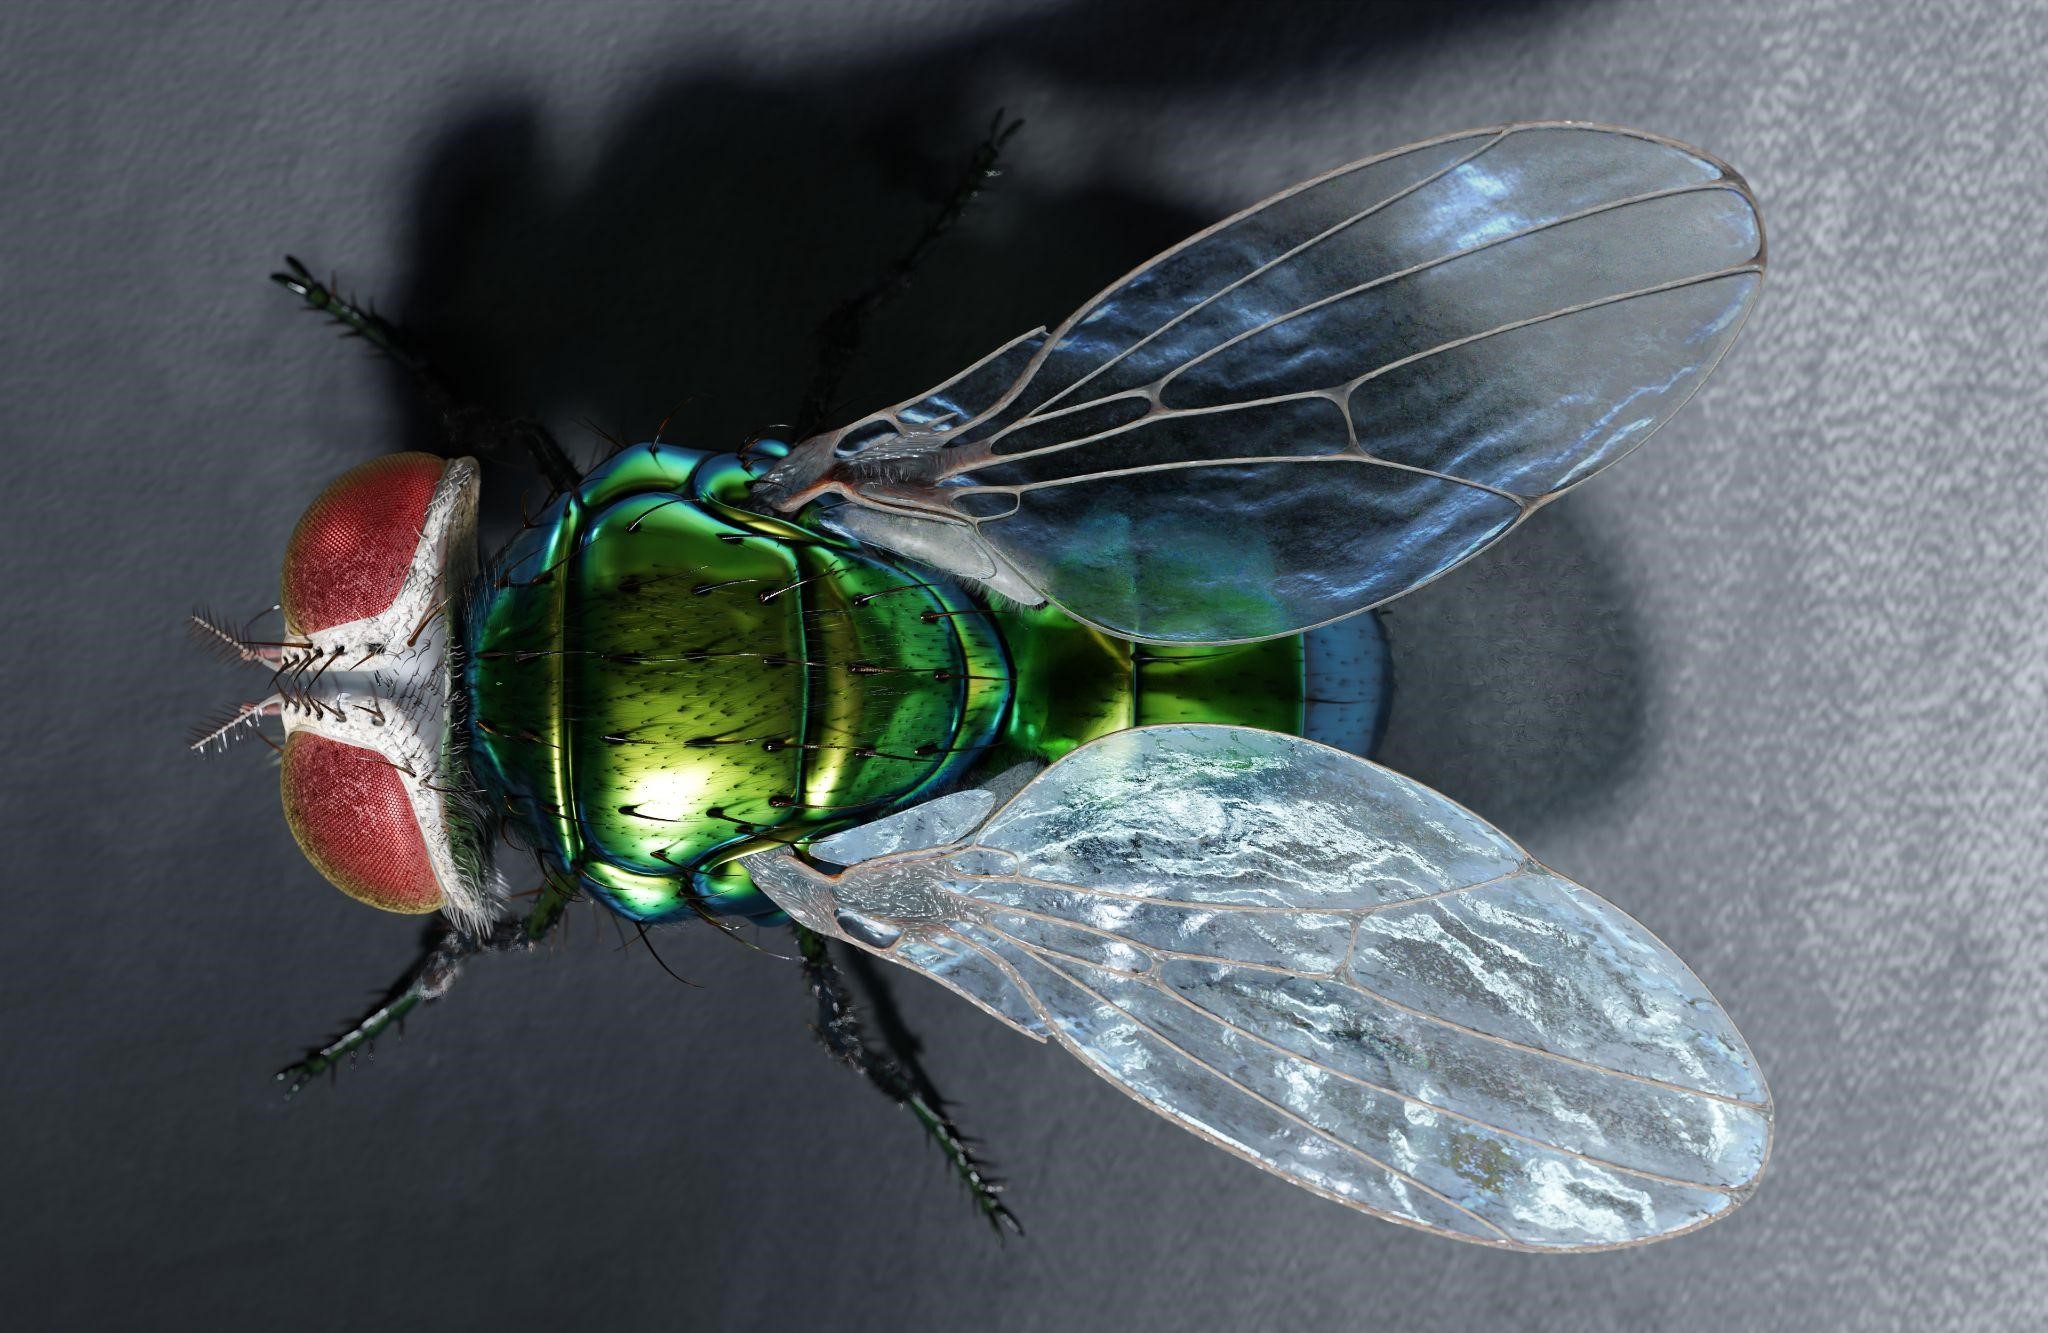
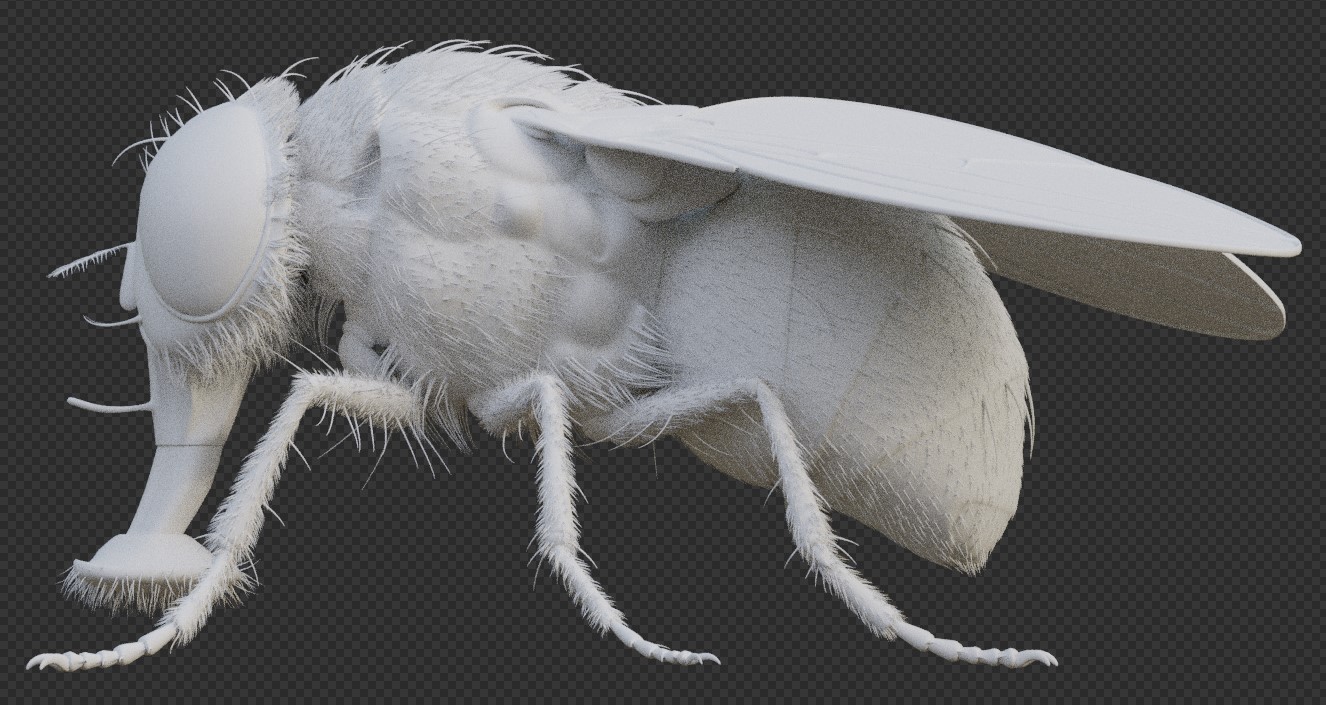
MODELS – Fly development
I have developed the fly from scratch, hoping to reuse this asset multiple times with minimal tweaks. The entire process has been extensively documented here.

Overall, the modeling process was fairly straightforward, while the most significant (and enjoyable) challenge was the shader work, using a lot of Fresnel nodes.
The fly is fully rigged with IK.
MODELS – Sketchfab Asset collection
For elements that I don’t consider unique and essential to the scene, I directly turn to Sketchfab. The generic assets available there are awesome, and I had no intention of modeling a bed and sheets.

MODELS – Human Character
I started by using MakeHuman, but I realized that the texture quality, in particular, would consistently hold me back.
After conducting an investigation, I decided that Daz Studio would be the most appropriate for my purpose, and I switched to it after obtaining their super-detailed Genesis 9 characters.
Below, you can see a comparison shot before and after replacing the human model from MakeHuman with Daz3D (with minor modifications throughout; let me know if you spot them all!).

Honestly, I had messed up the materials of the MakeHuman model and the lighting in the “before” shot, but in my opinion, the quality of the Daz characters is vastly superior.
SIMULATIONS – Cloth
Finally, I quickly simulated a piece of cloth and let it fall onto the delicate bottom of the lady.
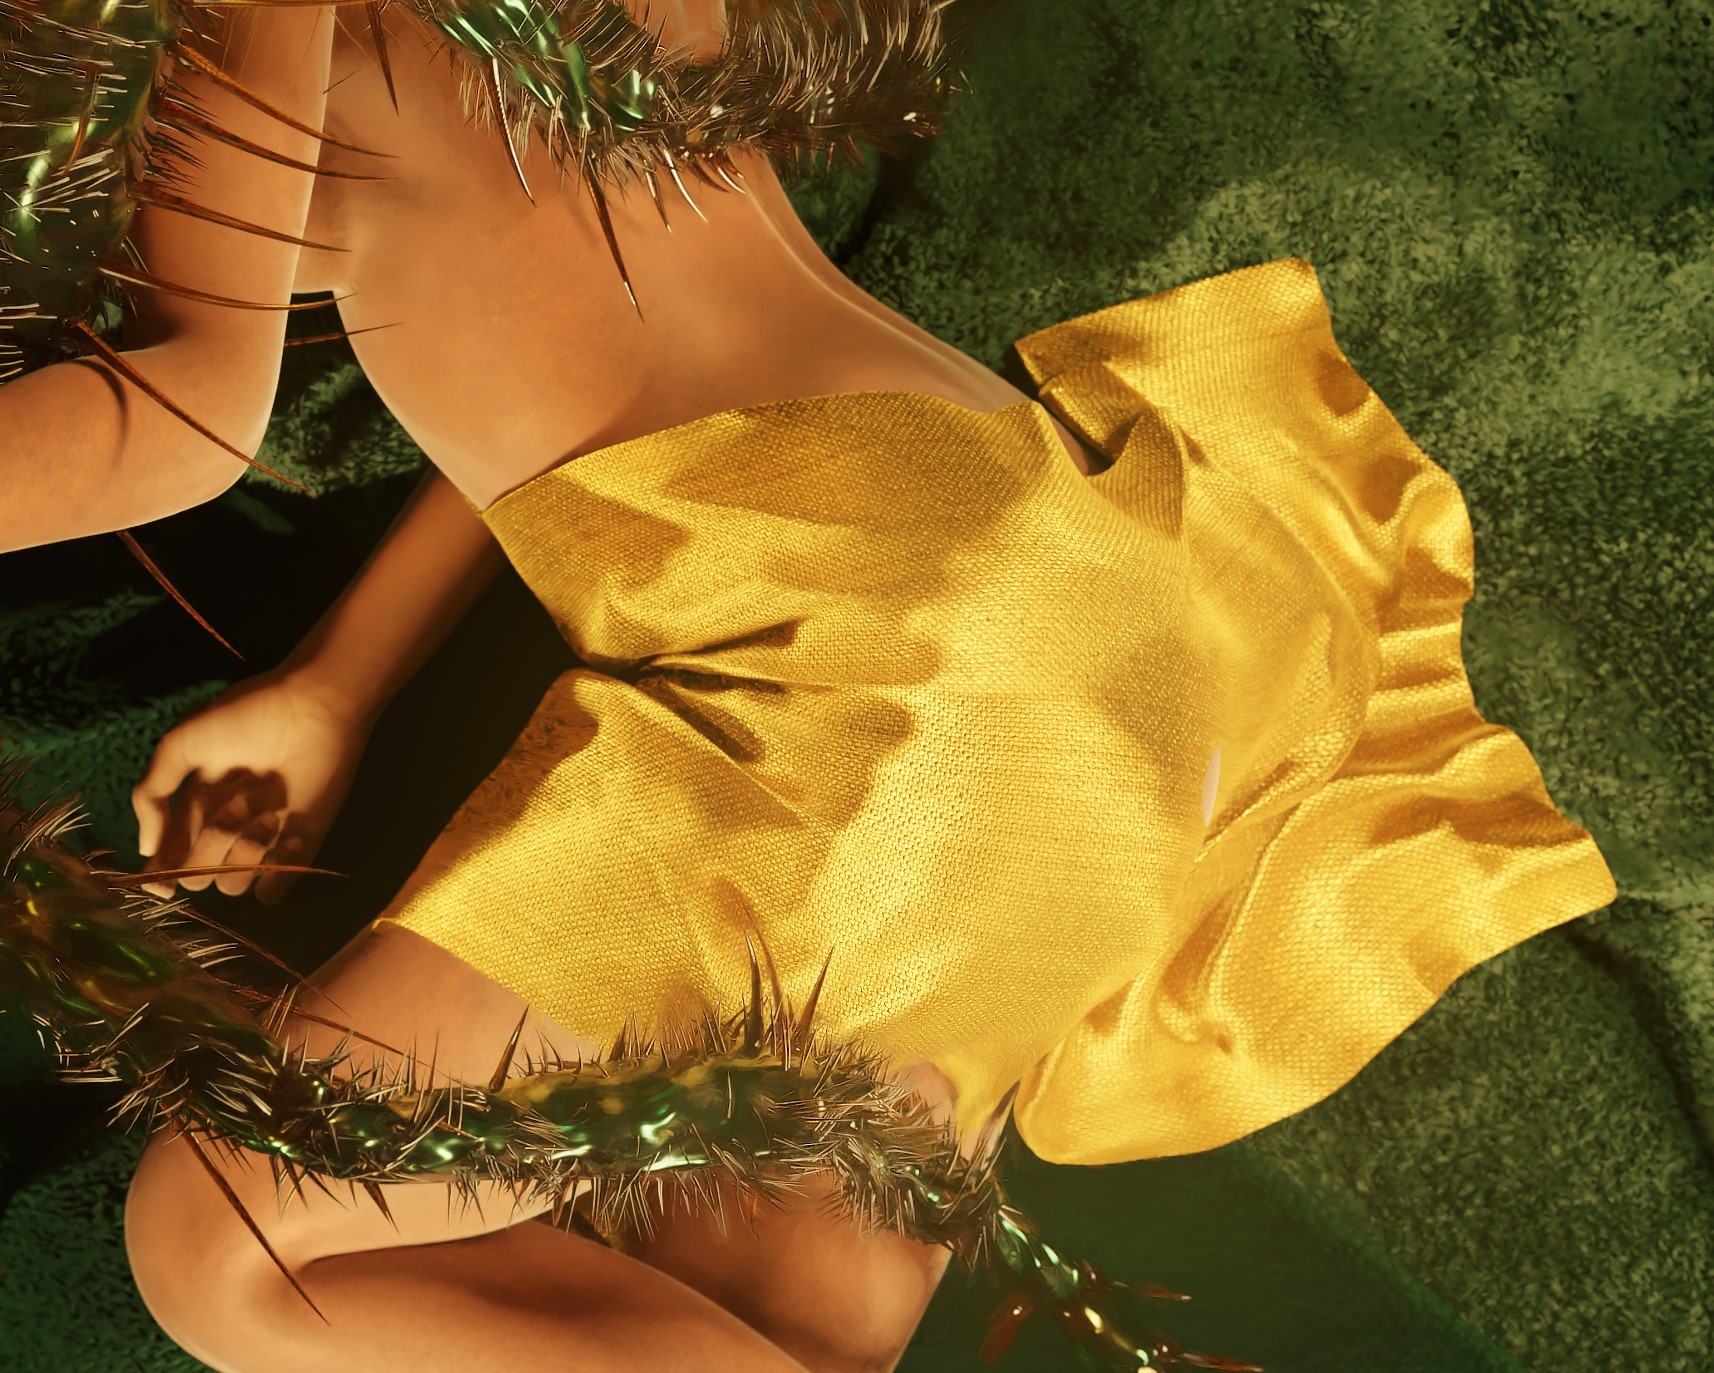
Given the regulations regarding nudity on the internet, I have made an effort to cover anything that could be considered offensive. I don’t like it, but at least I can publish the pieces. It still looks good, I think.
SIMULATIONS – Hair
The hair was created using the “old” hair system (prior to Blender 3.5) and has been manually groomed. The shader used is a principled hair BSDF.

I can’t help but think of Tina Turner in Mad Max 3.
I added hair particles to some sheets to give them a plaid-like appearance, as well as to the rug.

MATERIALS
I have collected a few base materials from free sources on the internet and fine-tuned them to best fit the current composition.

All the sites from which these materials were obtained are referenced at the end of this article. They’re all entirely free, and they’re awesome! The cloth materials on top are fully procedural.
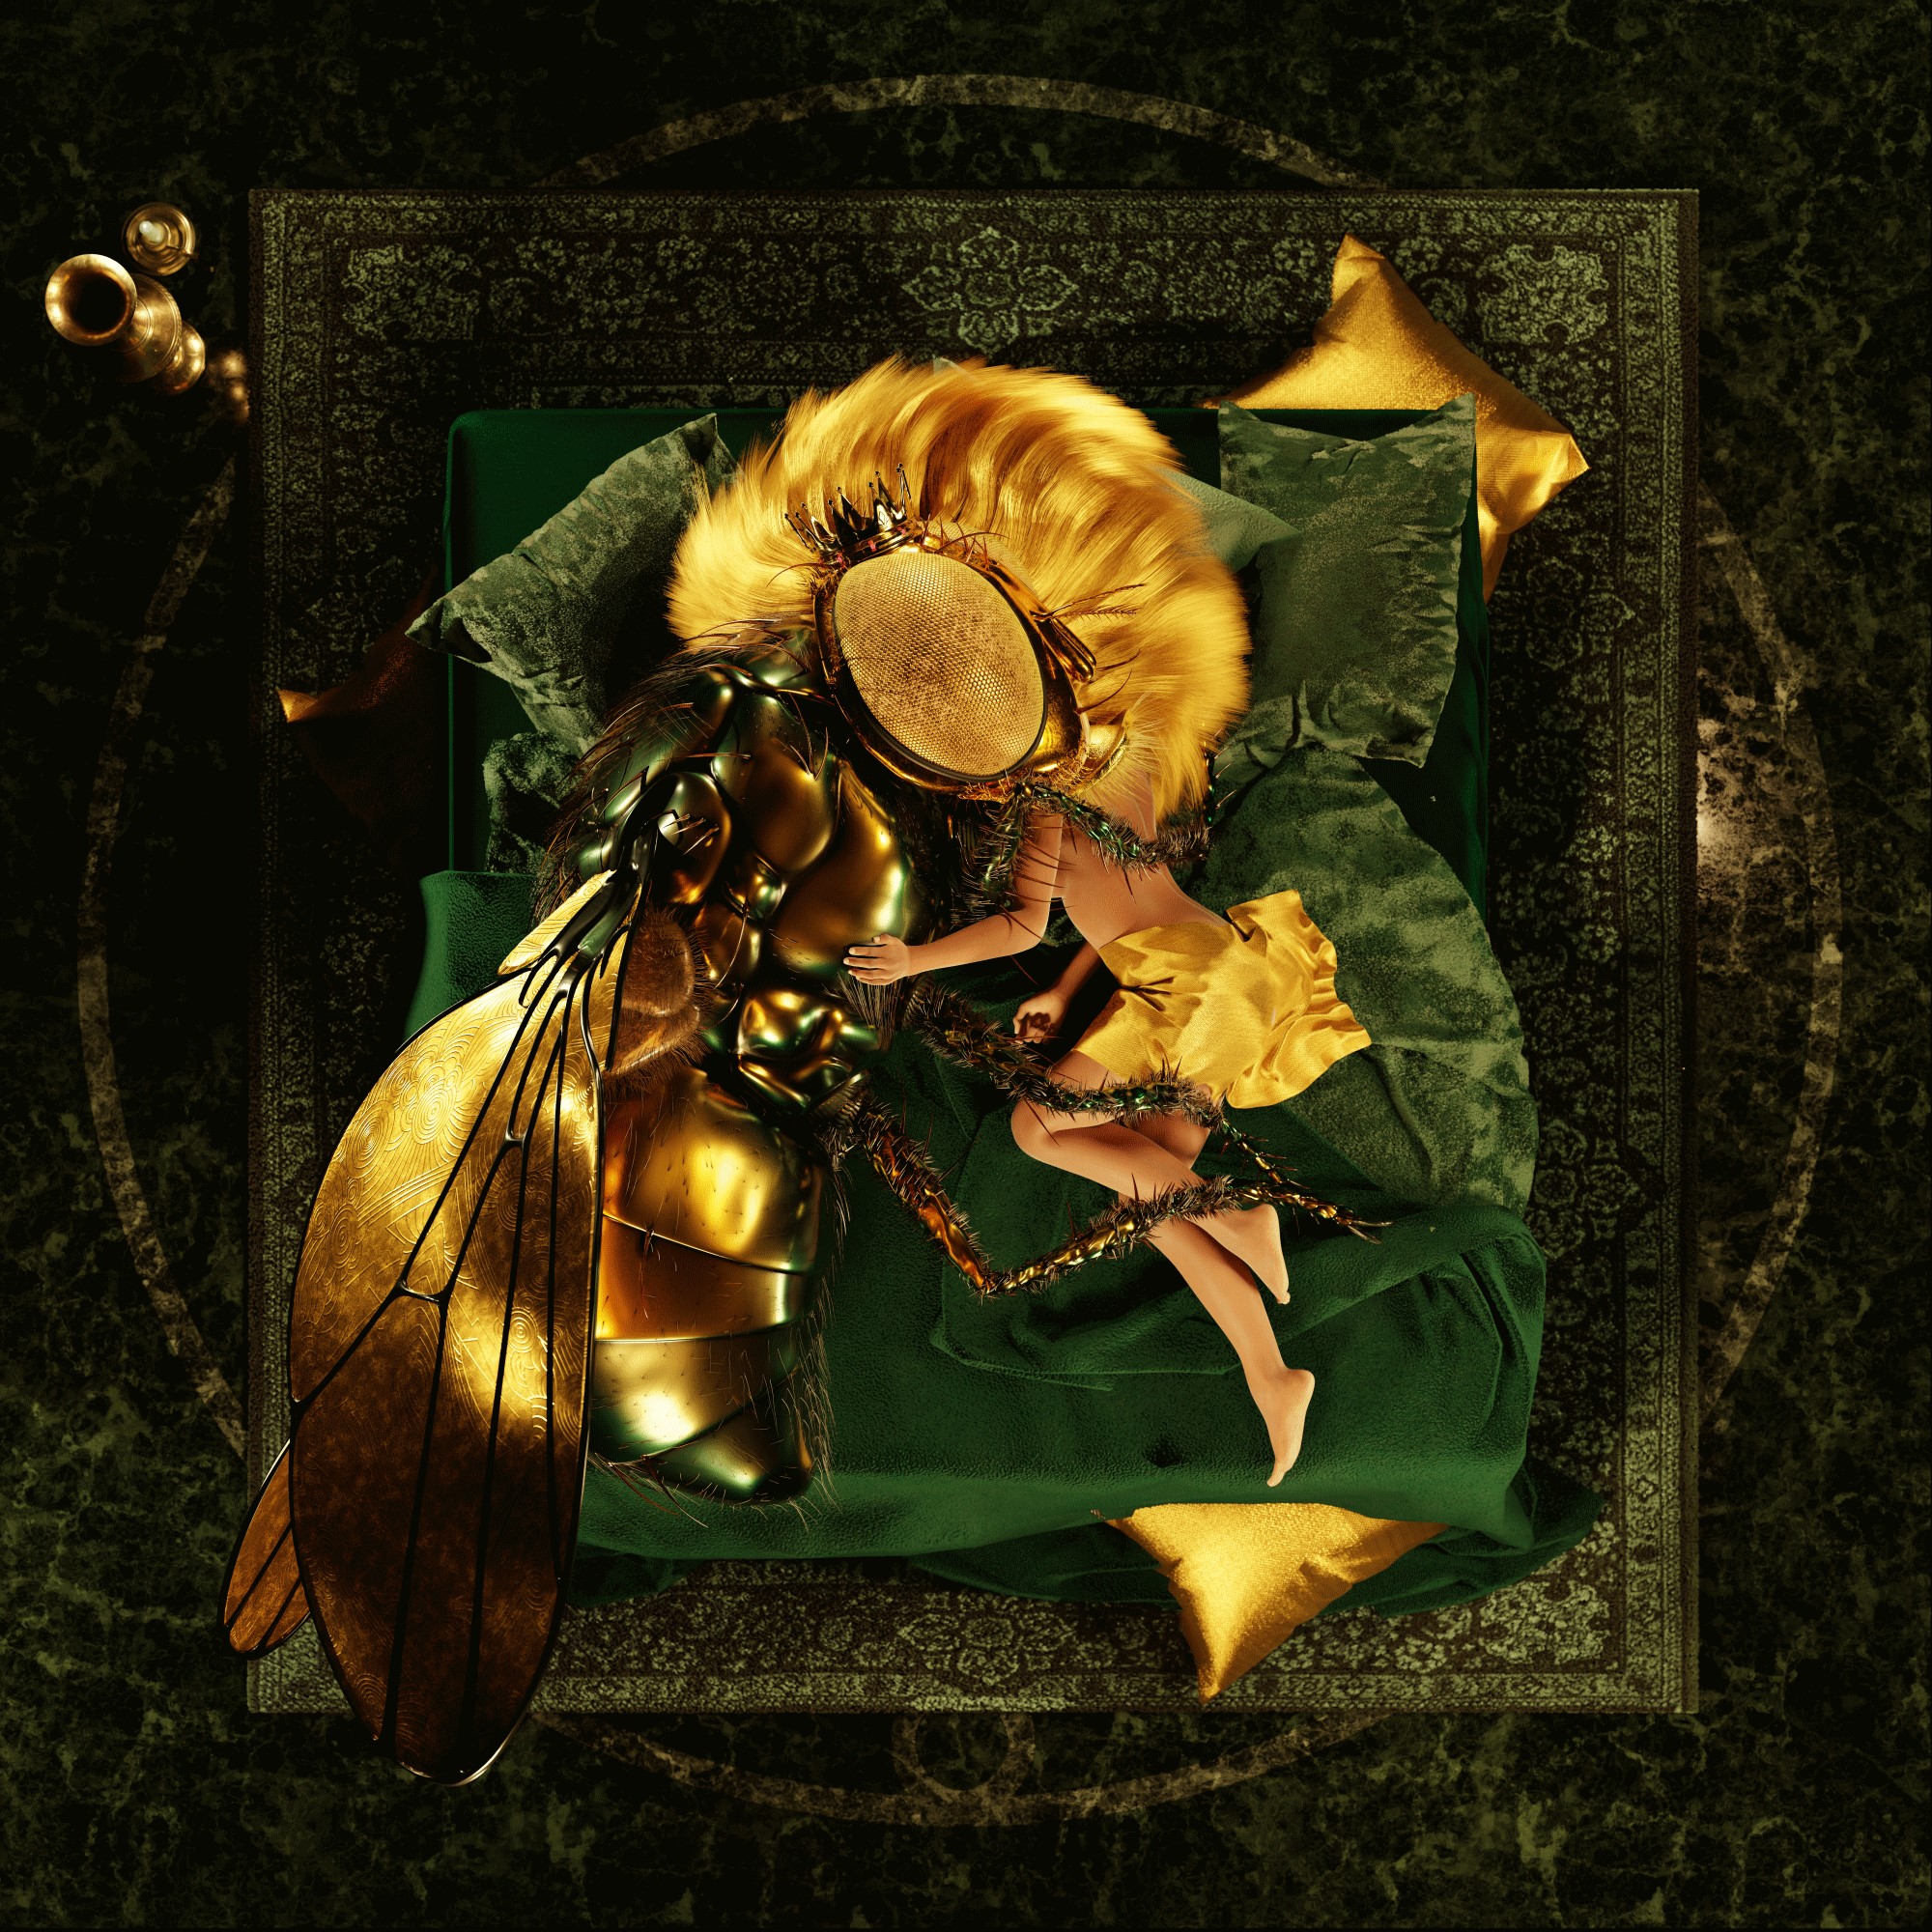
FINAL COMPOSITION
For this composition, I planned to rely on a “false” symmetry, where the characters mirror each other while being entirely different. It is once again a way of trying to blend, embrace, or reconcile two opposites.
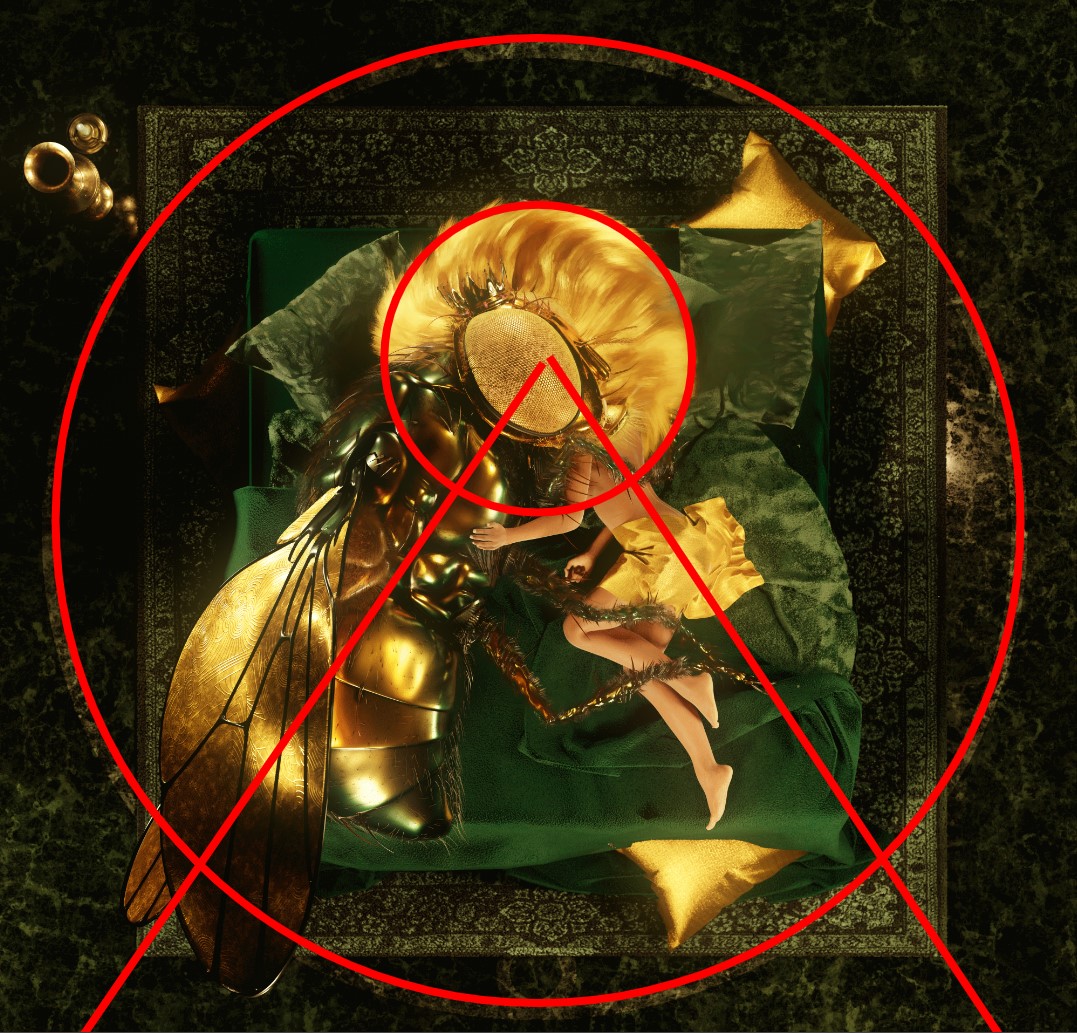
Circular and rectangular patterns frame the center of the composition, intentionally making it somewhat hard to read. The two bodies are oriented to follow symmetrical lines. The focal point is located at approximately one-third of the picture, drawing inspiration from the rules of thirds in photography and the golden ratio.
LIGHTING
For the lighting, I decided to distribute a few point lamps and completely eliminate the HDRI (which I tend to use systematically as a base lighting). I placed small discs below each of them so that the direct light does not reach the ground and create harsh highlights that would distract the eye and disrupt the composition.

RENDERING
Before rendering, I always check the false color profile and adjust the exposure accordingly. That really helps to obtain a “sane” image as a base and minimizes the required corrections afterwards.
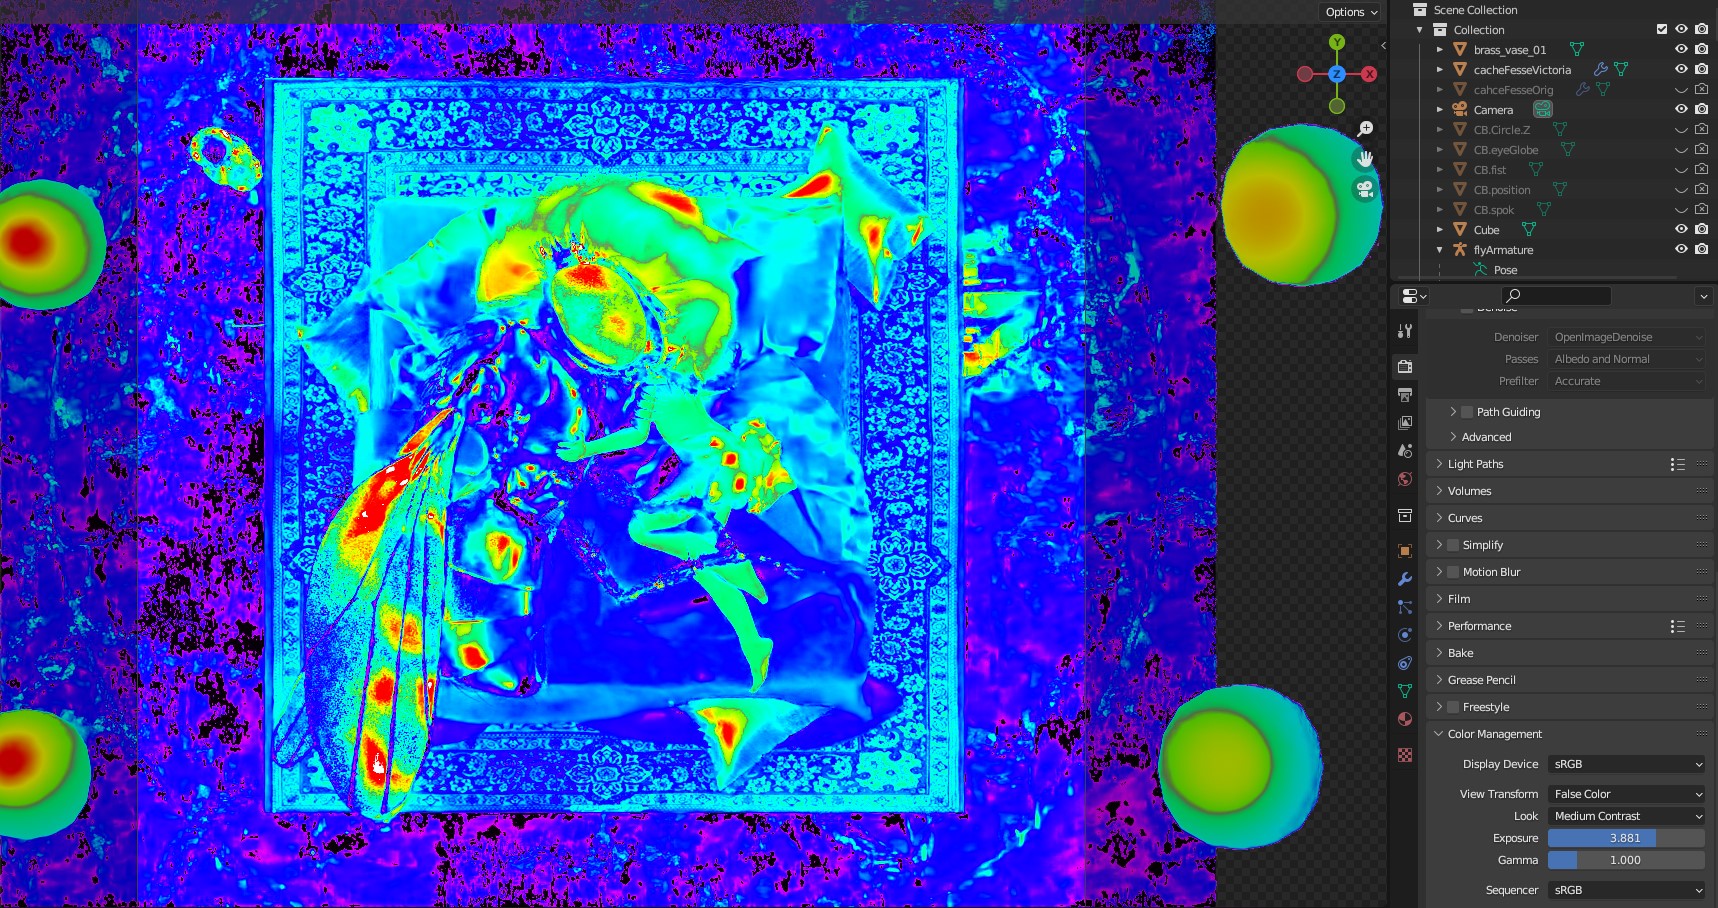
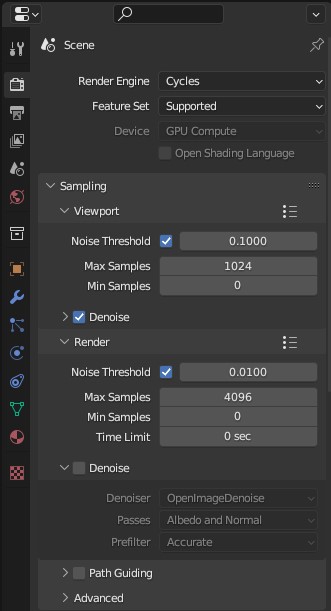
I use fairly typical render settings, and I handle the denoising in the compositing pass. Nothing too special here.

POST – PROCESSING
Here are the before and after images, showcasing the post-processing using Topaz Studio II.

In this case, there is a subtle correction. I have added some painterly details to the “empty” areas and further blended the colors to enhance the dreamy atmosphere. I have also slightly blurred the fine details, such as the woman’s hair and the fly.
However, most of these post-edits are only visible in high resolution and large format.
ASSET ATTRIBUTION
This piece makes use of several assets which are licensed under Creative Commons Attribution.
- “Messy bed 2.0 (with wall mounted backboard)” by thethieme
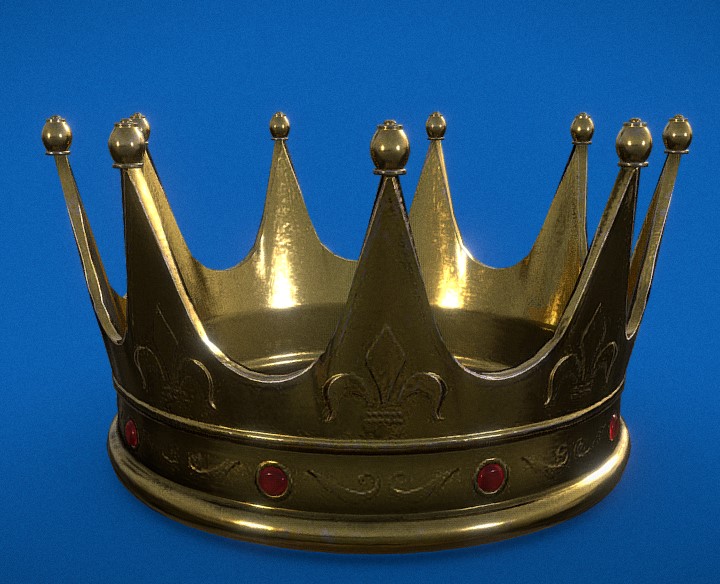
- “Golden crown” by Pieter Ferreira
The following resources have been used as well, and are subject to CC0 licence.
RENDER – Embracing Demons

A quick walkaround video,
Here are a few renders of the fly before integrating it into this piece.
Thank you for reading. Feel free to ask any questions, and if you like my work, follow me on social media. Have a good day!
About the Artist
Denis Gauder, a 3D artist from Belgium. He is focusing on producing thought-invoking pieces, with a dark twist.