INTRODUCTION
My name is Murad, and I'm a 3D generalist from Armenia. Despite studying Applied Mathematics and Computer Science at university, I didn't pursue a career in art until I returned from the army in 2015.
I began learning 3D software through free resources, starting with 3ds Max and later switching to Maya. I landed my first full-time job as a 3D animator at a small studio in Yerevan, but I didn't have the opportunity to pursue personal projects that truly interested me.
In mid-2020, I started hearing about the growing popularity of Blender and decided to explore it more closely. After using Maya for four to five years, I made the switch to Blender and found it to be more productive and efficient.
INSPIRATION
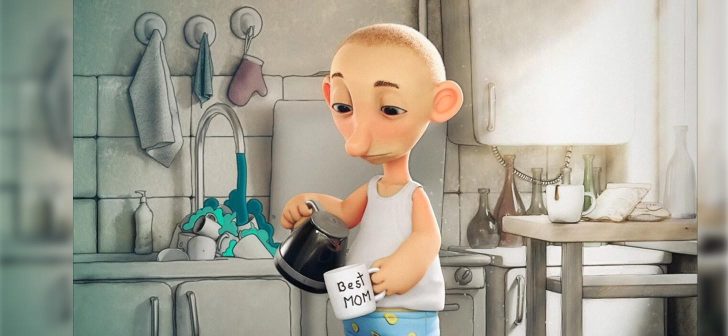
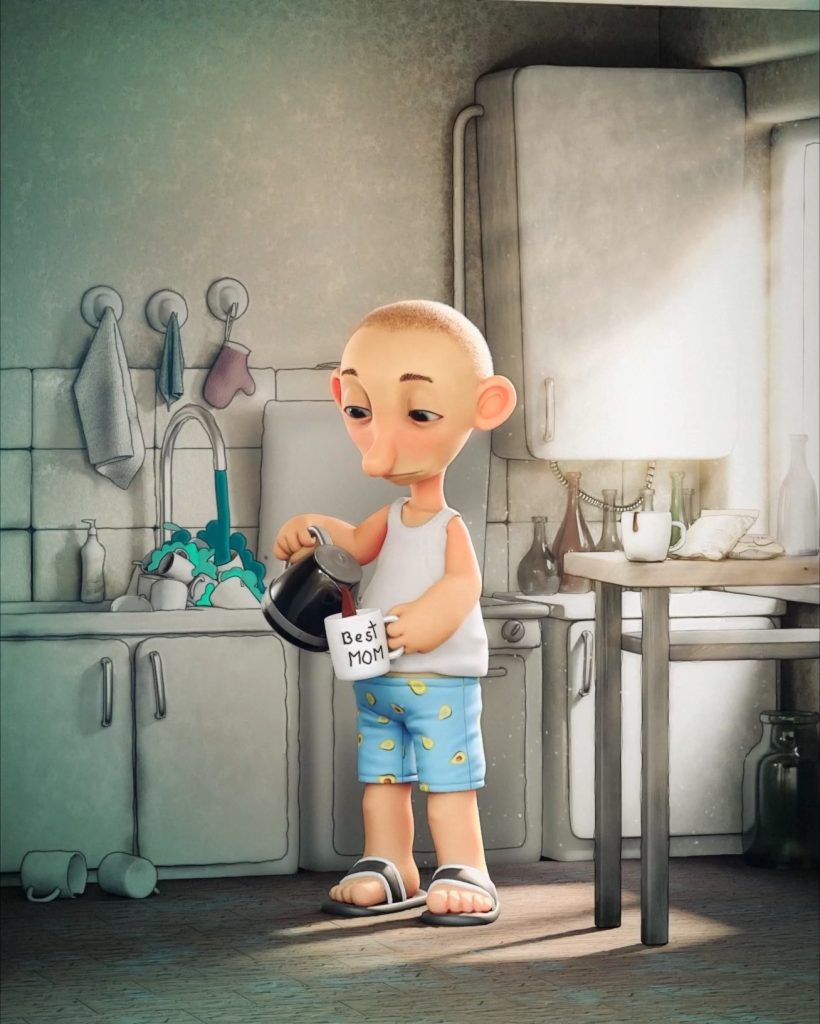
Today, I'm proud to work at my dream studio Triada in Yerevan and have the freedom to explore my personal artistic passions using Blender. I'm excited to share the story behind one of my most recent works, which was inspired by a new kitchen where I used to start my mornings last year. The artwork is titled "Good Morning, Coffee."
This idea visited me one summer morning in 2022. I woke up and found myself heavily dependent on the dark elixir. I believe most of you recognize that feeling :) Sometimes, it seems like you need tons of caffeine to stop feeling like half a human.
As a self-proclaimed coffee and sleep enthusiast, I knew I had to capture this experience in my art.
CHARACTER CREATION
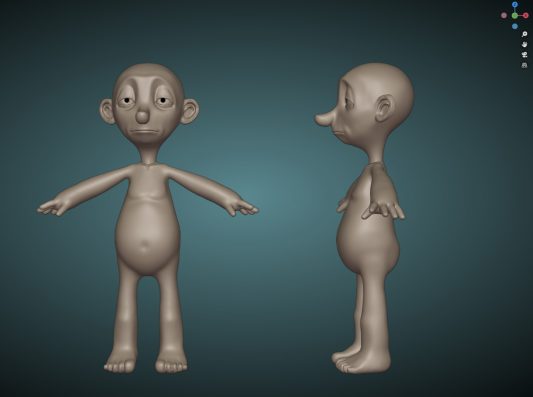
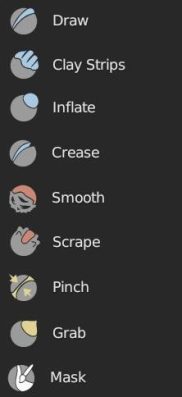
The character is fully made in Blender. Blender’s sculpting tools are incredibly useful, so I didn't need any additional software or add-ons to design the character. Although Blender has a bunch of great tools for sculpting, my main workflow for sculpting characters includes only these nine brushes (at least for this character, I did not use any other ones).
For retopology, I used a great add-on called Retopoflow on Blendermarket.
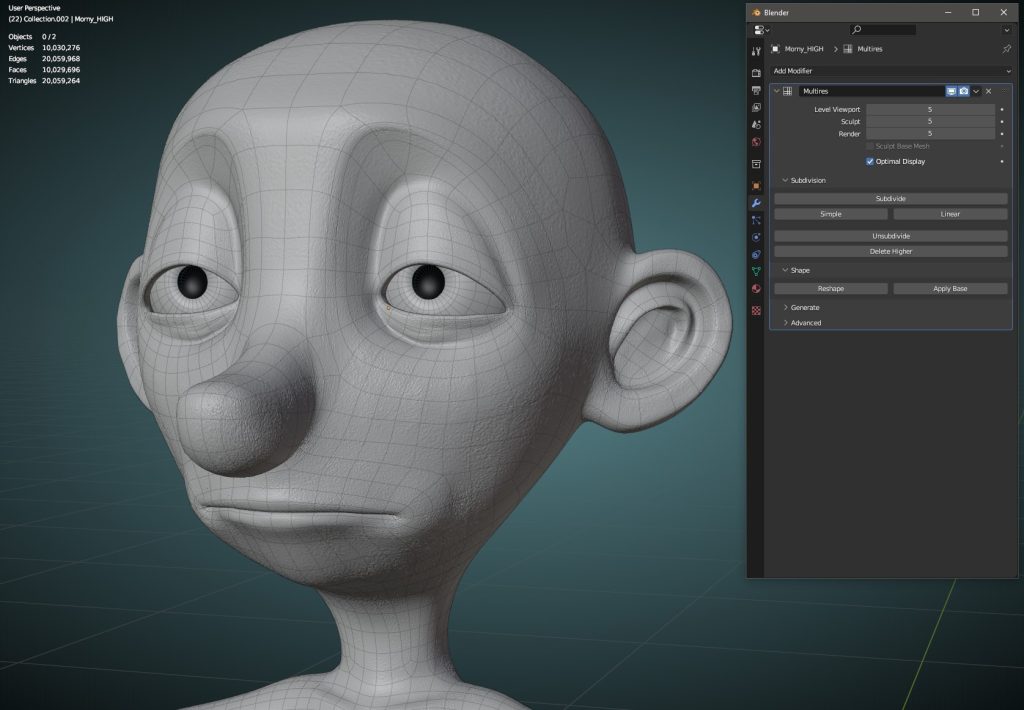
Once the model was retopologized, I sculpted details with the multiresolution modifier of the face and skin using alphas provided by the Sculpting Toolbox.
Here is the result …
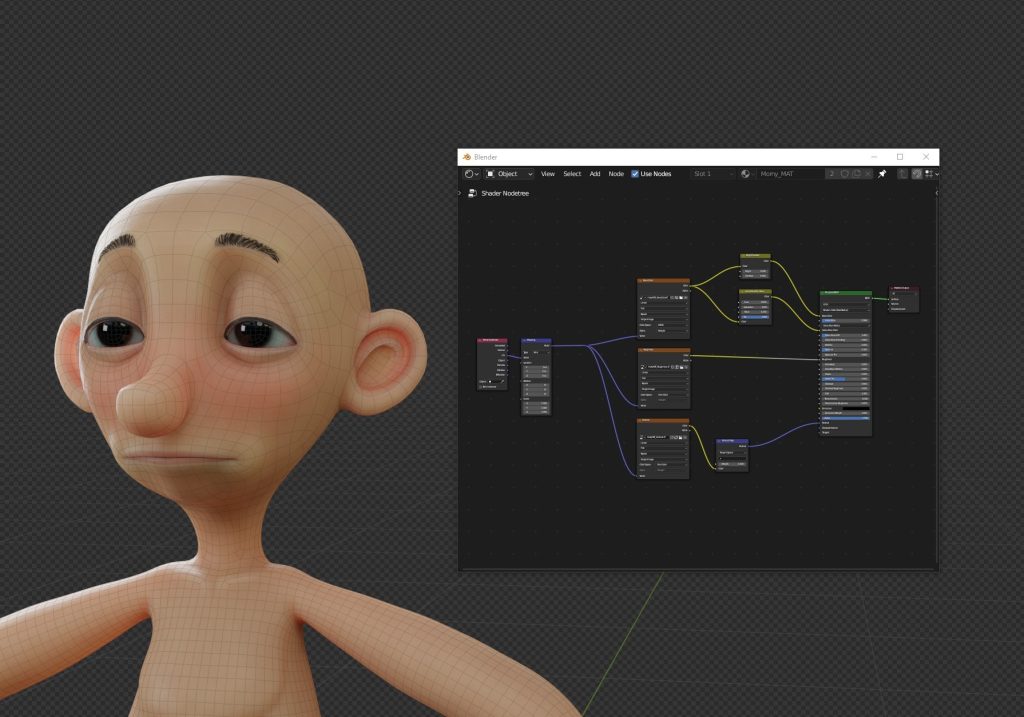
After that, the texturing part followed. My character isn’t so detailed and realistic, so Blender’s common texturing was enough for this part. Using the bake from multiresolution option for normal maps and standard painting for color and roughness maps, I got this result.
The shading model is pretty straightforward. I only used color, roughness, and normal textures. For SSS, I used the same color texture with twice the saturation.
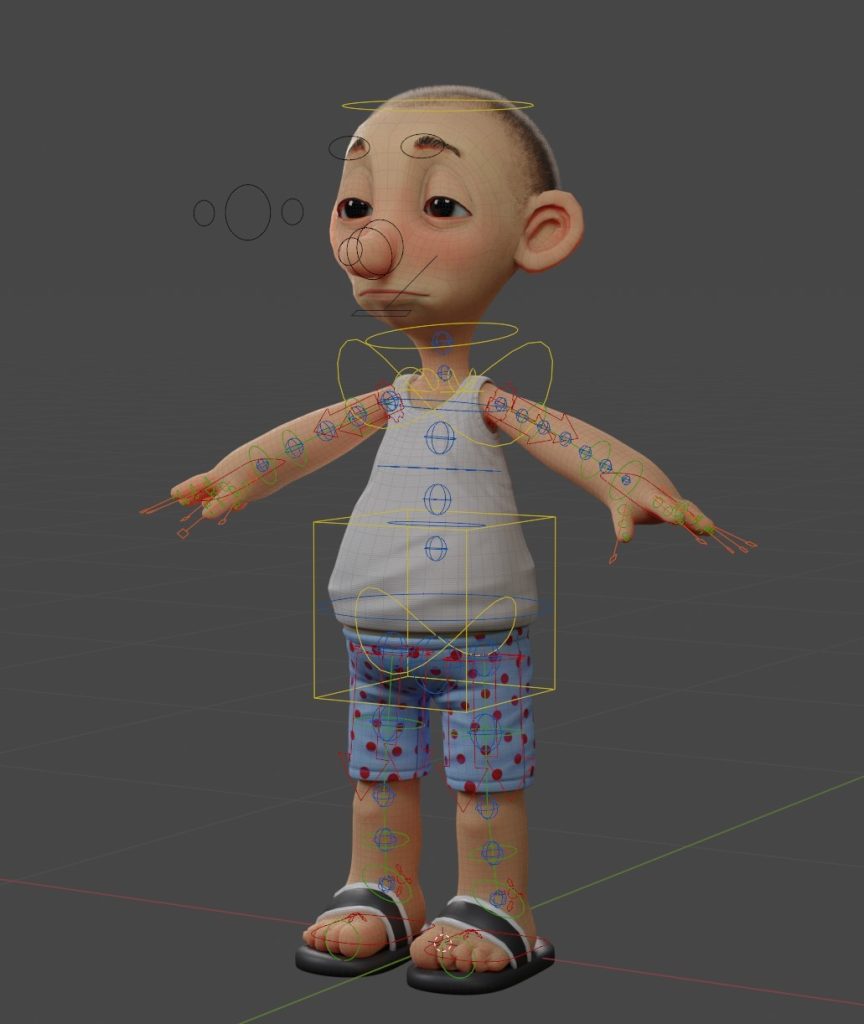
There is no specific technique for creating clothes, just the same as the main body modeling, so I'll skip this part. The rigging was done by Rigify, with some manual rigging for the face, especially the jaw, nose, brows, and eyes.
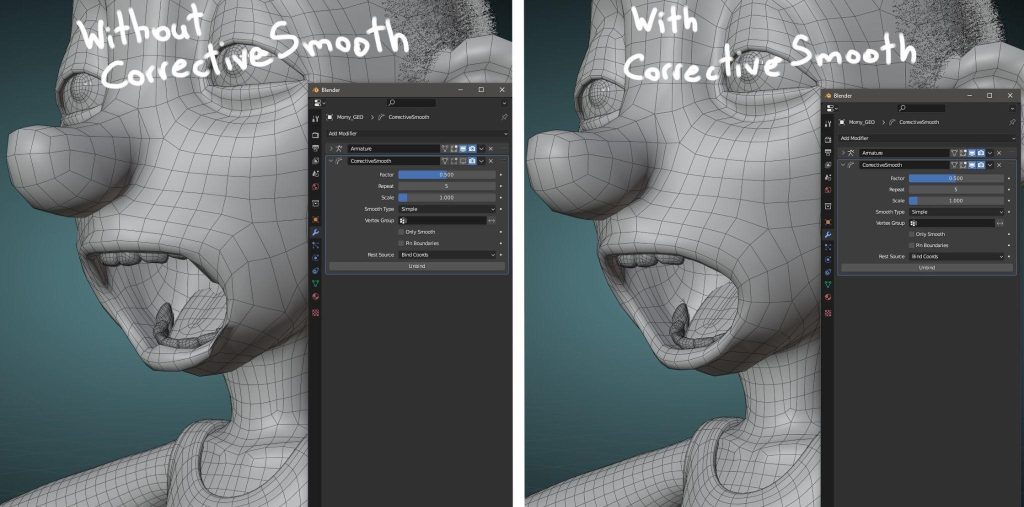
The only advice I can give here is to use the CorrectiveSmooth modifier. I think many people may not know about it, but it's a huge time saver, especially when Weight Painting is a headache for you. You can see the effect of it below in the jaw area.
Of course, it won’t work in game engines, but inside Blender, it does a good job. I added some extra blend shapes to my rig in the animation stage, which I'll talk about later. It's time to create some environments…
ENVIRONMENT
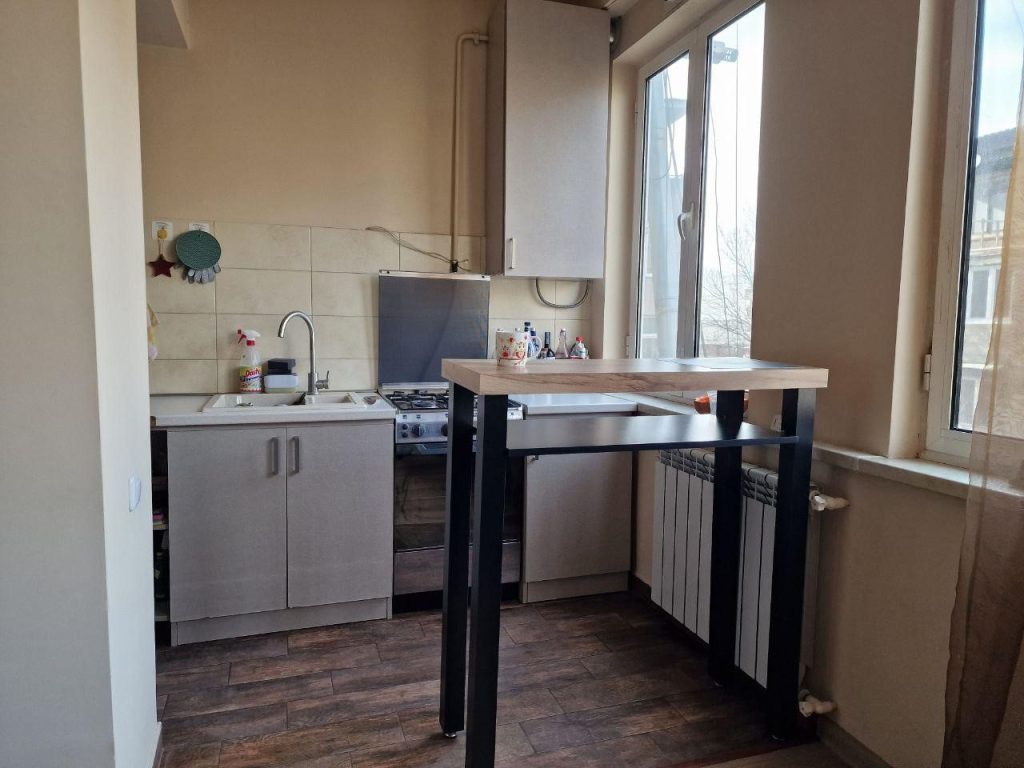
Since this artwork represents me and my personal feelings, I wanted to recreate a special place that is very important to me - a space that I share with someone who is very dear to my heart: a corner of my kitchen where I have my morning coffee.
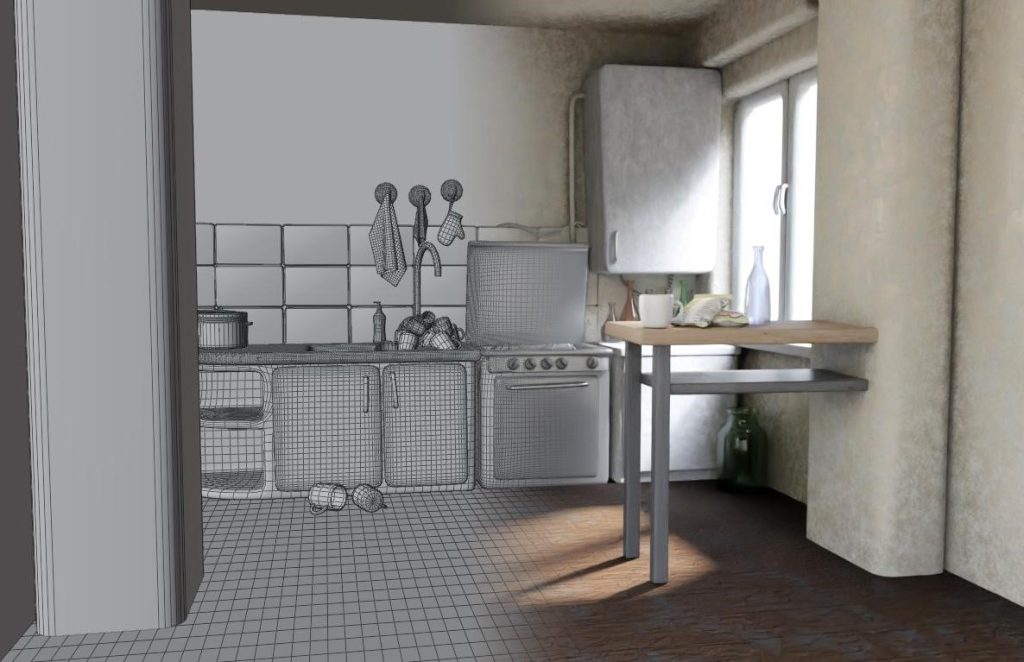
You can see that most of the models are just beveled boxes, so overall, modeling the kitchen was standard box modeling.
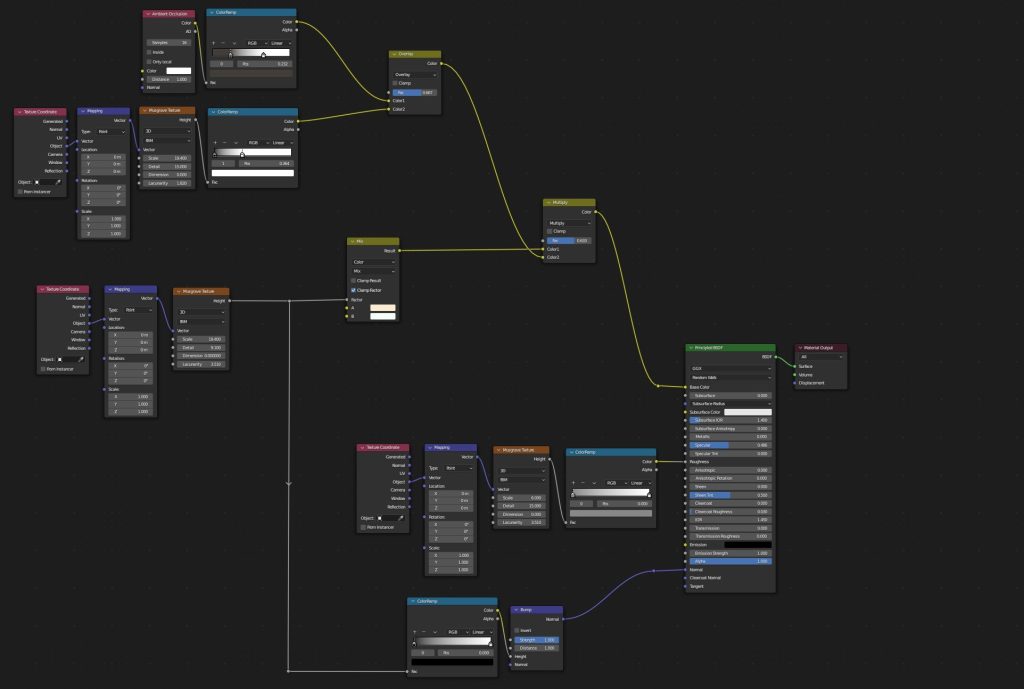
For the shading, I mostly used procedural textures, mixing a lot of ambient and musgrave textures. For example, here is the node graph of the wall material.
LIGHTING
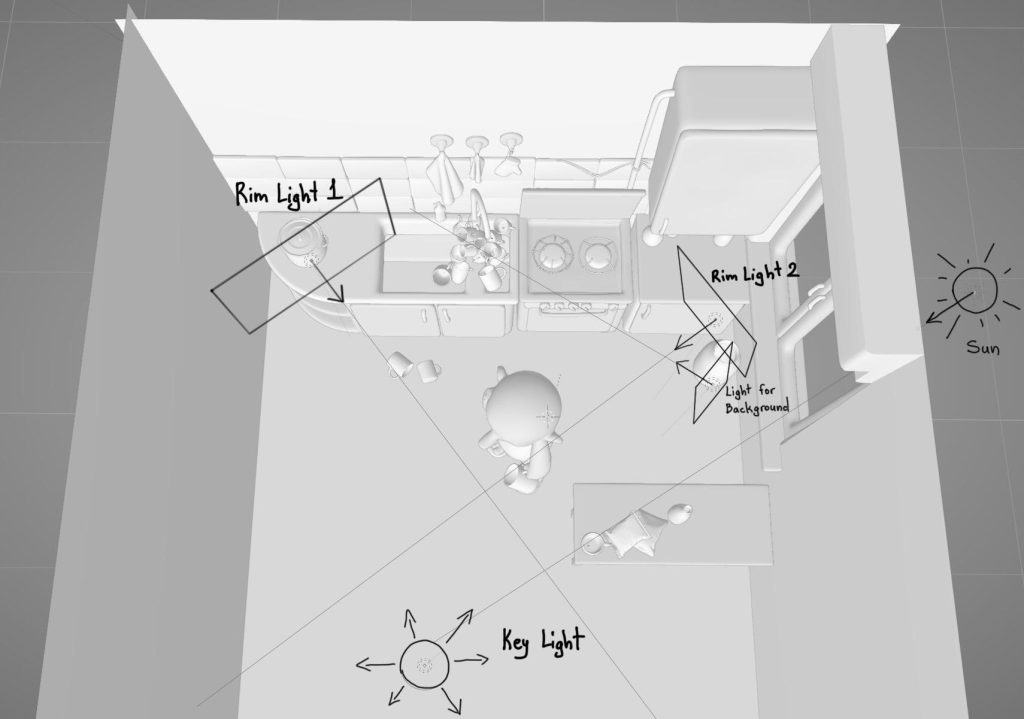
For the lighting scene, I used five light sources and an HDRI. The main goal was to create an illusion of a sunny morning that illuminated the whole scene only with the sun, while still having an accurate enough composition. So, I achieved the effect with this type of lighting structure.
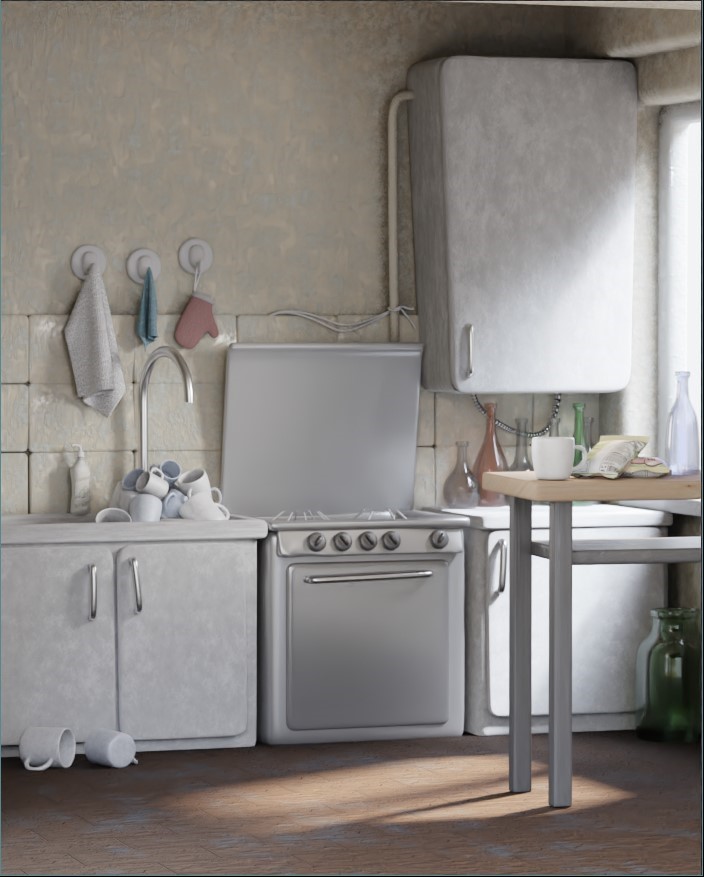
The final pure render without post-production looks like this…
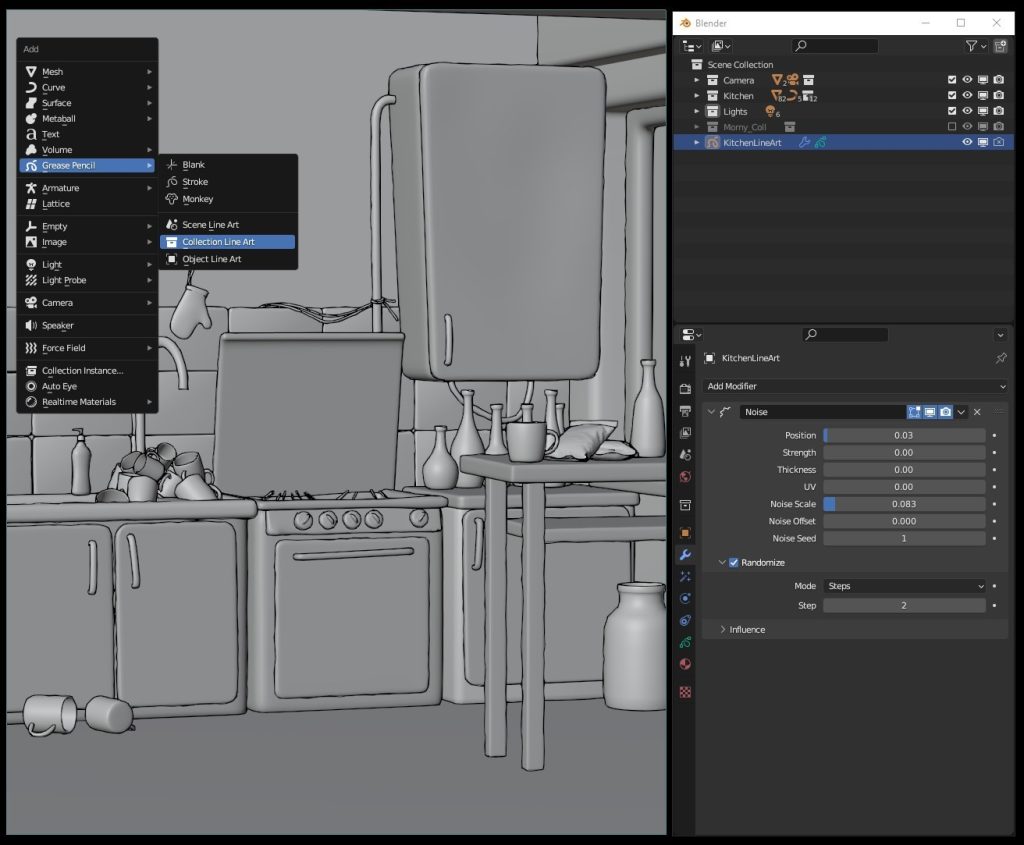
After that, I added a LineArt grease pencil object with the kitchen's collection selected. Because I don't have animated objects in the kitchen, I applied the Lineart modifier for faster performance and added a noise modifier with the Randomize parameter checked on, so it would add a low FPS hand-drawn effect to the kitchen. I will render the lineart in a separate sequence so I can play with it in post-production.
ANIMATION
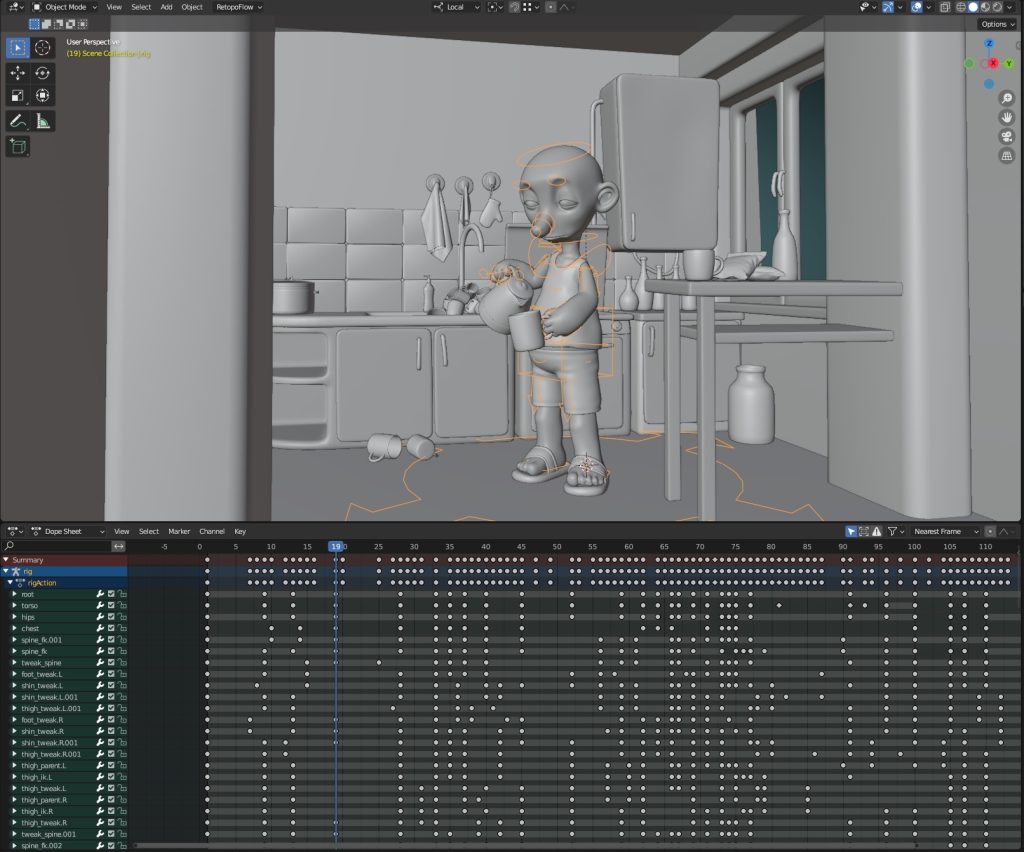
I animated the character in the traditional way of 3D animation, that is, blocking-polishing.
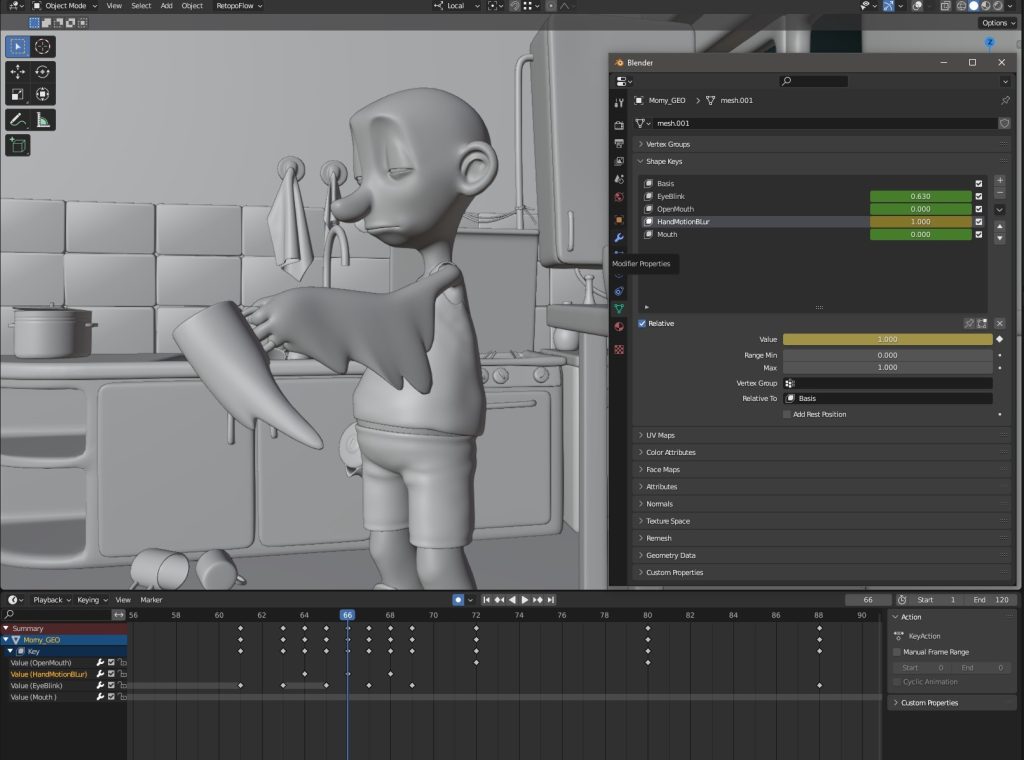
After bone-based animation, I started to play with blendshapes. Overall, I added only four blendshapes. The first one was for eye blink. The second one was for stylized motion blur (I did not use motion blur in render options; instead, I did it in mesh animation level).
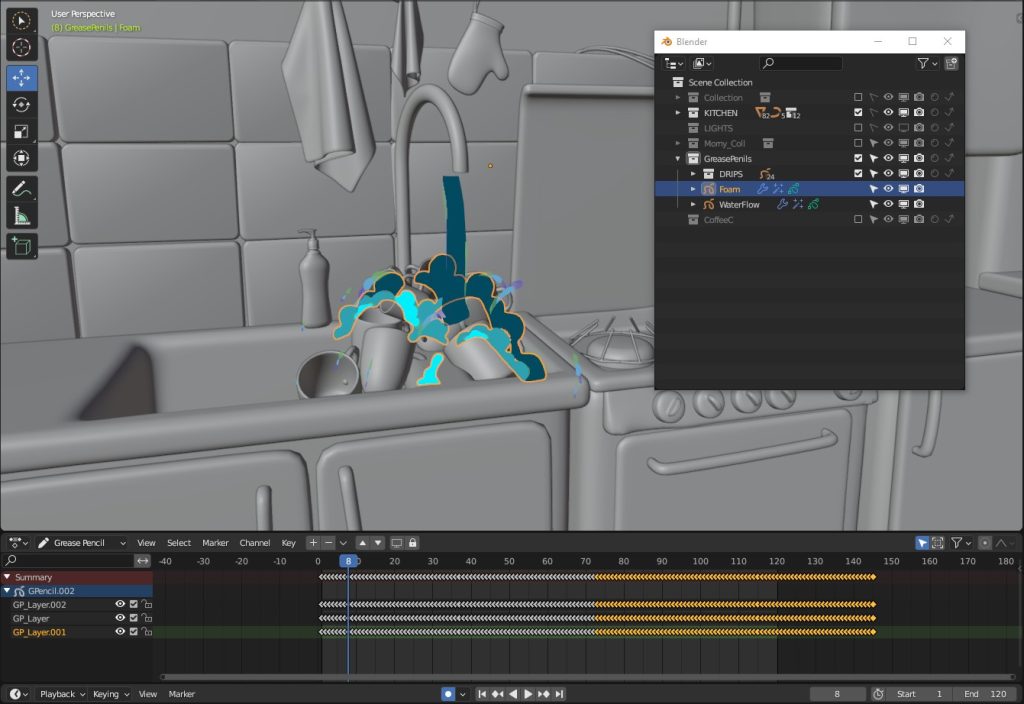
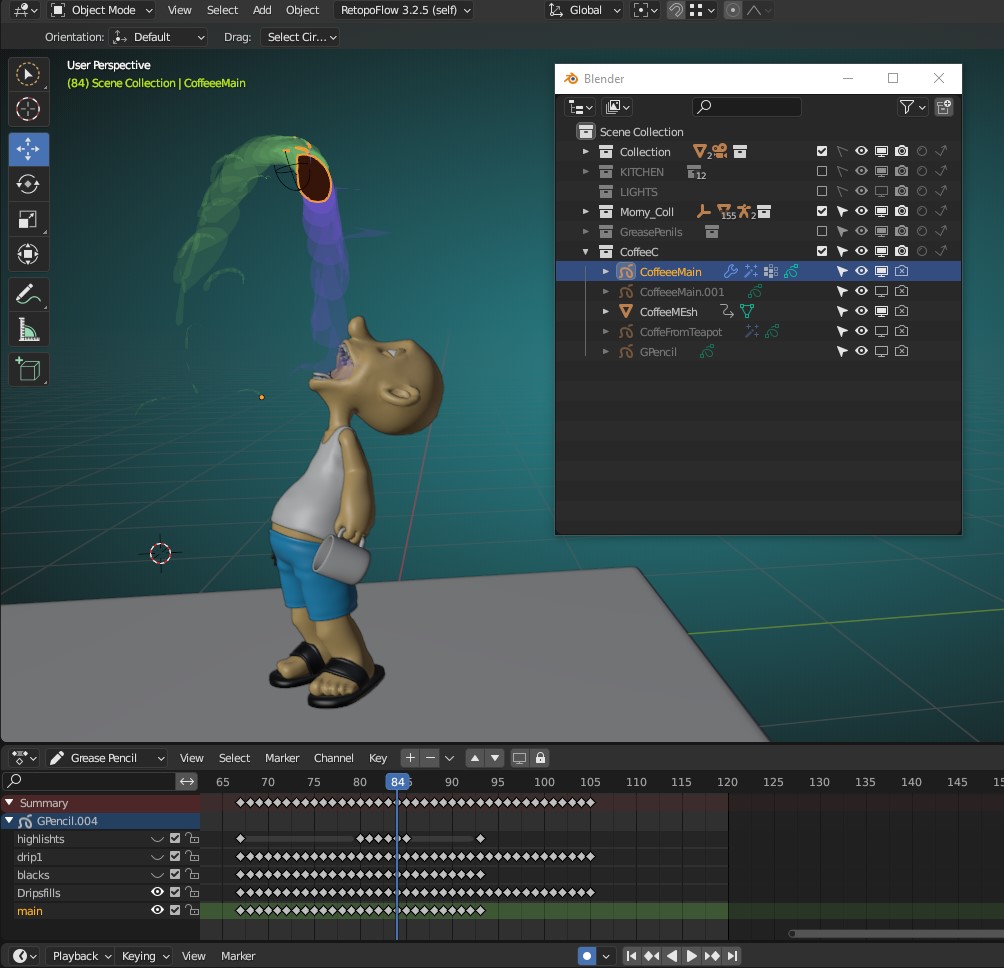
The last two blendshapes were for mouth animation, especially for this frame… The character is animated, so it's time for Grease Pencil. This was the most fun part for me as it was the first time I did traditional animation frame by frame.
For the water tap in the background, I separated the animation into three main objects: the actual flow, the foam, and the water drops. I animated only one drop, then duplicated it many times and offset the animation.
The main coffee animation was a bit challenging, so I used a helper object, a simple sphere mesh that I animated like a bouncing ball and drew frame by frame over it.
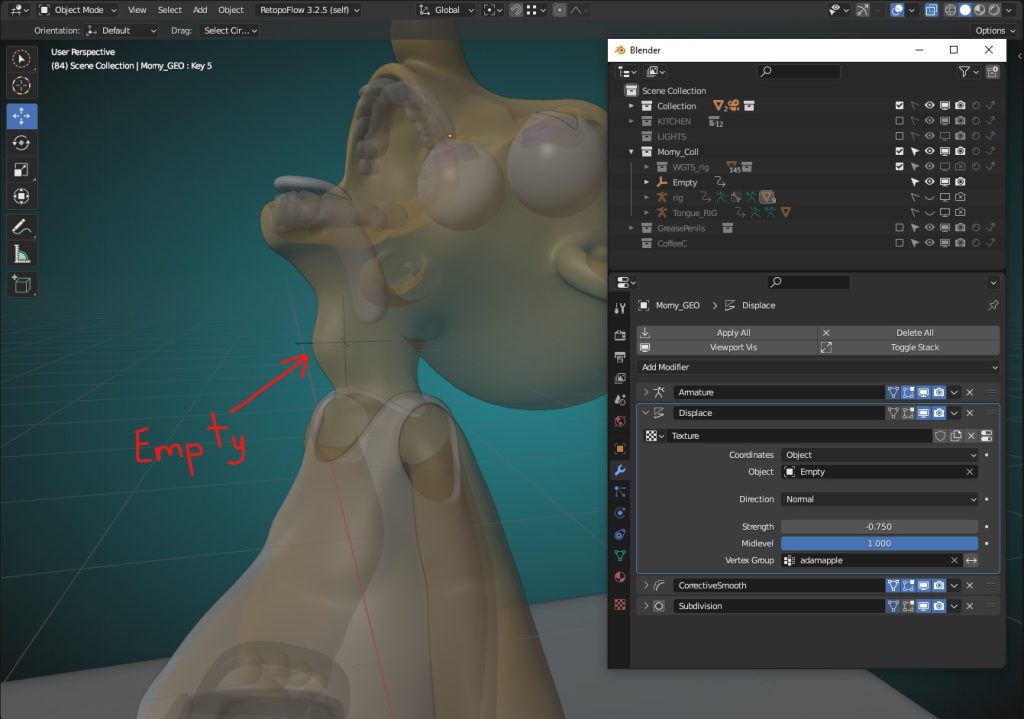
The very last thing before rendering was the throat animation. Here is how I solved it. I did it with a displace modifier, with a radial gradient in it. I added a weight group so it only affected the throat area and set the texture space to an empty. After all, I had to adjust the texture coordinates to fit it well. So, the empty goes up and down, and the throat follows it.
RENDERING
I had to wait for about two days to finish the rendering process. The animation was 120 frames long with 24 fps, and each frame took approximately 15 minutes to render.
For animations, I always use rendering on the command line. I recommend this method to artists who don't have a powerful PC. It is more stable and uses fewer resources because you are rendering without opening Blender. If you're not familiar with it, you can read Blender's documentation.
POST-PRODUCTION
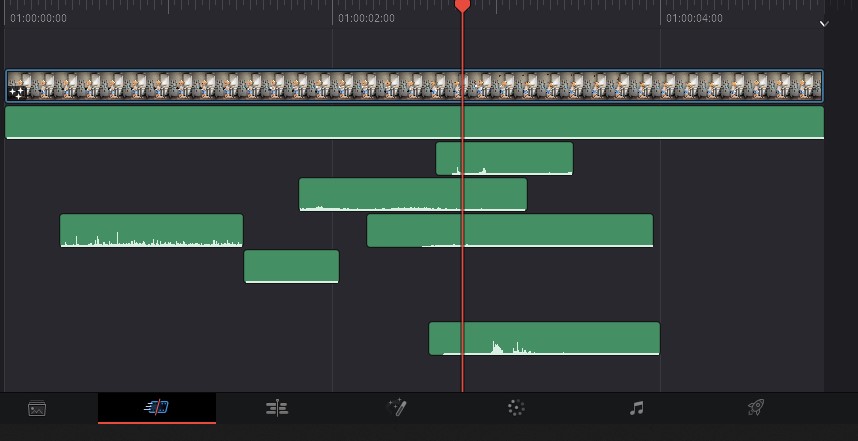
I did a lot of compositing in DaVinci Resolve to achieve the style that I like. I rendered the background, character, all line arts, and all 2D animations separately in sequences, and combined them in DaVinci. I also used some effects and presets from BorisFX Continuum.
I recorded some of the sound myself with my phone, and sound editing was also done in DaVinci Resolve.
GOOD MORNING COFFEE
And that's it. I hope my article was informative, and you enjoyed reading it.
Wishing you all more creativity!
About the Artist
Murad Rama (Tshntshghukyan), a 3D generalist from Armenia.


1 Comment
Thanks for the comprehensive description. There are some really useful tips in there.