Video Tutorial: Rigging Procedural Eyes with Auto-Rig Pro
dadscastle writes:
Uncertain how to rig procedural eyes? This tutorial will show you how.
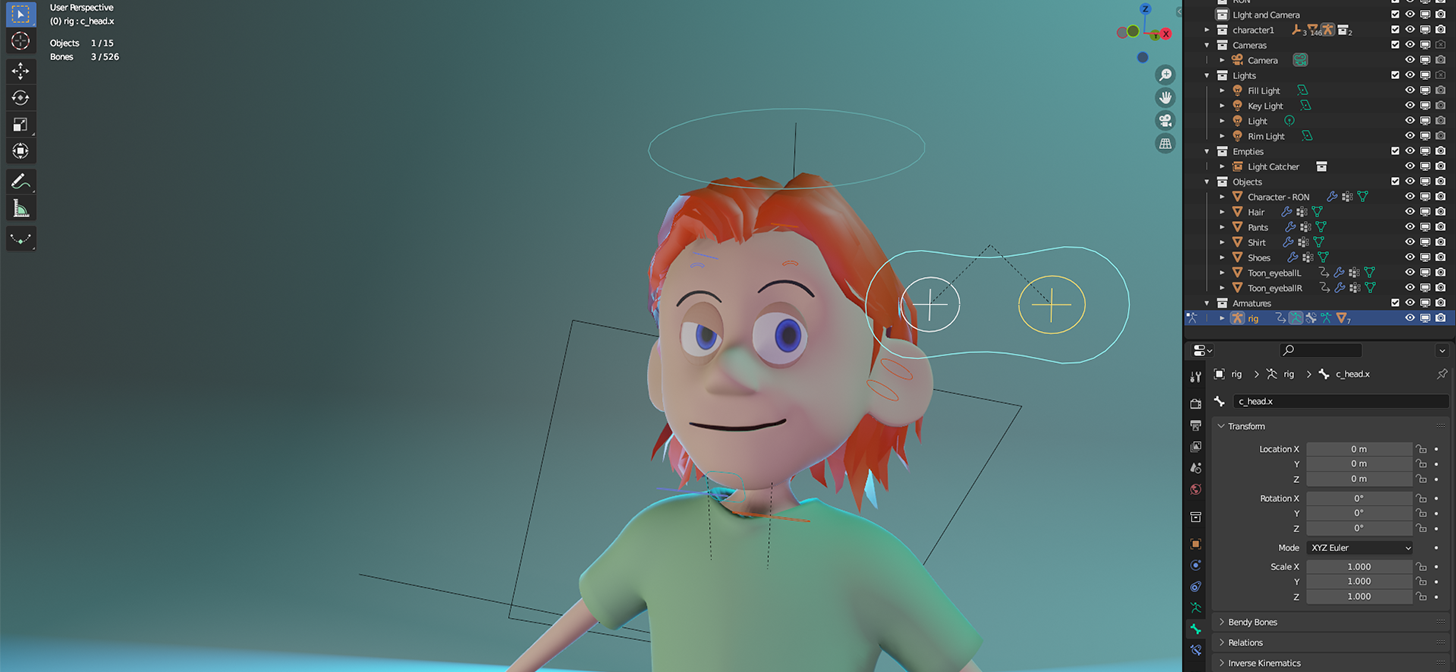
Most rigs assume the eye is rotated by rotating the mesh. However, when rotating procedural eyes, we’re changing the material coordinates not the actual mesh. In this 4-part Blender tutorial, you’ll learn how to rig procedural eyes using Auto-Rig Pro (ARP) by disabling the mesh rotation from the eye controllers and creating new drivers for the eye materials. I also show how to rig the geometry node eyelids from my last tutorial. The concepts presented work with other types of rigs such as Rigify. Enjoy and have a great day!
Part 1 – Model and Eye Prep: import the objects and prepare them for rigging.
Part 2 – Rigging and Binding: create the ARP rig and bind the character and eyes.
Part 3 – Creating Procedural Eye Drivers: replace mesh drivers with procedural material drivers.
Part 4 – Eyelid Drivers and Parenting: create drivers for geometry node eyelids and finalize project with parenting