
Behind the Scenes: Watermill

INTRODUCTION
Hi, my name is Loris Longari. I’m a 48-year-old self-taught 3D hobbyist from Italy.
I started my 3D adventure a long time ago with Imagine 2.0 when tutorials were only found in monthly magazines and computers had the power of a modern smartphone.
After that, I tried Lightwave and Modo, and in the end, I landed a year ago at Blender.
INSPIRATION
I was always fascinated at that time by films that began to use computer graphics like Babylon 5 but with age, I began to prefer the quieter places and then I dedicated myself to trying to recreate environments that would give, to those who look at them, tranquility. For this reason, I started following Rob Tuytel’s courses on creating realistic landscapes.
I never liked to replicate the tutorials so I added some things that inspired me. For example, the watermill wheel with which for the first time I “faced” the simulation of liquids.
PROCESS
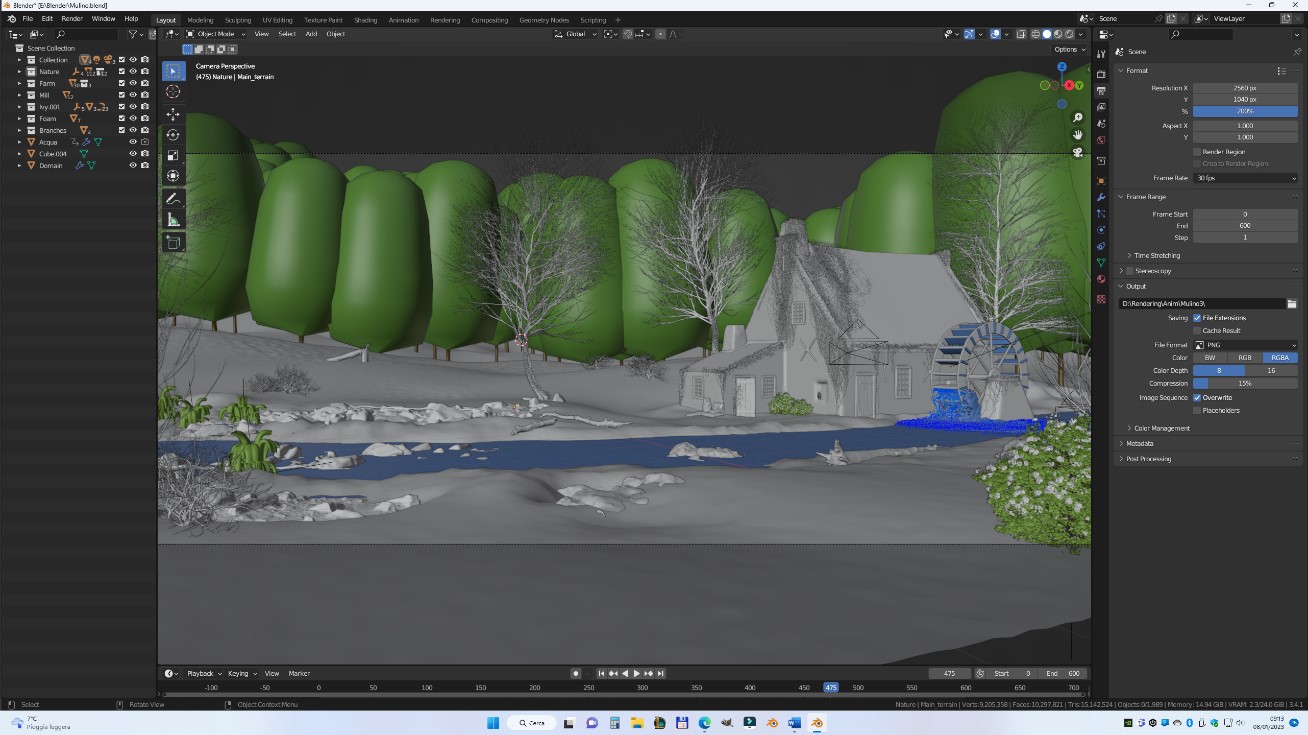
I’m using Blender on my desktop based on the Ryzen 9 AMD processor and a 3090 from ASUS.
BLOCK-OUT
Usually, I proceed by making a simple block-out through modeling the landscape and the most important areas in broad terms. Then all items, rocks, bushes, plants that are not the main objects are scattered with vertex or weight paint on the terrain.
TEXTURES
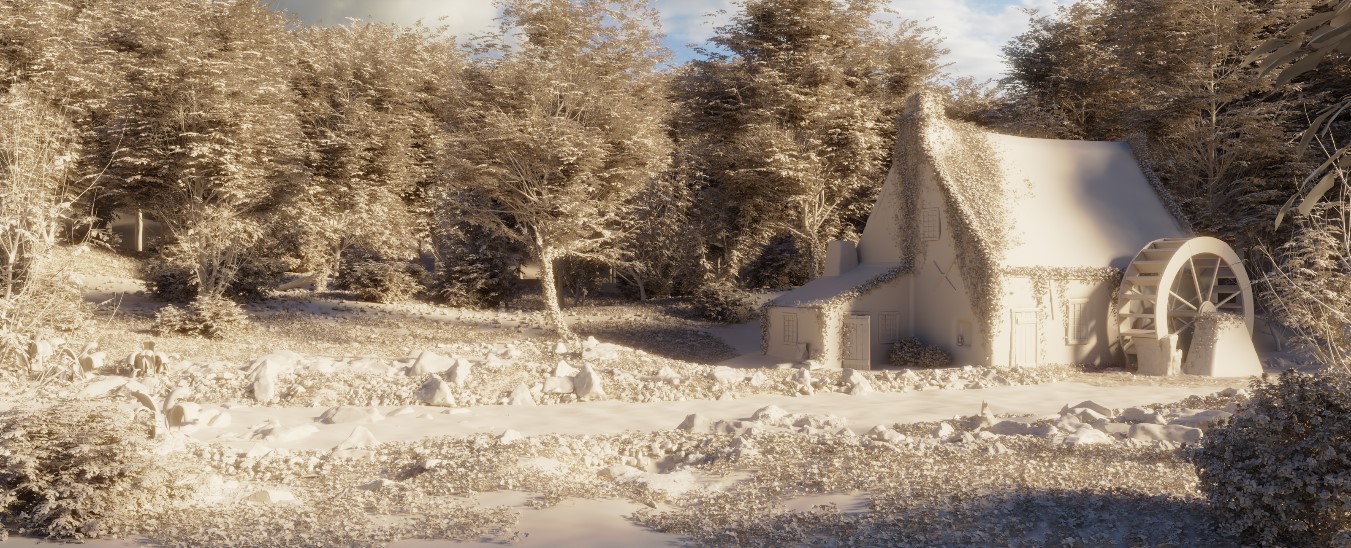
The mill and its roof are really simple objects textured with procedural textures.
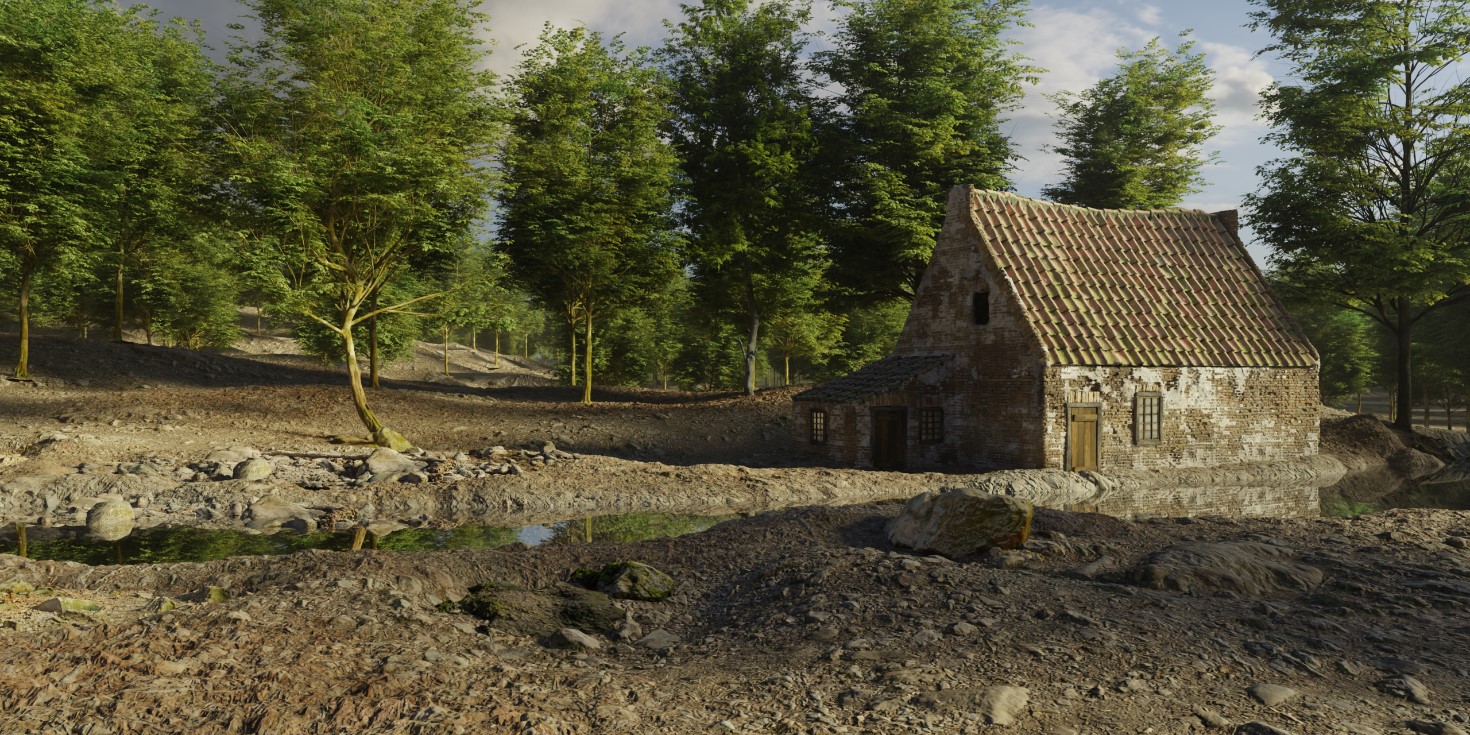
For example, in this image, the landscape has only a few textures that simulate a barren terrain, and the plants in the distance are low resolution plants replicated through geometry nodes. Only 3 plants next to the mill are high resolution plants used during the original tutorial; distant and young trees, and bushes are created with the free addon Modular Tree and scattered in specific areas.
ENVIRONMENT
After that, I started adding bushes and custom created young trees to make more complex nature variations. At this stage, I also scattered rocks in 3 different dimensions.
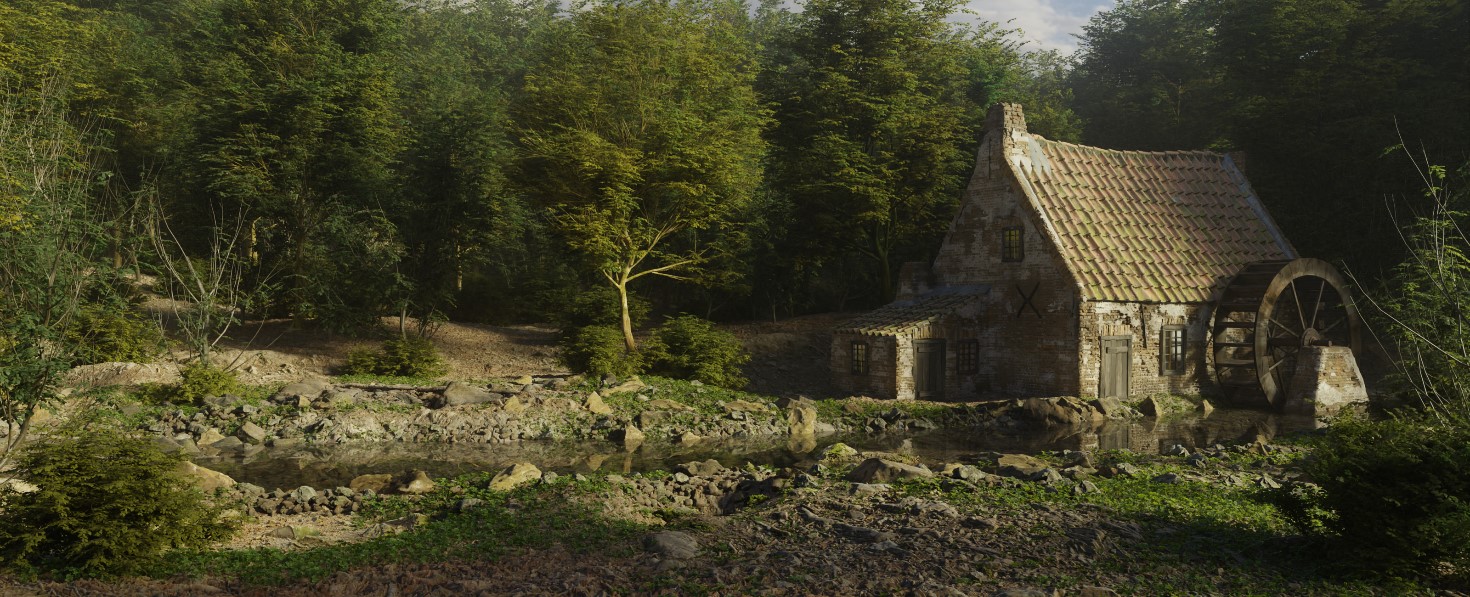
In the meanwhile, I was trying to fix lighting so that it turned out relaxing (a relaxing animation was my first target). At this point, the mill wheel was added.
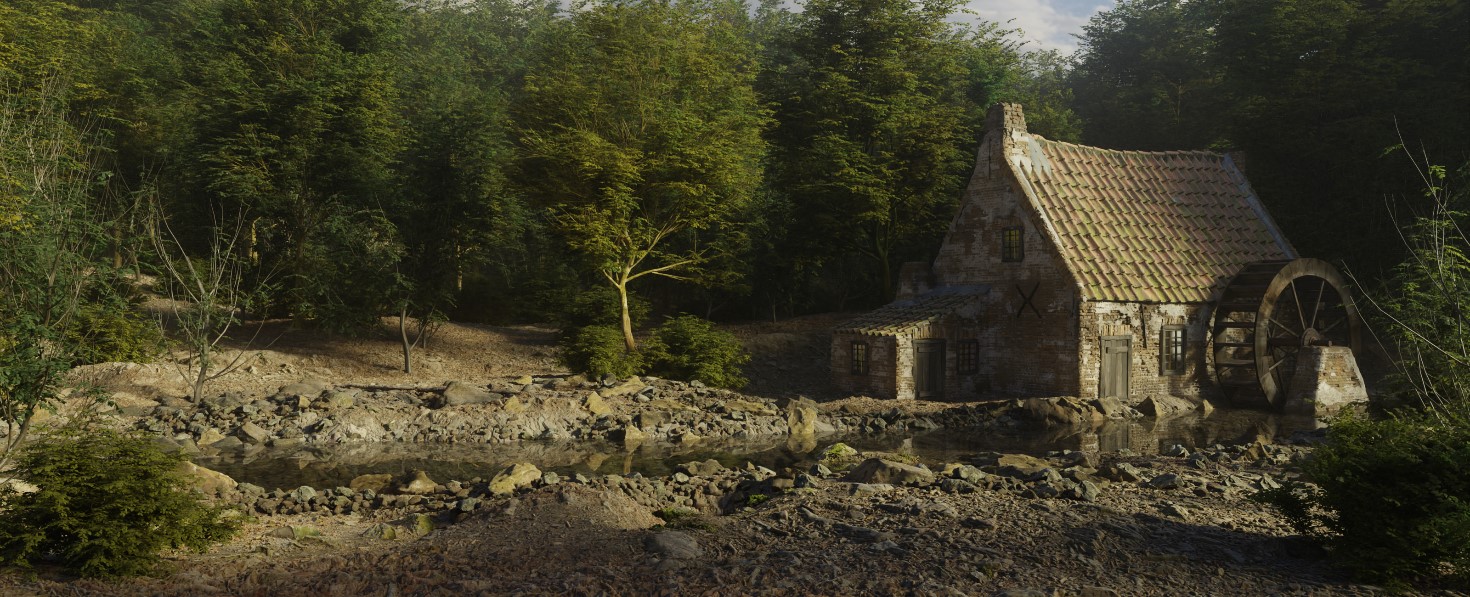
When I was finally satisfied with the current setup, I started adding green clovers near the river.
These are the screenshots for with and without the replicator proxies.
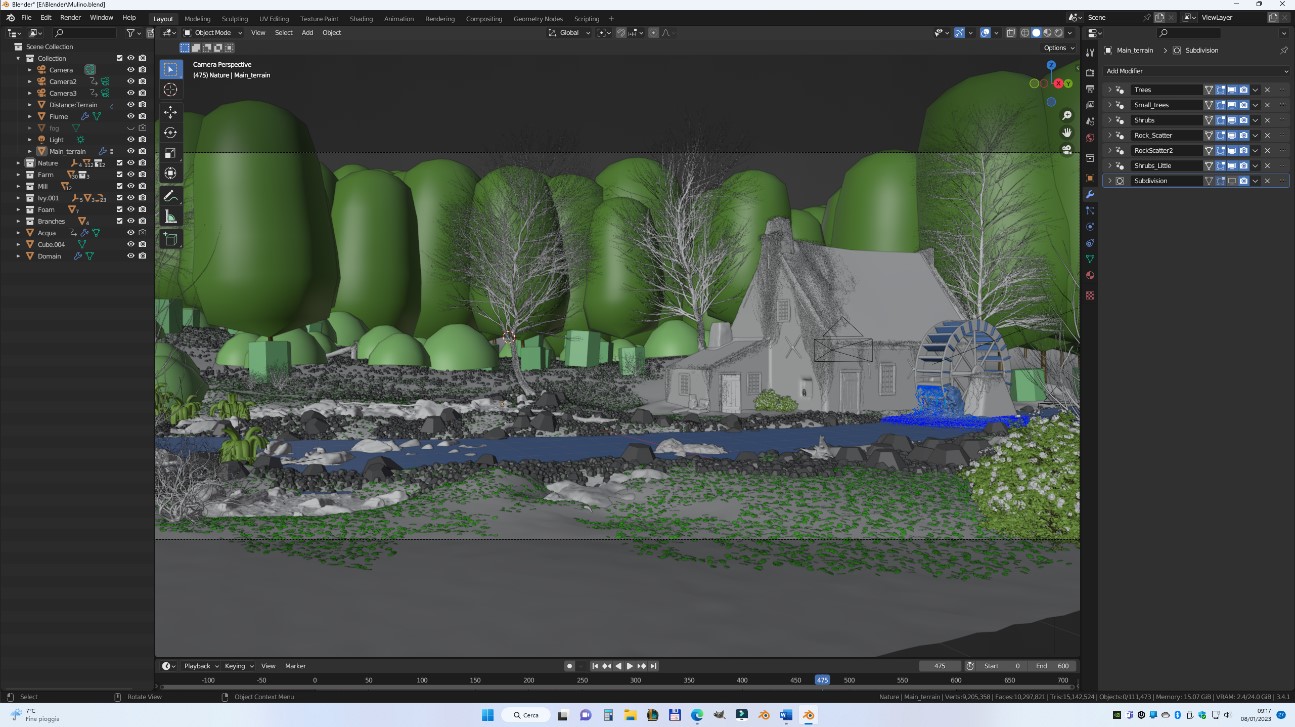
At this stage, after adjusting the size of stones, grass, bushes, and plants, I added a fog on the scene with big volumetric objects all round the terrain. Ivy was also added with a built-in ivy generator, with custom leaves on the walls and the roof of the mill, and on the main tree trunks.
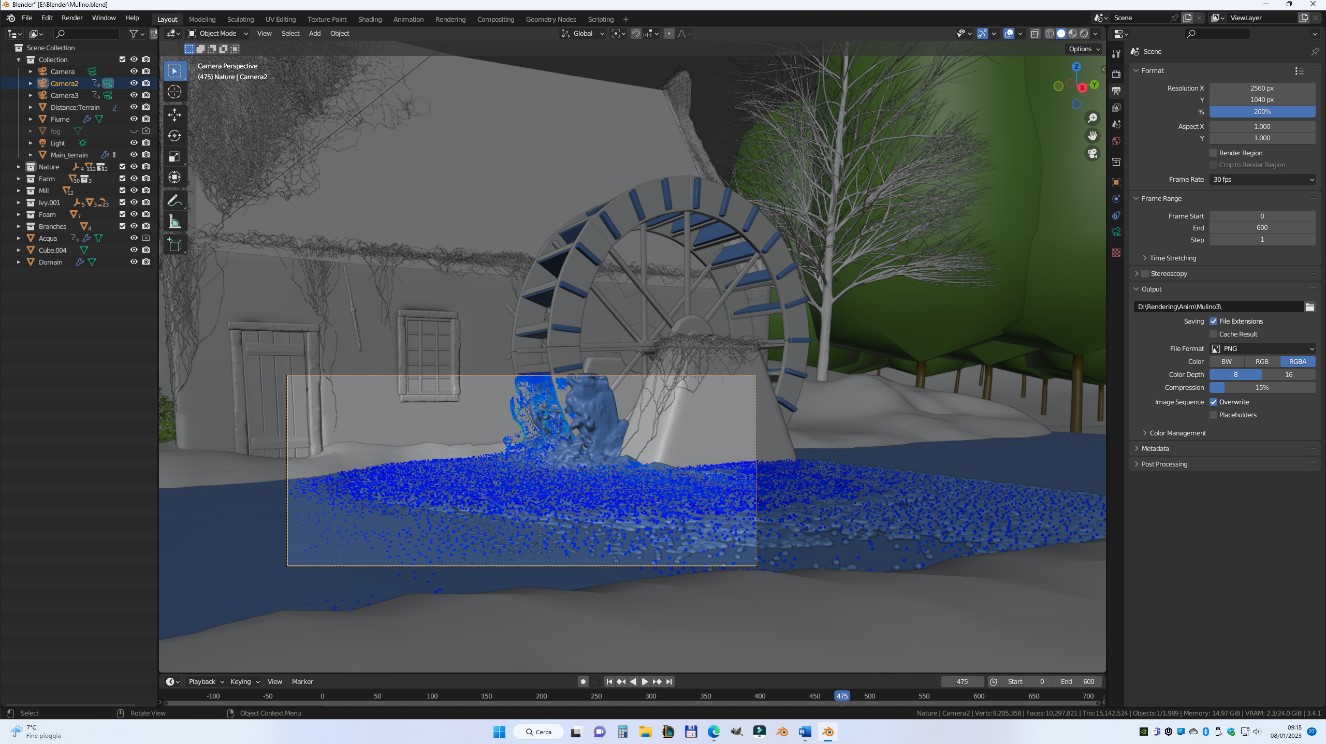
WATER
The water falling from the mill wheel is simulated through the dynamics of Blender fluids. Particles were created to simulate foam and splashes in the area near the wheel.
After creating the main wheel, I copied every single peg of the wheel and used it as a particle emitter. The domain was set up to the height of the third peg, from about half wheel to the mill gate and the other side of the river so that the foam could spread on the crest of the river.
In this way, the water emanated only from the pegs coming out of the water level.
At last, after the water domain was baked, I used a full transparency shader on water and assigned particles only for foam and sparkles.
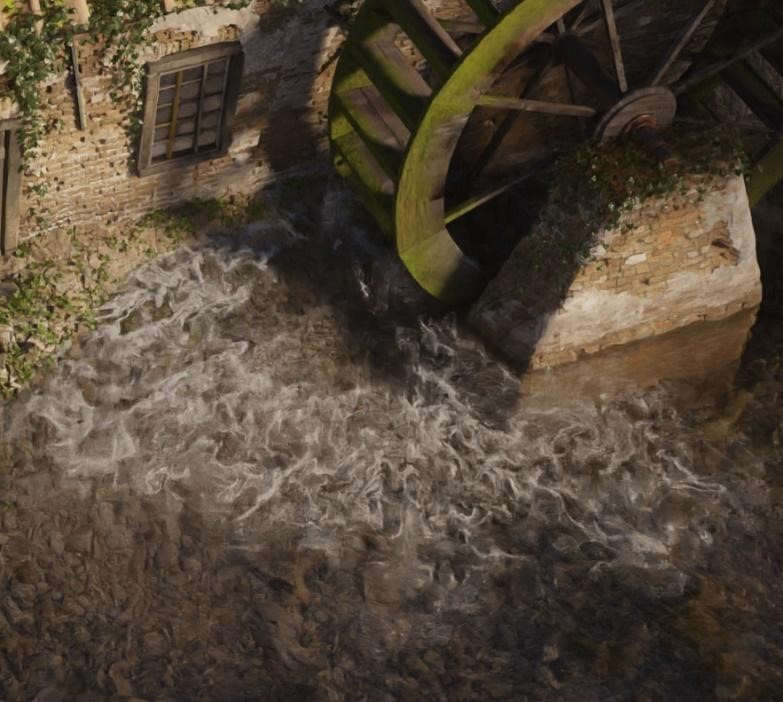
This is the result:
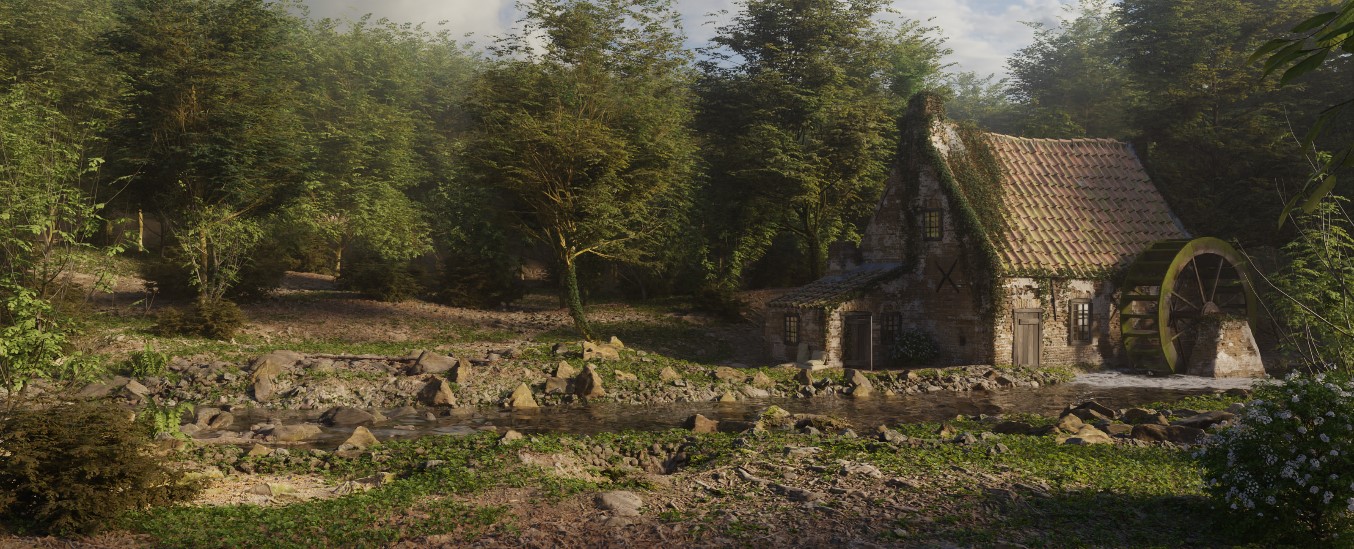
After the last adjustments, the scene was completed and I started to generate the animation that you can find on my little YouTube channel.
WATERMILL

Here is the animated version of this scene:
Thank you for reading this article and I hope that you’ve learned something new.
Have a nice day!
About the Artist

Loris, a 3D hobbyist from a quiet town of Castelgerundo near Milan, Italy, hoping to be an inspiration to someone.


