
Behind the Scenes: Fern Flower

INTRODUCTION
Hi! I am Adrian Bik, an 18-year-old living in Cracow, Poland.
I’ve been studying Blender by myself for around four and a half years now. I’ve been playing video games since my childhood and always wondered how those virtual spaces were created. At some point I stumbled upon Blender and I remember being absolutely blown away by what was possible to do at home, even with my sluggish laptop. I started watching tutorials on YouTube (Blender Guru, CG Geek, and CG Boost helped me a lot) and since then, my progress has been slow but steady.
Now, I’m in the middle of my senior year of high school. I want to major in computer science, but my dream is to work in the game/VFX industry some day.
INSPIRATION
I was initially inspired during a walk in the woods, which reminded me of old Czechoslovak animated movies that now feel very nostalgic to me. Jiří Trnka made a movie called “Špaliček” showing some of the Czech traditions over the course of an entire year in a very beautiful way.
I really liked that and wanted to create a render that shows some of our Polish tradition, while retaining a bit of that signature look.
CONCEPT
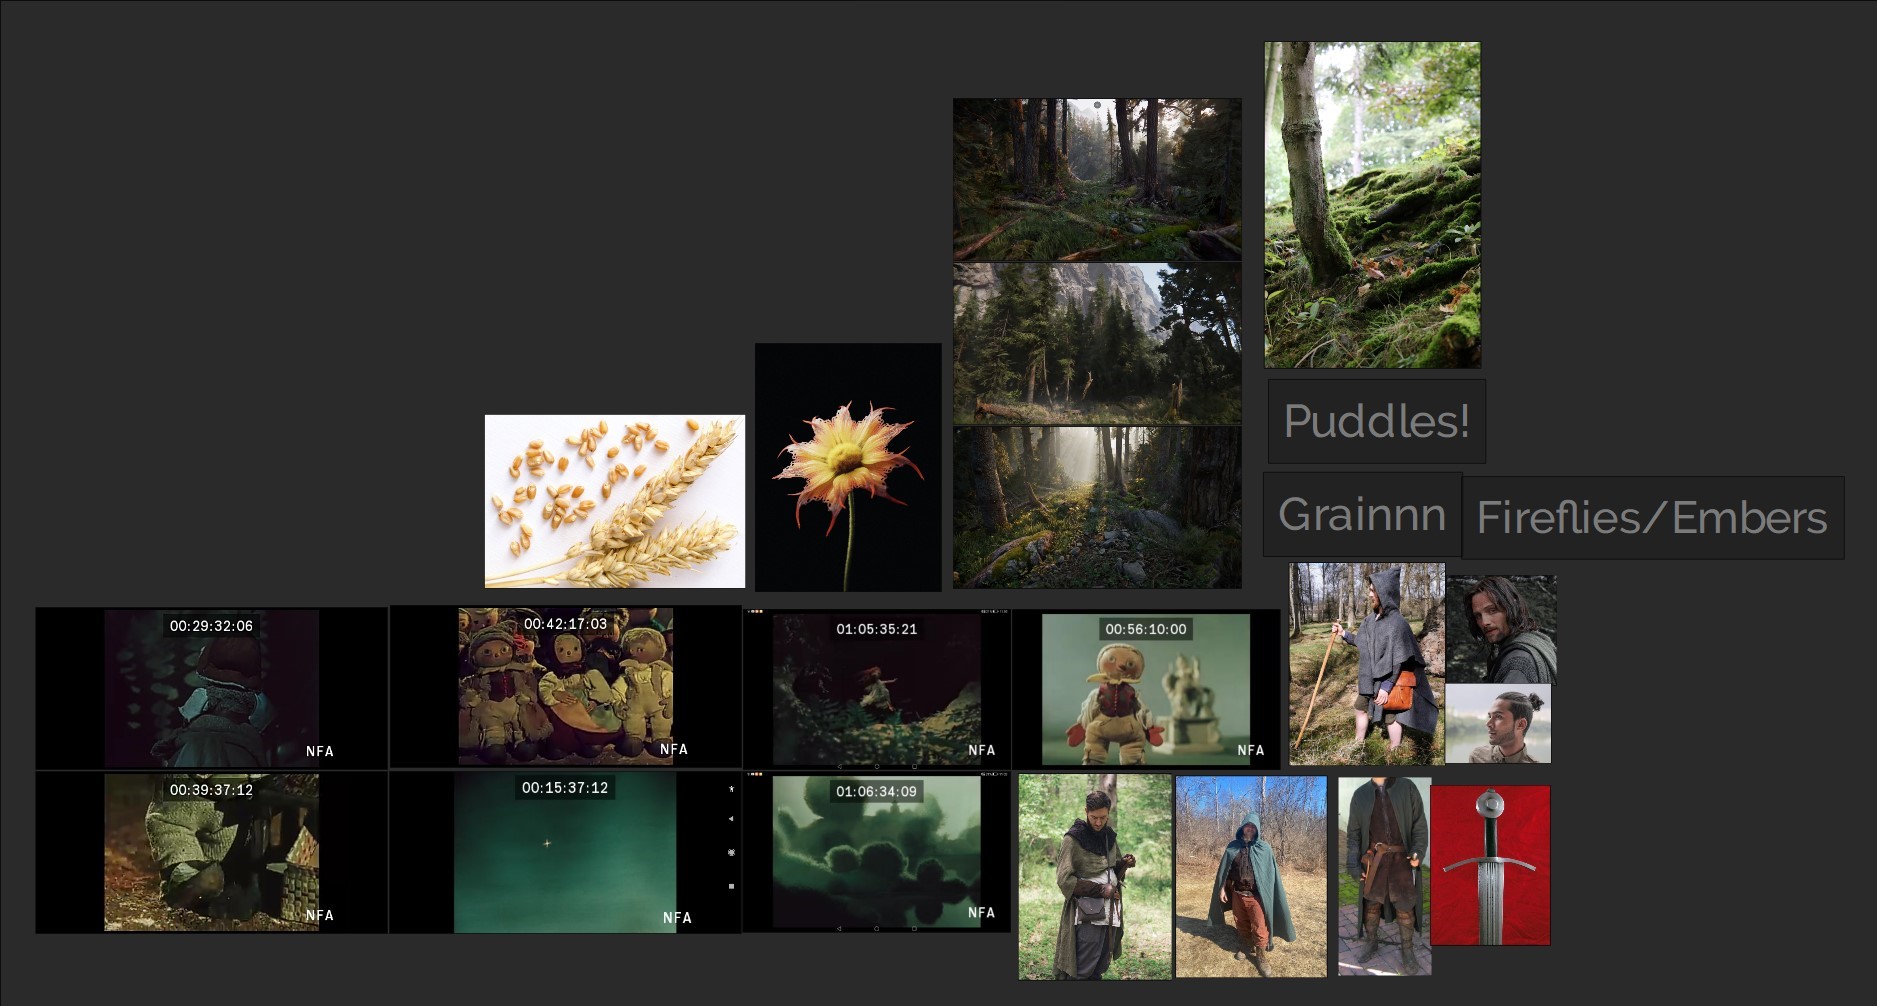
As always, I started by gathering references for the entire project.
I watched the movie “Špaliček” to get a feel for the lighting, atmosphere, and style before gathering some images and organizing it all in PureRef (It’s the main program I use for keeping track of my ideas and keeping the look consistent during work.)
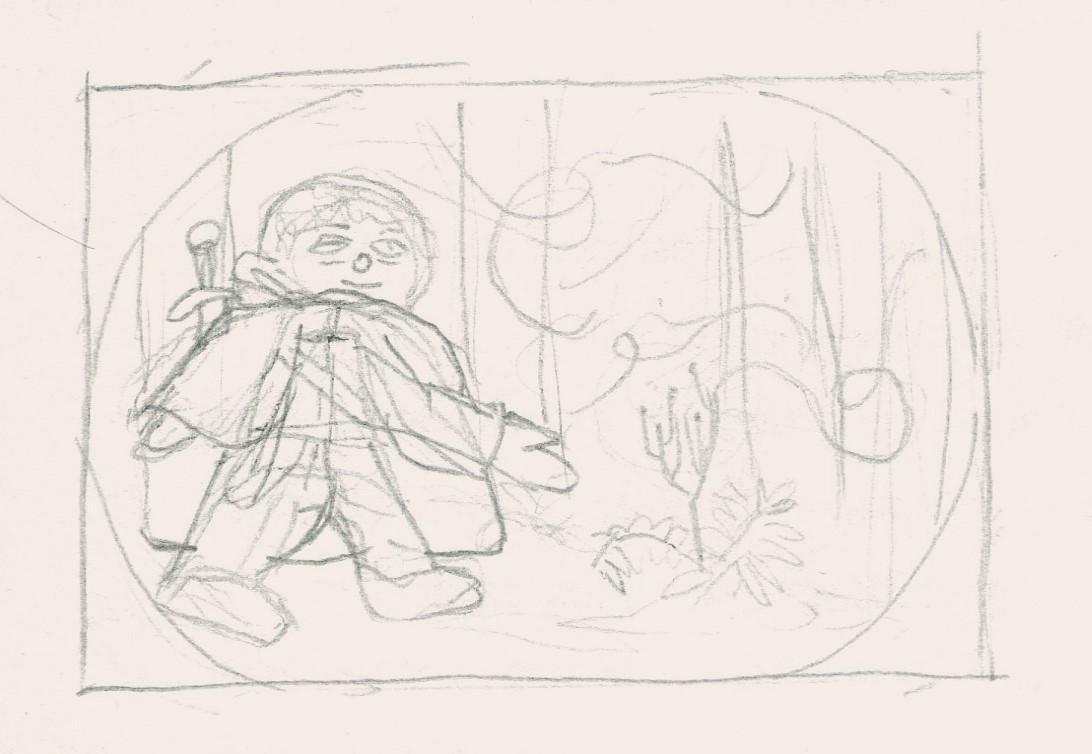
I also made a concept which was a couple of quick iterations with a pencil to help in setting of the proper composition and mood.
THE CHARACTER
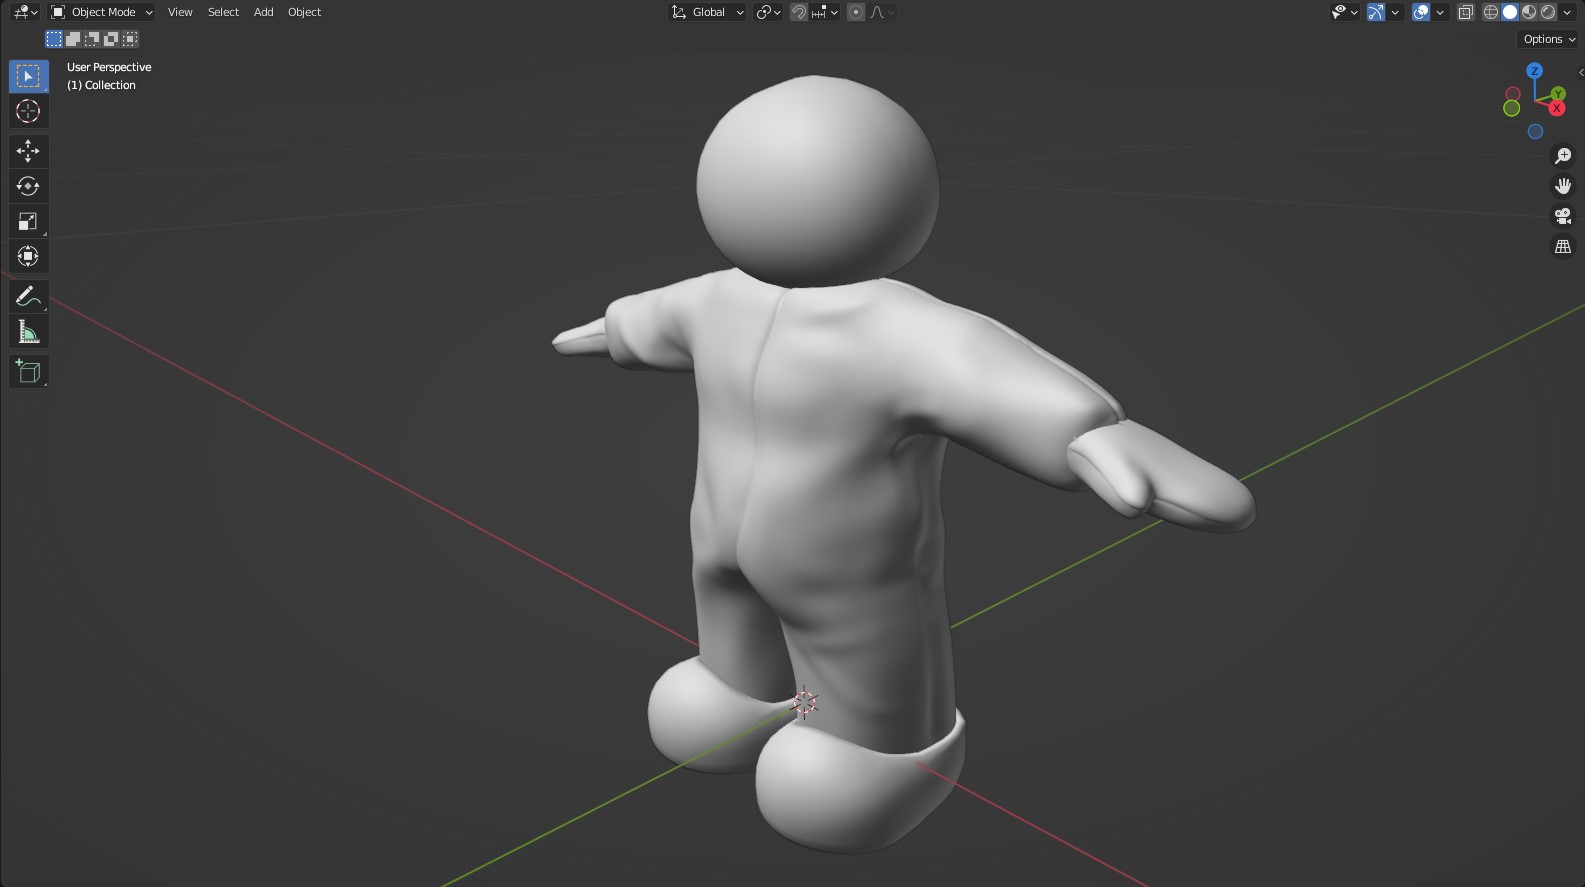
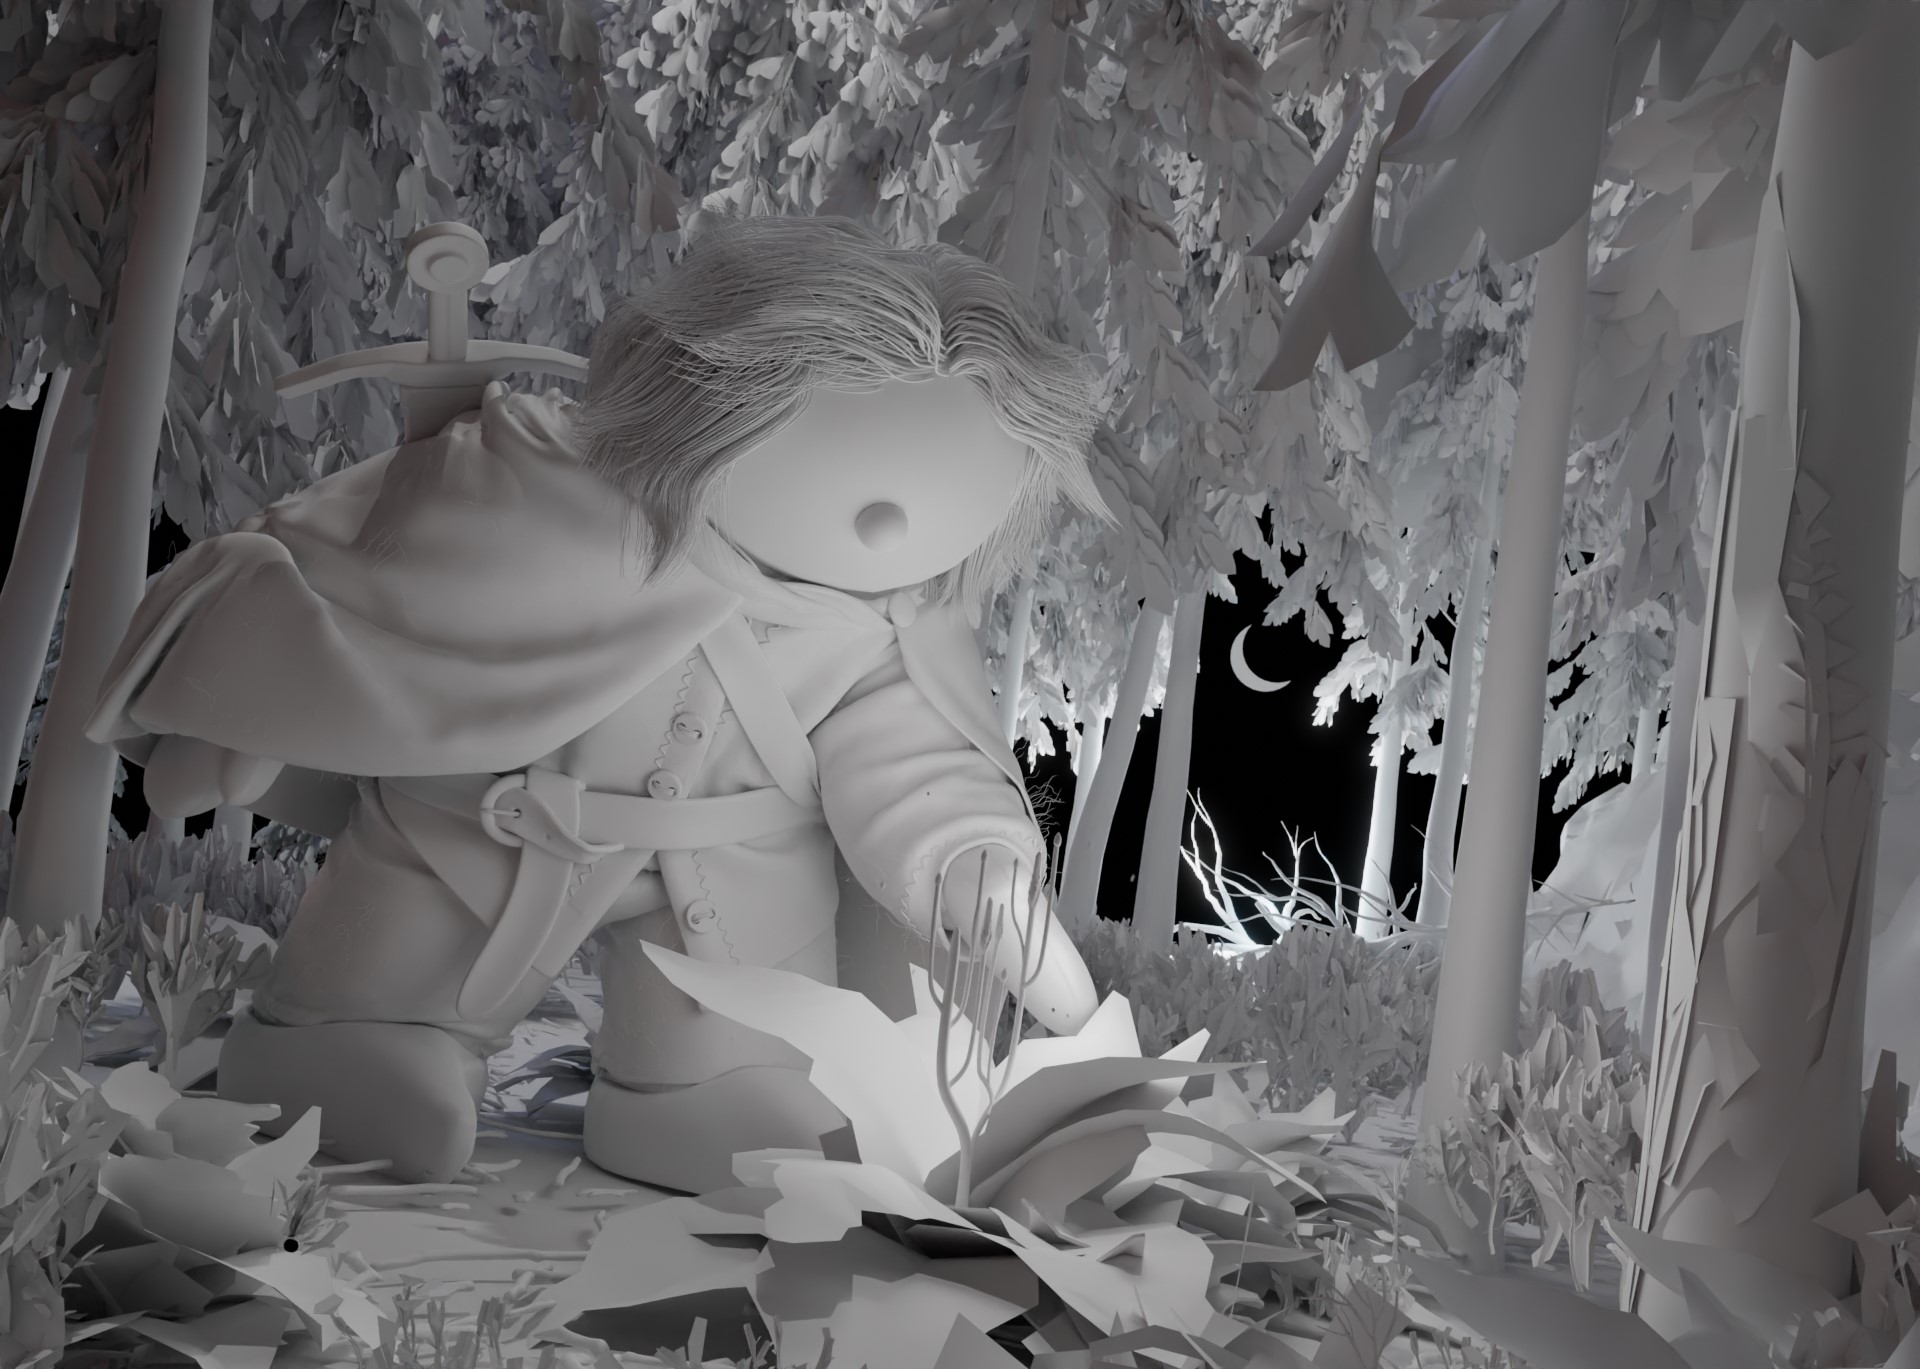
First I started sculpting. I sculpted the main body form with Blender, blocking out the general shape and making the puppet look like it’s stuffed with cotton.
Then I quickly rigged the character with the help of Blender’s built-in Metarig add-on. This allowed me to animate him bending into the final pose. This step would be required later, as this was how I wanted to achieve realistic folds and creases in the clothing.
To make his outfit, I used Marvelous Designer and built a cloth simulation. I assigned different stiffnesses to all of the accessories.
With everything in place, I simulated the material while the model was setting into his position:
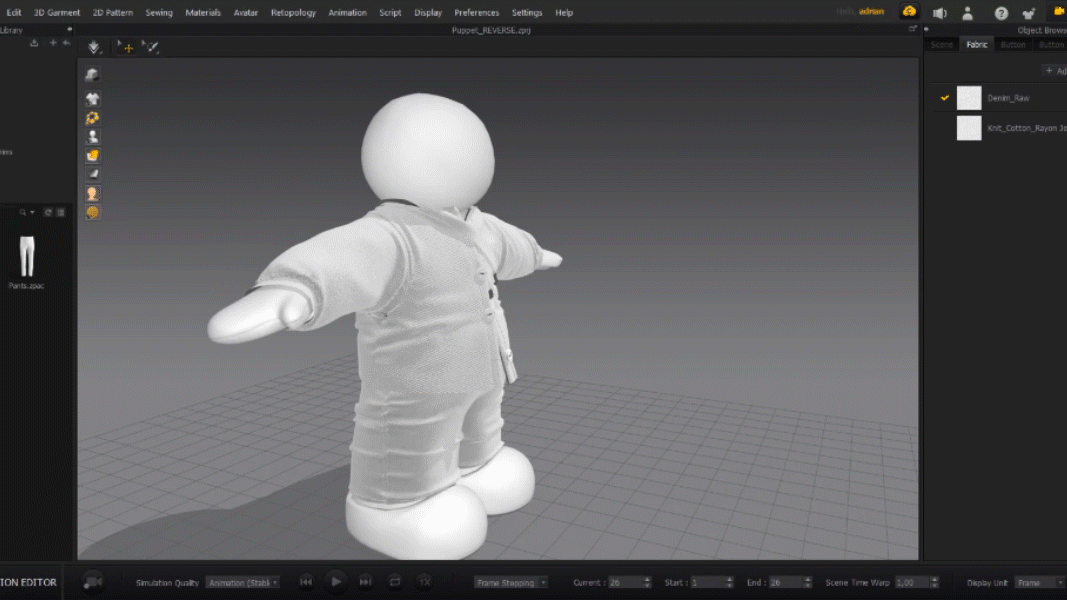
Marvelous Designer also allowed me to quickly add realistic buttons and stitches. It gave me UV maps for the clothing as well.
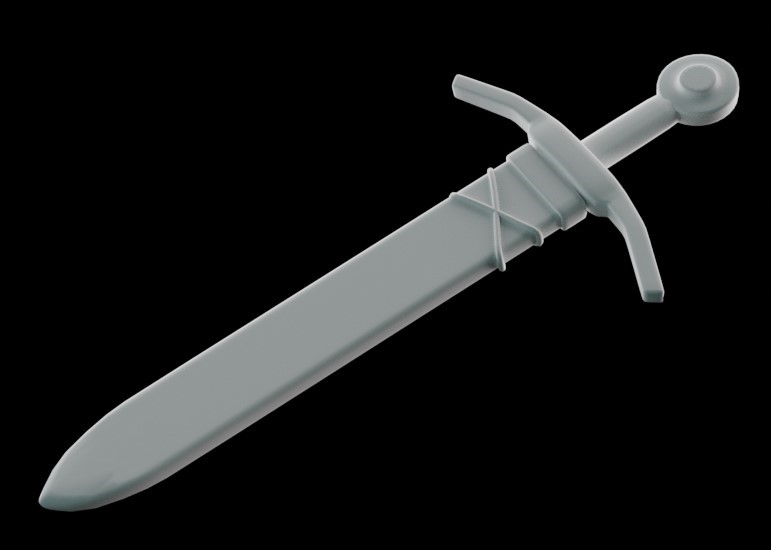
Finally, I modeled a quick sword and was ready to start the texturing.
TEXTURING
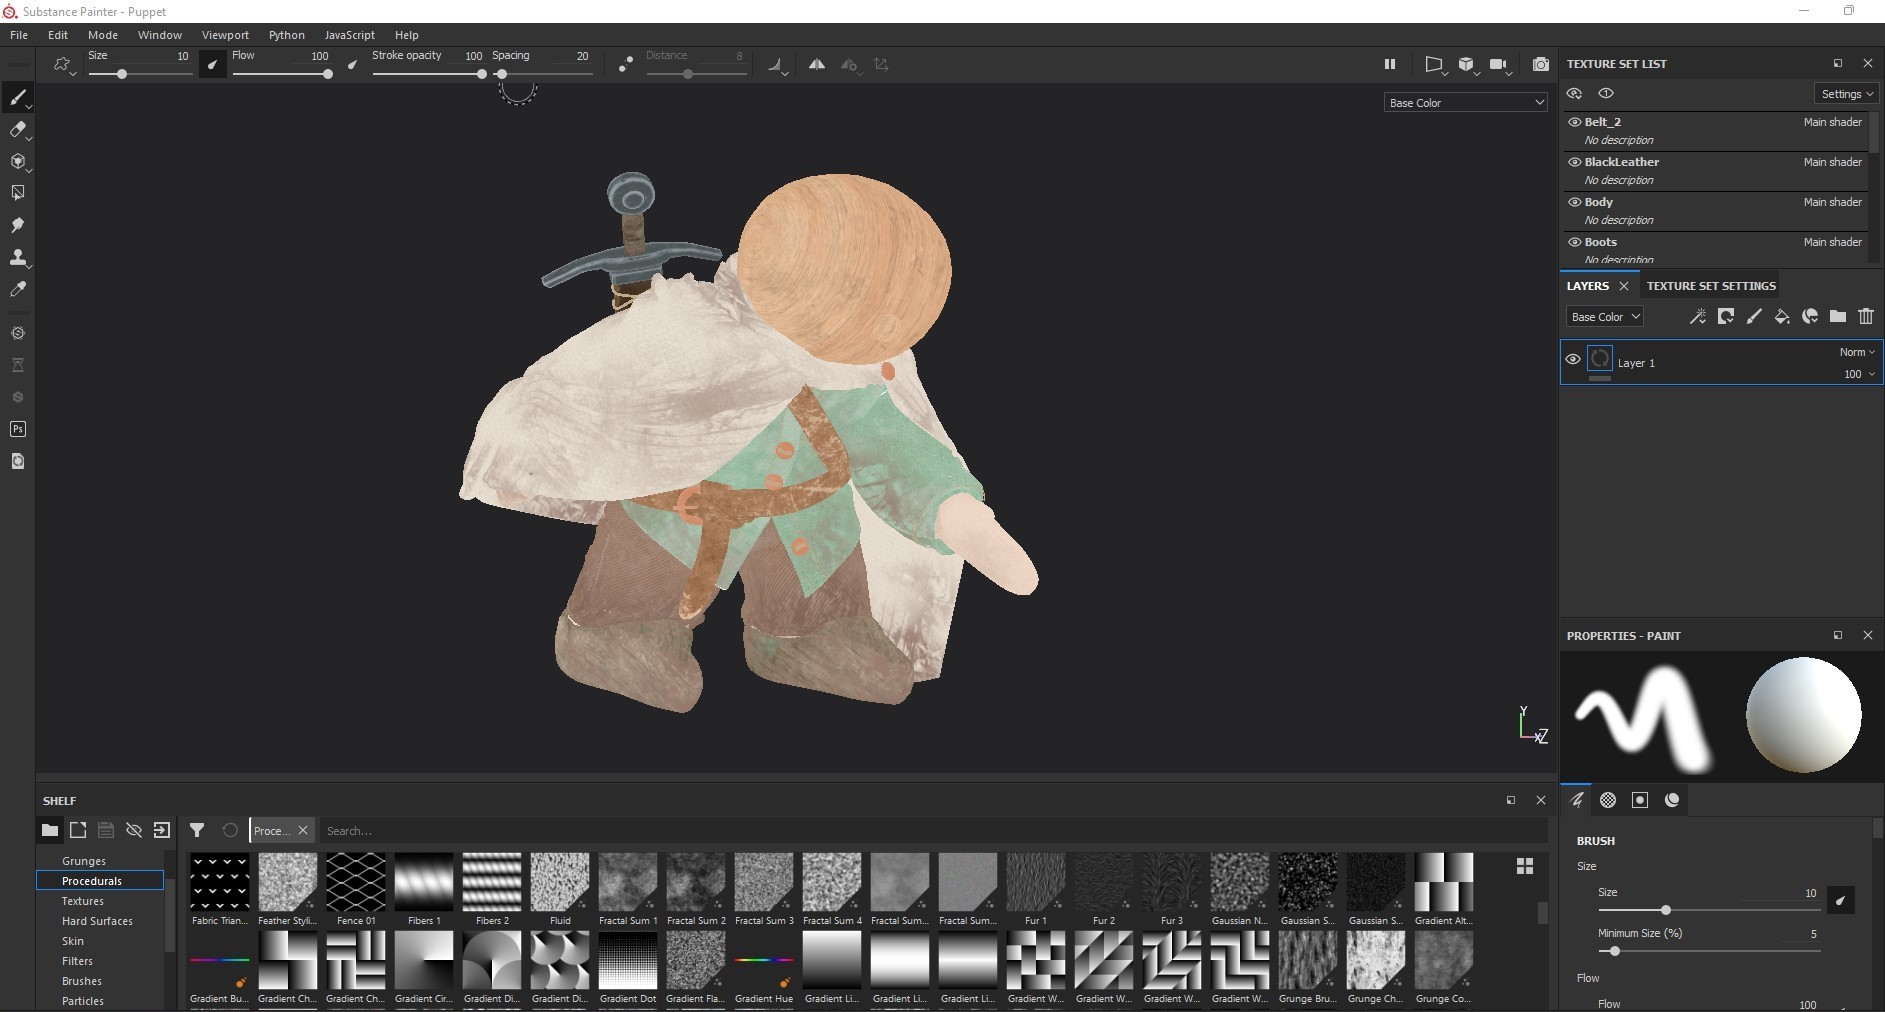
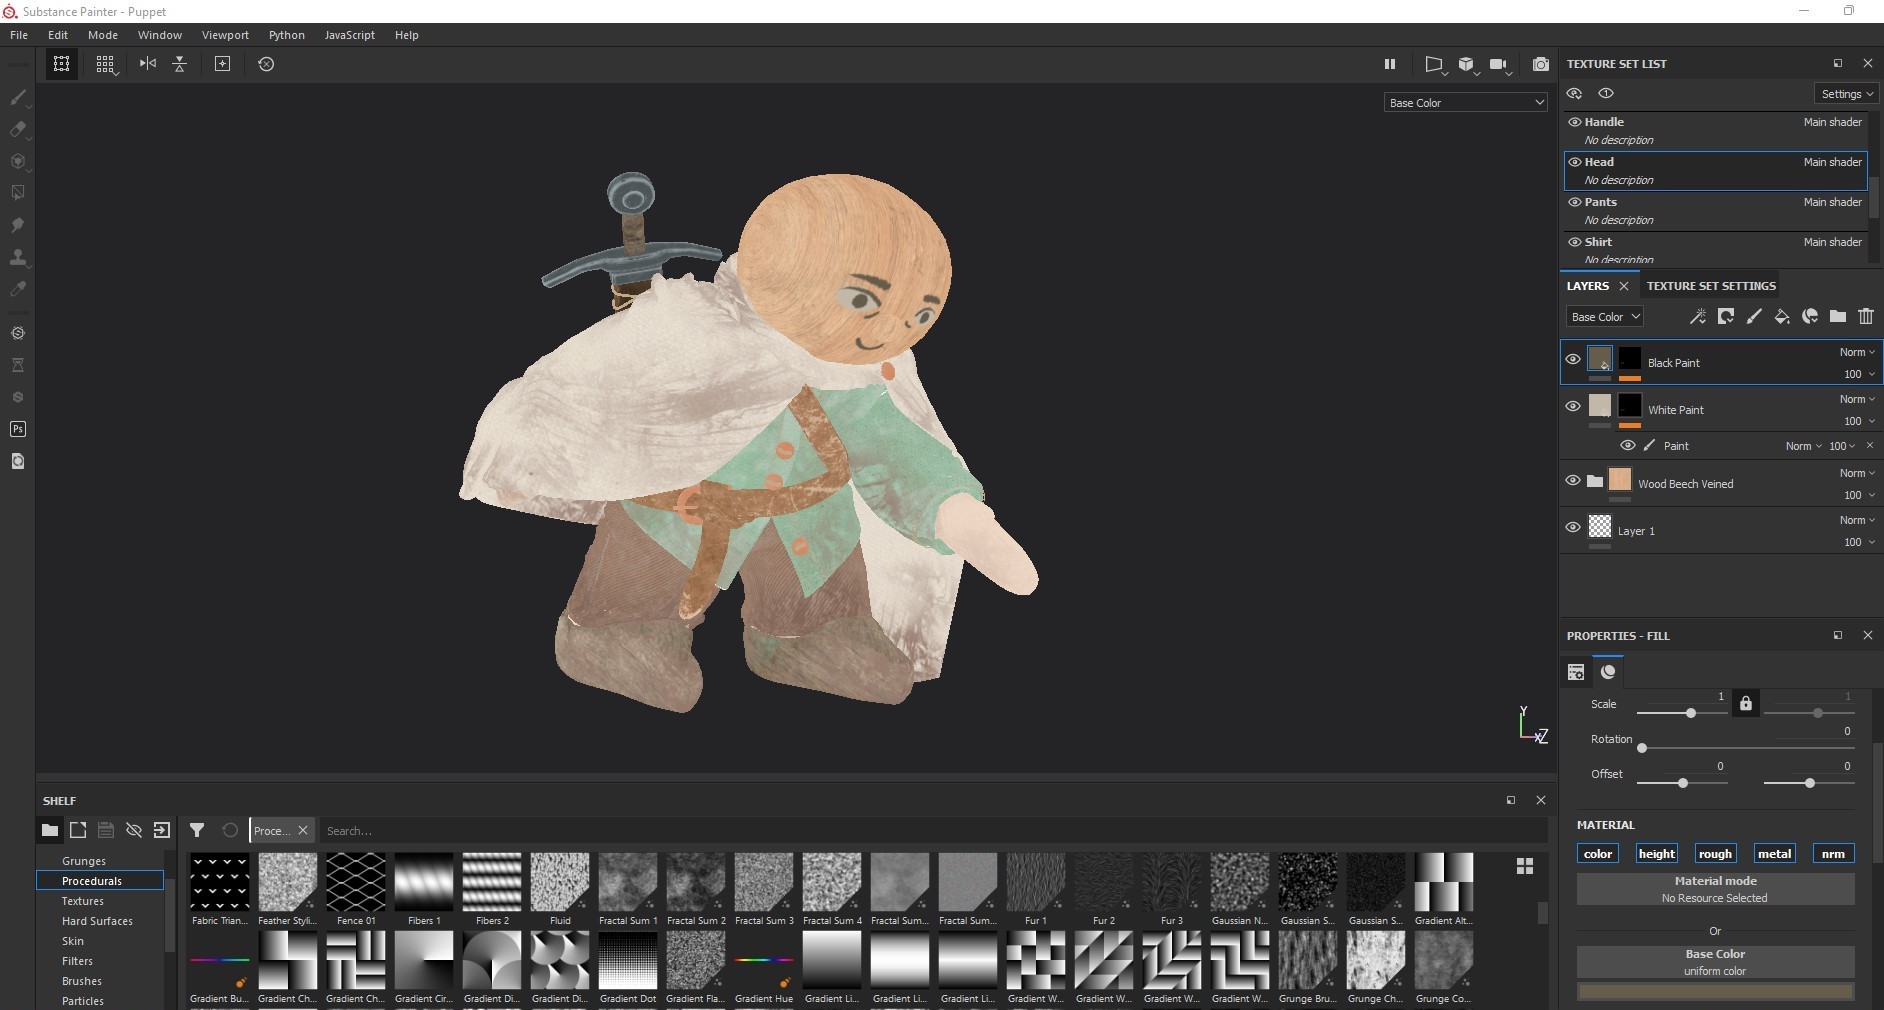
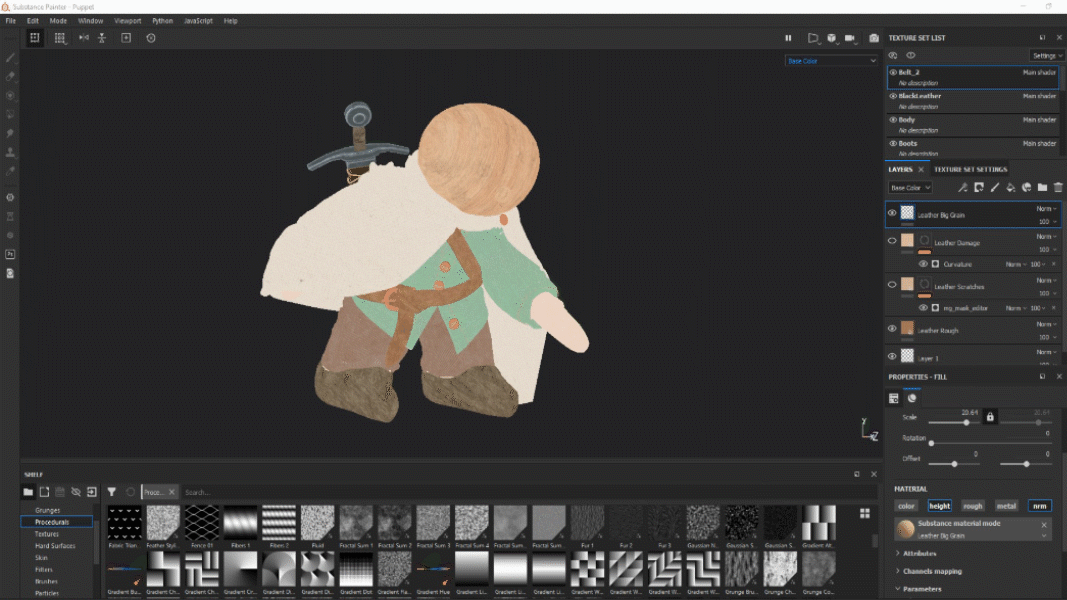
The character was textured in Adobe Substance 3D Painter. I divided the model into 4 different texture sets—the body, head, clothes, and the sword.
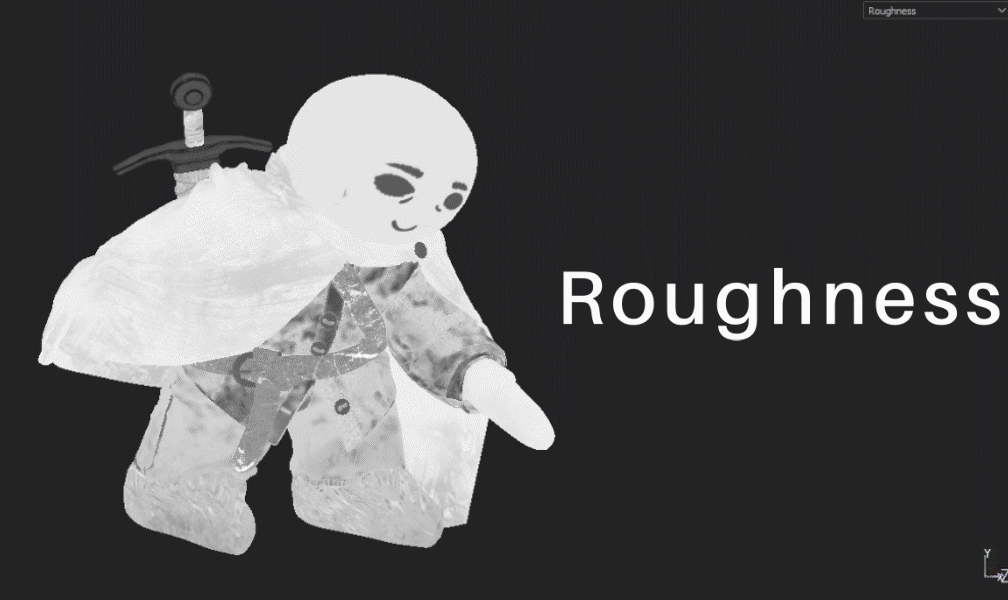
I was using PBR (Physically Based Rendering), so I needed to prepare 5 different texture maps: Albedo/Base Color, Roughness, Metallic, Normal, and Height. The resolution was 4K.
I took a couple of different fabric materials from Quixel Megascans as the base for every piece of clothing. I also used Substance’s built-in generators for the stylized wood and steel.

This looked too clean, so I broke it up a bit by adding wear and scratches to every part of the model. This was done by using a combination of generated masks and hand painting with a graphics tablet.

To me, it still looked too perfect, so I painted in more dust and mud splashes while still being careful not to add too much or to apply it in unrealistic places.
Finally, I gave the puppet its face.
The full process, but animated:
Here are all the other textures:
HAIR SYSTEMS
Finally, to finish the character off, I added his hair. For me, this was a nice opportunity to try out Blender’s new hair curve system. It has recently been reworked to allow easier strand placement, clump management, and generally made creation of hair and fur for characters a lot simpler. To familiarize myself with it, I followed Noggi’s great tutorial on this topic:
Even though the fresh tools made the process a lot easier, I was still struggling with shaping many hair curves (professional CG hair artists, you have my respect), but I’m sure it’ll get easier with practice.
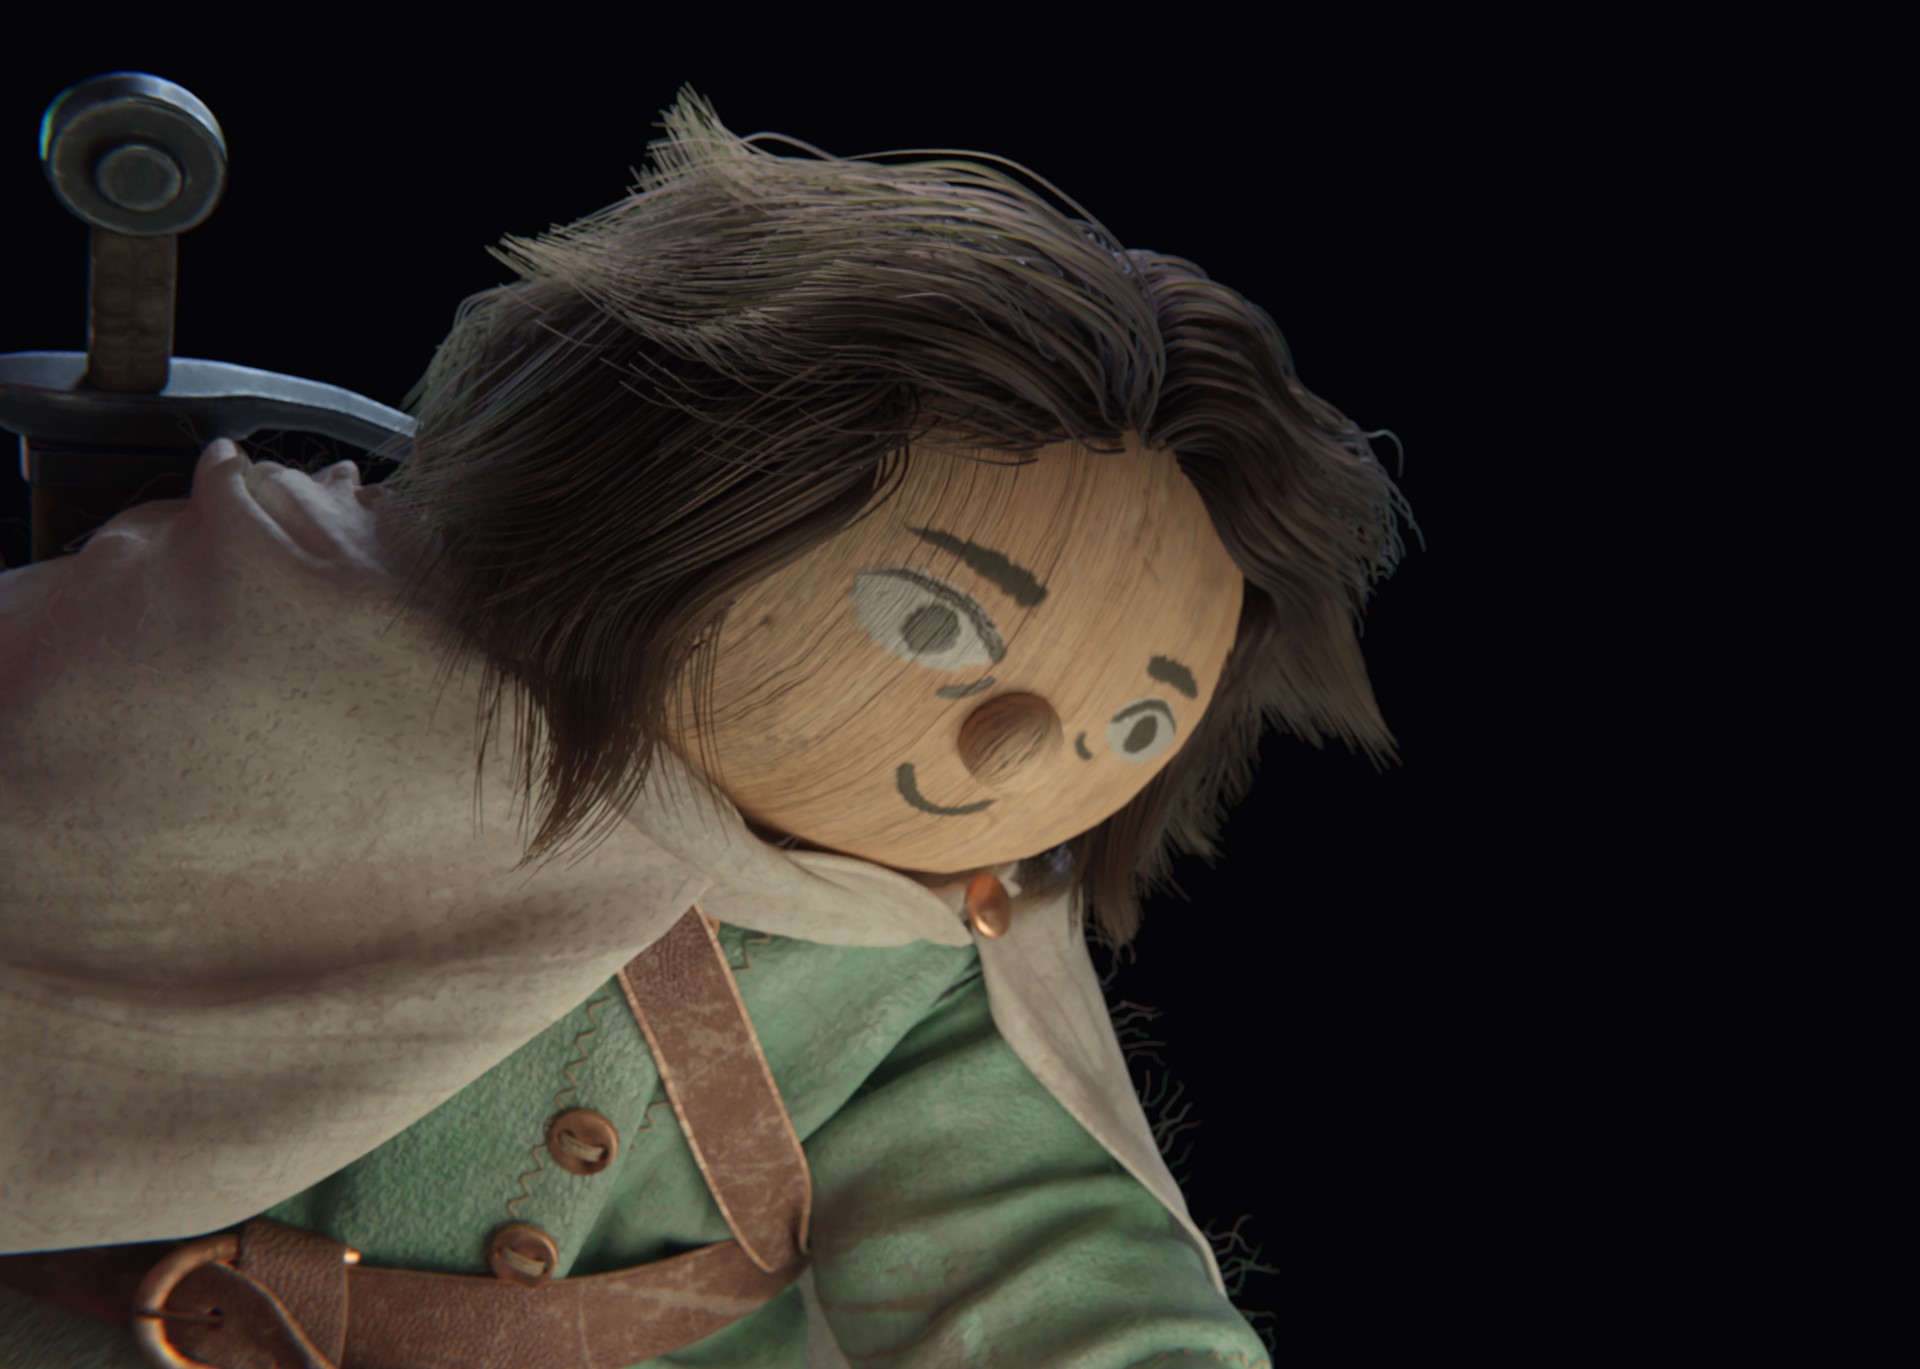
Additionally, I’ve applied a few more conventional particle systems to the clothes to give them a softer, fuzzier look.
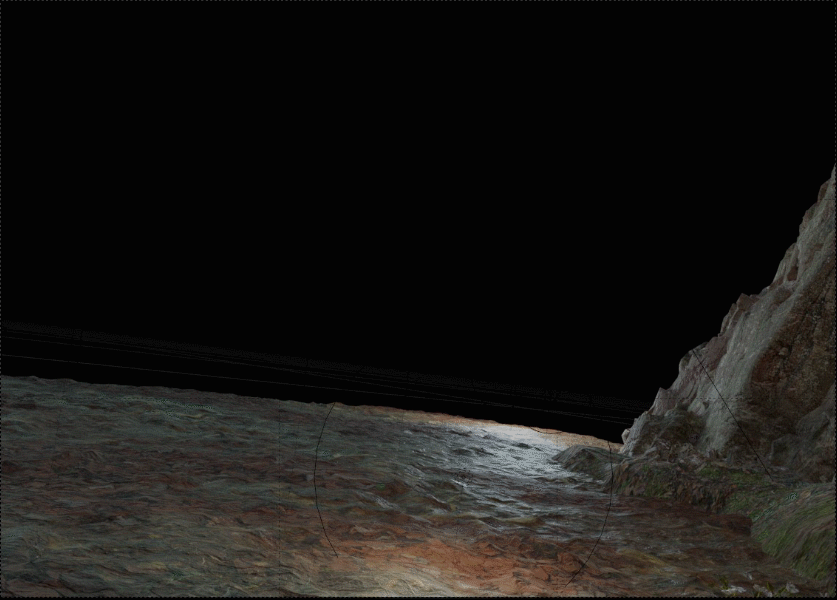
THE ENVIRONMENT
Creating the environment was a challenge of its own.
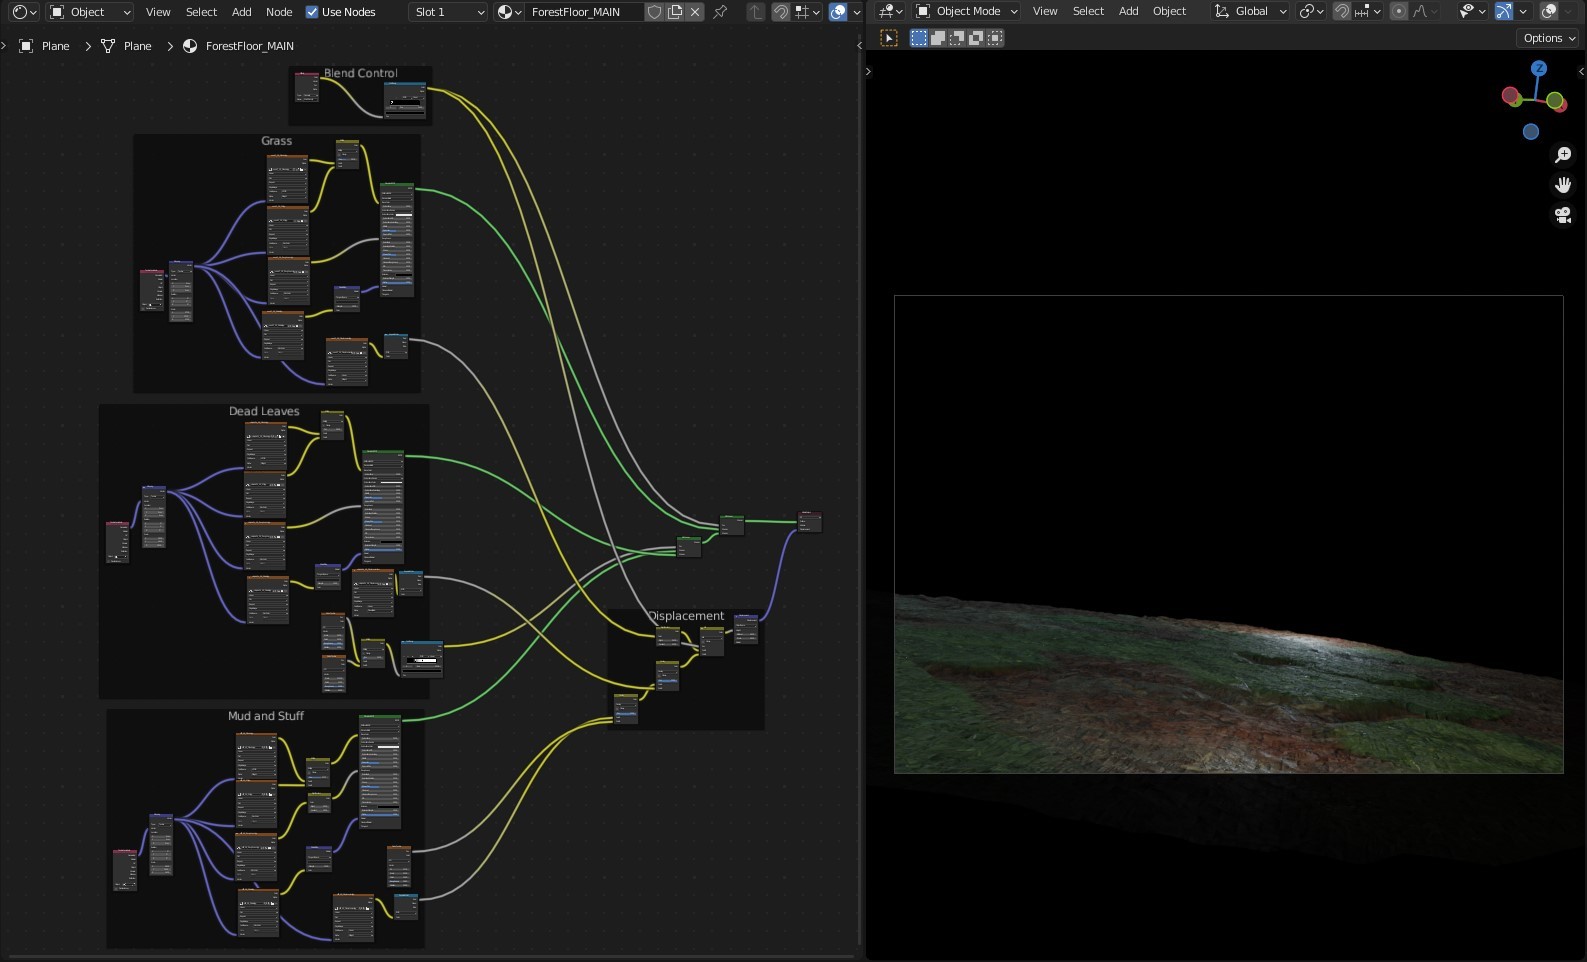
The forest floor is a subdivided plane that I displaced using various noise textures mixed together for a more irregular look. The material consists of three main layers—first mud, then dead leaves, and finally grass.
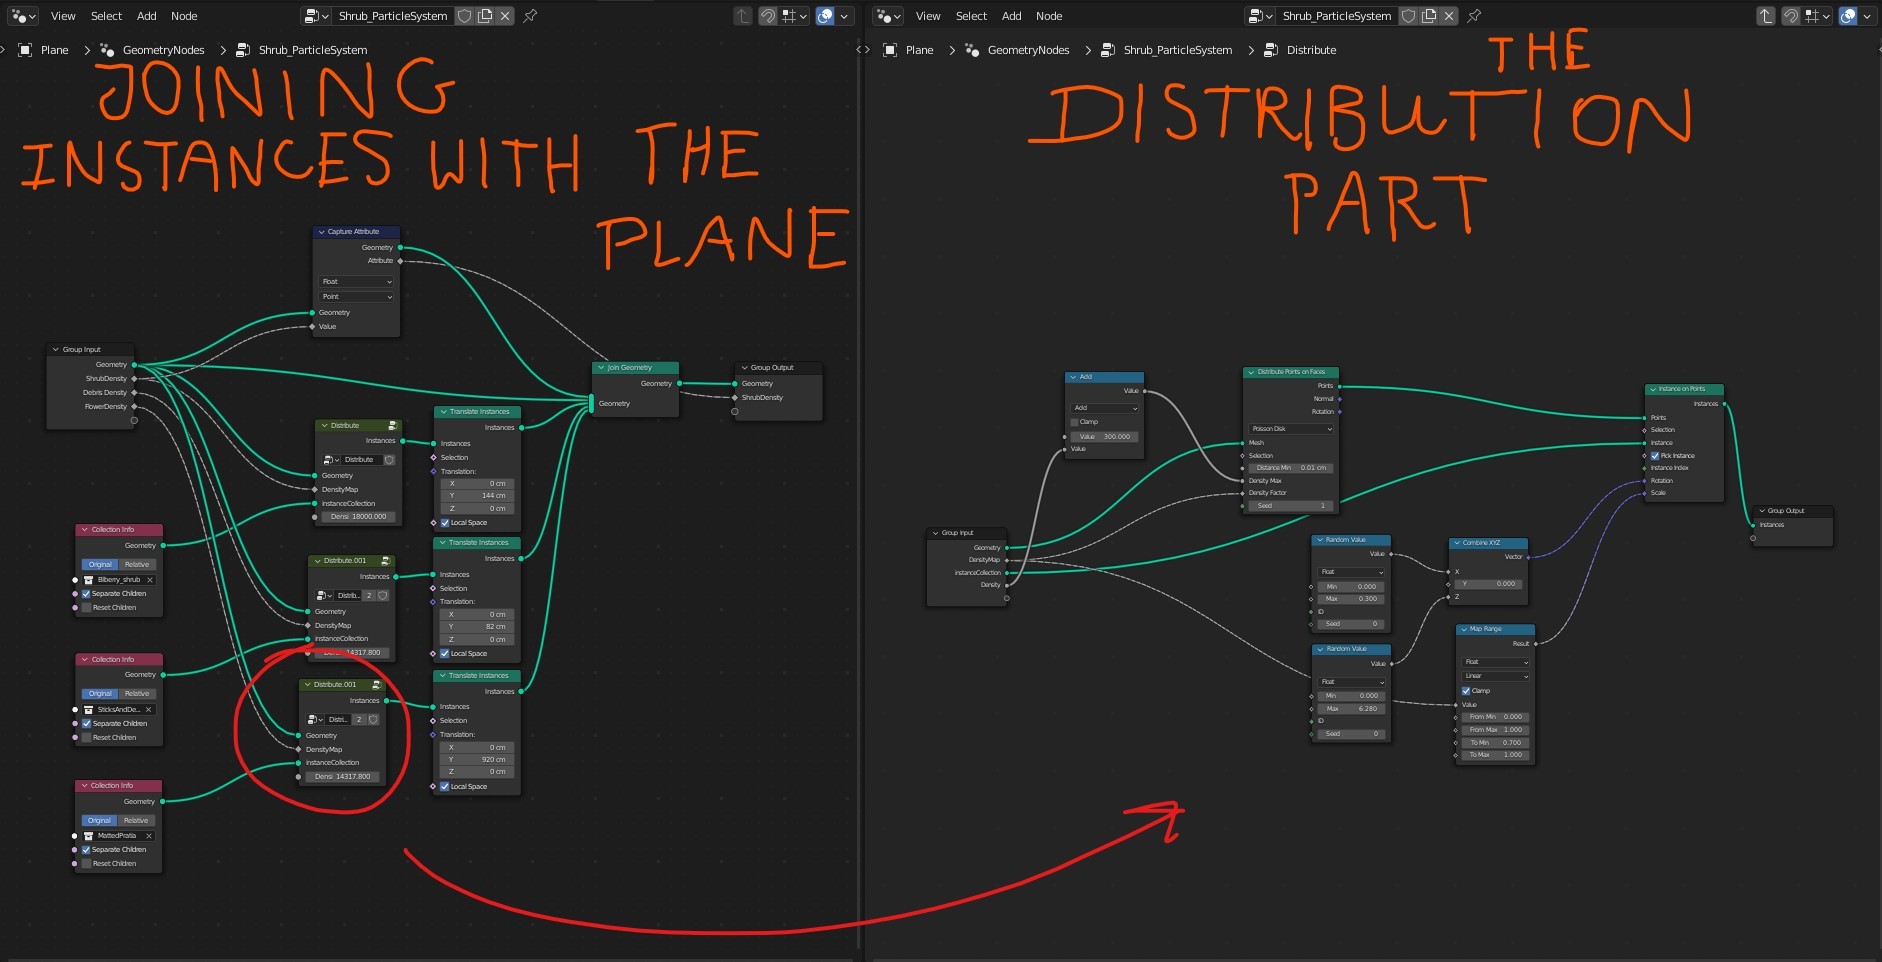
For the vegetation in this project (and the cliff face), I used assets from Quixel Megascans. To distribute them, geometry nodes proved incredibly useful. After coming up with the right setup, I could just paint spots on a weight map. It controlled the bush density, essentially allowing me to “paint in” greenery like Bob Ross. Geo-nodes also took care of scattering tiny debris like sticks all around the camera.
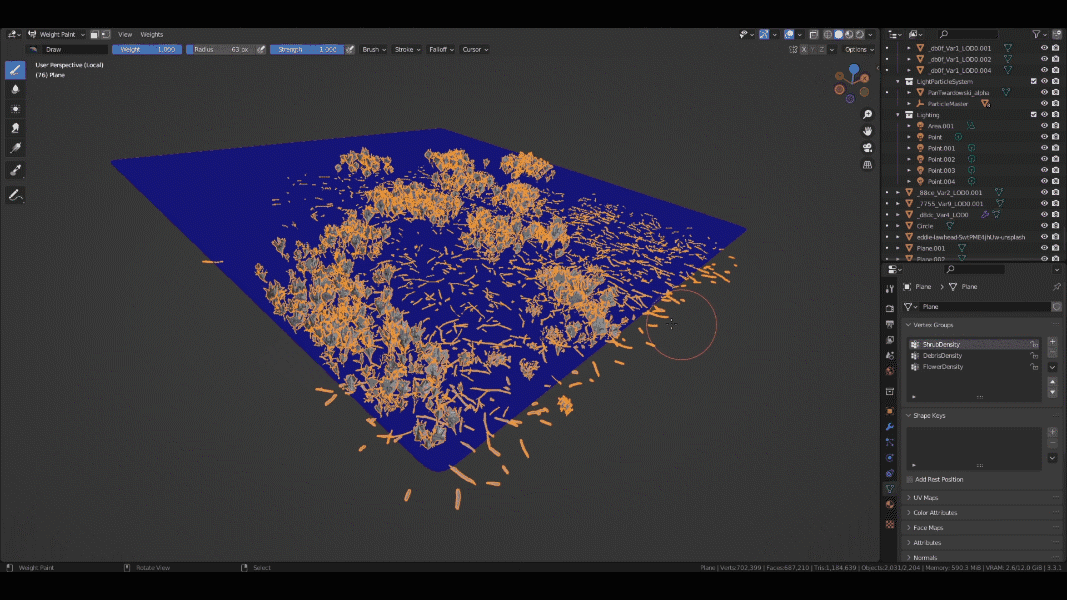
The geo-node tree is shown over here:
Objects like the trees and fern have been placed manually, and the trees were modeled by myself with Maxime Herpin’s Modular Trees add-on. It allows for the procedural creation of trees, almost like Speedtree but free and within Blender.
I did notice that it is rather limited in terms of possible tree types and stability though. The full process is broken down:
THE FLOWER
There is nothing particularly interesting about the way the flower is modeled. However, I think that its material deserves a mention in this article. The flower has two parts with two distinct materials—a translucent hollow shell and a smaller, emissive version of it on the inside.
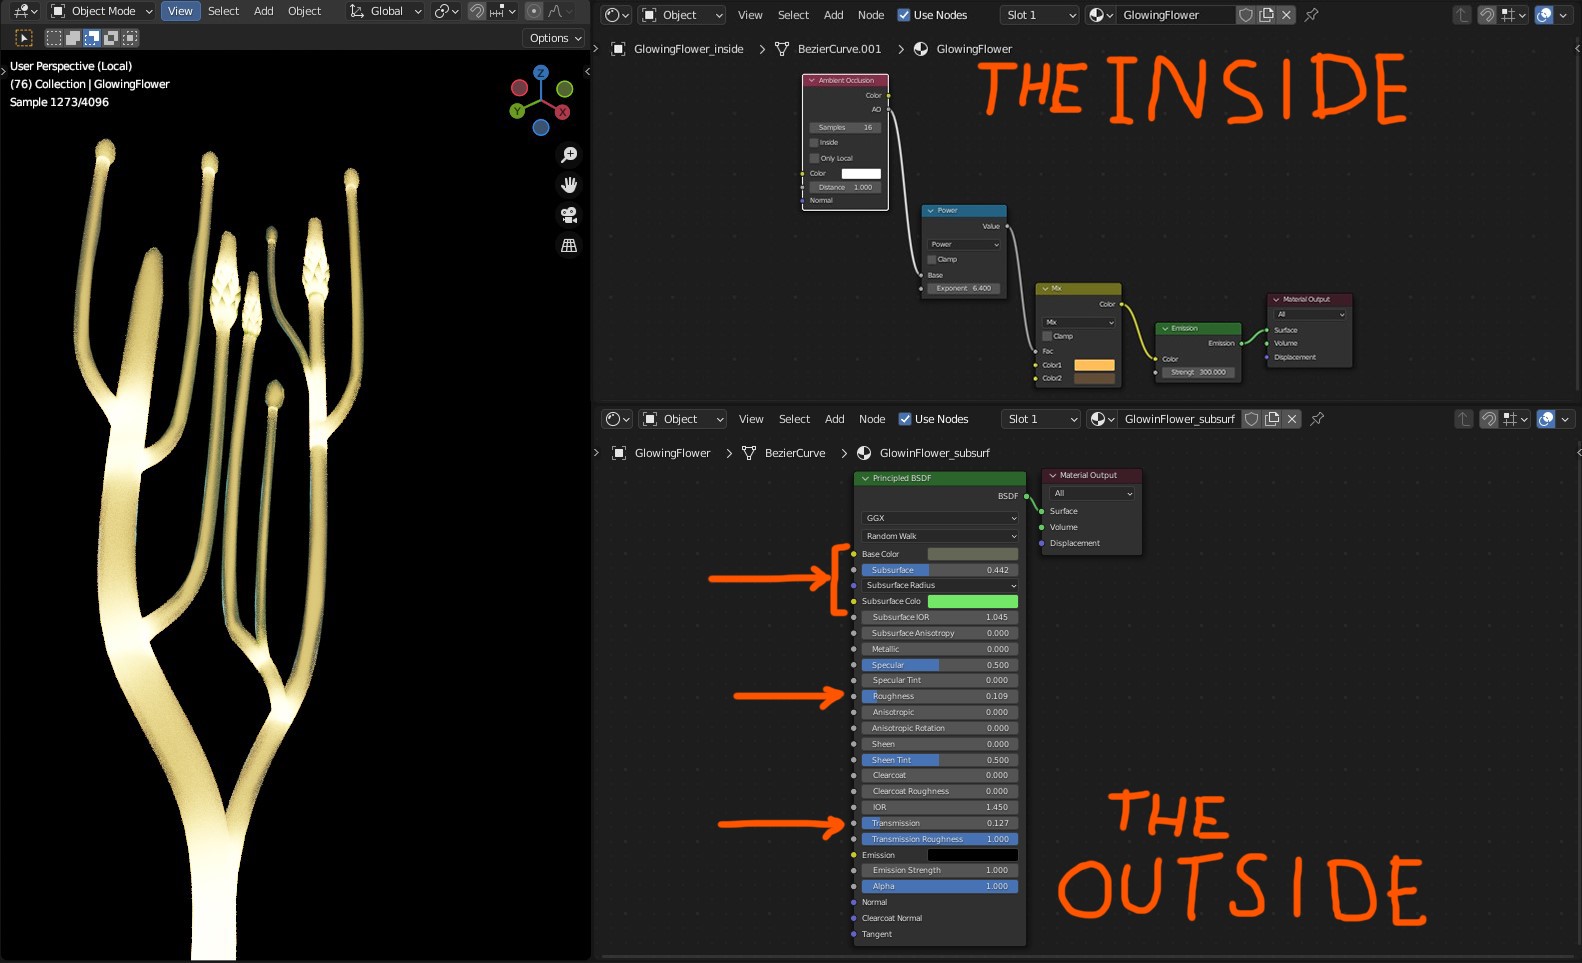
The outer material vaguely resembles glass. It is a subsurface scattering base that we are able to see-through, thanks to a transmission shader mixed into it.
LIGHTING
Most of the lighting in the scene is coming from a giant image of the background, set up to fill the whole view (inspired by the LED greenscreen innovations in the film industry). I also brightened up the shadows a bit using an HDRi set to a tiny brightness value. This is meant to make the shadows look more realistic as they’re never completely black in real life—there’s always a bit of background noise.

To bring the lighting up a notch, I added a couple of light sources in strategic locations. They were supposed to pull the viewer’s attention into the right place and also to keep the scene looking realistic.

For example, there’s a white light placed near the forest’s edge that adds additional moonlight scattering on the trees that was completely missing before.
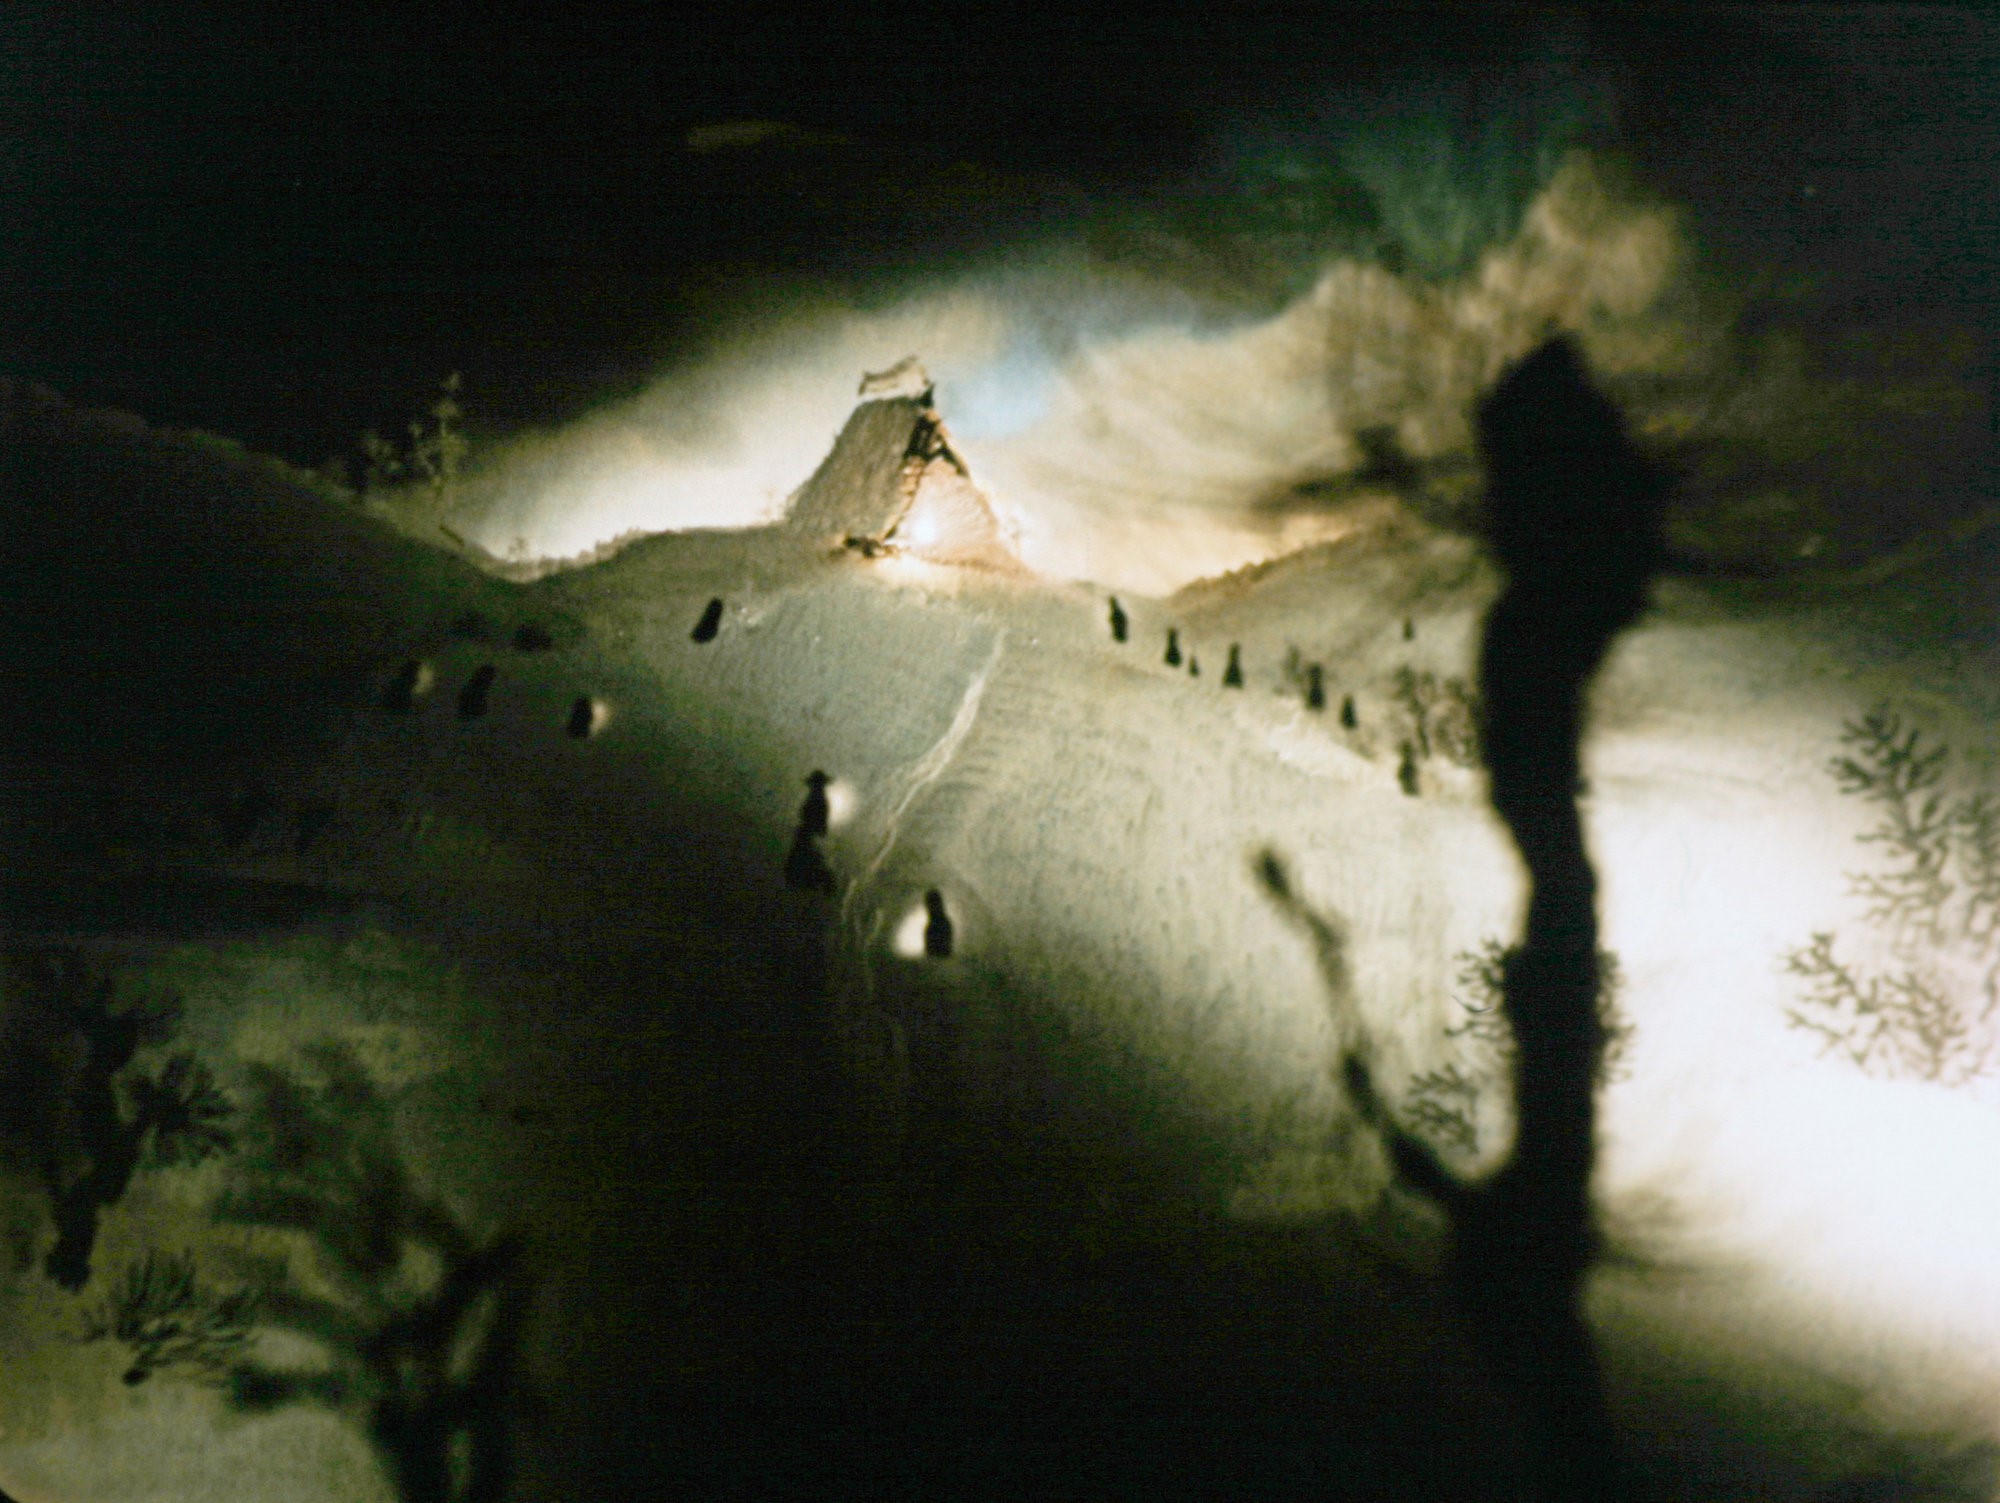
FERN FLOWER
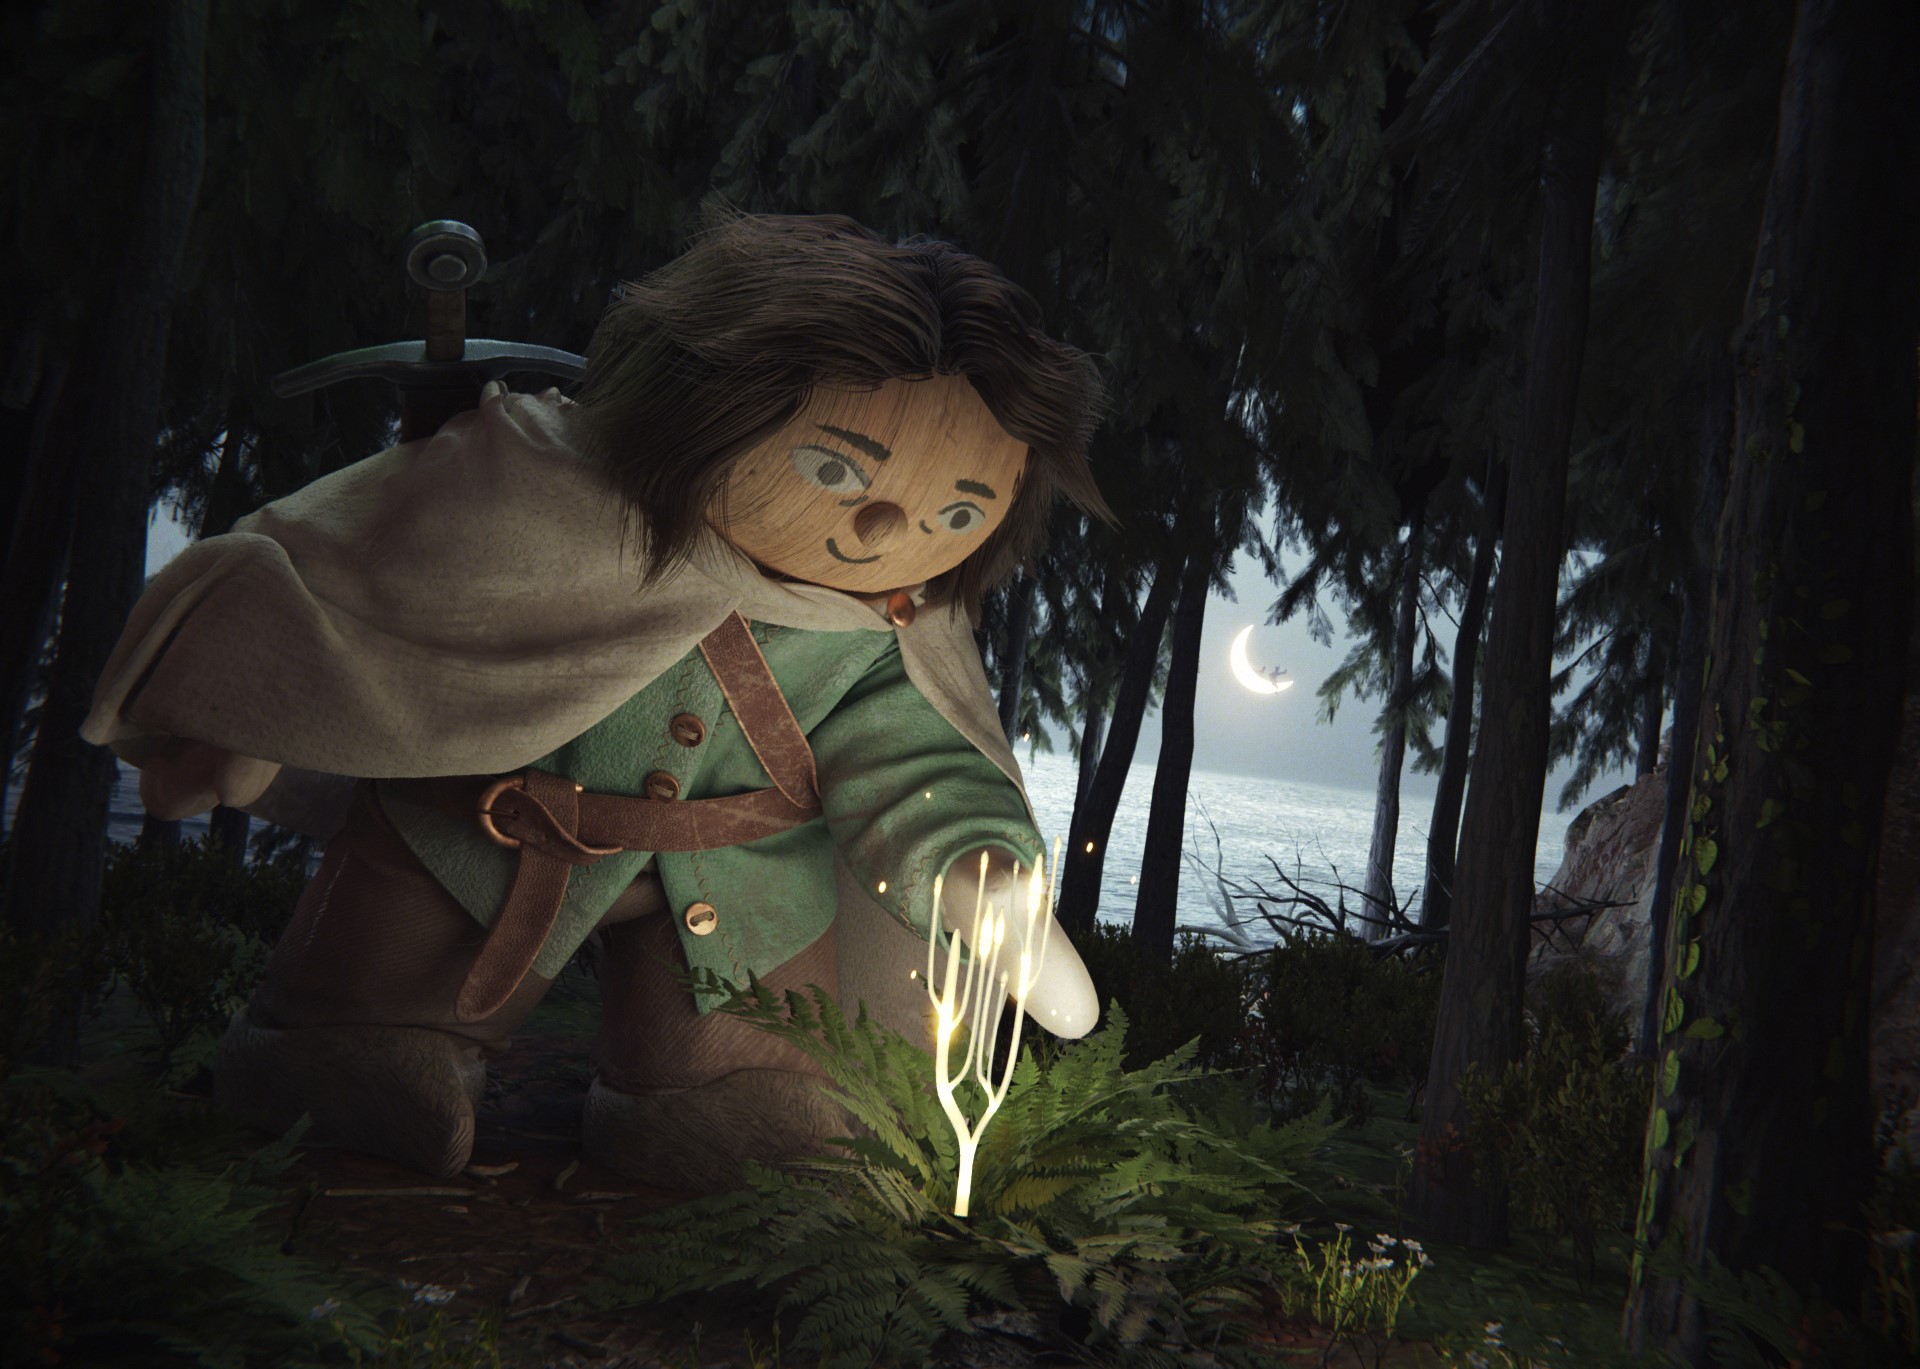
And there you have it!
Thank you for reading this article and I hope that you’ve learned something new.
About the Artist
Adrian Bik, an aspiring 3D artist who is making art in his free time. He is currently looking for opportunities in the professional field.


