Behind the Scenes: Spiral with Glass
INTRODUCTION
Hello everyone, my name is Sean Turner and I’m a 3D artist from the UK.
I’ve been doing 3D art on and off for around 15 years mainly in the field of architectural visualization, always striving for that ‘photo’ look.
INSPIRATION
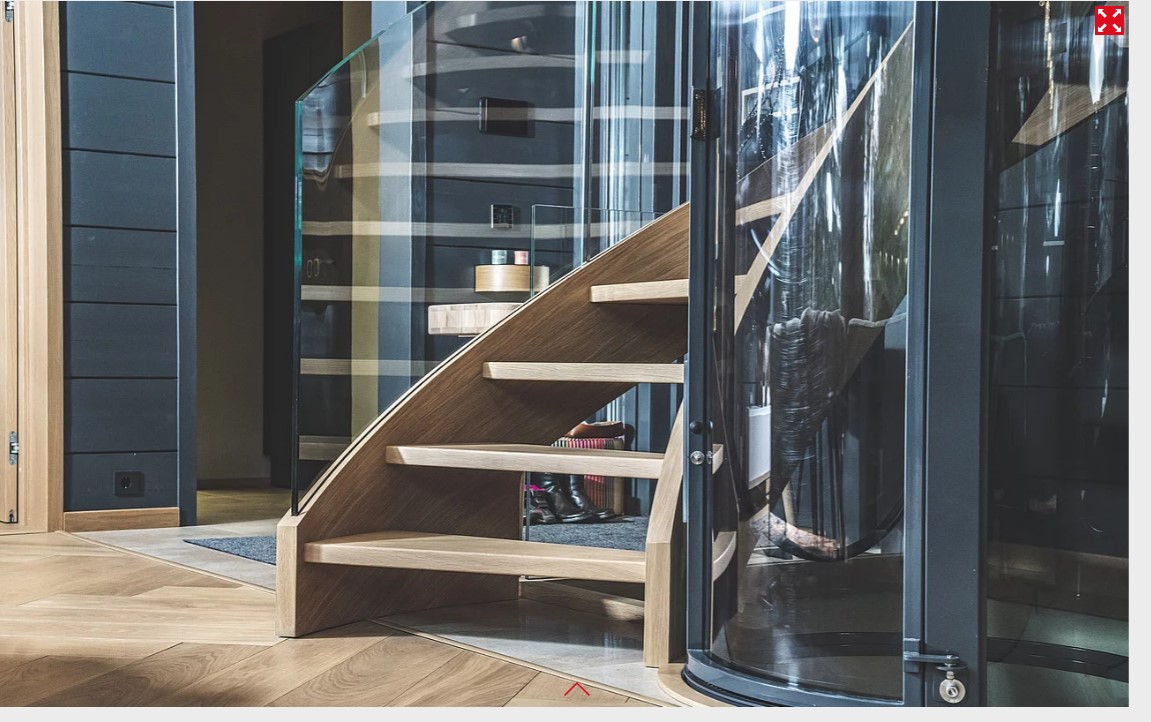
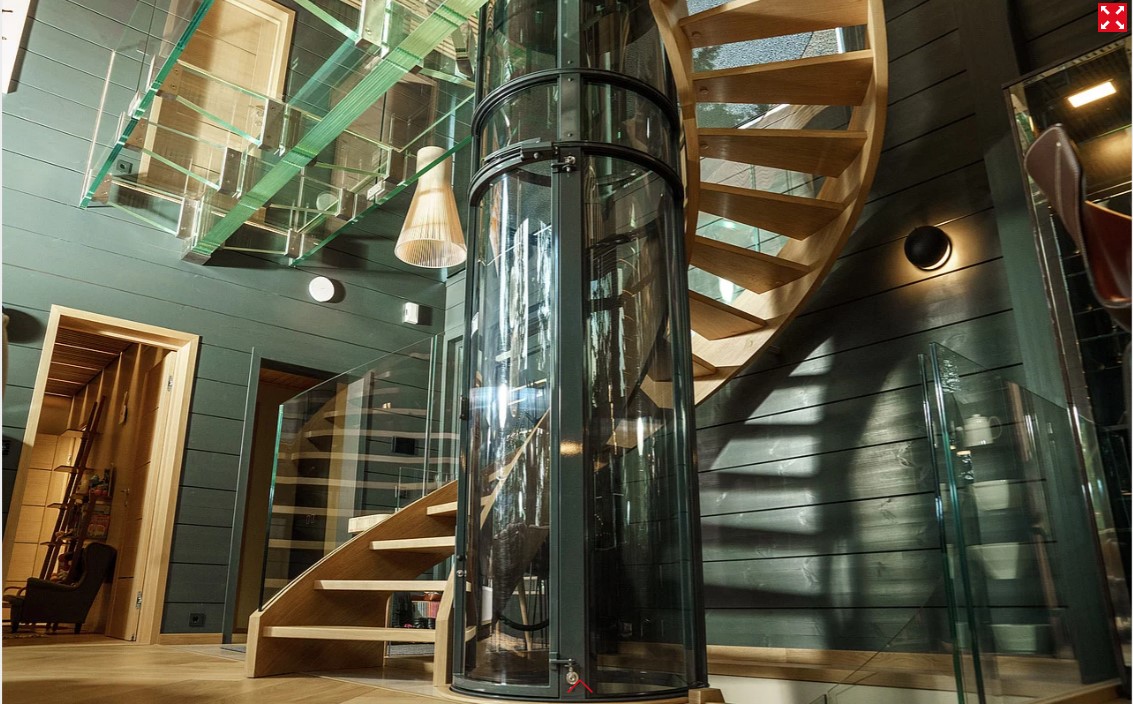
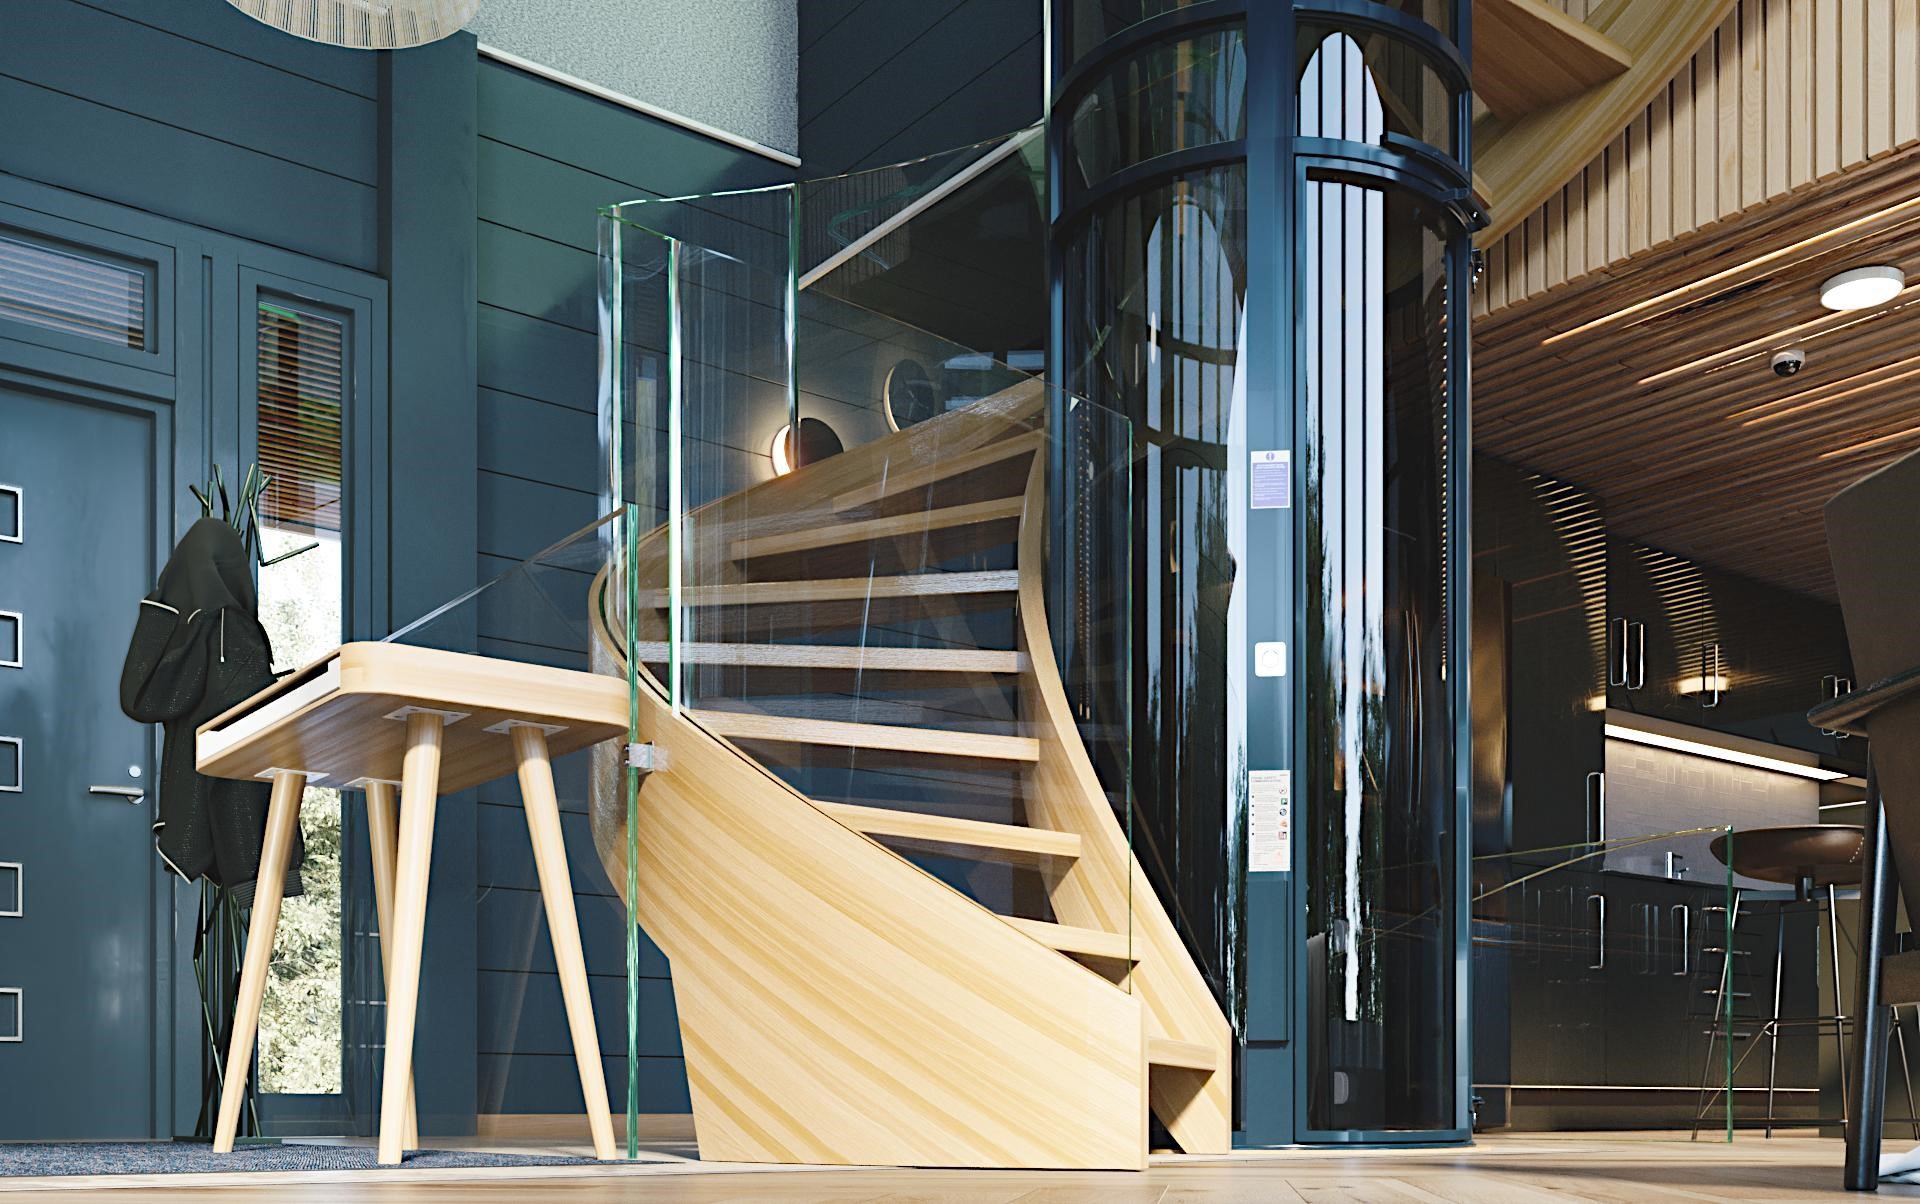
The inspiration for this project came from these images I found on a staircase manufacturing company’s website.
If your goal is to work in the field of architectural visualization, then ‘realism’ is obviously key.
I believe the best way to achieve that ‘Realistic’ look is to practice recreating from photos. After all, if it looks like the photo, then it looks realistic right? This I found gave me a good solid foundation for producing my own scenes.
I wanted to challenge myself a little in this project so I decided on these images as they contained a staircase that winds around a lift, leading onto a catwalk containing a lot of glass.
PROCESS
I will always start with the most challenging part of the image, whether it be an object that I consider challenging to model or maybe a key material that might be difficult to replicate. If I can’t achieve this, then the rest of the scene simply isn’t going to work.
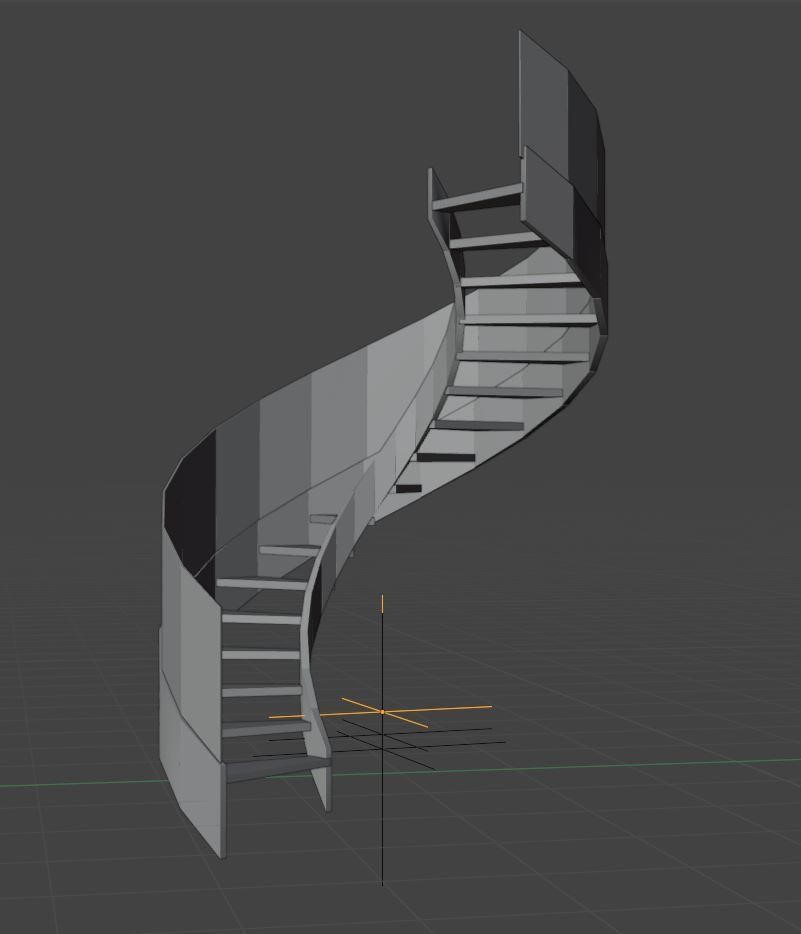
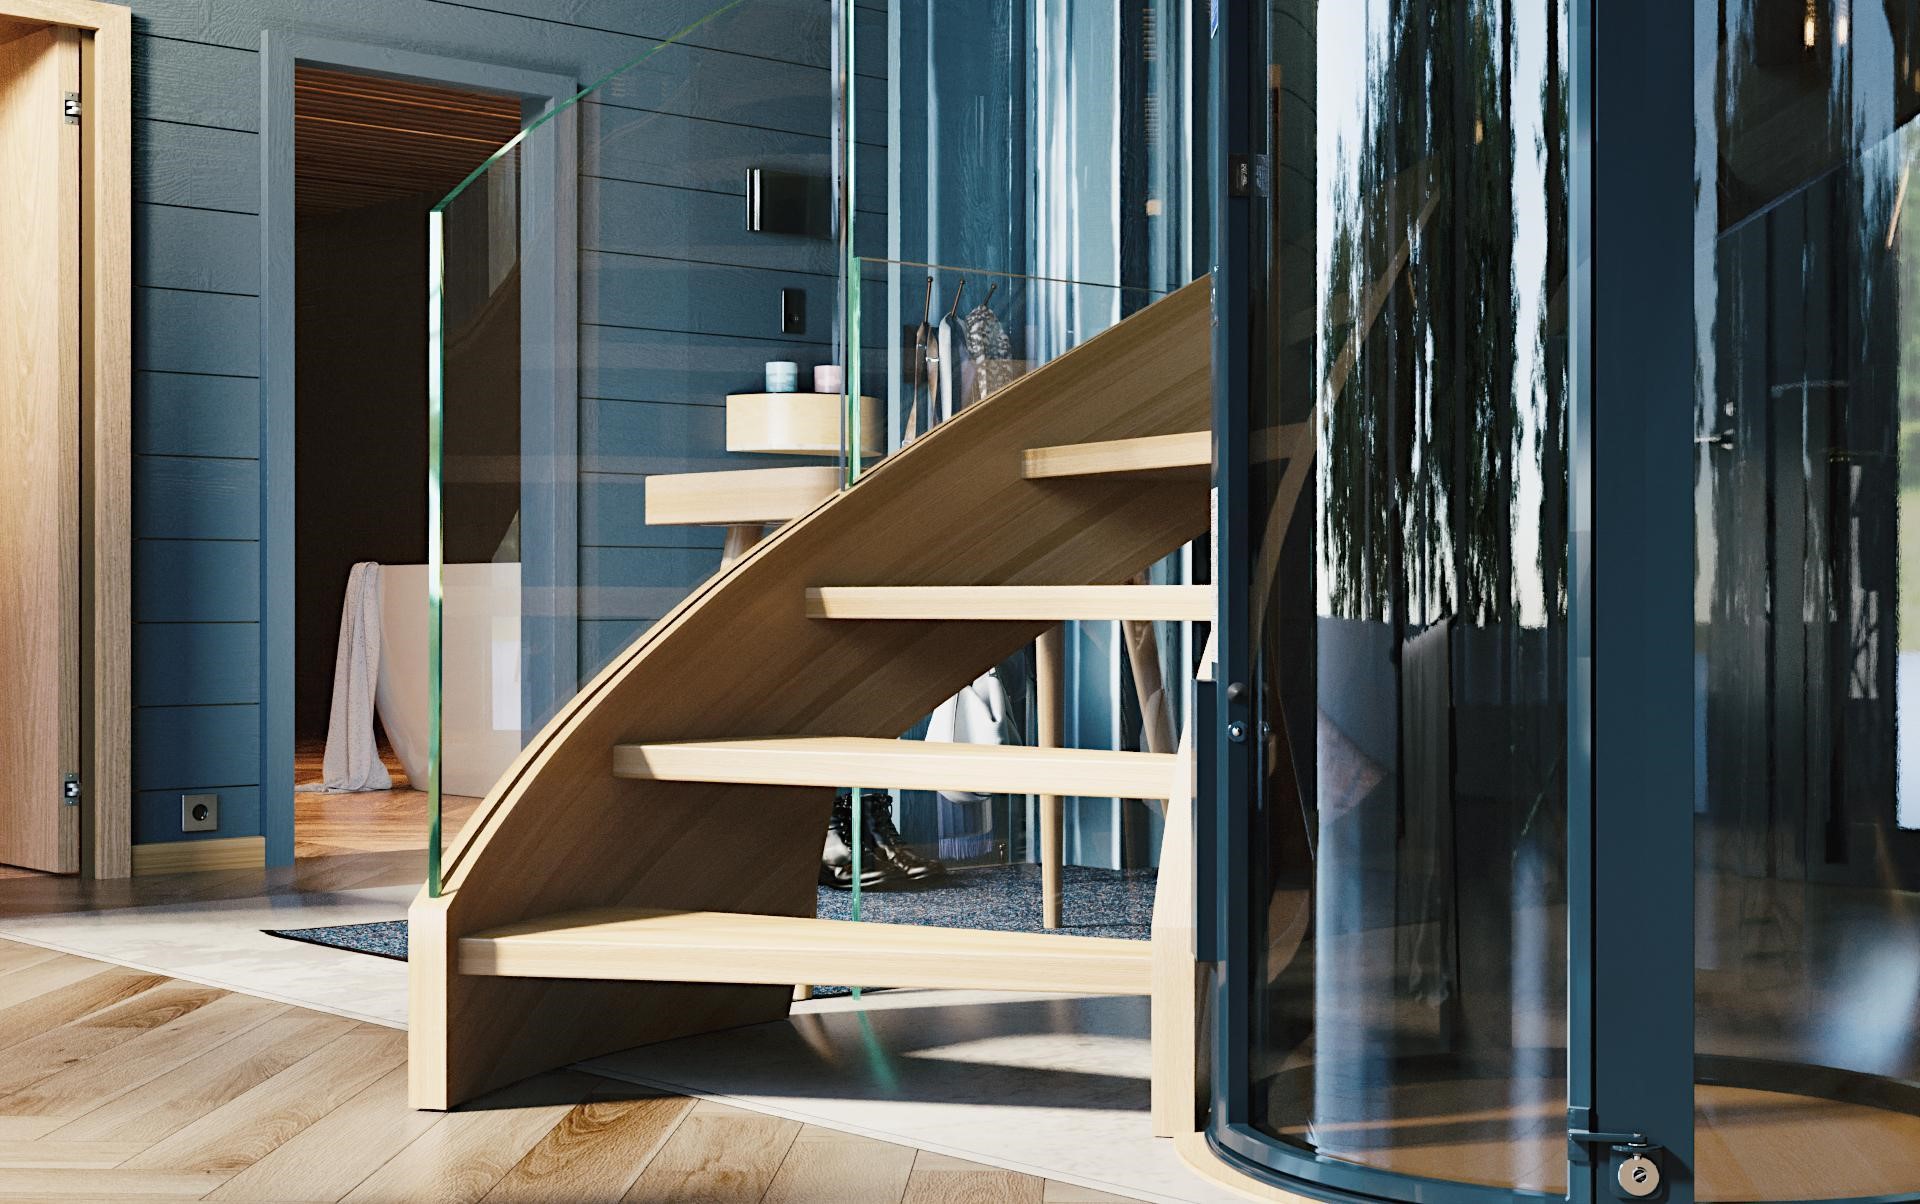
THE STAIRCASE
I haven’t modeled a spiral staircase for a good few years but as it turned out, it wasn’t much of a challenge at all in the end. Just a couple of tutorial videos later and I ended up with this using the Array Modifier.
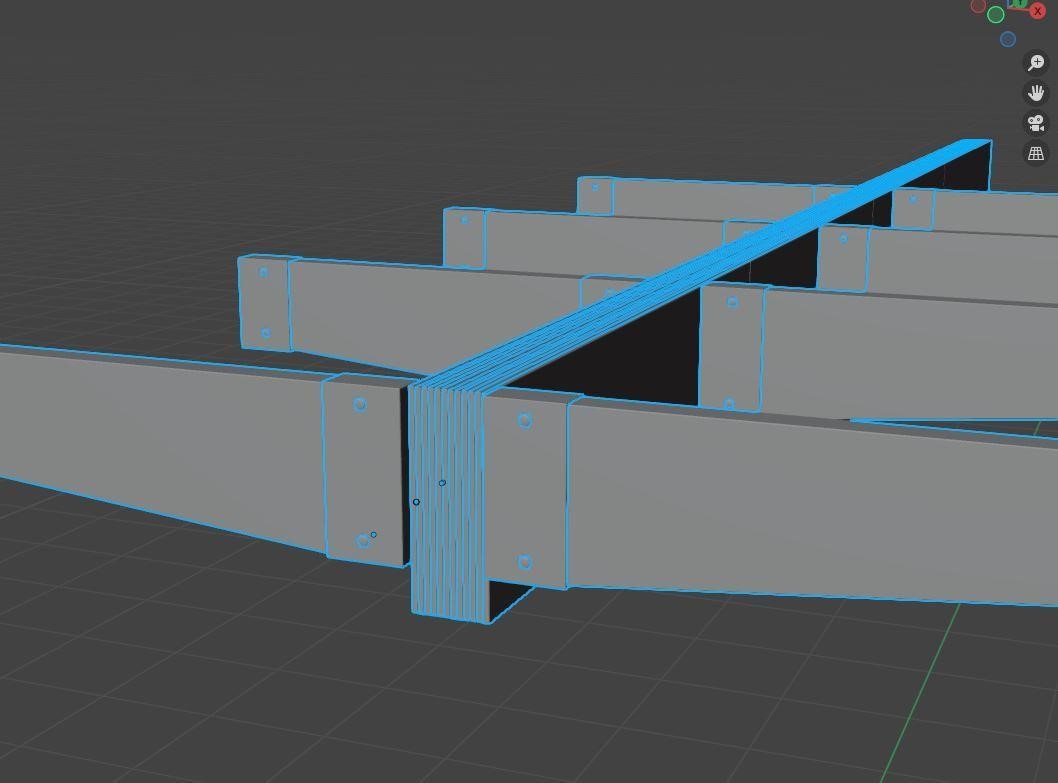
THE GLASS
The main support for the walkway consisted of multiple panes of glass in parallel which would have to be tweaked to achieve the level of realism required, depending on the glass material.
MATERIAL
This is a very important aspect to the scene and one I usually spend a good deal of time on, either finding good quality materials or creating my own.
This is the material for the glass I settled on after a little experimenting.
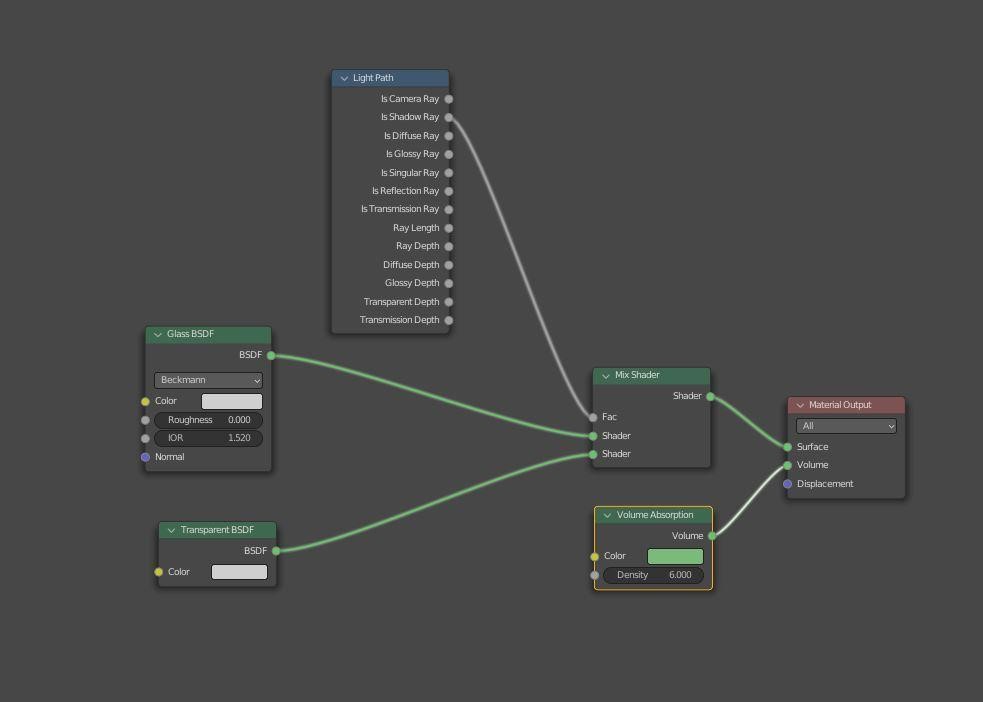
I used a separate material for the glass edge as I wasn’t achieving the results I wanted.

Once the staircase and the glass was satisfactory, the rest of the scene was pretty straightforward.
LIGHTING
I never really saw lighting as a major issue, Just a simple sky and sun or an HDRI for the environment and maybe a number of area lights strategically placed for noise reduction or for extra reflections on surfaces if required.
I will, however, use little ‘tricks.’ For instance, negative value lights and reflector planes (similar to what photographers use) for adding contrast in areas that may require it.
In my opinion, the key to a realistic render is not primarily in the lighting, although of course it contributes, but in the materials and a good LUT added in the post processing stage.
A clay render to get a rough guide for the overall lighting.

I often do close-up test renders of sensitive areas as I don’t want any nasty surprises when the render is finished. (This won’t apply to most people but as I’m still using CPU, it’s definitely needed in my case.)

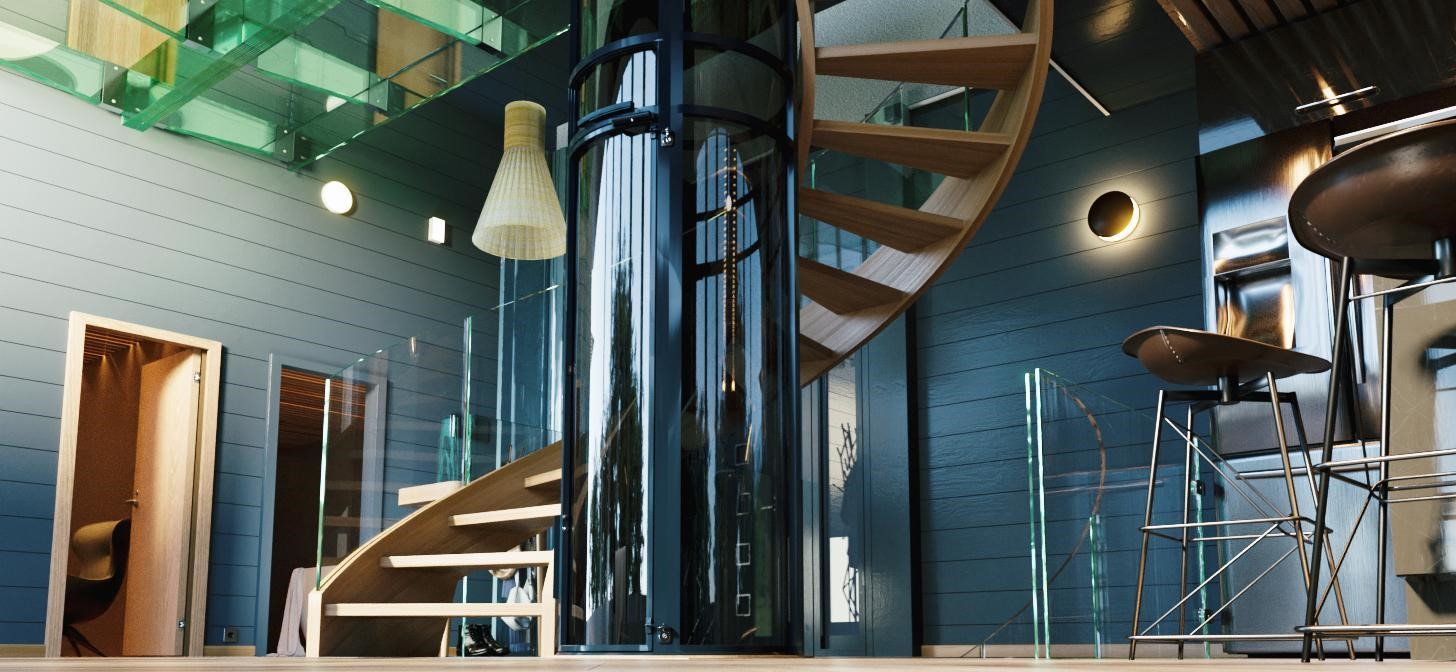
SPIRAL WITH GLASS

That’s all, I hope you’ve learned something new from this article!
Thank you and have a nice day!
About the Artist
Sean Turner, a 3D artist from the UK. My Discord username is…SBTLINK#50013


