Behind the Scenes: Breaking Boundaries
INTRODUCTION
Hi, my name is Robert Kouts. I’m a 17-year-old, self-taught 3D artist from Australia.
In this article, I will explain my process for creating this animation which placed top 100 in the Moving Meditations Challenge. I will primarily focus on the effects and animation because I think that’s what makes this render unique, as opposed to things like texturing or modeling which already have hundreds of amazing tutorials.
The challenge was run by Clinton Jones, also known as “Pwnisher.” I highly recommend you to join his Discord server.
He runs a render challenge every week to sharpen your skills, and hosts massive month-long community challenges about twice a year with thousands of participants and entries just like this one.
I have entered every single month-long community challenge that Clint has released since the start of 2021, and I can undoubtedly say that the competitions reignited my passion in 3D art and pushed me far enough to get a full time job as a 3D modeler.
I cannot recommend these challenges enough.
You can also follow Clint on Youtube:
Hardware: Laptop – GTX 1060 6GB, i7-7700HQ, 16GB Ram
Software: Blender, Substance Painter, Nuke, Marvelous Designer(for clothes)
THE IDEA
A lot of the time, especially when starting out, you will fall short of your intended outcome. That’s exactly why you should shoot as high as you possibly can, further than you think you can possibly achieve. Because if you get even half way there, even a quarter, then you will have created something worthwhile.
This is the attitude I have when approaching these competitions. The idea I have in my head is always miles above what I end up making in the end. But the end result would not have been as good as it could be, without those ambitious visions at the start.
The rules of the competition were as follows: You have to download the template scene, you cannot touch the camera (camera shake is allowed), and you must replace the mannequin with one of the 27 provided animations, while you can change everything else.
With this in mind, I set out with the intention of coming up with an idea with a meaningful story.
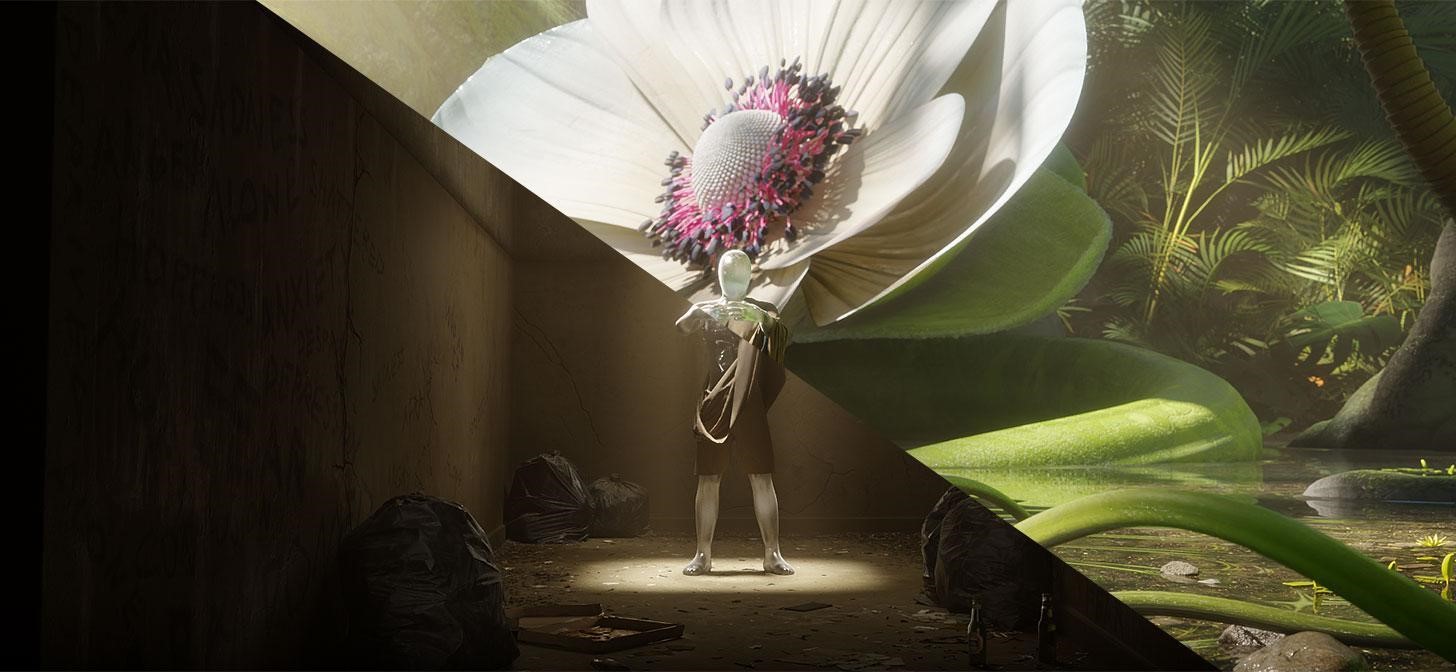
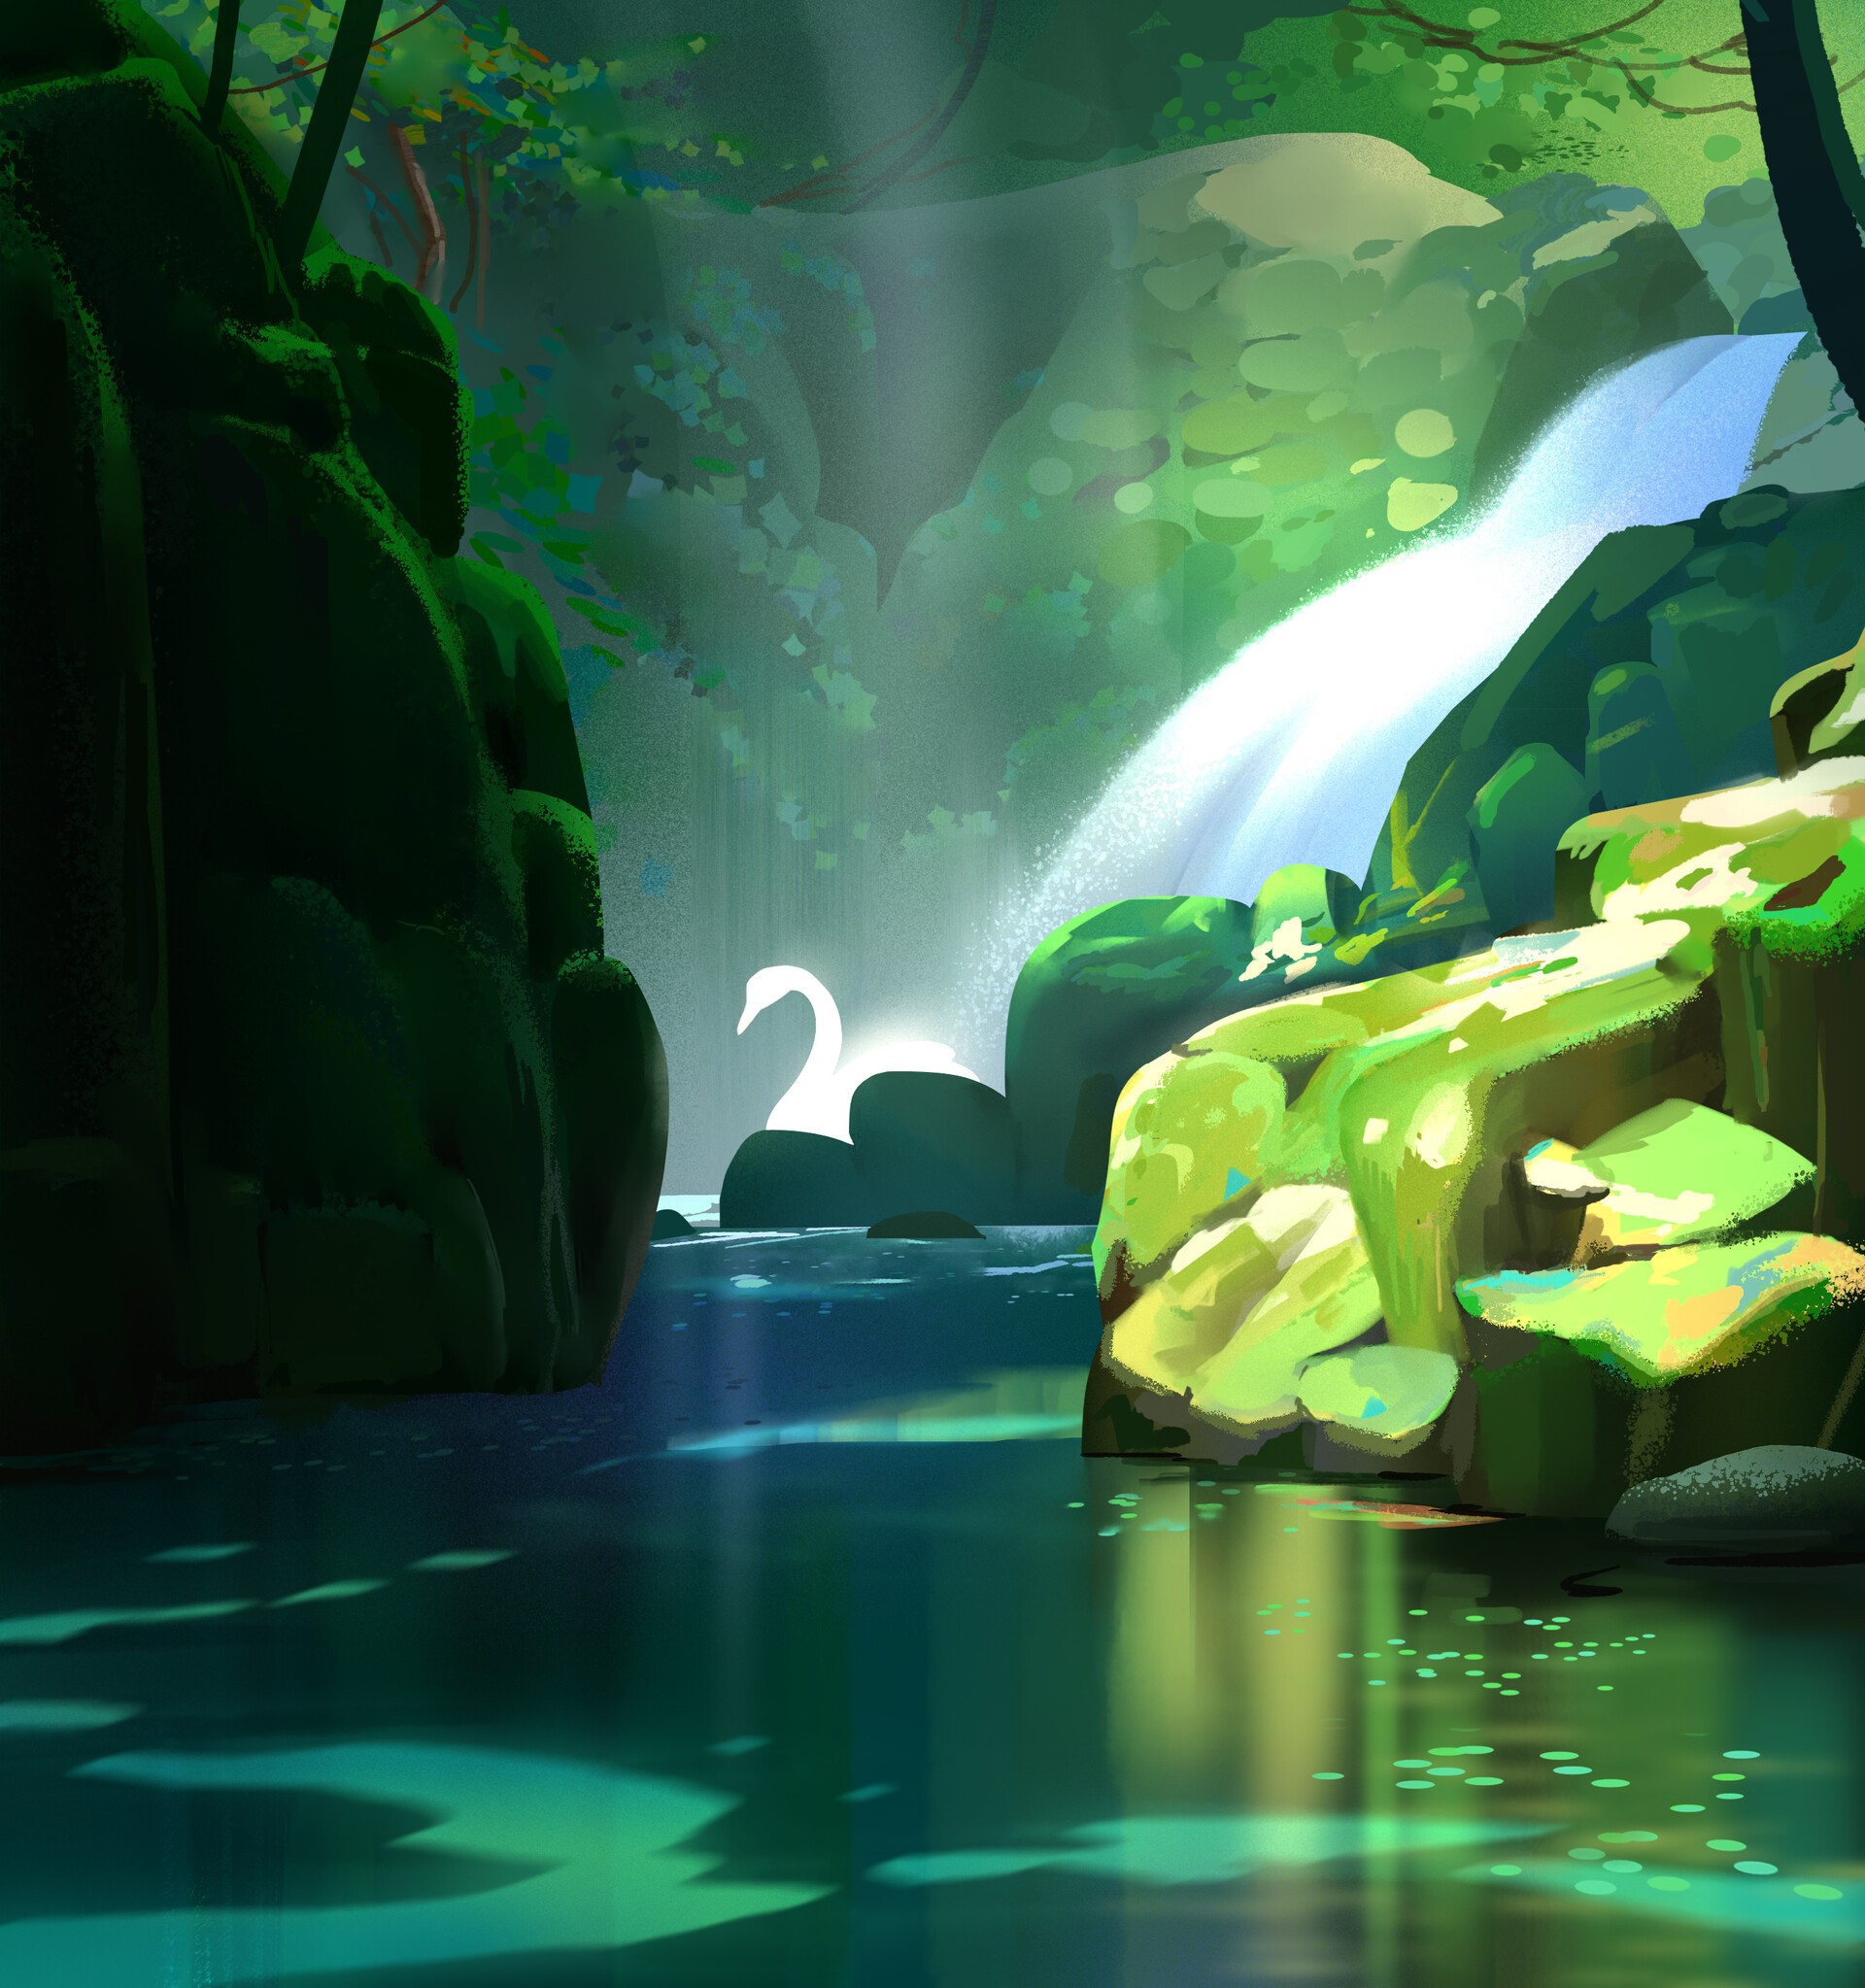
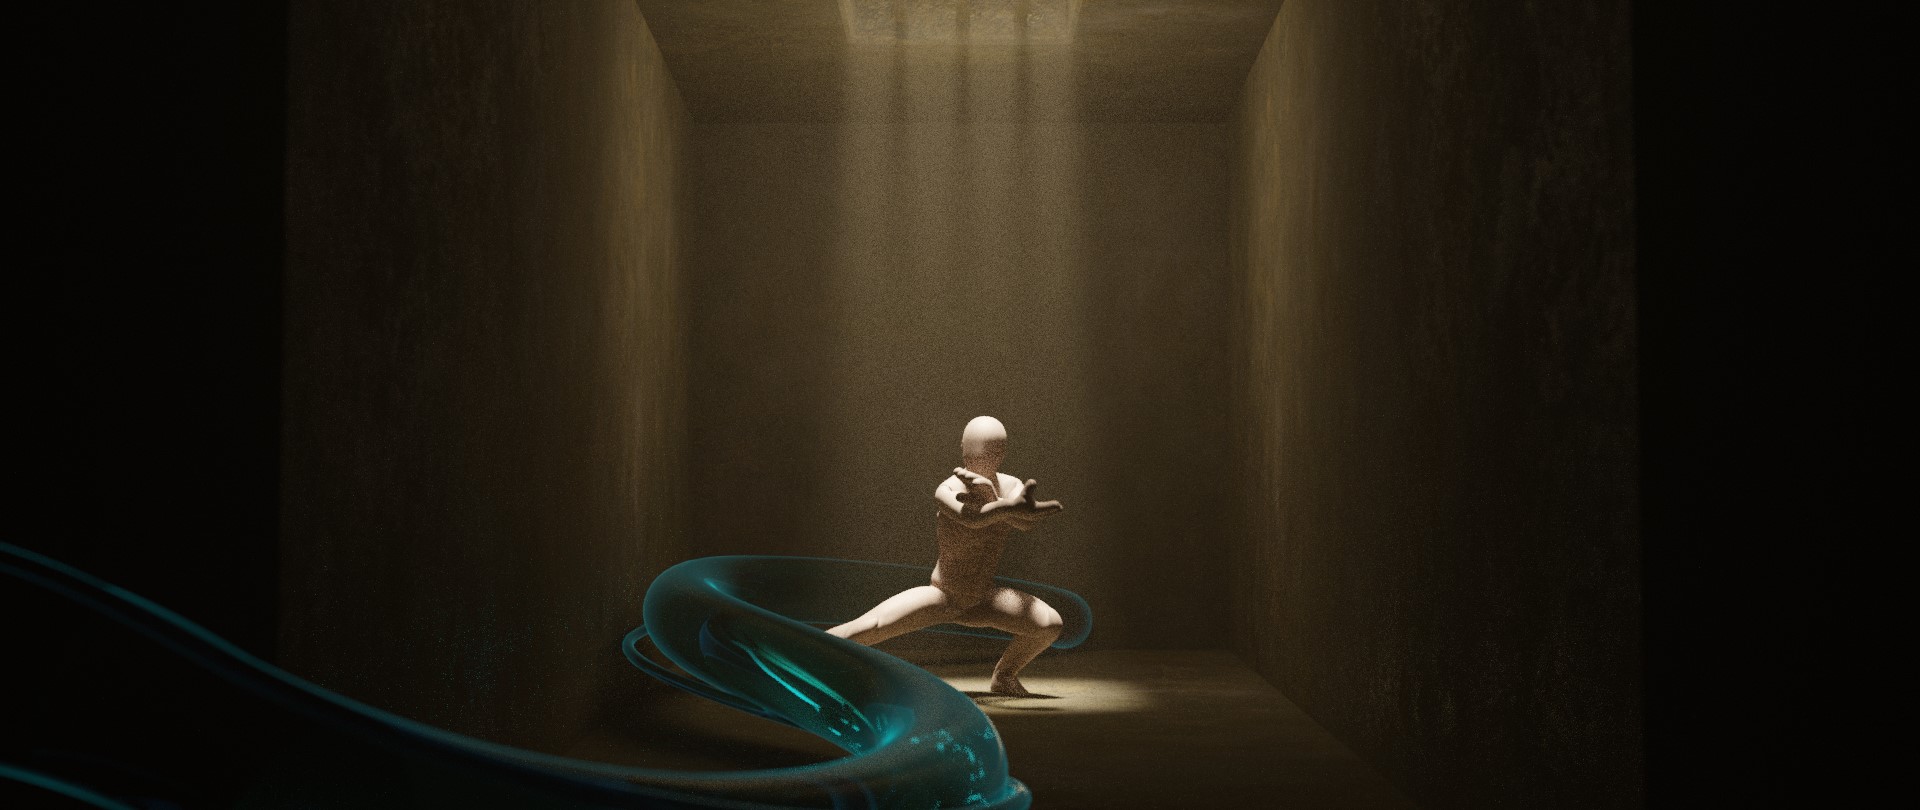
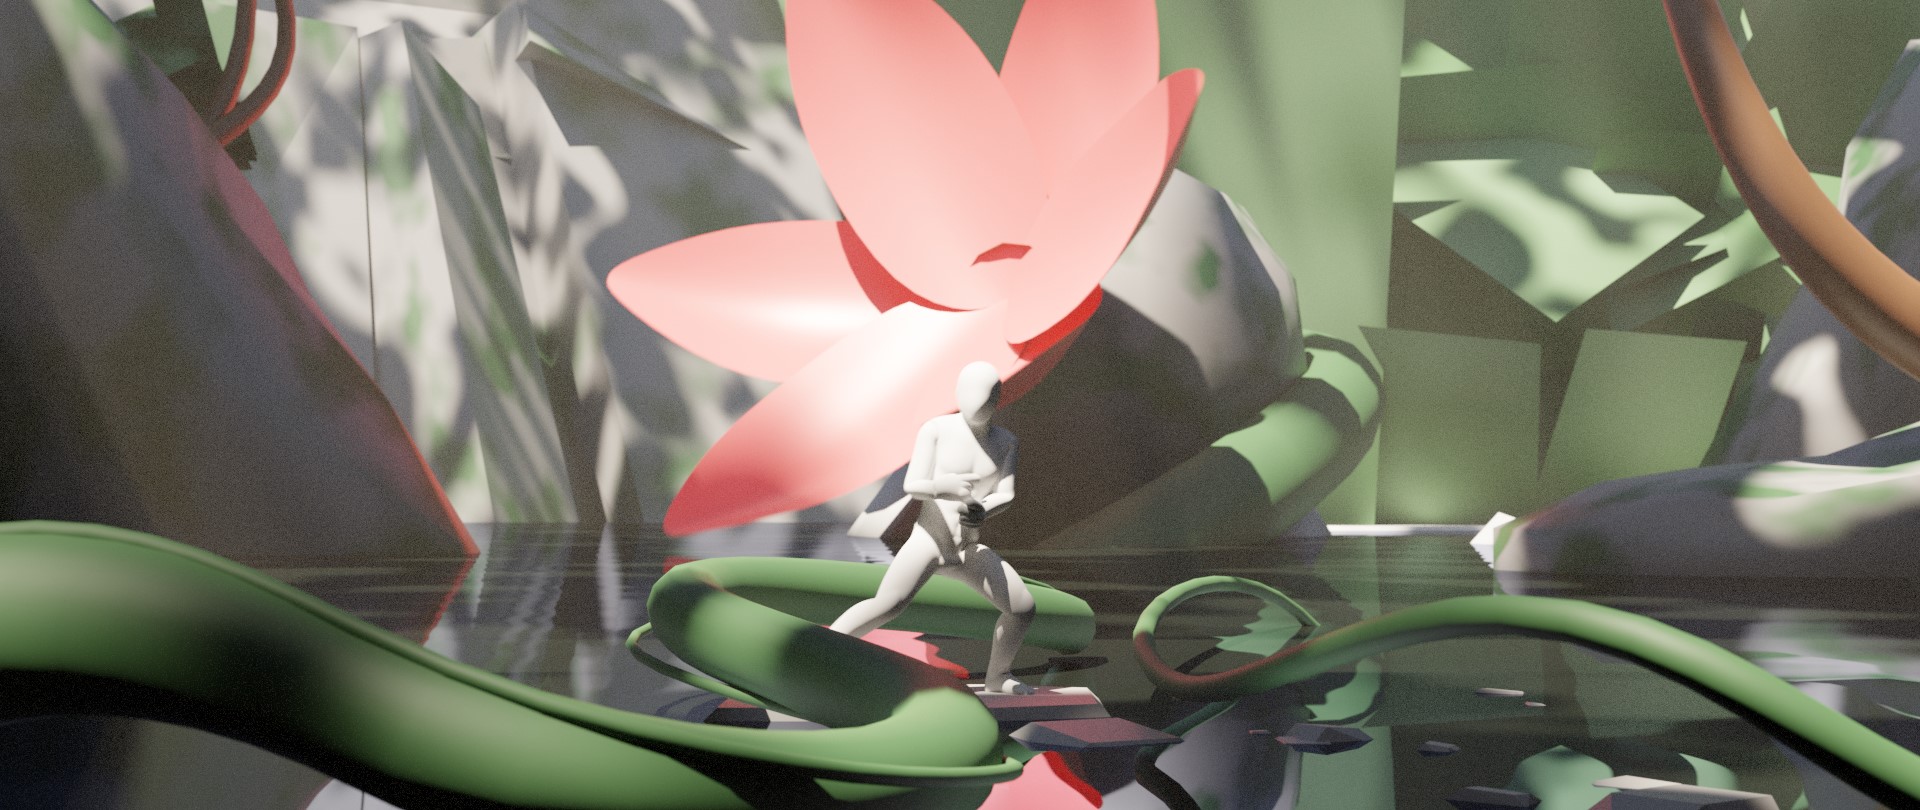
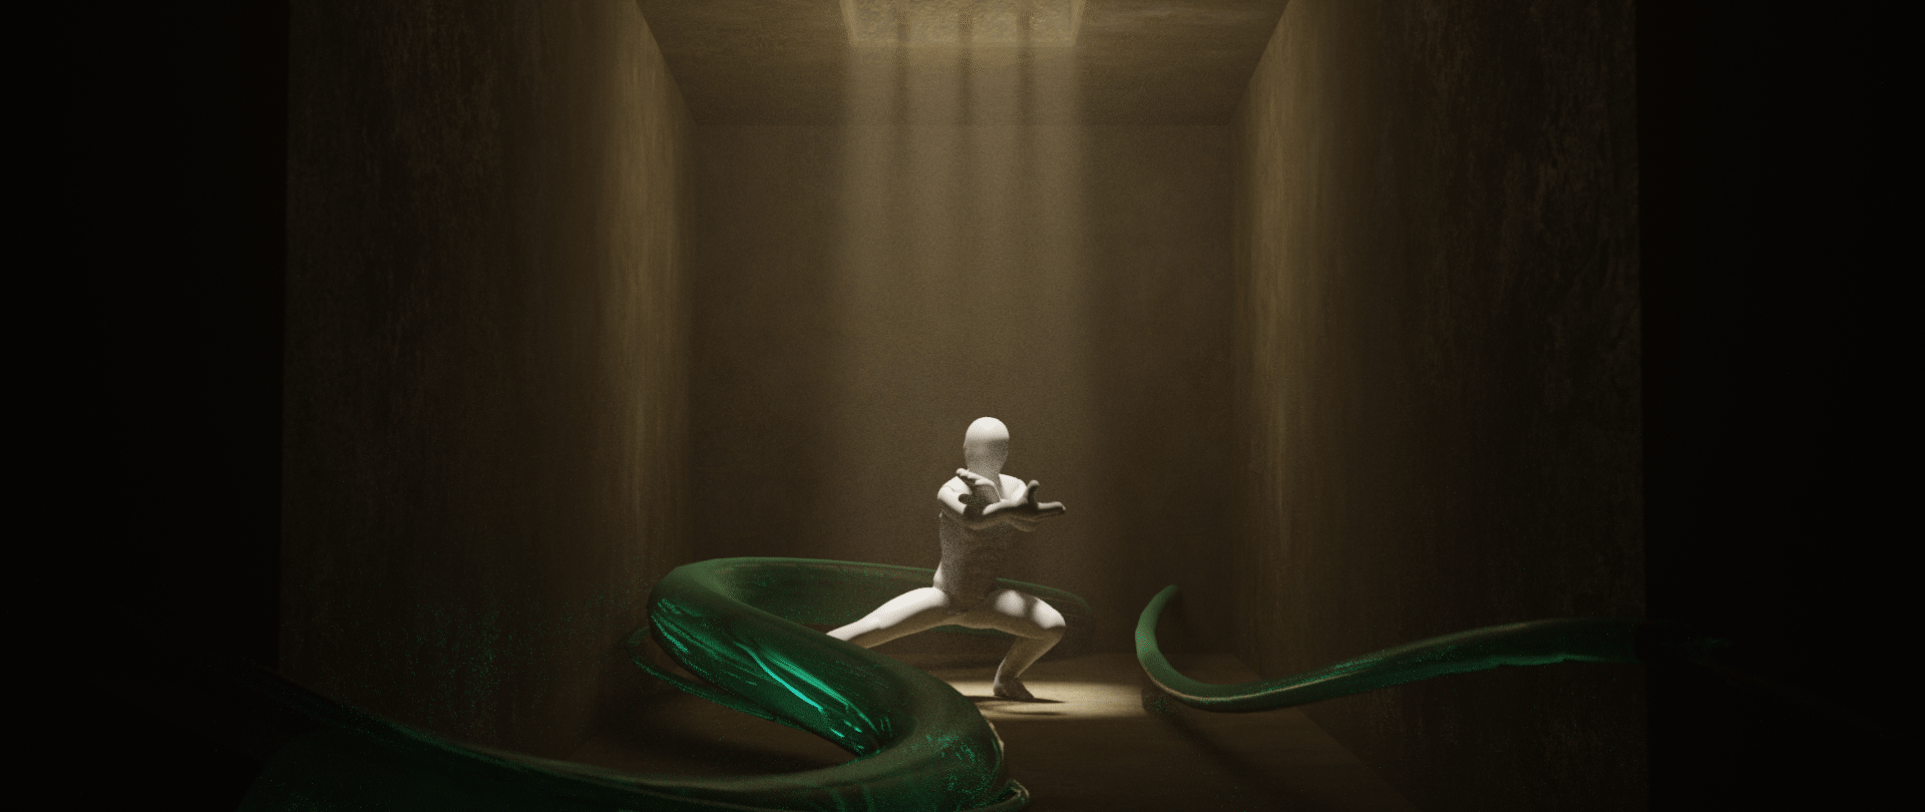
After a lot of thoughts and ideas, I landed on the idea of a person breaking out of a prison inside his mind. I wanted a lot of contrast between the “prison” in his mind and a lush forest representing the outside realm of possibilities.
This art piece by Florian Coudray definitely inspired and helped shape the forest scene:
BLOCK-OUT
After one full week of experimentation, I did a blockout and a simple lighting test:
I was still unsure about how the second scene should look. I wasn’t clear on the feeling and atmosphere I wanted to achieve.
Nearly 2 weeks into the challenge, I still only had a simple blockout of the scene, but at least I was a bit closer to the overall feeling and layout of the natural environment:
Some people were starting to question whether I would actually finish on time. I had some doubts in the back of my mind as well. Despite this, I kept pushing forward.
DETAILING
This will be extremely brief as I want to mainly talk about the effects and animation.
I used a combination of Substance Painter and Blender procedural materials for texturing. I also made use of some Quixel assets for the props and foliage. Some people don’t like using assets, and I was like that previously as making everything yourself can definitely be fun, but sometimes you need to use assets so you can save time and focus on what really matters.
Here are some WIPs of the first scene:
I did a bit more exploration for the second scene:
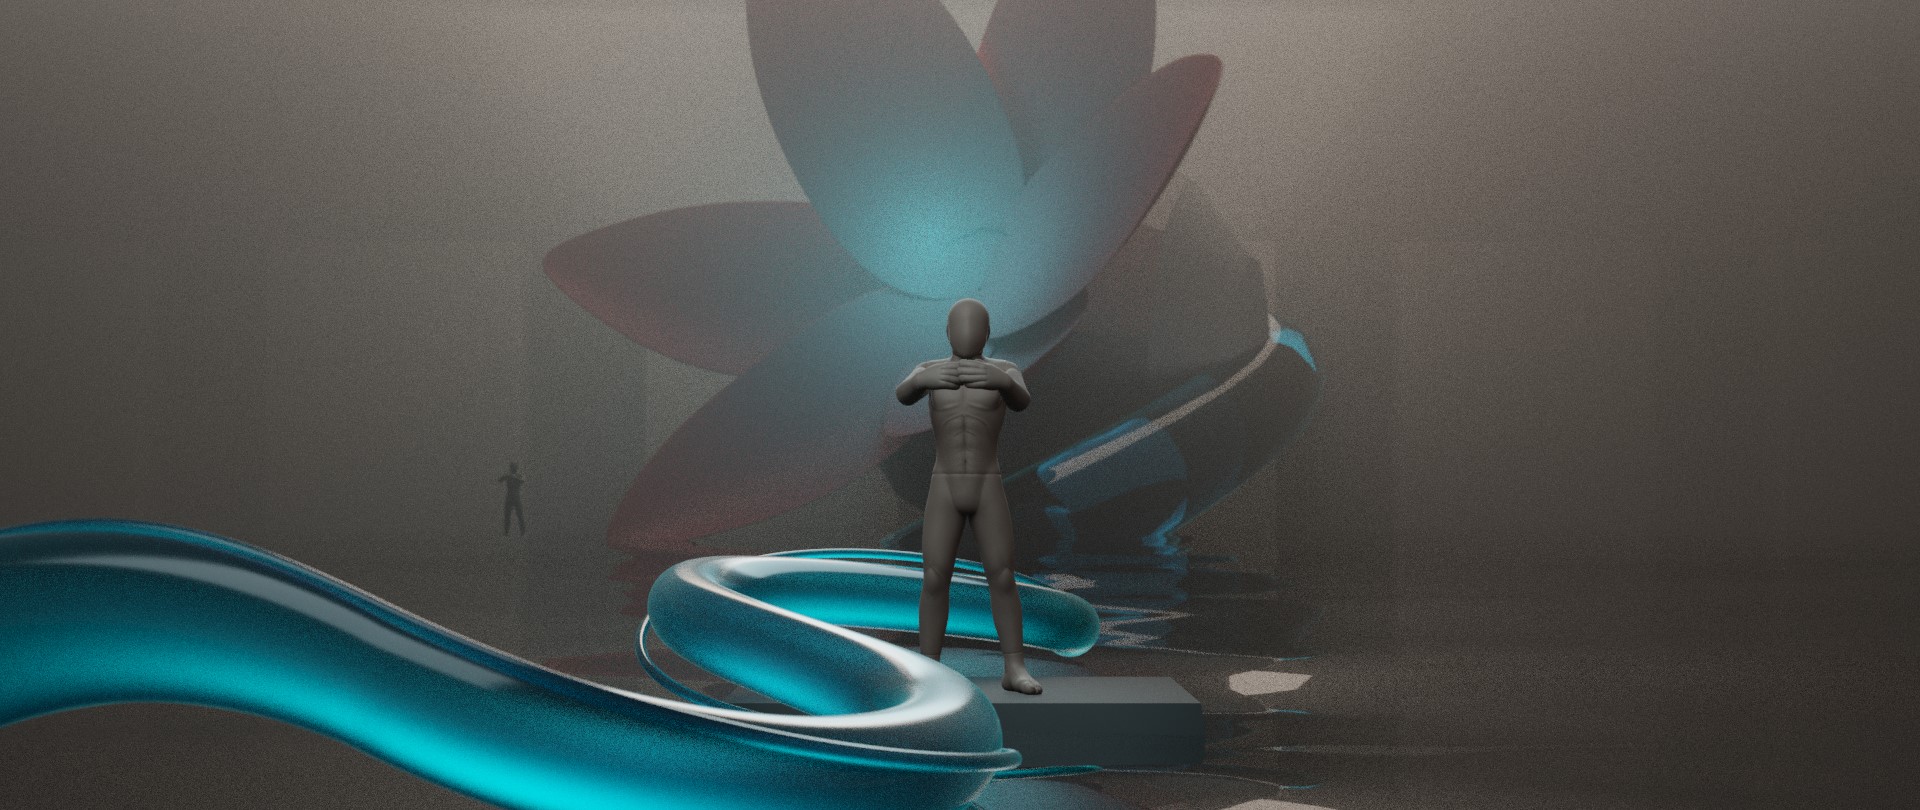
I realized these images weren’t achieving the stark contrast from the first environment that I was aiming for, so I stuck with the forest idea.
Here are the WIPs for the forest scene:
THE GLASS
Now onto the fun part!
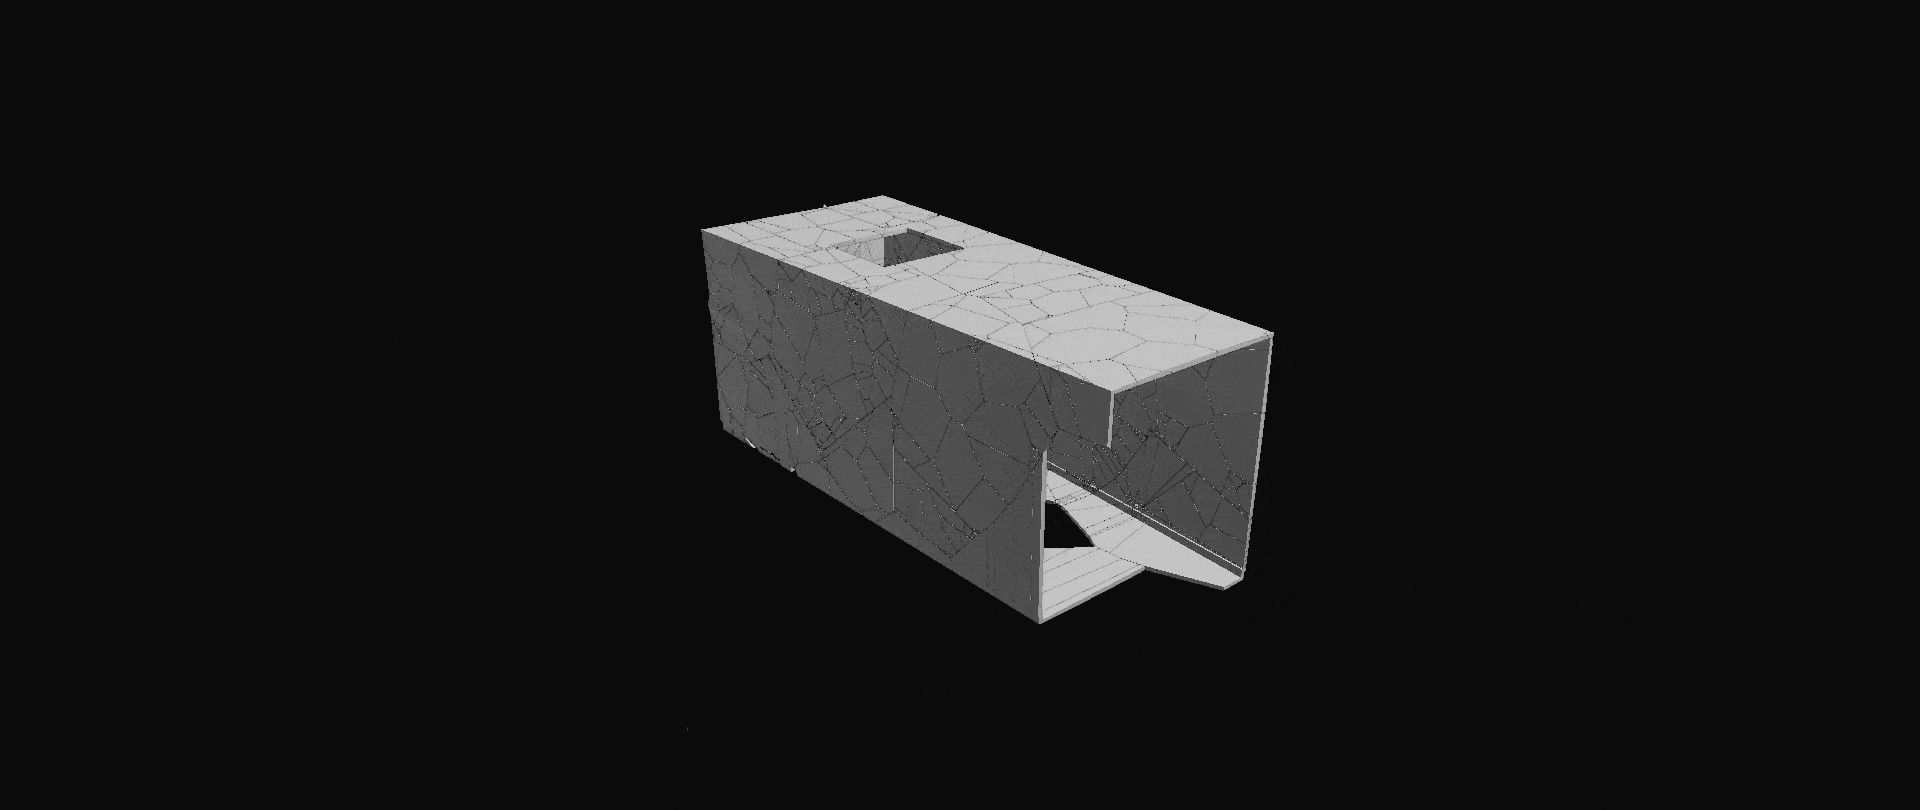
The glass cracks were achieved with a combination of techniques. First, I created a simplified version of the room, and broke up each of the 4 walls using the cell fracture addon that comes with Blender.
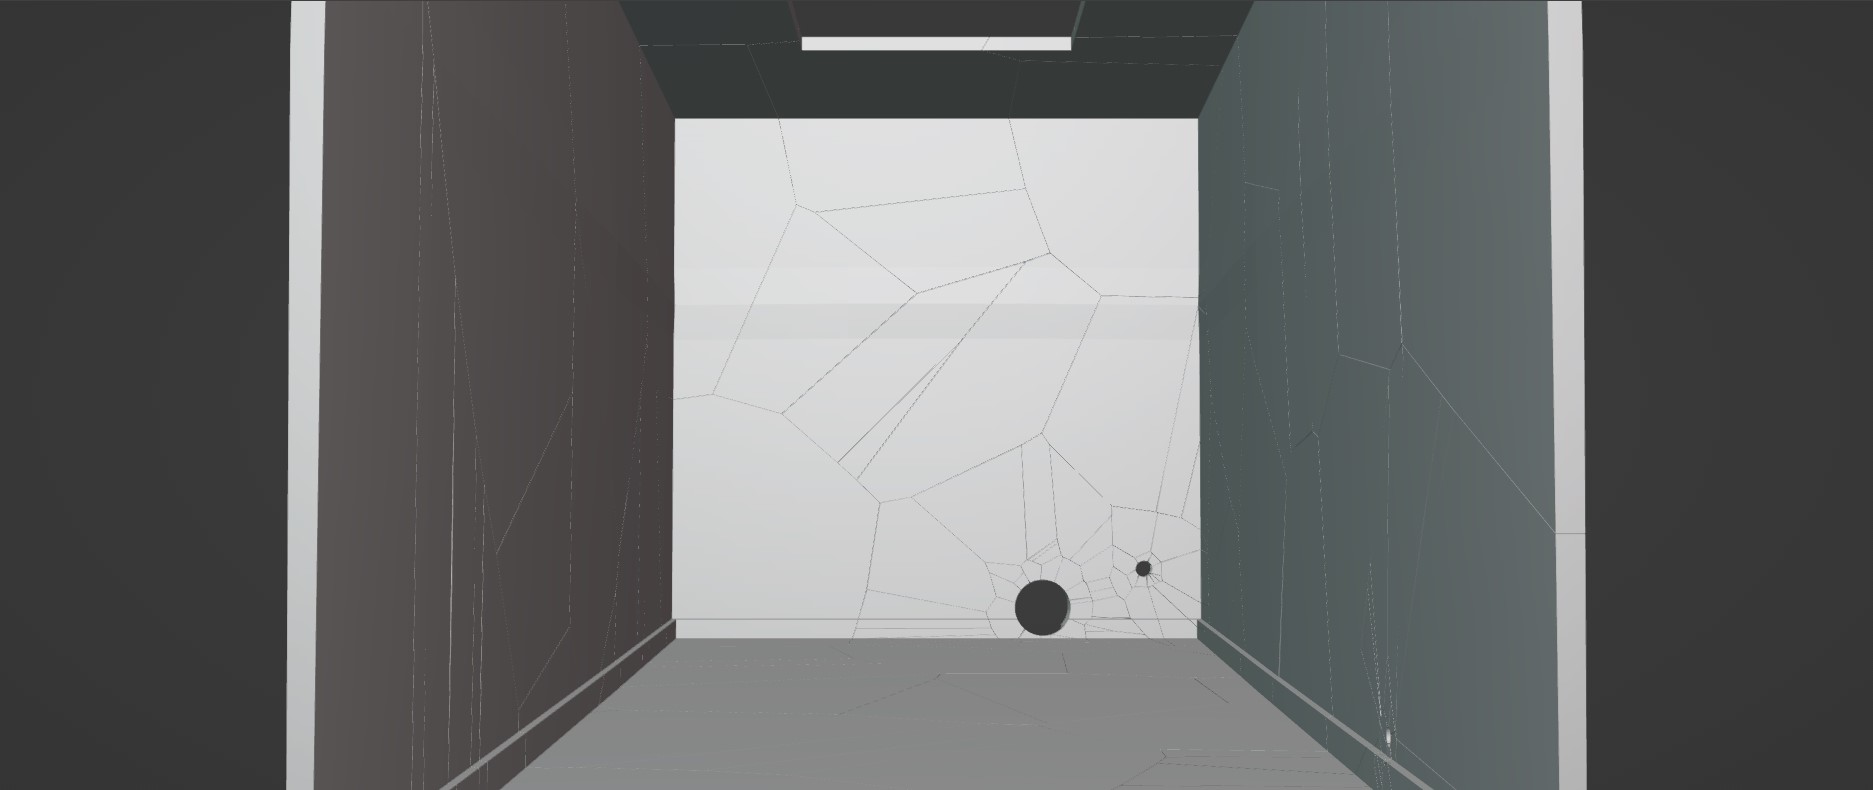
I also cut out holes where the vines enter the wall using a boolean modifier.
The glass material applies some surface imperfections, and gives each of the colors Red, Blue, and Green a slightly different IOR to get some slight aberration. This wasn’t realistic, but it’s all I needed for the effects I was aiming to achieve.
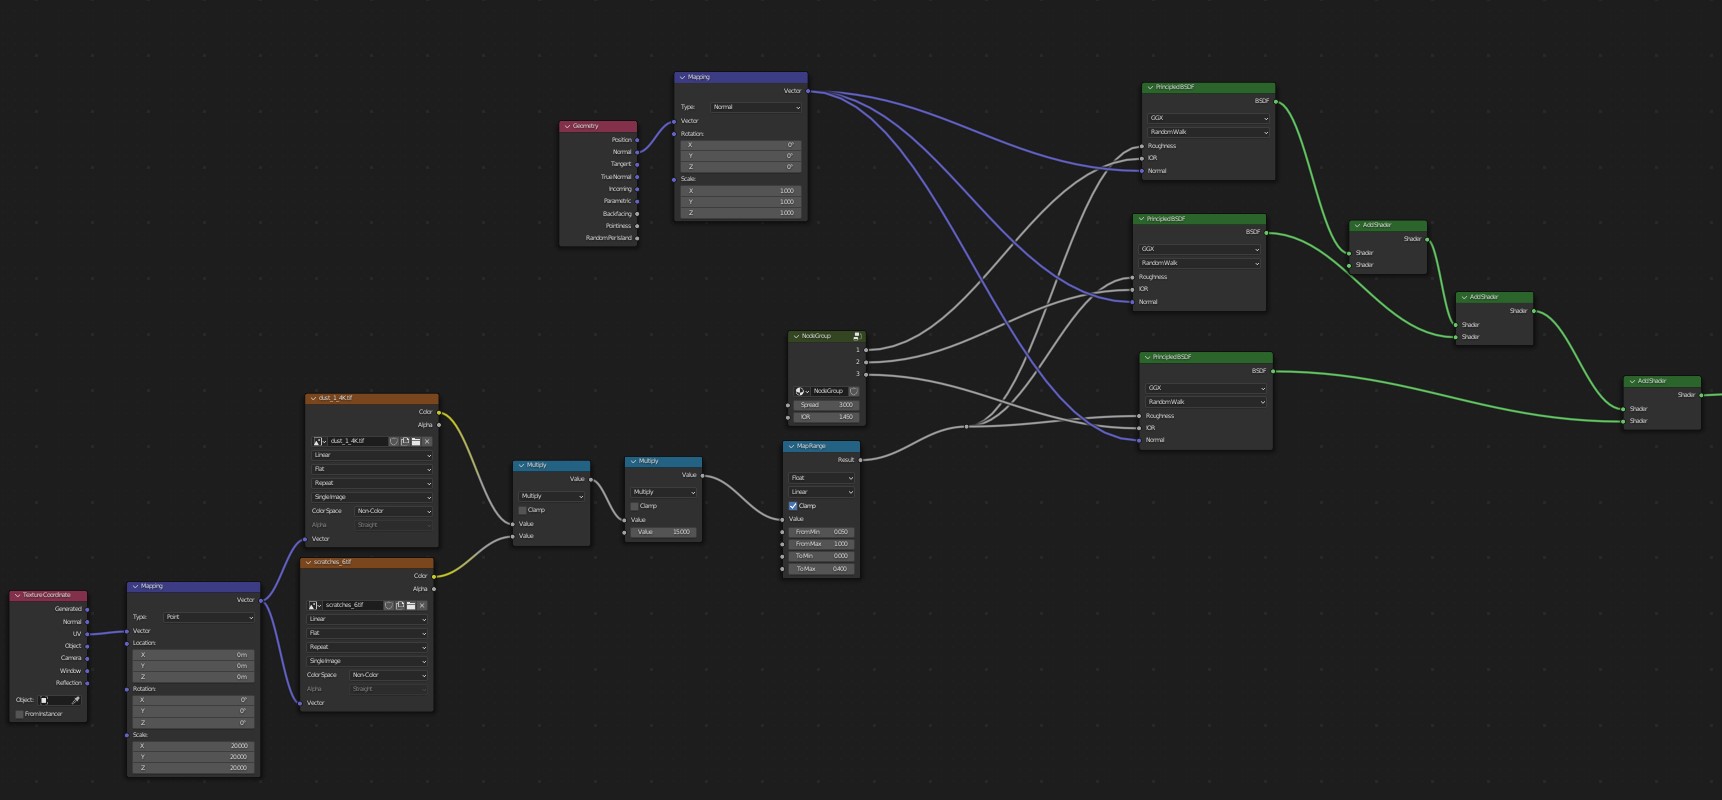
Since rendering glass could take quite a long time, I decided to render each of the 4 walls a single time at 4k, and then composite the cracks into the scene after the final render. This meant that I could save dramatically on render time, while still having the cracks to follow the walls.
Here are 4 of the 5 walls (Bottom, Right, Top, Back):
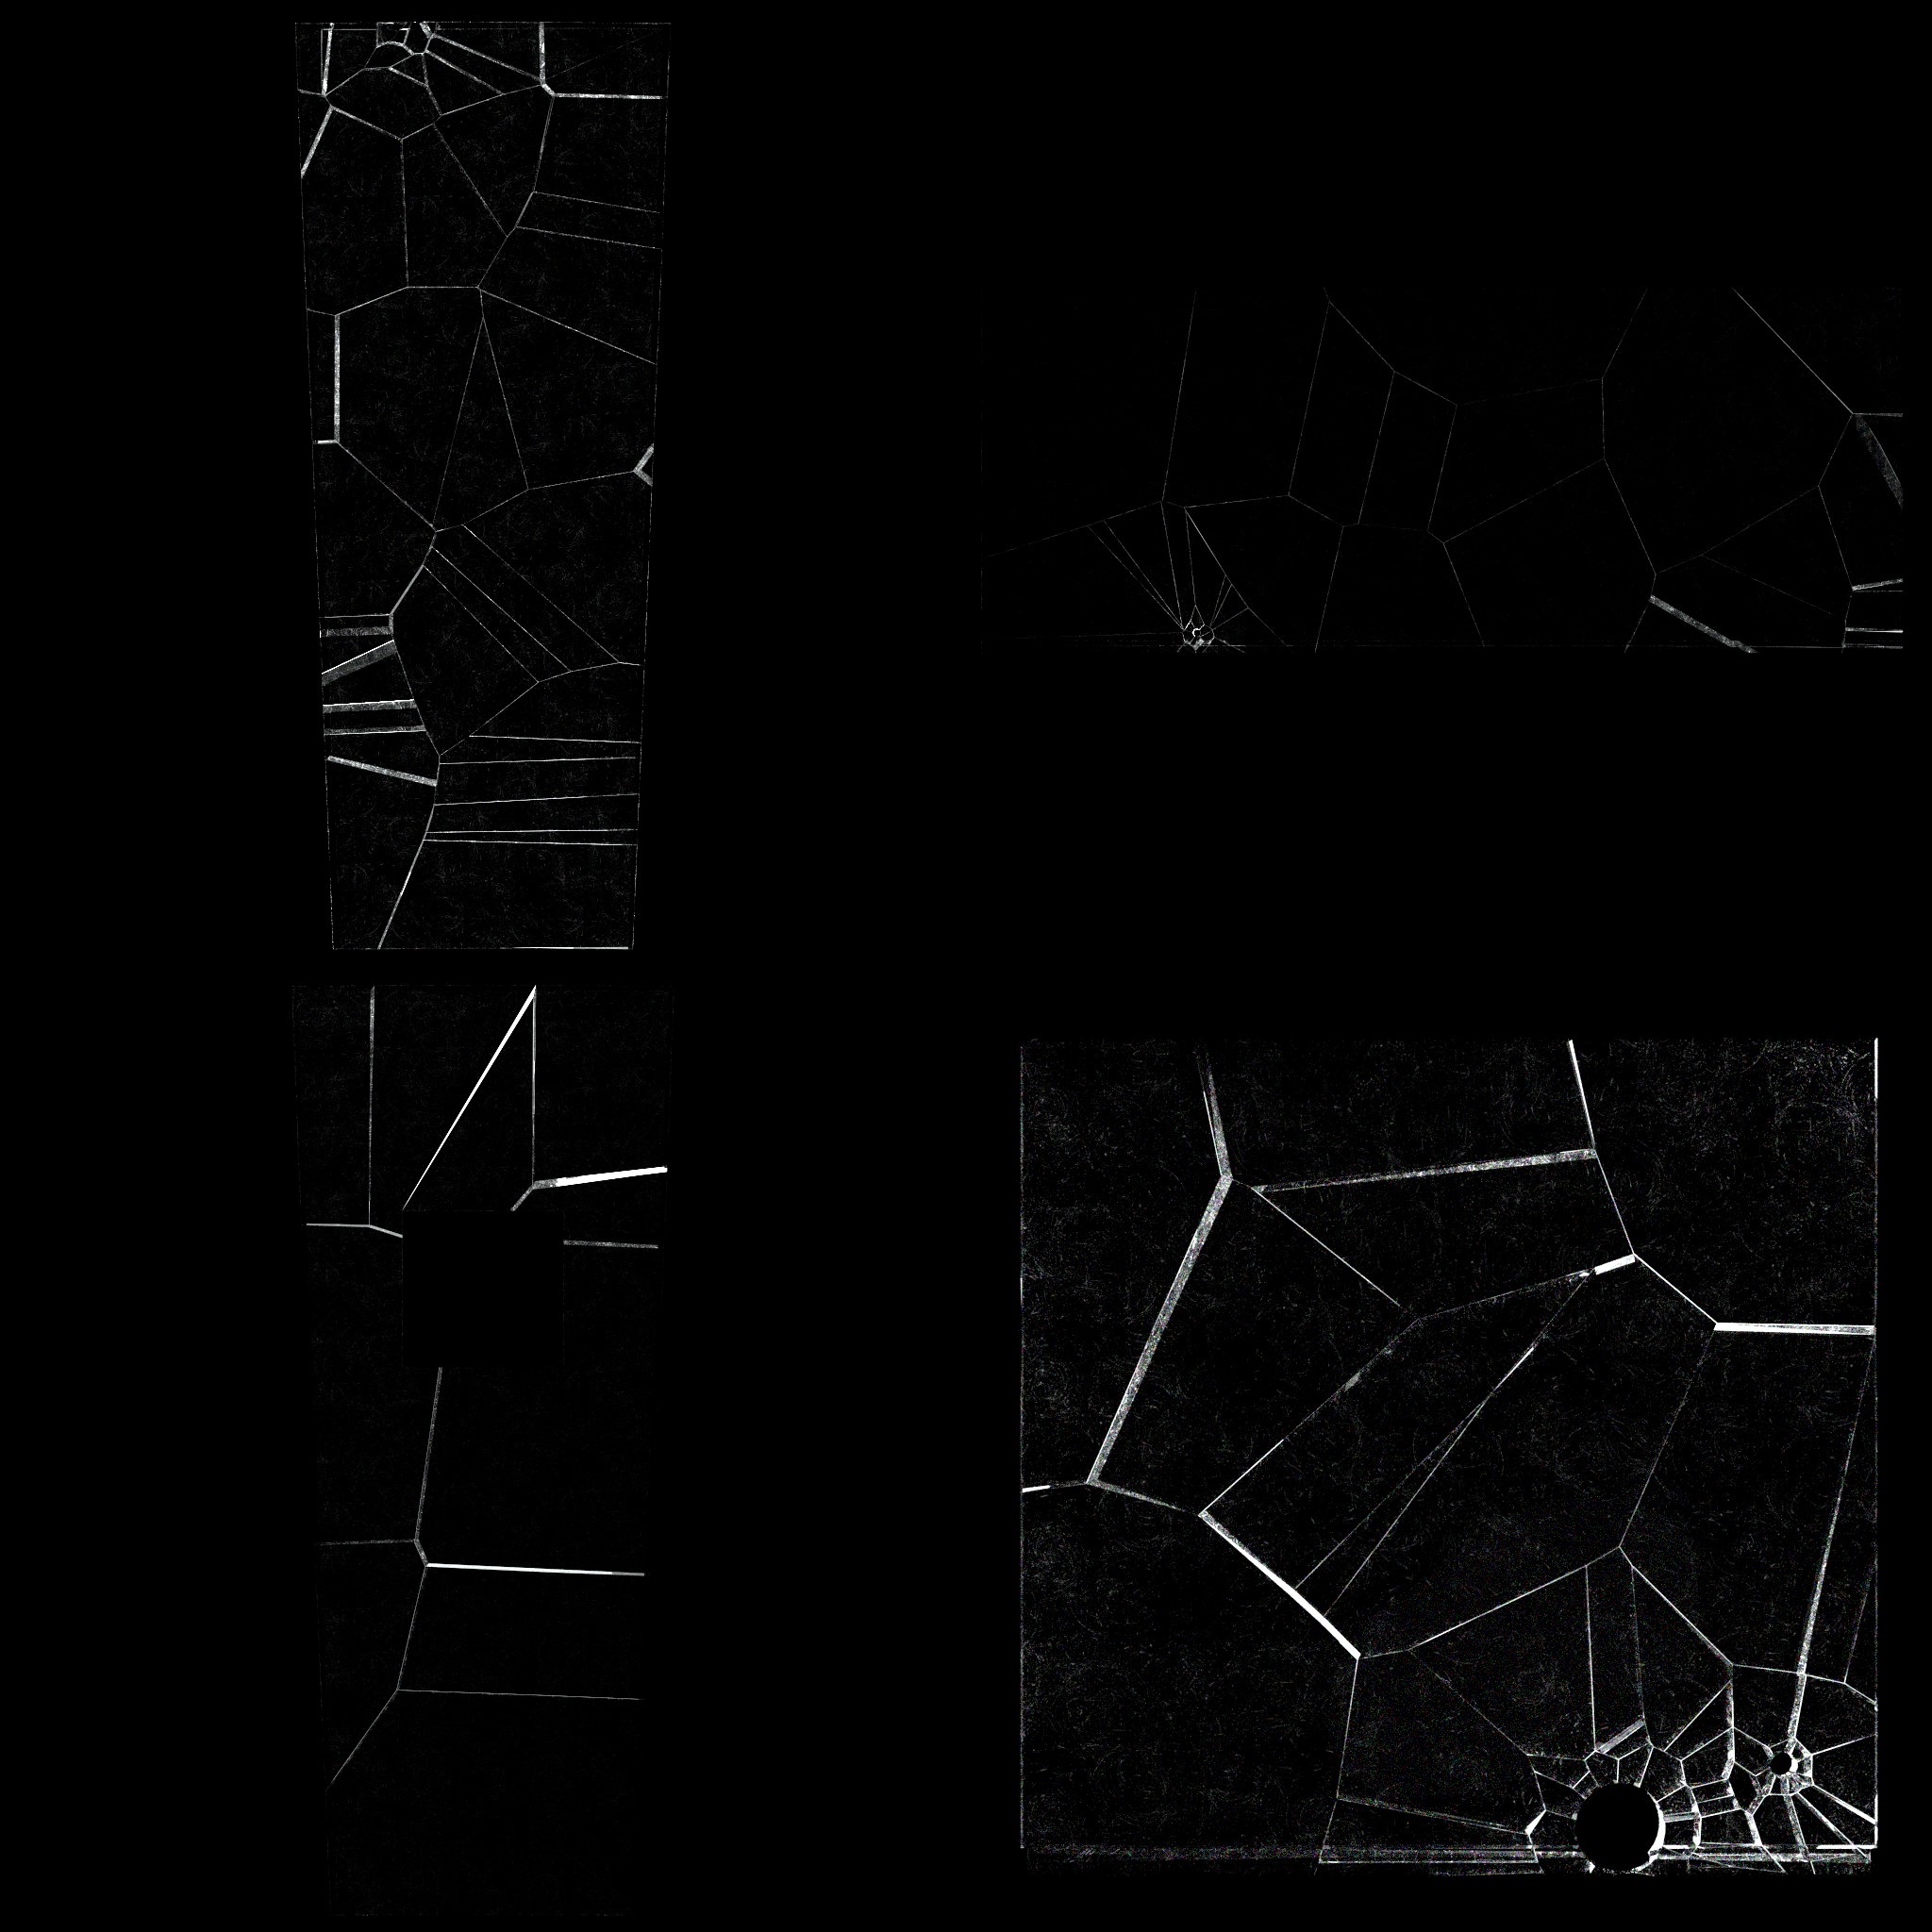
The easiest way to apply a texture onto an object in compositing is using the UV pass. So from each of the camera angles that rendered out the cracks, I also did a UV project from the view of the corresponding wall. This was done so that the UVs would perfectly line up with the image.
And lastly, I animated the visibility of the crack objects and rendered out a black and white mask to achieve the growing effect later on in compositing.

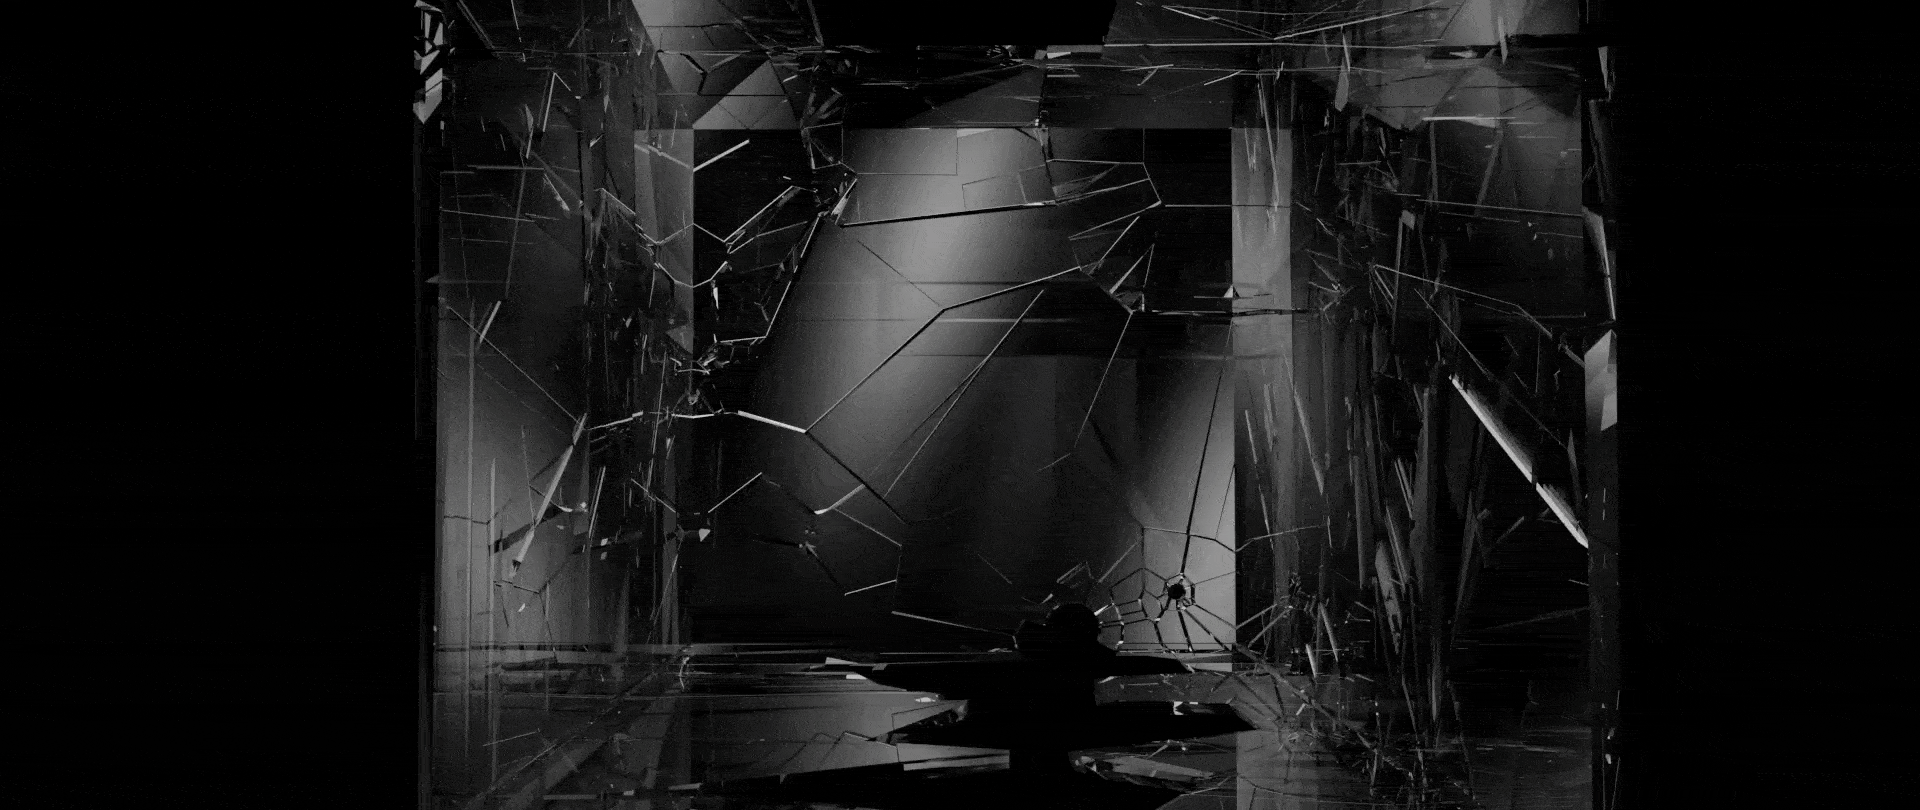
All of these layers combined together in compositing gives the following result:

For the glass smash, I used the same objects from the cell fracture earlier, and applied a rigidbody. Because of the way Blender’s physics simulation works, all of the glass shards exploded without any extra steps.
I then baked the simulation, and used a geometry node setup to scale down all of the instances over time.
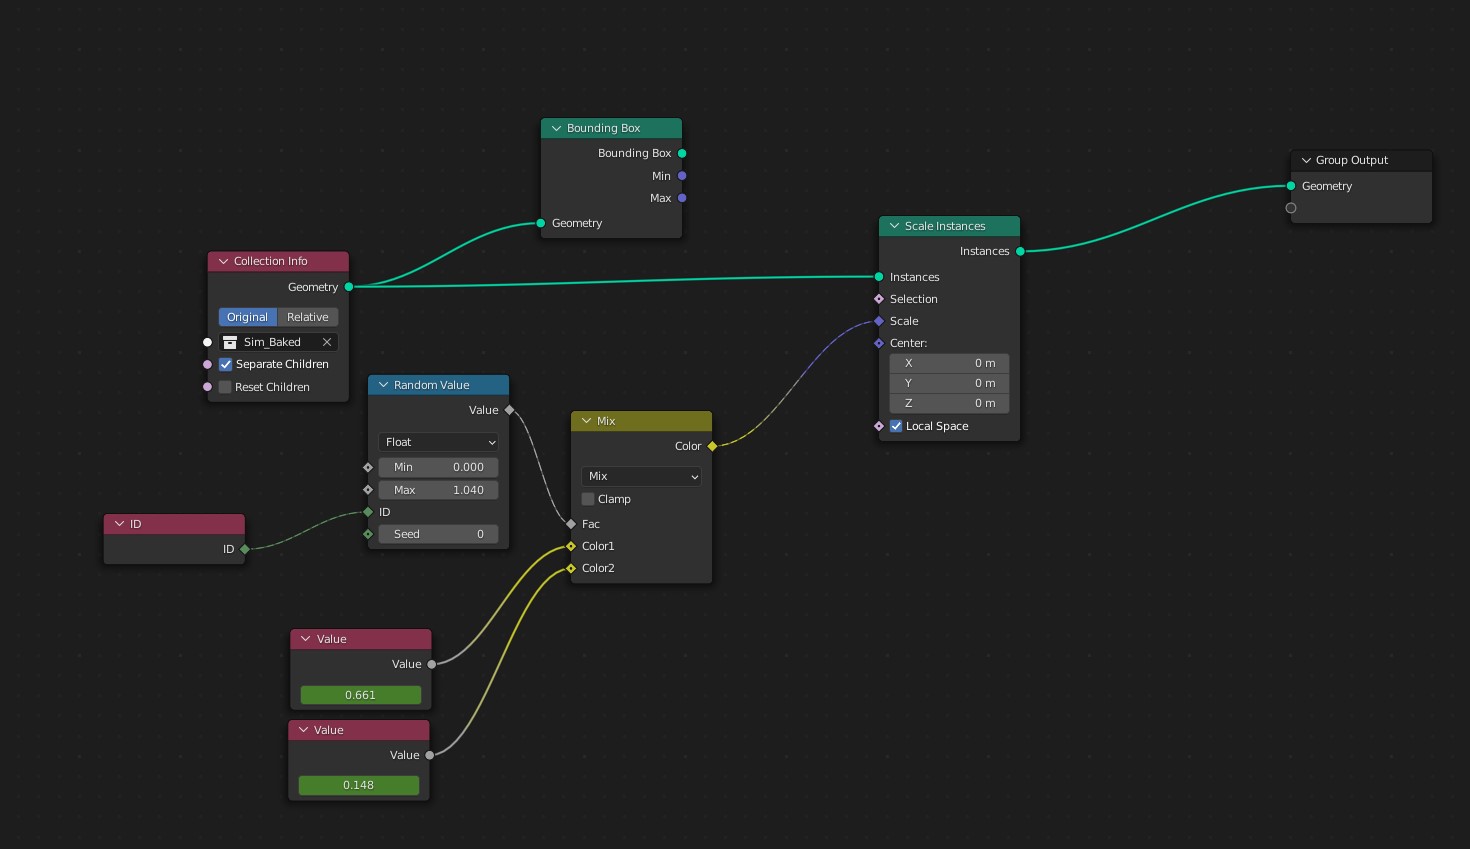
I then applied a pretty-much default glass shader to the pieces and rendered out the glass smash separately, so that I could composite it on top of the final render, and I didn’t need to re-render the glass every time I changed something in my scene.
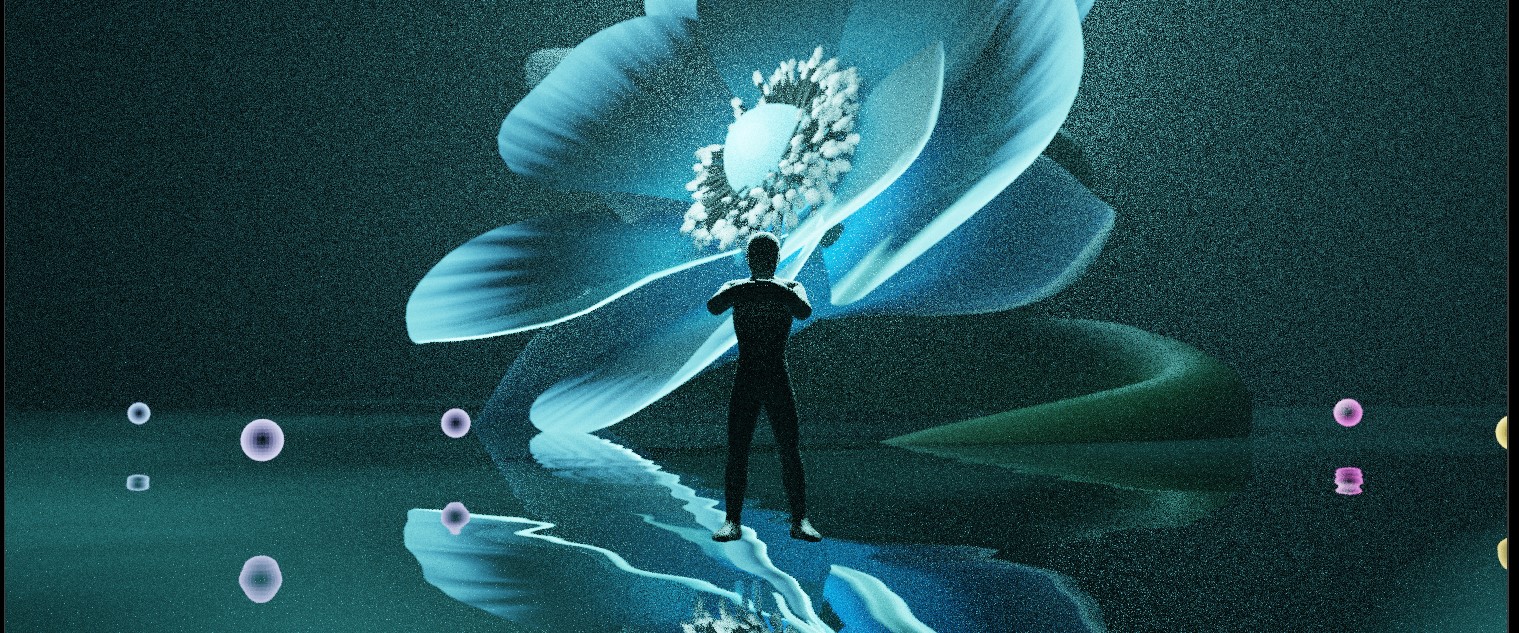
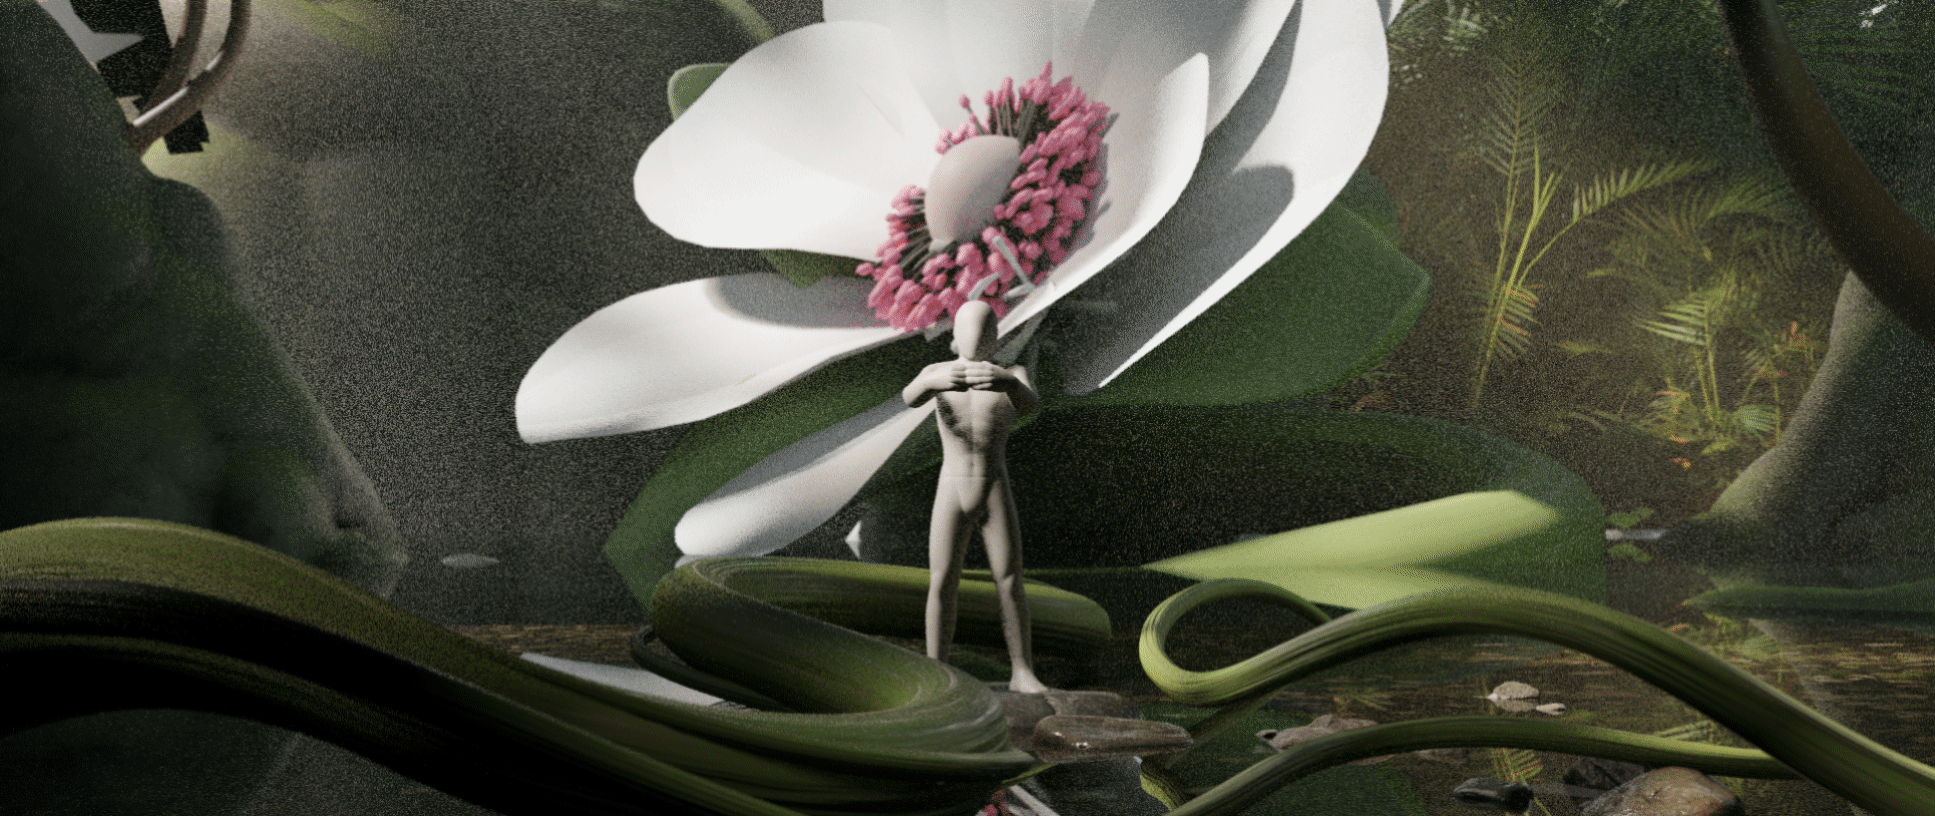
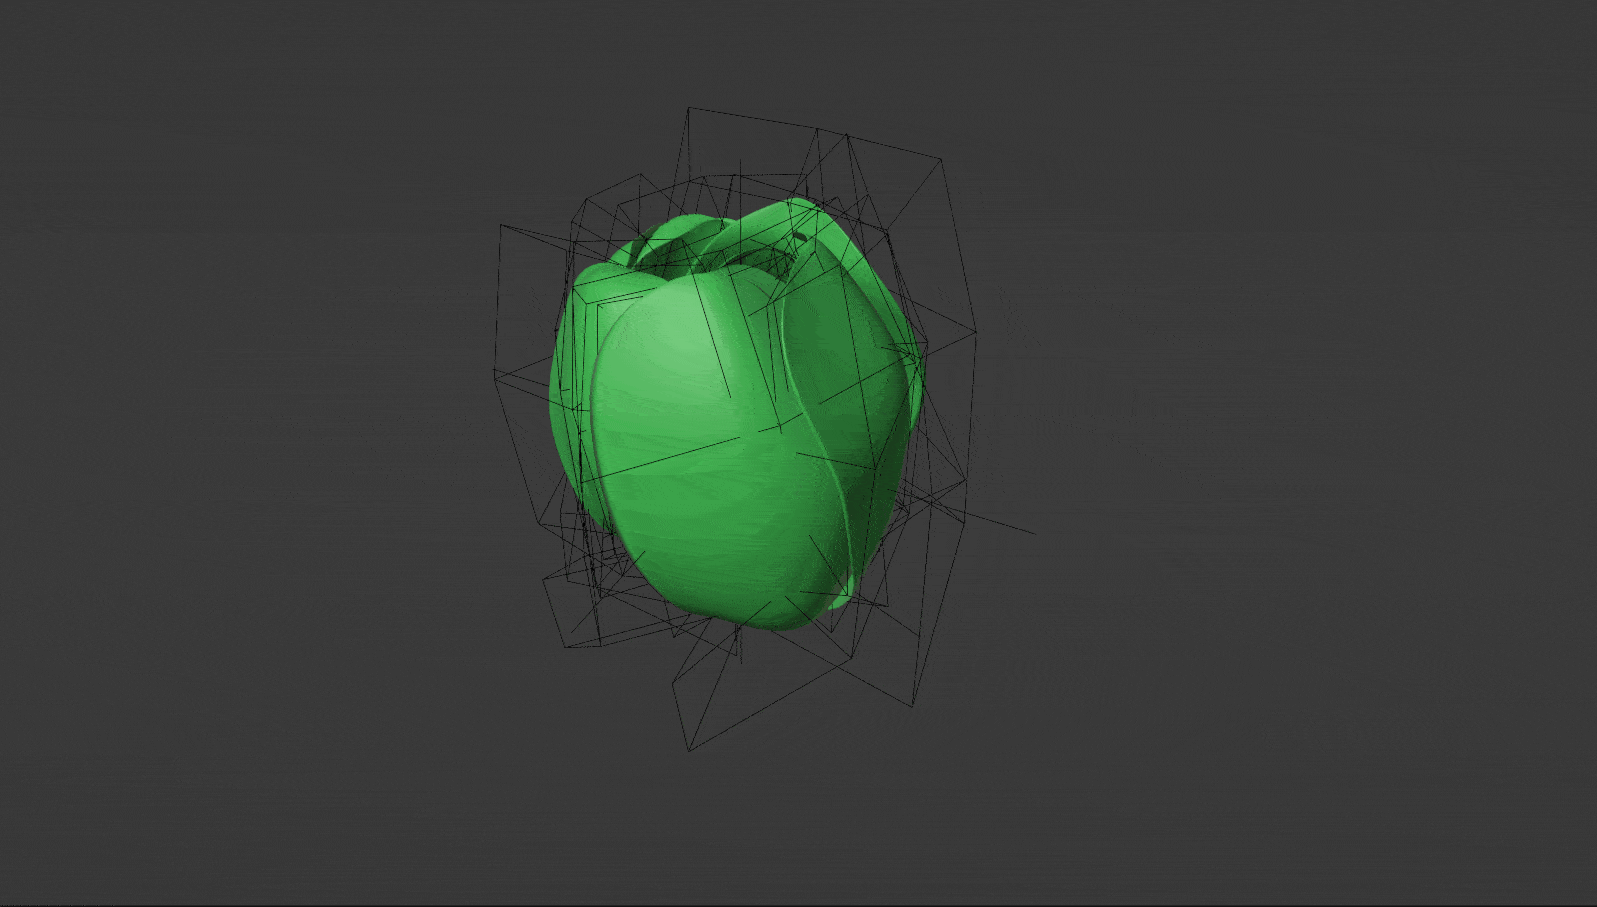
THE FLOWER
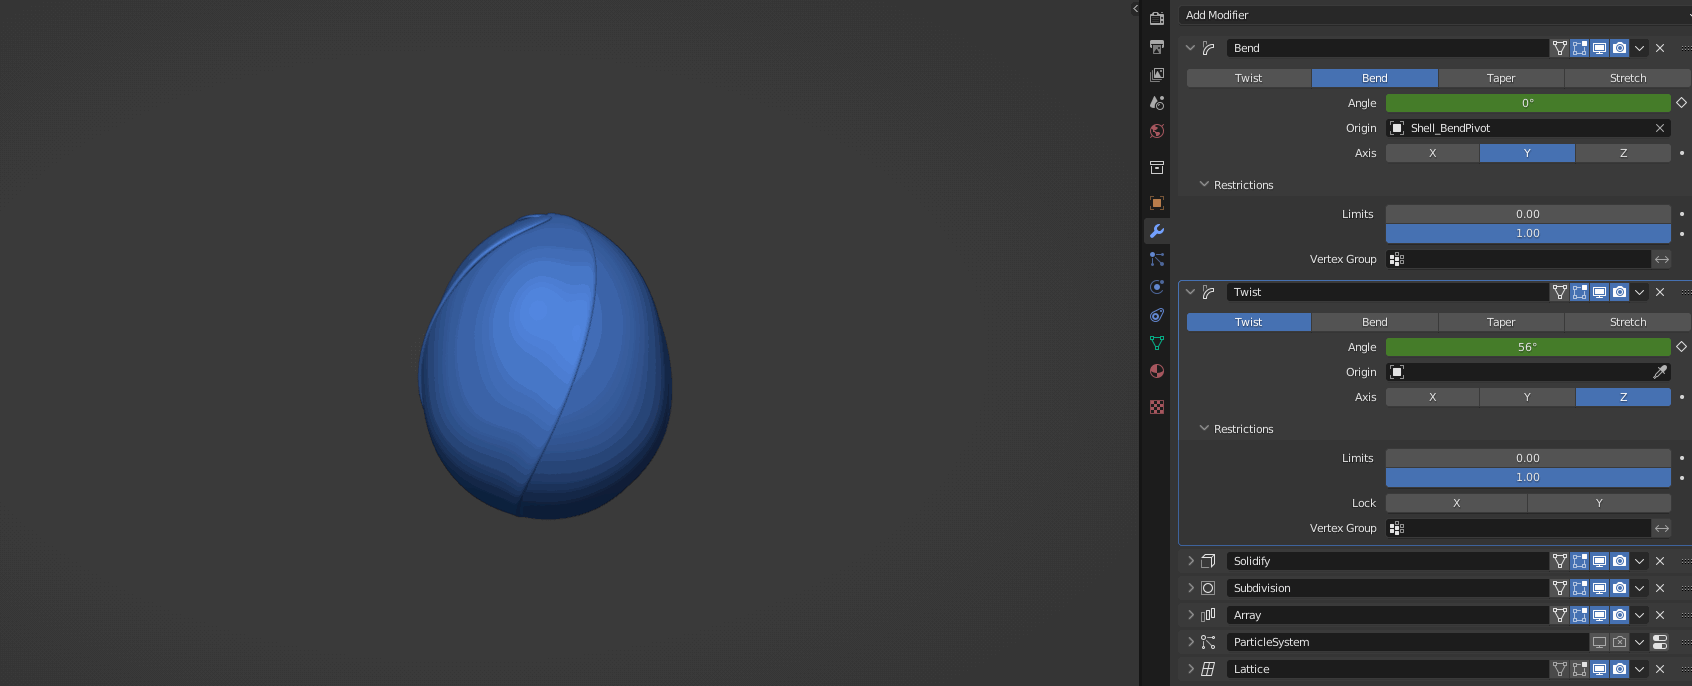
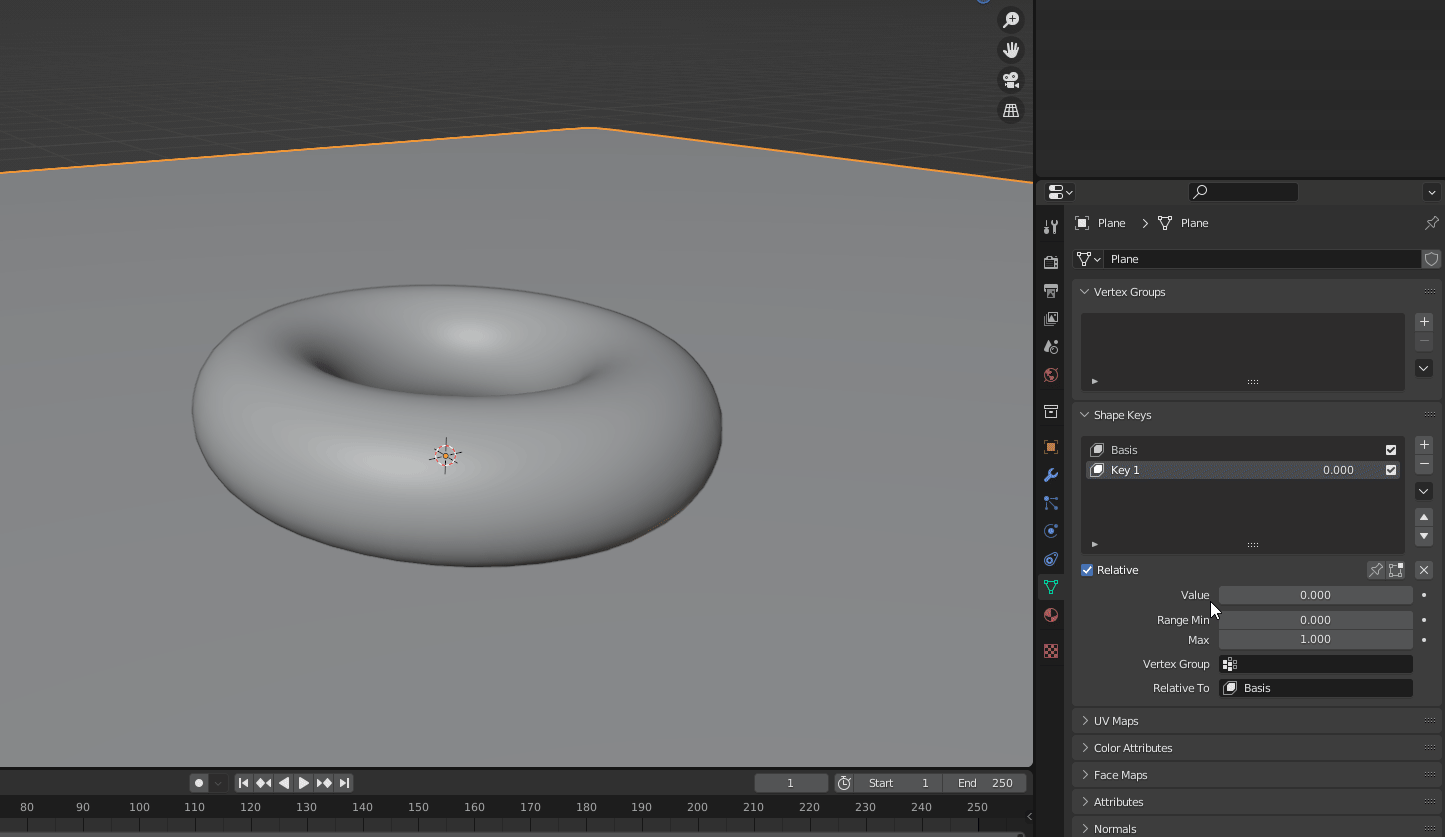
The flower is made up of 3 layers: the shell, petals, and center. Each is animated using a different technique.

The outer shell is animated using two simple deform modifiers. A bend deform, and a twist deform, both keyframed over time.
The petals are deformed with the lattice modifier and manually animated with a series of shape keys.
The easiest way to use shape keys in this manner is to disable “relative” in the settings.
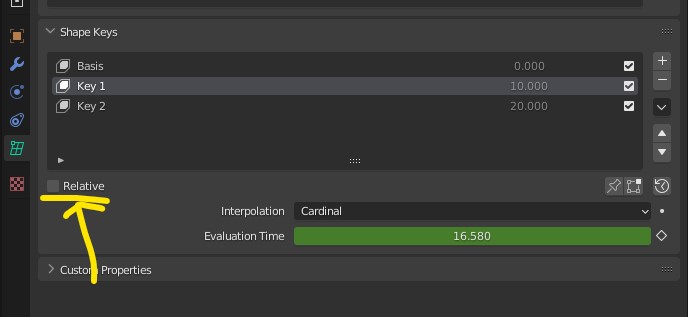
This changes the behavior of the key shapes so that they blend with each other sequentially based on a single value “Evaluation Time.”
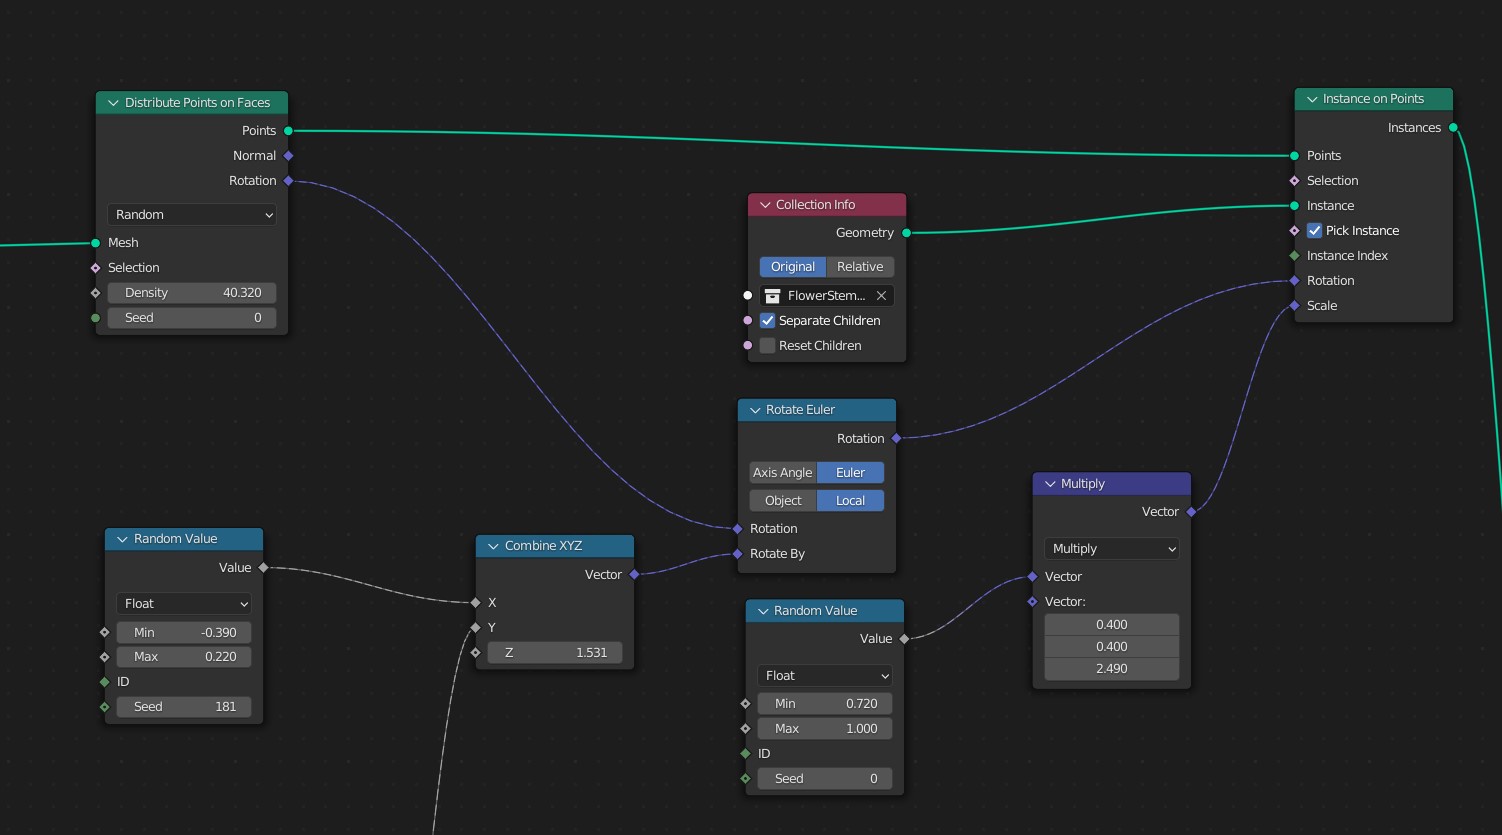
The center of the flower was created and animated using geometry nodes.

The stems were scattered using a simple point scatter, with some randomization added to the rotation and scale.
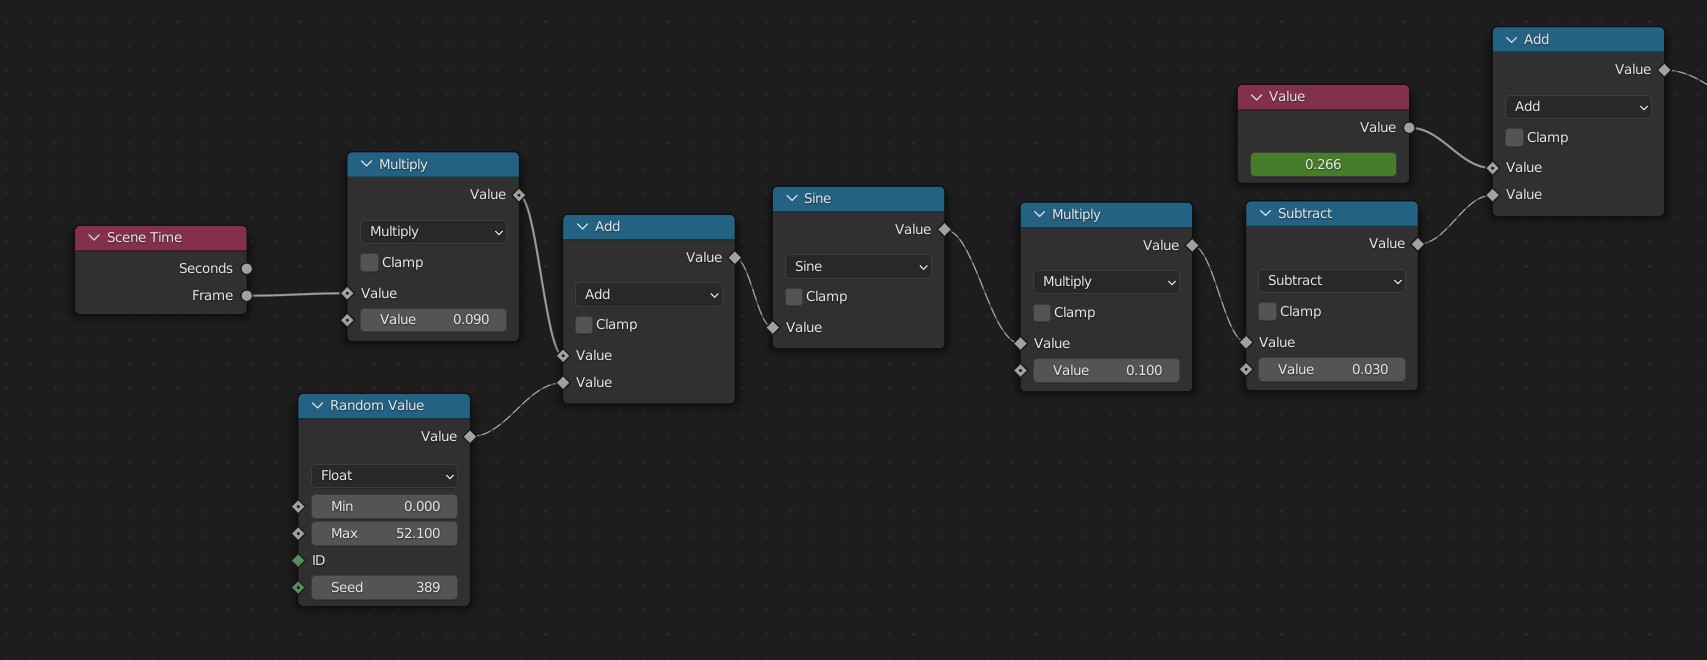
The bounce motion was achieved by rotating based on a sine function. This was the easiest way to get something to move smoothly back and forth:
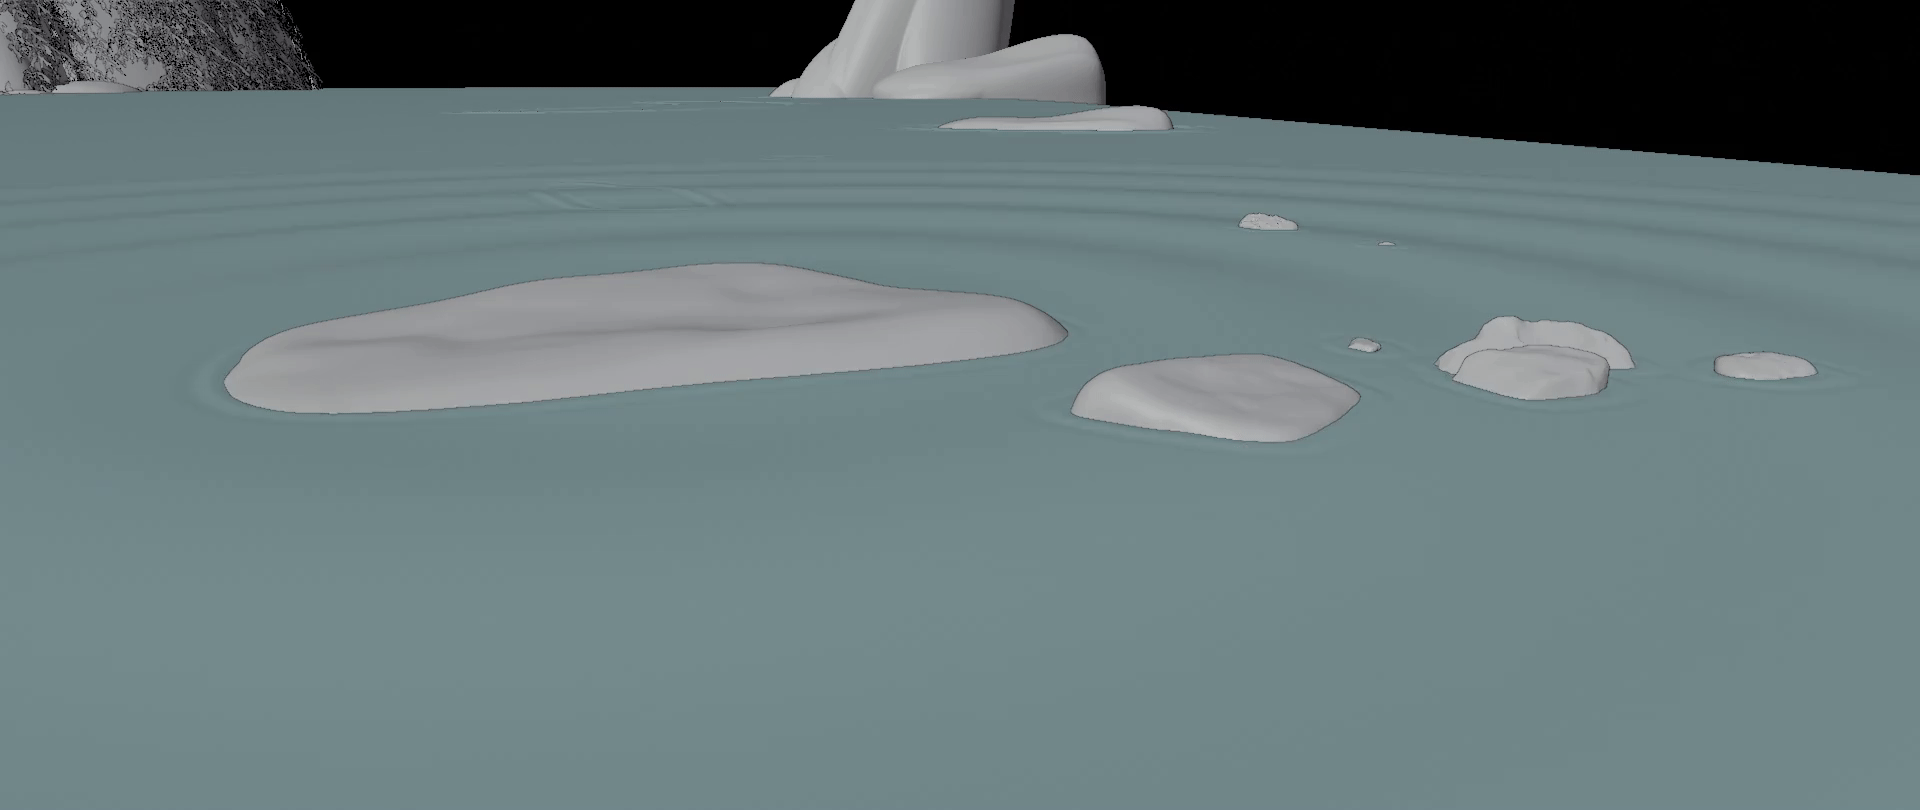
WATER EFFECTS
The water ripples effect was produced exclusively with geometry nodes.
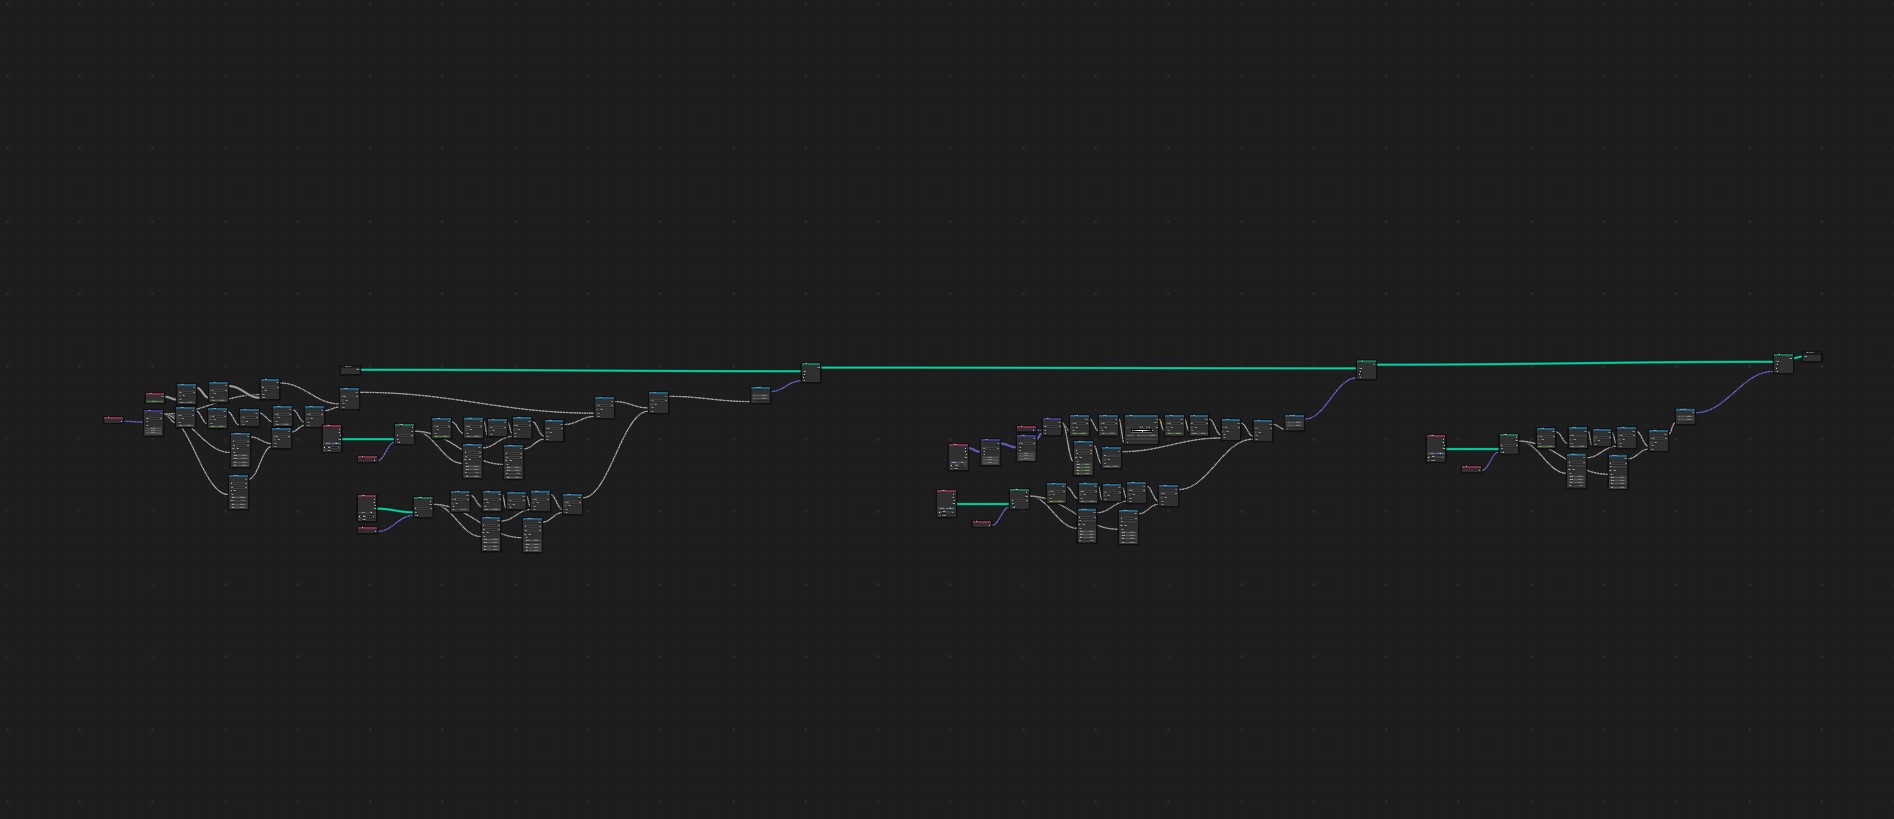
This may seem very large and complicated, but it is just a simple setup duplicated a few times for different areas of the water:
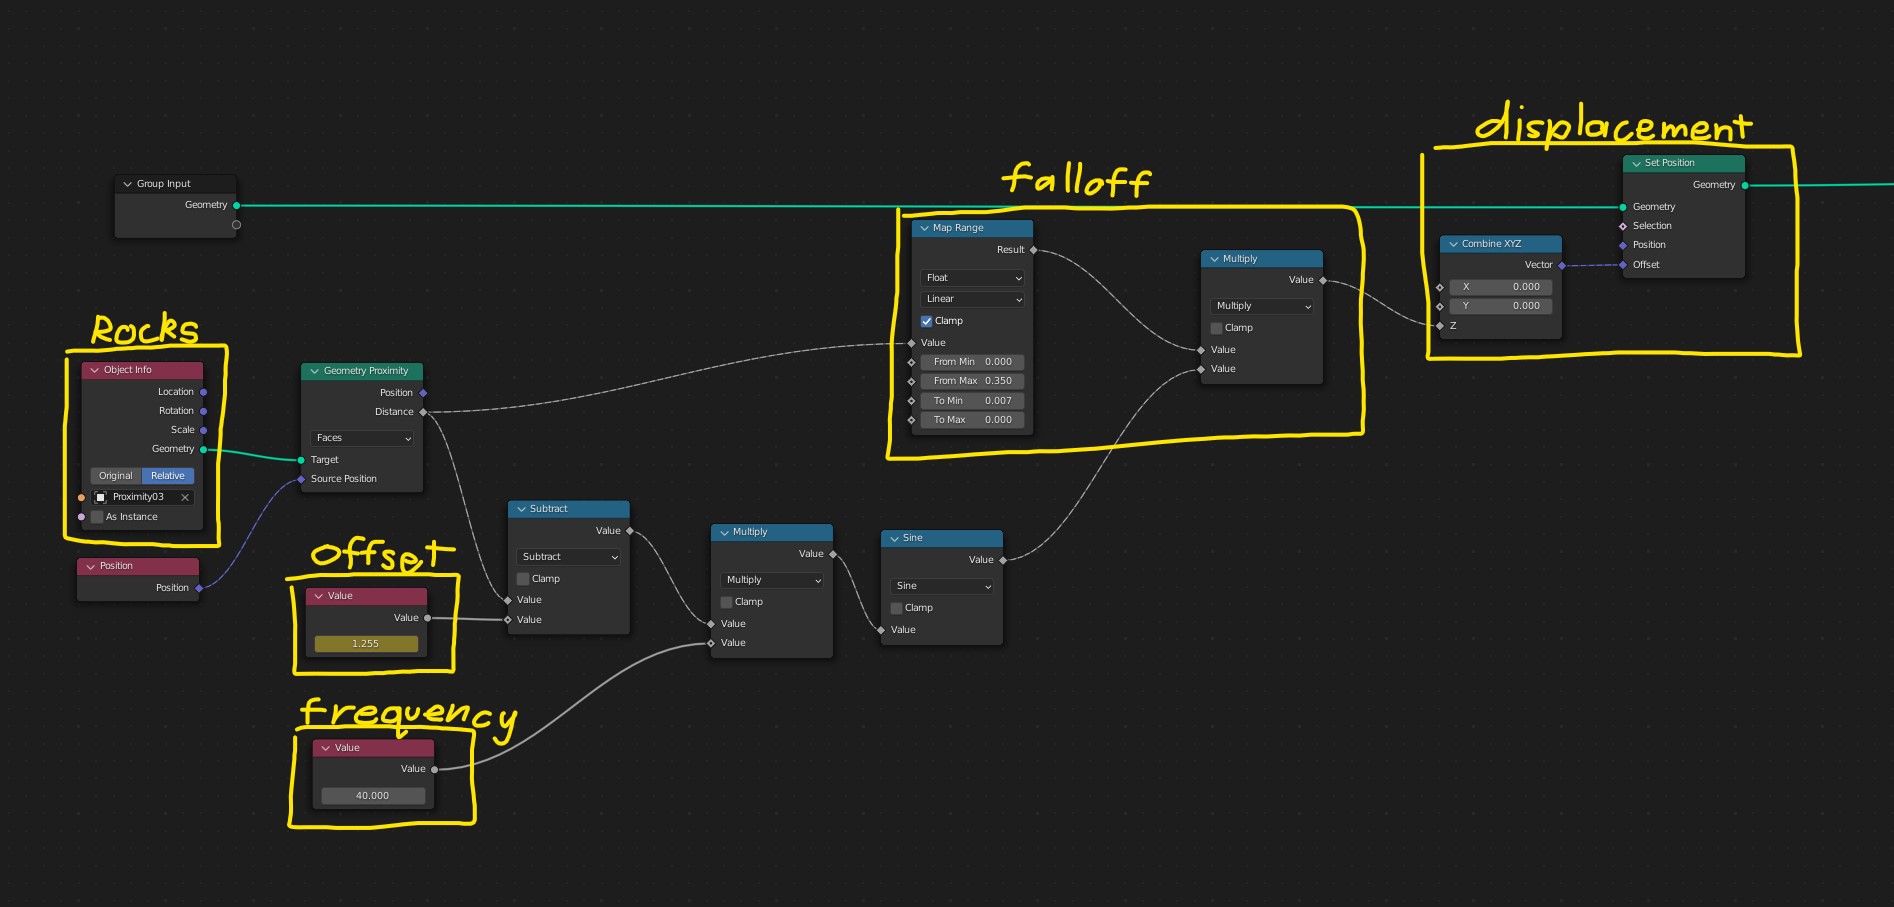
First, use the Geometry Proximity node to get the distance to nearby objects. Using this value, we put it into the Sine function to generate the wave pattern but before we do, we plug it into a Subtract (or Add depending on which way you want it to move), and a Multiply node.
The Subtract node moves the waves in or out, animating this value gives us the outward motion.
The Multiply node changes the amount of waves within a distance. So if you want lots of small waves, then make this value larger or if you want a few big waves, make this value smaller.
Finally, we plug the output of the Sine function into another multiplier again, using the Geometry Proximity output to make the waves fade out after a certain distance.
The animation of the lily pads floating on top of the water was created with the Surface Deform modifier and some basic position and rotation keyframes.
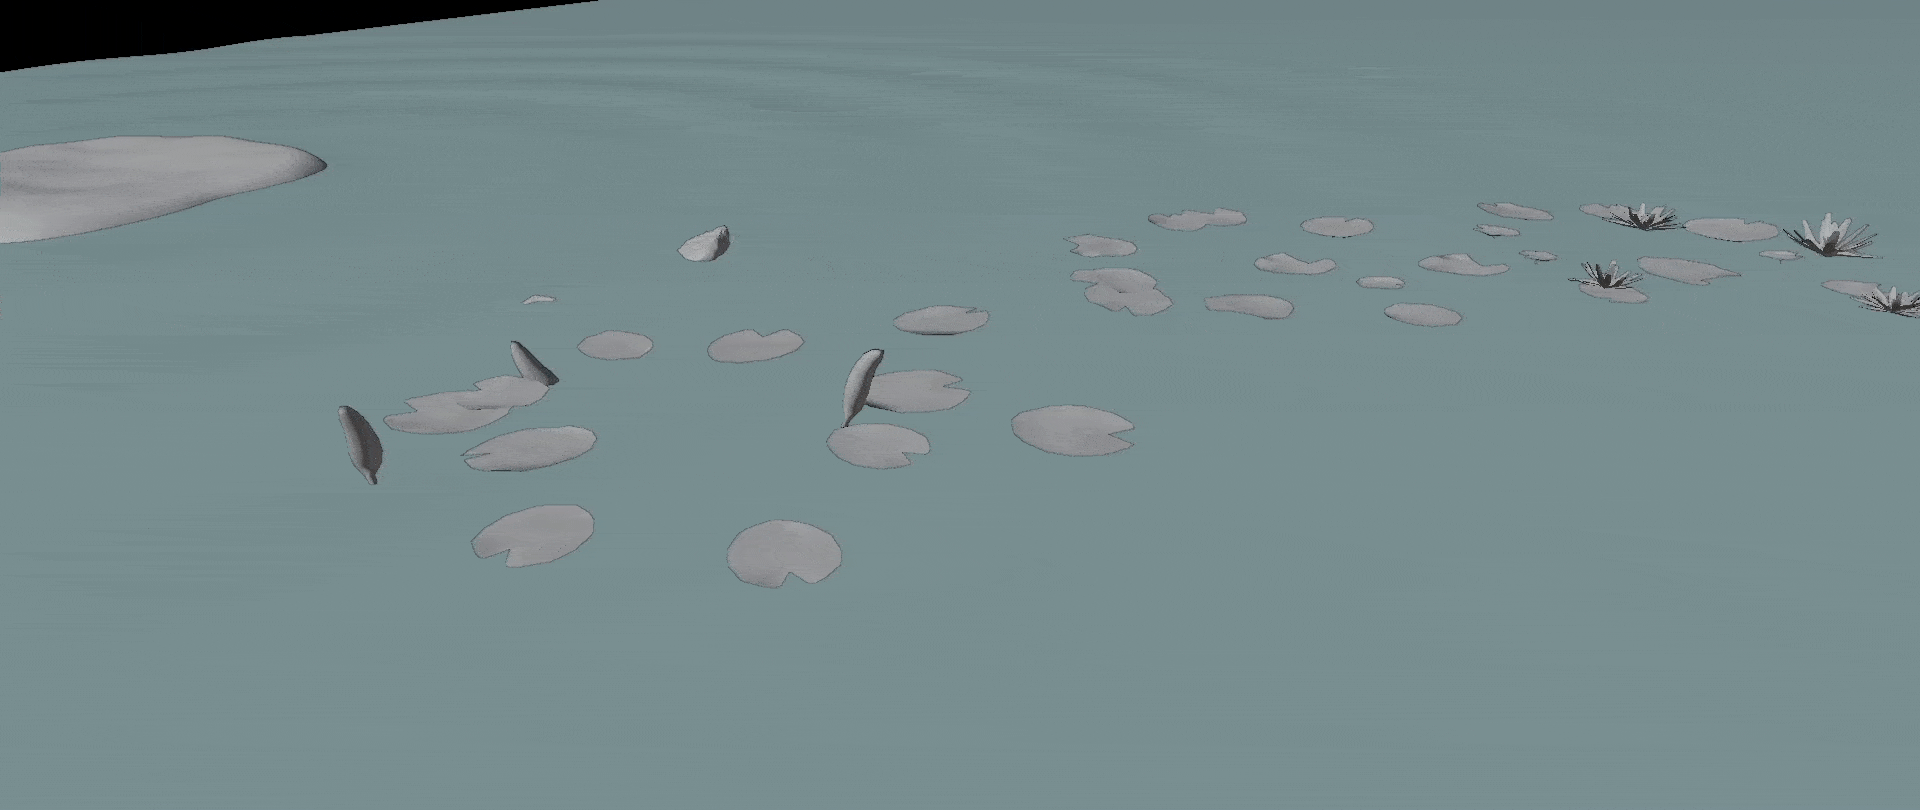
The Surface Deform modifier deforms an object’s vertices based on the surface of another object, hence the name. The modifier works using a binding system.
In the case of the lily pads, I first disabled all deformations on the water so it was completely flat, and the lily pads were sitting just on top. Then I binded the lily pads to the water using the surface deform, and after re-enabling the deformations, the lily pads perfectly floated on top of the waves.
Here is a short clip showing the basics of the Surface Deform modifier:
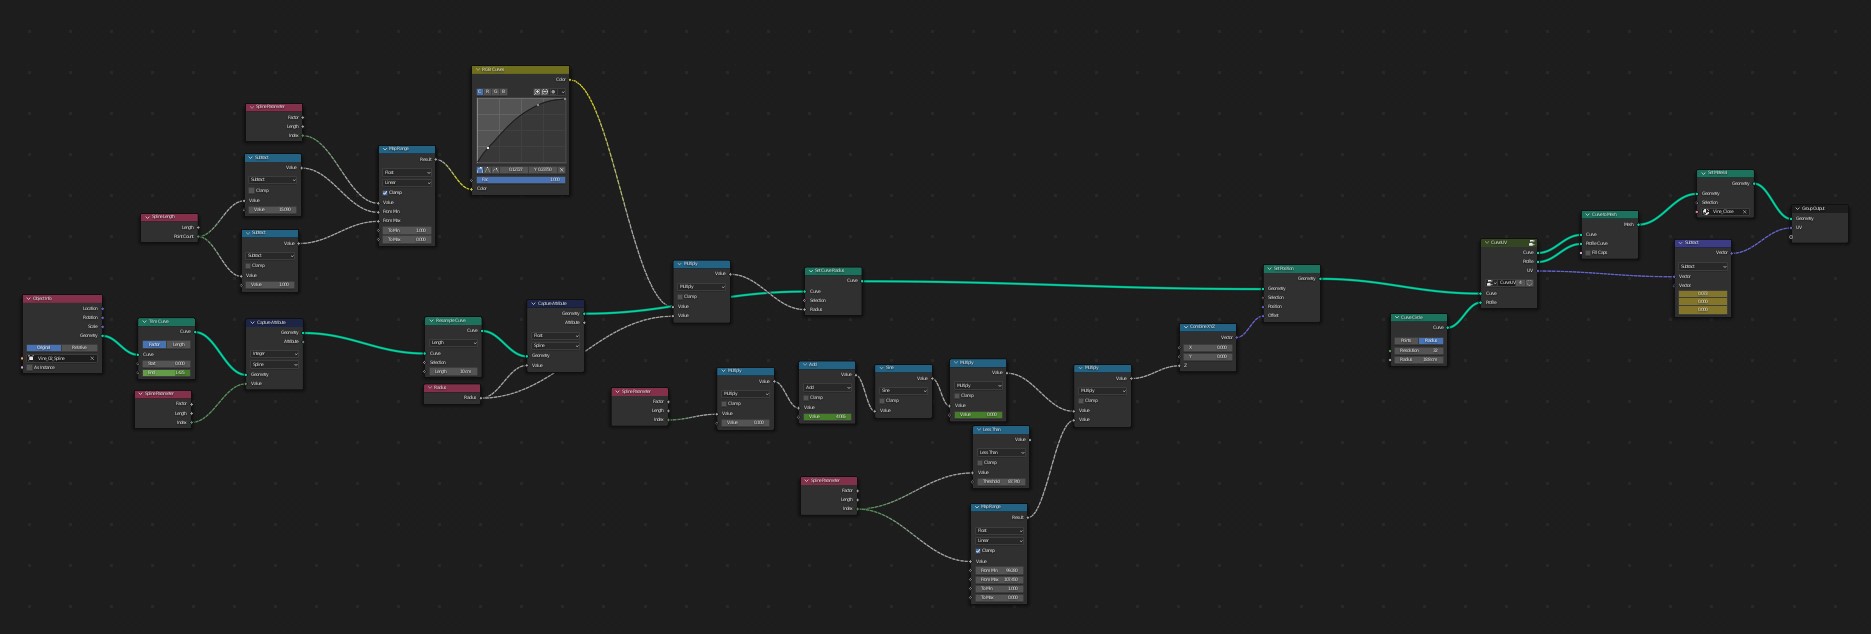
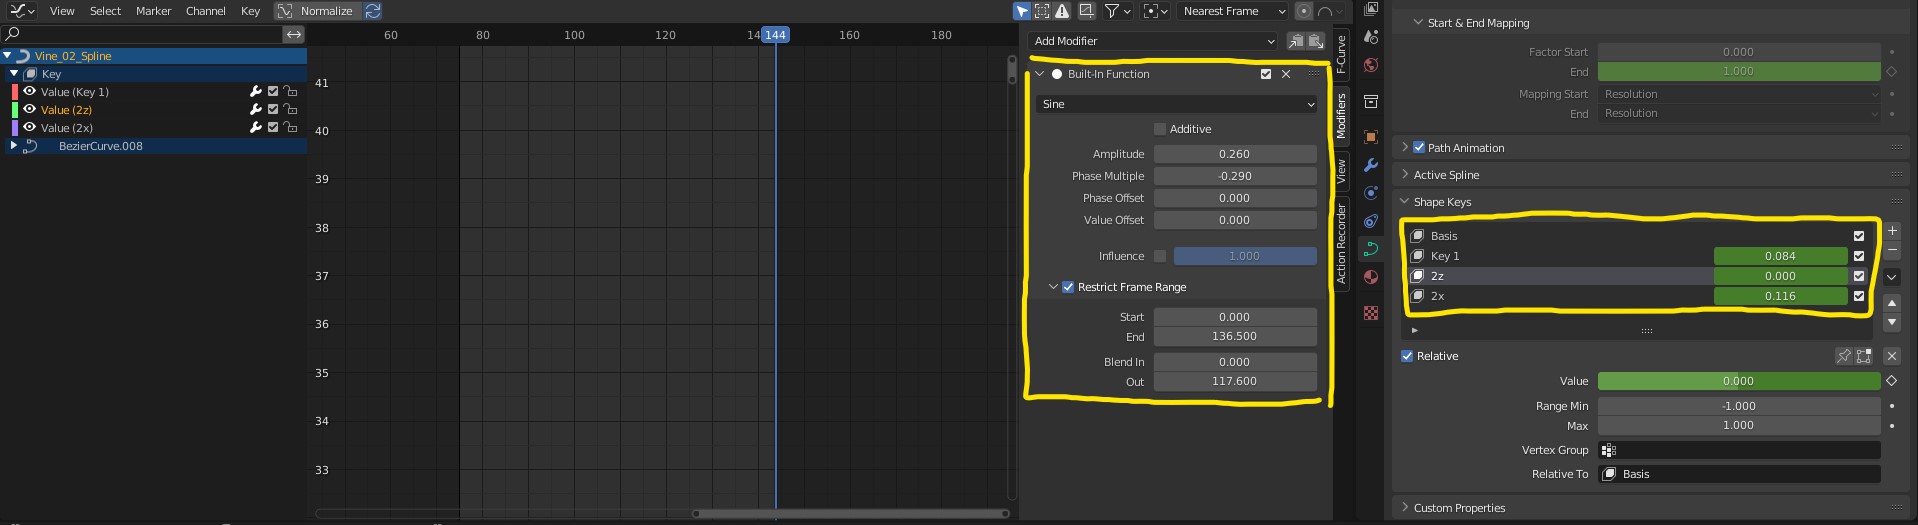
VINES
The vines were created using a combination of Blender’s curves and Geometry Nodes.

Here is the node setup:
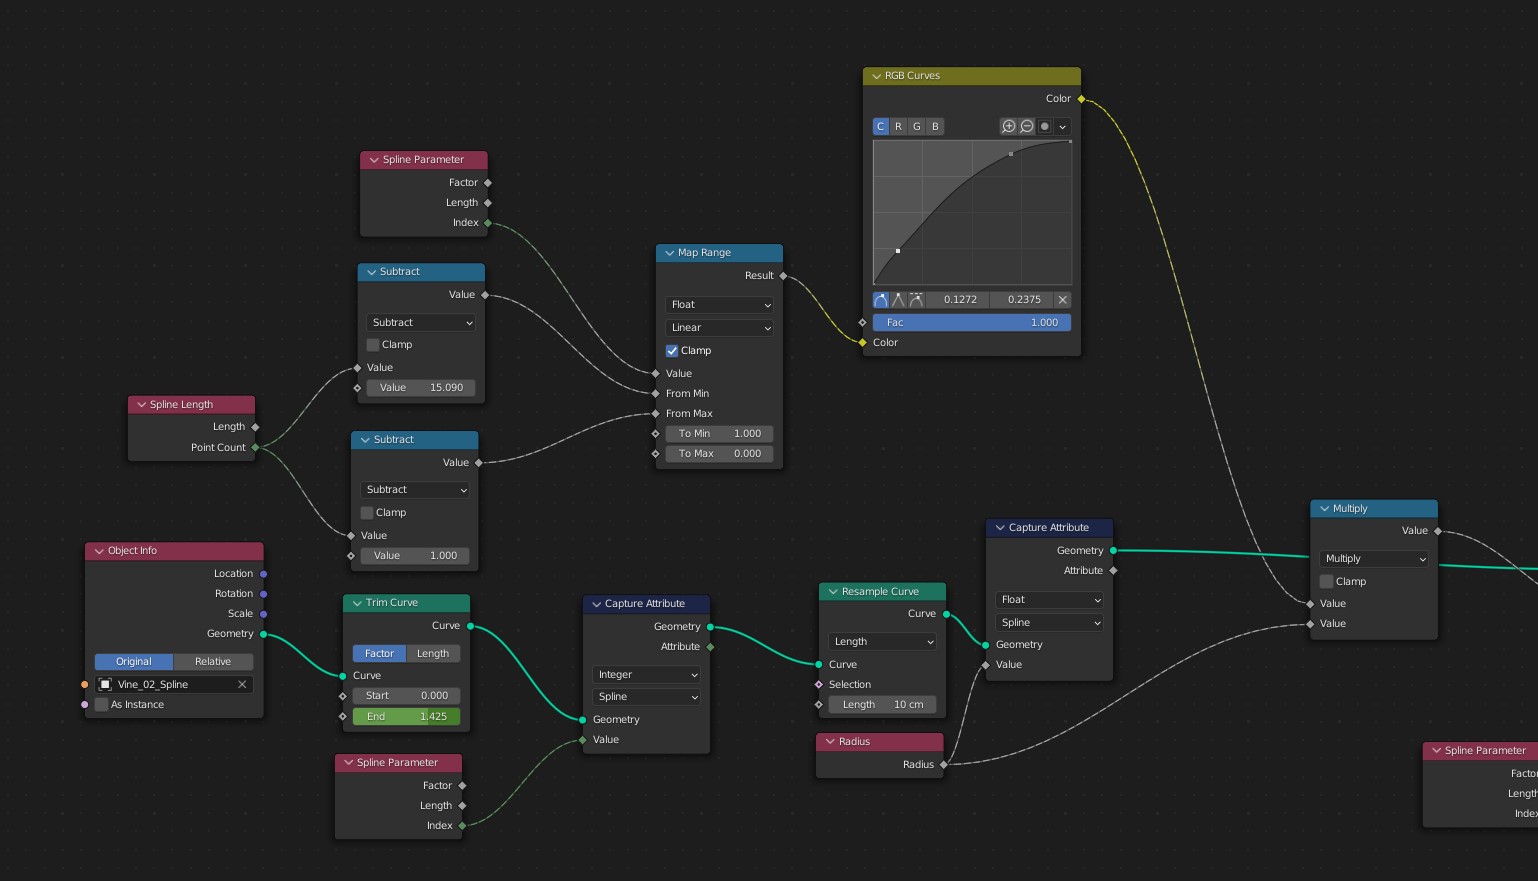
To put it simply, it scales the curves’ radius based on the distance to the end of the curve:
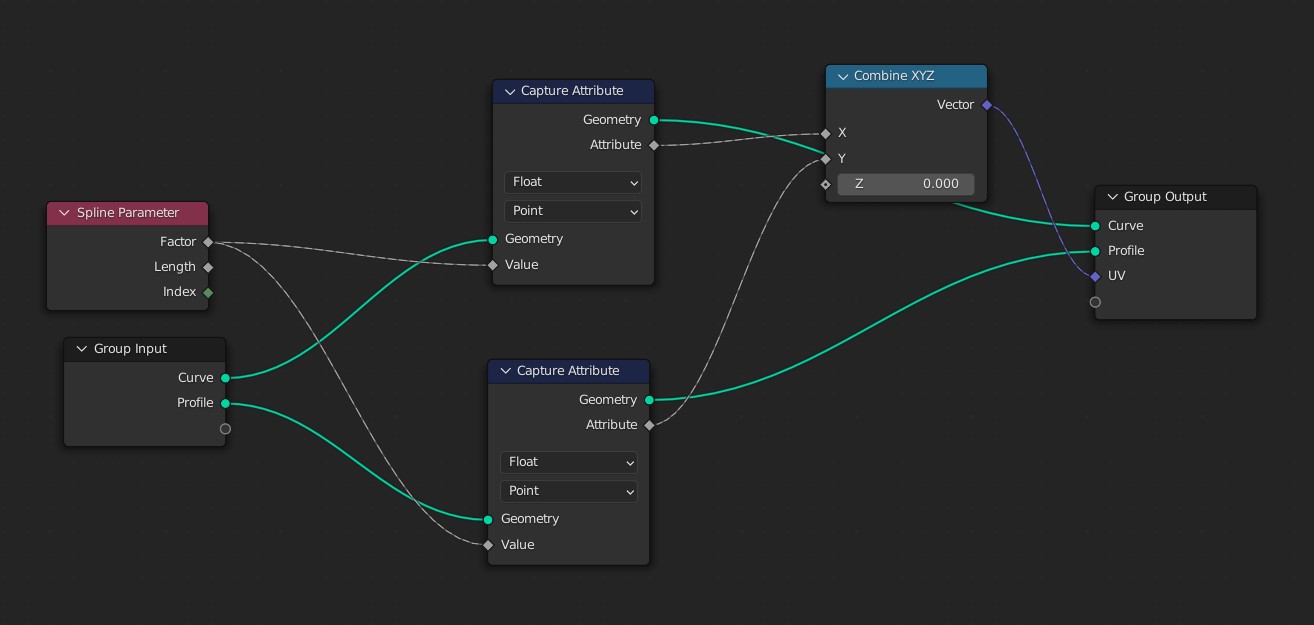
And then before converting the curve to a mesh, it uses this node group to generate UVs:
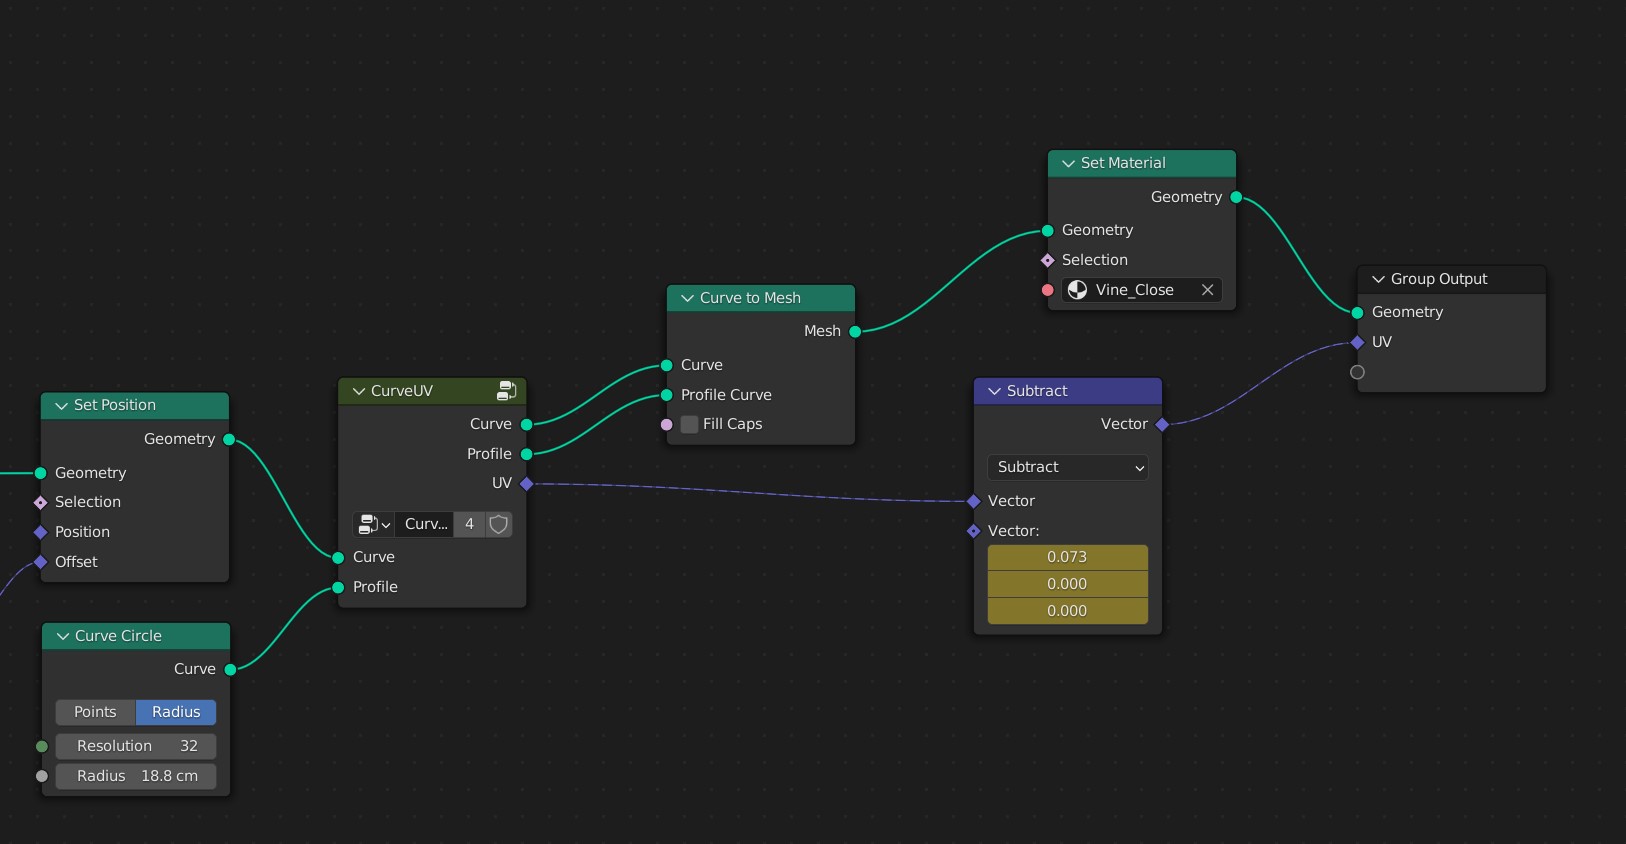
The “jiggling” was achieved using a few shape keys on the splines and a sine wave modifier in the curve editor:
COMPOSITING
The final composite was done in Nuke. Here is a short breakdown showing my process:
I have used Fusion, After Effects, even Blender’s compositor, and Nuke definitely beats them all. I would highly recommend anyone who wants to become serious in VFX/Animation to learn Nuke. If you want to start learning it but don’t have the money, there is a non-commercial version which contains all features and it’s completely free for learning.
BREAKING BOUNDARIES
The final frames were rendered using Garage Farm, as my laptop was definitely not powerful enough and crashed everytime when trying to render even a single frame.
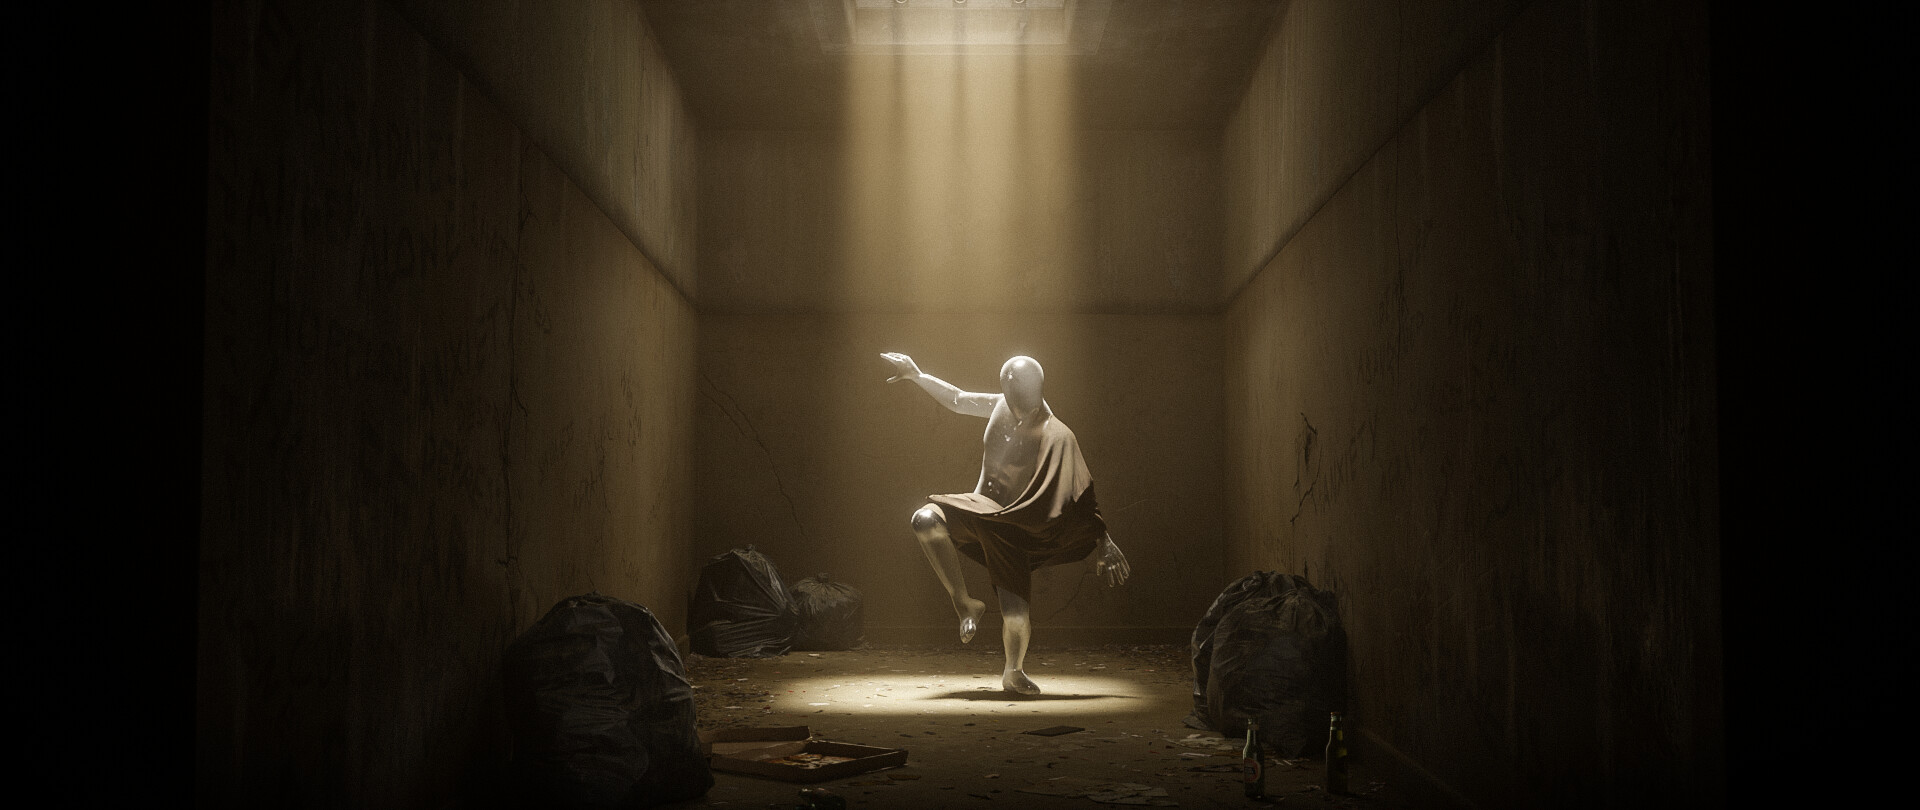
After a full month of work, here is the final render:
And here is where Clint and Freddie Wong (guest judge) revealed my submission during the top 100 livestream:
I’m very happy that Freddie was able to figure out my story purely from watching the animation.
Overall, I am very happy I did this challenge. I definitely think it’s my best piece so far. As with all of these challenges, it has pushed me far further than I could have imagined. And again, a massive thank you to Clinton Jones.
I hope you all got some value out of this article!
No matter where you are right now, no matter what skill level, age, hardware, etc, if you just put in the work, hours, and effort, you will get to where you want to be.
Thank you!
About the Artist

Robert Kouts, a self-taught 3D artist from Australia.


Amazing, and Any idea about releasing the project file?
this is dope man. it was a stand-out in the kung fu challenge and I had to google your name. Come to find out you’re still a teenager! keep dedicating your time and energy to your craft. big up
hey god post