
Behind the Scenes: Photo-scanned Food Animation
INTRODUCTION
Hi, my name is Kris and I help run the website, iMeshh! Our main focus is making Archviz (architectural visualization) models and also bringing out educational videos on our YouTube channel.
I’ve been doing CGI for about 6-7 years now, with a main focus in the field of Archviz. I learnt most of what I do from YouTube and a selection of free/paid courses. I’m a firm believer of being able to learn anything from the internet if you’re passionate enough!
INSPIRATION
I made some fruit and bread as part of an iMeshh release, and was pretty proud of the results so I wanted to make an animation of it to showcase the food!
This shot feels a bit gross but I love it nonetheless!

As inspiration, I used Alex Roman’s Silestone – ‘Above Everything Else’,
This video is 11 years old and in general, Alex Roman is a CGI god! I highly recommend everyone to check him out. He is an absolute pioneer in the field.
To those who regularly compare renderers and complain some are more realistic than others, well check out his “The Third & The Seventh” video from 12 years ago. This shows what you can achieve with even 12 YEAR old renderers (in this case Vray).
His animation, which I was inspired by, is absolutely next level and I surely can’t compete with that, but it was amazing to try out a few of his shots.
PHOTO-SCANNING
The first step was to actually photo-scan the food. I literally just went to the shops, bought anything that looked tasty, and took it home. Each fruit took 3-4 hours, with days of work for only a few items of food, so some ended up going moldy by the time I got to it…
This is more of a blog about the animation process, but as a quick explanation of the photo-scan process I used:
- Void method for photo-scanning (check it out on Google)
- A new extra-sharp prime lens
- Polarized lens and lighting
- Reality Capture
- Photoshop to create glossy maps, etc. if required
As a tip, make sure the lighting is as even as possible, and take more photos than you think you need! If the food flops around or is soft, freeze it first ;)
ANIMATION SCENE
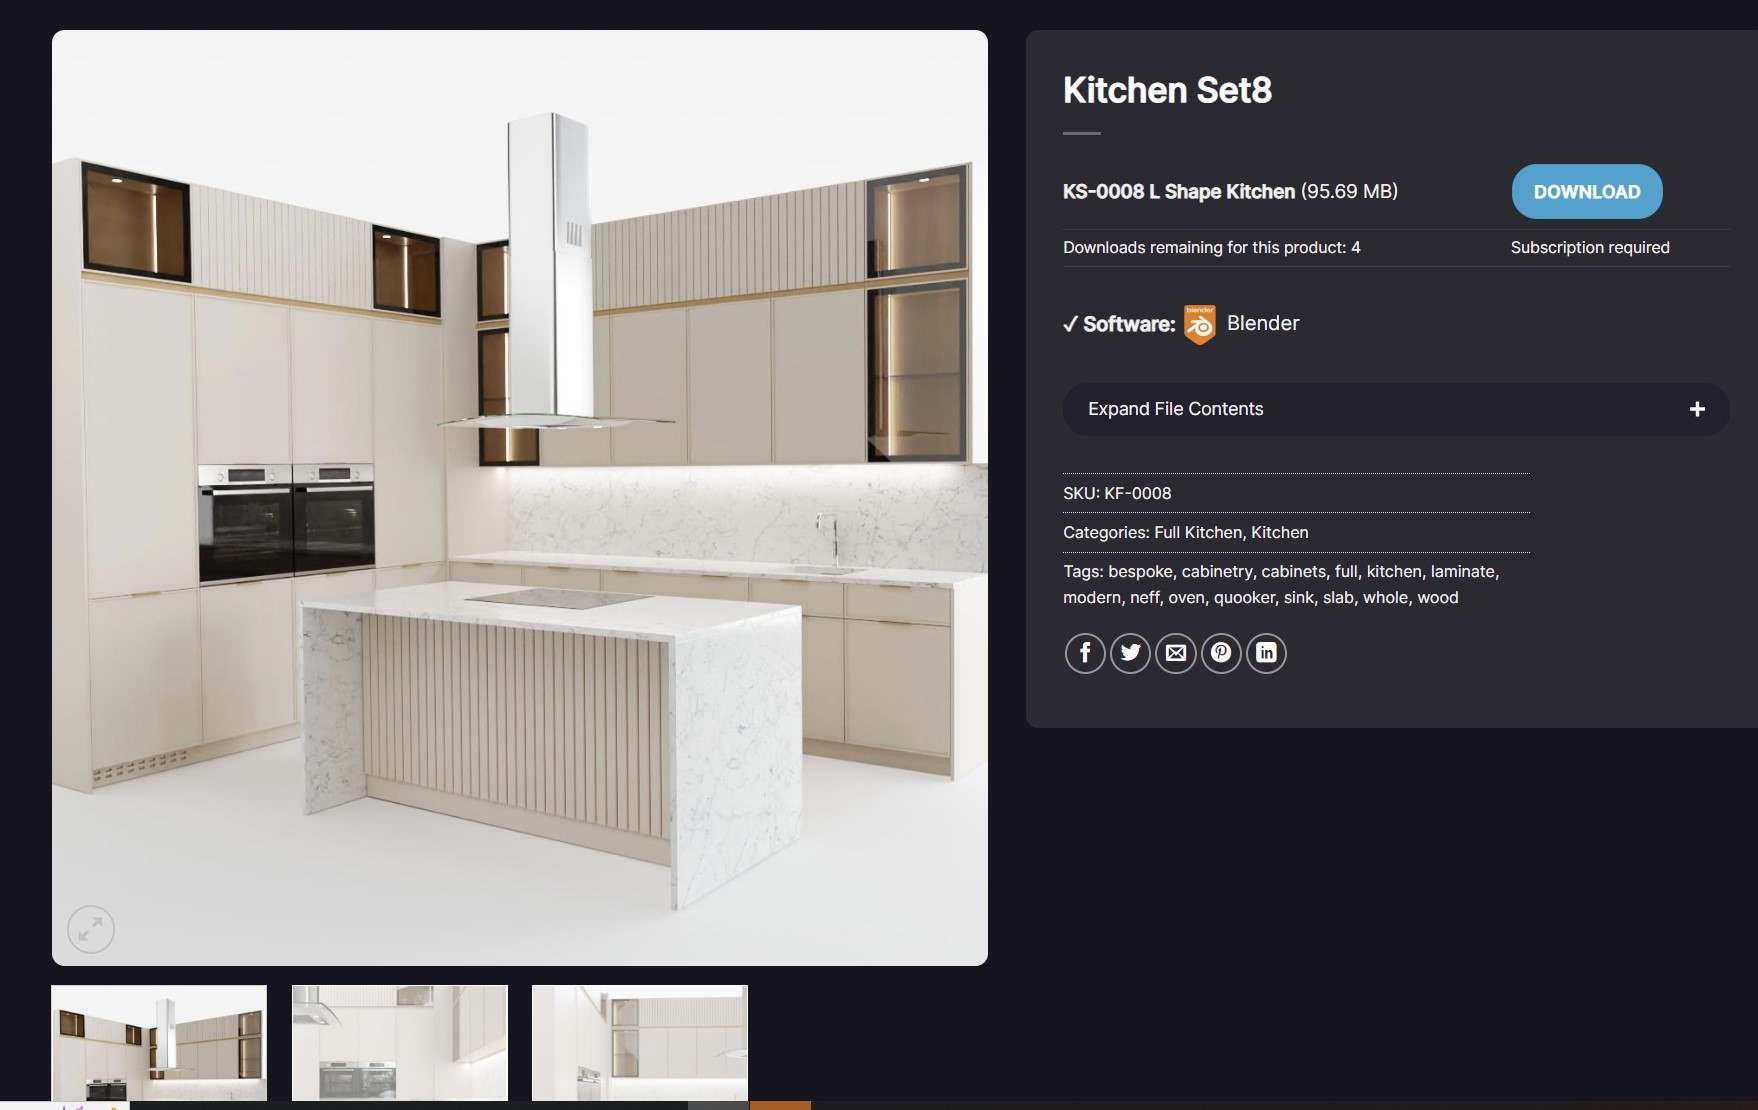
This scene I tried to keep it as simple as possible, so I grabbed a kitchen from iMeshh and built the scene around it. I then broke the scene into different Blender Scenes for each shot to keep everything organized.
I used a very simple area light setup. I didn’t used HDRIs because I wanted more control of the specific item that was to be illuminated.
CAMERA MOVEMENTS
I tried to make sure all my camera movements were as simple as possible with basic left-right, up-down movements at the same consistent speed. This is very important, and I see too often that people fly cameras all over the scene which can be distracting.

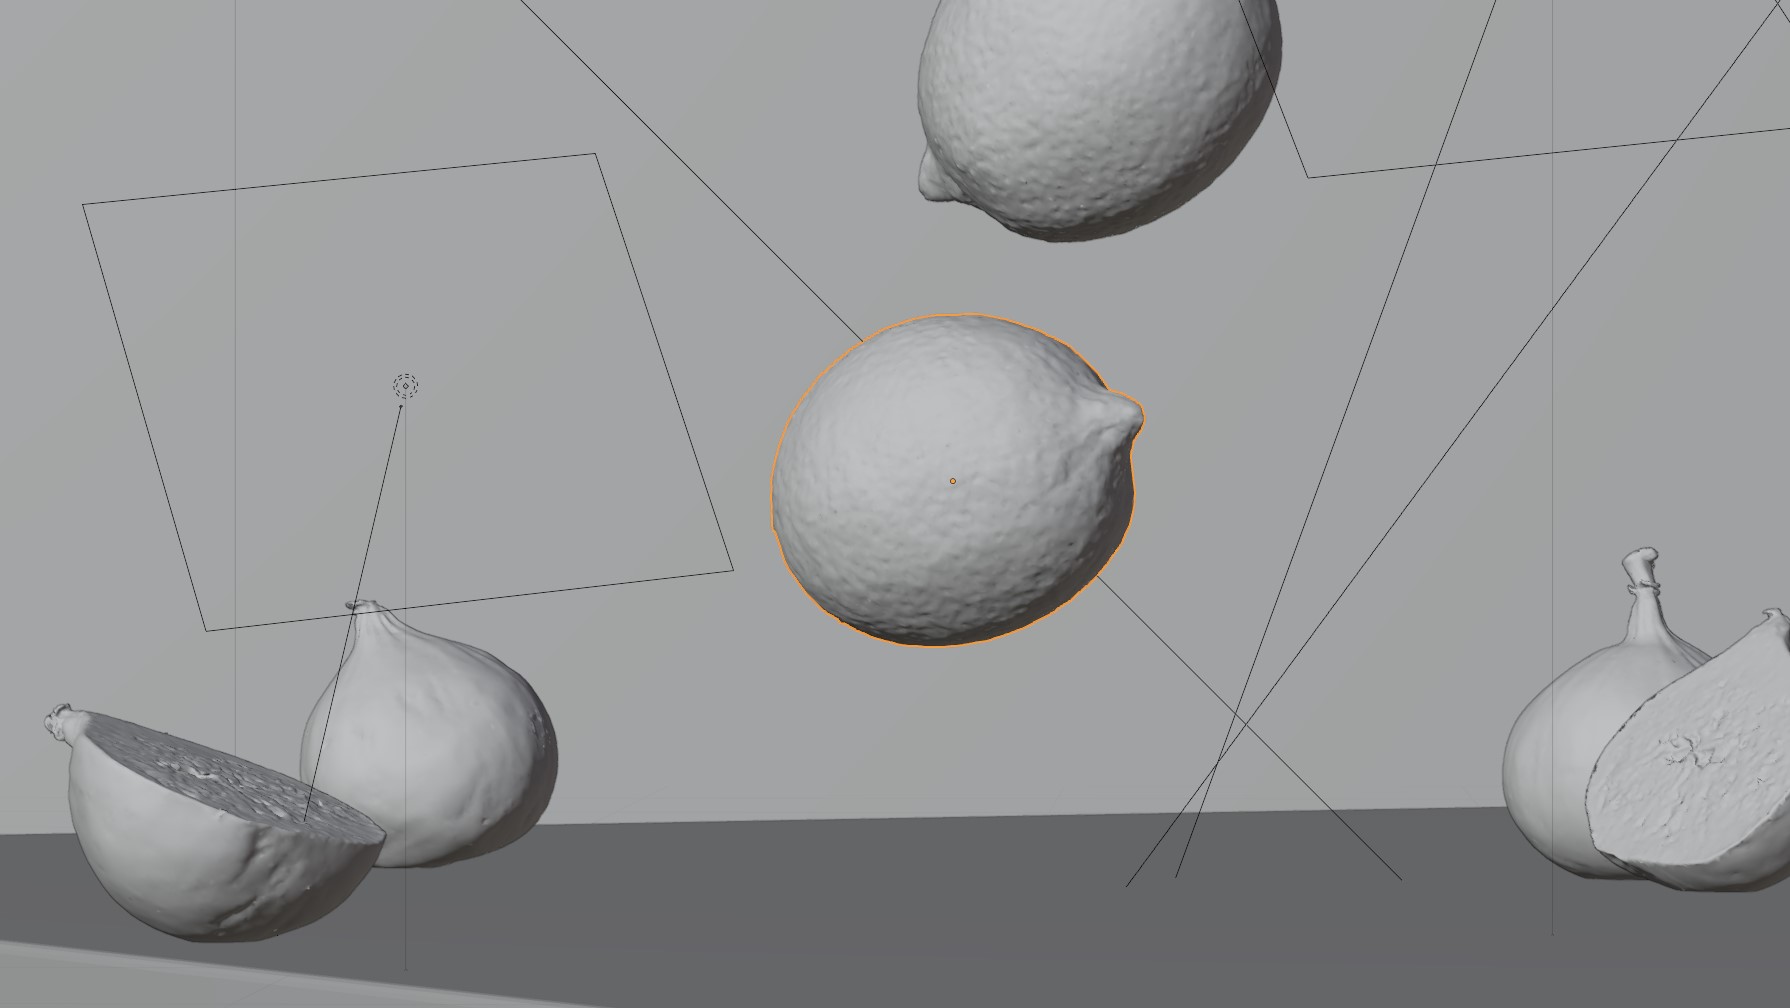
FALLING FRUIT
This was the fun part! For the very first shot, I used soft-body simulations but this was taking more time than I had, so the rest of the fruit unfortunately didn’t have any soft-body. You can see this on the avocado shot which feels very rigid but… never mind, next time! ;)
It is a little hard to see the soft-body simulation at the start because lemons in general are quite tough, but you can see a little deformation where the lemons make contact. In my opinion, this was enough to sell the feeling I was going for.
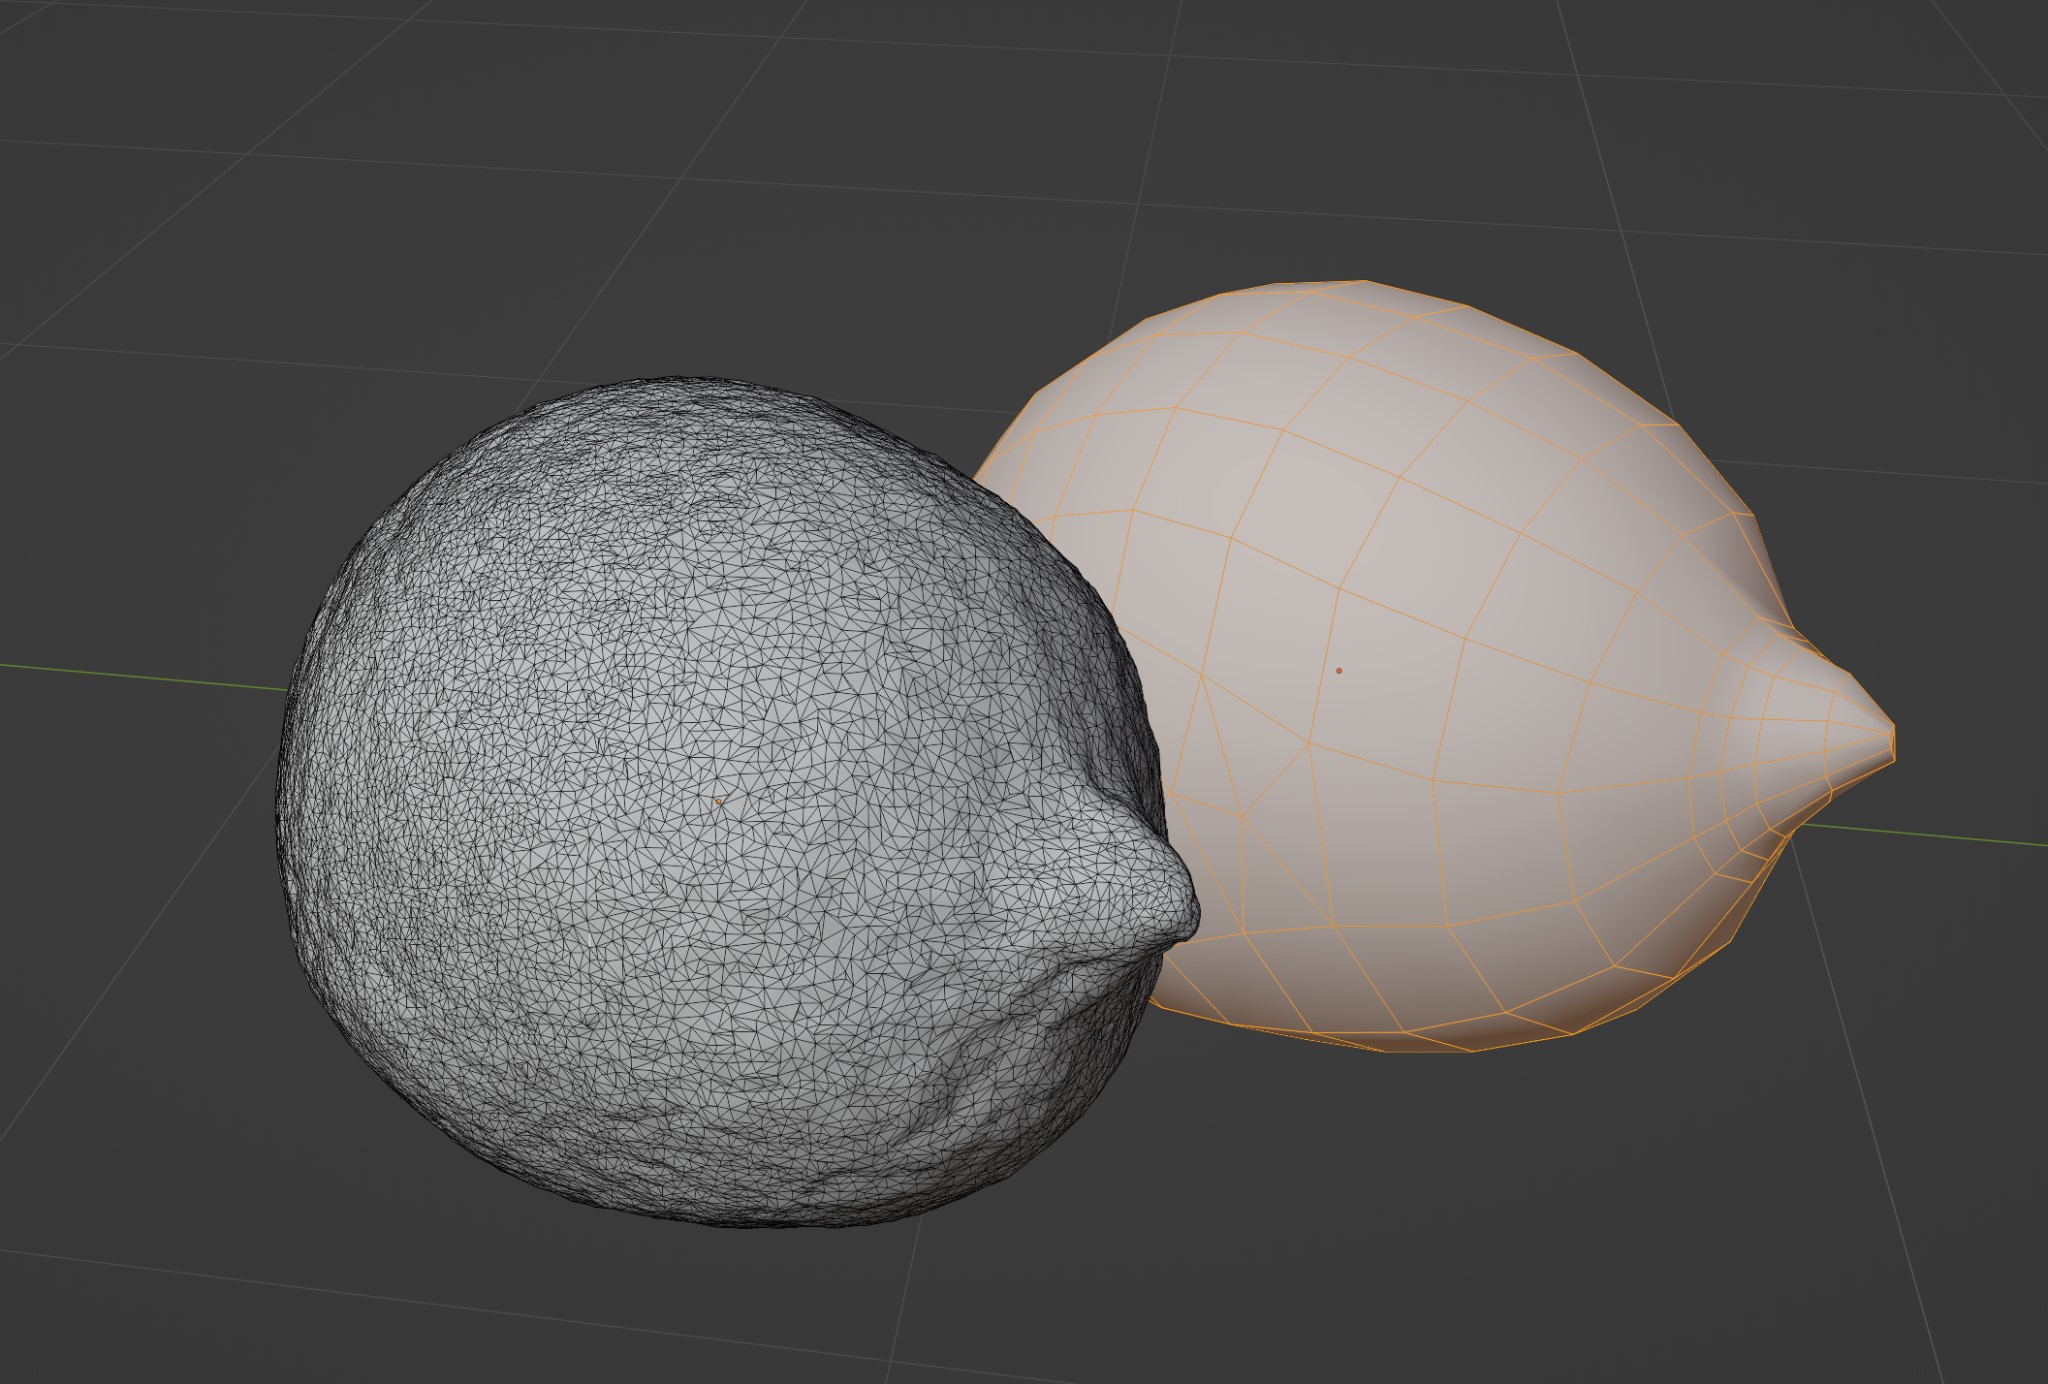
To speed up the process, I made a much lower poly version of the lemons and used the surface deform modifier from the high-poly to the low-poly version. Then I added soft-body simulation to the low-poly version. The high-poly version reacted in the exact same way, just much quicker than adding soft-body simulations to the high-poly version.
For the other shots, I simply added rigid-body physics to everything and had a wicked time throwing fruit all over the place until I got a shot I liked.
As a tip, make sure all the origin points are in the center, and the scale is applied. Or else you’ll get weird physics simulations which will drive you crazy.
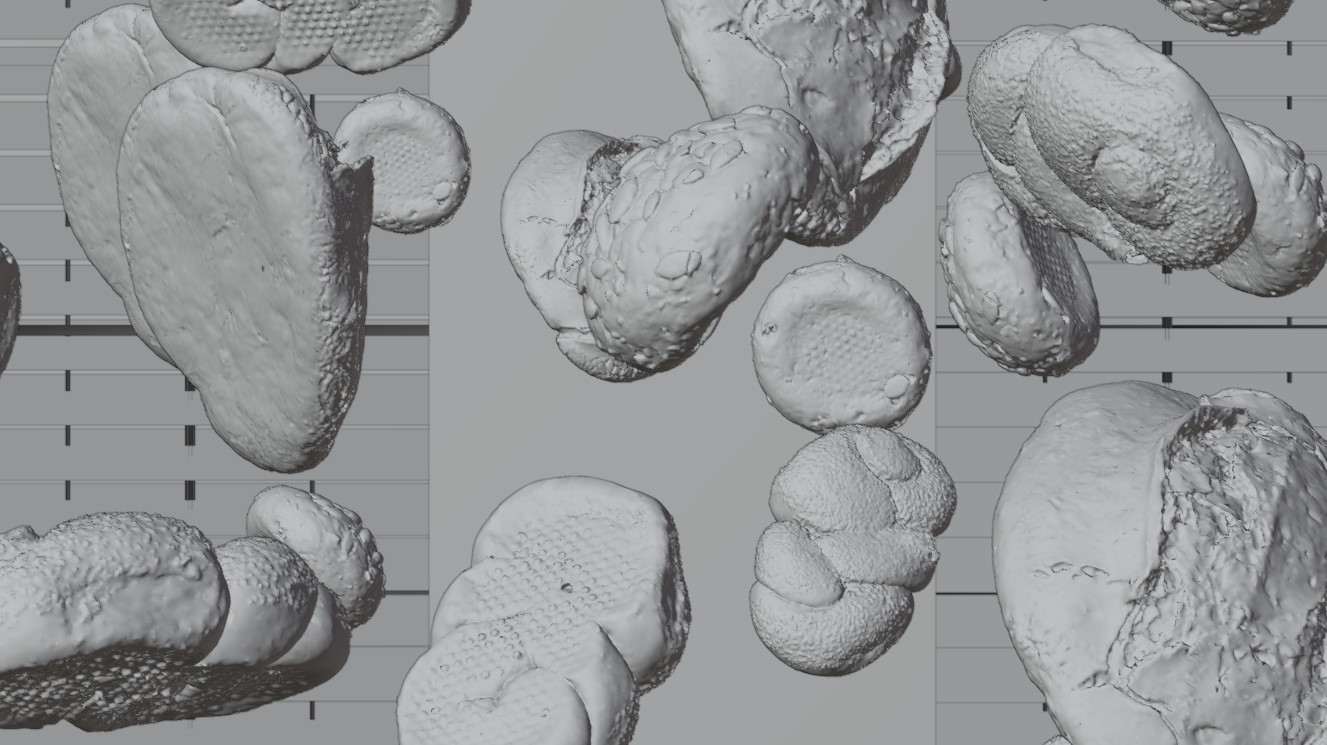
PHOTO-SCANNED FOOD ANIMATION
Here are some more renders, next to their clay renders!
MUFFINS
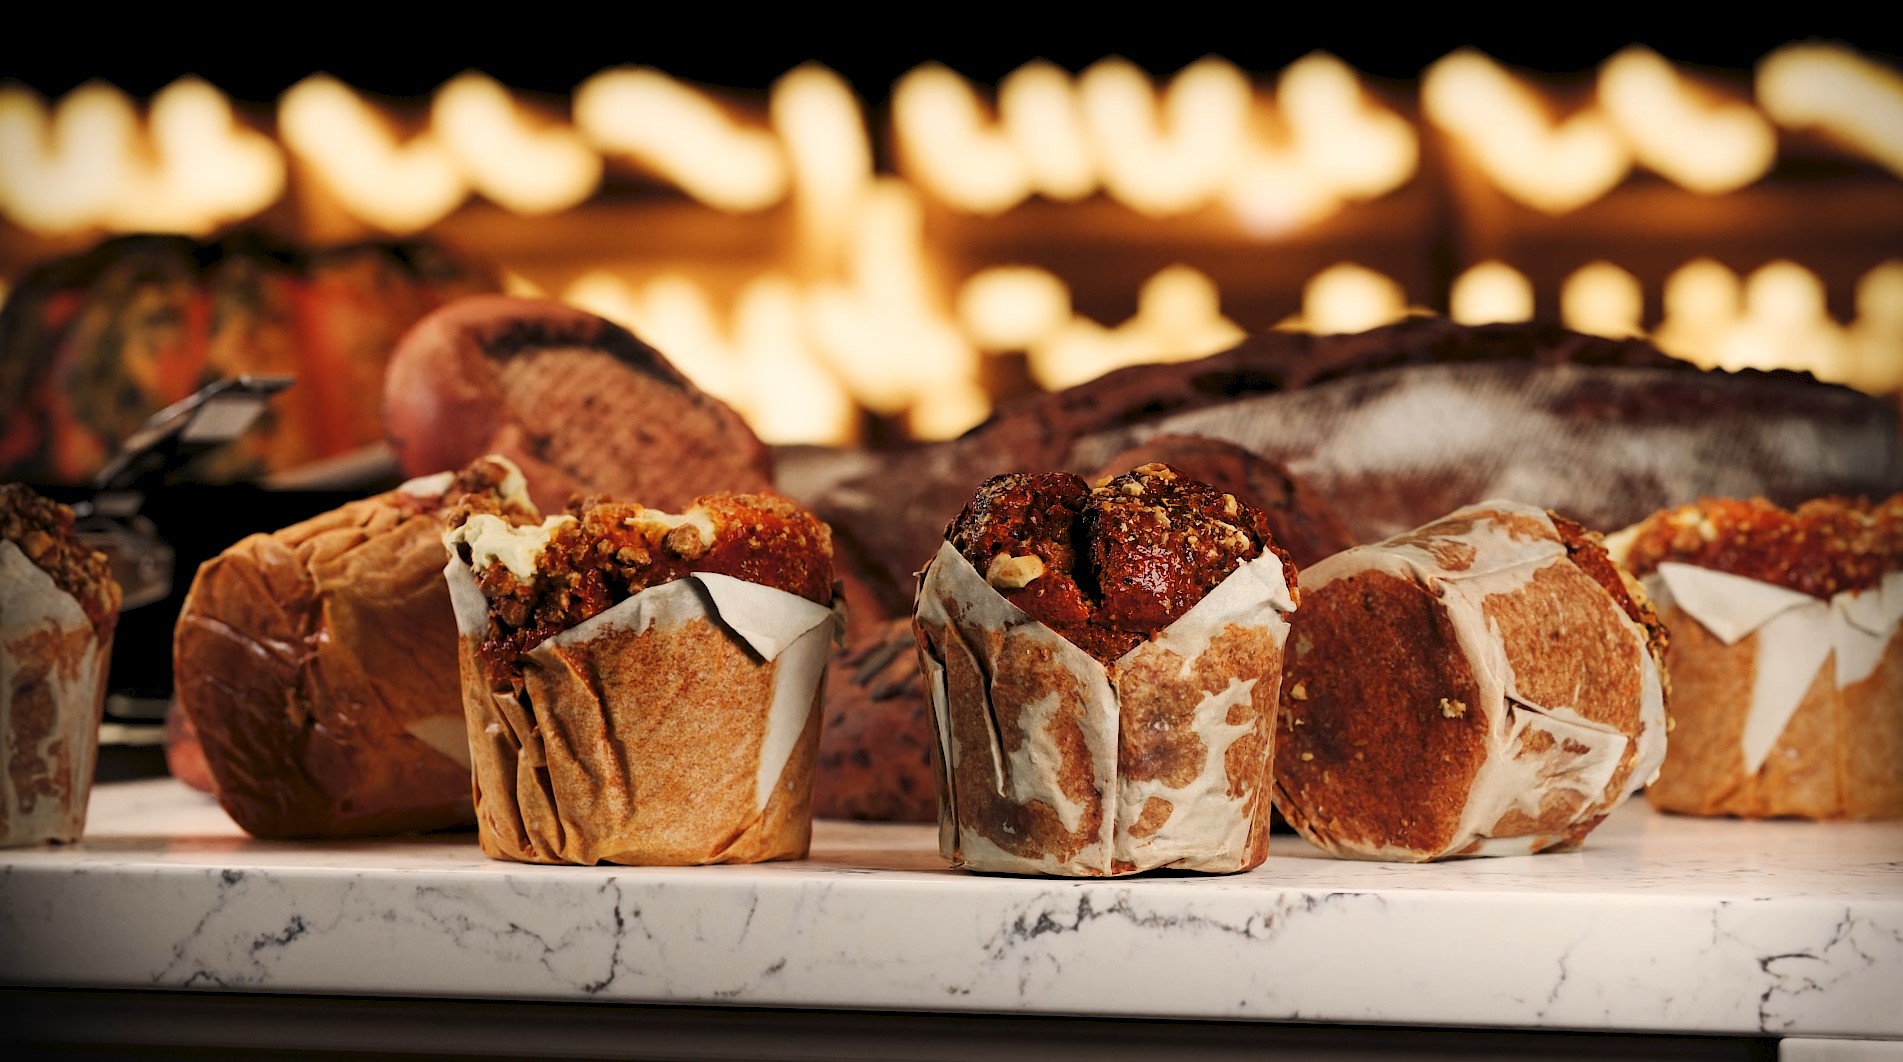

The background in this shot is actually one of the beds from iMeshh with LEDs on it. I rendered it out of focus, and then added it onto a plane in the background so it renders much quicker for the animation.
CANTALOUPE

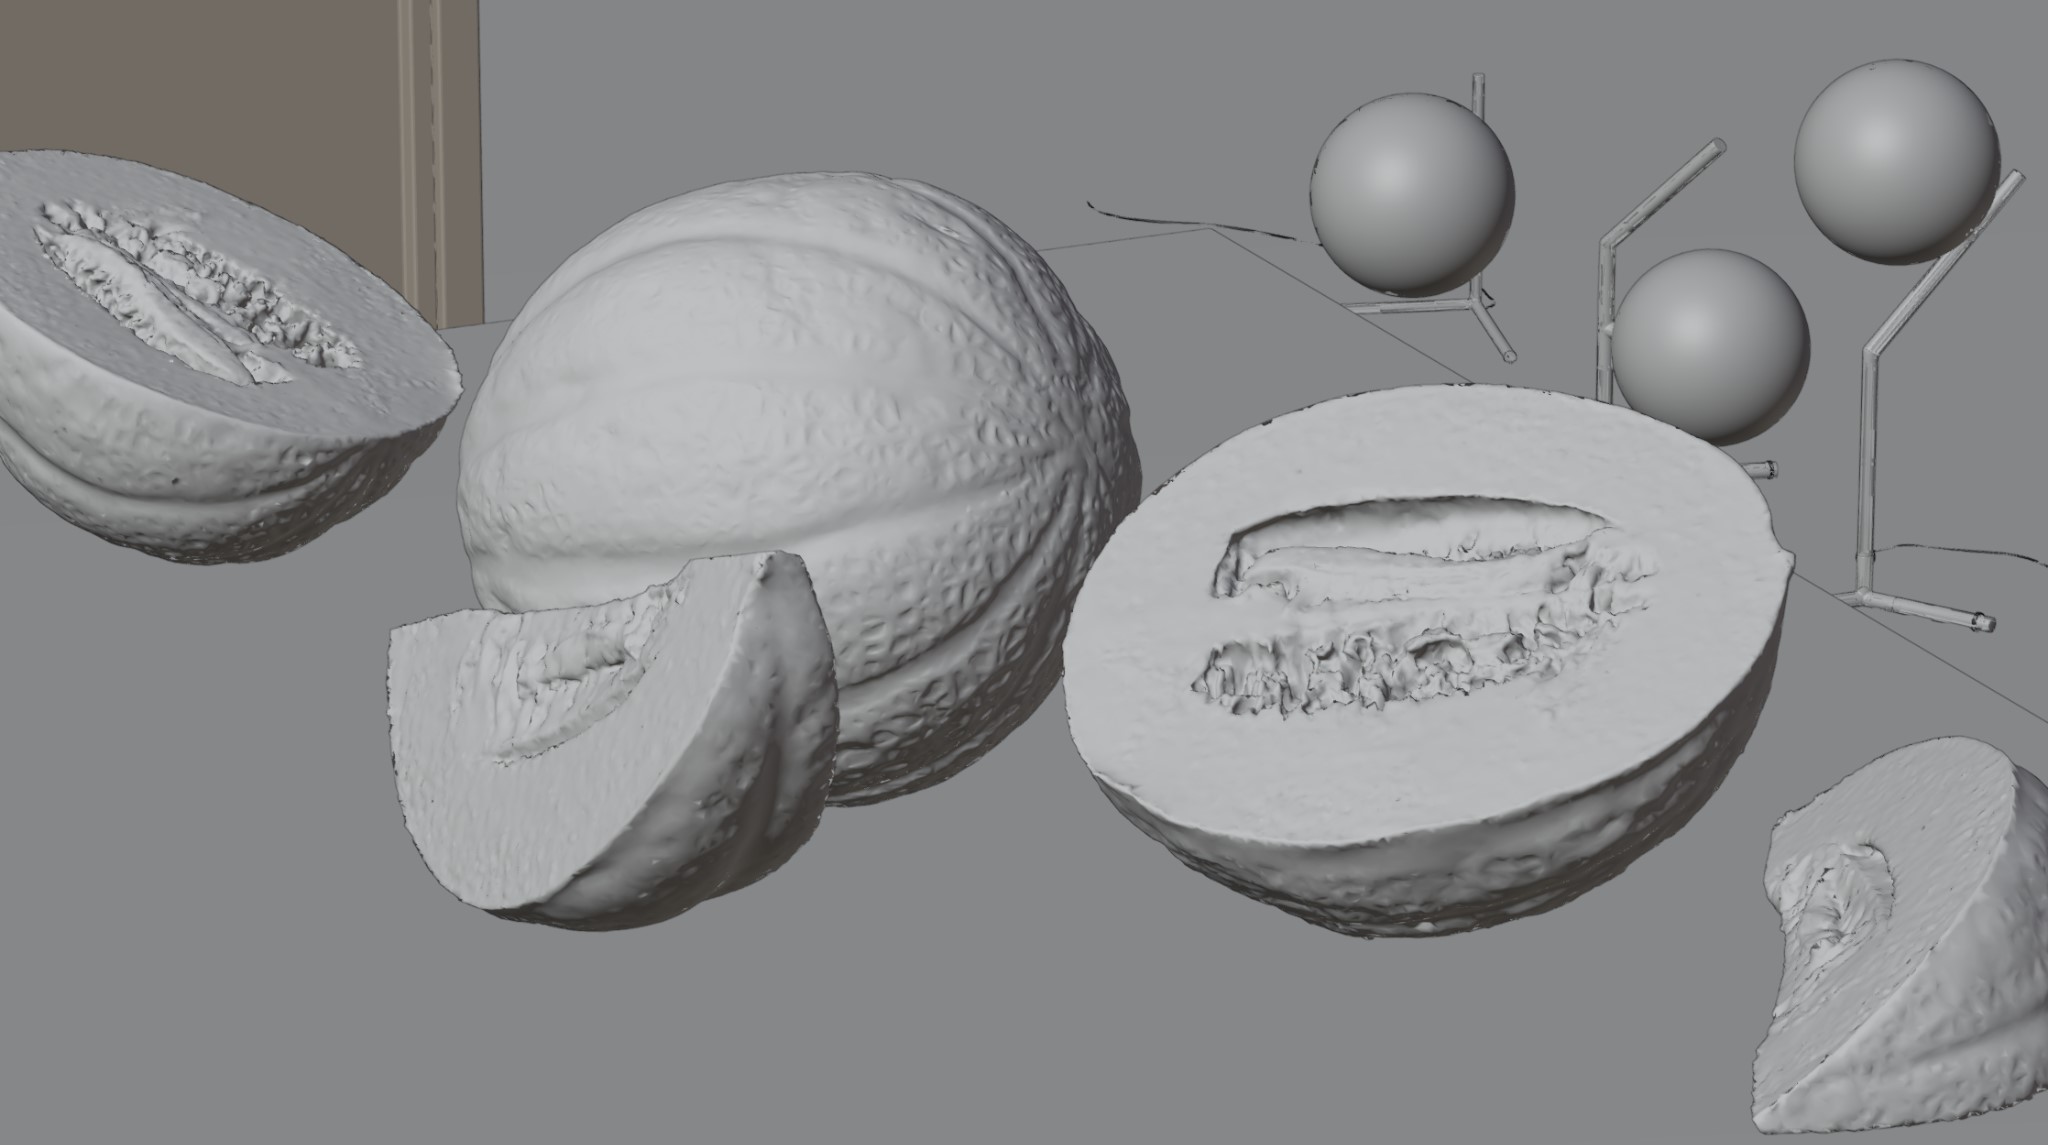
I don’t know why, but I love this shot. I think the physics movement feels pretty natural.
ORANGES
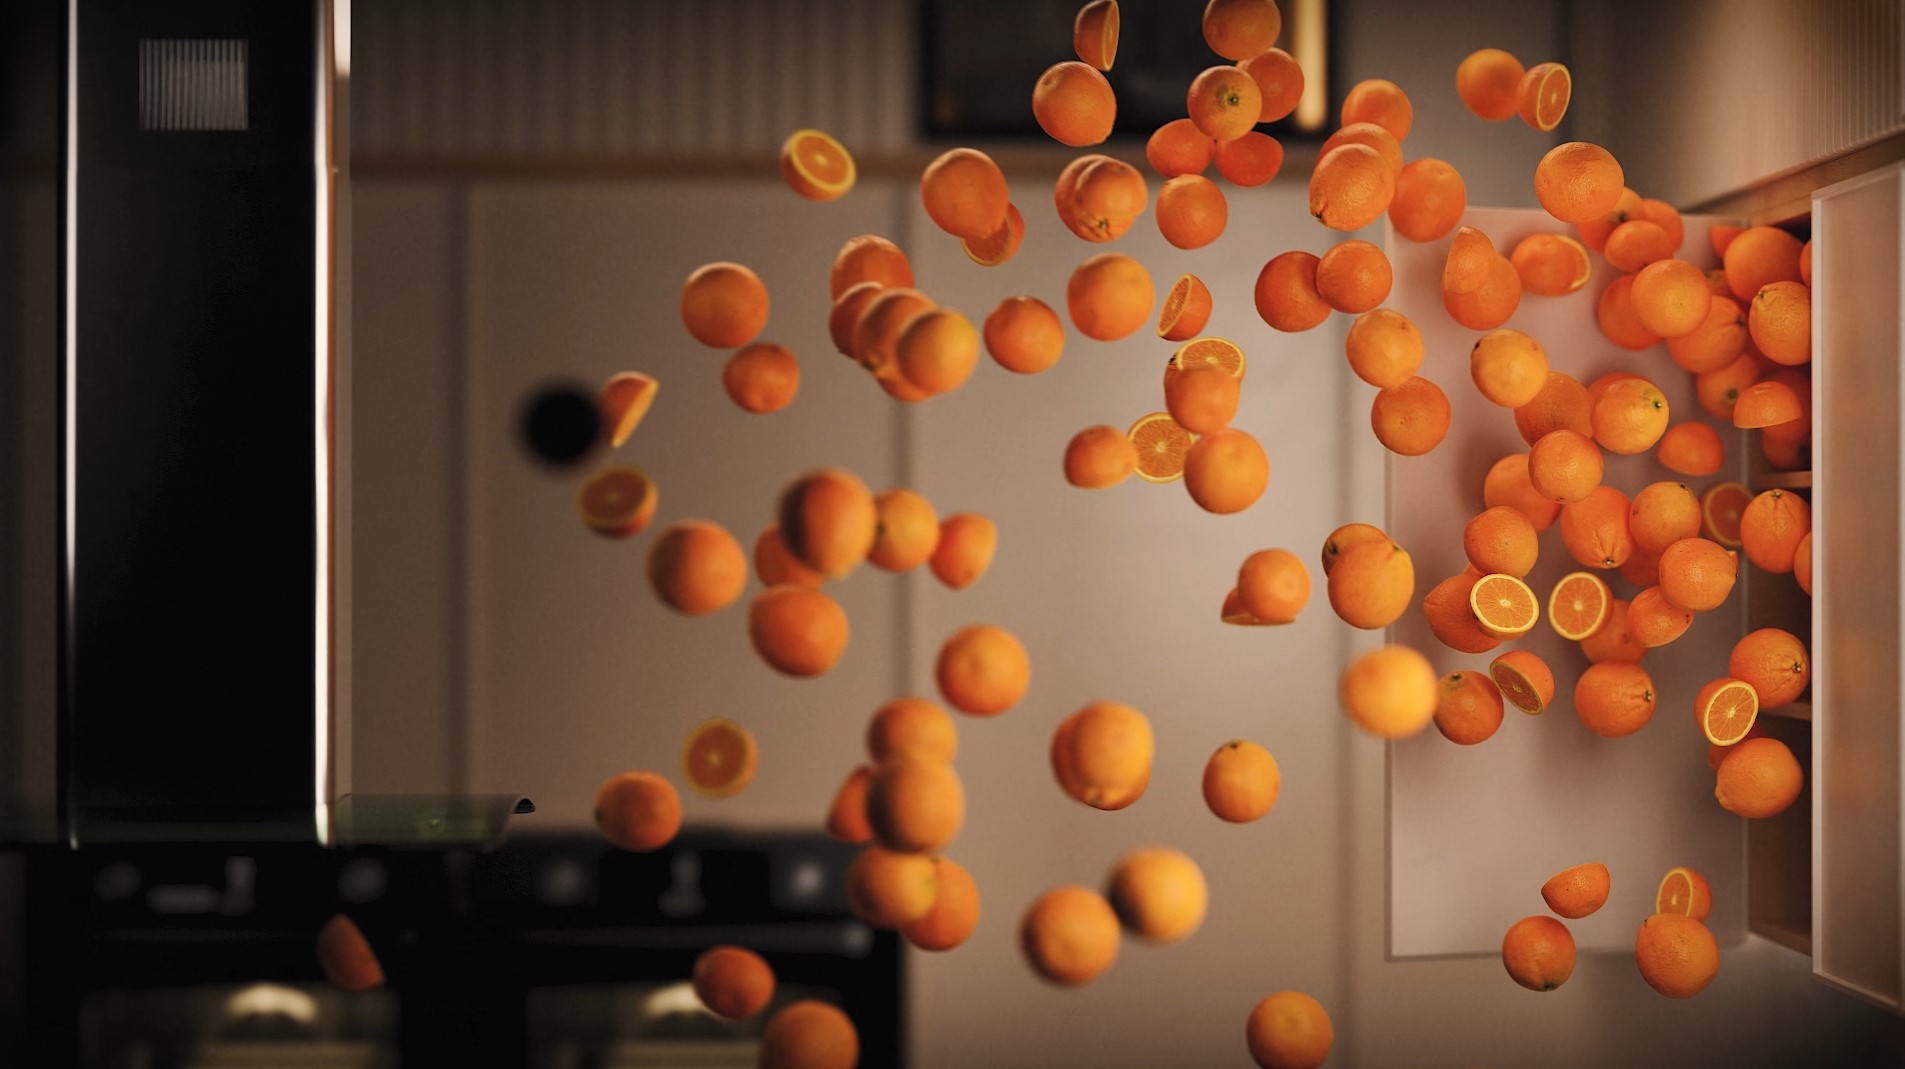
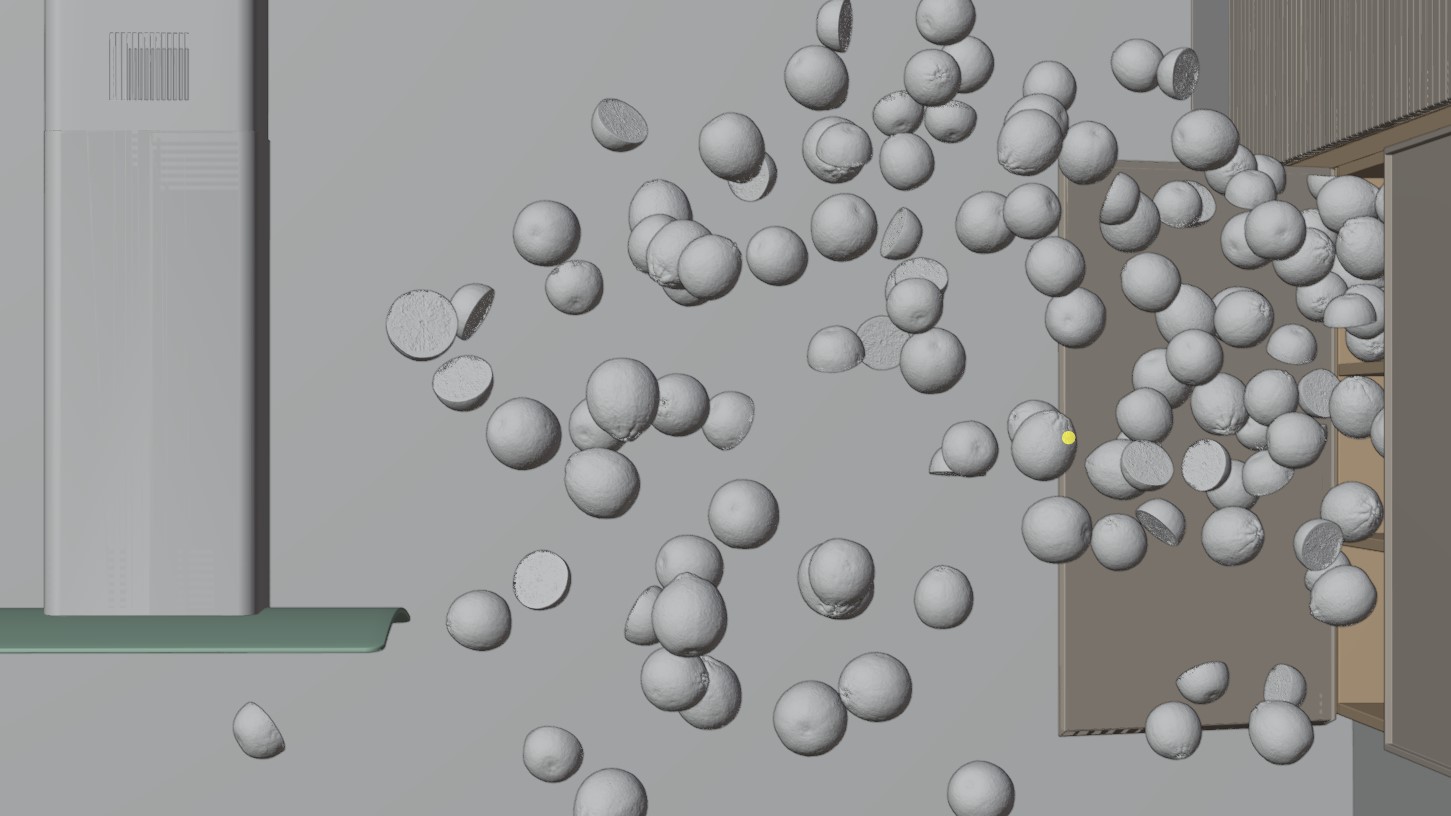
To push out the oranges in this shot, I gave them all a fast, round rigid-body simulation and inside the cupboard, I then added a hidden rigid-body box which moves quickly in the direction of the door as it opens. This ejected everything out and it turned out great!
Not going to lie, this took a LOT of trial and error.
BREAD
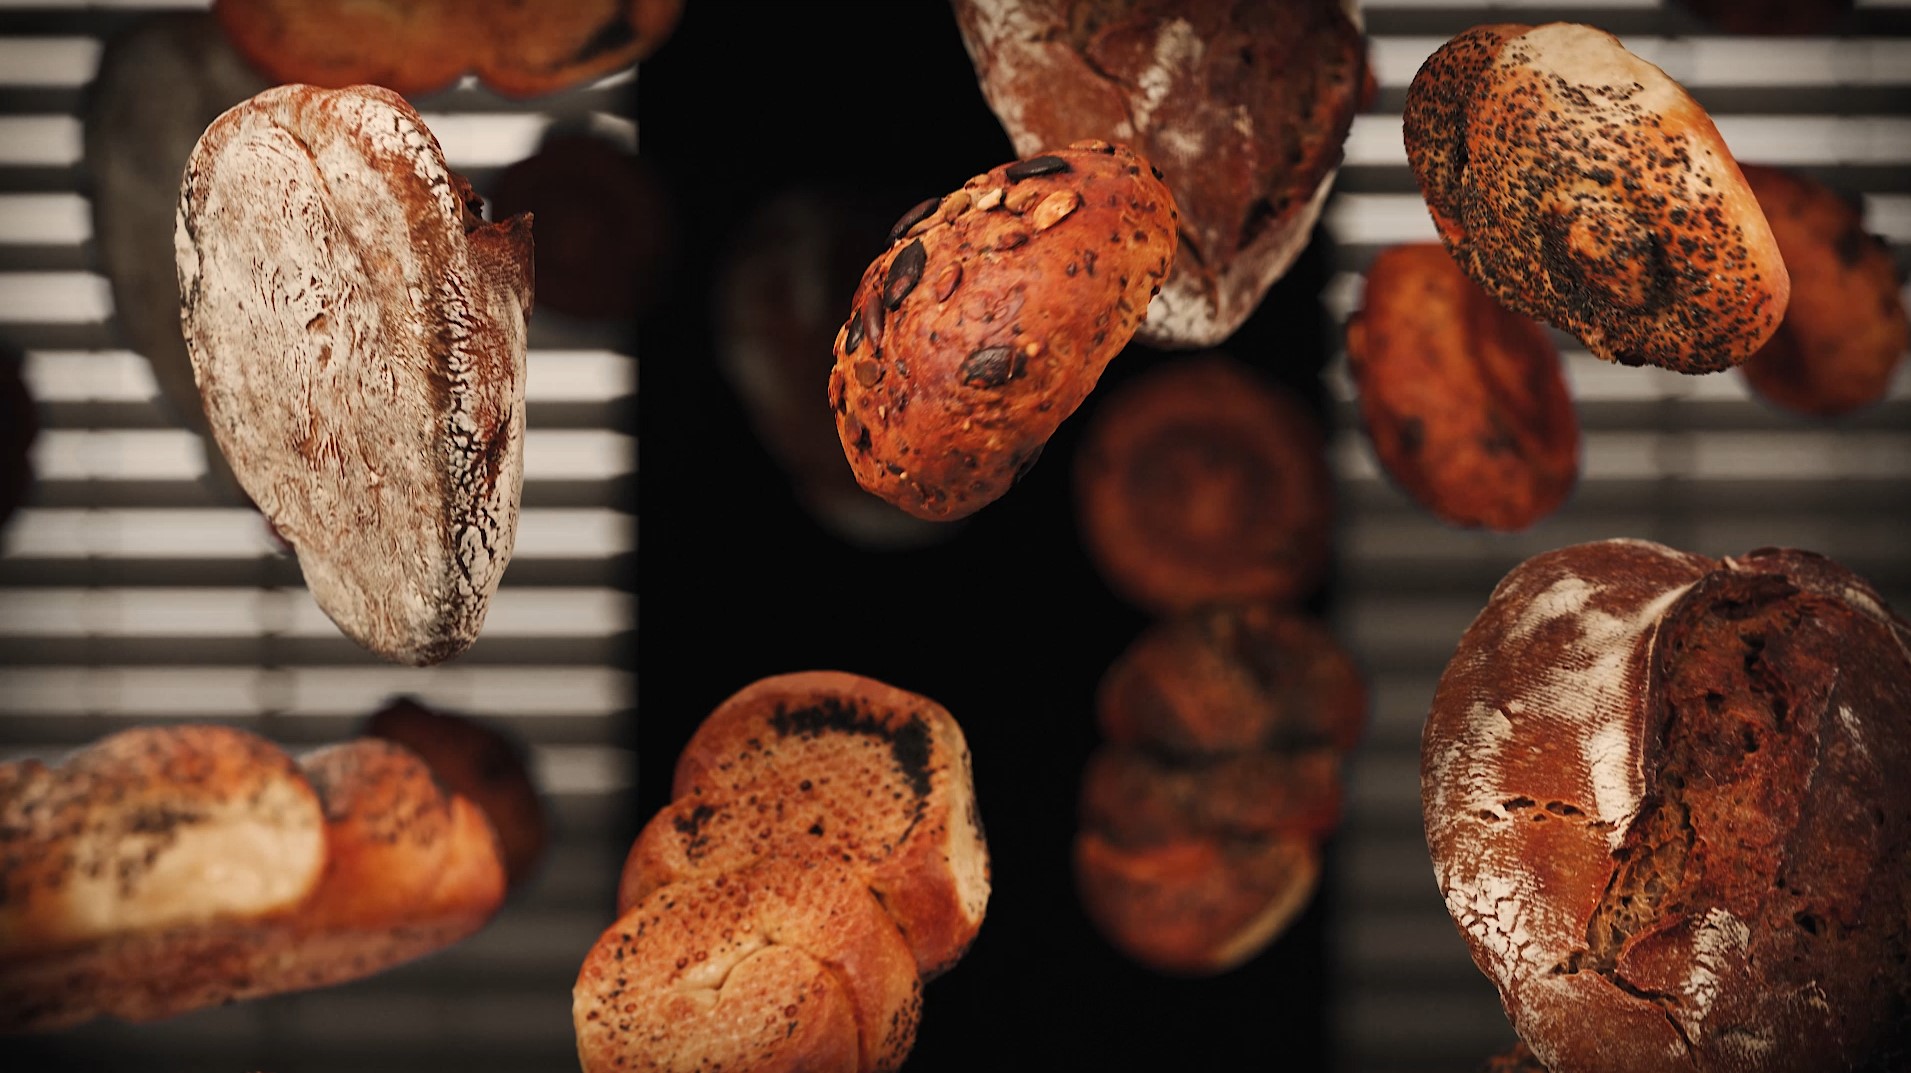
For this bread shot, the bread is not actually falling. They are only randomly rotating with the camera moving upwards.
And those are shutters in the background are opening to let light in.

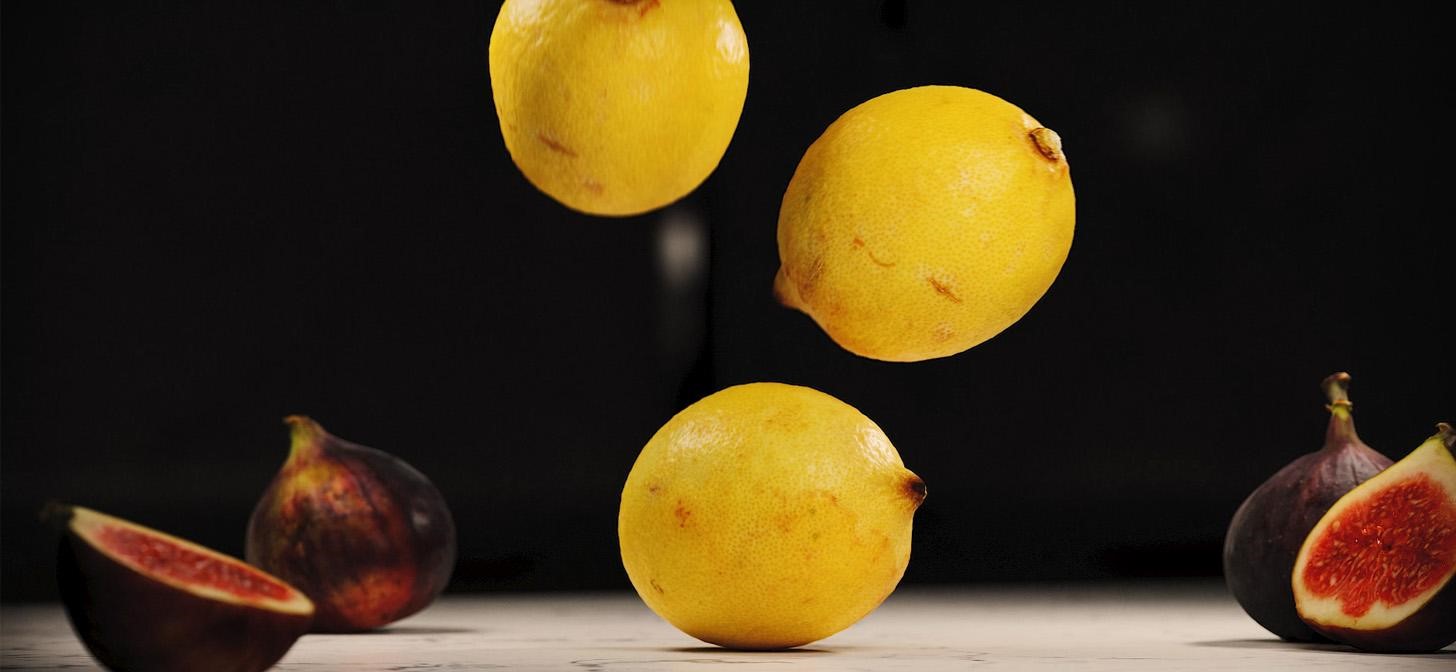
LEMON

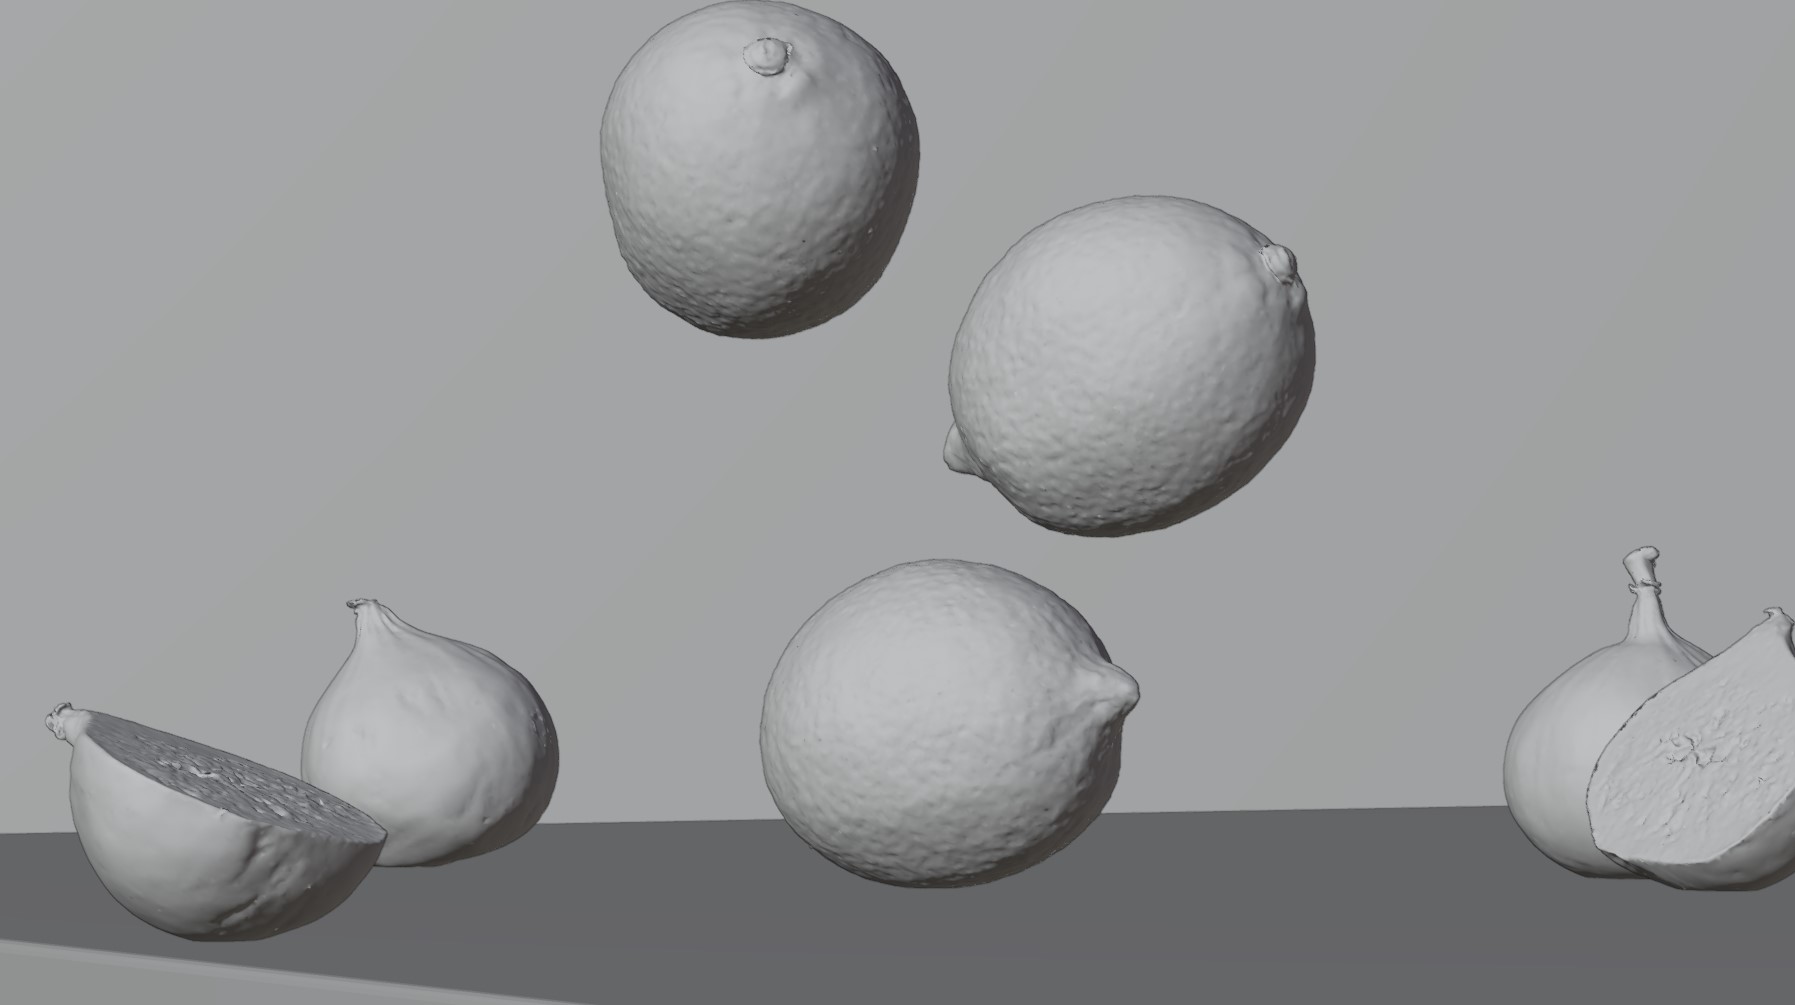
This is my favorite shot of them all. I think it’s because of the subtle soft-body simulation, and the colours really pop!
Thank you all for reading my article!
I hope it inspires you to create your own photo-scanned food, and if you have any questions please mention them in the comments below. Thanks!
About the Artist

I am Kris, a CG artist and co-owner of iMeshh. I love teaching and helping others in the industry :)


