
Fastest way from Static Mesh to Fully Animated Character : Blender to Character Creator 4 – Humanoid Pipeline

Greetings, My name is Peter Alexander, I’m a 3D Generalist and Character Artist who specializes in Reallusion-related workflows. In this video, I’m going to demonstrate how to take a ready-made 3D character model, rig it in Blender, and import it into Character Creator 4 (CC4) to make it compatible with Reallusion’s 3D facial animation standards.
INTRO: Select a 3D character model of your choice
For this demonstration I’m going to be using a model purchased from the 3D artist, Makar Malicki, whose assets can be seen on Artstation.
I’m going to start by opening a Blender file that I previously set up by separating the mesh into sections. This may not be necessary for you, but it helps me in the weight mapping process. Also, keeping the body separate from the hair, eyes, teeth, and accessories also helps to apply a degree of symmetry when doing facial expression editing.
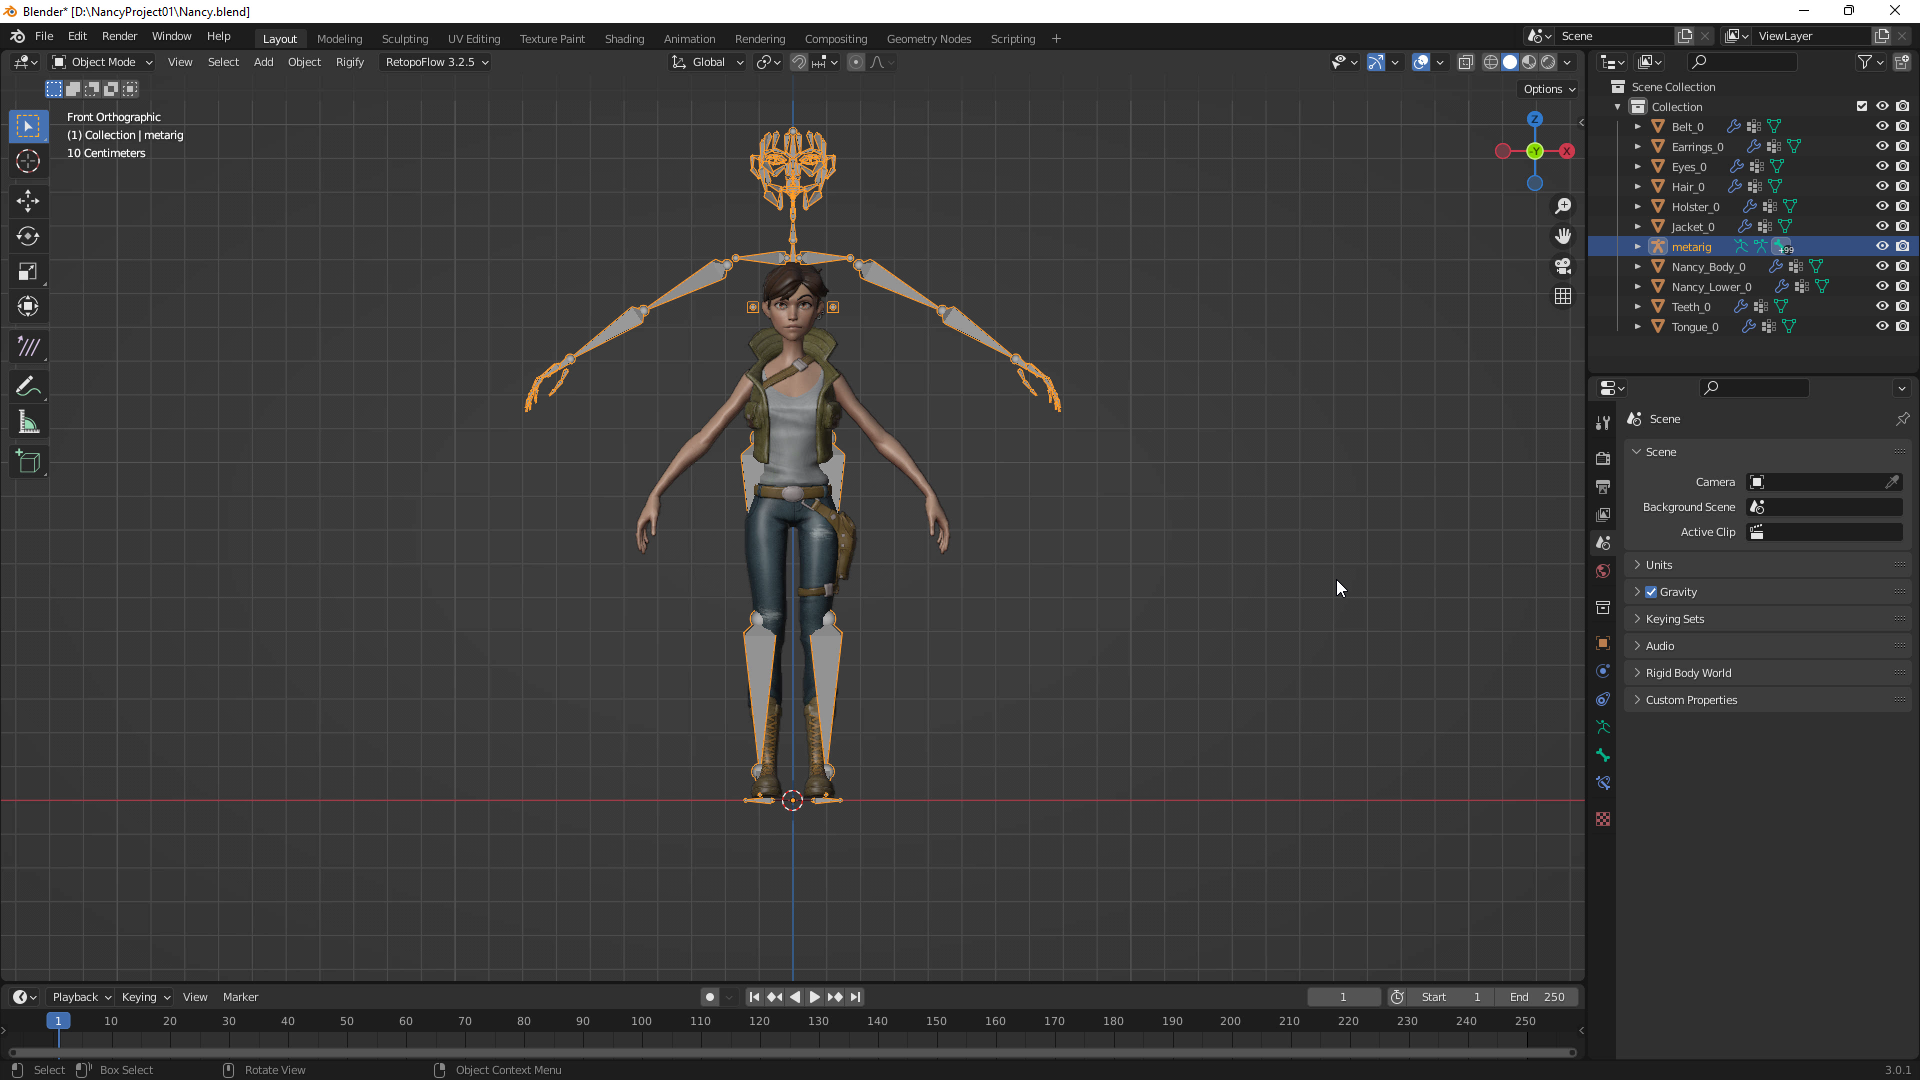
STEP 1: Blender Character Rigging
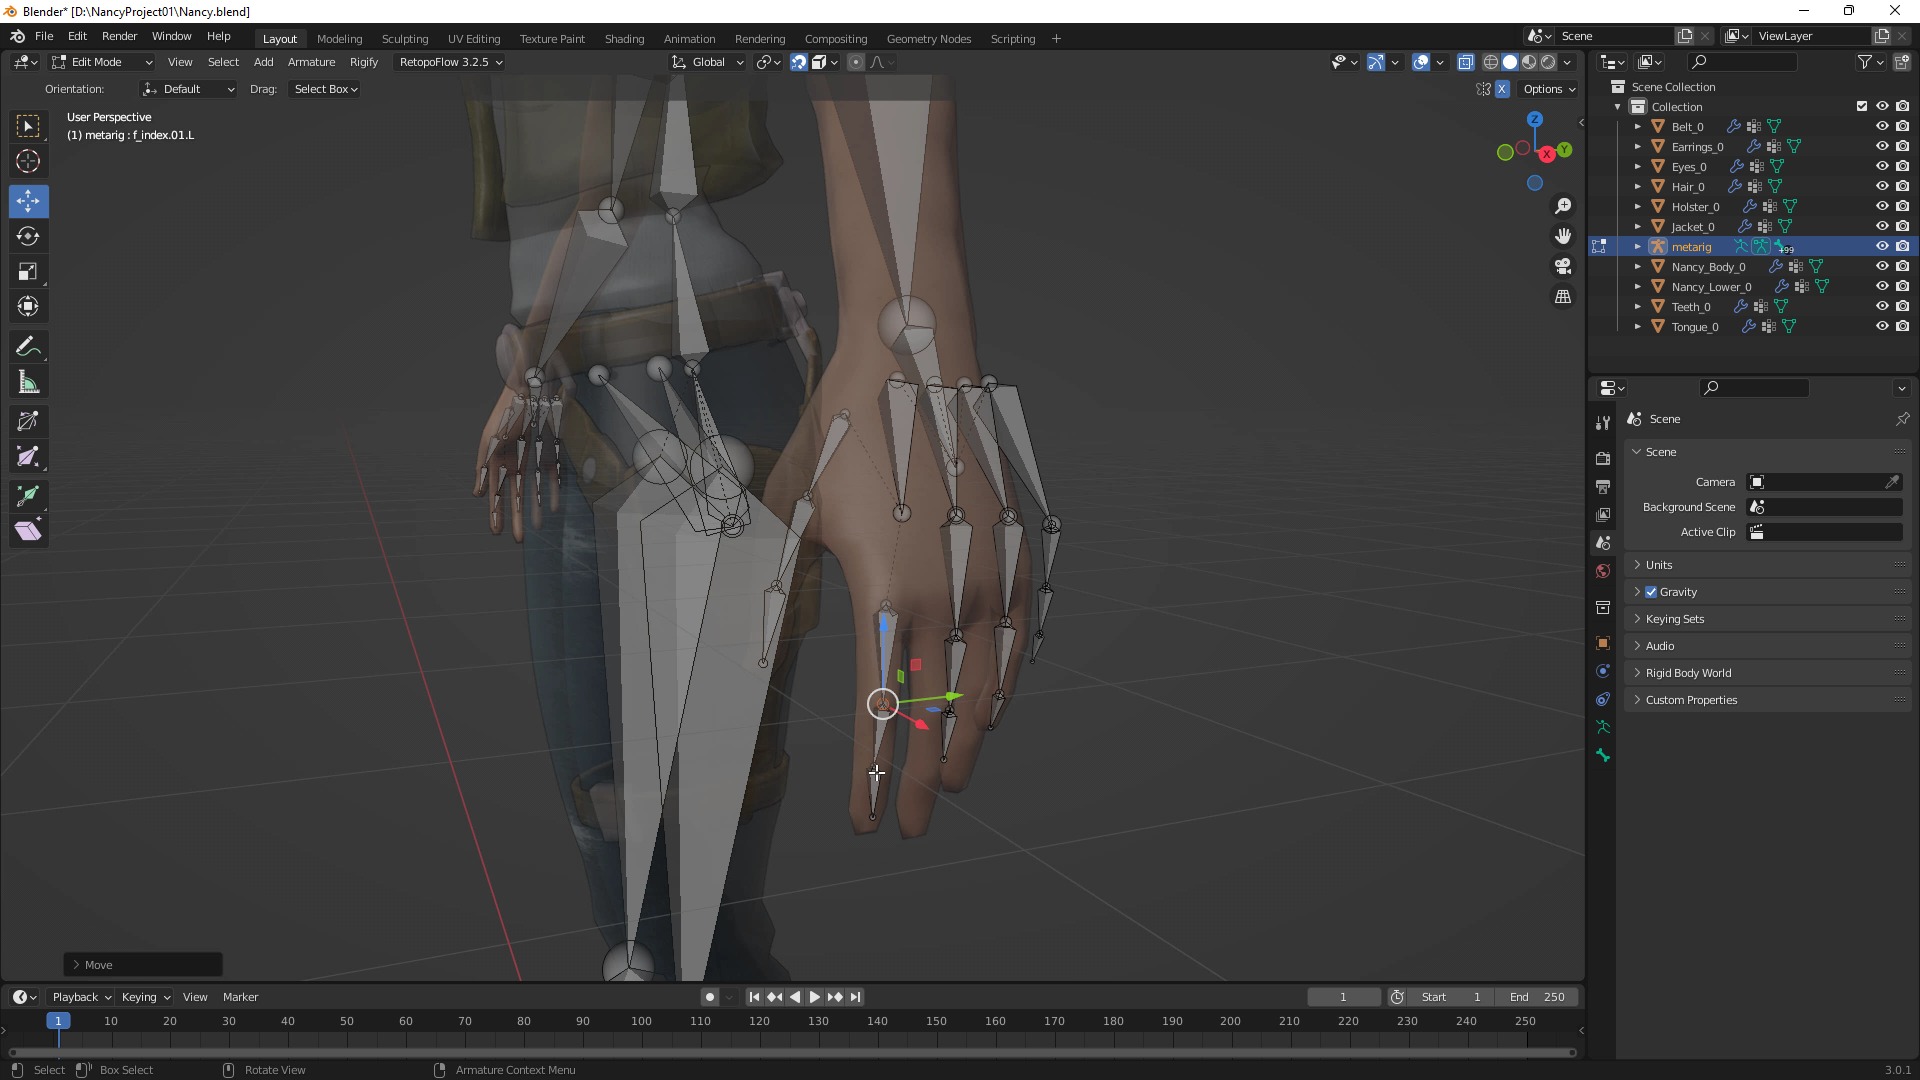
For rigging, I use the Human Meta-Rig located in the Armature section under Add. After adding the Meta-Rig, I scale it down and align the bones to the model as best I can. It can be difficult to align bones in threedimensional space, so I turn on the Snap > Volume > Center option for some bones, especially the fingers.
I deleted most of the facial bones, as morphs will control much of the expression system. Technically you can leave them, or apply weight maps to assist in the facial setup process in Character Creator 4, but my preferred method is to leverage morphs.
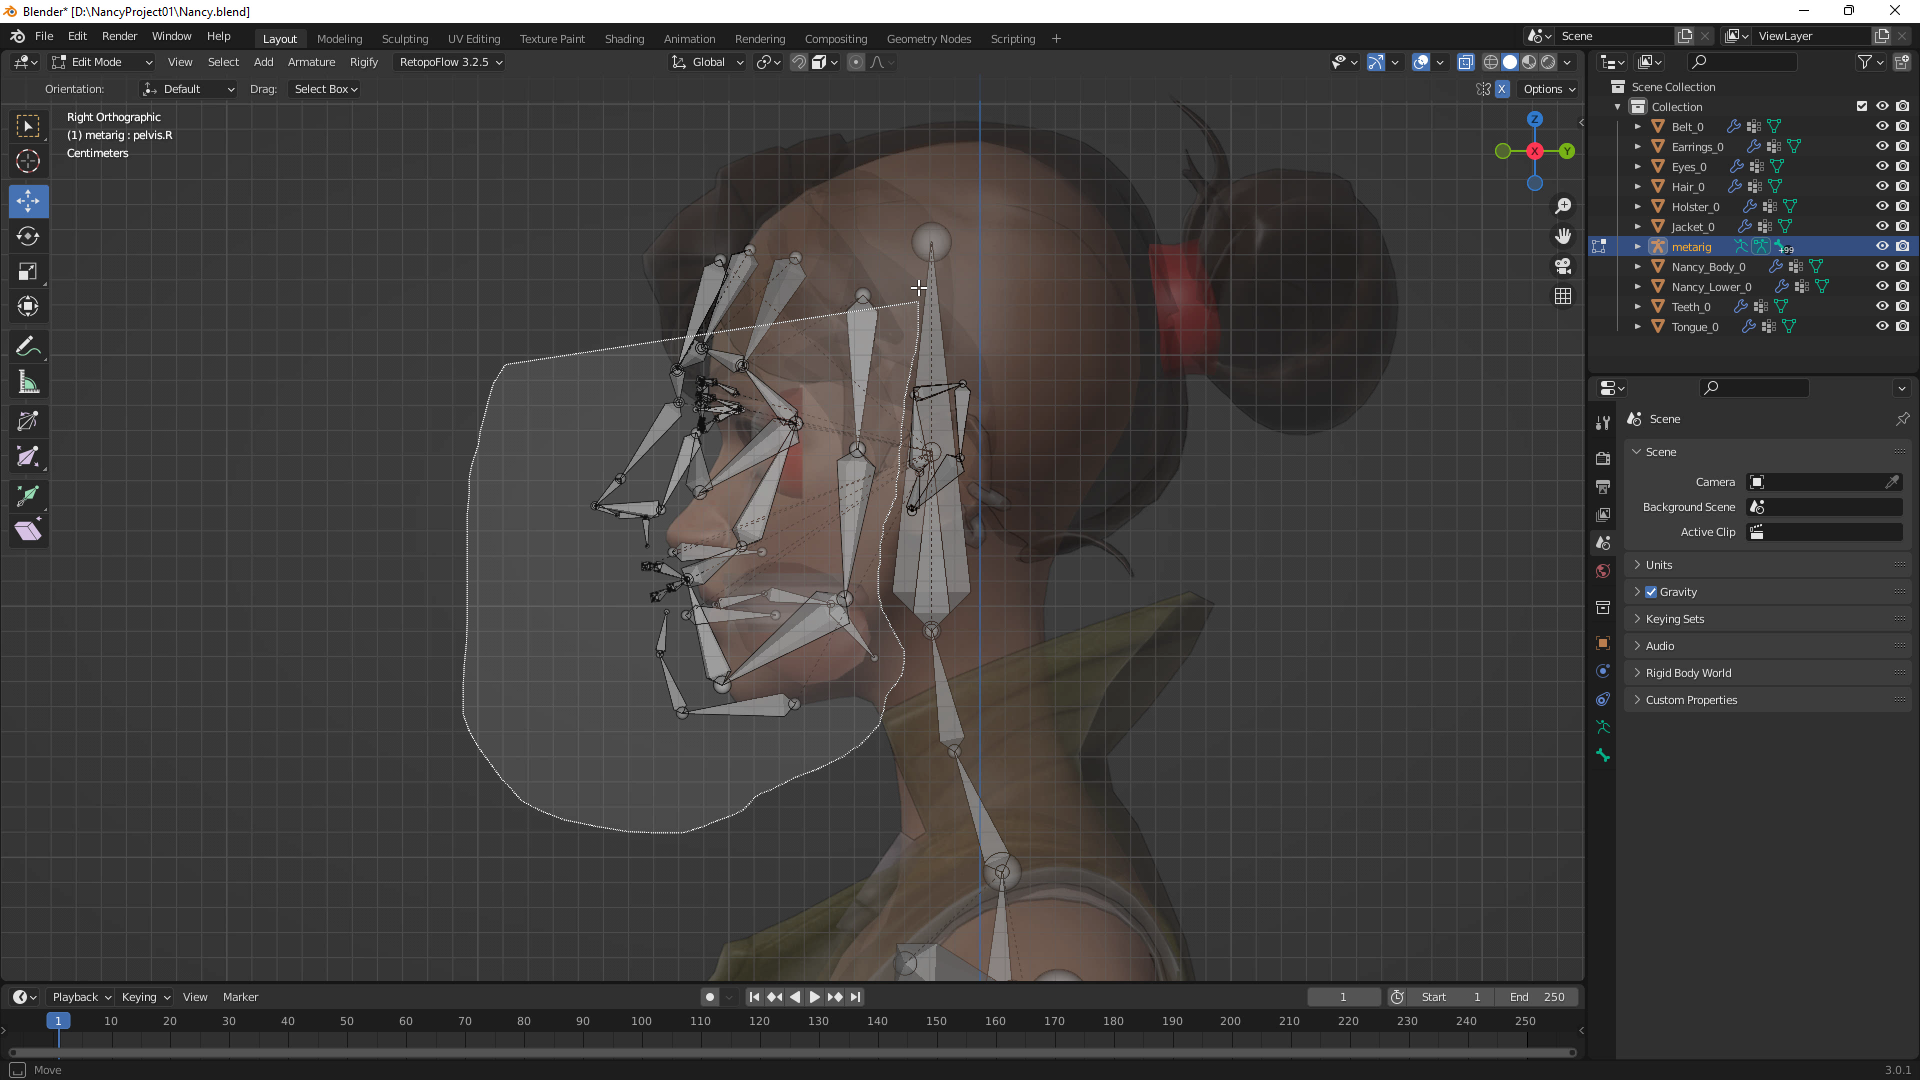
I add a bone for the jaw, three bones for the tongue, and I give the top and bottom teeth a bone each. Your setup doesn’t have to follow this precisely, although you’ll probably want at least a jaw bone, as well as bones for the eyes. While your face setup can be different, try to keep the rest of the bones consistent with the Human Meta-Rig. These names will be used in a script within Character Creator that will automatically identify the MetaRig setup.
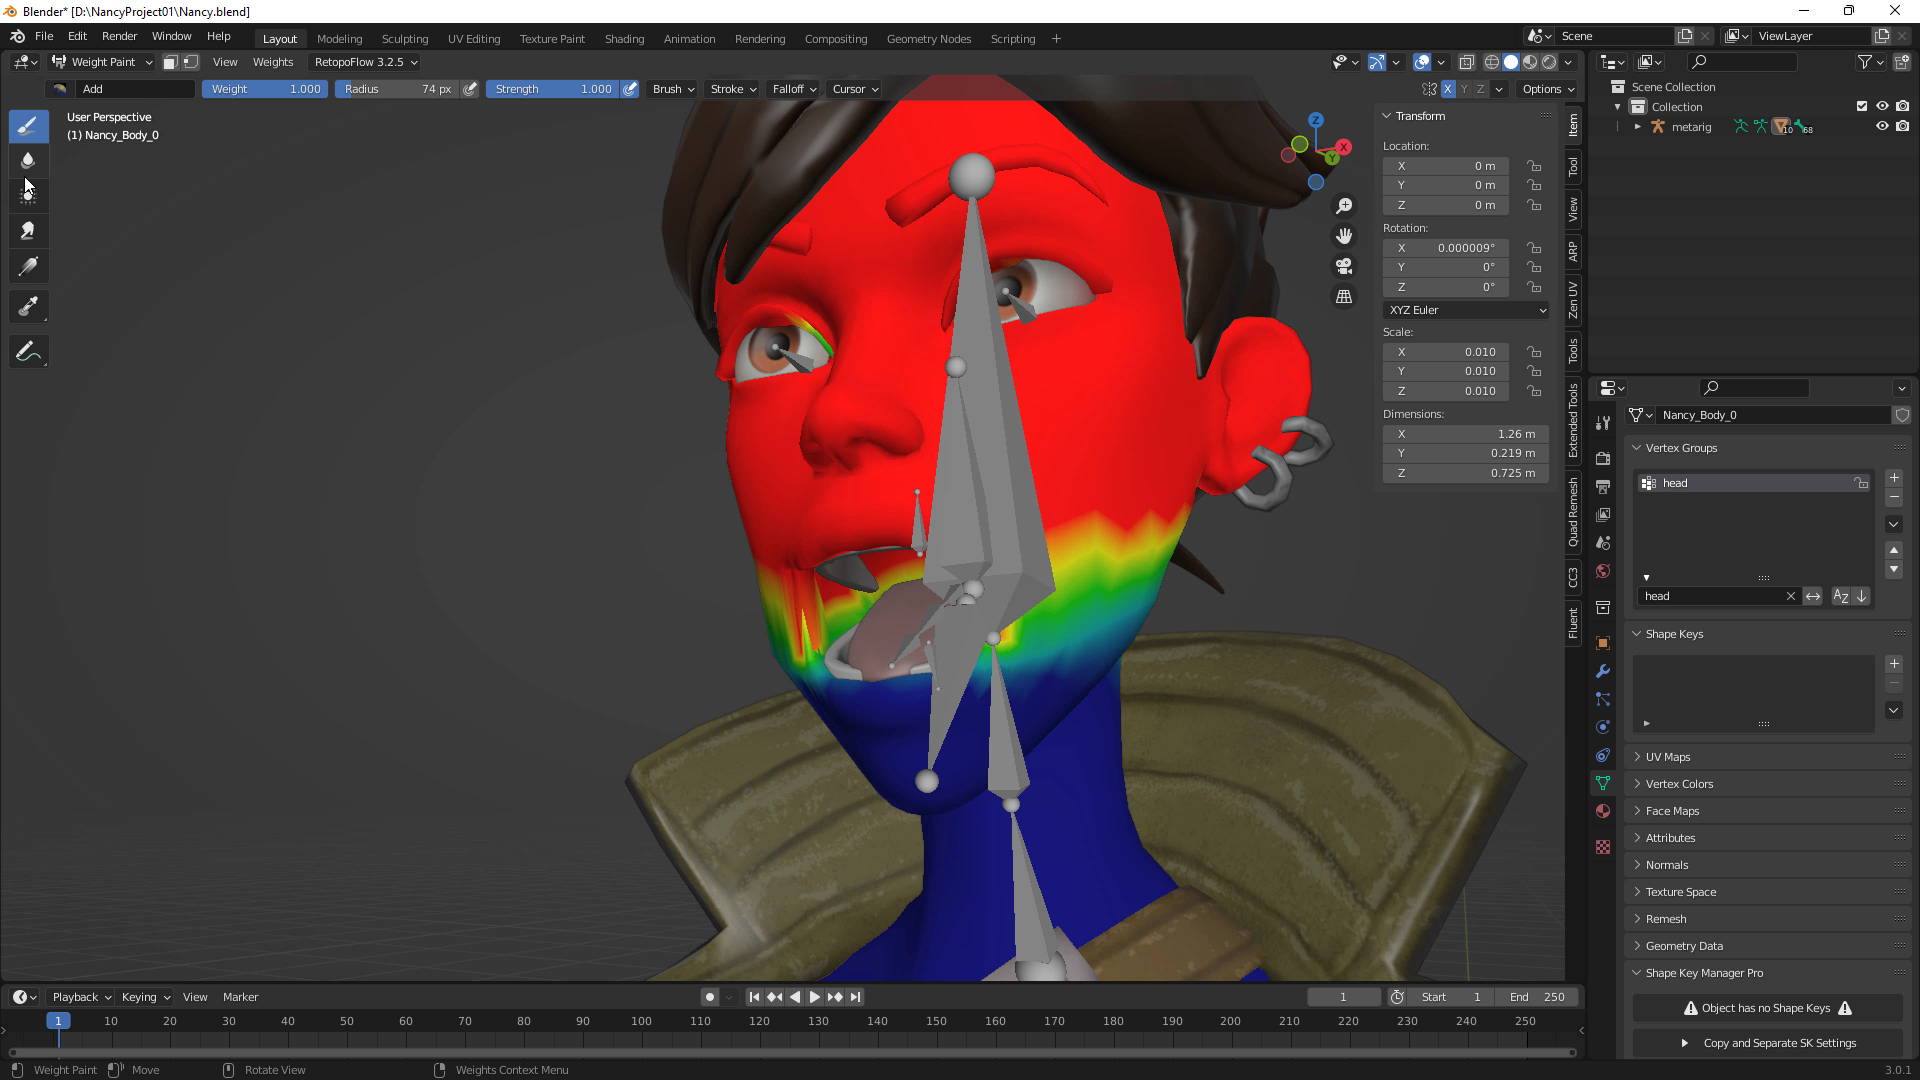
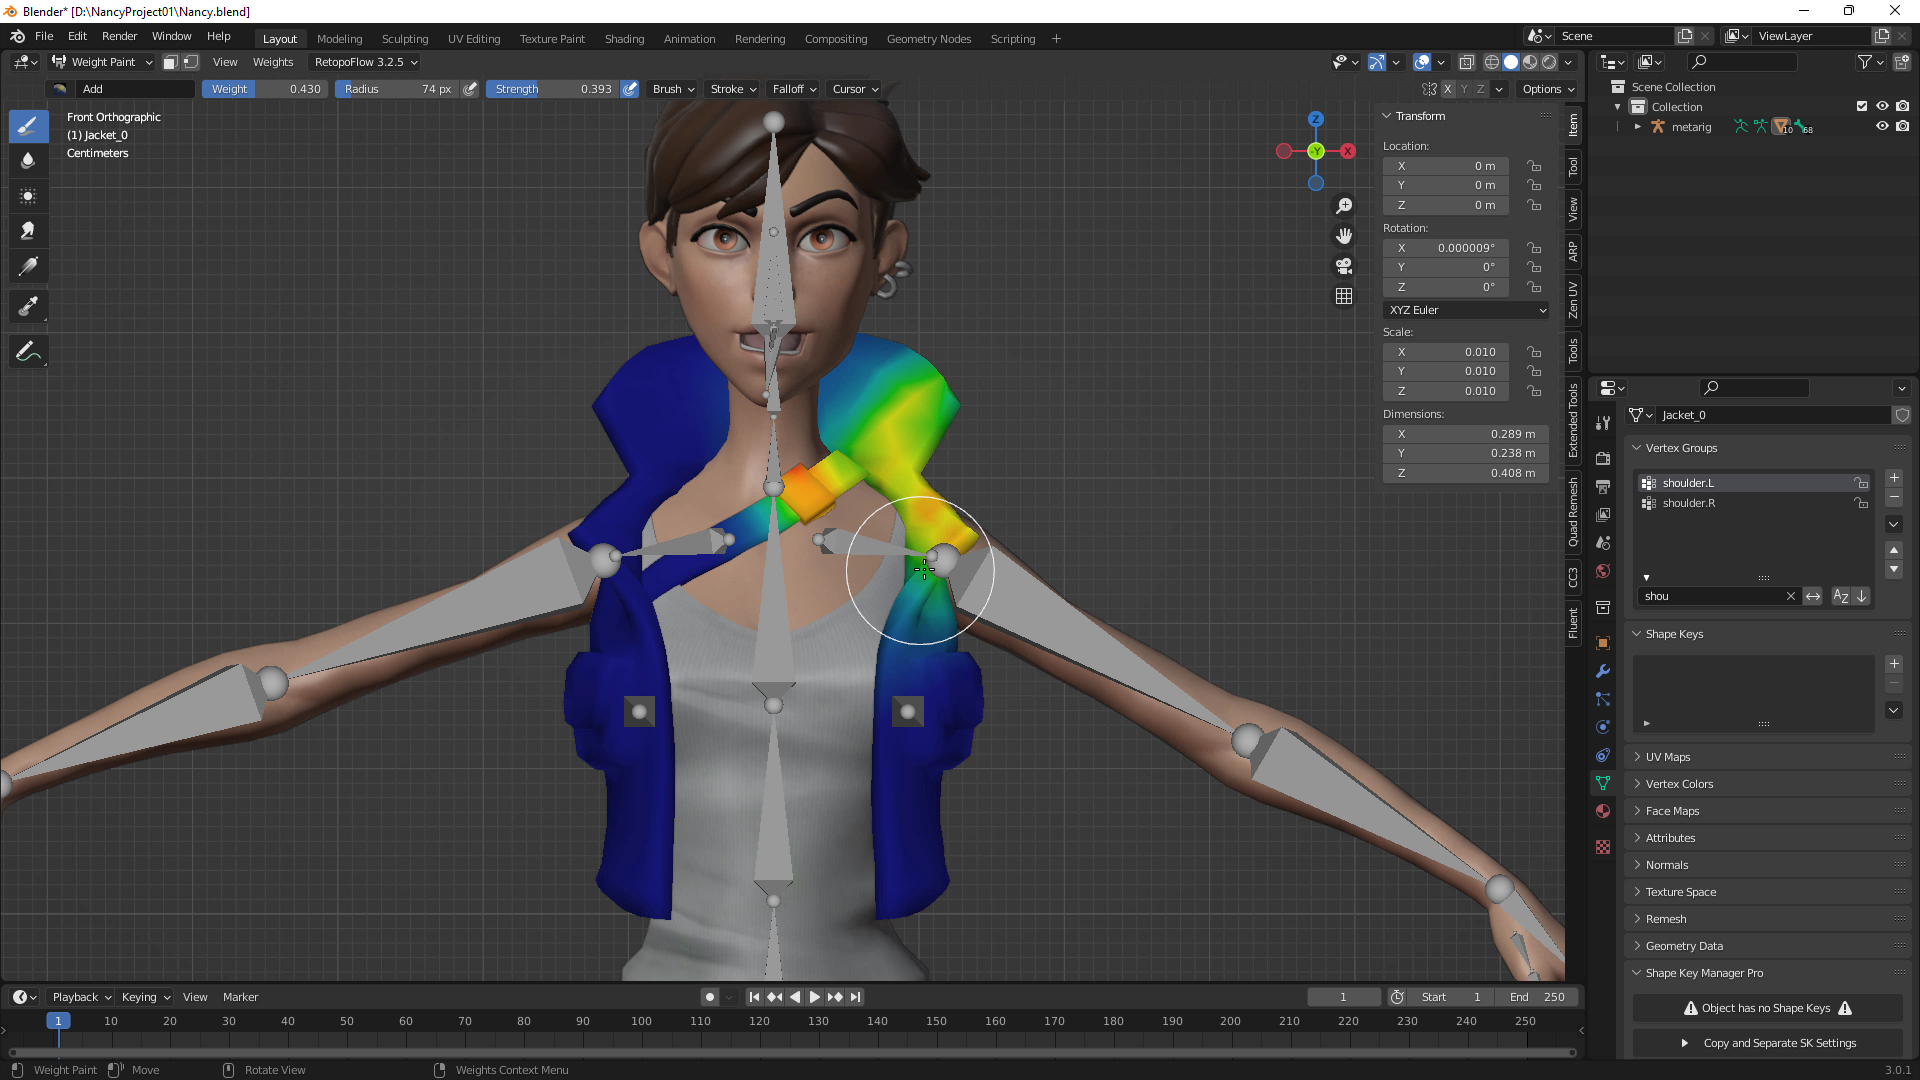
Once the bones are aligned, select all the meshes and bind them to the armature. Weight mapping will almost always require adjusting. The trickiest parts tend to be the jaw for me—although getting bulkier clothing to deform properly can be problematic as well.
You’ll want to thoroughly test your weight maps before the next stage. Character Creator does have a system that allows you to edit weight maps, though it’s not as robust as Blender’s. Using Blender’s pose functions can allow you to see which aspects of your character need to be touched up.
STEP 2: Auto Import Meta-Rigged Character to Character Creator 4
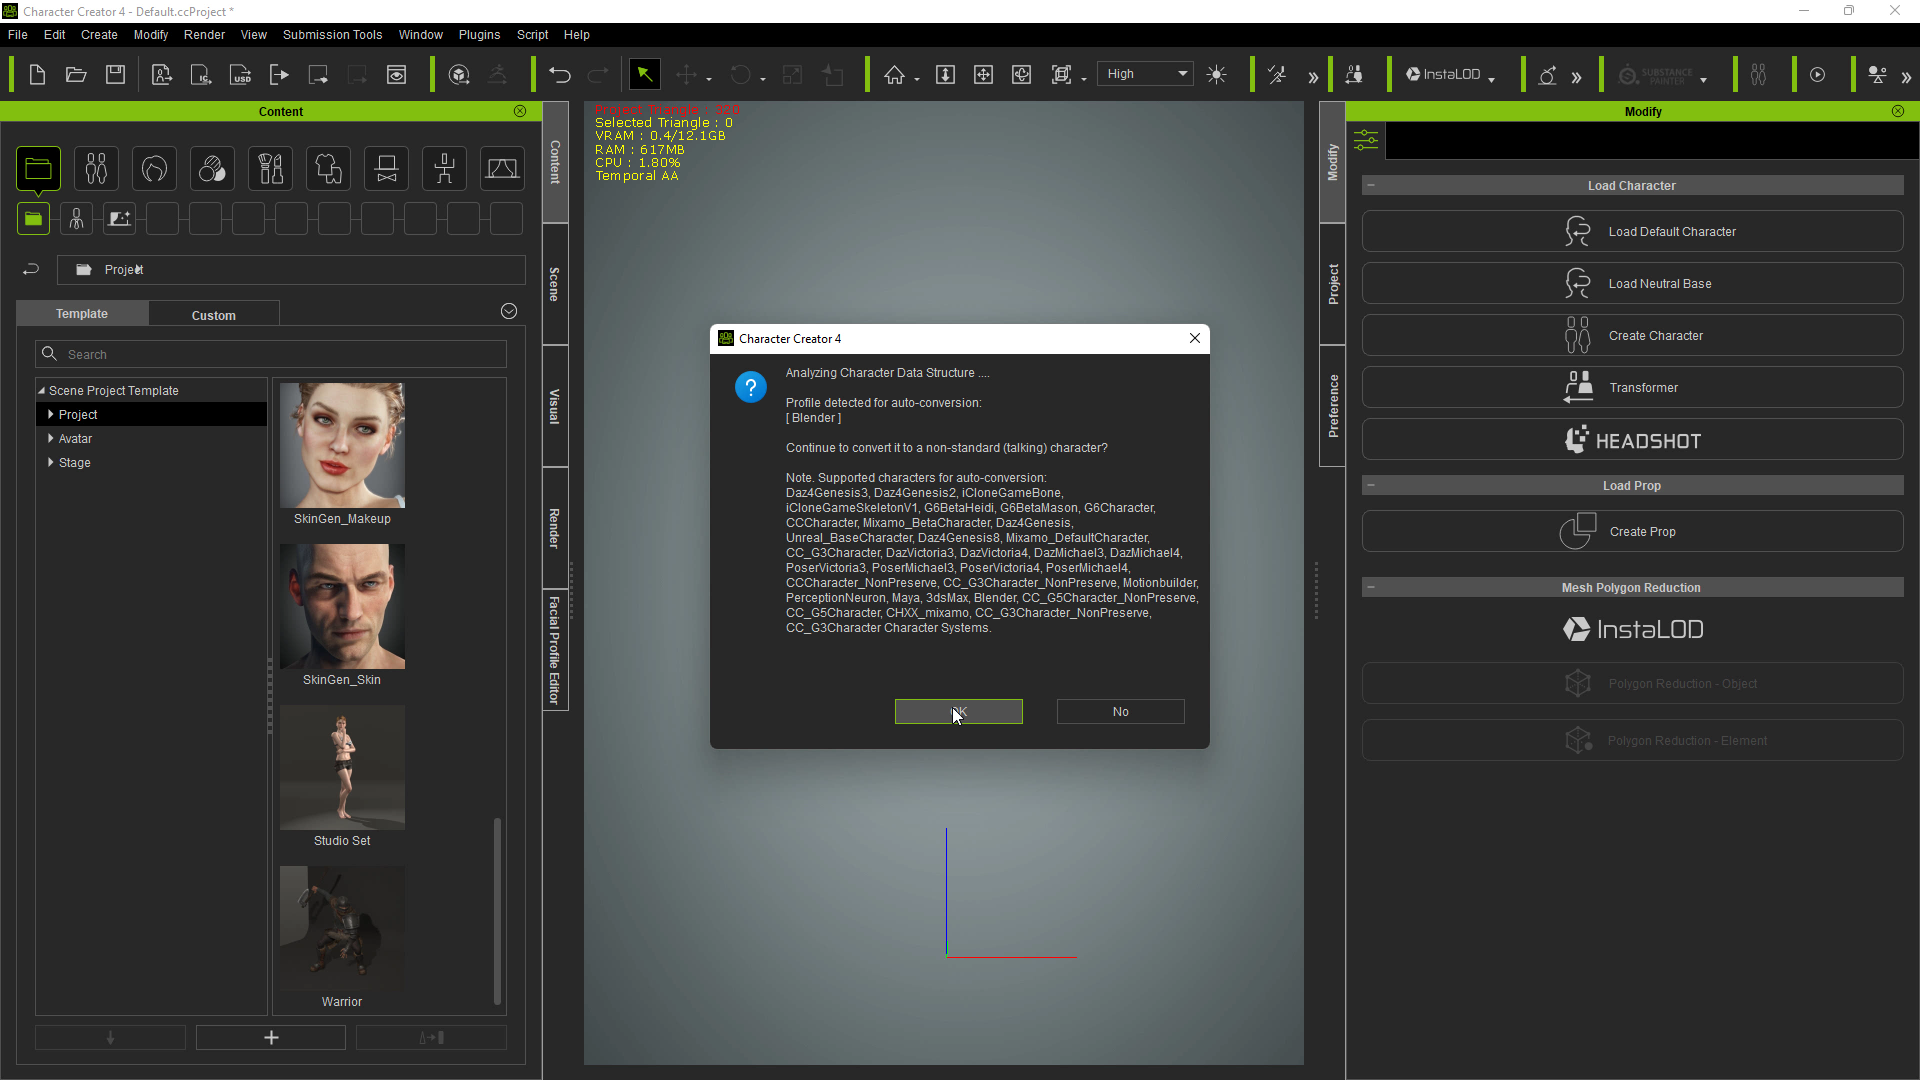
With the rig finished, export to FBX (uncheck Add Leaf Bones), then import into Character Creator 4. You can do this by dragging the FBX into CC4, or opening up the Import dialog and selecting the file.
Unless you’ve changed the bone names, the script should detect Blender’s Meta-Rig, if you use that rigging for your character. If not you’ll have to manually assign the bones using the bone assignment menu.
Reallusion’s motion library will be largely compatible with your imported character; although due to the proportion difference of stylized characters, you’ll notice some of the poses and animations need to be adjusted.

The Facial Profile Editor allows you to insert morph data into named slots that will be used to give the character facial animation and lip-sync compatibility. For a custom character outside of Character Creator, these slots will be empty by default. Depending on how you’ve rigged your character, you’ll need to export the model to a 3D application that allows for manipulating OBJ and/or FBX files to efficiently create morphs. Zbrush’s GoZ is built into the pipeline, but an FBX can be exported into Blender, or similar software, just as easily.
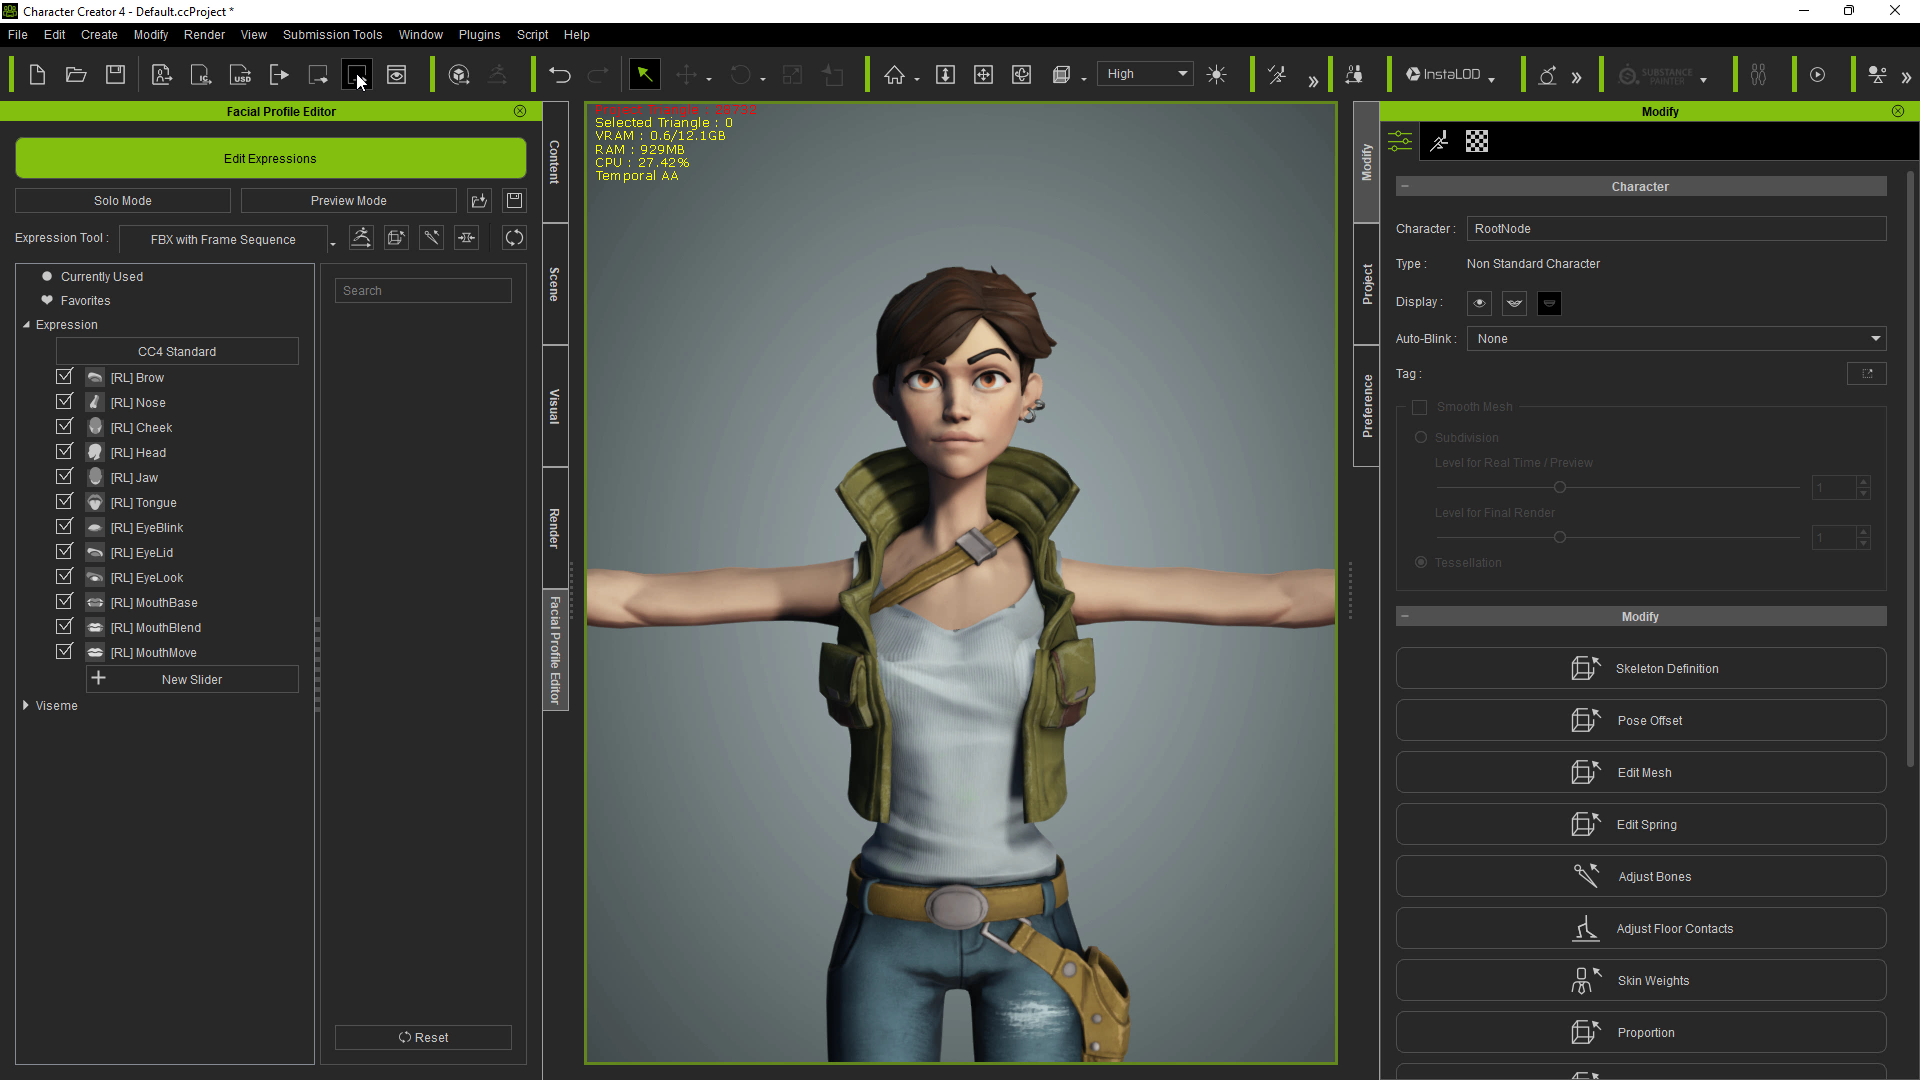
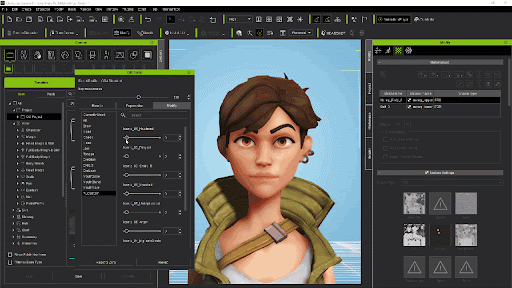
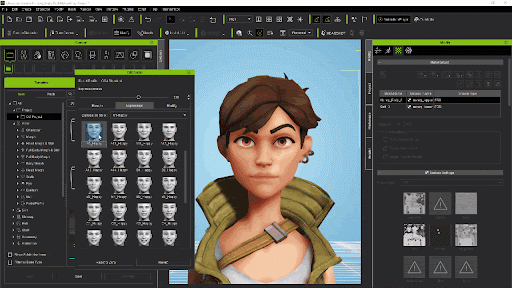
STEP 3: Adding Facial Rigs in Character Creator 4
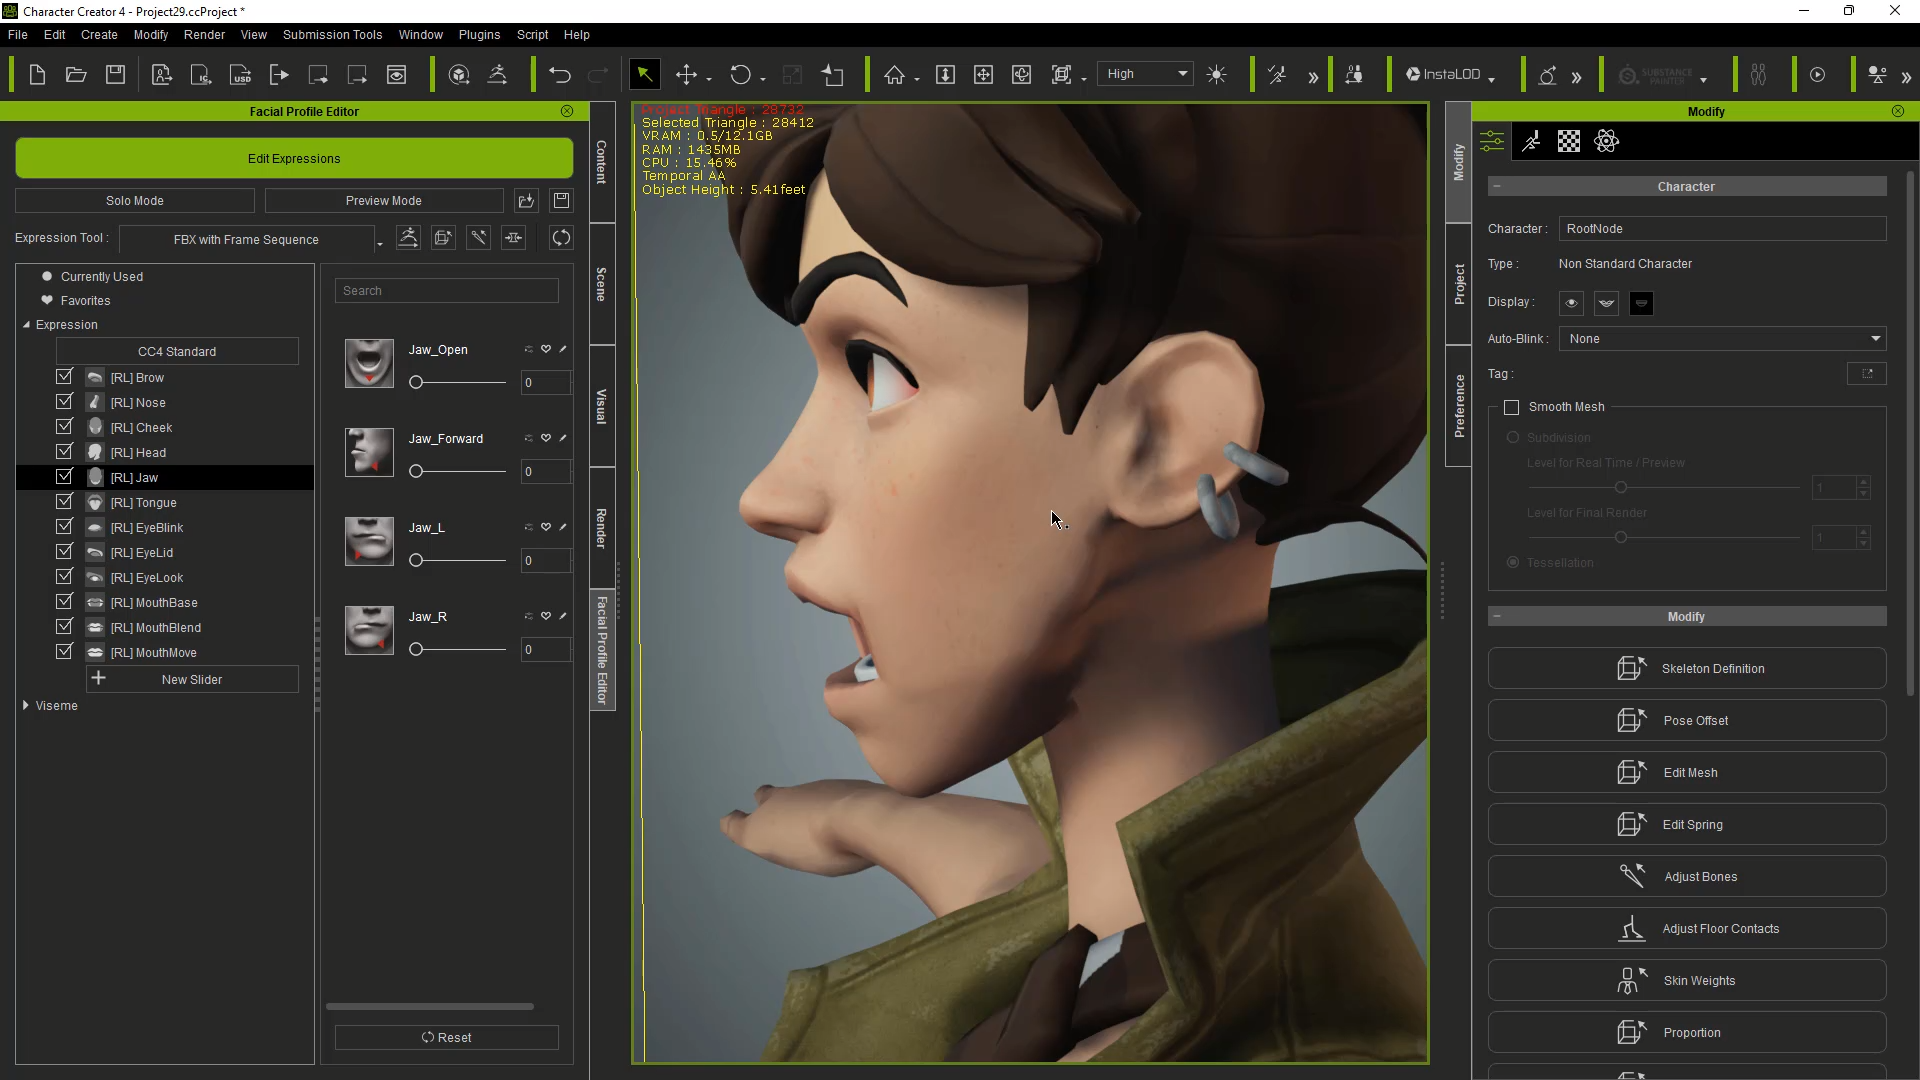
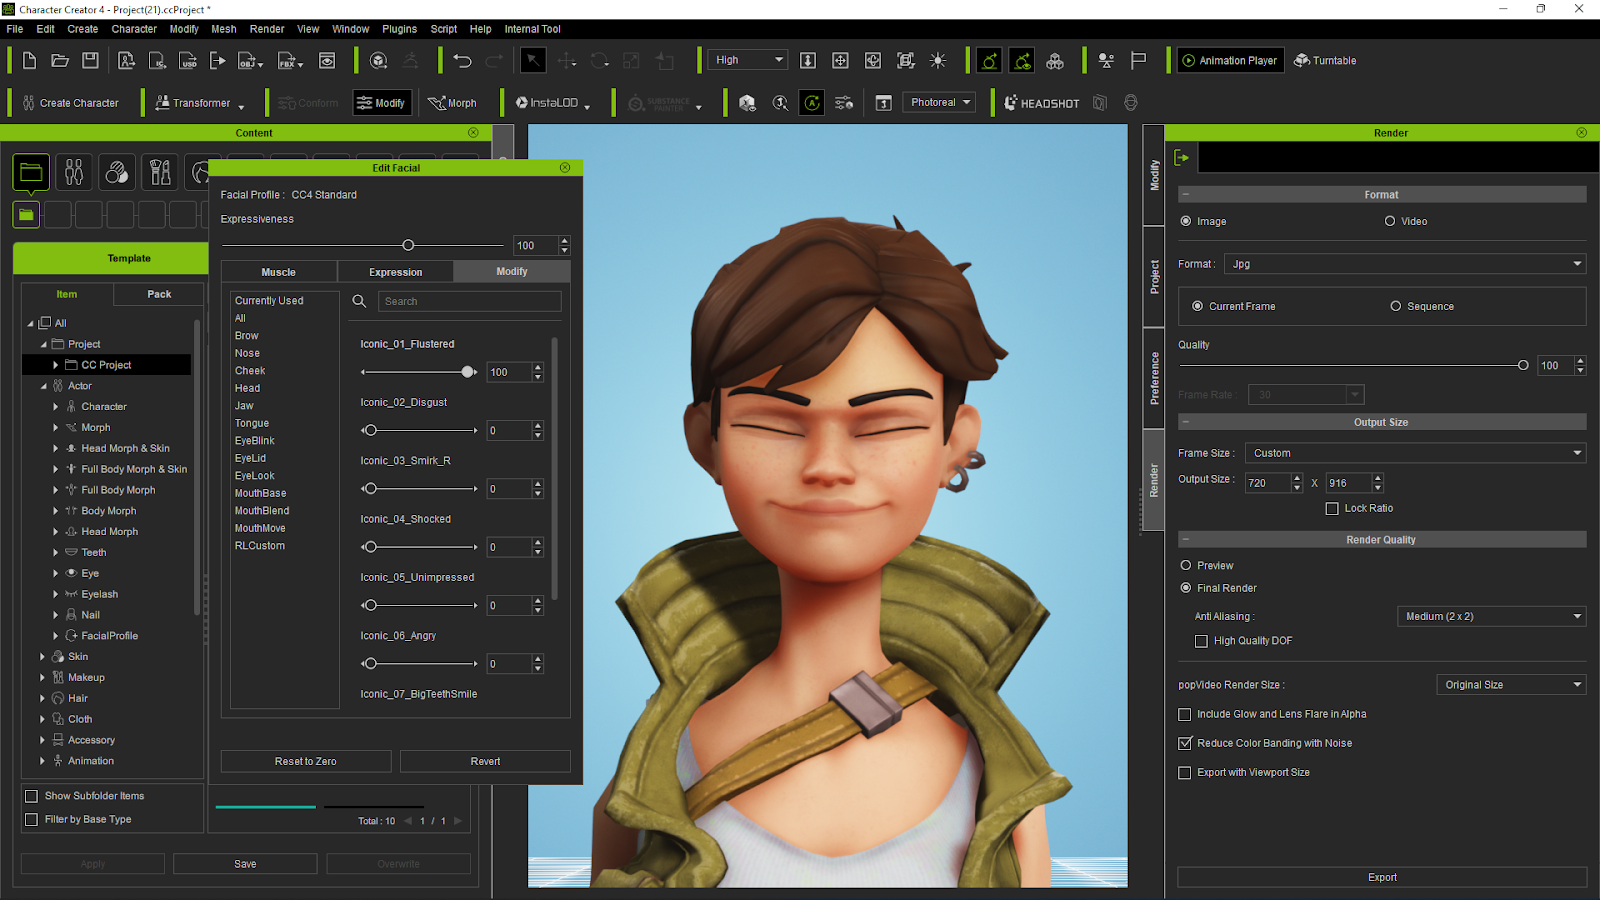
Each expression has a thumbnail that visually conveys the intended morph for that slot, often with little red arrows for additional assistance. This eliminates a lot of the guesswork involved and makes the process attainable for many skill levels.
STEP 4: Batch Import Facial Morphs from Blender FBX
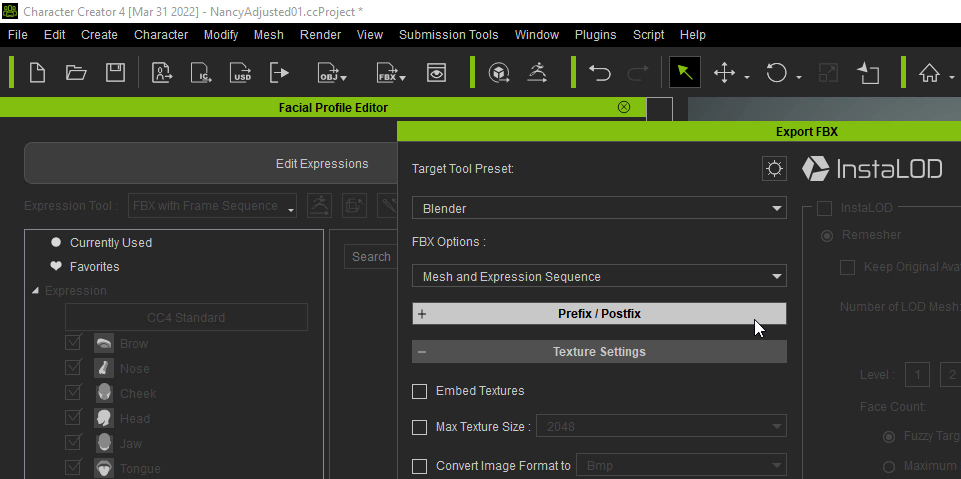
Character Creator 4 has an additional FBX export option, which is optimized for exporting FBX data for the Facial Profile pipeline, with presets for most industry-standard software. Blender is my software of choice, so I select that option and choose ‘FBX and Expression Sequence’.
Pro Tip: From the FBX export panel, please make sure to check “Mesh and Expression Sequence” options so the FBX file will include empty morph entries for Blender designers to easily fill in additional morph data.
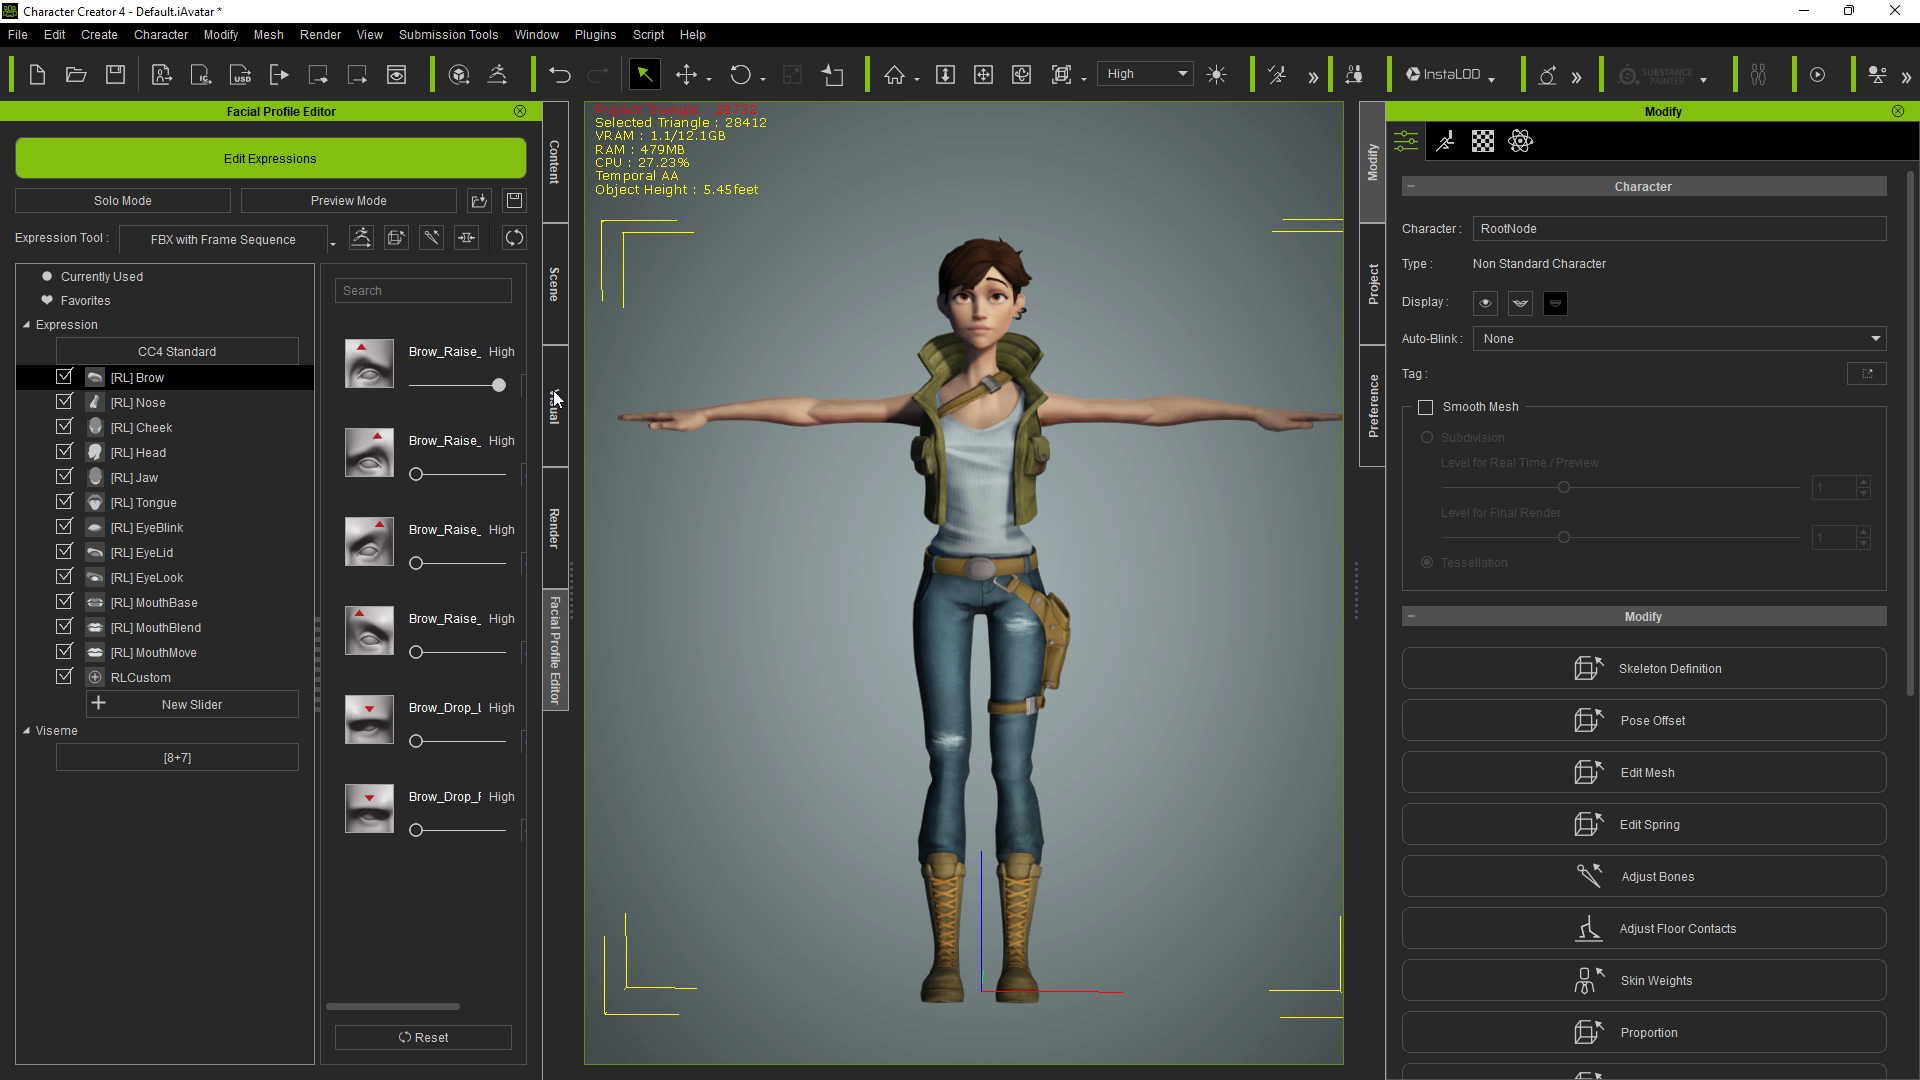
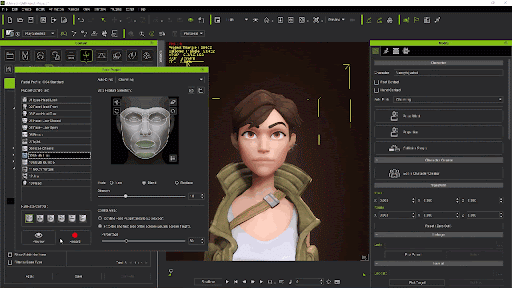
Morphs for Blender are located in the Shape Keys section. Character Creator 4 has populated the slots with empty names, making this process much easier than if you had to manually insert the names.

Blender has many tools for sculpting expressions efficiently. I use a combination of the sculpting tools and the Edit Mesh tools. Also, Blender has a feature called Blend from Shape Key, which allows you to select aspects of your model and add or subtract other shape key data. It’s very useful for this process and in general.

When you’re finished editing, export as an FBX back to CC4. Uncheck Add Leaf Bones before you finish the export.

STEP 5: Check Animation in Character Creator and iClone
In CC4, go back to the Facial Profile Editor and import ‘FBX with Frame Sequence’, choosing the file you just saved from Blender.
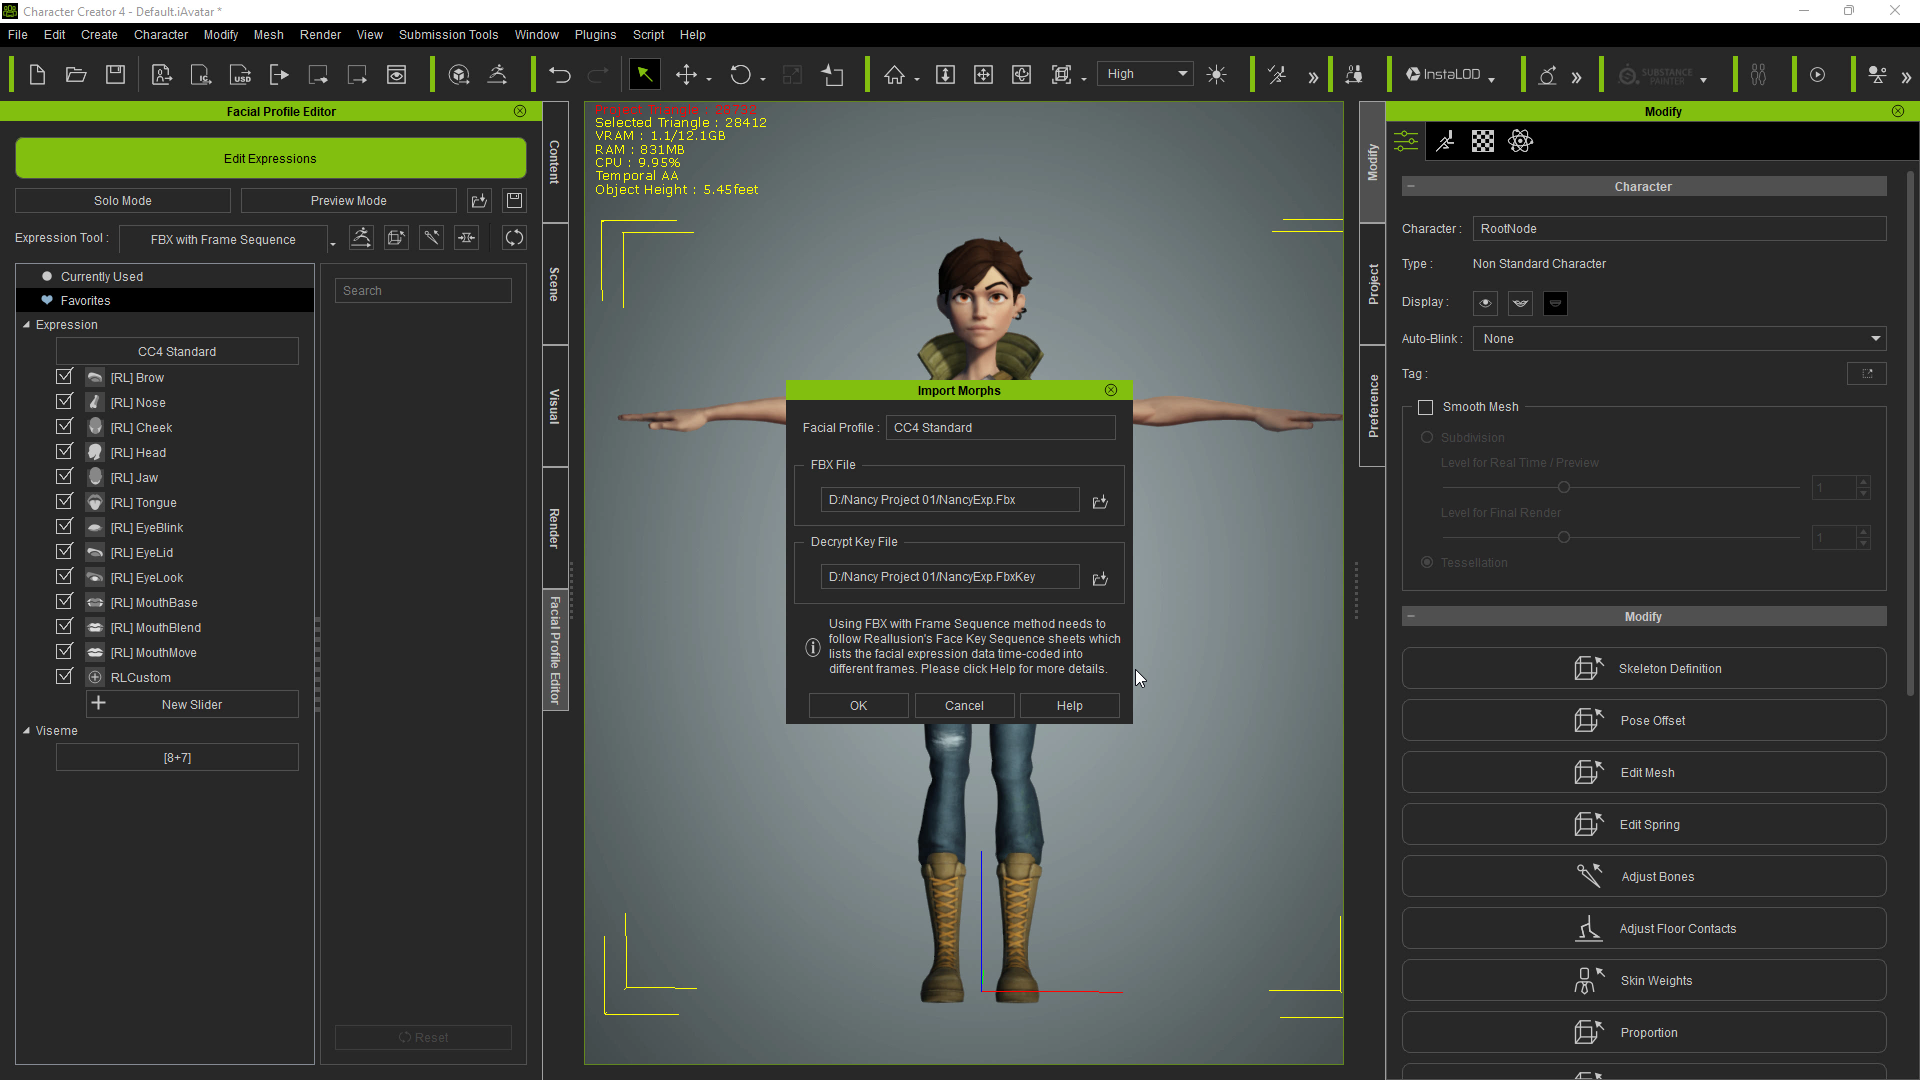
The morph data should now be populated with the data you exported from Blender. This pipeline allows you to efficiently switch between Character Creator 4 and your 3D software of choice, allowing for easy adjustments for each morph data slot.
In addition to the morph preset slots and categories, you can add your unique expressions and categories, allowing for nearly limitless expressions full of personality. From an artist’s perspective, this adds a new dimension to 3D art that was previously limited to professional animators.
Another benefit to CC4’s facial expression pipeline is that it is extremely well organized. If you want to dial in a specific feature, you don’t have to stumble around looking for it. Everything is categorized, there’s a search menu, and you can see which morphs you’ve dialed in by going to the Currently Used section at the top of the categories.
You can check your expression work by going through all presets in the facial editing menu. If your expression looks mostly like the ones visualized in the icons, you’re in good shape in terms of expression compatibility.

With the character mostly set up, I’ve imported her into iClone 8 for a quick animation demonstration. The iClone Face Puppet and LiveFace features are fully compatible with every aspect of your custom character, just as they would be with a Character Creator avatar.
The Face Puppet menu allows you to manipulate aspects of your character’s expression using a wide array of programmed presets, with the ability to implement your own presets if needed.
Certainly, you can use iClone’s timeline to fully animate Nancy by blending motion clips, changing curves, or setting motion layer keys.

In Conclusion
To sum up, my experience with using CC4 to add a personality to this character is a very positive one. Traditionally, adding this level of complexity to a character is beyond the scope of artists who specialize in areas of 3D outside of rigging and animation. Character Creator 4 opens up a new avenue for artists to bring life to their creations, giving smaller studios access to tools and pipelines that are extremely easy and efficient to use. I am not a professional rigging artist, and my experience in this area is limited at best. However, with modest familiarity with Blender’s tools, I was able to successfully take this static character, rig it in Blender, and endow it with full personality using the new features in Character Creator 4 and using Blender for the morph target pipeline. In brief, my main takeaways are:
- Due to its speed and ease of use, Character Creator 4 is the ultimate tool for bringing life to rigged characters.
- Blender (my software of choice) is an excellent choice for getting a character prepared for the Character Creator 4 pipeline. In addition, the facial morph pipeline is very Blender-friendly.
- While I am not a trained animator, iClone 8 is easier to use than ever. Applying, cutting, and blending motion clips makes the process of animation quite enjoyable.


very nice.