
Behind the Scenes: Cozy Little Kitchen
Introduction
Hi, I’m Hussain Saaif, a self-taught 3D artist from the Maldives. I’m 19 and I’ve been using Blender as my tool for 3D modeling for almost 2 years. I tried many 3D design tools before I settled with Blender. To be honest, it was just because Blender was free and it had many of the features I desired.
Inspiration
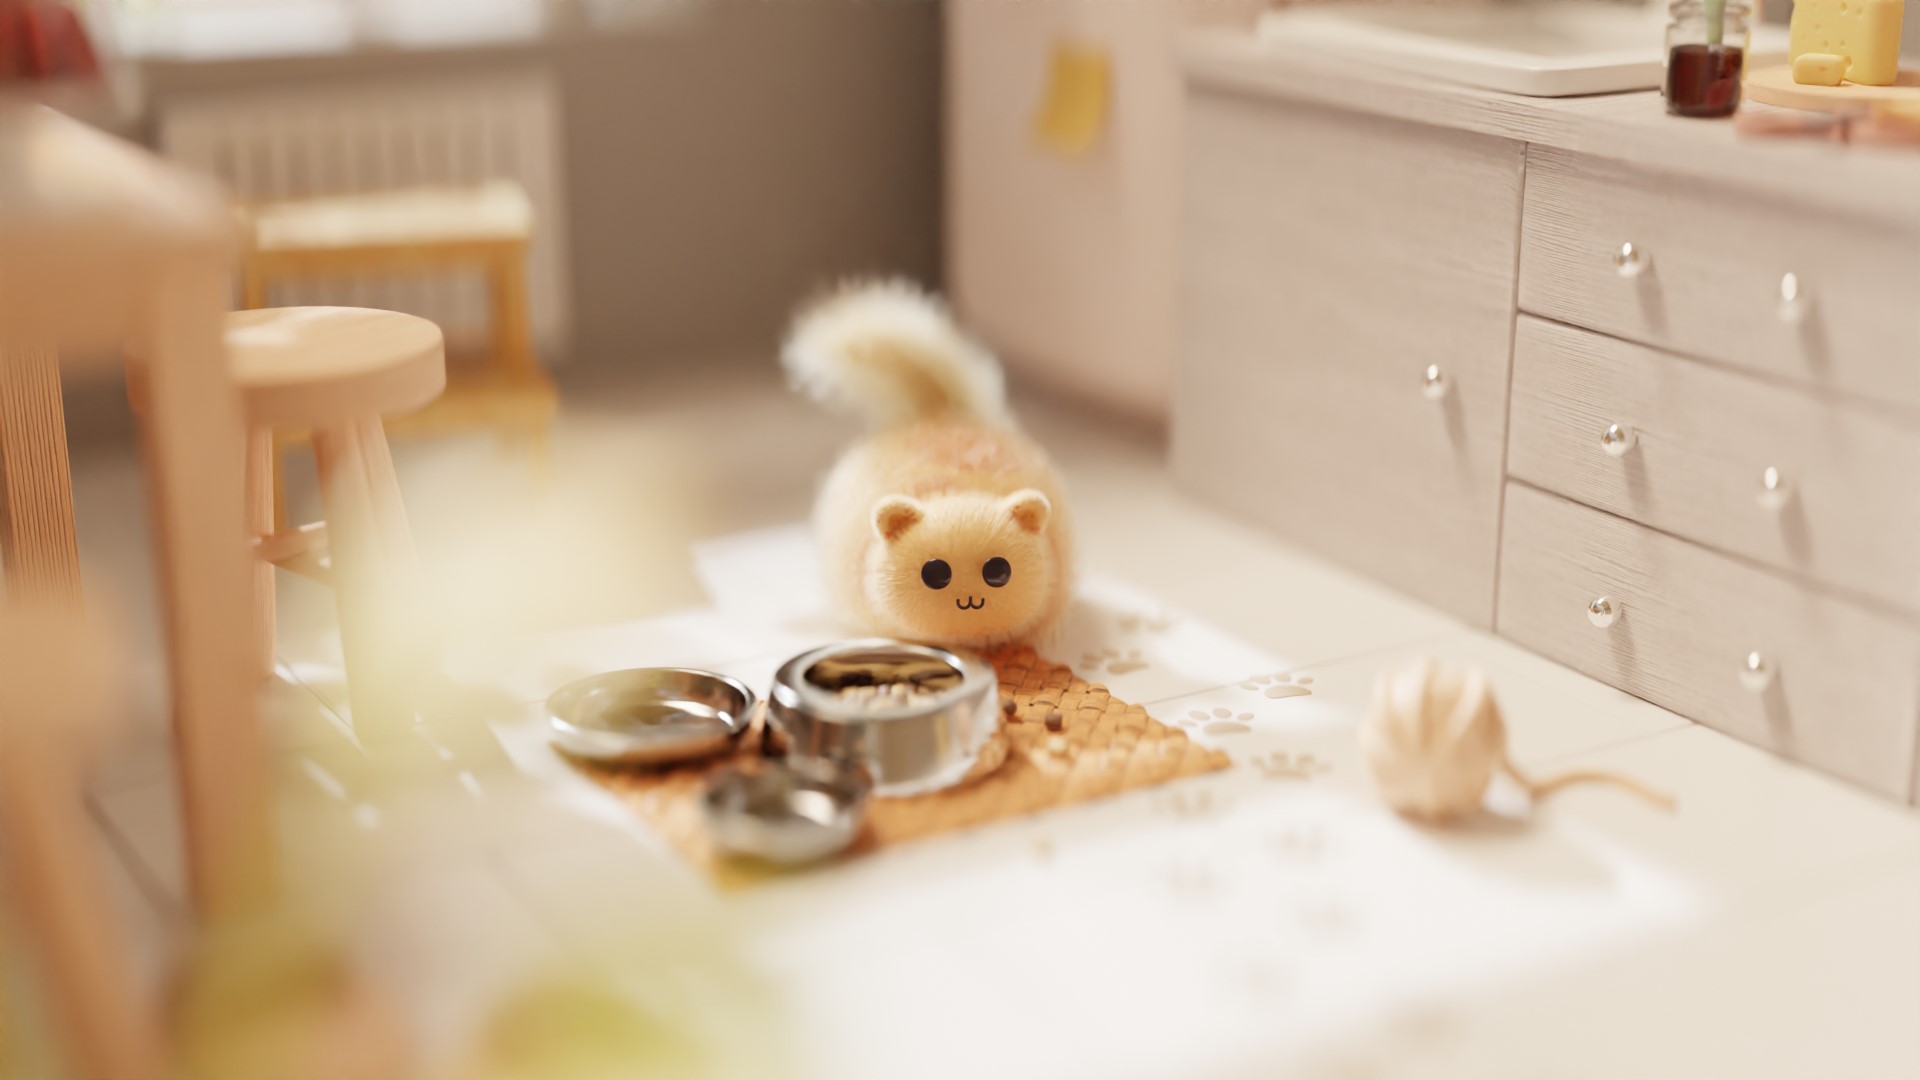
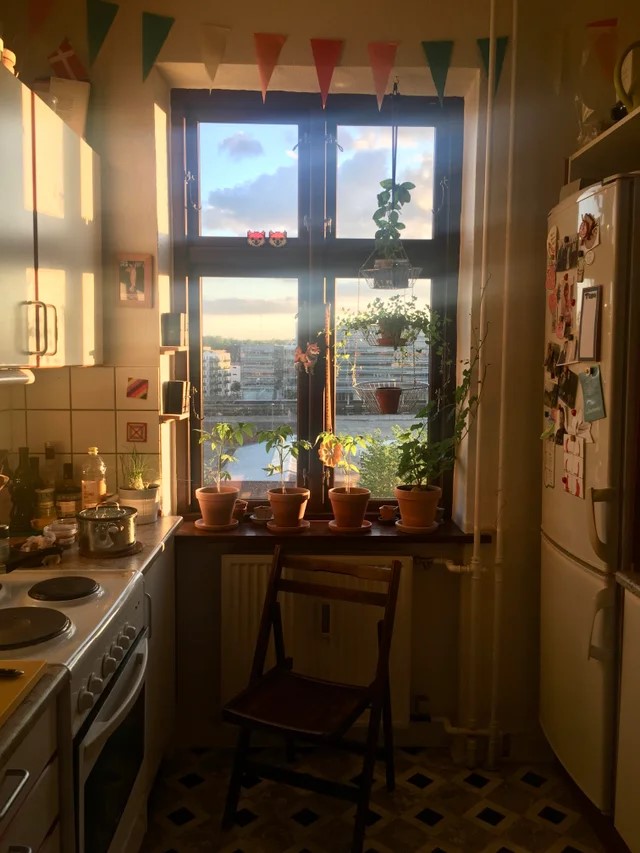
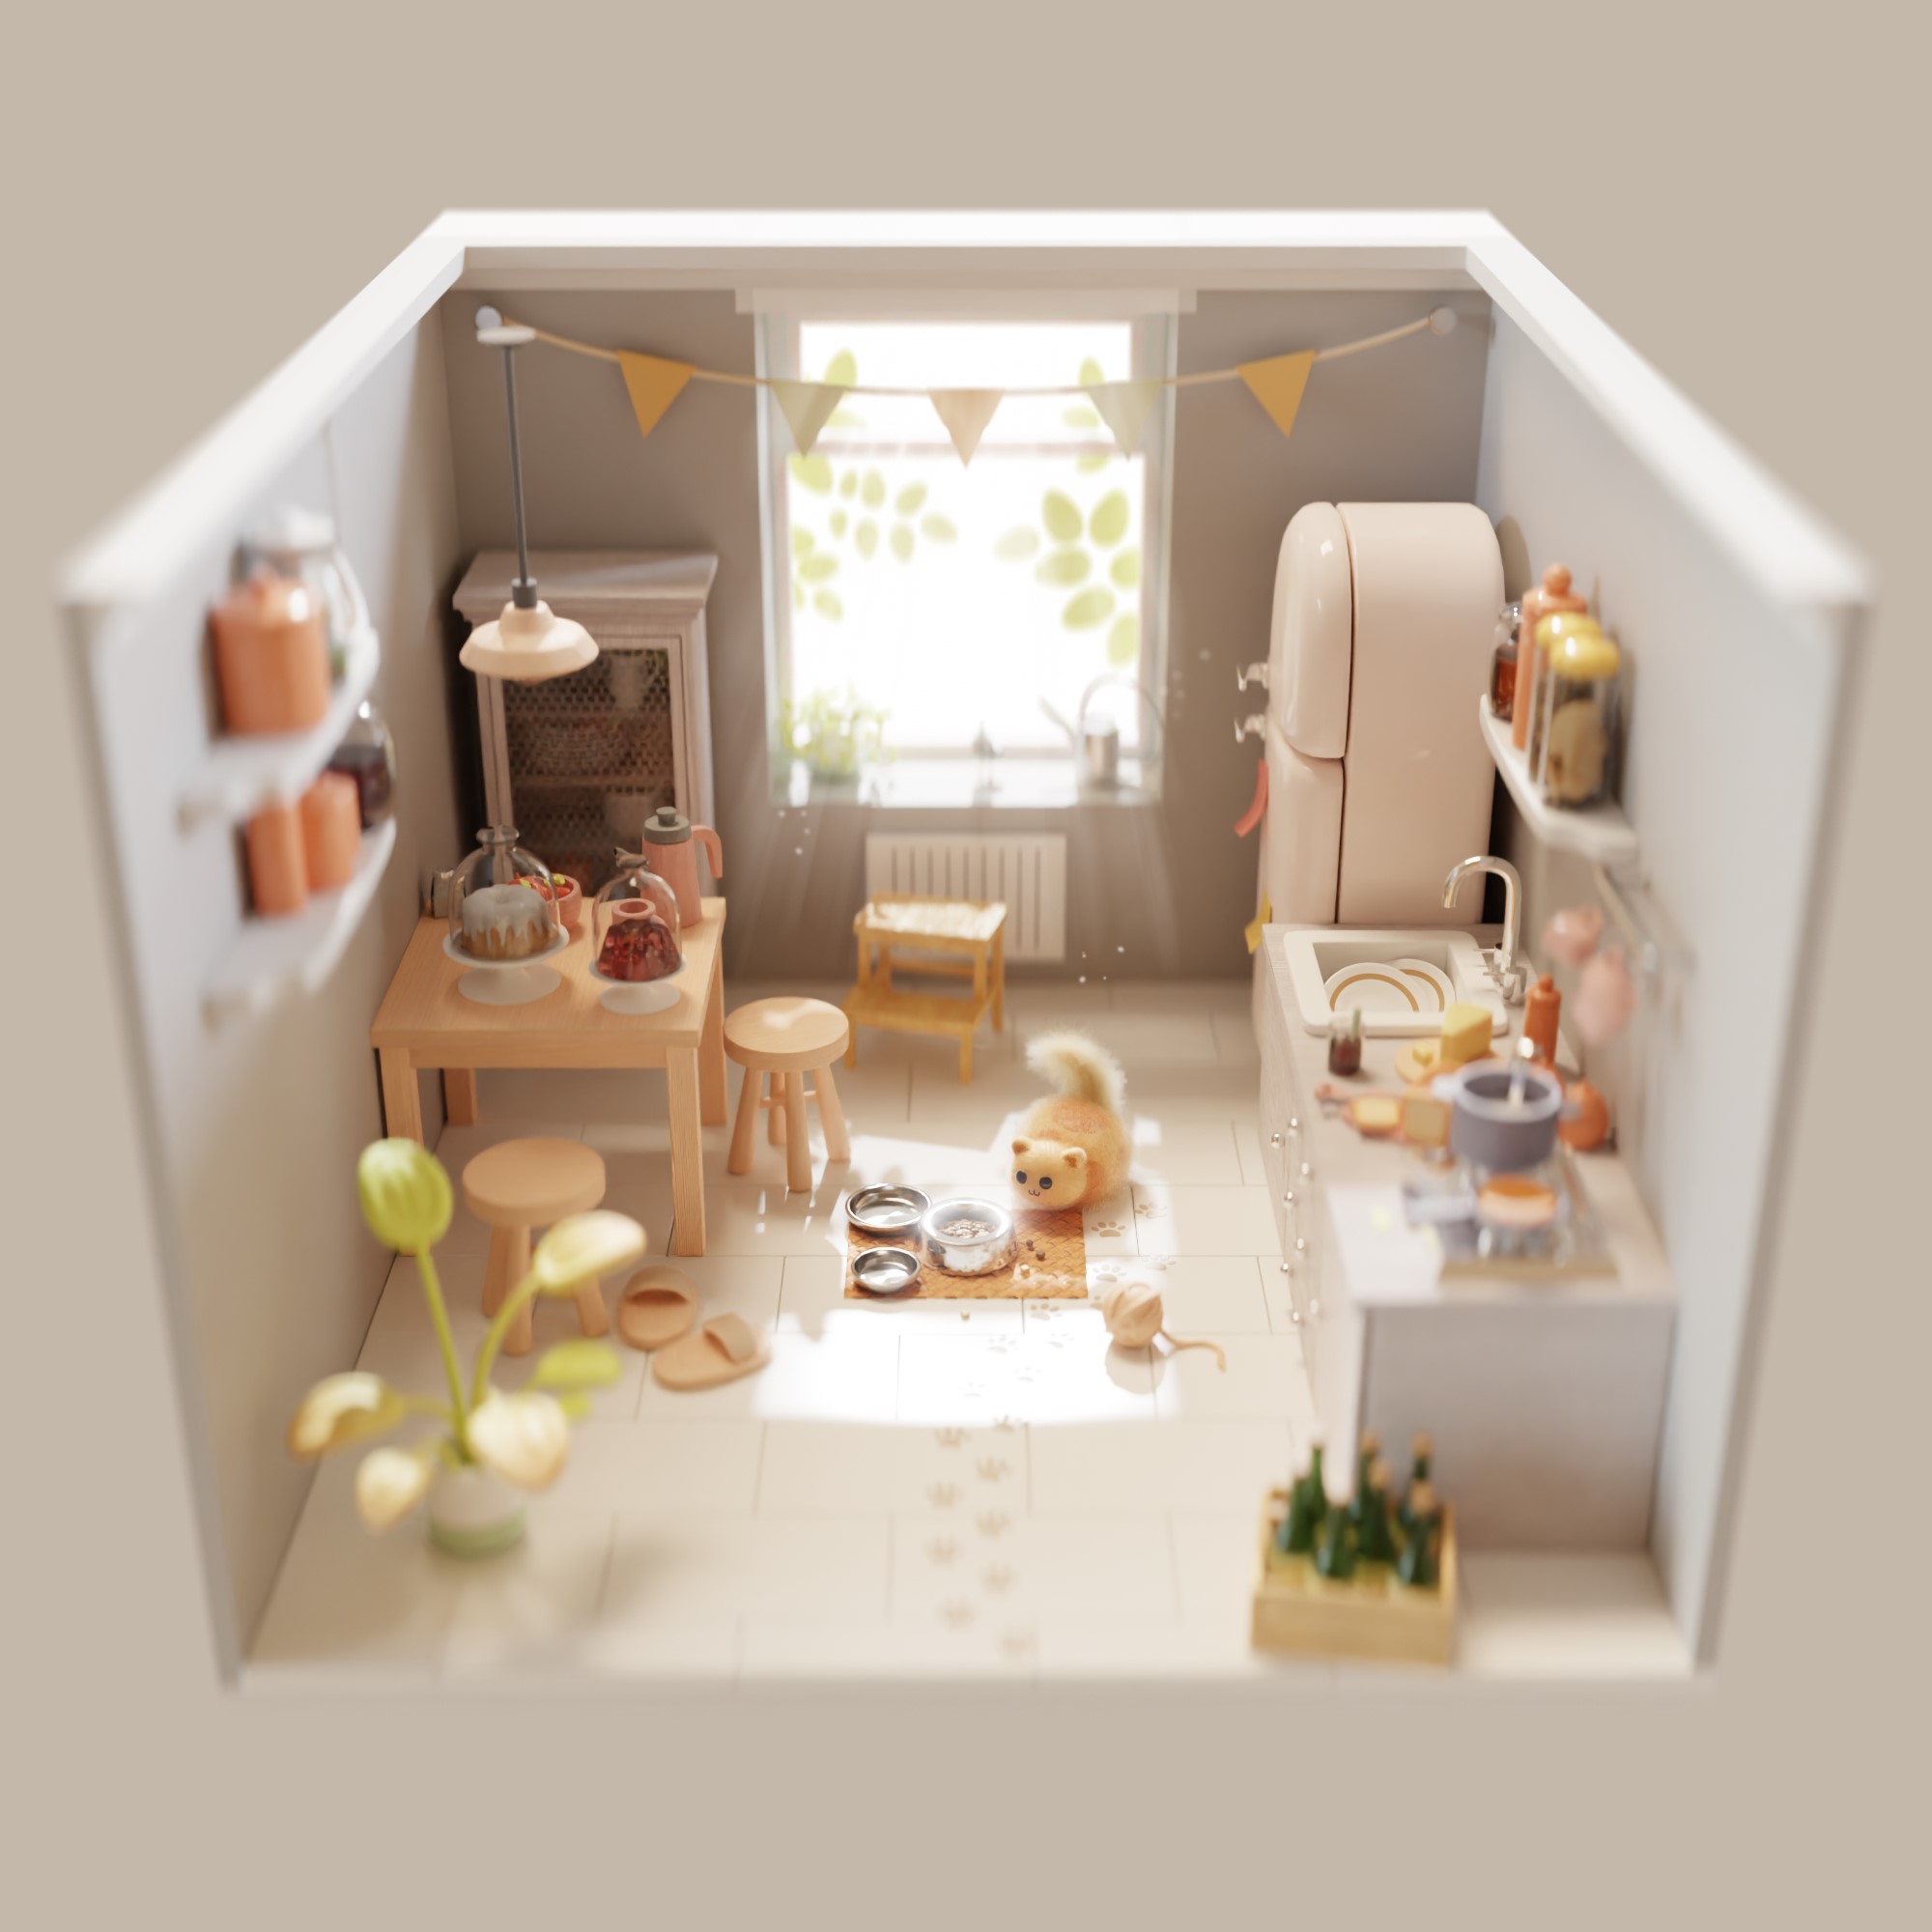
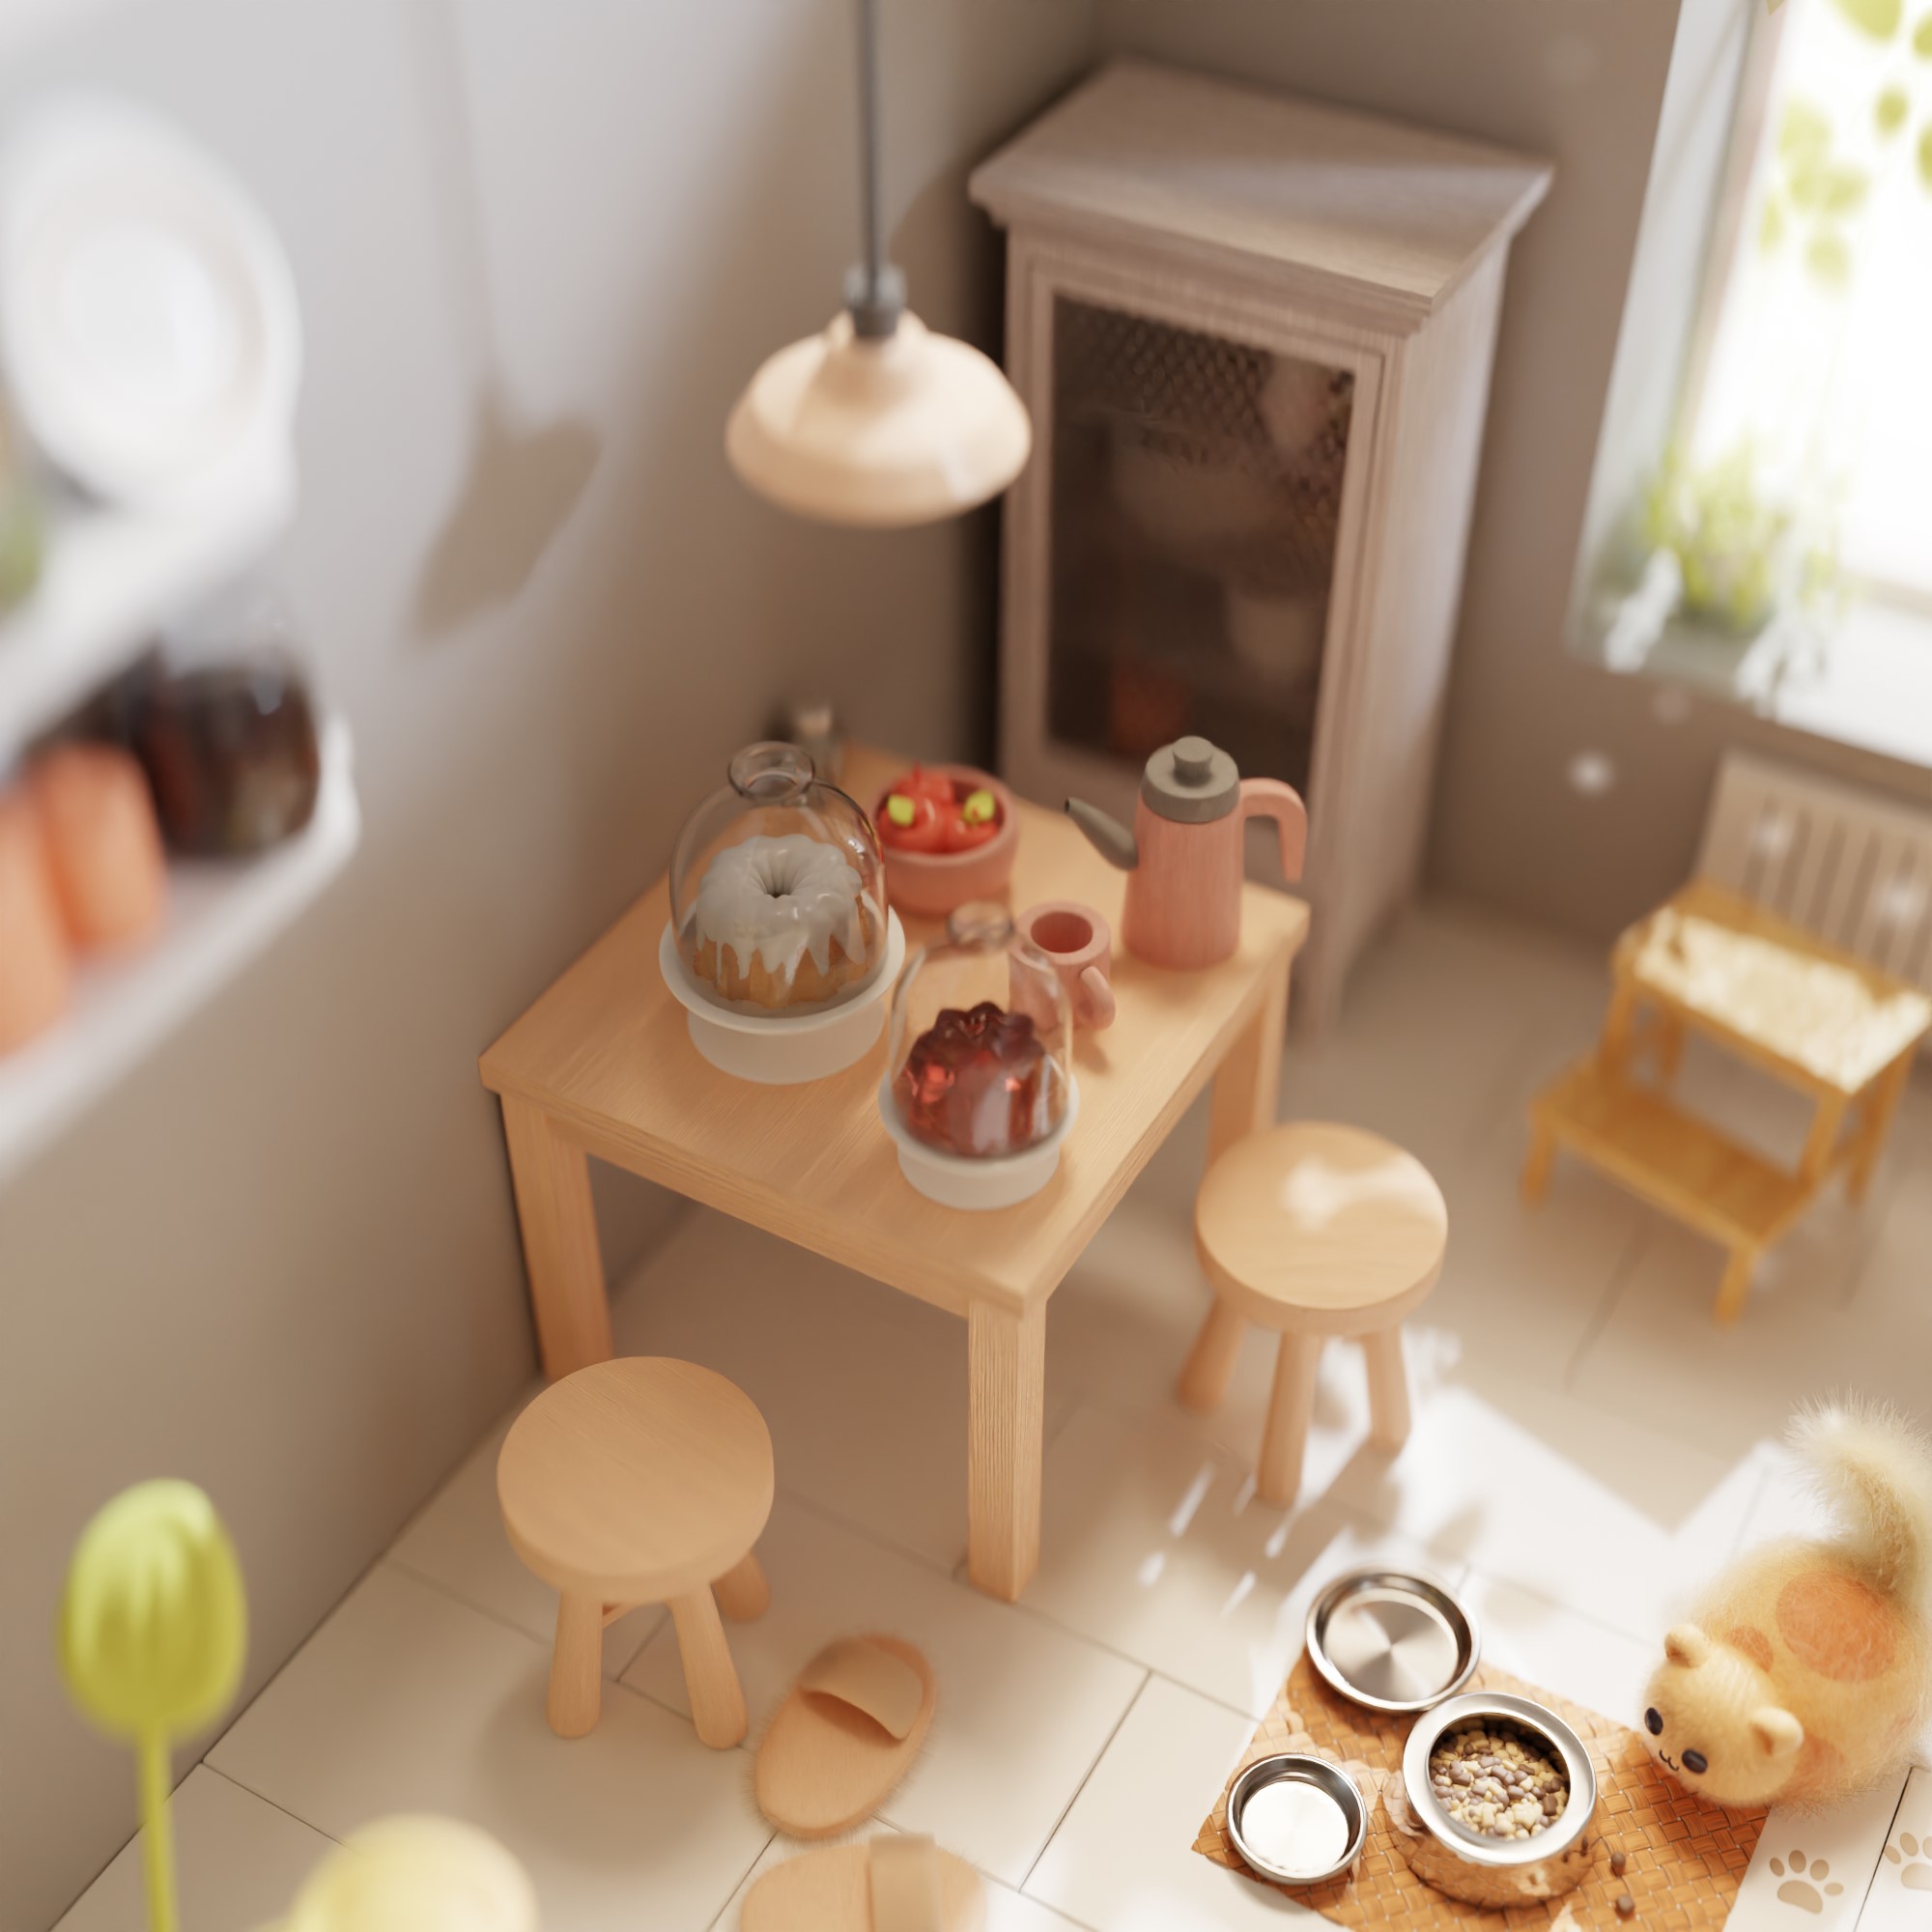
One day, I came across this picture of a cozy kitchen on Pinterest. It had this very warm lighting coming from the window which also gave a very comfortable feeling, and I imagined in my head a small diorama-like room where a warm light shined through a window onto a small cat. Why a cat? Because they are so freaking cute, of course! This was also a fun project as I wanted to learn more about color, lighting, and composition.
Blocking out the Scene
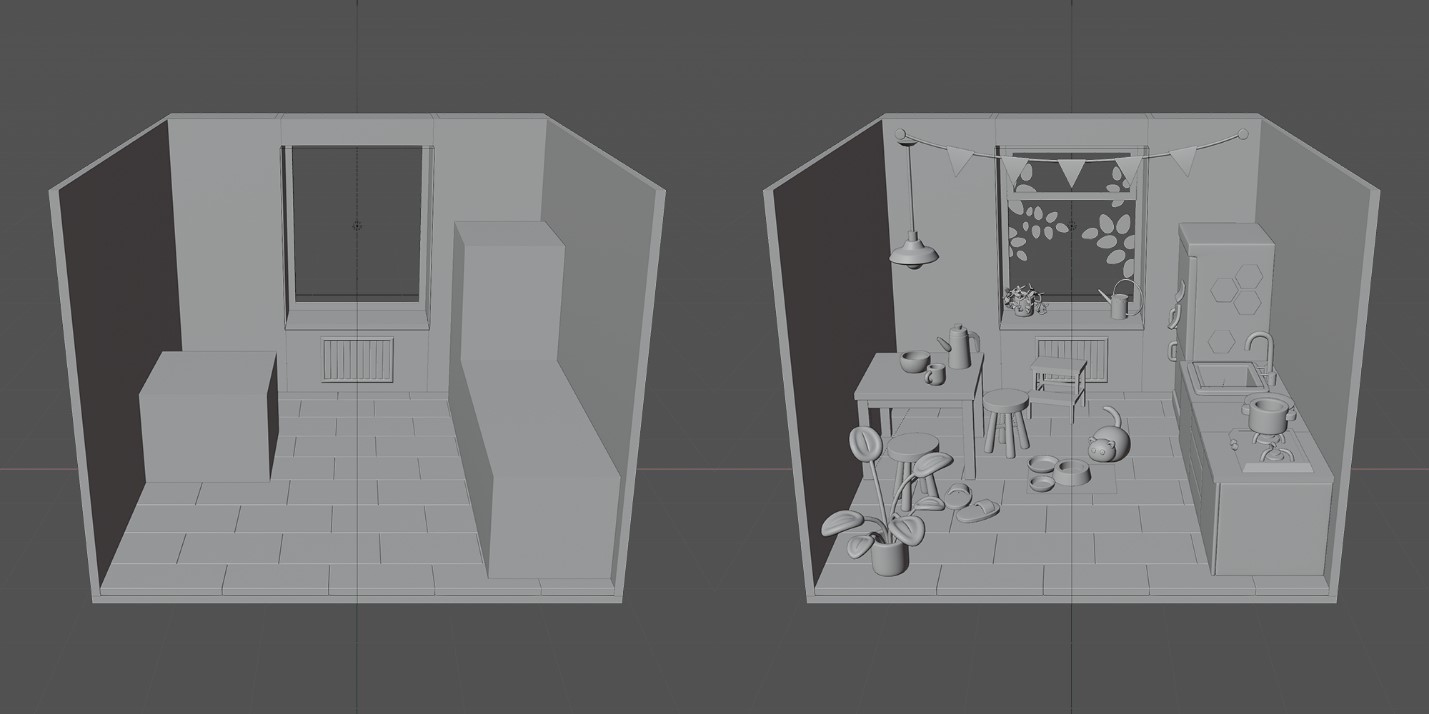
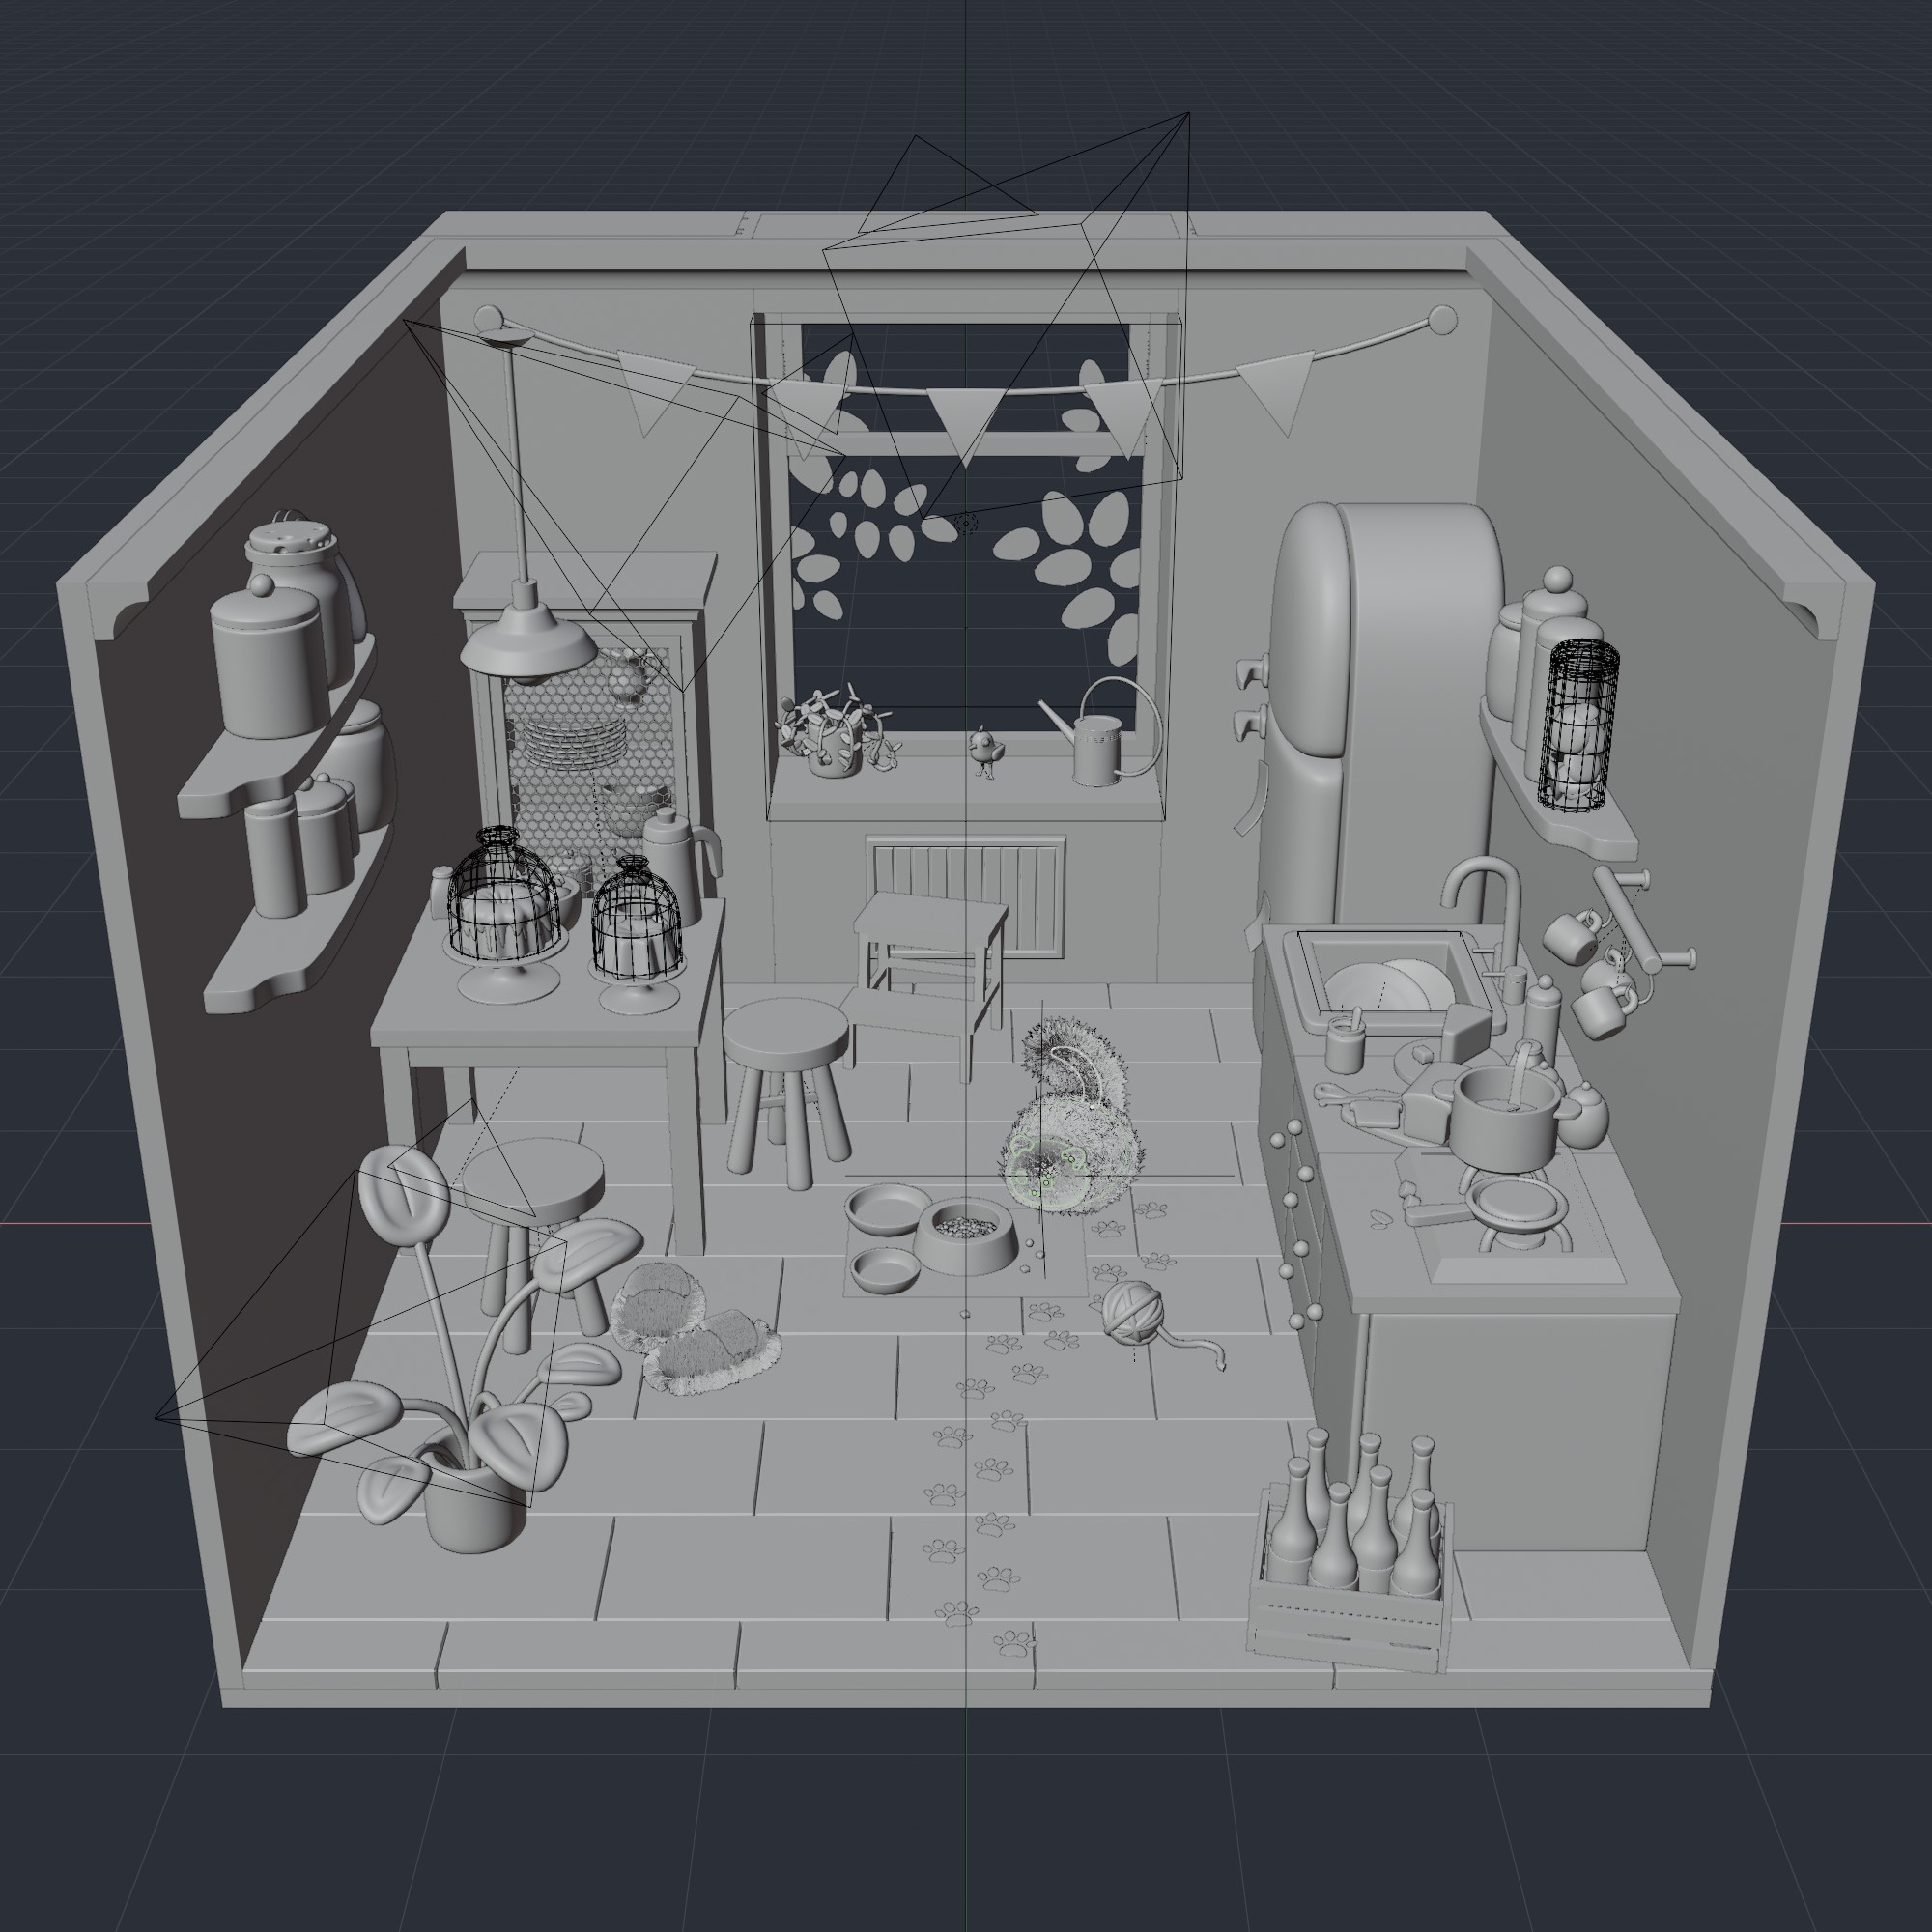
I don’t usually sketch my scenes on paper. Instead, I prefer to start blocking out the scene in Blender. It allows me to work on the overall composition of the scene and work on the lighting at the same time. The lighting is not too complicated as it involves just one Sunlamp and an area light as a portal. The portal light was important because I also used an HDRI from Poly Haven, and it guides the light from the HDRI through the portal, making the overall image sharper.
As for the composition and framing, I follow the rule of the thirds with the help of composition guides which can be enabled in the viewport display setting of the camera. I made sure that the window and the place where I would add the cat would lie in the middle of the frame.
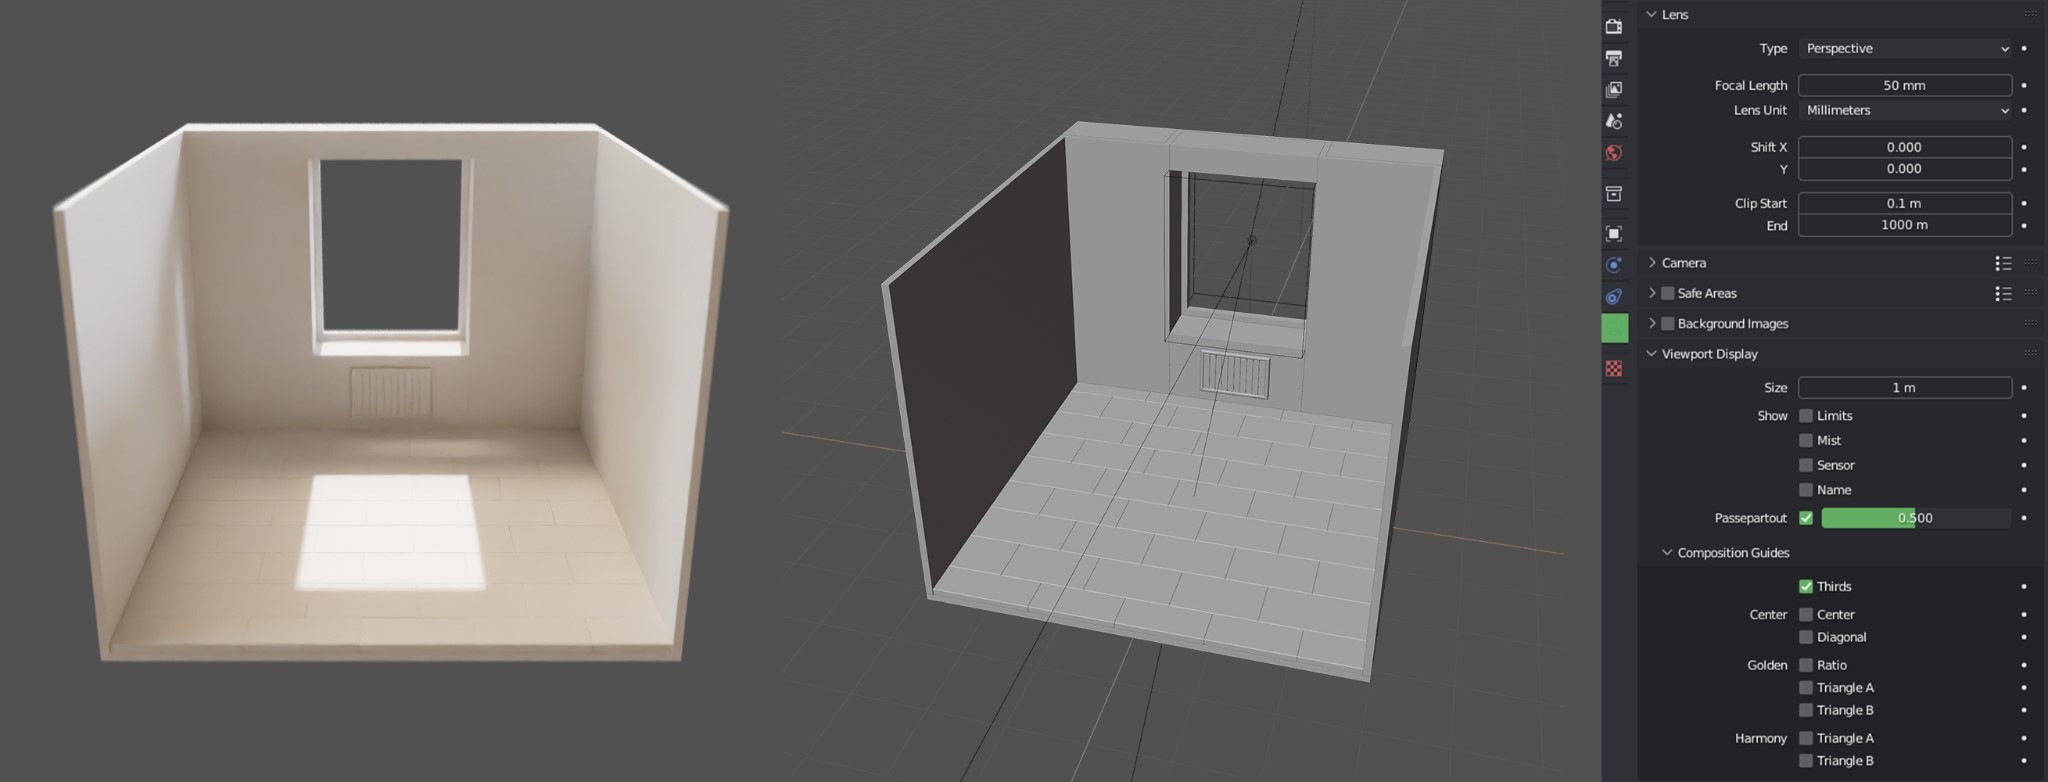
At this point, I slowly start to add details. I model very basic shapes from cubes so it’s easier to understand the scale and the overall layout of the scene.
First Test Render
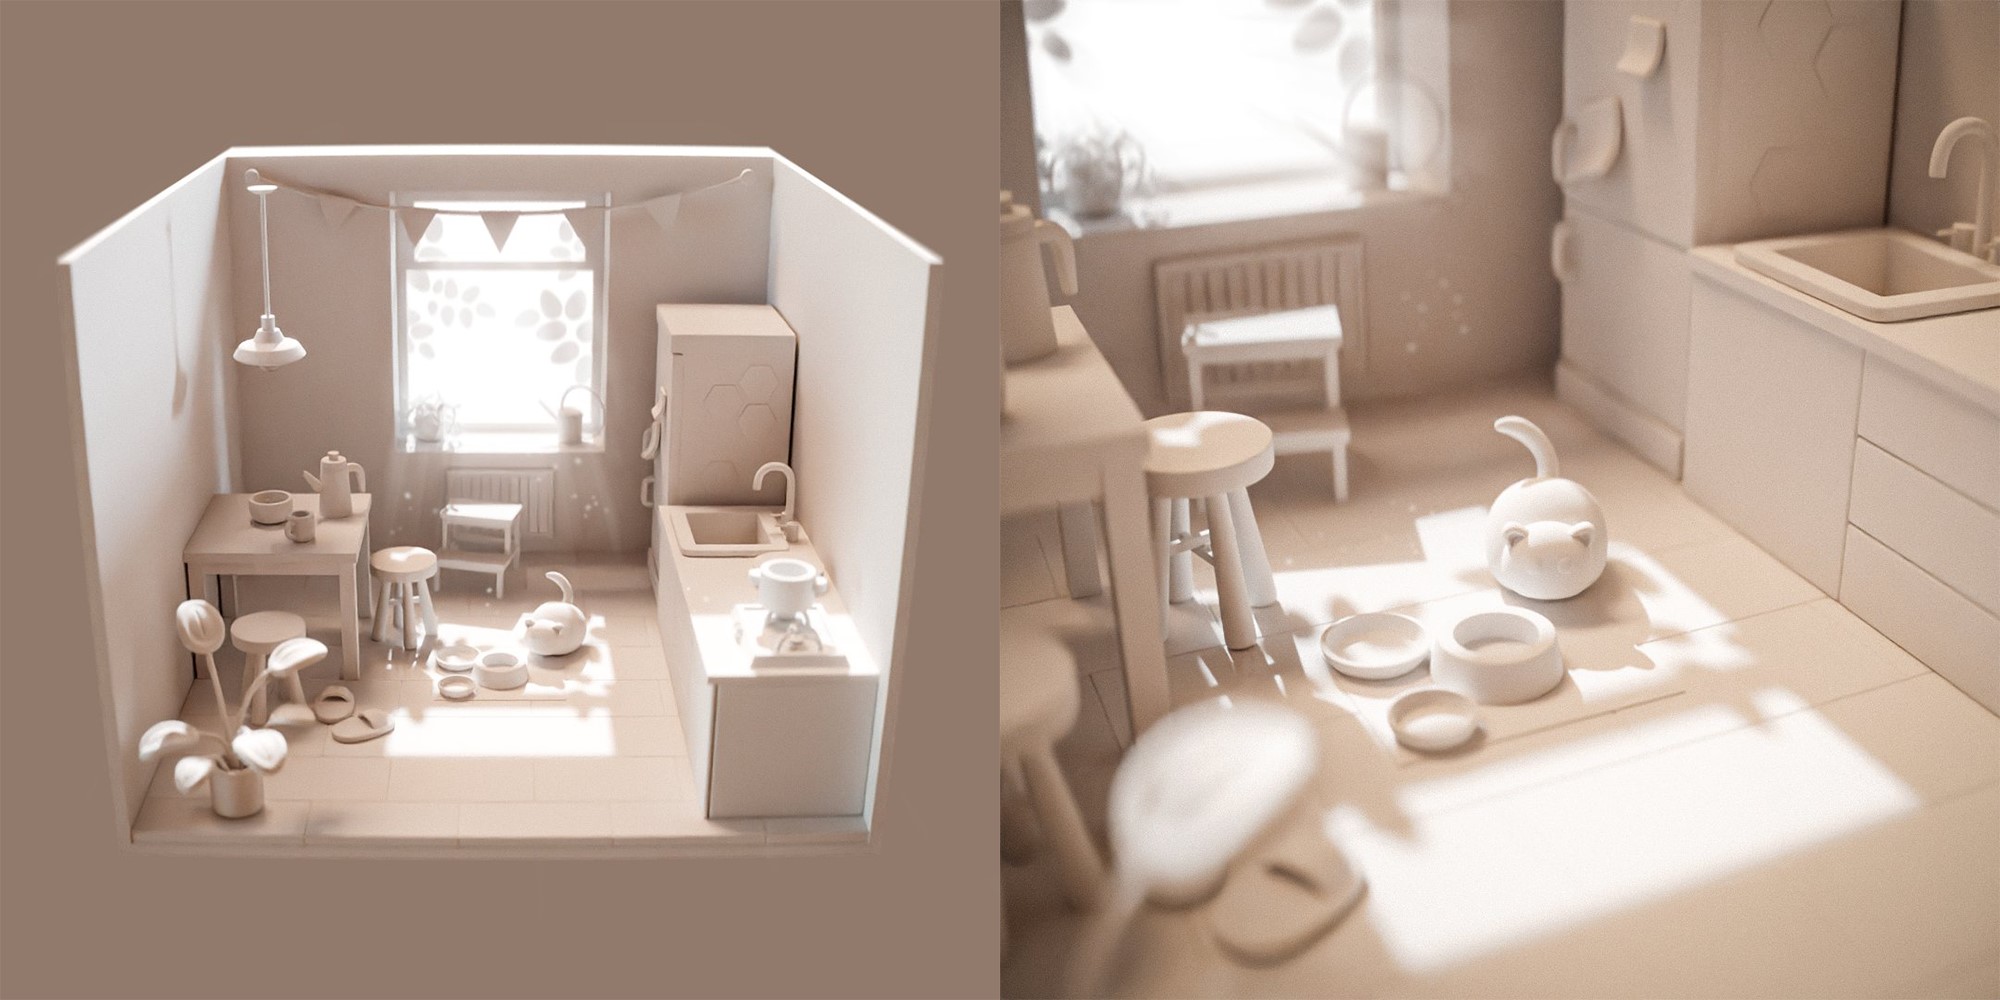
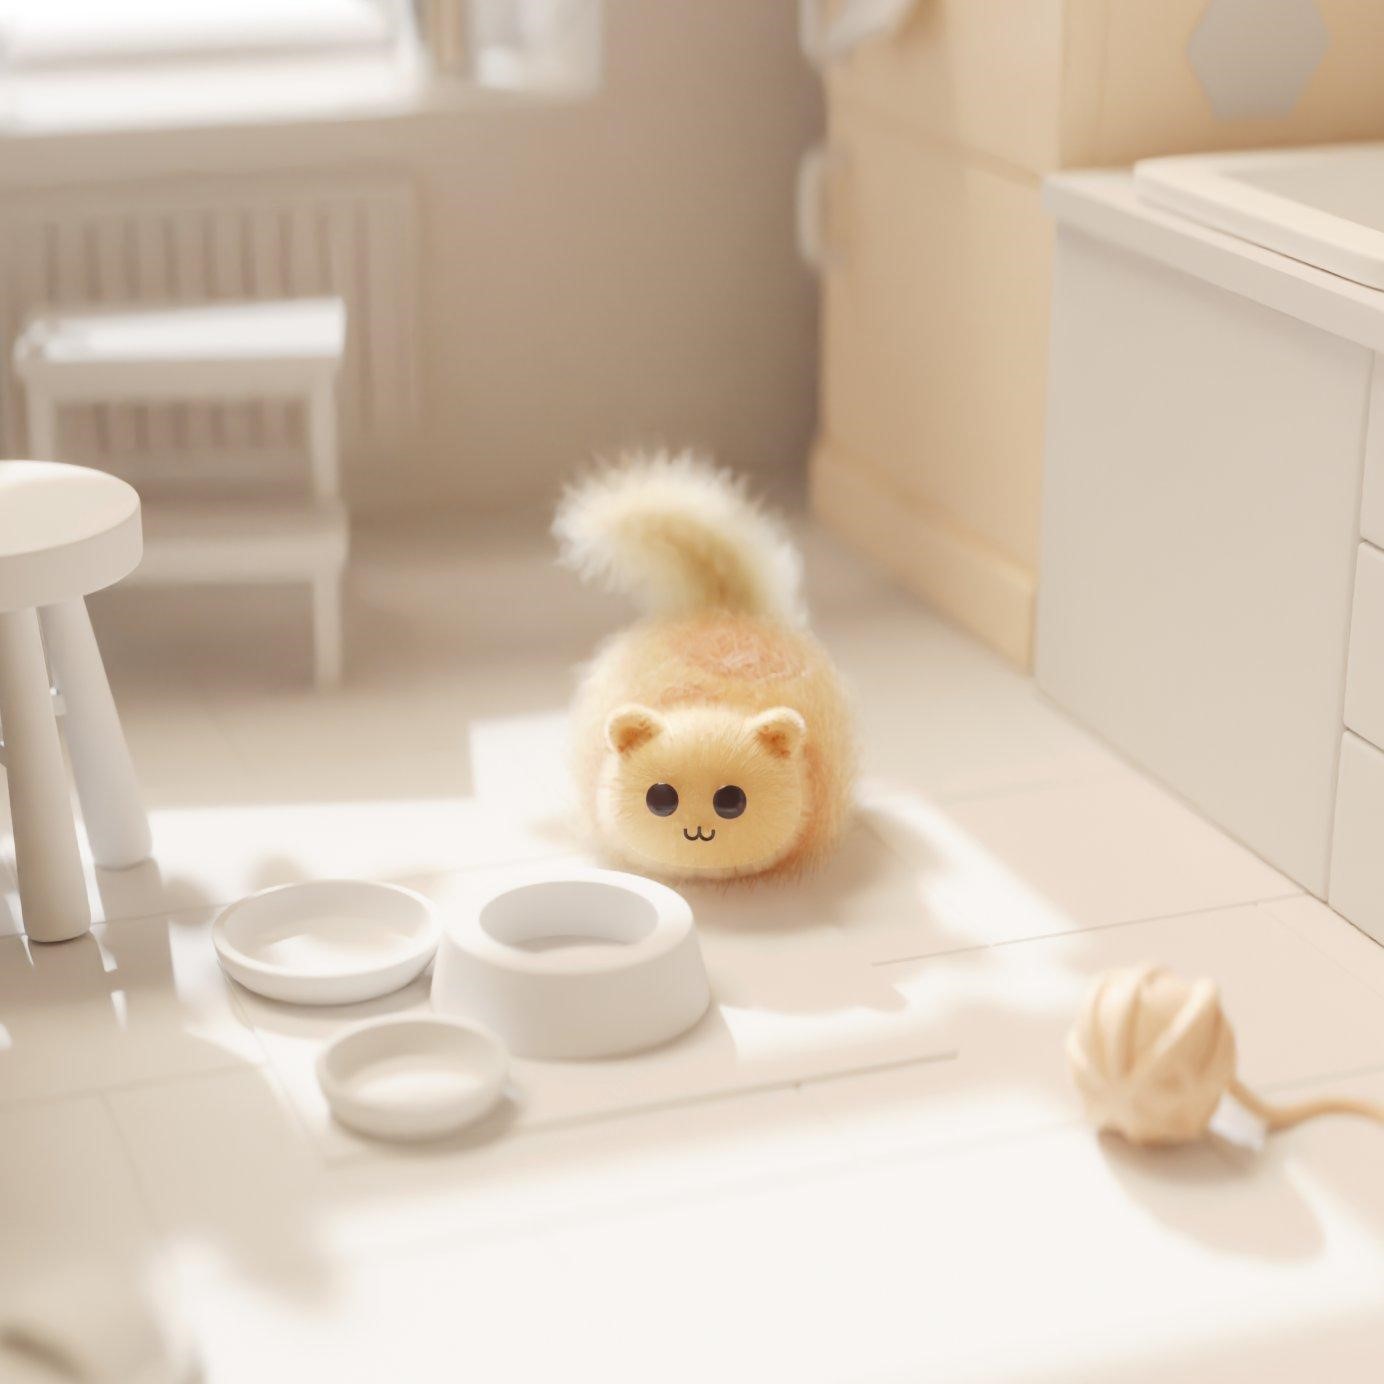
Once I am done modeling, I would usually do a test render to work on the overall look and feel. I rendered the scene at a low sample rate and for this scene, I also wanted to render it with a transparent background so I enabled the transparent film options in the render properties. I did that so I could make the window glow while maintaining the sharp lighting everywhere else.
Adding the god rays was very simple––I just used Photoshop’s brushes to paint it. This saves a lot of rendering time because Blender is still very slow at rendering volumetric lighting. The dust motes floating around were also done in a similar way, just painting it over in Photoshop.
Adding Materials
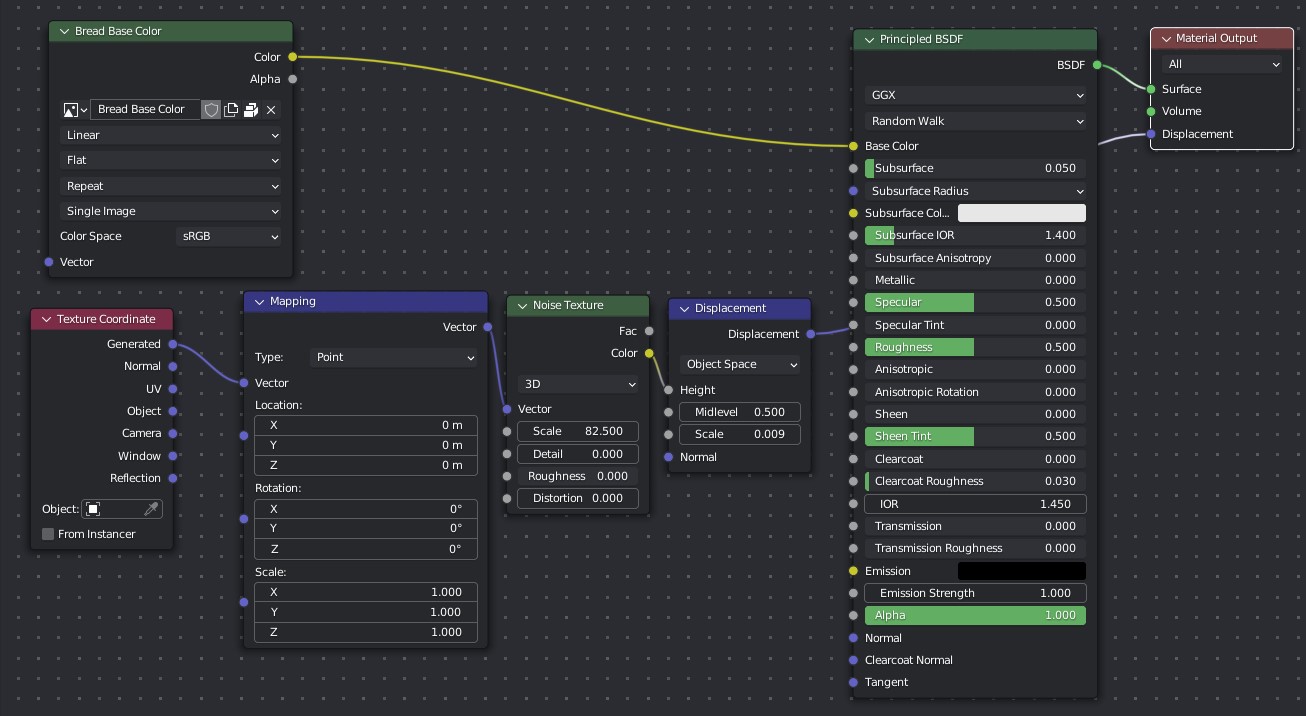
Before I add any materials, I first have to decide on what color scheme or palette I should follow. I chose to follow primarily an analogous orange color scheme. Almost all of the materials are actually just the default principled shader with the base color changed, with a few exceptions like the cat which has a Principled BSDF shader for the base color and a Principled Hair BSDF for the fur which was added with a particle hair system.

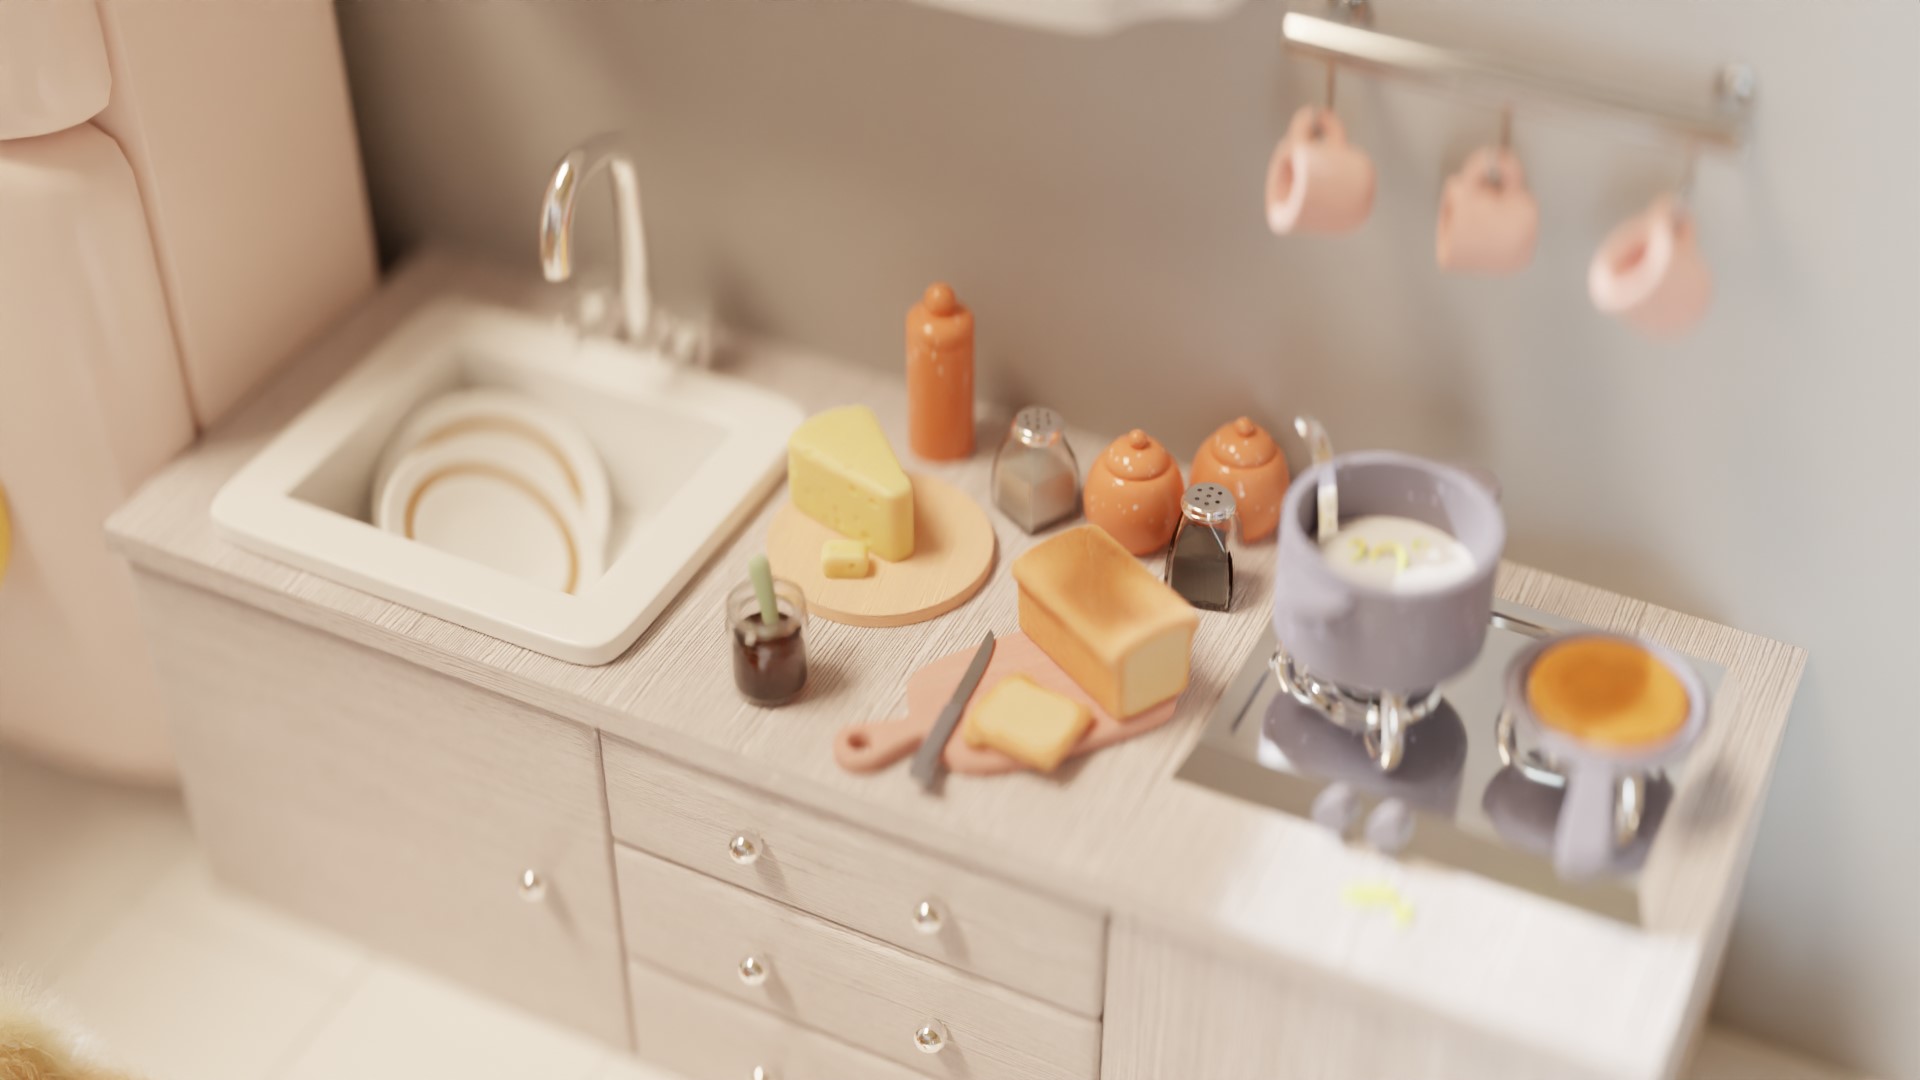
For some other things like the loaf of bread, the texture was painted in Blender and I later added procedural texture displacement with a noise texture and a displacement node.

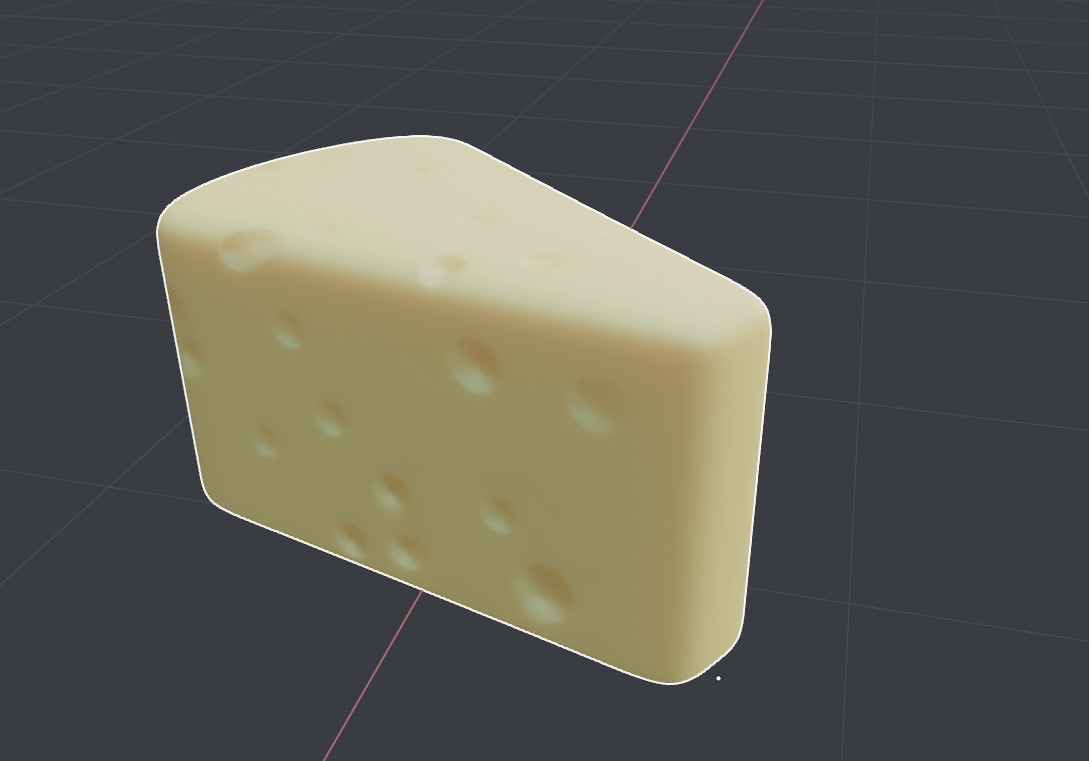
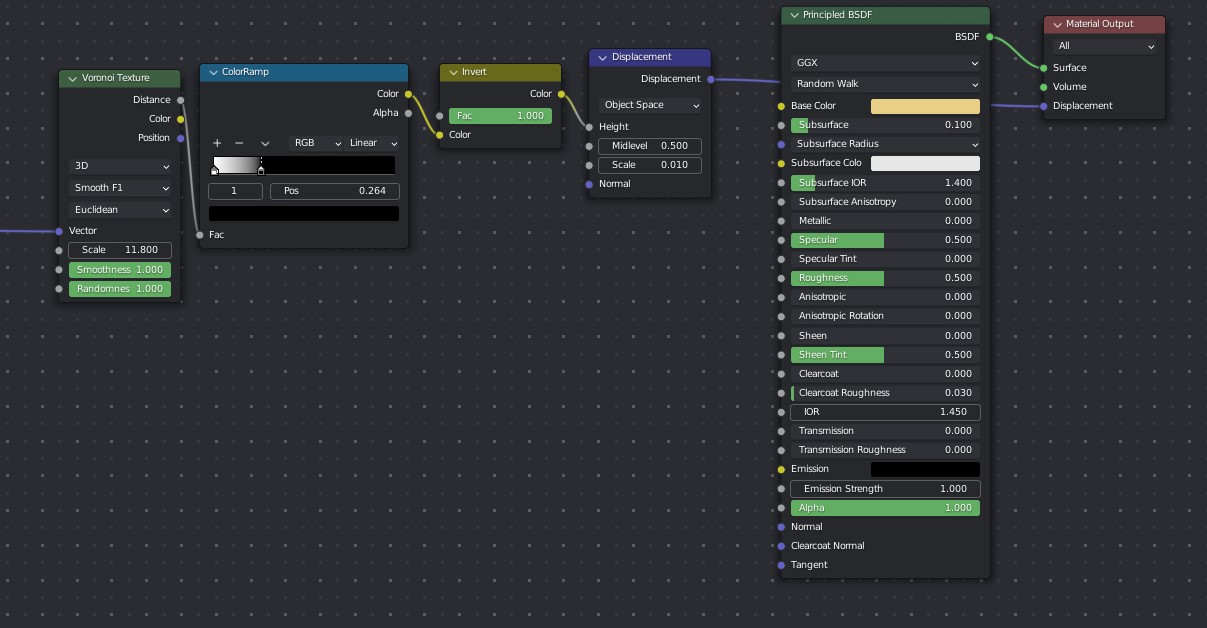
The slice of cheese has a fully procedural material, with a Voronoi texture and a displacement node. I added a very small amount of subsurface scattering as well.
Finishing Touches
Before I rendered the final image, I modeled more objects to fill up the empty areas of the scene.
I added little mugs, jars, pitchers, pots, pans, cake, and plants, all of which are assets I modeled for a previous project. I also wanted to guide the viewer to the cat as much as possible so I added little paw prints on the floor, plus I made the fridge in the back more rounded and smooth, because before it didn’t show any reflections. After I was done with the details, I added 3 more cameras to show the objects of interest.
Then I rendered the scene with a transparent background and added the god rays and dust motes in Photoshop. I didn’t need to do any color adjustments because I felt the scene looked really great just how it was.
Cozy Little Kitchen
Thank you so much for reading this article. Have a nice day!
About the Artist

Hussian Saaif, is a 3D artist from the Maldives.


