
Behind the Scenes: Cozy Gold

About
My name is Levi André. I am a 3D archviz artist, I’m 35 years old, and I live in Angola.
I have a bachelor’s degree in architecture. I’m a self-taught 3D artist who started learning 3D in 2006 with AutoCAD, then migrated to Revit and SketchUp. In 2018, I decided to learn Blender, which has become my main tool for modeling, texturing, and rendering.
Cozy Gold
“Cozy Gold” is part of a project developed for a client. It’s a hotel project based in Luanda/Angola. As I was getting the floor plans done, the client asked for some interior visualizations with suggestions of furniture, color palettes, and lighting.
The Process
Inspiration
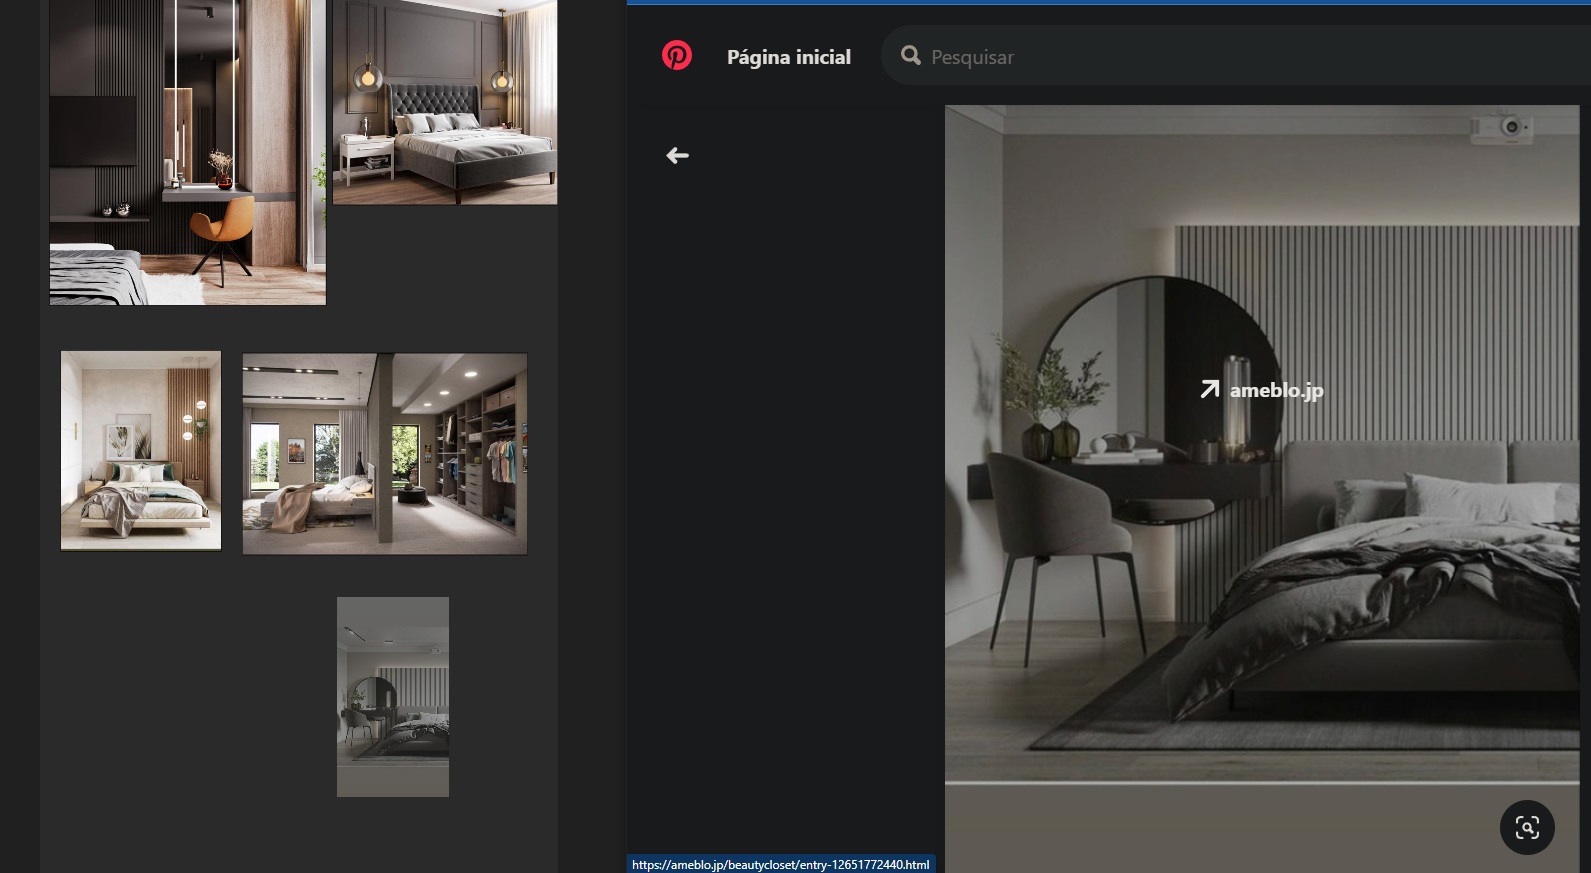
As always, my first step before opening Blender was to collect some photos for the type of environment I’d be working on. For this specific project, I collected some master bedroom images from Pinterest, Houzz, and Google, and built a mood board with a cool and free app called PureRef, which I recommend for all artists who want a tool that keeps all the ideas in an infinite canvas.
Dragging and dropping image references from the source directly into PureRef’s infinite canvas was awesome.
Color Palette
It’s important to decide which colors will be used on the project. A quick briefing with the client was crucial to define the color palette and avoid step backs and unnecessary revisions.

I use a color hex site to choose different combinations and it gives some good and accurate suggestions about complementary colors to fill the palette of my choice. I recommend it to interior designers and artists who, like myself, struggle to combine colors in a scene.
Modelling
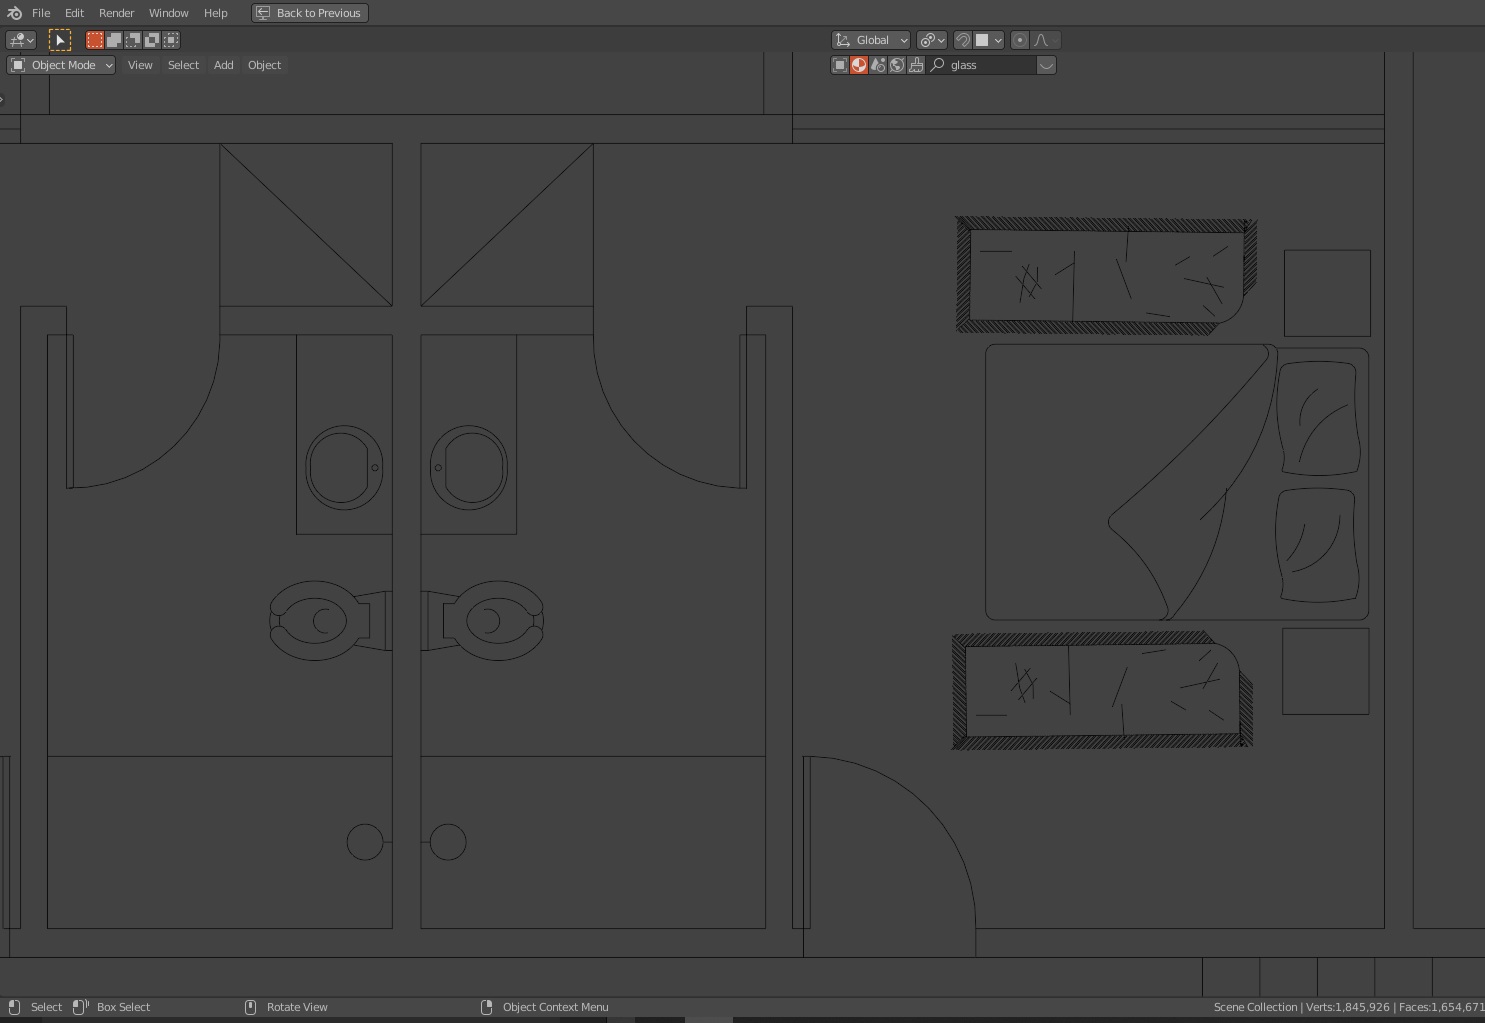
After that, I imported the floor plan, which was saved as a .dxf file, to Blender.
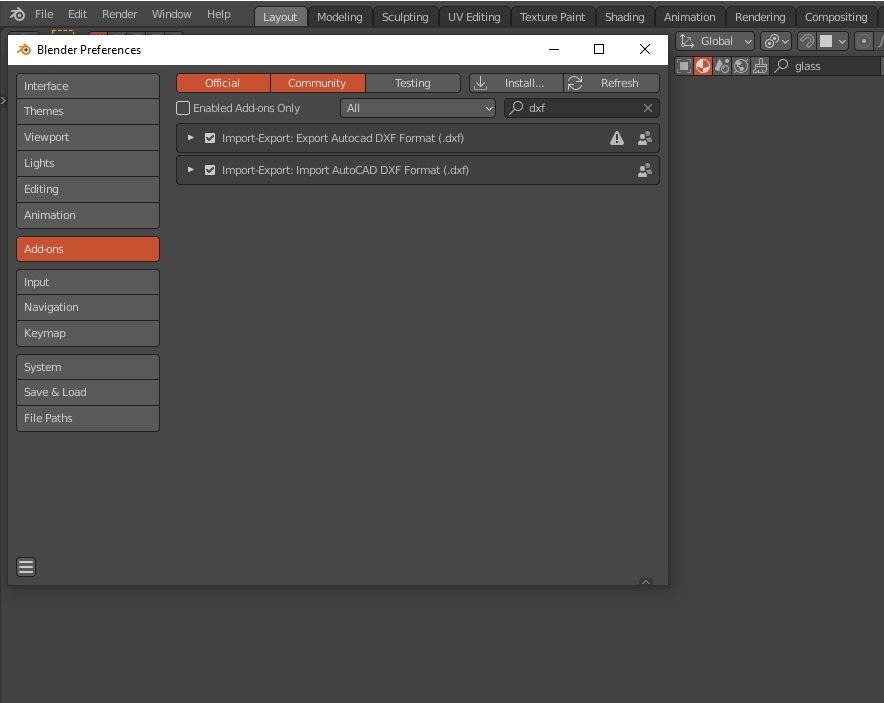
To be able to import or export .dxf formats, you have to enable the DXF Import-Export add-on in Blender’s Preferences.
With the floor plan imported (and without deleting our beloved default cube), I modeled the main structural components of the room (walls, floor, and ceiling). My first concern at this point was to make sure that all the measurements matched the actual technical drawings.

I was planning to post the final result on social media. I set the output dimensions to 1350×1080…then multiplied each value by 2 to increase the overall output resolution.

Lighting
Since the client was in a rush to see the project and make quick decisions about the furniture and materials for the bedroom design, I needed a quick way to get the job done. For the first time, I used the Easy HDRI add-on. It’s a fast, free, and fantastic tool to set up the light in your scene.
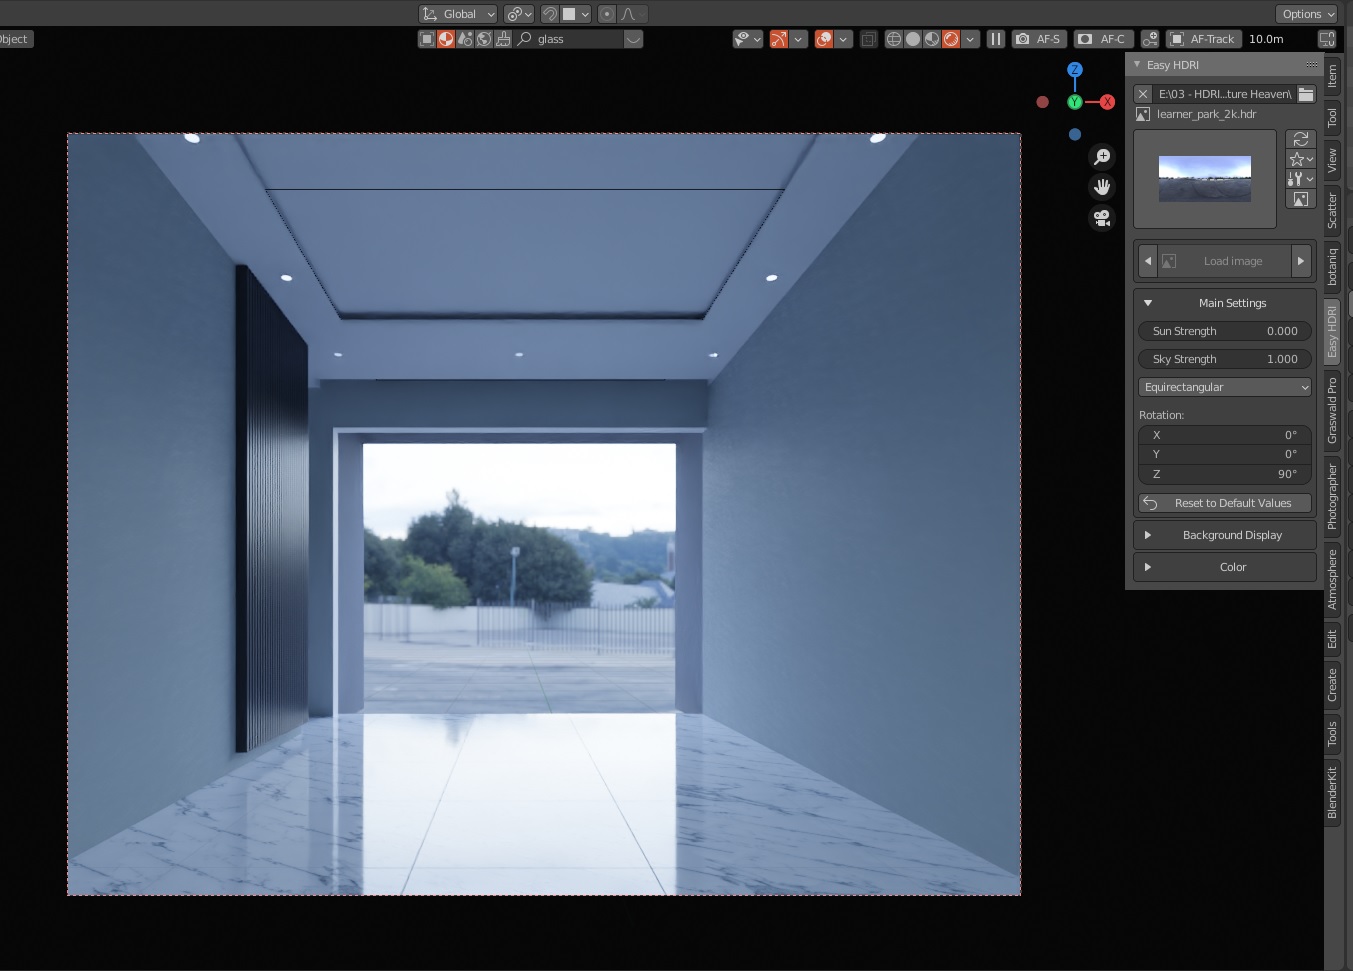
This add-on loads all the HDRi in the folder you select and gives you the flexibility to change, manipulate direction, and adjust sun and sky intensity without stressing with the good old nodes.
Filling the scene
With the main design coming along, it was time to fill the room with furniture. In interior design projects, the deadlines are always tight. This one was no exception. It would be painful and time-consuming to model every single piece of furniture ourselves and expect a pleasant outcome. So, to make my workflow fluid and fast, I downloaded some assets from iMeshh, which has stunning high-quality models, and other free assets from 3dsky.


Shading
With the scene filled, I started to give some love to the materials. My PC has an old GTX1060 3GB graphics card and an Intel i5 processor, so I use EEVEE most of the time to preview the shaders and make crucial decisions.
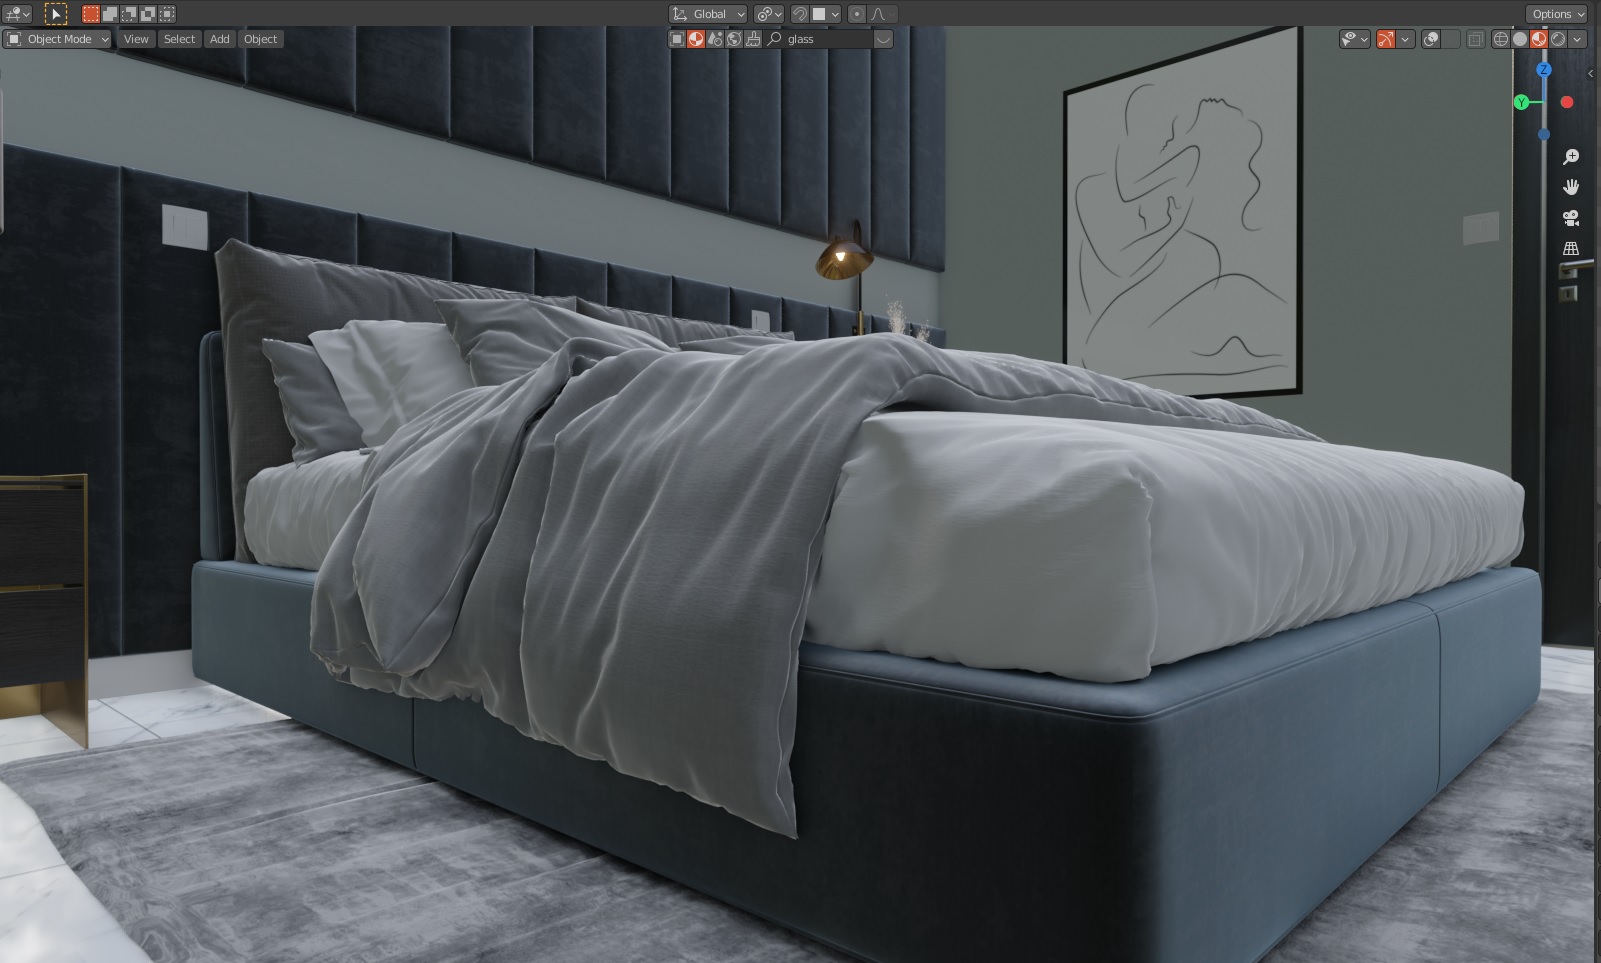
To increase the level of realism on fabric, I used this technique that I learned from an amazing Blender artist, Luan3dr.
It basically consists of mixing the main texture output with an RGB curve and adding a Fresnel Input as the factor of the mix. I generally set the sheen to a value higher than 2 to boost the falloff according to the shader (not a rule, just my personal taste).


Shaders such as the gold, wood, carrara marble, plastic, and matte metal were achieved using textures and the Principled BSDF shader. Again, time was of the essence, so I couldn’t afford to focus on tiny details like surface imperfections and all the good stuff that catches the eye and takes realism to another level.
The vase’s glass shader came with the asset from iMeshh’s amazing exclusive library.

More Lighting
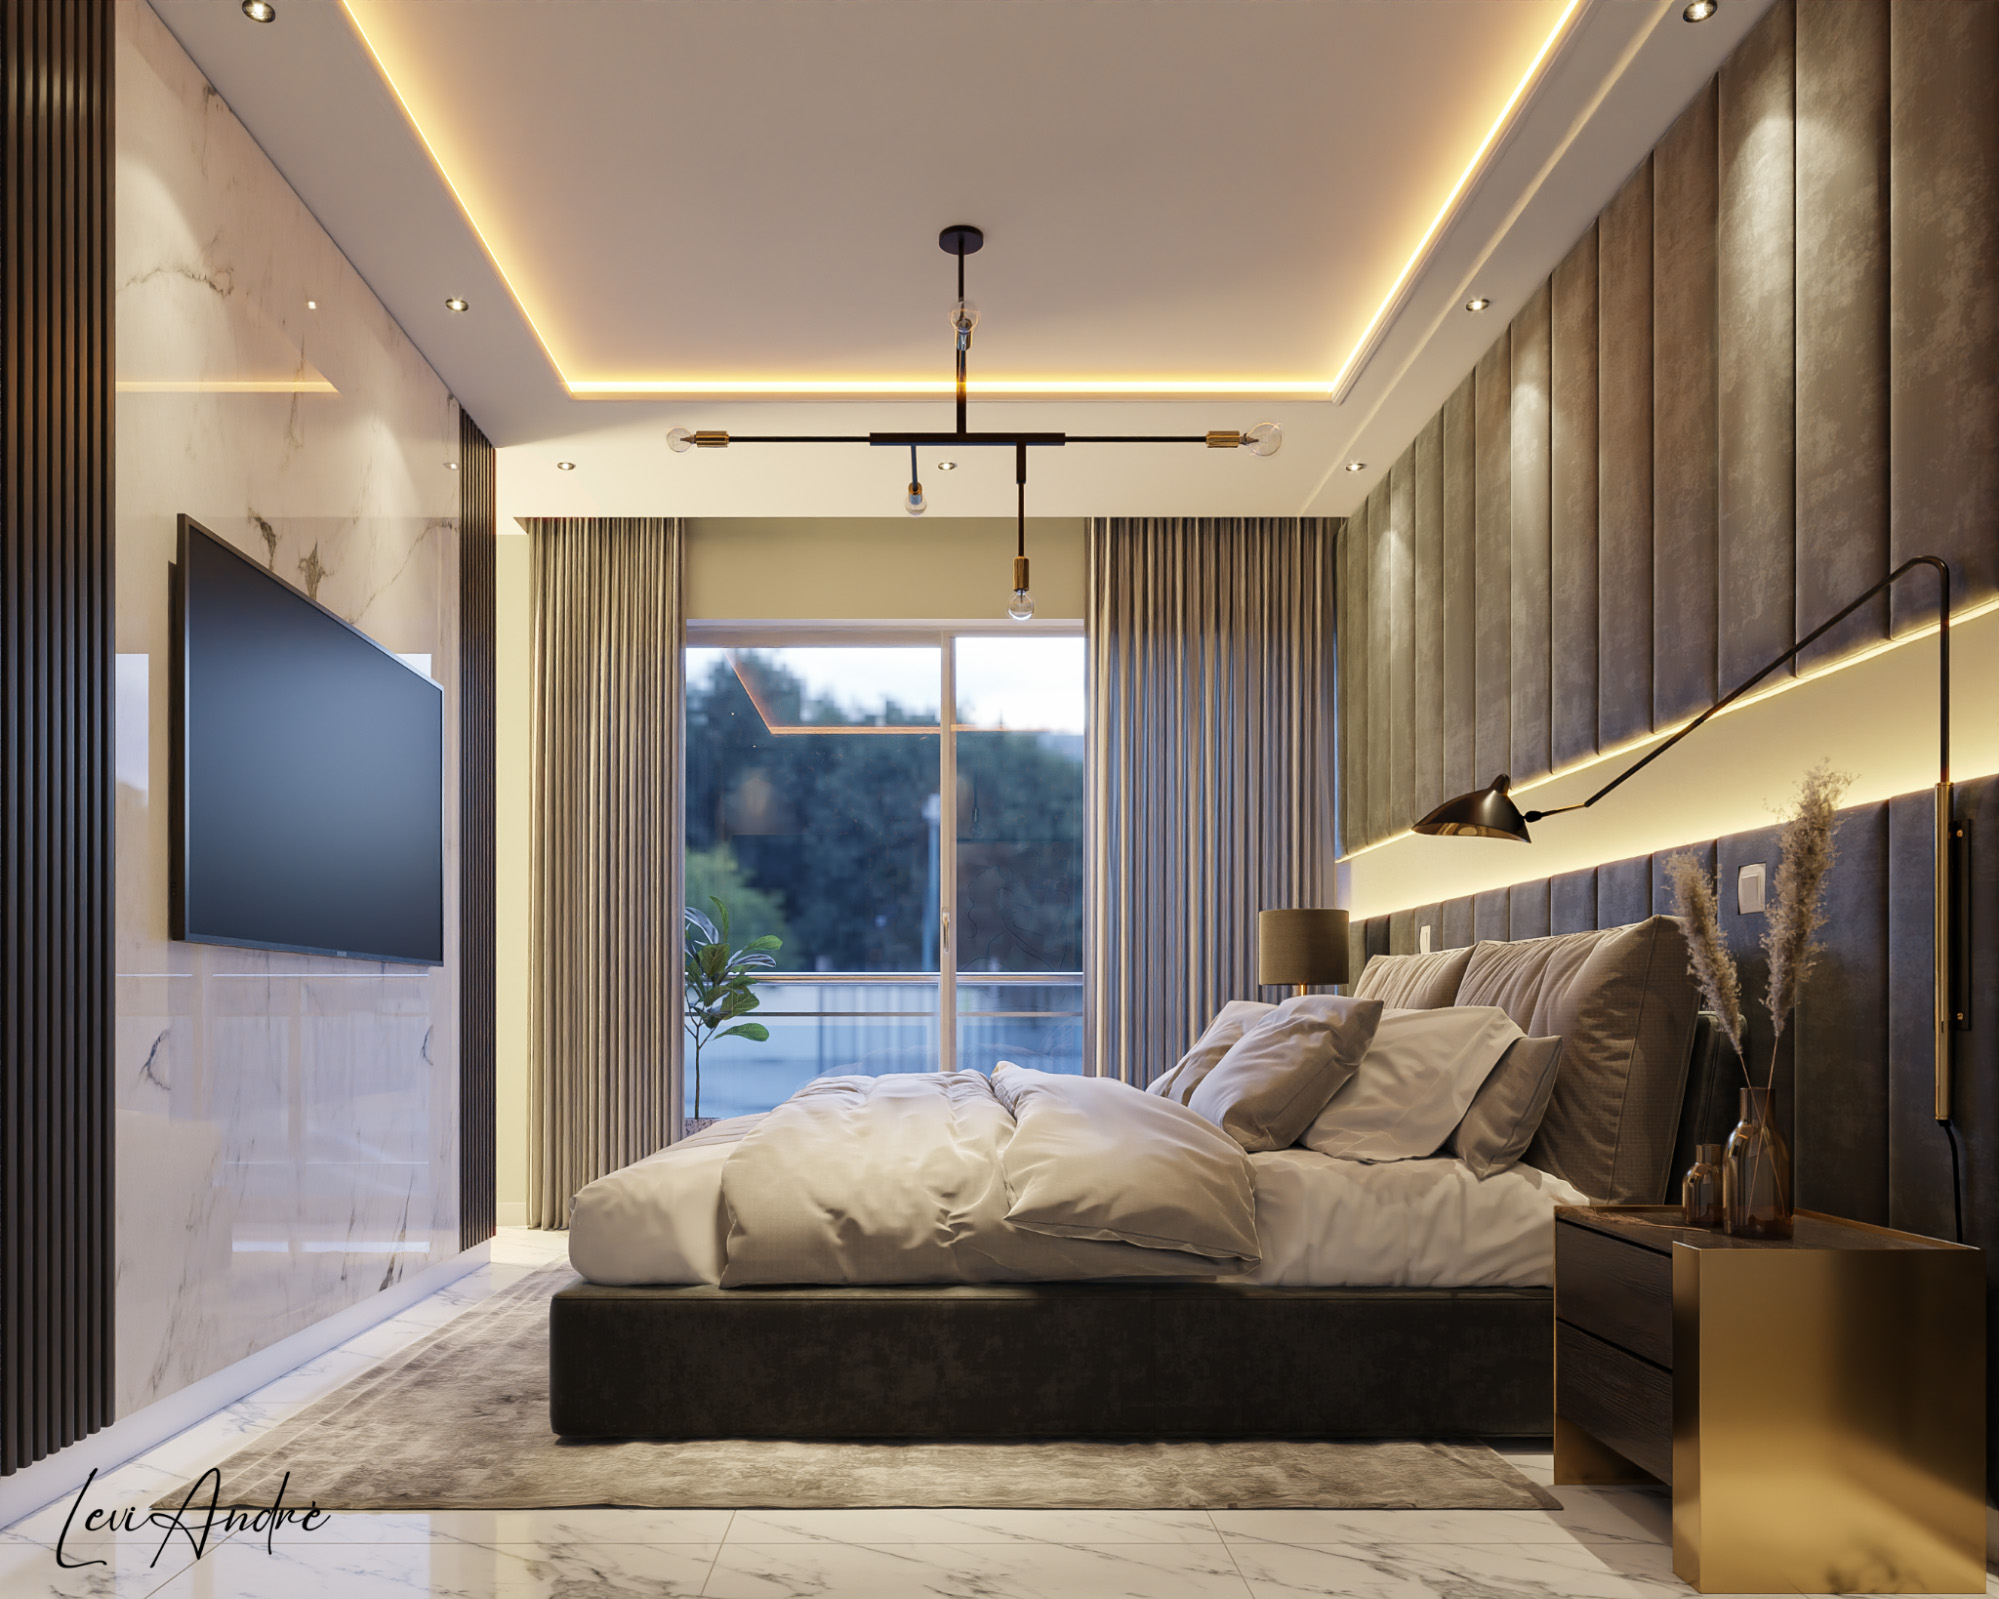
As mentioned before, for a natural looking late afternoon vibe, I used an HDRi from Poly Haven. There are tons of HDRi organized by category, from sunrise to midday and sunset.
Some may say that I could tweak the lighting a little bit more, and they are right. But for this project, and for the sake of meeting the deadline, perfectionism wasn’t a priority.
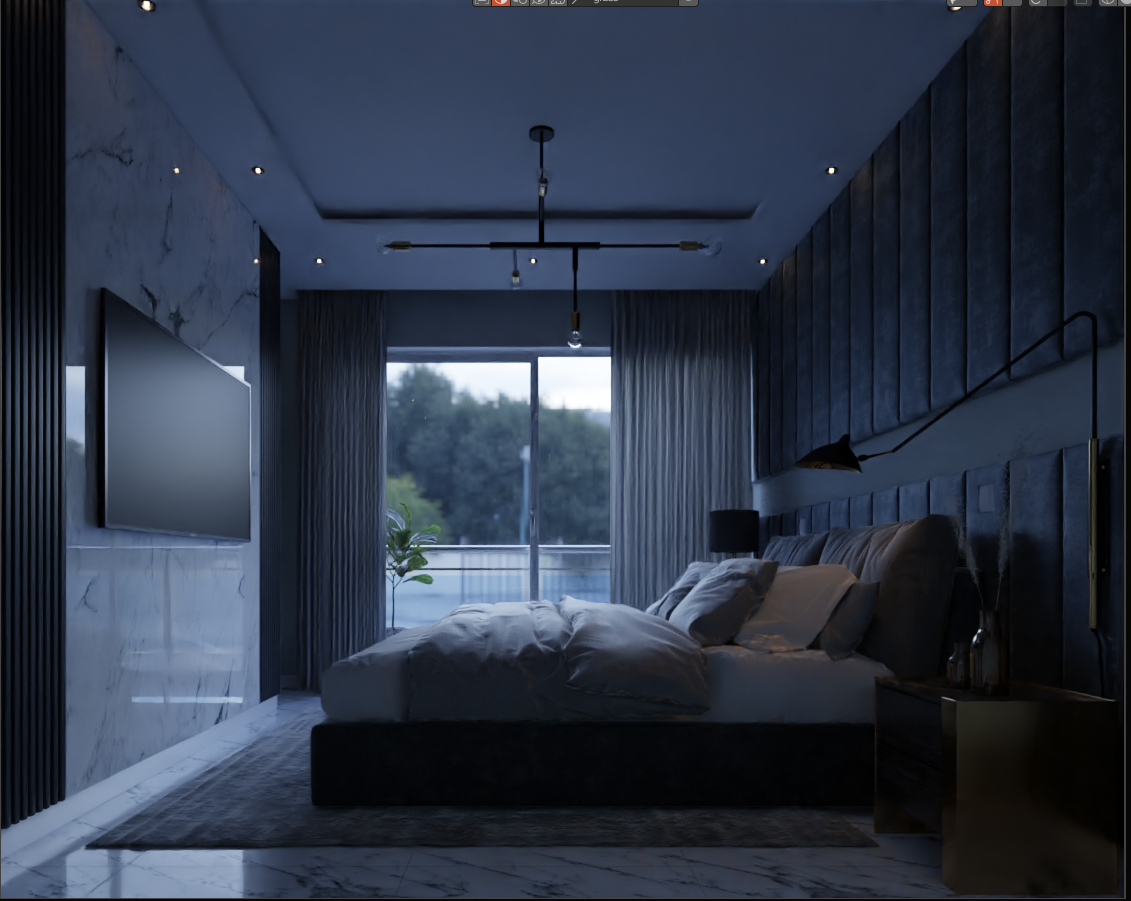
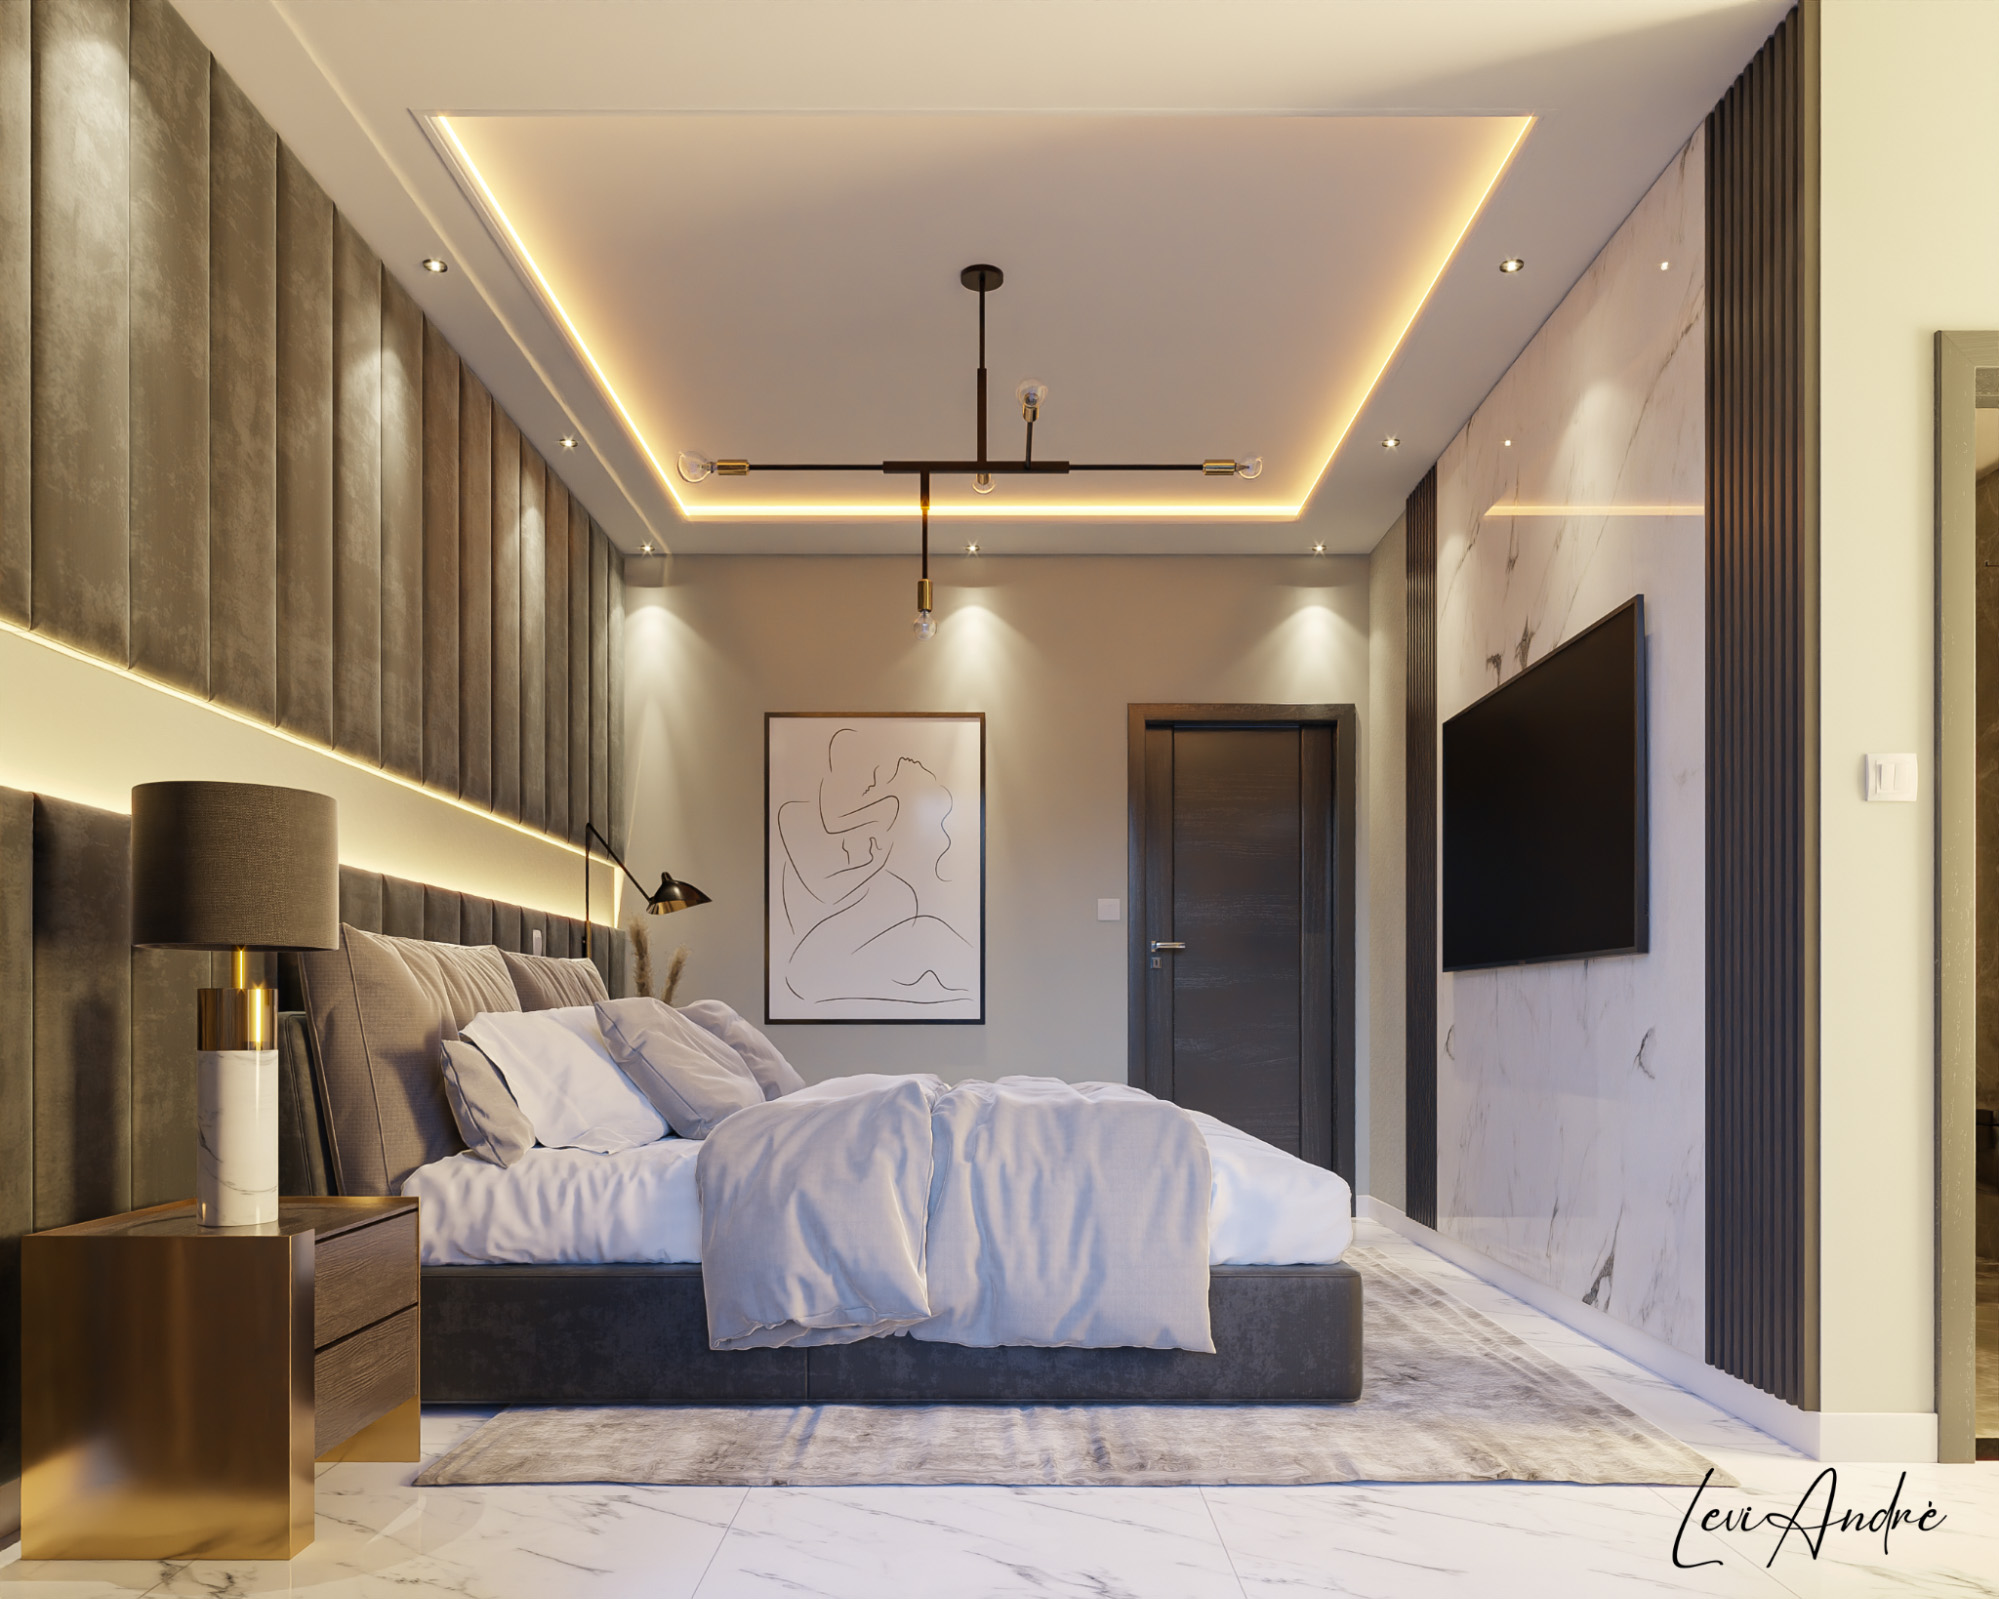
For artificial lighting, I used some IES light textures, spot lights, and area lights to mimic LED strips. I decided to keep the ceiling lamp switched off to avoid excess “sparkling” information, and to avoid breaking the mood I was aiming for. Knowing this is for a hotel room, I was looking to bring that cozy feeling to the place. Must say, the client loved it.

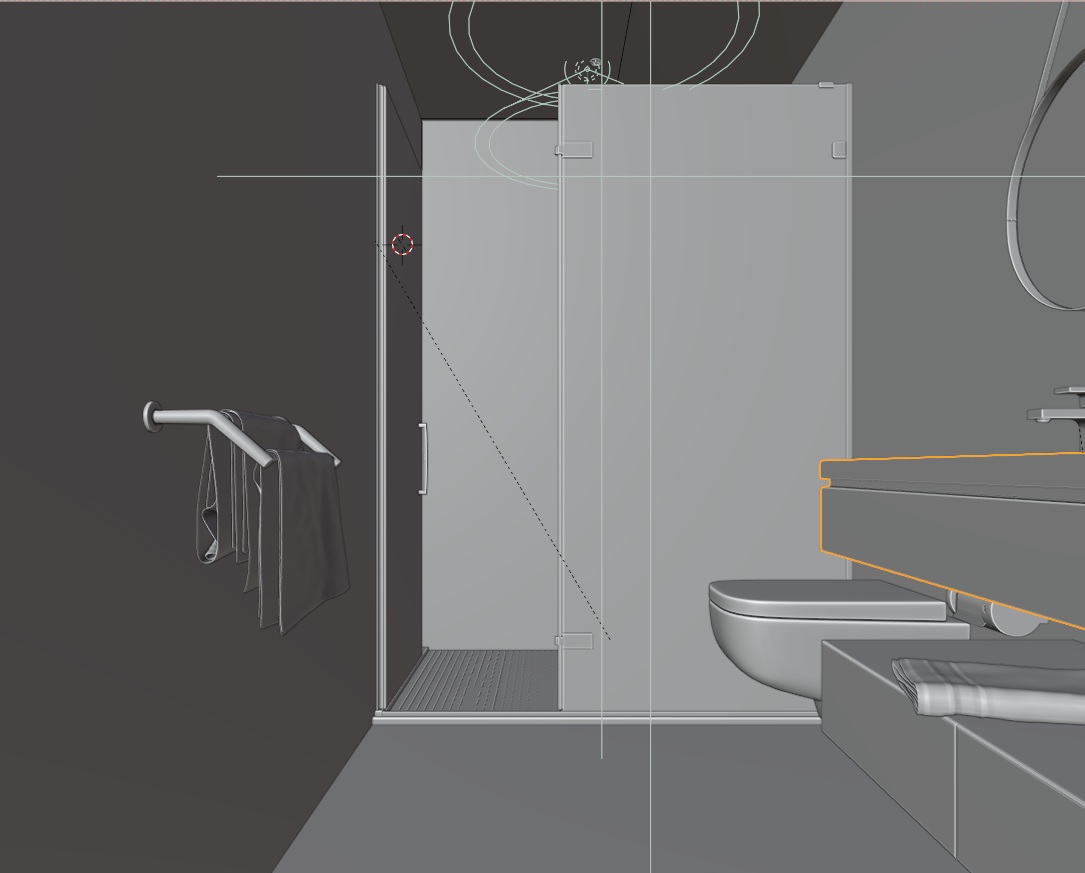
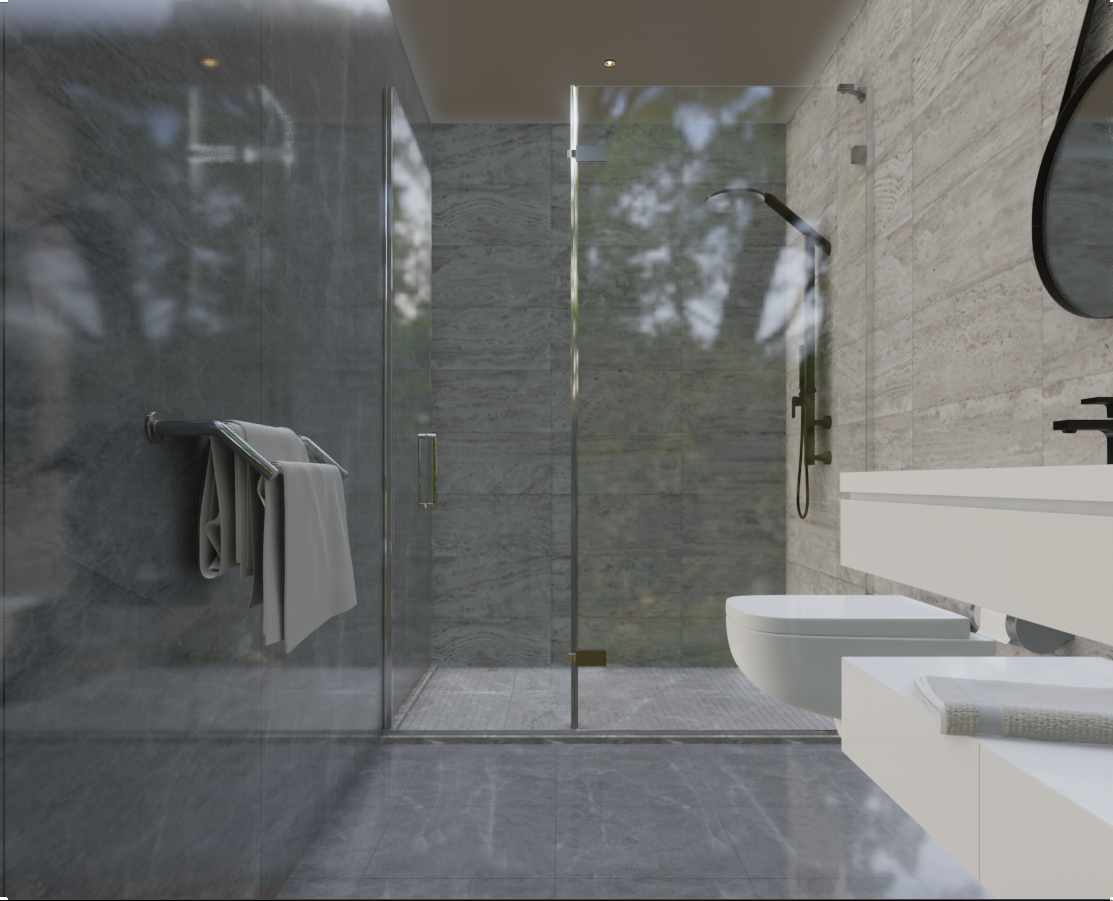
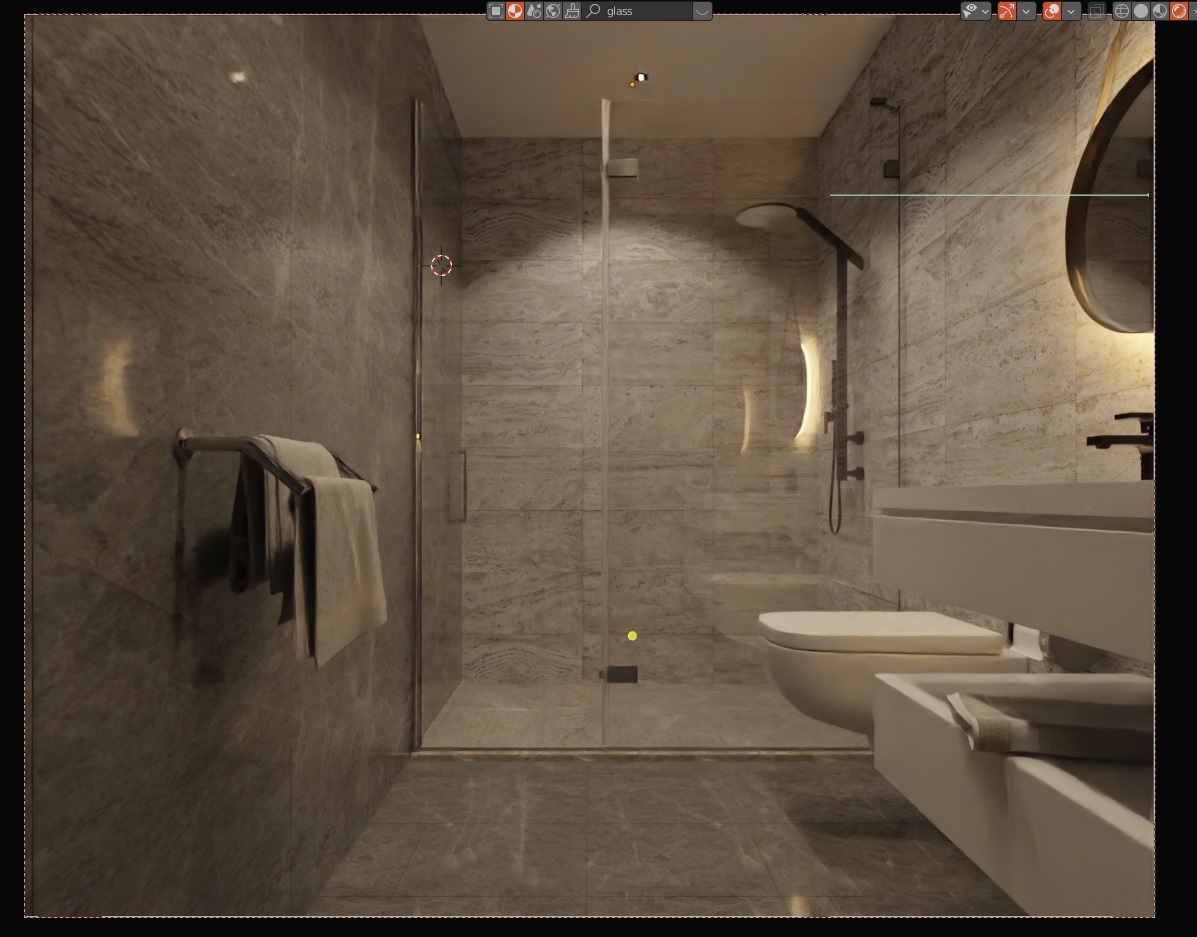
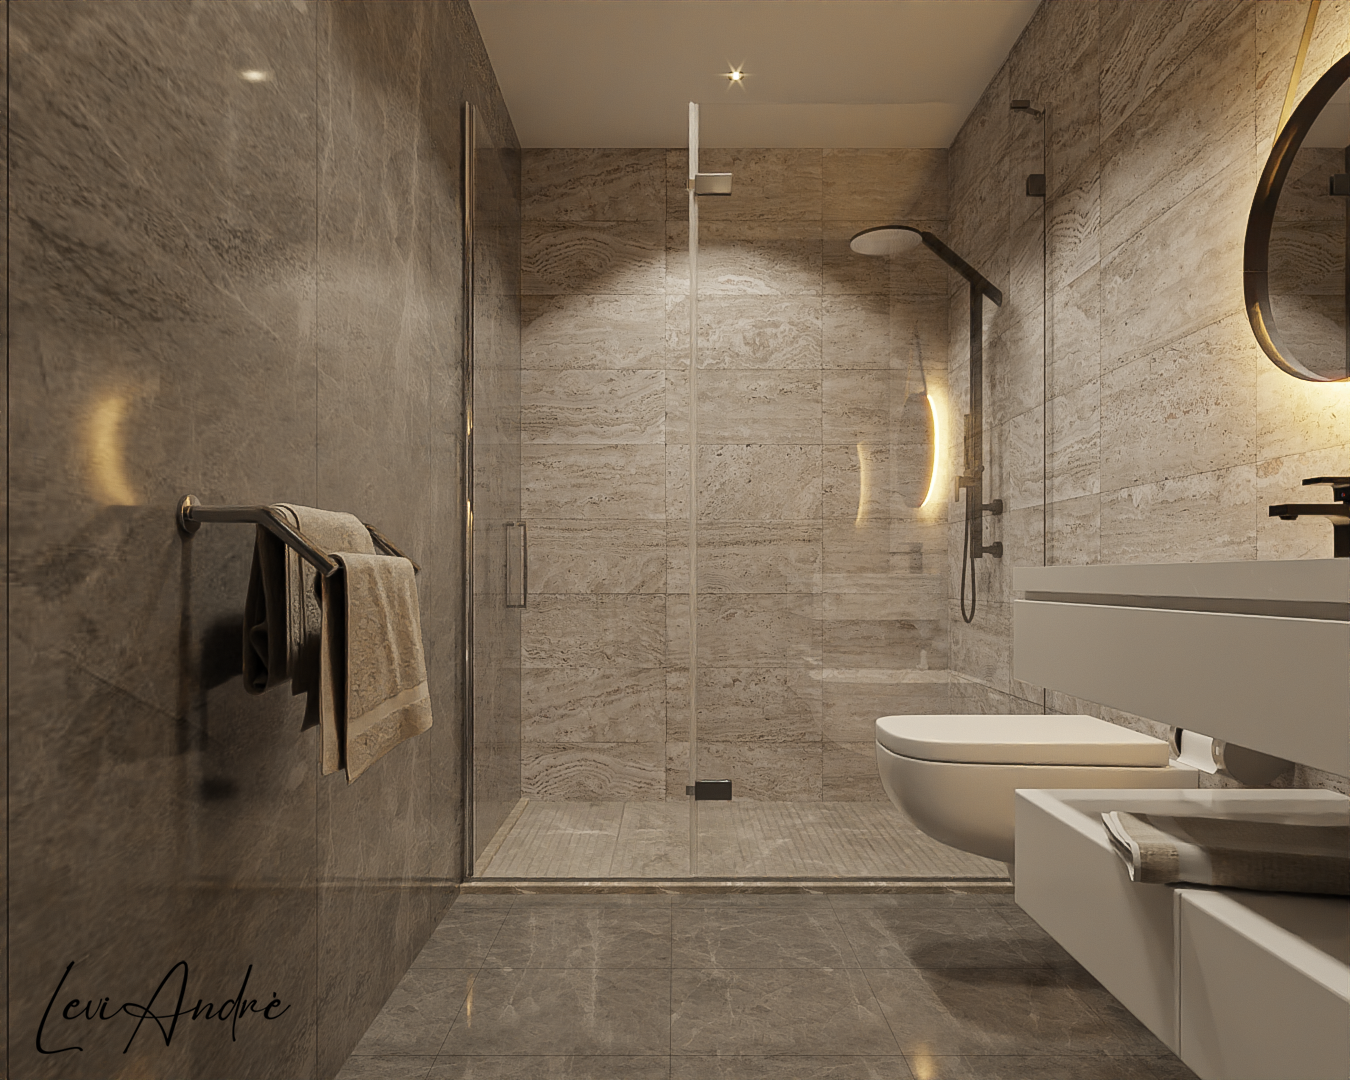
The bathroom lighting consists of two point lights on the ceiling and an area light with disk shape behind the mirror. I increased the exposure a little on the post-processing.
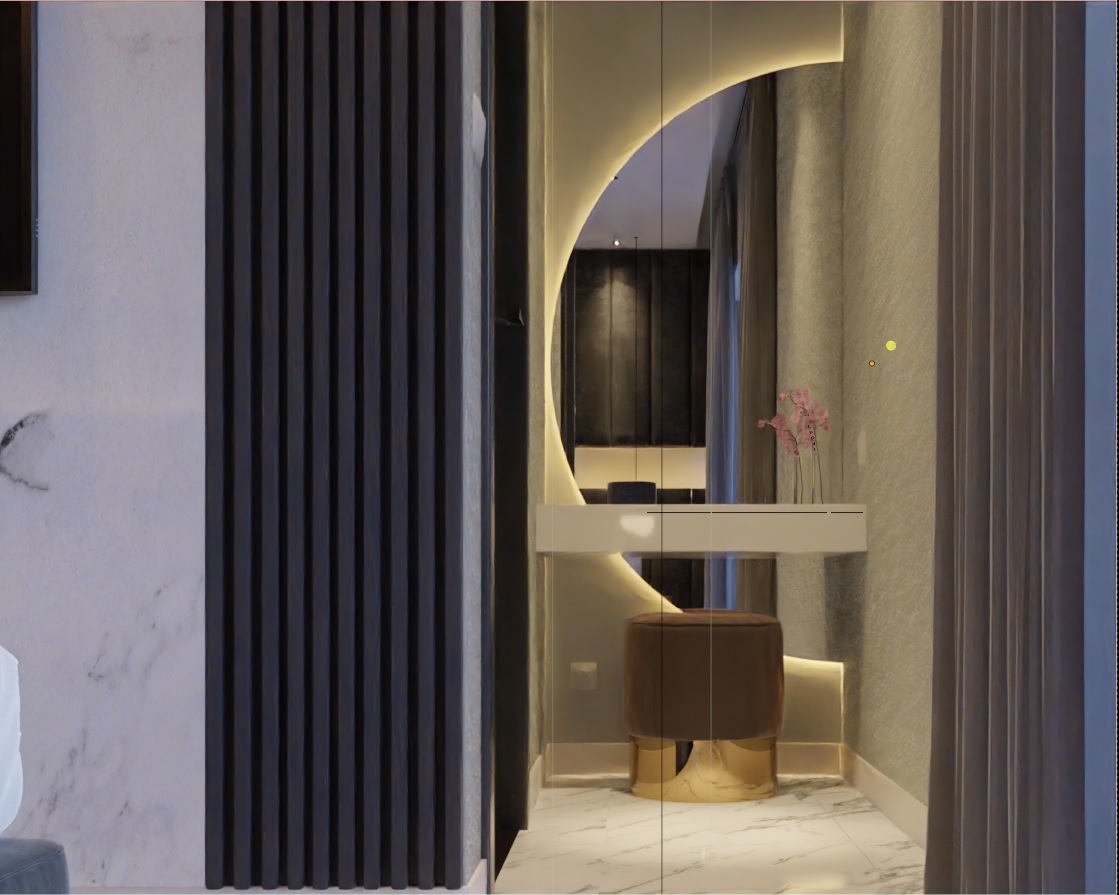
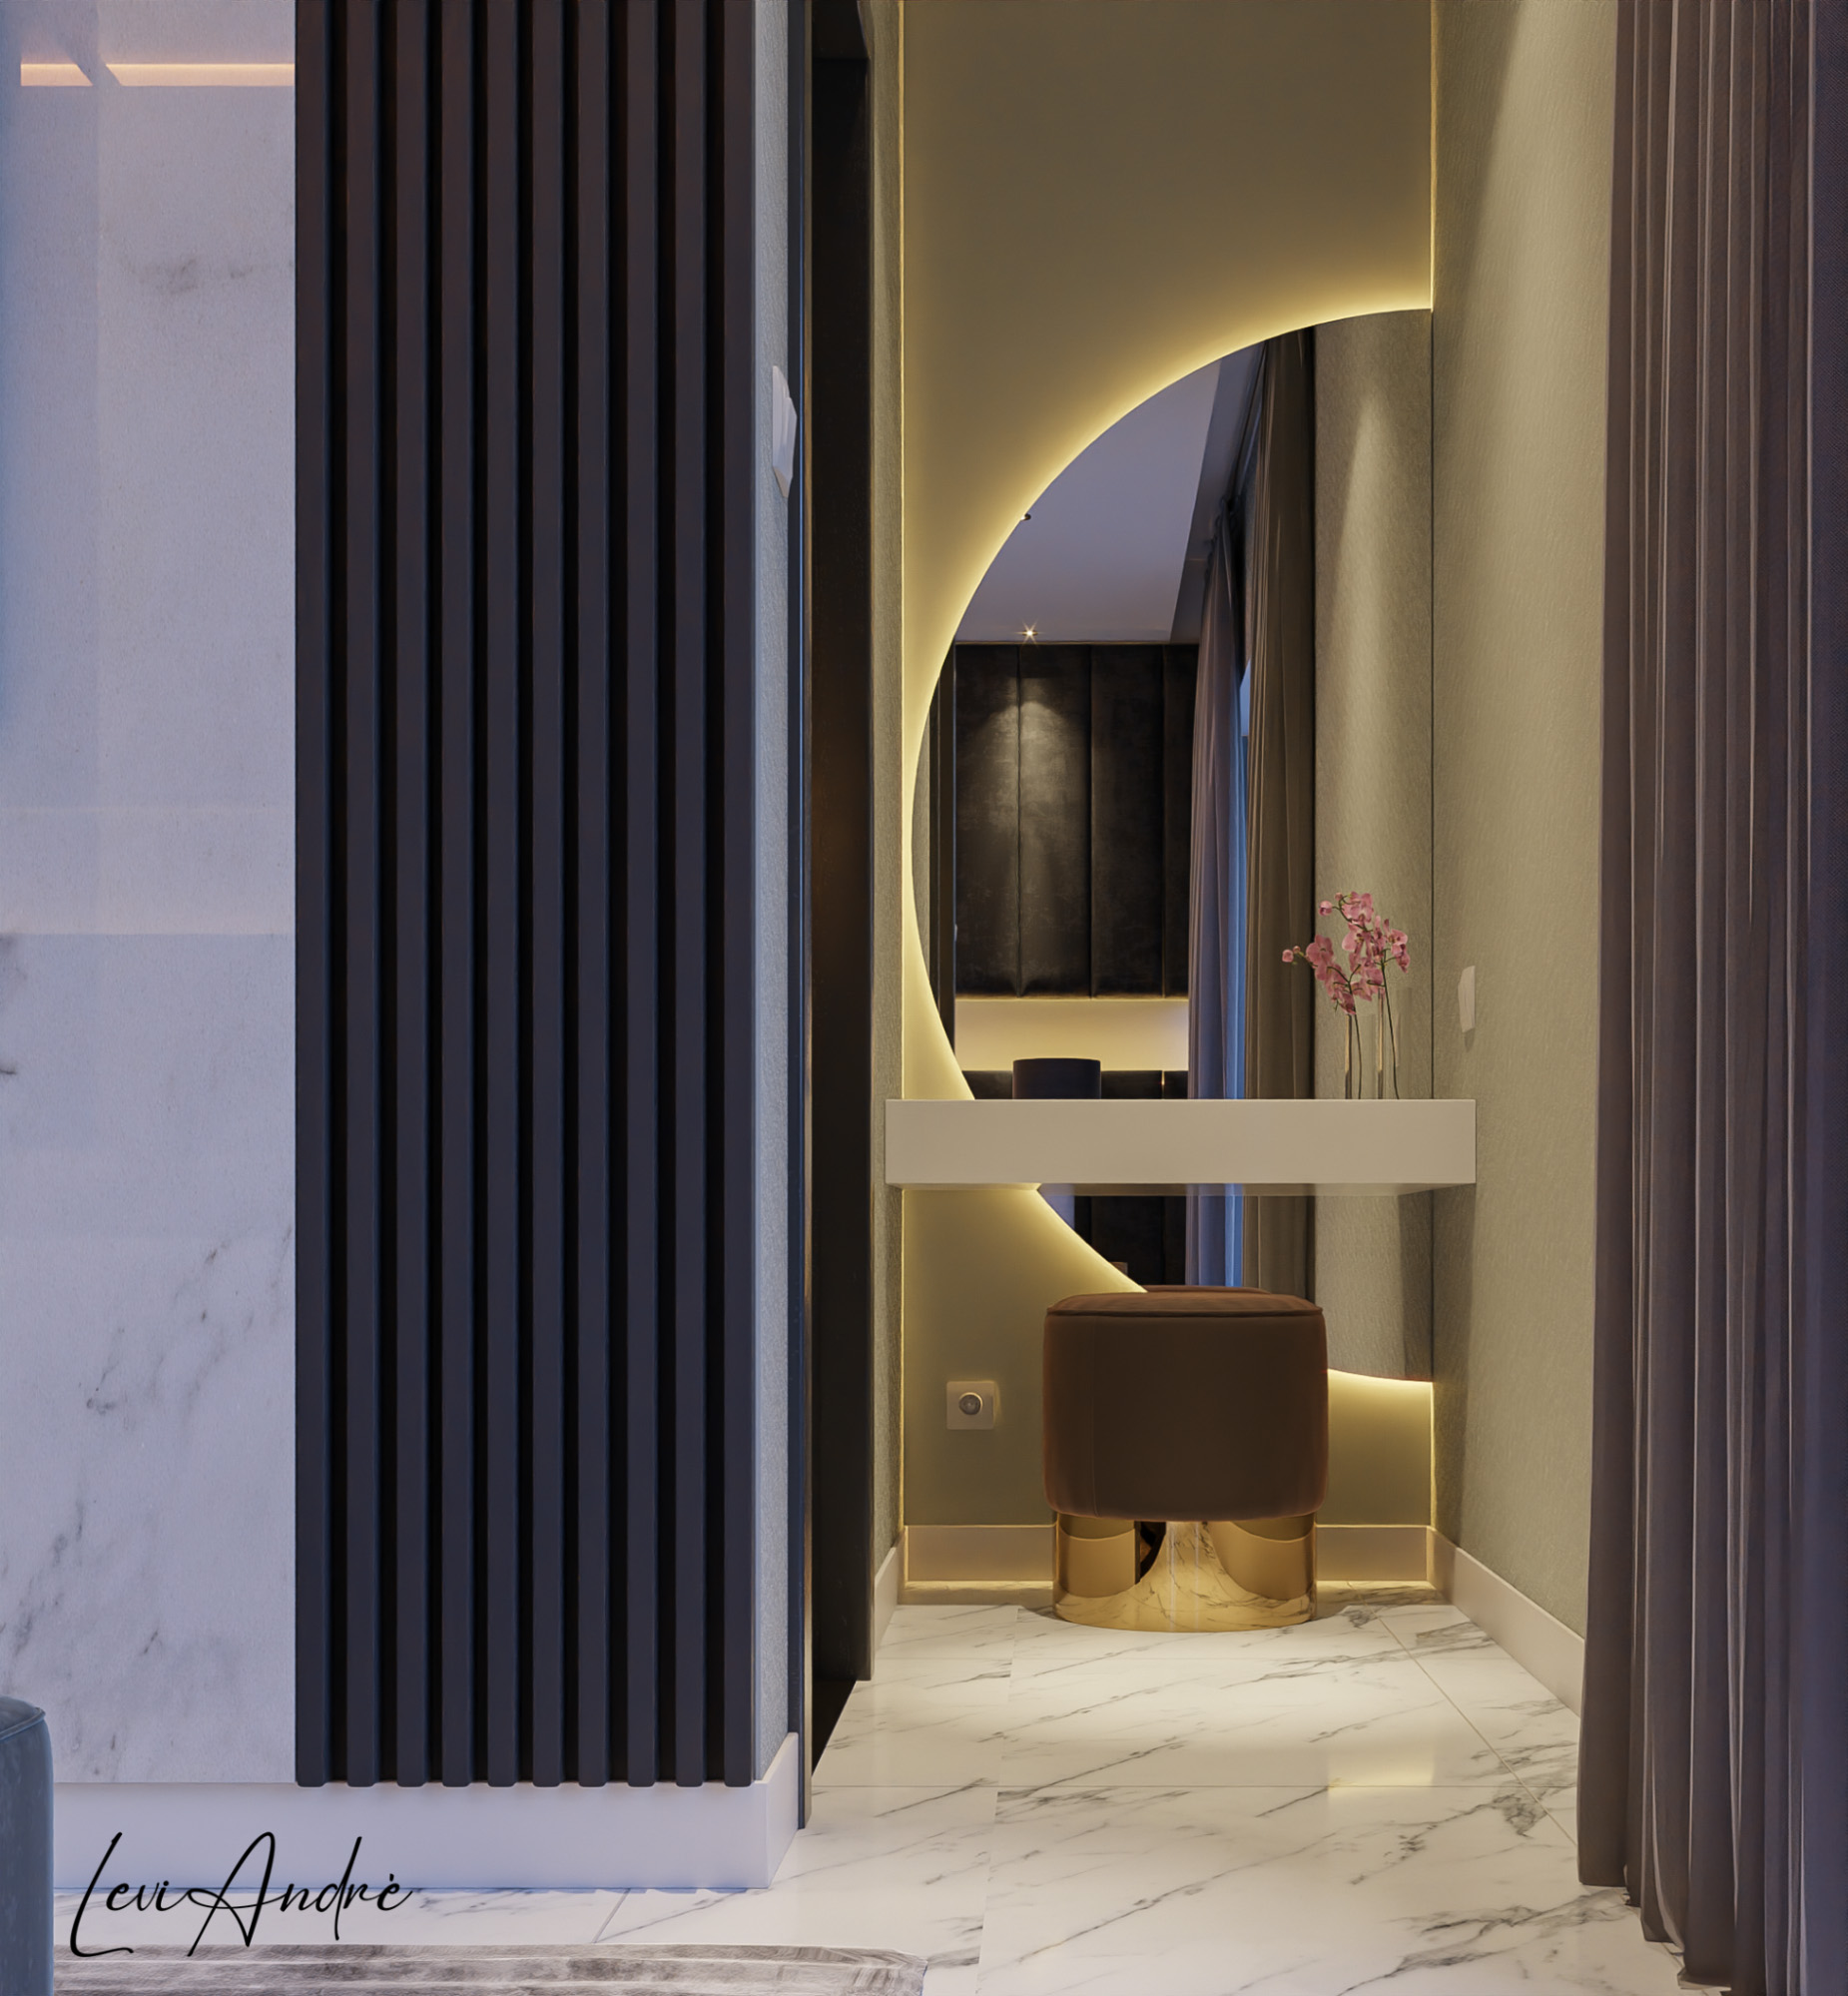
The dressing table area lighting was achieved with a spot lamp and an area light with disk shape behind the mirror.
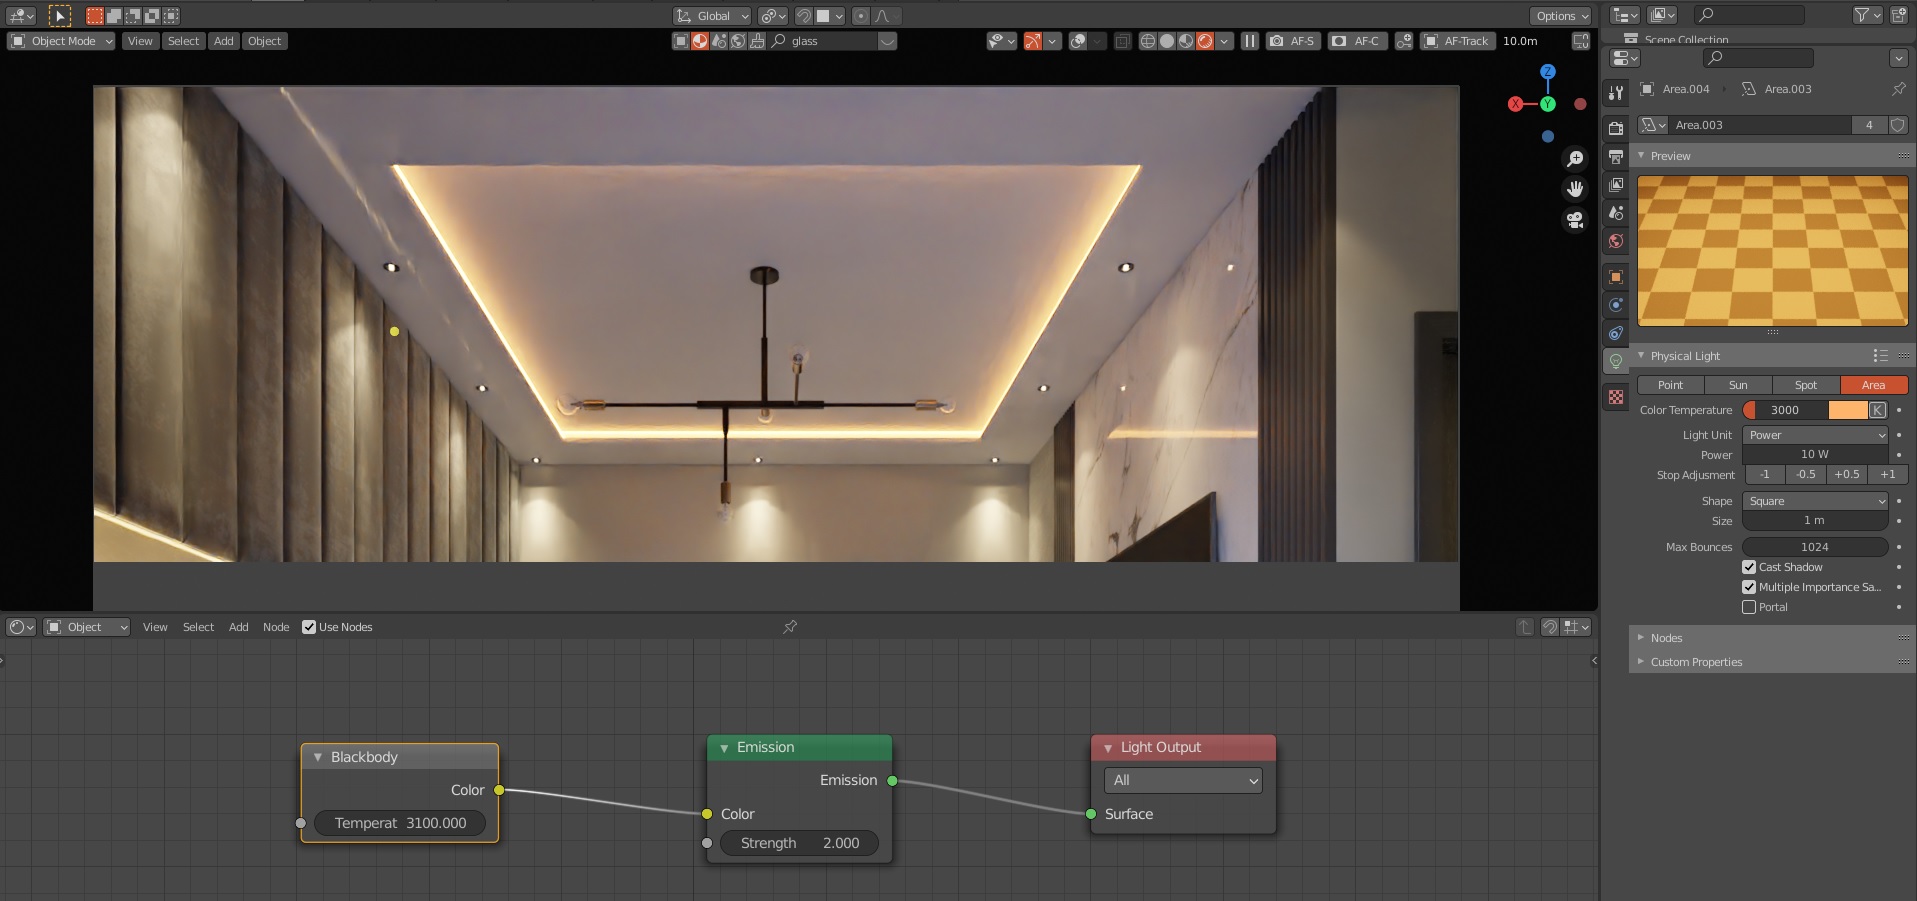
Tip: I used four area lamps facing inwards to mimic led strips on the ceiling. I always use the Blackbody node to set the light temperature. In this case, 3.000 Kelvins and 10W for power were enough.

Extra Tip: We have to approach every scene as a movie stage, where we can add props and all the effects and fixtures needed to achieve final great results. There are no limits in this department, so for an extra highlight, I set a random point light above the bed corner—as if the spot lamp on this side was “doing its job” even though the light source is far from the camera.
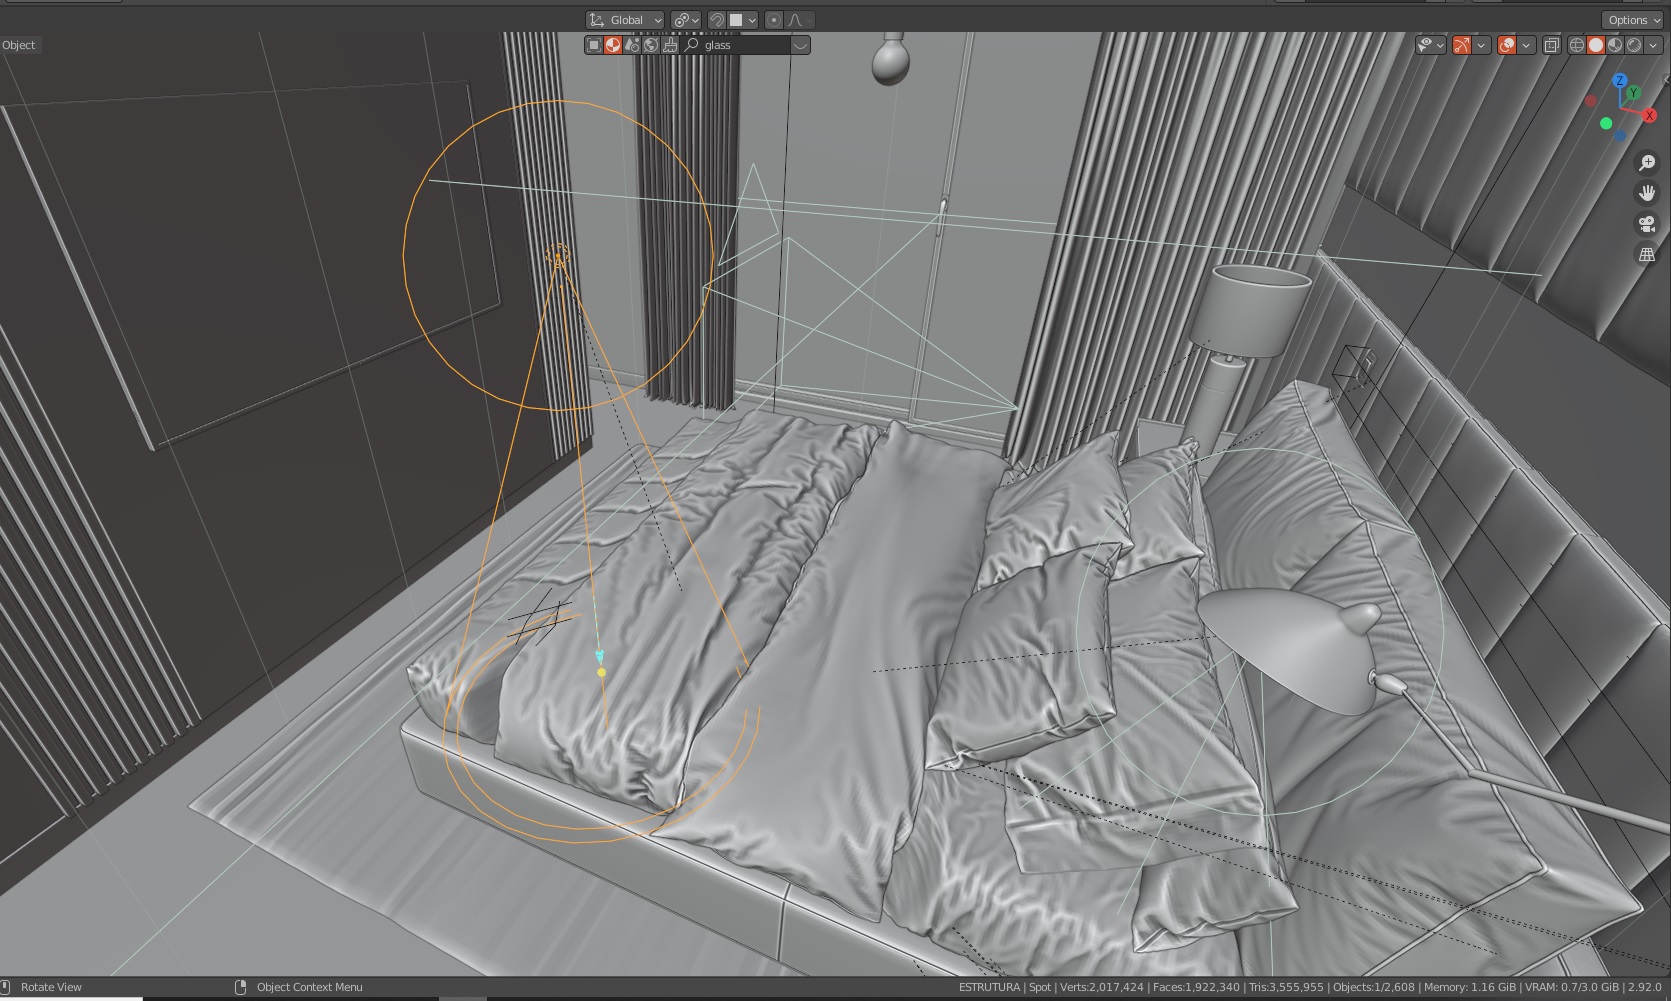
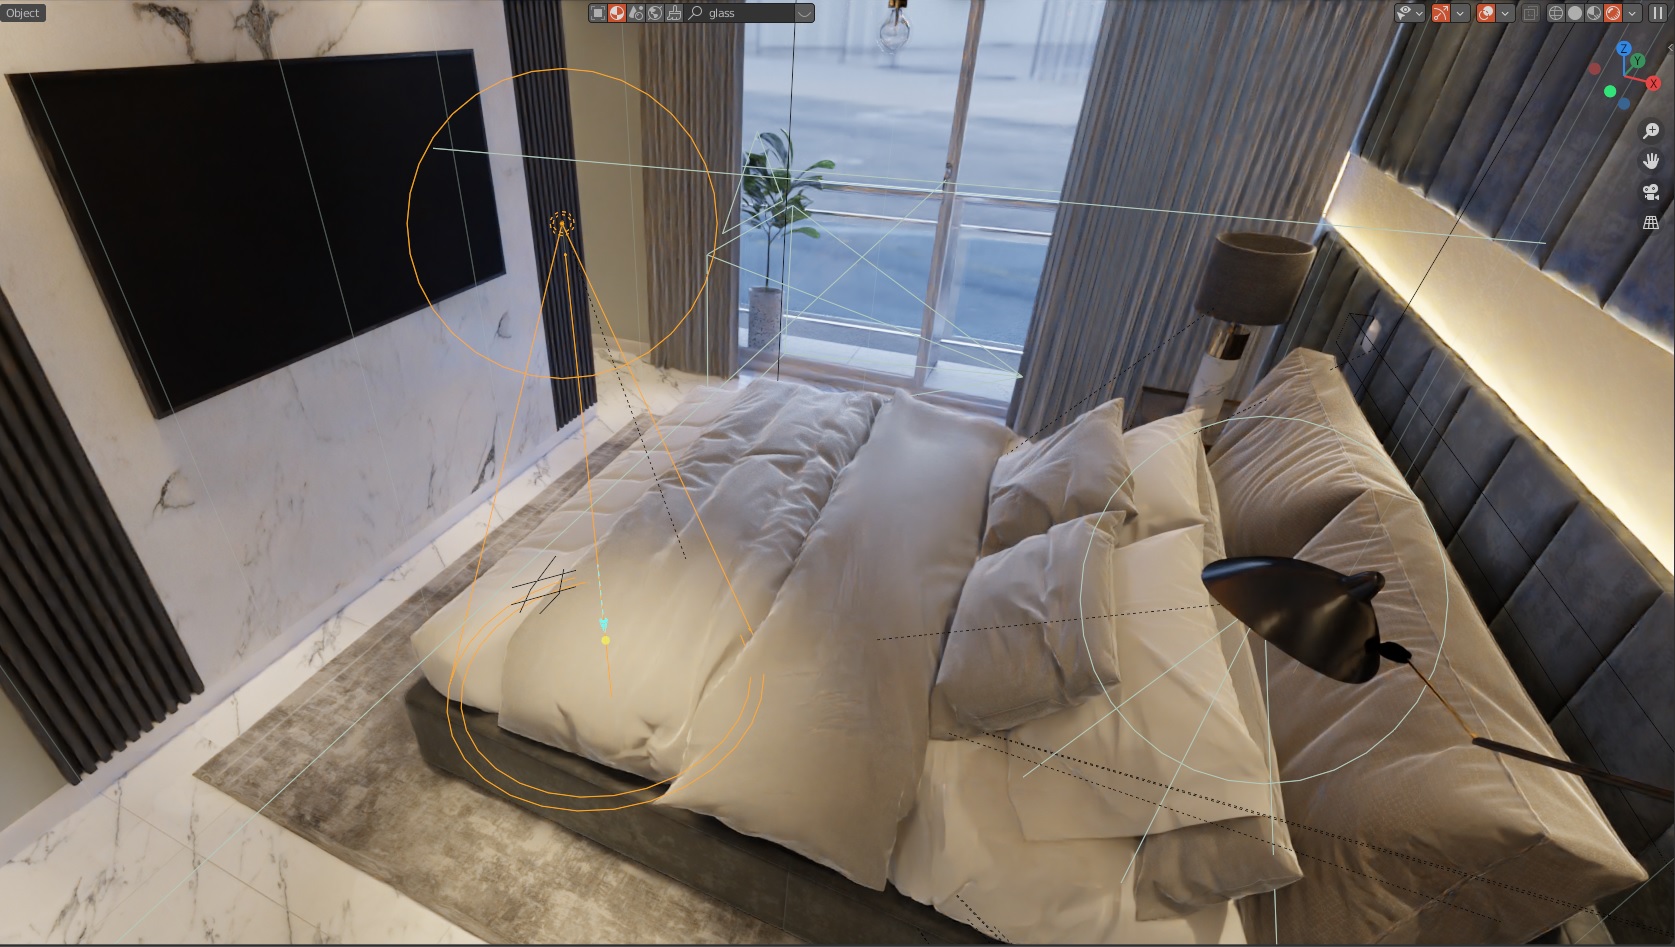
It’s ironic how sometimes we have to break the logic and good sense to achieve photorealistic results.
Rendering Set Up
Sampling and image output resolution
For this particular scene, I choose to use 500 samples and a resolution of 2700×2160. These settings were a middle ground that I’ve found to deliver the job on schedule without compromising quality and, above all, to meet my client’s expectations.

Compositing
Because of my hardware limitations, I generally prefer not to go wild with the nodes on the compositor. For this scene, I mixed a fog glow and streaks (both Glare nodes). I prefer to manipulate color corrections, saturation, sharpness, and other effects in external photo editing softwares.

Final result
After rendering and post-processing, this is the final result for Cozy Gold.
About the author
 Levi André, “Respect all, fear none”


Very cool work! :) thanks for sharing your process!