
Behind the Scenes: Swat Kats – Jake “Razor” Clawson – 2021
Hello!
My name is Chirag Sharma, and I work at a digital agency in India as a Creative Director/Technologist. When I am not working on projects from the agency, I spend time developing my own series of artworks featuring pop-culture icons from the ’90s as 3D renders.
As a child growing up on the Indian subcontinent in the 1990s, I spent a lot of time reading comics, watching cartoon shows, and hearing stories about the rich mythological culture I grew up in. I would draw, sketch, and paint on anything and everything I could find.
In my early teens, watching films by Pixar, Disney, and Dreamworks, I knew 3D animation was the career path for me. The year 2007 saw me enrolling in a college devoted to 3D animation and multimedia. Over those years, I was able to learn from some of the industry’s best CGI artists. In 2010, I graduated with a degree in 3D animation and multimedia.
Then life happened. To make ends meet, I got into advertising. Long story short, I’ve been working in the digital ad industry ever since.
While I kept an eye on how the 3D animation & visual effects industry was evolving, I recently re-kindled my love for building characters in 3D.
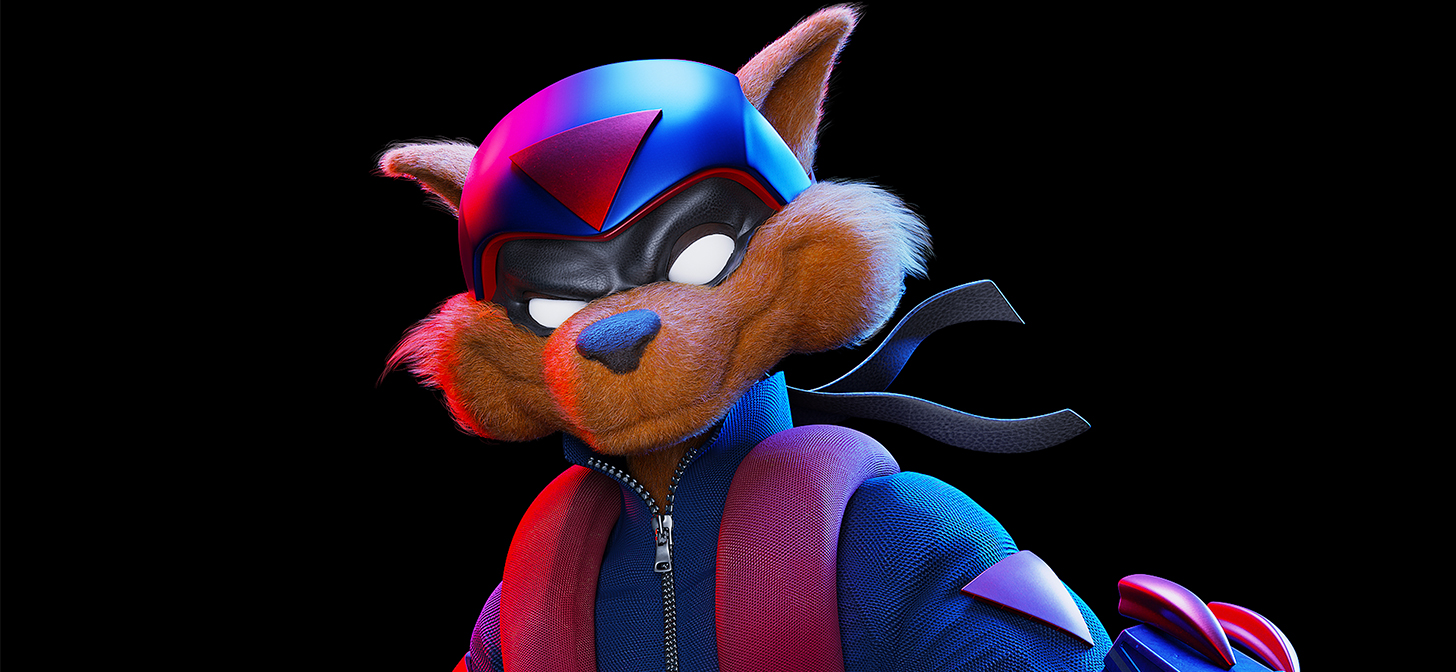
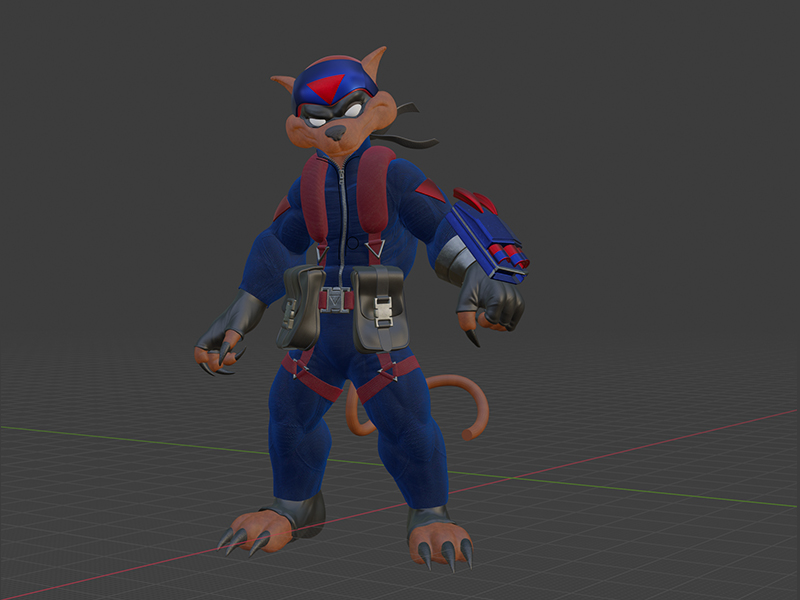
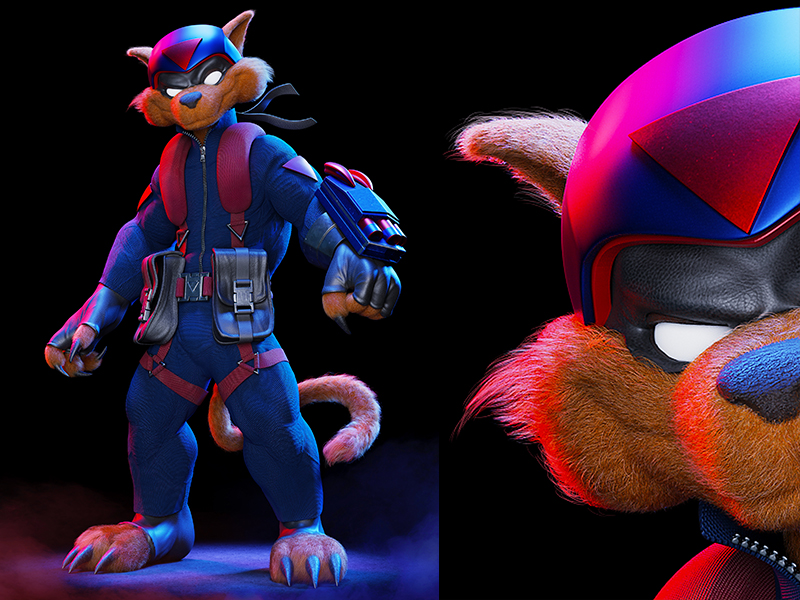
SWAT KATS – Jake ‘Razor’ Clawson
Swat Kats was my favorite show while growing up. For the longest time, I had dreamt of sculpting the kats in 3D. Styling in a way not seen previously. I picked this sole image to be my reference for the build.
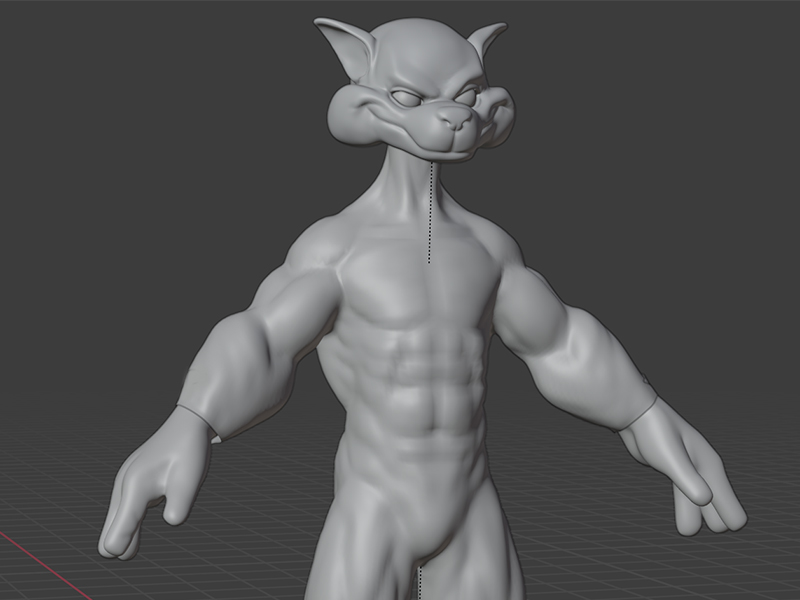
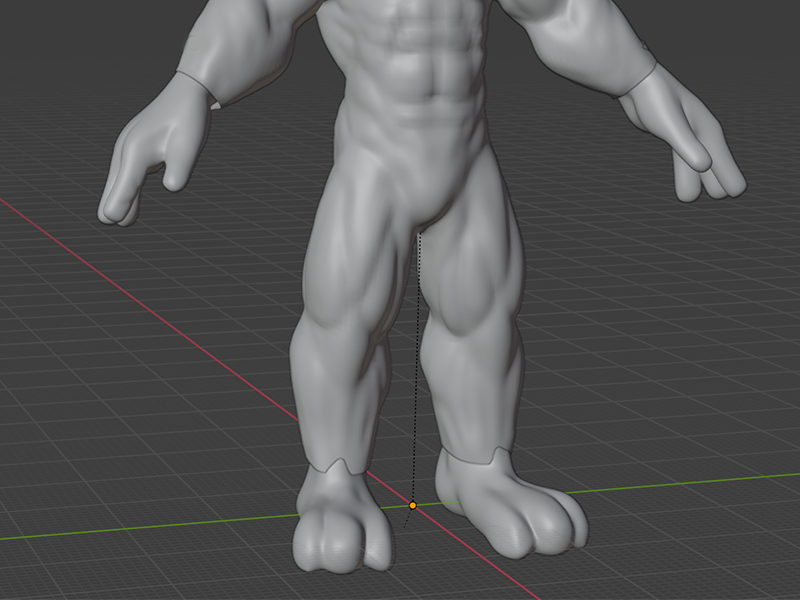
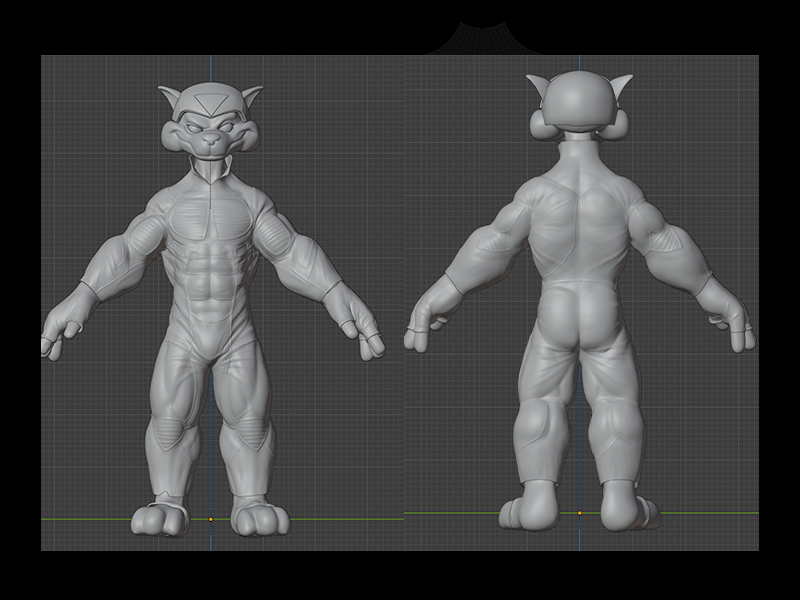
Sculpting anatomy
Transforming a quadruped into a bipedal character poses some challenges. While respecting the original TV show design, I wanted to make my version feel realistic. I wanted to make the characters seem like they could actually exist today. Understanding how anatomy is conceived traditionally in production houses, I began to discover how leg muscles could support an upper frame like the original design. I finished the base sculpture in about eight hours.
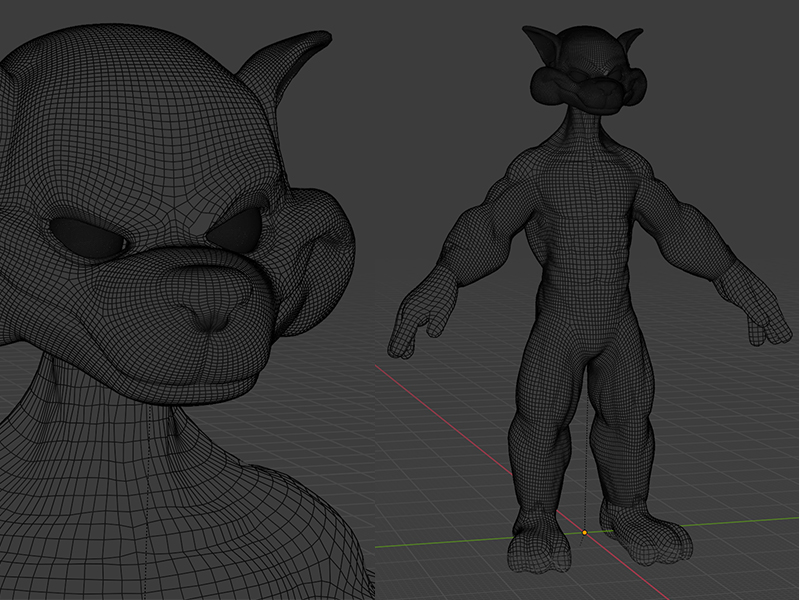
Retopology & UV unwrapping
I probably spent most of my time at this stage. In order to create a usable mesh, I had to grind my way through the poly build tool. I UV unwrapped the model and saved UV maps for all components.
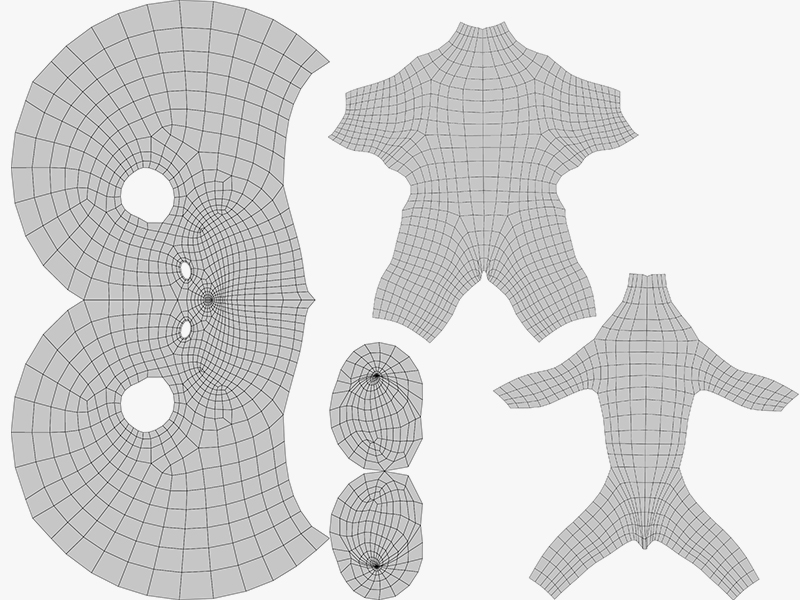
Costume & gear, part 1
Shrinkwrap comes to the rescue! To create the basic mesh for the flight suit, gloves, ankle coverings, and helmet, I heavily replicated the mesh and used shrinkwrap with the solidify modifier. In addition, I utilised a multi-resolution layer right on top of the modifier to add features like creases, folds, and armour mesh.
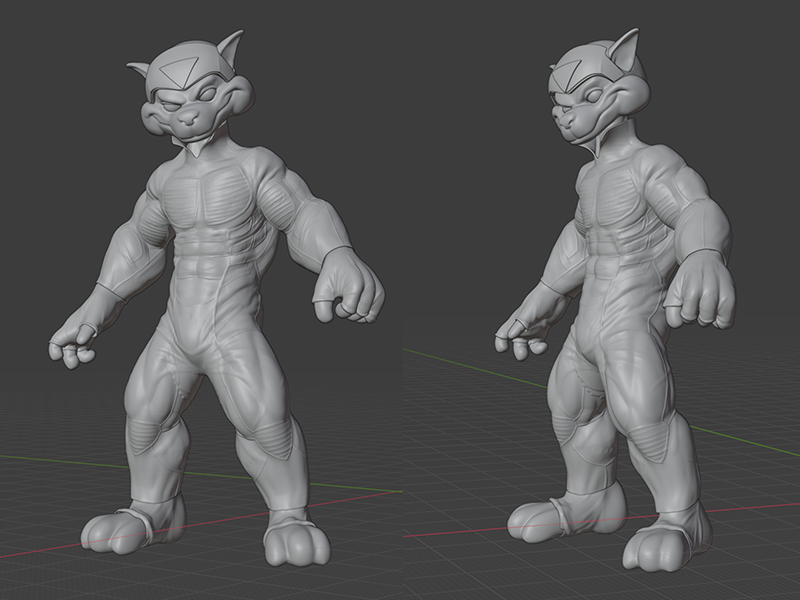
Rigging and posing
This is one of my favorite parts of the whole thing. I wanted the position and attitude to convey the model’s personality. To parent and pose the mesh, I utilized Blender’s inbuilt Human meta-rig. Throughout the process, I experimented with many stances until settling on the one that was closest to the reference I had.
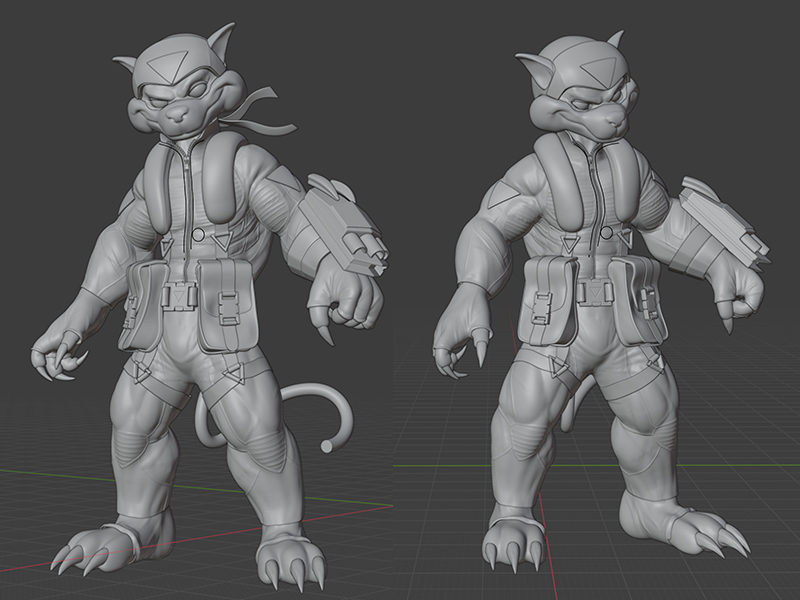
Costume & gear, part 2
At this point, I incorporated the rest of the accessories, UV unwrapping them simultaneously.
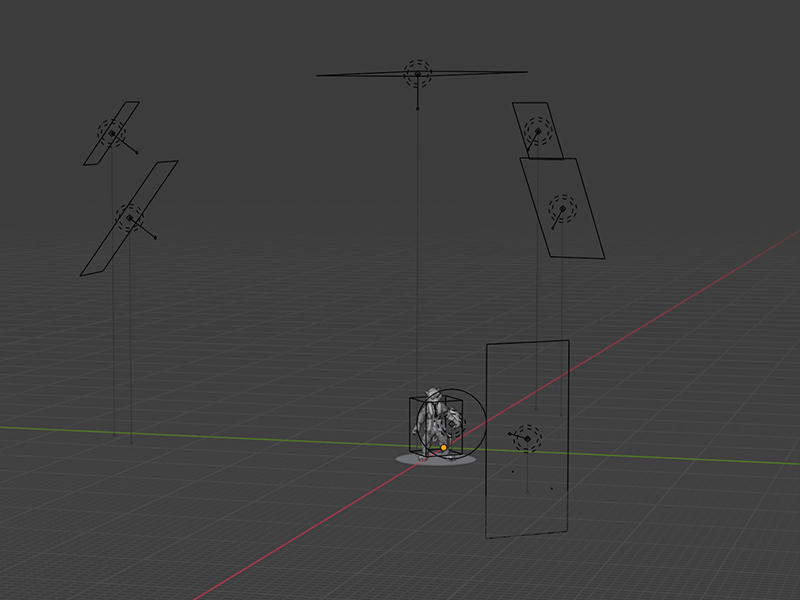
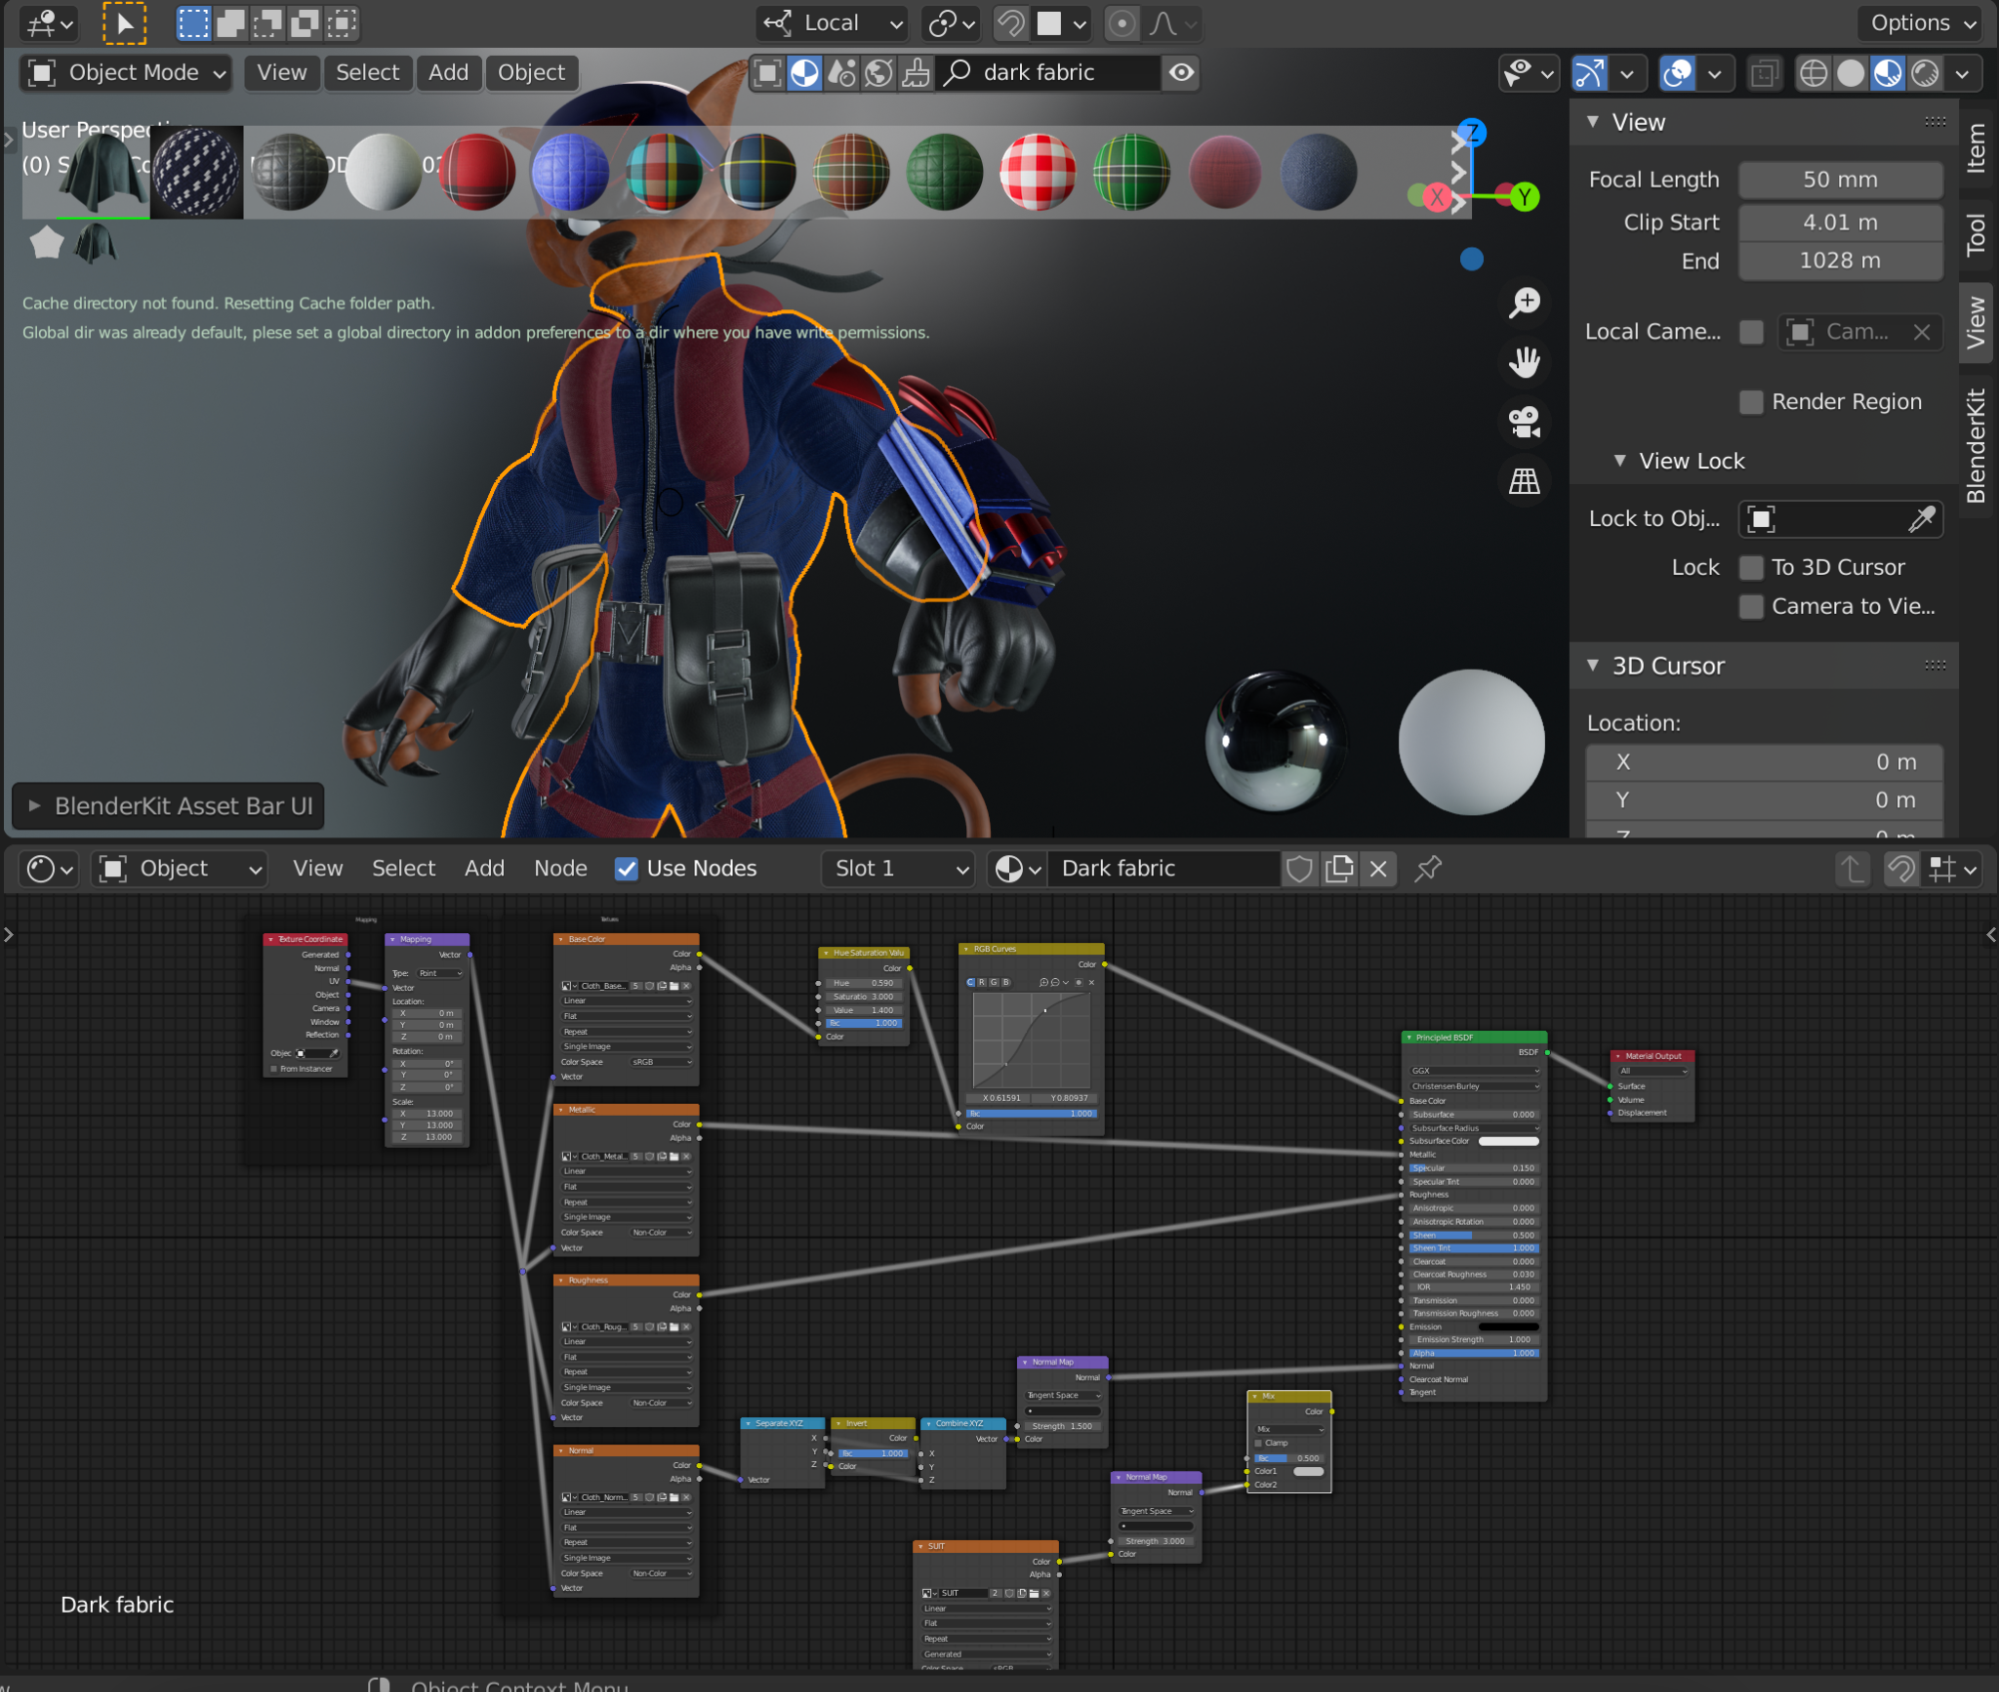
Lighting & materials
To complement the suit’s colour scheme, I created a basic four-point lighting system combining red and blue hues. I used the BlenderKit plugin to create my material nodes and built on top of the configuration it offers.
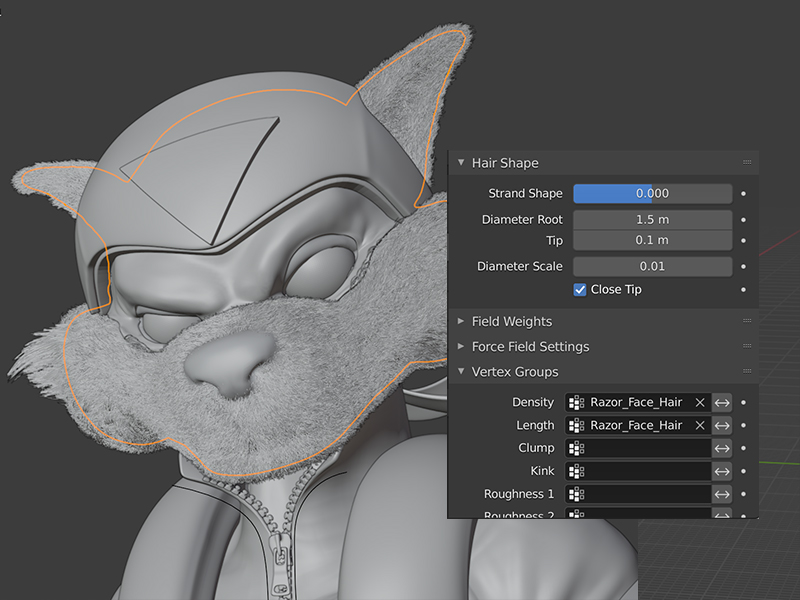
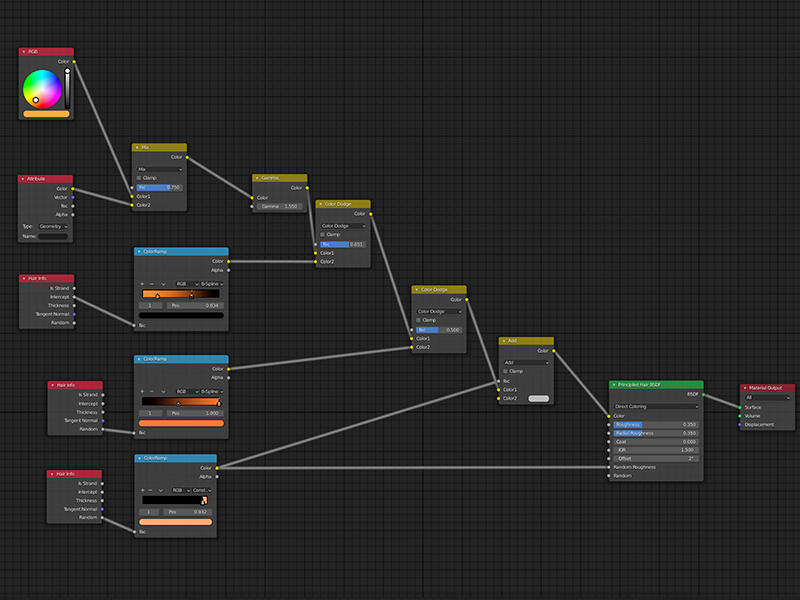
Fur particle system
Hair particle setup was, by far, the toughest part of the entire process. After days of research, I realized the tip of the hair particle was the key. It had to decrease proportionally from the root to achieve the result I had in mind. For shading, I created a custom material.
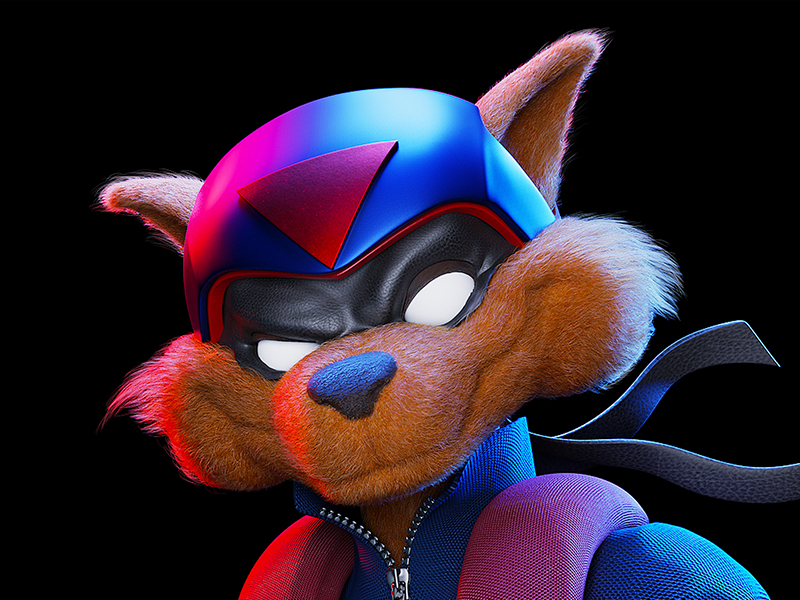
Rendering & compositing
Finally, after weeks of experimentation, Razor was rendered using Cycles engine. I included smoke on the floor in Photoshop, matching the lighting setup in the scene. After a few rounds of color correction, Razor was ready to fly. :)
About the author
 Chirag Sharma, Blender Enthusiast. Evoking ‘90s nostalgia, one piece at a time.


Wow. Awesome job~!!!
Really brings back my childhood memories.
Hope to see Callie Briggs in 3D in the near future.
Chirag. It’s Bade Meow and Chhote Meow
Nice work! :)