
Behind the Scenes: Shelby Cobra
About
Hello! My name is Tiago Gomes and I’m a 24-year-old aspiring 3D artist from Porto, Portugal.
I’ve been learning 3D in my free time for 2 years now. I decided to learn when a friend of mine, who is a game developer, suggested that I should get into it since I liked video games so much and was interested in how they were made. When I was younger I tried Cinema 4D and loved it but I ended up not pursuing it.
Four years ago, I started learning a bit of programming, Java(Android) and C#, but when I started tinkering with Blender I got hooked and addicted to learning more. I started learning 3D in December 2018 mostly by watching videos, reading articles, doing some courses on Udemy and a lot of trial and error. Since then I’ve started to learn Substance Painter and Photoshop in order to create better textures and do image composition.
Inspiration
I normally do more stylized/cartoon pieces since it’s the style I prefer and because photorealism was always overwhelming to me. I have been curious lately if I would be able to do something more realistic so I thought modeling a car would be cool and good training since I’ve never tried making one. I chose the Shelby Cobra on the suggestion of a friend and because it’s an iconic car.
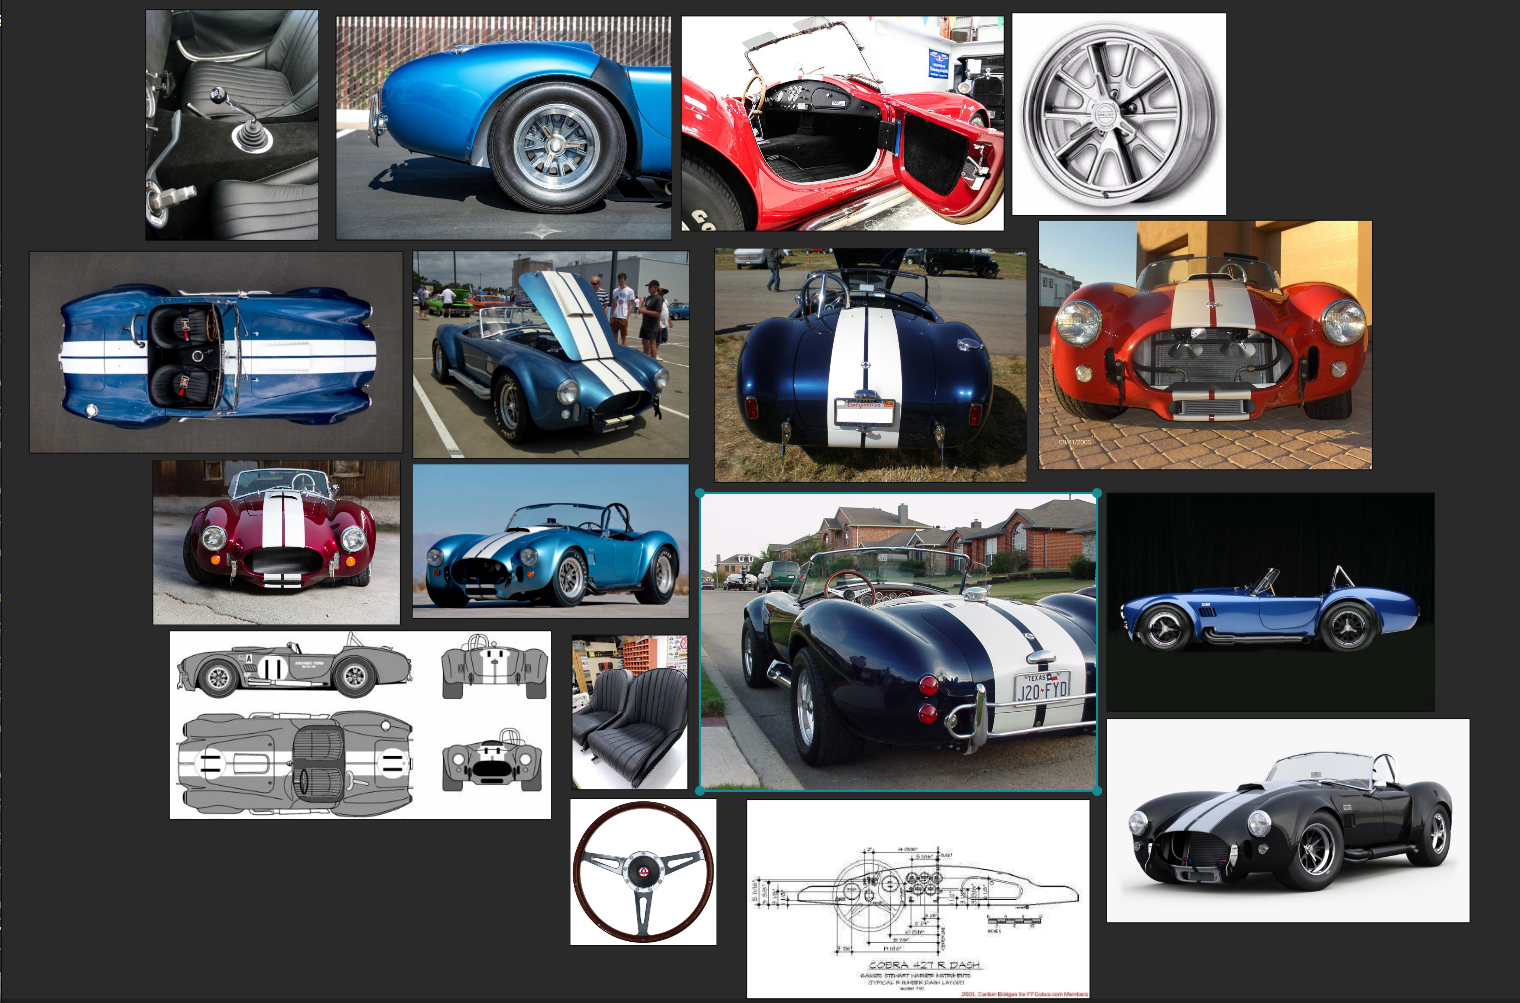
Good references help a lot, so I searched for pictures of the car from various angles and put them together in PureRef to make the modeling process easier. Here is the result:
Modeling
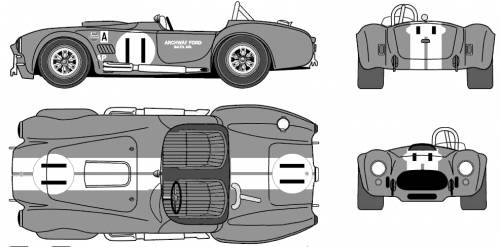
When modeling cars, it’s easier to find a diagram of the car itself with various perspectives, so I added it and duplicated/rotated/moved it to match the part of the car I wanted to model.
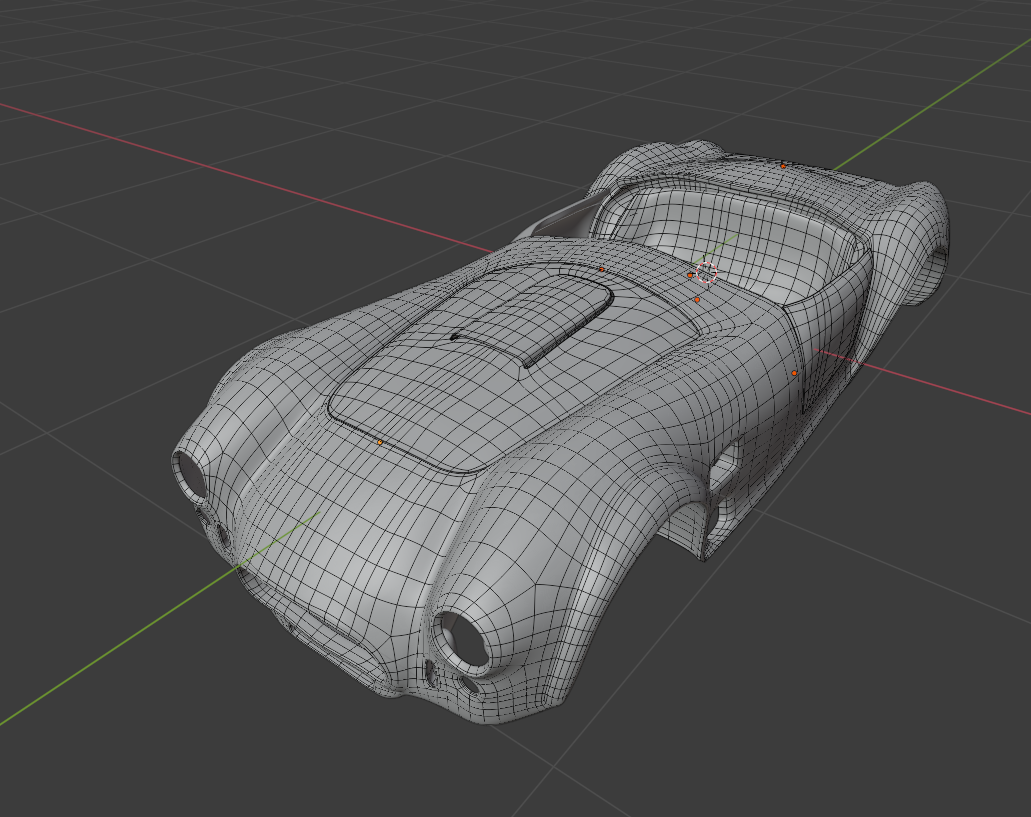
With the diagram in position, I modeled small parts like the hood, fenders, the front, and the doors by using planes with Subsurf and Mirror modifiers and then extruding/moving vertices using the diagram as reference. Then I joined everything to complete the chassis; I separated the hood, trunk, and doors afterward just in case I wanted them to open.

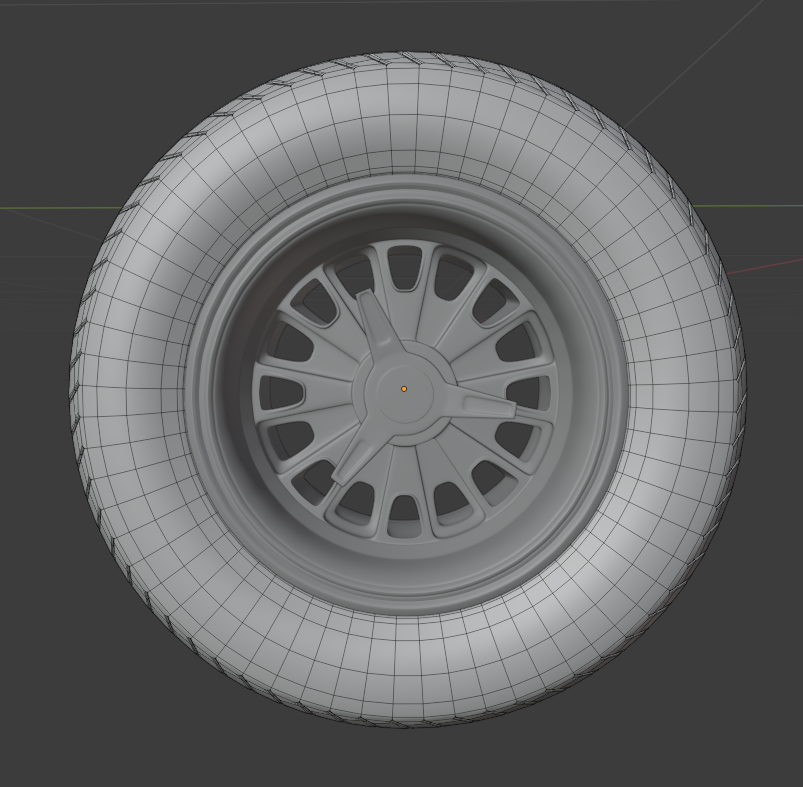
The wheels are a big part of the image of the car so that was what I modeled next. I started by adding a circle and deleting 3/4 of it so that I could mirror and save time. I also gave it a Solidify Modifier to add thickness.
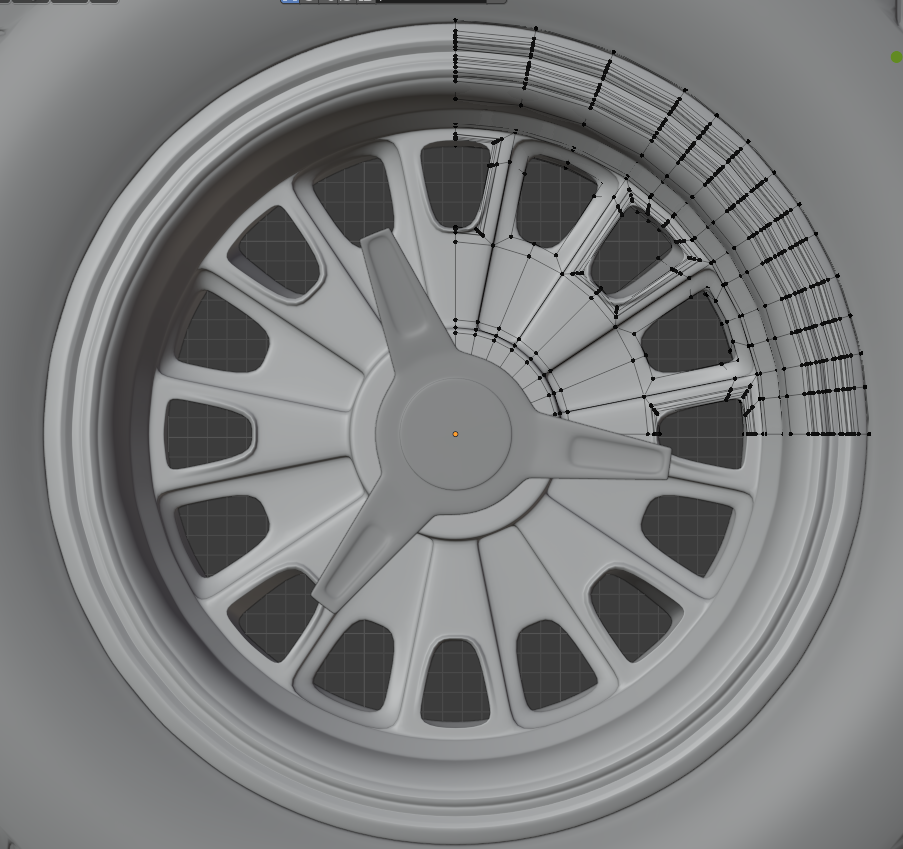
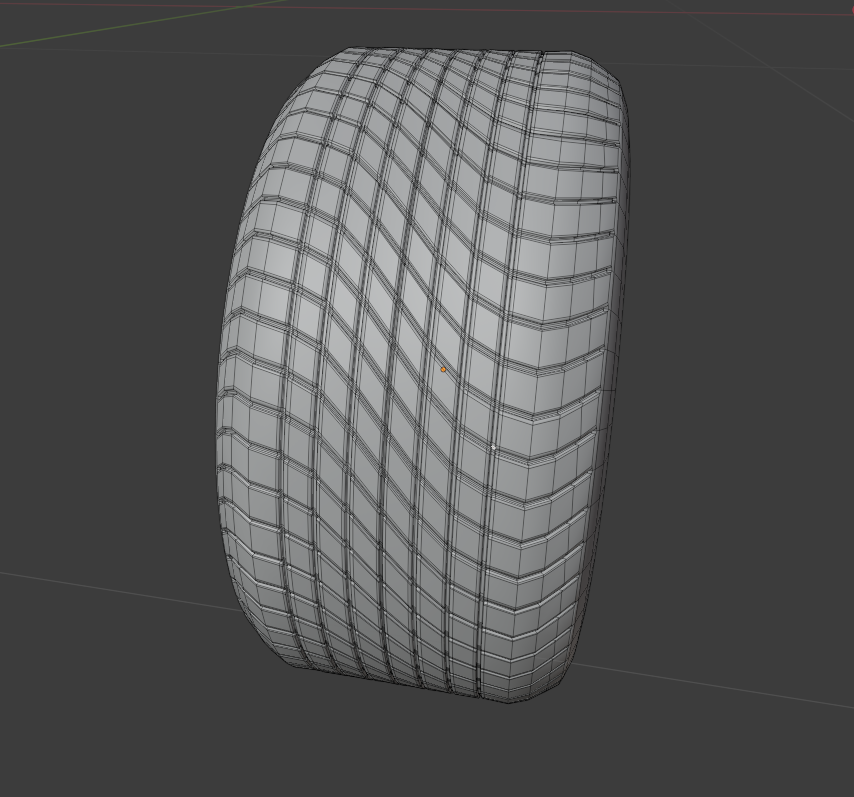
To model the tires, I used a cylinder and cut a hole in it to fit the rim. For the treads, I added the edge loops that I needed and, by using proportional editing, gave that curve design to the tire and extruded to give depth to the treads.
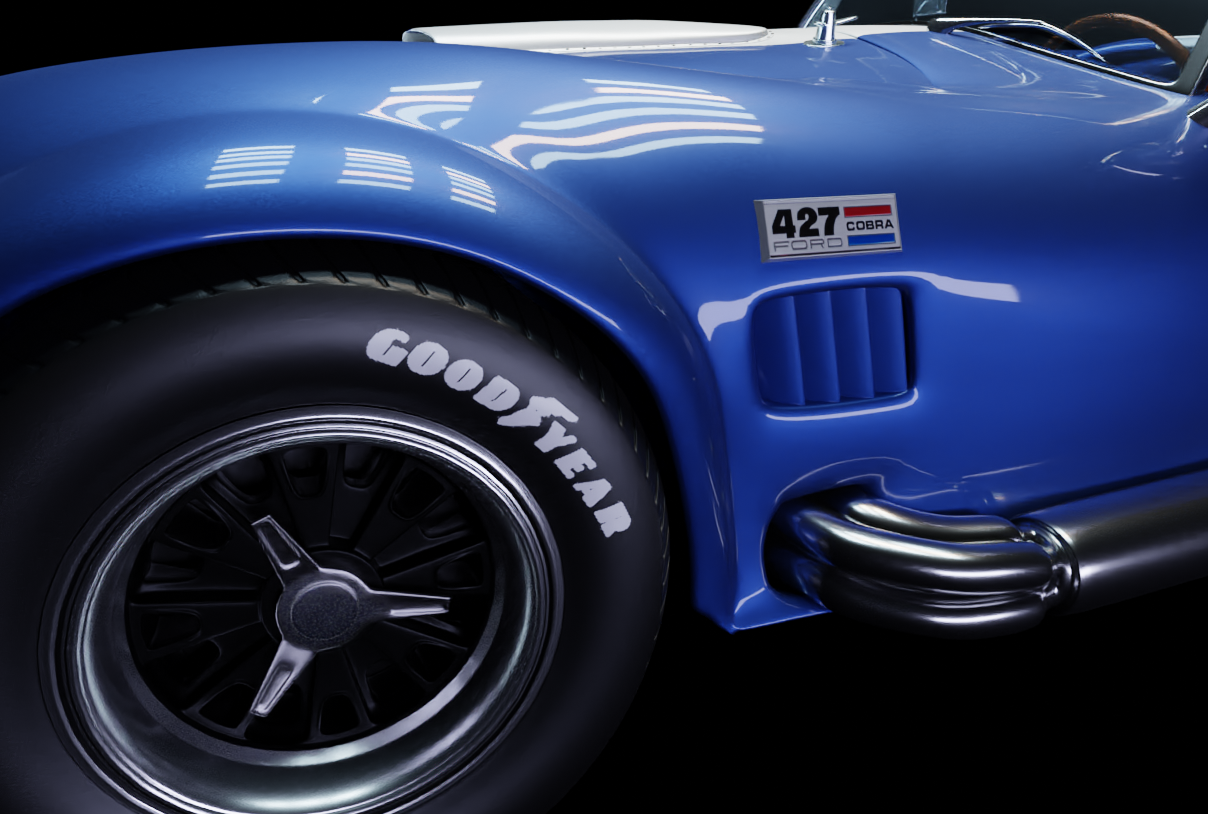
With the chassis and wheels created, I modeled the windshield, wipers, side mirror, bumpers, headlights/taillights, exhausts, and the radiators/tubing according to the reference to complete the exterior of the car. The Shelby badges are an imported SVG file that I then converted to a mesh and extruded to add thickness.

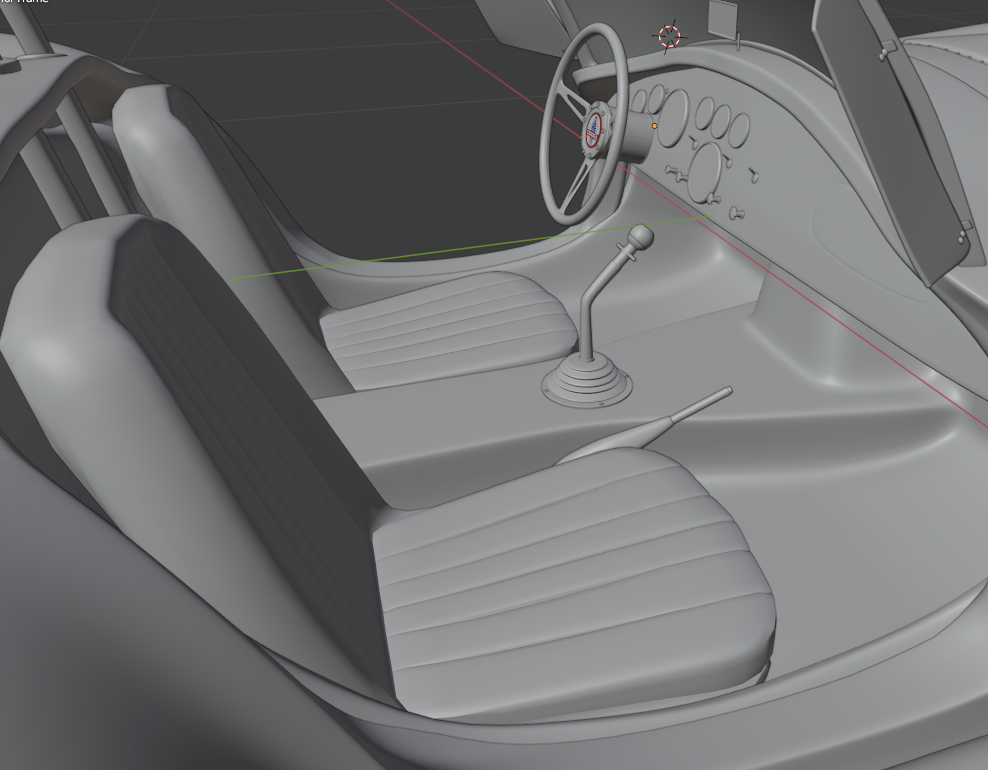
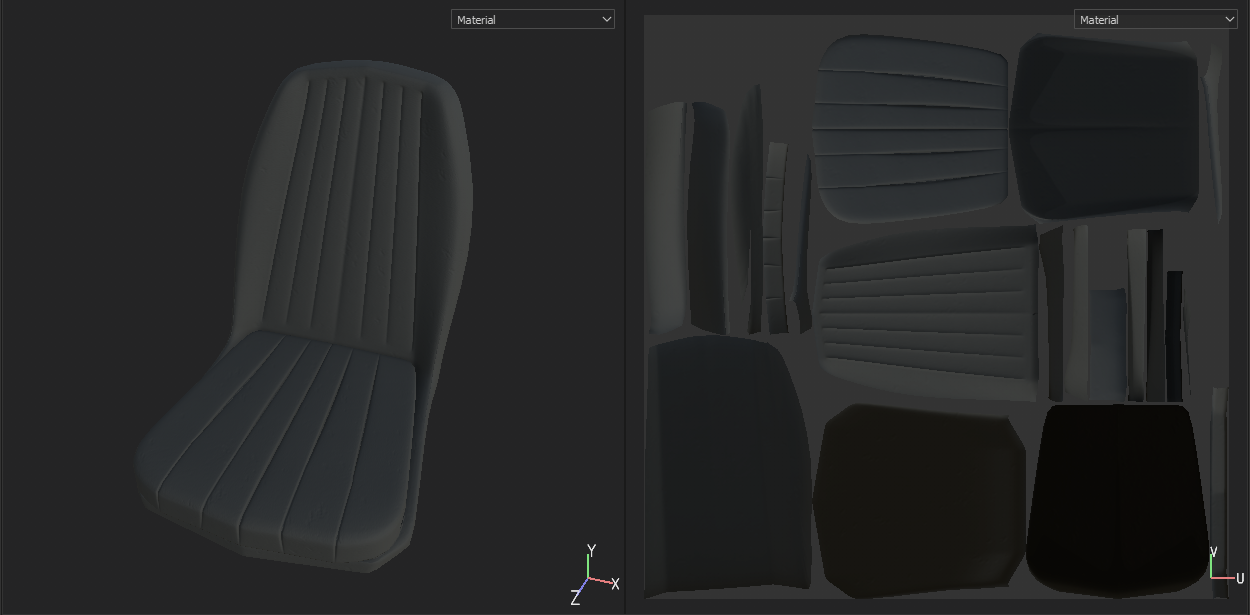
On the interior, I started by modeling the dashboard and all the objects associated with it, like the steering wheel and all the gauges/buttons/switches. After the dashboard, I modeled the car seats, the gear stick, handbrake, and the mirror.

Texturing and shading
Every material of the car is procedurally textured or just Principled BSDF shaders except for the badges and car seats, which were UV mapped and textured in Substance Painter.
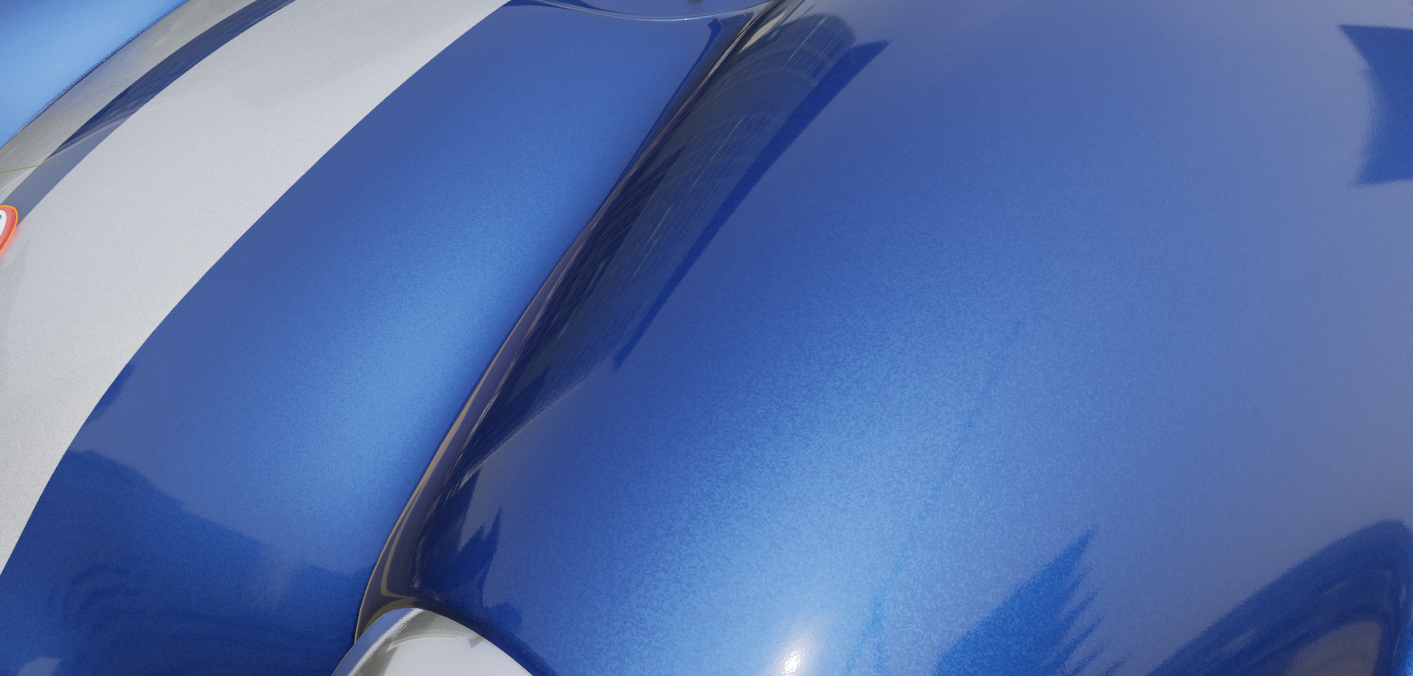
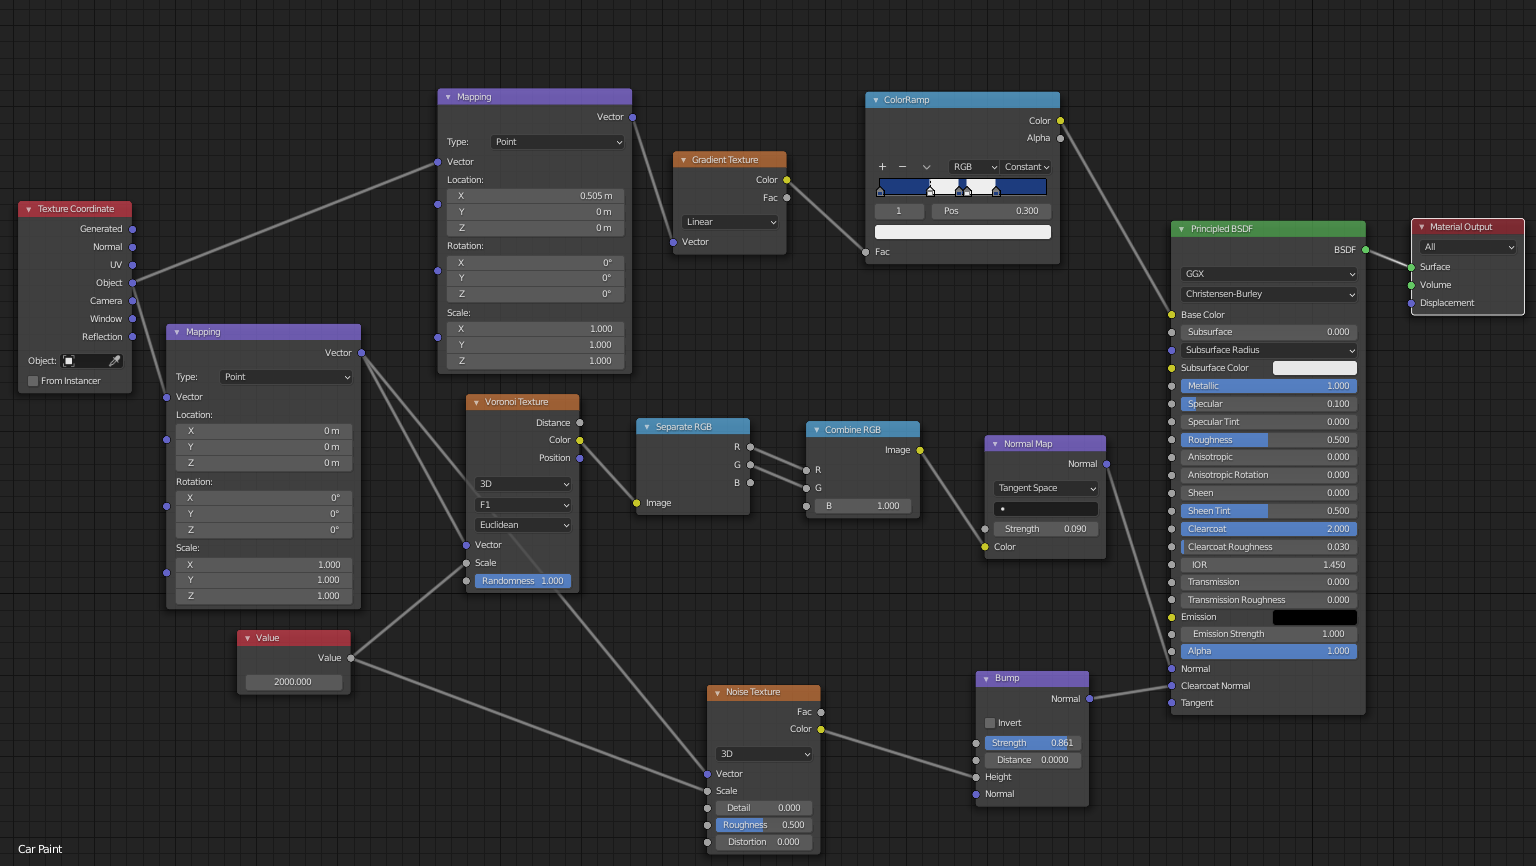
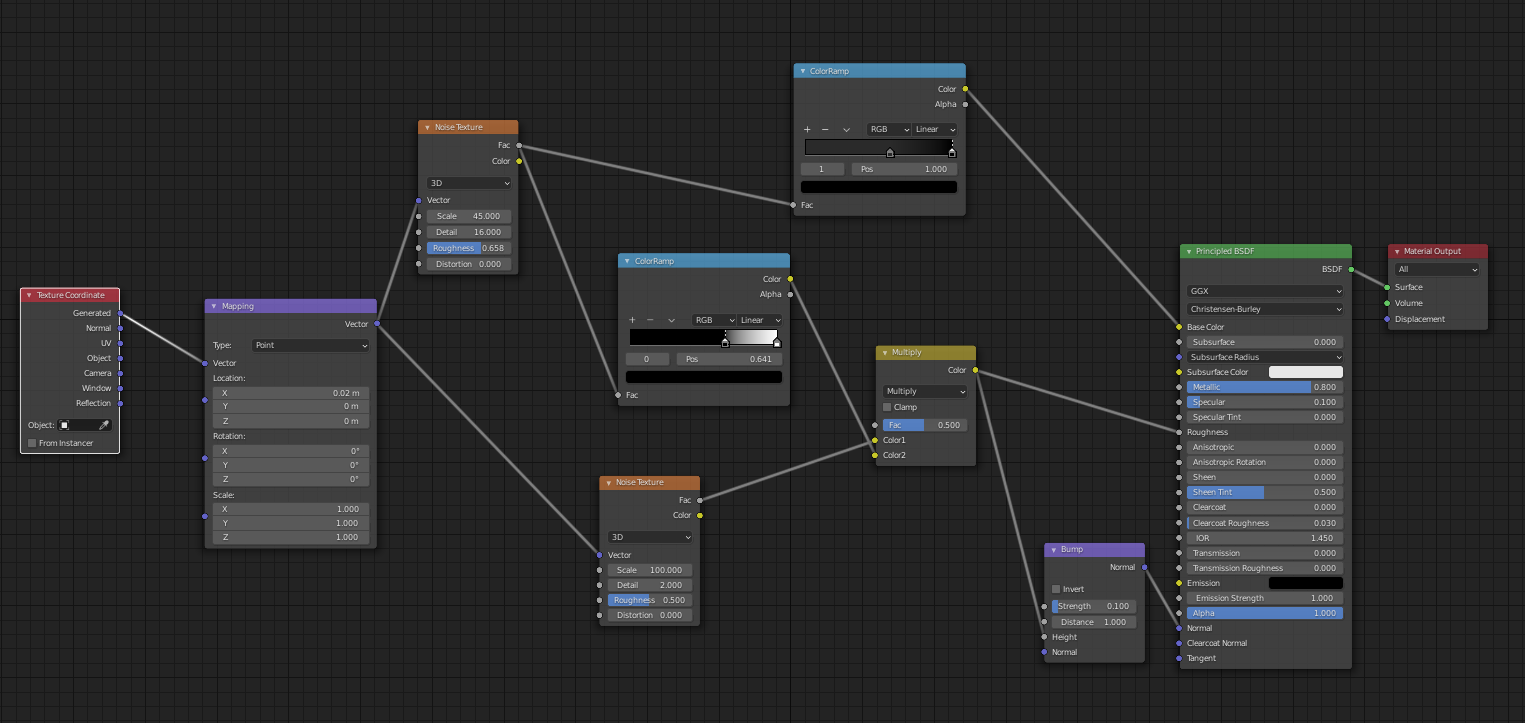
For the car paint, I used a Voronoi Texture to give that flakey pattern. For the stripes, I used a Color Ramp while using Object in the Texture Mapping node so I didn’t have to unwrap and texture just because of the stripe. Here’s a closer look and the node setup:
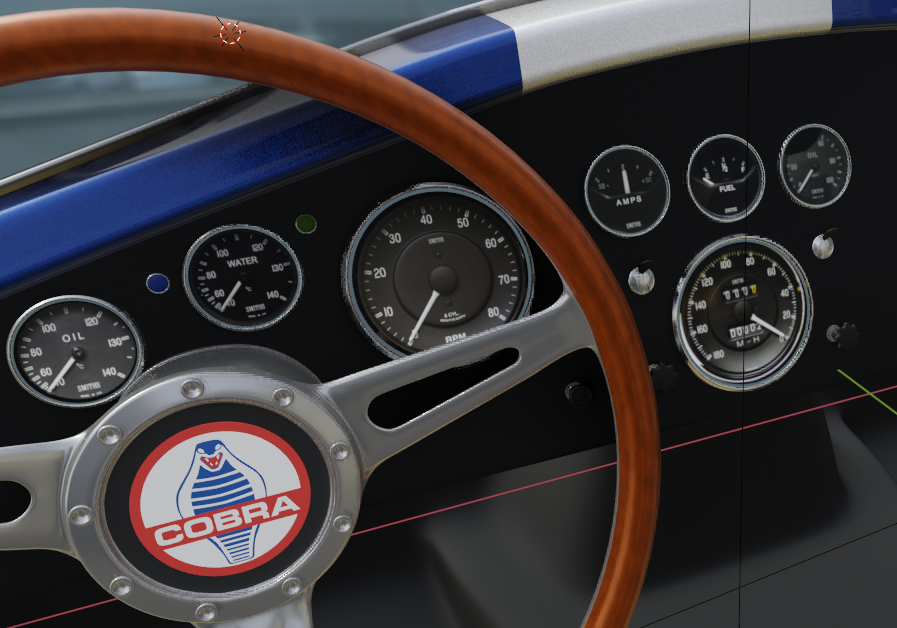
For the gauges, I searched for pictures of each gauge and joined them together in Photoshop to use them as a texture. Same with the side badges and the tires (with a noise texture to add the texture of the rubber).
For the backdrop I used some procedural textures to give it a kind of asphalt look with puddles:
Lighting and rendering
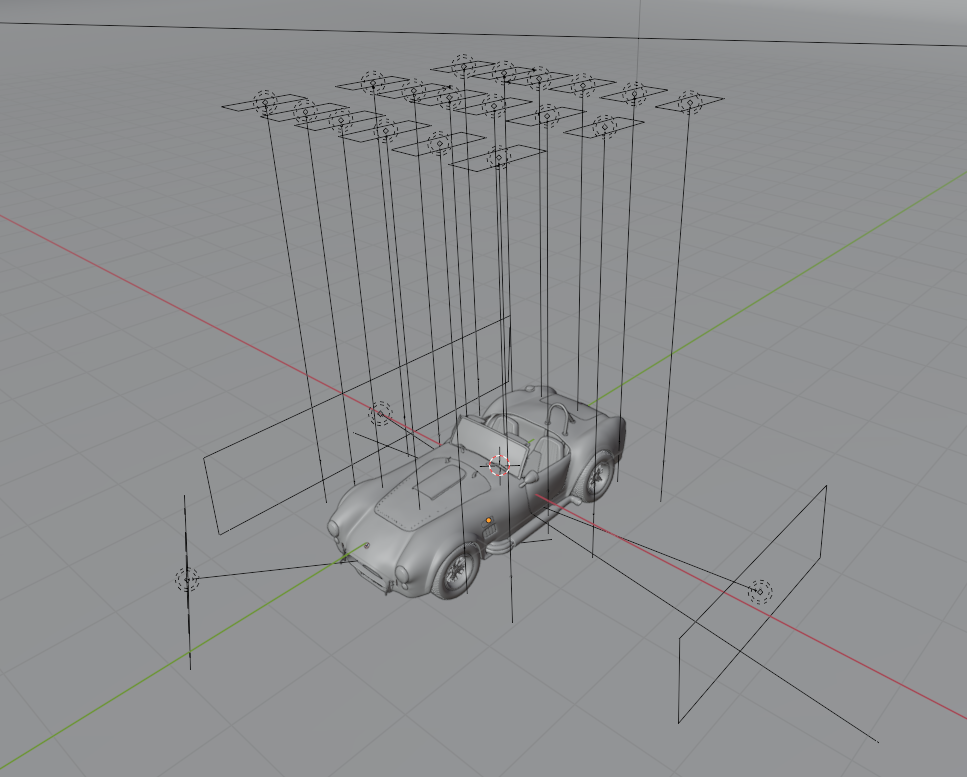
I’m not very good at lighting but I used simple 3-Point Lighting with some lights on top to give better reflections on the car. I also changed the color of the top lights to create a mix between warm and cool colors. Here is my light setup:
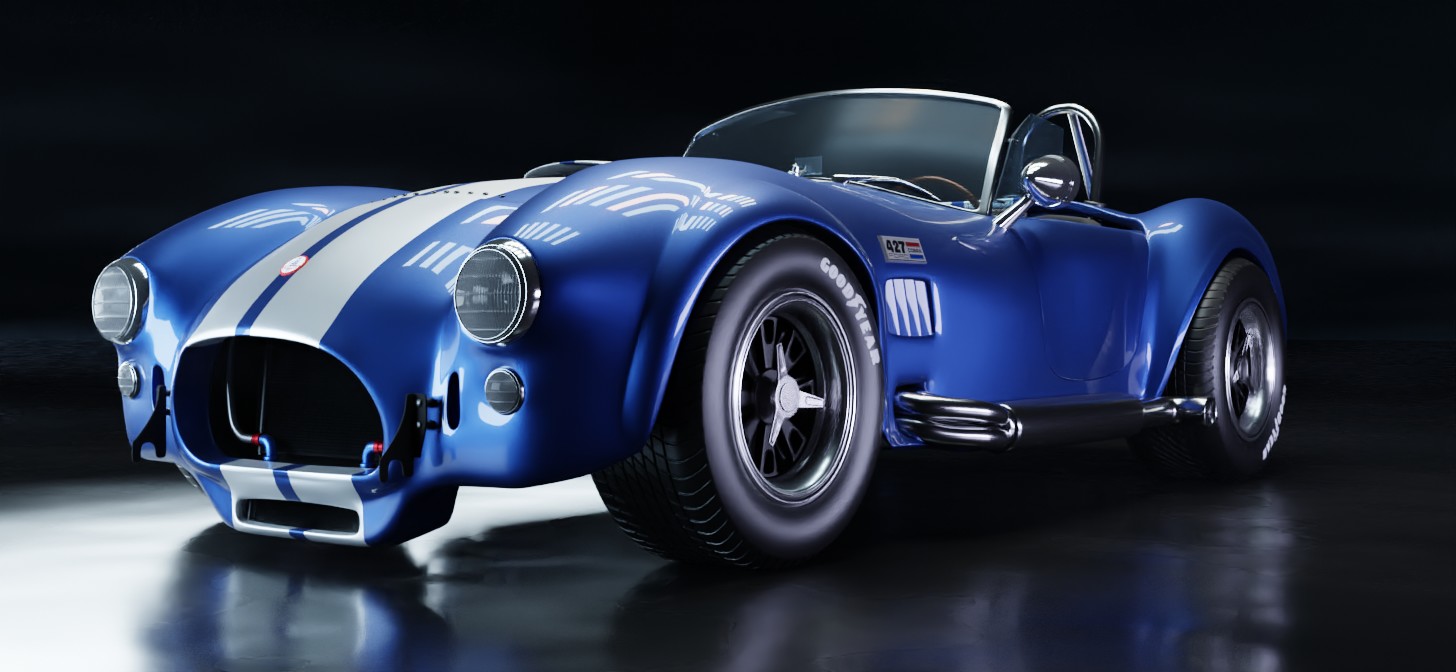
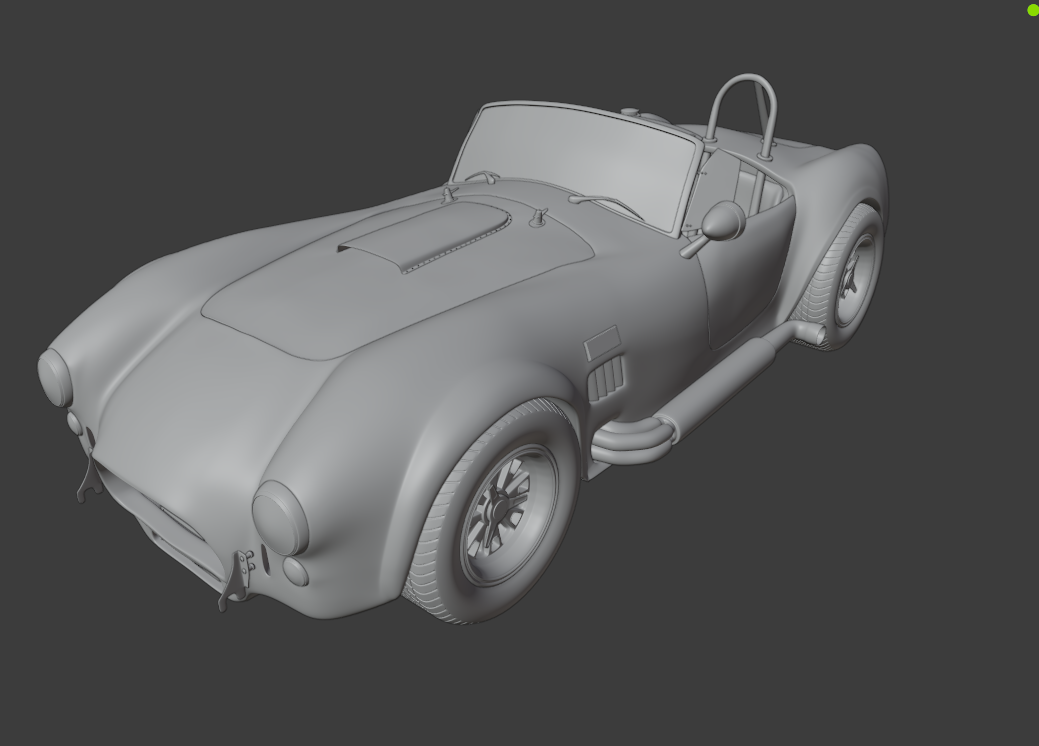
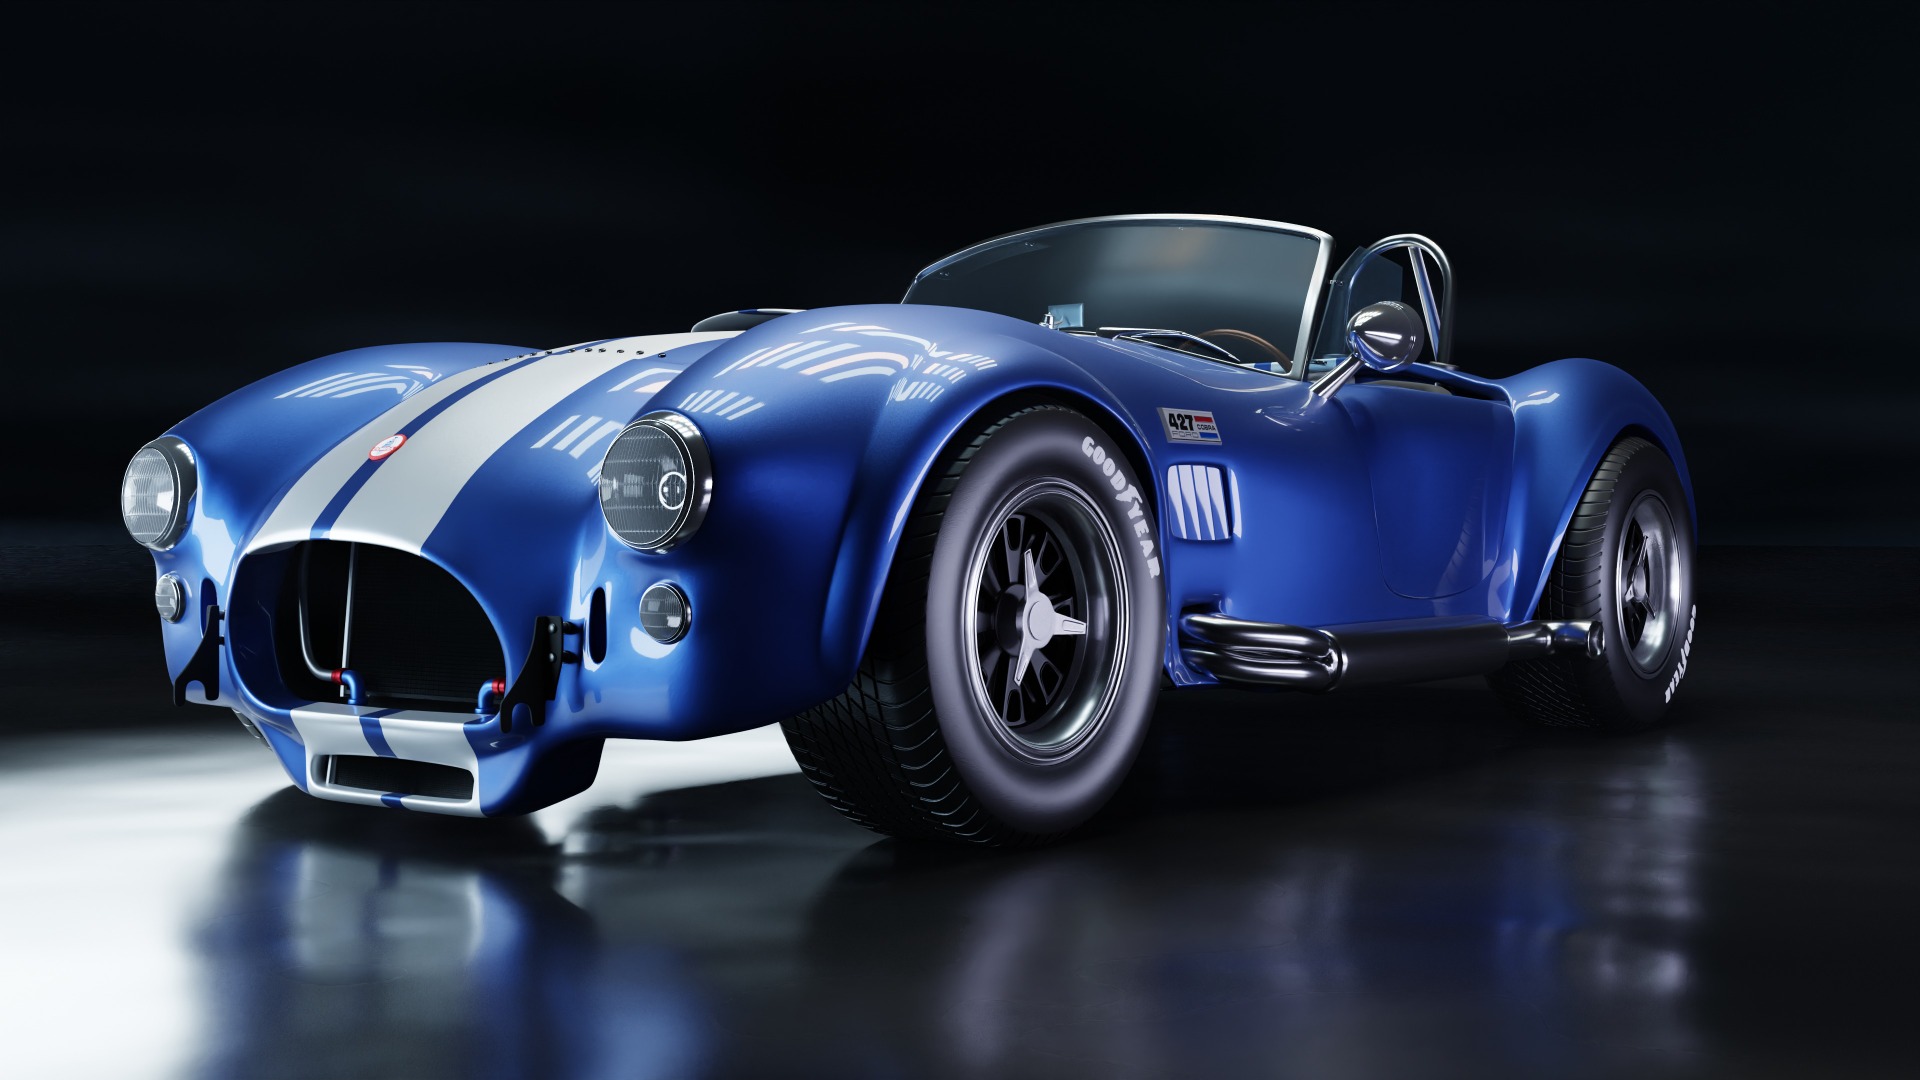
The scene was rendered in Cycles with 600 samples and Optix Denoiser at 4K resolution. I also used Medium High Contrast and ramped up the exposure a bit in Color Management. Here is the final render, you can check the rest at my ArtStation.
About the Author
 Tiago Gomes, 3D Artist


