Behind the Scenes: F1 Concept Car
About
Hello, my name is Volodymyr Borovkov. I am a freelance 3D artist and web developer from Germany.
I have been using Blender since 2014 and learned 3D modeling and rendering by myself. As I am also a huge Formula 1 fan, I mostly focus on modeling F1 cars in my free time and try to improve my skills with each model.
[sponsor id=’qarnot’]
Inspiration
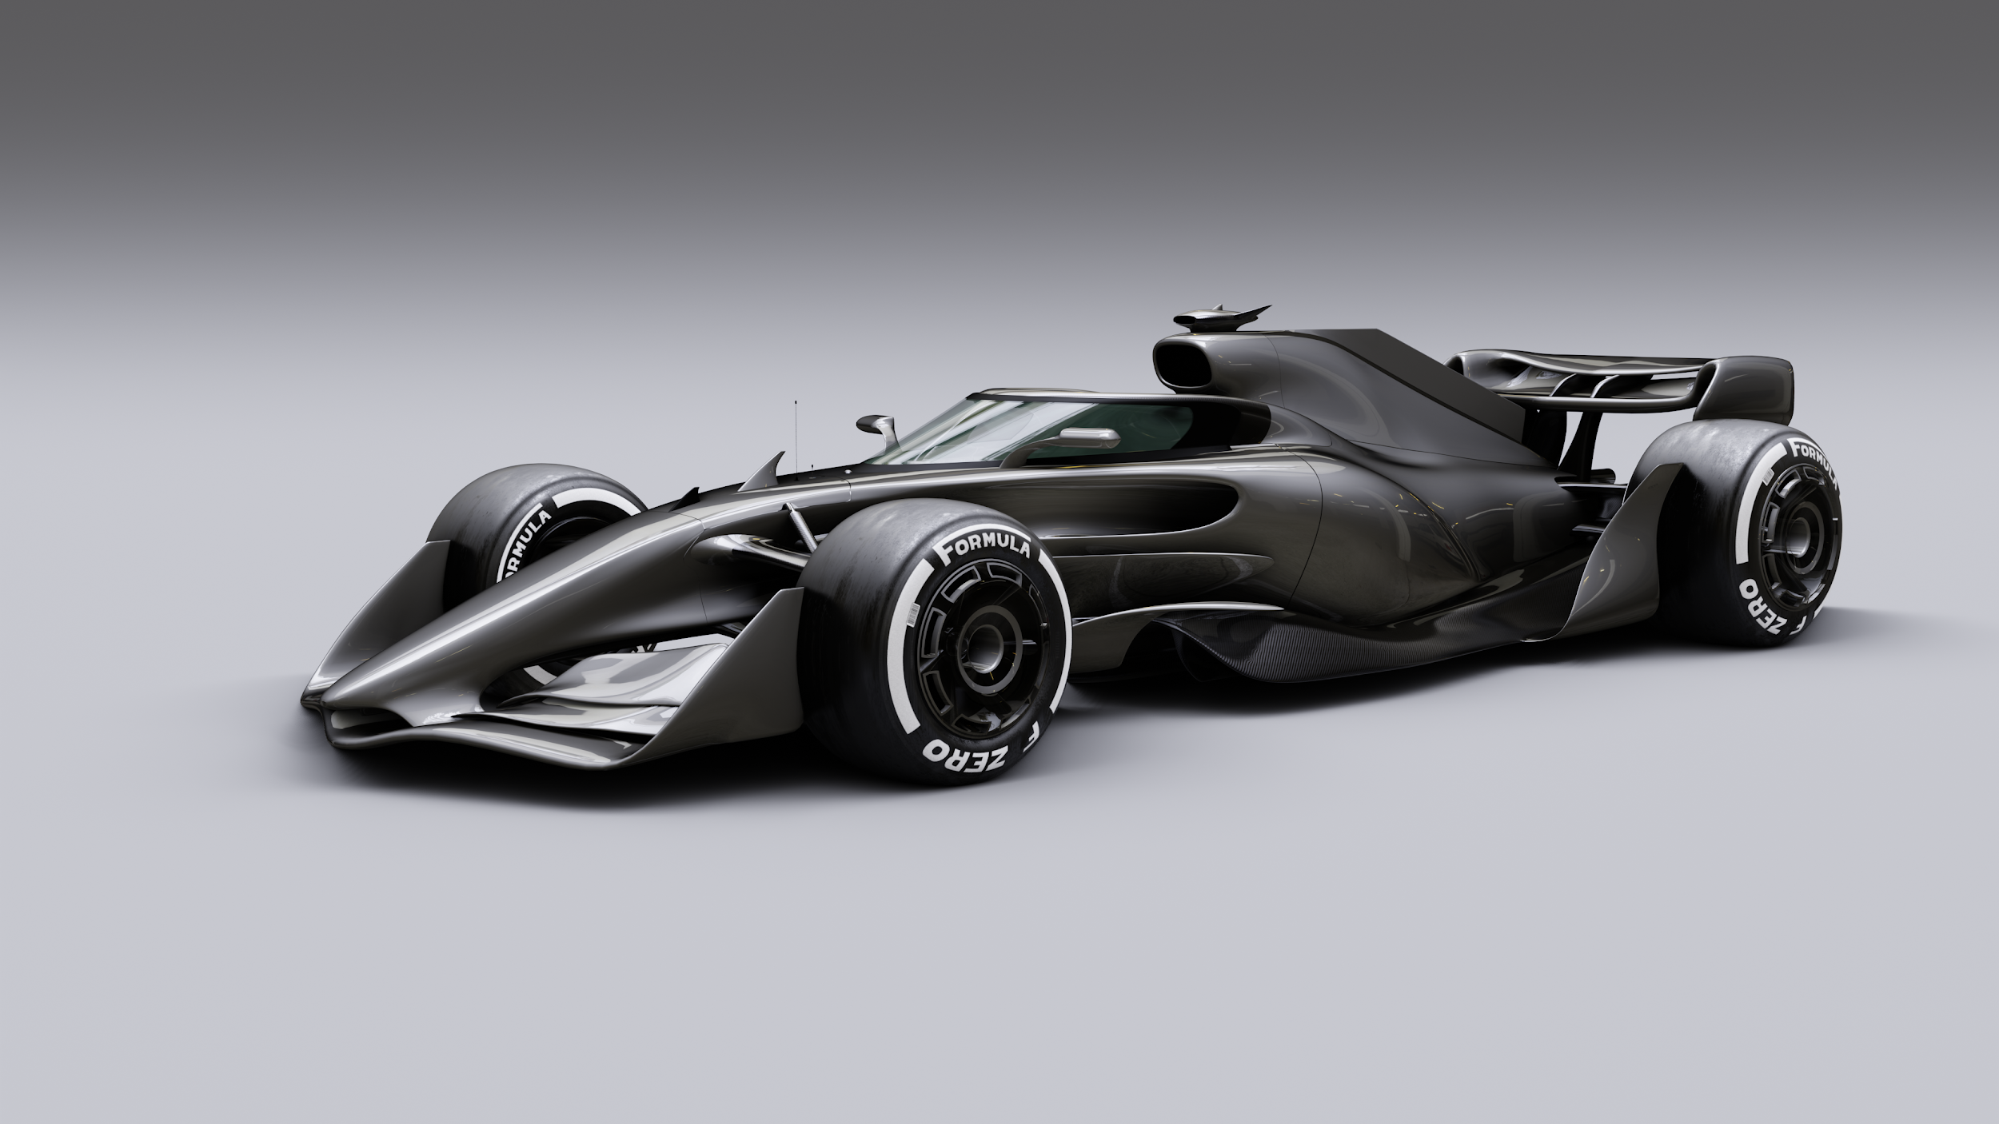
This particular model was just an experiment, I didn’t foresee the final outcome of this car.
My favorite modeling part, in general, is to make unique shapes with NURBS, and Blender with matcaps or EEVEE does a fantastic job to visualize that.
Tools
For this project, I used Blender 2.90.1 and Photoshop for textures.
Modeling Workflow
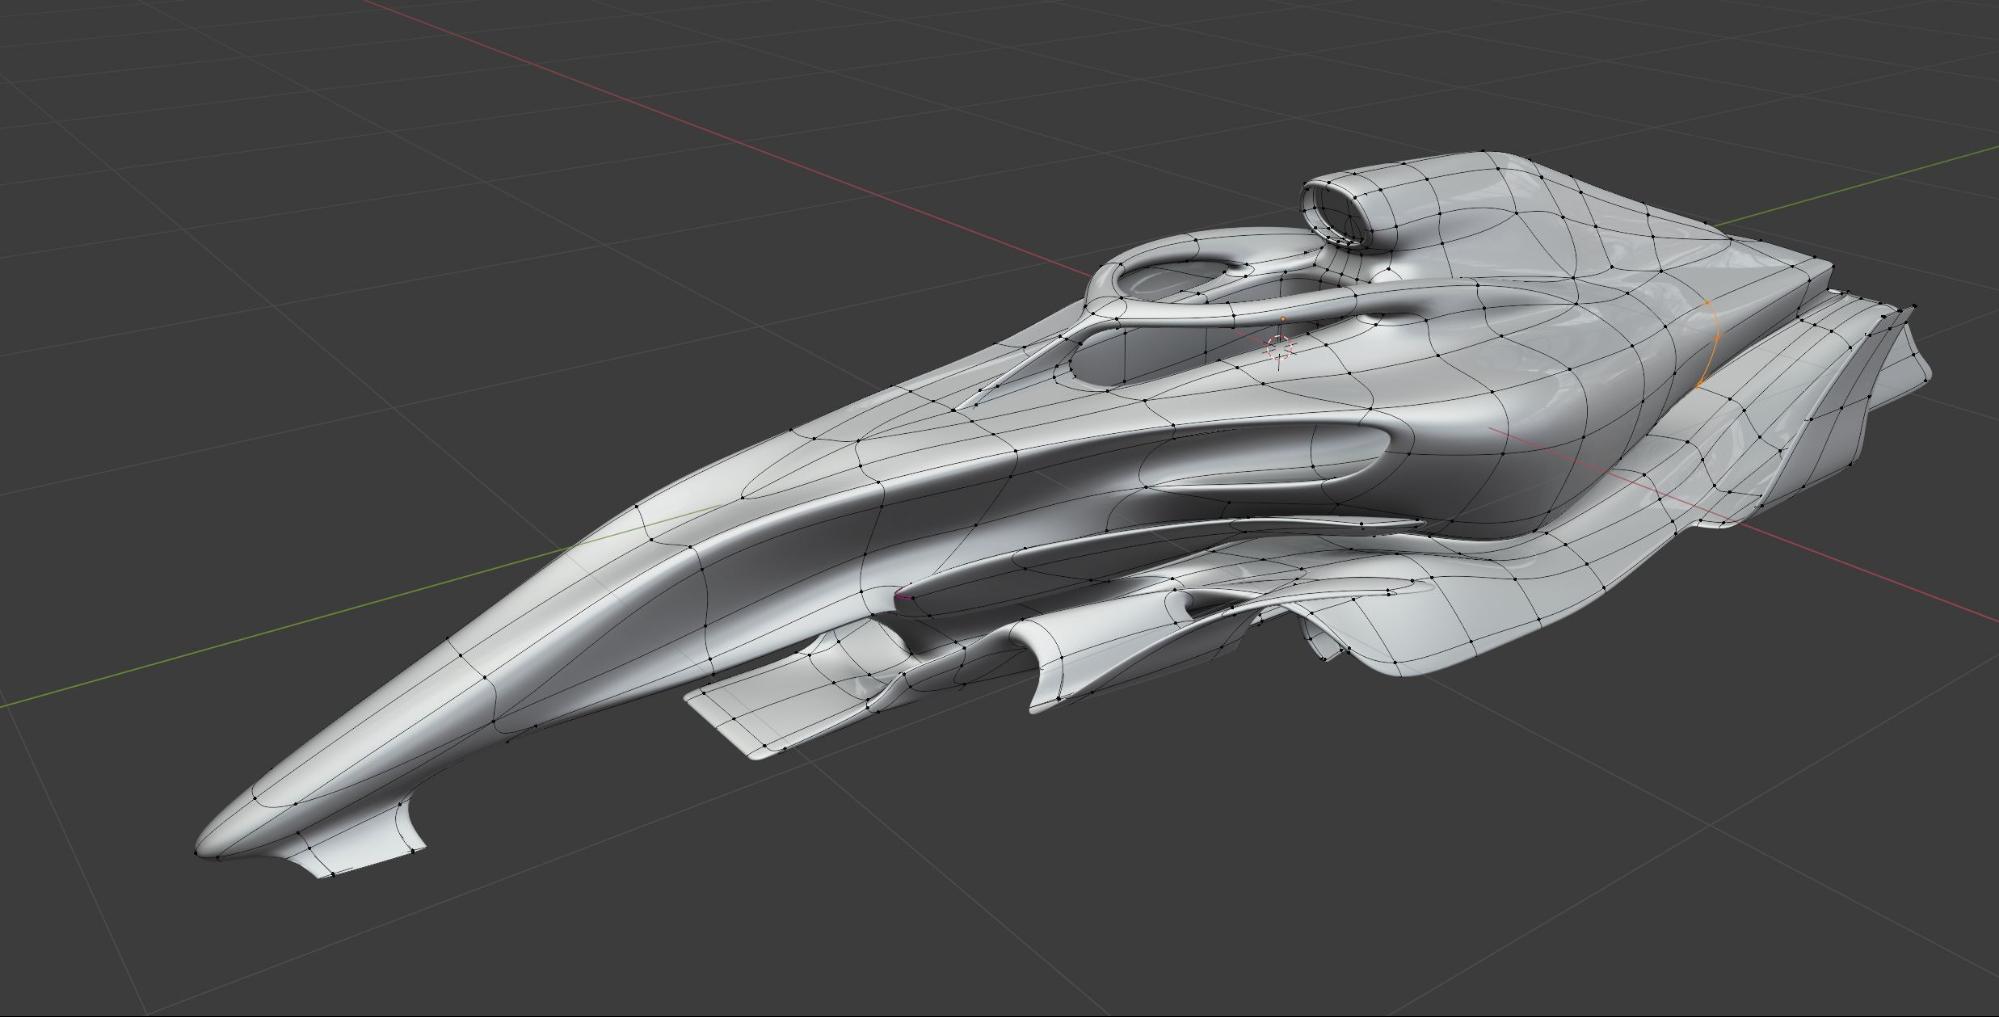
As always, I use the same modeling method and same modifiers stack:
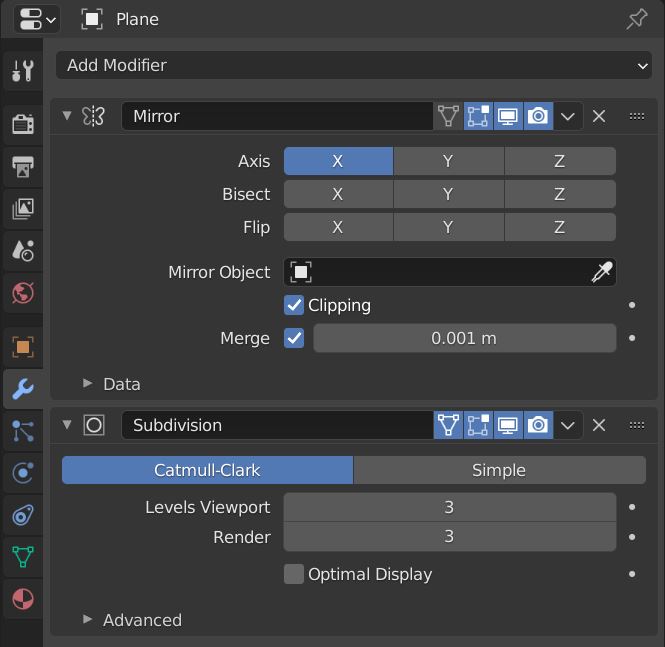
I started by placing a plane, cutting it down the middle, deleting one half, and applying a mirror modifier with the clipping option turning on.
Next, I applied a subdiv modifier and switched on the “On Cage” Button—and then the fun began, because there are only a few controls to shape the car the way I want. :)
I used the same stack for the front and back wing, suspensions, cameras, and mirrors.
Also, by dissolving some edges I could achieve an interesting transition between the sidepods and the rest of the car.

After I was happy with the overall design, I added some gaps and details to the car. I used the shrinkwrap modifier for this to make a clean, light transition between the separated surfaces.

Next, I gave my attention to the car rims and the Aeroscreen. For the rims, I was inspired by the Porsche 908-04 RSR Vision GT rim design, which also had a transparent plastic cap on the wheels. For the aeroscreen, I looked up a real one from a modern IndyCar:
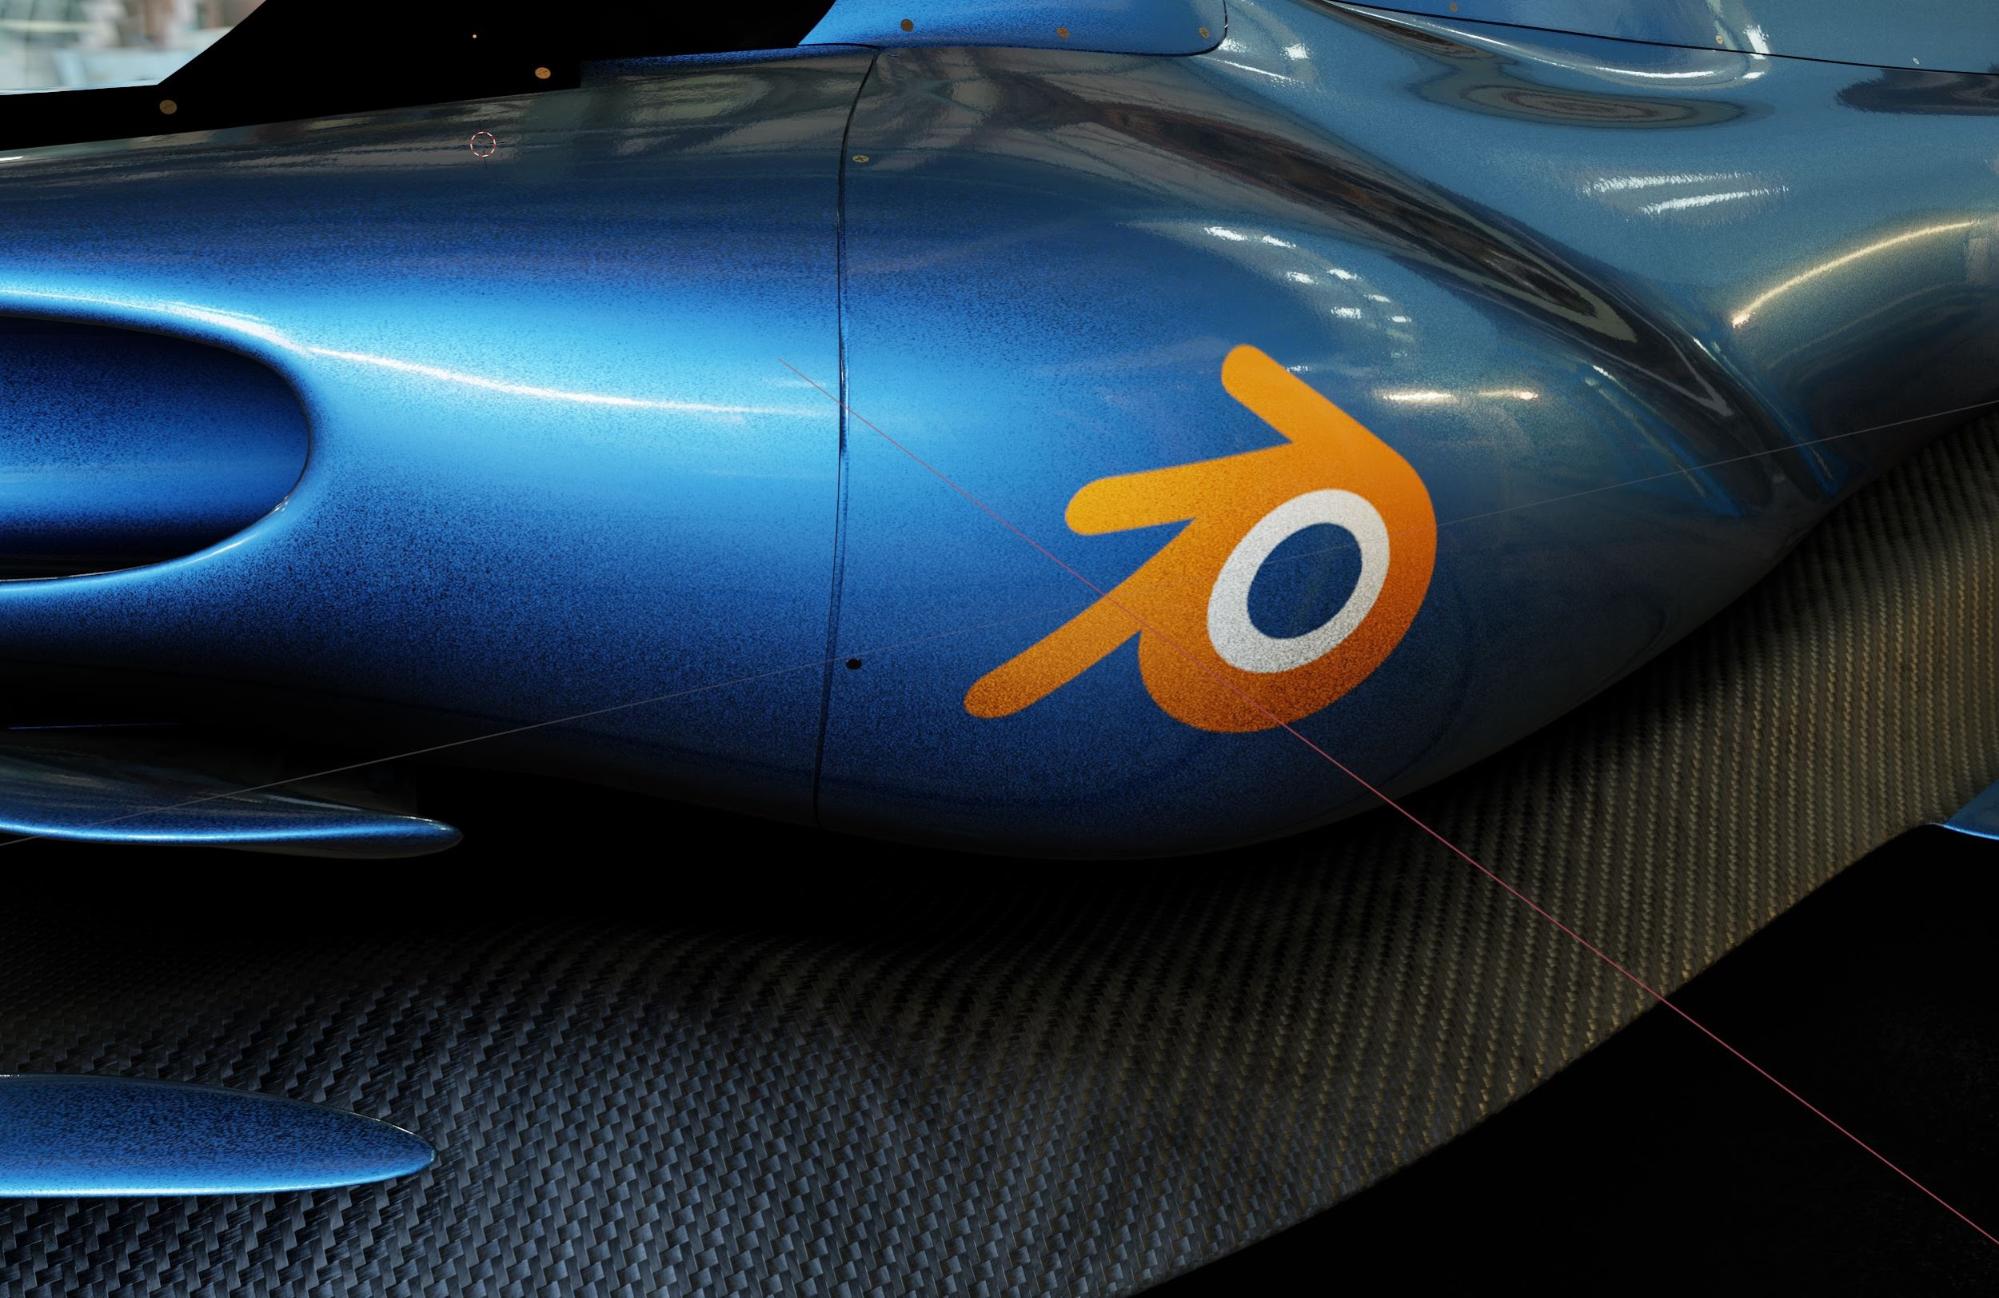
Then I painted the car in Blender’s orange color and put alternate Blender logos on top alongside the ASR Formula logo (a SimRacing Modding team that I am a part of). Soon you can take a ride in this car in Assetto Corsa and rFactor 2 games—even in VR. ;)
The result in EEVEE was already very satisfying:

Studio Setup and Lights
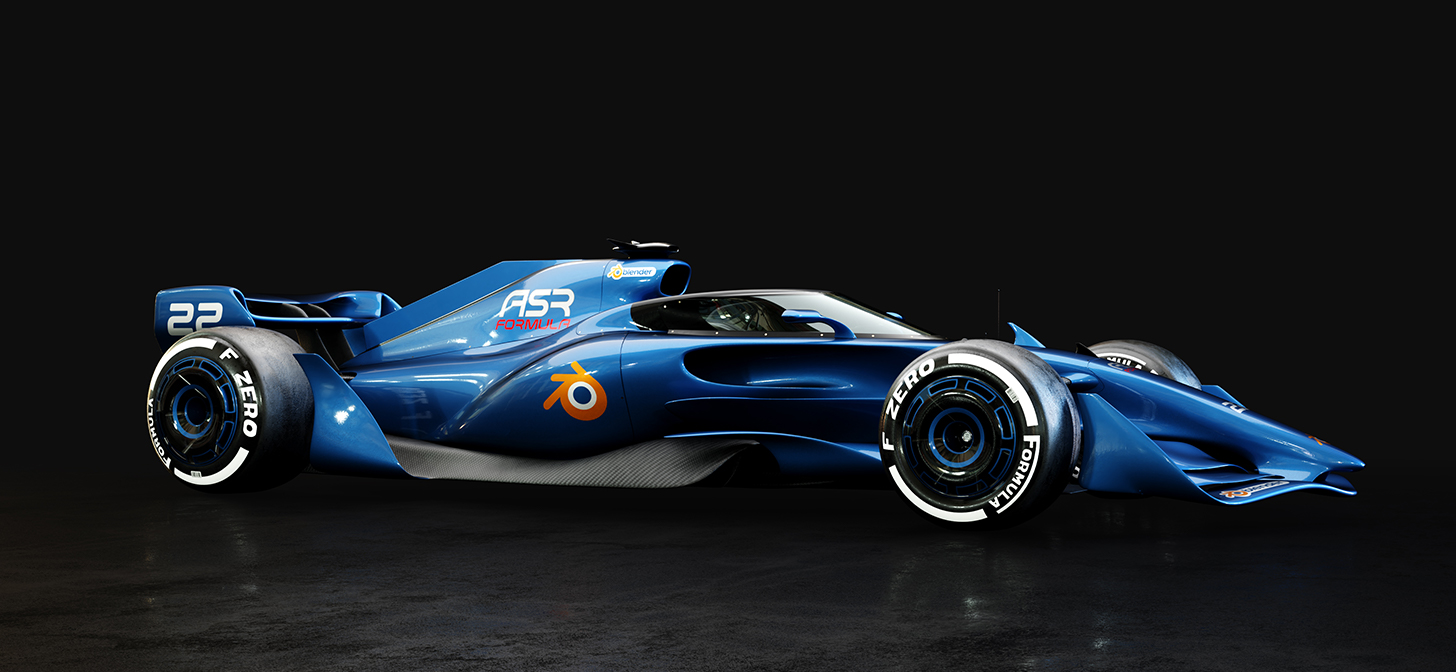
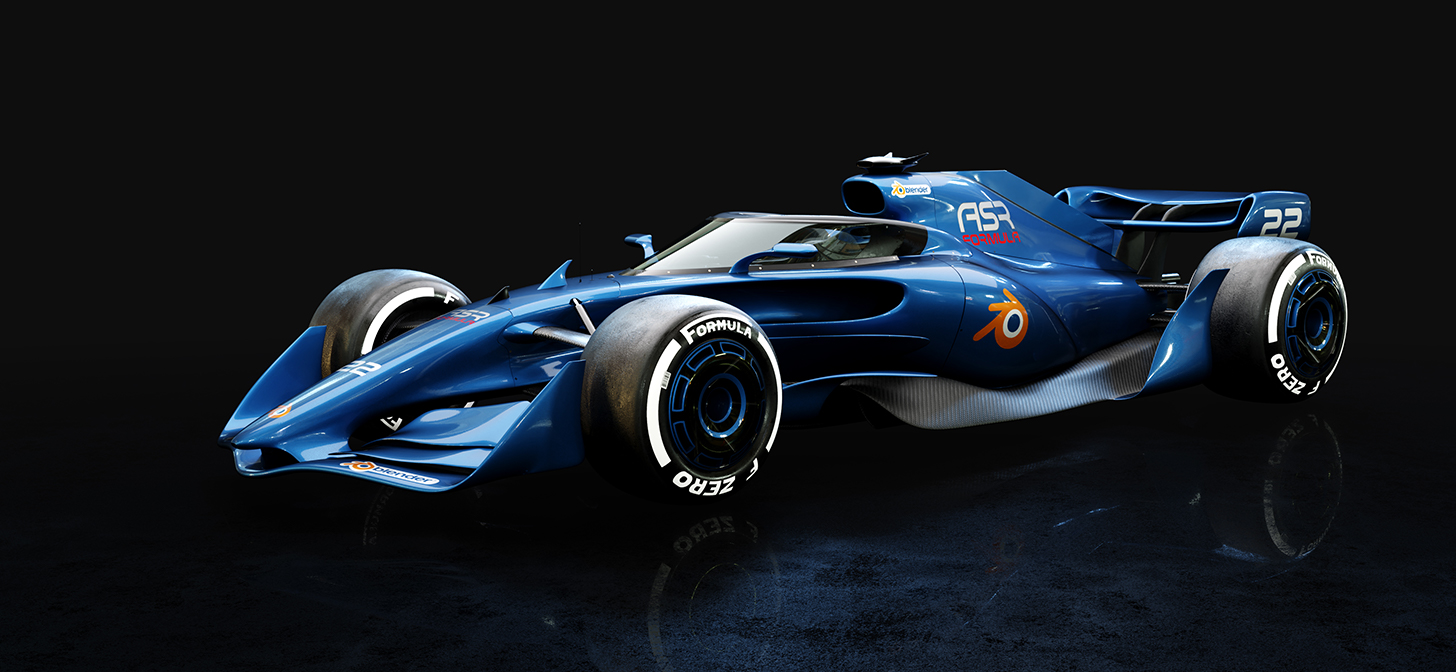
Finally, I wanted to make a render in Cycles and this time I made a darker scene and a Blender blue color for the car. Here is the basic scene setup:
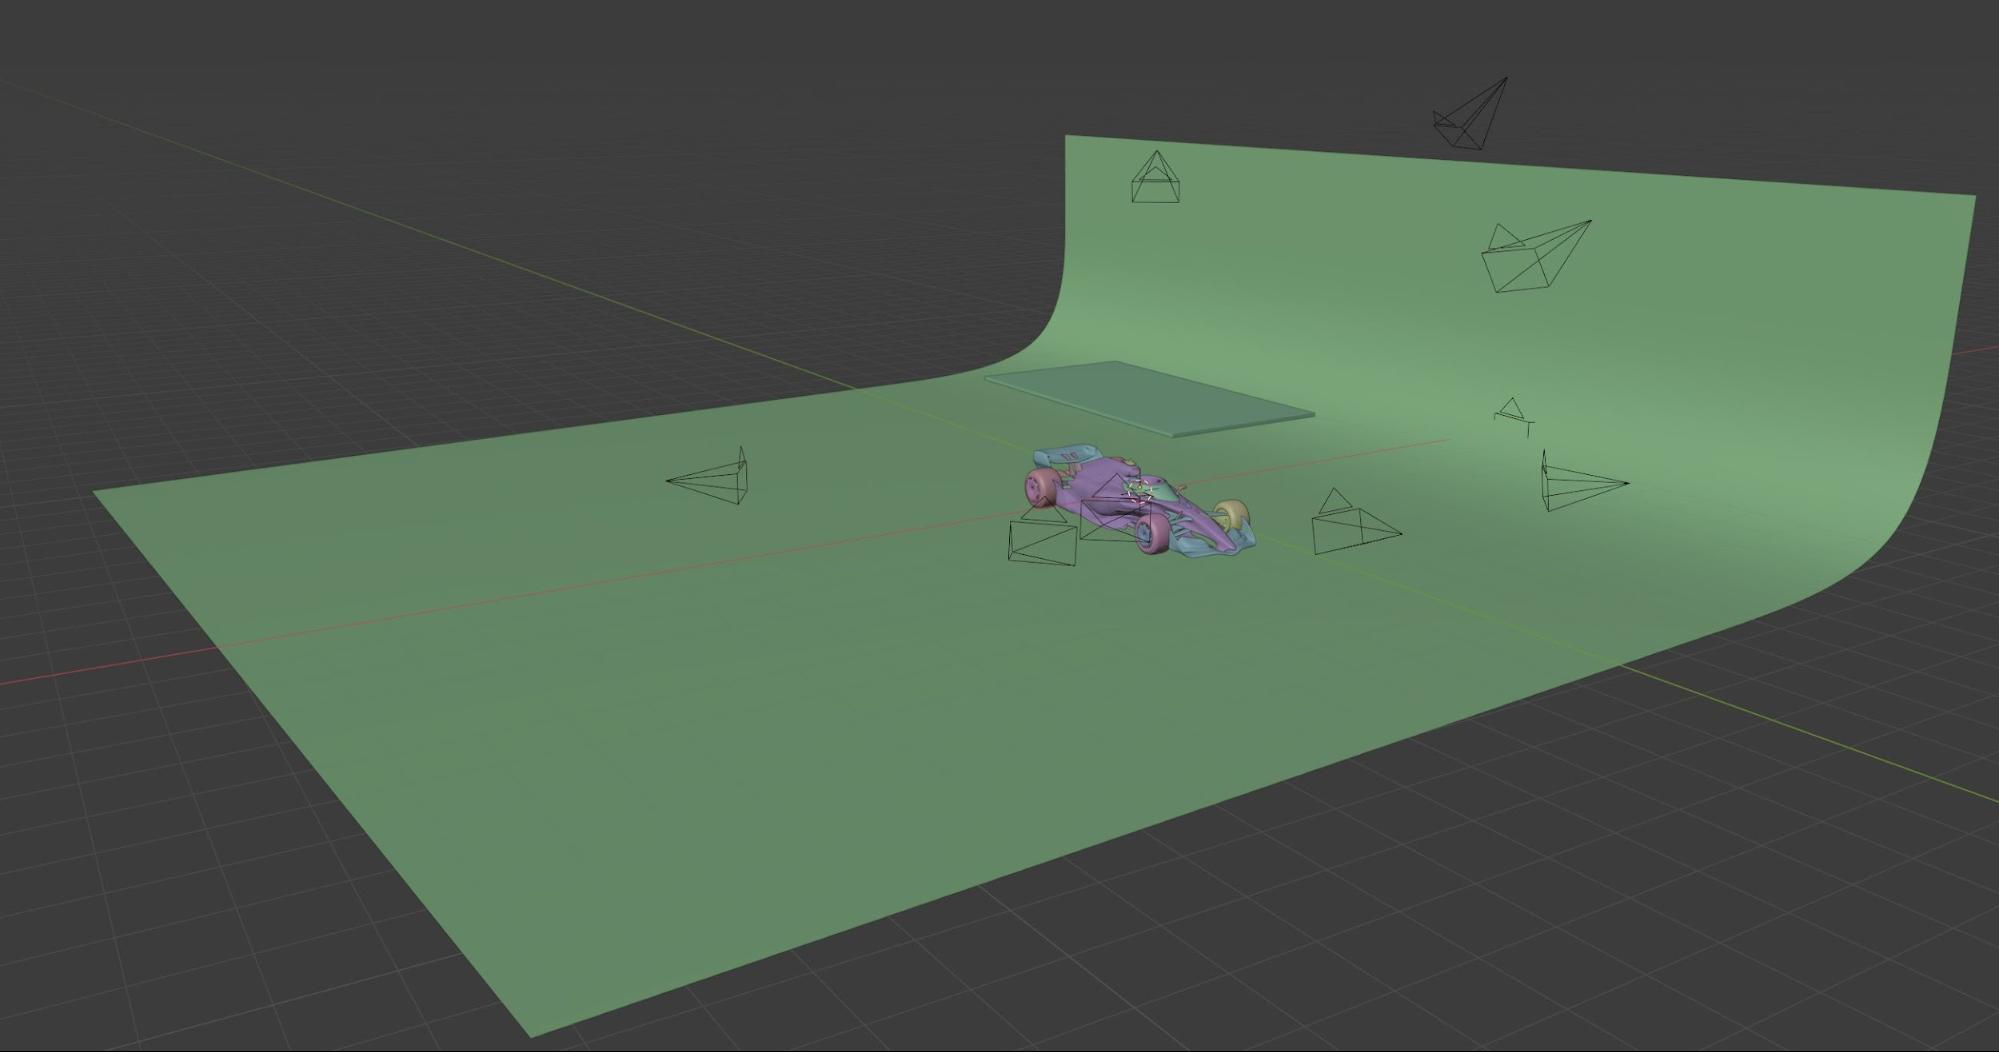
I made a simple plane, extruded one edge to the top, and beveled the corner. Over the car, I placed another plane with emission material. For the environment, I used an HDRI from HDRI Haven.
Materials
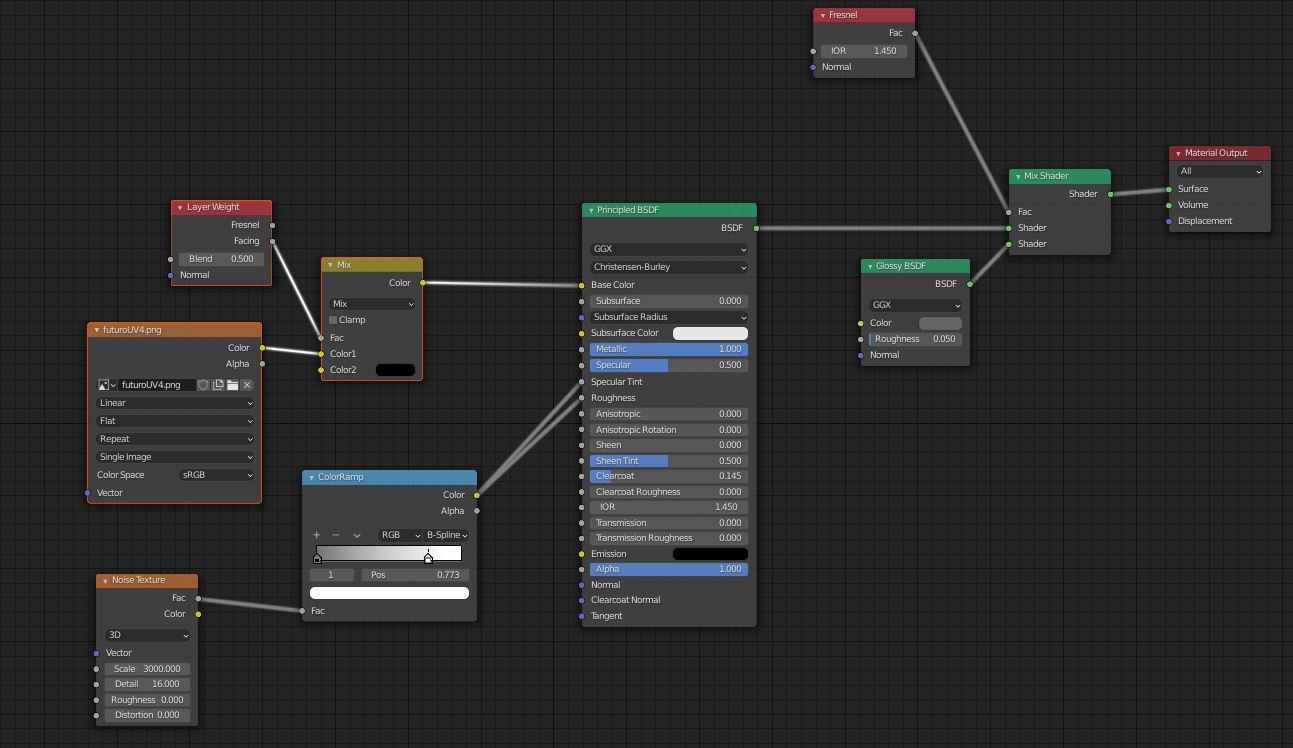
For the car paint shader, I mixed the texture with a black color, set metallic to 1, and for roughness I used the noise texture, which I scaled up to 3000 to make a nice metallic glitter effect. The principled node I mixed up with a glossy shader to make a beautiful clear coat:
Final image
And here are the final images. :)

About the Author
 Volodymyr Borovkov, 3D Artist and Web Developer


Great Work. Keep It Going
Insane! Fabulous work, fabulous concept. Can’t imagine how many hours that took.
Gosh, this is work is absolutly awesome