Behind the Scenes: Morning Workout
Introduction
To begin my explanation, I’m currently a 3D student in my 4th year in France. I discovered 3D with Blender 2.49 even though I only seriously started using it years later. At school, I learned 3ds Max, then Maya, both of which I still use today. For my personal projects, I try to use only free and open-source software such as Krita and Blender.
This project is for a CG contest for the Highlight Challenge.
Software
- Blender 2.82a
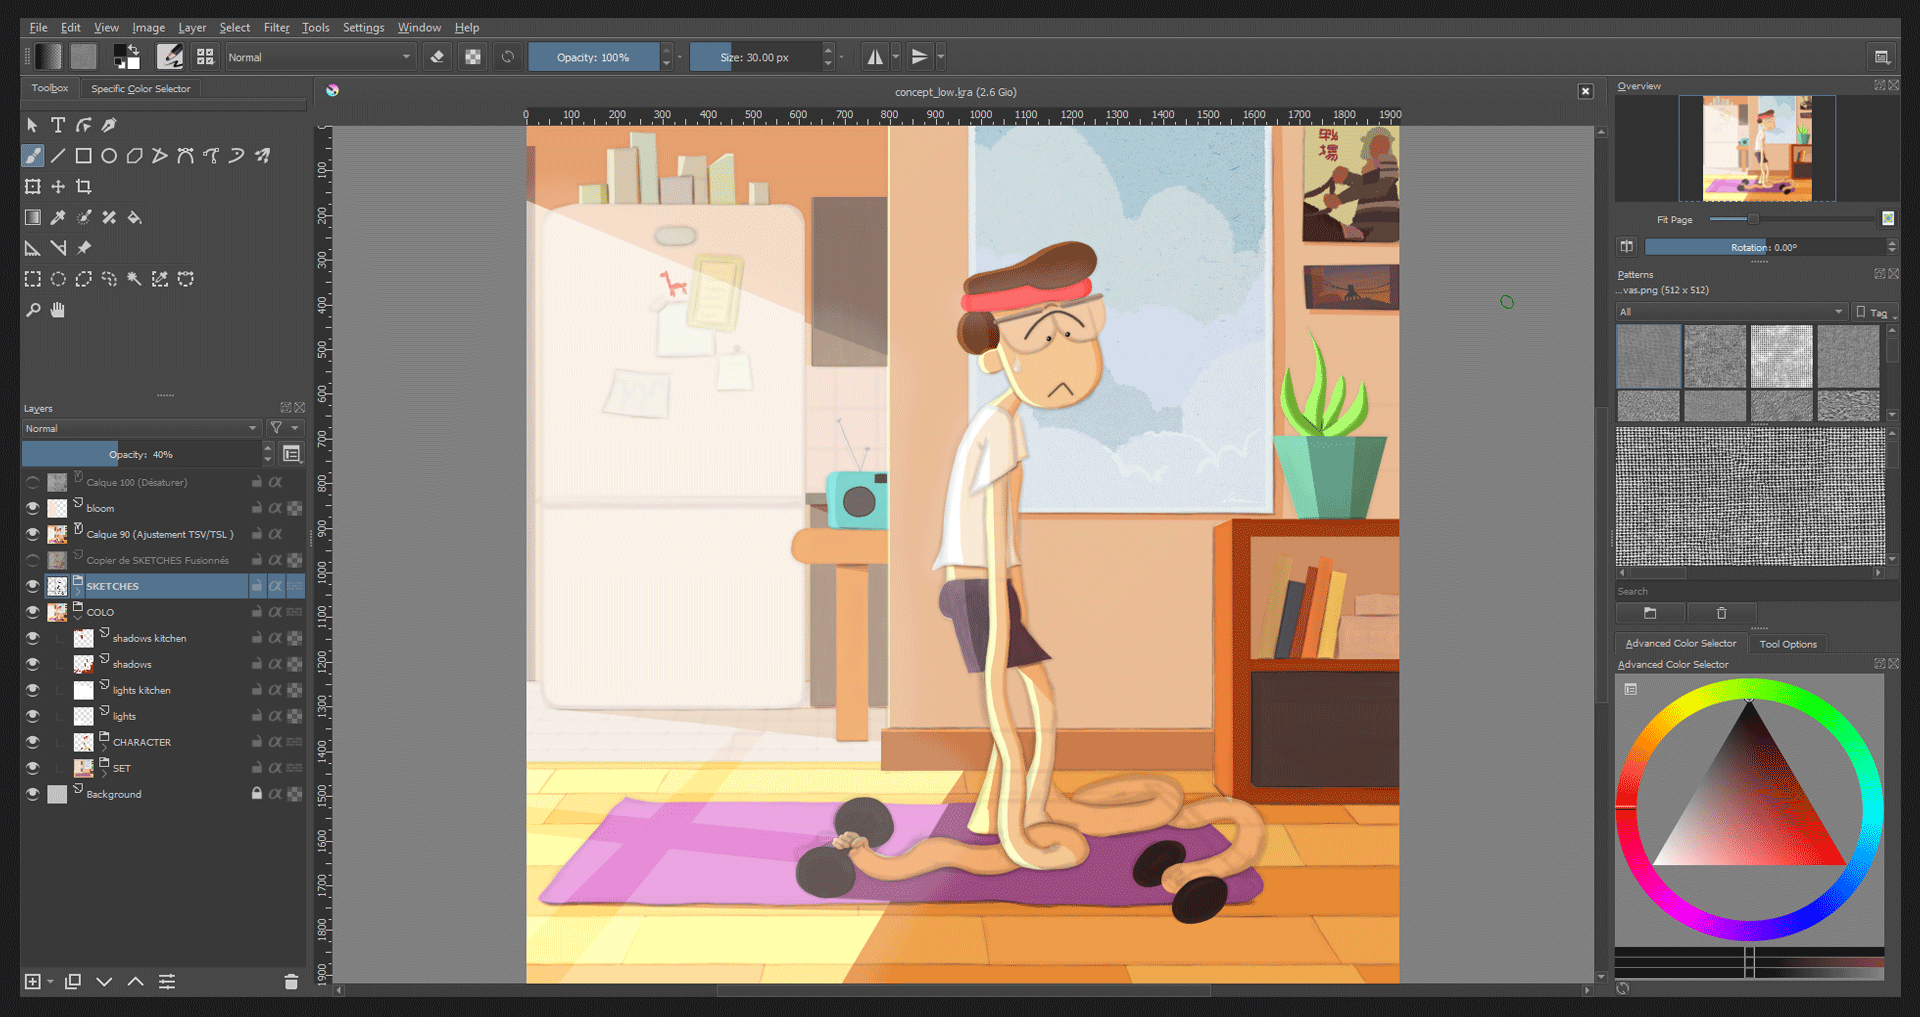
- Krita 4.2.9
- Open Broadcast Software (recording the process)
- DaVinci Resolve (for editing the process)
References
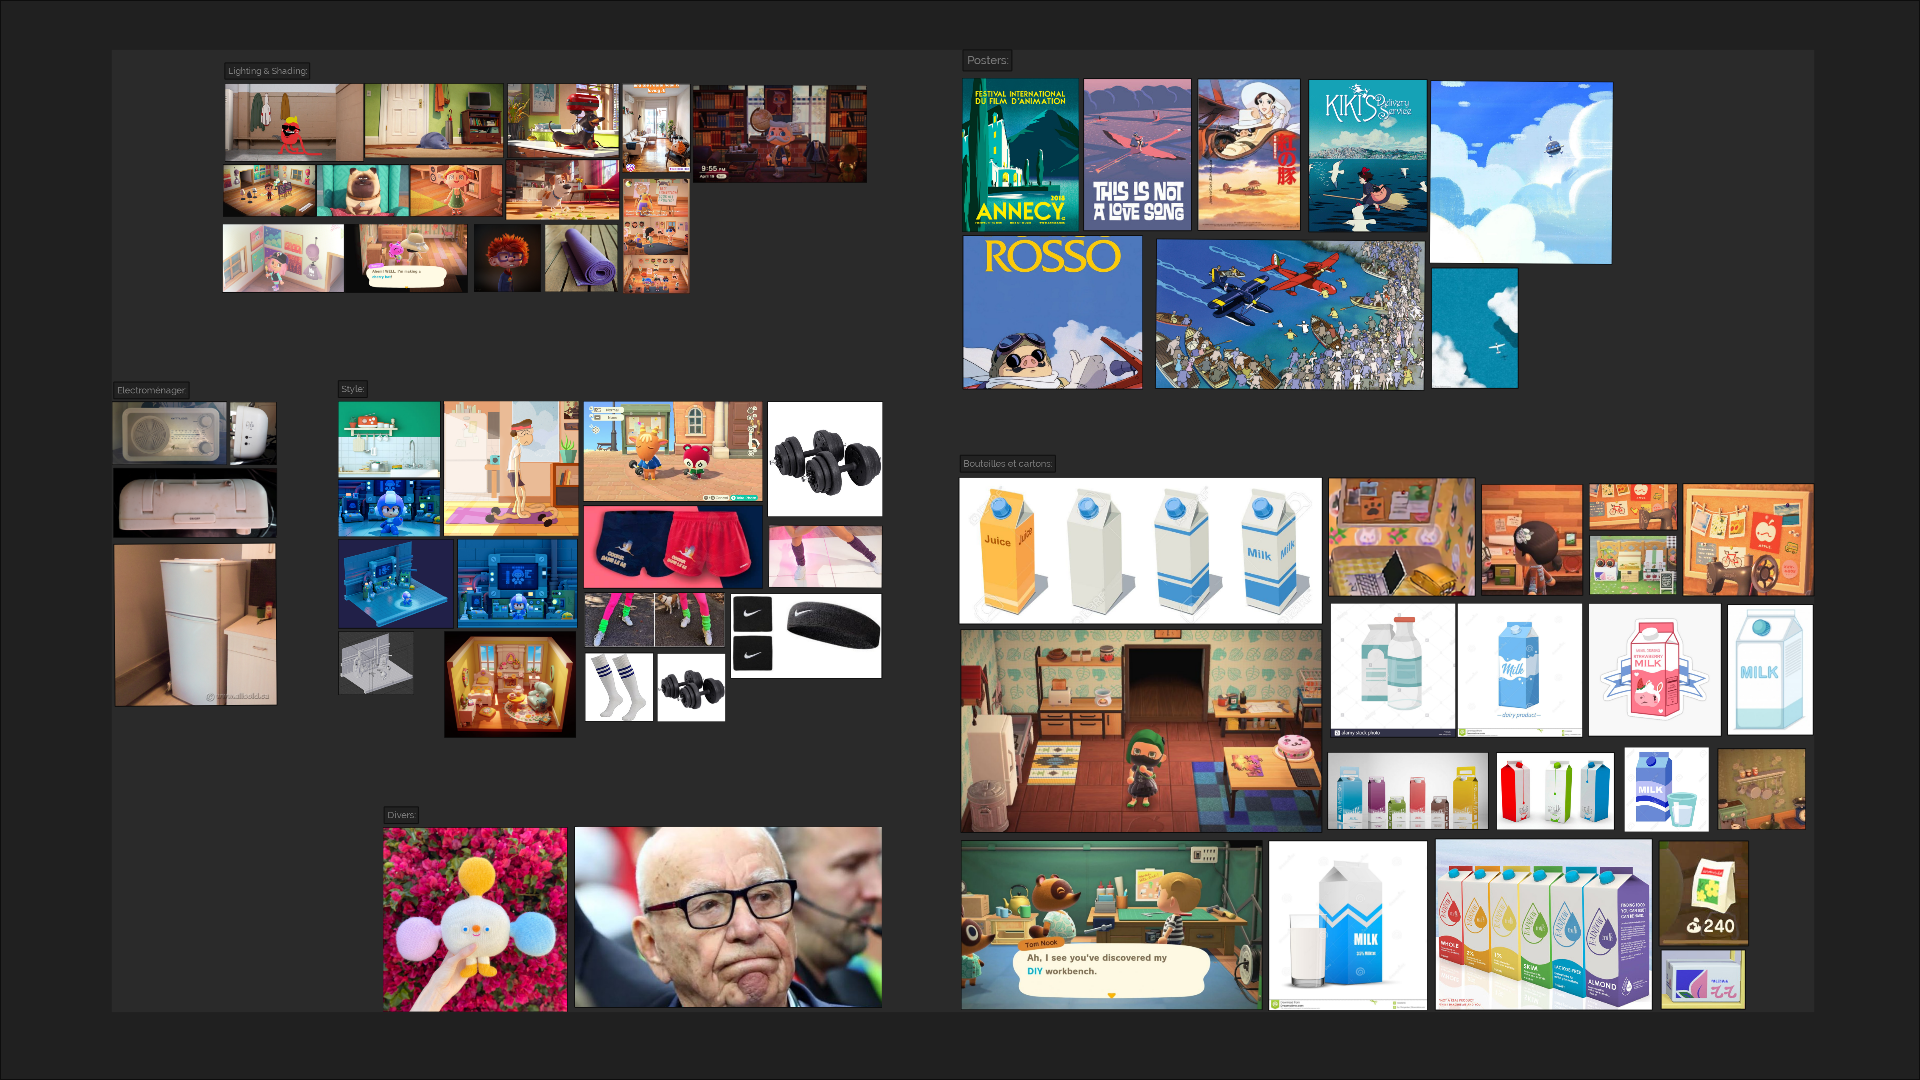
The first step was to look for images, photographs, and screenshots of everything that could help me in the future: at this time Animal Crossing: New Horizons had just been released and it became my main reference. I chose a stylized universe to experiment and try new things in 3D (at least for me).
Concept
For once I decided to do a 2D concept before diving into the 3D world. I used it to try several ideas, compositions, and set up a mood with colors. The final image is not that beautiful but it was really useful when I started with the 3D.
Blocking + UVs
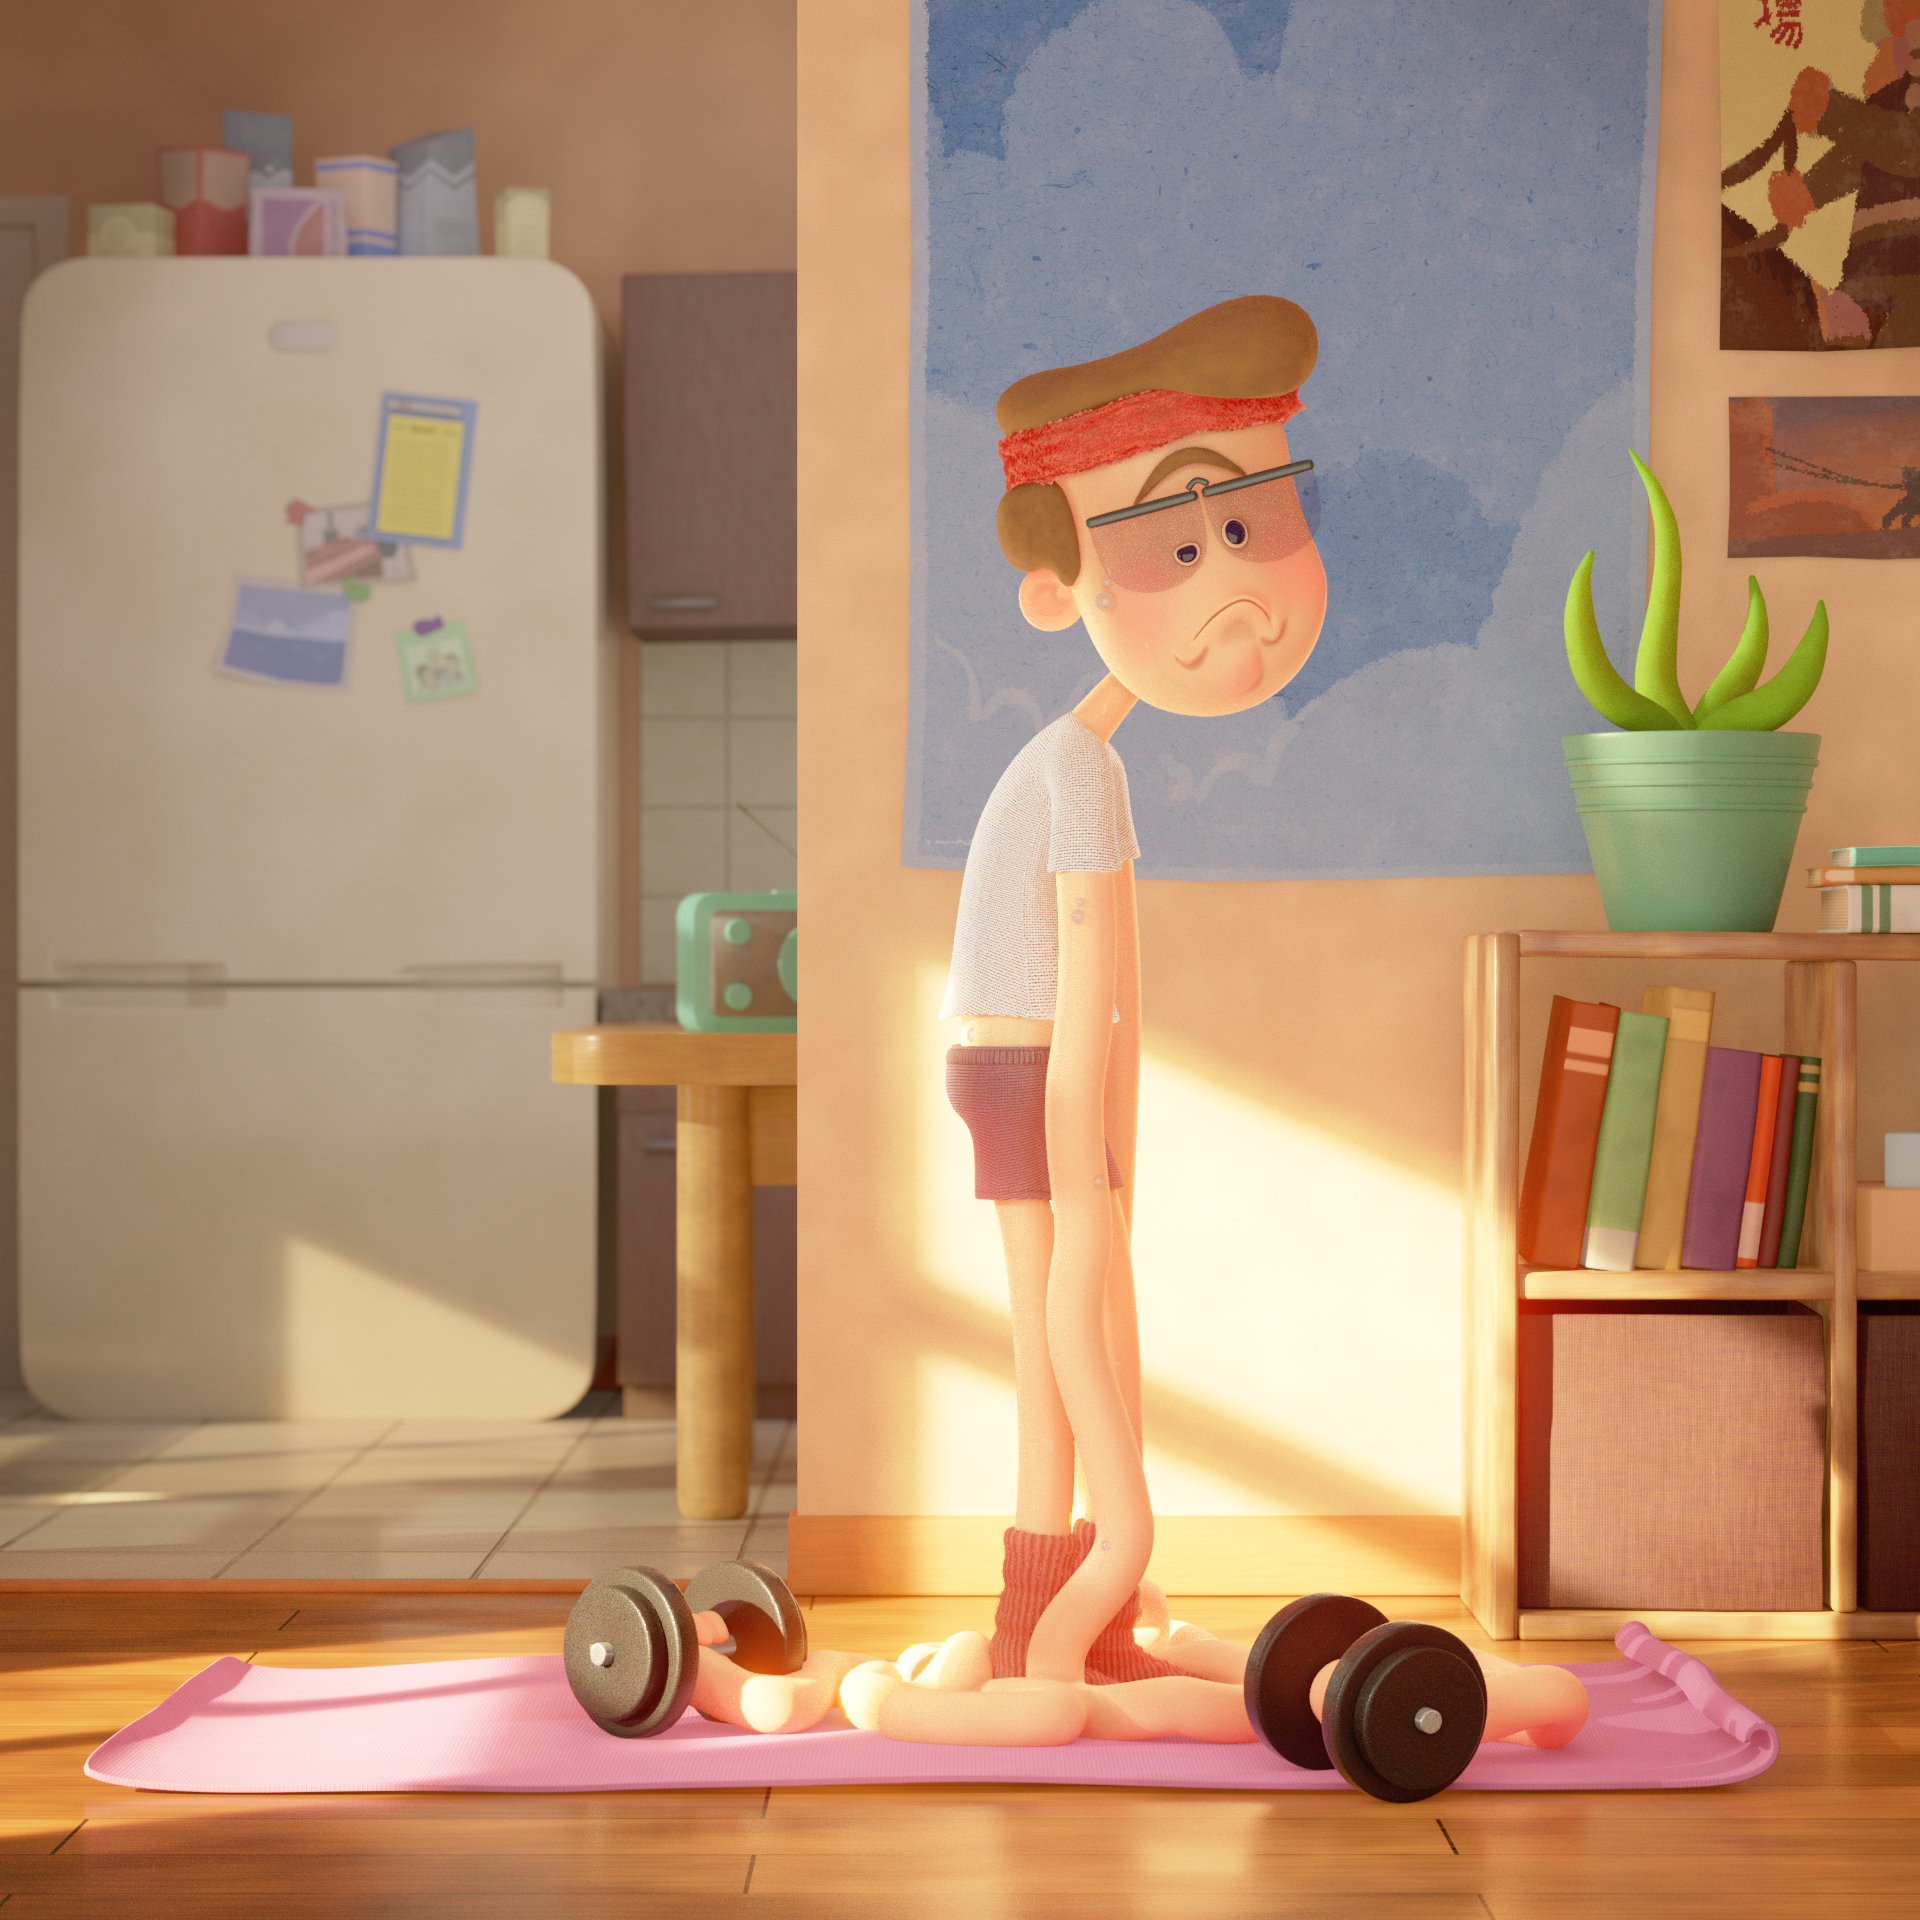
With the concept on my side, I started blocking the big shapes of the picture, looking for a nice angle with the camera, playing with its lens, and trying to match the concept the best that I could. I didn’t hesitate to cheat with the scales: the character is 1,80m tall but the fridge is 3m. Before being demotivated I also unwrapped my models at this stage.
Modeling
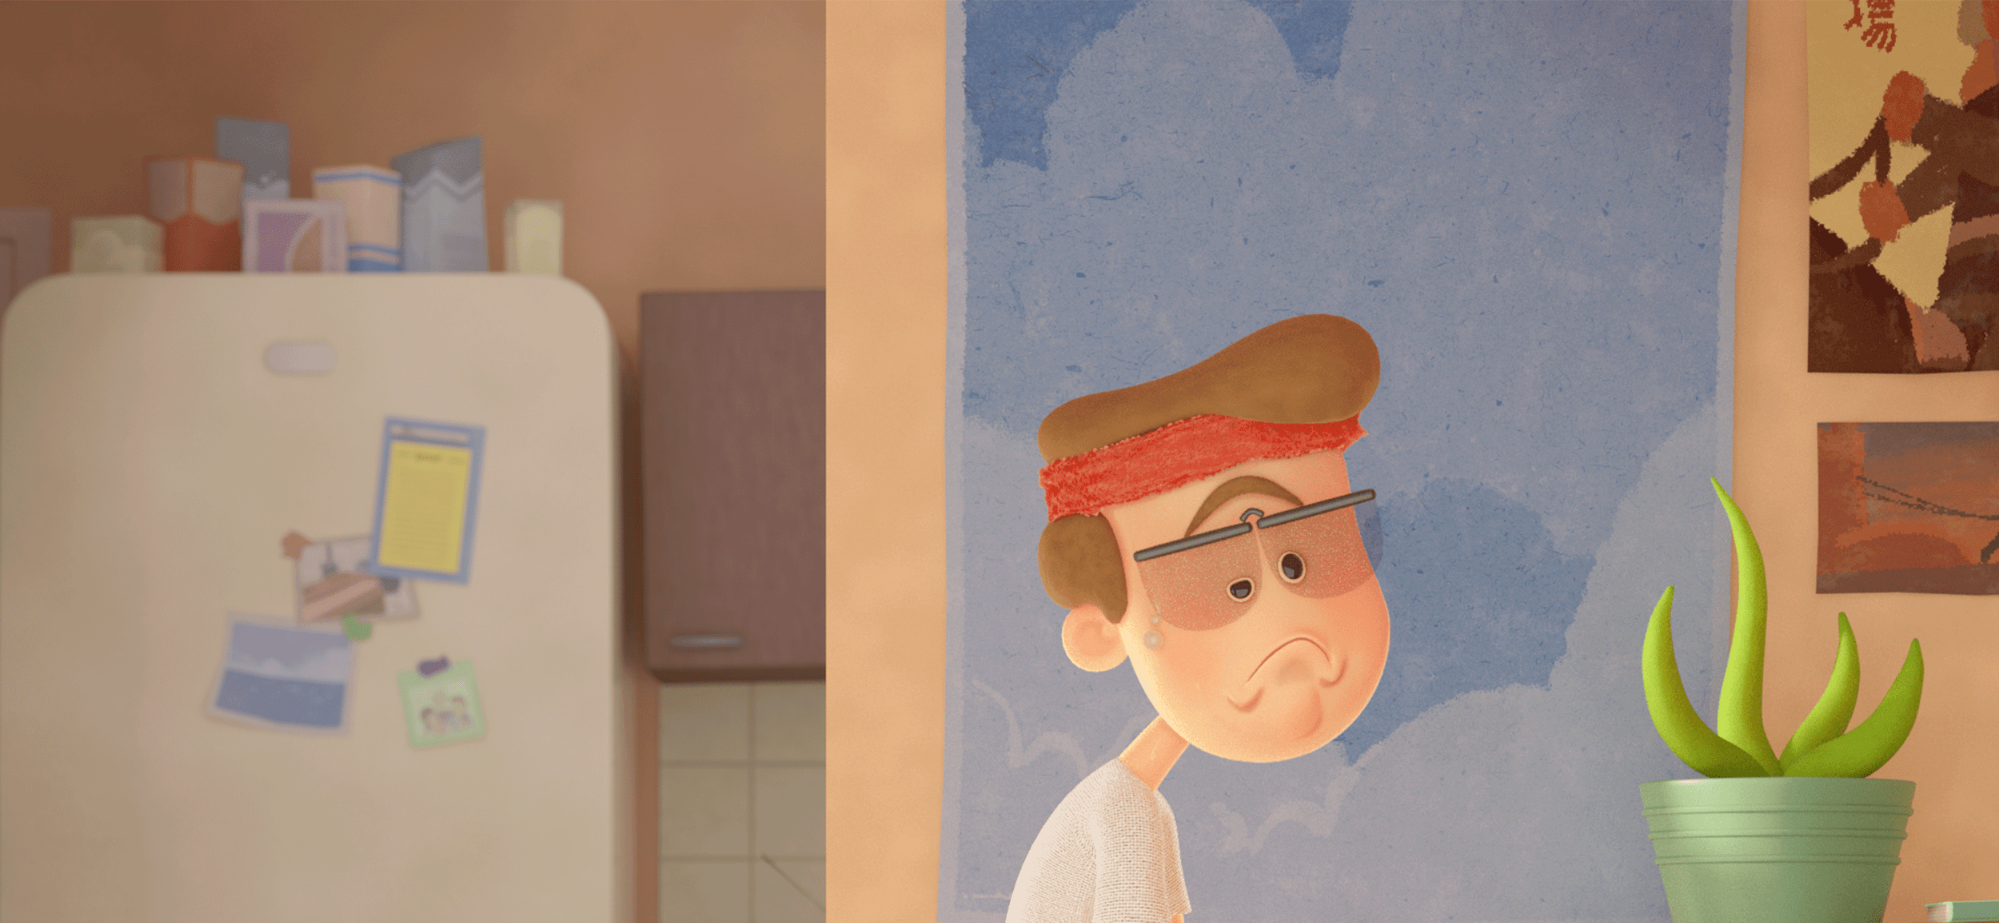
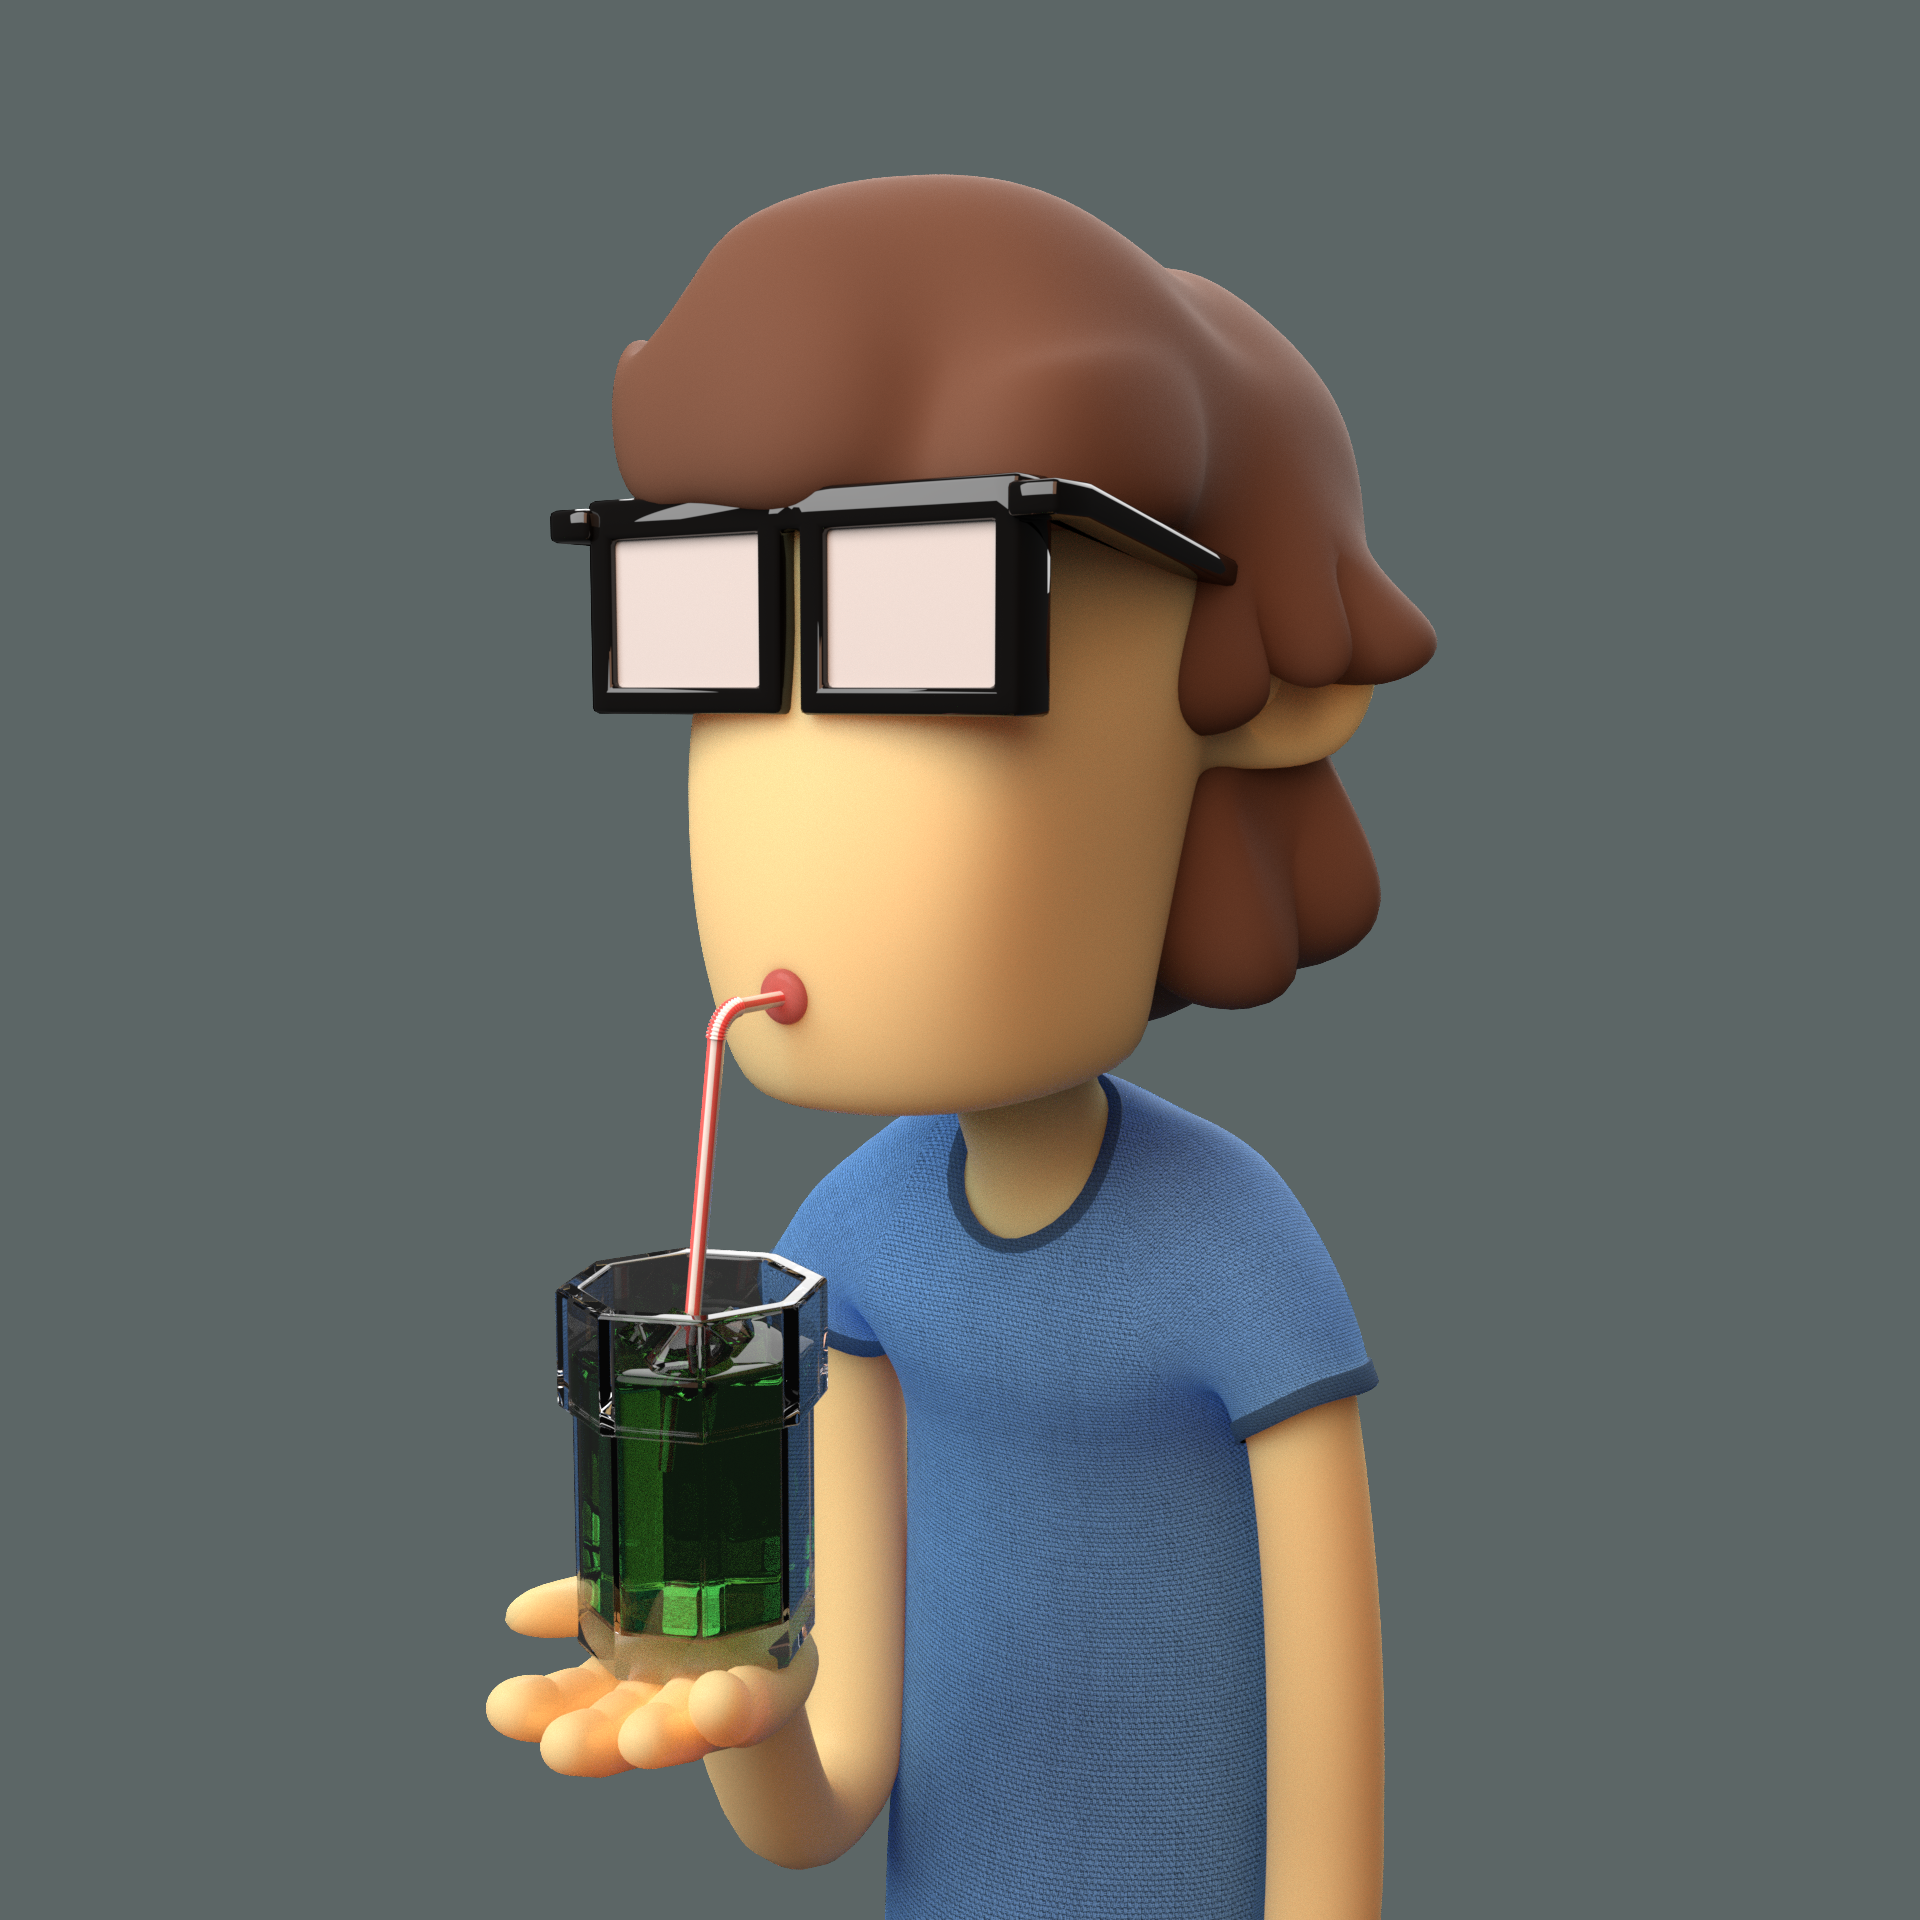
After the blocking stage and with the help of Blender’s sculpting tools, I took some time to work on the hands and the mouth, adding the character’s facial expression. I also broke the “straight” look of the objects (verticals and horizontals) with small rotations.
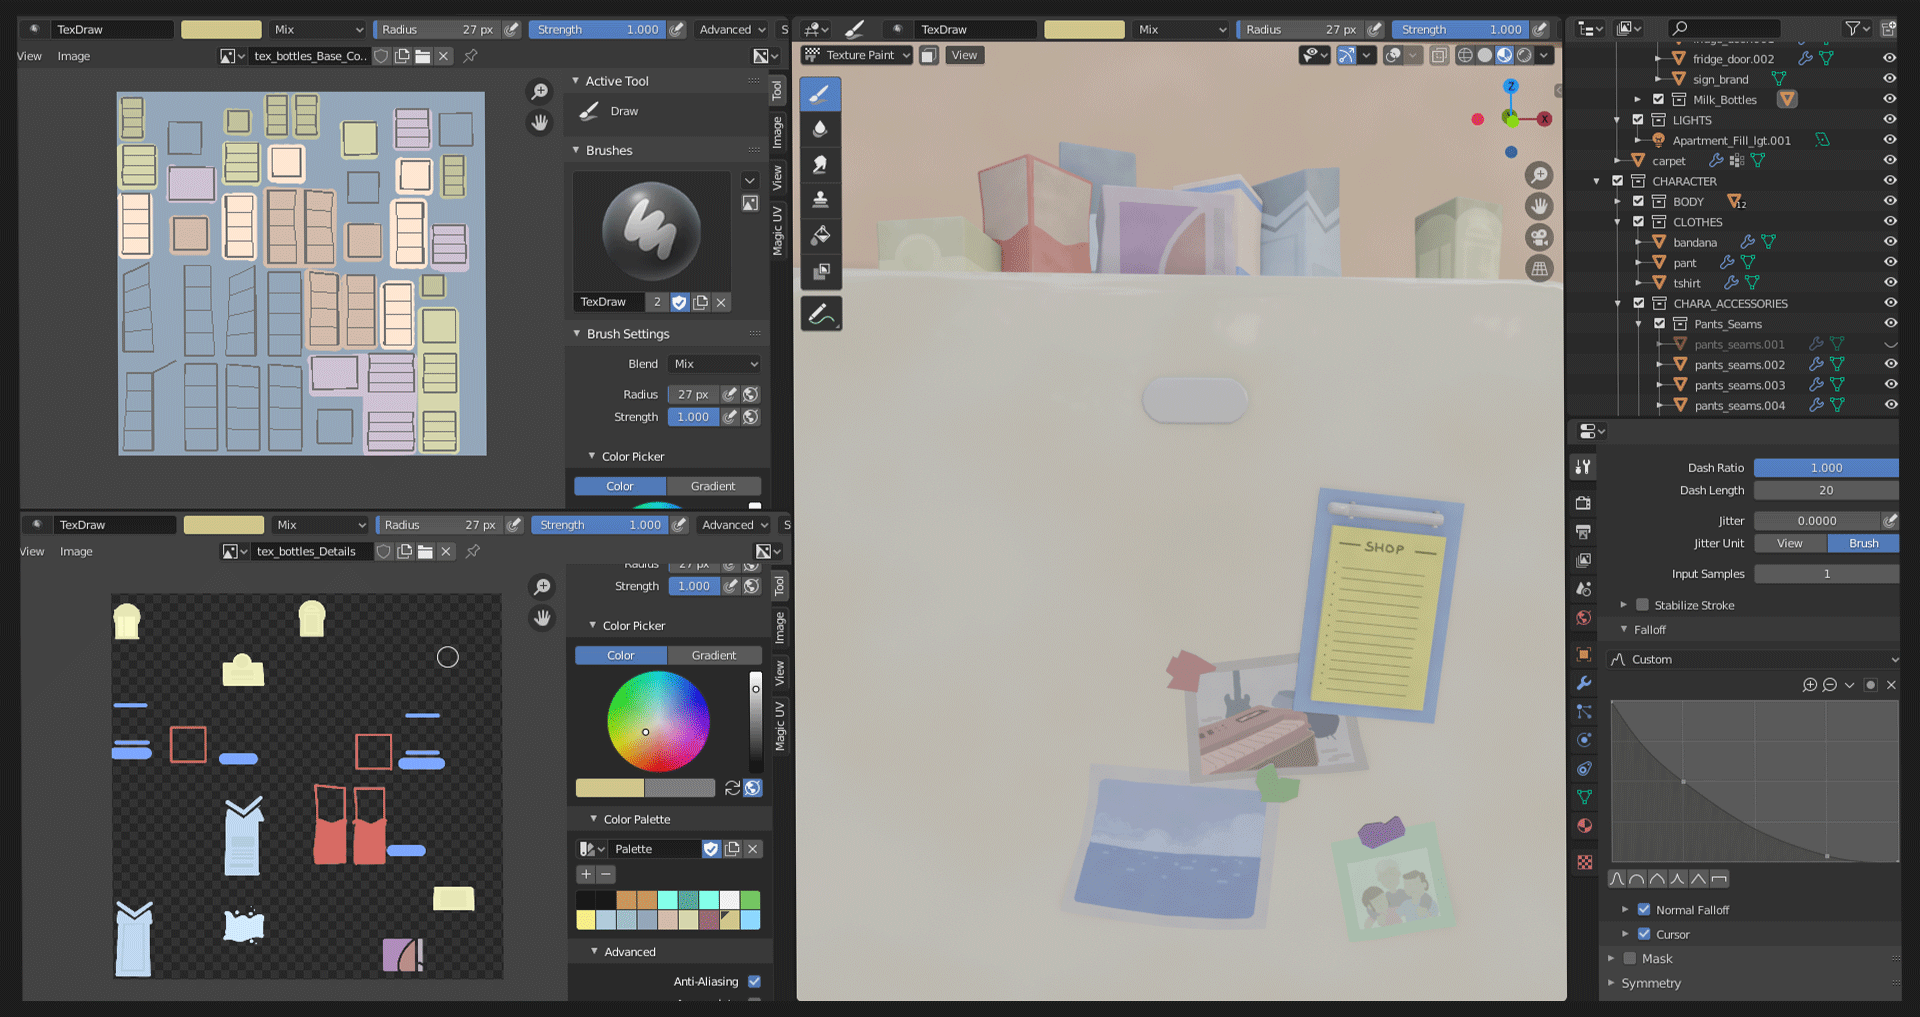
Shading + Texturing
On this project, I chose to do the shading and texturing inside Blender—a first for me! I learned a lot of things about procedural shading and handpainted textures.
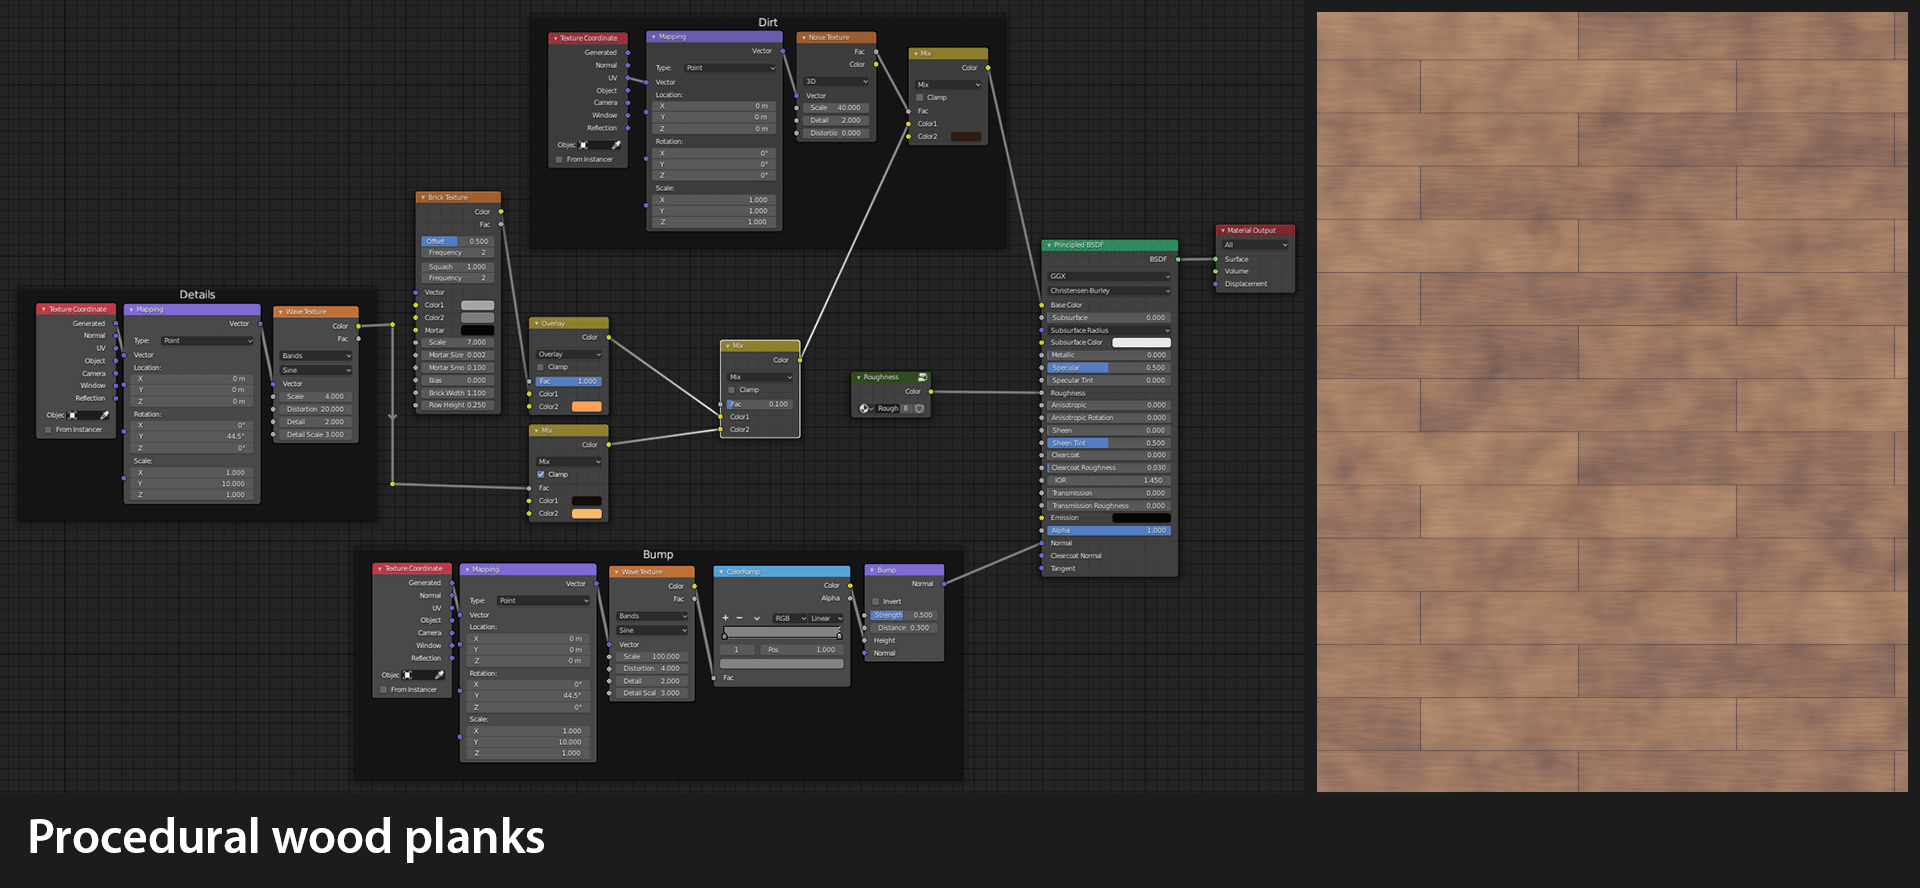
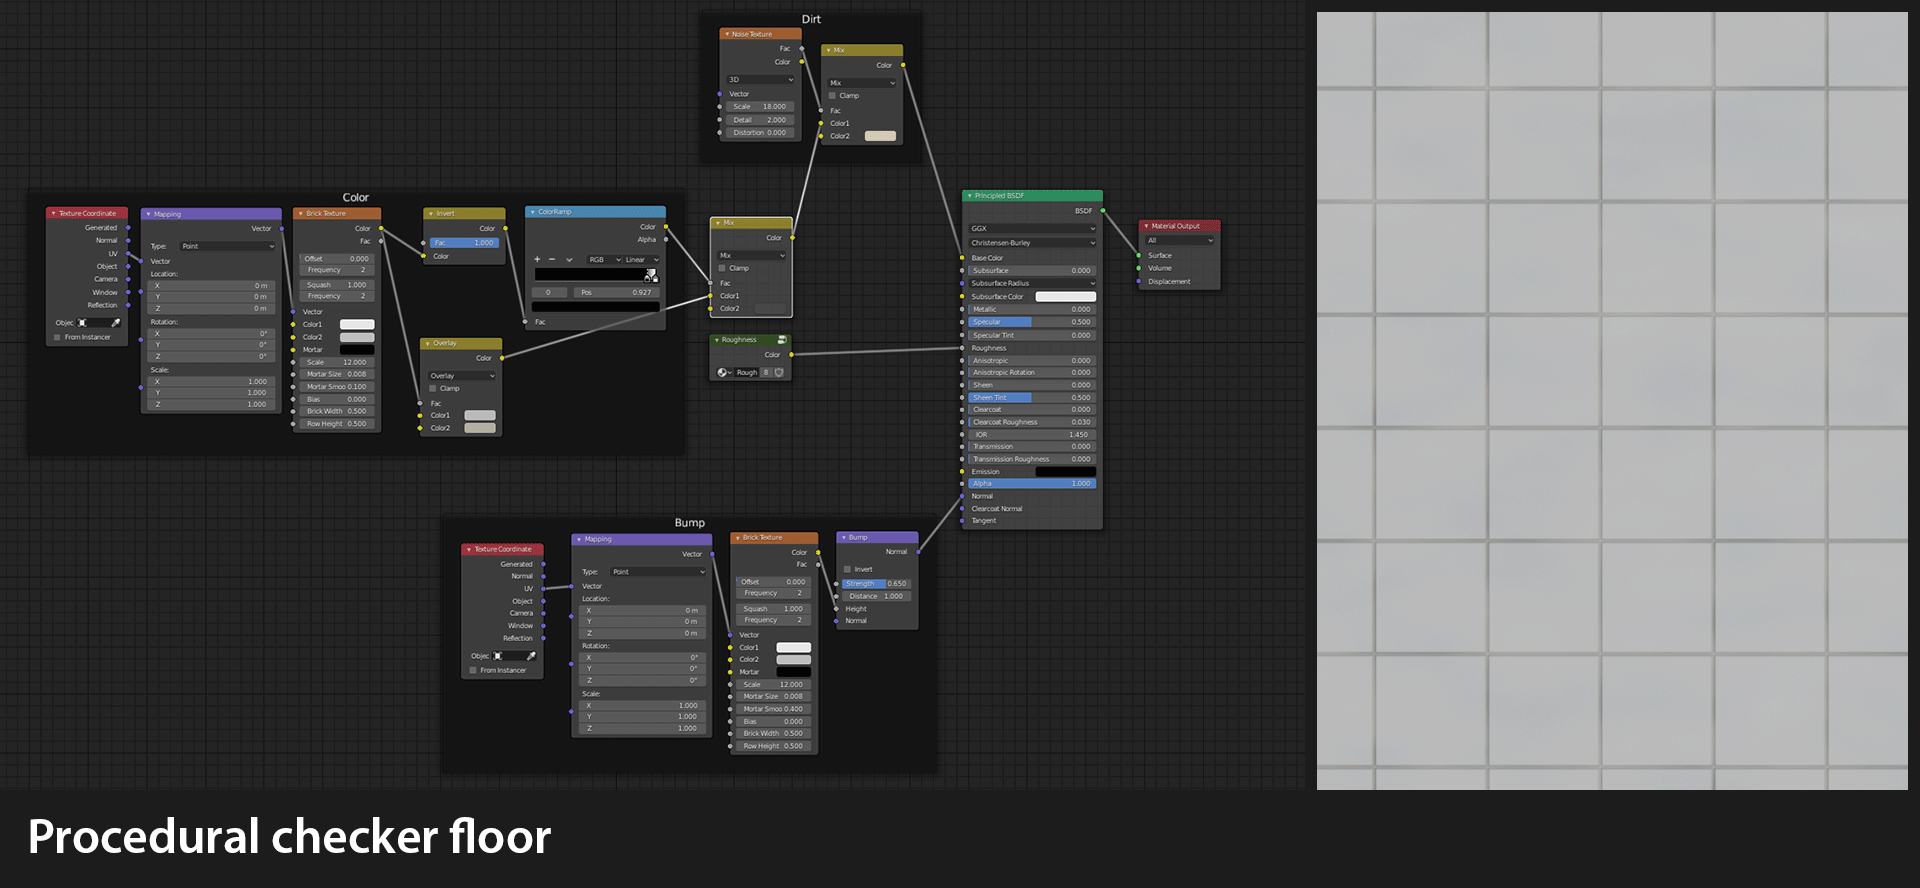
As you can see, I really exaggerated some effects like glossiness and dirt because in the final render they were not really visible.
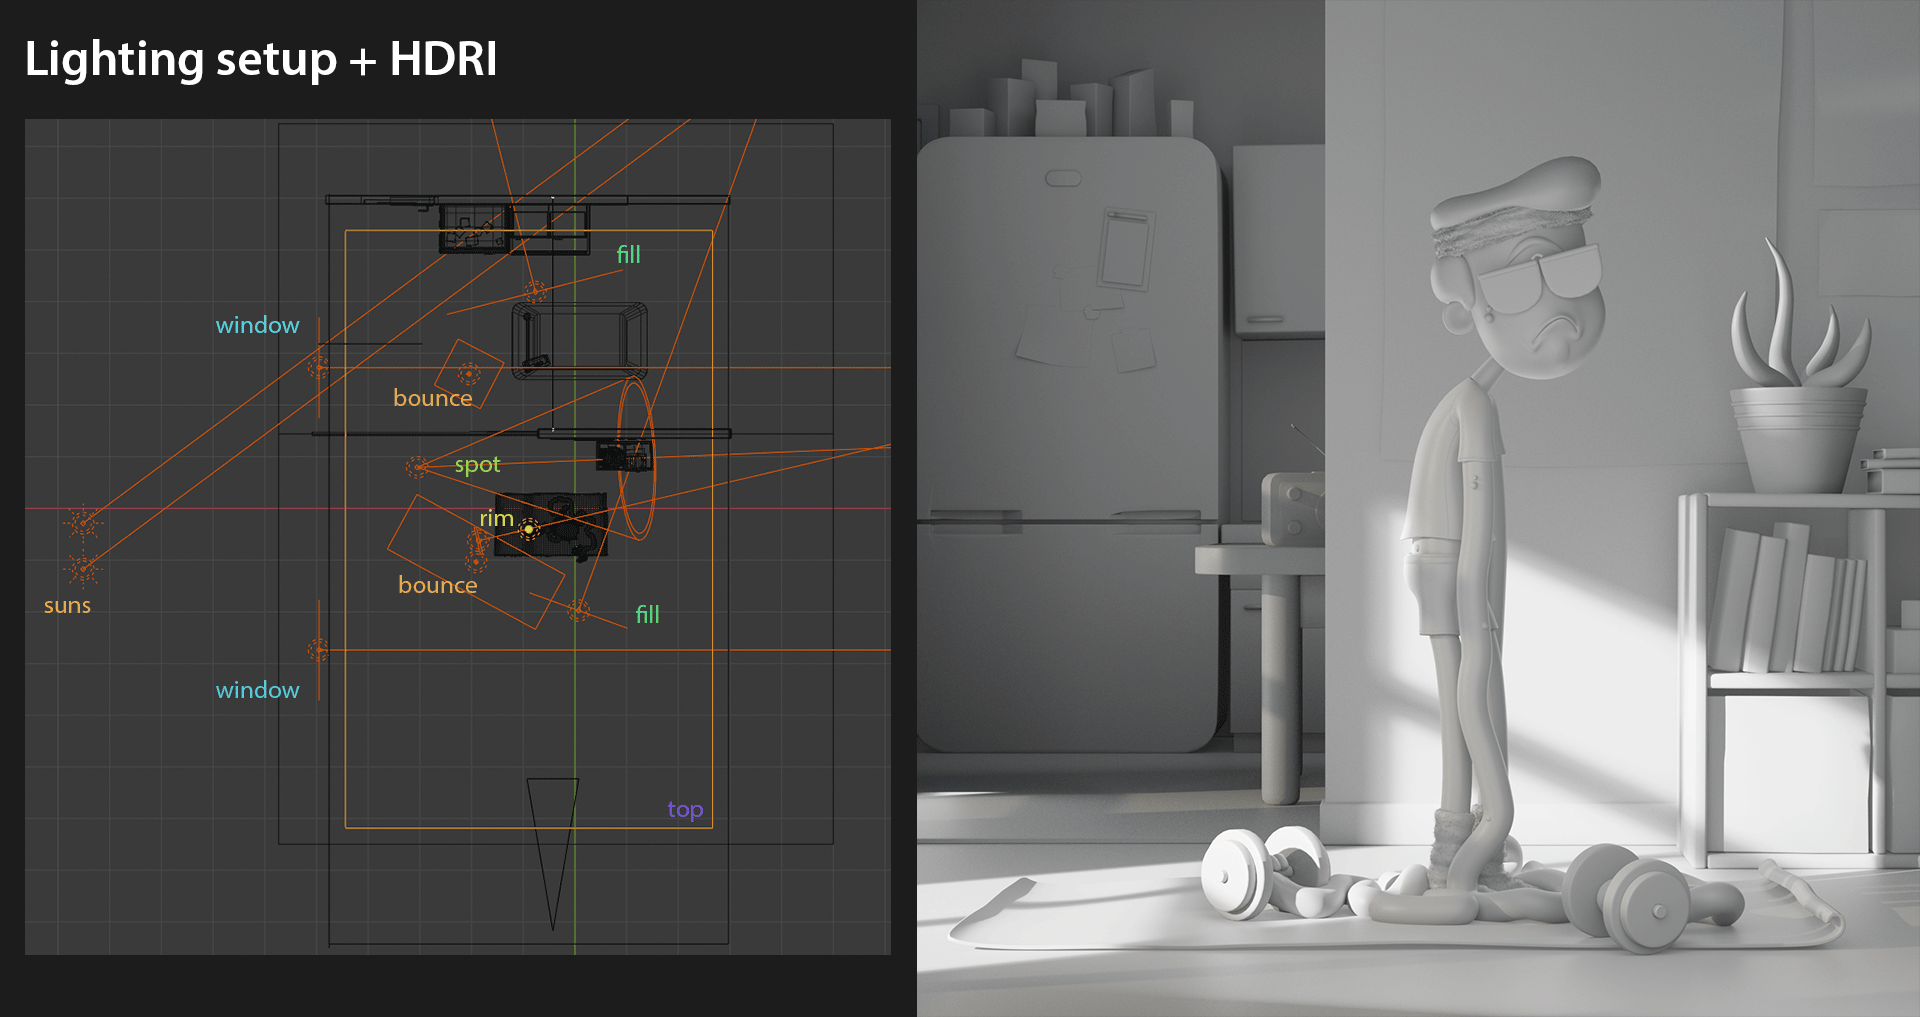
Lighting
This was the hard step! The challenge was to adapt the mood of the 2D concept into 3D. I failed to put the character in the light as I had wanted, but that was part of the challenge! Here friends’ feedback was quite important and helped a lot to achieve the final result.
There’s no light-linking in Blender (the ability to assign a light to only specific objects) so I ended up using “Renders Layer” to separate the character and the set.
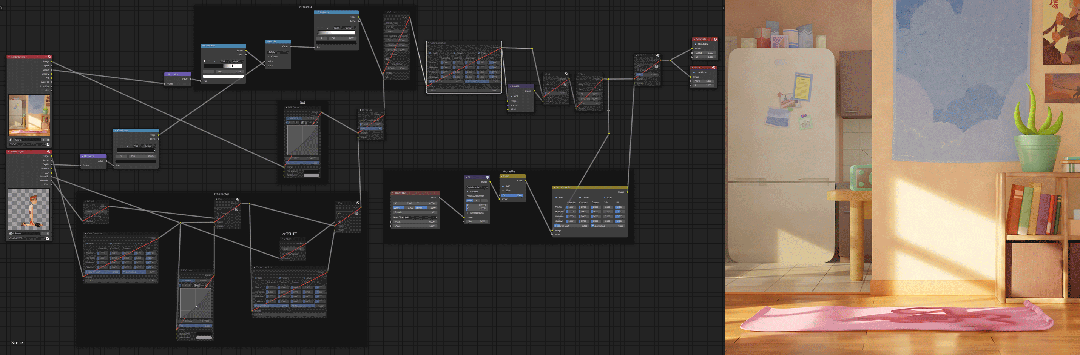
Compositing
I did the compositing in 2 steps: the first part in Blender to composite the character and the set, do color grading, add z depth and a vignette. Then in Krita to darken some shadows and redraw the mouth, which was too red after the 3D compositing in Blender.
And that’s all folks! The production took around 2 weeks (not full time) to achieve this result. For the first time, I recorded my entire process from A to Z. You can find it on my YouTube channel.
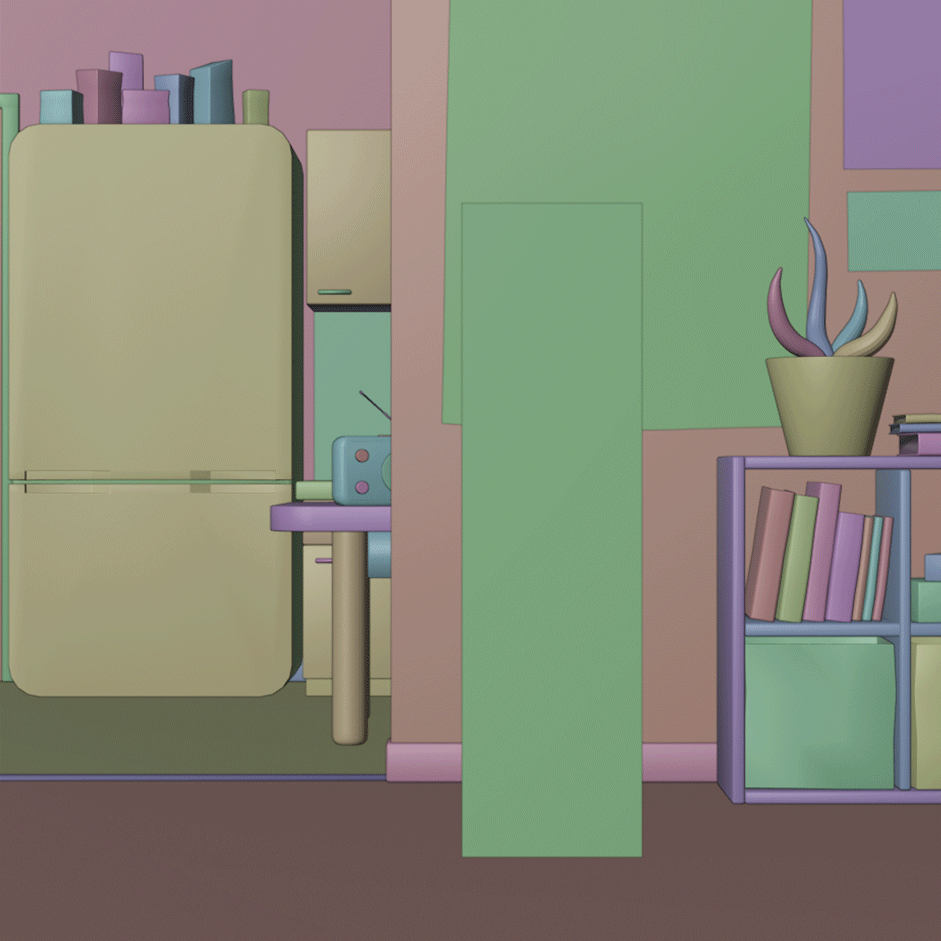
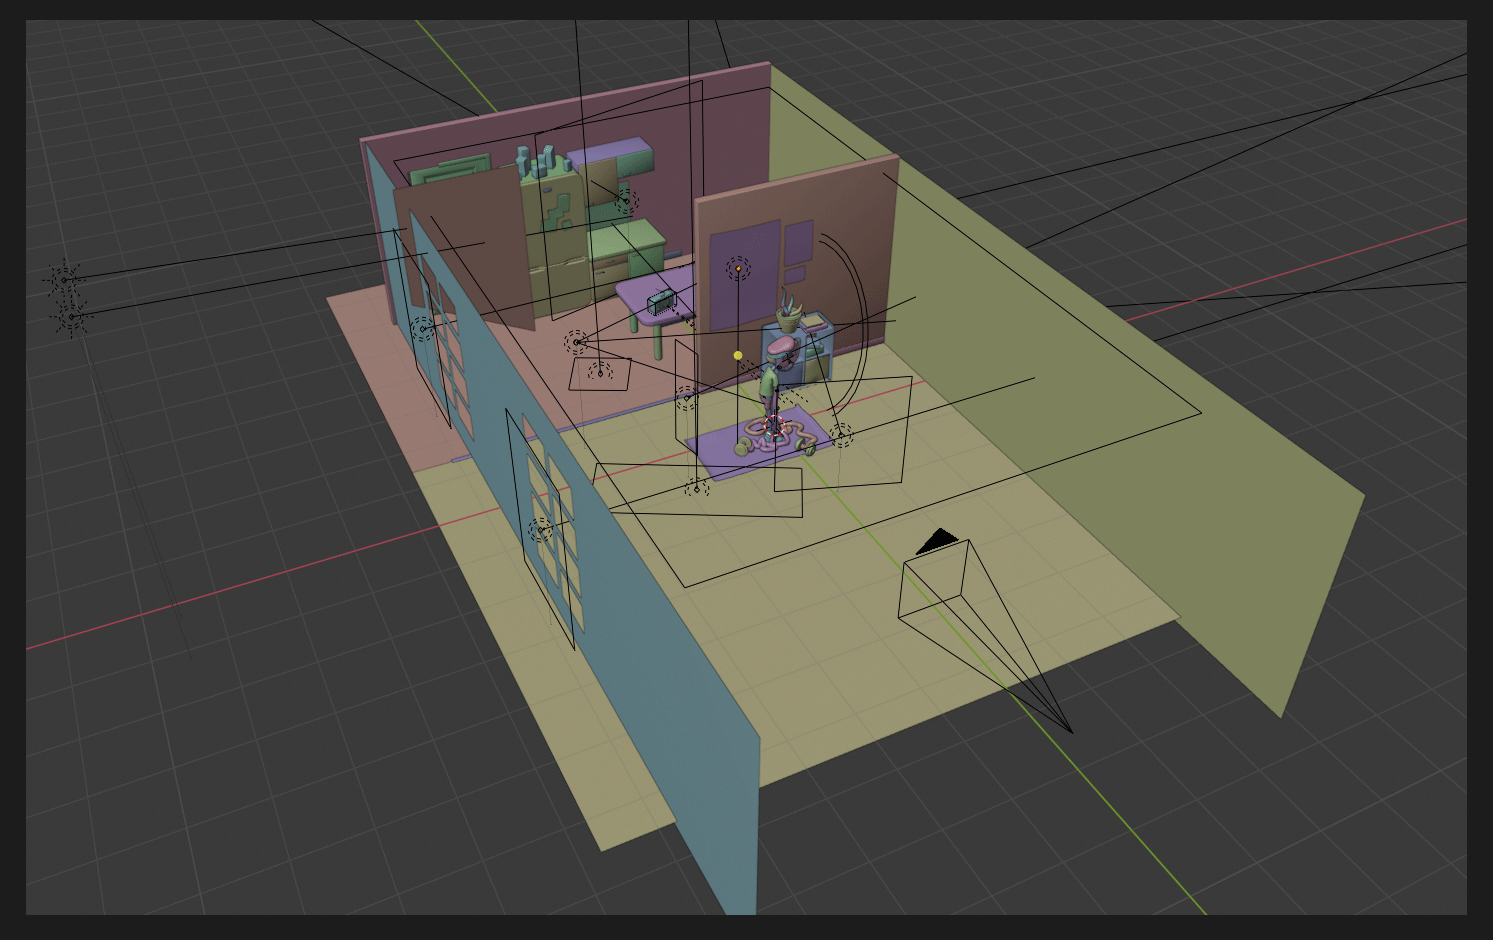
To finish, here is a general view of the final scene:
And a little gif of all the different steps:

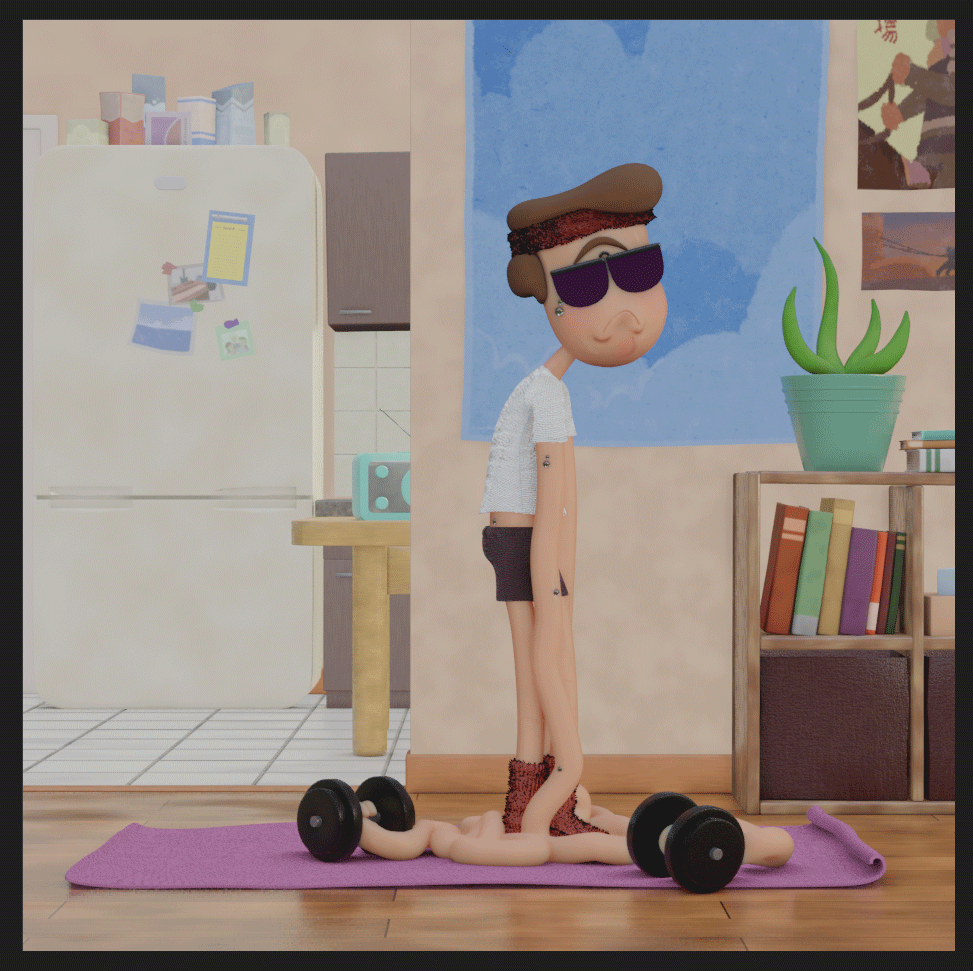
Final Image
Again, a big thank you to the Highlight Challenge and BlenderNation for this opportunity. See you for maybe another project. :)
About the Author
 Auguste Lefort, French student in 3D animation. I use Blender in almost all my personal projects!


