Behind the Scenes: Atomic Suzanne Ray

About Me
Hi everybody, my name is Rafael and I have been exploring this amazing world of 3D since last November. I have been taking a course and also studying things by myself, therefore, you can call me a noob.
I’m from Brazil and work with video editing and infographics at a university in São Paulo.

Inspiration
The idea behind my Ray Gun came after a friend and I started little modeling challenges (we’ve made five so far) in our free time. The fun part of the challenge is starting with easy objects and making them harder along the way.
This challenge was creating any kind of weapon.
When looking for references, I found so many awesome concepts of ray guns, but one caught my attention because it was beautiful and simple, like a ray gun must be.
My model is based on the original Atomic Freeze Ray Gun from Michael Murdock, but I decided to add some Blender jokes to it, for example, Suzanne as its energy core and the default cube as a little charm.

Modeling
I confess that I thought the whole thing would be a nightmare before I started modeling my gun, but it became delightful as it took shape.
My goal was to model the gun in one day.

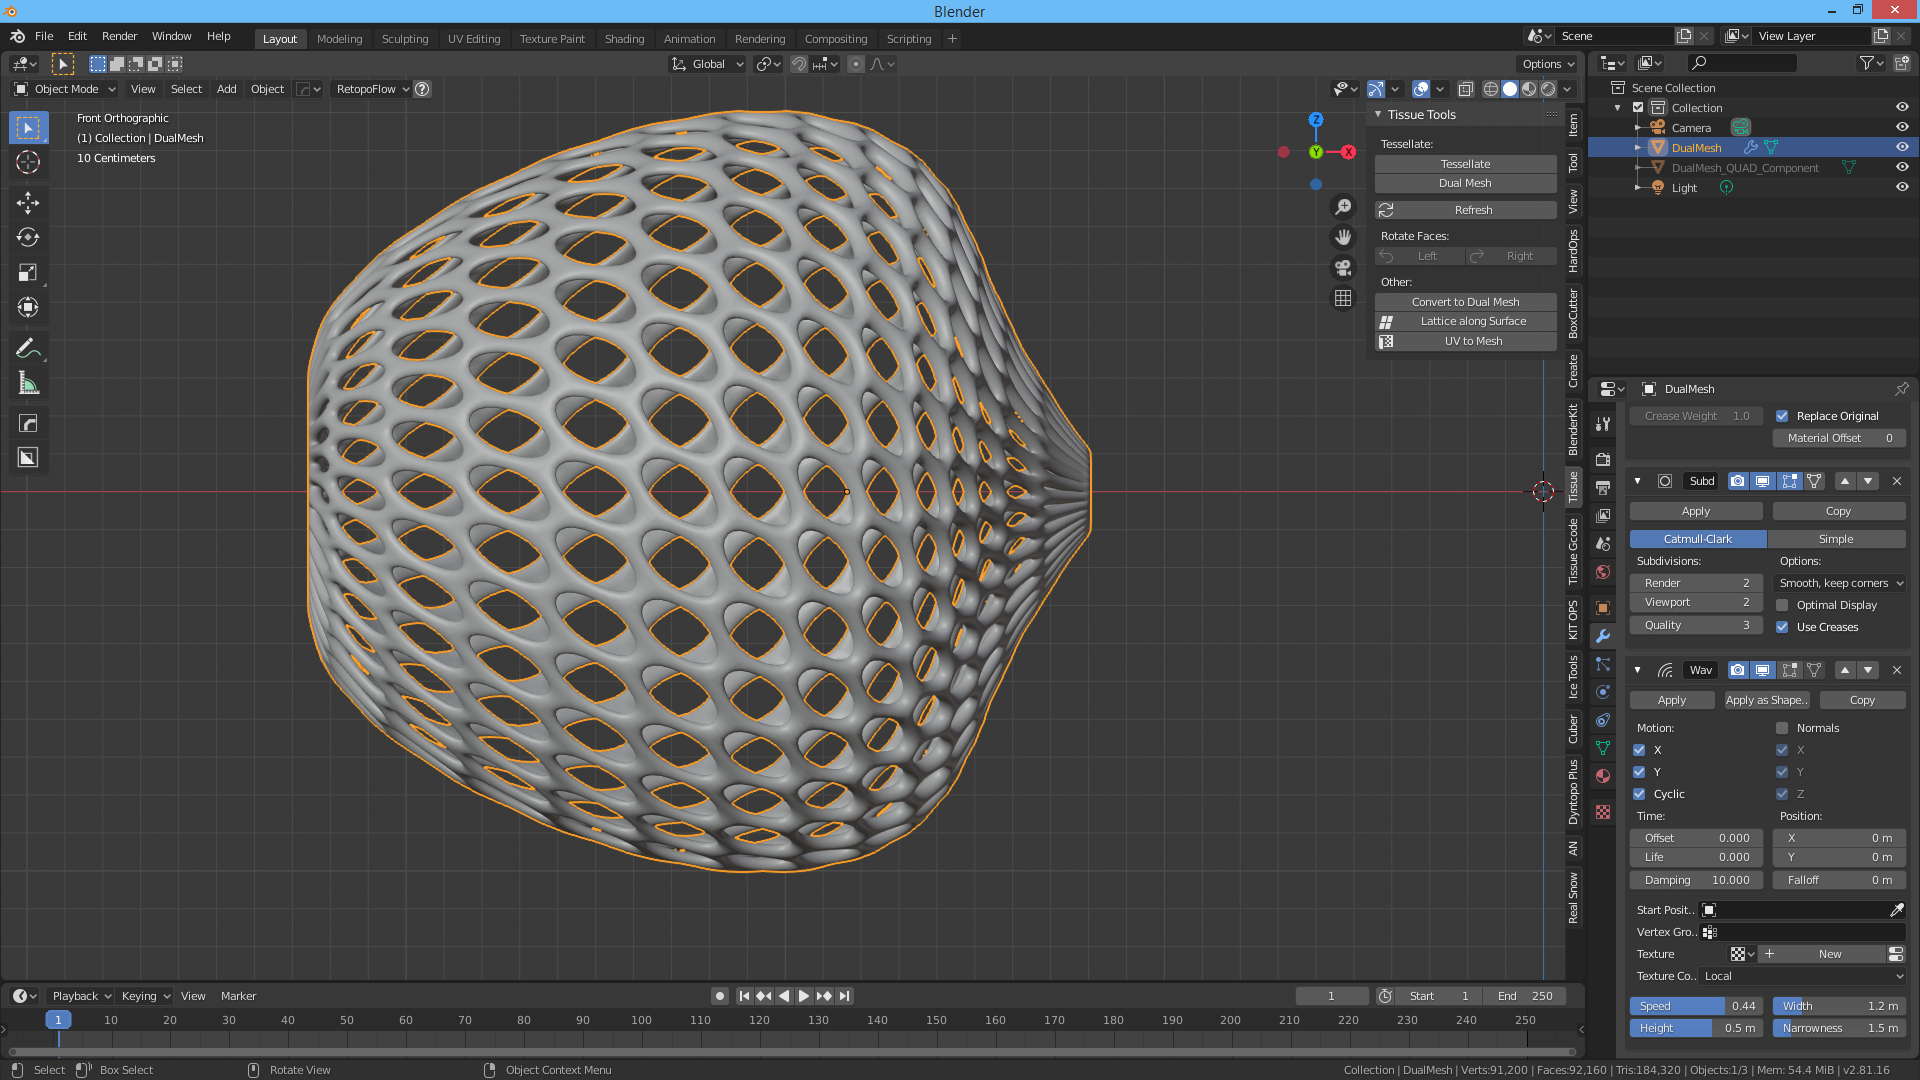
All modeling was done in Blender 2.81 without using any kind of cutter addon (I tried, but it started making me lose my mind).
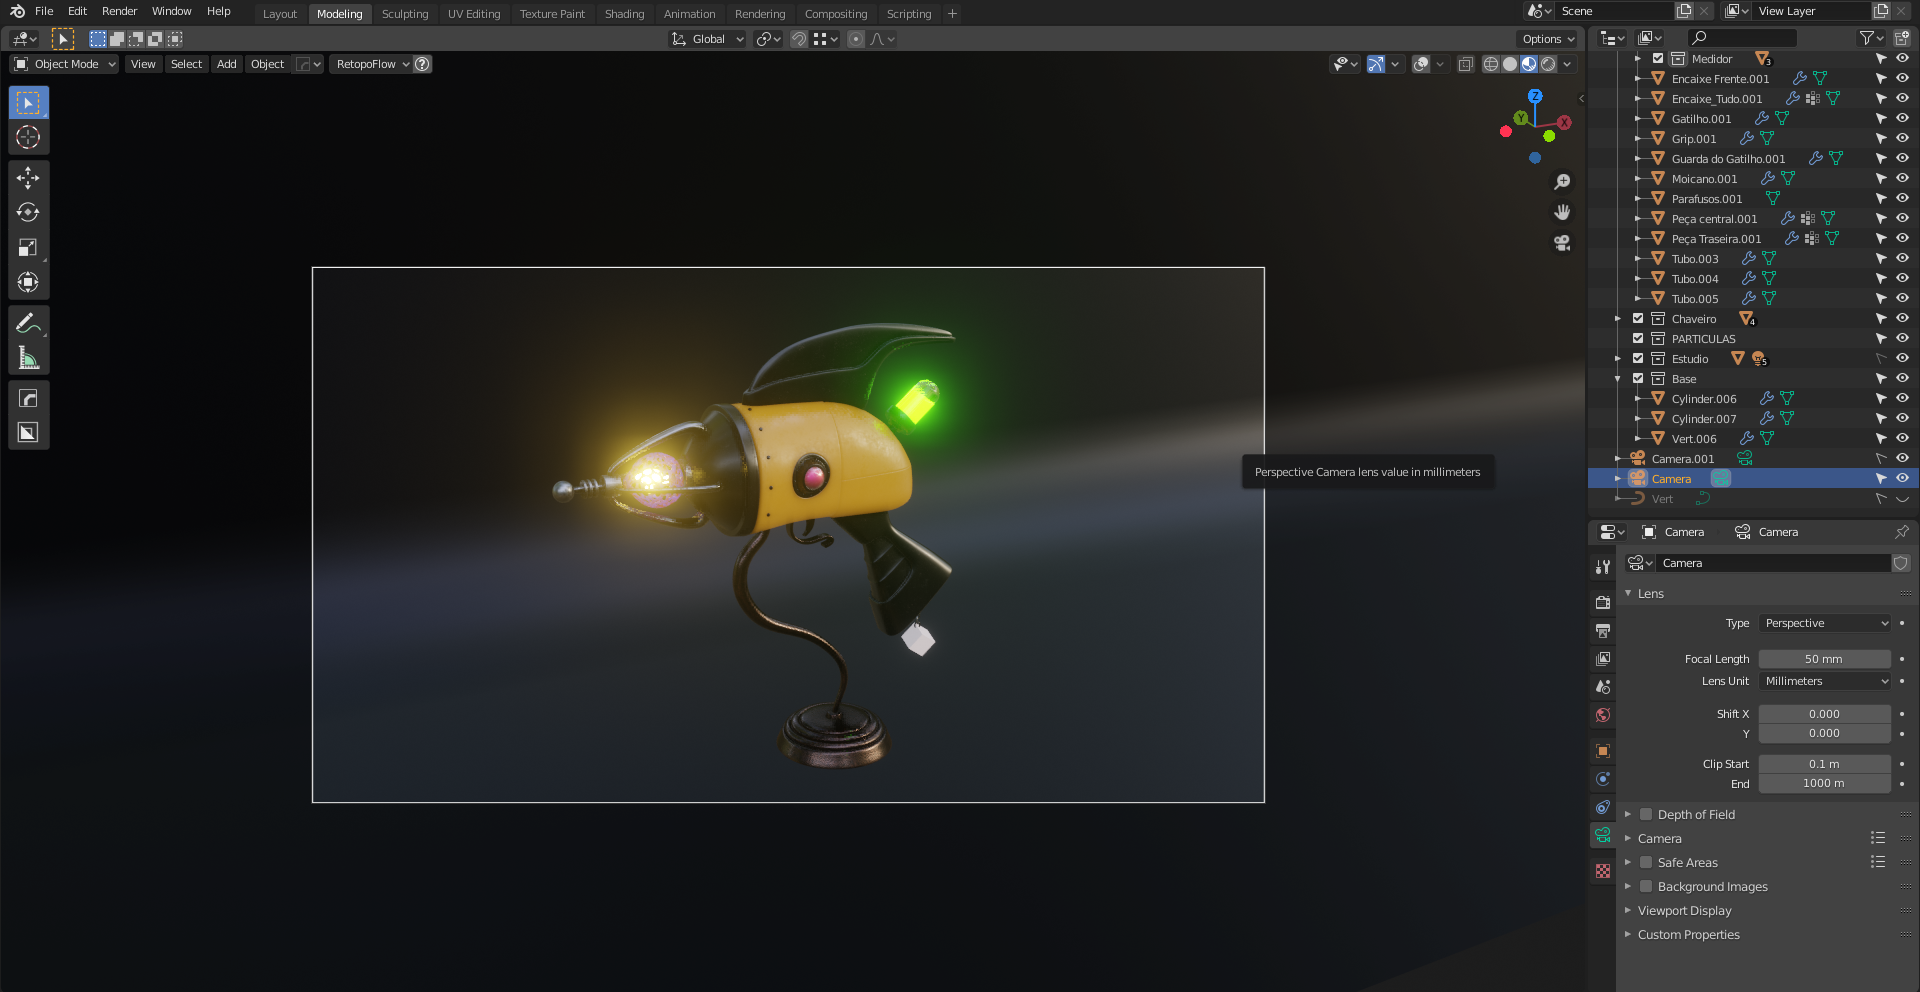
I wanted to make something clean, but a little bit ‘different’, so I used things like this “alien shape” that I created with a simple sphere. Then, I applied a Dual Mesh effect with the TISSUE addon and put three modifiers on it:
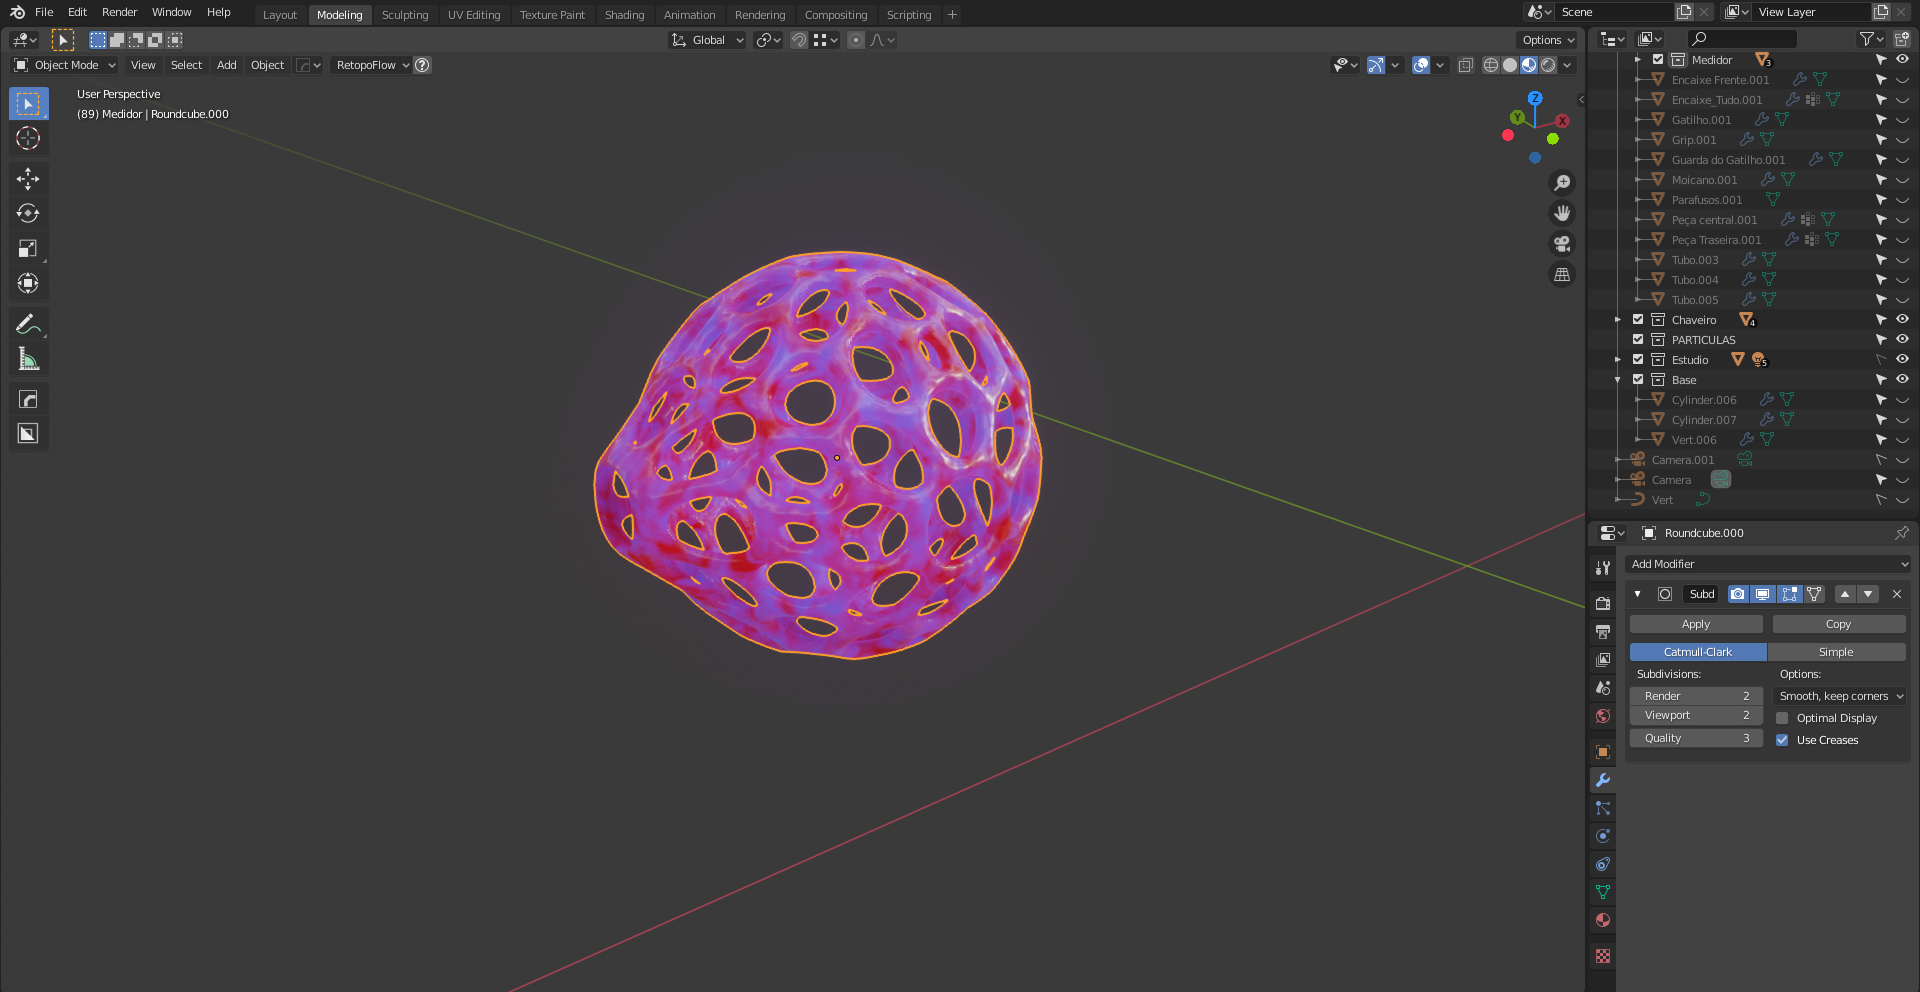
- Wireframe, because I wanted to create a sort of “cage” and be able to adjust its thickness because it needs to be more than a wire.
- Subdivision Surface.
- Wave Modifier, which I used to control and create that organic shape that uses Suzanne’s energy.
My gun was asking me for MORE POWER, so I created this green radioactive liquid (a simple cylinder deformed with proportional editing active).

Texturing
As a beginning artist, my techniques are limited, but BlenderKit helped me to understand better how materials work in Blender. Most of the materials came from it.
This gun is special, not only because its energy comes from Suzanne, but also because it’s made of a material that is not metal, as most of the weapons we know are. I wanted it to have a visual that seemed to be made of something more “alive,” like a peach pulp, lol.

For the other materials, Metal Rough and Steel Dark Used completed the harmony I was looking for.
Lighting
The Atomic Suzanne Ray Gun was the star of the show, so, I create a simple infinite dark background, added a space HDRI (for atmosphere) and added five area lights to reach the final result.

Rendering
For this one I chose EEVEE because of the way the lights behave on it. I set it to 600 samples, ambient occlusion, bloom, screen-space reflections and it took a couple of minutes because my computer isn’t that powerful.
Post-Processing
Almost there, I found myself looking at my final render and thinking: There’s something missing, but what?

Photoshop had the answers.
I used the camera raw filter and made the lights and the bloom a little bit more dramatic and added the final touch to my render: grains. Just a little bit or my image would look like it was from on old tv show.
This the final result, hope you like it.

About the Author
 Rafael Kazam, Digital Designer and 3D enthusiast.


Great job!
You have learned all this in 2 months? That’s… really impressive! I love it!
Yes. I started studying Blender last november ^^
Thank you for the kind words. Maximum effort ahead.