
Behind the Scenes: NEOPARK
Hello, my name is Petra Sedlarova. I am a full-time 3D artist at Bohemia Interactive, and also do 3D art in my free time. The NEOPARK scene is a free-time project which I started in order to test the new version of Blender 2.8. I wanted to see what it had to offer, how to work with it, how to work with collections, and how to make EEVEE work and create materials in it. In this article, I’d like to describe the steps I took that helped me achieve the result. Hopefully, you’ll find it useful.
Theme
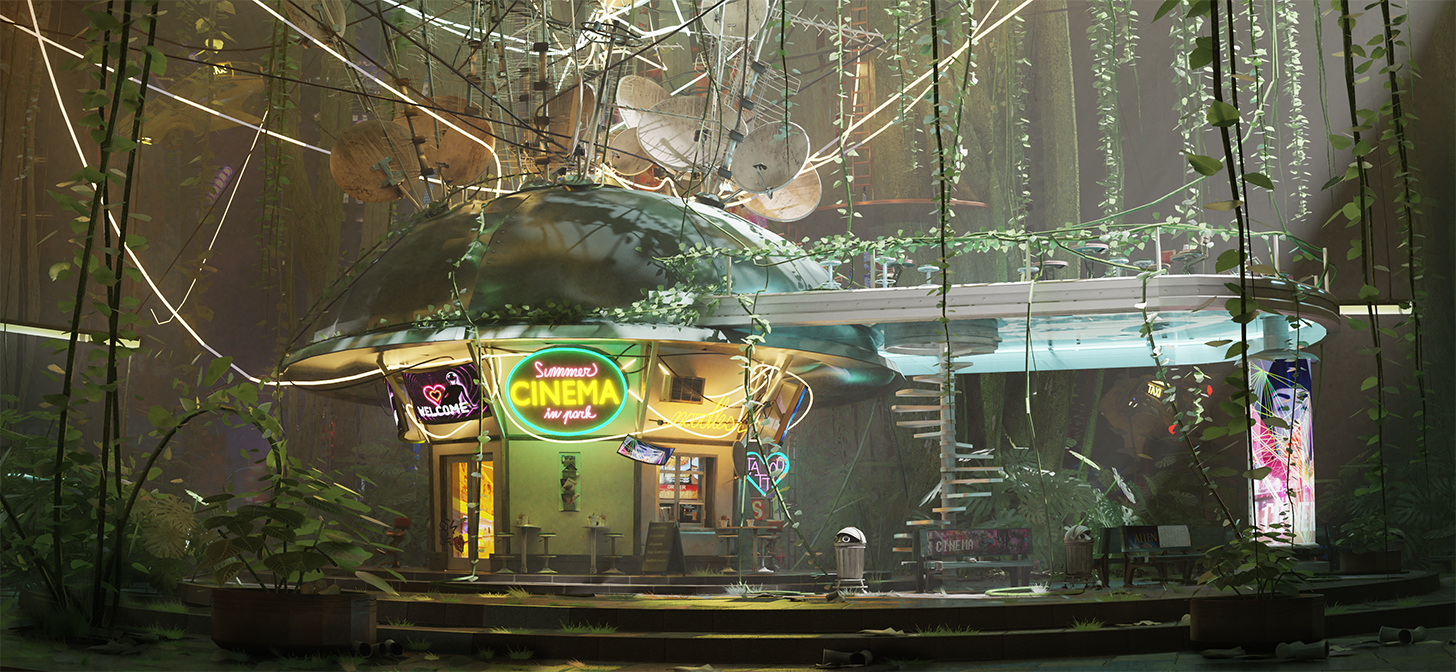
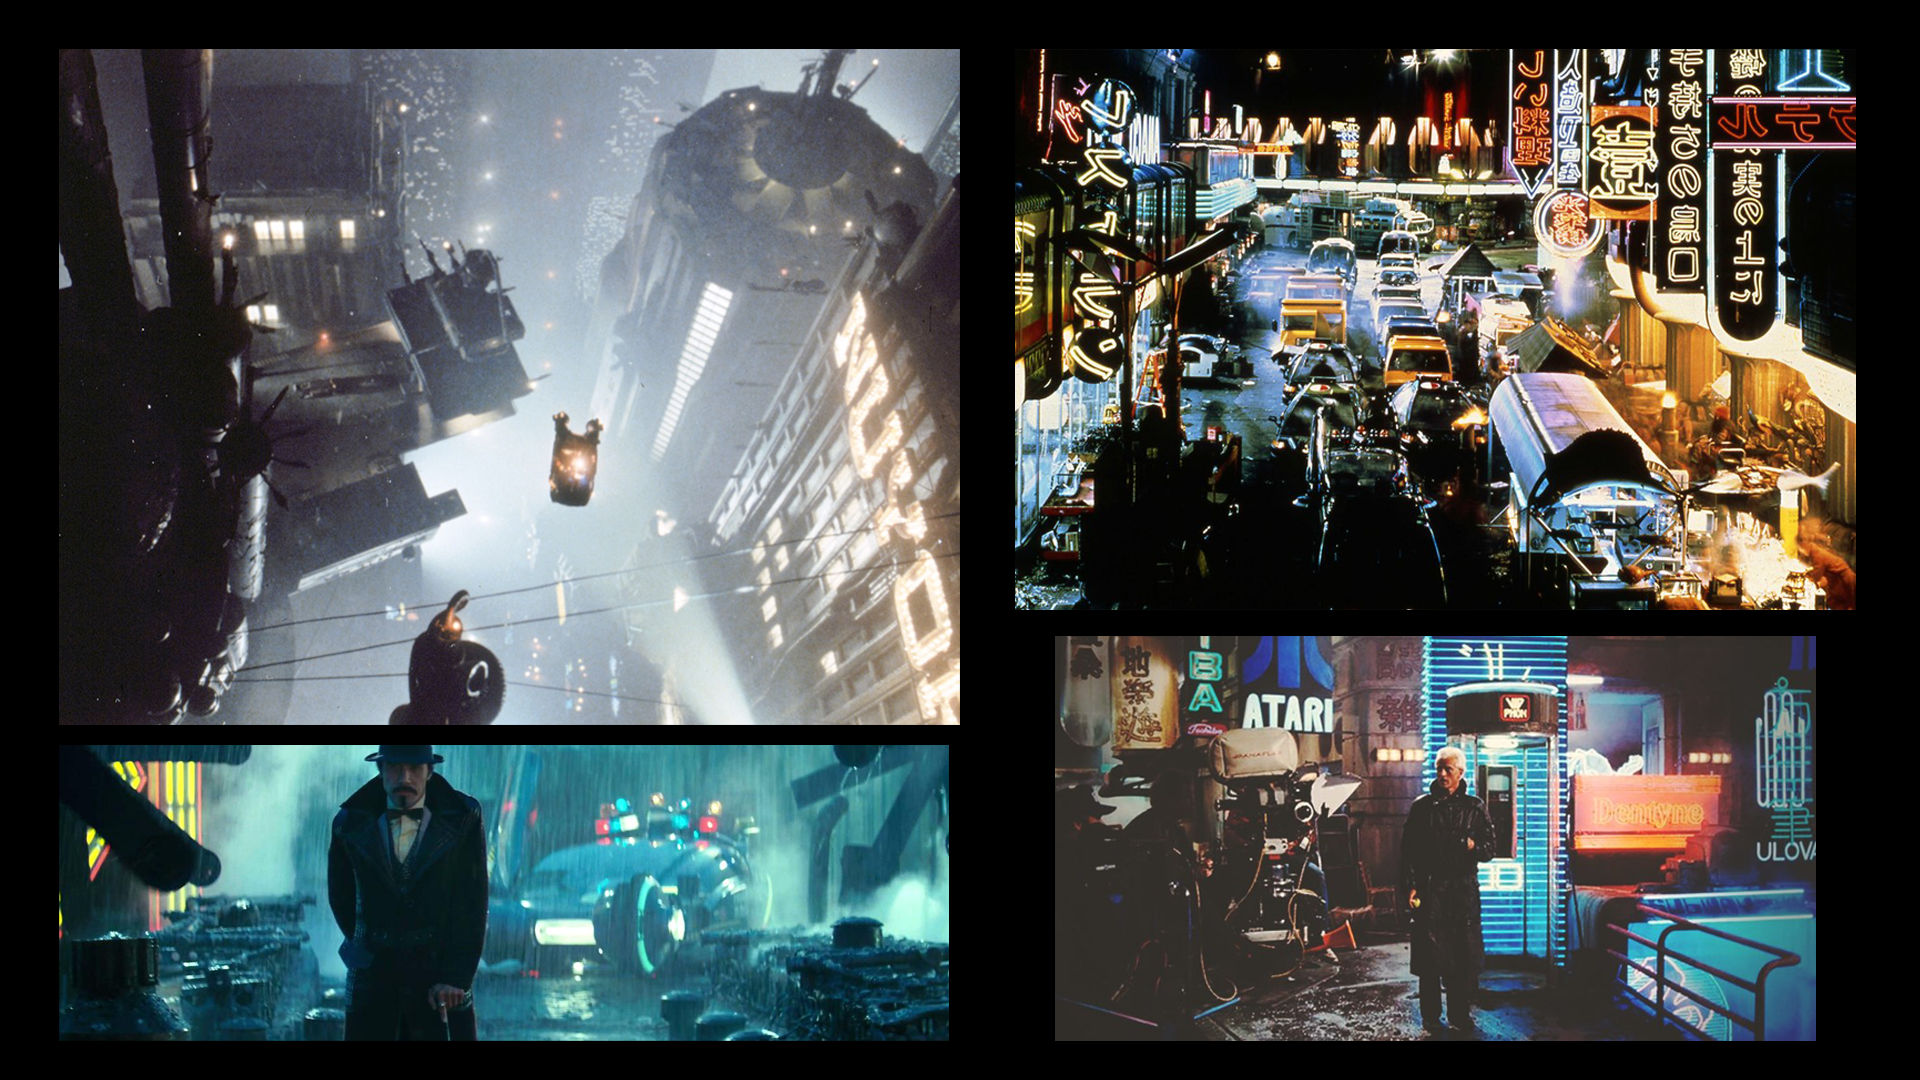
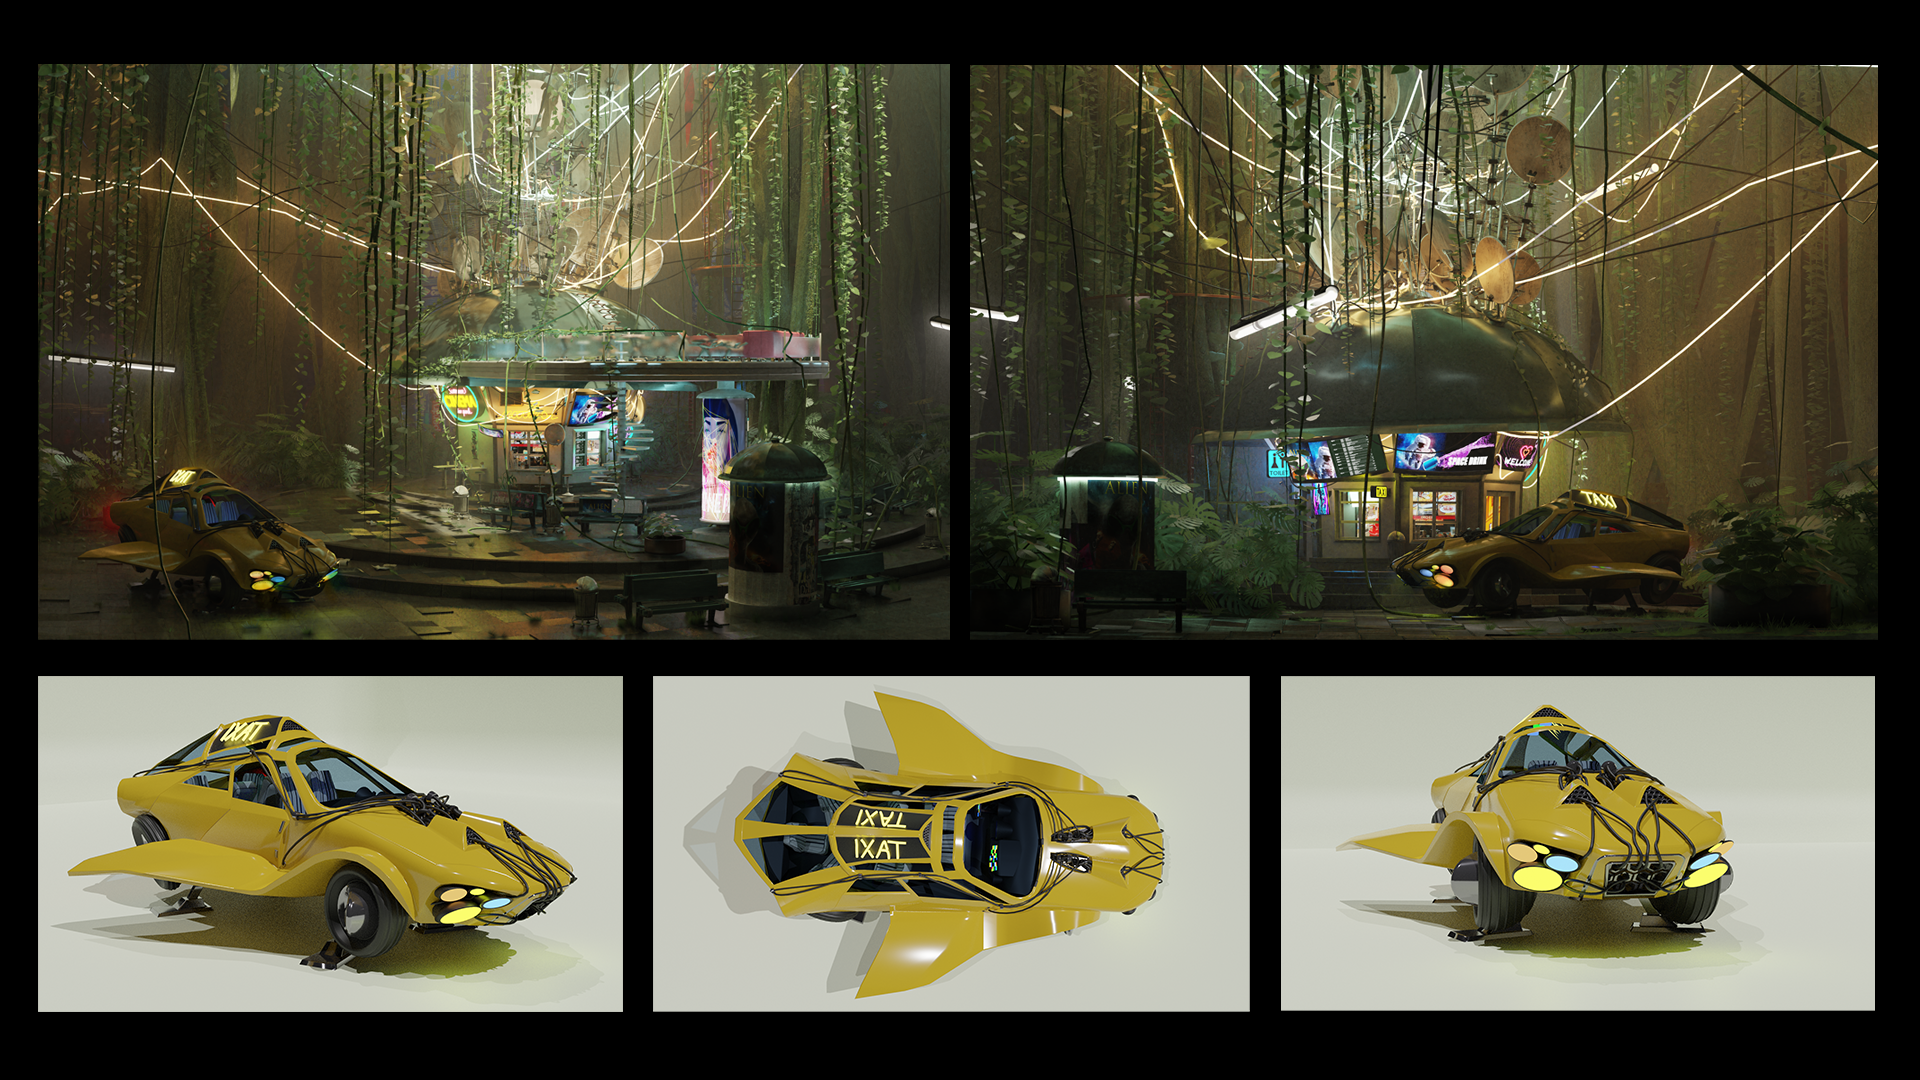
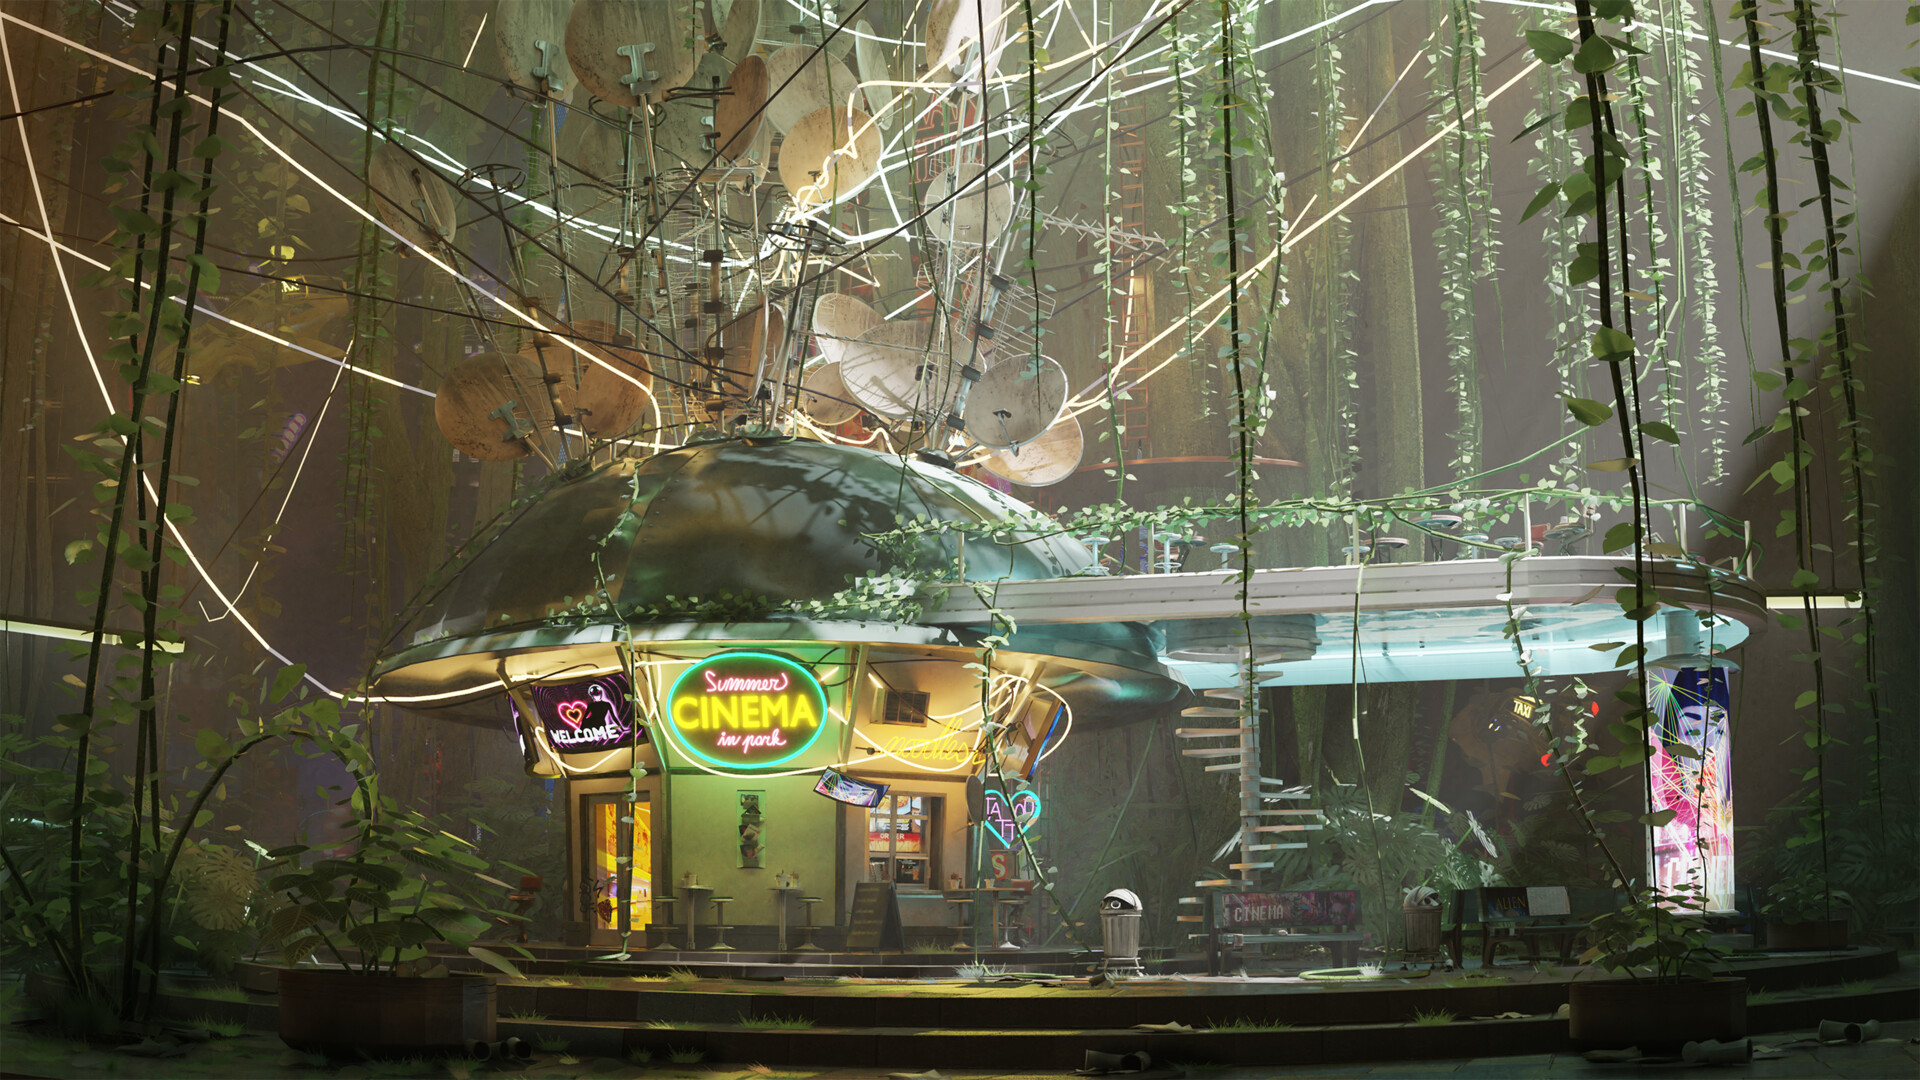
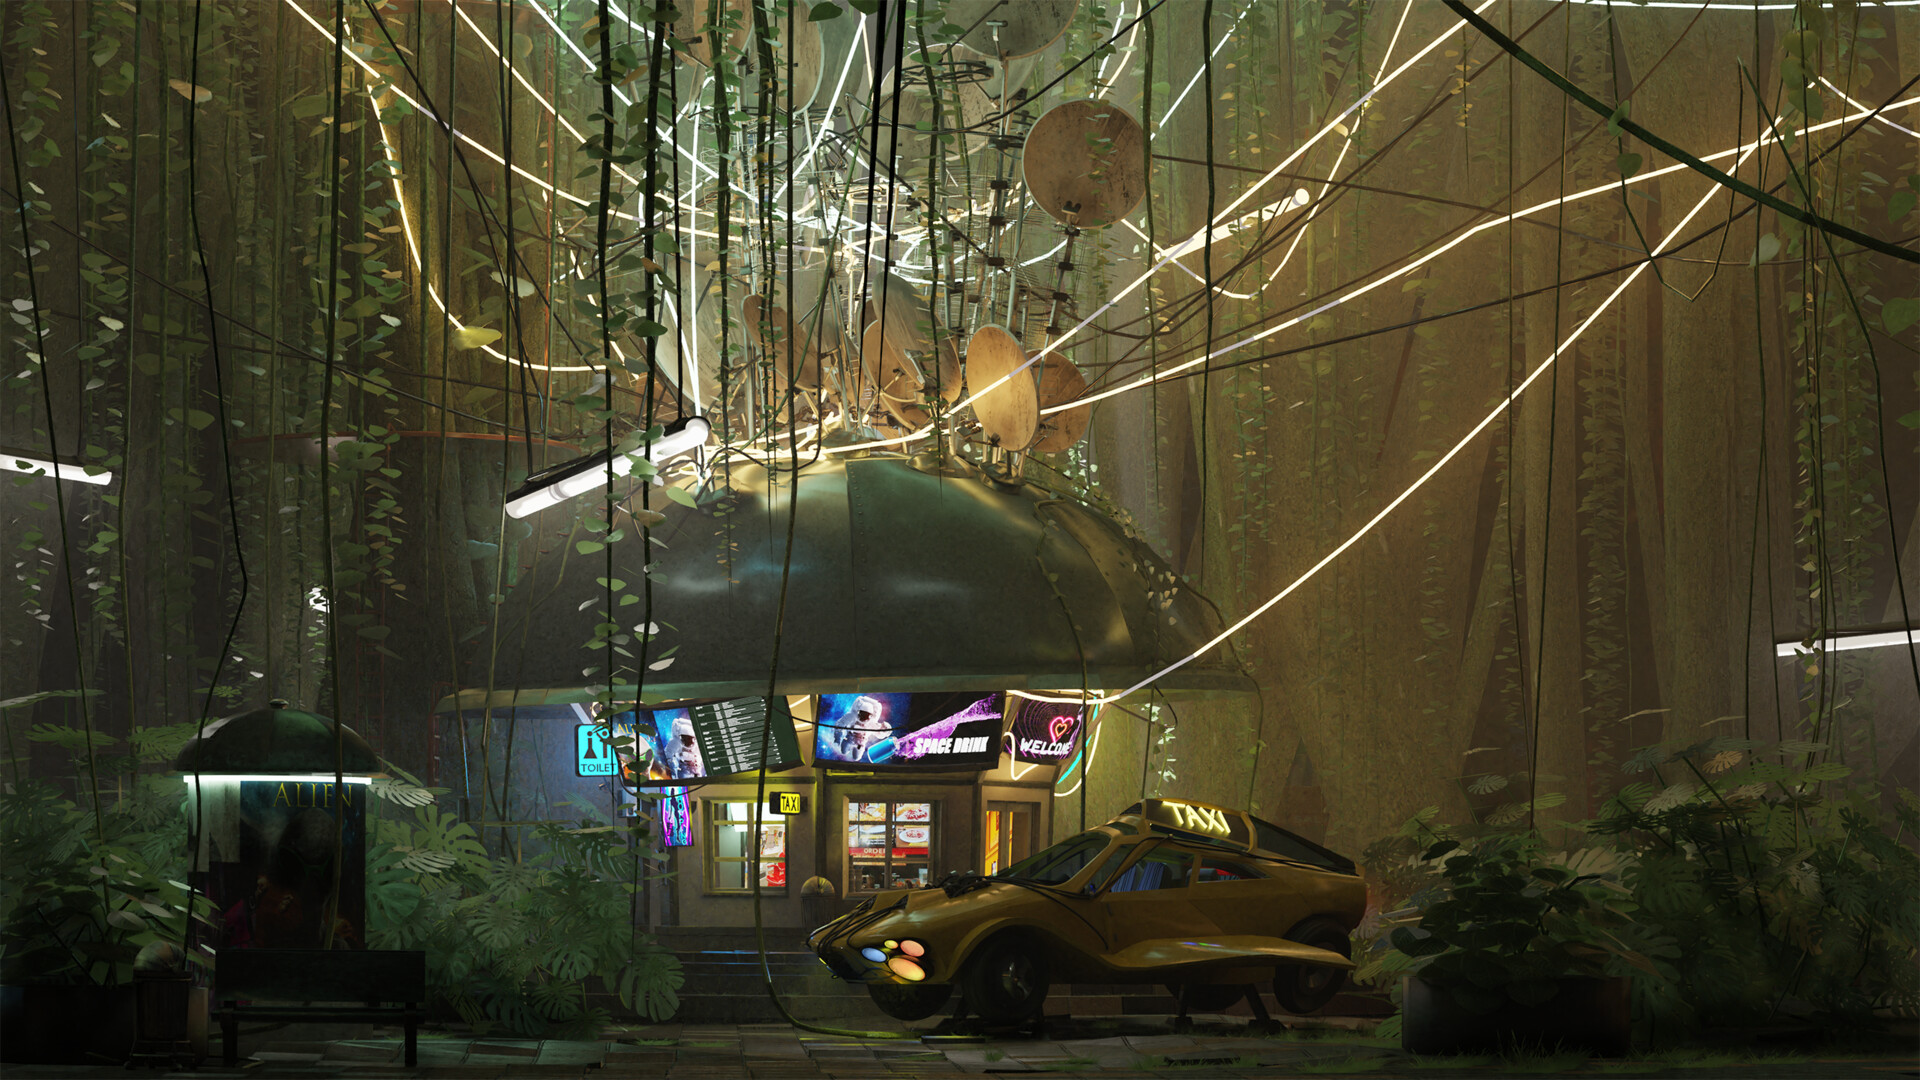
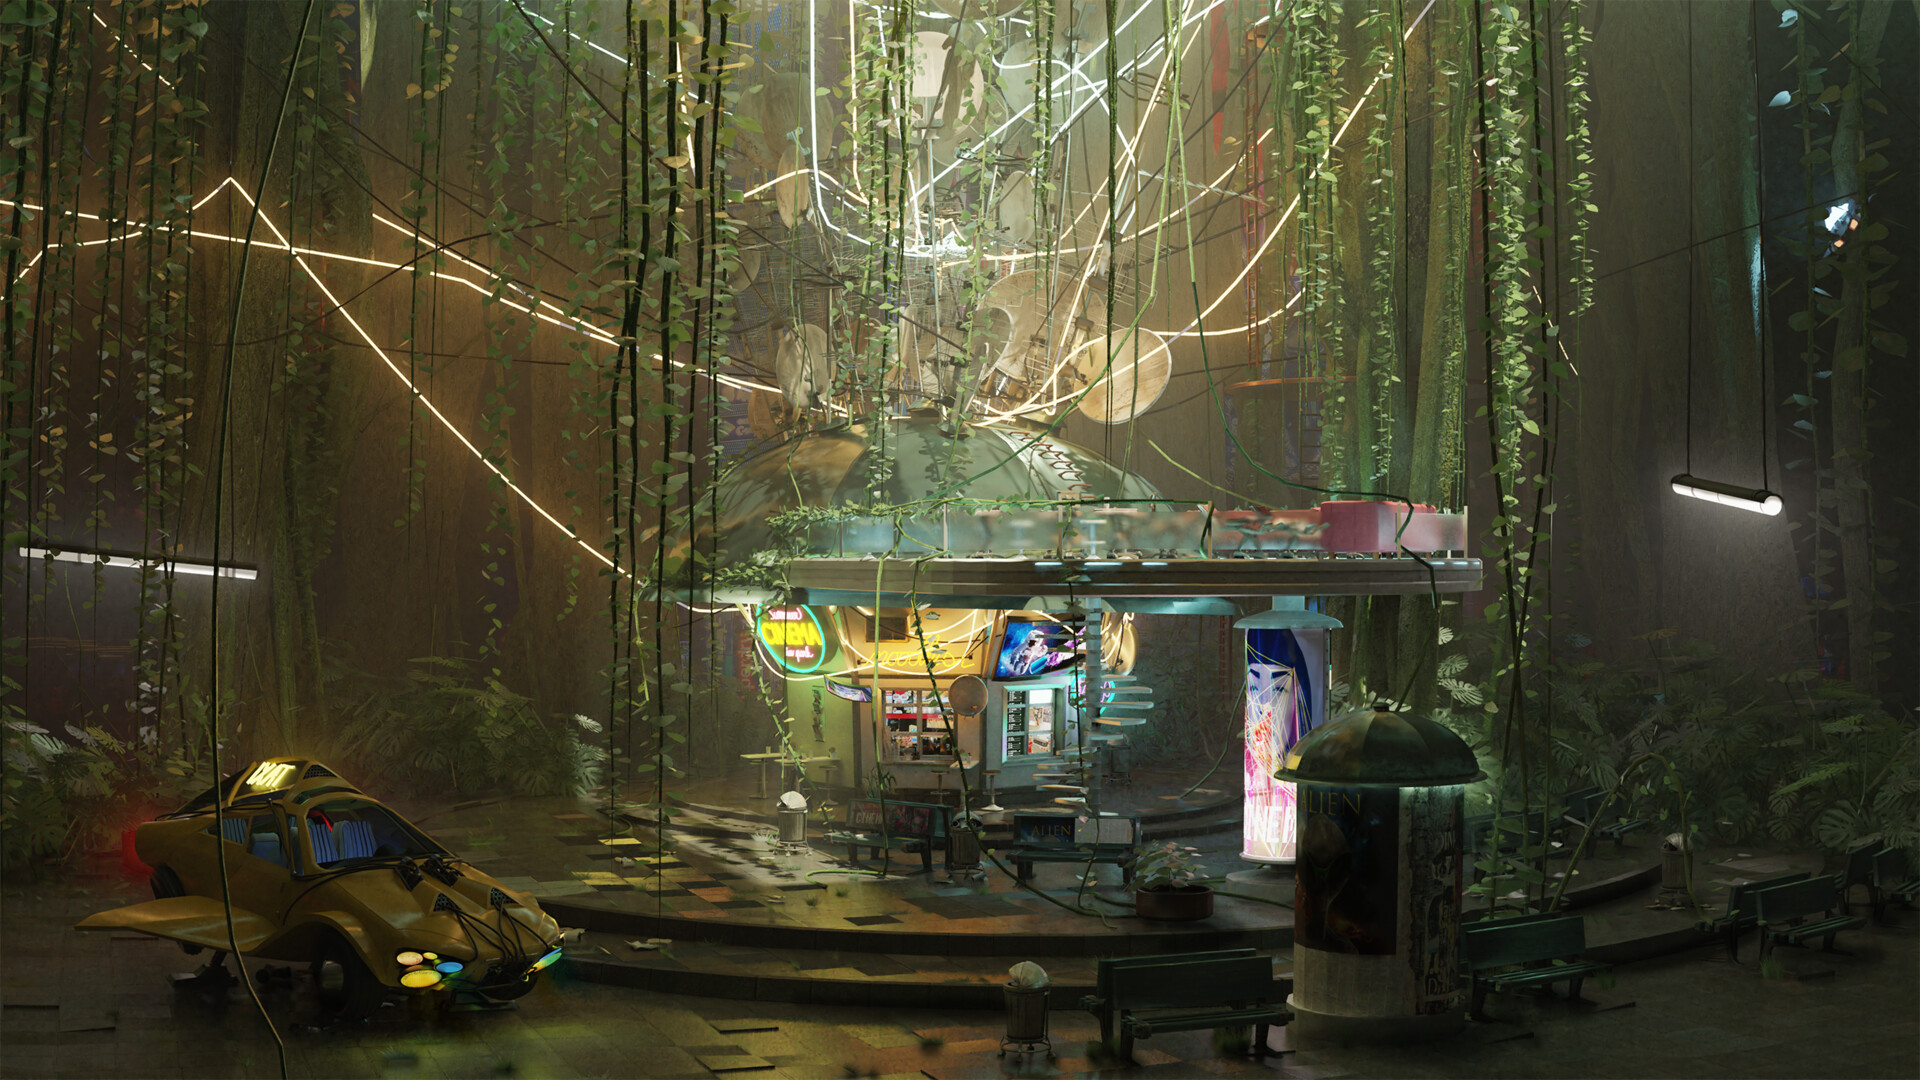
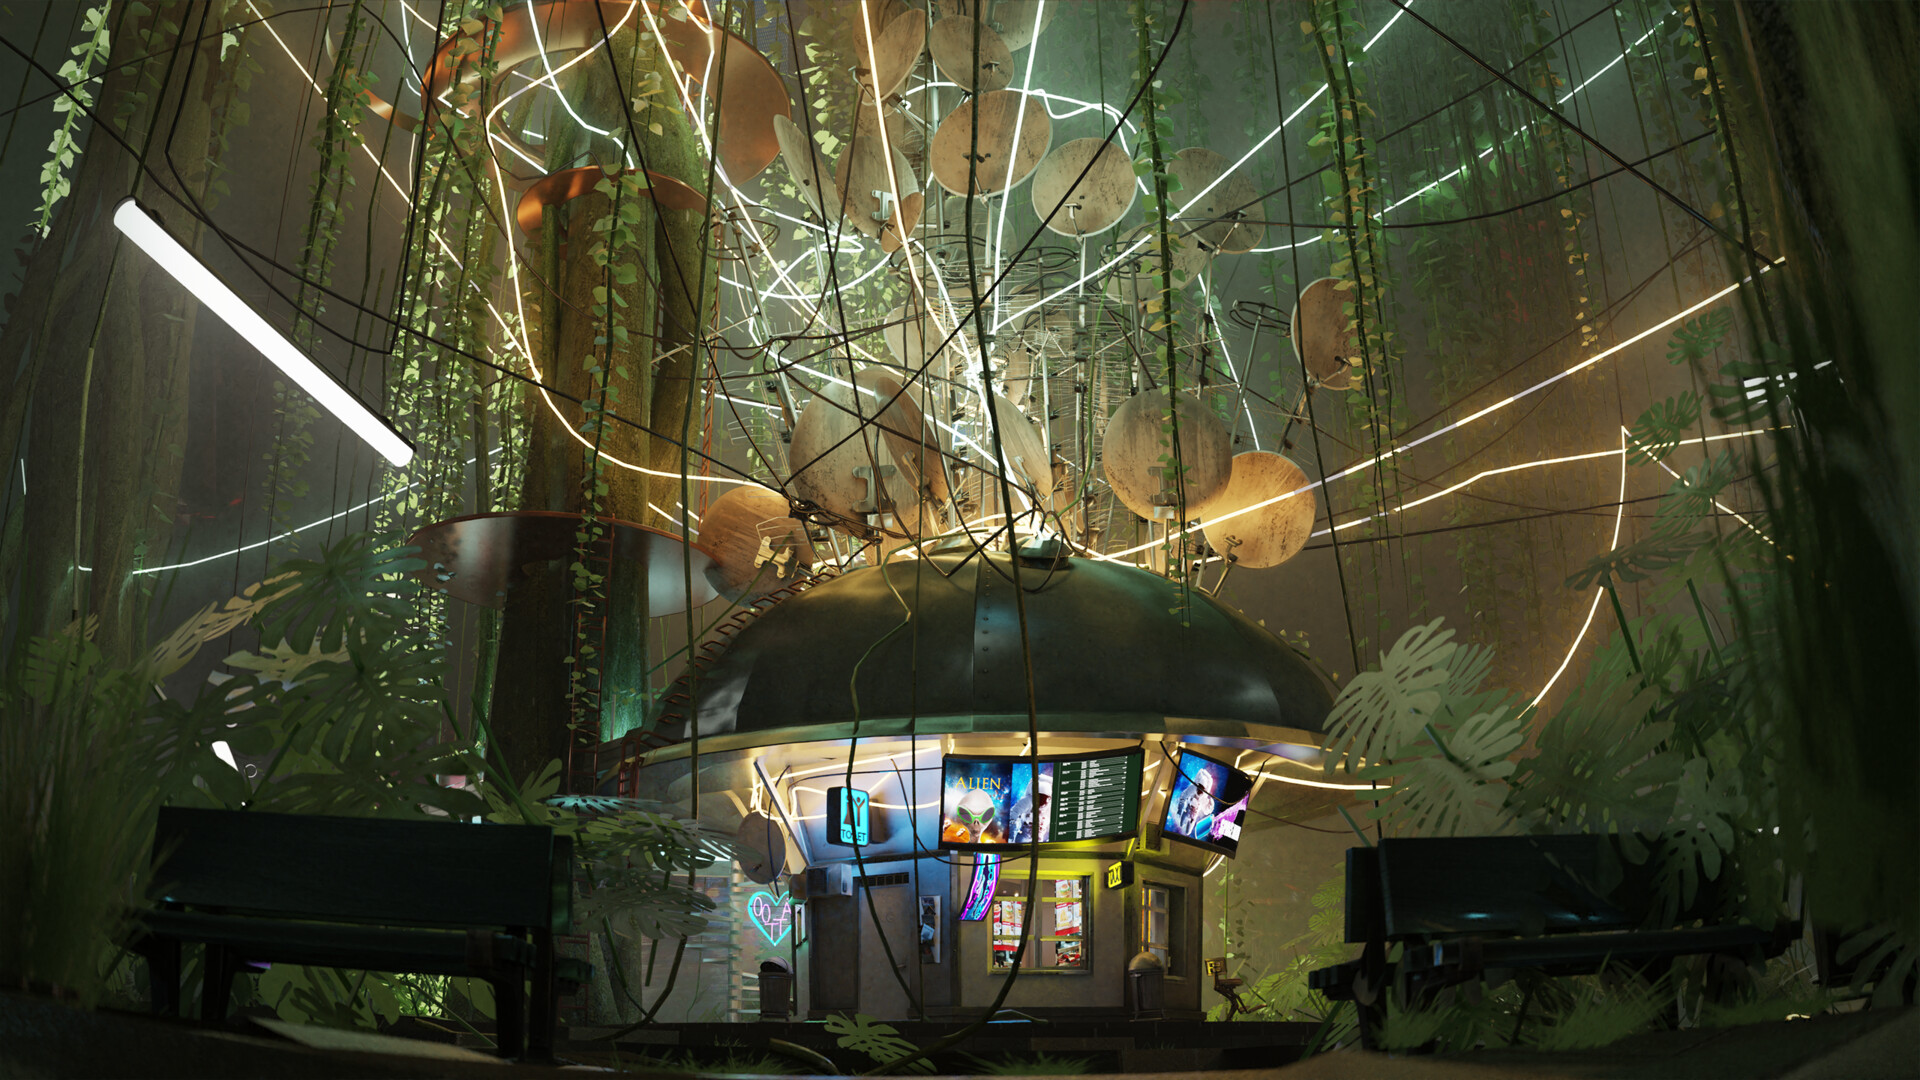
I’ve had an idea about a retro-futuristic vision for a while. I was always fascinated by how old movies show their view of the future (e.g., the Blade Runner from the early 1980s). I wanted to get the feel of the city—and then set it into a dense vegetation.
Scene Preparation
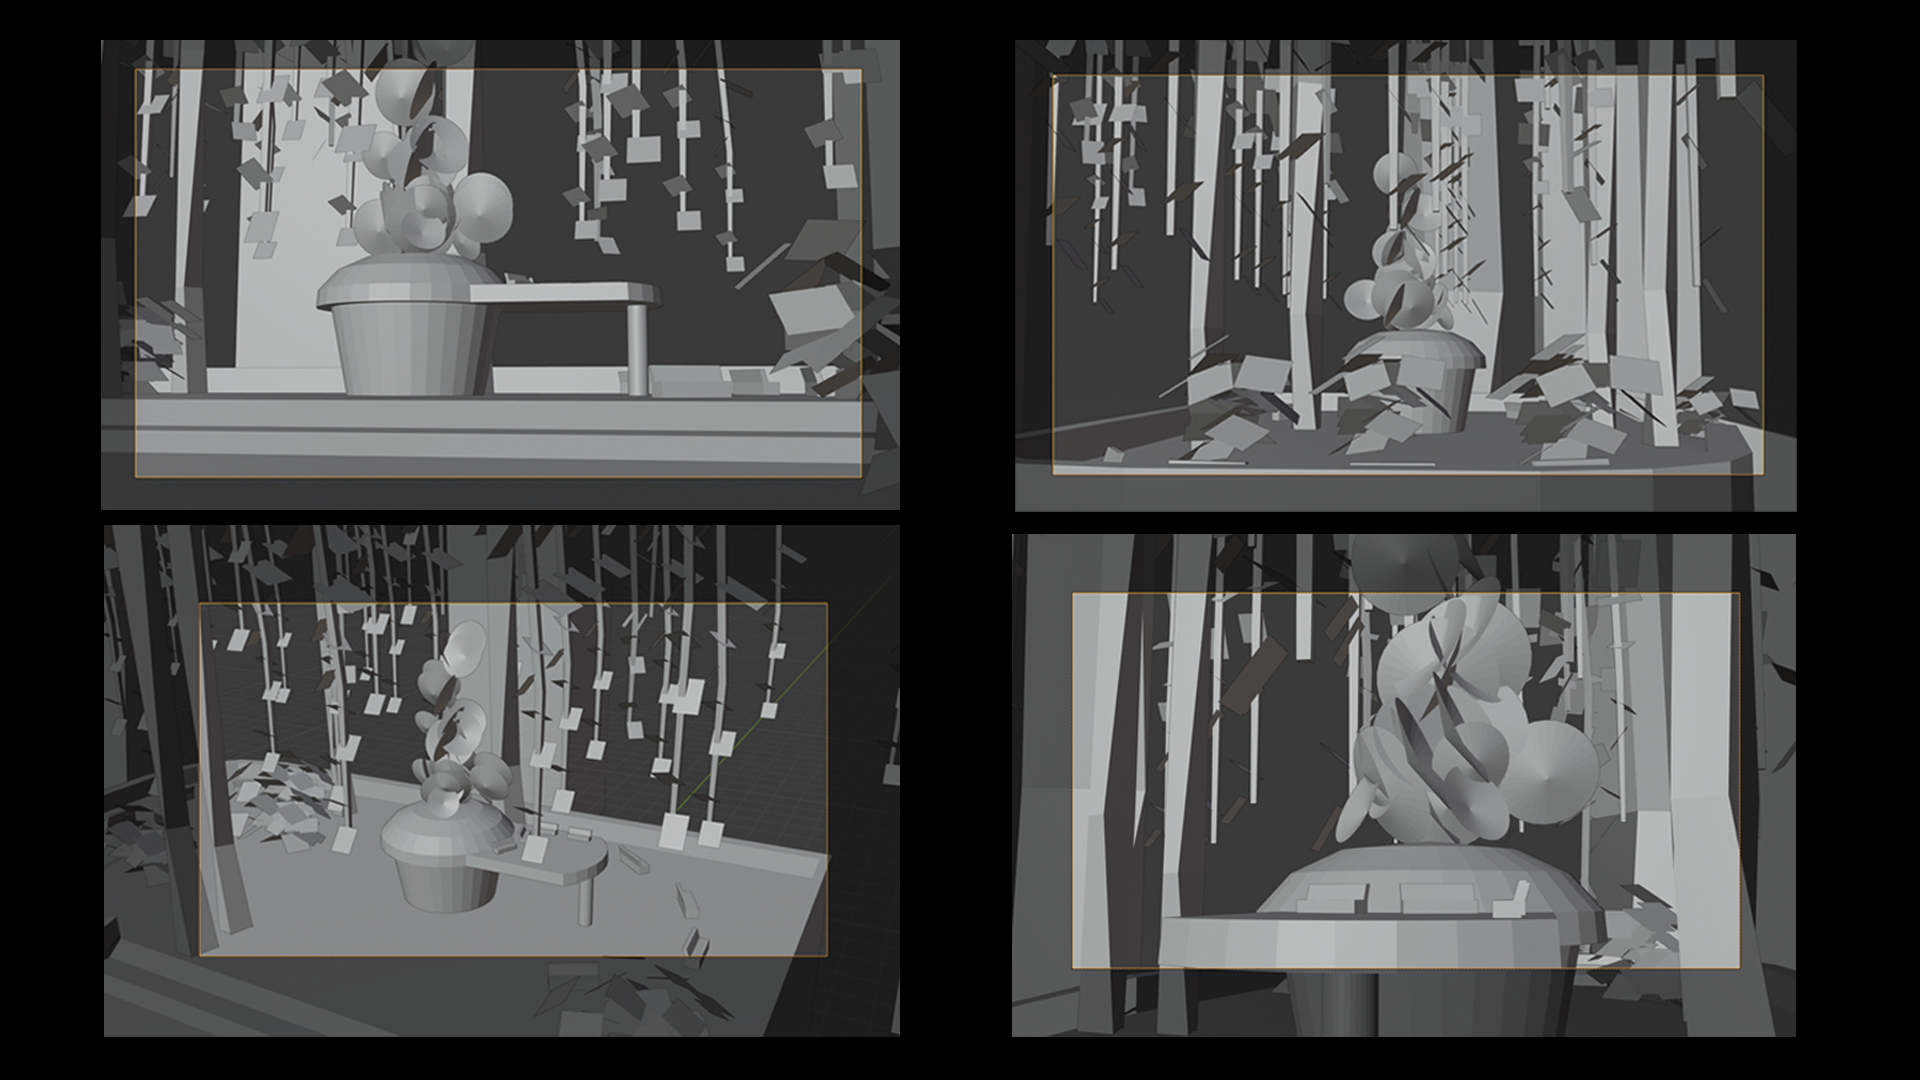
As the first step, I created a scene and populated it with basic grey boxes. The main focus of the scene went to the largest object in the middle. I knew from the beginning it would be the pillar of the scene.
After that, I placed and set up a couple of cameras; this helped me realize which angles would become important for the renders, and also which areas would later need more focused care.
As a general rule of thumb, it is good to decide early on what colors of the scene will be dominant. This will help when creating textures for the assets, and also make things easier for the final renders. Otherwise, there always is a risk of the scene or some parts of it being broken right at the very end.
Asset Creation
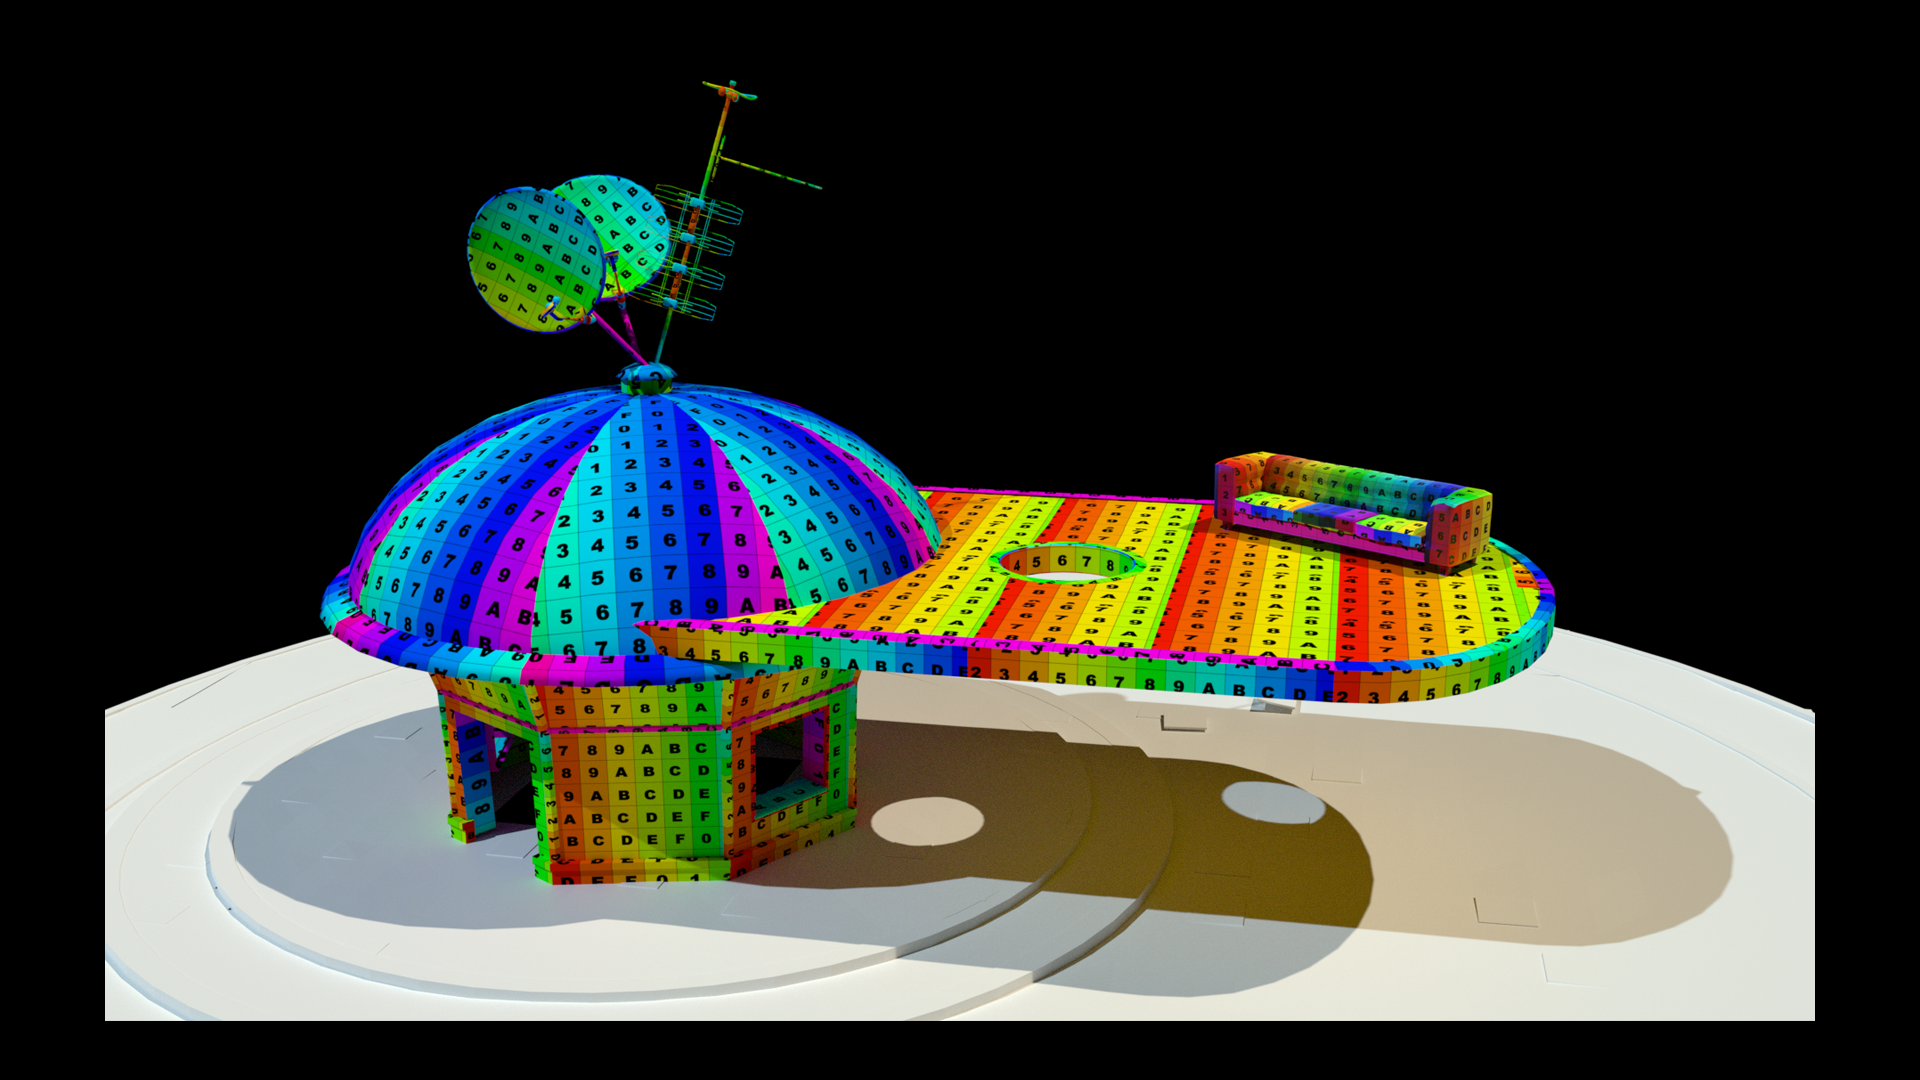
I modeled every asset separately and in a new scene. It was important to keep the ratio and size of every asset the same, and also the UV maps distribution (UV Checker helped a lot here). All of the maps (normal, ambient occlusion, and roughness) were made in Blender. As for the diffuse maps, I created these in 3D-Coat. The car gave me a particularly hard time because I had never made one before!
Lianas
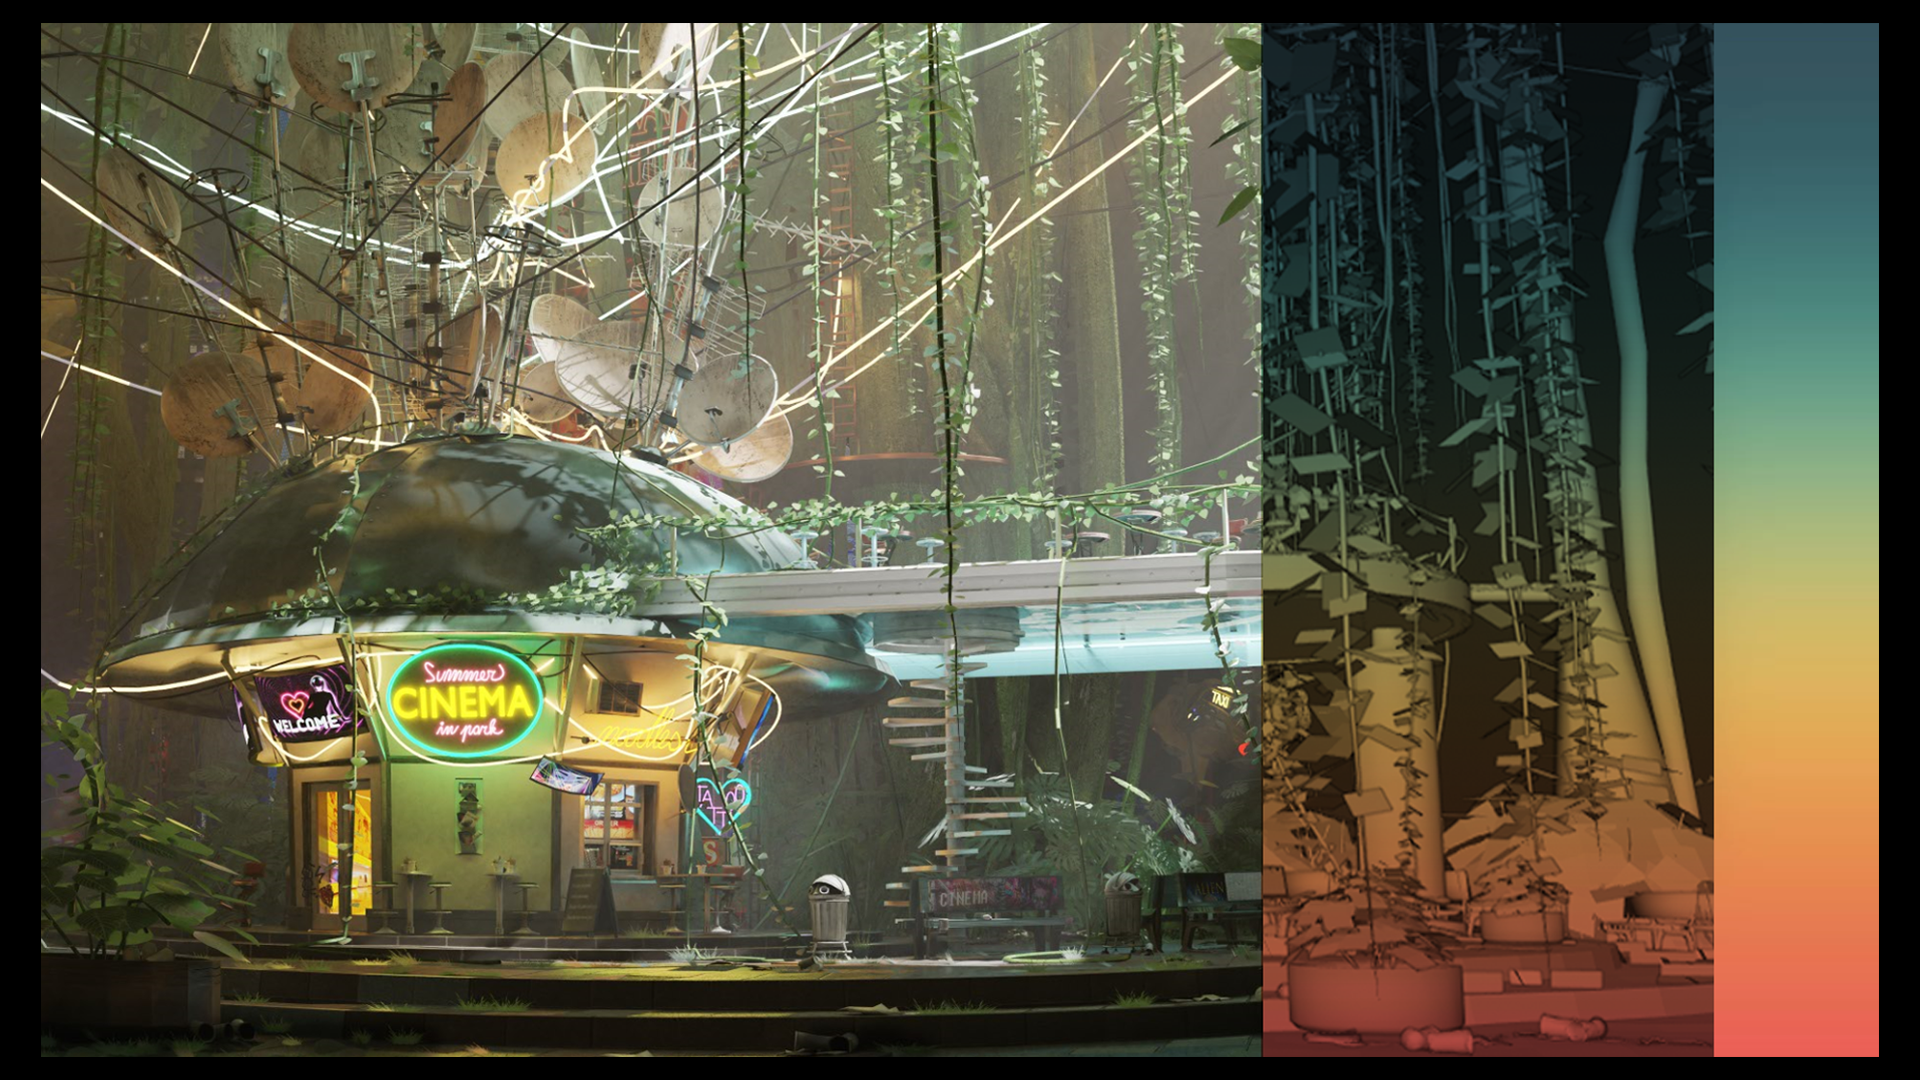
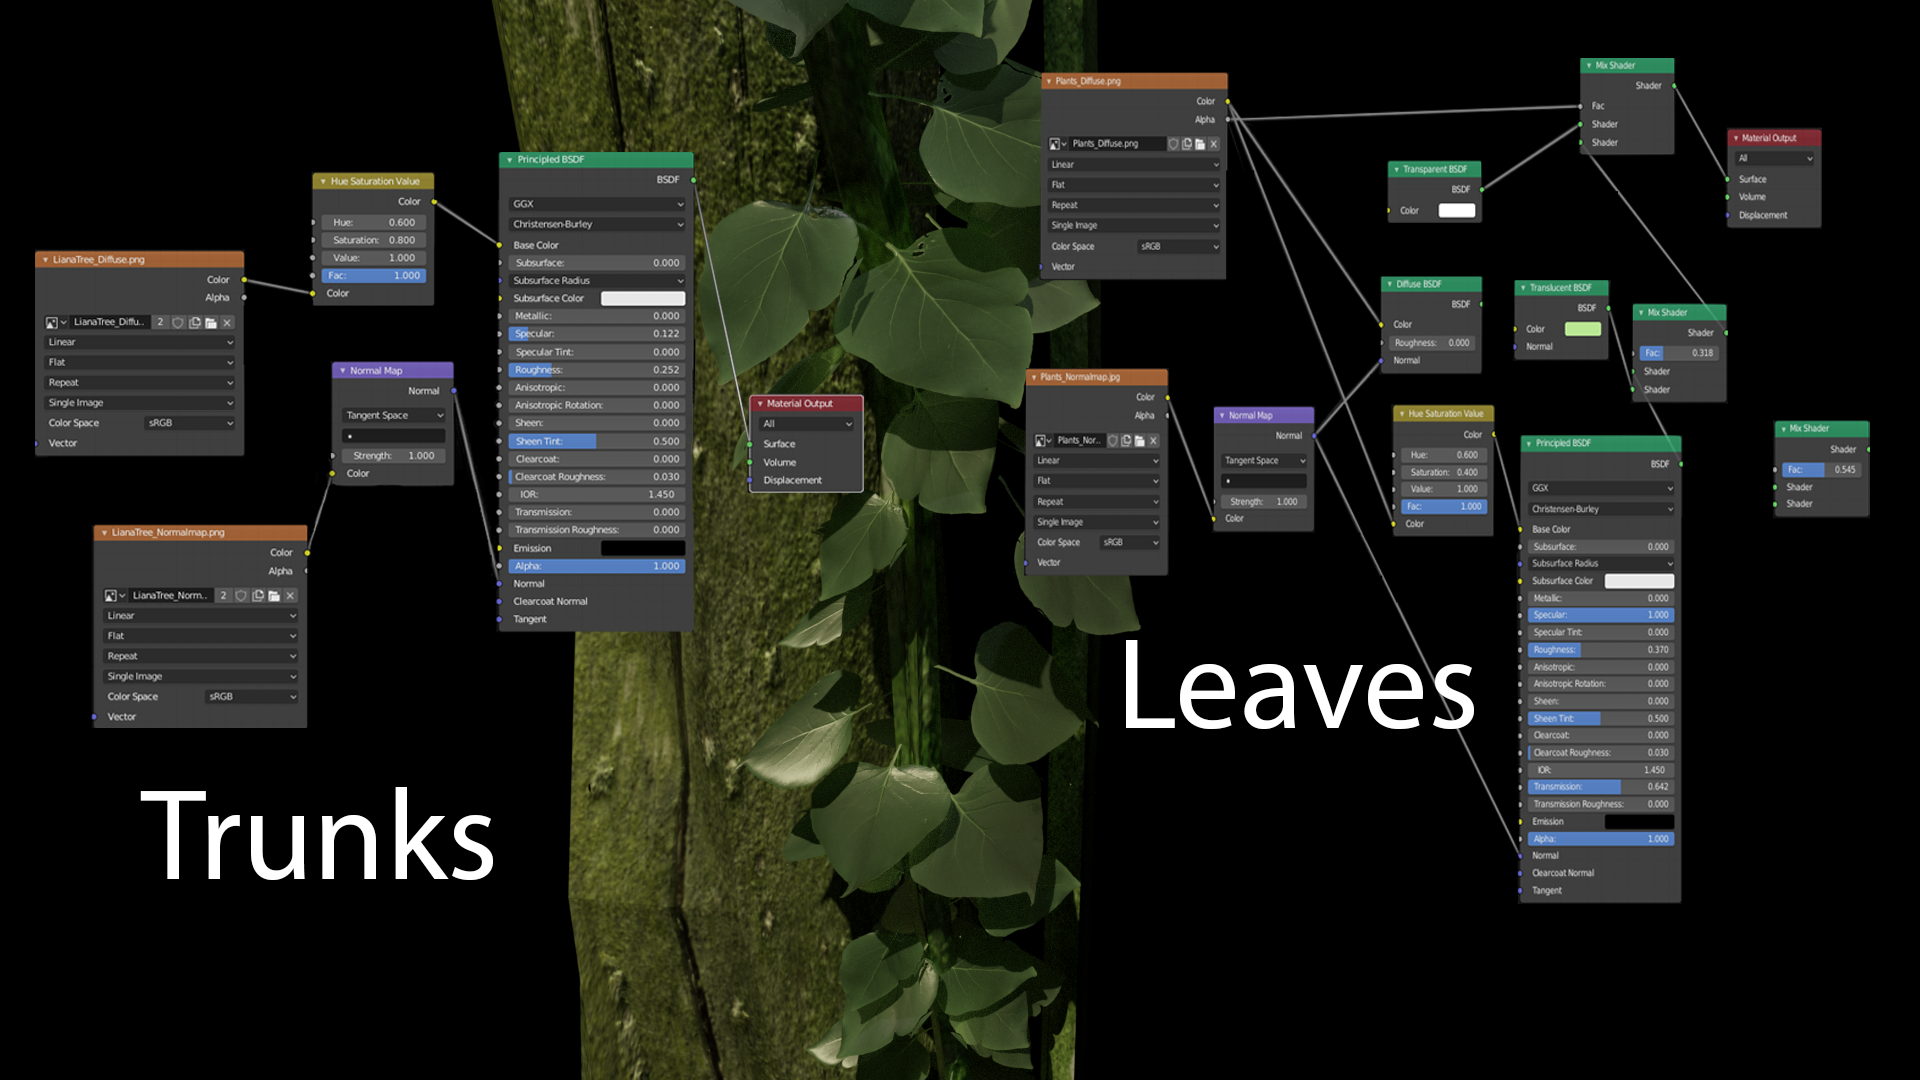
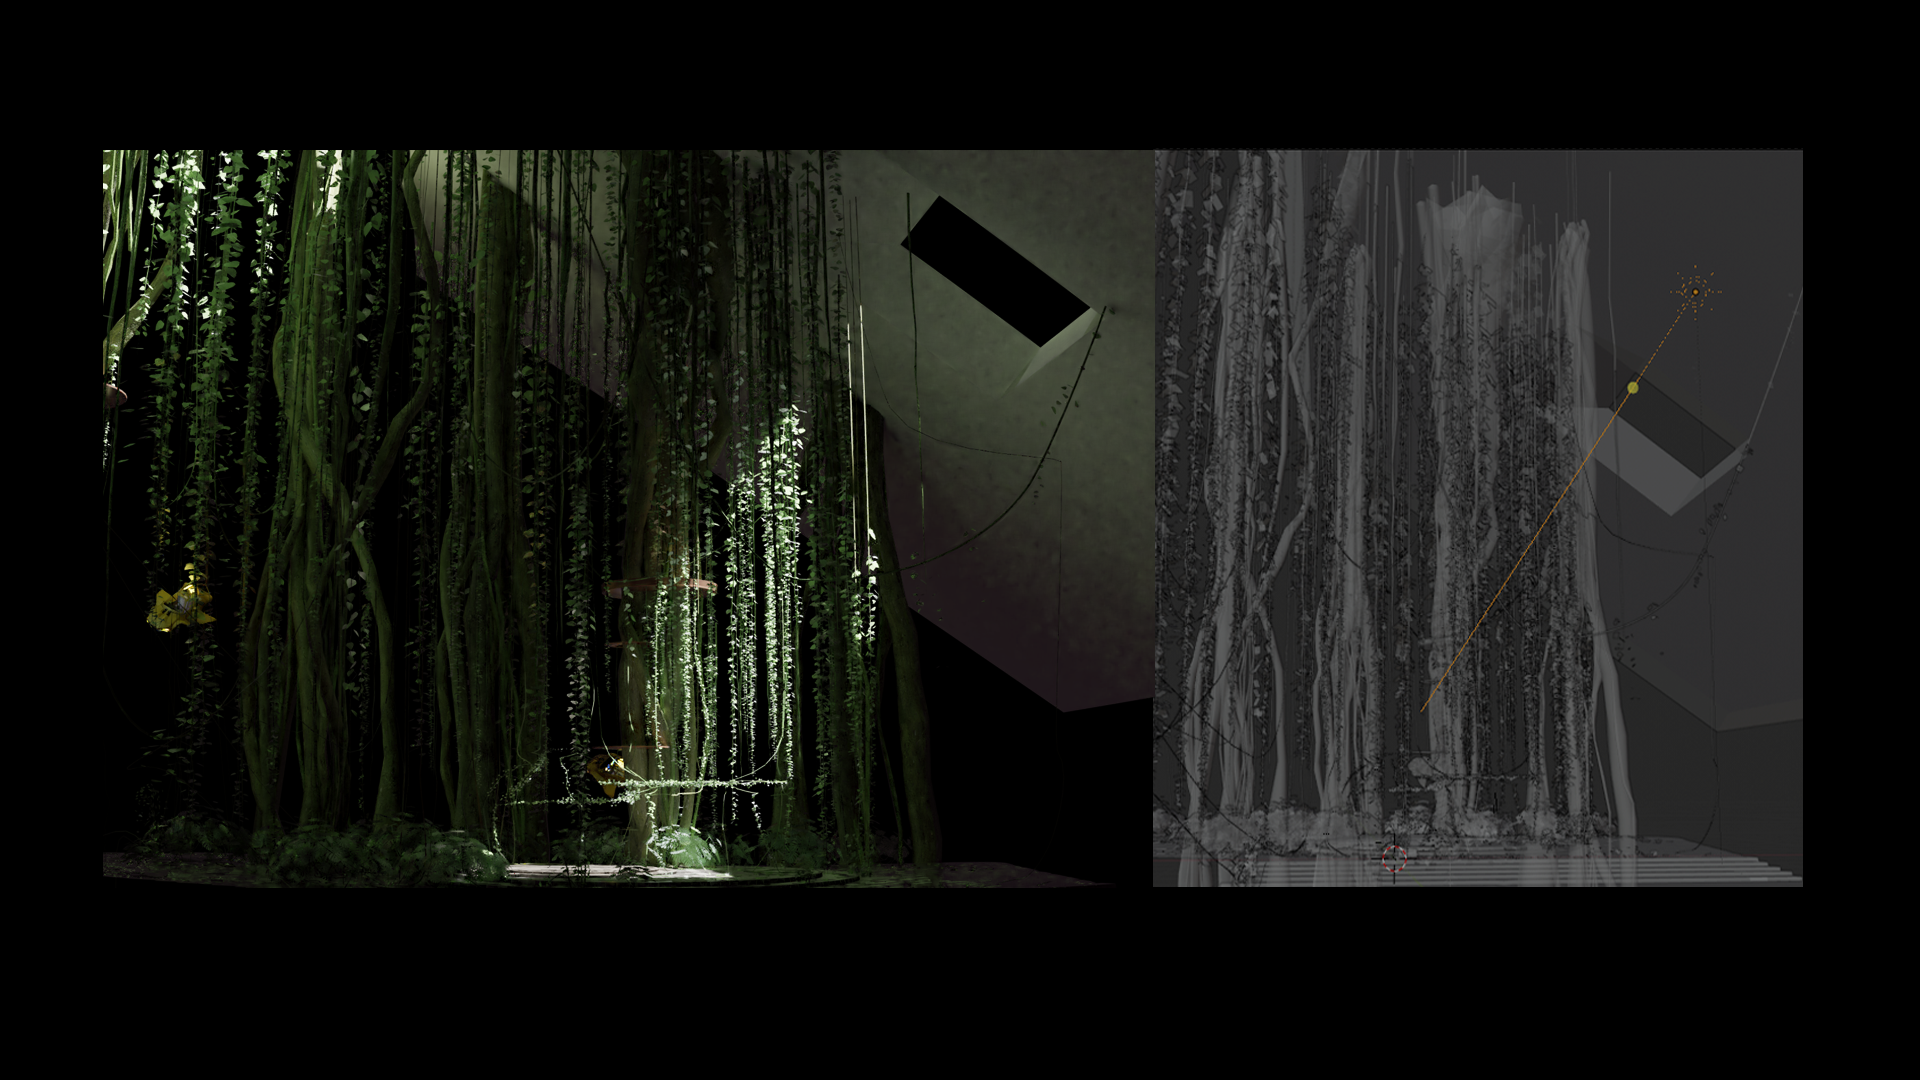
I created a base mesh of a liana—and attached leaves as billboard textures to it. The lianas that are touching the buildings or hanging horizontally are produced by the Bezier Curve (it is good to keep the curves in the scene as long as possible—this approach comes in especially handy when you need to move them). The large lianas (trunks) are also made by the Bezier Curve. They were transformed into a mesh and mapped in UV. You can see the EEVEE settings for leaves and trunks in the picture.
Final Scene Settings
My goal was to go for an evening scene with lots of lights and reflections. The atmosphere is a bit dark and moody, and resembles a thick fog. To make it work as a whole, all assets have quite a high reflection setting.
I really wanted to emphasize the amount of vegetation that is around the city center. For this, I used a strong source of light that goes through another object. This made it feel like the light struggles to go through the dense vegetation.
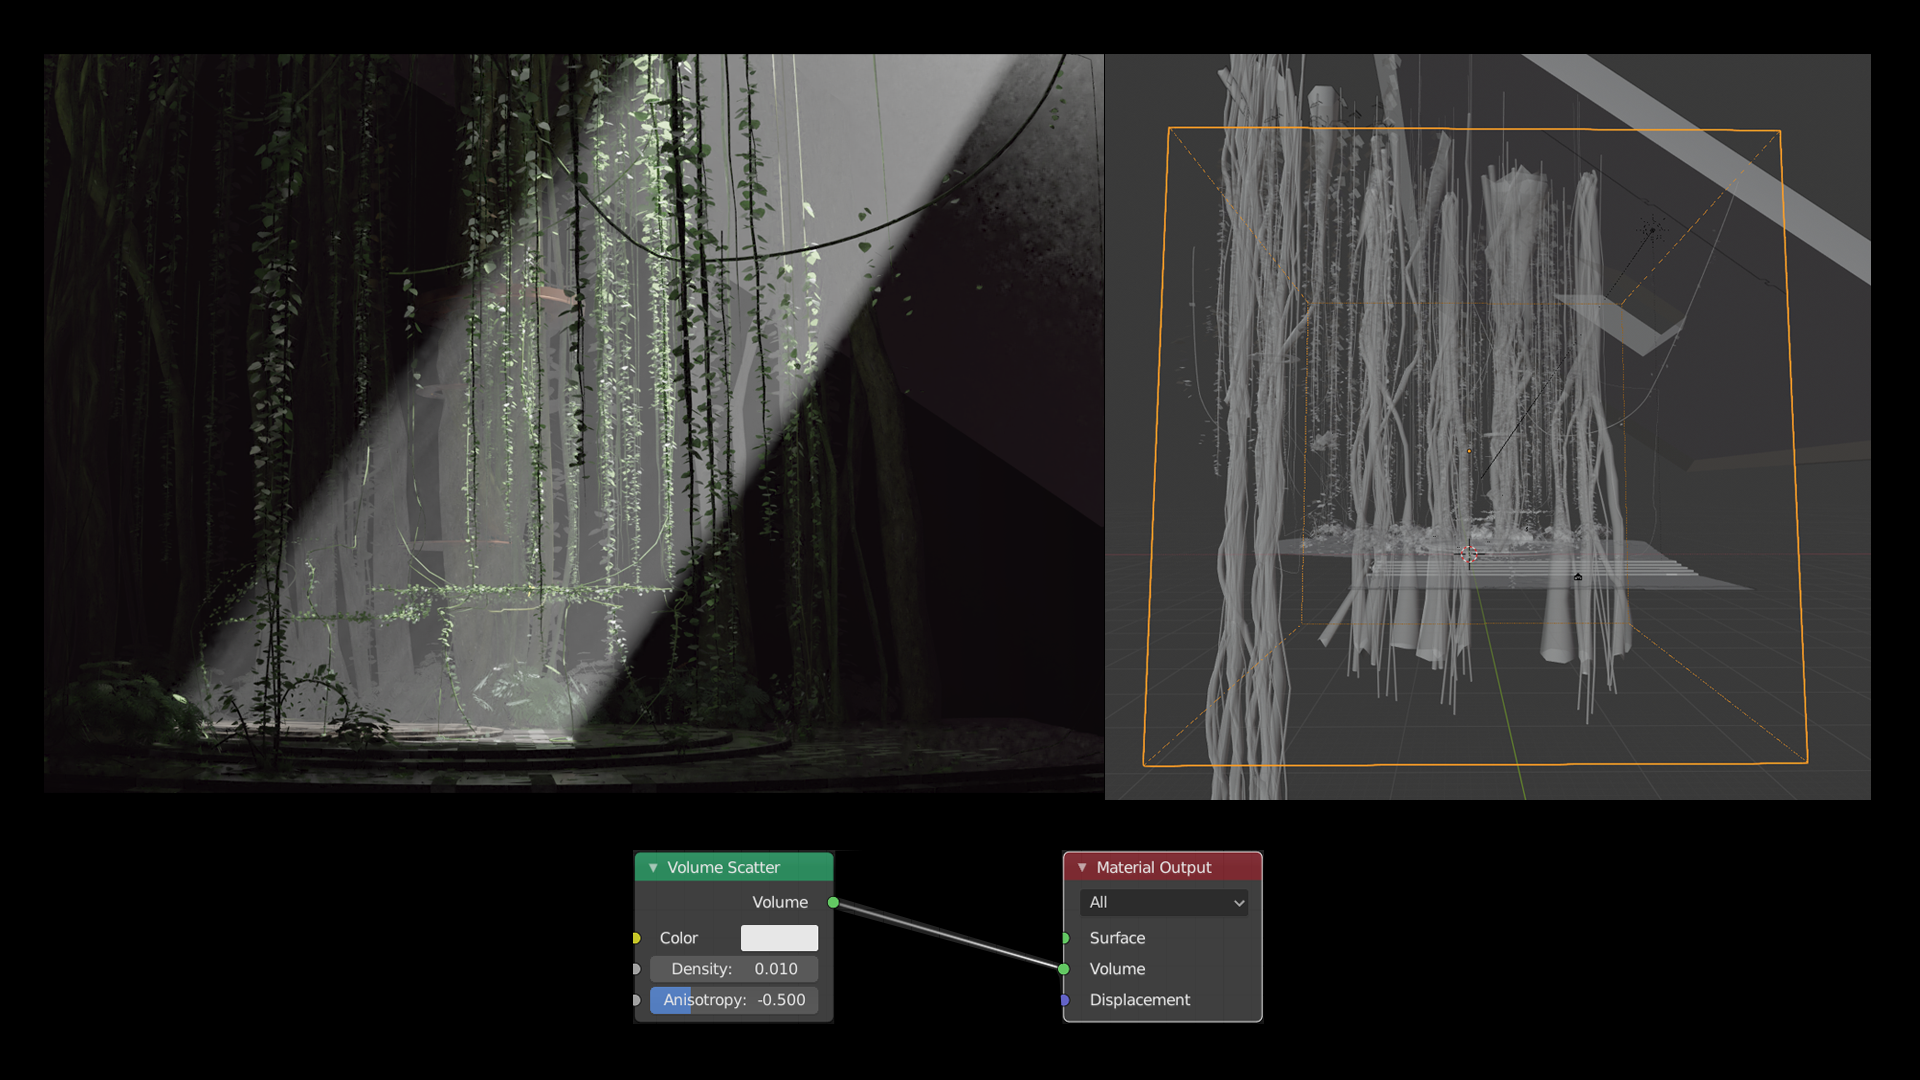
The scene also contains a cube with the Volume Scatter shader, which allowed me to set a level of volumetric fog in the scene and helped with enhancing the overall atmosphere.
Rendering
The renders were made in Cycles. I used a panoramic camera (Fisheye Equisolid- Lens 90.00, Field of View 180 degrees).
Because the camera angles were set from the beginning, I knew exactly what other renders I’d need. For every single render, I had a separate folder containing the scene, and adjusted it to fit the final render best. I could, for example, toggle the lighting and volumetric fog for the benefit of the whole scene.
Sketchfab Scene
The scene available on Sketchfab is a bit different from the Cycles renders. The original scene is massive, and I had to heavily optimize it. EEVEE helped me a lot here; I unified a lot of materials into larger chunks. This also helped me orient myself in the scene. Overall, exporting the scene from Blender to Sketchfab was really easy and effective; I only had to readjust some materials, pack all textures with the project, and add post-effects.
I hope others find some of this information useful. I learned a lot myself while creating this scene. See you at the next one!
About the Author
 Petra Sedlarova, 3D artist in Bohemia Interactive. Artist at work and in my free time.


Very nice !
Don’t mind if I set this as my wallpaper ?
Sure you can use it.
Very nice work. I really like the atmosphere.
Could I ask what project you work on at Bohemia?
I work on project Ylands.
Sure you can use it.
pekna praca len tak dalej
Díky:)
Jen tak dale, tesim se na tvuj dalsi projekt:)
Very well done, indeed! :) I see that Blender gained some more popularity in BIS team since I have left. That’s so good to see! ;) Greetings!
I love Blender. Especially my own projects I make exclusively in Blender. :)