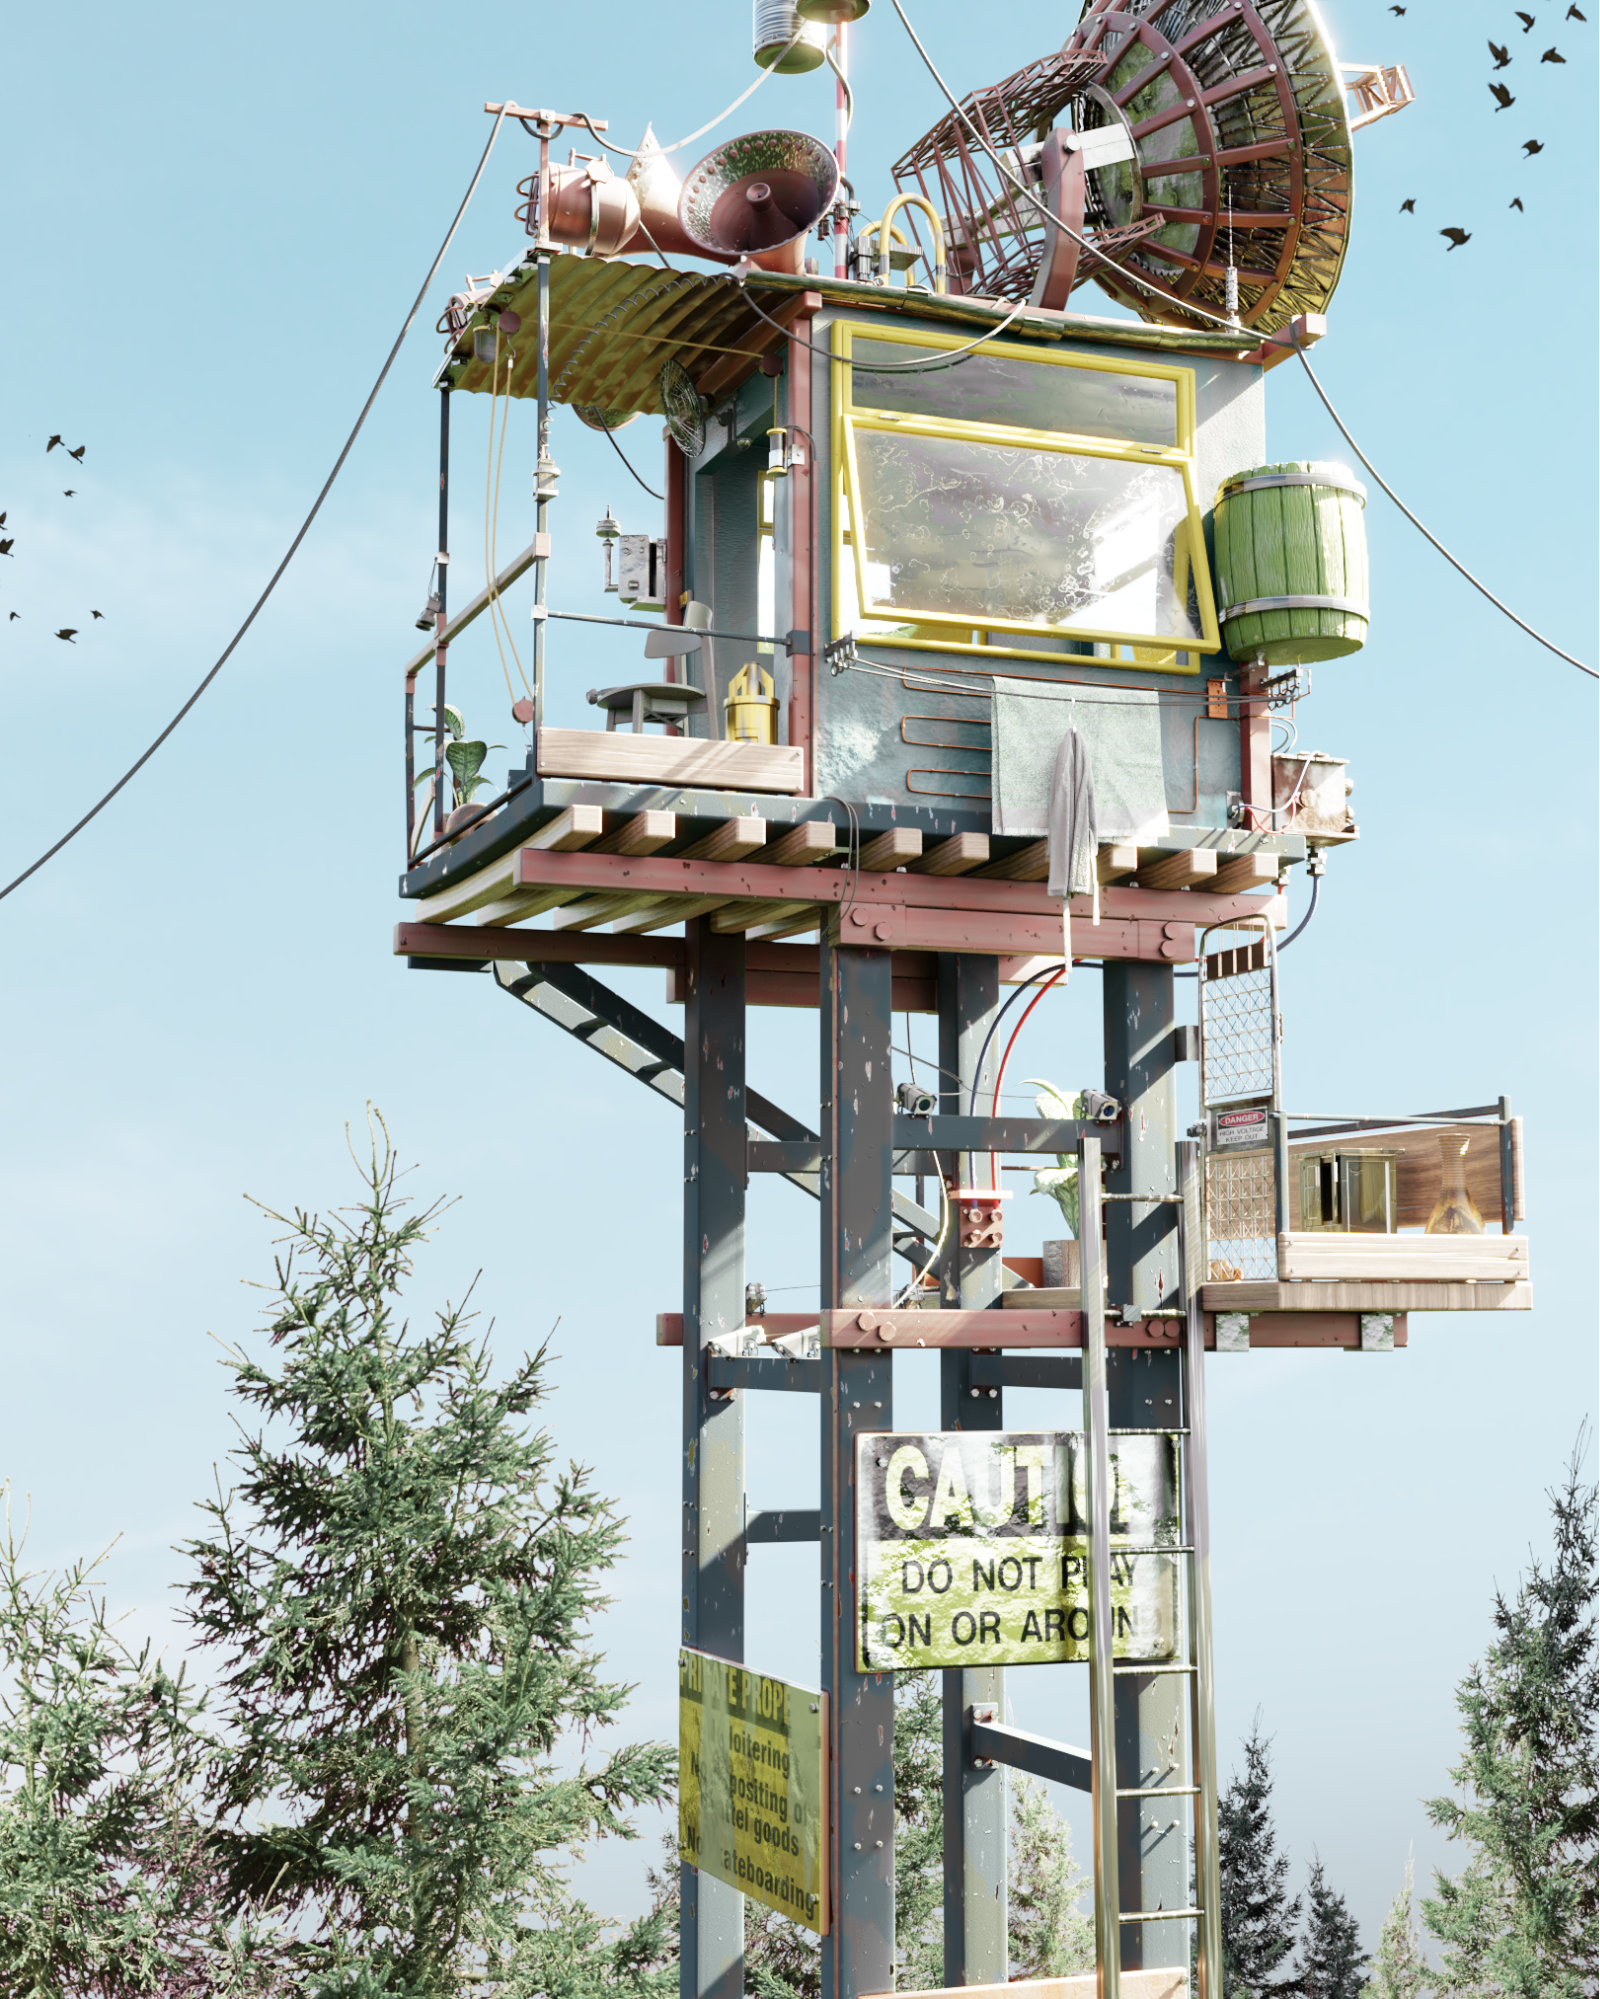
Behind the Scenes: Watch Tower
About Mohit Pundir
Hi, I am Mohit Pundir (“ace7410” on Blenderartists), 27 years old, from Singapore. I am a self-taught CG artist with a passion for animated movies. I am also a software engineer by trade and around mid-2016 I discovered Blender while I was pursuing a degree in Computer engineering.
I was introduced to animation as a week long course when I was still in school (~2009). During that time we were introduced to different animation styles like flipbook, claymation, stop motion, and how they are all done.
Warning: watch out for loud music. This was created when we had not much knowledge about editing, copyright, or YouTube.
At that time I was quite confident what my future was going to be. I was interested in drawing and really loved the idea of creating animated movies. However, at that time Singapore wasn’t really known for animation or anything to do with it and I was unable to see any future if I were to pursue a career in it. YouTube also wasn’t that big, so creating an income out of it was never even considered.
Anyways, fast forward to 2016 and I really wanted to get into animation and discovered Blender, which is capable of doing everything needed for animated movies: sculpting, modelling, lighting, texturing, and compositing. So I started learning from Blender Guru, CG Cookie, CG Geek, and YanSculpts. For 2019, I am trying to improve my ArtStation portfolio, posting monthly while learning and improving from the previous post. I am still improving on things like scaling, lighting and compositing, but quite pleased with the artwork I was able to create this year.
Inspiration
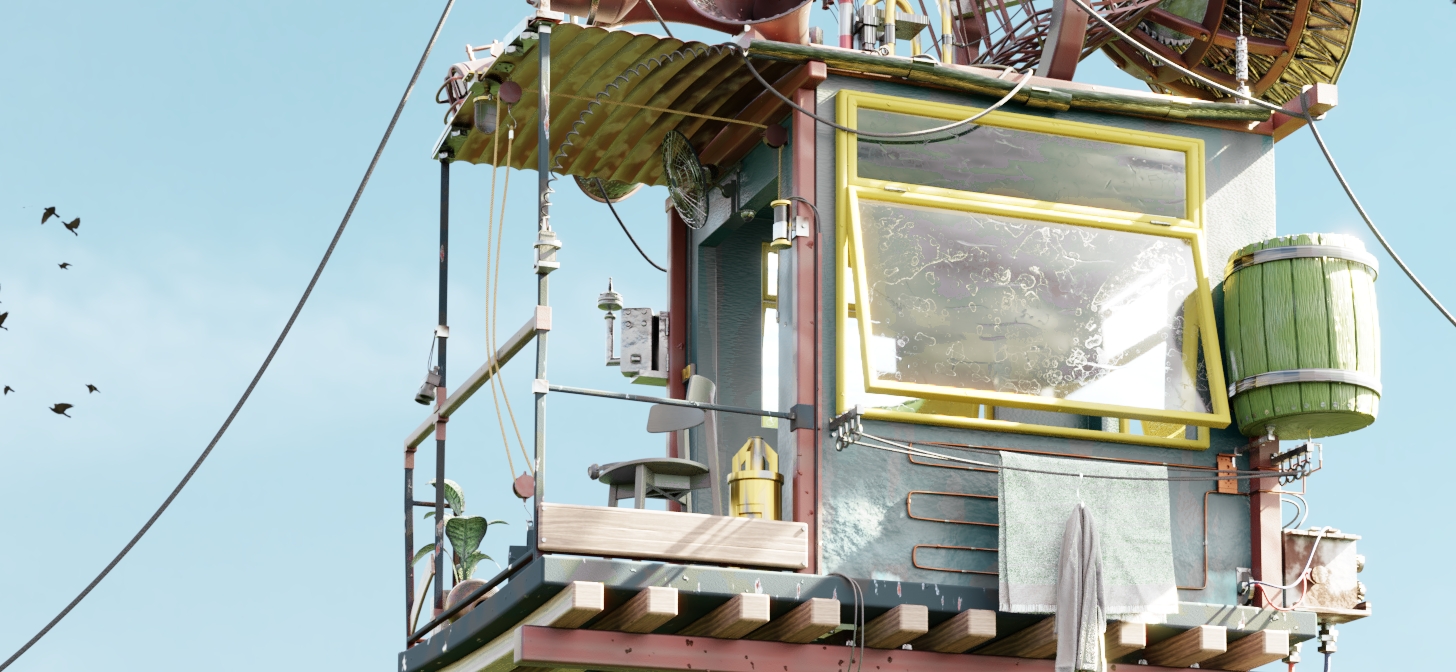
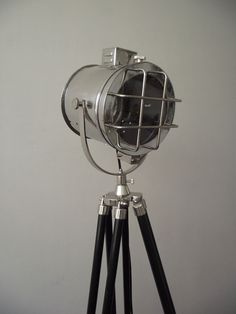
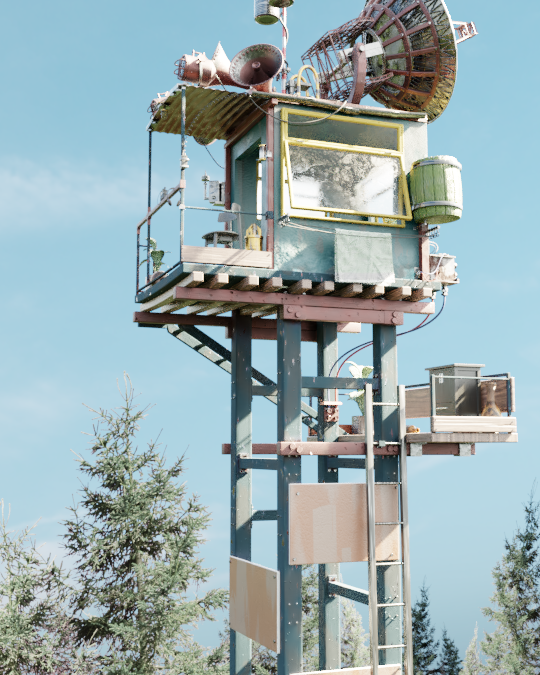
I have been a fan of things people create ever since I joined the Blender community. The often complex and different projects seem doable once you learn more about the process and techniques used in making them. For my artwork I try to incorporate several things to learn and push myself, be it from a modeling or texturing perspective. For inspiration, I wanted to create something other than just an interior visualization and wanted to add as many details as possible. For this artwork I tried creating something of a watch tower/guard house and then added things that would seem logical, like search lights and speakers. Another thing I wanted to learn was to use Blender procedural textures. I wanted to minimize the use of any material library (at least for the main objects) and just try to understand and create the materials.
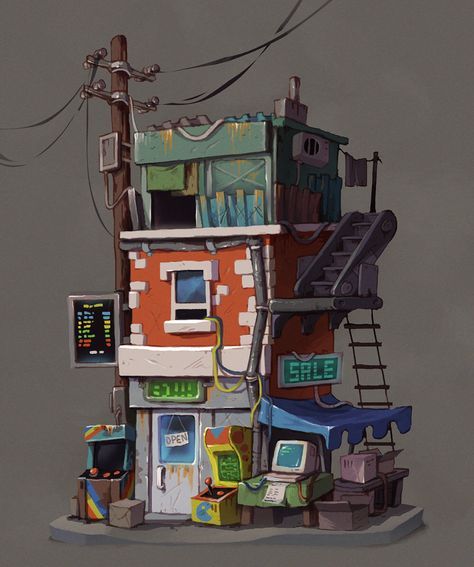
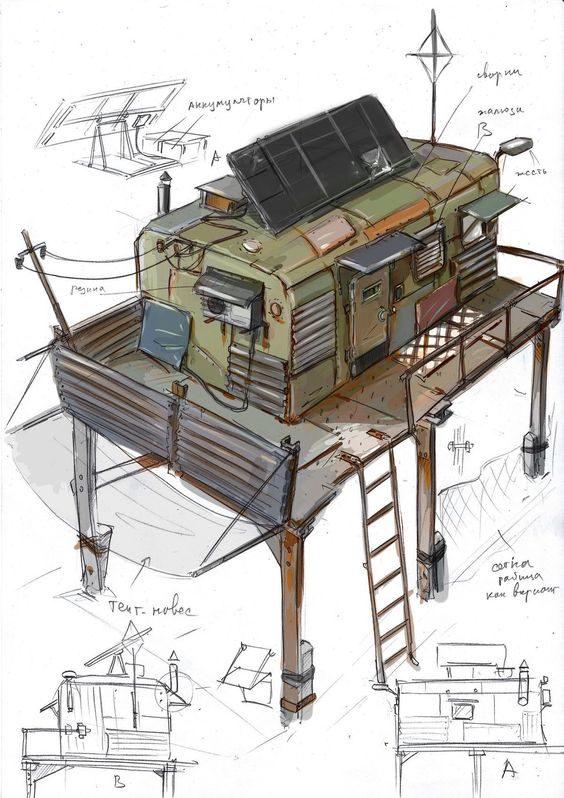
References
Mostly all of my references are from Pinterest. First I tried looking for a watch tower and then from the related images tried to find more features to add into the image.


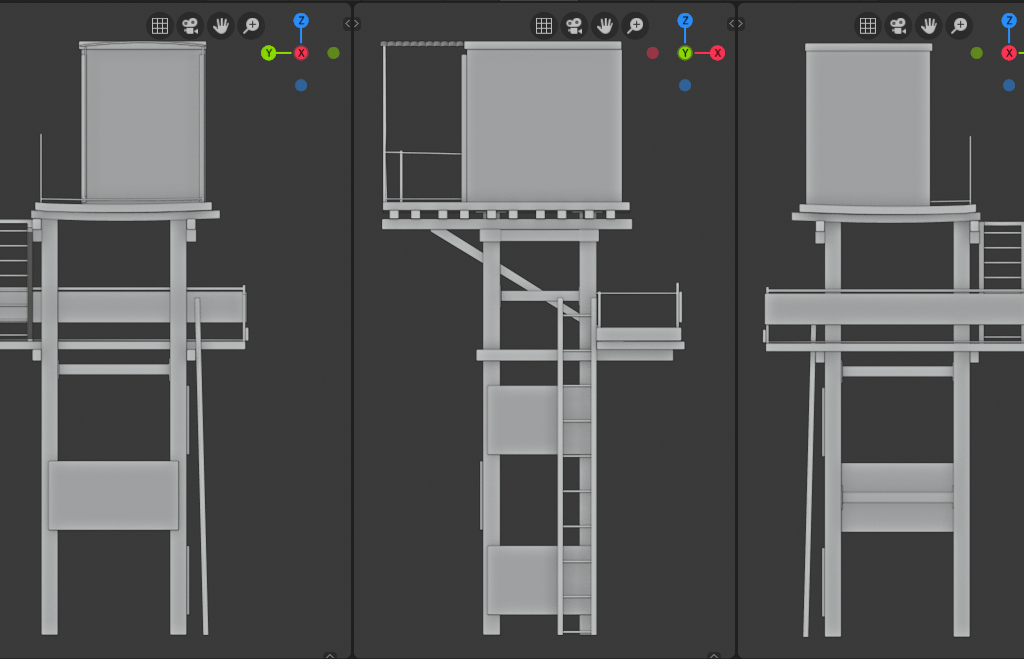
Modeling
For modeling, I tried to focus on the main subject (tower) and used the basic objects to create the main shape. Through this I would get a clear idea of what the final model would look like. Once the initial modeling was completed I would start using the modifiers to further work on model.
Modifiers
Blender is known for its modifiers and they make the workflow very easy and flexible. For this project I tried making use of them as much as possible.
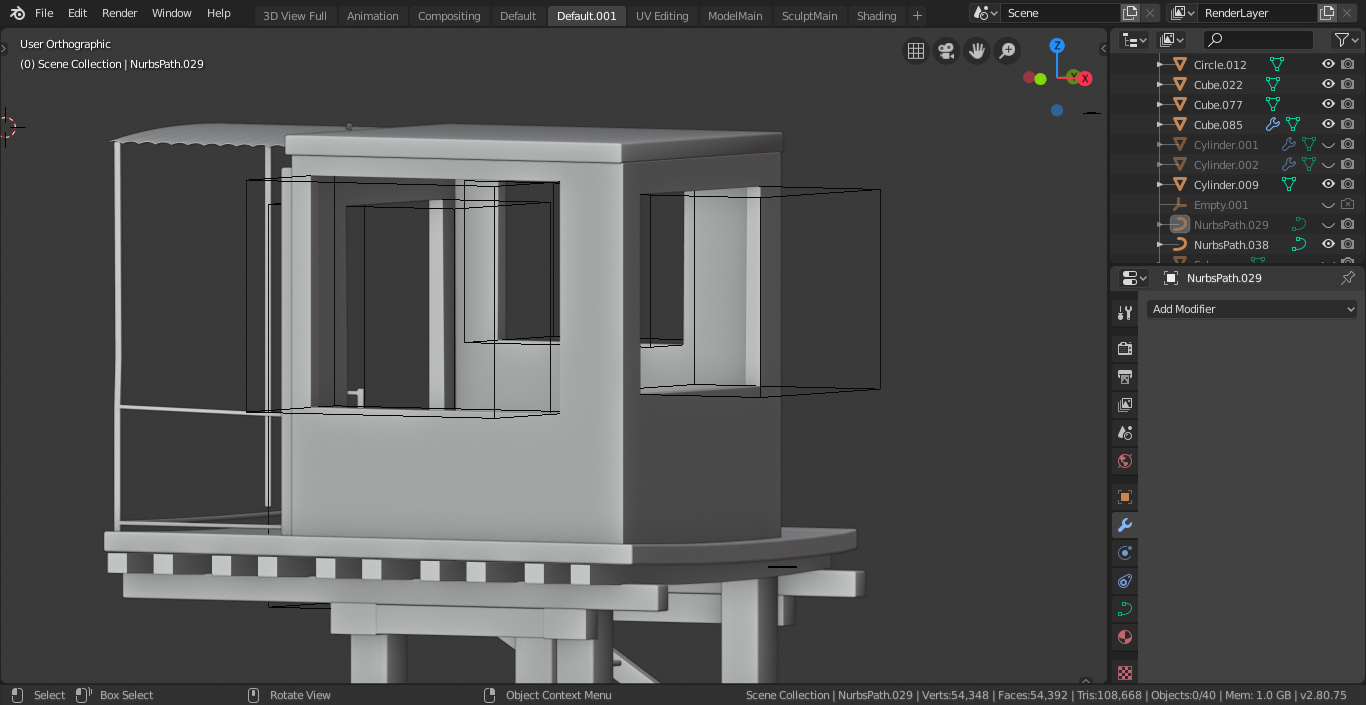
Boolean + solidify: To create space for windows and doors. Instead of using the archipack for them I prefer using the boolean modifier and then just modeling the windows separately. The boolean modifier will create the space for the window while solidify will give the proper thickness to it.
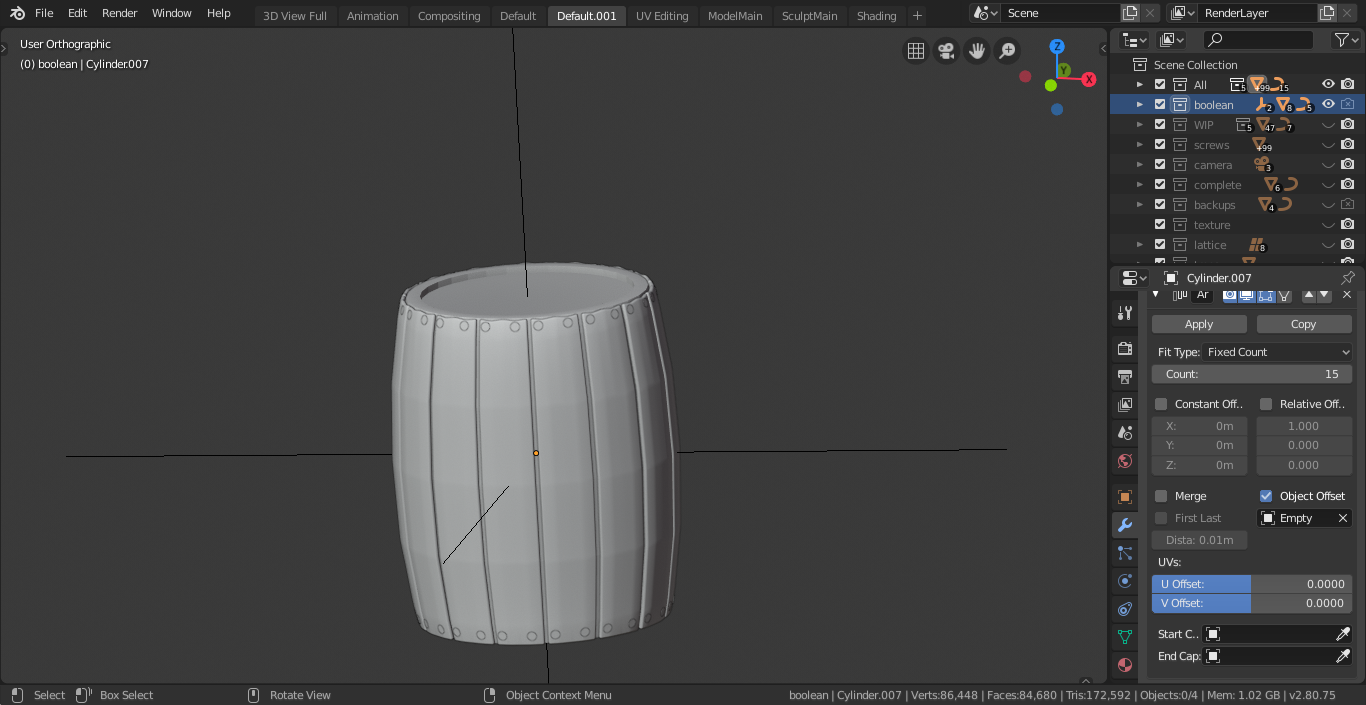
Array: another common modifier, anything that requires duplication or multiplication can be created with the array modifier. Another way of using an array modifier is by using the “object offset” option. With this feature I was able to select any object (Empty) and make the duplicates around it.
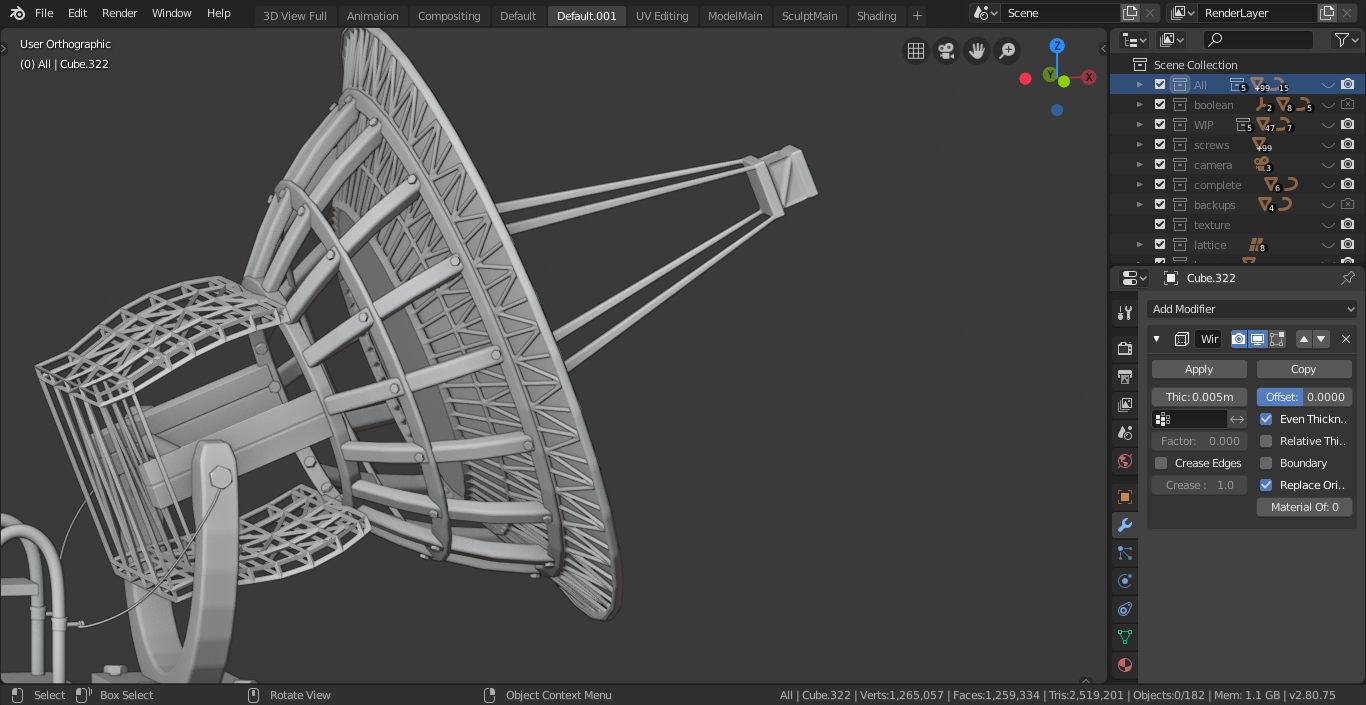
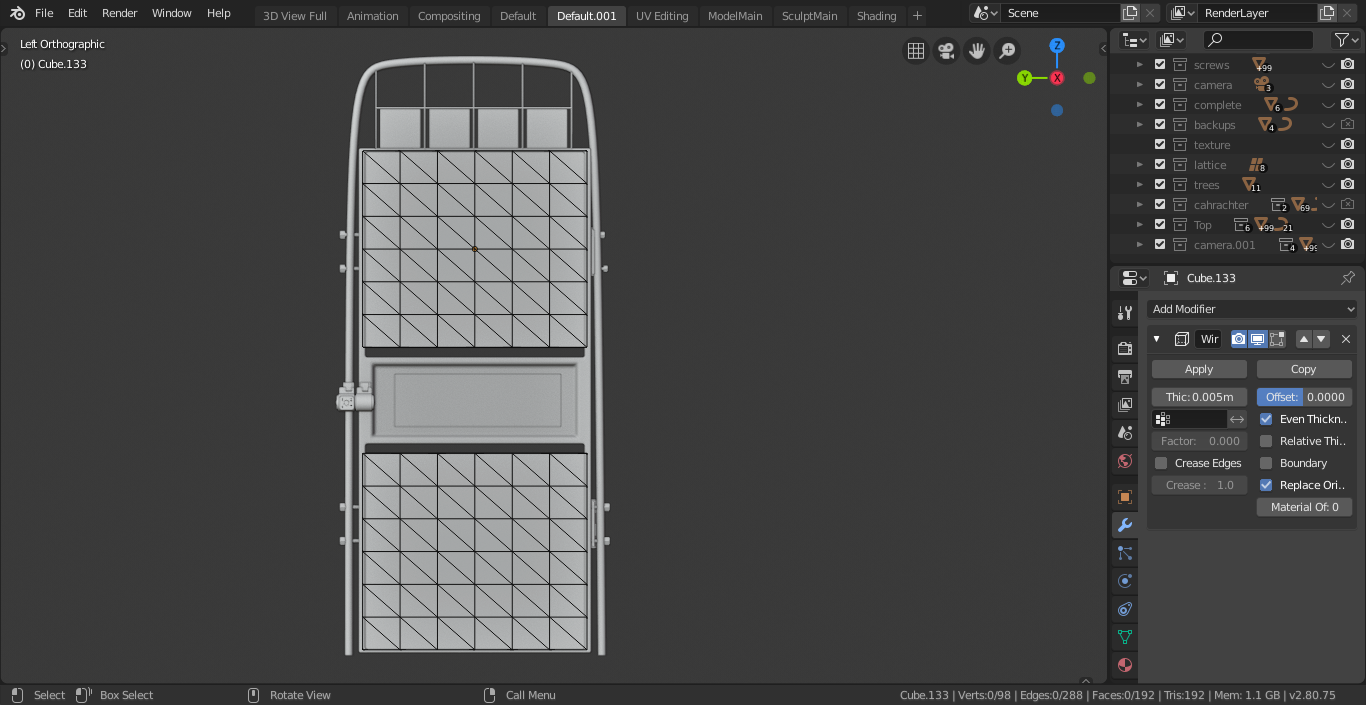
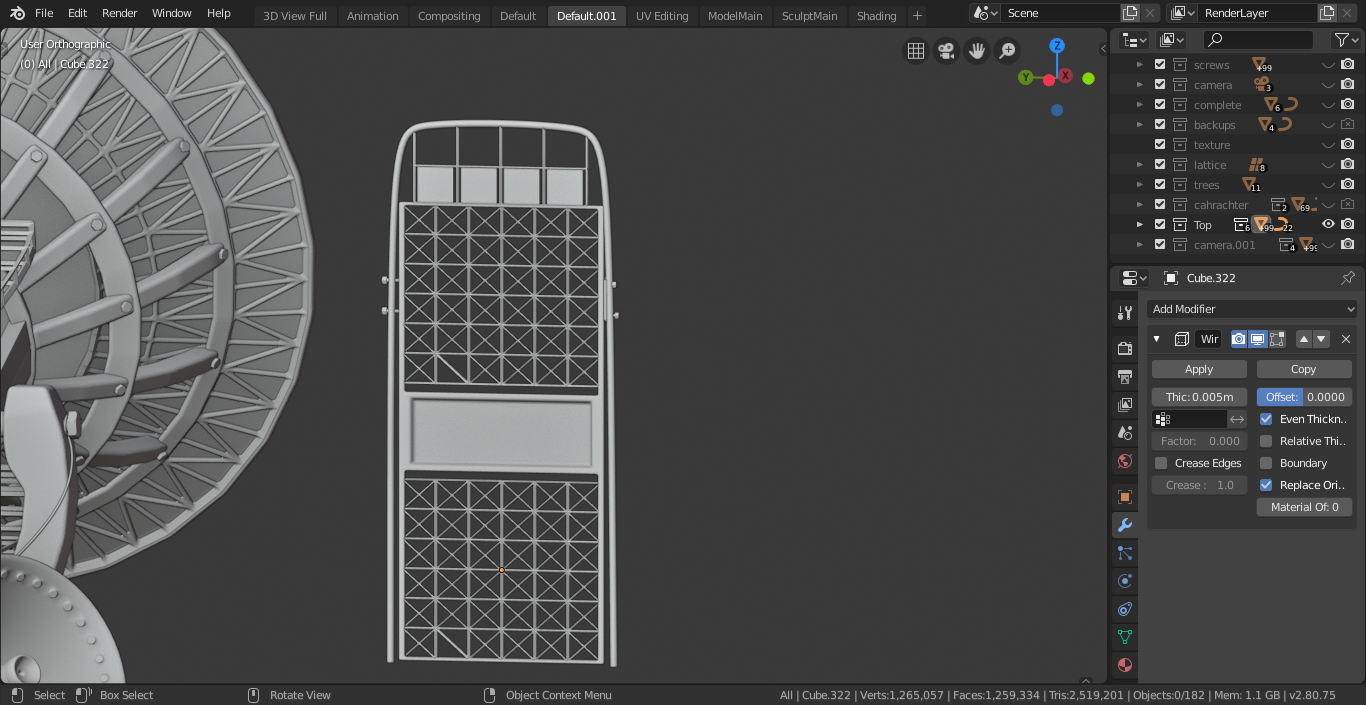
Wireframe: in order to create the metal frame-like structure, I used a plane/circle object and created the edges based on how the frame is supposed to be (ctrl+t for triangulate) and then used the wireframe modifier. Duplicating the existing object and then using the modifier would create a frame for that object.
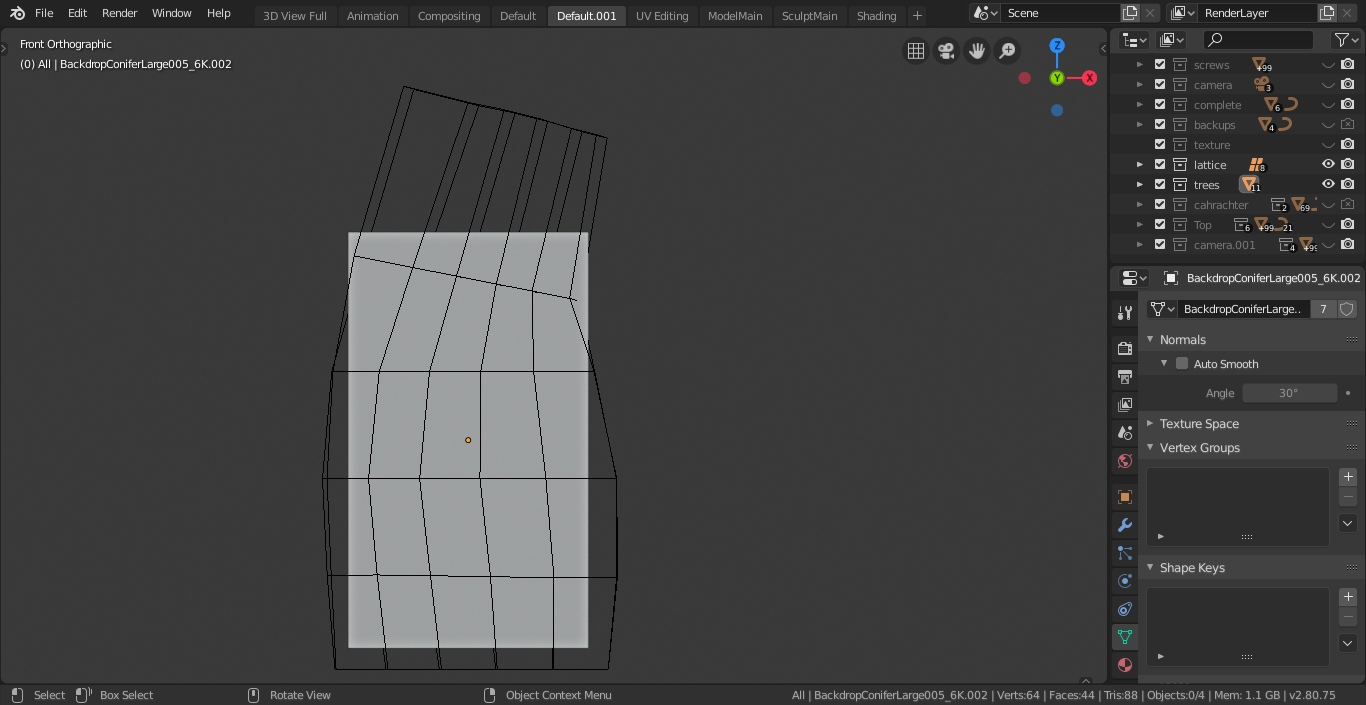
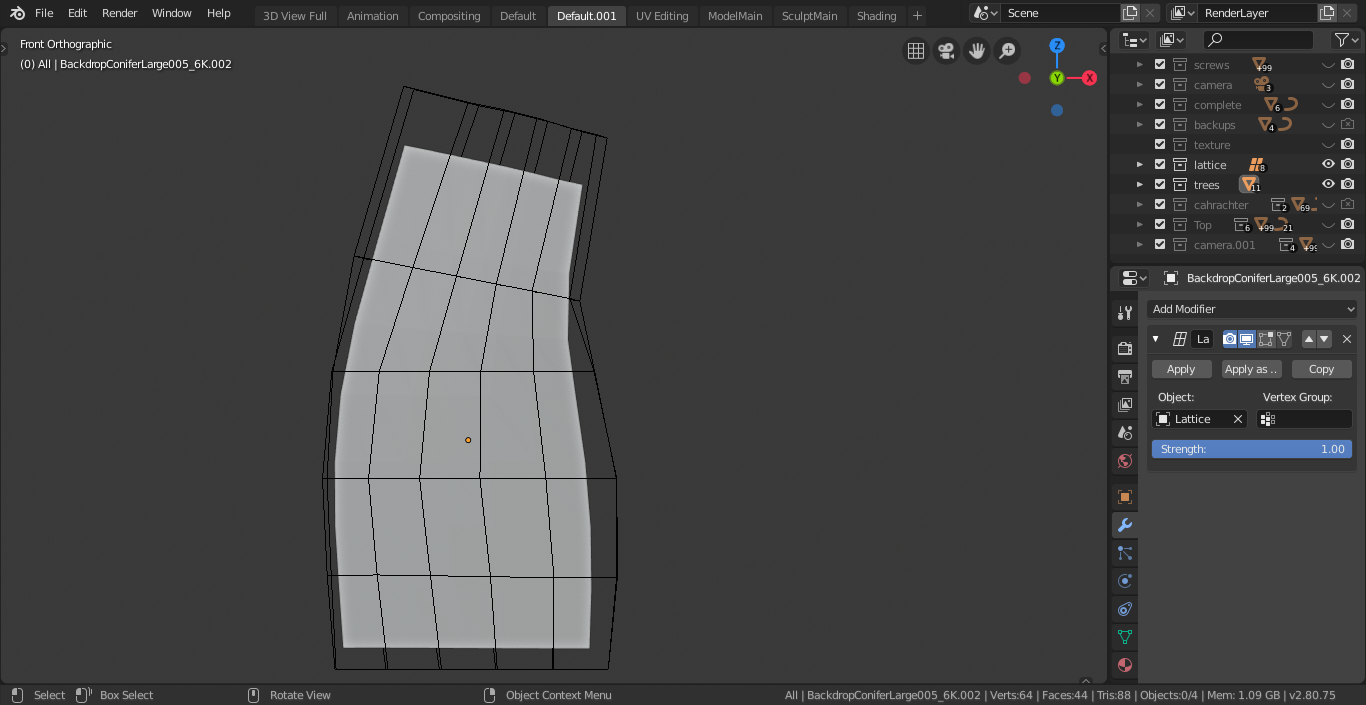
Lattice: In order to add trees and birds into the project, instead of using particles or 3D objects, I opted for 2D images. For trees I used one 2D image and then in order to add some variation I used the lattice modifier. I just subdivided the mesh(2D image) to allow for easy deformation, created a lattice around the mesh, and added edges to it. I deformed the lattice to my liking and finally added the modifier to the mesh and assigned the lattice as the target.

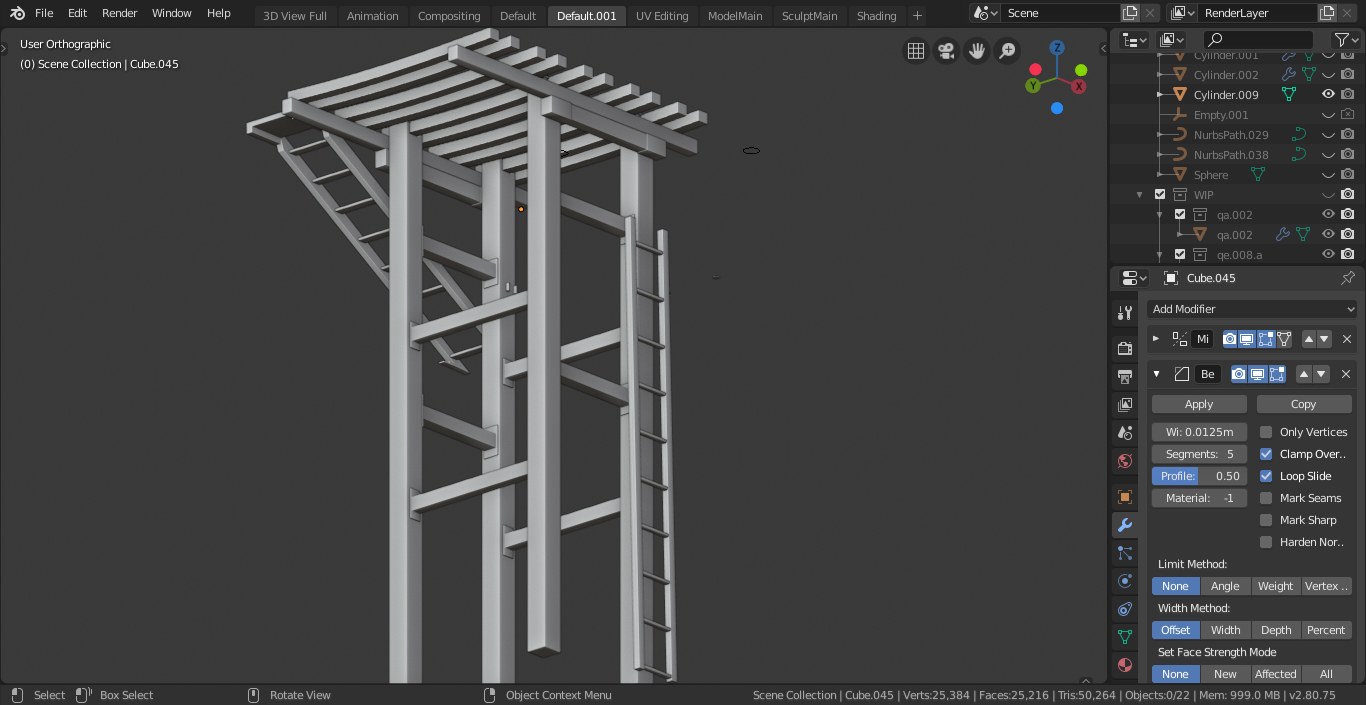
The rest of the modeling is just following the basic modeling techniques like extruding, rotating, and scaling. I just used the objects that resemble the actual objects the most and started modeling. For my artwork: speaker and lights were created from cylinders, windows from cubes and the satellite dish is just a circle. Another thing I added in the artwork were wires/cables, since they are everywhere in fantasy or reality. I just used curves(path) with various depths to create them.
Texturing
For texturing, I followed the same process as the modeling. I started with a default color and then worked my way up to the actual shader.
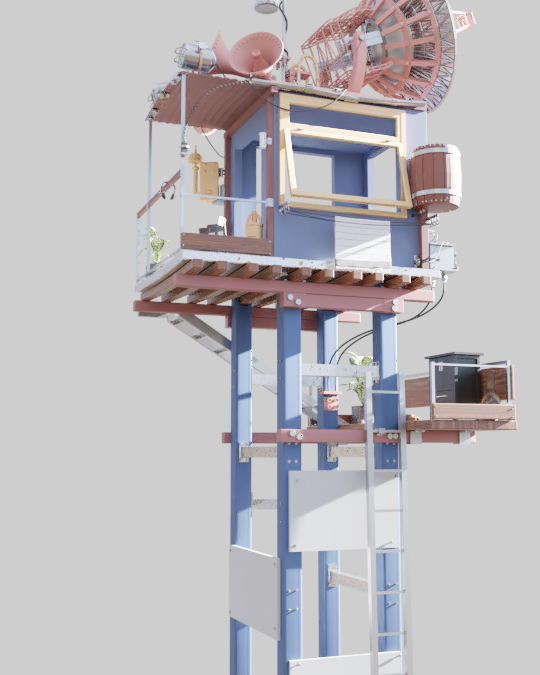

Even with the default color (principled shader) I was able to get an idea of how the final artwork would look. Since I was trying to make do with procedural textures, texturing was just the principled shader with a lot of noise/voronoi textures for variation and alpha mask.
The thought process of texturing was to create 2 types of variations: one was to showcase the dents, rust, and chipping away of the paint, while the other was to show the fading of the paint.
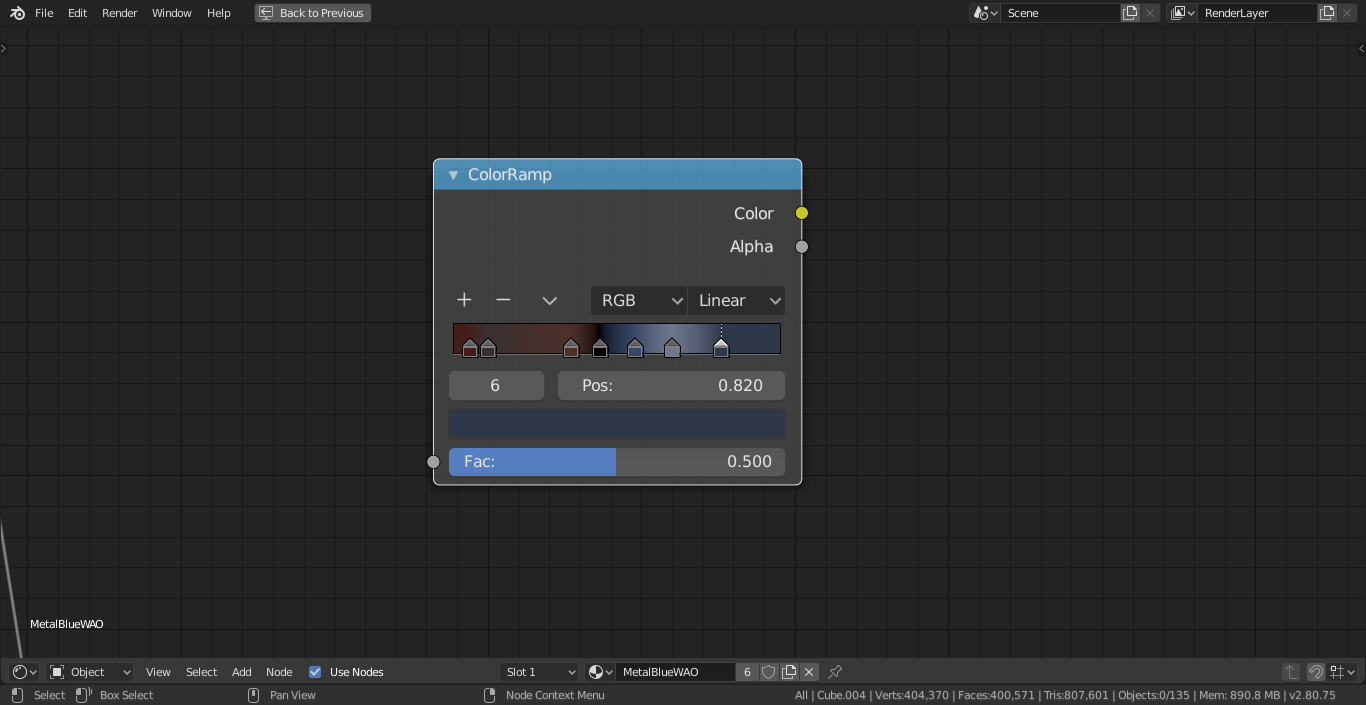
Creating the color palette (image below): everything on the left of the color black was used for the rust and everything on the right was used for the main color. To break away from monotonous coloring I used some variations of the same color. For the main color I used dark grey blue (most right), I created two other variations of the same color: one more saturated and lighter and the other less saturated and lighter; the same goes for the rust.
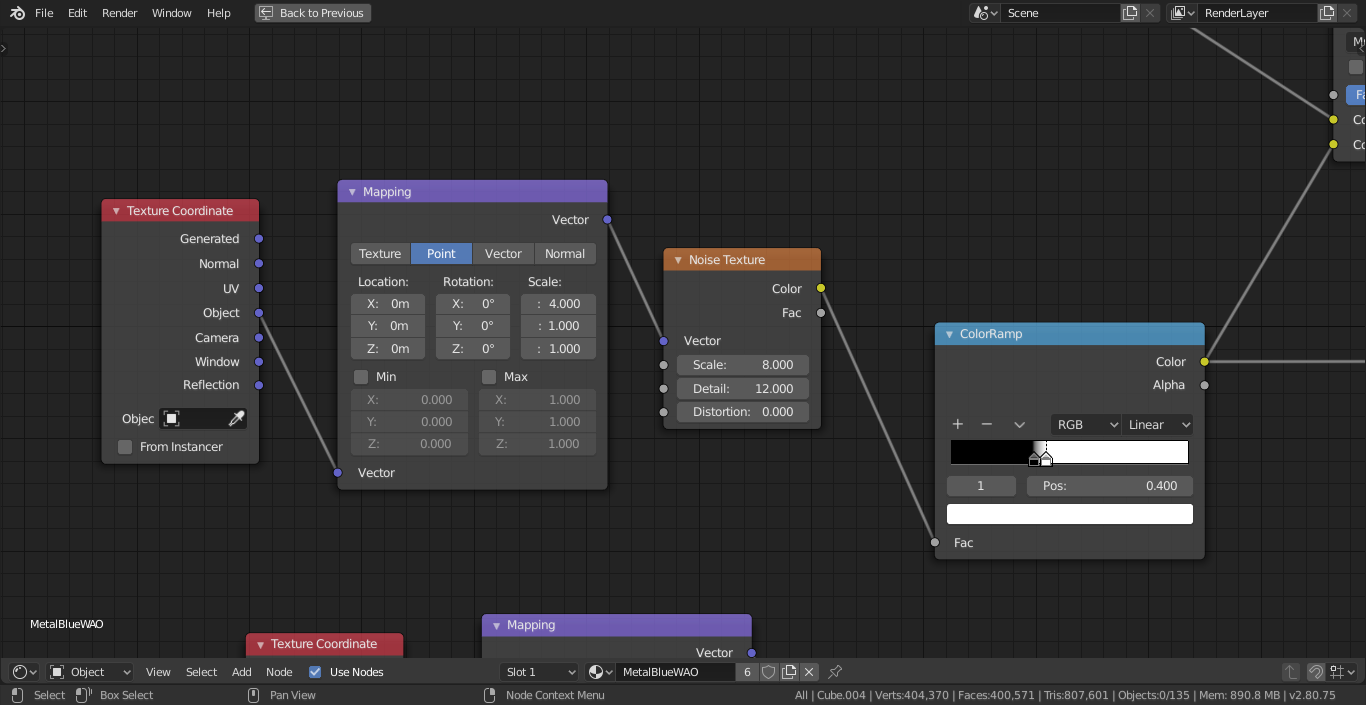
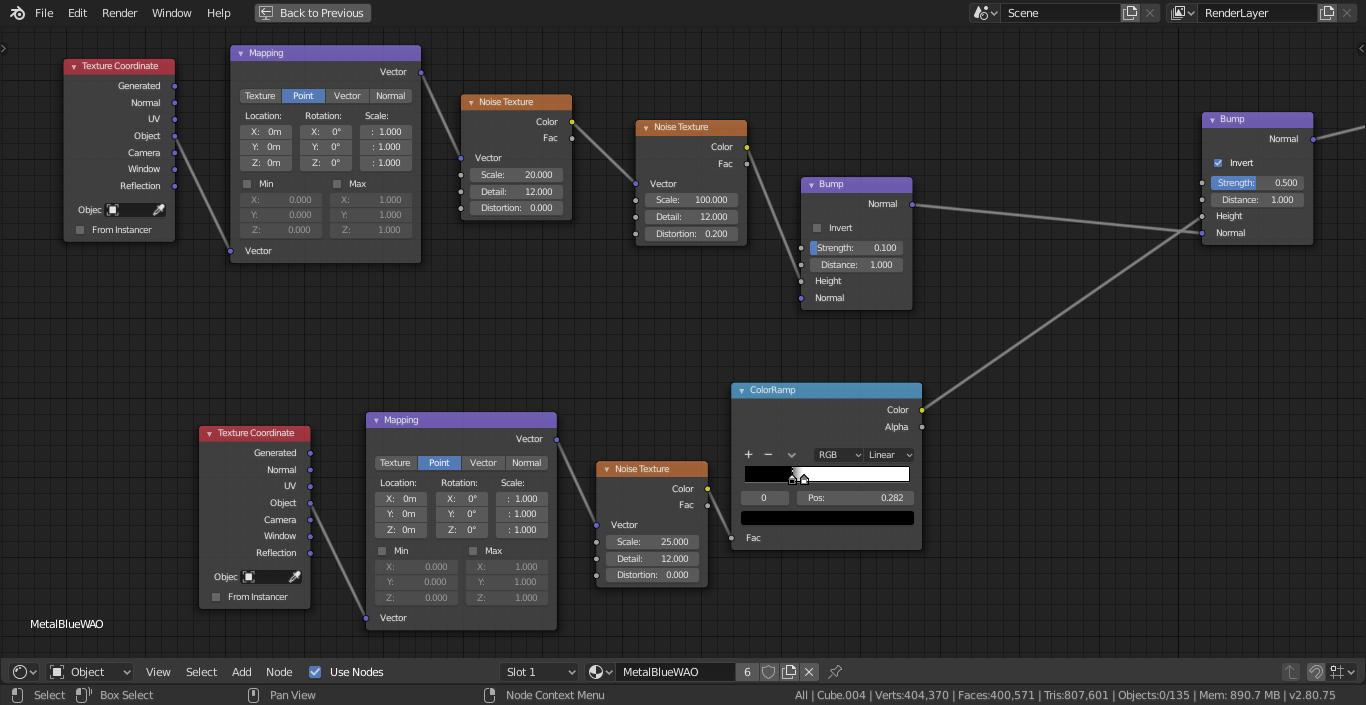
After the color palette was created, I just used a noise texture to determine which part would be in color and which in rust. I tried to use different options in texture coordinates to get various noise patterns and to add vector maps in between texture coordinates and mapping nodes to produce more noise patterns.
After that I used another noise texture, which would only affect the color side, to determine which part should be faded. For the fading effect I just used the same color palette and ran it through the hue saturation node (under color option) and just decreased the saturation value by half.
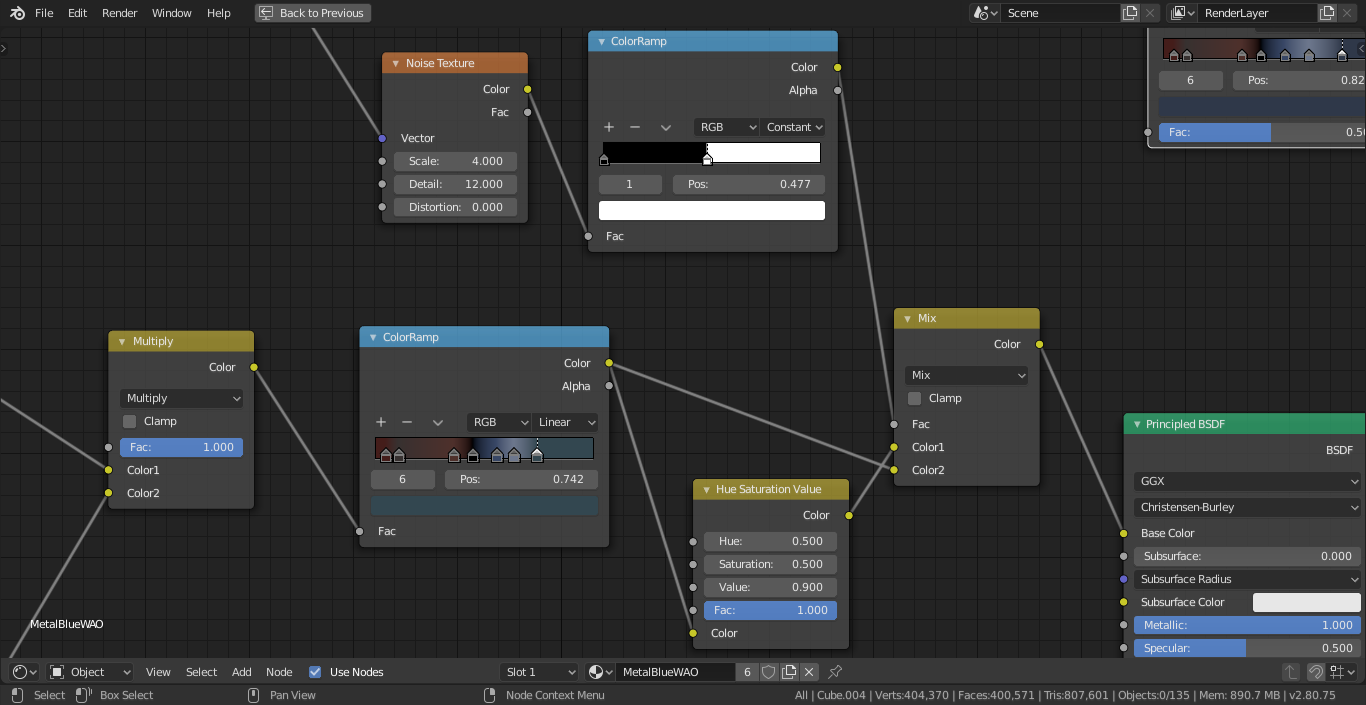
The mask created using the noise texture could also be used for roughness. Since the mask had already separated the color and rust, I just used the same color ramp and plugged it into the roughness socket. For the bump map I created two variations, one to show the generic bump using noise texture, and the other to show the accumulation of the paint or small bumps on the wall. For the second bump I followed CG Cookie’s method (Creating realistic icicles) of creating ice lumps.
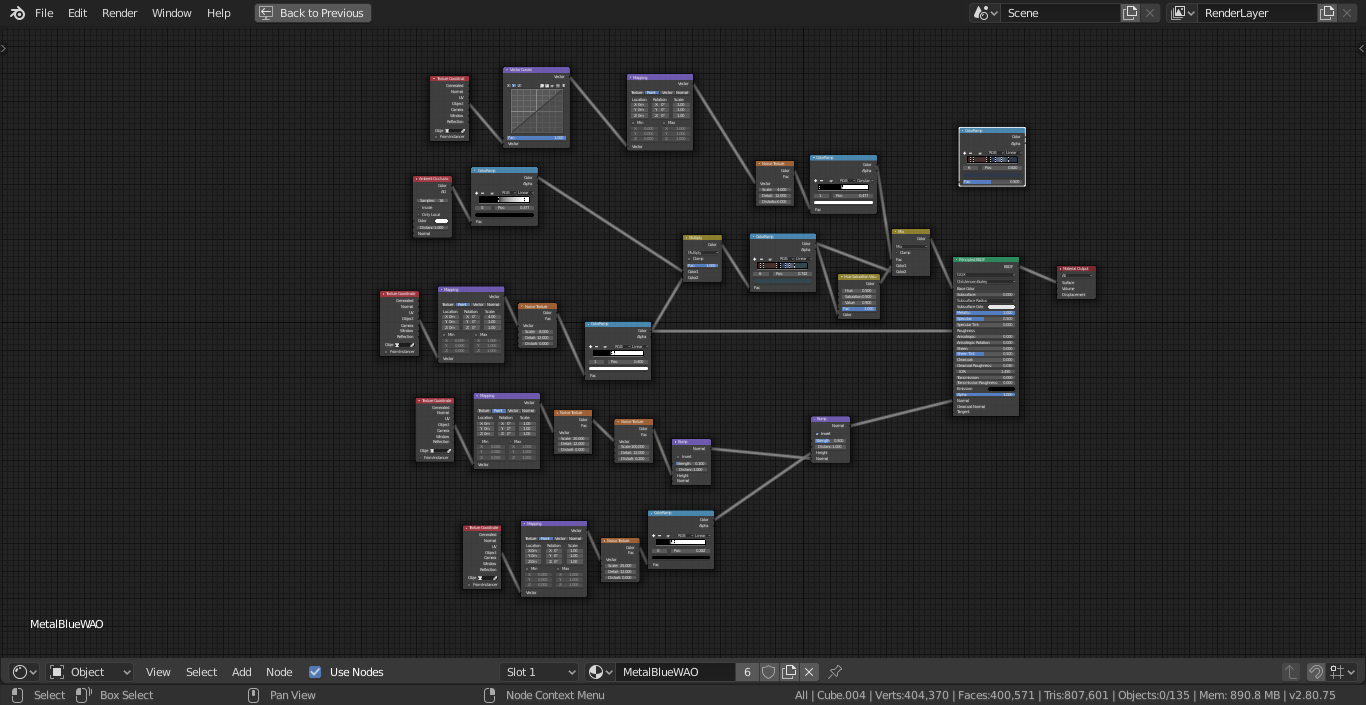
This may not be the best way to create the texture, but since I was trying to create it all by myself I ended up creating this mess. The rest of the textures were also created using similar techniques.
Lighting
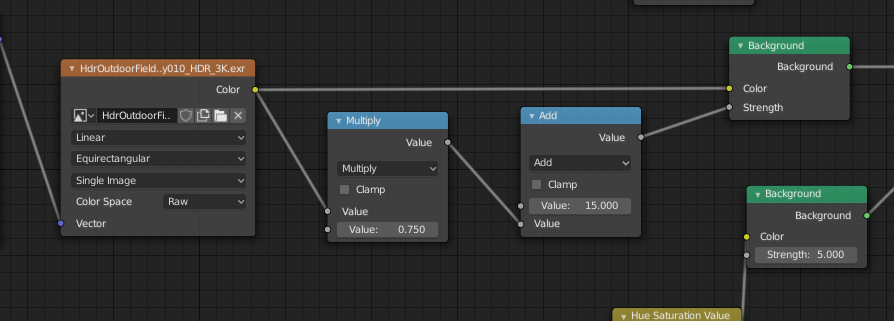
For lighting I wanted the scene to have good shadows, but if I were to use just one HDRI with strong sun rays (clear sky), the area just below the main house would have been in complete darkness. So I used Blender Guru’s technique (How to do outdoor lighting in Blender) to obtain both light and shadows.
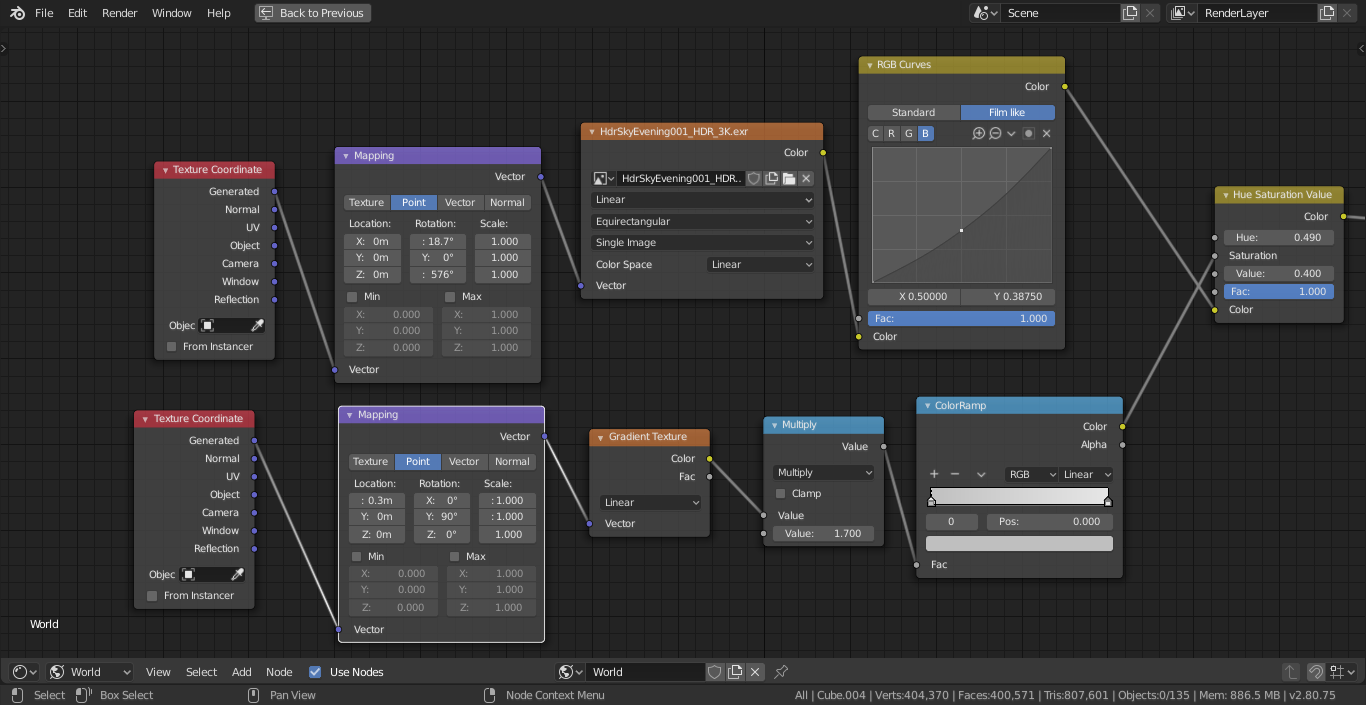
For the background I used a gradient texture to create a gradient effect (top down) and then used that as the saturation value for another HDRI (anything with clear blue sky). This approach resulted in a blue color on the top that slowly fades to white as it approaches the bottom of the image.
Compositing
Compositing is not one of my strong points so I just added a bit of fog glow to the image.
Rendering
Originally I created this project to test EEVEE, however after creating everything I wasn’t able to run EEVEE smoothly, due to my workstation limitations, so I ended up creating and rendering it in Cycles.
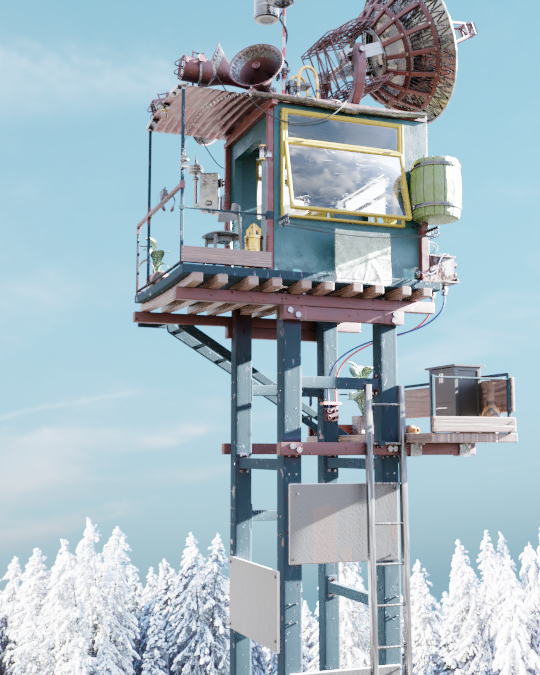
Final Render
About the Author
 Mohit Pundir, Self-Taught 3D Artist with a strong passion for Animation Movies


Love the towers great work and inspirational will follow your work