
Behind the Scenes: Royal Bulgarian Army Dagger

About Me
Hello! My name is Boris, 22 years old, and I am from Varna, Bulgaria.
I am a self-taught 3D artist with great passion for video games, space, history and weapons.
I discovered Blender in mid-2018 and it has changed my life! It is the software that has finally given me purpose and motivation to create, after going through the whole “What do I want to do with my life?” episode. After using Unity for a while, the desire to create my own 3D models was irresistible. As soon as I finished the famous donut tutorial by Blender Guru, I got hooked instantly and went through a whole bunch of other tutorials and reading materials about modeling, composition, lighting, texturing, etc.
Over the past few months I focused entirely on game art, more specifically weapons and props. Currently I am building my portfolio and I am determined to find myself a job in the game industry.
Inspiration
For my personal projects inspiration is something I can’t go without. It brings life to the artwork and you can tell if the person was wholeheartedly invested.
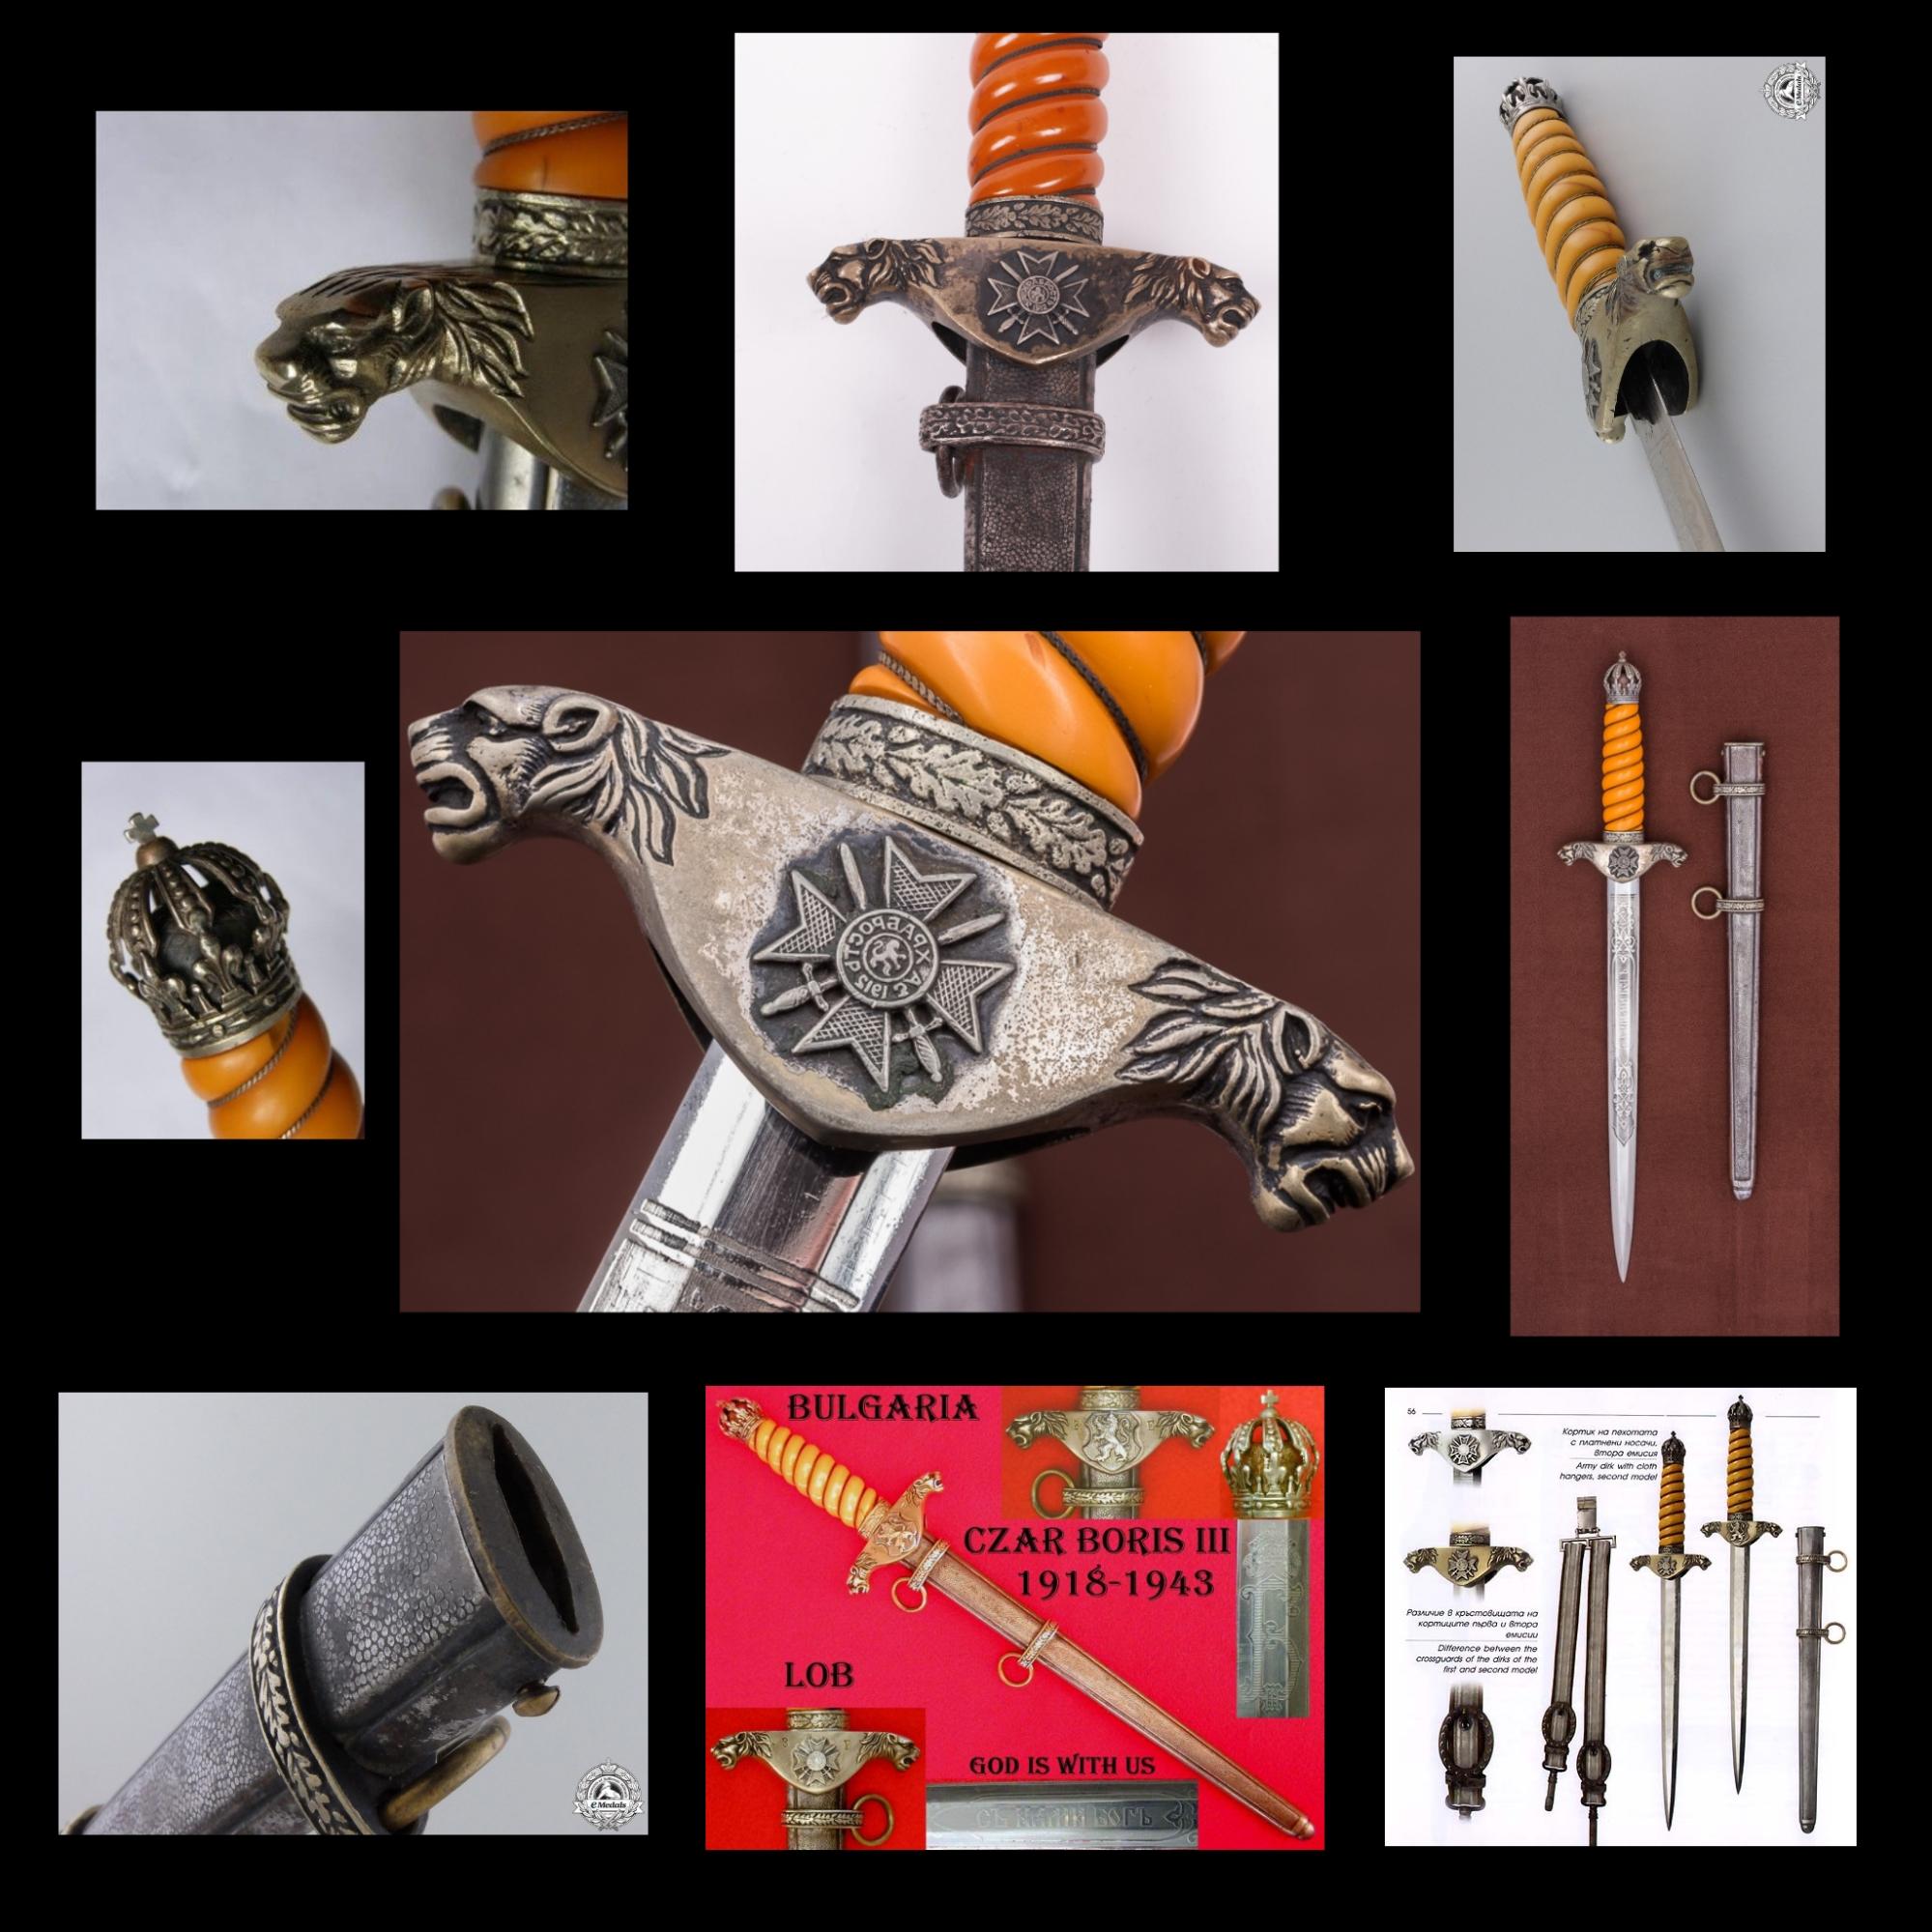
In this particular case I got my inspiration from the World Wars era and the history behind this finely-detailed dress dagger. Such daggers were given to the officers of the Royal Bulgarian Army as an appreciation and acknowledgement for their outstanding service and achievements.
Tools Used
- Blender 2.79
- Substance Painter
- Substance B2M
- Paint.NET
- Wacom Tablet
References
Pinterest, ArtStation and Google are the websites I usually use for reference material. While struggling to find good quality references I stumbled upon a website for militaria collectors where I was able to gather high-res pictures with close-ups that were extremely helpful.
Modeling Workflow
The first thing I go for is opening the reference image in Blender and blocking the model out with primitive shapes using the subdivision surface modifier. After I‘m done with that I start making the high-poly version of each part.
(As most of the early work has been removed I will try to recreate it for the breakdown)
I separated the dagger and the scabbard into the following parts/materials:
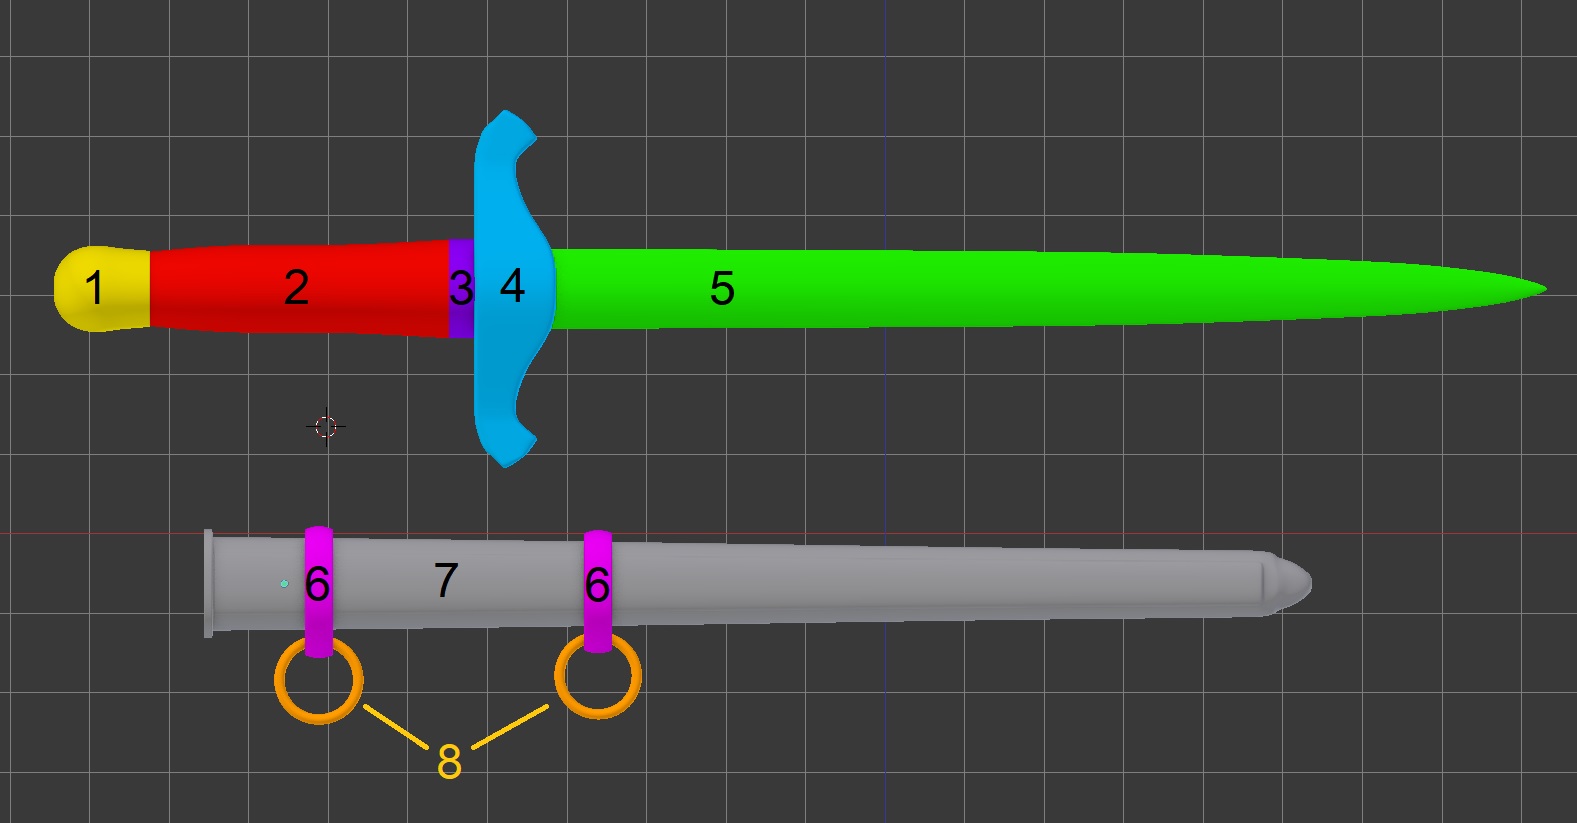
- Pommel (Crown)
- Hilt
- Hilt Circular Band
- Guard
- Blade
- Scabbard Circular Bands
- Scabbard Body
- Scabbard Rings
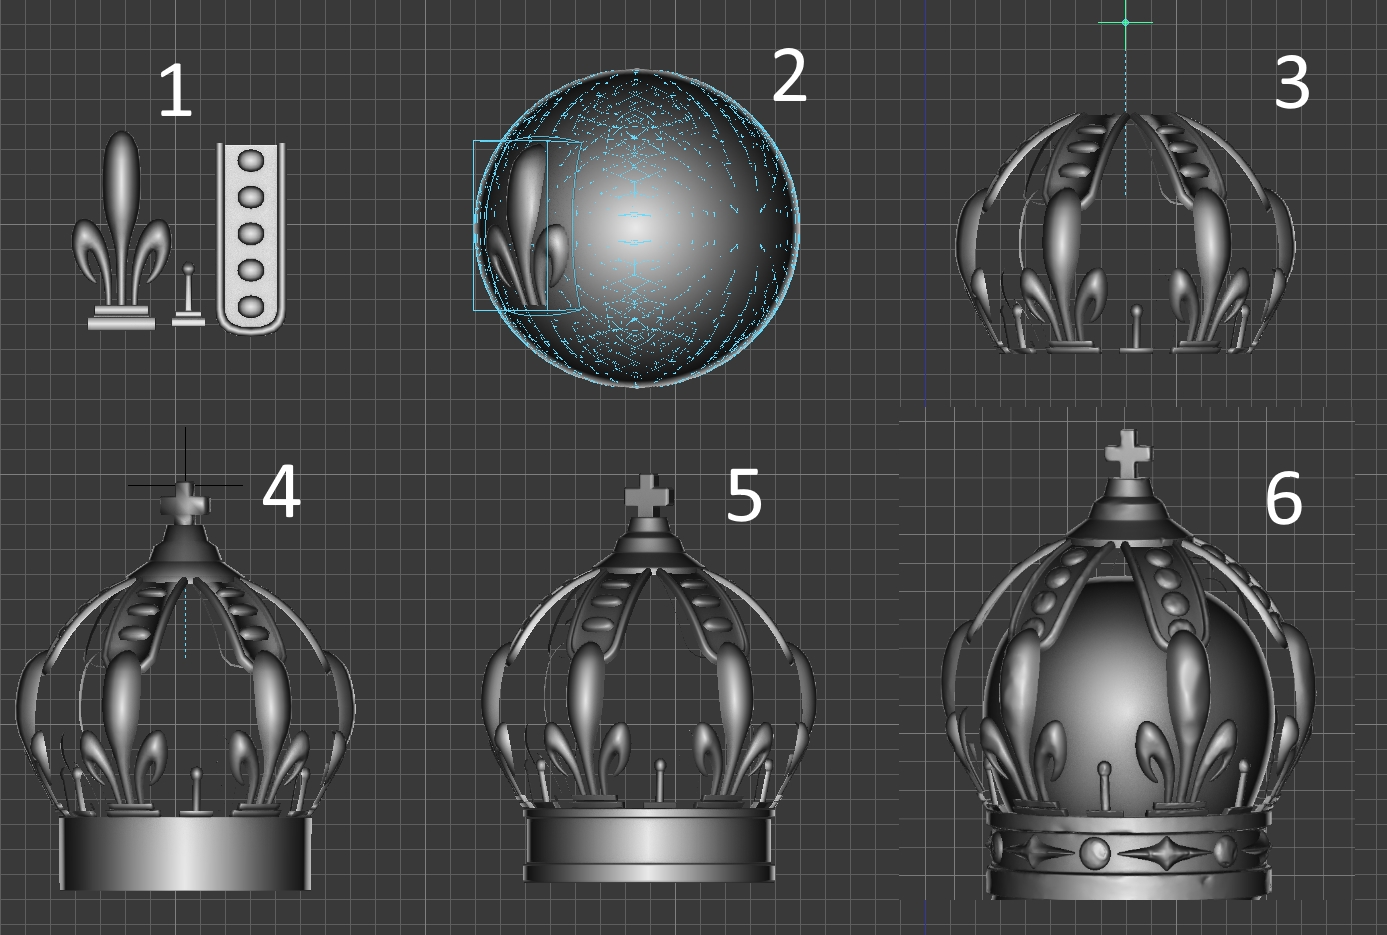
Pommel
I created the segments first, then I made a sphere > shrinkwrapped a Lattice as an object to it > made a cage (simple subdivided rectangle), around the segments, with a Lattice modifier and assigned all the faces facing the sphere to a vertex group and finally added the Mesh Deform modifier to the segments, binding them to the cage.
… and yes, there is probably a better way to do this.
The next step was using an Array modifier with an offset set to an empty object that was simply rotated 60° to achieve what I wanted.
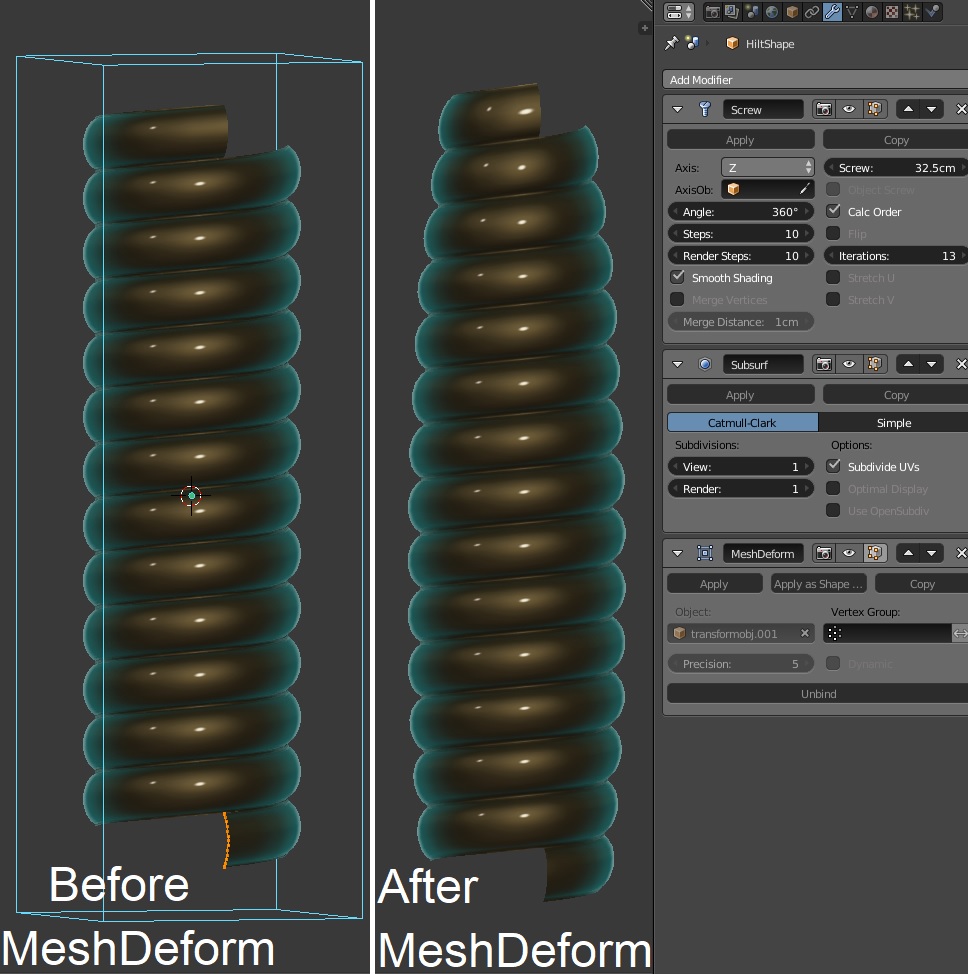
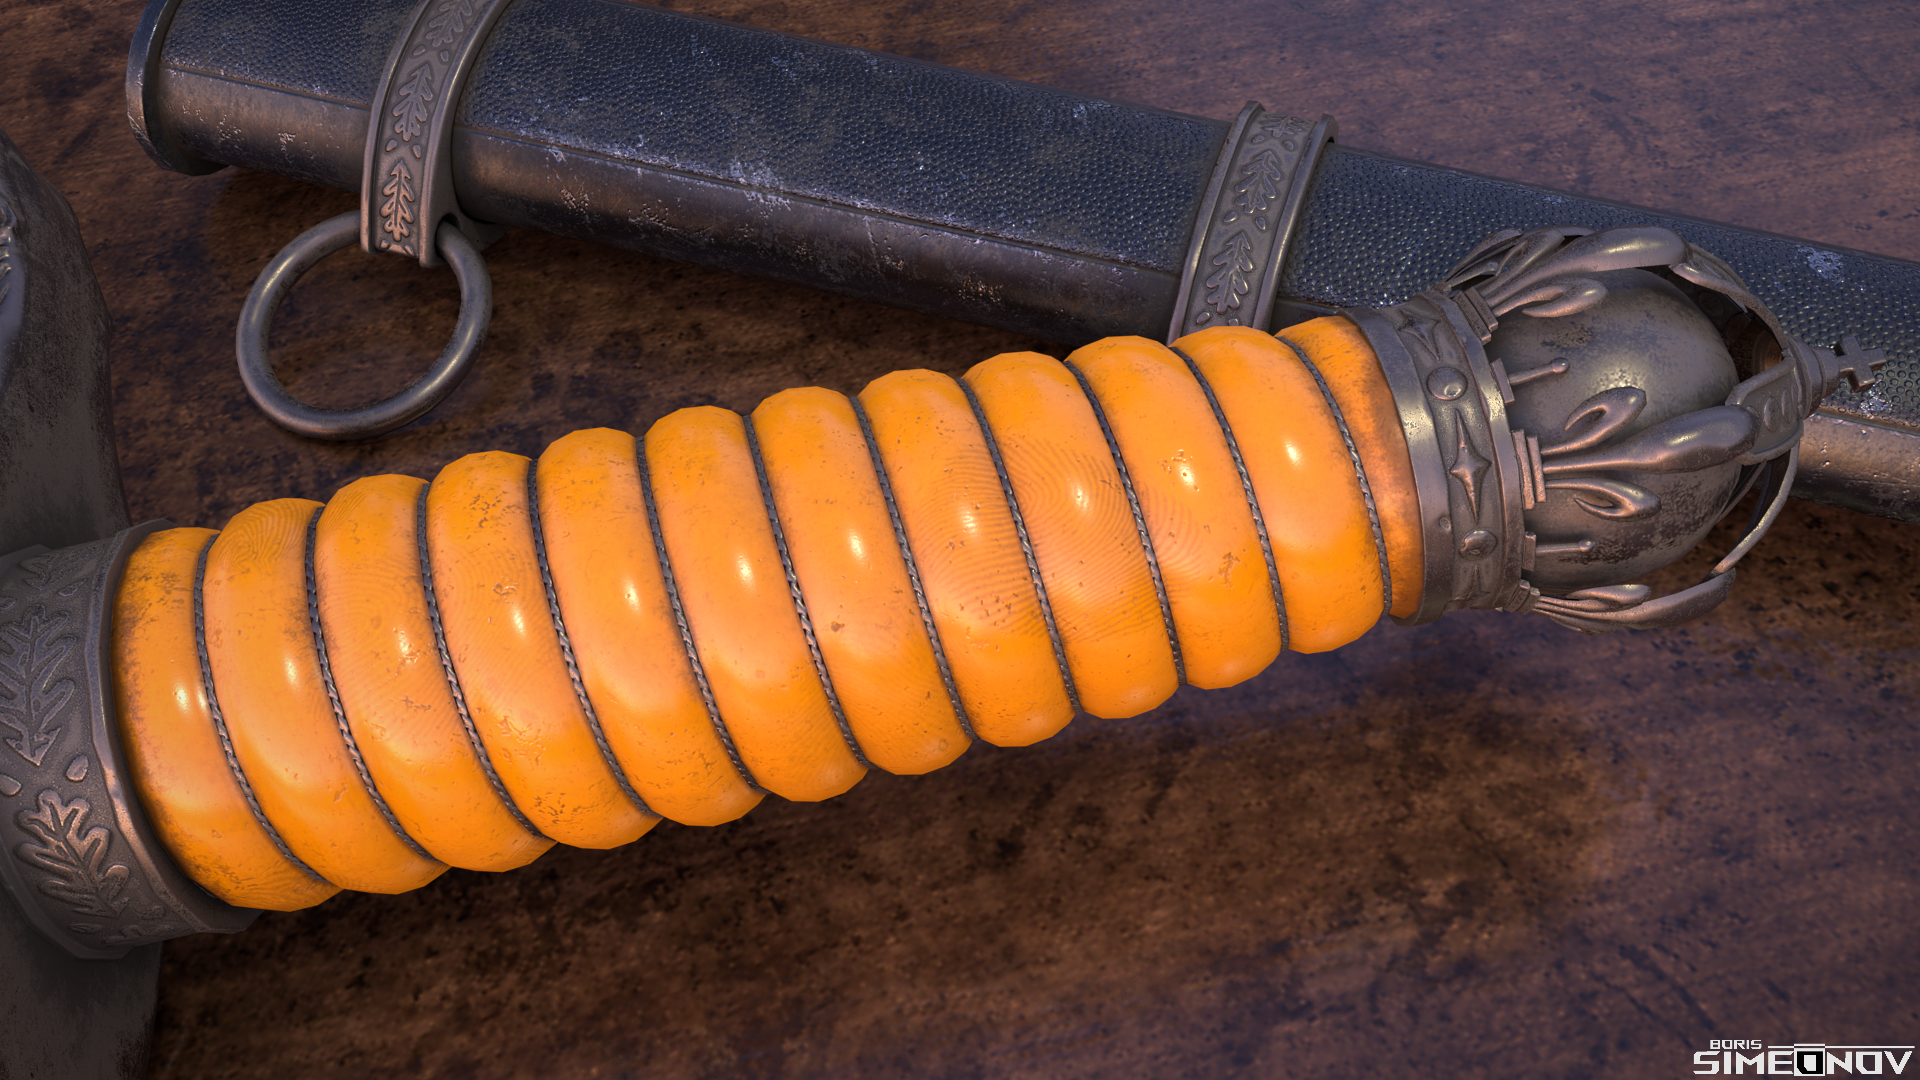
Hilt
To determine the shape of the strips of the hilt I used a bezier curve and then converted it to a mesh. Then a Screw modifier was added to achieve what you see below (on the left).
Afterwards I attached the Mesh Deform modifier and bound the hilt to the rectangular cuboid (the cage). By changing the shape of the cage in edit mode you can simultaneously manipulate the shape of the hilt.
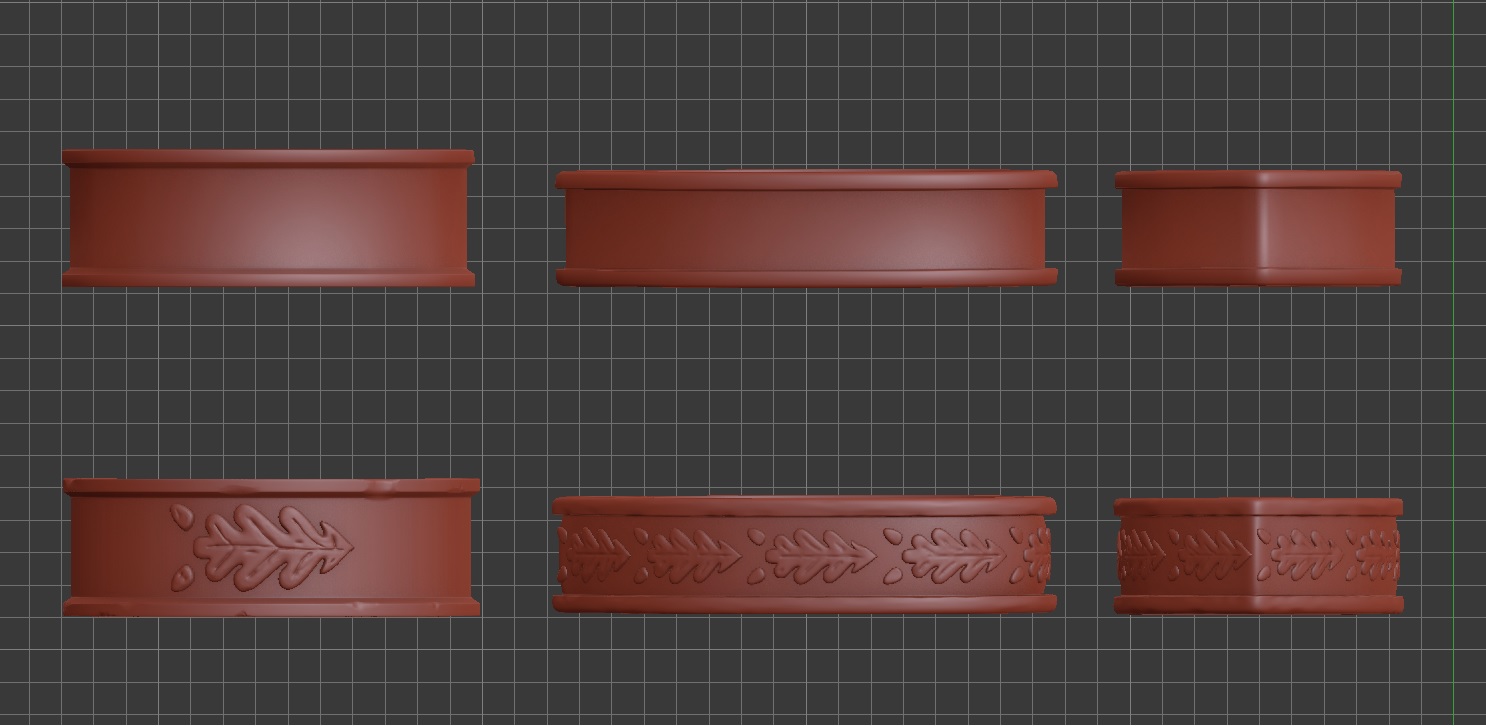
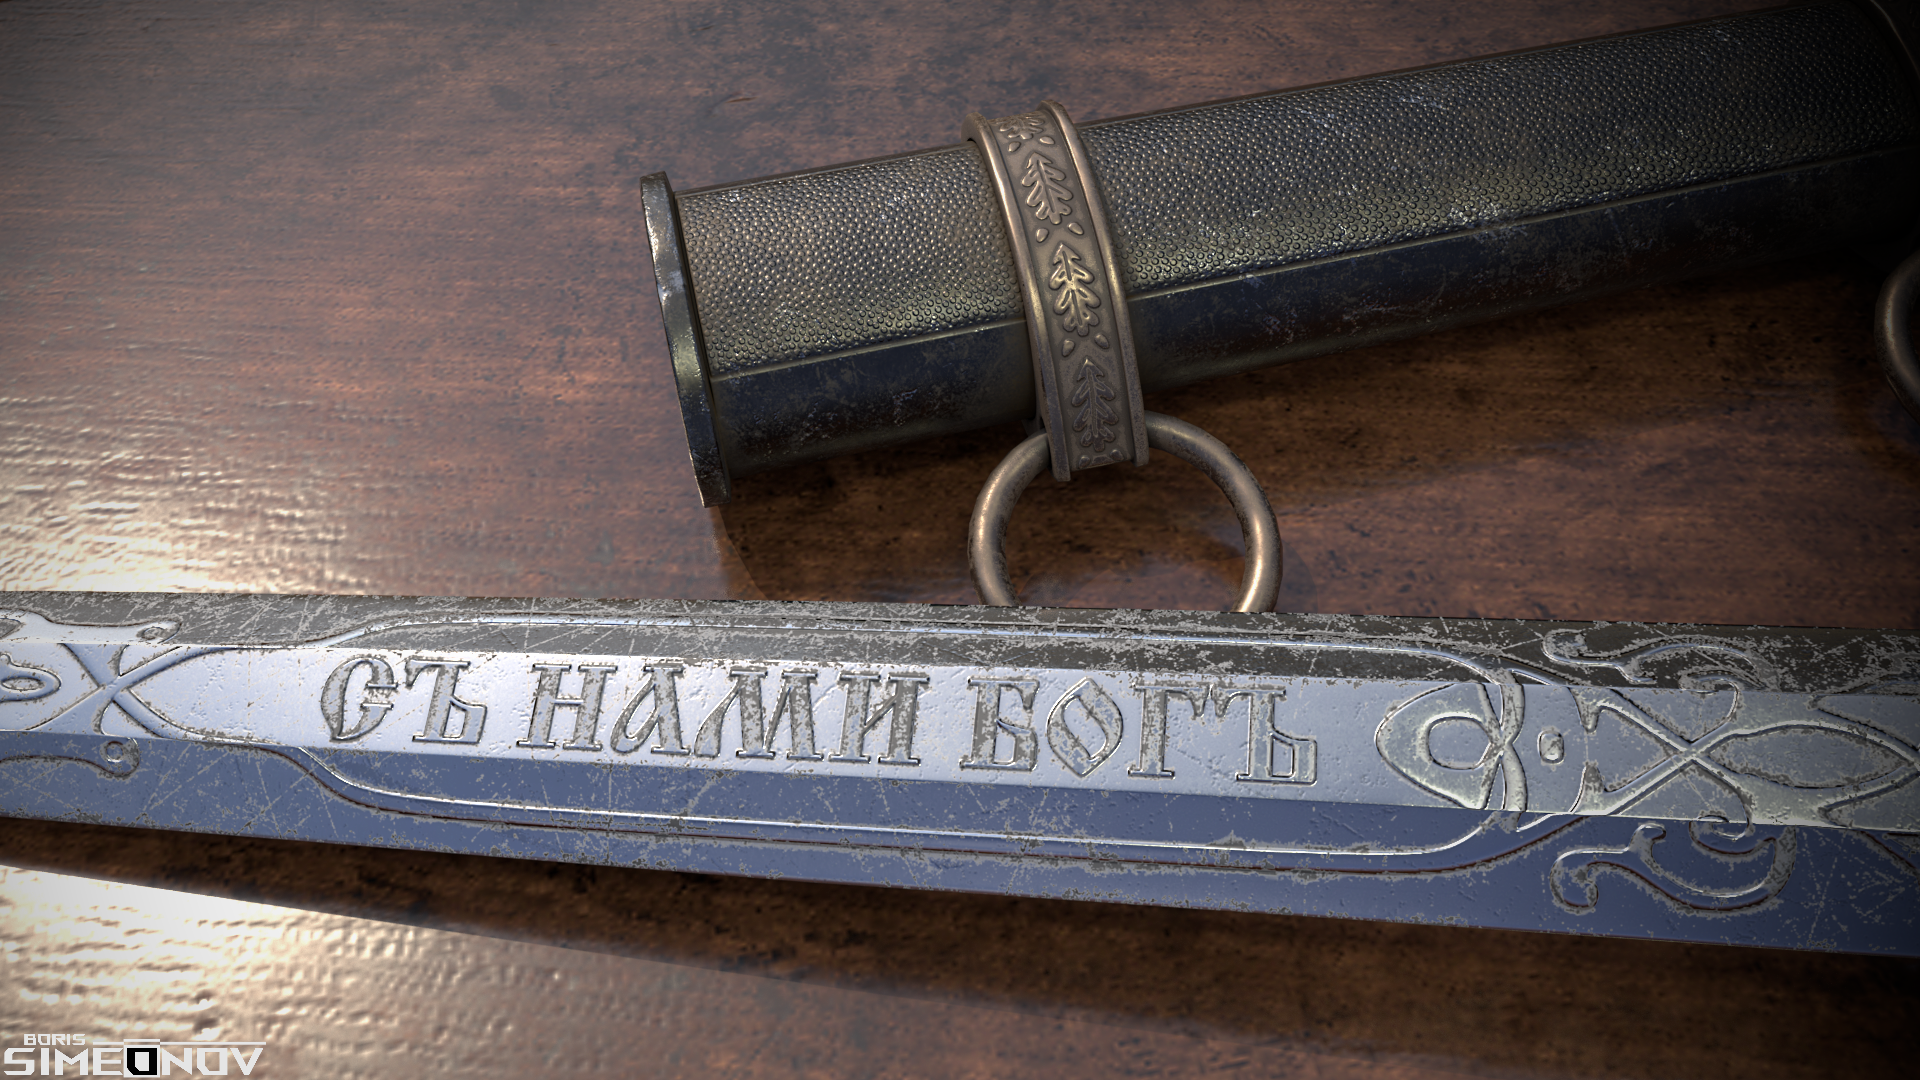
Hilt Circular Band / Scabbard (Bands, Body, Rings) / Blade
These were pretty simple with regard to modelling. The oak leaf details on the circular bands were modeled separately and then wrapped around the mesh in a similar way to the Pommel. Finer details were later applied through sculpting.
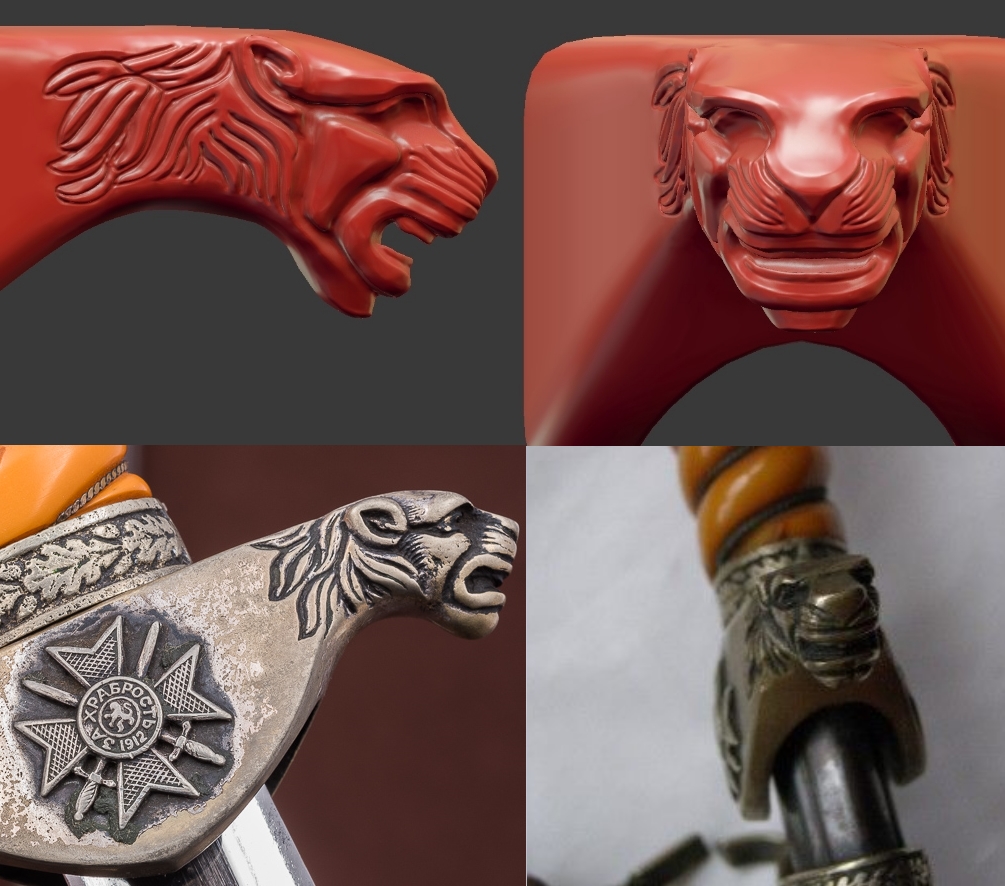
Guard
This is where I was truly introduced to sculpting. This part of the dagger was my biggest challenge, because until then I had only used sculpting for minor details on my models.
It really pushed me to go out of my way and learn new techniques. It took me a day and a couple of unsuccessful attempts until I got something I was OK with, for my first sculpt.
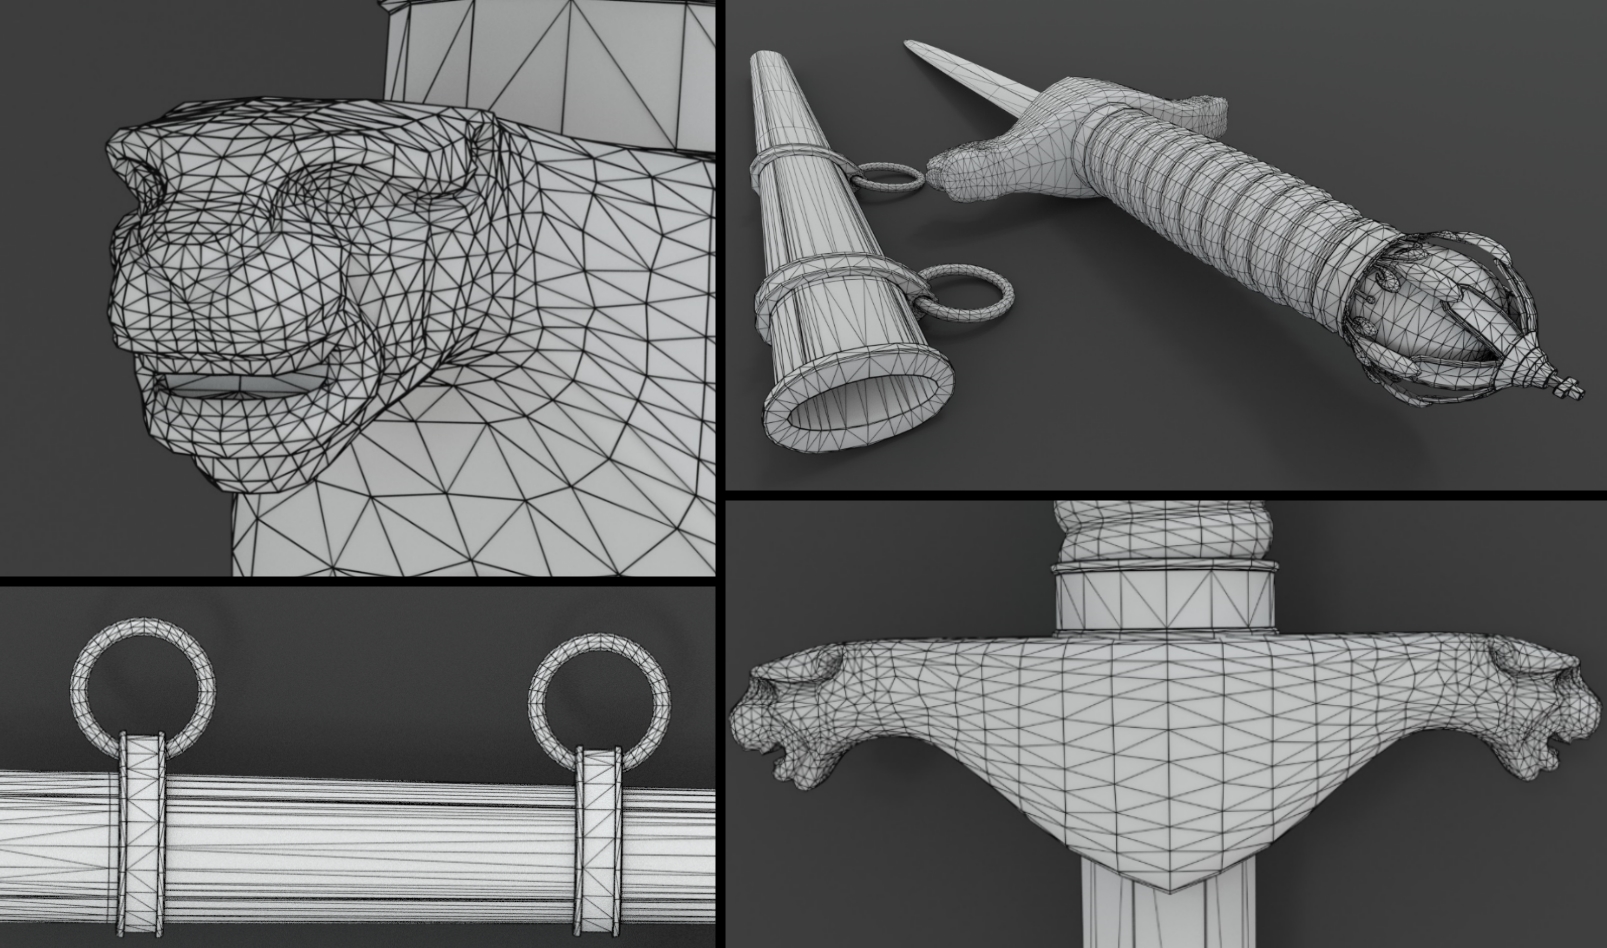
Retopology (High to Low-poly)
I always keep a copy of every part of the model before sculpting any details as I can easily create a low-poly version for some of them by removing unnecessary edge loops that won’t affect the overall silhouette. For the Guard (the lion heads) there wasn’t such an option (as it is a sculpt), so I had to retopologize manually, which took me a while but I had one of my favorite podcasts running in the background (TigerBelly), so it wasn’t that bad.
I ended up with around 14k triangles on the dagger and less than 5k on the scabbard. I am pretty sure that I could’ve gone with less than that.
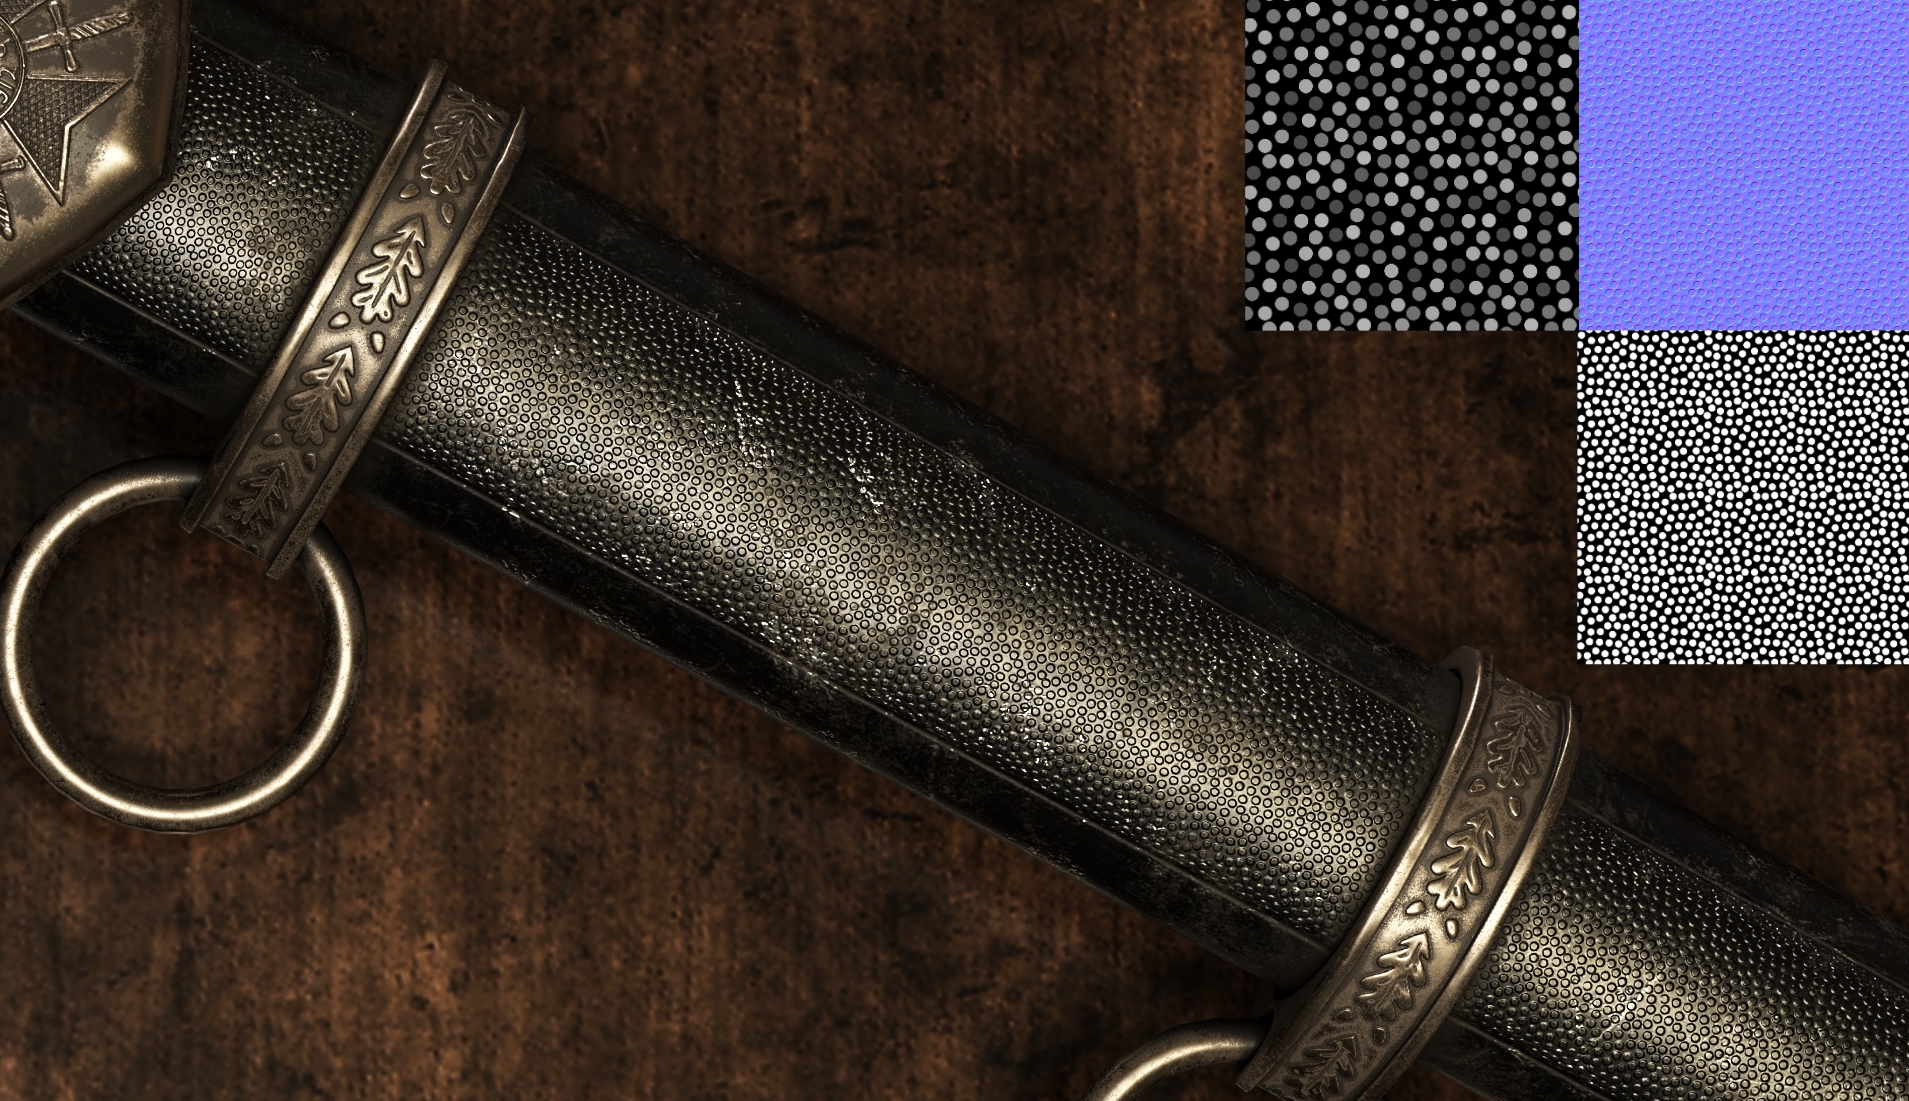
Texturing and Alphas
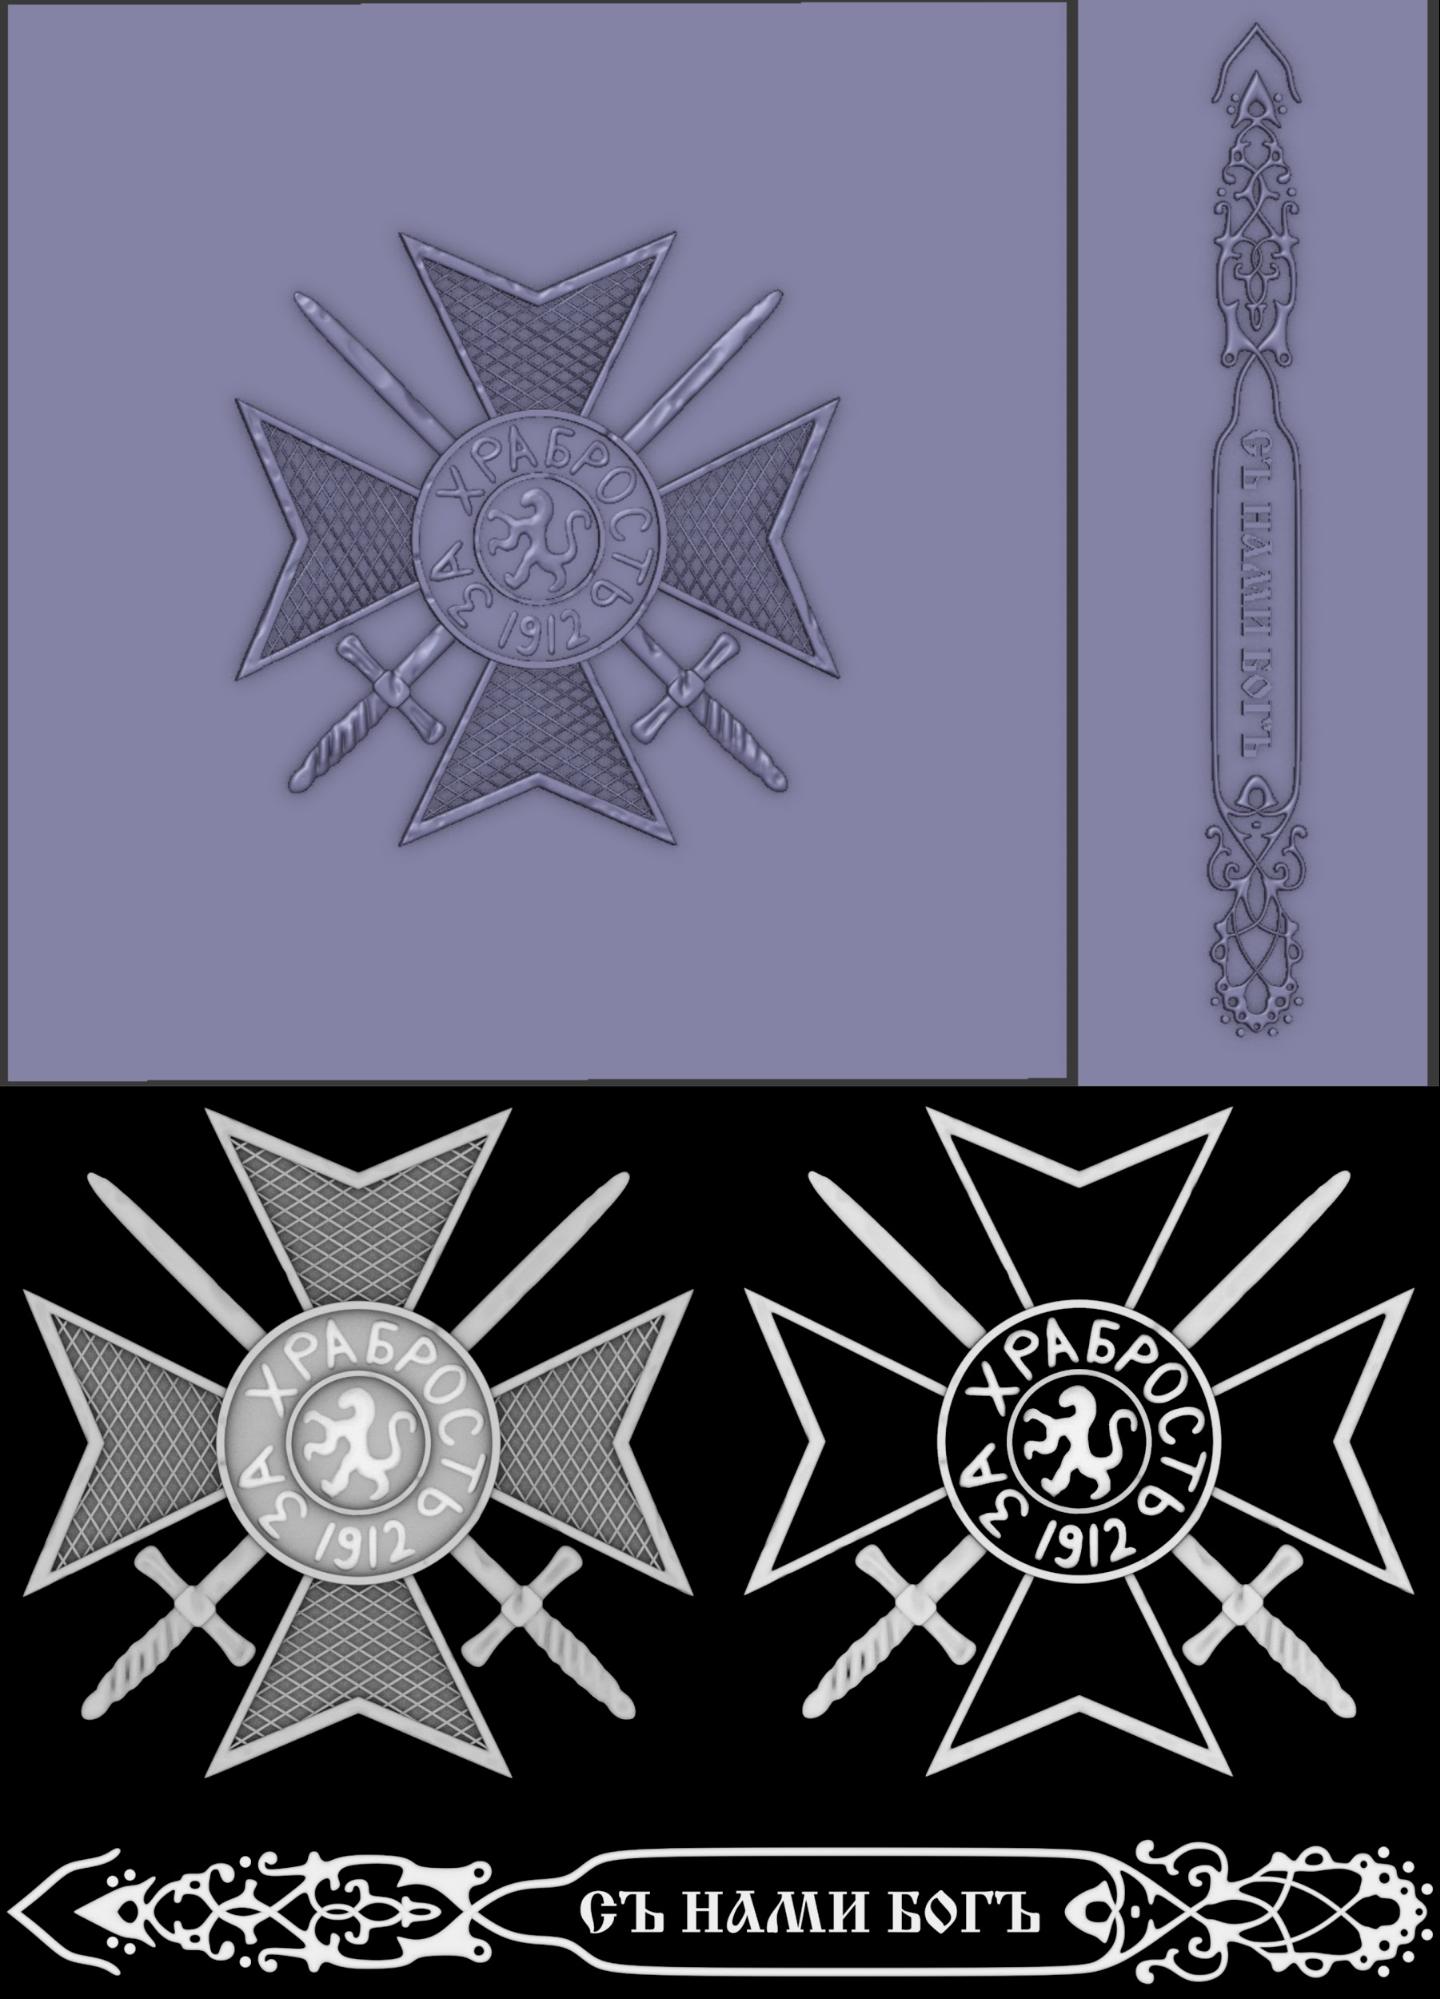
Creating Alpha Textures with Blender
Looking at the reference images I had to figure out how to add the engraving to the blade and the Military Order of Bravery to the guard. I chose to go with alphas, so I modeled my pieces, added details and made a simple setup—an orthographic camera, black background and white-ish material applied to the models (you can see the results on the image below). After rendering I imported them into Substance Painter and stamped them onto the model. Now, because I wanted Ambient Occlusion to be applied to my Alphas, I had to replace the previously baked normal mesh maps with my new normal map information (by exporting and replacing) and then extracting an AO map from the new normal map by removing the High-Poly mesh from the bake settings.

Texturing
My texturing workflow usually goes something like this:
Creating a Base layer by adding a Fill with a Basic Material from the Library >
Minor Color Variation by using some sort of a Grunge map (with a generator sometimes) > Weathering Effects/ Dents/ Edge Damage layers mostly done by Mask Editors/ Metal Edge Wear and grunge maps > Dirt/ Dust layer (w/ Mask Editor or Dirt Generator) > And, depending on the material, a filter for last (Usually Sharpen)
It is basically playing around and tweaking values.
For the Scabbard texture I used a free vector graphic which was made into a material using Substance B2M. I then made a new layer with a custom mask, imported the normal and metallic map and placed them into their relevant outputs.
Rendering
The rendering was done with Blender (Cycles) using free 8K HDRI maps from HDRI Haven. I made a simple node setup for the world (Texture Coordinate > Mapping node (so I can rotate the environment) > Environment Texture > Output). The resolution was set to 1920×1080 with a couple of 2K renders. Some of them included a transparent background and a wooden texture I created (that could’ve had higher resolution).
After the rendering process I opened Paint.NET, tweaked some brightness/contrast/sharpness values, added a couple of filters, and that’s pretty much it.
About the Author
 Boris Simeonov, Self-Taught 3D Artist with strong passion for video games and an ambition to break into the game industry.


Absolutely beautiful Boris. Thanks for sharing.
Thank you, Michael!
Fantastic!!
Thanks, Wil!
Wow! Beautiful work. Amazing…thanks for sharing.