
Behind the Scenes: Potato Beetle
Hi. My name is Bo Laugesen. I live in Slagelse, Denmark.
The first time I tried making 3D was 2001. I learned 3ds Max (3.1) at Truemax in Copenhagen and I later did some freelance jobs for a while, mostly with Maya. But I hadn’t done much 3D since then, except for some Counter-Strike source maps in Hammer. In the beginning of 2018, I wanted to make some 3D again and decided to try Blender. And I was amazed, and got totally hooked. So I started watching tutorials, and still am. And I’ve had a lot of fun with Blender BGE, and ended up making my own little game (Zap the dolls), and modeled some characters that I only used for animation and camera track tests. So when 2.8 beta came out, it was a good opportunity to try it out with one of those.
Inspiration and References
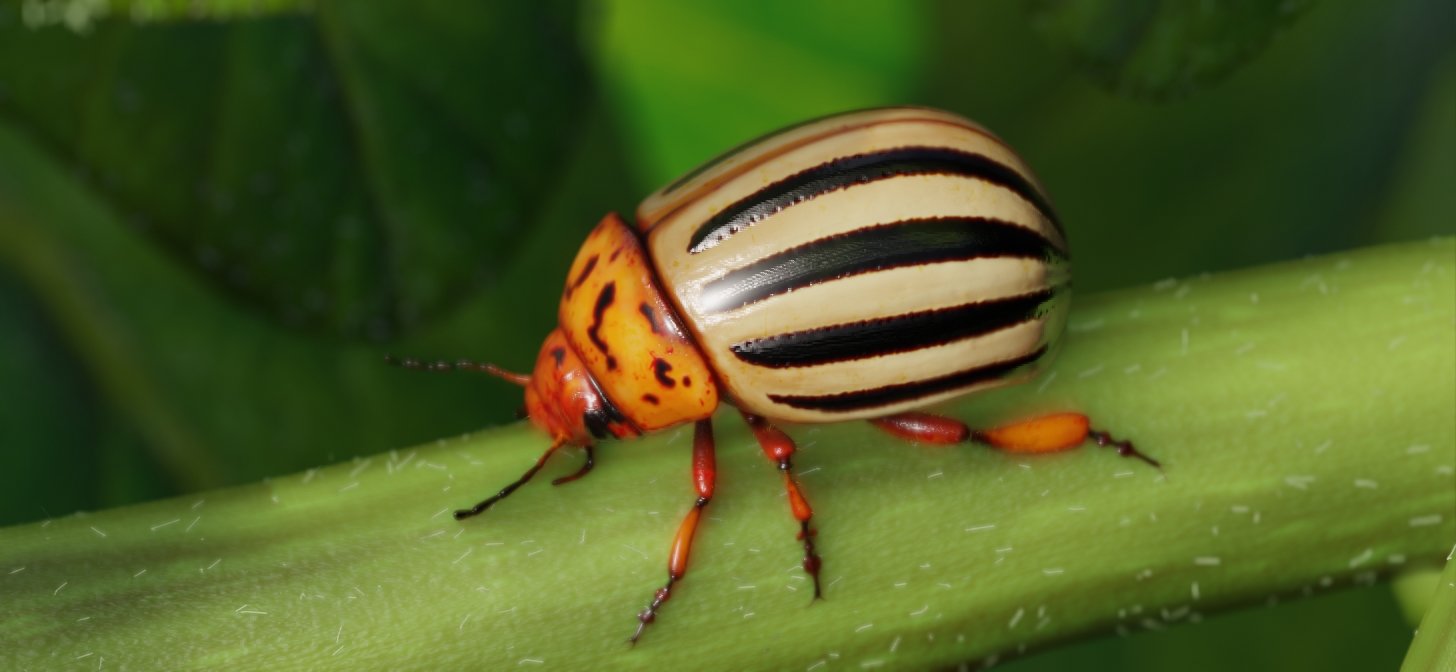
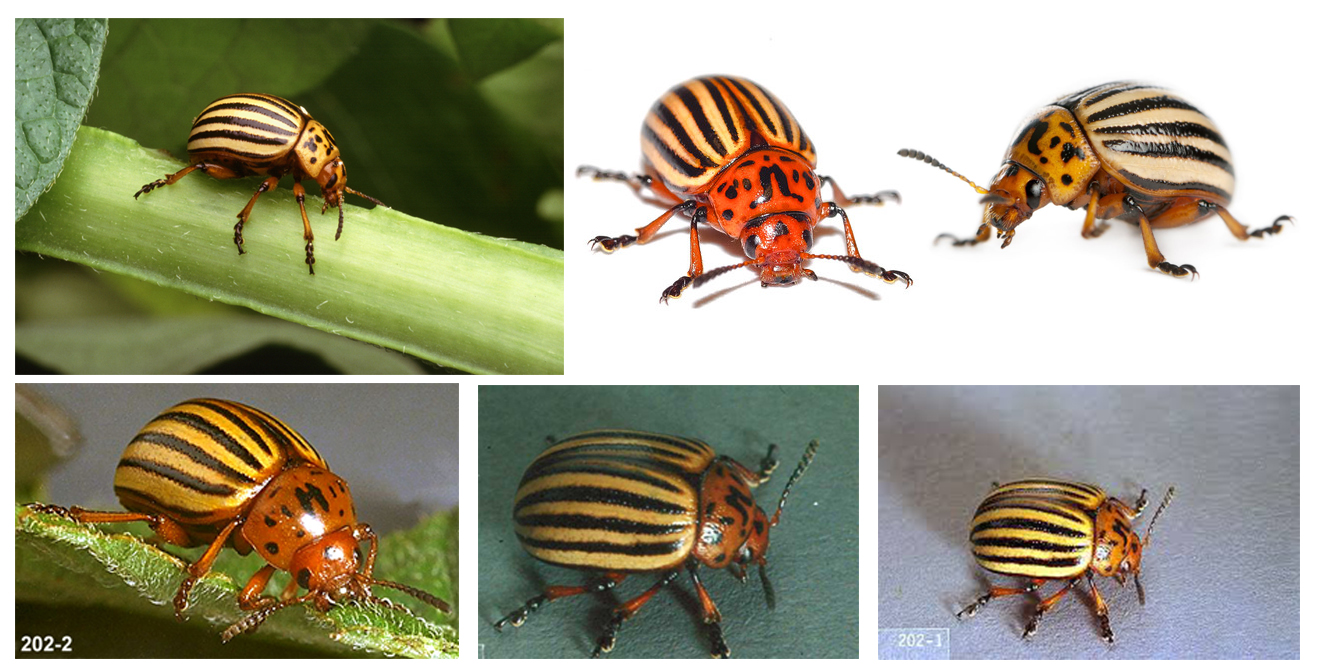
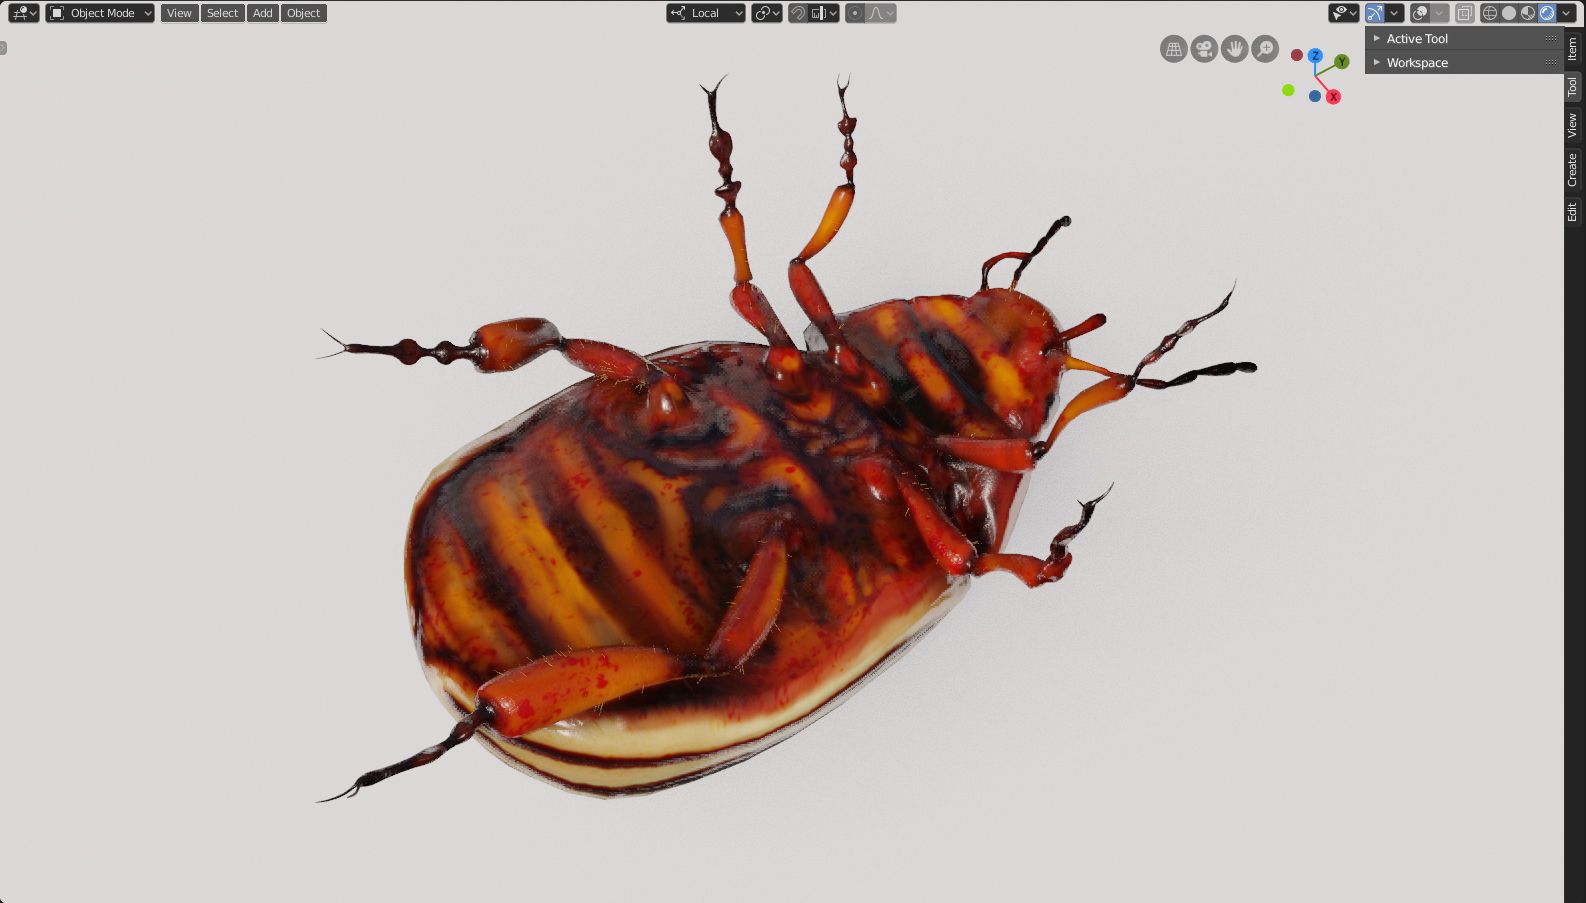
I usually look to nature for inspiration when I do my paintings in oil and acrylic and chose to make a potato beetle because of its bright colors. I found some references by using Google.
Modeling and Texture
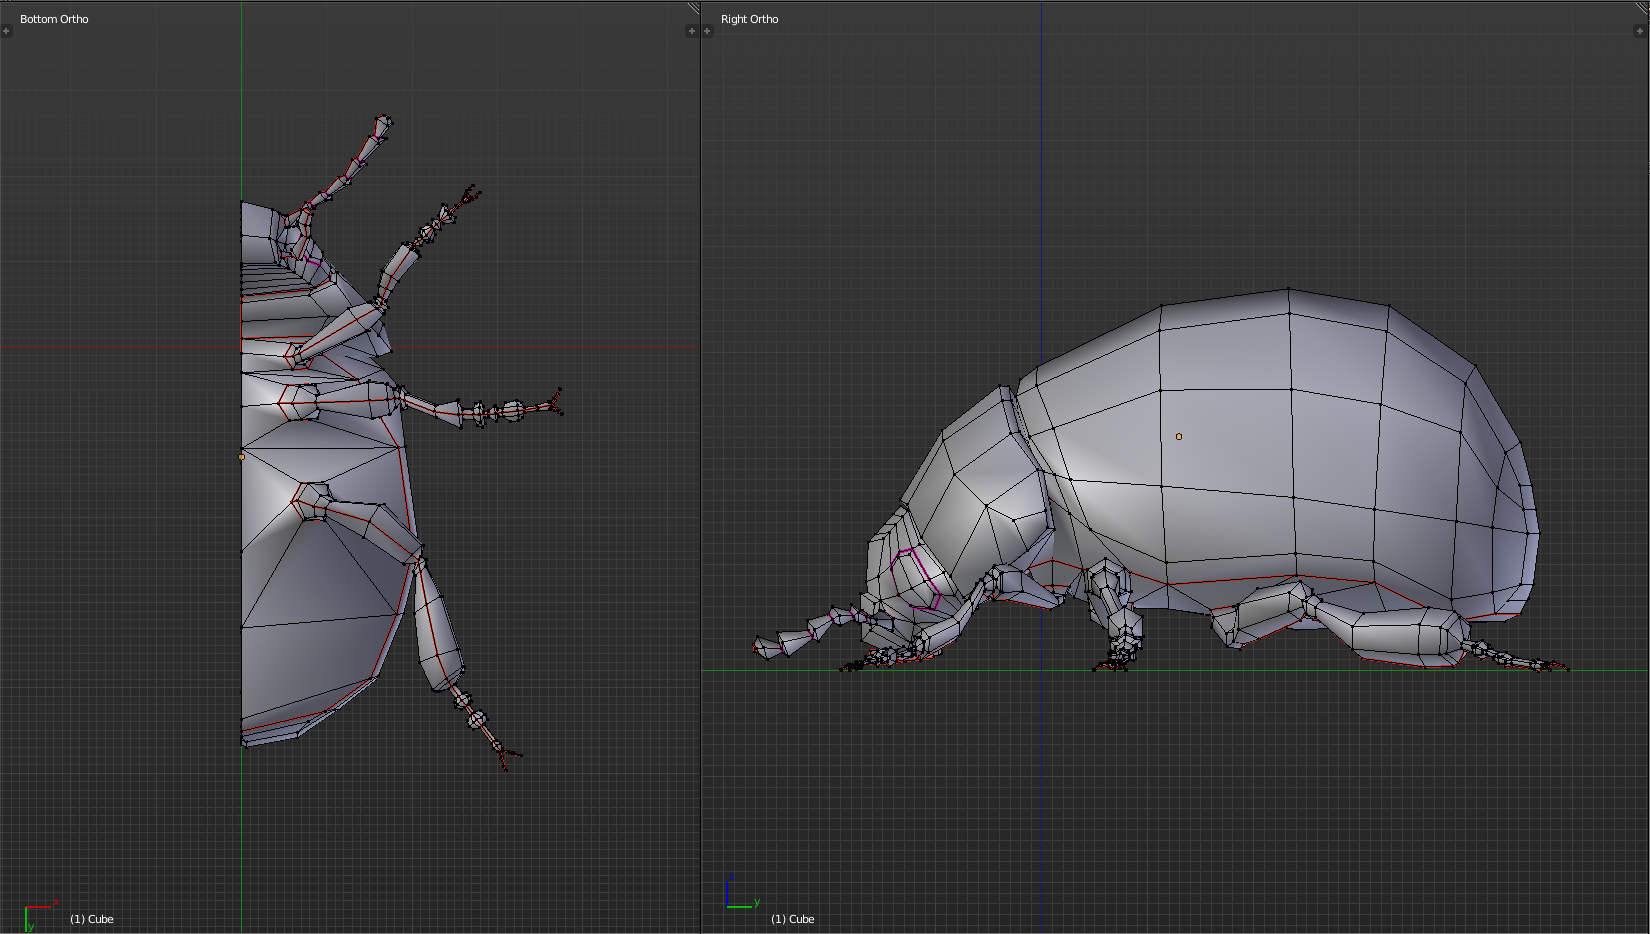
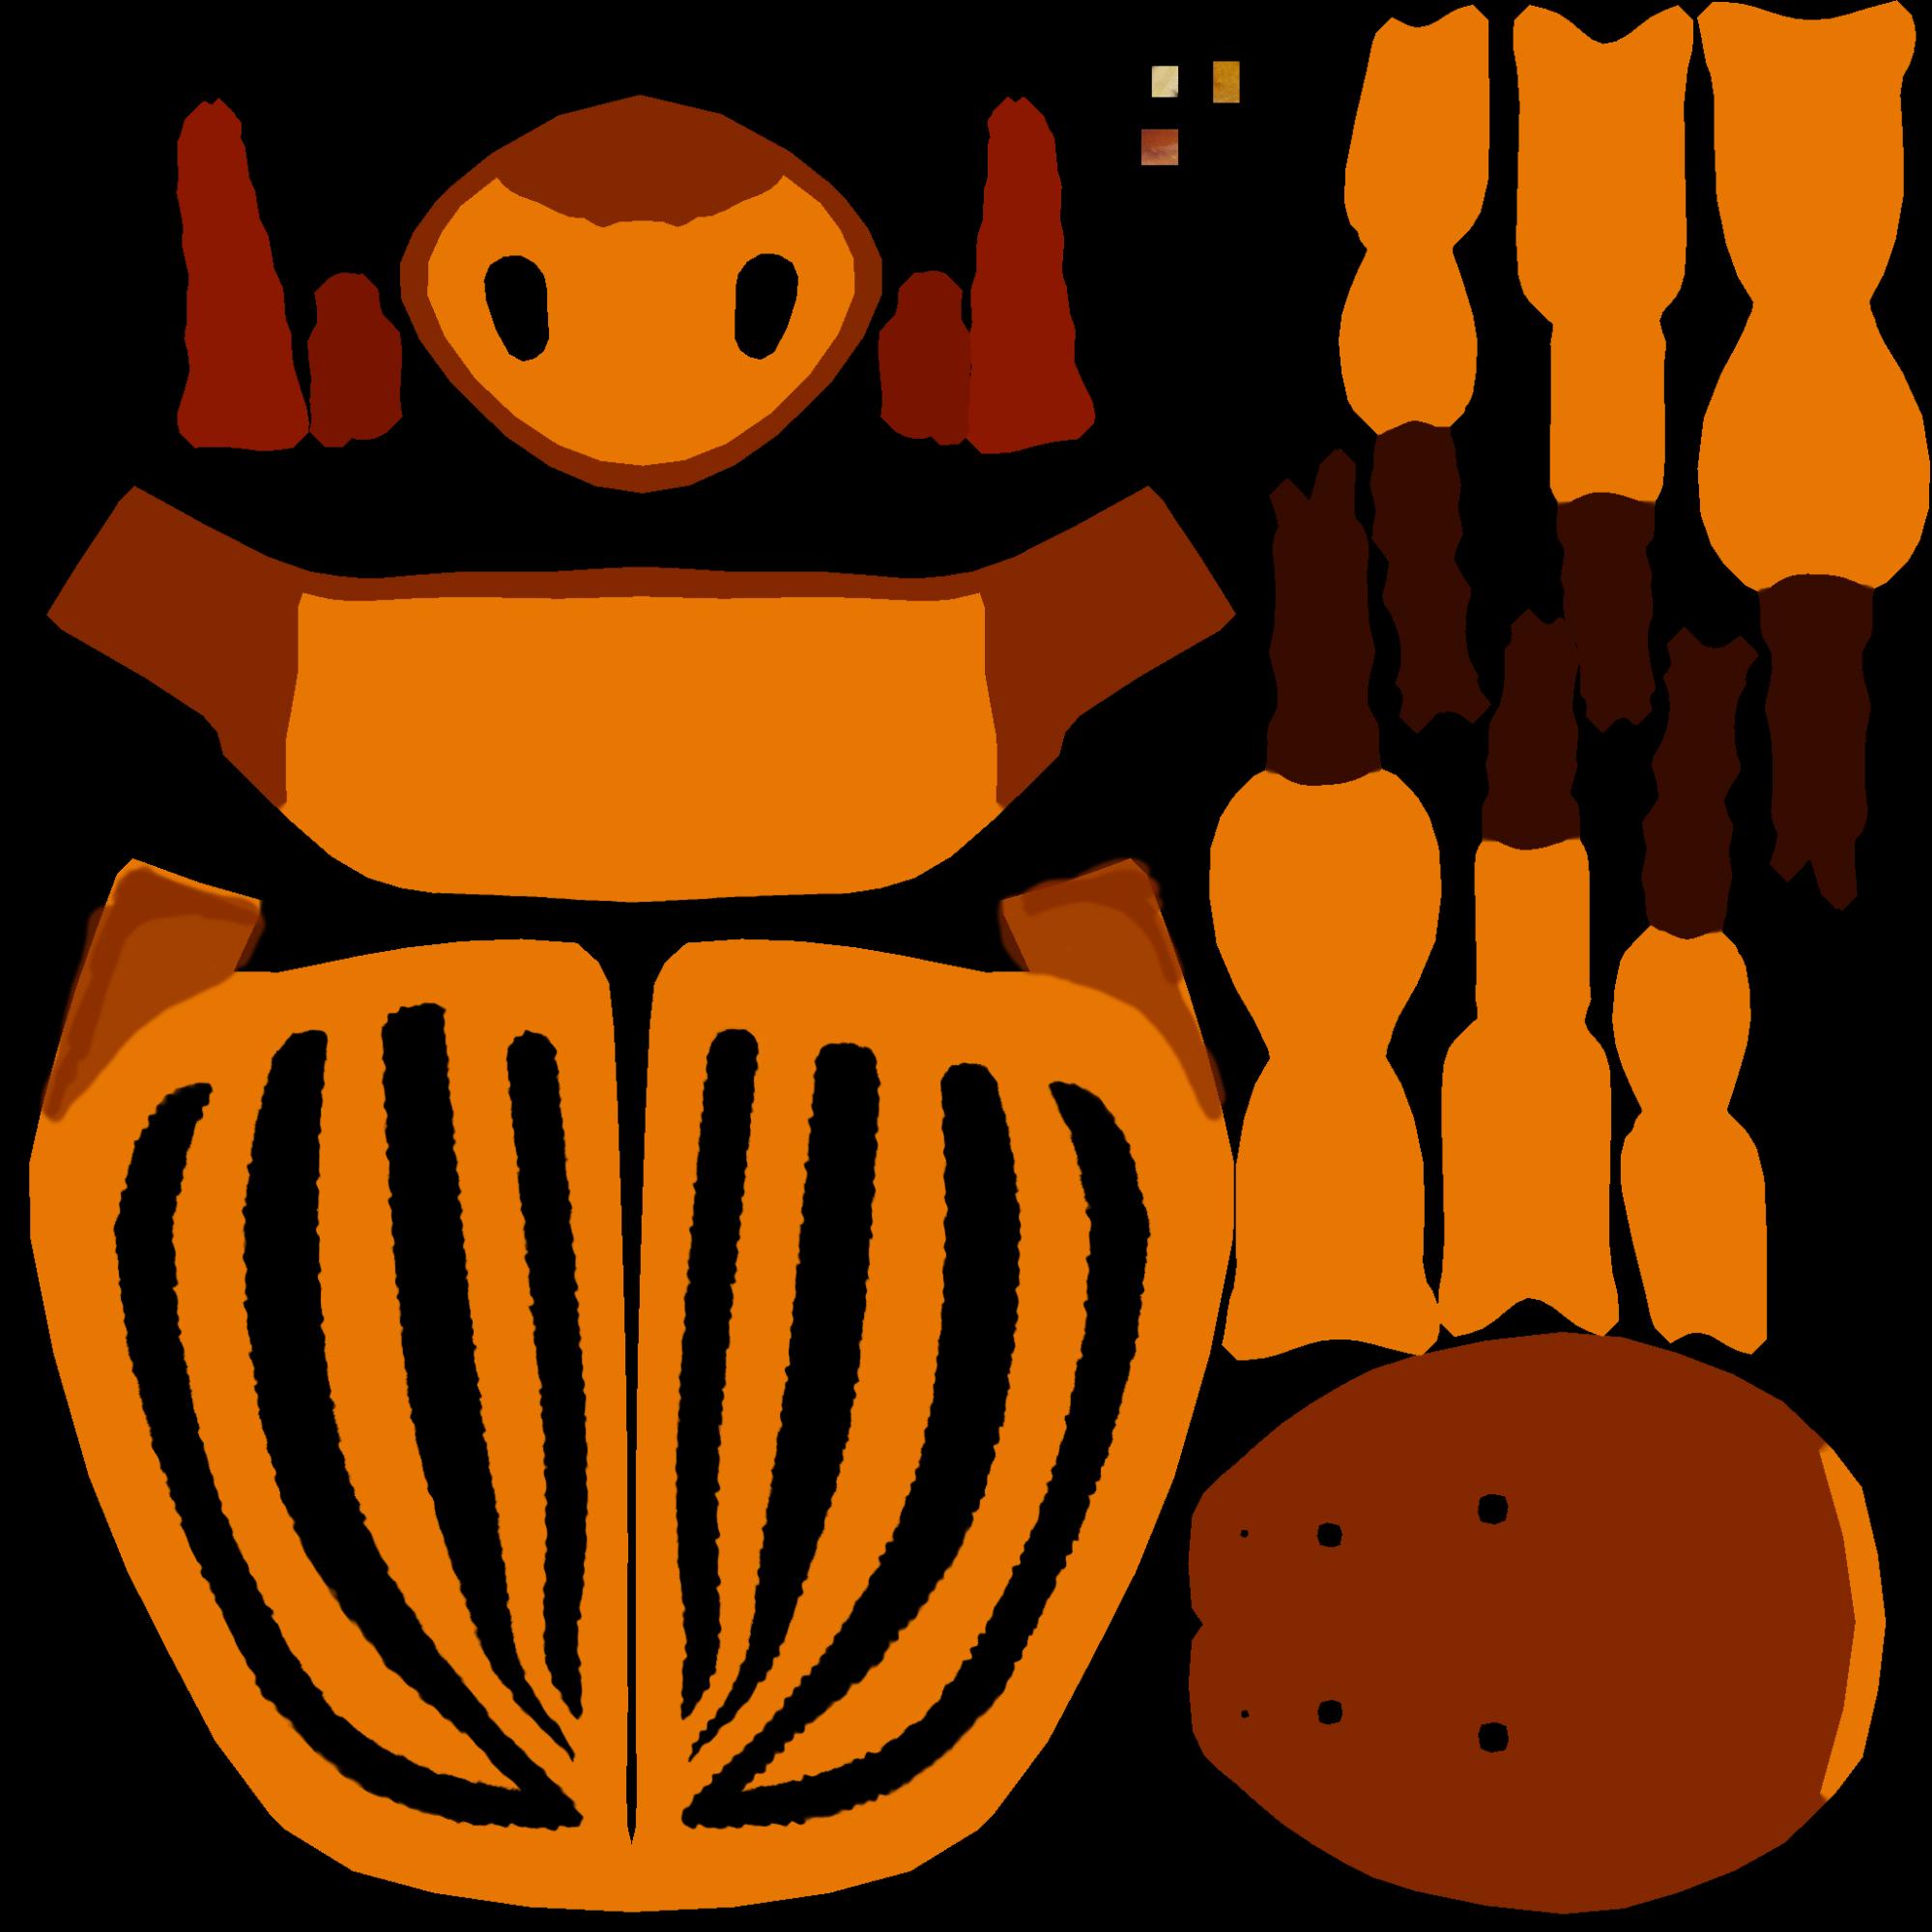
I started with basic box modeling, extruding, and scaling until it started to look like the shape of a beetle.

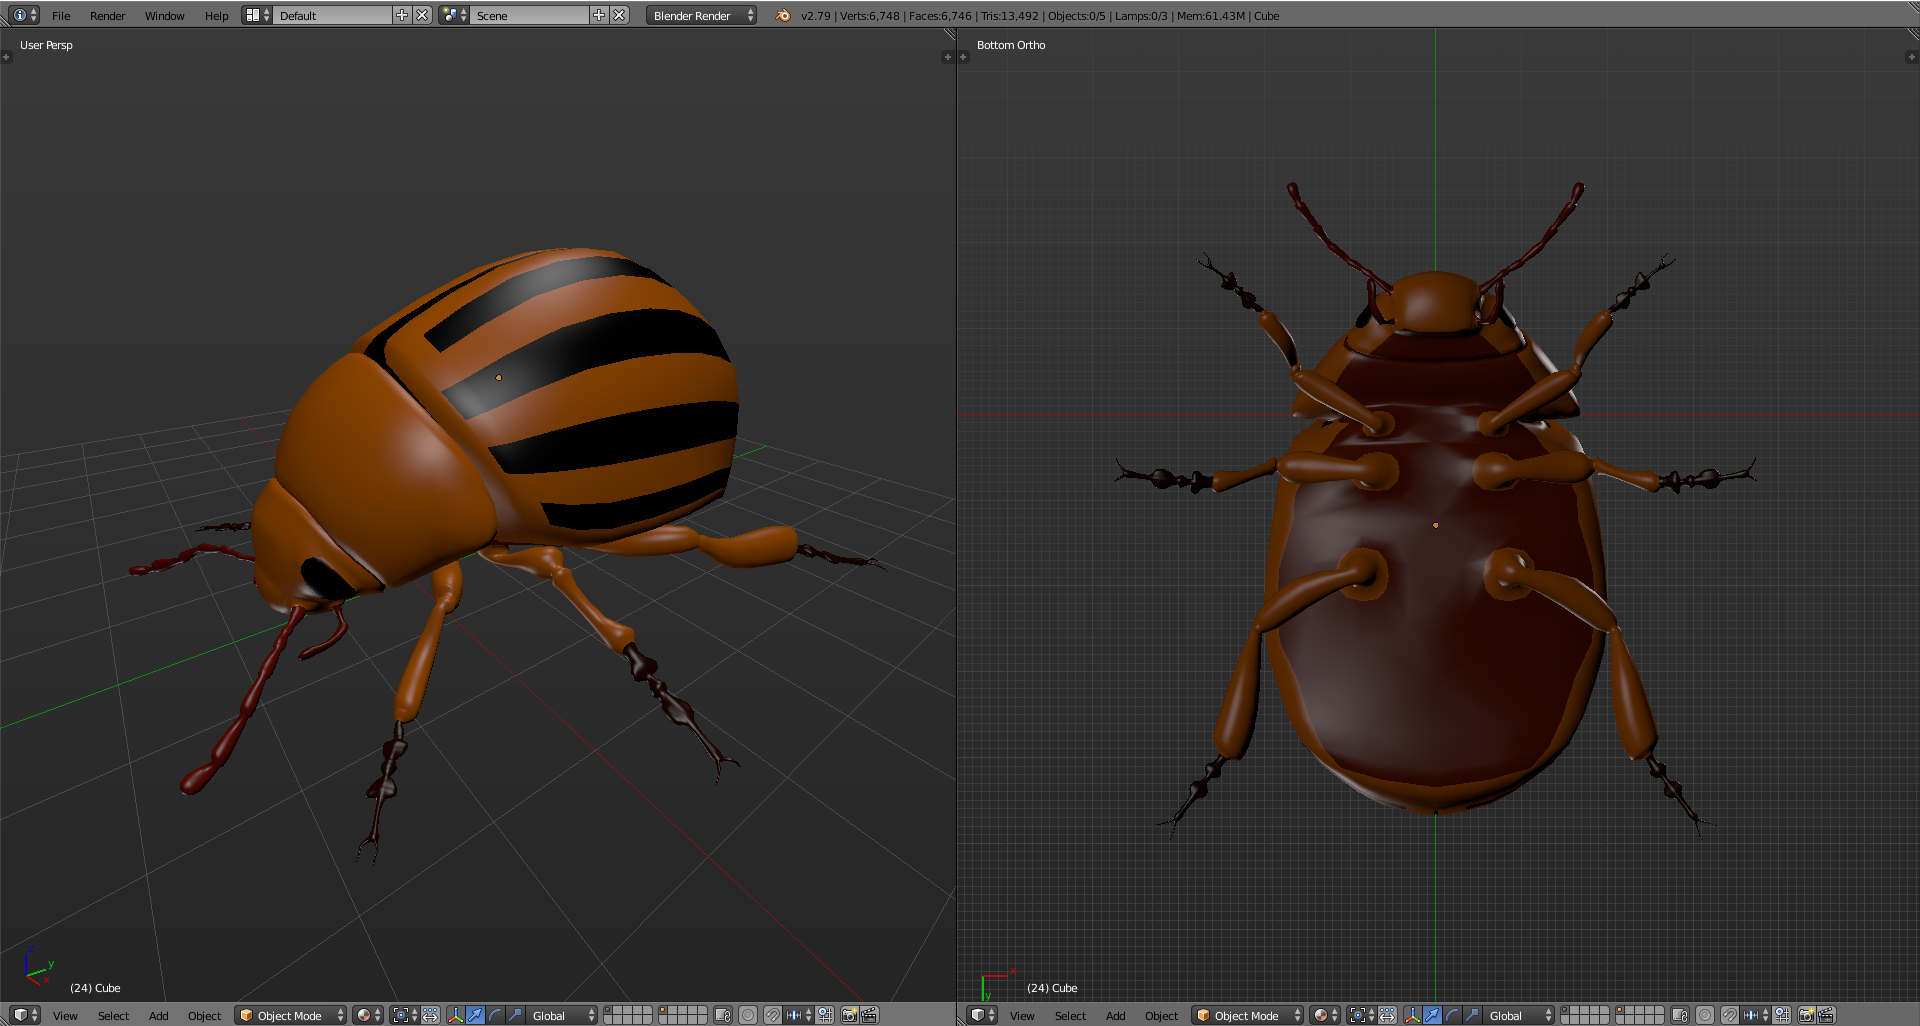
I added simple colors to the faces, and baked it to a texture that I could paint on.
I only used Texture paint to color the beetle.
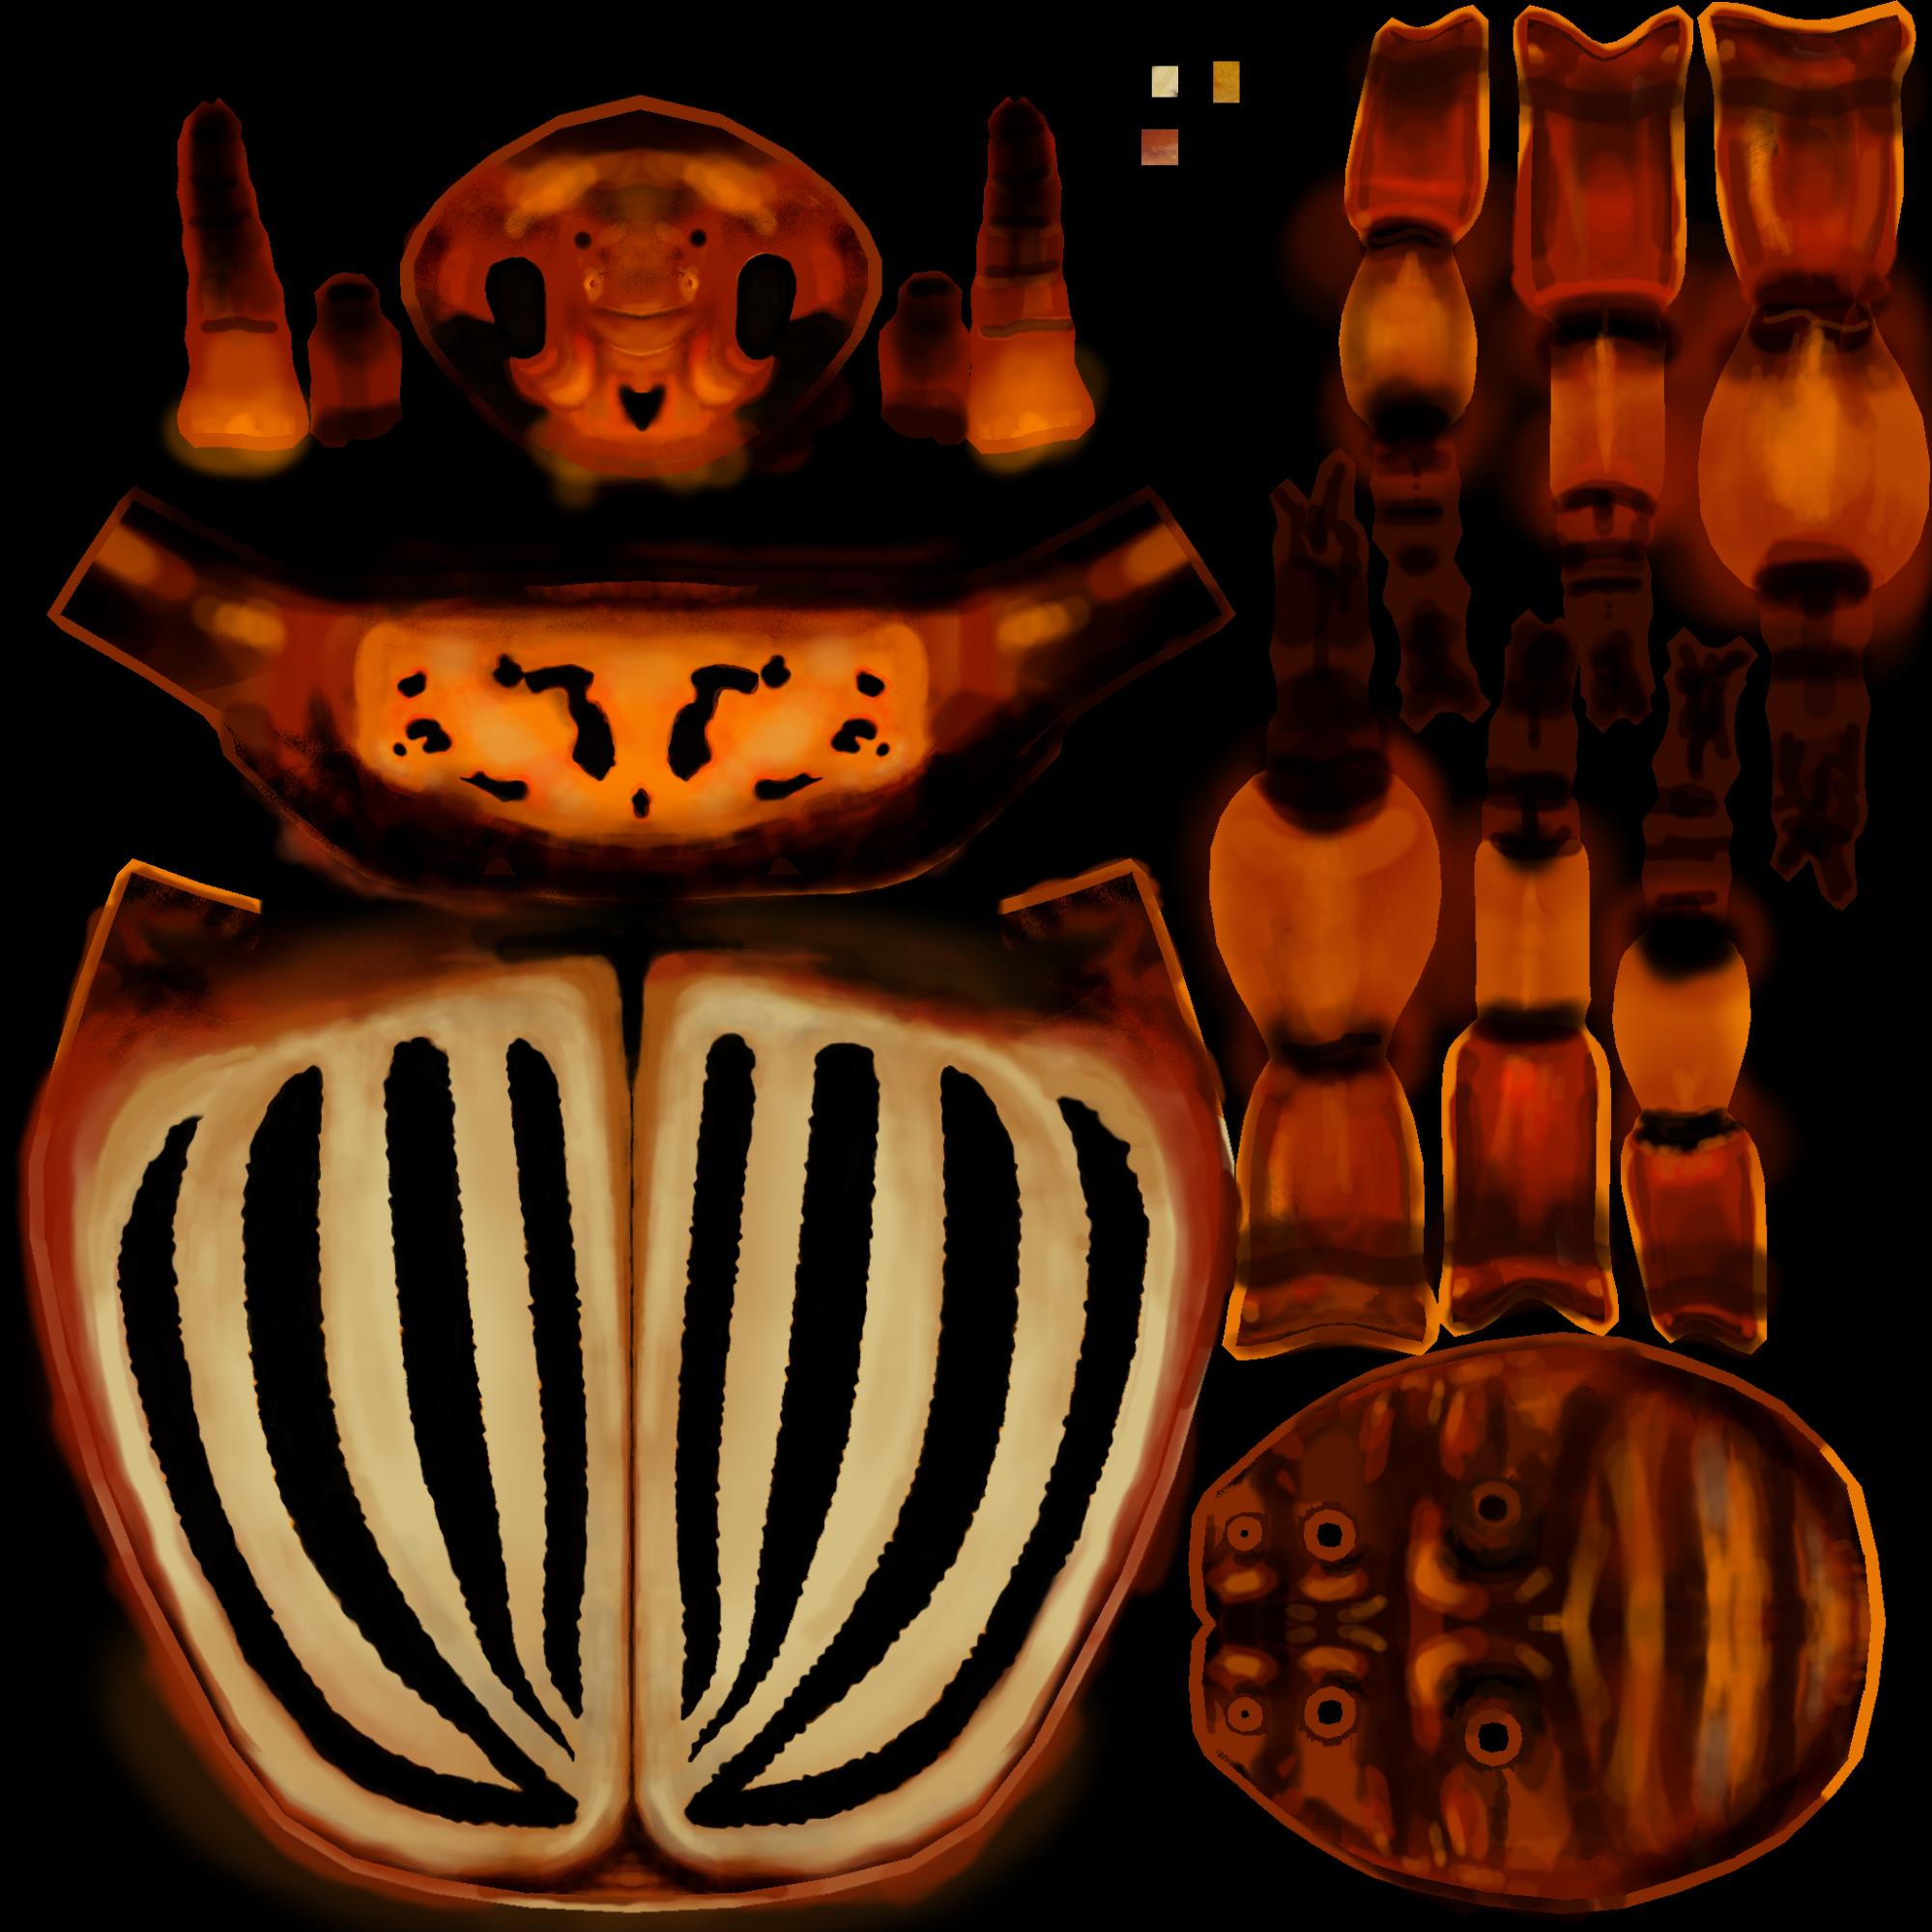
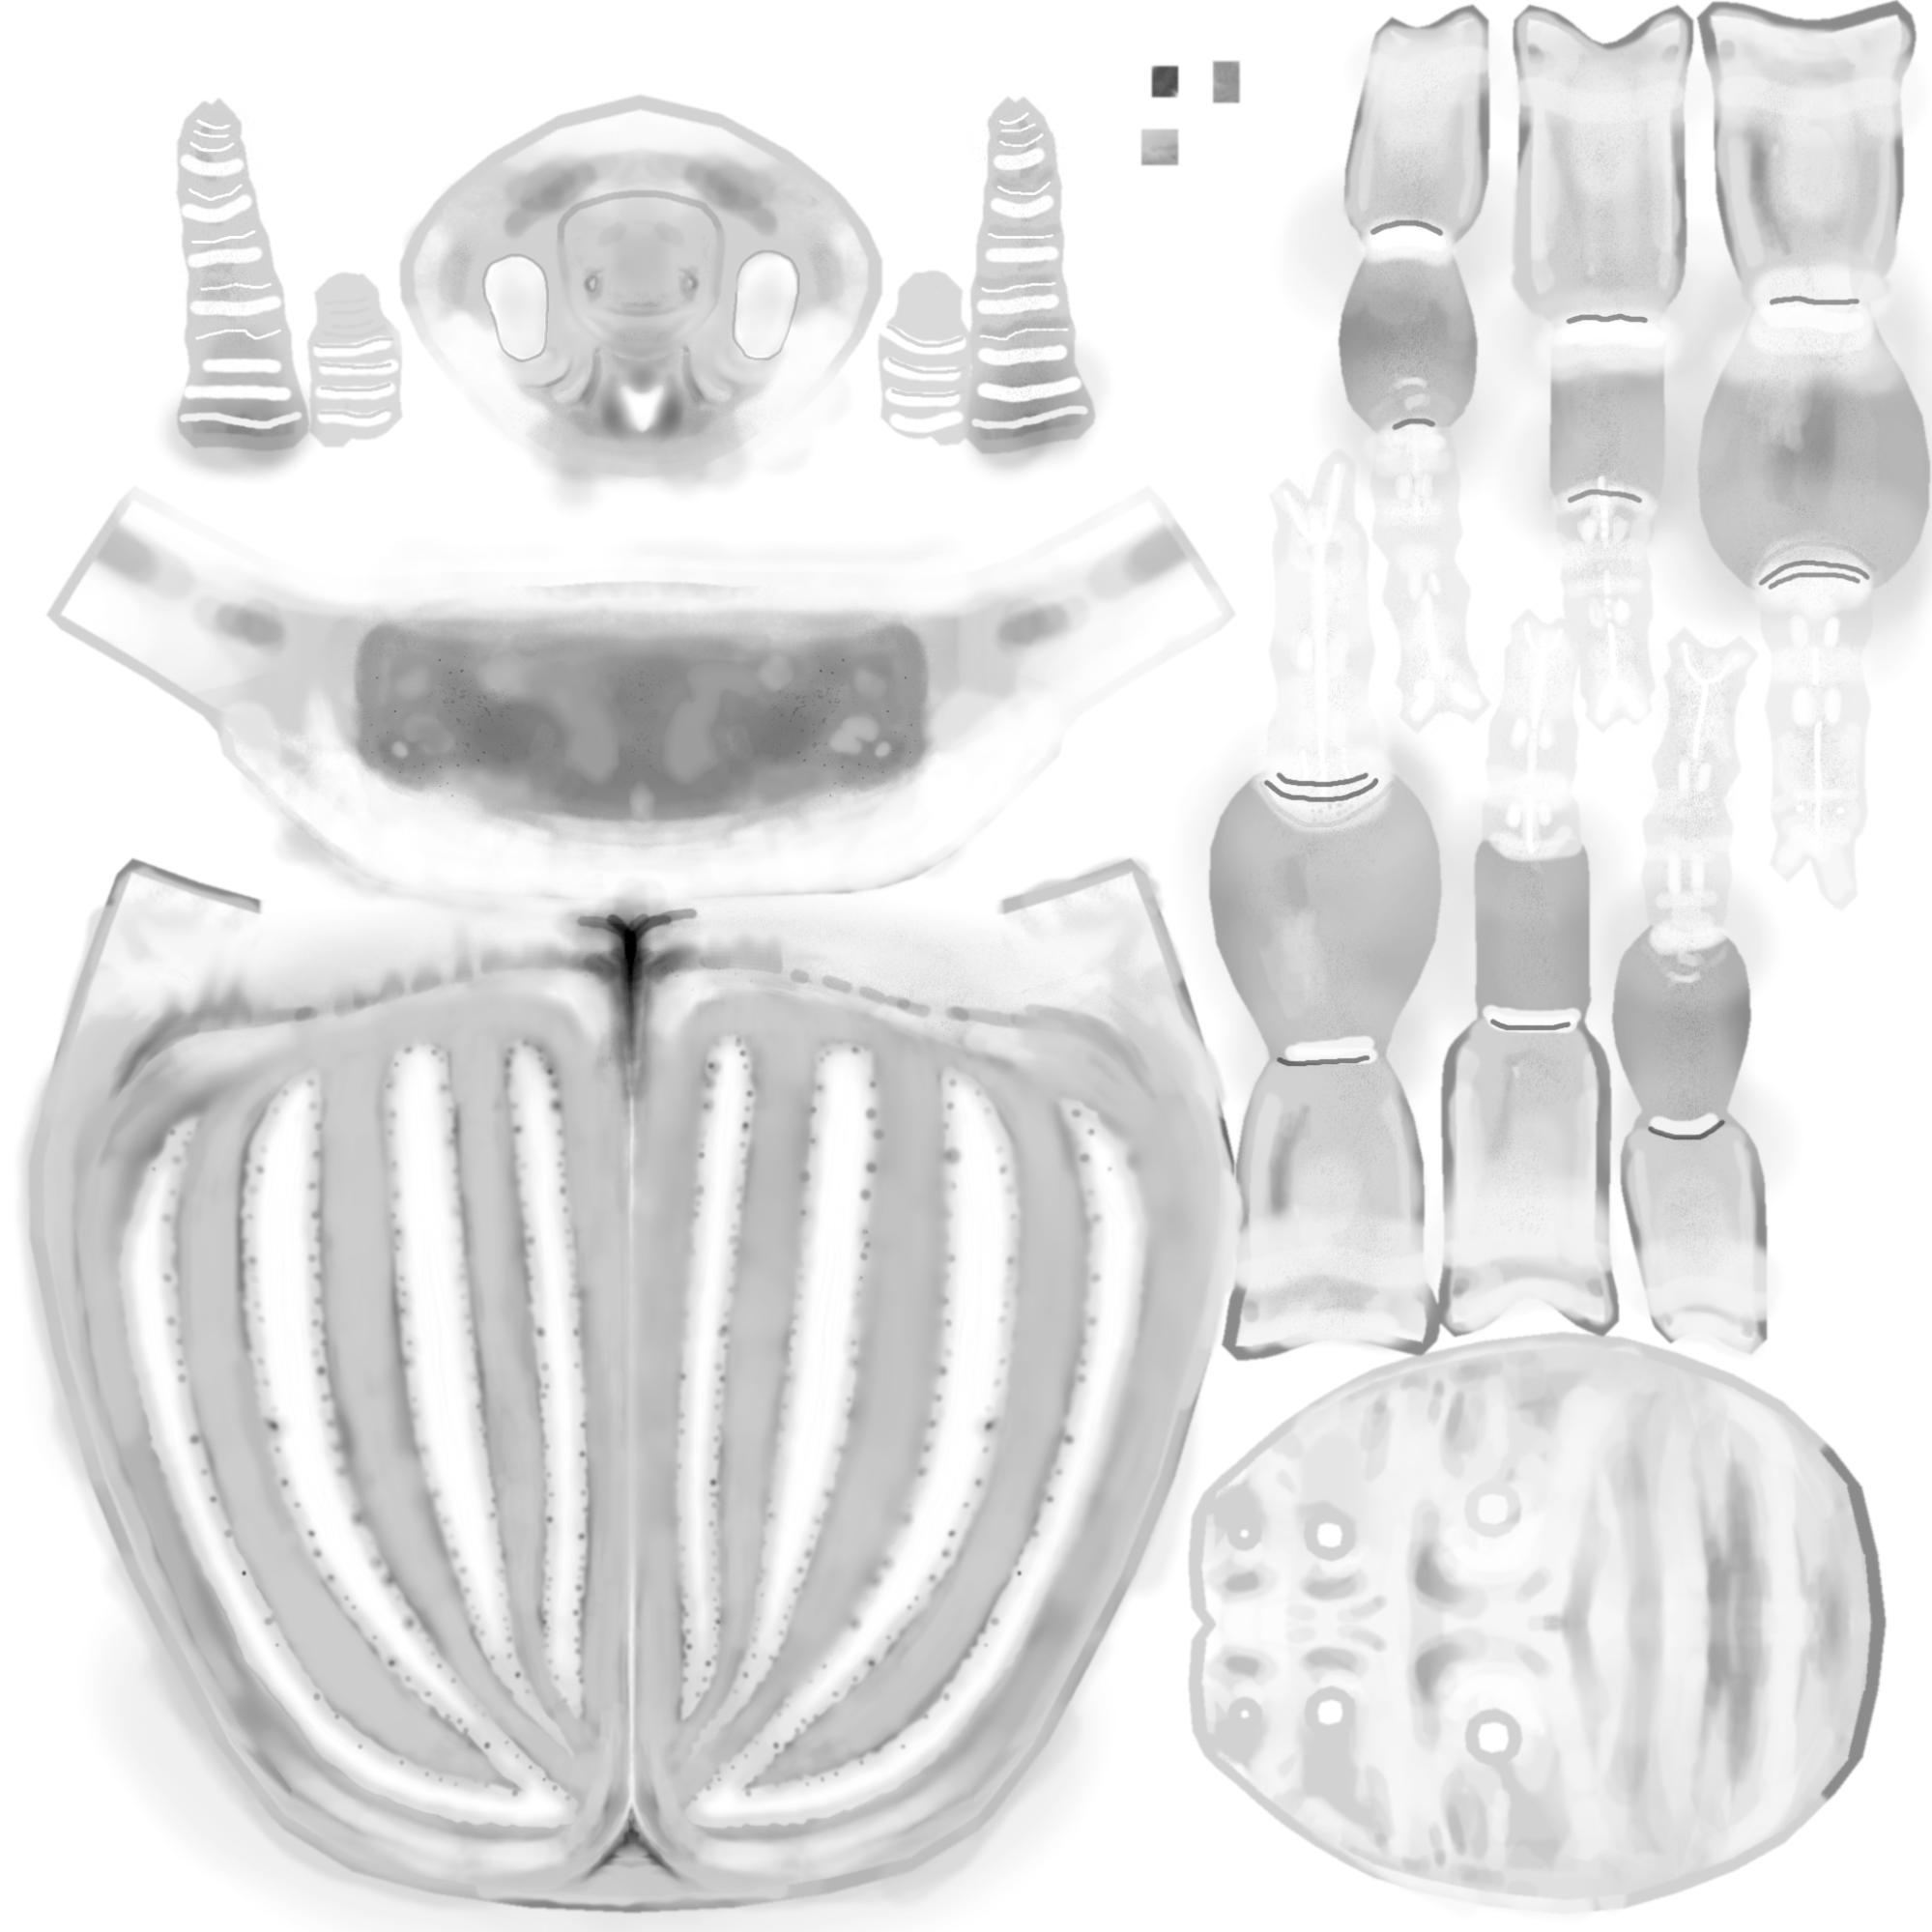
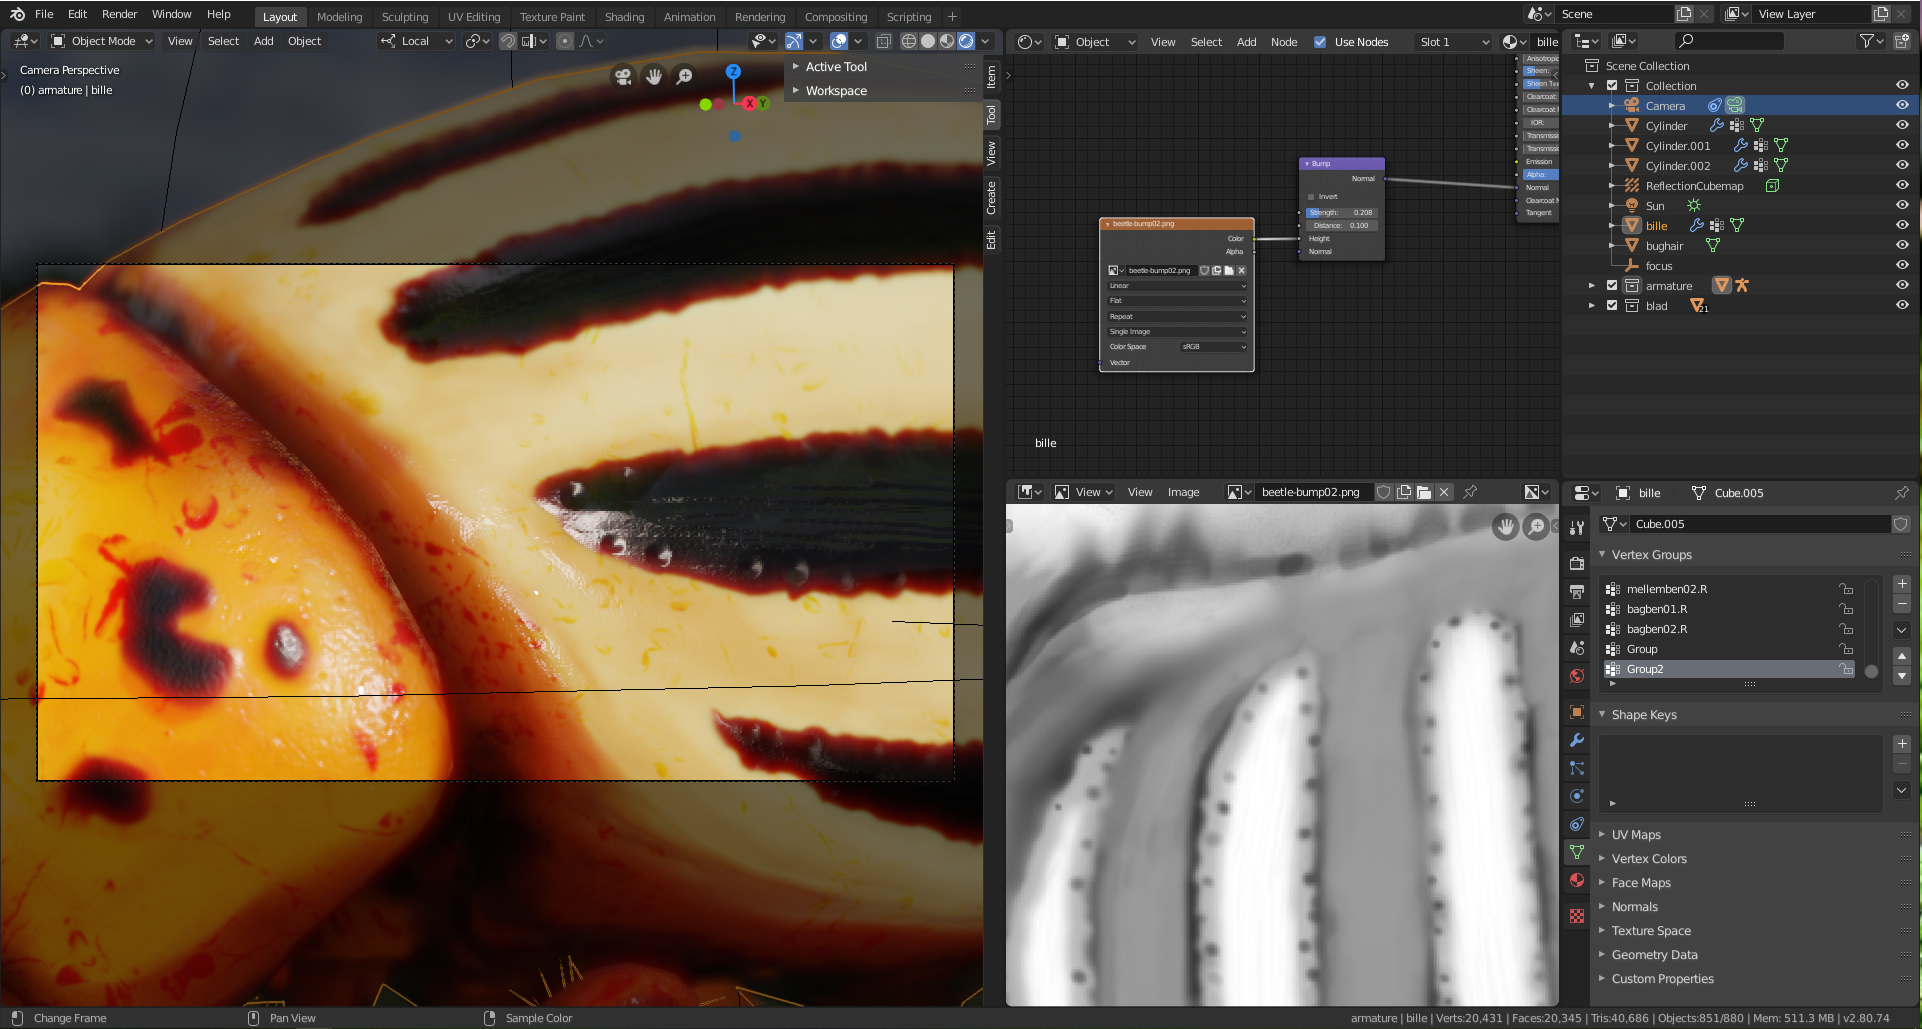
Then I converted the image to grayscale, to paint a bump and specular map.
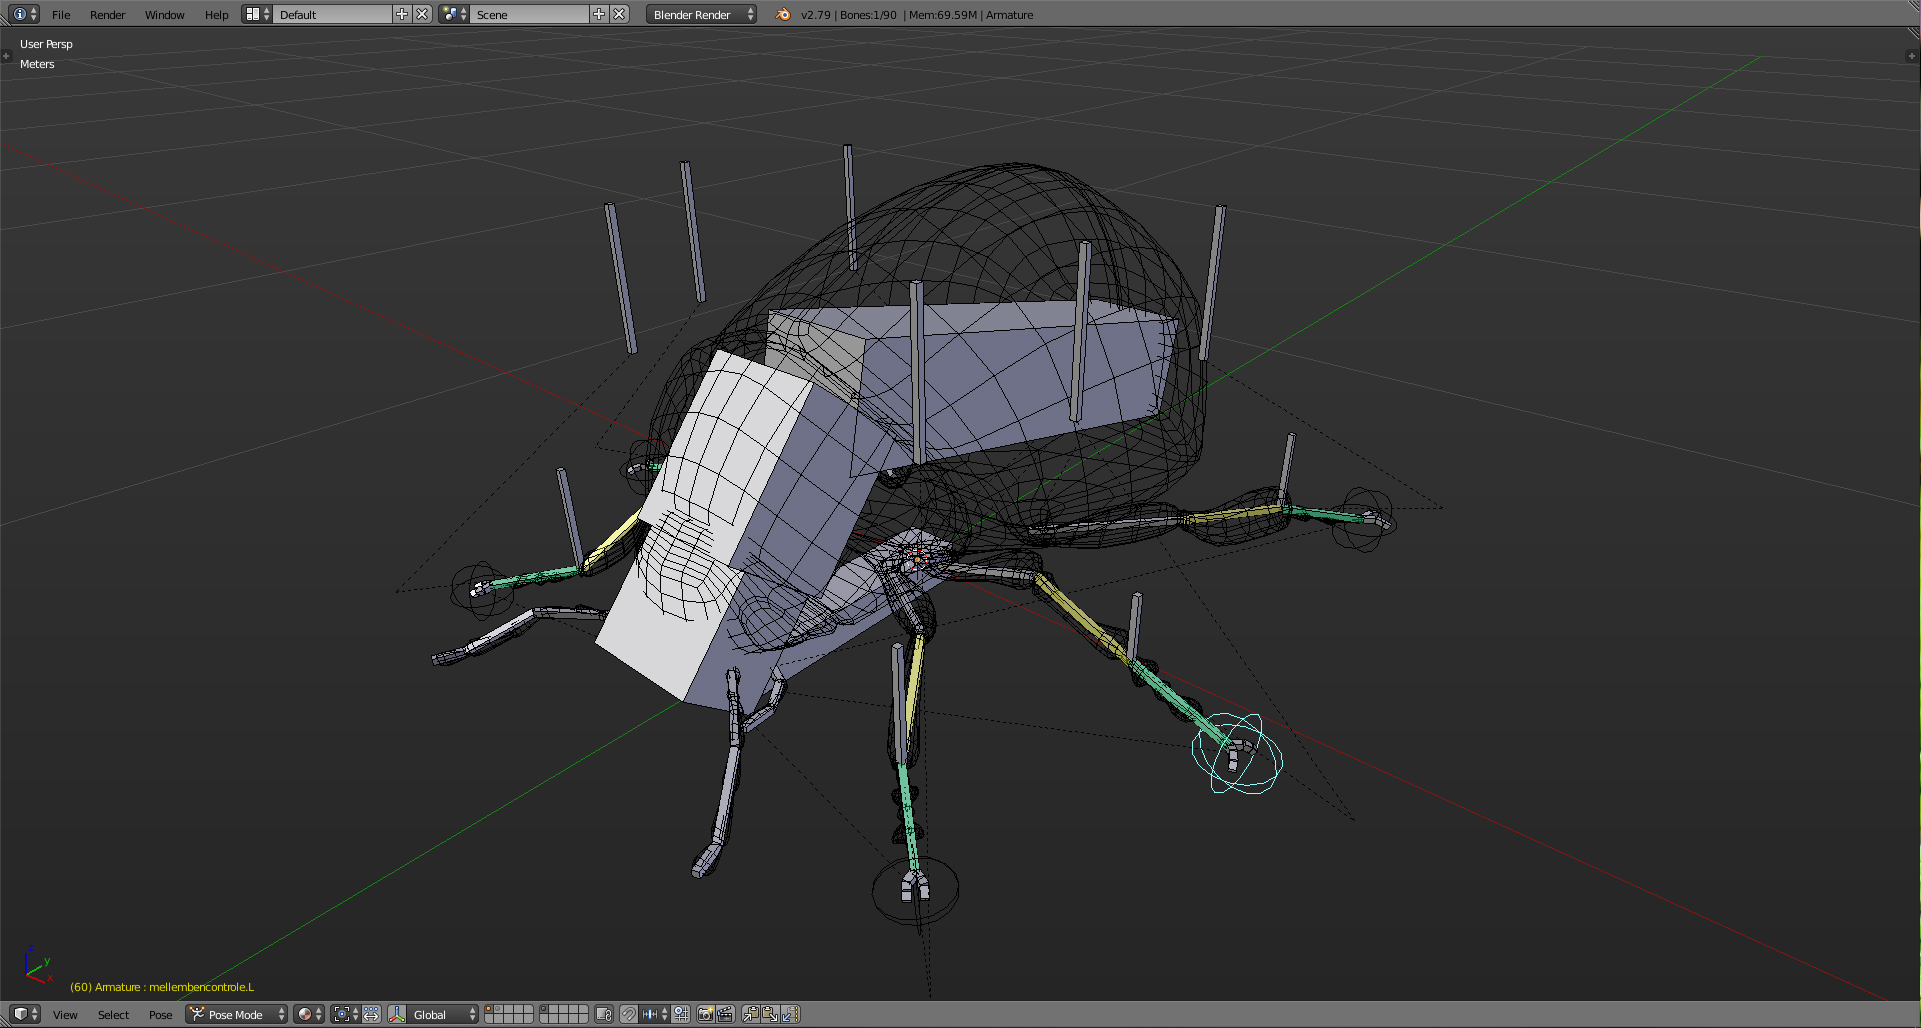
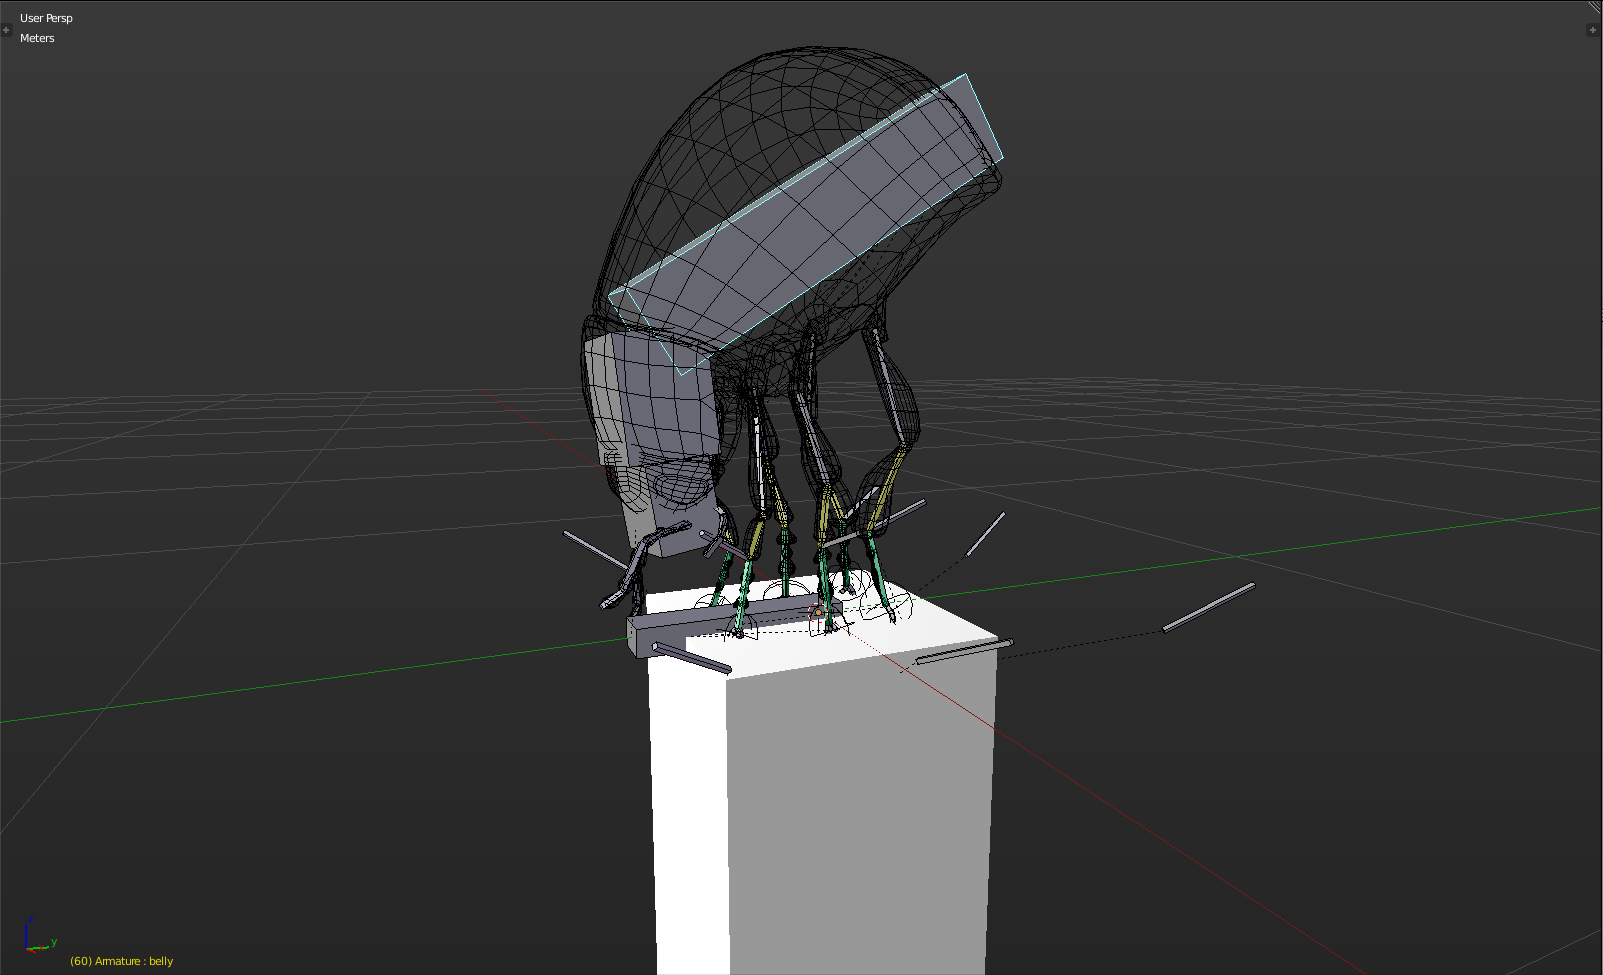
I then added a rig, so I could position it in the way I wanted. and made a small
animation test:
I changed the rig after the test because there had been too much sliding.
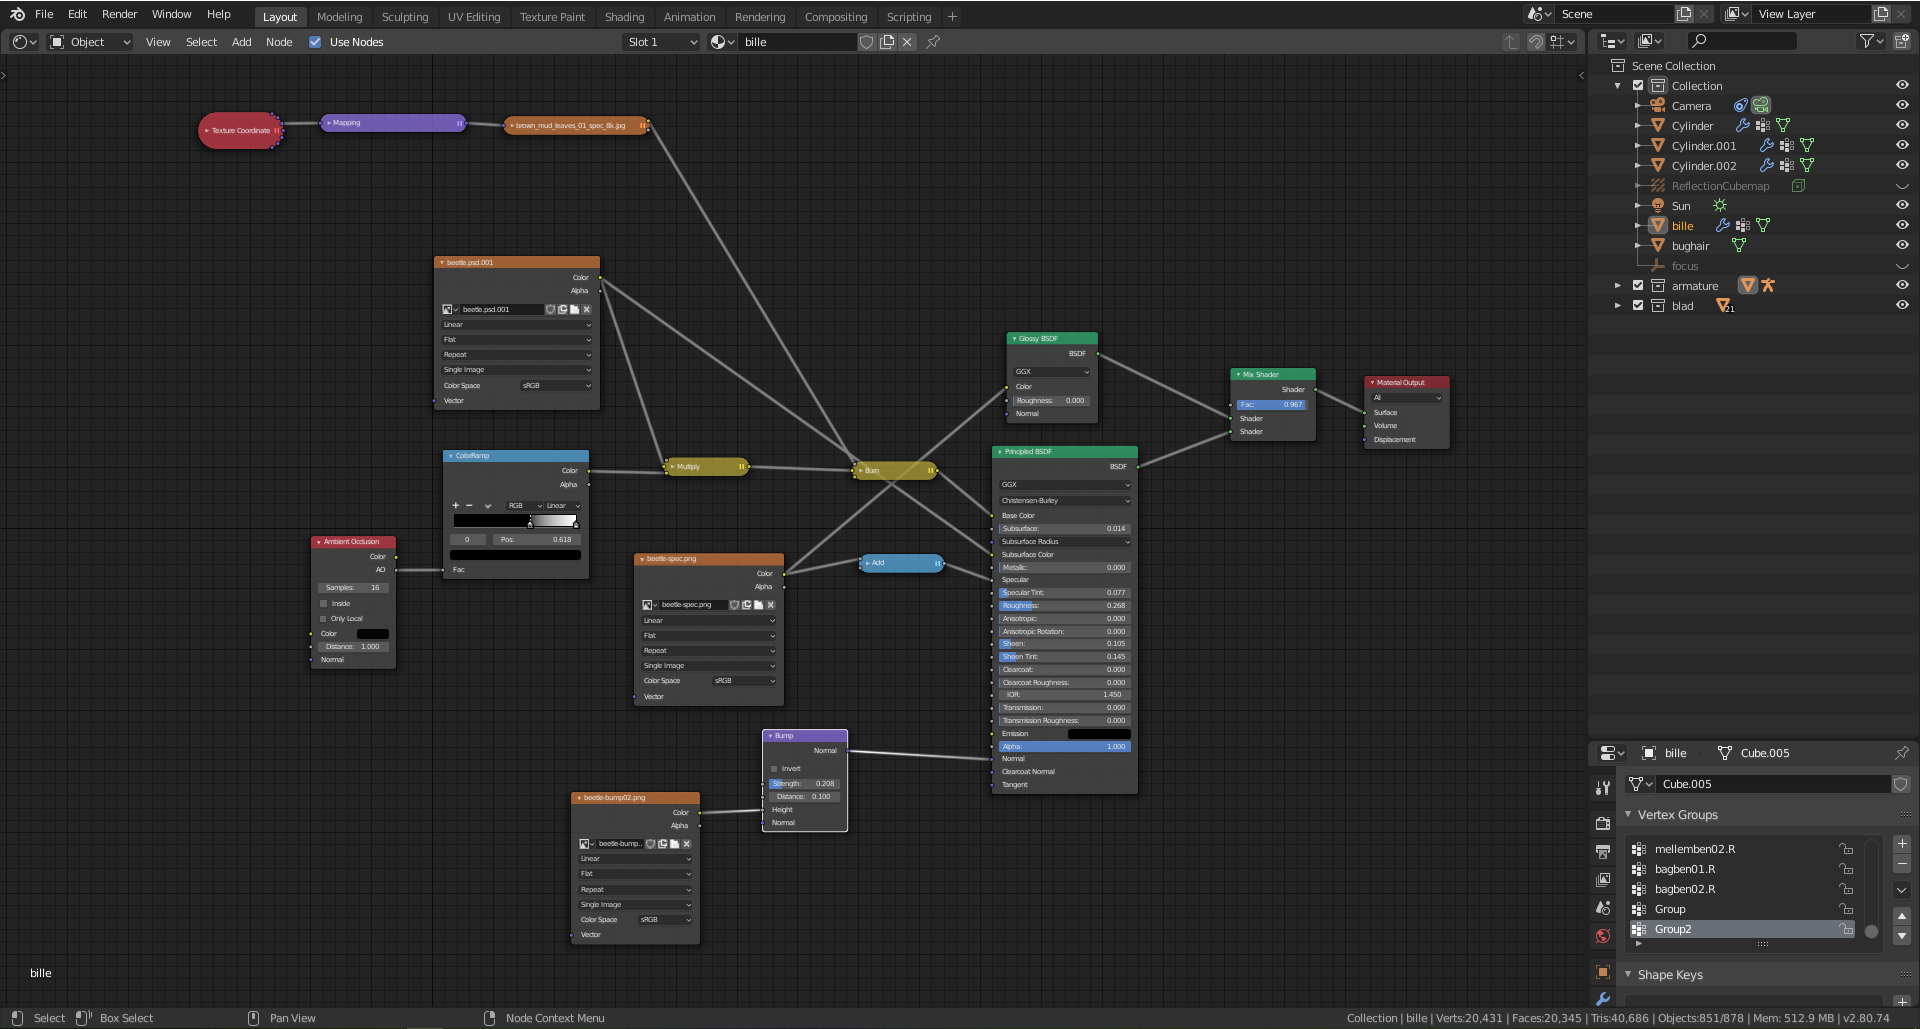
Then it was time to import the beetle into 2.8 and I started playing with the nodes.
I especially wanted the dots by the stripes to be visible.
With Eevee and the textures I had made, it didn’t take long before I got some promising results.

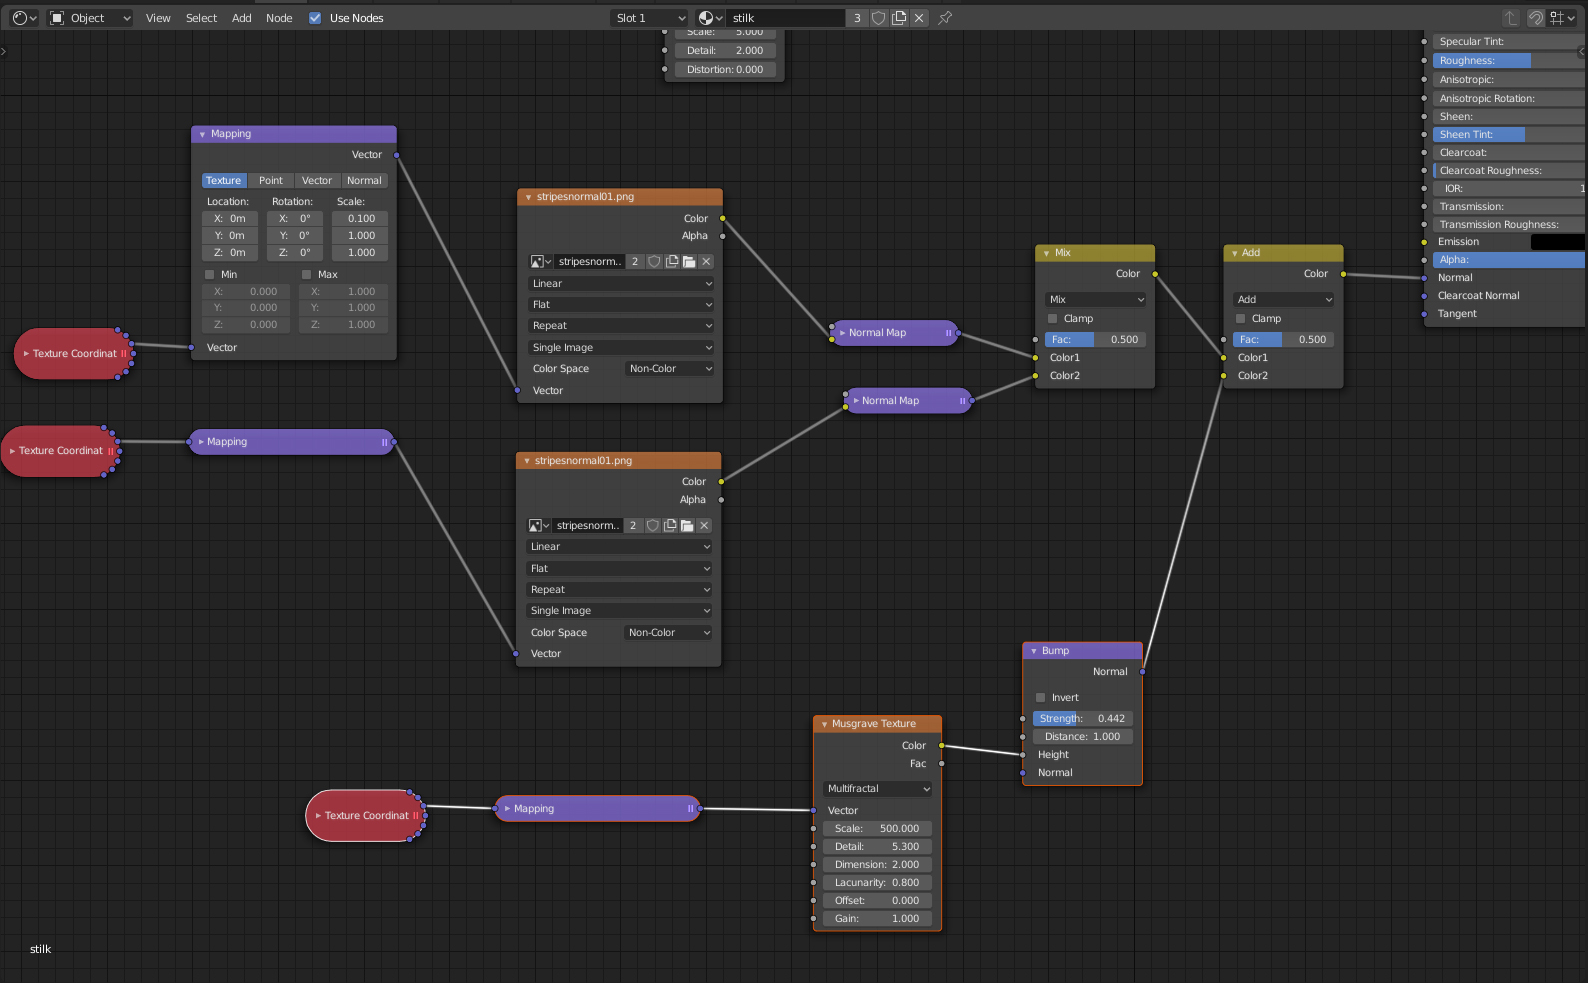


For the stem I mixed a musgrave and a noise for color. The normals are a mix between a musgrave with 500 in scale and a normal map I made.
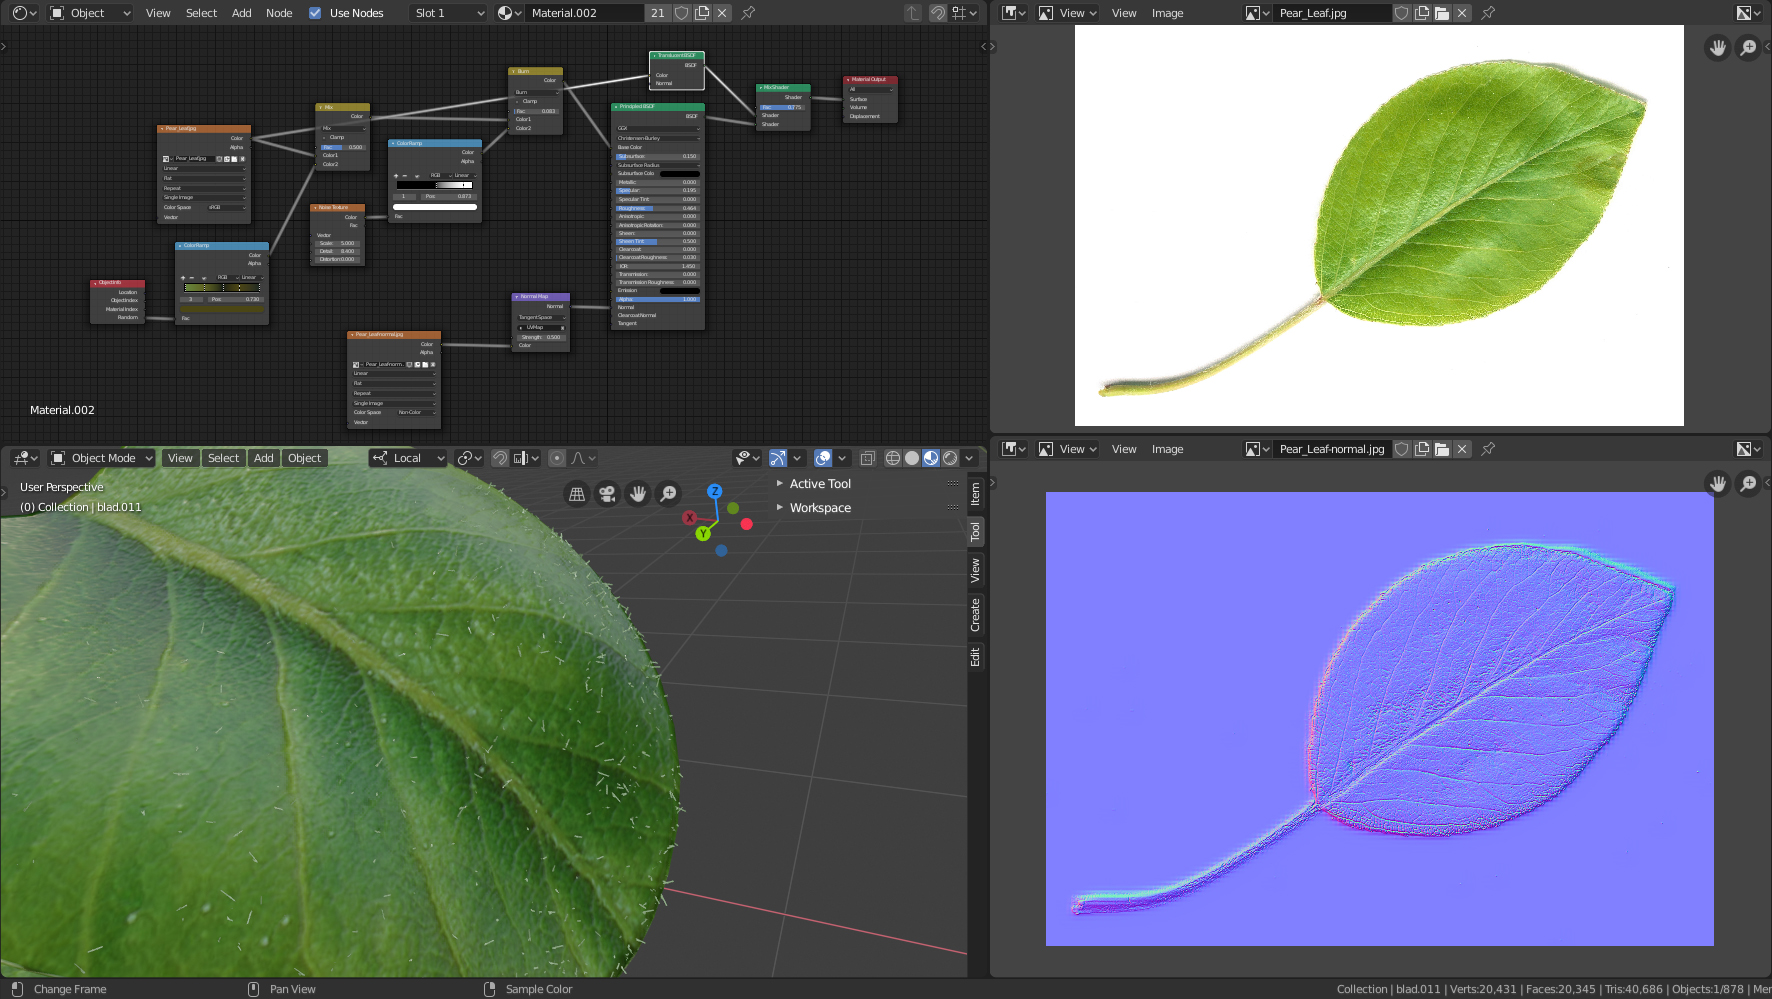
For the leaf, I found a good quality image I could convert to a normal map and mixed the image texture with Noise and ColorRamp to get some color variation.
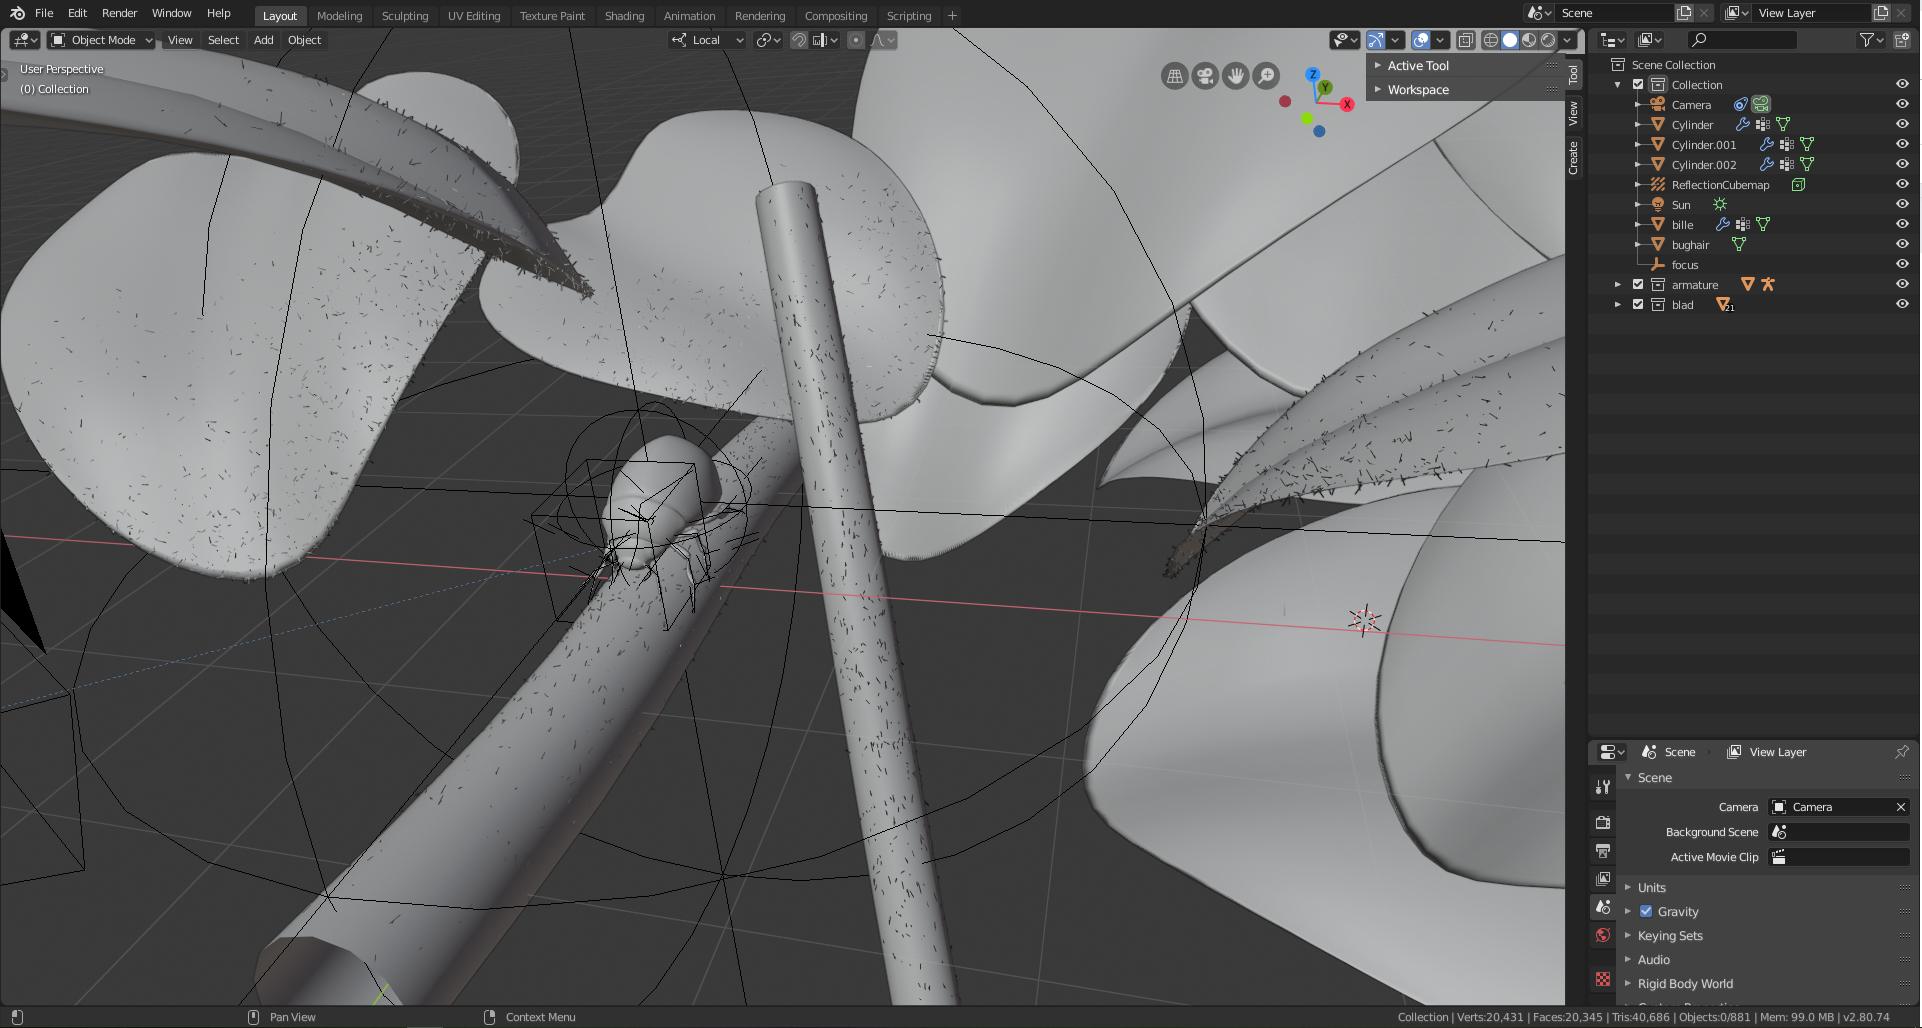
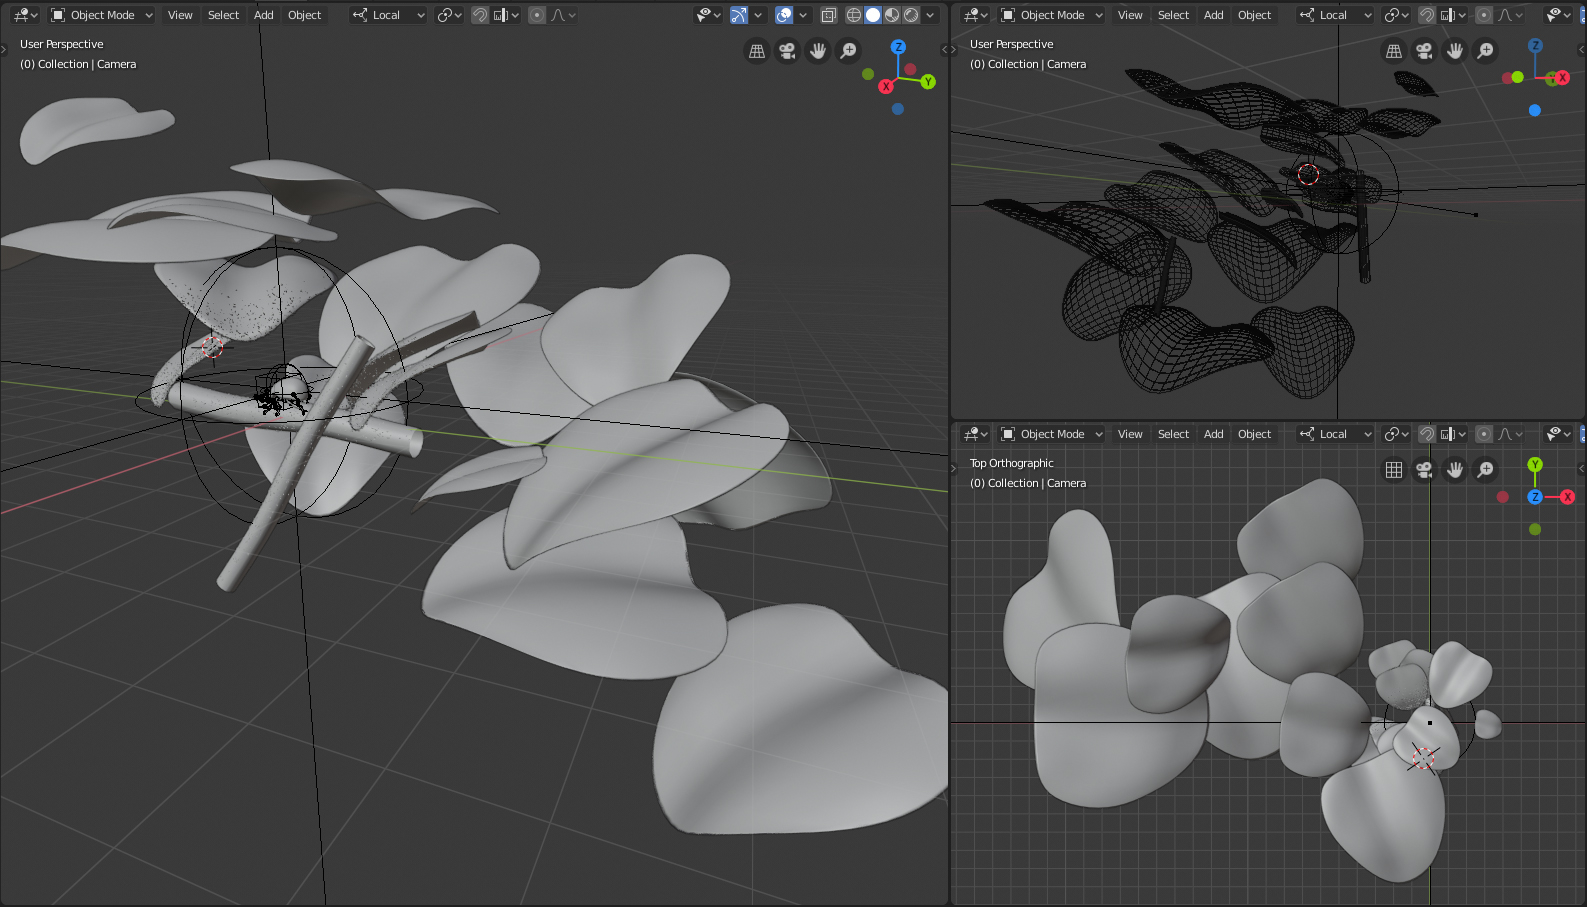
A small amount of hair was added, but only on objects closest to the camera. The leaf was copied, rotated, and scaled and then placed in front of the camera.
Camera and Render

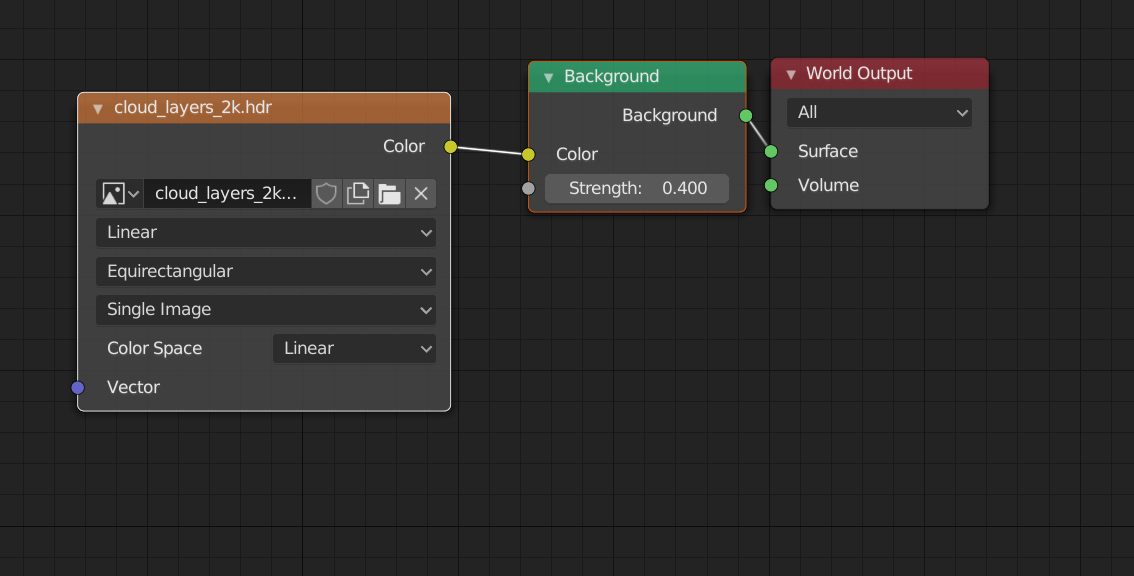
For the enviroment texture I used “light cloud_layers_2k.hdr” from HDRIHaven and changed the value to 0.4 to make the background darker, so the foreground stood out more. The sun lamp had a strength of 10 and the other lights had almost default settings.
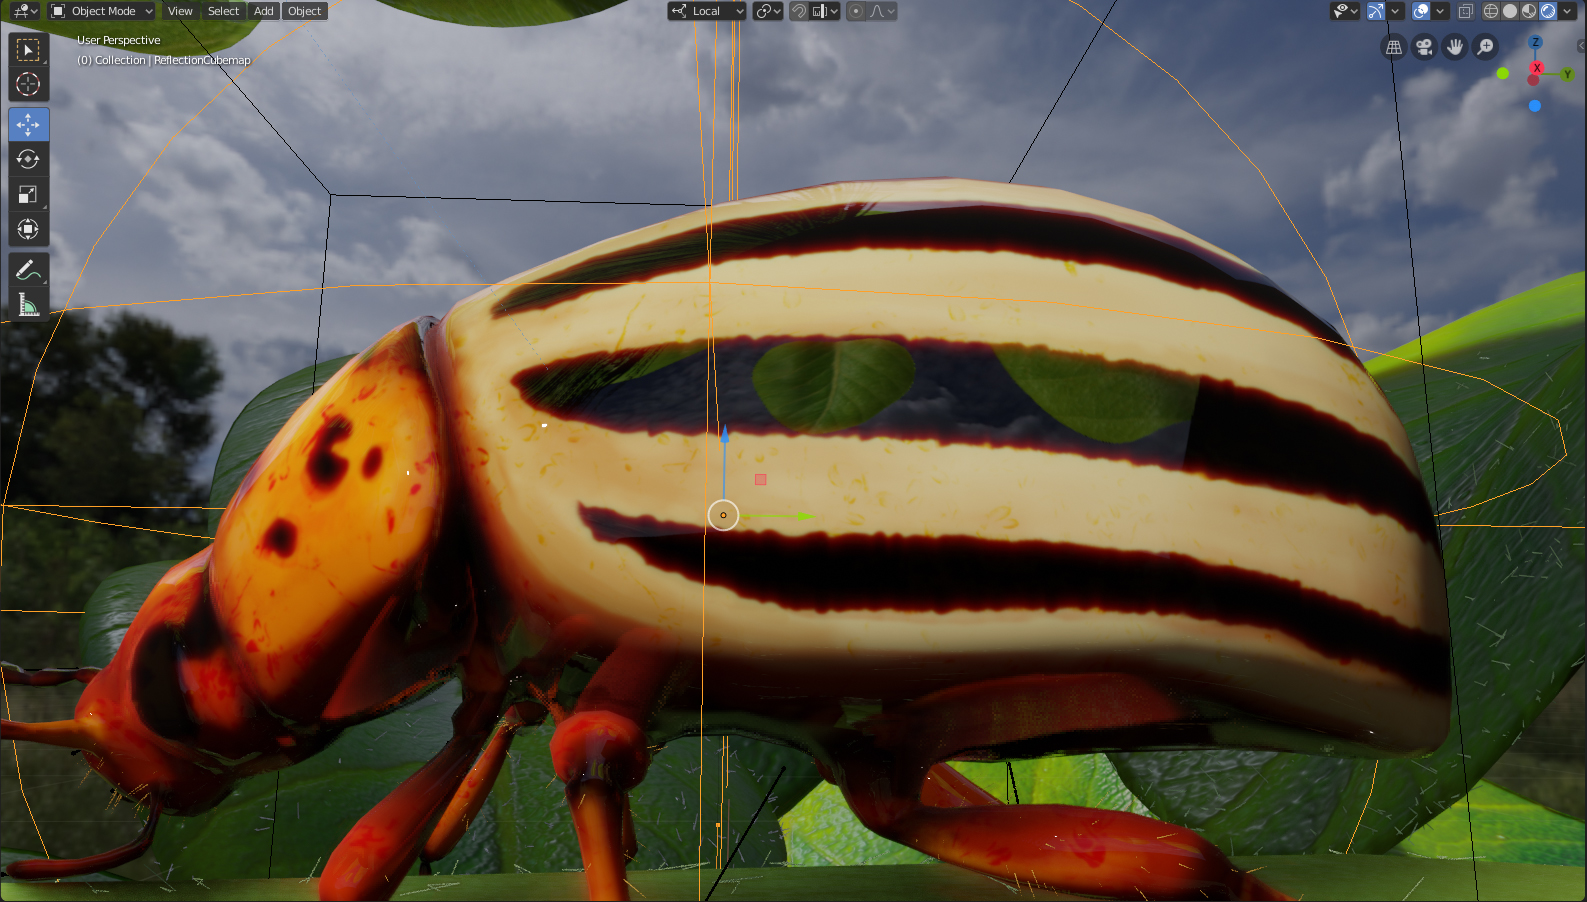

A Reflection Cubemap was added. but with the roughness turned down, so it was barely visible, only reflecting some greenish colors.
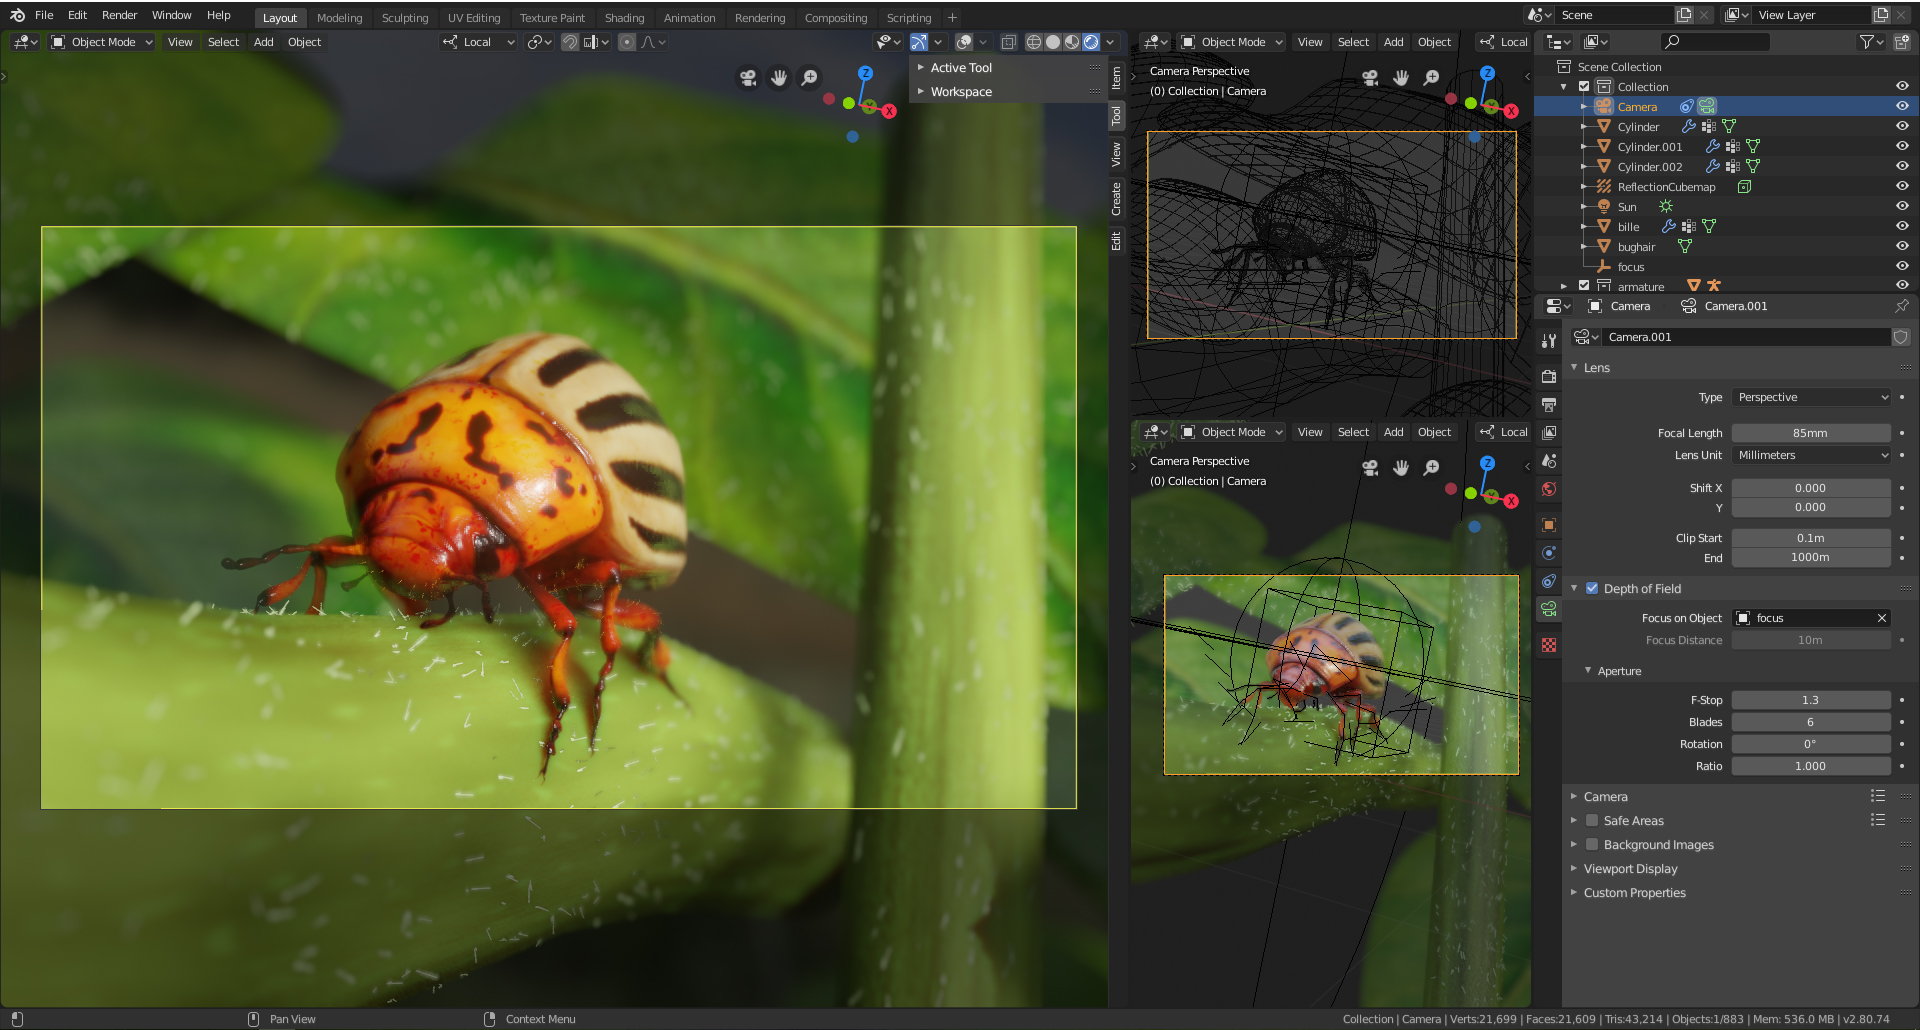
Finally, I placed the camera with a Damped Track to an Empty, which I also used as a focus object for the depth of field, with an f-stop value at 1.3 and a focus length at 85.

The finished scene had 18,449 faces and took 18 seconds to render.
Hardware
- Intel core i5–6400 cpu 2.70ghz 4 core 8GB
- Geforce gtx 960
Software
- Modeled and textured in Blender 2.79 and rendered in 2.8
- Photoshop to convert the image to grayscale and converting the leaf normal.
About the Author
 Bo Laugesen, 3D artist and very happy.


Cute~^^
Thanks im glad you like it :)
This is really impressive :)! A lot of different skills used and with only one year of Blender practise.
You mentioned musgrave for color on the stem, but have you not used hair particles as well? It looks like that on the image, but you did not mention it. However, it is those tiny details that makes it all so good :).
thank you, All my spare time has been used on blender the last year and a half. my first save file is from 27/02/2018 18.35 :)
Nice man, bizar you had a gab of all those years not doing 3d??
PS why not do all the stuff in 2.8, as i read this story’s intro i thought it was for learning 2.8. Outcome looks pretty sweet indeed, did you use some rigging software or did you made it yourself. Rigs can be quite complicated
Thank you :) I had some models that i hadn’t used for much, and just wanted to try Eevee with those.A chance to use em before going full 2.8. still have a few unused left. Yes I did the rig myself.
He says he used hair particles only on the objects close to the camera.
“A small amount of hair was added, but only on objects closest to the camera. The leaf was copied, rotated, and scaled and then placed in front of the camera.”
Thanks for the correction. Then I did not see wrong anyway :)!