
Behind the Scenes: Cute Warrior
Biography
Hi there!
My name is Anton Ivichev. I’m 32 and I have been doing cg graphics for around 14 years, 10 of which I have been working for the game-industry. I was born in Novorossiysk City in southern Russia. Here I started my career as a 3D artist for interior design, using 3ds Max. In my free time I have always been interested in games and participated in CG challenges.
The next step was working at game companies in Vologda and Sankt-Petersburg. It was great experience for me, where I learned Maya, ZBrush, Substance, etc., as well as improved skills in all aspects of art creation for games. In my career I have done not only concept art, texturing, modeling, and rendering, but also rigging, animation and a little scripting with Python and C#.
My favorite game engine is Unity. I love to expand my knowledge and everything that I know comes from work and self-studying.
Last year I started a new life in Berlin, Germany. The reasons for my move were family and the future, but I had to lose my permanent job in Sankt-Petersburg.
So, now in Germany I have participated in Integration Germany courses and I’m taking English courses. I’ve had a long period of time without work and that is the best time to study free software. In this way I’ve started learning Blender and Krita in order to make a couple of artworks for a portfolio and to find a new job in Berlin.
Making Of
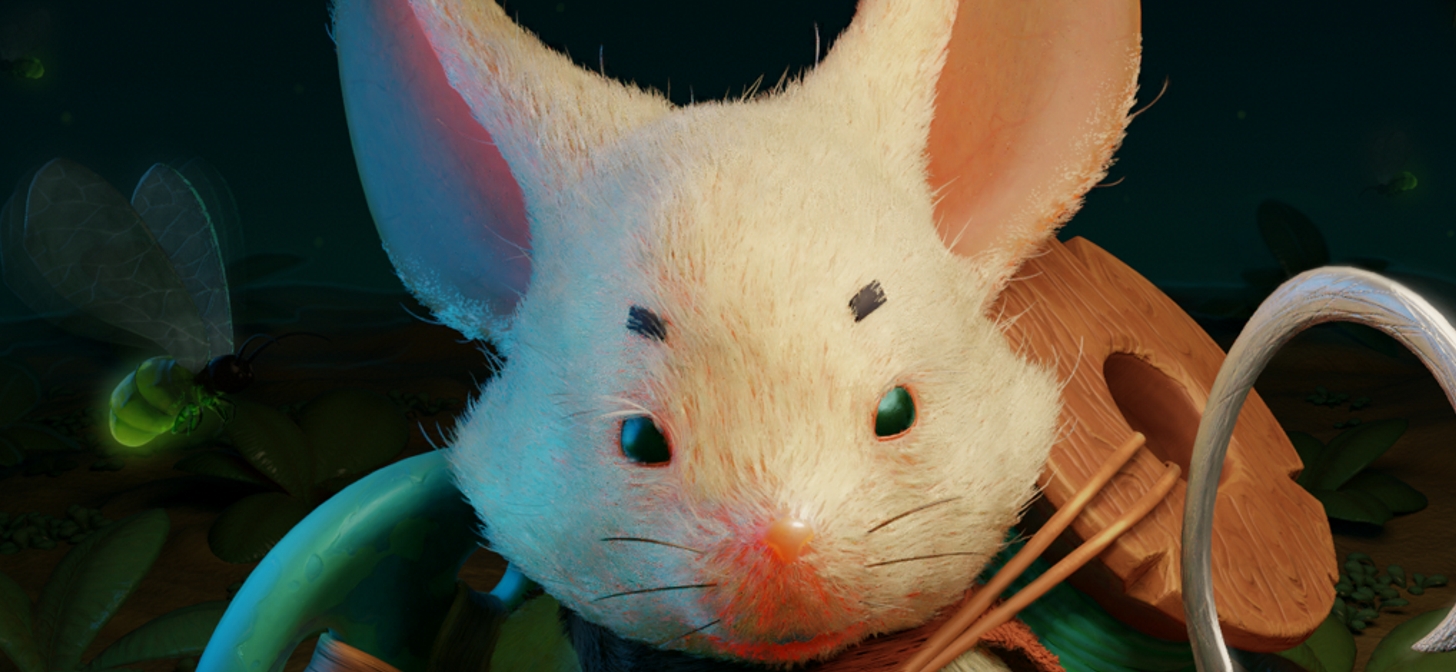
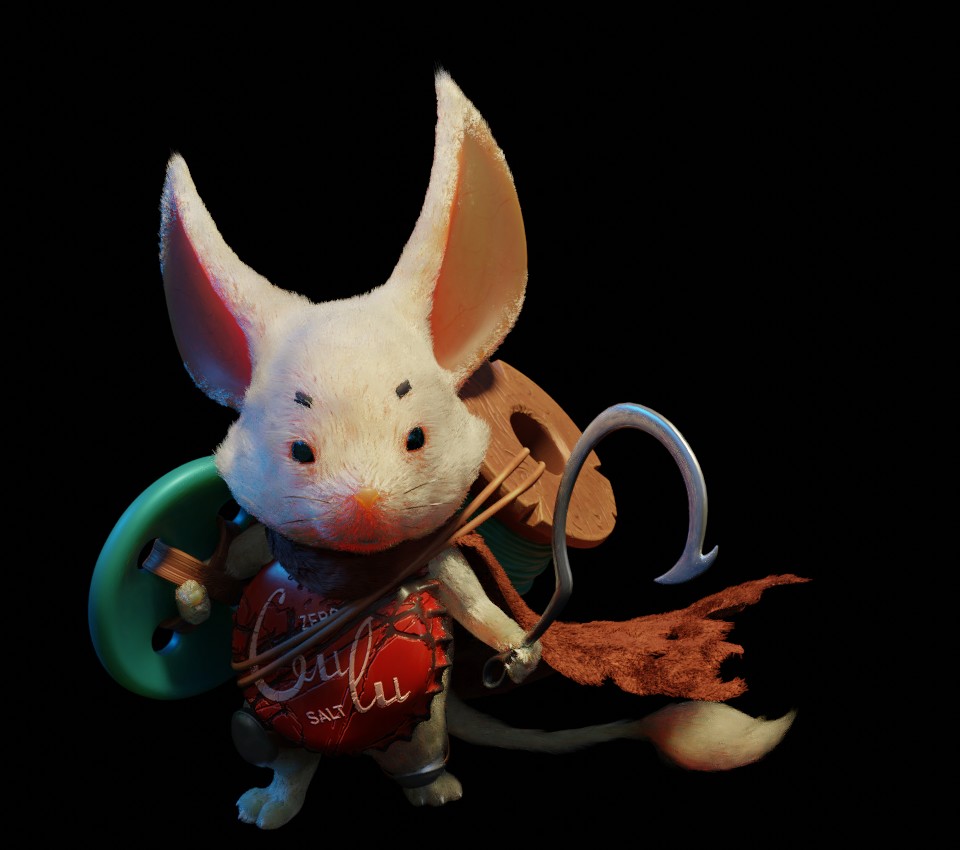
This brings me to the CG Boost competition for which I created my third artwork made with Blender and Krita: “Cute Warrior”.
I am fond of all cartoons made by Hayao Miyazaki and like stylized graphics. The challenge topic was “Cute warrior,” and it was ideal for me. Firstly I imagined a raw idea in my head. Then I did research on Pinterest to find good sources and build a reference board.
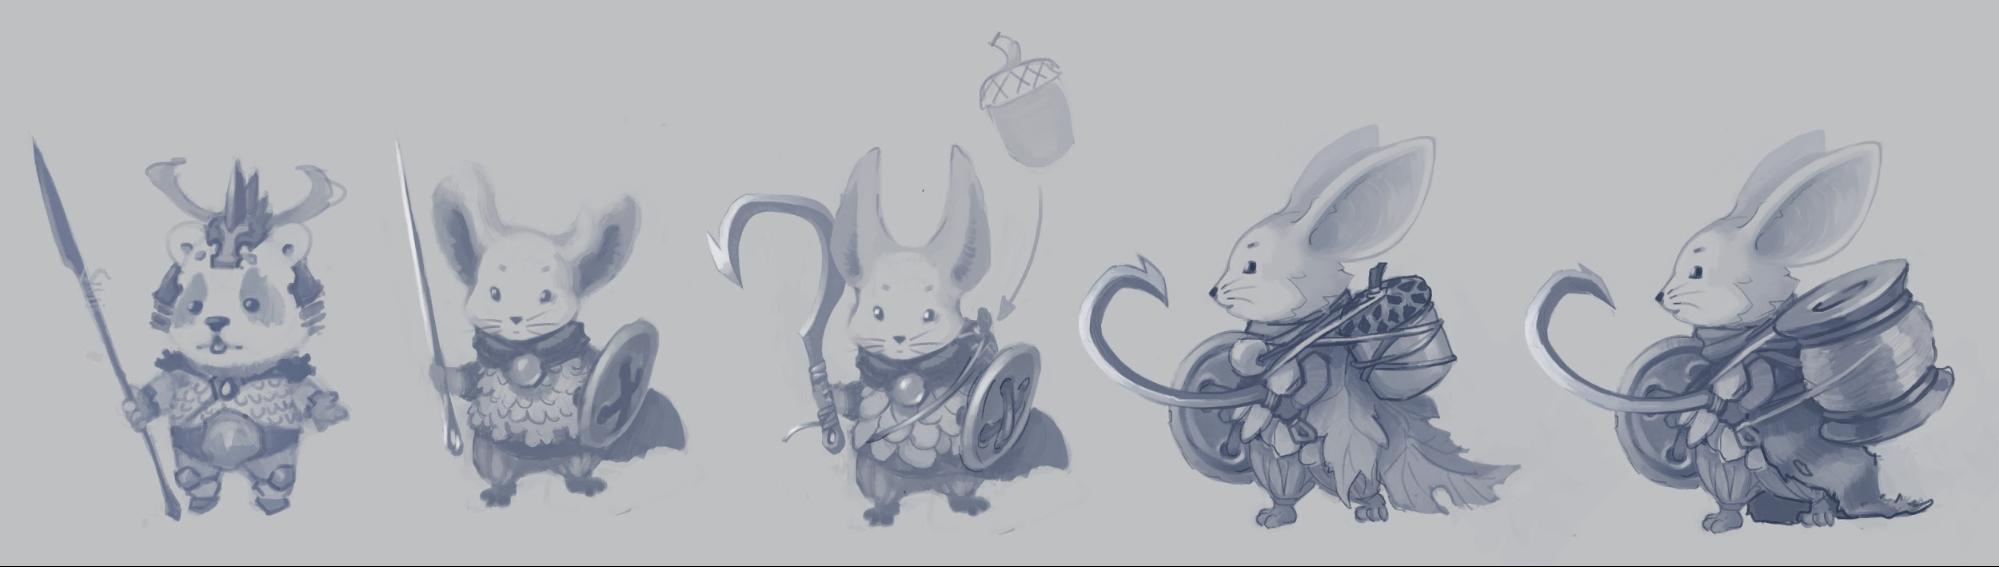
With these materials I started working and created some variation sketches of the main hero using Krita.
The next steps were quick blocking in 3D and quick lighting. Blocking was done mostly using primitives like a sphere or a cylinder squashed or stretched and shaped to the right forms without connecting them. Quick lighting is classic 2 direction light: blue = back/left and warm = top/right. Below are EEVEE render results of this phase:

Oops, a quick fix of the proportions. At this step proportions are very important:
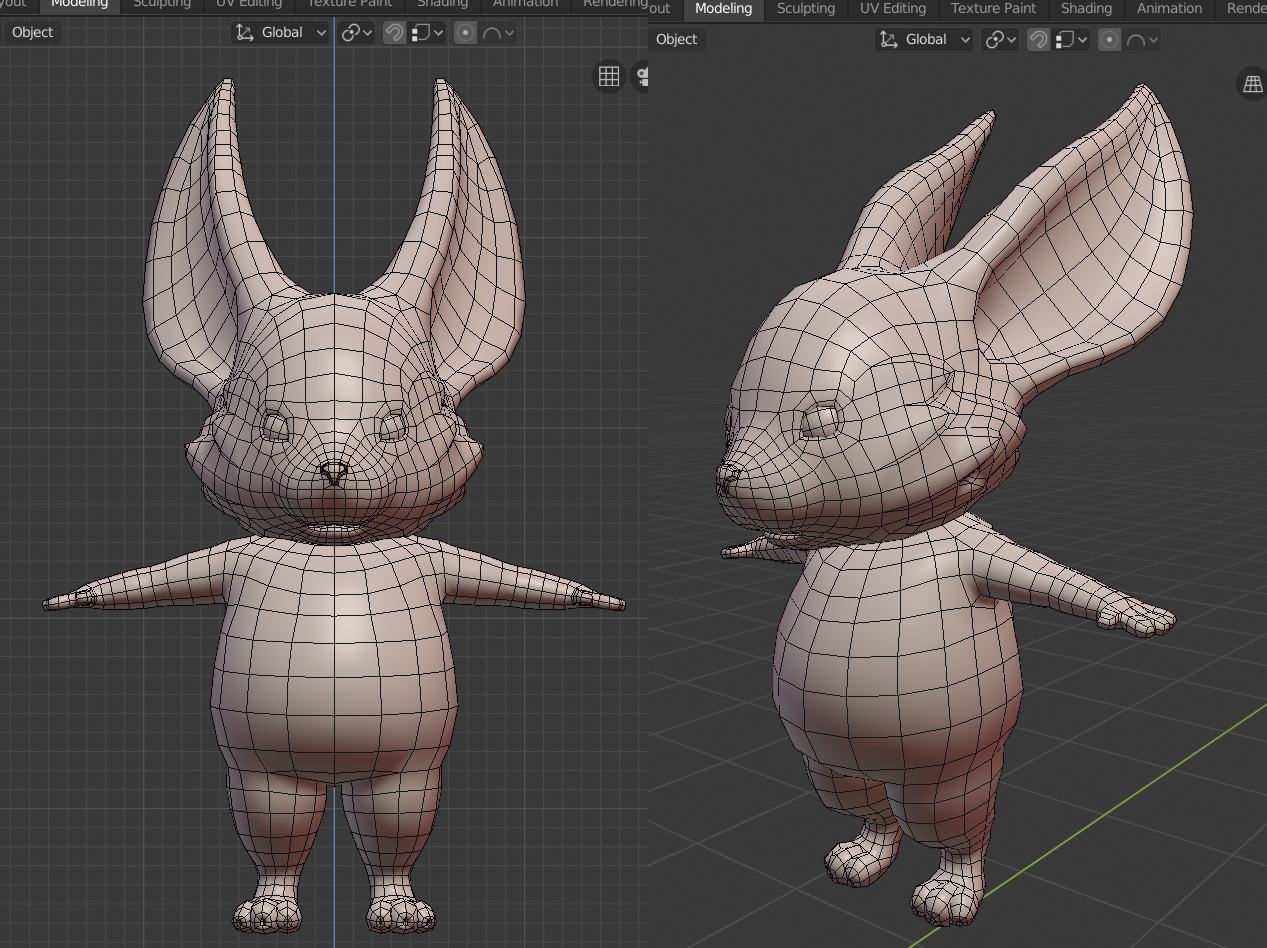
Then I connected all parts, sculpted more detail on the head, and retopologized.
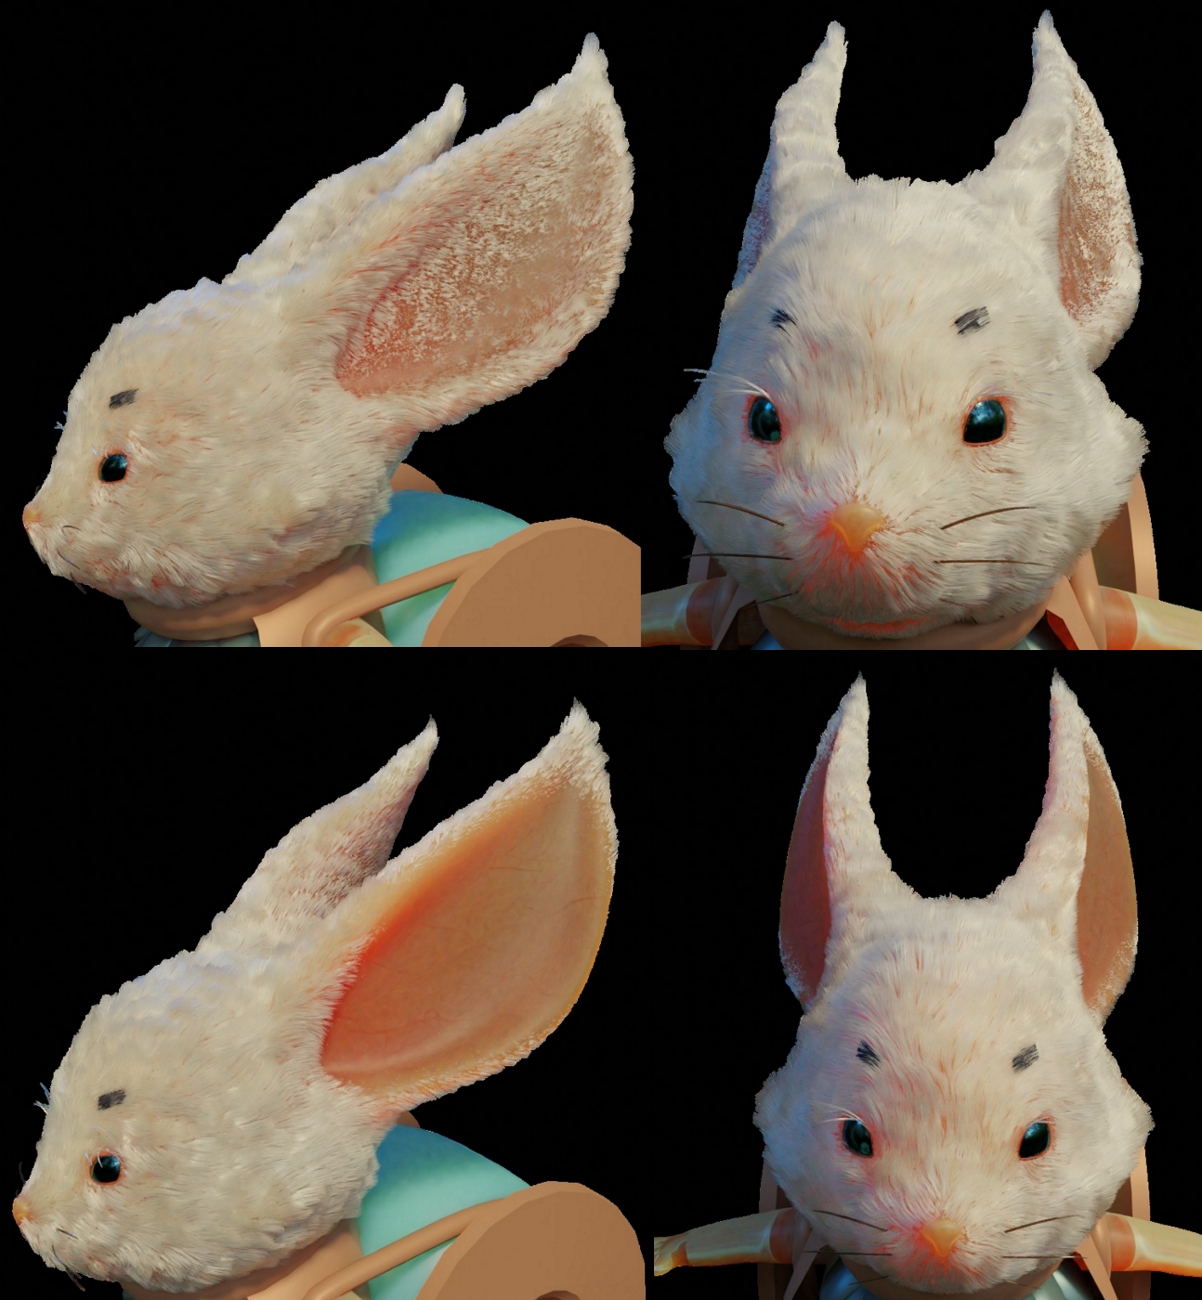
So after I received the final body mesh I immediately started testing the hair system. It is important for me to test as soon as possible the most risky part of work. Here are the first tests:
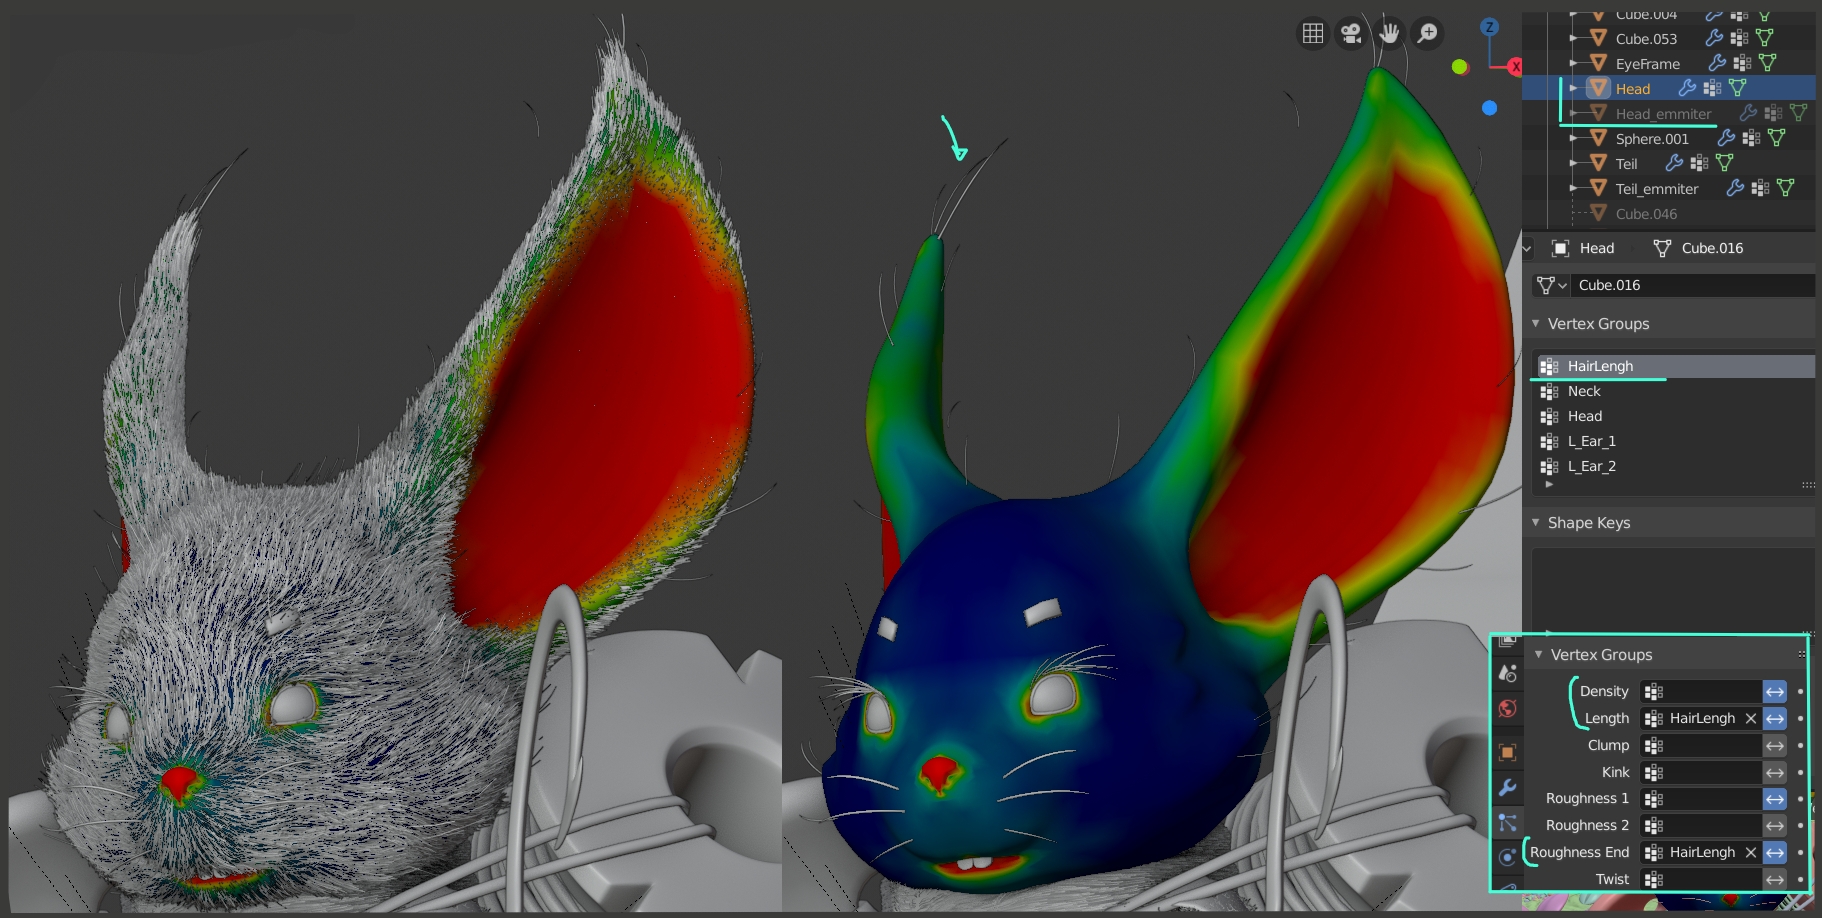
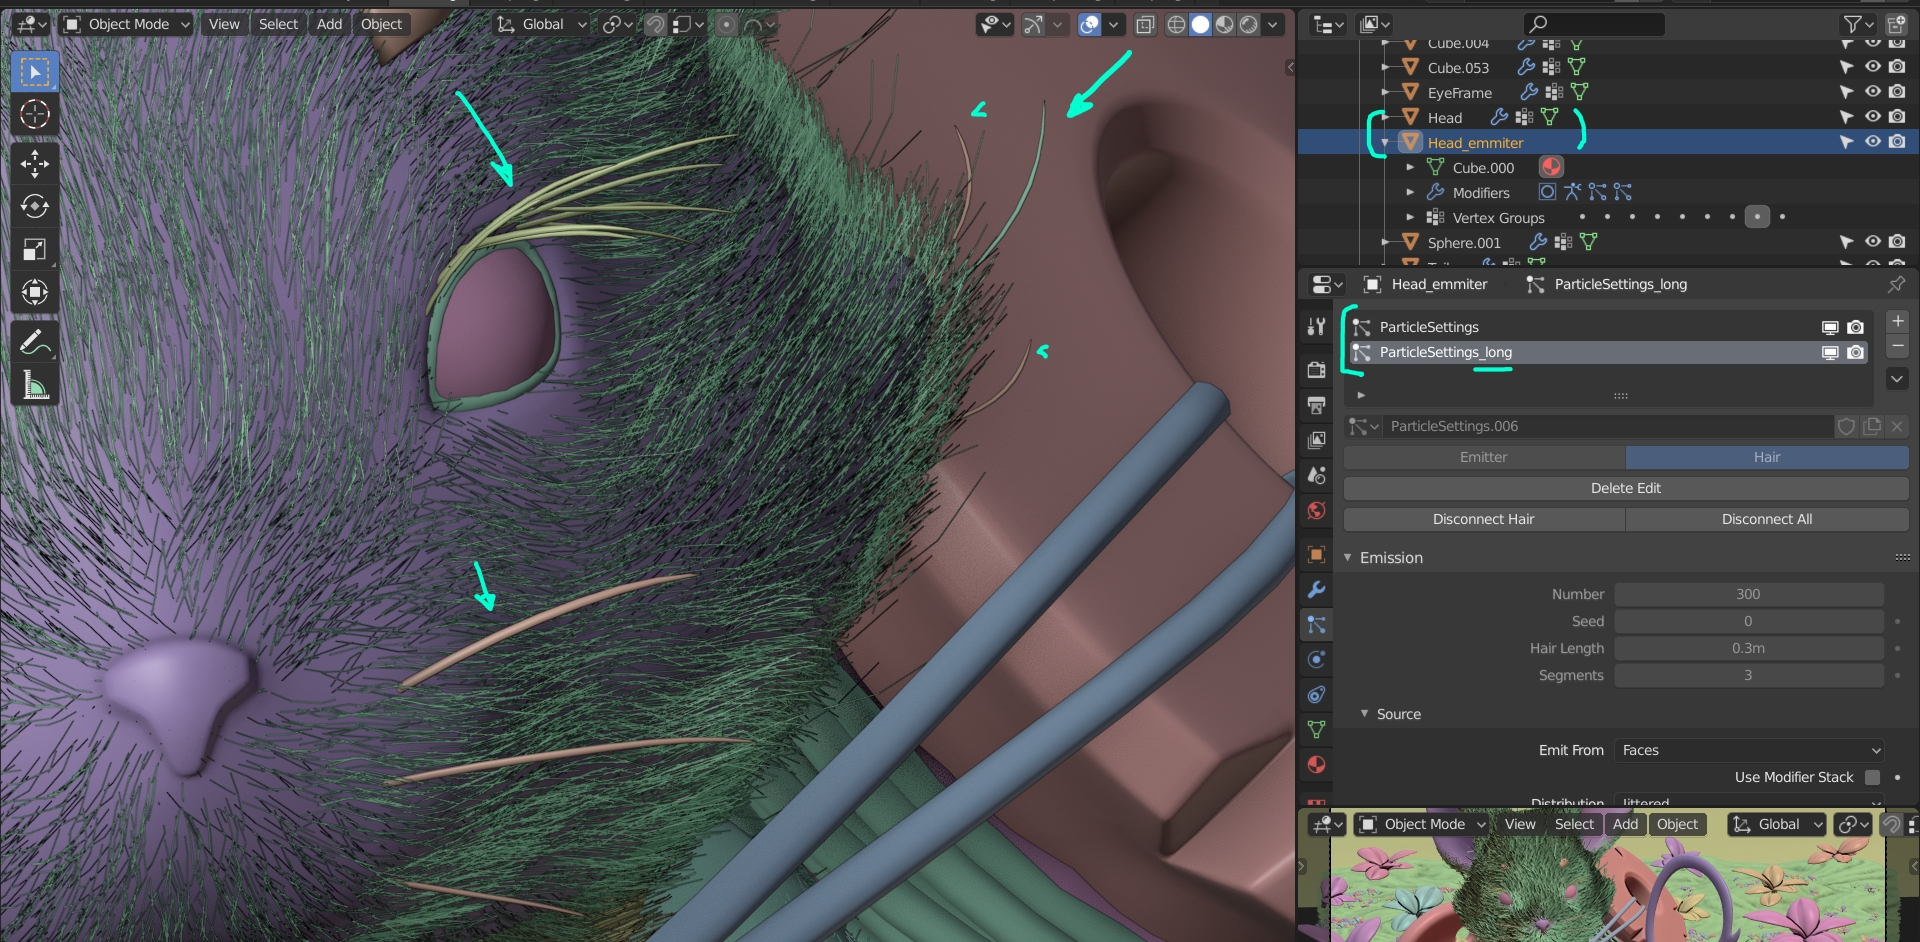
For less density and to control length of hair on the nose, inside the ears, etc., I used vertex weight paint. You need to create a vertex group in Object Data – Vertex Groups then paint in Weight Paint mode. In Particles parameters – Vertex Groups add this group into the slot that you want to control. Below you can see a screenshot of weight paint:
Also I created the mustache, eyelashes and single long hairs using additional meshes. These meshes have the same material as the particle (hair) system, it is the new Principled Hair shader. An important step: I hid the emitters of all meshes with hair on them in order to render only hair. Fur meshes had duplicates with skin shaders in order to render skin under fur. Because of this, it’s good to create the rig and skinning weight, after which you can duplicate skinned mesh for hair. But if you forgot, it is okay to copy skinning weight between two meshes.
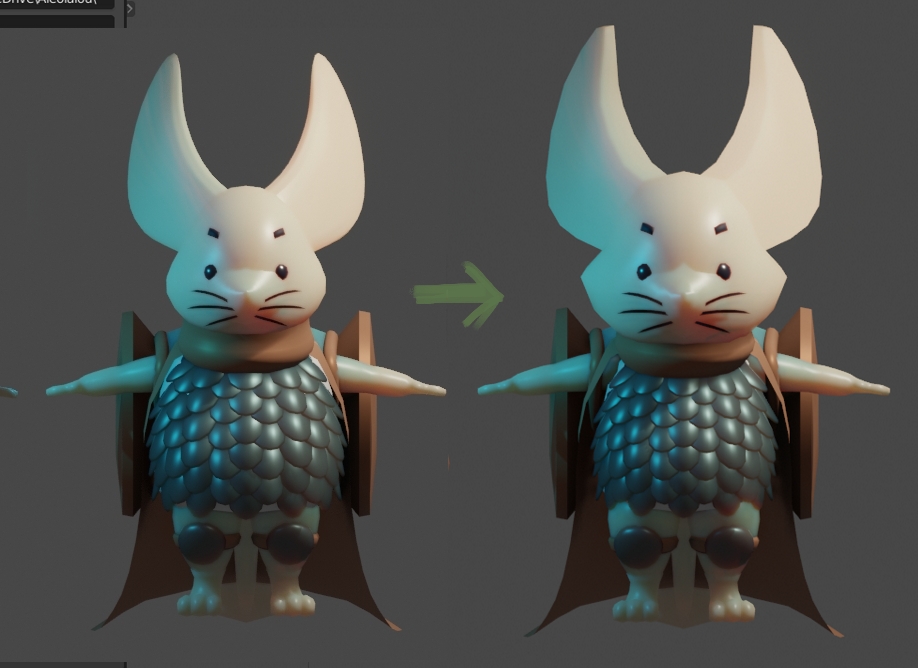
The final touch for the hair was a second particle (hair) system on the same mesh with a smaller count but longer hairs. Also adding roughness parameters to hair helps produce a more realistic result. Particles system – Roughness – Endpoint is a good parameter for more realistic randomness in hair direction.
The rig was very simple, without any controls. It was just for posing the model.
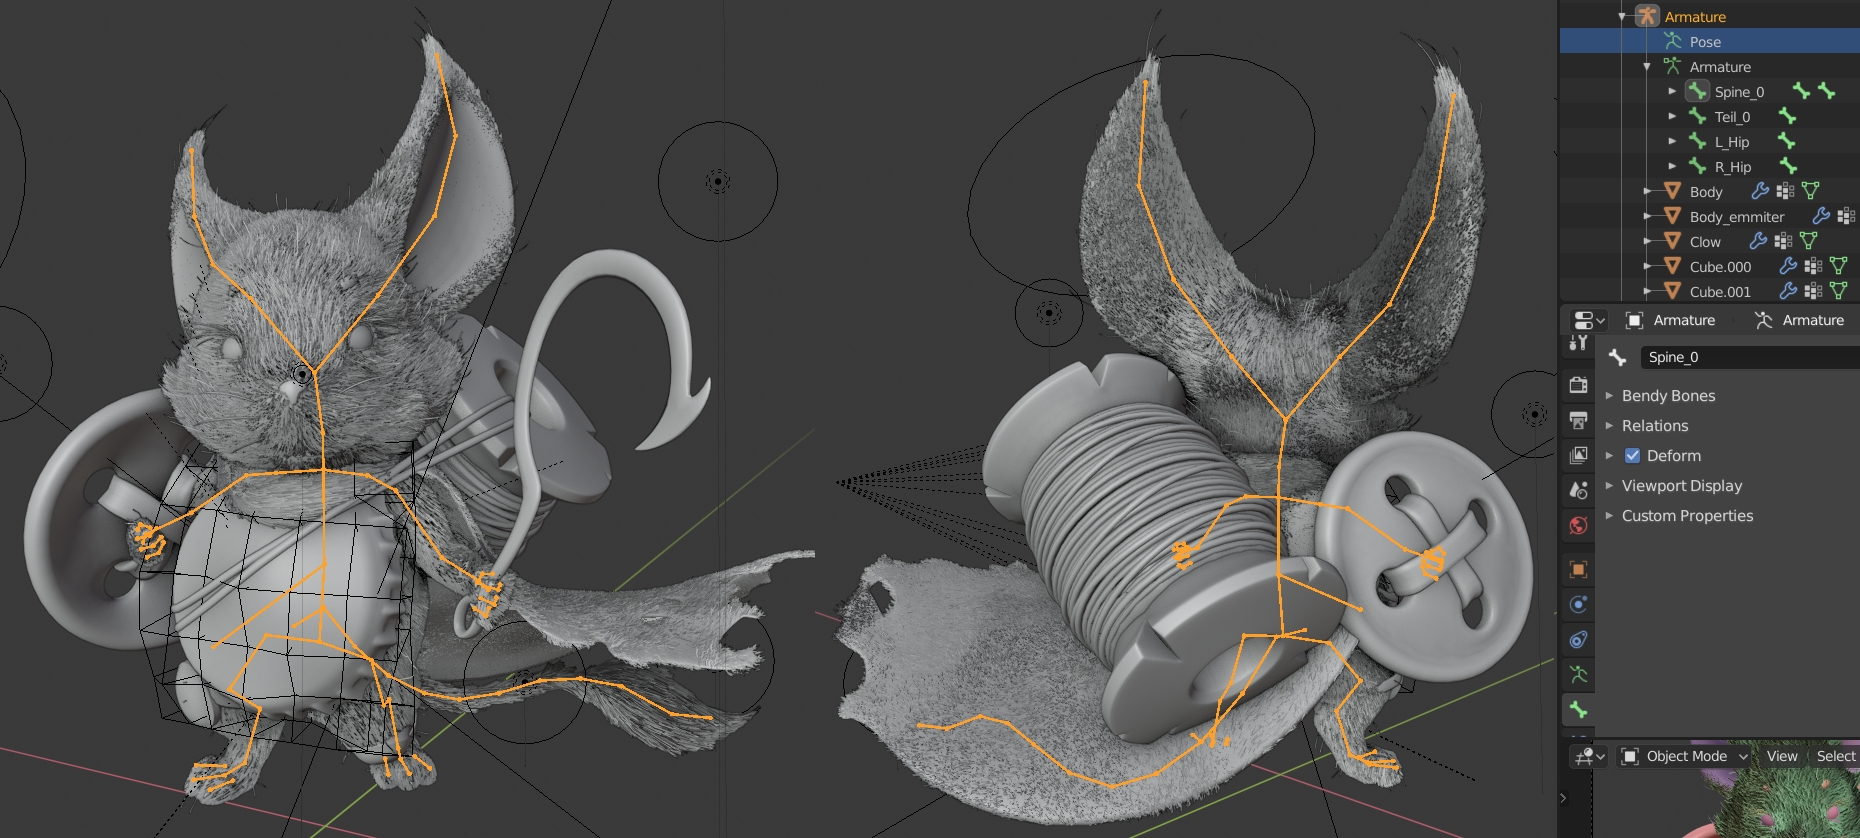
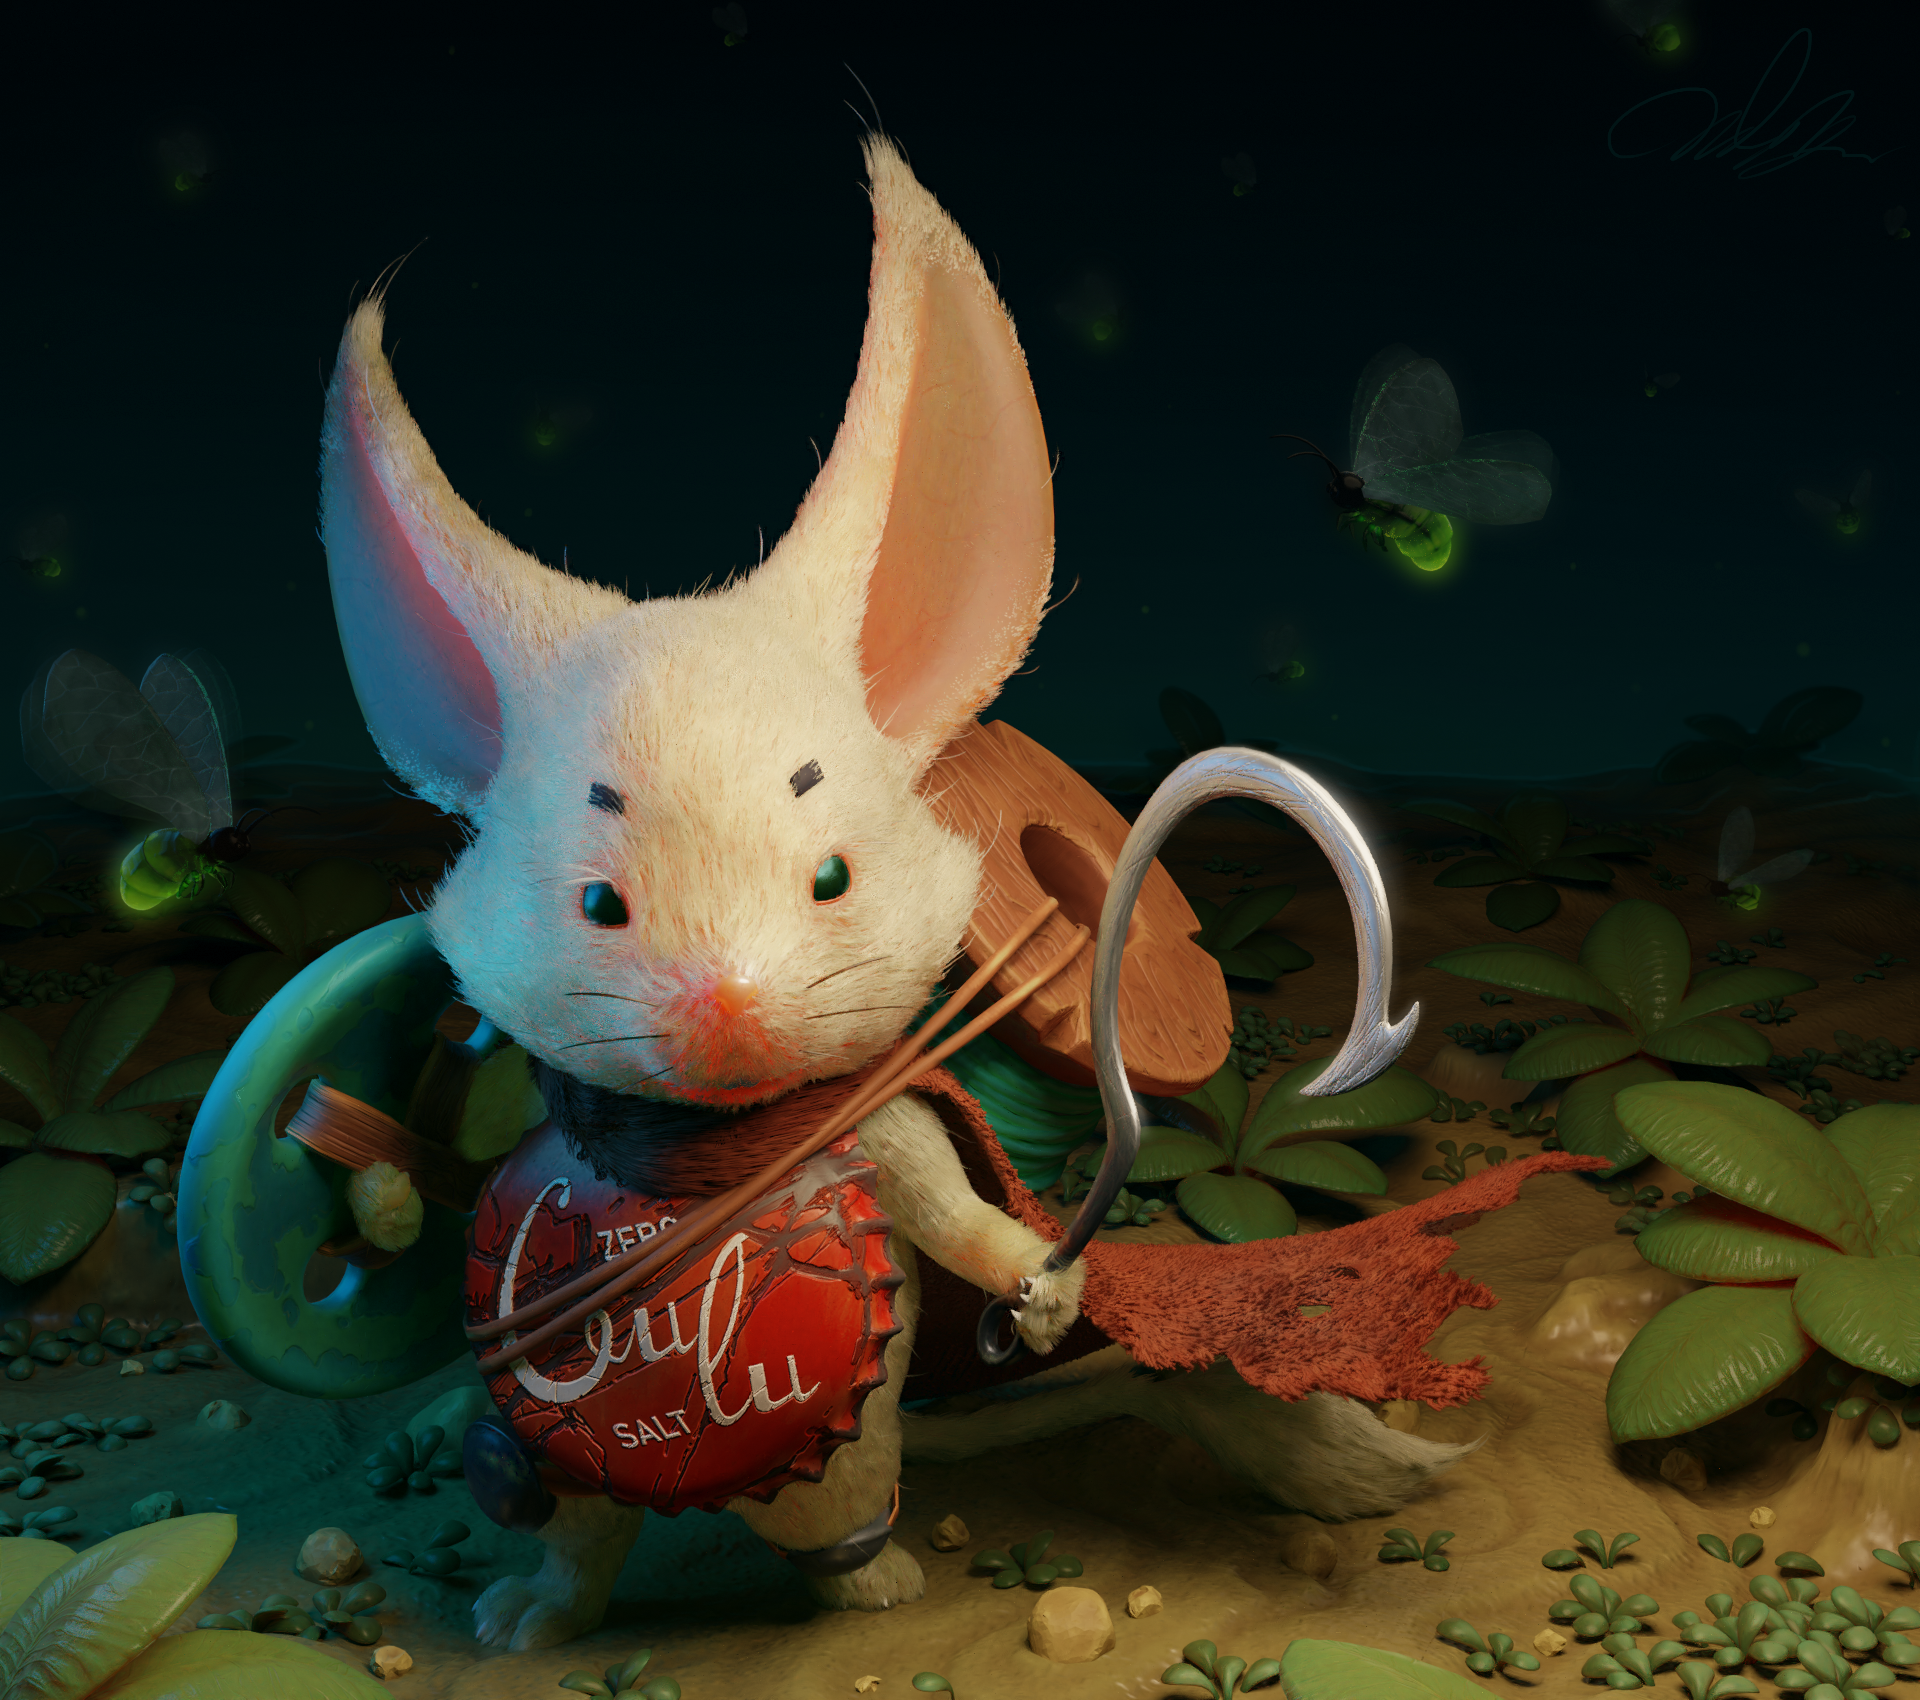
As you can see, I changed the main armor that you saw in the main blocking stage to an old bottle cap. An idea came to me when I was drinking classic Coca-cola and thinking that the existing armor was a bad fit for the environment and history in which the main hero exists.
Except for the hair and eyes, all other things use Principled BSDF shaders with different parameters and textures. Below is the graph of the material for the bottle cap:
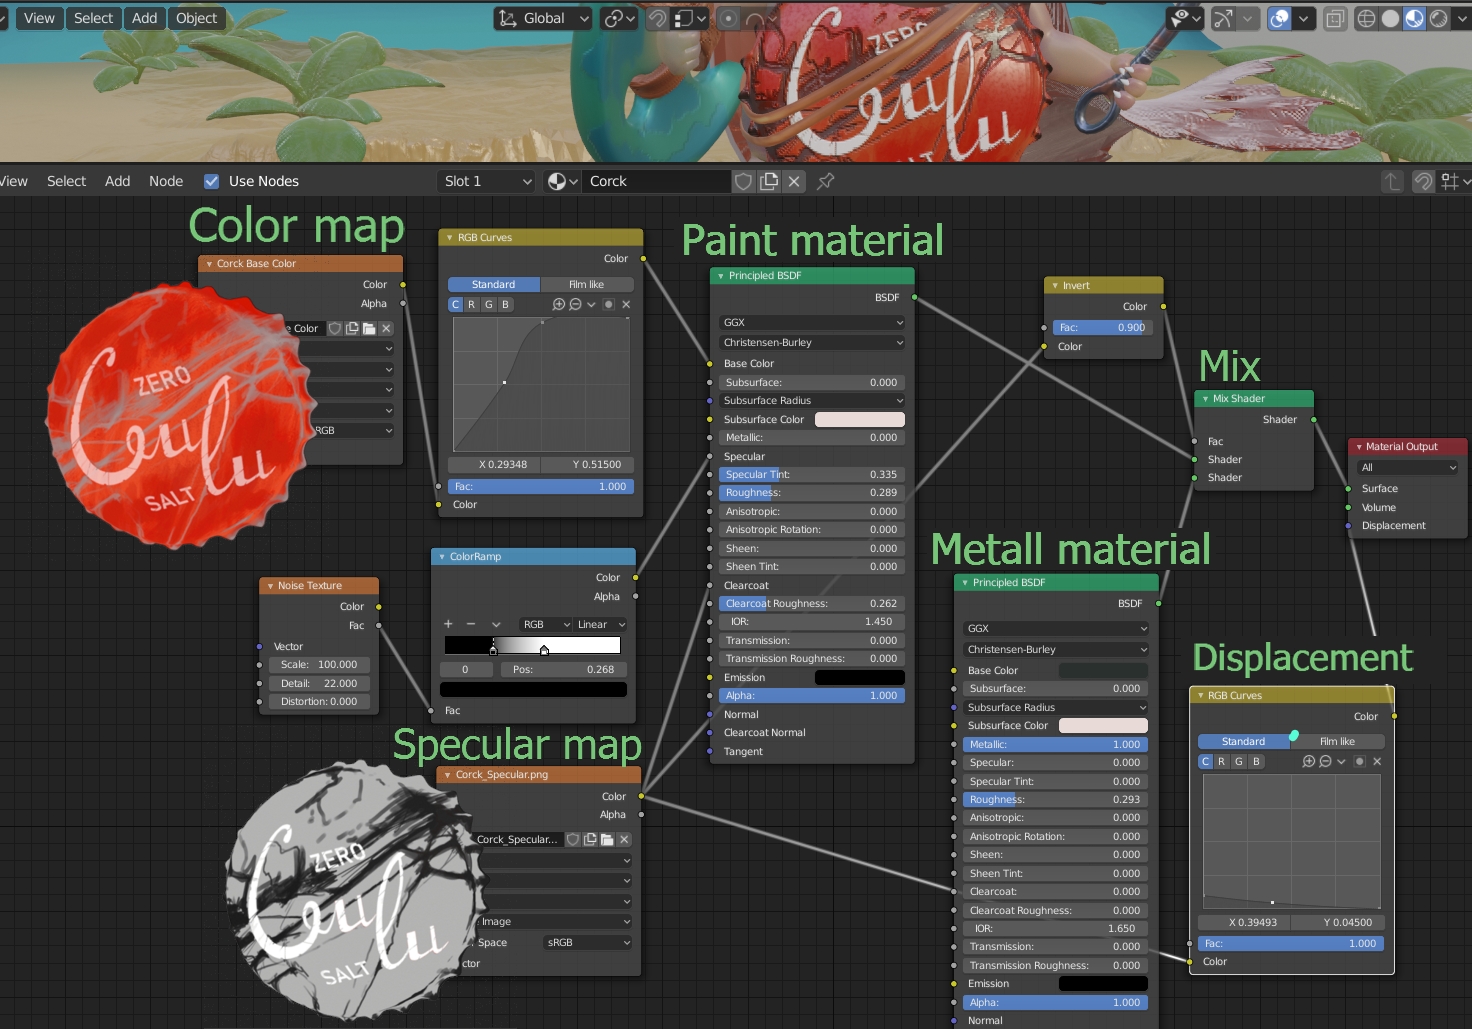
Most textures I painted and created with Blender tools. I only made the text for the cap and some color corrections in Krita.
Here is a screenshot with only color textures view:

After almost finishing the mouse I started to work on a final composition and an environment.
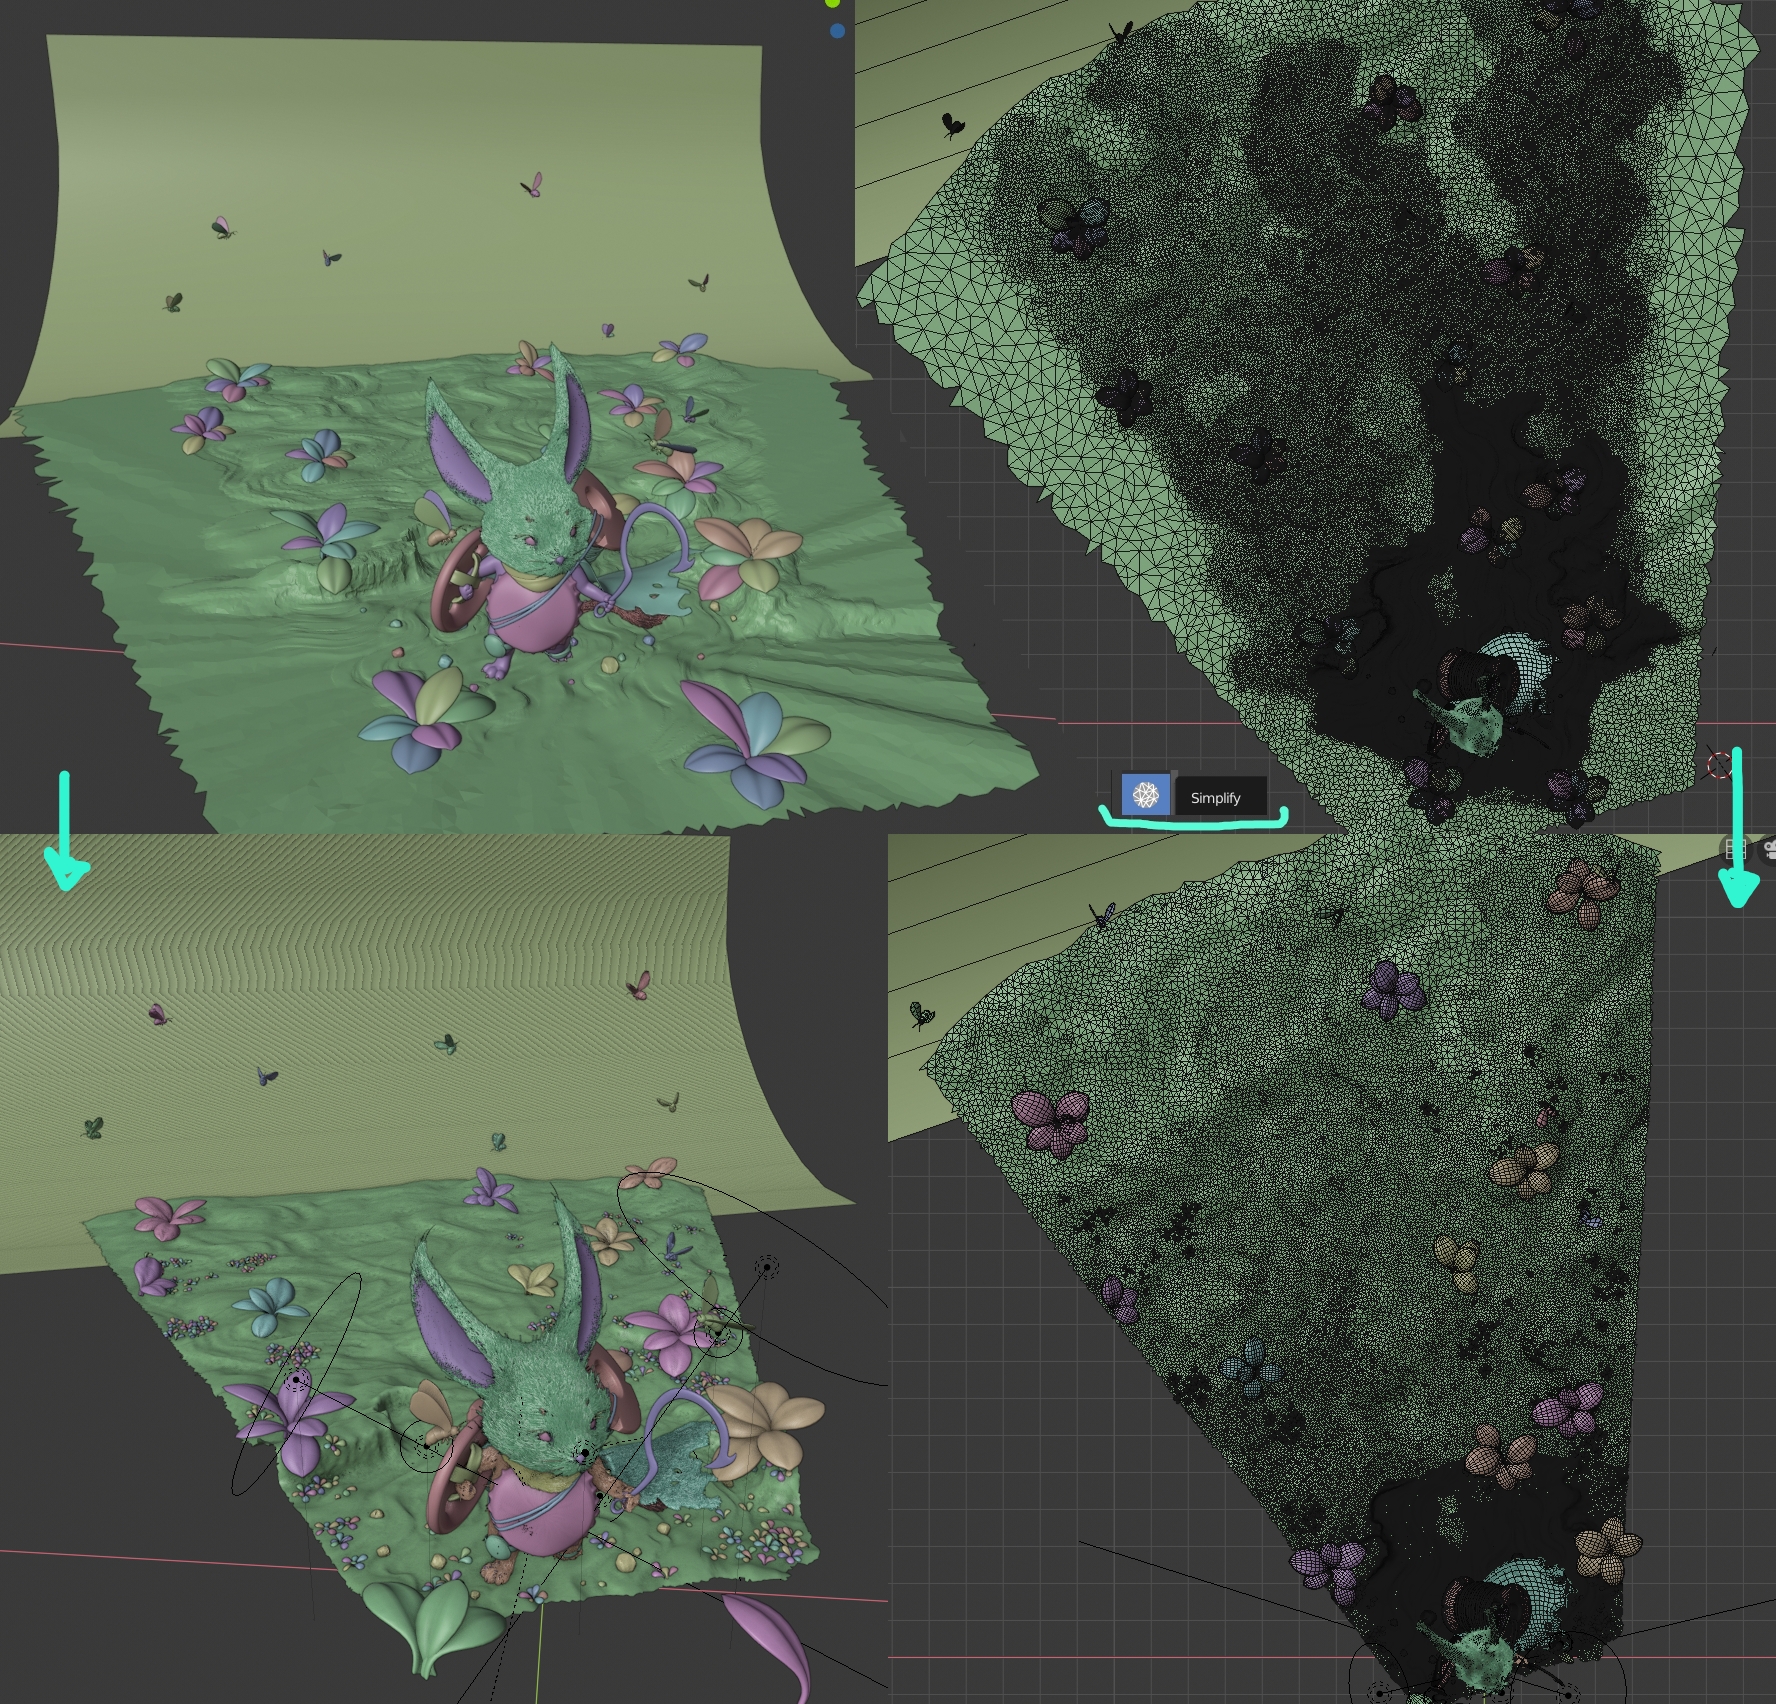
In World – Volume, I added Volume scatter to make fast fog without compositing. The ground was sculpted. When I had finished working on all the details and started rendering (Cycle – GPU), the program crashed after a few minutes.
It was a time for optimisation:
- I reduced ground density using the Simplify tool in Sculpting mode.
- I combined a lot of separate meshes that logically could be one mesh, like fireflies, bushes, grass, etc.
- I reduced subdivision levels where subdivision was unnecessary.
- I turned off cast shadow from fireflies lights, and deleted all firefly lights that were behind the mouse.
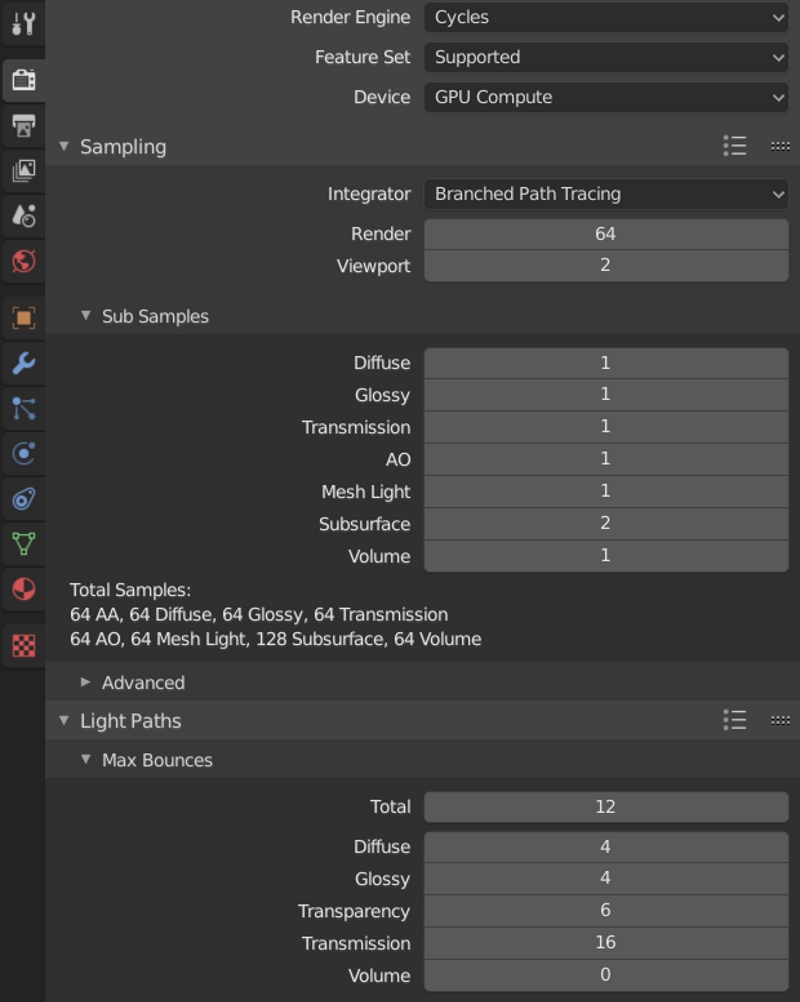
- I turned On: Sampling – Branched Path Tracing, added more samples to noising SSS and reduced from others.
- I deleted all meshes that weren’t visible in the frame.
Denoising was turned on. After this optimisation the render was completed without crashes.
Thank you for reading this making of. Thank you, Blender, for awesome free software and this forum for the article!
About the Author
 Anton Ivichev, 3D Artist


Nice scene and explanation. Was the aim to make it look like a stuffed doll? By that i mean the quite low amount of particles and the grooming, somehow feels like teddybear or some stuffed doll.
Hi ROMBOUT, thank you for feedback!
“Was the aim to make it look like a stuffed doll?” – yes and no. I tried make something tidy/cute without dirty and crumpled fur. Also I was in a rush, in front of the competition deadline = had no more time to experement with fur and stoped on this result.
But I agree with you, hier are some things could be fixed to make it better.
It sounded a bit harsh didnt :( It still a nice character, but i think if you had more time on the fur it would look way better :)
Blasting! So inspiring! Ready for his fairy tale! Great Job Anton.
Nice work!