
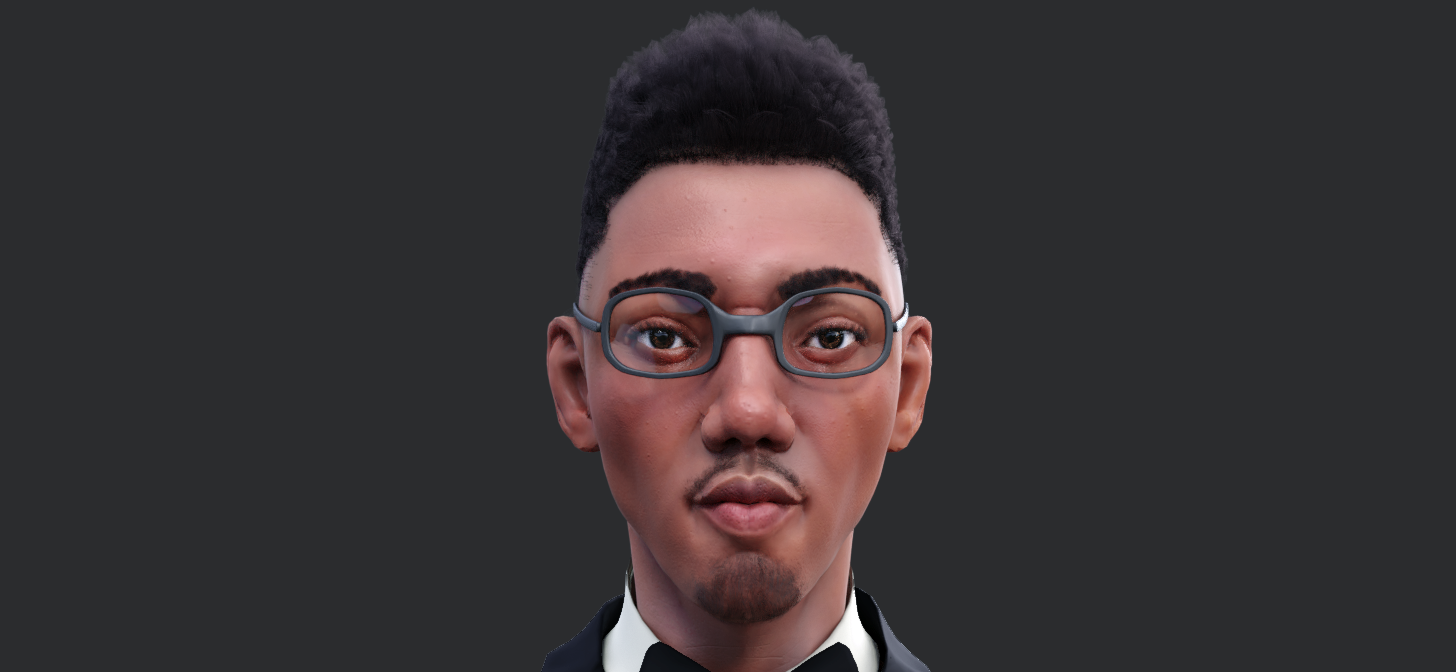
Behind the Scenes: Likeness Study
I’m Daniel Uchenna Orji, a 19 year old Character Artist and undergraduate of Computer Science. I am from Nigeria, Abia, to be precise and reside in Cross River State.
Background in 3D
I’ve always been a lover of games since childhood and I wondered how they were made, which is how I came to know about Programming and 3D softwares.
I then stumbled on Blender 3D somewhere around 2015, I think, but in 2016, I began watching and following Blender tutorials from Jacob Lewis and Tutor4U on YouTube. The process was interesting and I loved it.
After some months, I began sculpting so I could build skills in Character Art, my area of specialty. I’ve been learning till this point. I must say it gets more interesting with each project.
Inspiration For This Project
This likeness study was intended as a gift for my close friend, I just thought I’d do it as a little birthday present. 😁
Also, it’s just plain practice as well; getting the resemblance of faces is a tricky task and having the ability to do such will add to my skill as a Character Artist. I’m glad it turned out better than I thought, though there’s room for improvement.
Duration/Project Process
I took approximately two weeks to finish this, due to some factors. My indecisiveness was one of the causes and the other was the closeness of my friend’s birthday. 😁
Before I began I got refs, pieced them together in PureRef and a bit in Blender as well. From modeling, I moved to texturing and creation of hair systems, lighting, rendering and compositing. I did all these in Blender with some little tweaks to the final image in Photoshop. The details of the process are discussed below
Gathering of Refs
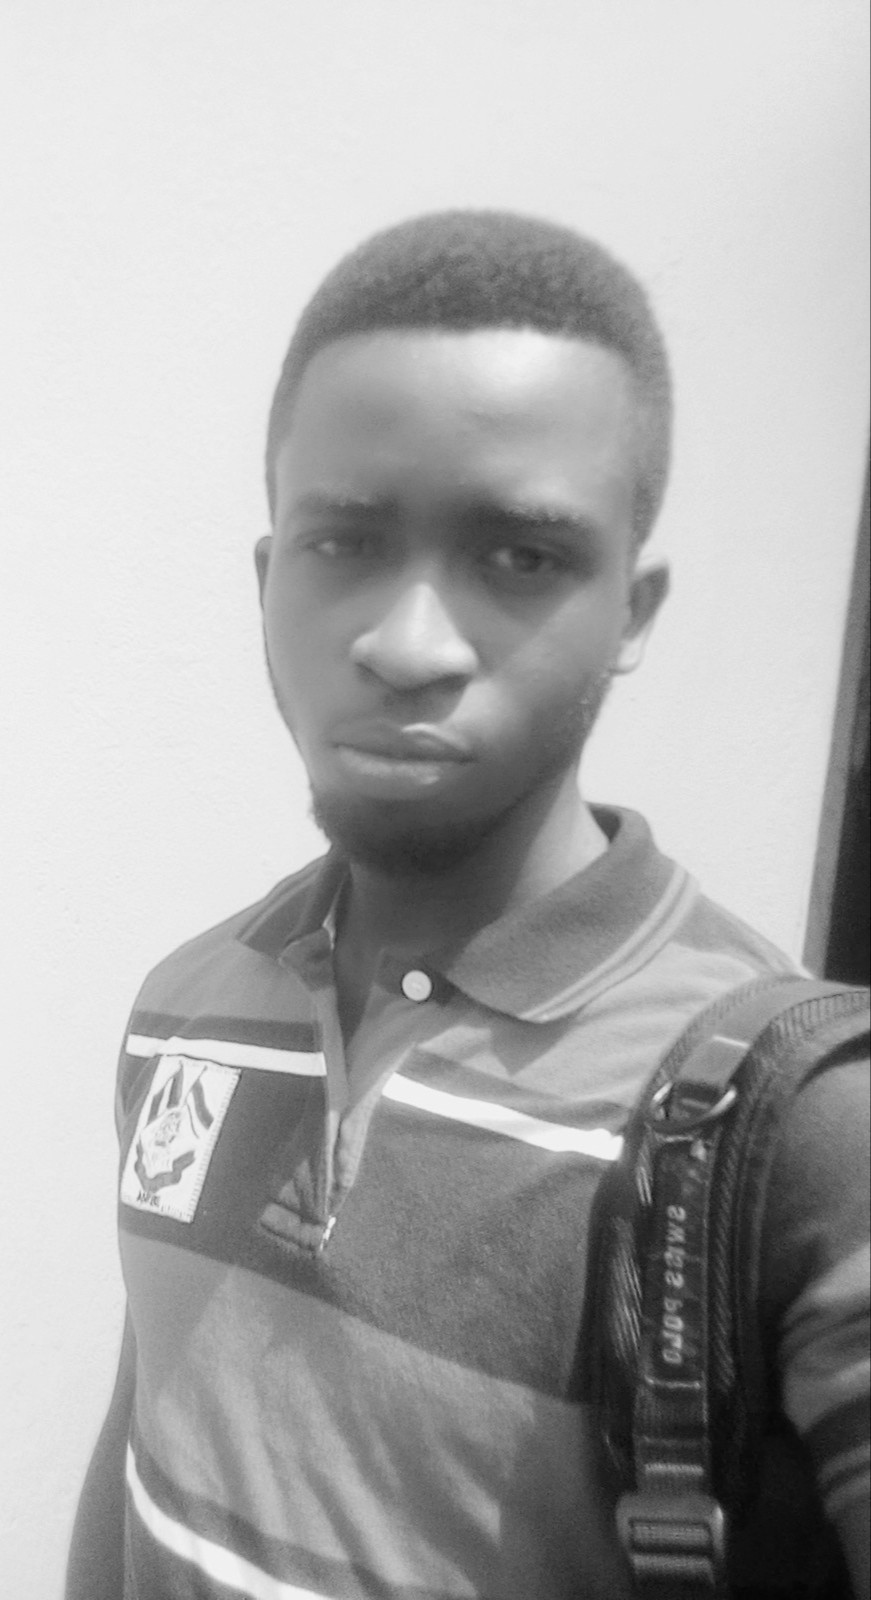
I got photos of him off Facebook and began studying the features of the face. I also referenced Anatomy for Sculptors and Anatomy of Facial Expression for tips (very helpful books)🙂.
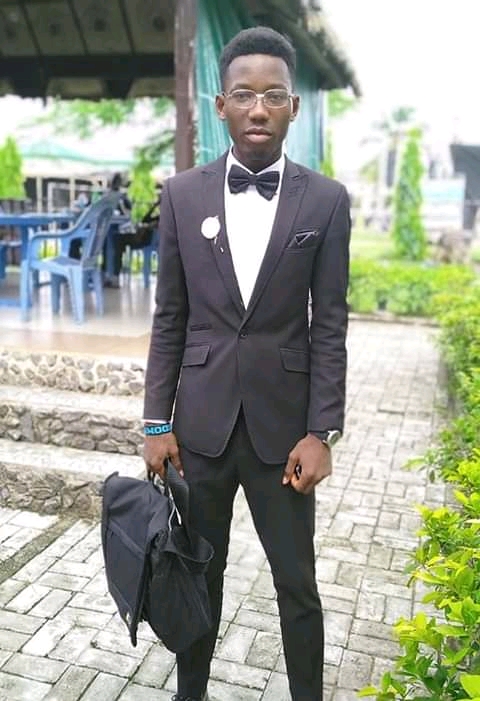
This is but one of several refs used, though it’s from this I got most features and the idea for the clothing, too.
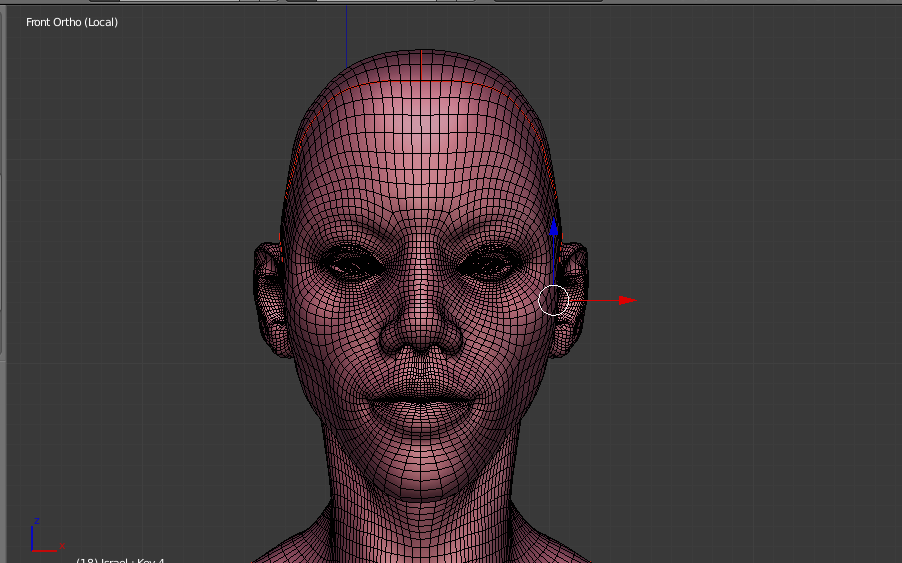
Modeling/Sculpting
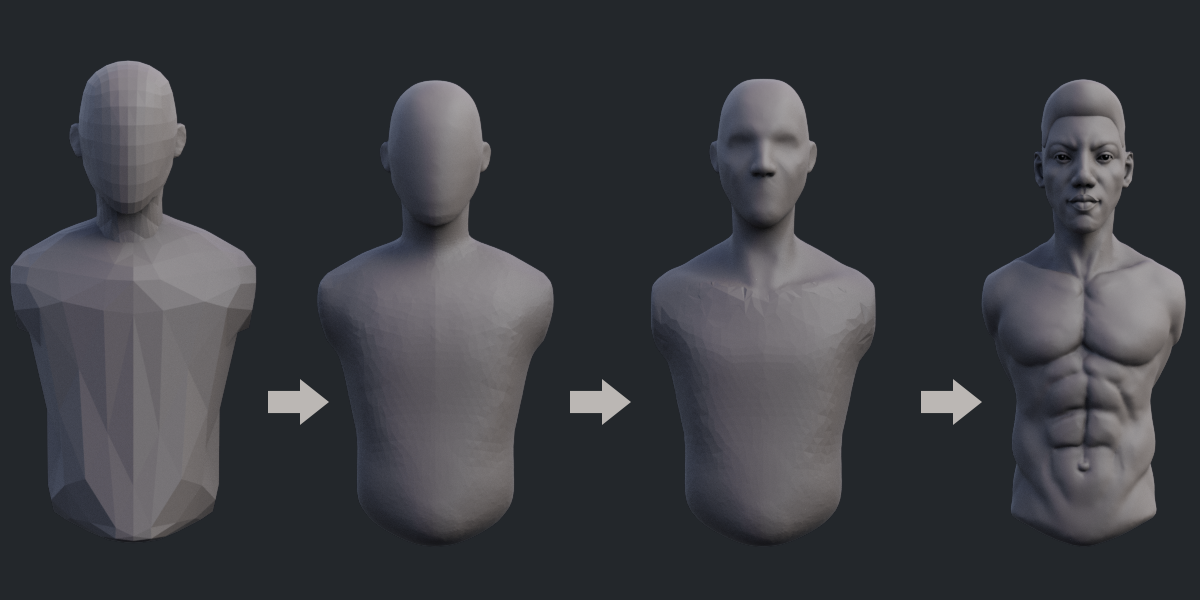
I started with a base mesh of a rounded cube to estimate the head, and a couple of spheres for the ears, neck, and torso.
I joined them using Boolean operations, switched to sculpt mode to begin creating the basic shape of his head and sculpting the planes of the head. I moved to sculpting the nose, eyes and mouth, ears and torso.
With that done, I made some tweaks to the sculpture in order to match as much as I could.
Texturing
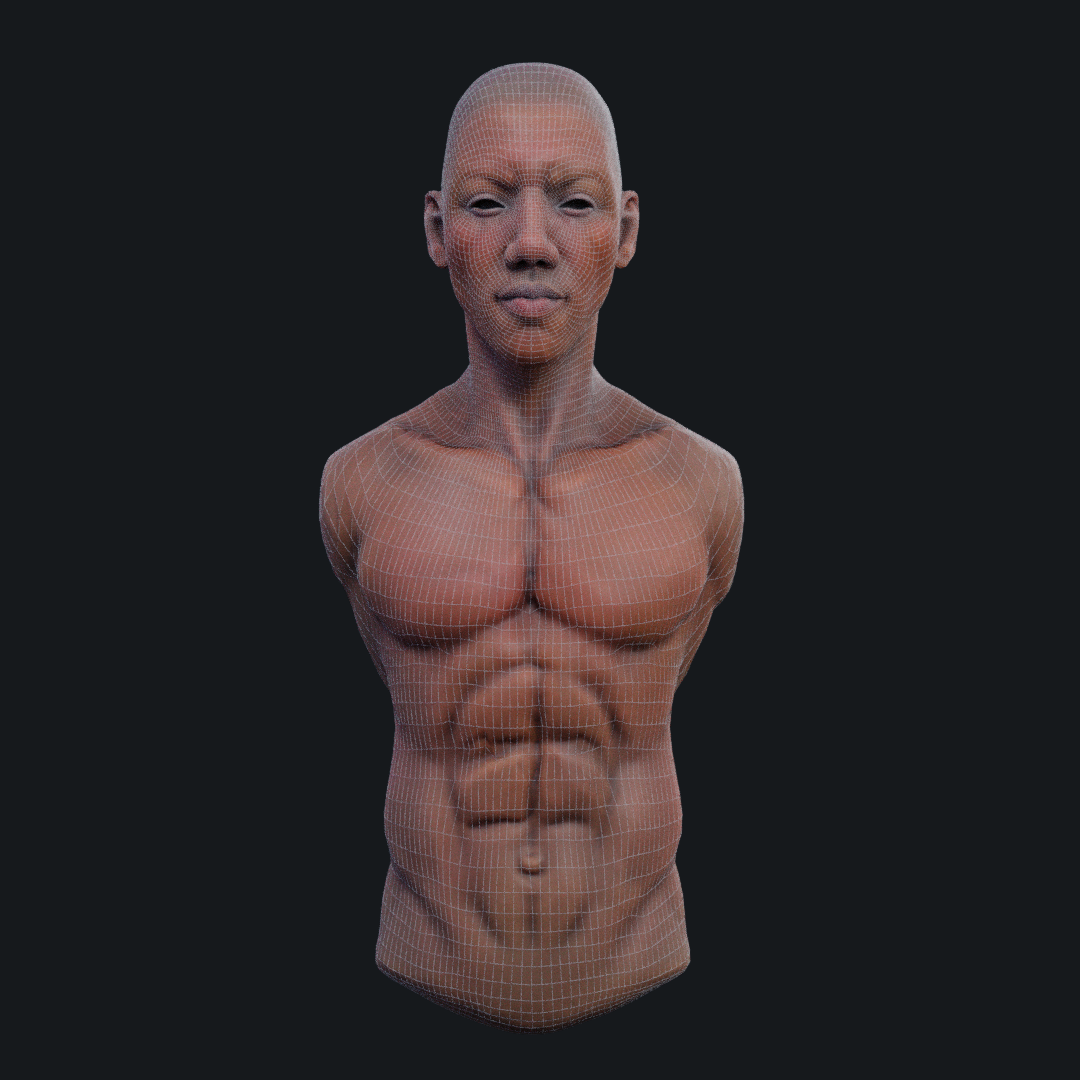
Once sculpting was done, I did retopology, applied the transformations to the sculpt, marked seams and baked out the Cavity and Normal maps all in Blender.
I referenced Skin tutorials from Rico Cilliers and Yan Sculpts on Texturing. I use digital and traditional painting tutorials to better understand texturing of the skin.
I then hand-painted the diffuse, SSS and Specular maps.
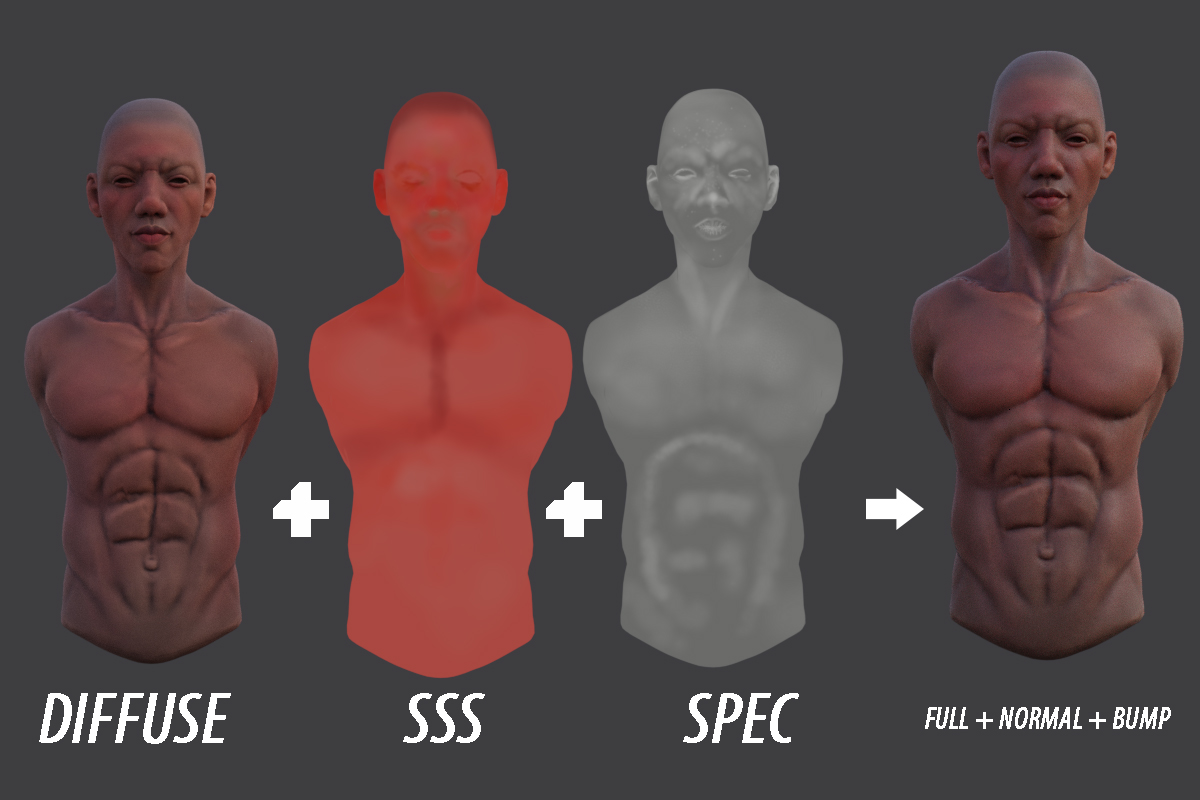
- I mixed the diffuse and cavity maps using the colour mix node and plugged it to the colour of the Principled & Sub-surface scattering BSDF with a high roughness value on the Principled shader
- The SSS map was plugged to the radius of the SSS BSDF, then I combined it with the Principled shader and the SSS BSDF with slightly equal amounts of both.
- The Specular map was plugged to the colour of the glossy node and mixed with the diffuse and SSS maps with less of the gloss coming through for the best look.
- The normal and bump maps were plugged to the Principled, SSS, and glossy shaders.
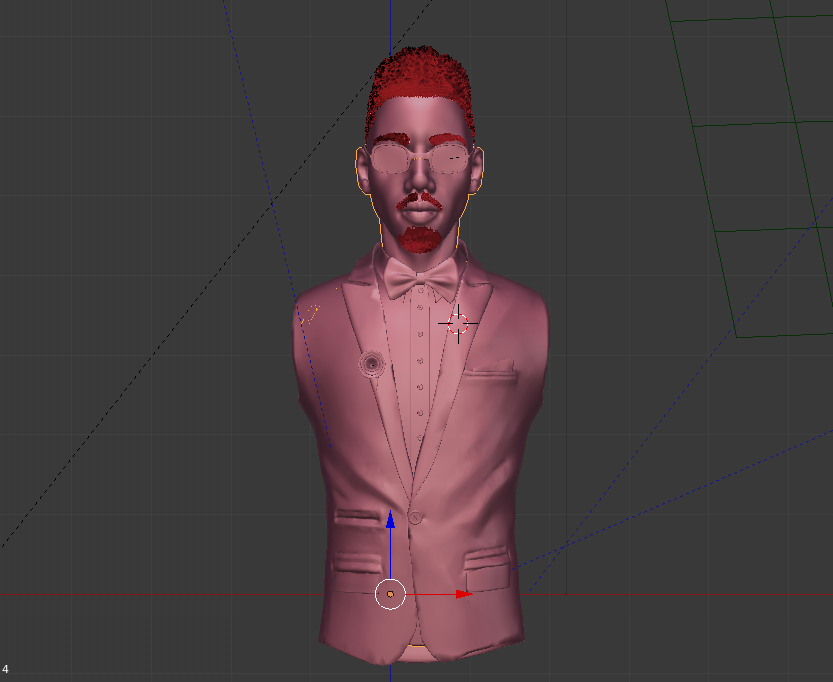
A Bit about Clothing, Hair and Lighting
I modeled the suit and shirt using retopology tools—shrinkwrap modifier and the snapping tool.
The bow-tie was done on a subdivided plane mesh with some point pulling to bring out the shape.
There’s nothing fancy on the materials, just the Principled node with high roughness and sheen.
Hair
The hair was fun and a pain at the same time, I’m glad it came out quite close to what I expected.
I used different systems for the lashes, scalp, mustache and beard.
I painted on the areas of influence, and added parent particles manually for more control.
The scalp is using a wave kink with low amplitude, medium frequency with high clump value on the interpolated children particles.
I finished the lashes, mustache and beard using interpolated children, high clumping on the lashes and less on the rest. For the brows, I used simple children on separate meshes snapped to the face.
Lighting
For the lighting, I used the Blender light studio add-on (free), to place the key, fill and rim lights, with a low intensity but large sun lamp for added highlights. A HDR from HDRHaven set to a low strength gave the scene a boost as well.
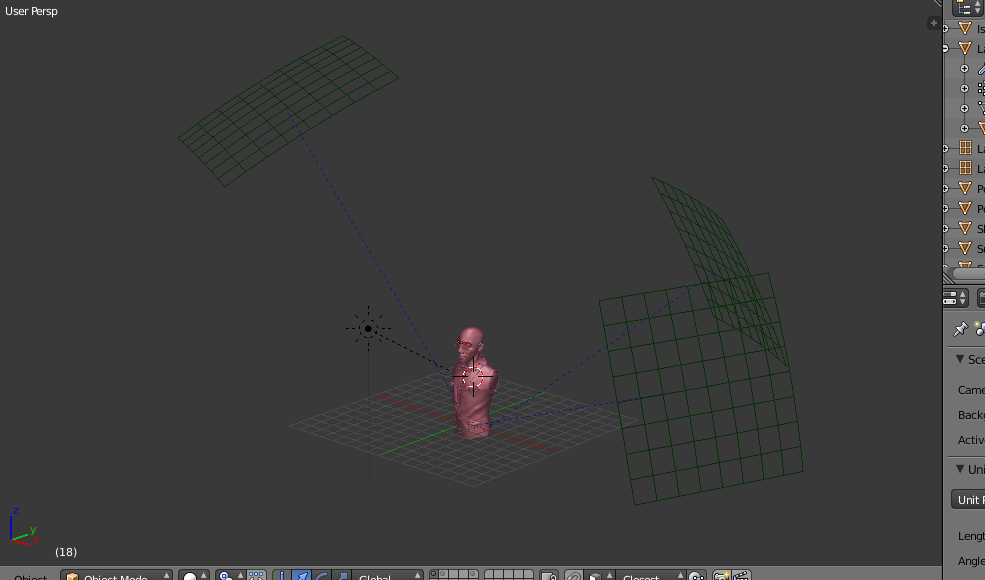
With that done, I rendered in Cycles and did some colour correction and softening of the image with enhancement of the shadows with the AO pass.

It was fun while it lasted. I’m glad he liked the portrait, as well.
I’m looking forward to other projects in the future and to whatever questions you might have as well. Just drop them in the comments, I’ll answer as soon as possible.
About the Author
 Daniel Orji, I’m a 3D Character Artist. Interested in freelance or permanent work. Looking forward to working with a great team!


I love your work. i am proud of you.
Thank you
Great job man! Though the torso was a bit to much perhaps, its never going to been seen. Saves time sculpting it
Yeah. I guess so . He’s not even as built like that . Thanks for the compliment
thats cool my friend……you make it look easy……I know its not….but you did an outstanding job.
Would you do one of me?? Grin……wishful thinking.
again….you did a great job.
Randall Underwood
… Thank you Randall. Glad you love it!
This is awemazing bro super proud of you.. Dang
Thanks. Very much appreciated
Great work my friend! with detailed description.
Thanks.
Always new you had talent. Well done bro. I am looking forward to doing more work with you.
I am too. Thanks Abdullahi
Hey Daniel let’s talktalk business in private
Hello… You can chat me up on Facebook, Daniel Uchenna Orji
Or my mail
[email protected]