
Behind the Scenes: KDA Kayn
Background
Hi, My name is Jason Chan (“Ninjason Chan” online), I am a 21 year old 3D character artist and graphic designer, all the way from South Africa. I graduated from university this year April with a Bachelor degree in visual arts, Graphic Design. My goal for now is to look for an opportunity to work overseas.
I was very interested in Lego and Anime/cartoons during my childhood, I guess they became creative building blocks for my artistic journey. I was introduced to 3D at the age of 16, when my friend showed me his Blender teacup model. At that time it was like Pixar to me even though it looked unrealistic. Soon after, I discovered that you can make your own character in 3D and so I taught myself how to do it through YouTube tutorials.
Hardware
- Intel core i3 – 8100 coffee lake
- 8 GB RAM
- GeForce GTX 1050 GPU
Software
- ZBrush: sculpting
- Substance Painter: face painting
- Blender 2.8 cycles: Retopology, old school modelling, Lighting, shading, hair simulation, rendering
- Photoshop: Tattoo illustration, post production
Inspiration
“Jason, why do you always create female characters?” that is a question that I get asked a lot. I know that we should draw what we enjoy in life, but for the fun of it, I decided to take up the challenge. I started a male base mesh, but it did not go well, because I did not have any concept in mind.
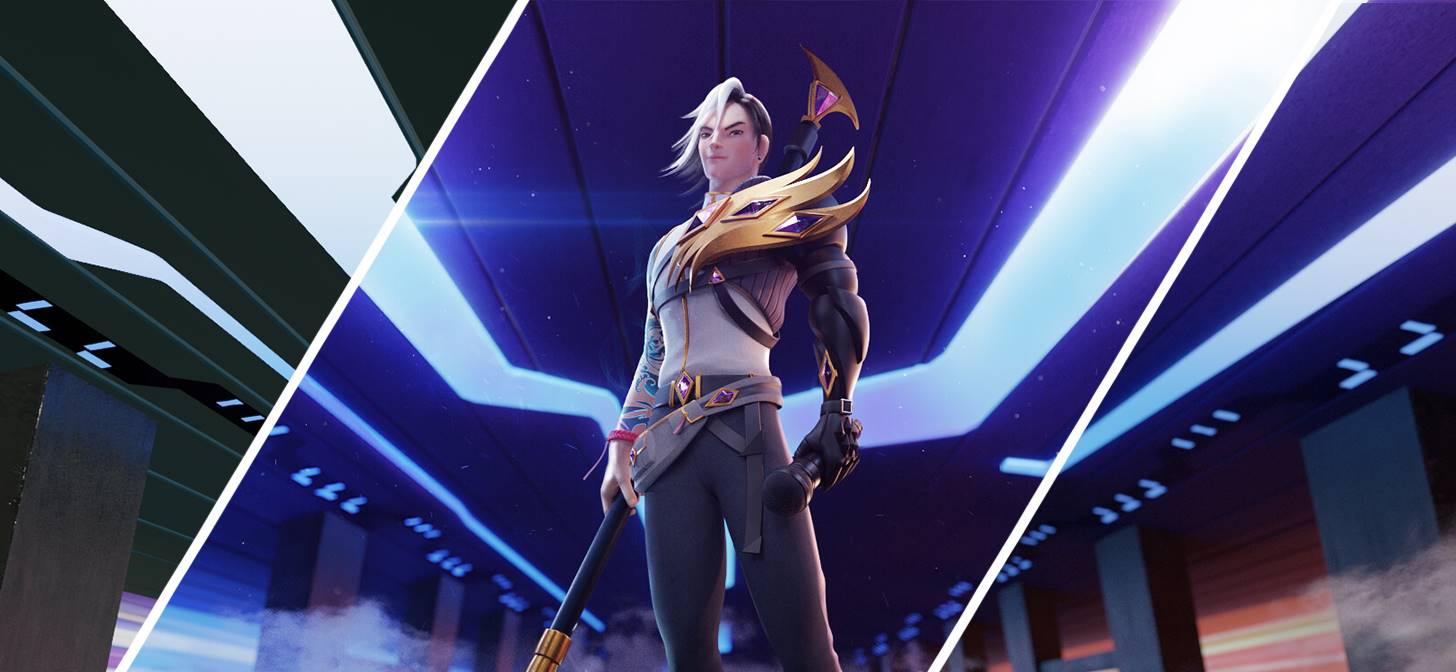
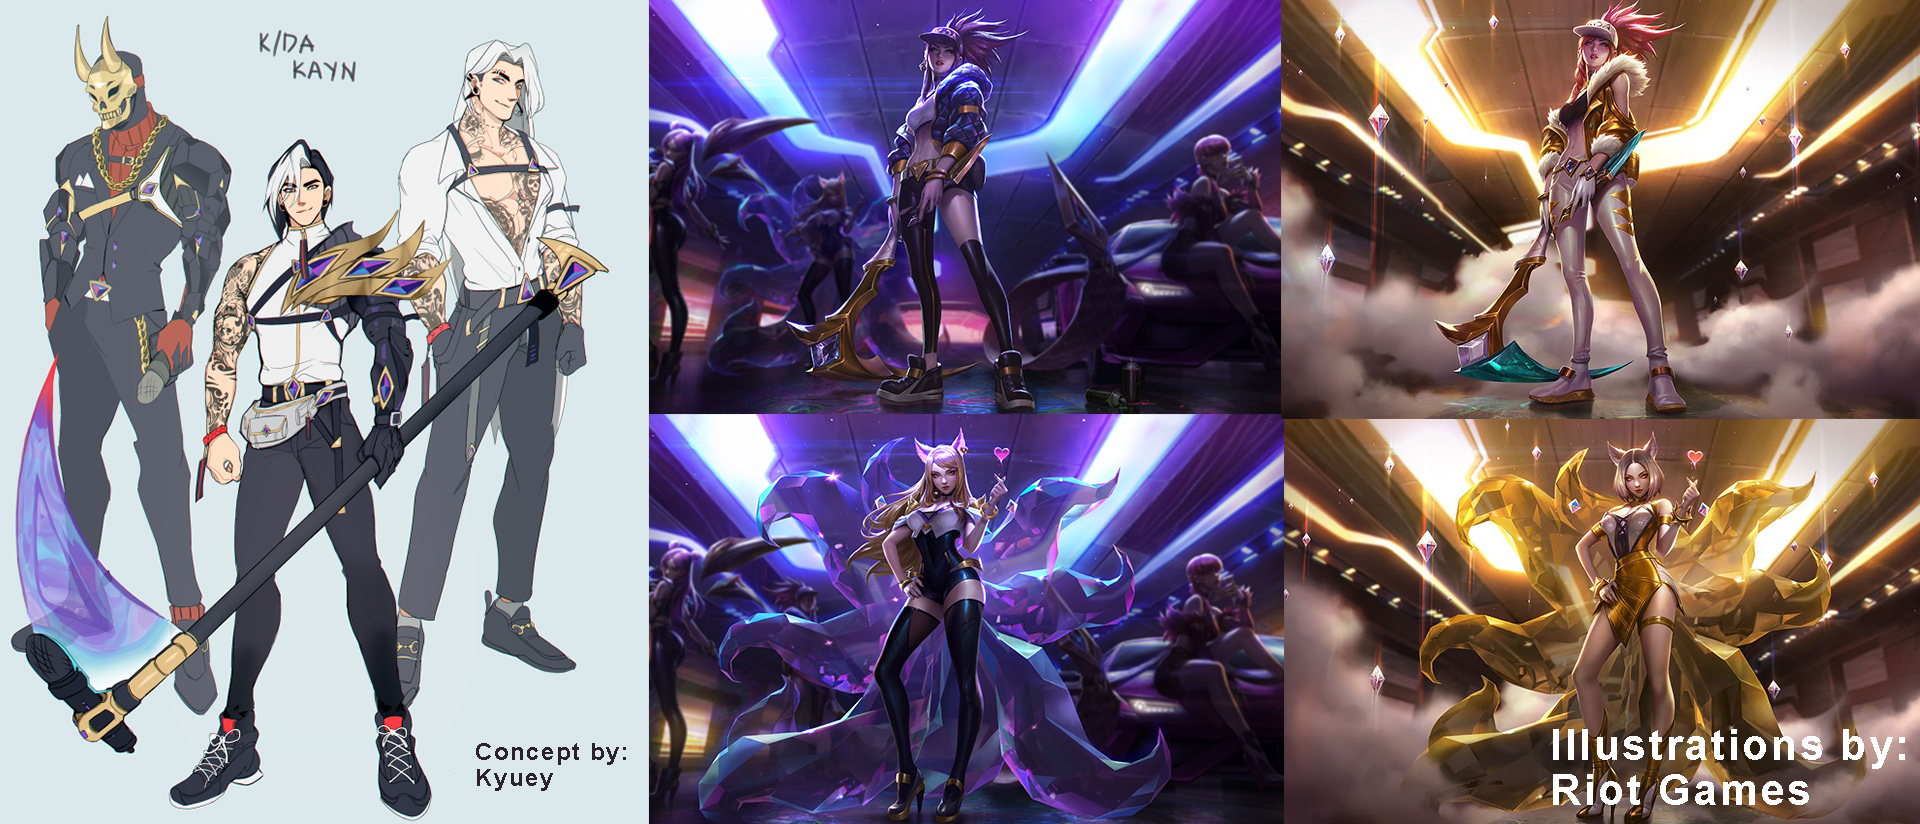
It wasn’t until I was browsing through Twitter that I stumbled upon Kyuey’s KDA Kayn concept design which caught my attention. At that time, I was hooked on the League of Legends KDA song, so I messaged Kyuey immediately to ask for permission, because I also wanted to see the whole scene happen in 3D.
First Steps
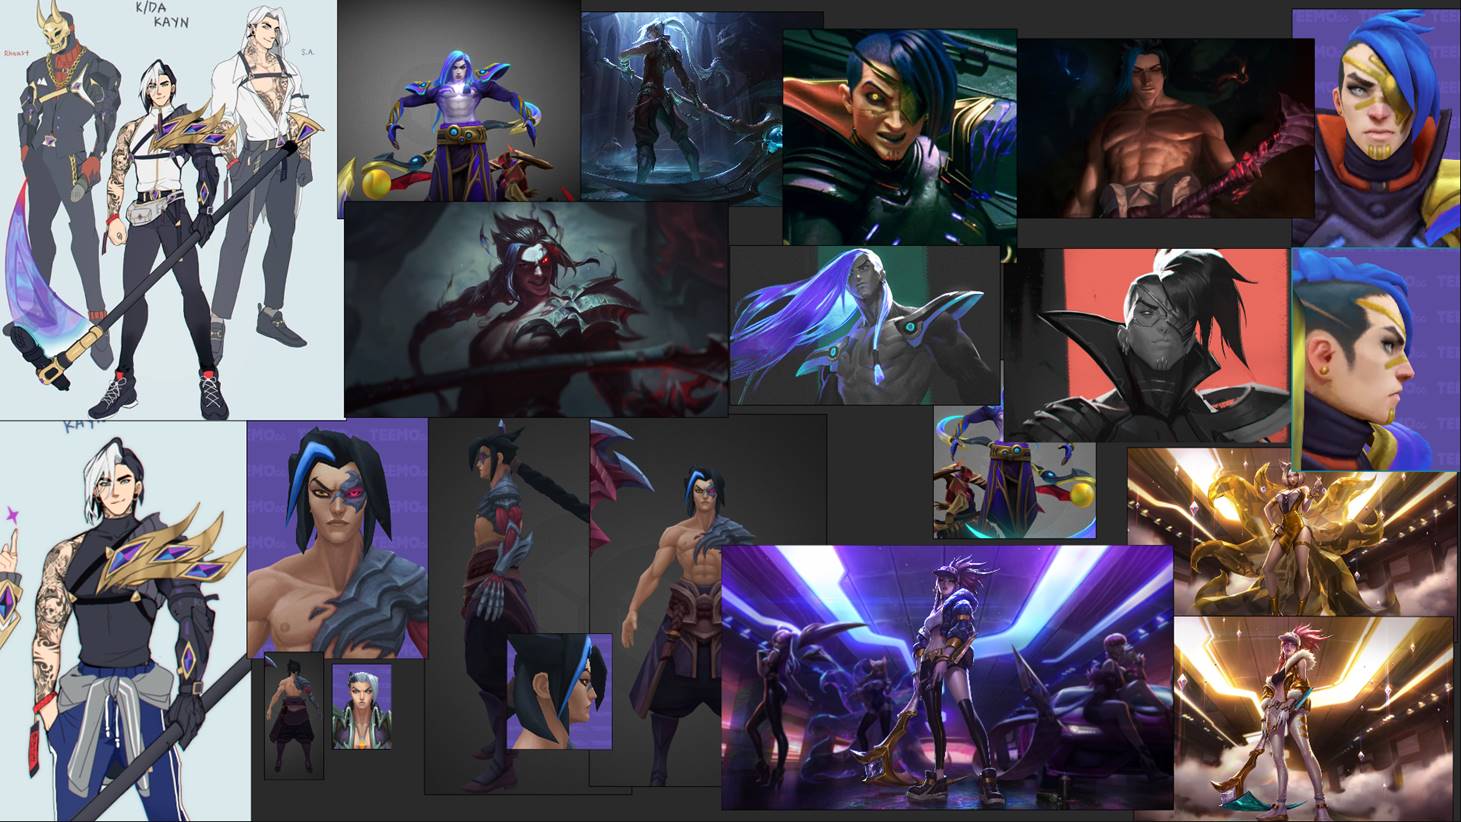
I gathered as much reference as I could, from the character’s in-game orthographic views to his splash art wallpaper and fan art. I saved them all into PureRef and had it opened on the side whenever I worked on it.
The first few results always look terrible, but that’s OK. Time and revision will make up for the errors, but if you take too long on a piece, it may sometimes lead to frustration and anxiety. I show my progress to the concept artist as much as possible, fishing out criticism so I can improve.
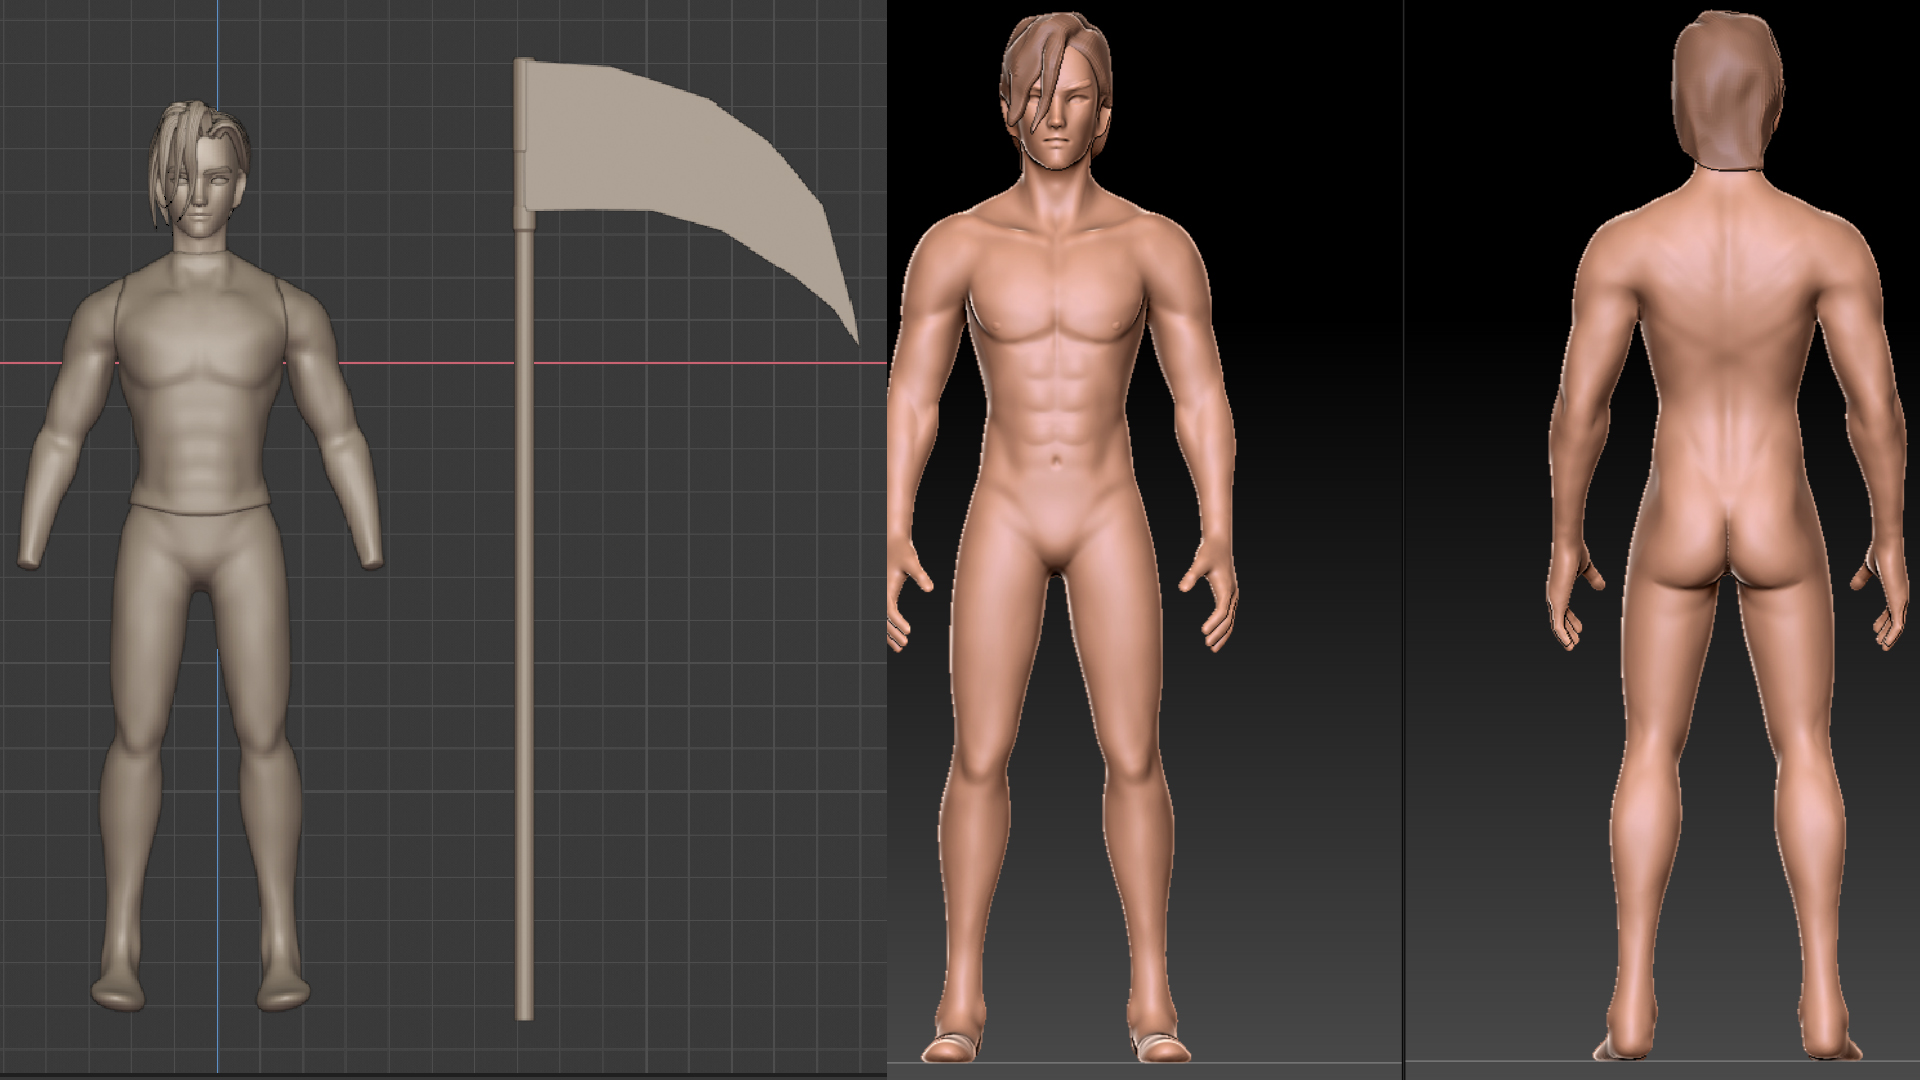
Sculpting and Modelling
I used ZBrush to refine the basic body mesh so it looks like Kayn and then used Blender to model all the other components. I retopoligised everything in quad topology so that it became easy to UV unwrap.
Tools
I did not use any complex modifiers for my objects, most of them just have a bevel, subdivision surface and then a solidify. I set my bevels to edge weights so I can customise the sharper angles. Objects such as the belt, fanny pack and straps are all bounded by curve modifiers.
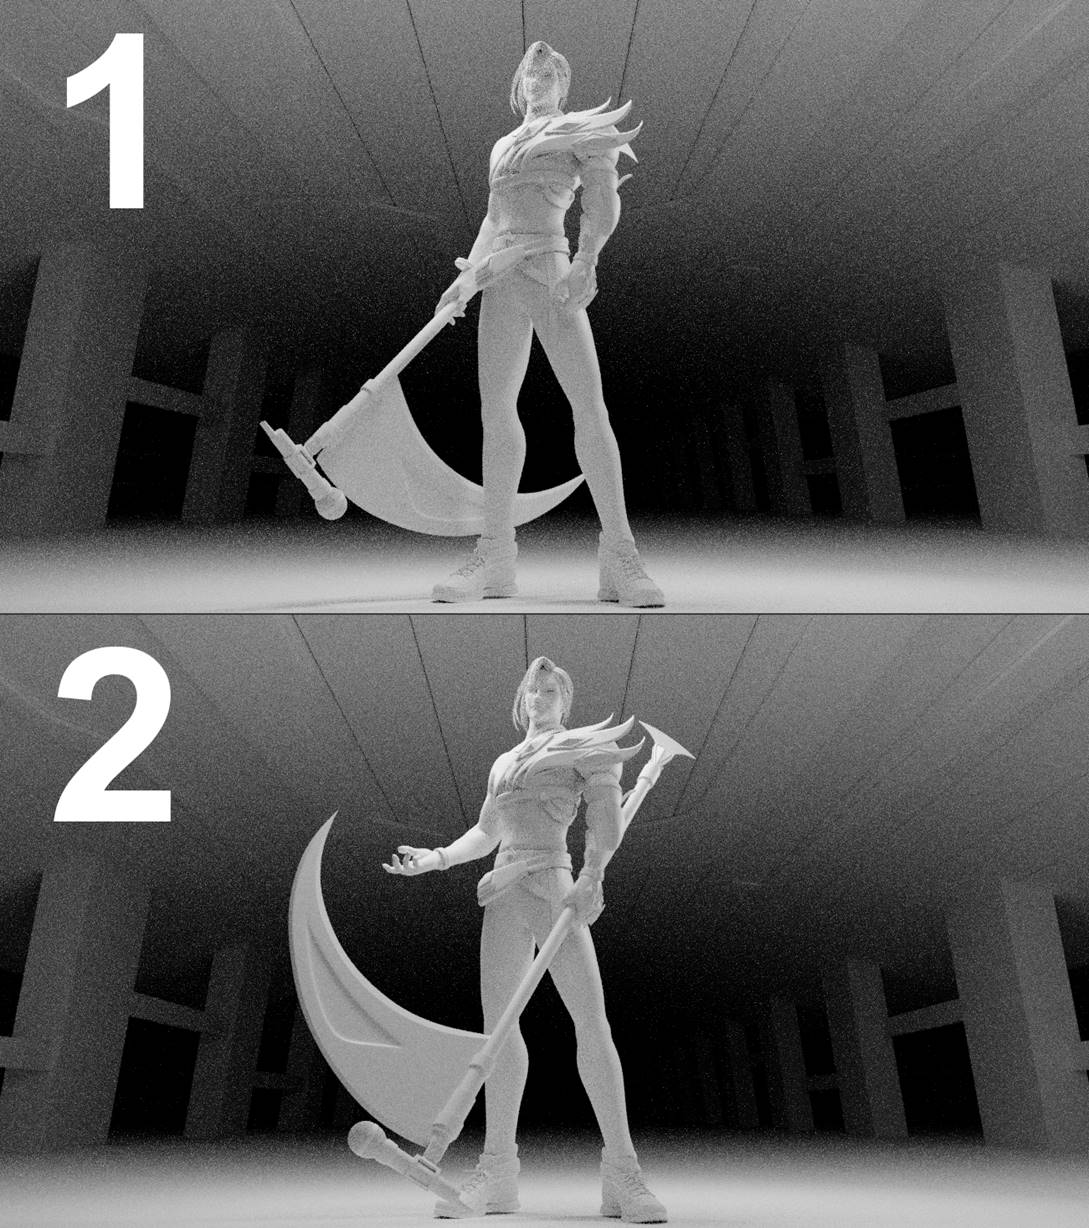
Posing
To make my life simple, I rigged the model. I parented some detachable objects to empties to organise them in groups.
The way he holds his weapon was a concern. I chose Option 1, because the scythe in option 2 acted as a visual blockade between the character and the viewer. Since the camera angle is quite low, a triangular shaped pose was more appropriate so that our eyes lead up to the face.
Lighting Hacks
Lighting this scene was a huge mess. Using the KDA wallpapers as references, I started with the standard 3 point lighting setup, but the scene still lacked life, so I just added more lamps where they were needed. However, with environment lights coming in from the top and the sides, it diffused the extra light sources that I was adding into the scene. So in order to get more control over the lighting, I created an invisible light reflecting “roof” (uncheck the camera check box in the objects tab)
to isolate the character from the environment lights, allowing me to light the character the way I wanted.

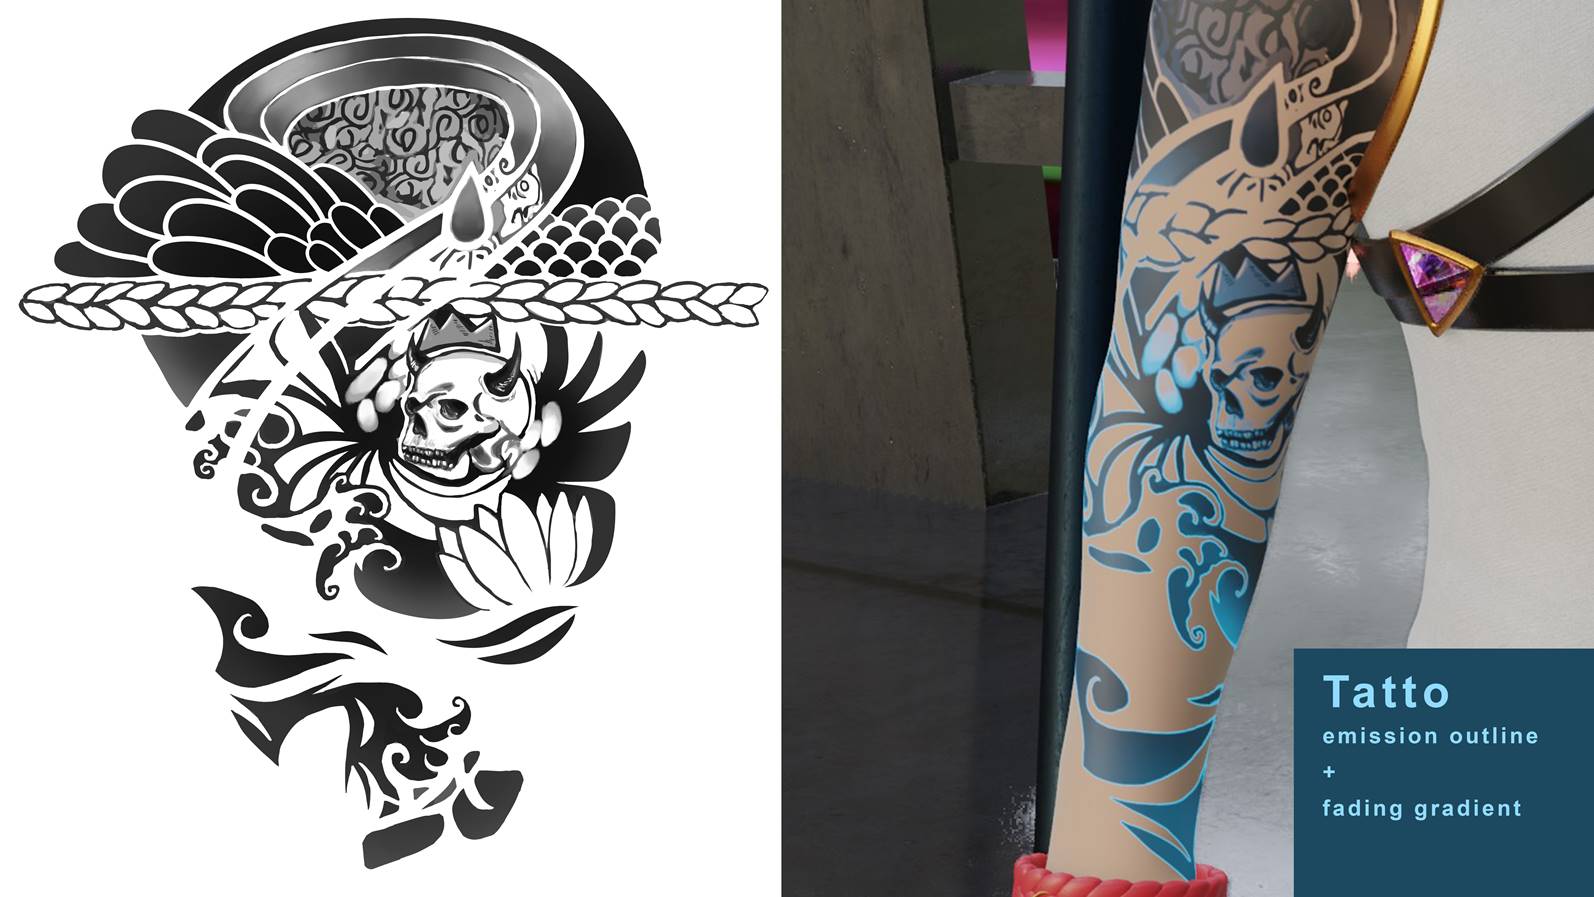
Tattoo
I had to redraw a high resolution of an unwrapped version of the tattoo. Setting the flat tattoo image as a mix factor node helped a lot on the property controls.
Texturing
All my textures came either from Poliigon or Quixel’s Megascans library.
Rendering Tricks
I couldn’t render the whole scene without my PC crashing or running out of memory. So what I did was break the render into 3 parts using “Ctrl B”, and then combined all of them using Photoshop. This method is also useful when you make changes to a section of the rendered image and need changes.
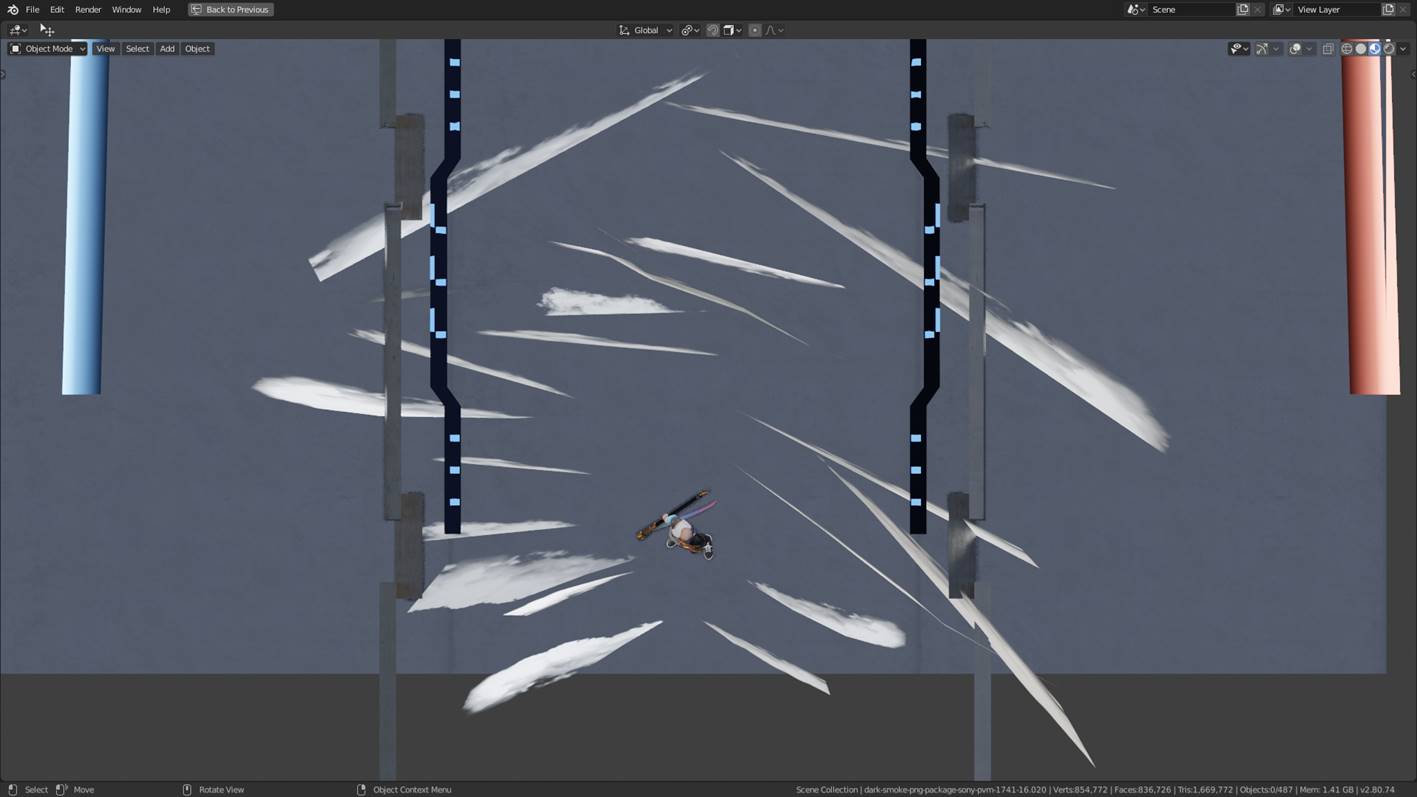
Smoke was also problematic. Even though my computer can run a smoke simulation, it would kill my time and not really give me the results that I wanted immediately, so I faked the illusion of smoke by adding planes of smoke images and altering their opacity according to the distances away from the camera.
Post production
Photoshop came in handy to give my render a make over. I had to manually brighten some of the rim lights to make the character stand out. I also added more vibrant colours and dust particles to give the scene more life.

Conclusion

This project was made whenever I had free time, so the time spent was the longest compared to my older projects. Since there was no deadline, I took my time to observe the illustrated splash art from Riot games. I’d say the whole project took me over a month to do, but it was a fun experience and a rewarding process.

Thanks for reading, I hope you enjoyed it and see you next time!
About the Author
 Jason Chan, 3D Character Artist and Graphic Designer


Hahaha … CTRL+B trick for render… what cool and simple solution. Wonderful artwork, I’m loving it.
What did Kyuey said, did You get some feedback?
Kyuey was more excited than I was during the whole process, so all the feedbacks I got were all positive.
Cool. I’m not surprised with this kind of reaction from Kyuey. 2D artist love to see their work in different media… and You did a great job.
Thanks Igor!
Kyuey was more excited than I was during the whole process, so all the feedback I got were all positive.