Behind the Scenes: Strikebreaker

About
Hi. My name’s Alexander Lortkipanidze and I’m from Tbilisi, Georgia. 3D modelling has always been one of my biggest hobbies, and, with time, it grew into a full-time job. Since I started working at it full time, I’ve worked on a number of projects, ranging from middle-sized AA-games, to indie titles, and full-fledged AAA projects, including the recent Spiderman game by Insomniac. As an outsourced specialist, I often found myself doing things beyond my normally defined role; this left me with a strong impression that the more tools you’re familiar with, the better – which segues us nicely into the story of how I decided to make the Strikebreaker.
The Project
The Strikebreaker is for all intents and purposes a story of a test project.
It started with a trailer for DECALMachine that popped up in my recommended videos on YouTube. One thing followed the other, and soon I knew about the Mesh Machine, HardOps and Boxcutter, and it all seemed like a very convenient workflow. I had never worked with Blender before; but seeing what those plugins could do, I felt that this was the best time to try it.
After studying the interface, and making a few test assets, it was time to move on to a test project. In order to test the workflow I decided to make a mid-sized asset, something that could utilize the plugins to their full extent without getting out of control.
A small vehicle is a good idea for a mid-sized project, something with enough smooth shapes and intricate details. After a short brainstorming session, I decided I would make a sci-fi ground attack aircraft. I like grounded, “20-minutes into the future” sci-fi, and I like planes. Better to stick with what you enjoy.
Workflow
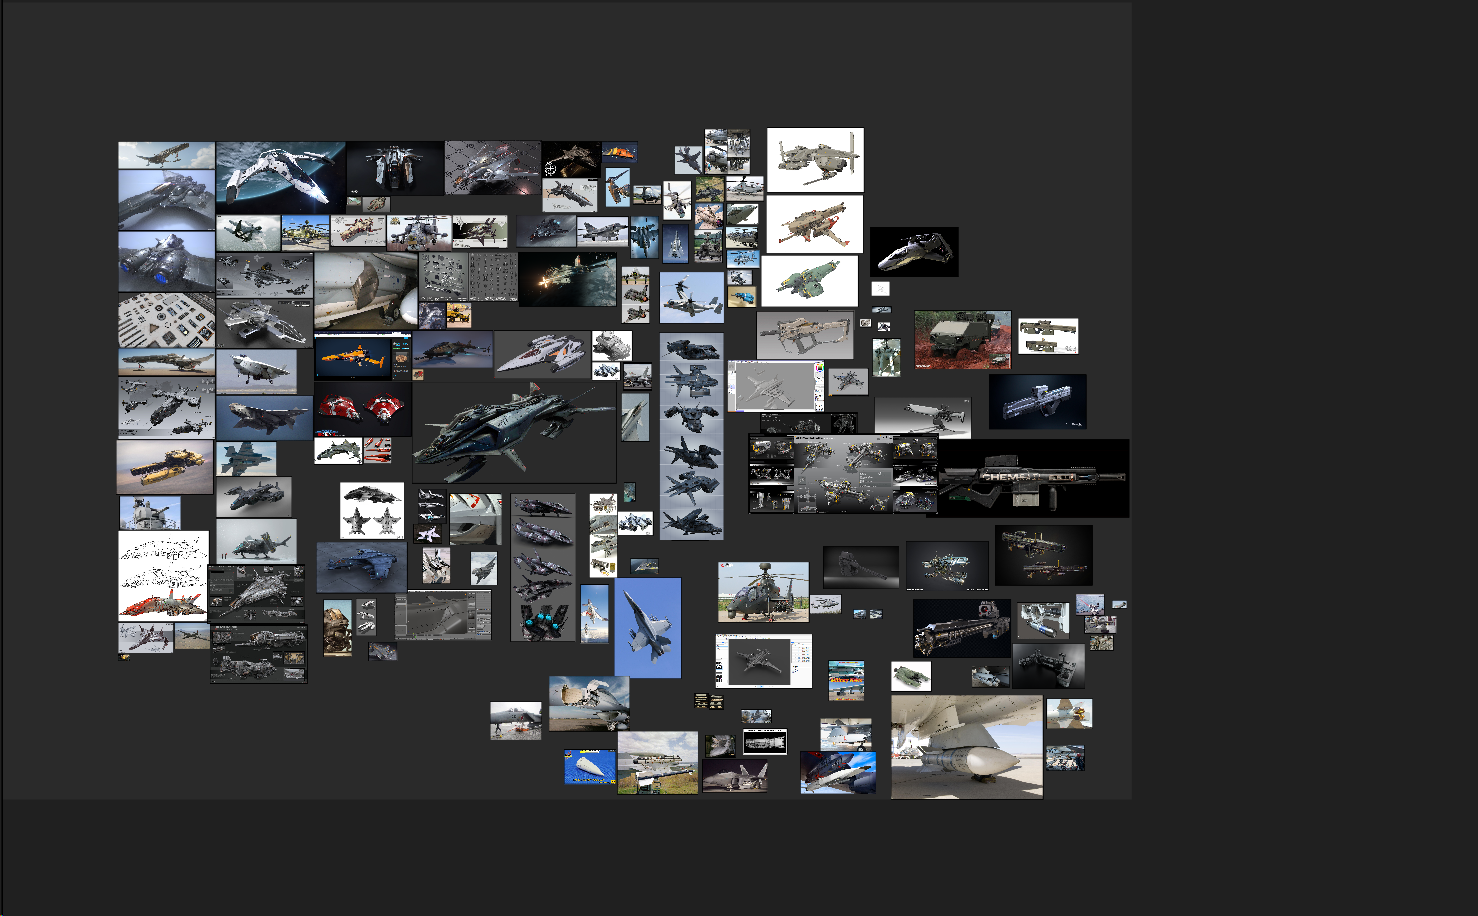
Like every project, it started with reference hunting, and when it was done I ended up with about 70 images. PureRef helped me to keep them organized.
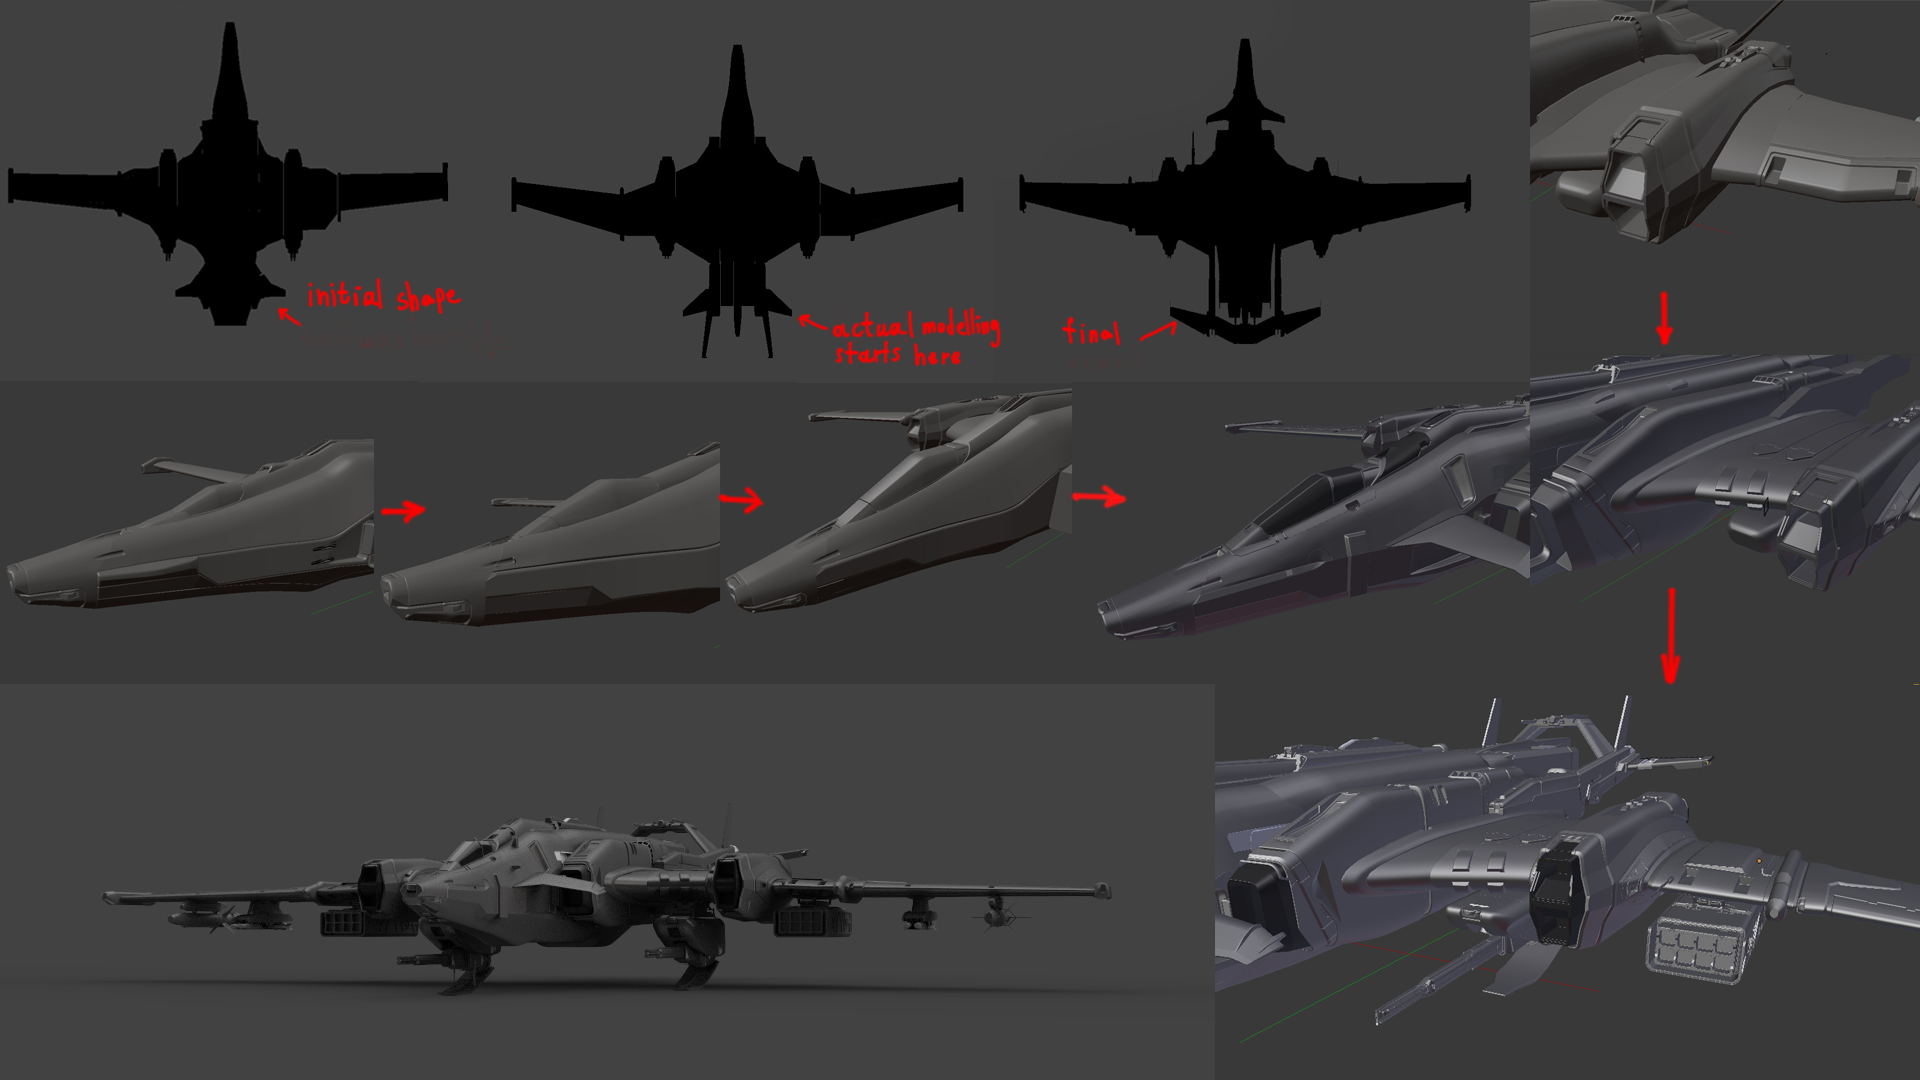
There isn’t much that hasn’t been said about hard surface design work over the years. Once you have an idea, you block out the mesh and work on establishing the silhouette and refining it before moving on to the secondary shapes – the process is the same in every software. So far, the process for Blender was no different. The test run was going well – Boxcutter made the process that much easier, and with Boolean Cleanup and Refuse I avoided making the typical boolean mess out of the project in the early stage. I’d have plenty of opportunities for it later.
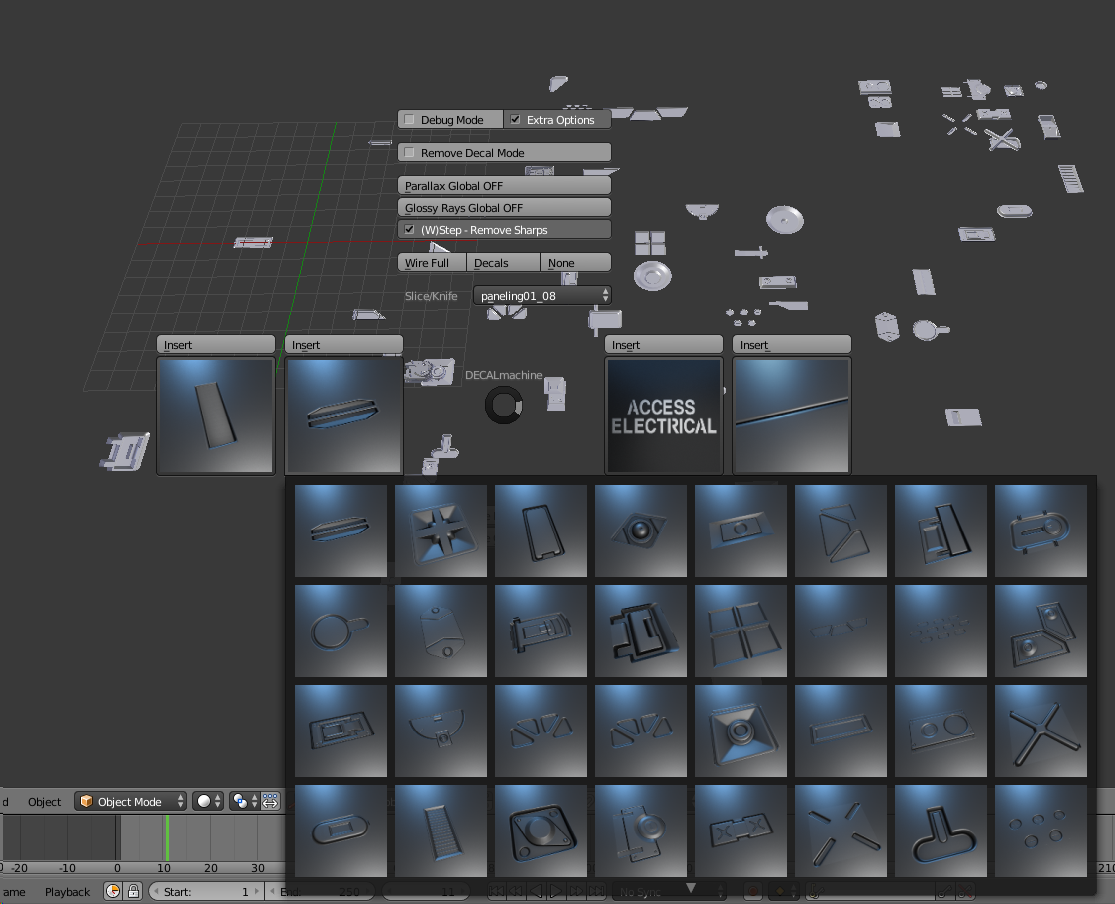
With the boolean workflow, cutting complex small-scale details into curved surfaces, especially small indentations or bolts, will inevitably lead to a speedbump, unless you find a way to sidestep the issue or work within the limitations of the form you’ve got. For that, I planned on using the DECALMachine – after all, that plugin was the reason why I originally decided to test the waters with Blender.
I already had a decent selection of decals for Substance Painter – all I needed to do was to convert them for DECALMachine.
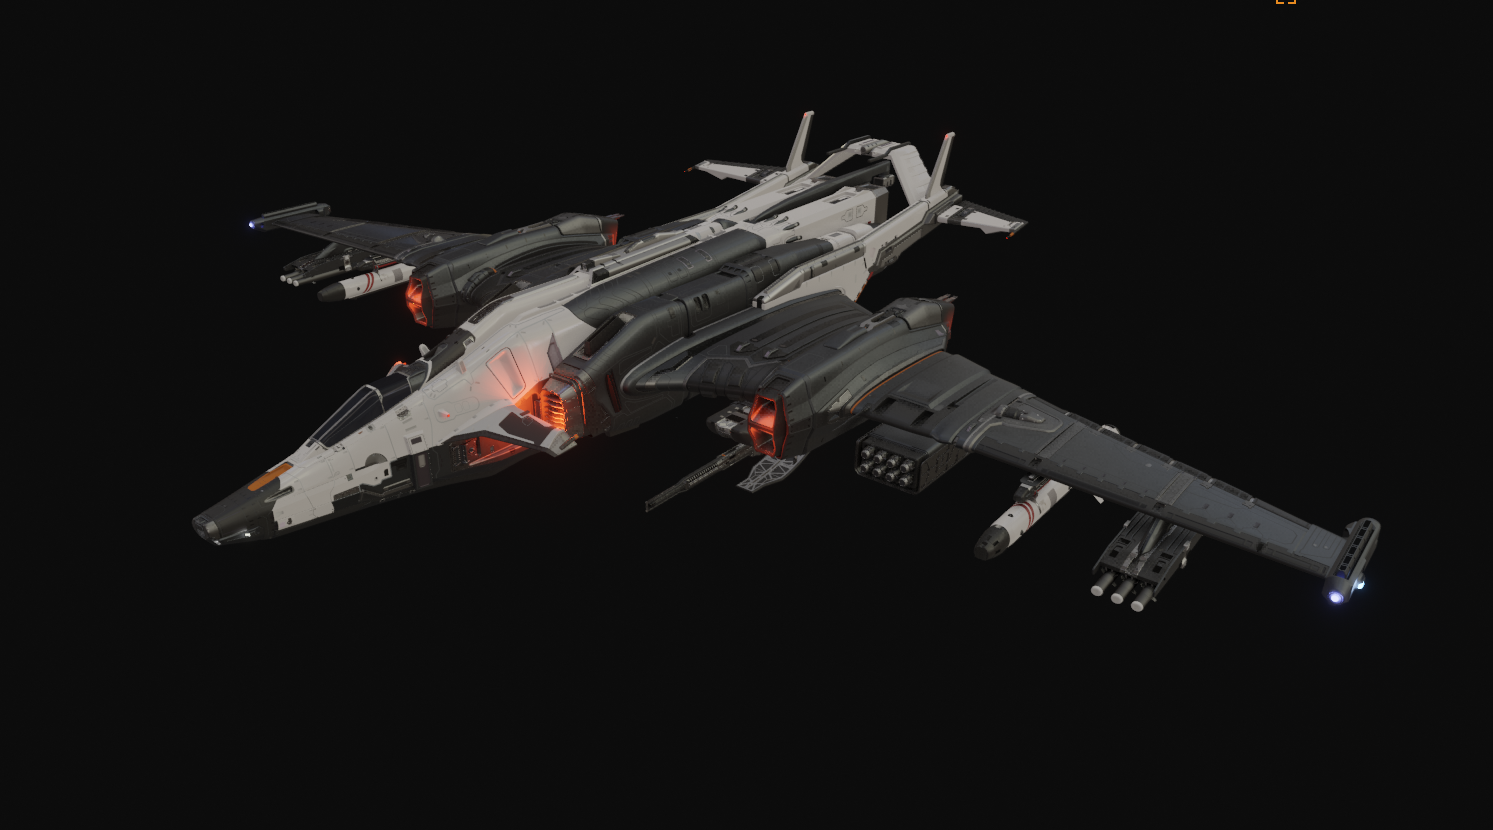
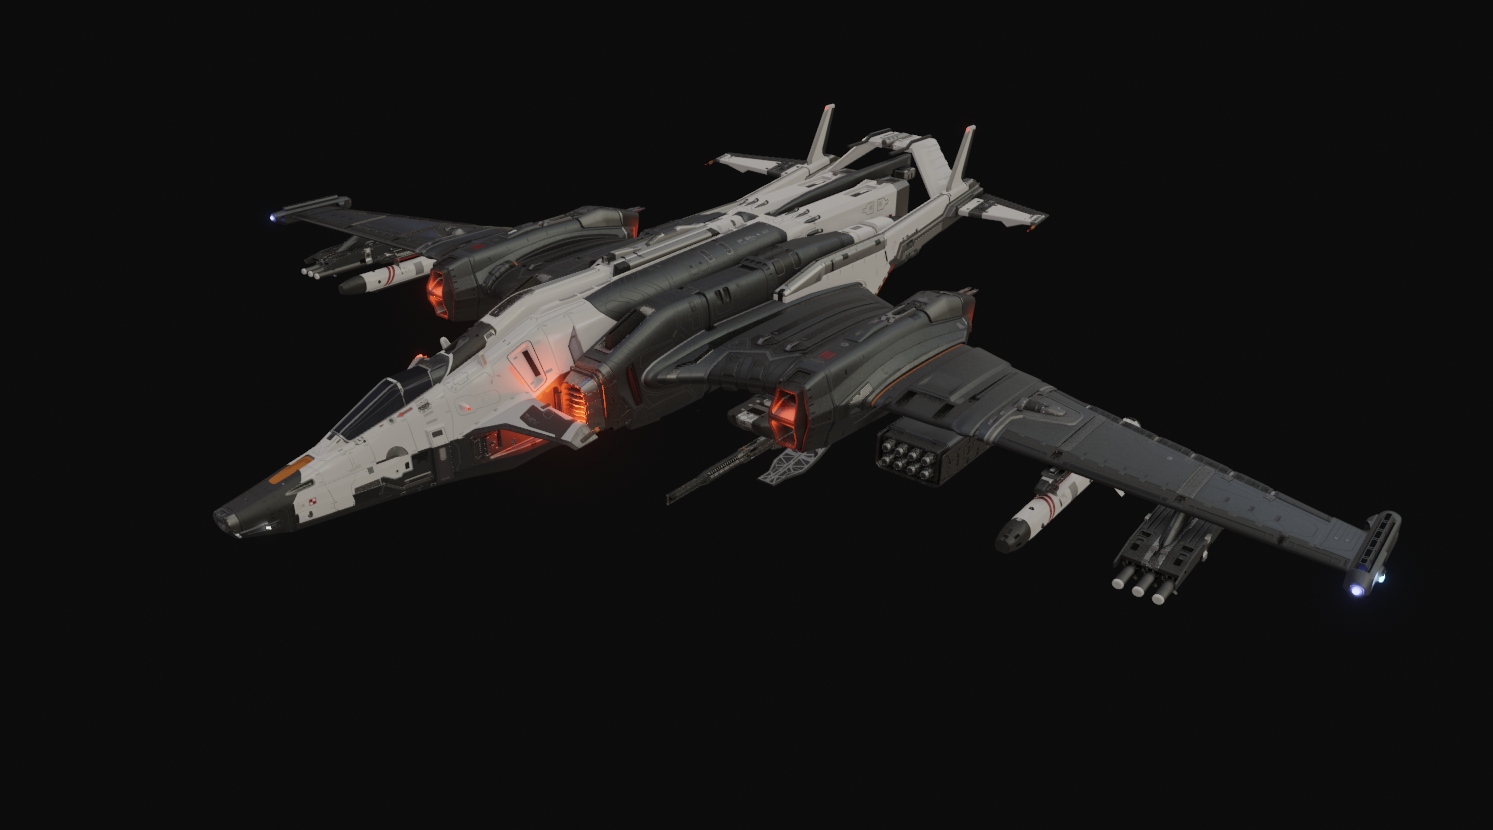
The project was 90% done, and all that remained was presentation. By this point the 2.8 Blender beta was perfectly workable as far as I was concerned, so there was no point not to render it in EVEE. I plugged in HDR, adjusted contrast, and added some lights to give extra impact to the engines.
What little compositing there is was done in Photoshop. I threw together some simple matte painted backgrounds, adjusted the lighting where necessary, and the project was finished.
And that’s it. So what did I get out of this, other than a portfolio piece and a nice set of tools? Are there any tangible advantages to using Blender+plugins for your design process?
Why Use Blender + Plugins?
Well, when you’re creating hard-surface concept art you will, unless you’re just making art for art’s sake, have to dedicate some time for cleanup. Whether you’re working with CAD or Sketchup models, or are dealing with ZBrush, you will inevitably arrive at a point where you’ll have to clean up the mess you’ve made. All the tools used in the typical hard surface design workflow also have the side effect of making a model impossible to use for anything except static renders without putting in extra hours for cleaning up. You’ll need to retopo and clean up the mesh – and it will inevitably take a lot of your time.
Of course, there are alternatives. For example, there’s this guide on getting both low and high poly models out of Fusion 360 – but it requires purchasing additional software just to process the model into .obj. And, also, once you’ve settled on a shape for your low-poly, you’re locked in. You’re supposed to do most of the detailing work after you got your basic surface mesh exported. If you want to change anything, you’re out of luck, and it still needs cleanup.
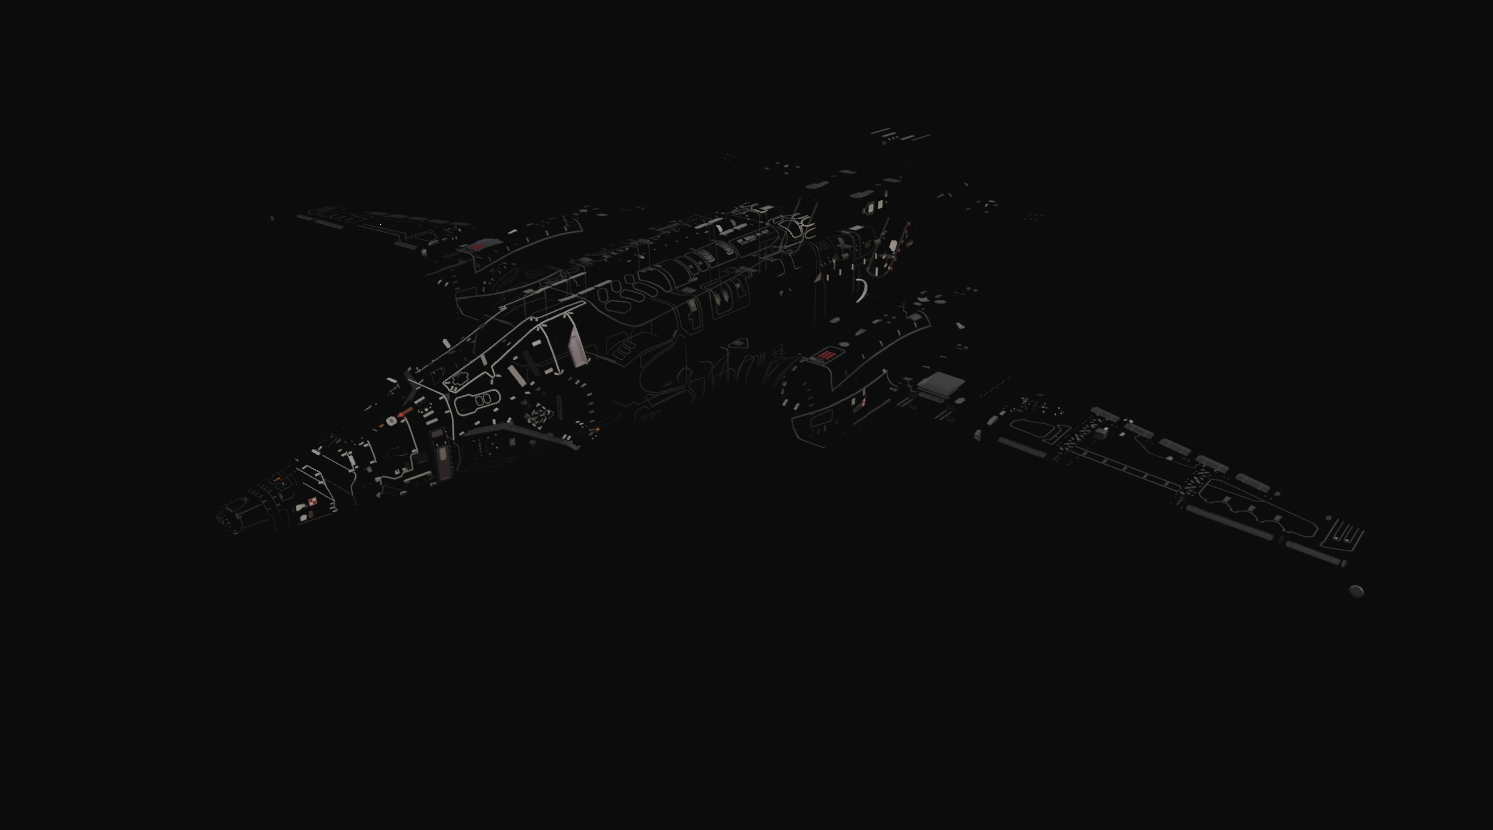
The HardOps+decal workflow, however, sidesteps those issues completely, putting the model just a few steps away from the implementation. Using decals for small details means that you’re not bound to the usual hurdles with high and low-poly, where altering one may break the other, and you don’t need to re-bake anything. In fact, the Strikebreaker doesn’t even use subdivision at all – it’s all completely reliant on bevels. The only thing I’d need to make a low-poly out of it is to turn the bevels off and use the Refuse tool on the most dense polystrips – and there aren’t many of those. Definitely much faster than struggling with subdivision. Also very important, when you’re using EEVEE you already have a good handle on how the final result will look, and if you need to change something at the last minute, well, you can do it very fast.
As an example, all I need to do to make this asset game-ready for a decal/weighted normals workflow is to clean up the bevels, and backfaces, and, optionally, create the UVs for tiling textures. I’m already using decals, so I don’t have to do anything there.
But what if the the weighted normals aren’t an option, and decals don’t work? After all, not everyone uses them, and more importantly, not everyone uses them all the time. Unreal Engine’s support for deferred decals was abandoned halfway, and while it’s possible to still rely on decals in UE, you’re often better off doing thing the conventional way, and this is assuming the best of circumstances. When it comes to vehicles, a lot of developers would stick to traditional baked textures workflow, maybe with a trim sheet or two thrown into the mix. In this case, you can still still bake the decals down, using the mesh with bevels as your high poly, and produce the low poly by simply turning off the bevels and adjusting some geo.
Is this workflow perfect? No, even if it works, there are without a doubt technicalities I haven’t discovered yet. There always are. When it comes to production speed, however I still have a workflow that does a job and a half, and it’s hard to overstate that. As far as the test project goes, Strikebreaker was a success, and that’s all there is to be said about it. It’s time to push HardOps and DECALmachine even further and see what happens.
And that concludes the article. I focused on the tools, technicalities and methods above everything else, but to be honest, this is one of those cases where the tools made the project. Thanks for reading, and if you have more general questions about the design process, don’t hesitate to leave a comment or drop a message on my Artstation.
About the Artist
 Alexander Lortkipanidze, 3D artist


