
About
My name is Arseny Lavrukhin and I’m a CG artist from Moscow, Russia. I’ve been doing CG for a little more than 6 years and for 4 of them I worked in an architectural studio. At this moment I’m a jobless freelancer.
I’ve studied Blender since 2016 and now I just can’t imagine myself working without it. You can find my works done with Blender on my ArtStation page (link at the end of the article).
I want to tell you about my latest work called “Revenge”. This article will be a making-of where I will tell you about my approach to creation and post-production of raw renders, as well as some tips and tricks. I hope this article will be informative and useful to you.
I wanted to make a scene with dynamic composition, motion blur and some FX with Blender.
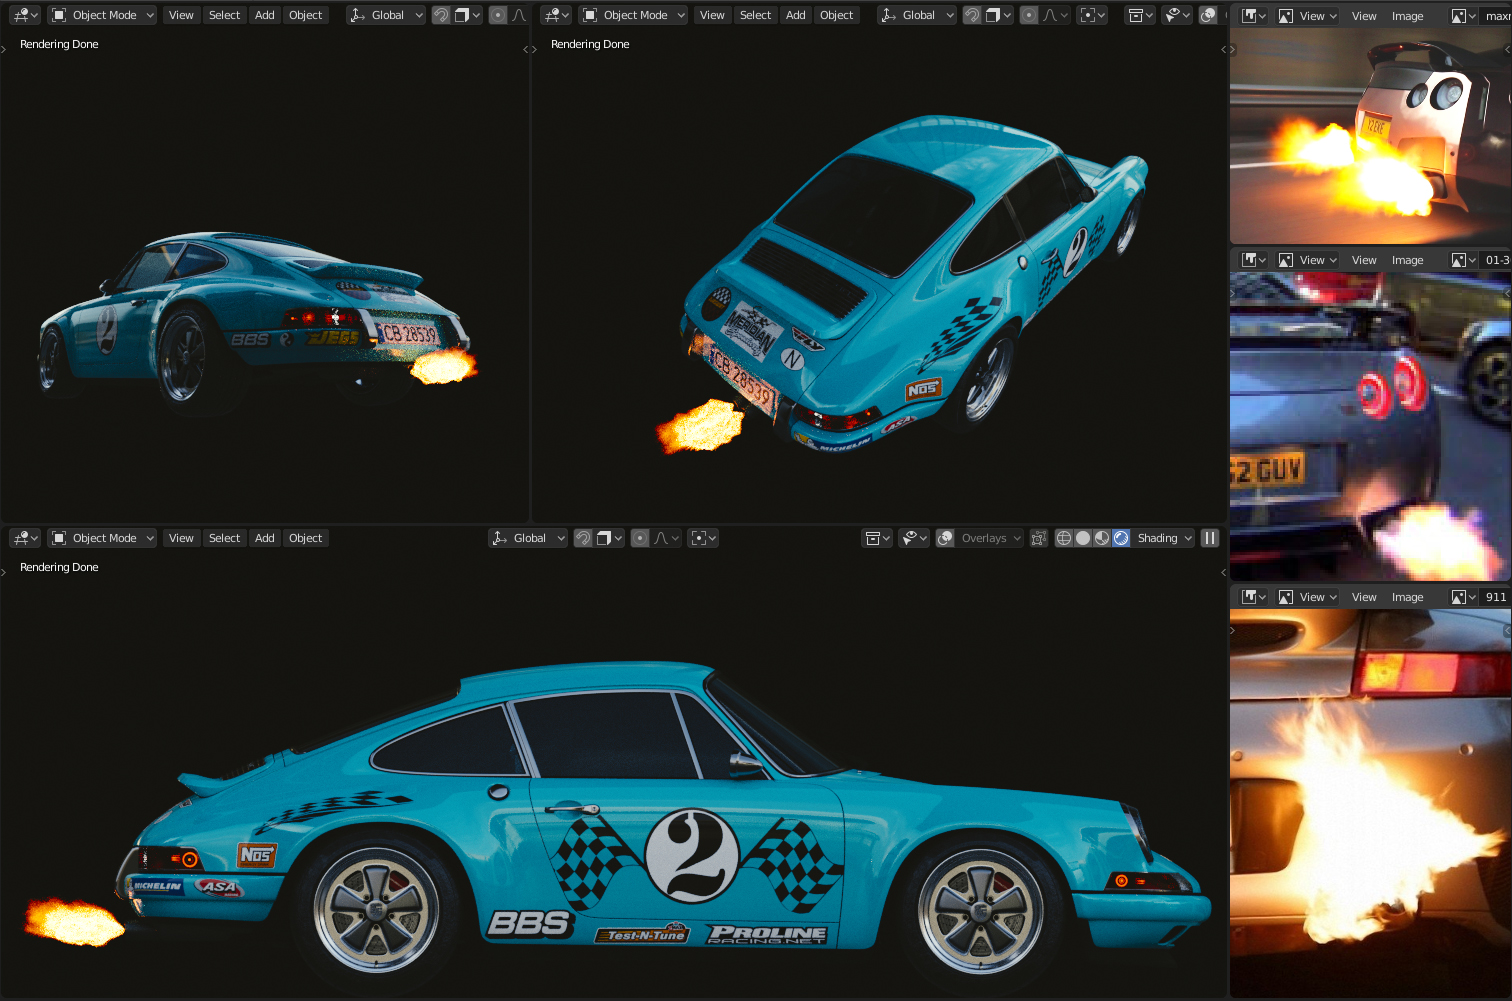
I found this image on the web and realized that it was what I was looking for.
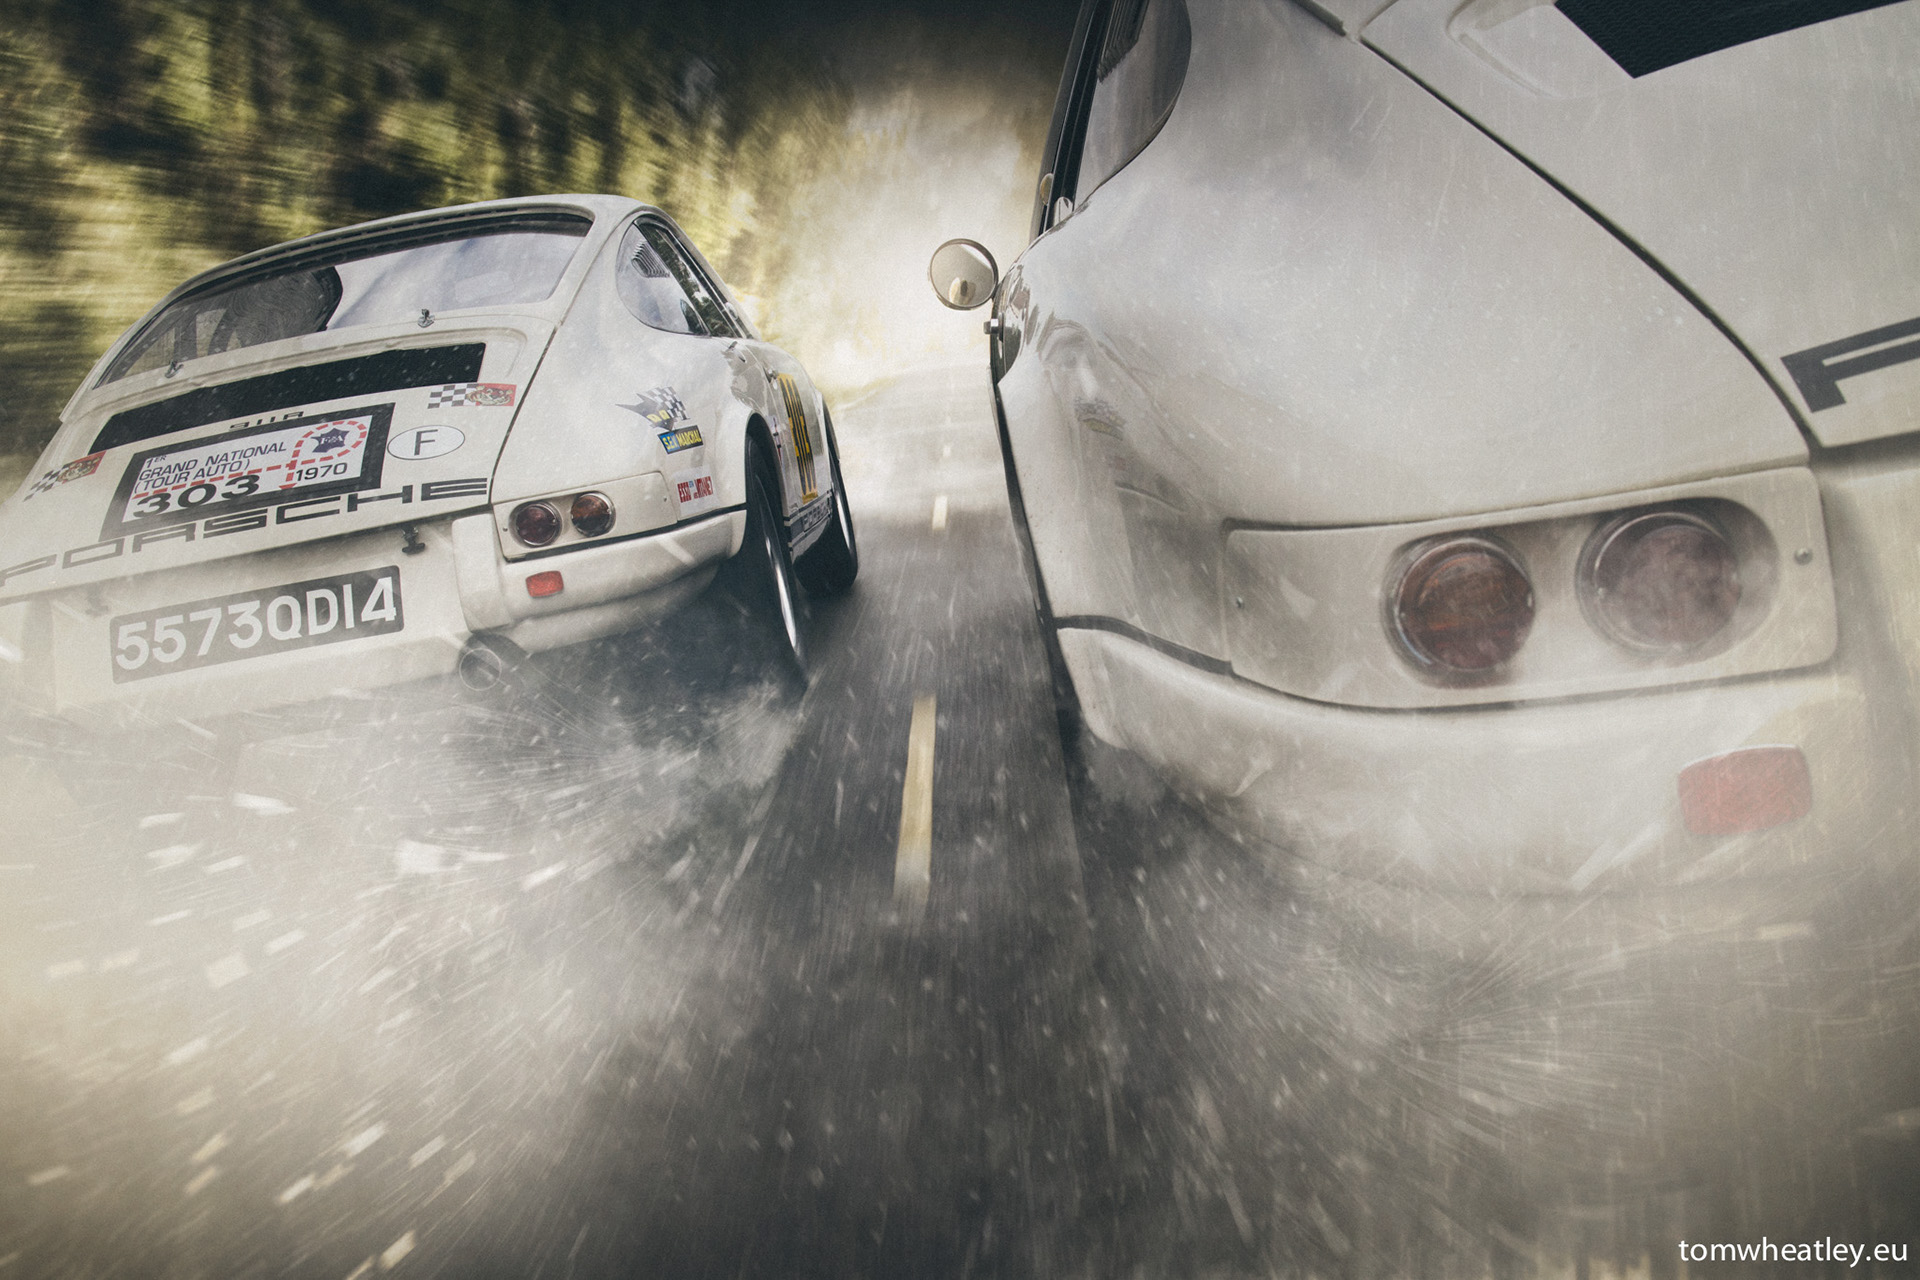
This photo was made by an automotive photographer Tom Wheatley and inspired me to my work “Revenge”. I took the idea – two Porsches in a race against each other.
I didn’t plan to spend much time on this work - the main goal was to understand how to make motion blur and some effects in Blender. So I took a great Porsche model made by a CG-artist from Poland, Szymon Kubicki.
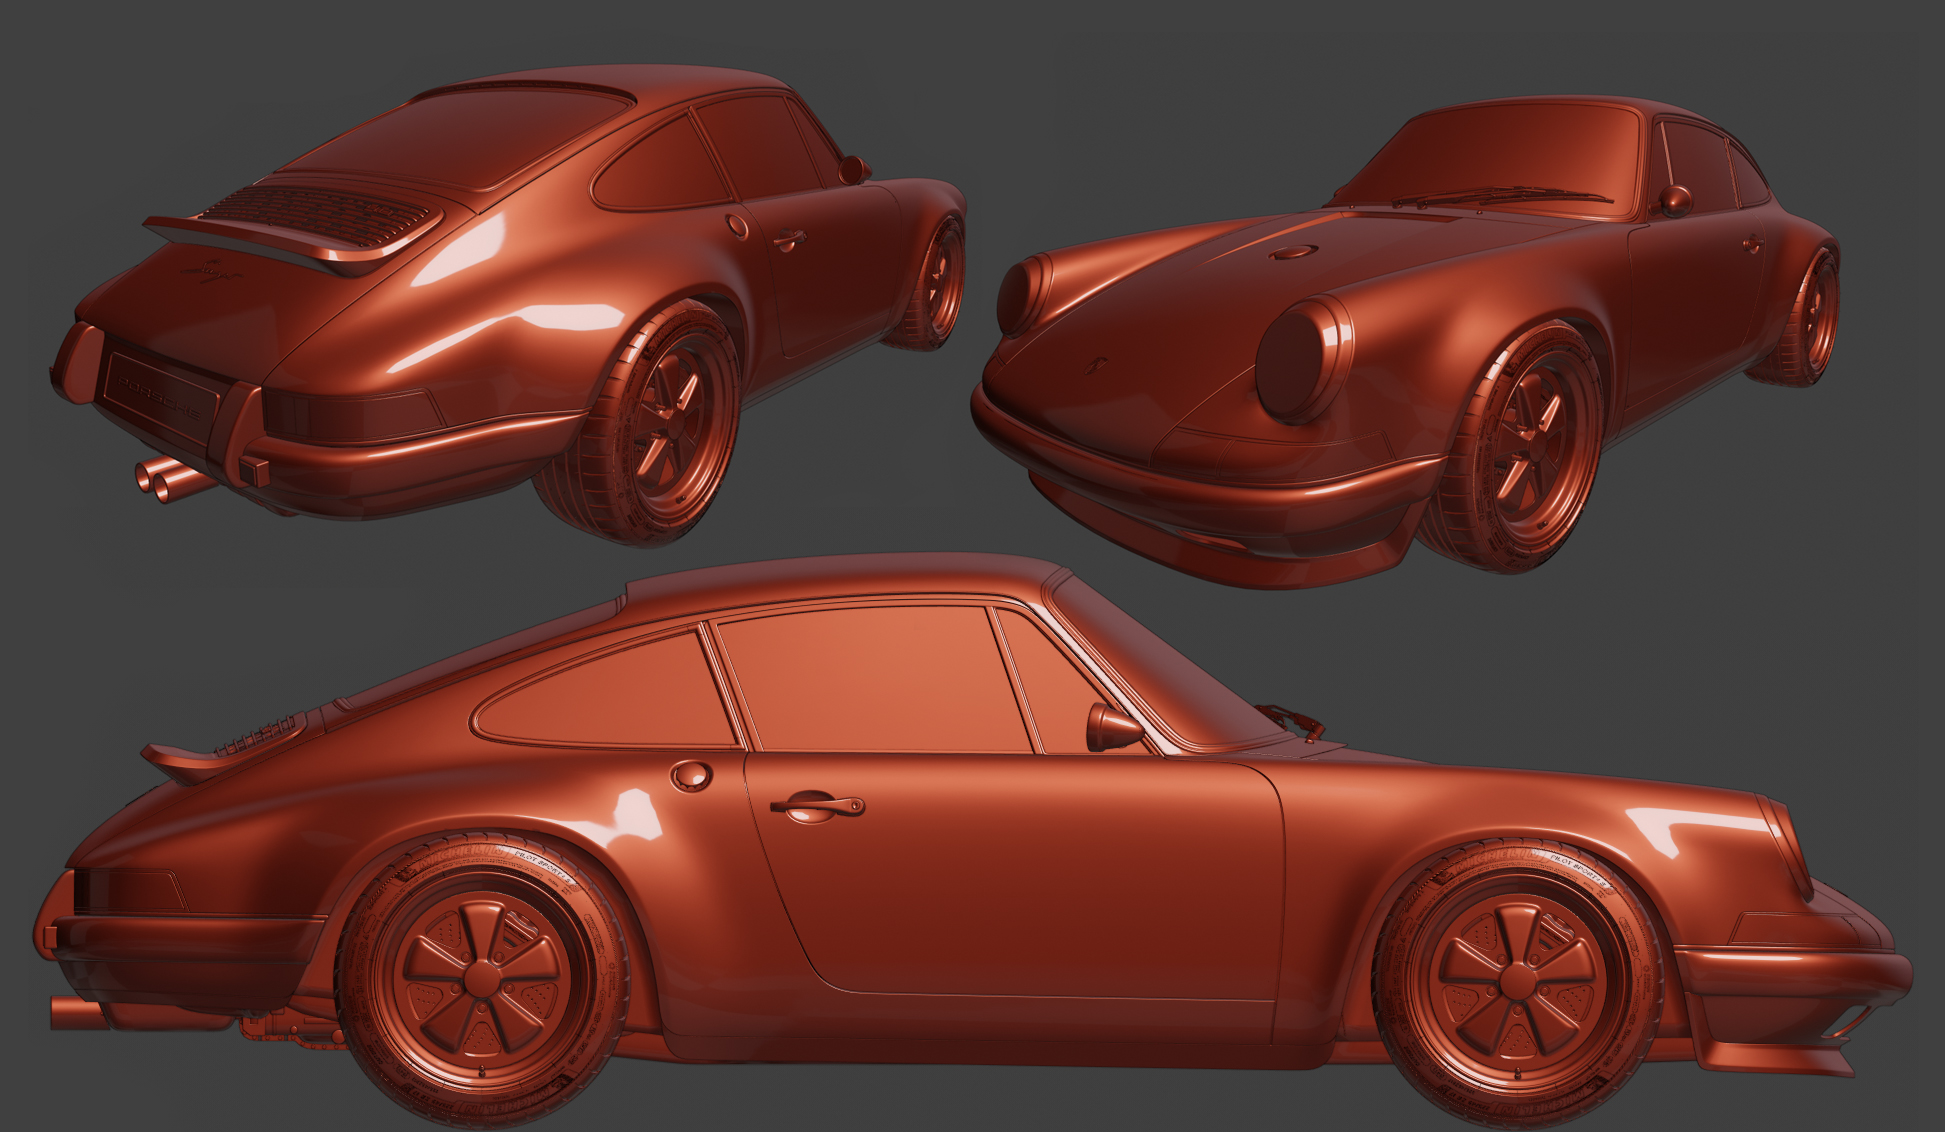
This model has a lot of small details and it’s absolutely free! You can download it from his ArtStation page.
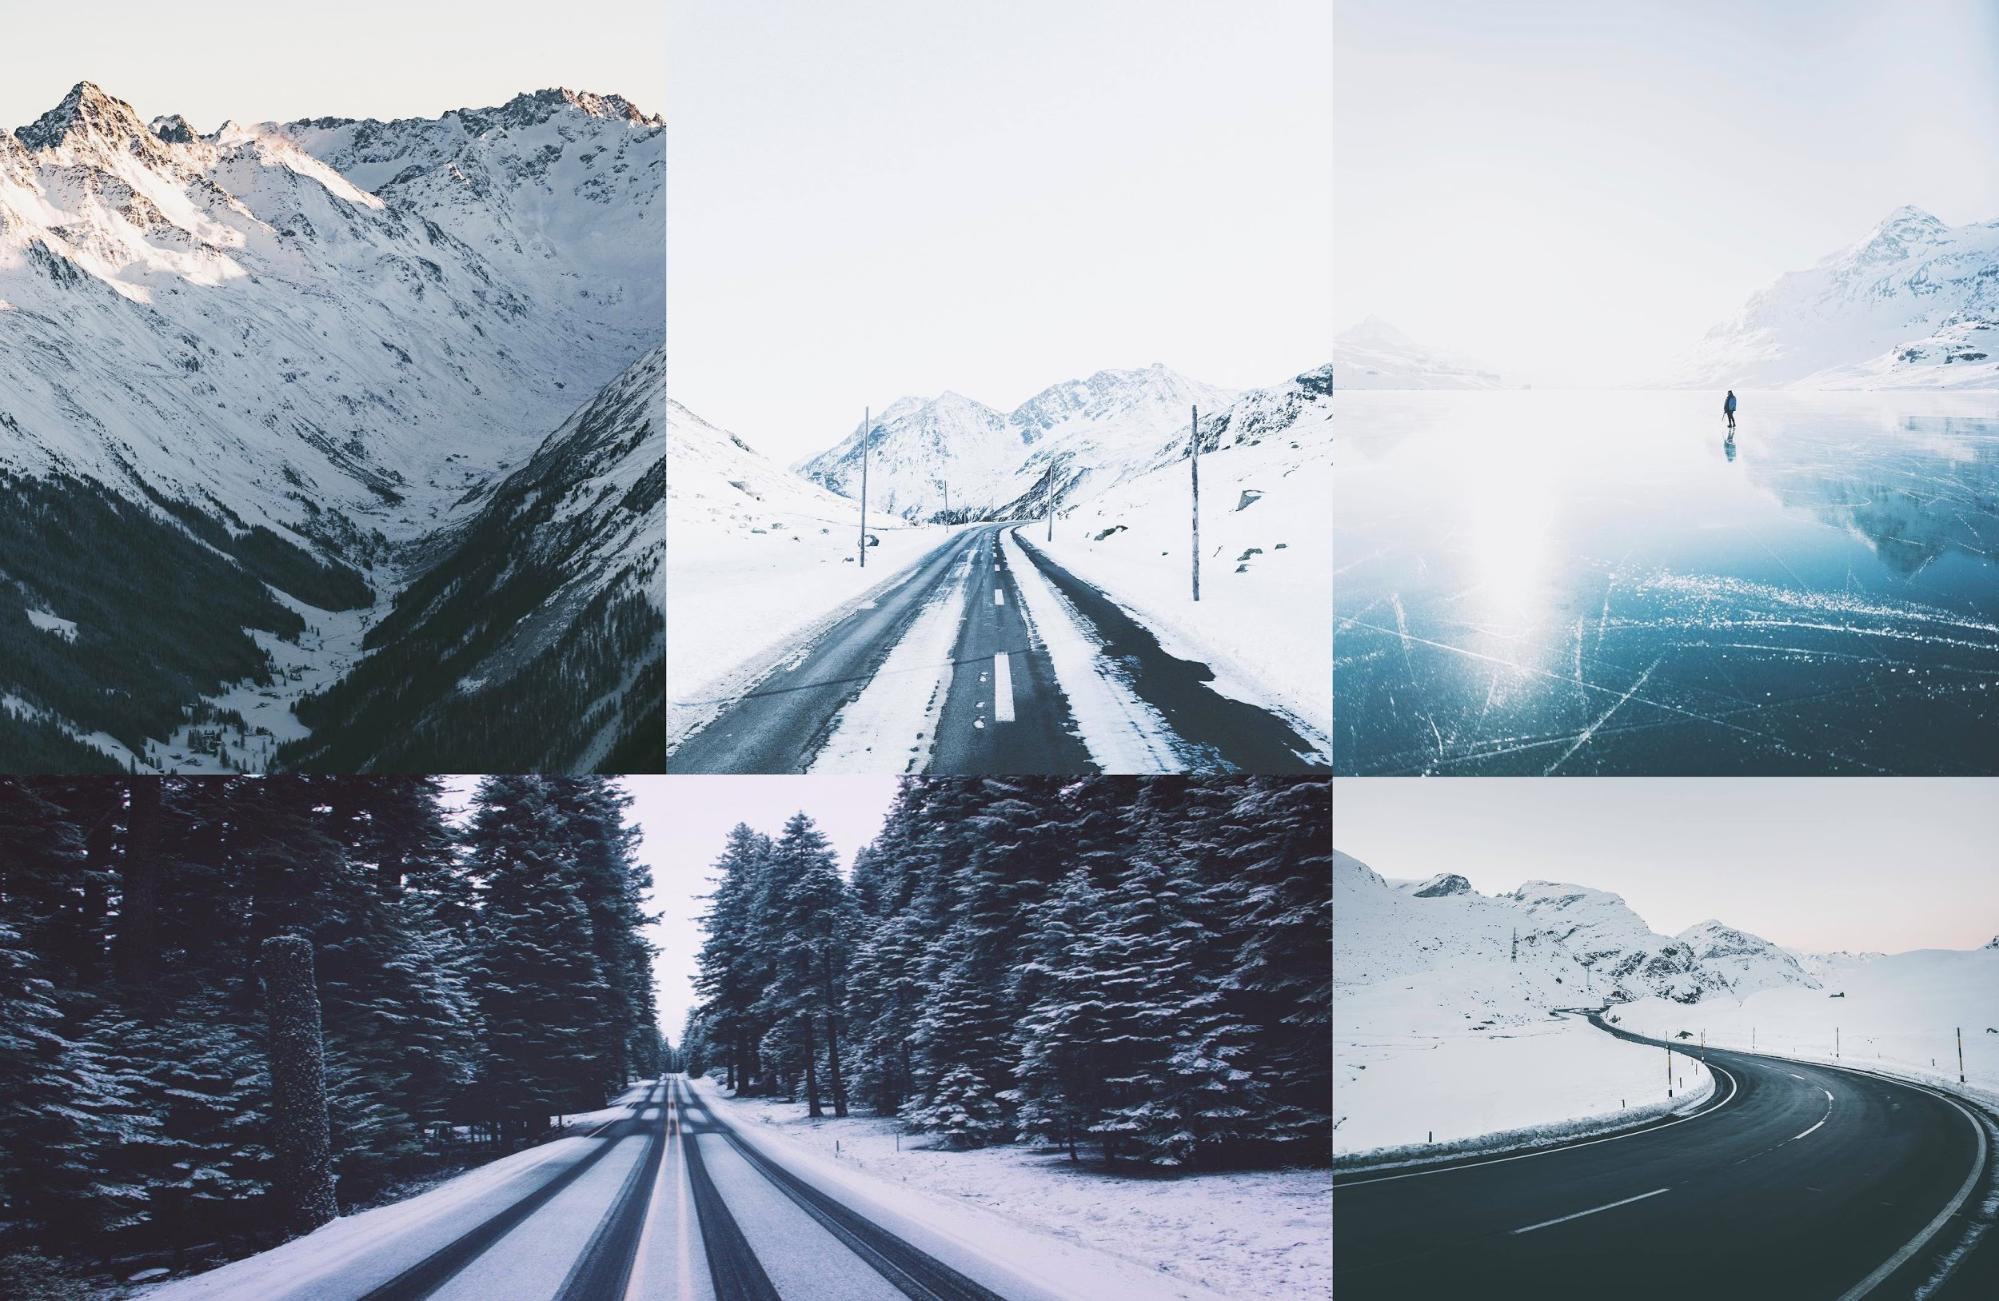
I decided to make a winter environment for this work – two Porsches in a race against each other on a road covered with snow on a background of snowy mountains. Sounds good, yeah?
These were my environment references:
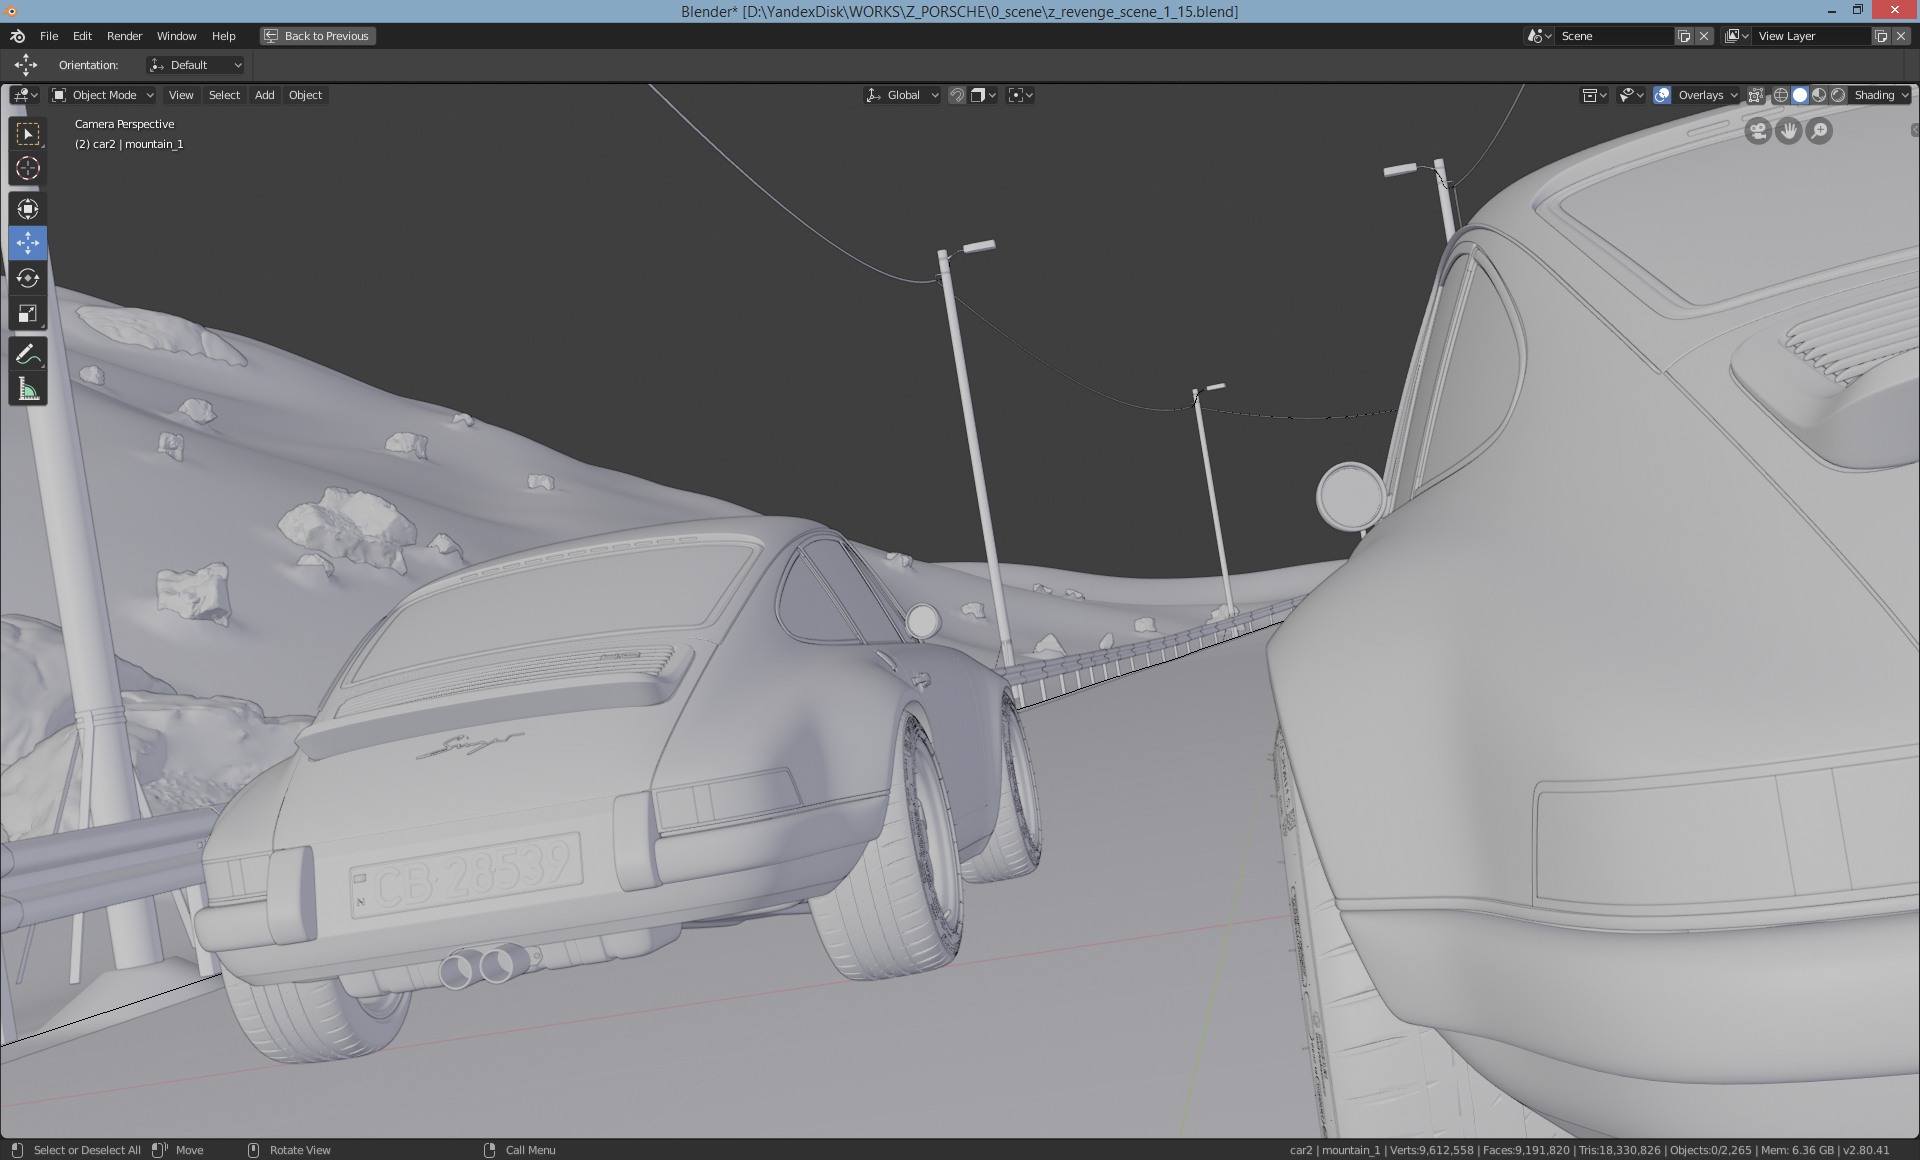
So I got started. I created a plane for the first thing and added to it an asphalt texture, then duplicated this part and joined objects. After that, I applied a Simple Deform modifier to bend the road. At this stage, I also imported the cars into the scene and positioned them according to the reference.

The texture of the road came from megascans.se.

Environment
The hill on the left I made from a simple plane with many subdivisions and lifted its vertices with enabled Proportional Editing mode. I also modeled road props – street lamps, wires, road fence and added some stones to the hill’s surface.
Baking
I had created a snow gathering effect near the stones so I baked a displacement map.

To do this you need to:
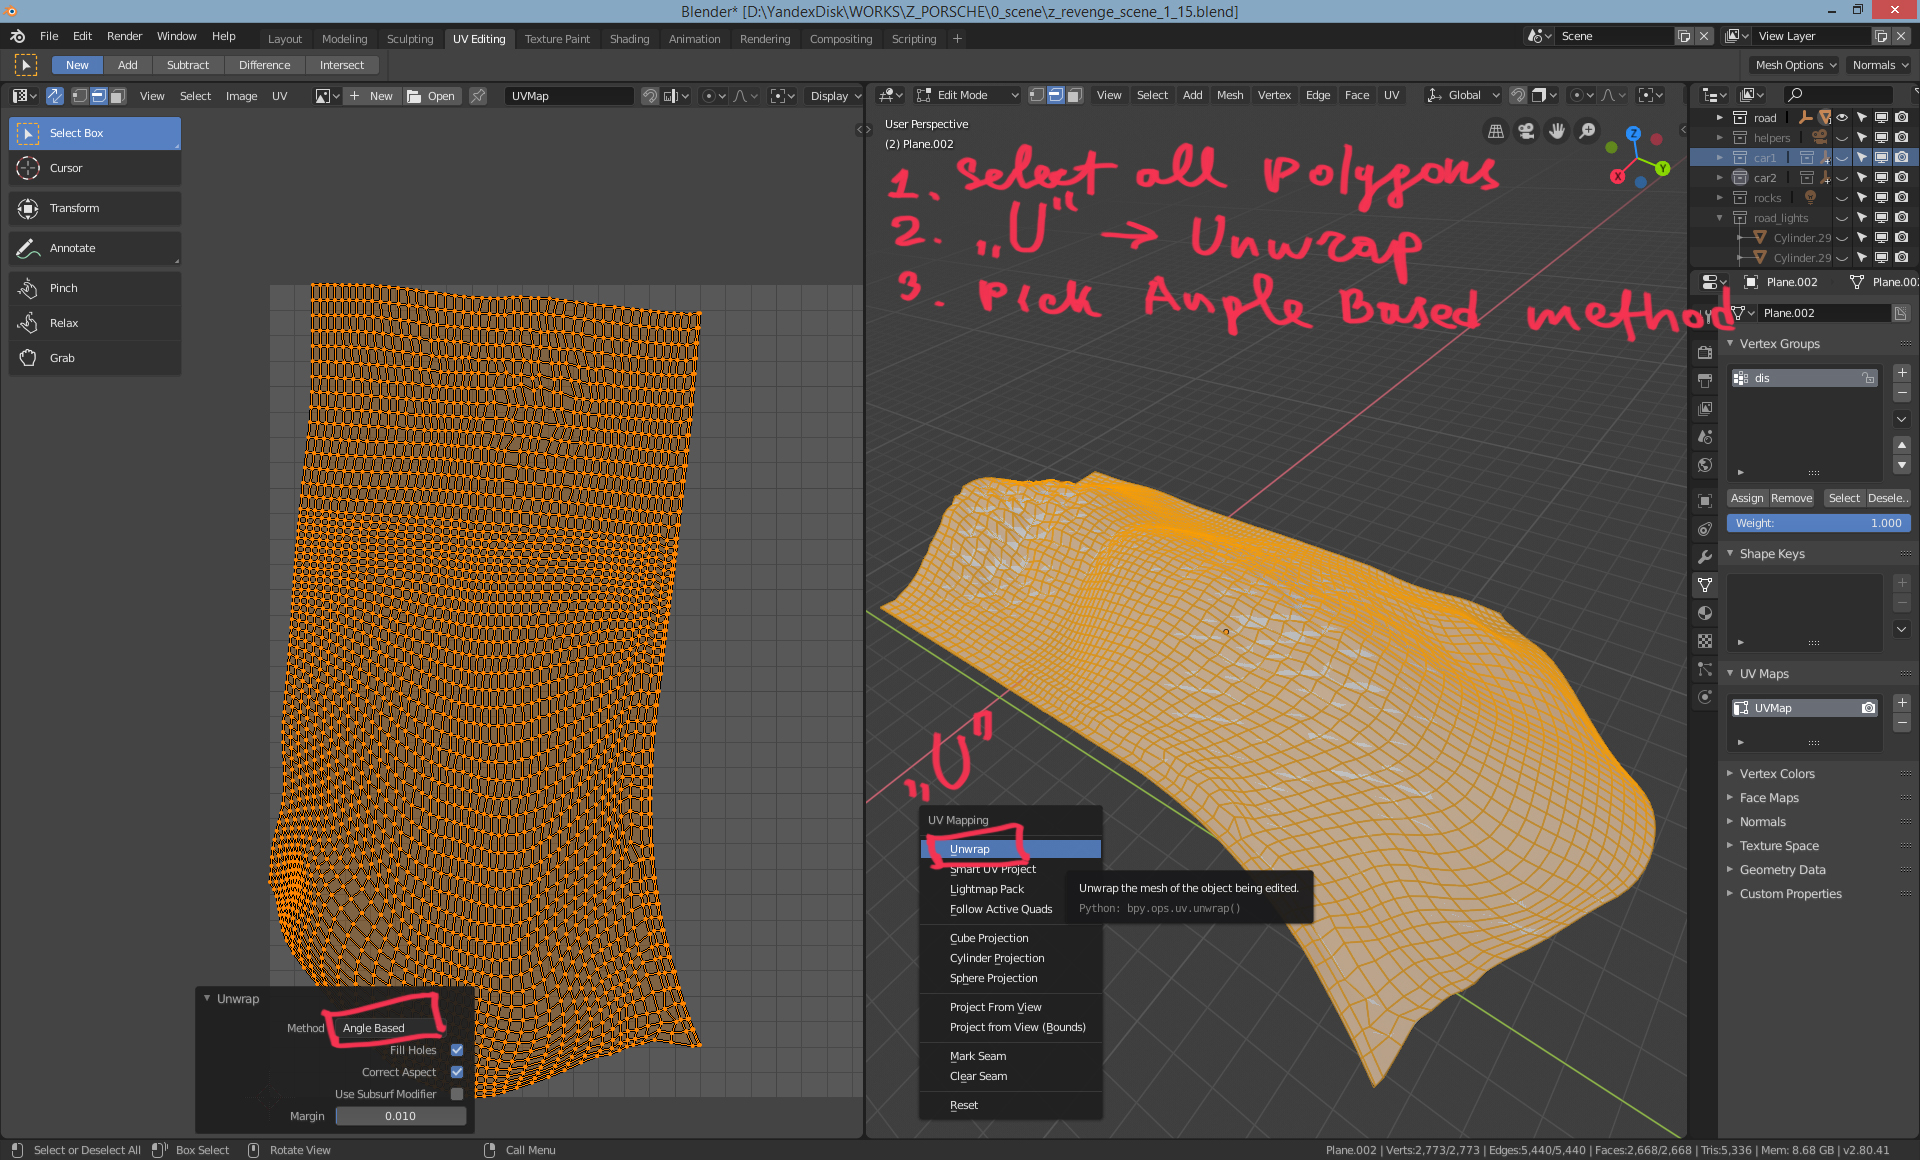
1) Unwrap your surface – select all polygons, press “U”, select Angle Based unwrap method (it fits better).
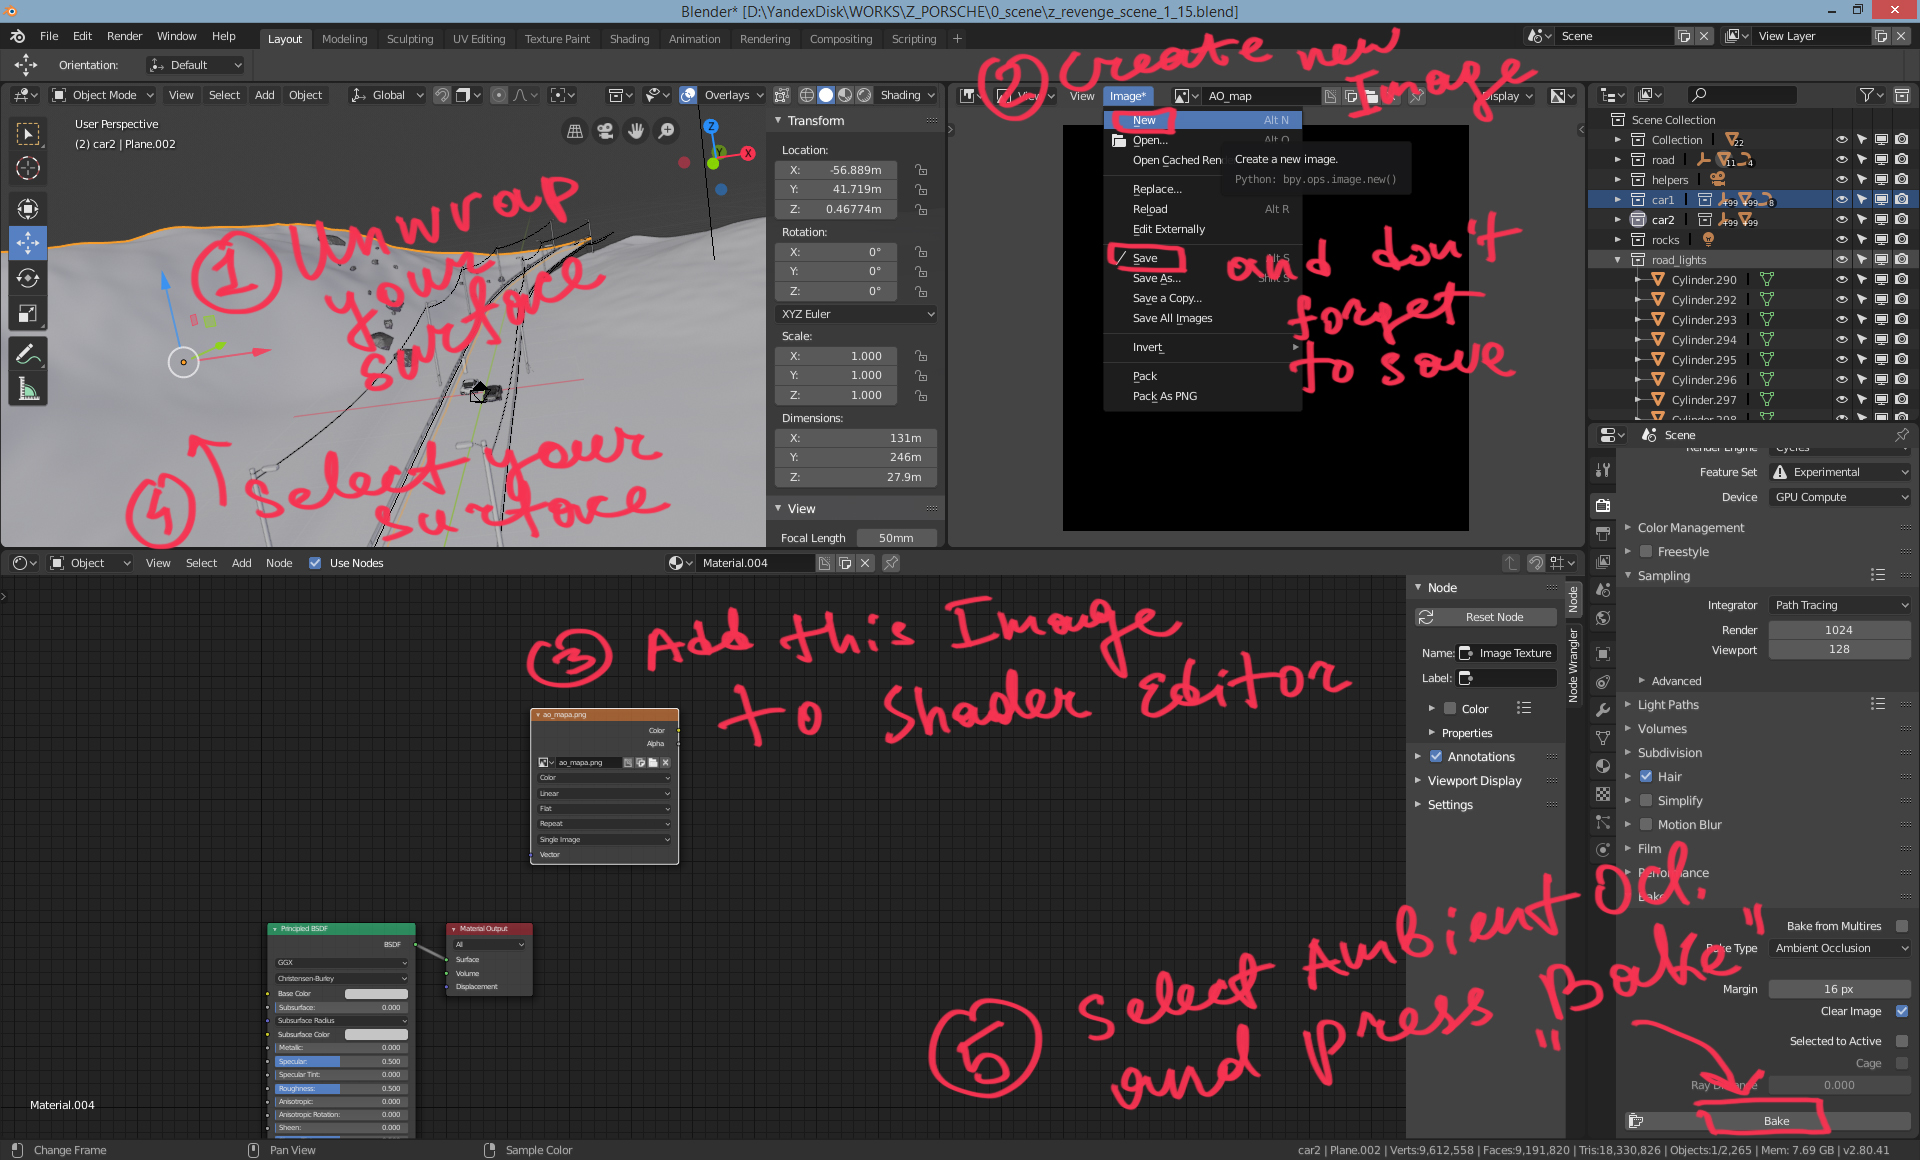
2) Open Image editor, create a New Image and save it to your hard drive.
3) Select your surface. Add this Image Texture to the Shader Editor (Node Editor), but do not connect this map to other nodes. Just leave it there.
4) Go to the Bake tab of Cycles render settings. Select Ambient Occlusion and press «Bake». Note that your surface must be selected.
5) Save your baked image.
Note that for baking you may need to use a stable version of Blender because I tested it in Blender 2.8 beta and it didn’t work. So I opened my file in Blender 2.79 and baked my map there.
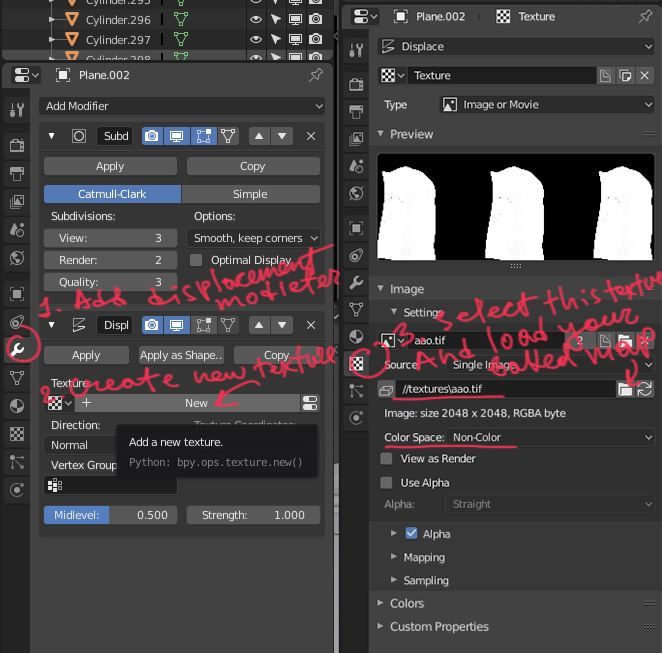
6) Add a displacement modifier to your surface. Create a new texture and select UV Texture coordinates.
7) Go to the Texture tab and load your baked AO texture. Don’t forget to set «Non-color» color space there.
Linking
It is better to load heavy objects to your assembly scene as “Links” when you create big projects. This approach has many advantages: links do not overload the whole scene, they save space, and if you make changes in your link-files it automatically applies to your assembly scene. You can also scale, rotate, move and animate them in the assembly.
To insert your objects in your assembly as Links in Blender 2.8 you need to:
1) Save your model as a separate file on your hard drive.
2) Open this file and select all elements you want to be in your assembly scene.
3) Press “M” and create a New Collection.

It’s very cool that you can leave other objects in this file (for example Lights, Cameras, etc.) and they won’t add to your assembly scene if you don’t include them in your Collection. For example, it could be helpful if you set up shaders for your objects and still work with lights.
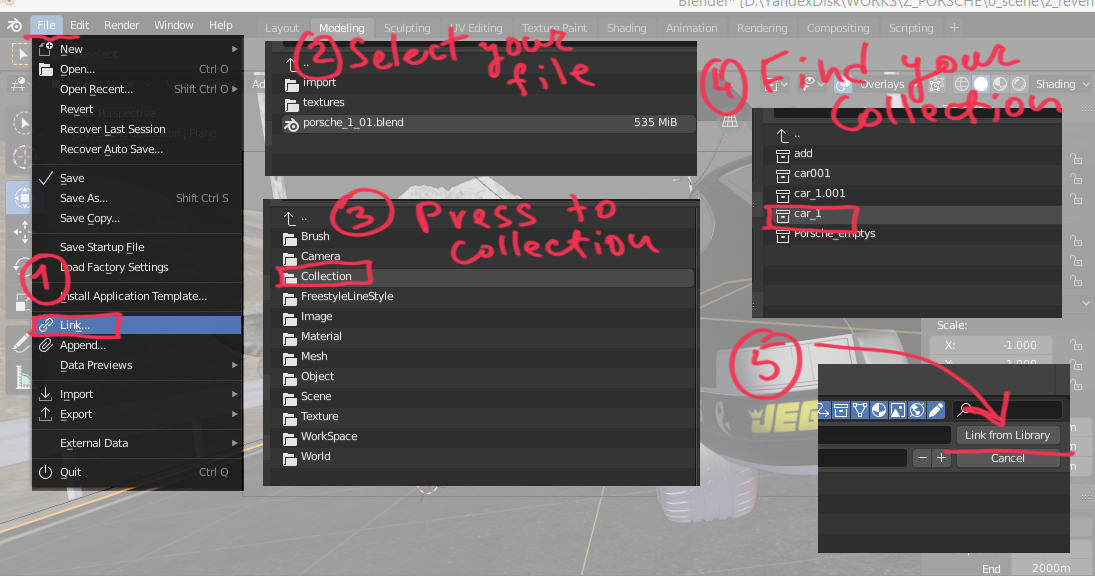
4)Open your assembly scene, then go to File > Link > select the file with your model > go to Collection > select your Collection name > press Link from Library.
Background
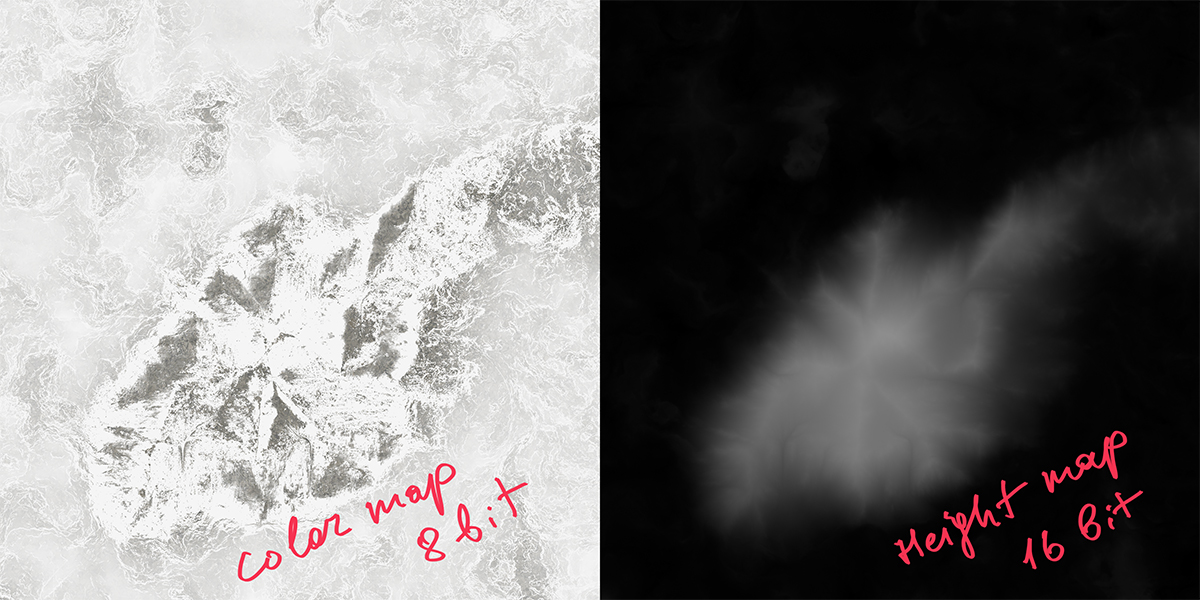
I made a mountain in World Machine for the background. As a result I got a color map and a height map which I could use in Blender as a displacement.

Here are my maps:
To convert it to a geometry you need to do these steps:
1) Make a plane.
2) Add Multires modifier with Simple type of subdivisions. Add as many subdivisions as you need.
3) Add Displace modifier.
4) See Baking section above, step 6 has a similar way of proceeding.
Shaders
The shaders in my work are pretty simple.


FX: Exhaust fire
The fire was done within Blender’s Quick Smoke.
So first you need to add to your scene a mesh (a cube for example) and set up its size (it will be a fire emitter). Then select your cube and press spacebar to search and type “quick smoke” and select it. It will automatically convert your cube to a Smoke Emitter and will add a Smoke Domain. Now you can play an animation and see what you have got.
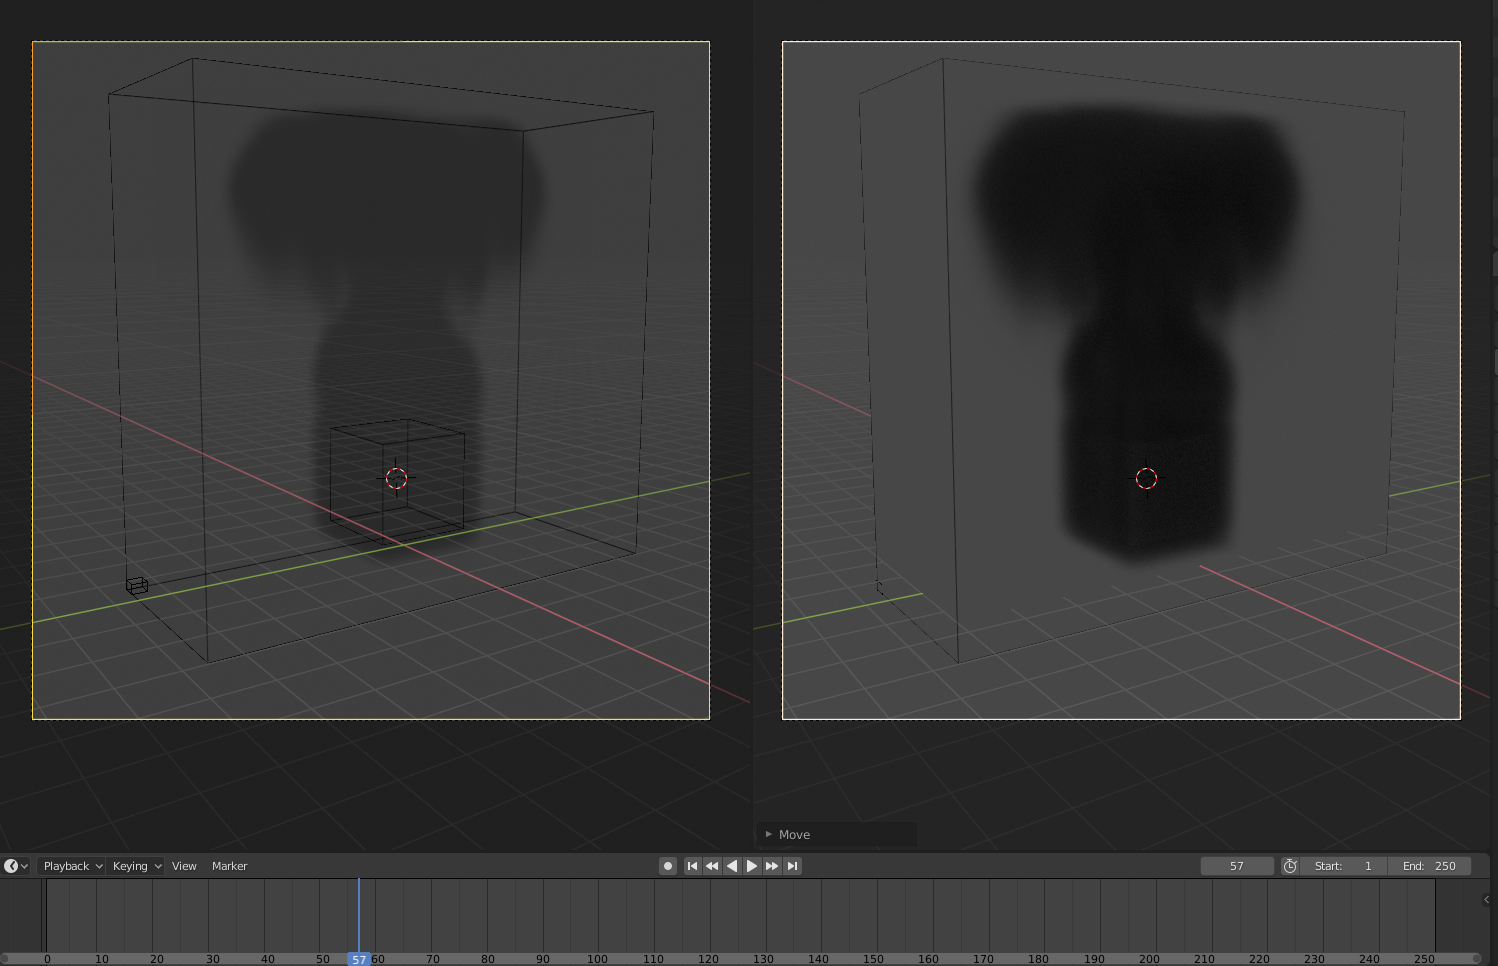
Note that you can modify shapes of your Domain and Emitter.
Then add a direction to your fire. Add a Wind force for it: Add > Force field > Wind. Set up the strength of the wind. To add a fire select your Emitter and choose Fire (or Fire+Smoke) in Flow Type in the Settings. In my case, it is just a fire with no smoke.
Feel free to add other Forces to get a desired result. It could take bunch of time. Be patient.
These are my settings:

You will also need a fire shader. Here is mine for Cycles:

Note that in the Attribute node you have to type “flame”. It won’t work without it. This shader you need to add to your Smoke Domain.
If you have not only fire, but smoke, too, then your shader will be looking something like this:

Press the button «Bake all Dynamics» in Smoke Domain preferences when you have set everything up.
FX: Snowfall
The snowfall I also made in Blender and then added it as a layer (screen blending mode) when I did post-production.
You need to use a Blender Particle System for this.
First make a plane, set required dimensions and position. Select it and go to the Particles tab and select New. So now you have your Emitter.
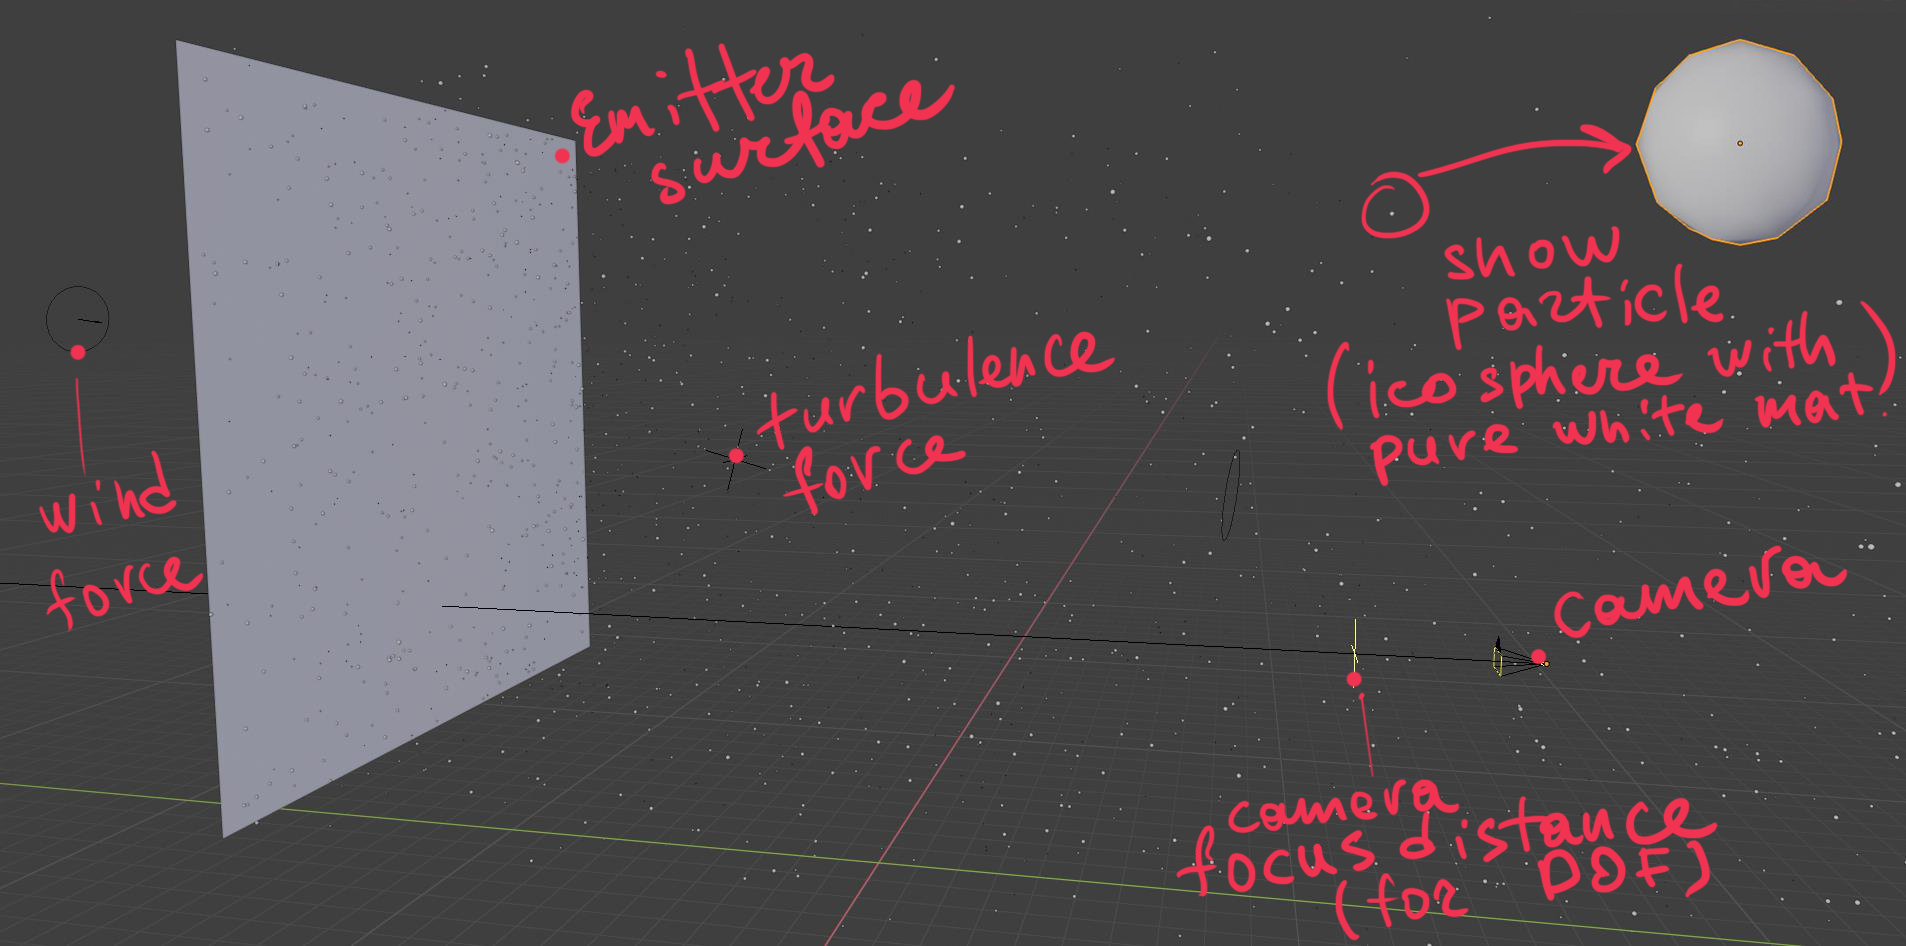
Make a sphere (snowflake) and give it a pure white color. Select your Emitter and go to Emitter preferences in the Render tab. Select Render as Object and add your sphere to it. After that, you need wind force. You can also play with Turbulence and other forces.
Create a camera and set up the focus distance (for depth of field effect) and don’t forget to switch on Motion blur in the Cycles renderer preferences. After that, you can bake your simulation and render your snowfall.
Here are my settings for an Emitter, forces and a camera:

Post-production
I like to save my renders as multilayered EXR files and then open them in Blender for post-production. In most of the cases I do a color-correction my raw renders, use Glare, Lens distortion nodes and add Film Color Management with increased Gamma to kill pure black color.


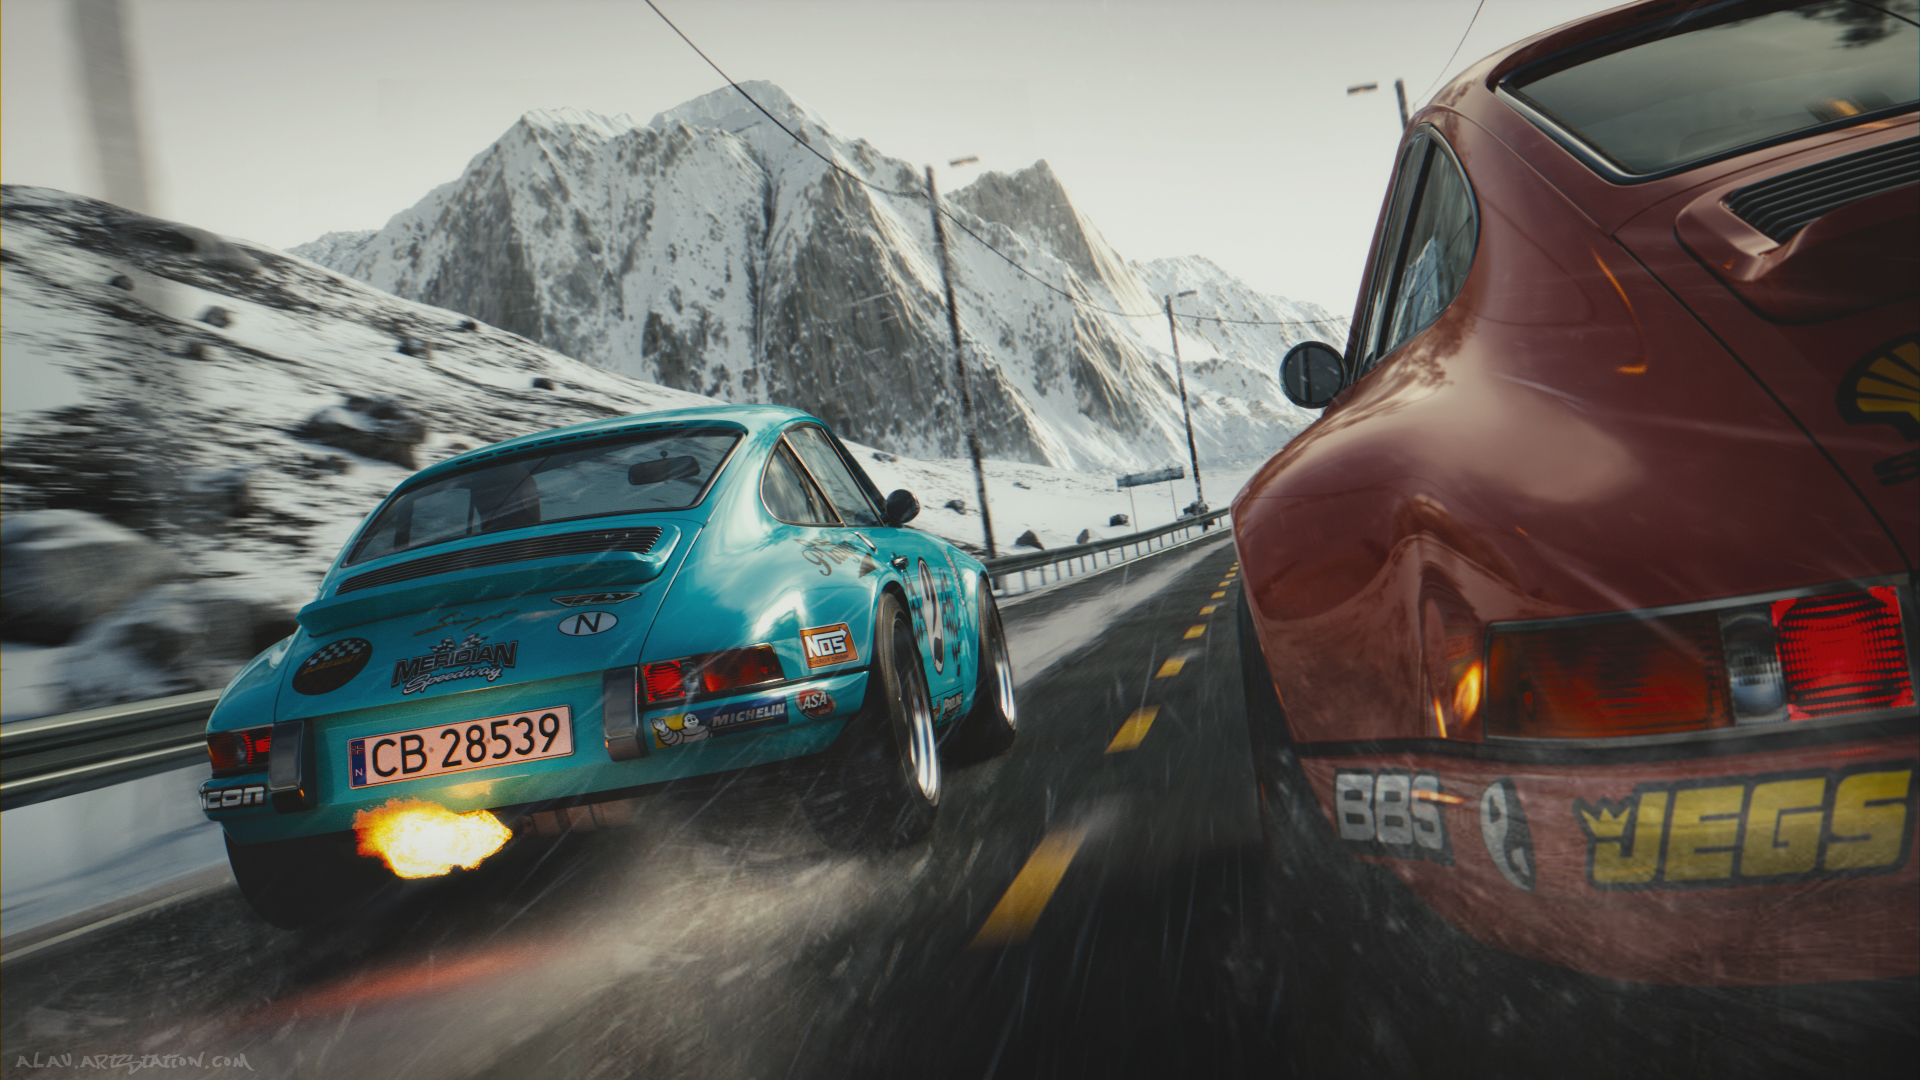
This is the final image:
That’s all, guys:-) I hope you like it! Good luck to all and be 2.8!
About the Author
 Arseny Lavrukhin, CG Artist
4 Comments
great work.. really like it.. I've saved it as PDF will redo on weekend.
Thank you Arsney.. :)
Arseny-
Thanks so much for such a detailed breakdown! Great format, and great work!
I'm glad you like it, guys! Cheers!
Sooo cool!
I'll definitely try out some of your techniques!