About
Hi! It’s Jakub Wysocki and I am 29yo who decided 1.5 years ago to finally go after his long delayed plans to become a 3D artist.
My daily tool is Blender, but I am also supporting my workflow with other tools like Substance Painter, SketchUP, ZBrush, World Creator and many more one task programs.
I was always on the more technical side of things and had a little bit of previous experience of modeling in 3DS Max (very little experience, when I am thinking of it from today’s perspective), but since I got Blender into my hands I cannot stop learning more and more.
After a decision to fully push myself into learning, I quit my regular job to focus only on 3D. Since then I do some freelance work from time to time (mainly architectural and product visualisation), but now I feel that my interests are evolving more towards game development and the artistic side of the industry.
You can find the full pack of renders on my ArtStation page, if you are interested.
Thanks to BlenderNation for giving me the opportunity to share details about this project! :)
Inspiration
The project started simply as a modelling practice without even planning to push it. Early inspiration and reference images were real pictures, which you can find here.
I made it together with concept artist Jakub Kowalczyk, who dealt with the most of 3D modeling as a form of training. You can find more of his awesome work on his ArtStation (and he is bringing more and more Blender into his workflow).
After helping with modelling, I was focused on creating materials and a rendering process in Blender. It turned out to be fun so I decided to go even further! And it turned out to be fun so...
Modelling
First of all, every project including this one has to have very clear assumptions. It may seem that they limit you a lot, and it's true, but it's a good thing to be limited. This way you can focus better on the subject to do it the best way you can and not get distracted by thoughts in the middle of the project like this: God maybe I should be doing a Christmas Tree with headphones instead of a bottle? So get your guidelines quickly and make the most of them!
Assumptions:
- 80’s pepsi bottle
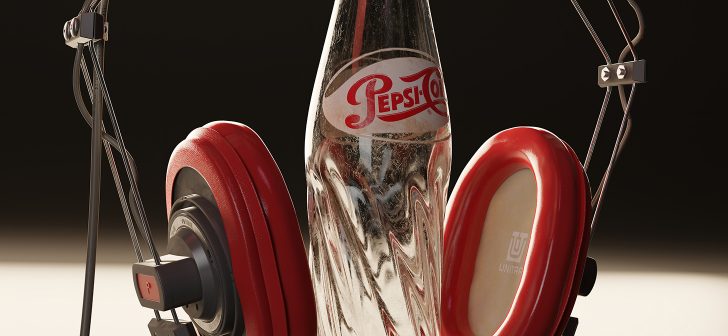
- vintage 80’s Polish headphones, located on the bottle
- well thought-out shapes for easy UV unwrap
- maximum procedural texturing
- find references for everything
Modelling the Bottle:
- Linear Proportional Twist
- Solidify for glass effect
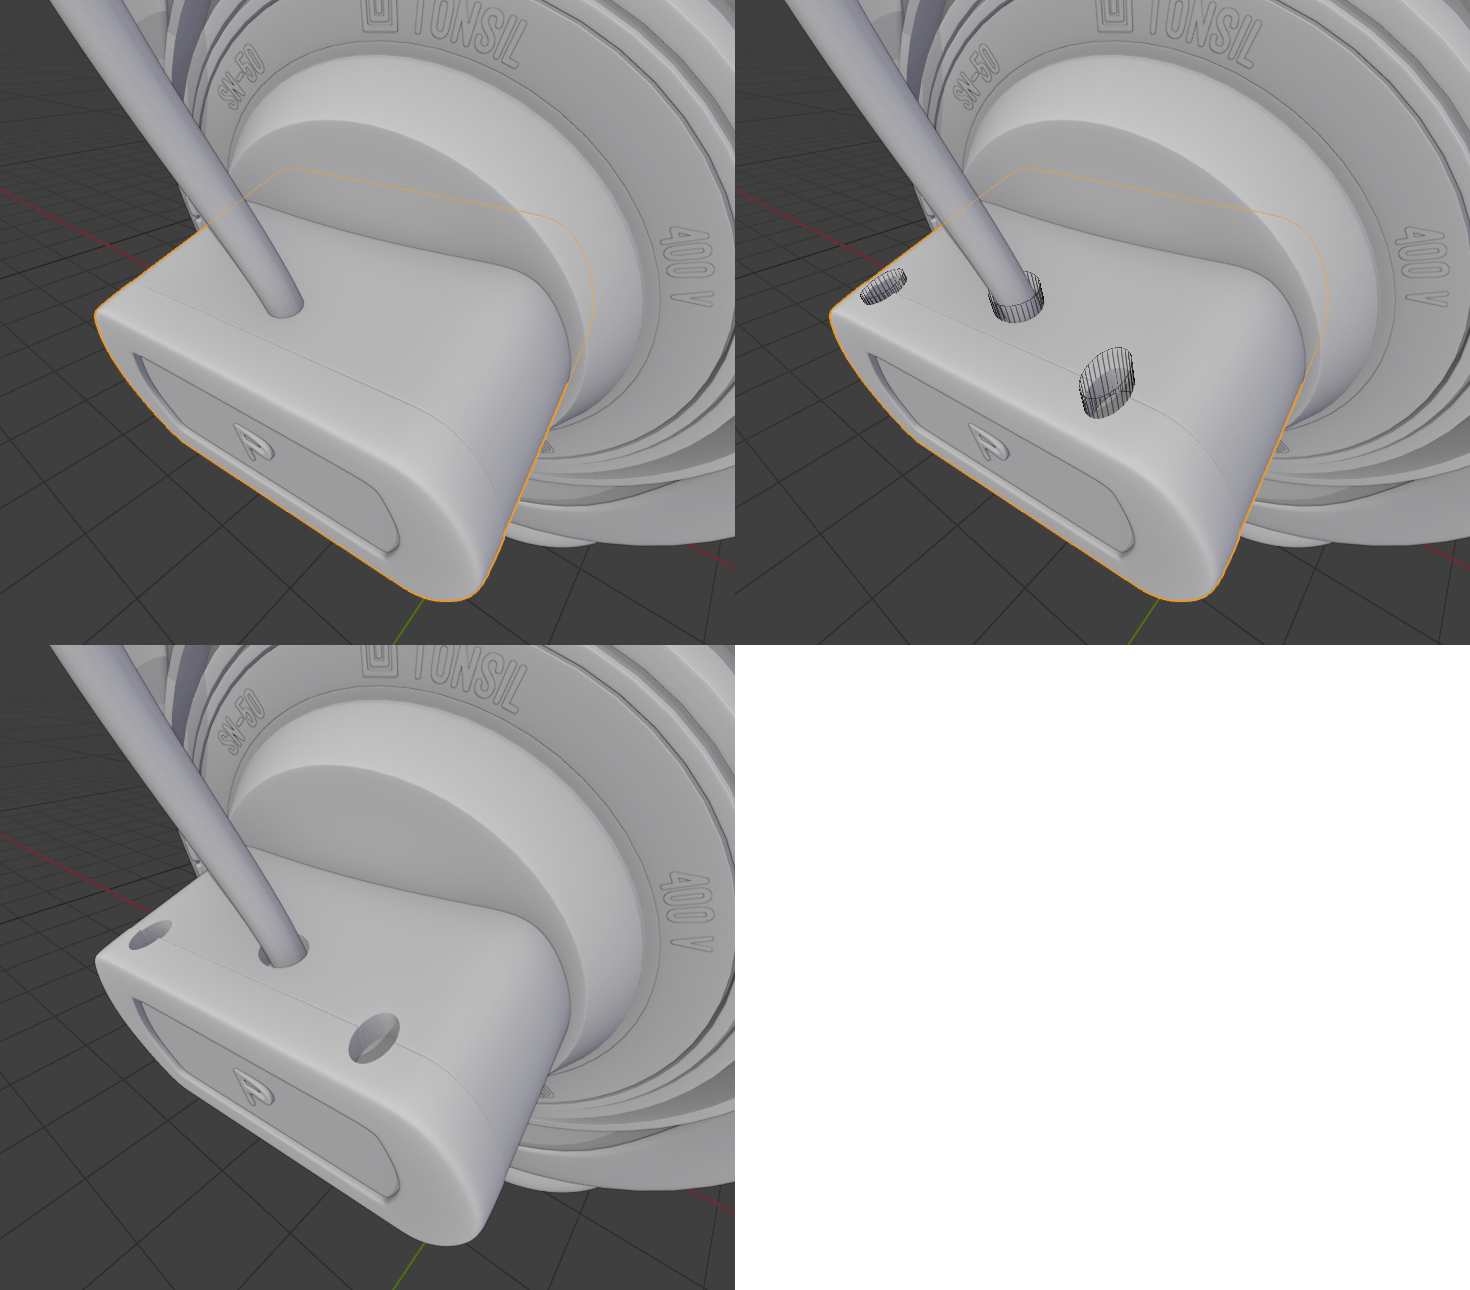
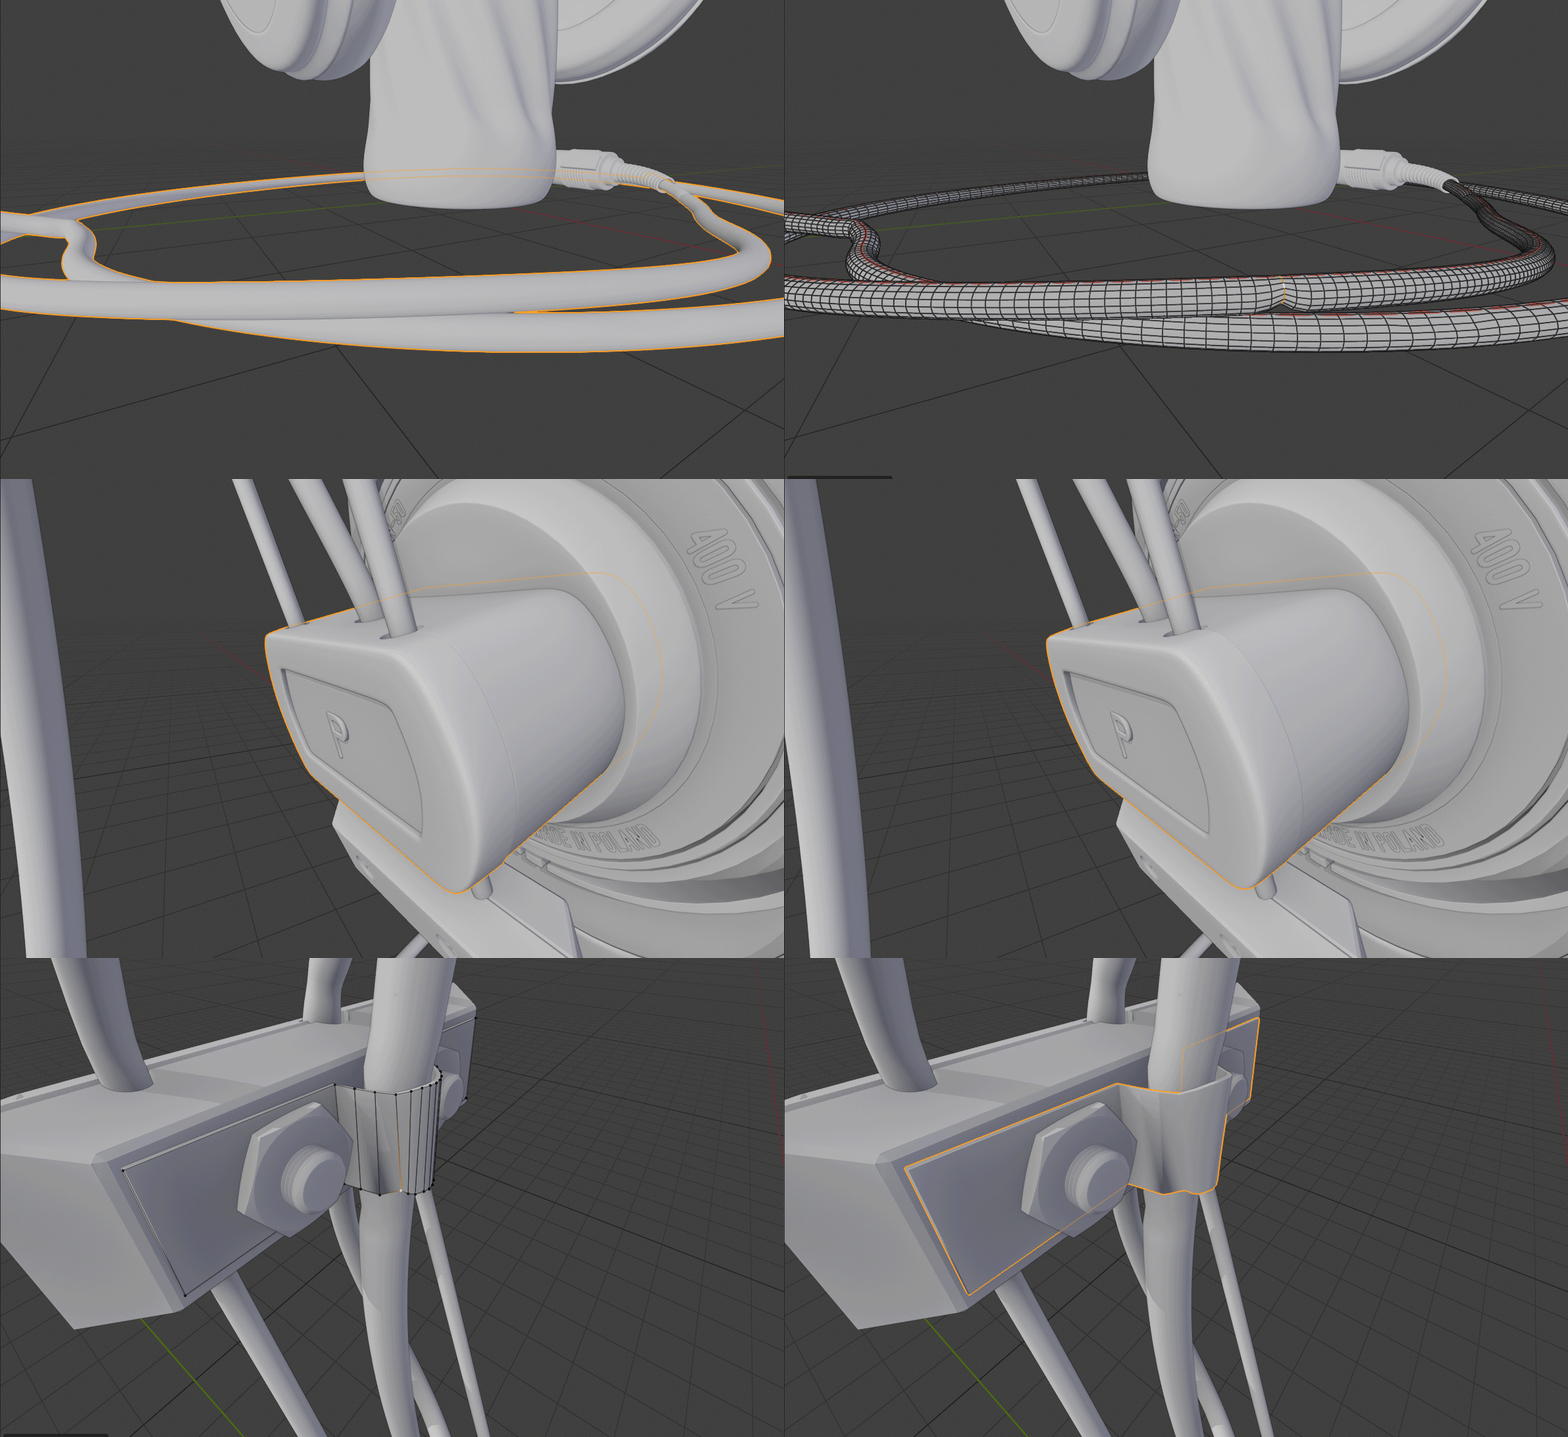
Modelling the Headphones:
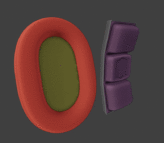
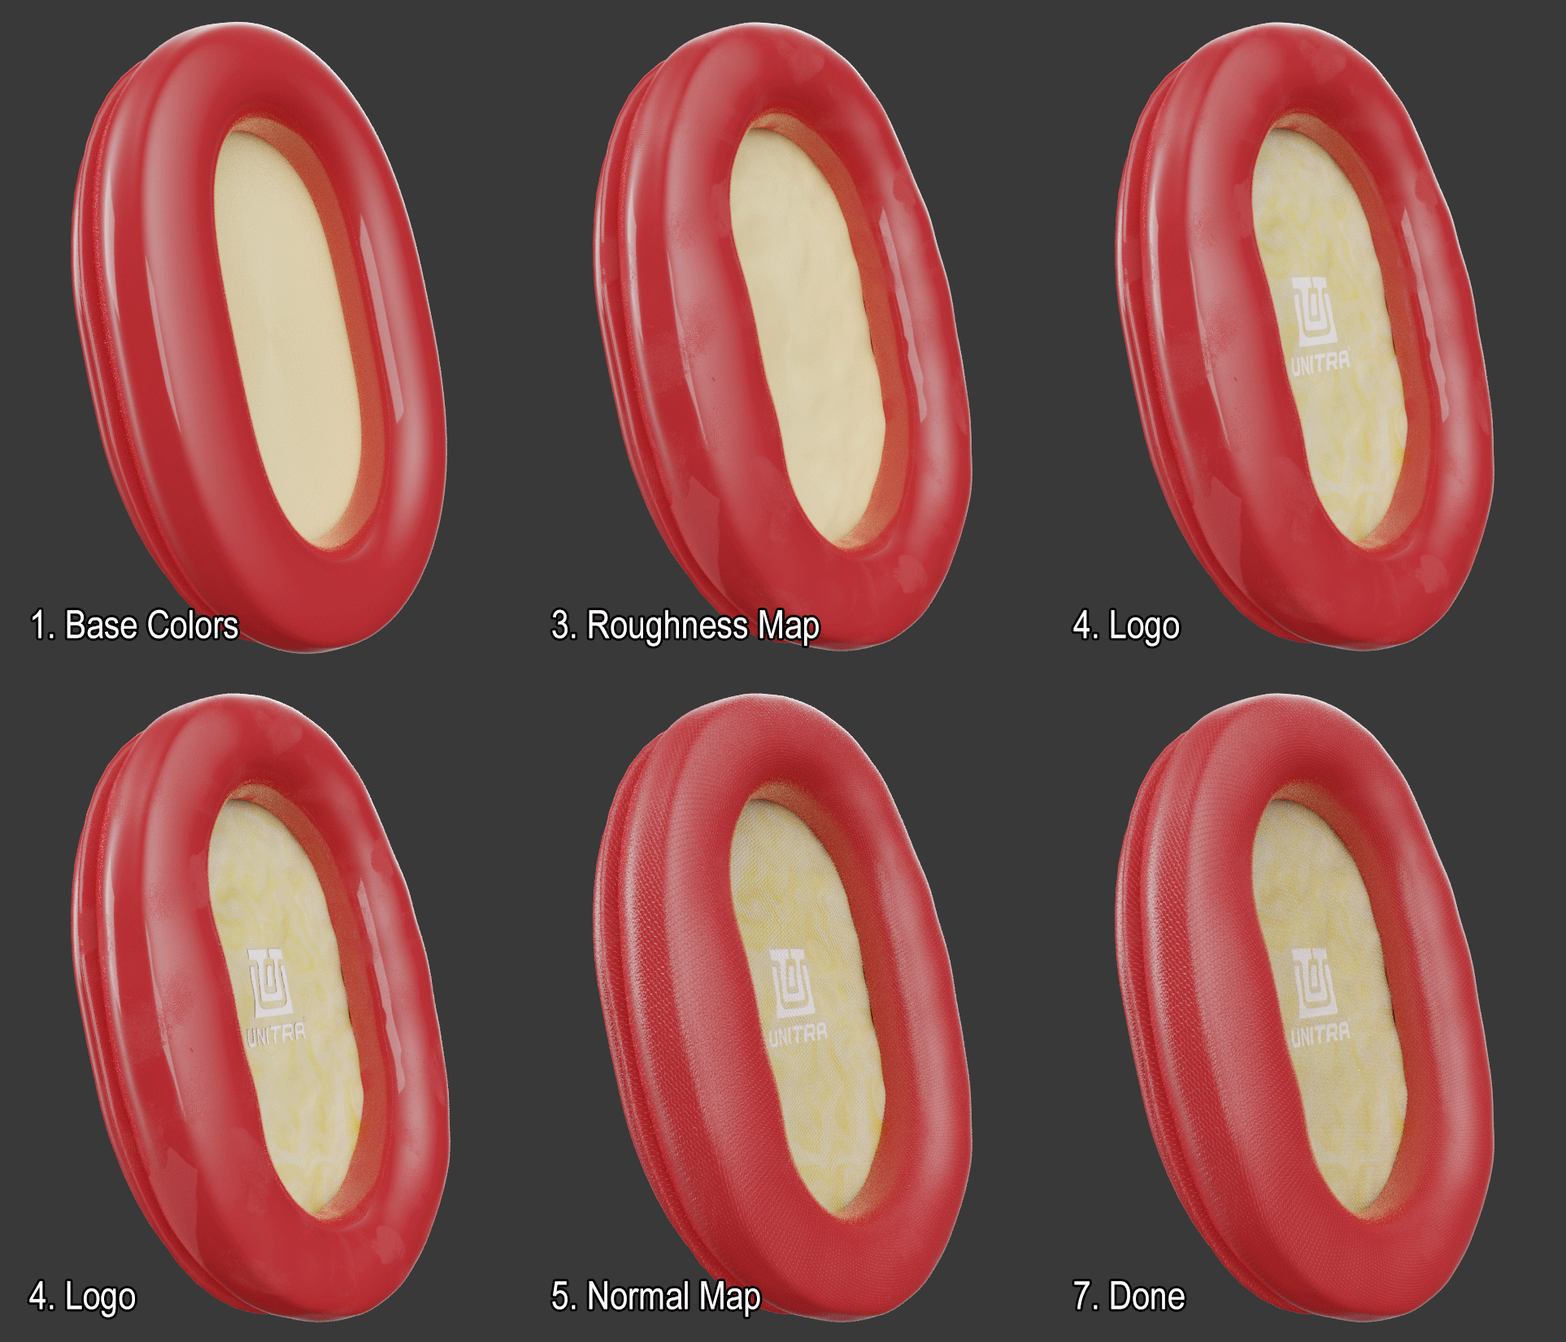
Red cushions have a very simple geometry, heavily subdivided and, for imperfections, a displacement modifier. Simple geometry made UV unwrapping easy.
Materials
Making any base material is as easy as deleting a cube, but trying to make it look realistic - this is really hard. And all that really has to happen is the surfaces have to be imperfect. Every surface of every object in real life is a bit off, no matter how expensive the item is. So creating the materials for this project was all about making them worn. Especially because its 80’s stuff!
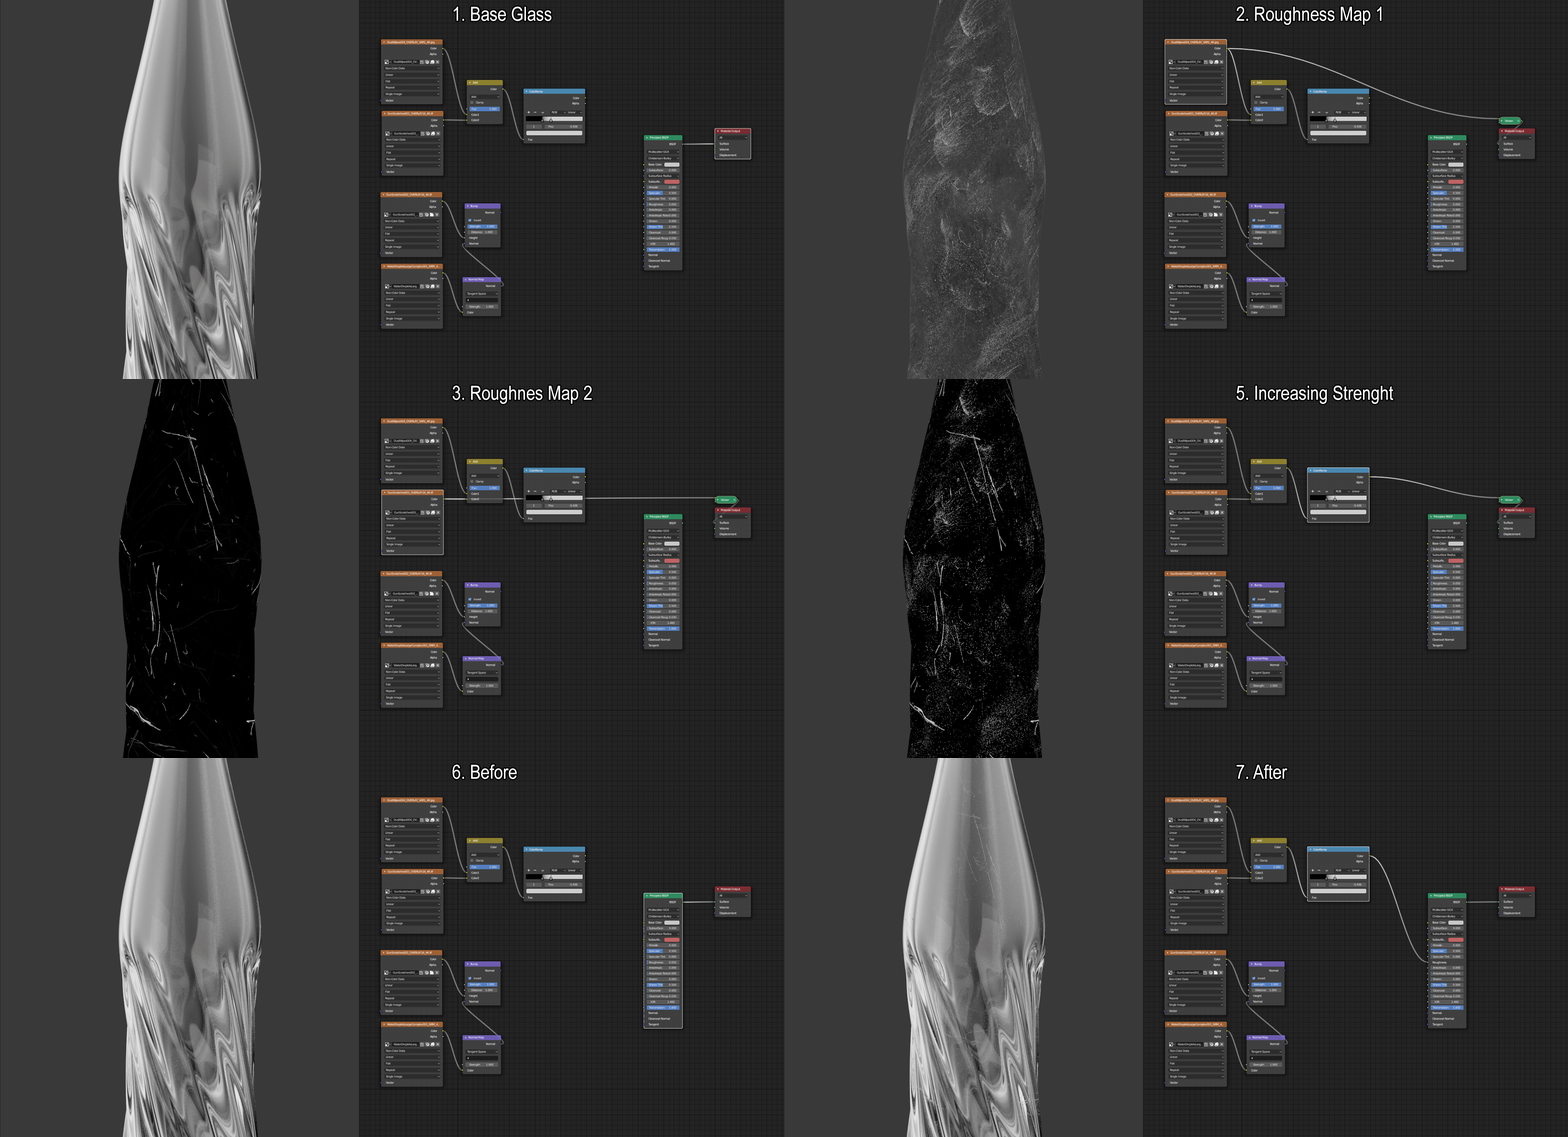
Surface Imperfections:
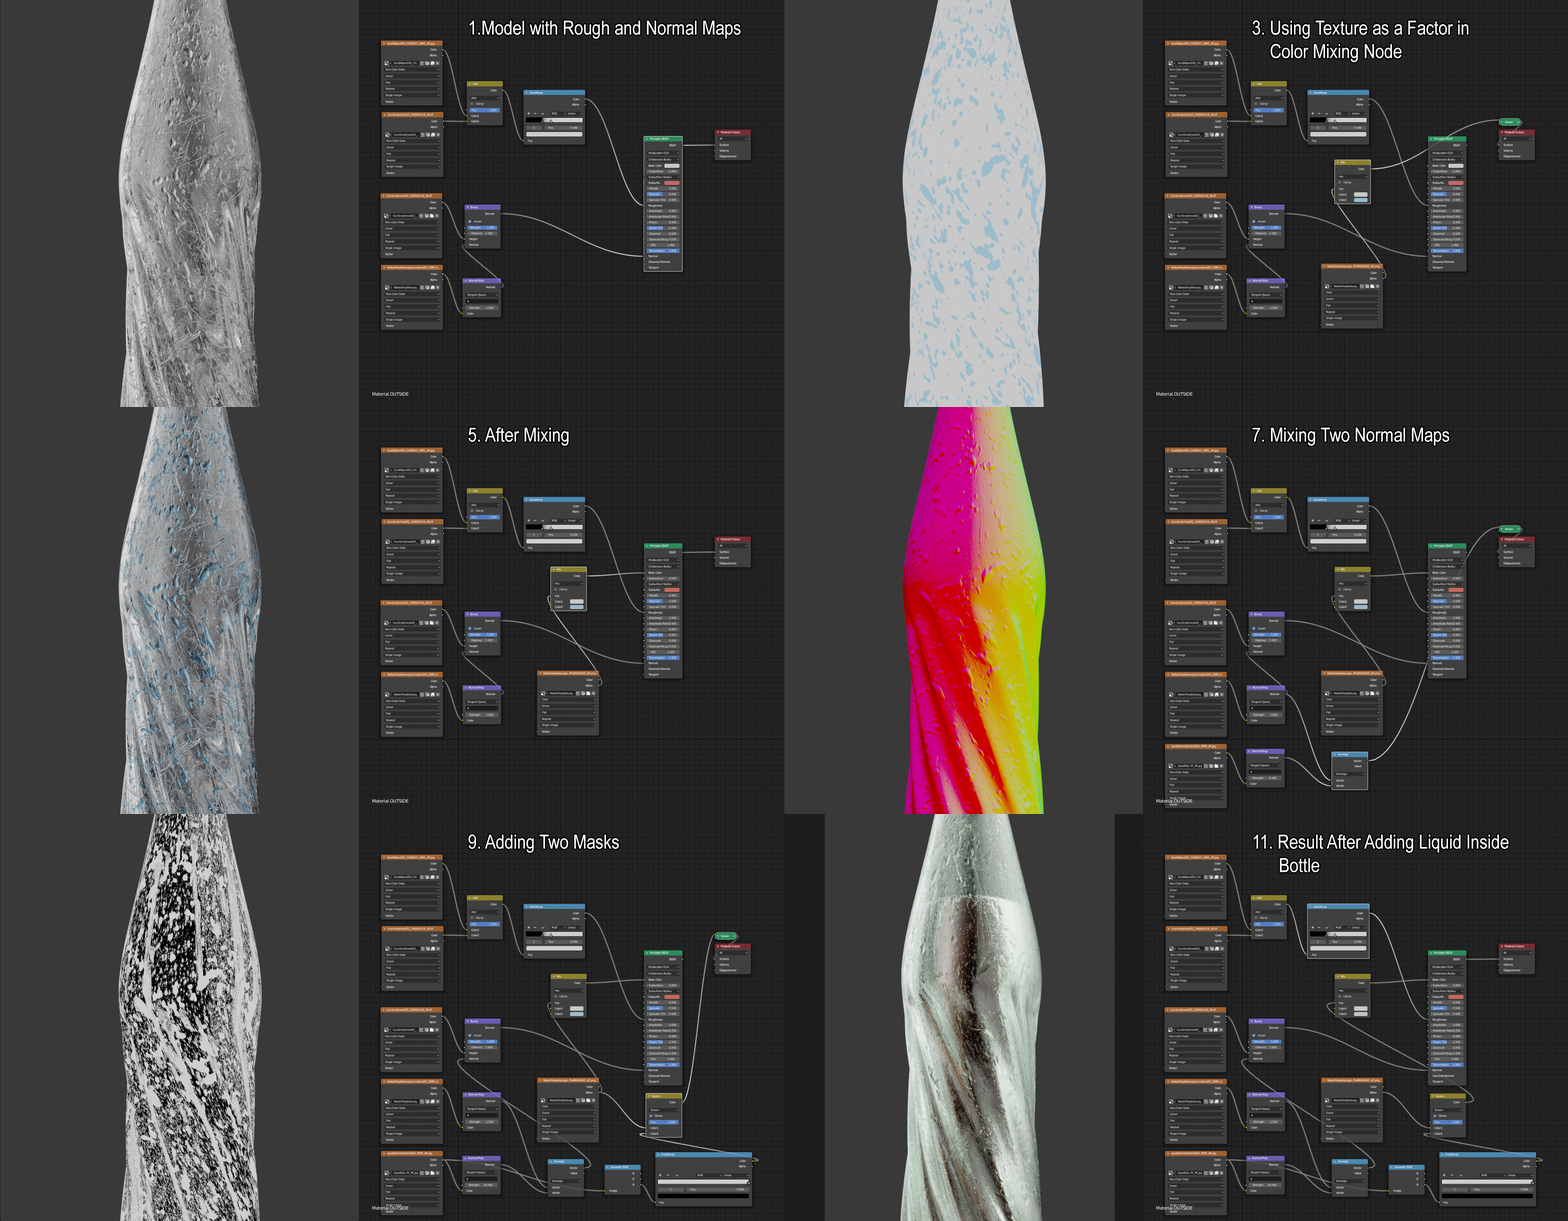
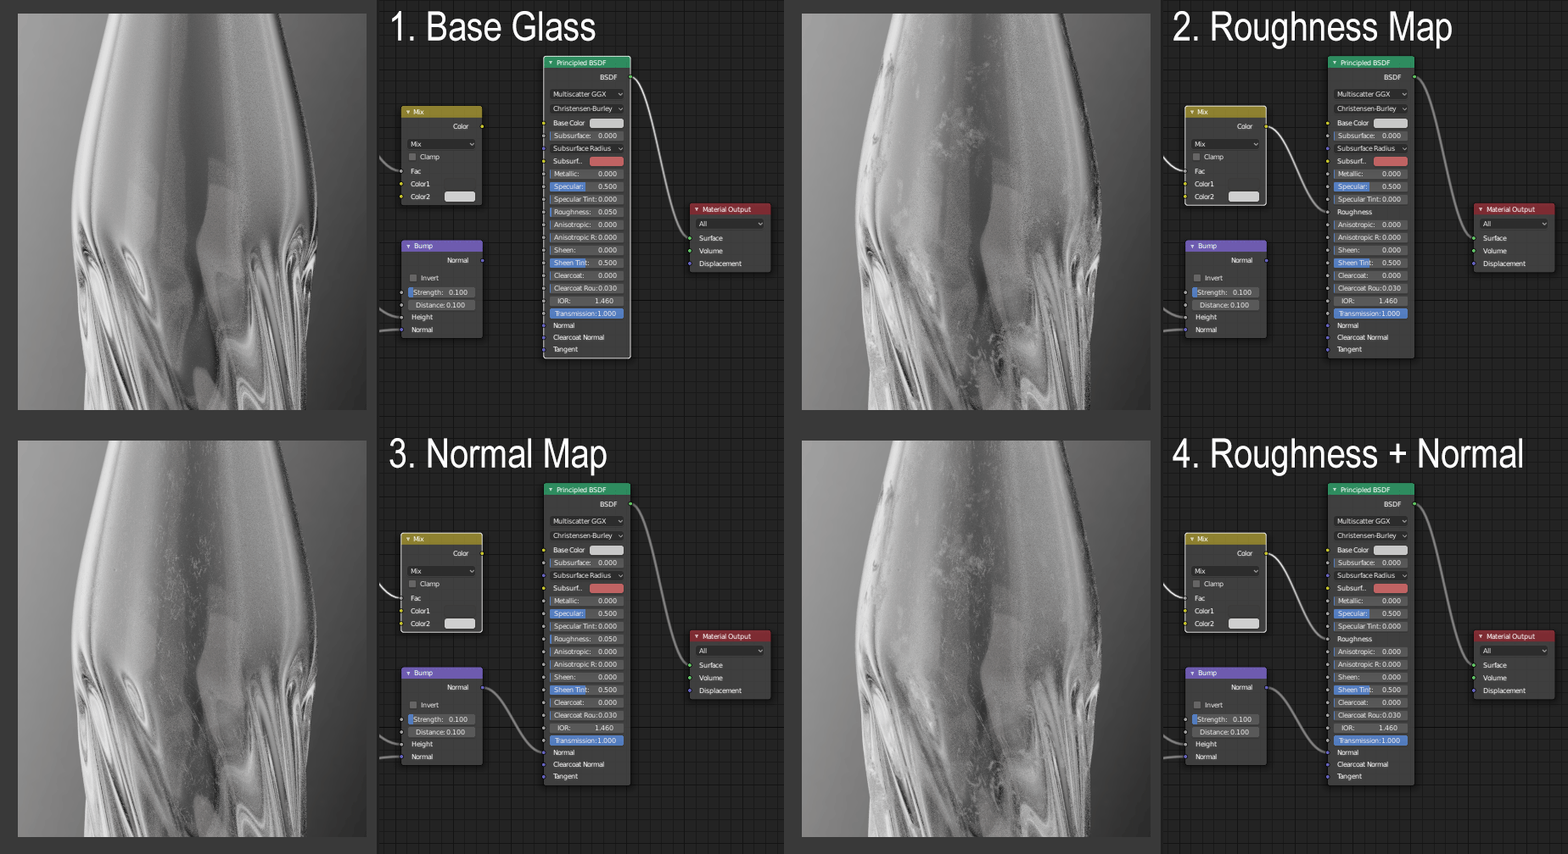
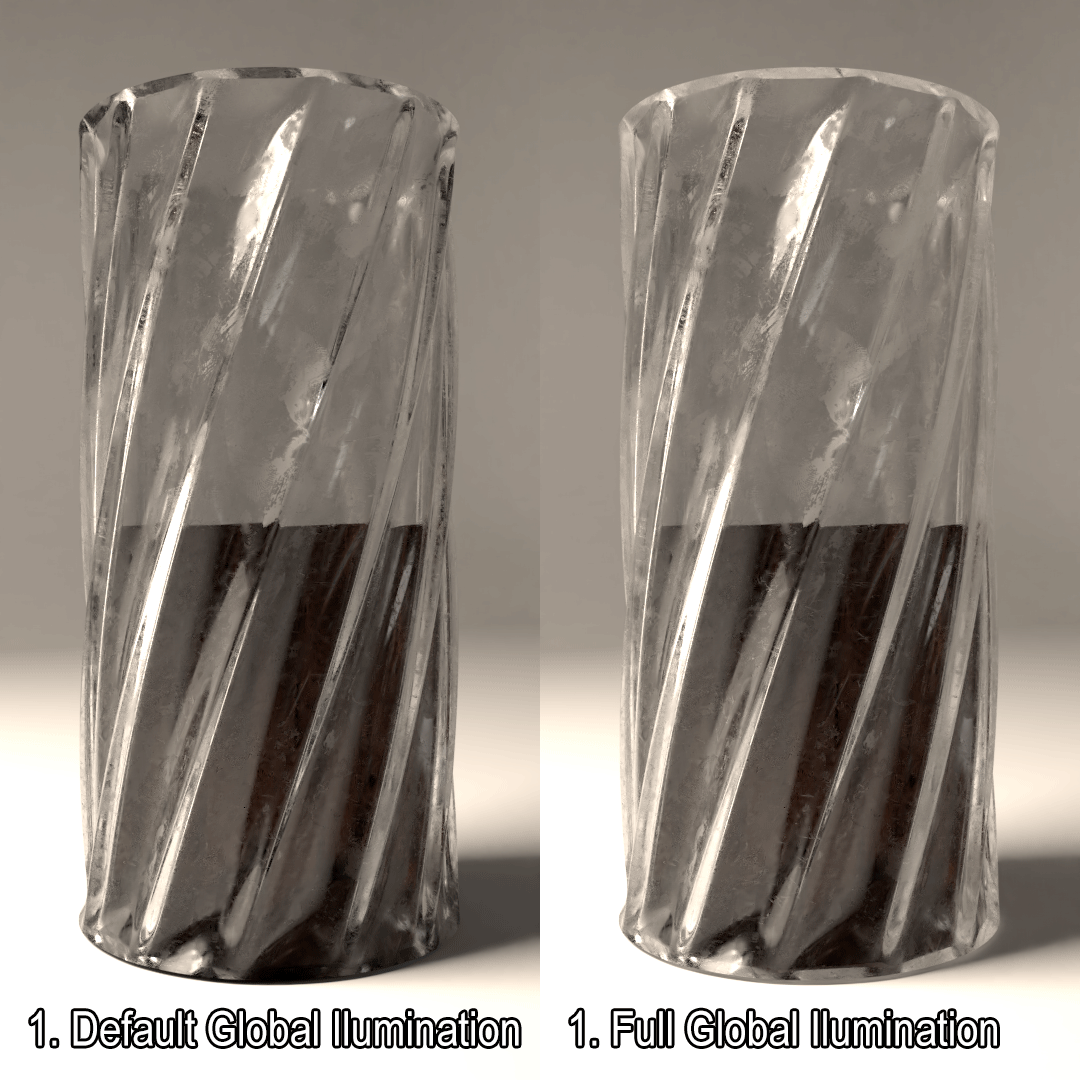
As all materials in this project have the same structure and general idea behind them, below I created an extra sample glass material (not used in this project), just to show you idea of creating surface imperfections. This process was repeated on all materials in the project.
Most of the textures are UV based. Now, let's focus on the real materials which were used in the project.
1. Glass
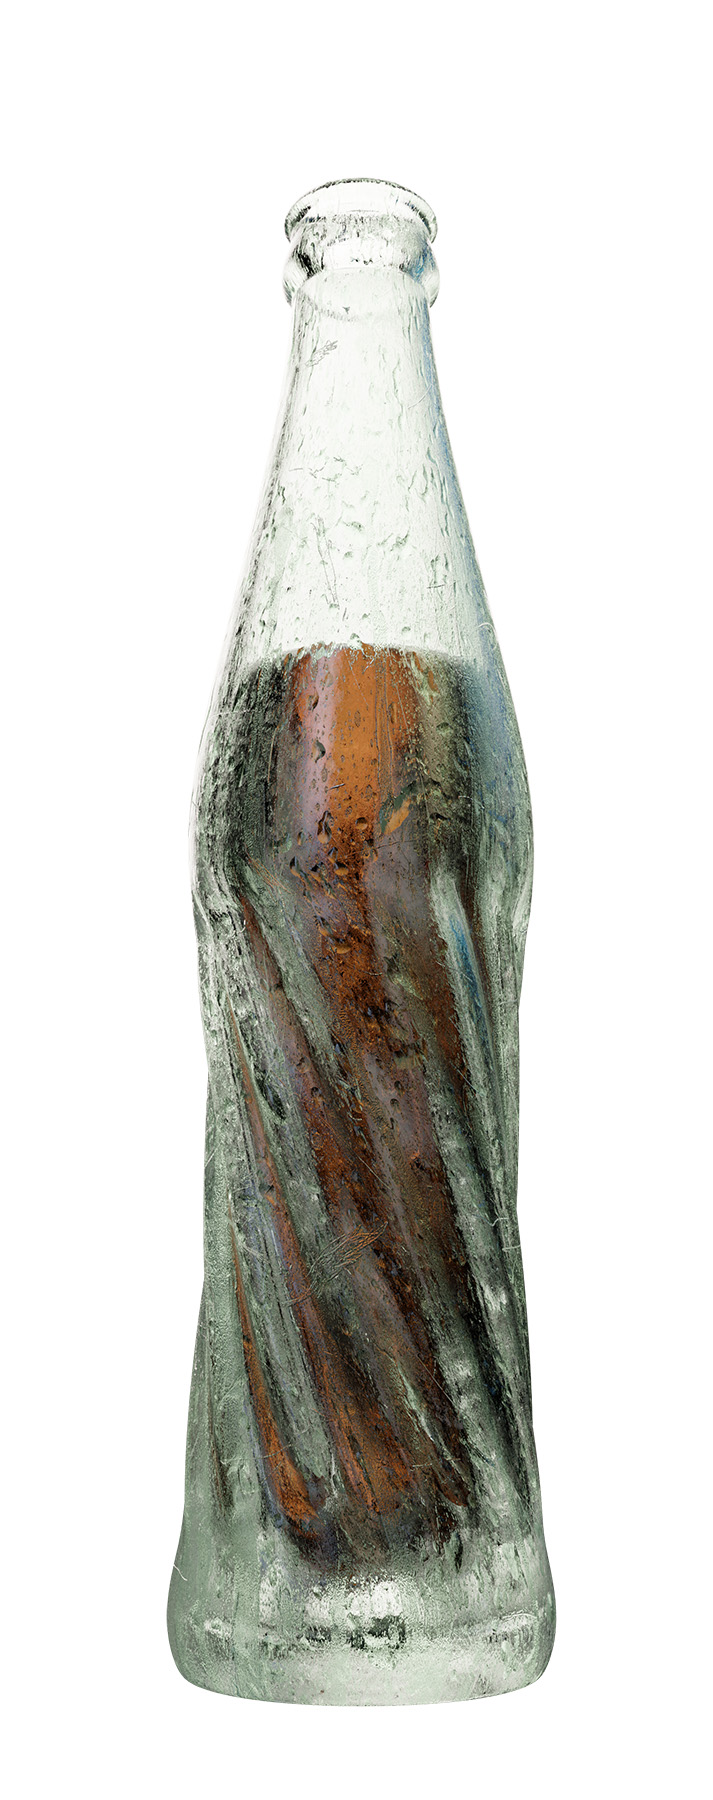
There is not much difference between real material glass used in this project (below) and the one I used as the "example material". The main roughness and normal maps are waaay weaker to keep a good general balance with the rest of parts.
2. Label
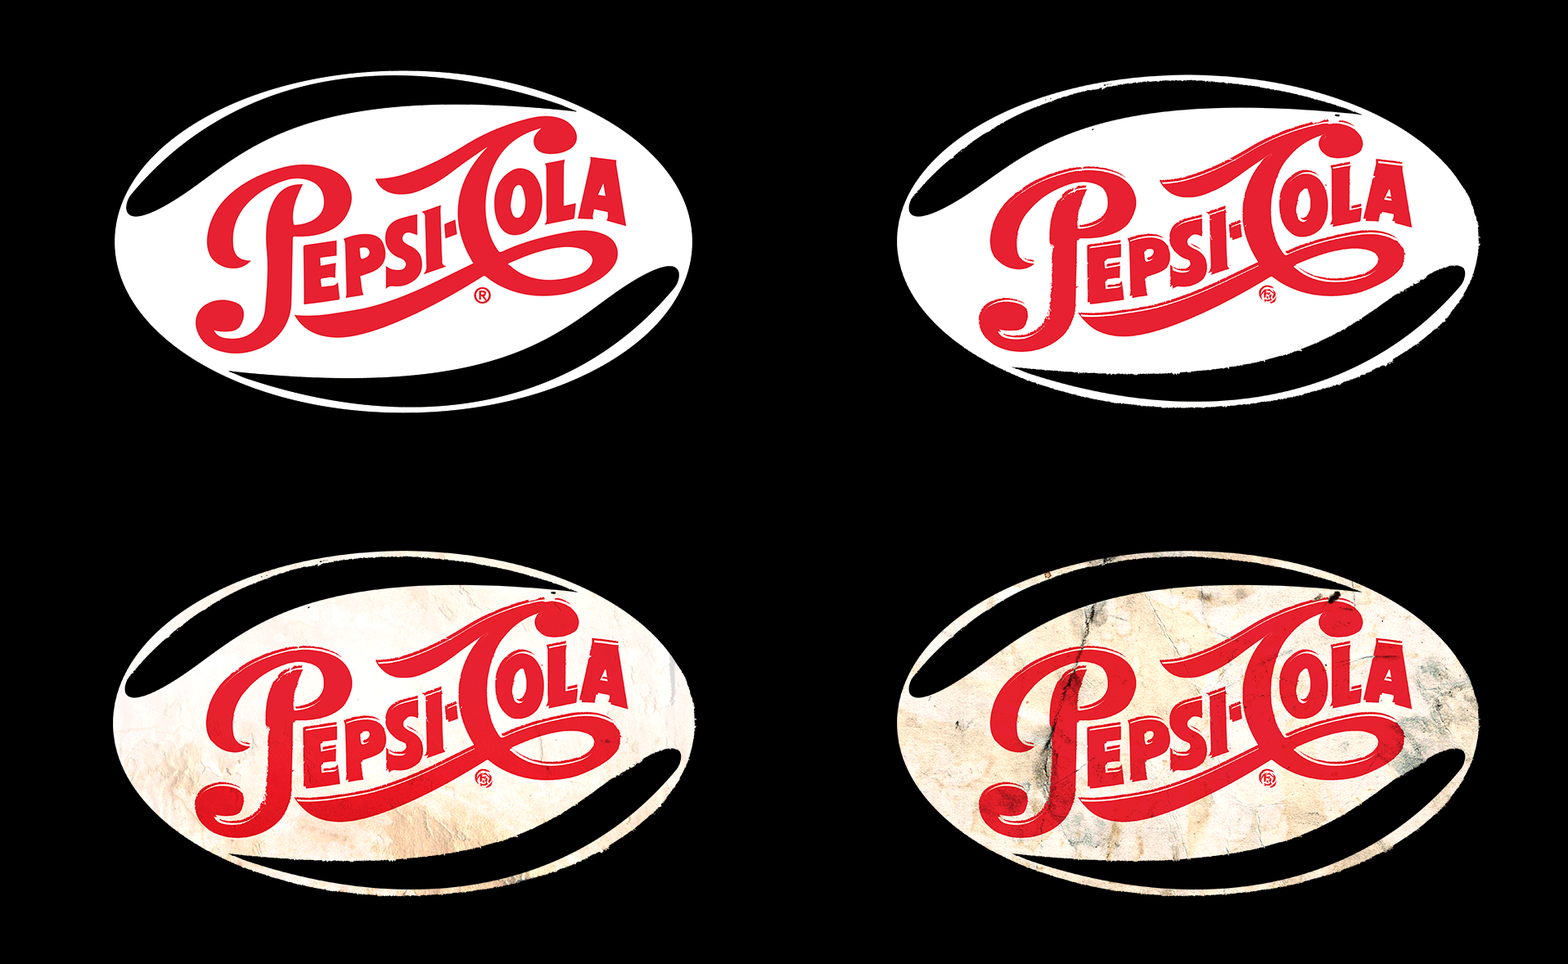
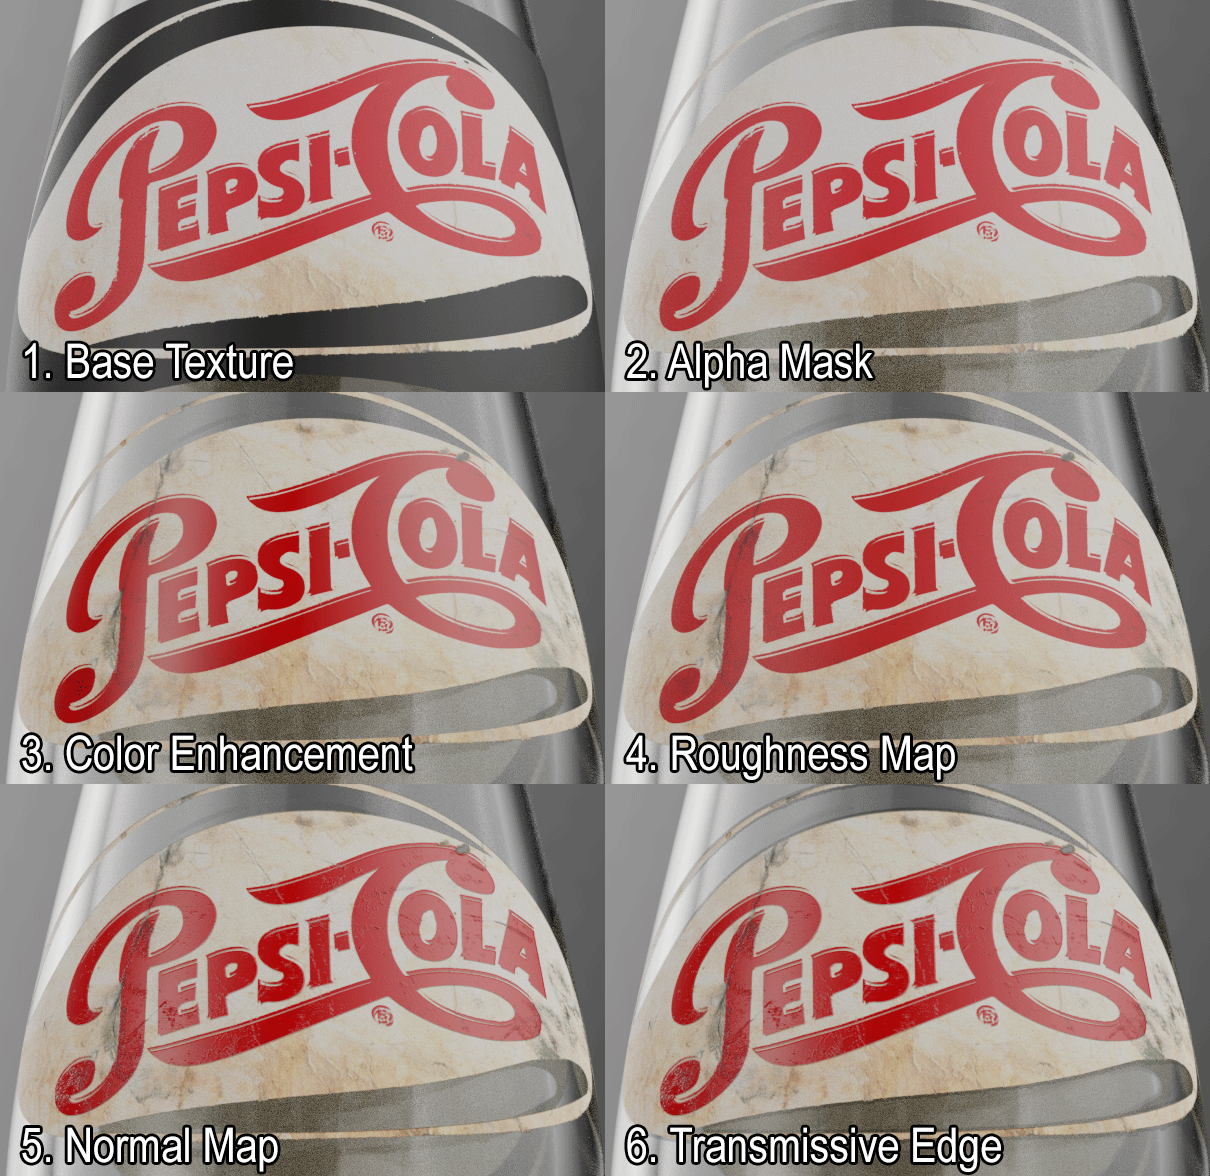
The label consists of two different parts, an old Pepsi logo obviously, and the oval paper sticker. The label has an alpha mask which was created in Photoshop. In Blender it was used as a texture on a Plane, which was projected on a bottle by using the Shrinkwrap Modifier + Subdivision Modifier. Roughness and Normal maps were extracted directly from the initial diffuse/color texture.
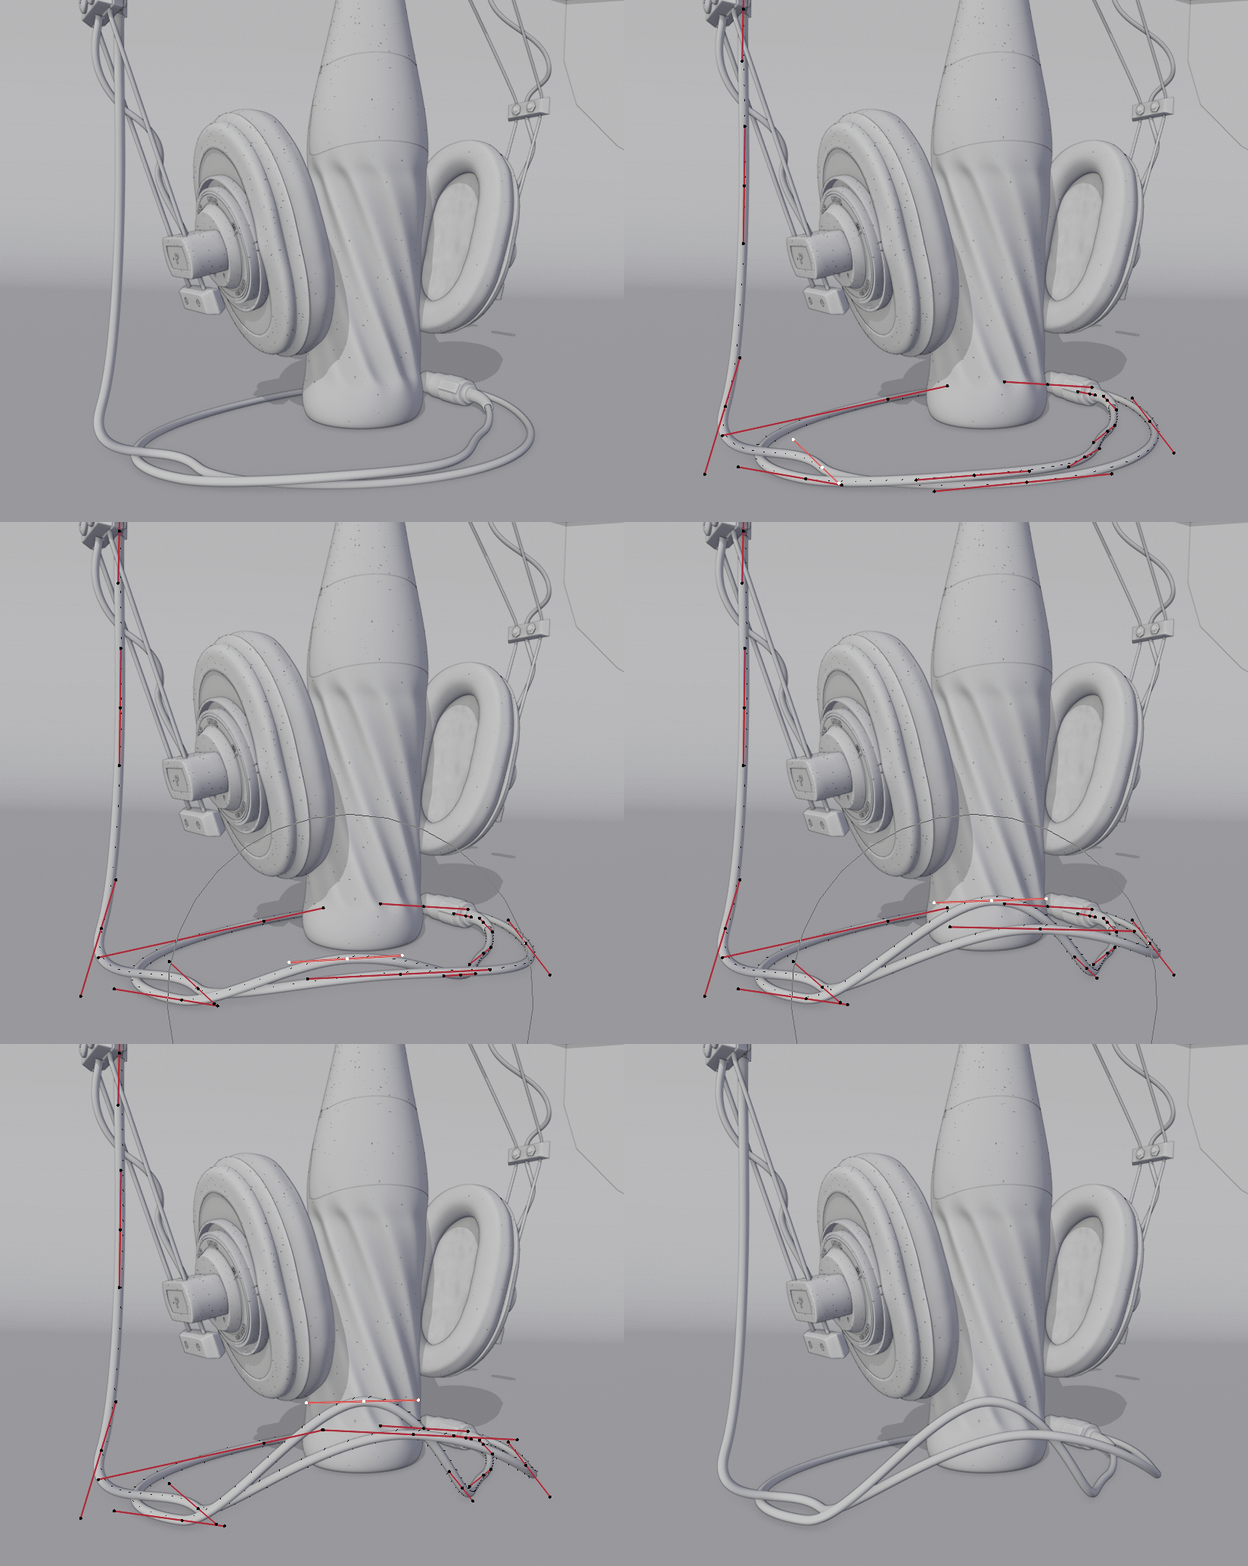
3. Plastic / Cables:
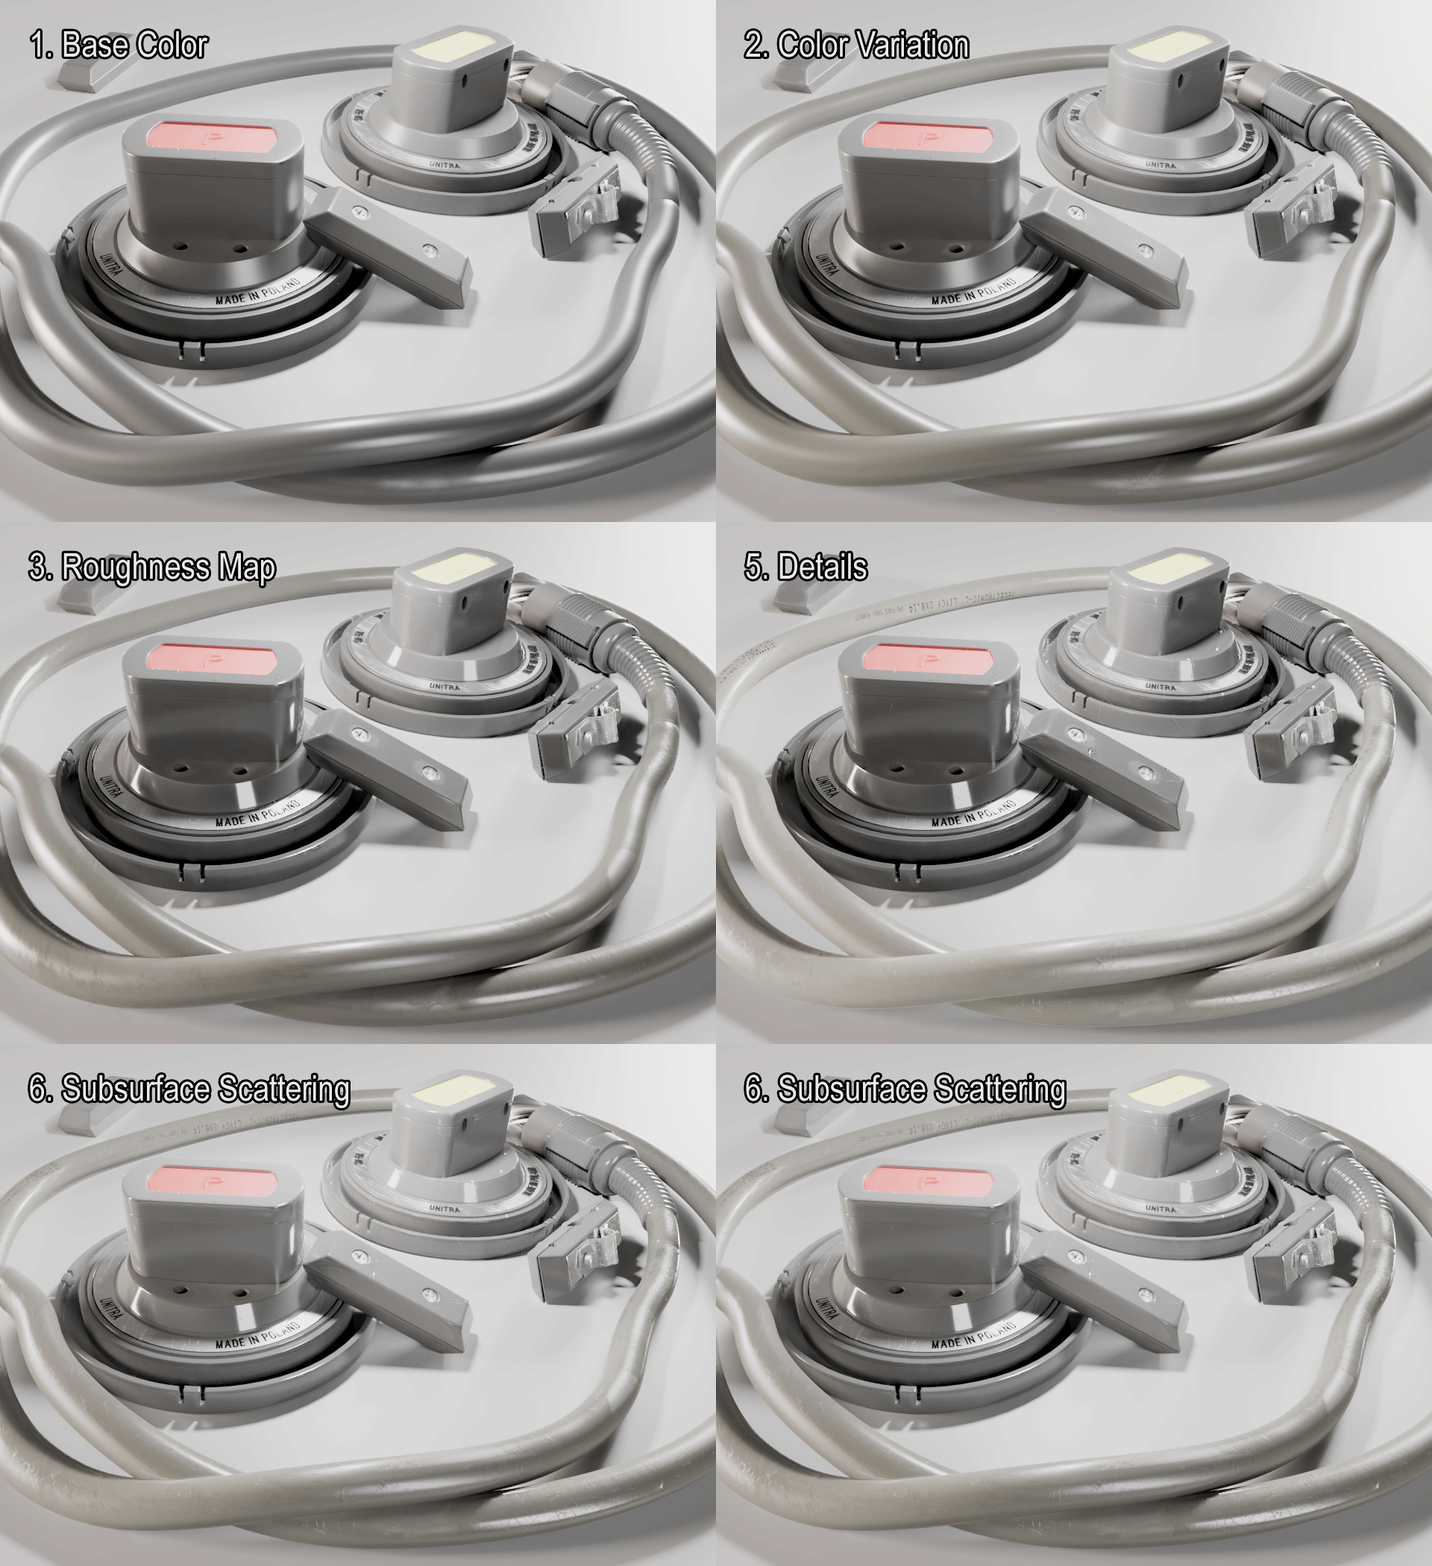
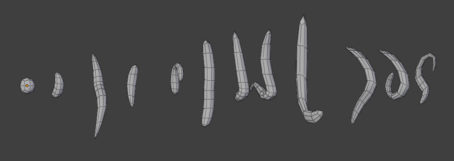
The hardest part here was the fact that plastic used in production of Old Tonsil Headphones looks super cheap (but it actually isn’t). It really was a challenge to create a cheesy plastic that looks quite good and looks a bit cheap at the same time. Below you can see several passes that were essential in order to achieve the quite-cool-cheesiness!
As usual, I used minor surface imperfections. Due to more complicated geometry and laziness, some parts of the model are using procedurally generated UV coordinates and box mapping for textures. Finally, Subsurface Scattering is responsible of adding a lot of softness and realism (but also increasing render times).
4. Foam / Red artificial leather
The red artificial material (which I still don’t know how to name :D), was mainly established with an interesting pattern created by a normal map.
To create the yellow “foam like” material, the main step was to use strong Subsurface Scattering and a lot of hue variations.
5. Extras
To add some final touches, I distributed dust-like particles to a majority of the parts, by creating Particle Systems. Dust particles are simple shapes with random value from white to grey. What is more, I made some additional imperfections into the geometry of the meshes. Out of the usual imperfections in materials it is good way to add some “bigger scale” defects and at the same time avoid repeatability, with is easier to achieve by picking defected areas manually. They were made in the simplest way you can imagine - rotating, scaling and deforming some parts of the meshes in edit mode.
Lighting & Rendering
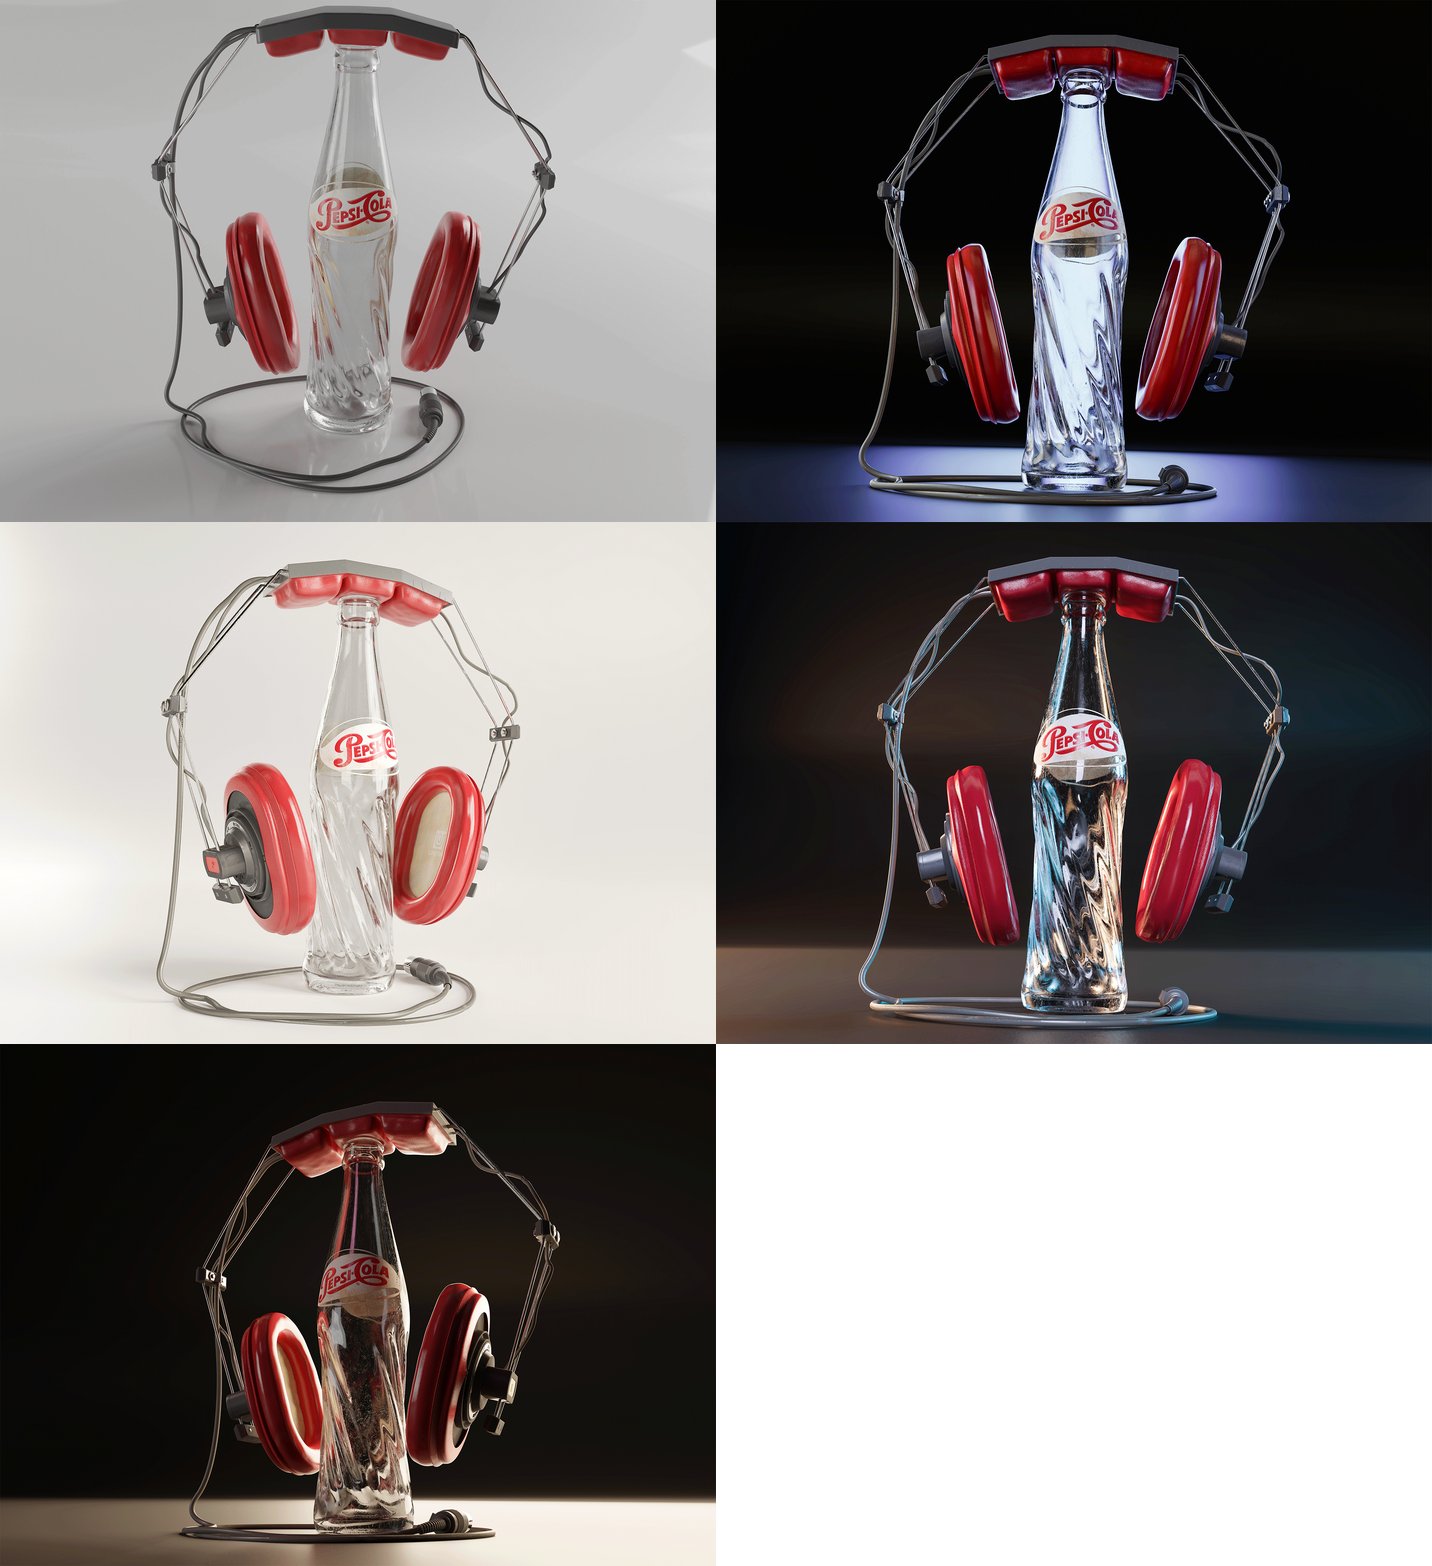
Lighting is what makes everything pretty or ugly. If you create good enough lighting, even a pile of rubbish on a dump can look awesome, and the opposite is also true. Here are my lighting assumptions:
- Test as many as possible different lighting setups, you never know which one is the best
- If you want to get a photorealistic result, be sure to examine how photographers make shots of their products.
- Try many camera setups
- Optimize your render to get quick render times
- Also I realised that after increasing the resolution of the final output of the image, you can render in fewer samples rather than in lower resolutions to still achieve great results with denoiser! (2k render was looking good at ~800 samples, 4k render it was ~500 samples, 8k ~350 samples etc.)
Changing light path bounces make a big difference for glass final outcome.
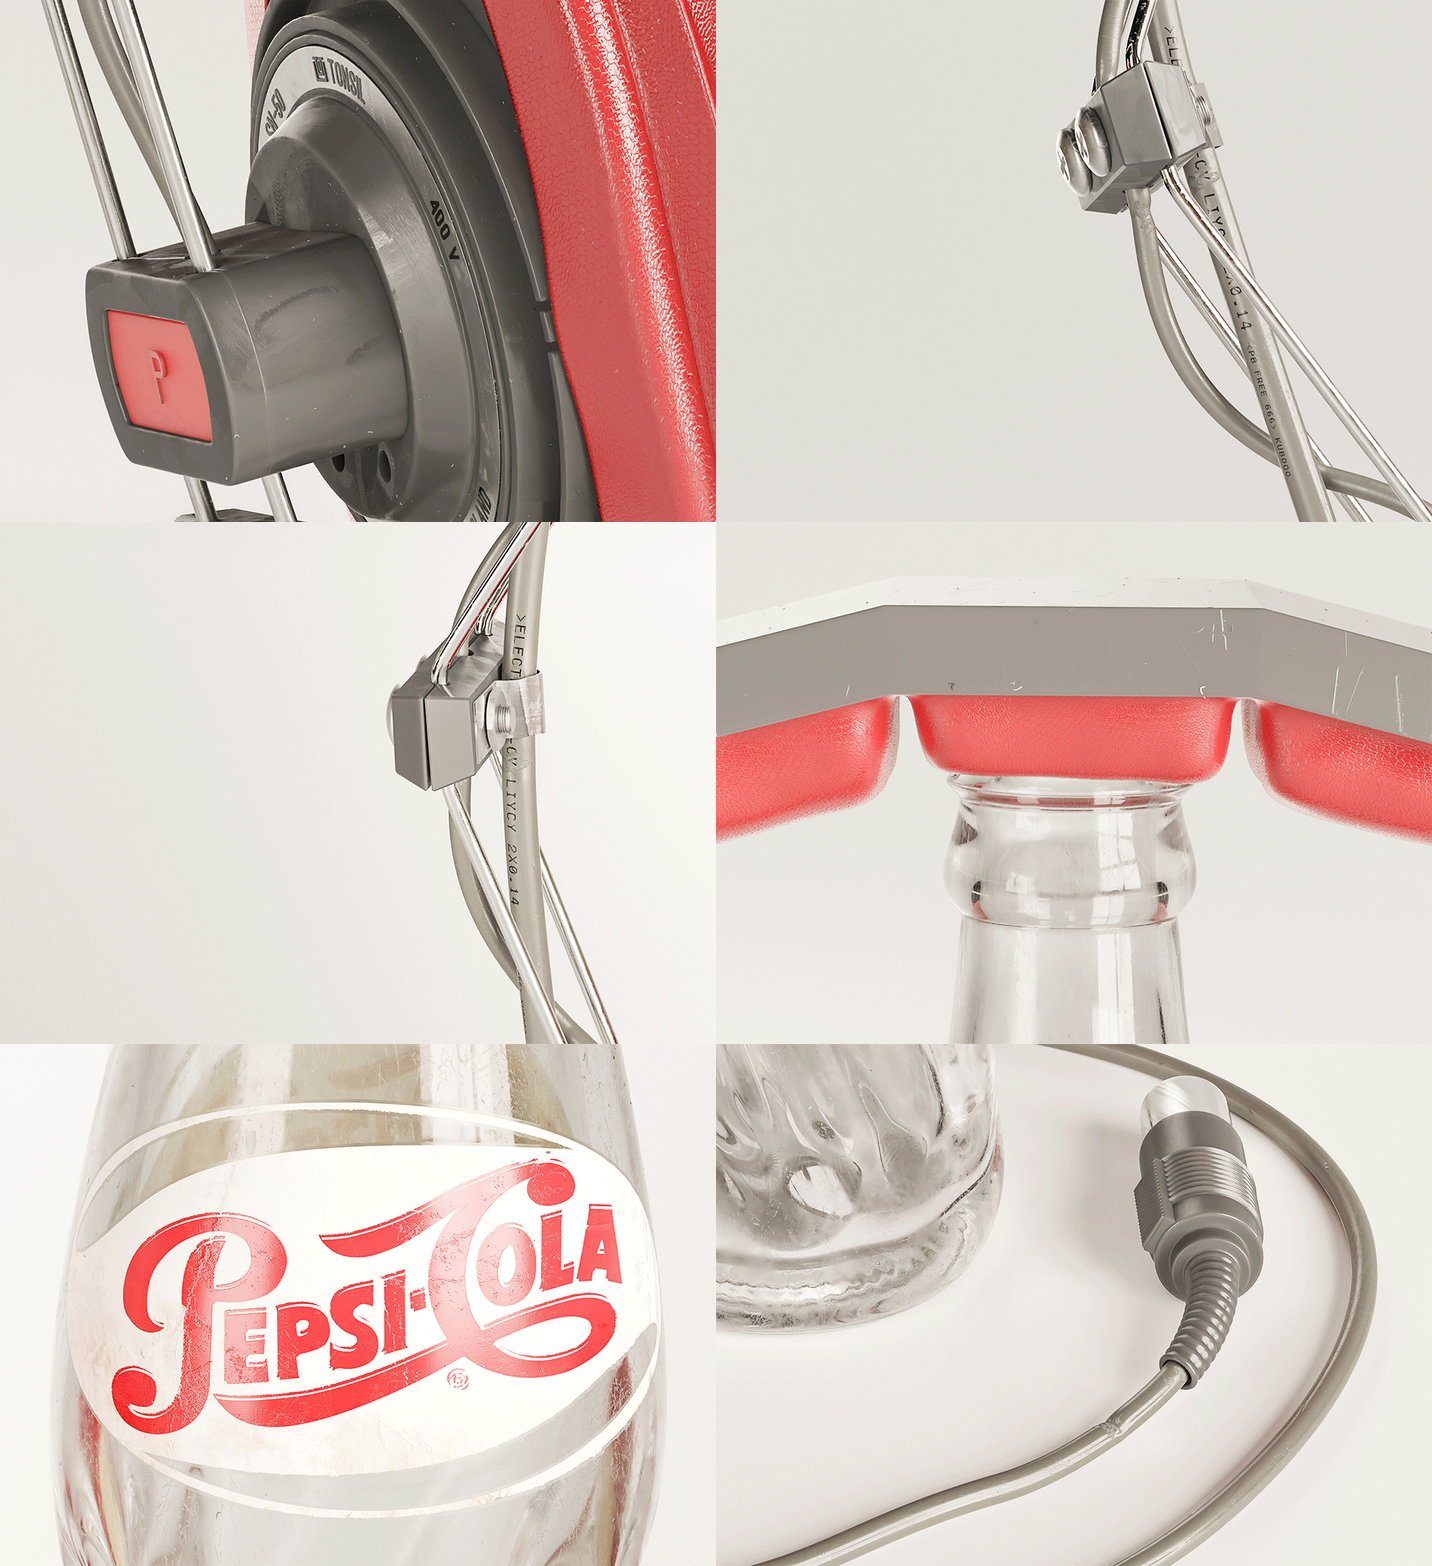
Final shots were made in 16k so all close ups are just a zoom into image.
Similar to testing a lot of light setups - it’s good to test a lot of close ups to pick up the final ones :)
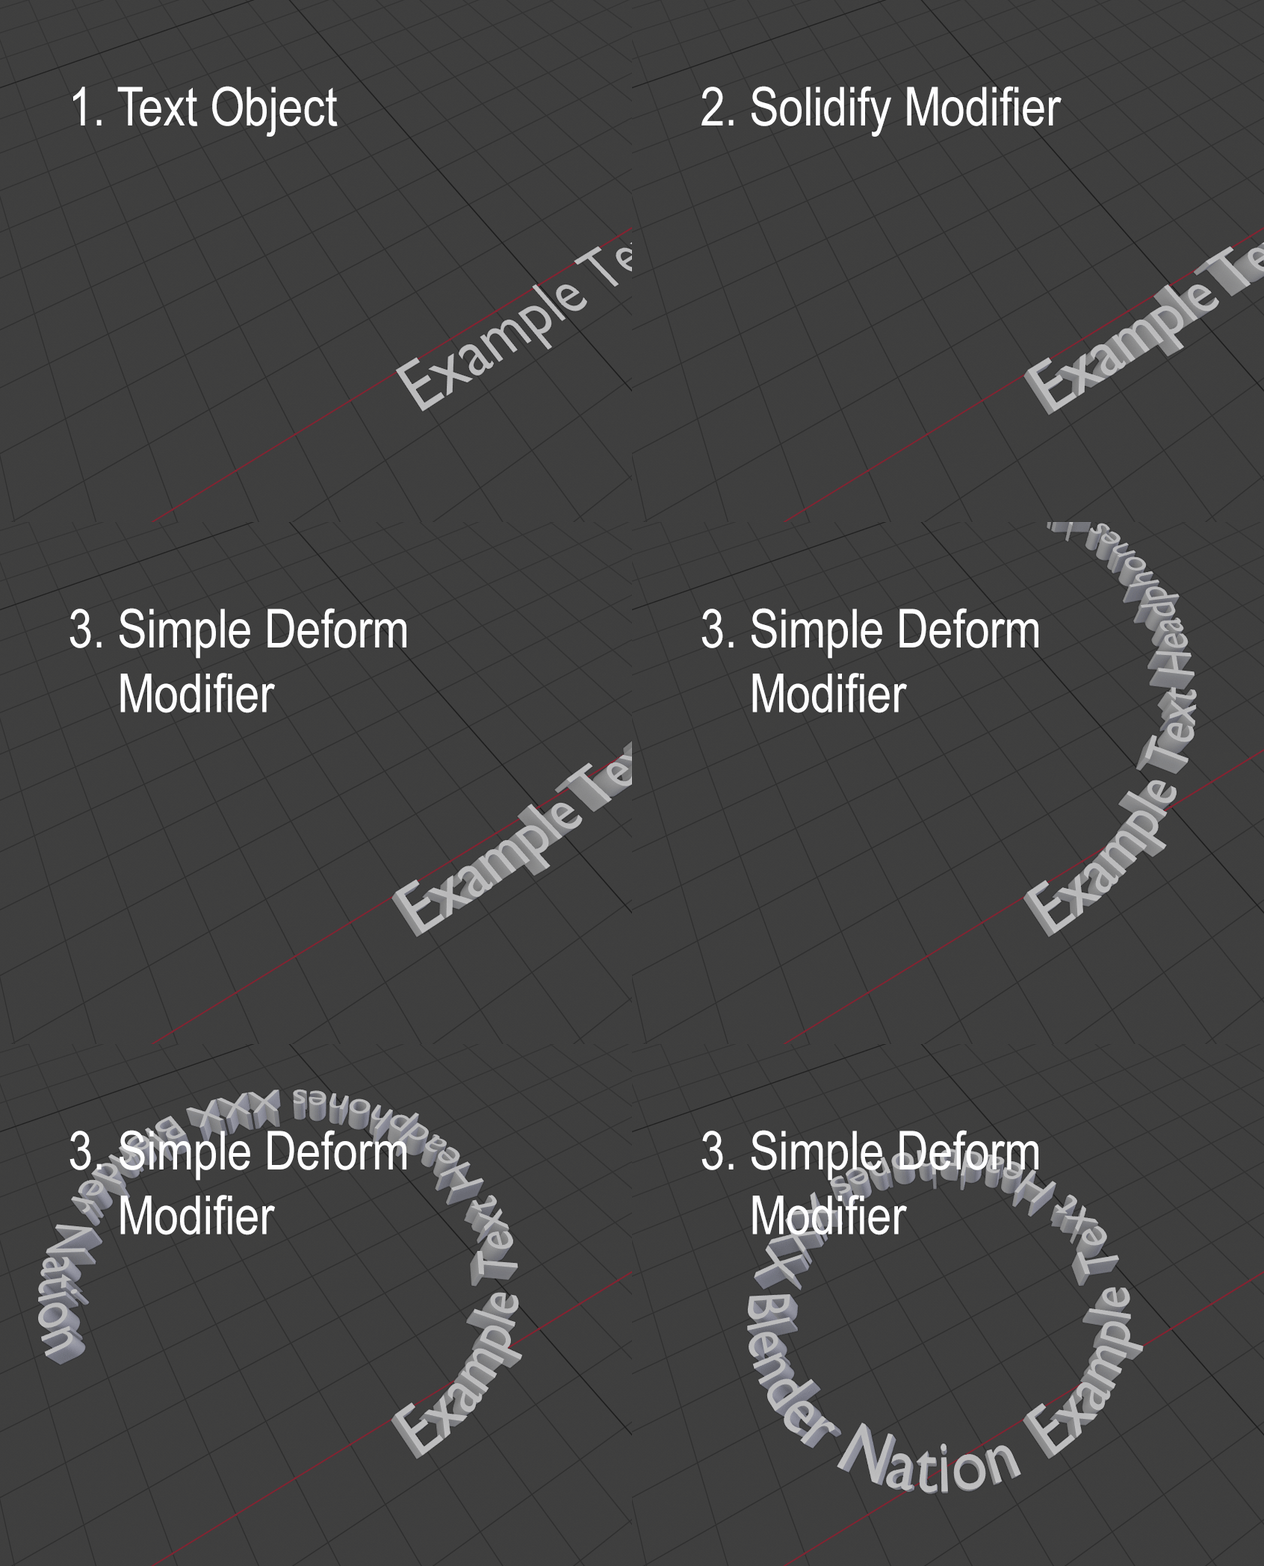
Wireframes are a mix of renders from the Blender Viewport, with different overlays (like wireframe properties, etc.) later mixed in Photoshop.
Conclusion
And that’s it. If you have any questions you can contact me on Artstation or by email. Thanks for reading and thanks to BlenderNation for featuring this article. Hope some tips were useful :D
About the Author








11 Comments
Thats quite a bold move to quit your job and learn 3d?!?! How does one support himself doing such a thing?
I became totally bored after 2 years work at the factory, so hard times need hard measures xD! Fortunately, quite fast I been able to make some small cash by doing 3D projects.
OKay that good to hear than. I mean learning 3d takes quite a long time.
Really solid, precise and finicky work. Thank you for that great making of.
Świetna praca!
Pozdrawiam
Thank you for this terrific survey of your process. The work is tremendous.
There are some lovely materials and texturing in there. Excellent :)
There was Unitra walkman, called Kajtek, as well. Tak trzymać, Kubo!
Super praca!
Thx everyone! I am planing to keep up! (Dziękuję xD)
omg I love it.