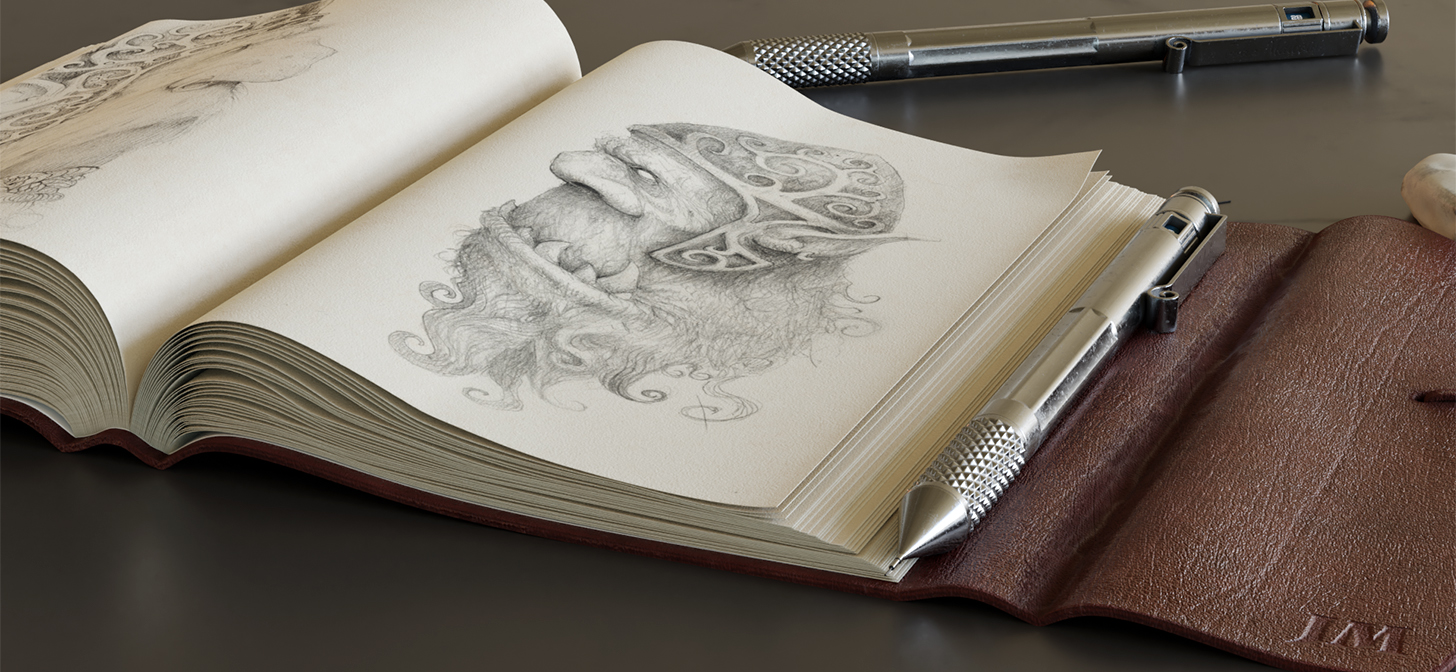
Behind the Scenes: Sketchbook and Mechanical Pencils
My name is John Malcolm and I live in Paisley in the south west of Scotland. Until recently I worked as a full-time graphic designer in the newspaper industry. I’ve always been interested in art – I’ve been drawing since I was a child – and maybe about 10 years ago or so I started getting the odd commission for digital illustrations. I’ve been dabbling with Blender on and off for years, but about a year ago I started using it much more and I’m pleased with the progress I’ve made in that time. Blender 2.8 and EEVEE are really exciting and I’ve done a number of small projects to take advantage of EEVEE’s more bearable render times for creating animations.
Sketchbook
The goals for creating this image were:
- To create a nice simple scene I could animate using EEVEE, with a kind of hand held camera feel. I started the project in Blender 2.79 and finished it in 2.8. There are still some addons I love that haven’t made their way over to 2.8 yet.
- To be able to get some nice Cycles renders out of it as well.
- To further practice modelling pages in an open book – I had done one recently and wanted to see if I could improve things.
- To get some more Substance Painter experience. In an ideal world Blender would be able to do everything that Substance Painter can – but Blender being free means I can justify owning Substance Painter as well.
- To incorporate some of my pencil sketches. Most illustration I’ve done in the past has been digital, using Corel Painter. I do however love to take a sketchbook to my local pub every once in a while. It’s nice and relaxing and it’s good to get away from the computer now and again… and there’s beer of course.
Modelling
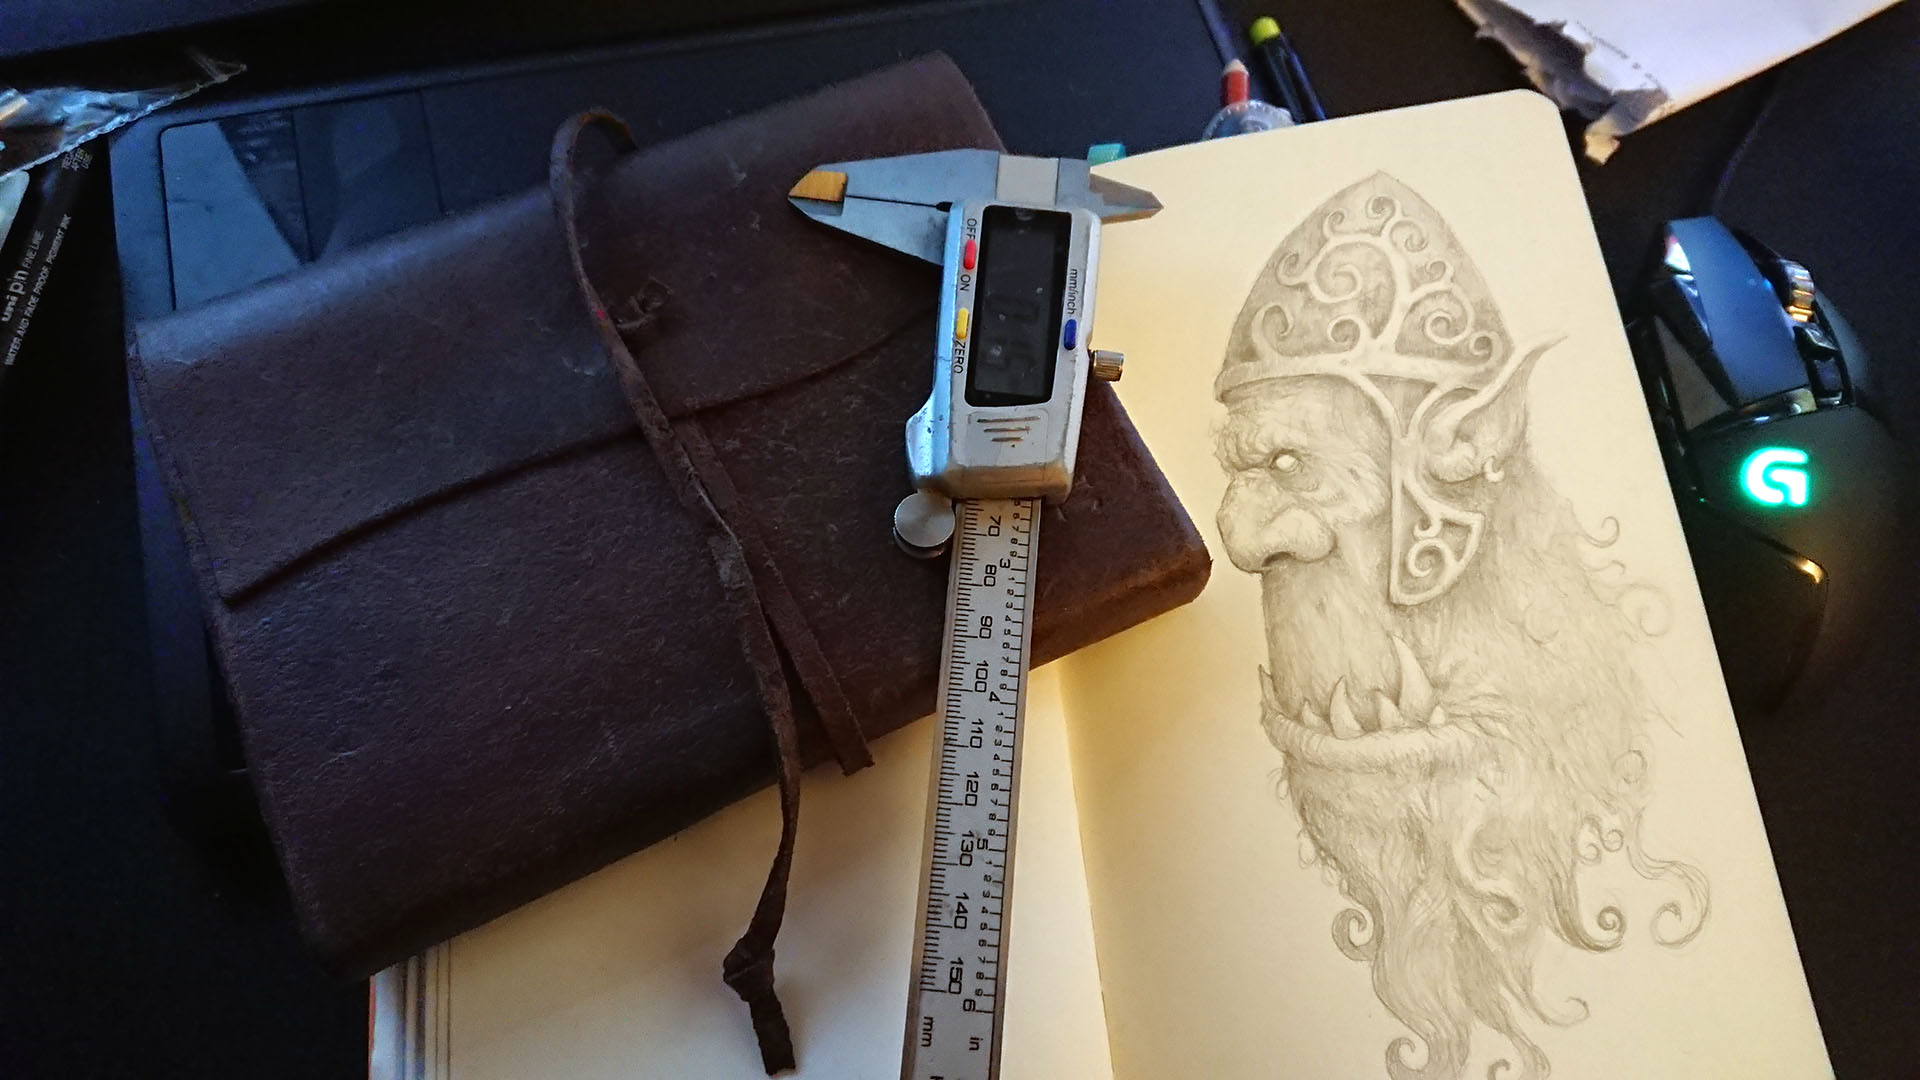
Some of the most important aids – real world reference and a set of cheap digital calipers. These have been incredibly handy for many of my Blender projects that are based on, or similar to, real items. Why guess how thick some sketchbook paper is when you can measure it?
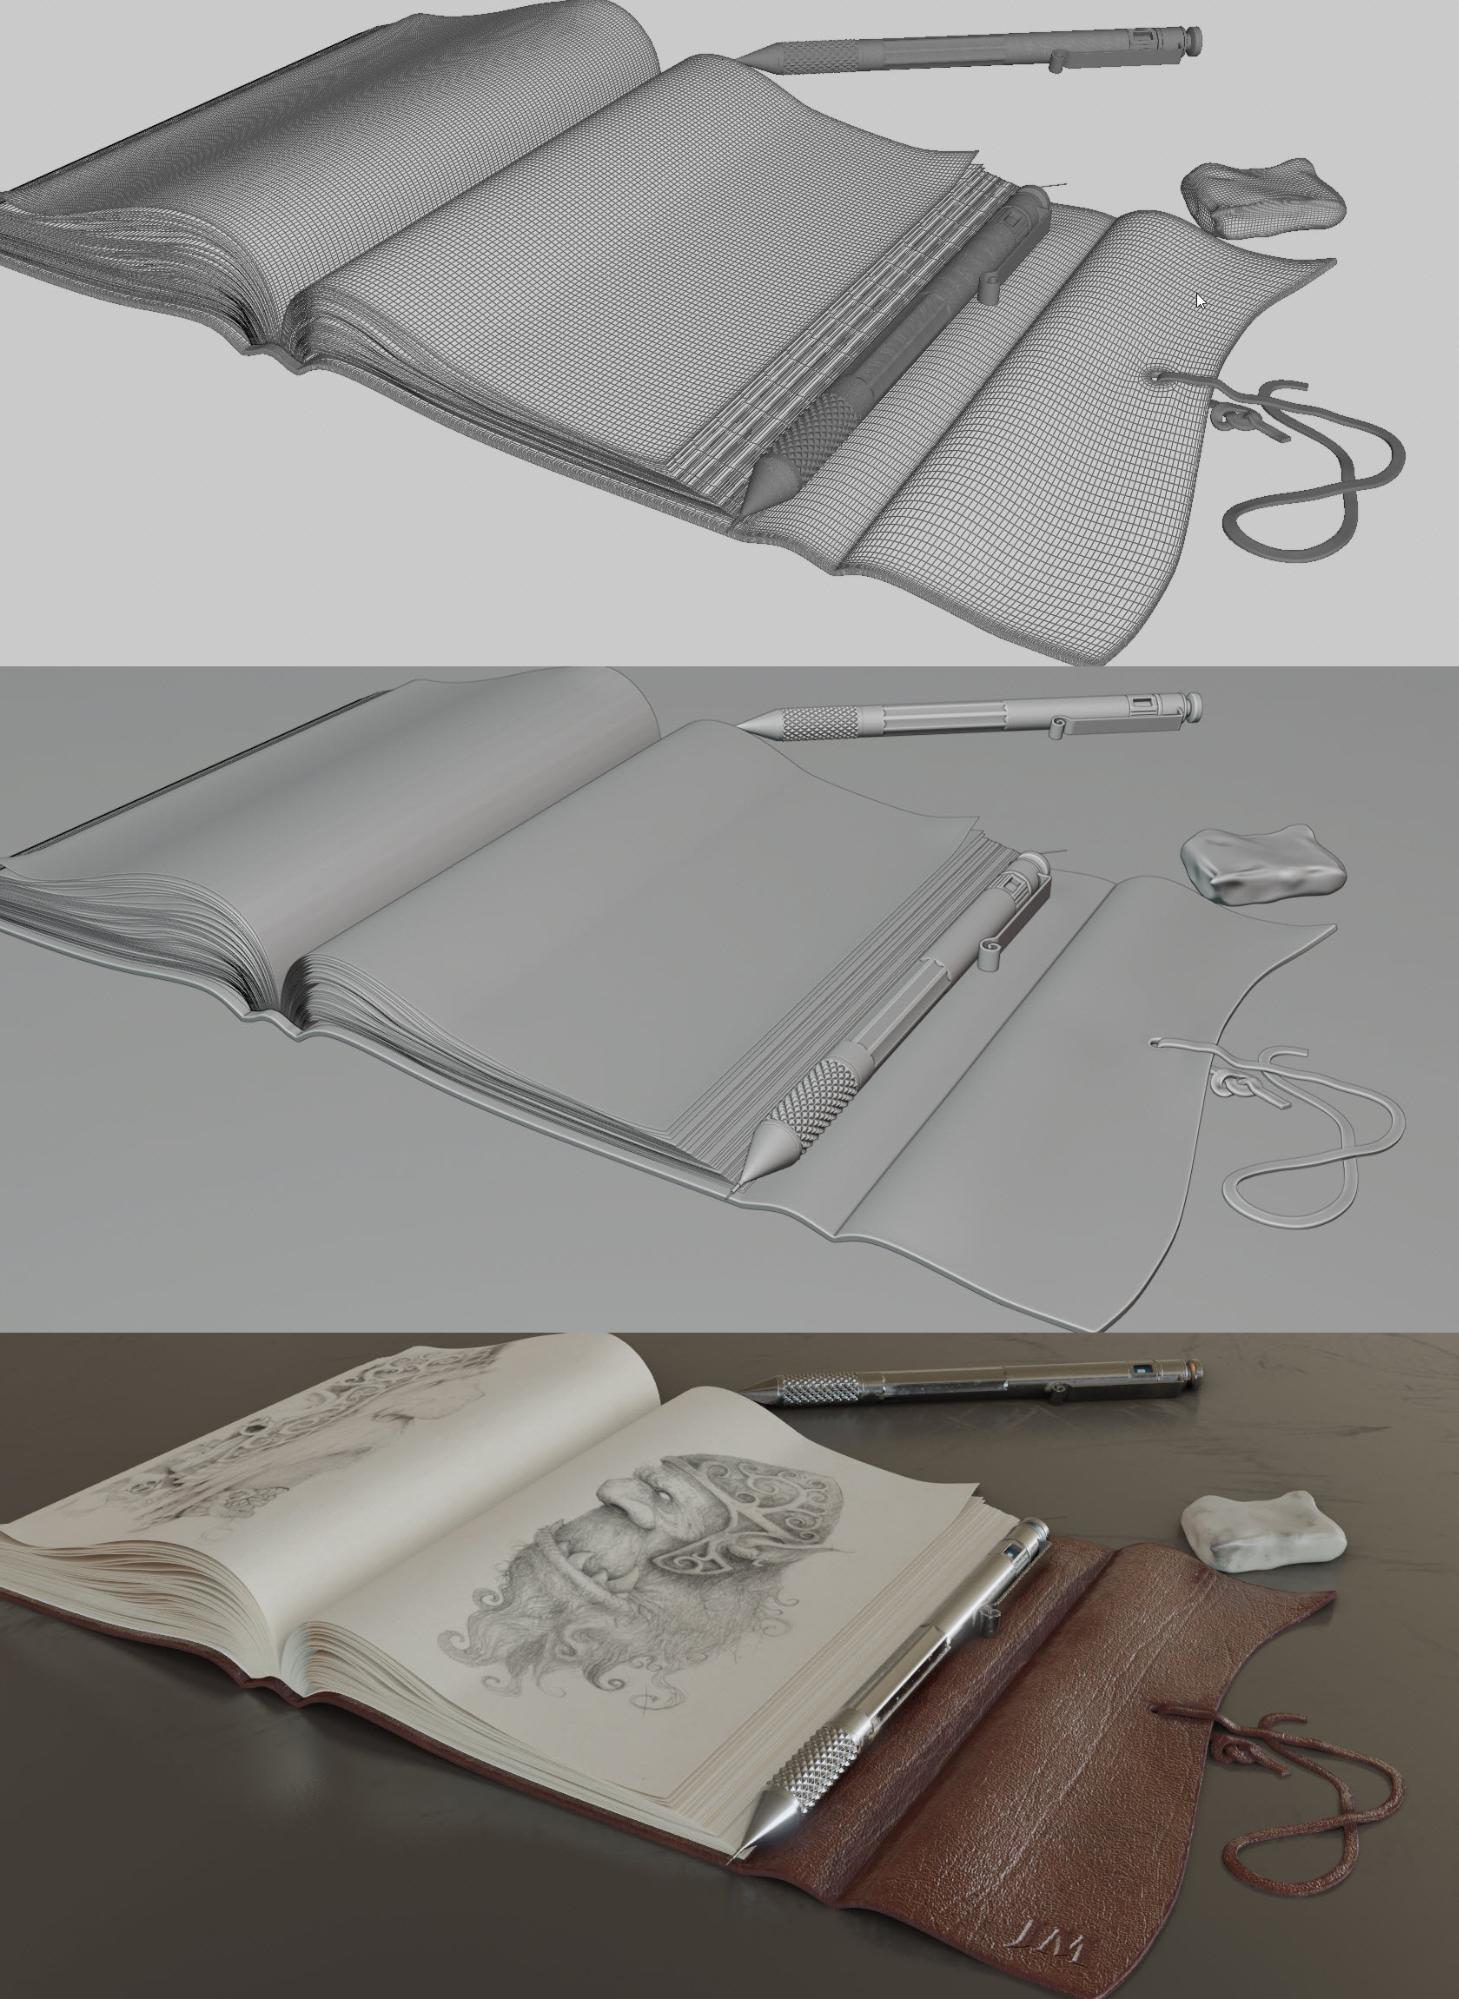
I started with the sketchbook’s leather cover. I was originally planning to have a closed second sketchbook in the scene. For that reason I’d started with the cover in five different pieces: Front and back, spine, and the two parts that fold around the front when it’s shut. I laid these all out flat next to each other and created Bezier curves to have each piece bend correctly using Curve modifiers. Once they were as I wanted, I applied the Curve modifiers and joined all the bits together.
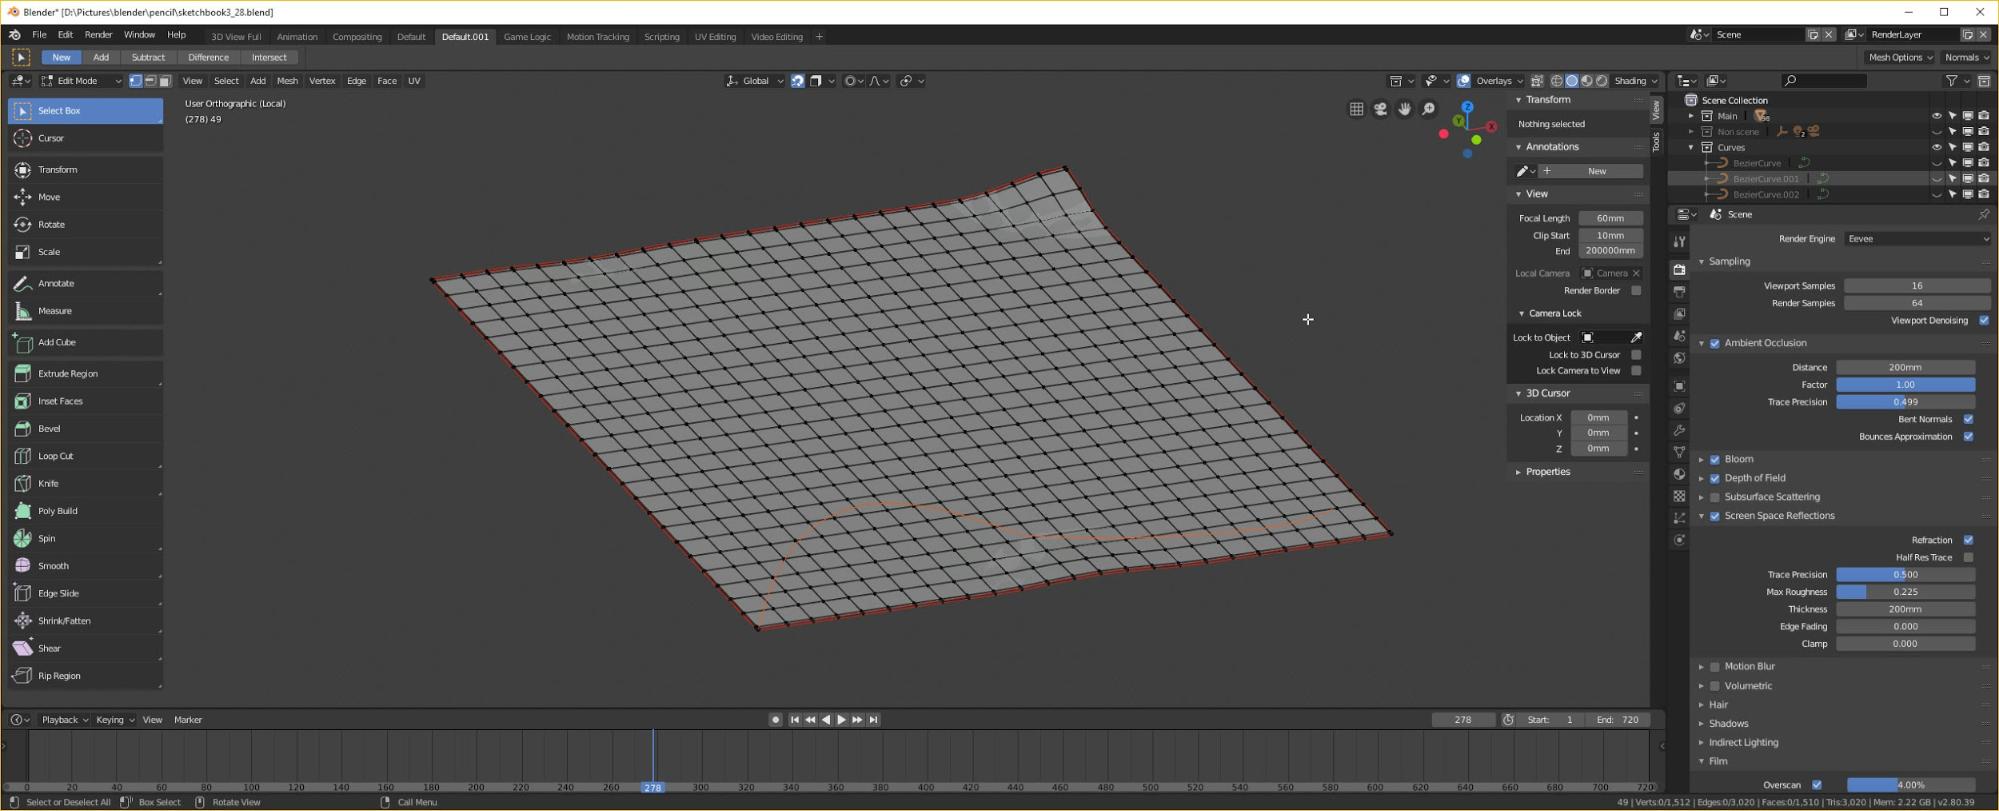
The pages came next. I created a single page. It’s a rectangle, given some more geometry by adding loop cuts (24 in both X and Y), and then extruded to the depth I wanted – which ended up being 0.125mm. I then gAve it a Subdivision Surface modifier and added in some more edge loops very close to all edges to stop the modifier rounding the corners. I added UV seams to separate the front and back of the paper from the edges and UV unwrapped it.
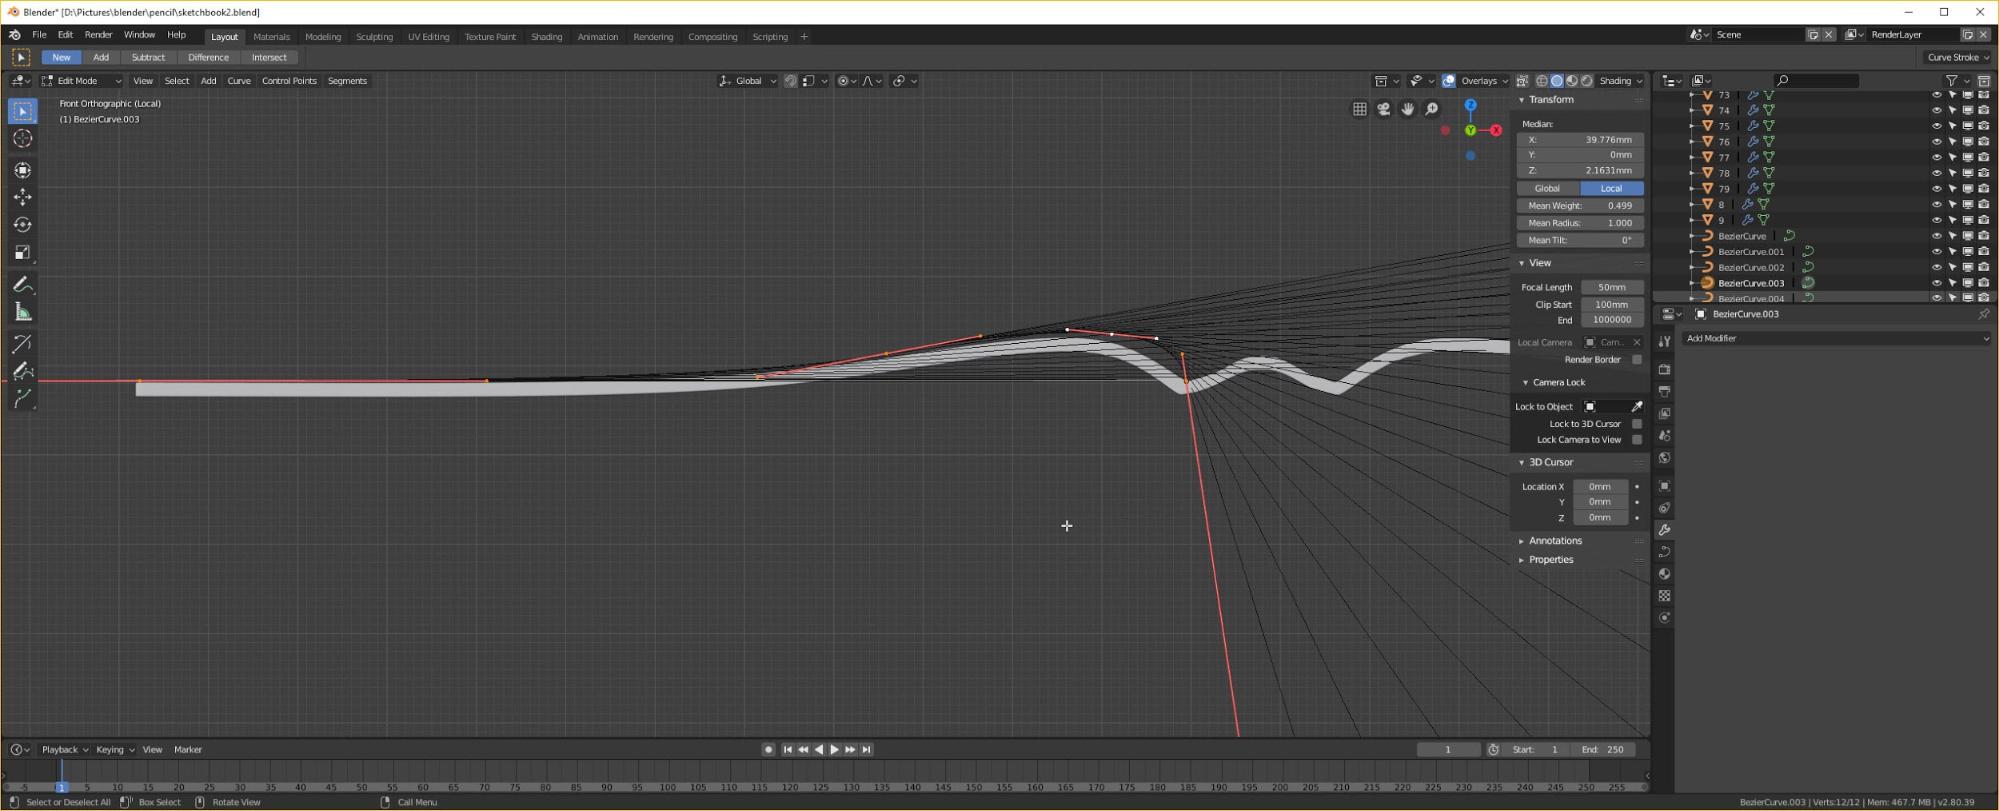
I made sure I placed the page’s origin at its bottom right corner then moved it into position on top of the leather cover. I placed the origin on the inside part of the cover where the page would emerge from. I added a Bezier curve. Its origin is in the exact same place as the page one origin. I manipulated it’s control handles from front orthographic view to form the shape I wanted my first page to take. Its initial point goes almost straight up from the book’s spine. Then I gave page one a Curve modifier, with the Bezier curve just created as its target. Then I went into Edit mode in the Bezier, selected all the control points and made sure the Mean Radius was set to 1.0 – otherwise the curved pages will be squished.
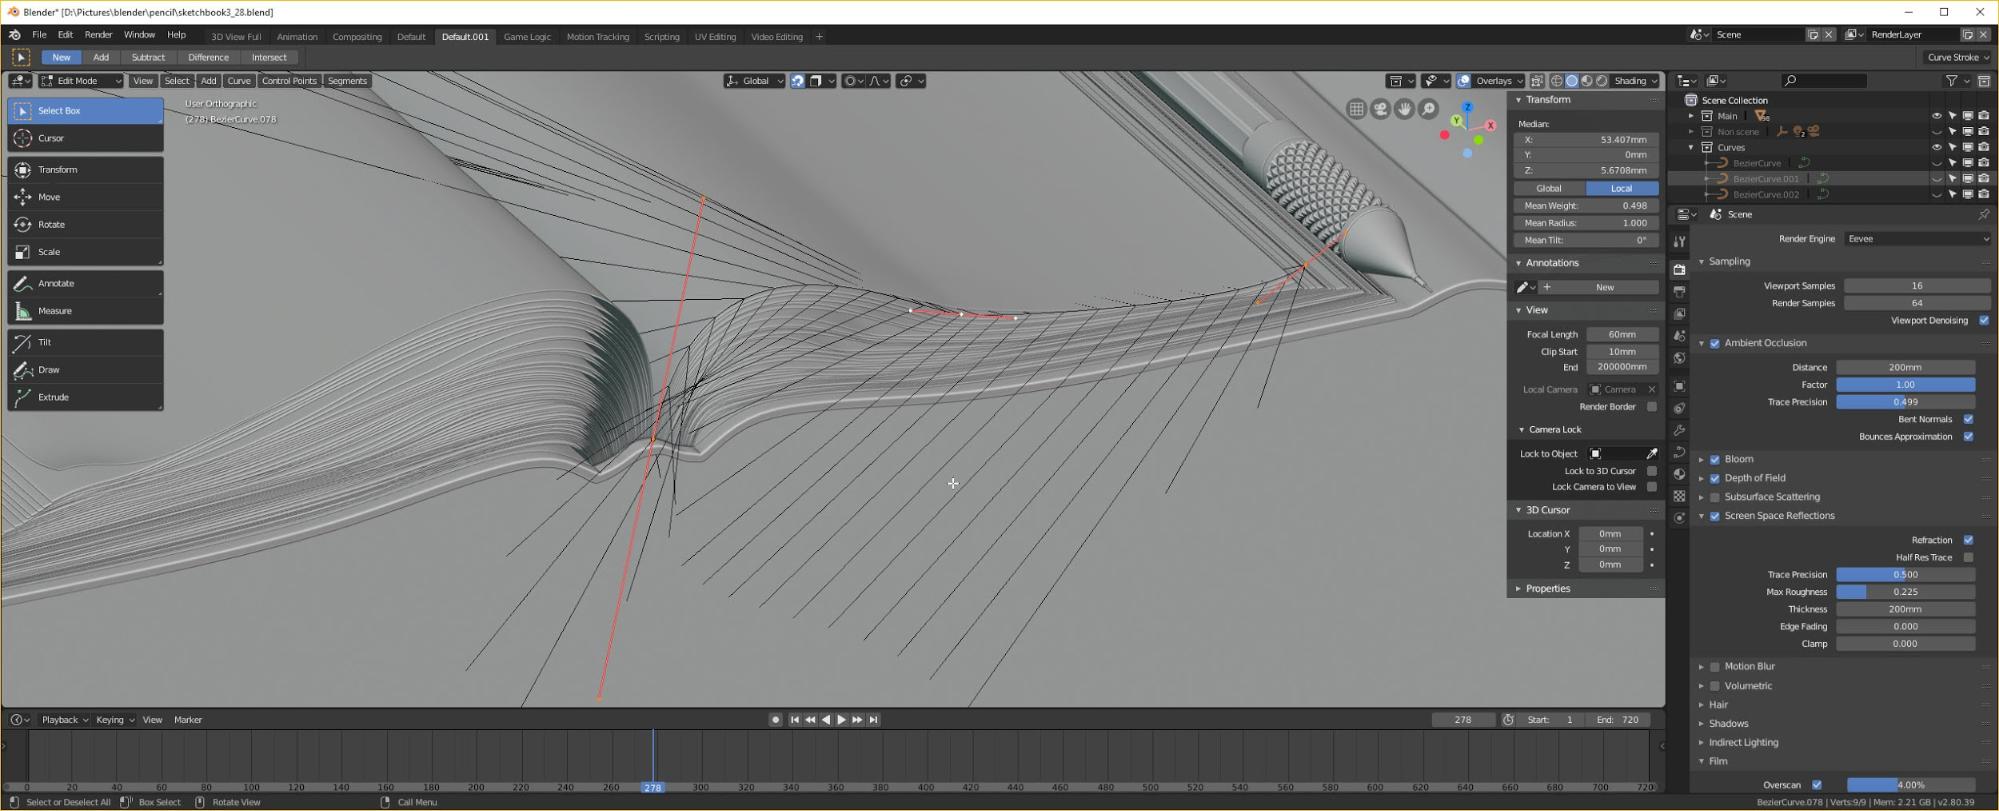
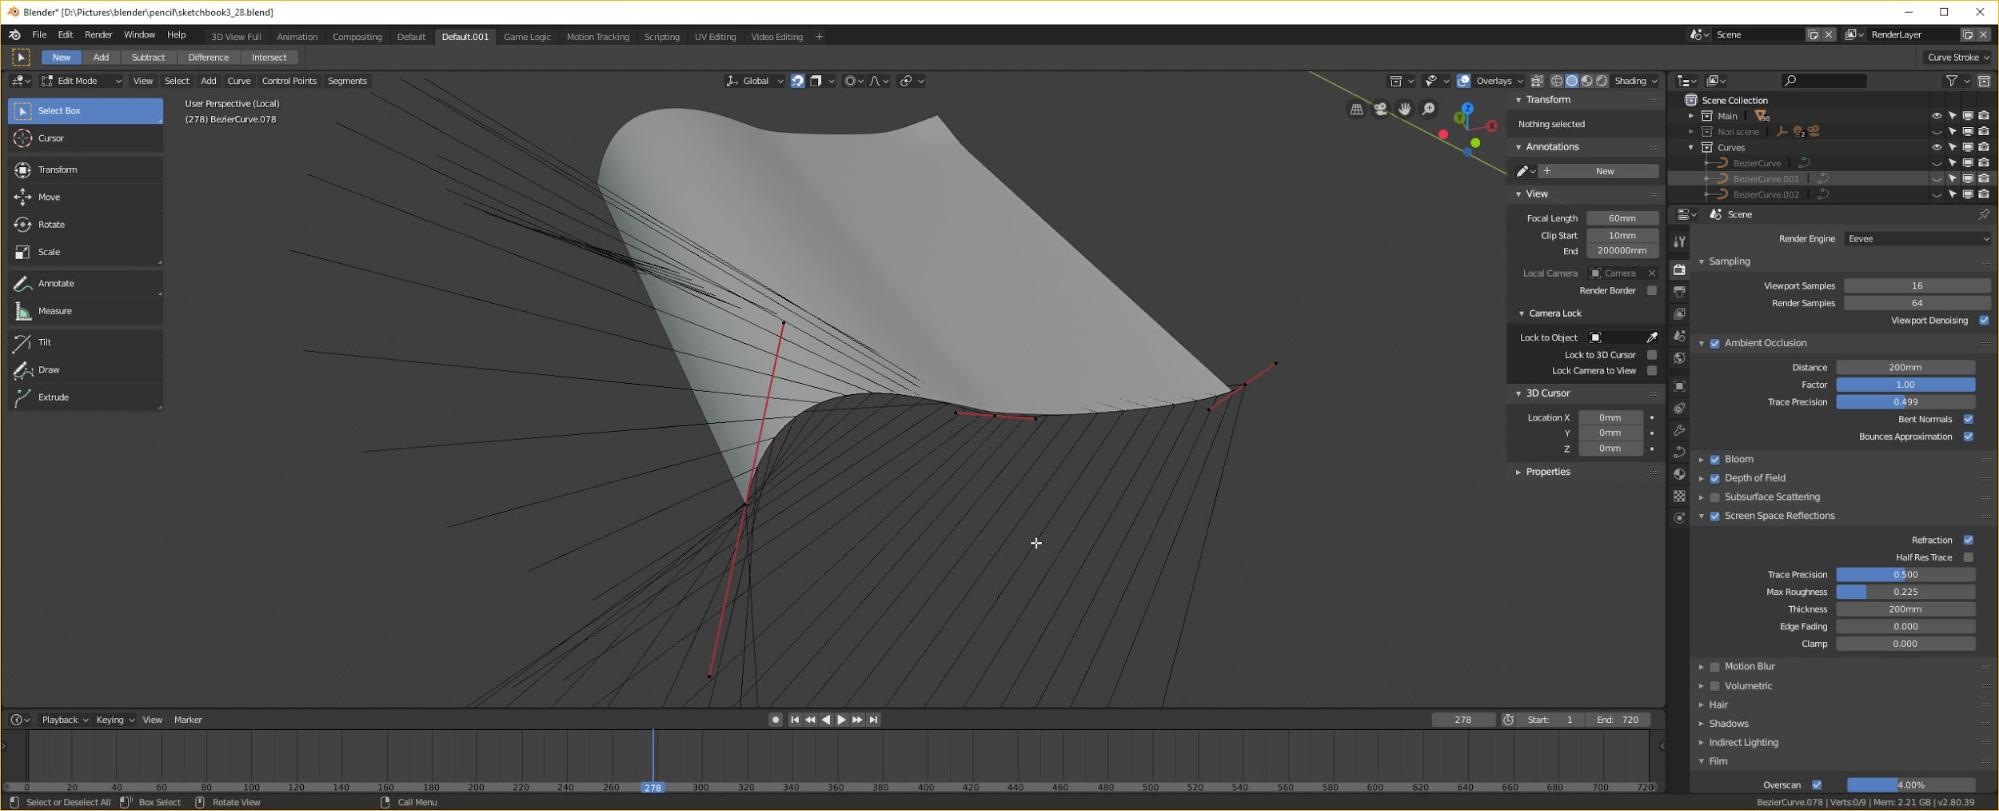
I toyed with the idea of using Array modifiers to create the remainder of the pages, but decided to do it manually. Duplicating them by hand meant that there were small irregularities in the spacing that I thought looked more convincing. I selected both the first page and its Bezier curve, hit Ctrl+D and duplicated them moving them over a tad to the right and up so that their origins were positioned on the spine correctly. Then I jumped into Edit mode on the newly duplicated Bezier and tweaked the control points, making sure that the new page didn’t intersect the page beneath it. Tweaking all the curves by hand as I made them also made things look a bit more natural than if they were all straight clones of each other.
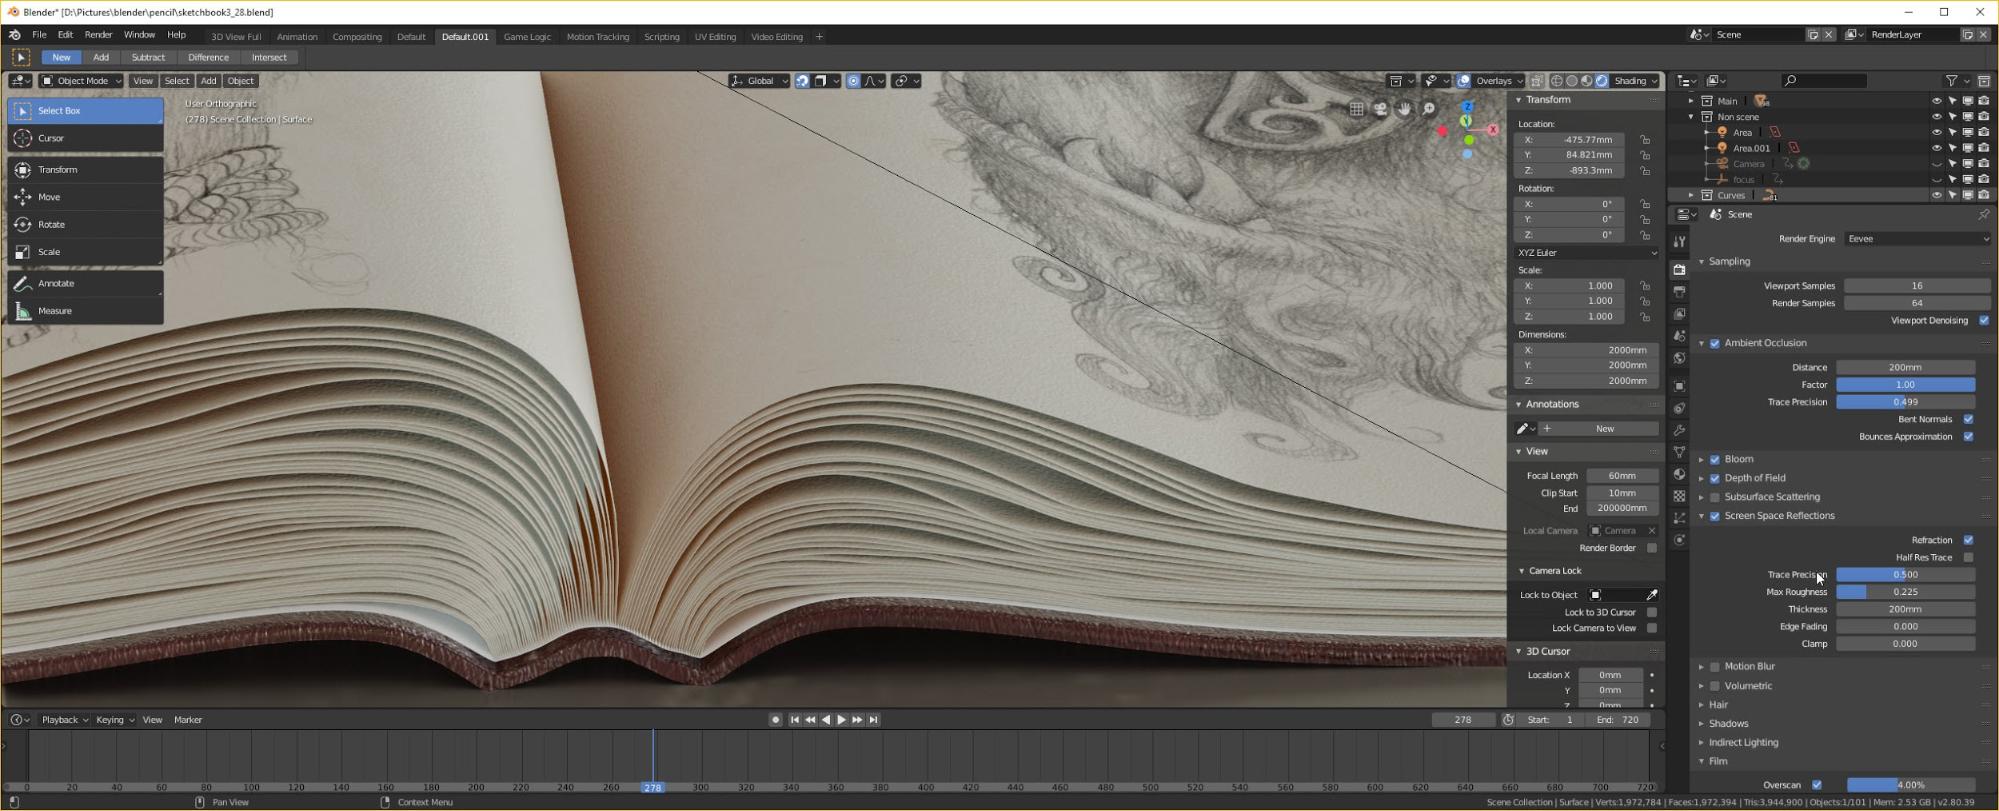
When I reached the point where I wanted the sketchbook to be open, I created a duplicate of the original page and switched its origin to bottom left and off I went again. There are about 80 pages in total I think. This process didn’t actually take too long and varying each curve by hand allows the pages to interact with each other in interesting ways.
Texturing
I used the Texture Atlas addon and made a combined UV map for the open pages and one additional left and right hand page. I exported an FBX of those same four pages as one object to use in Substance Painter. I then used Object>Make Links>Object Data to make every non-open left hand page share the same Object Data. Then I did the same with the right hand pages. That left me with the same 80 pages or so visually, but I only had to deal with texturing for four.
The top pages also got a few tweaks using Proportional Editing. This was great for lifting just a couple of the corners a tiny wee bit.
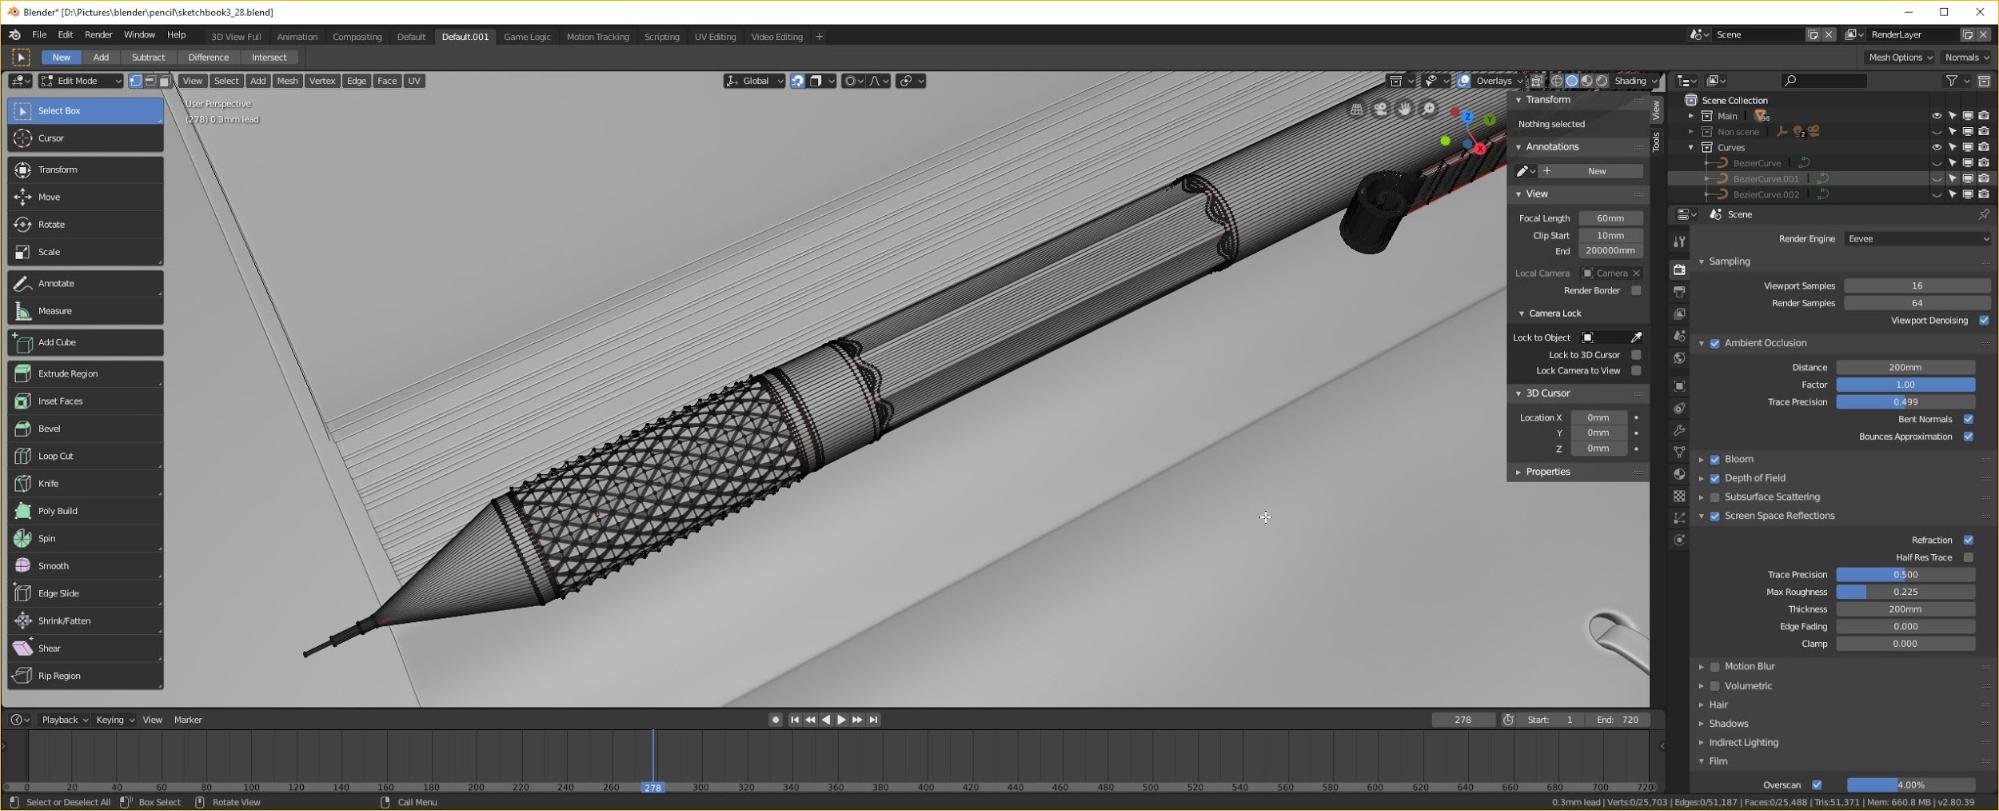
The other objects in the scene were fairly straightforward. The mechanical pencils are made up, but have some features seen in some real world ones. The putty eraser is as basic as it looks – a subdivided cuboid abused in Sculpt mode. I unwrapped everything and exported FBX objects.
I haven’t had Substance Painter very long and I still have a lot to learn about it. I usually start by looking around the supplied preset Materials and Smart Materials to see if I can find anything suitable to use as a starting point. I think I also downloaded a basic paper material from Substance Share to use as the foundation for the pages.
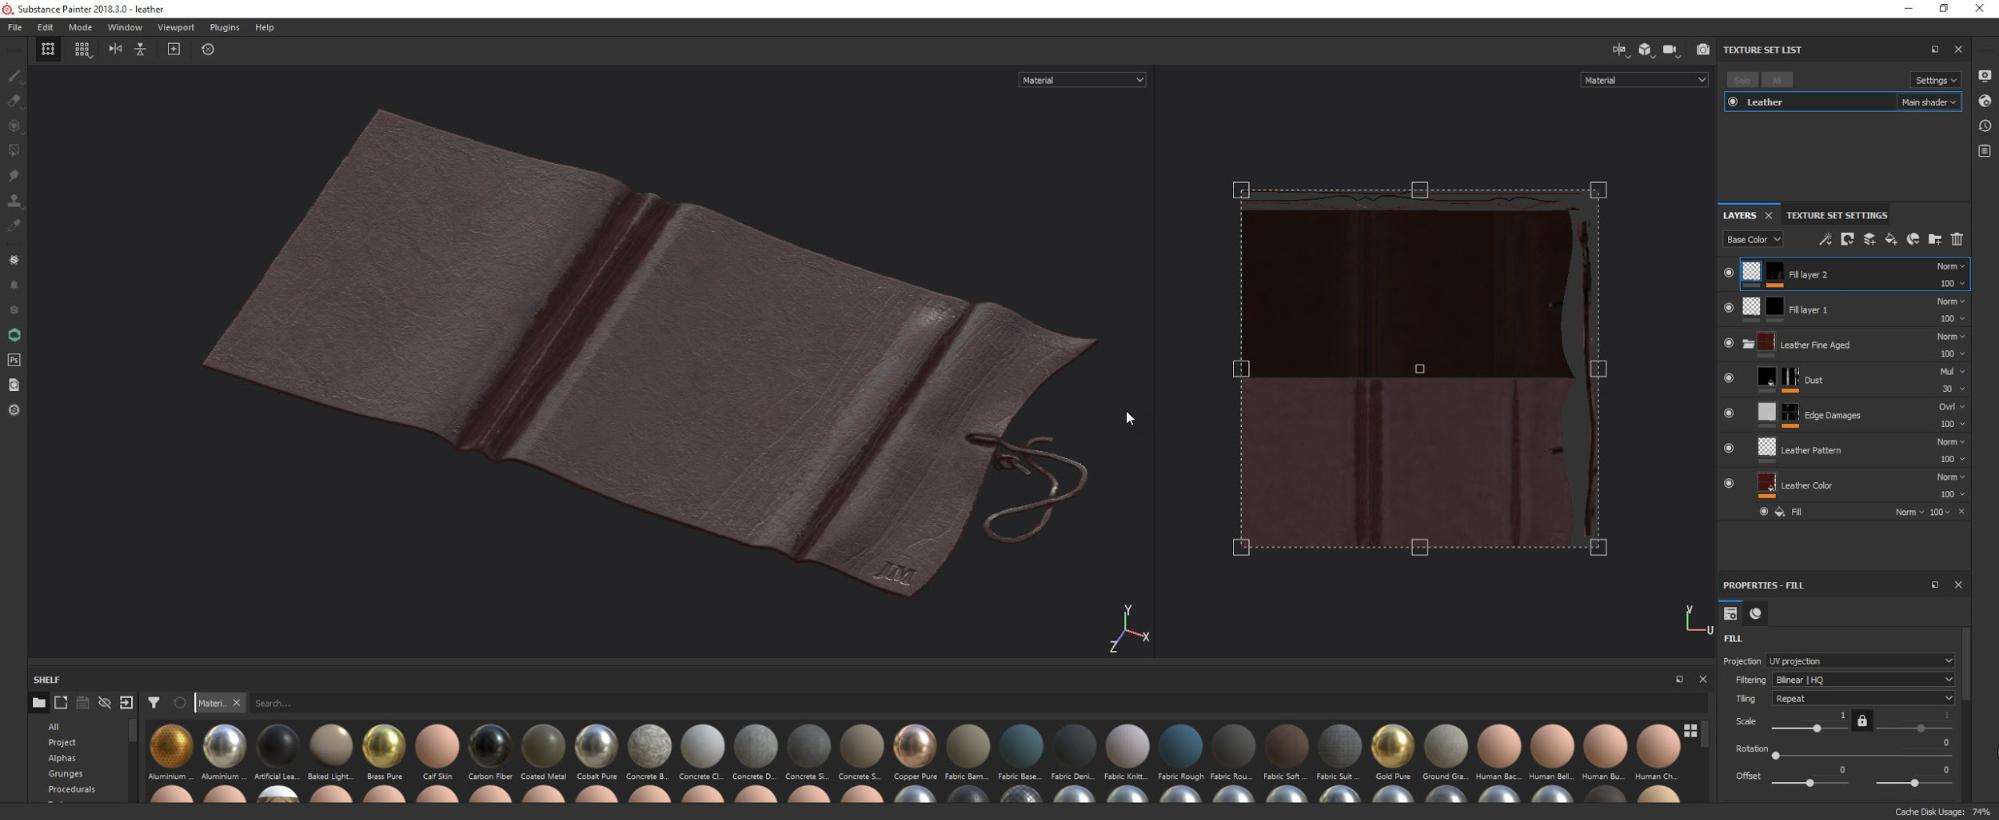
The leather for the sketchbook started as a Substance material. I hand painted more linear creases along where the leather would fold over, and stamped my initials on the bottom right.
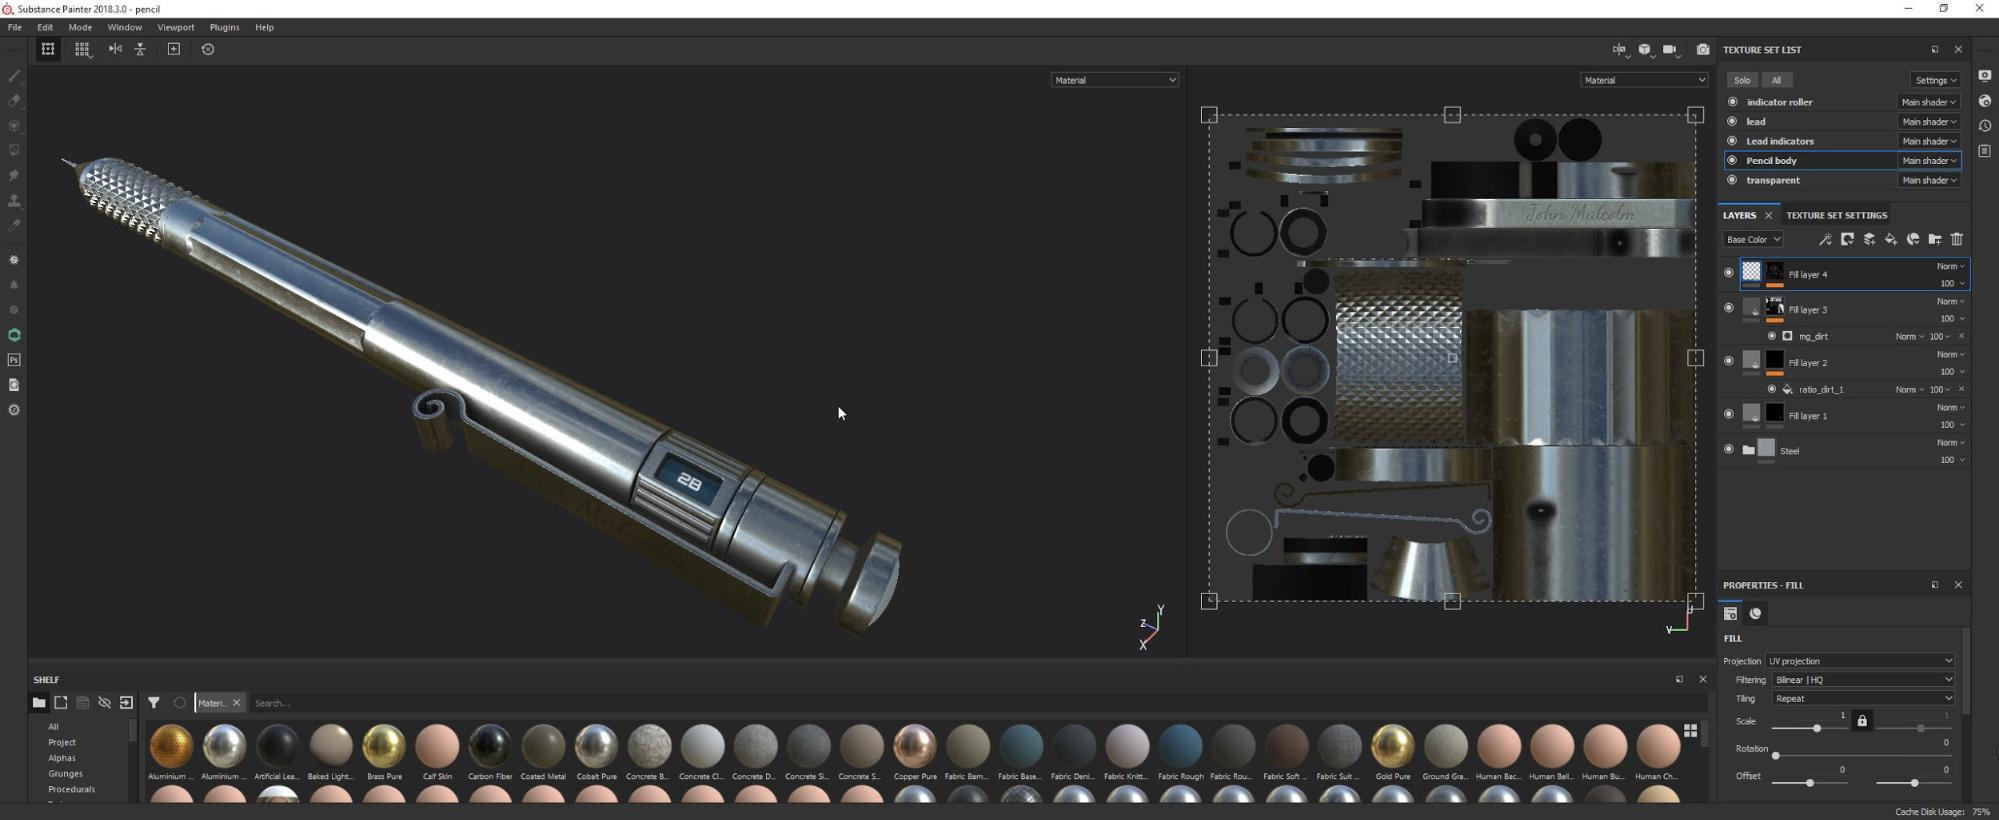
The pencil material is a modified steel Smart Material with some additional layers of grunge, tiny imperfections and some engraving that I don’t think can be seen in any of the Cycles renders or EEVEE animation :P
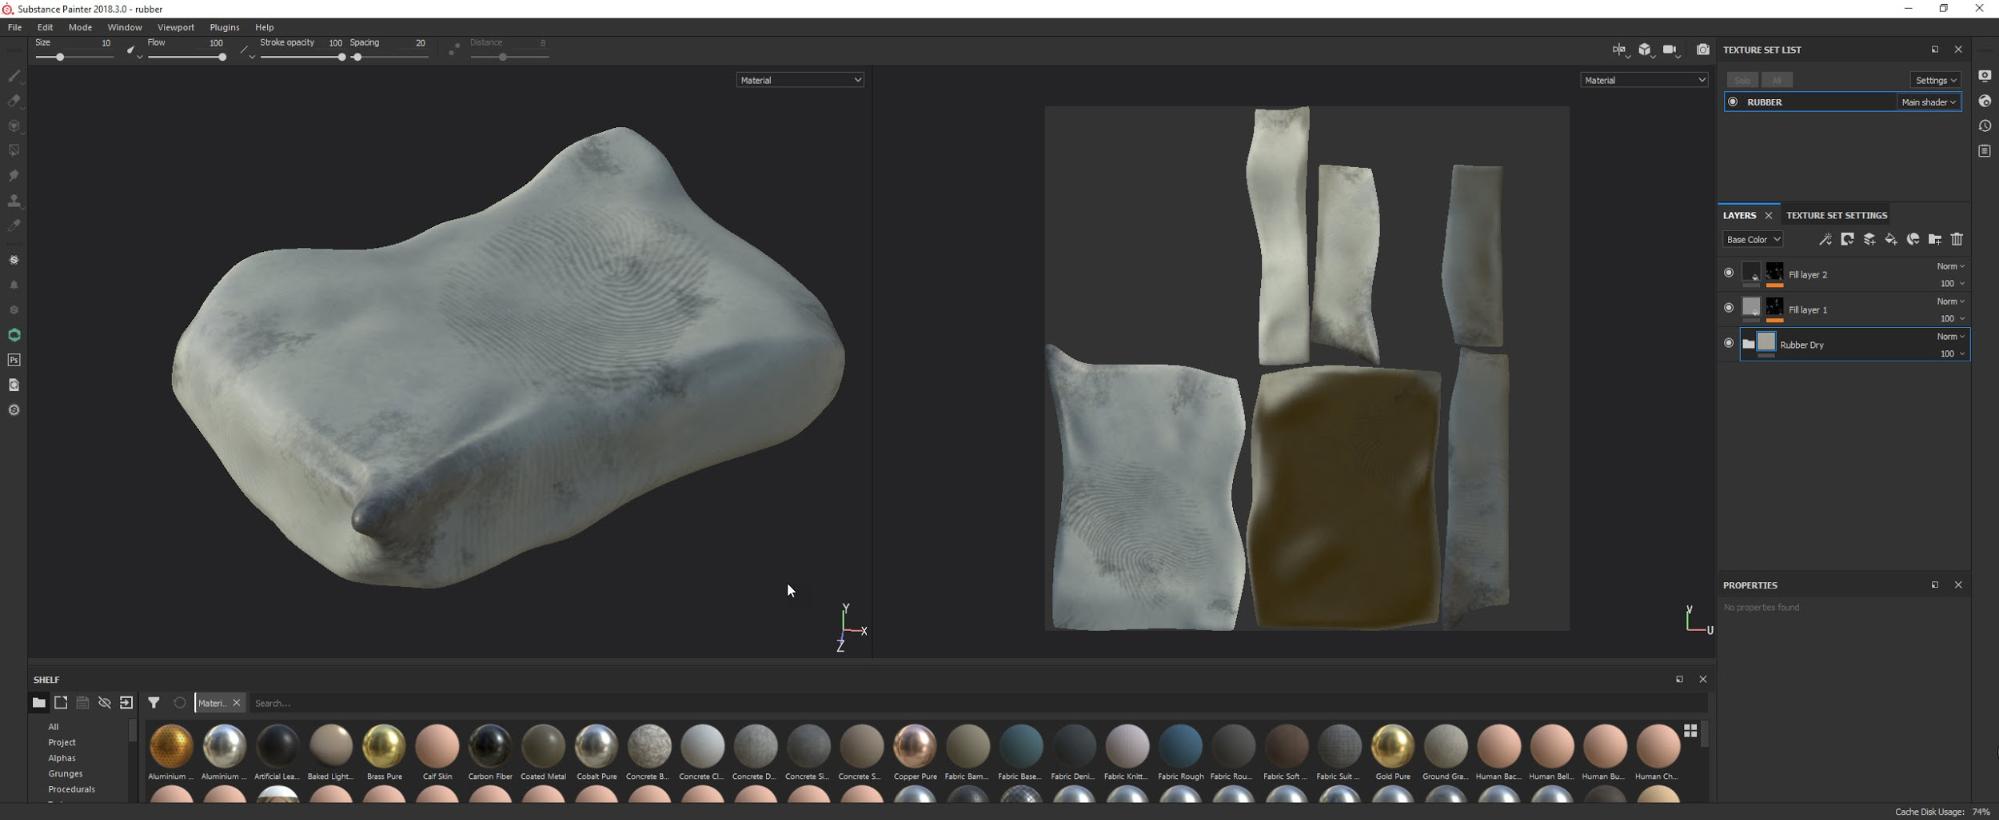
The putty eraser is… well… rubber. I added some fingerprints, some dirty areas and a dark corner where it would have been moulded into a point and used. The dirty and dark areas are given a much lower roughness than the rubber. I think this helps sell the idea that there is rather shiny graphite involved somewhere.

The pages were very simple to texture. I started with the base paper material from Substance Share. I had scanned a couple of drawings from two of my pub sketchbooks into Photoshop. I cleaned them up a wee bit, and applied levels to ensure their backgrounds were white before importing them into Substance Painter. For each of them I added a Fill Layer, set it to Color only, set Tiling to ‘None’ and the Layer Mode to ‘Multiply’ and positioned each on the appropriate areas of the overall texture map.
Recently I picked up Substance Painter Live Link (Hedgehog Connect) for using with Blender and Substance Painter. This enabled me to tweak things in Substance Painter and see the changes in Blender moments later.
The surface on which the objects are lying didn’t even have to go anywhere near Substance Painter. It’s just a cube, with a shiny reflective Principled Shader and one of the great surface imperfection maps from Poliigon applied to its Roughness.
Lighting
Lighting was mainly supplied by a nice HDRI from HDRI Haven. I added a couple of wee area lights only after I rendered the animation – just to get a hint of warm light from one angle and a slightly cooler light from another for the final Cycles renders.
Animation

For the animation, which was 720 frames, I first used the Fly/Walk navigation mode (Shift+F in 2.79, Shift+` in 2.8) to manoeuvre the camera (with Automatic Keyframe Insertion turned on). I used Simplify F-Curves in the Graph Editor to reduce the number of keyframes down significantly and then added some Noise modifiers to the camera’s Z Location (to give it a tiny amount of up-down motion) and its Y and Z rotation.
I added an Empty which became the depth of field focus for the camera and this was moved around as well. This worked OK, but could have been better. Having the DOF move and having a shallow depth of field means you are more likely to get unwanted artefacts such as can be seen on the right hand side of the leather near the very end of the video.
I don’t have the most up-to-date PC. EEVEE has meant I can render frames like these in seconds rather than minutes which means I can have the final animation in hours instead of days. Perhaps at some point if I’m not planning on using my computer for anything else for a day or two I can try a comparable animation in Cycles :P
Overall I was very happy with how this project turned out and how it was received. I love texturing and I love how adding subtle imperfections to things can bring them to life – I can’t believe I used to use uniform Roughness values for anything in the past.


About the Author
 John Malcolm, Freelance illustrator and Blender fan


Looks great!
Not 100% on board with that shaky hand-cam though. It was a little too much for me.
Cheers. It did end up a little over the top. It’s something I’d like to get looking more subtle and natural.
Fantastic work! Although the ‘shaky-cam’ was a little much . . . this was great!! Love your pencil work! [Two thumbs up from me!]
It looks really, really nice.
One way to create realistic handheld camera moves is… by making actual handheld camera moves.
You could print out a couple of pages with markers on them, place them in a position similar to your sketchbook and film yourself moving across the pages. After that you can camera track the shot and use the resulting camera in your scene. If you parent the animated camera to an empty, you can adjust the move to your liking while still retaining the realistic motion.
I’ve actually tried that in the past with little success. Camera tracking is something I’d love to learn more about. I just couldn’t get usable results and ended up going down the modifier route. TBH I think my first attempt at handheld camera seemed to work out best. The video on my Youtube channel called ‘Yet another Blender Eevee test animation’ seemed just about right.
I’ll look into actual camera tracking again though.
Great write-up John. Nice to see Scotland representing!