Behind the Scenes: Isometropolis PD

My name is Louis du Mont, I’m an animation director working at London based animation studio ‘We Are Formation’. We produce commercial animation for various agencies and production companies while trying to find as much time as possible to work on passion projects, one of which is ‘Isometropolis PD’.
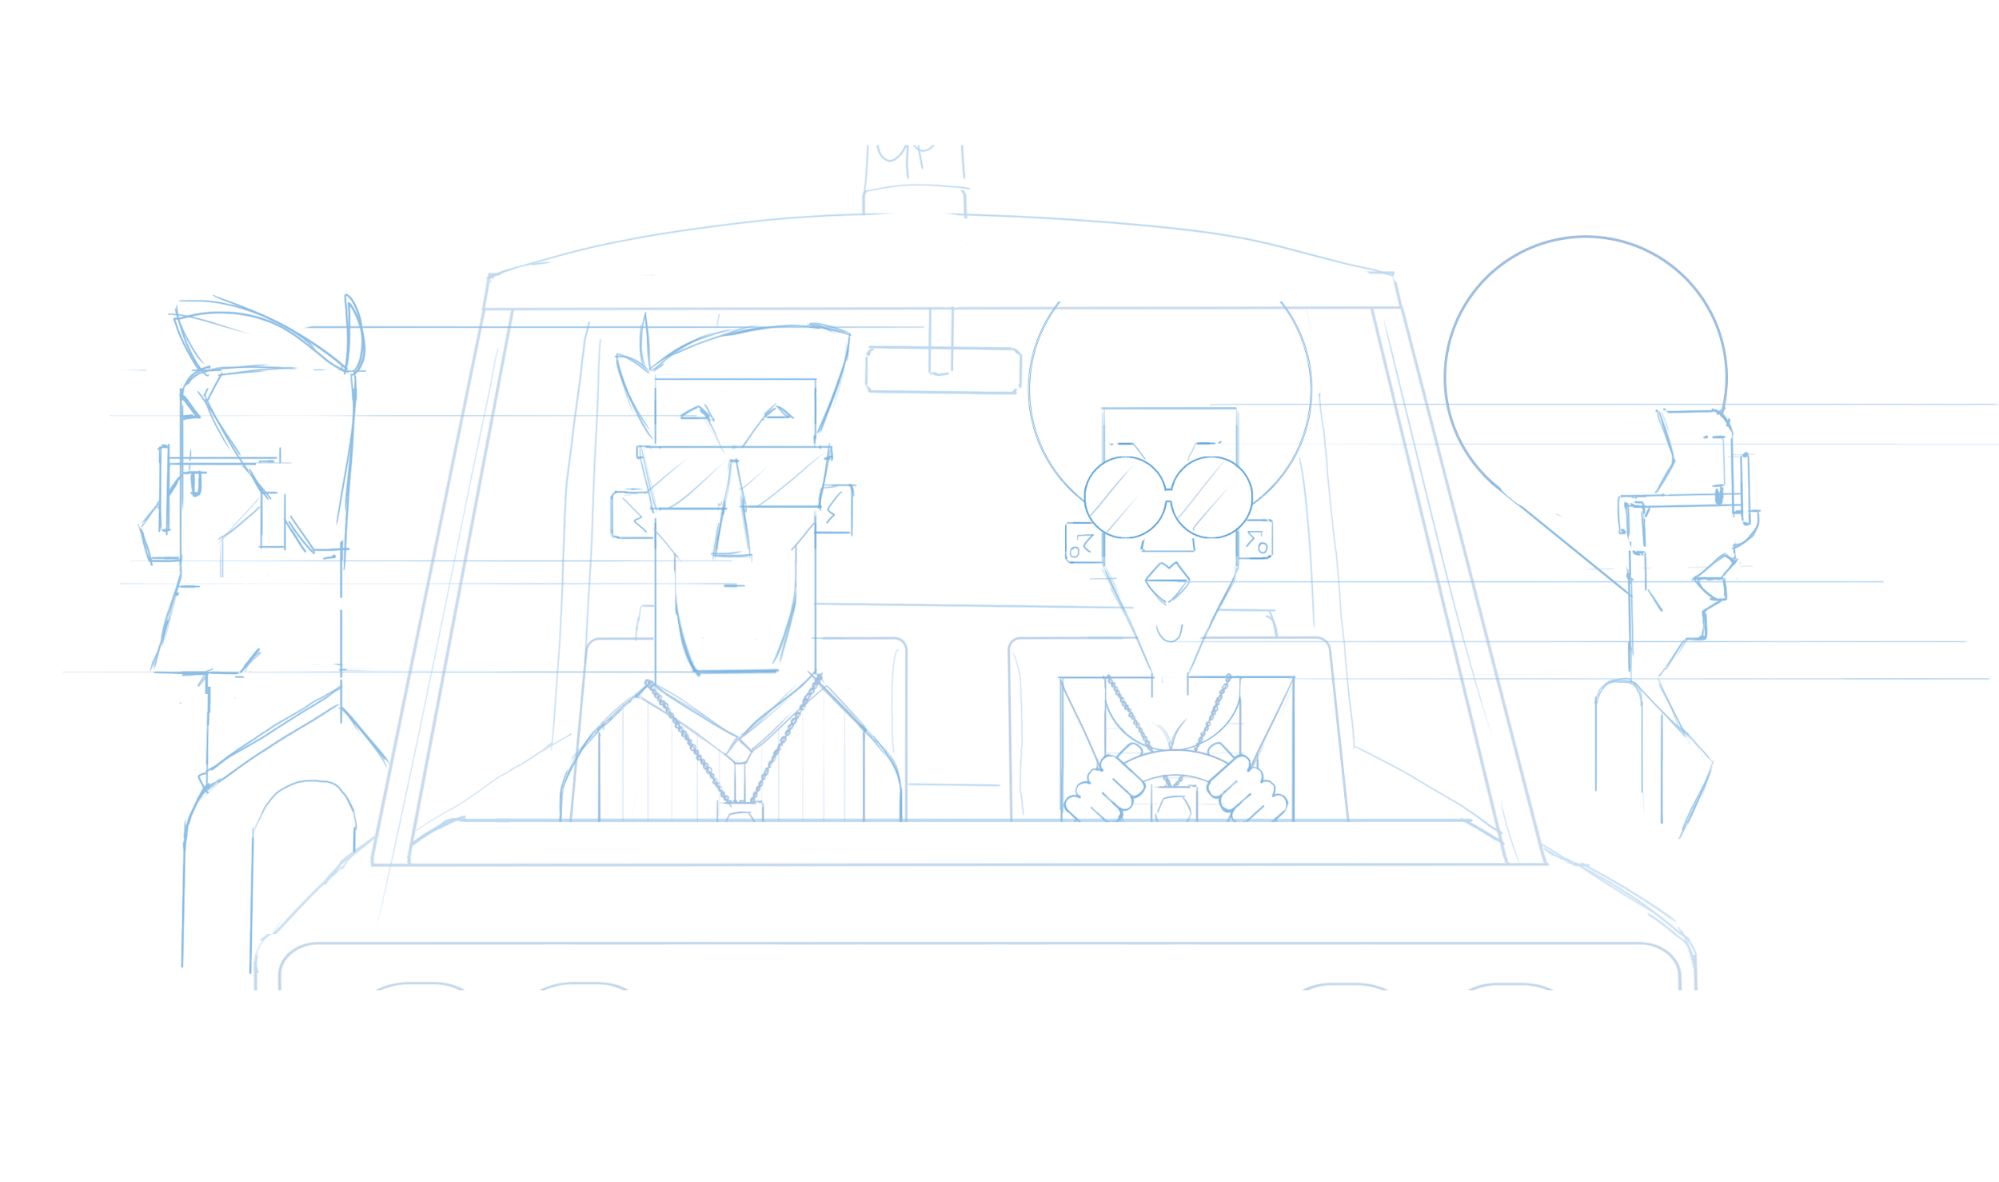
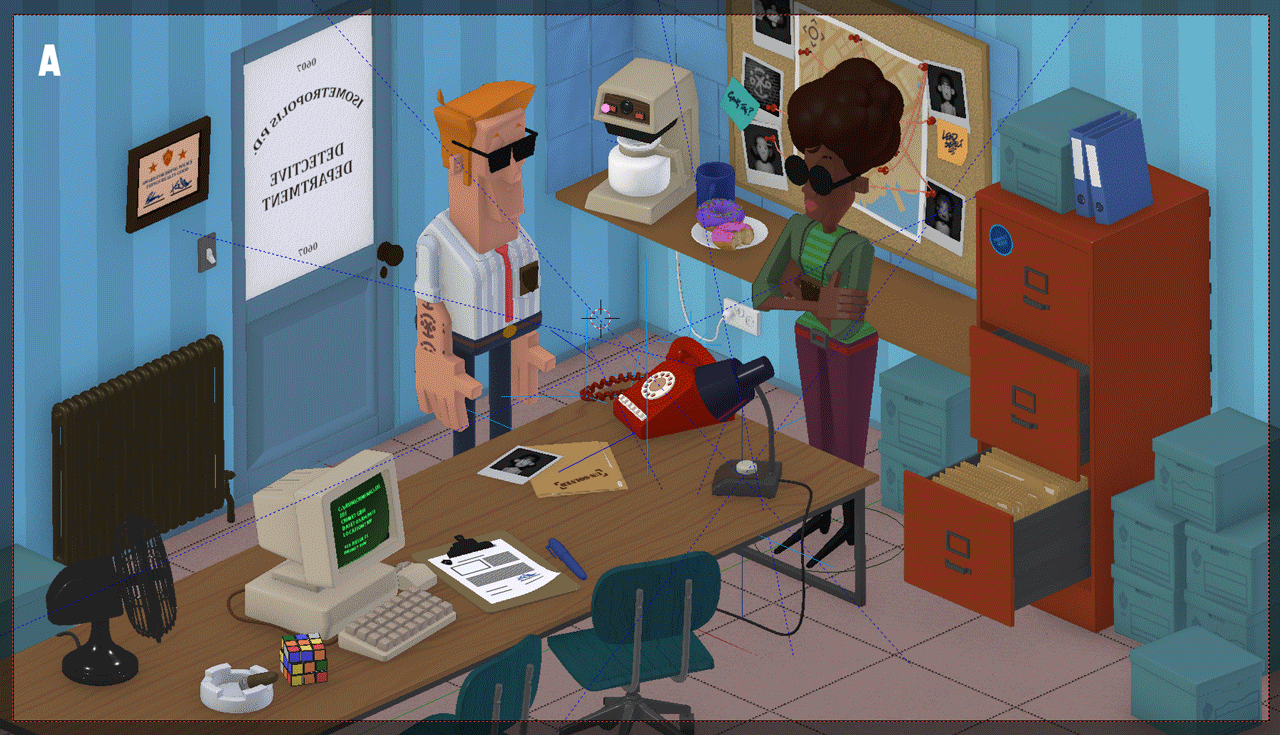
This project, like many others, started with a doodle. I’d been watching a lot of cop TV shows and movies and started to sketch this detective duo.
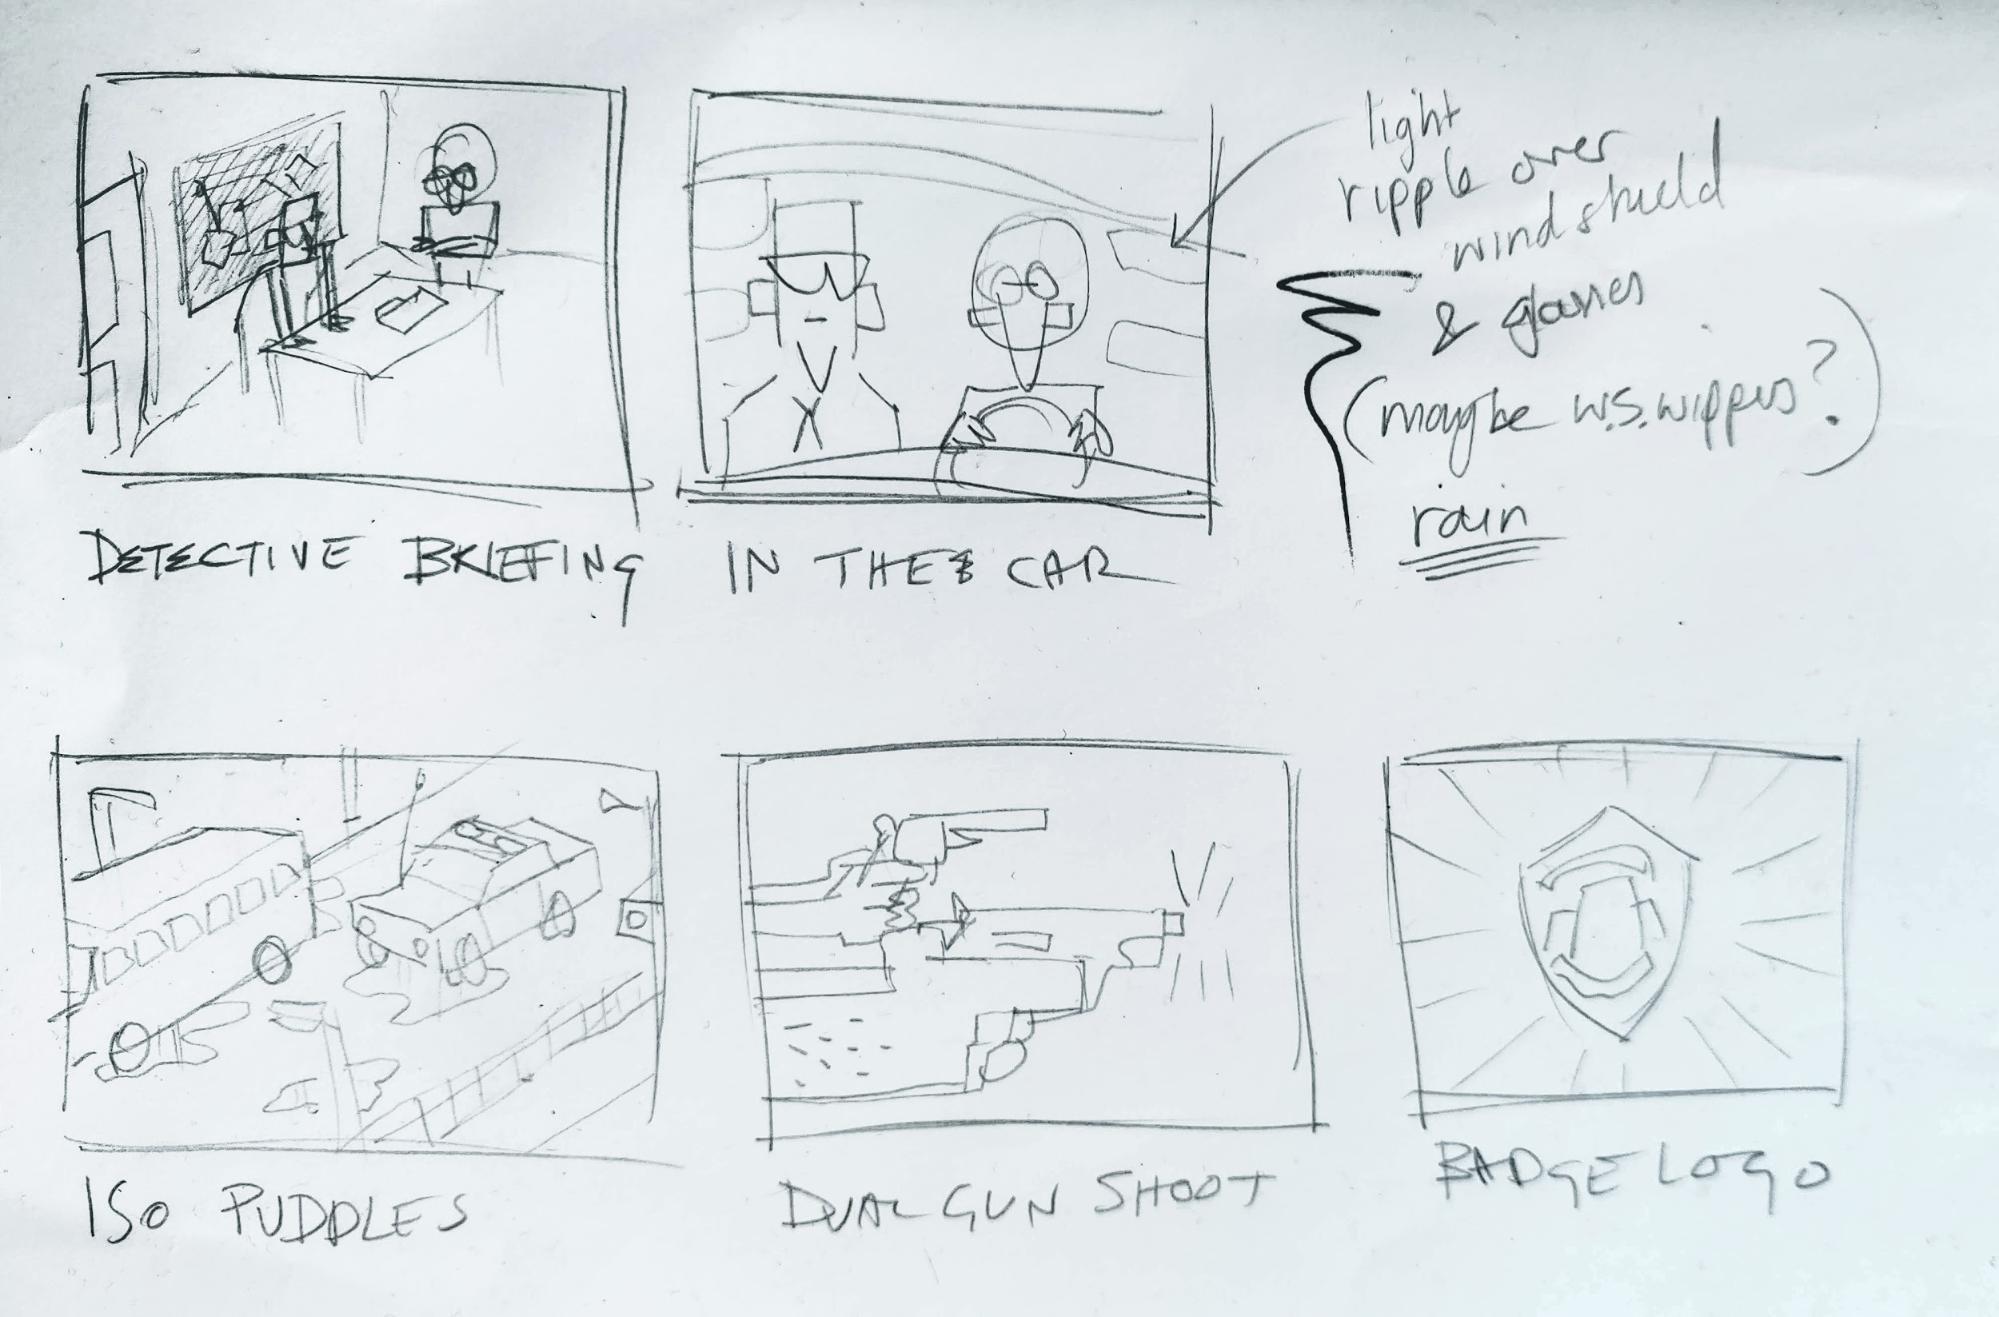
My plan was to create a set of 6 animated, looping GIFs with stereotypical TV cop drama scenes. Having created similar GIF sets before, I find the ability to experiment and produce something finished in a relatively small timeframe very rewarding. It’s also an ideal passion project to work on while other jobs are in. However, I got a bit carried away with the details when playing with procedural textures and modelling techniques so ended up switching from a low res 4:3 aspect ratio to full HD 16:9 as well as producing a mock intro, with accompanying sound design.
I did a quick sketch to get a rough idea of the layout of each scene and started modelling the characters.
Modelling
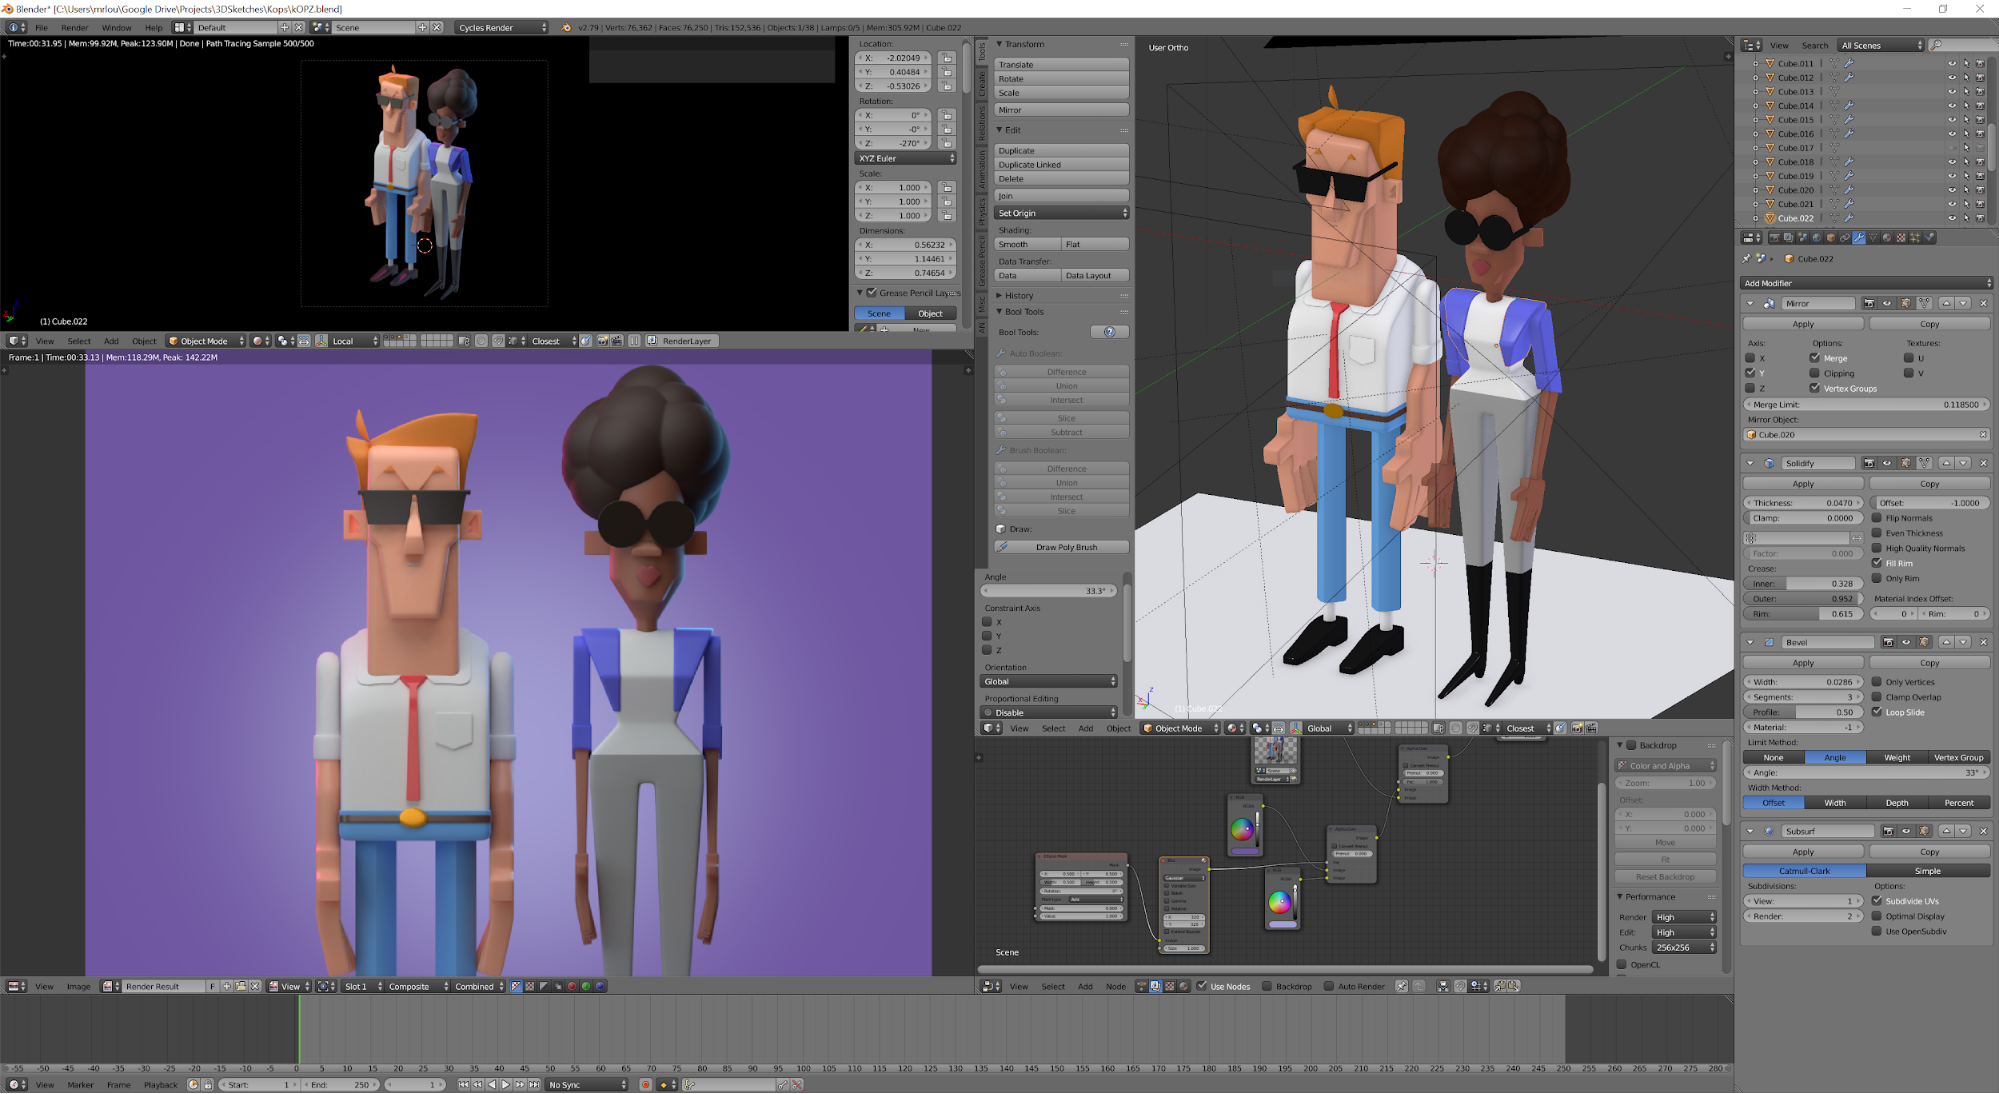
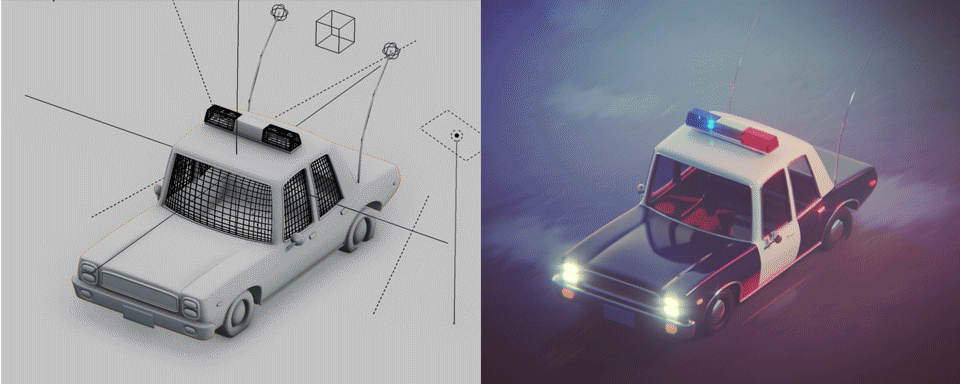
I started blocking out the forms with simple shapes, mainly insetting and extruding cubes. To smooth out the edges, each shape had a bevel modifier with 2 or 3 segments and then a subsurface modifier over everything to ensure there were no hard edges. I still find this non-destructive method of modelling so refreshing, being able to join objects or link modifier data and still retain a malleable base mesh.
It was then time to model the environment, including the various objects in the scenes. I found myself using Google Keep to create checklists to keep track of things I wanted to model. This worked well and I found considerable satisfaction in ticking off each object when complete.
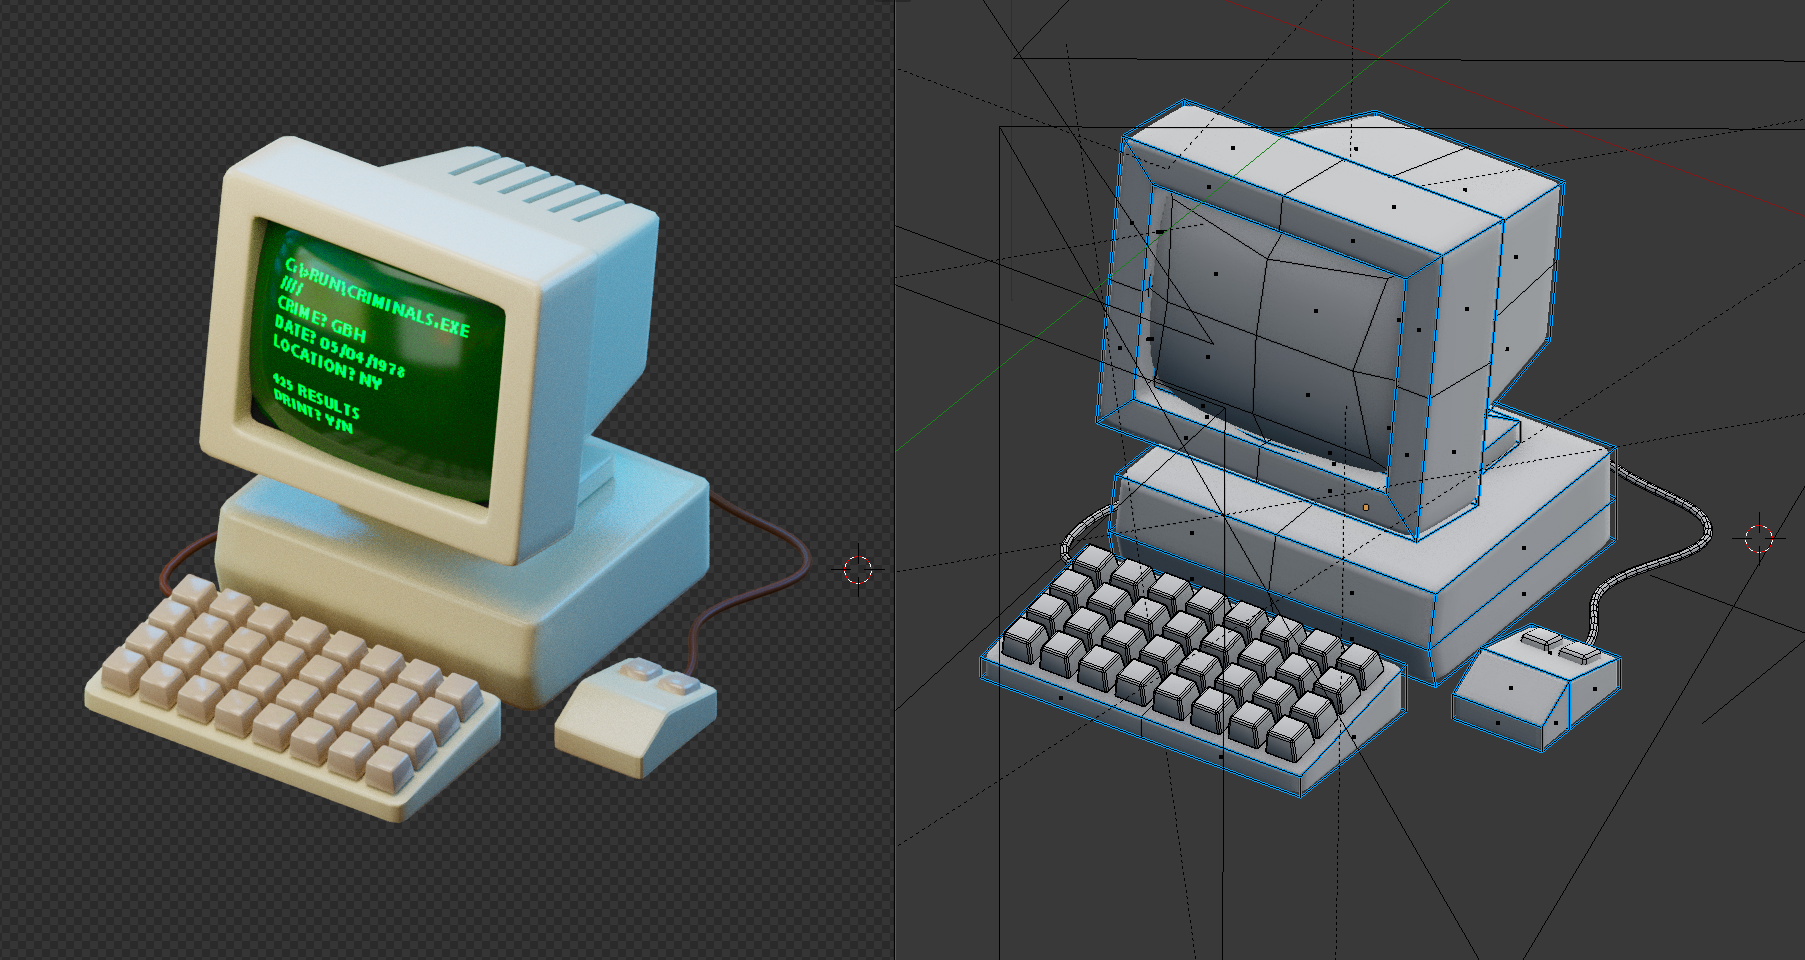
For each object I looked for a photo reference but was cautious not to directly copy it, but to retain a somewhat stylised aesthetic, with everything being a bit thick and simplified. I did this by using the reference images as a guide to the general construction of the object and then taking creative license where I saw fit. On reflection, I think I could have invested more time on this as some objects were adopting more real-world proportions than others, and the stylistic universe started to broaden.
Shading
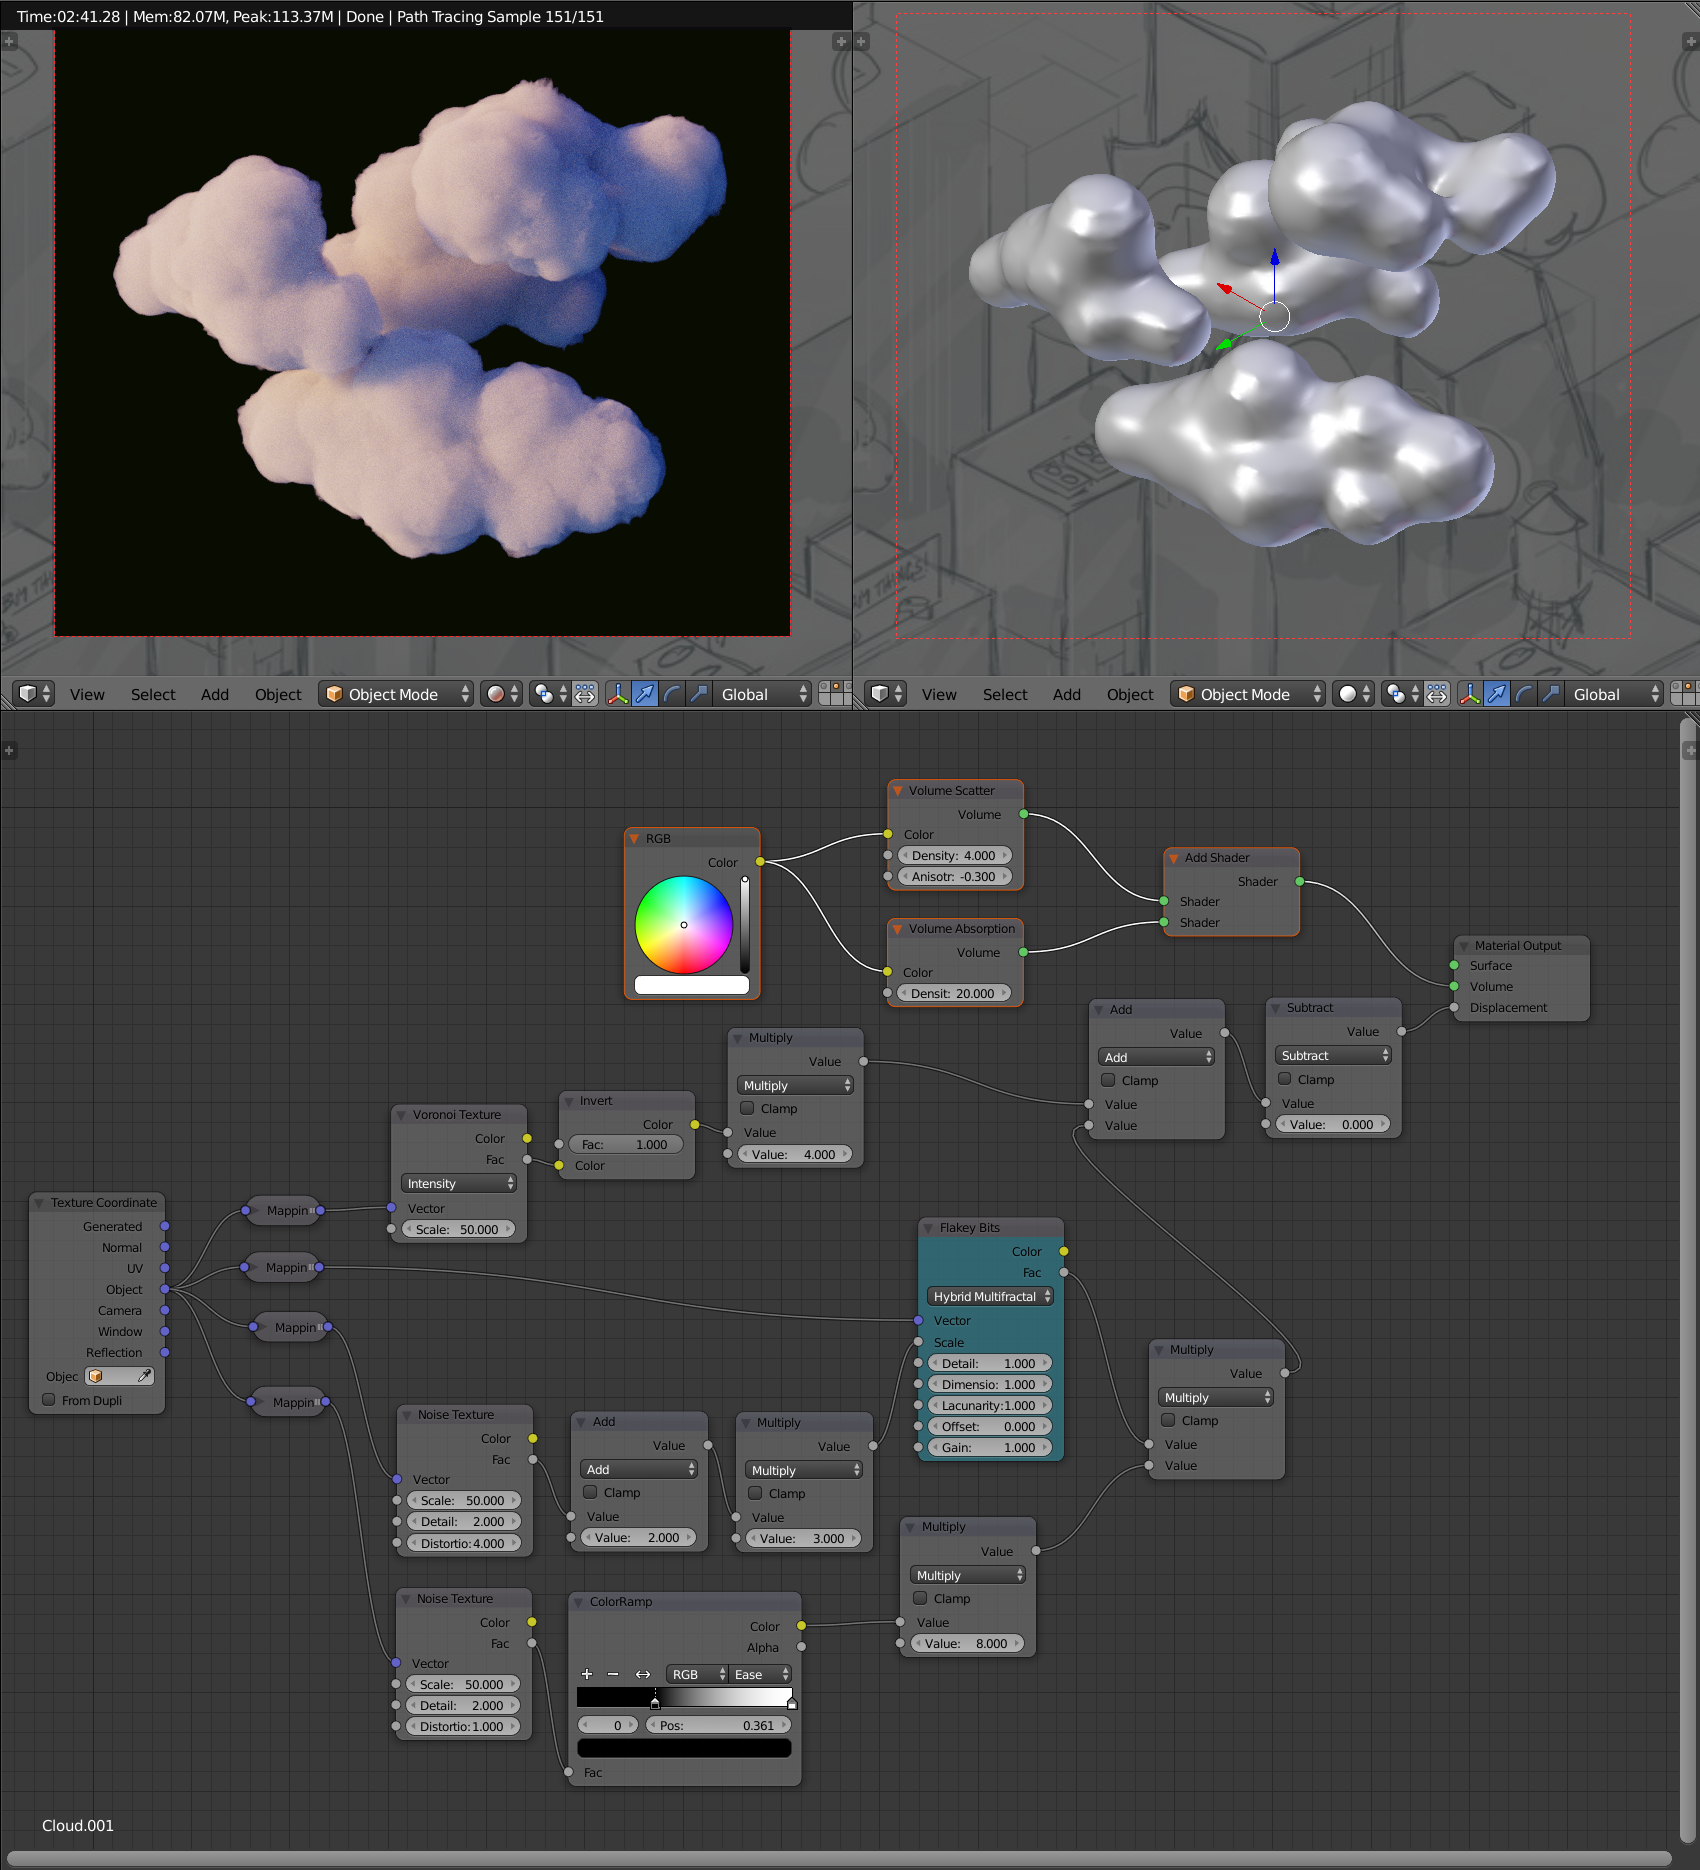
I was more than happy to skip the UV unwrapping step here and press on with selecting objects and poly’s and assigning the Principled BSDF material. In most cases, I just tweaked the base values. I also made use of Blenders procedural textures for wood grain, the road surface, the clouds in the cityscape shot and extensive use of the brick texture for most stripey or grid materials including the characters’ clothes, wallpaper, carpet tiles, and the car radiator.
Lighting
To set up the materials I had put in some white area lights on the ceiling of the room to mimic overhead strip lights. Although, this wasn’t giving me the ominous night time vibe I was after so I started to experiment painting with light, similar to the fake GI bounce lighting trick of old. I used emissive spheres to inject some localised colour into the scenes.
I also wanted to keep a Red/Blue colour theme throughout, reinforcing the police feel of emergency lights.
Animating
The animation throughout this project was quite simple. I’d opted for sharp pose to pose motion for the characters who, apart from answering the phone, don’t really move that much. I also used a sprinkling of motion blur to hide the atrocious in-between state of the arm. These characters are not meant to deform naturally and have a super limited range of motion.
Animating environment objects and cameras were more fluid. As most of the scenes included looping elements I made use of the ‘cycle’ and ‘noise’ motion modifiers with curves editor, offsetting the phase of the curve to create some quick secondary motion.
Rendering
Since making the jump to Blender I feel like I’ve been spoilt by GPU rendering, previewing multibounce GI and complex reflection in a few seconds. However, after making the choice to jump from little animated GIFs to full 1920×1080 video I wanted even more speed!
My computer is a 6 core i7 with 3 Nvidia GTX 1080 graphics cards, each frame at 1000 samples (with denoising) took 5-15 minutes to complete but the city scene jumped up to 1 hour per frame, likely due the the excessive volumetric clouds. I took it as a sign to explore other rendering solutions, as I’m more than likely to come up against this issue in the future as more and more client ask for 4K deliverables.
I started with Garage Farm, who were very attentive and the integration with Blender was solid, sending a render to up to 80 CPU nodes. I also tried out their GPU solution, which is to remote into a Windows computer with 10 GTX 1080ti GPU’s, very nice. I will certainly be using these services on client projects in the future but for this project I utilised Sheepit’s free distributed rendering. I set up an account a few months back and shared my computer’s GPU’s while not in use to rack up some points. I could then spend the points by having my own and other peoples computers contribute to the render. It works very well and I was able to get back an estimated 50 hour render in about 5 hours, with the caveat being that denoising and compositor functions were deactivated to enable multiple users to contribute to a single frame.
Compositing
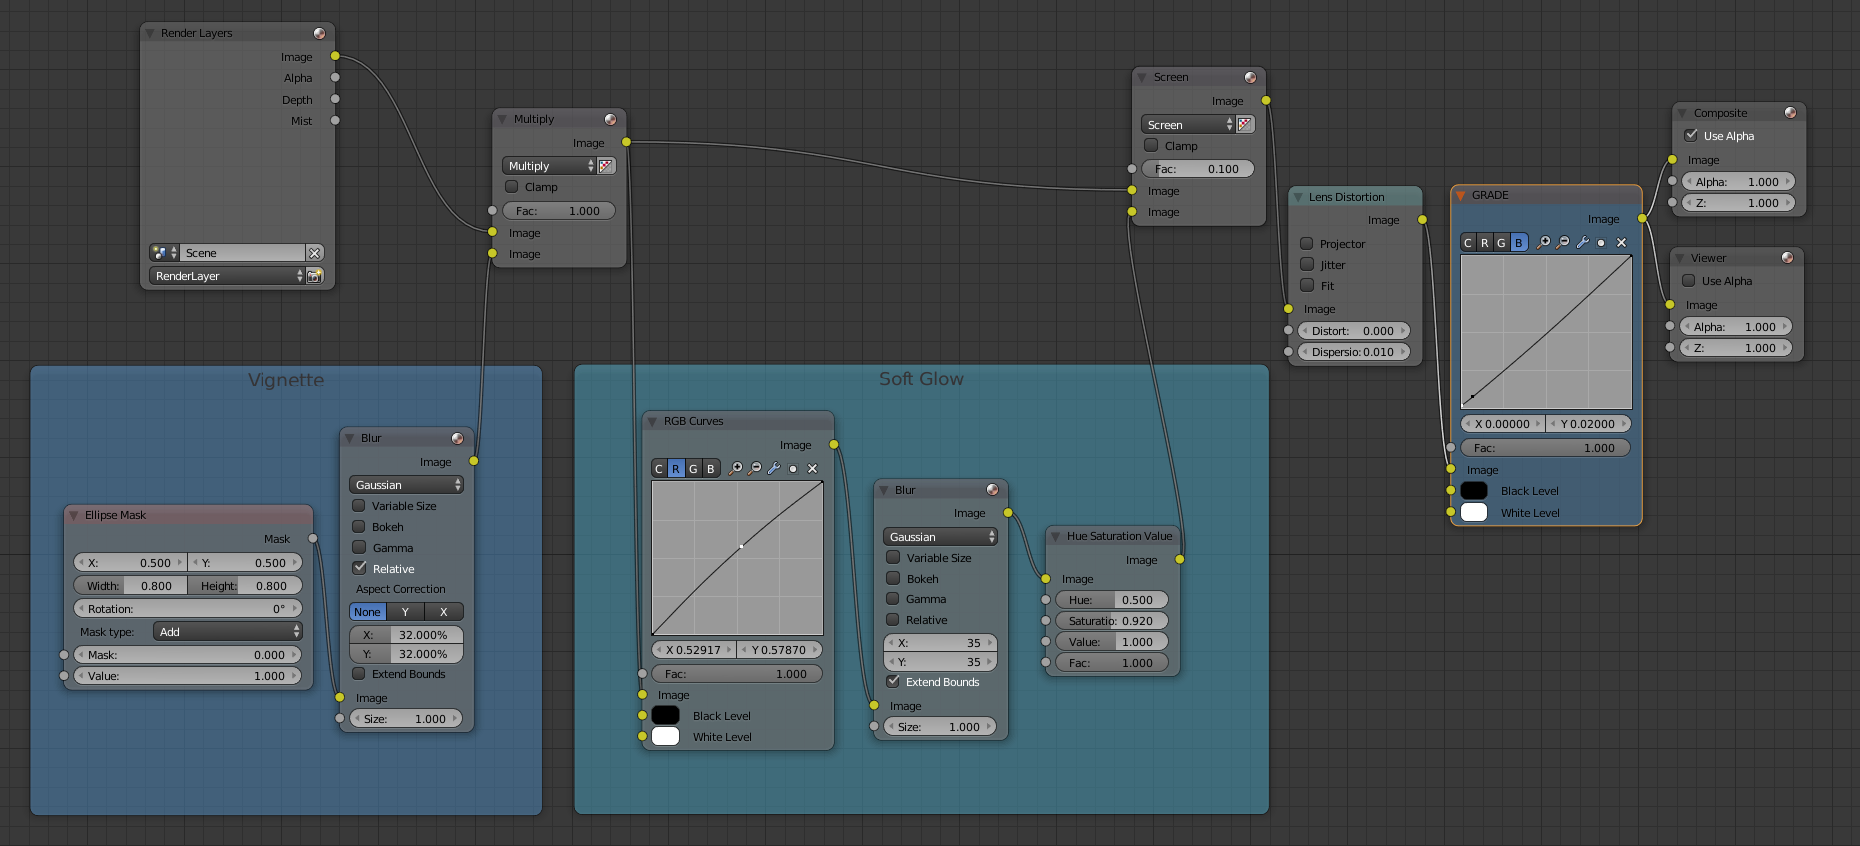
For the most part the scenes render to just a beauty pass. I took advantage of the Blender compositing nodes to add some lens effects, like glows and vignettes and a slight grade to lift the blues with curves.
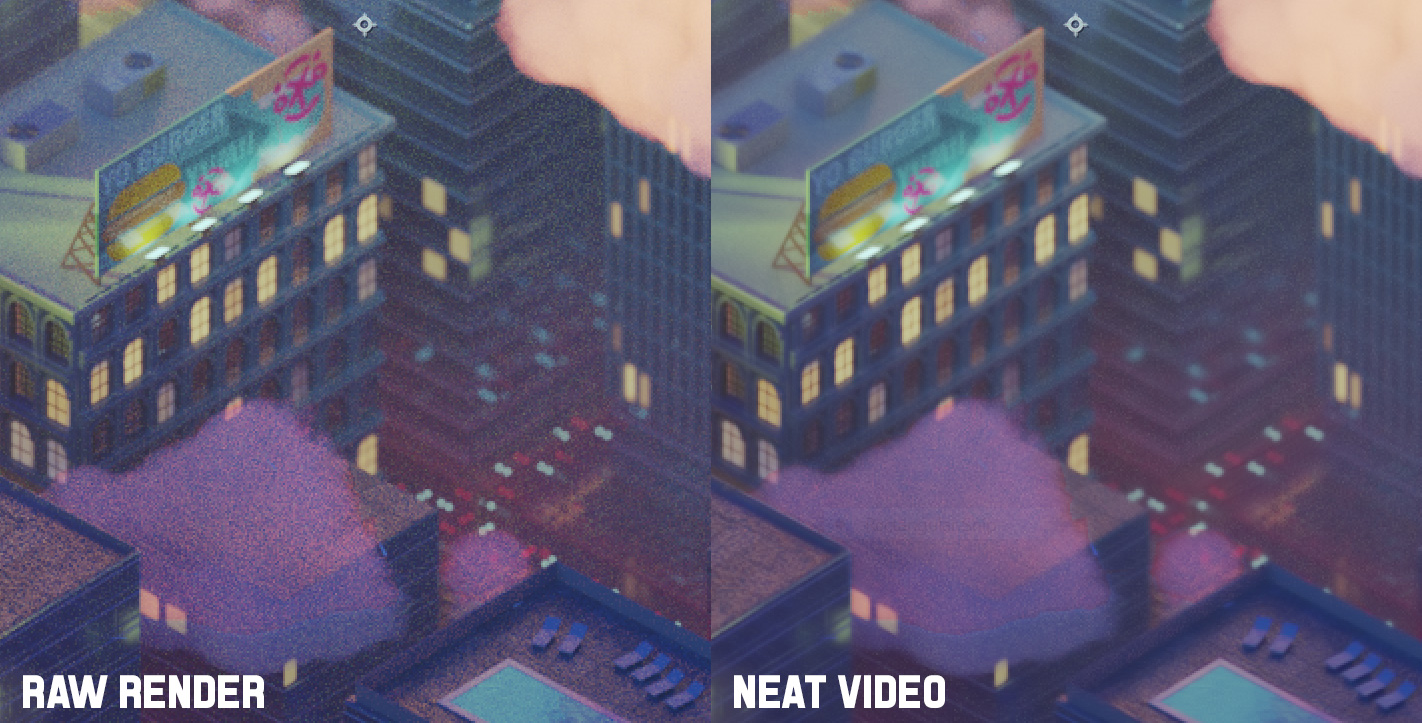
I also jumped into After Effects to take advantage of Neat Video’s noise reduction as, although the city scene had 1000 samples thrown at it, it was still very noisy, due to not being able to use the denoiser with Sheepit.
I was happy enough with the results and exported Quicktime Animation codec files for editing.
Sound
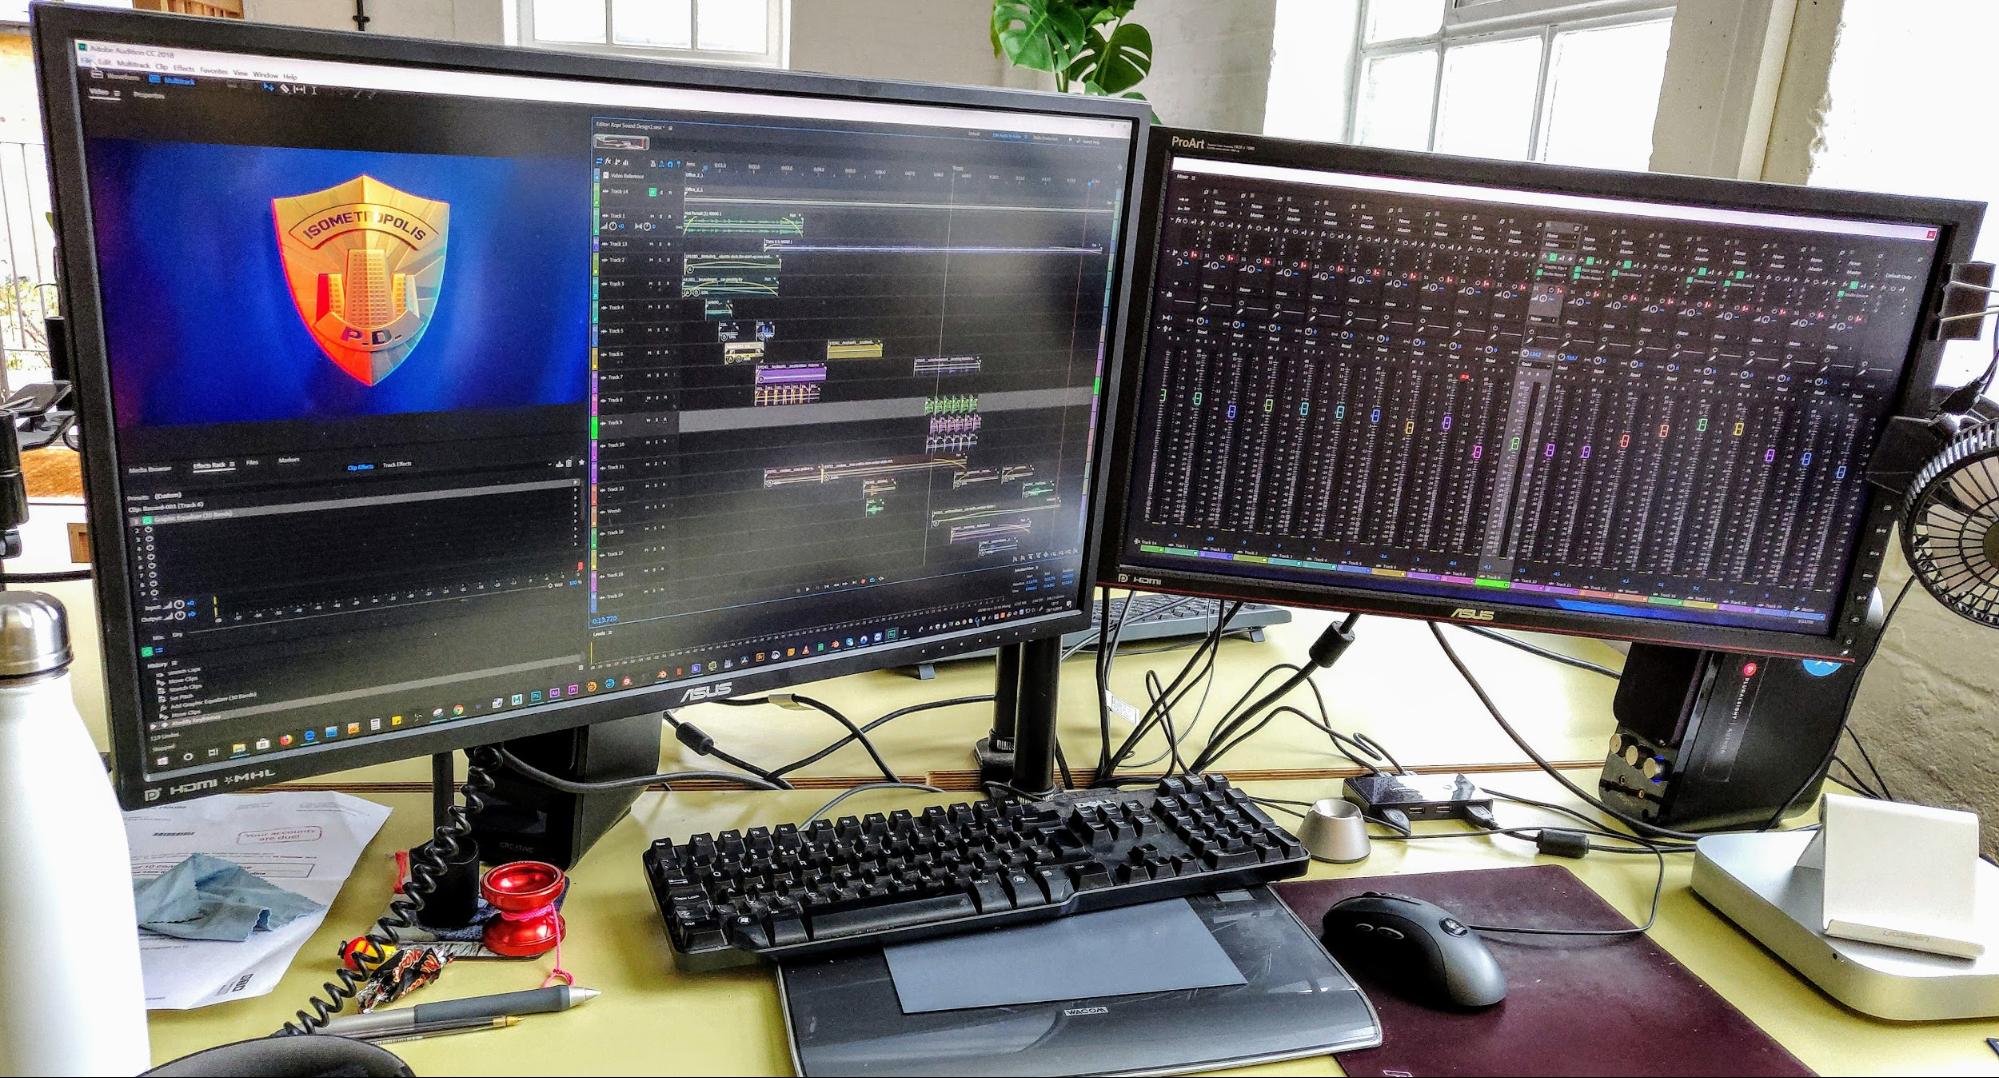
I browsed through incompetech.com’s amazing royalty free library of music and freesound.org’s CC0 license sound effects. I exported a rough edit to Adobe Audition to layout and mix the sound effects. Mainly tweaking EQ’s to create some frequency separation and adding reverb to bed the sounds into the environments.
To Sum Up
As with most projects I feel like I’ve learnt a huge amount about different practices. Being still relatively new to Blender, although not to CG, I find Blender workflows to be very refreshing and, after getting a few of the shortcuts down, found myself being able to produce things very quickly.
As I was working on this project around other client work I also got into the habit of stopping work at a point where it was very easy or enjoyable to pick back up again, in an attempt to not have it drop by the wayside.
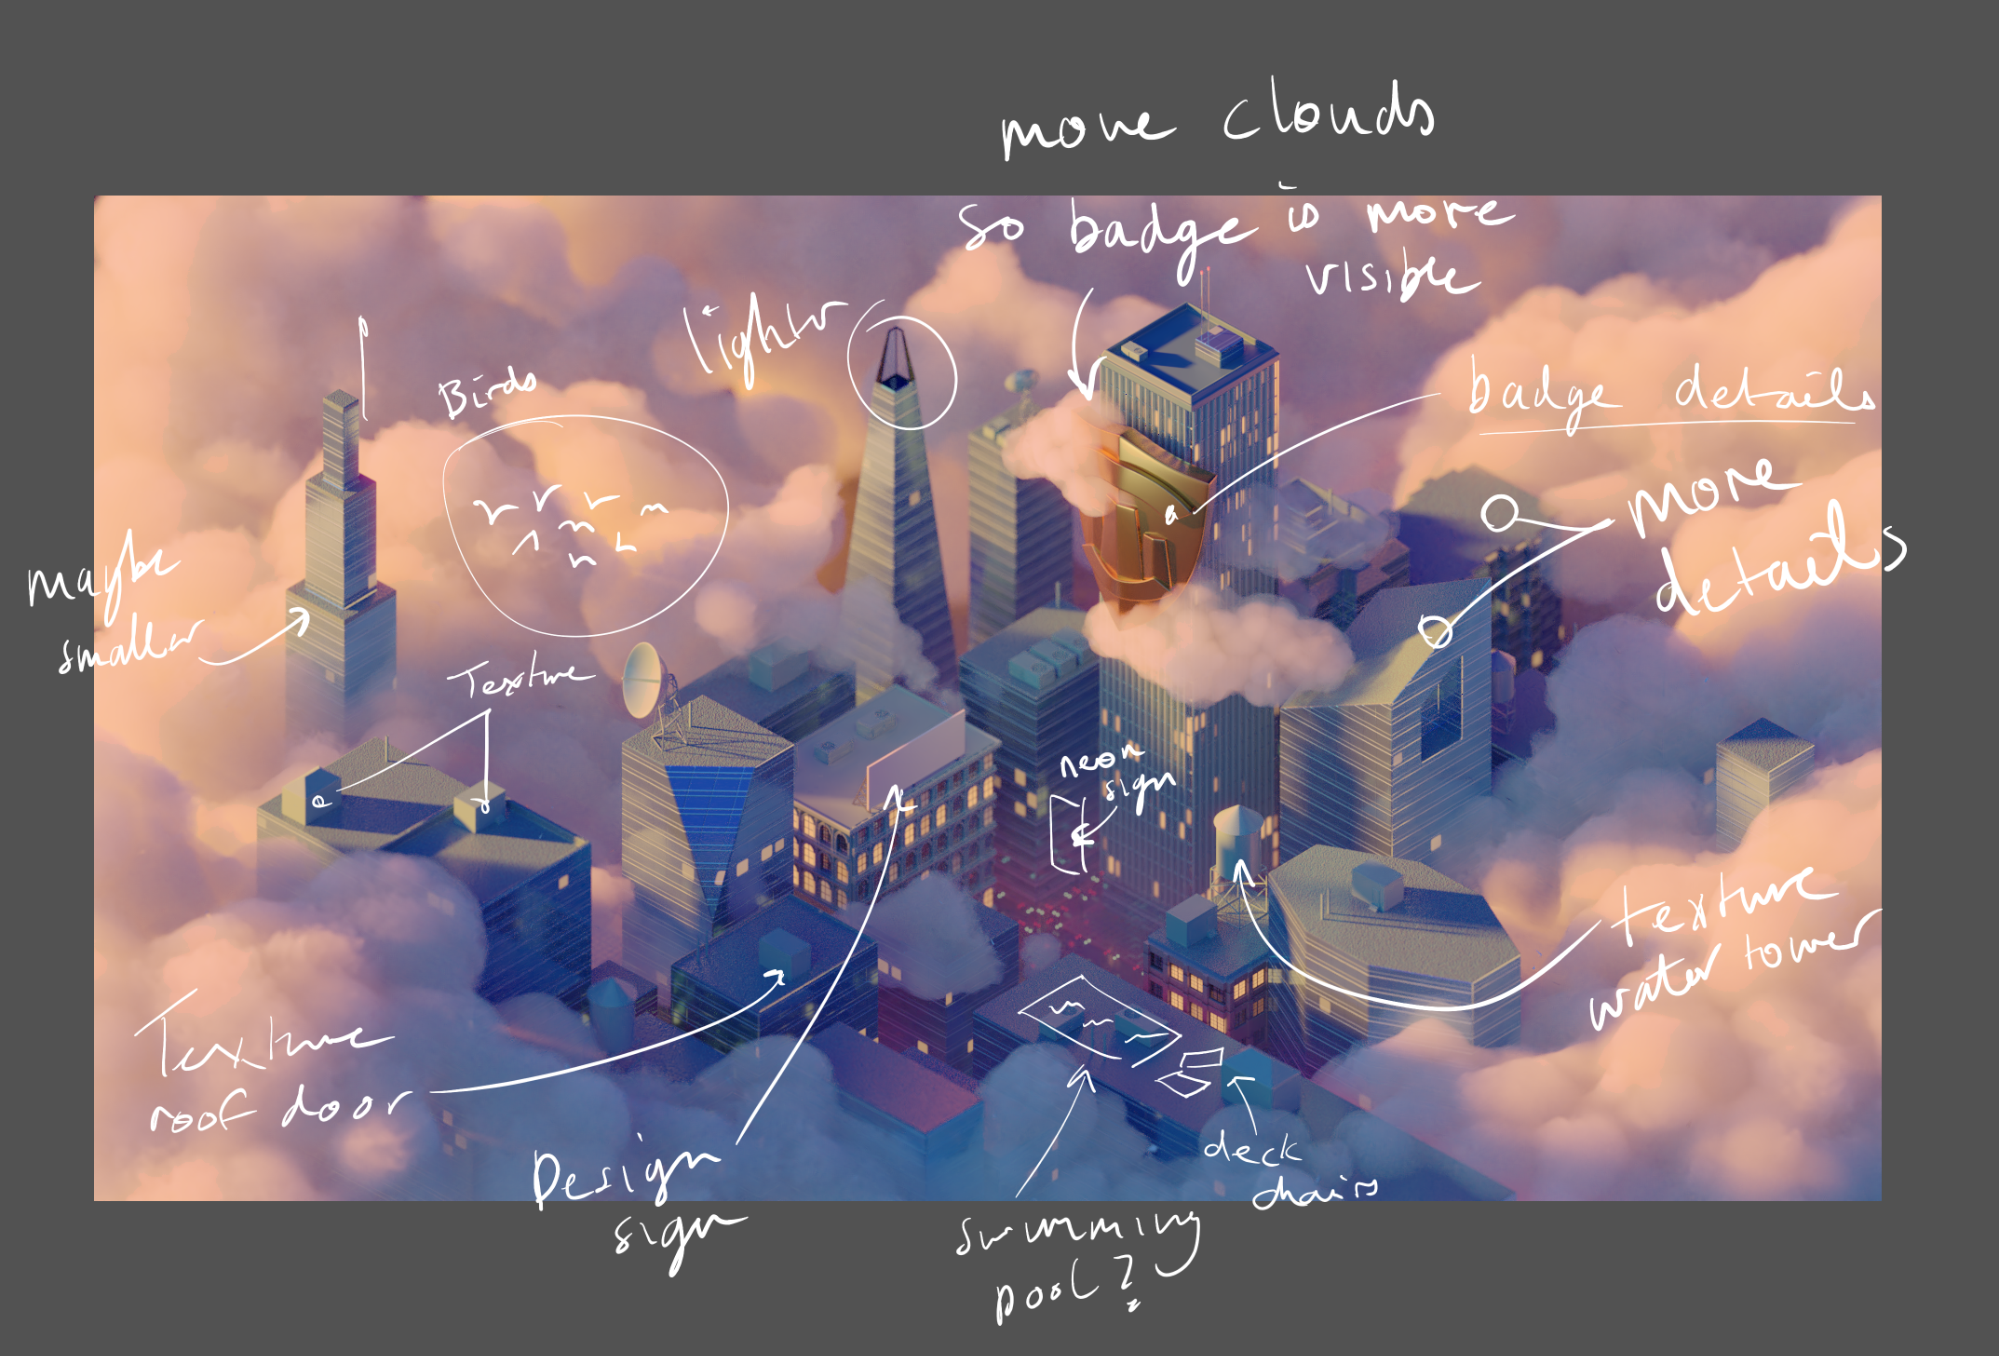
I also found playing ‘the client’ and exporting a render, sleeping on it and then marking up amends, to be very helpful, as well as sketching out everything prior to starting modelling and layout, giving yourself a little brief to work from and stick to.
I’ve added more making of stills in this flickr album:

About the Author
 Louis du Mont, Animation Director at We Are Formation


Might try eevee just for the volumetrics for speed improvement. seen a demo somewhere where cycles was used for everything except volumetrics, and eevee used for that. Cut down tremendously on render time and result basically the same looking
Btw, I found the example, which is in this 2.8 overview video by Aidy. It’s about 4 minutes in
https://www.youtube.com/watch?v=XoyEjutFR1U
Thanks Louis! I greatly enjoyed reading about your process and I love this ‘chunky’ visual style.
This is great, please keep it going!!
Stunning work, really nice to see this work and a really proper workflow given. PS you got some badass work on your Vimeo!
really cool! I love the design, the animation style. Also, thank you for sharing the behind the scene!!!
Mathias.
woooww excelent work!!!
This is awesome,I am pretty new to blender,I wish you could make paid tutorial series on how make this