INTRODUCTION
Hey everyone, my name is Beau Chapman, and I am a 19-year-old 3D artist based in Austin, Texas. Blender has been my hobby since I was 10 years old when I was first introduced to version 2.70 of the software. Ever since then, I've been working on different projects and honing my artistic style.
Currently, I have no plans to work in the industry and hope to keep 3D as a tool I can utilize to express myself in a productive way.
INSPIRATION
My style has been under development for the last 9 years and will continue to change over time. Right now, however, I draw lots of inspiration from relaxing compositions, colors, and settings. Many times, this results in a cell-shaded/non-photorealistic scene, and there is definitely a strong influence from Studio Ghibli and the lo-fi style (examples below).

(Lo-fi piece by Andrea Jovanovic)
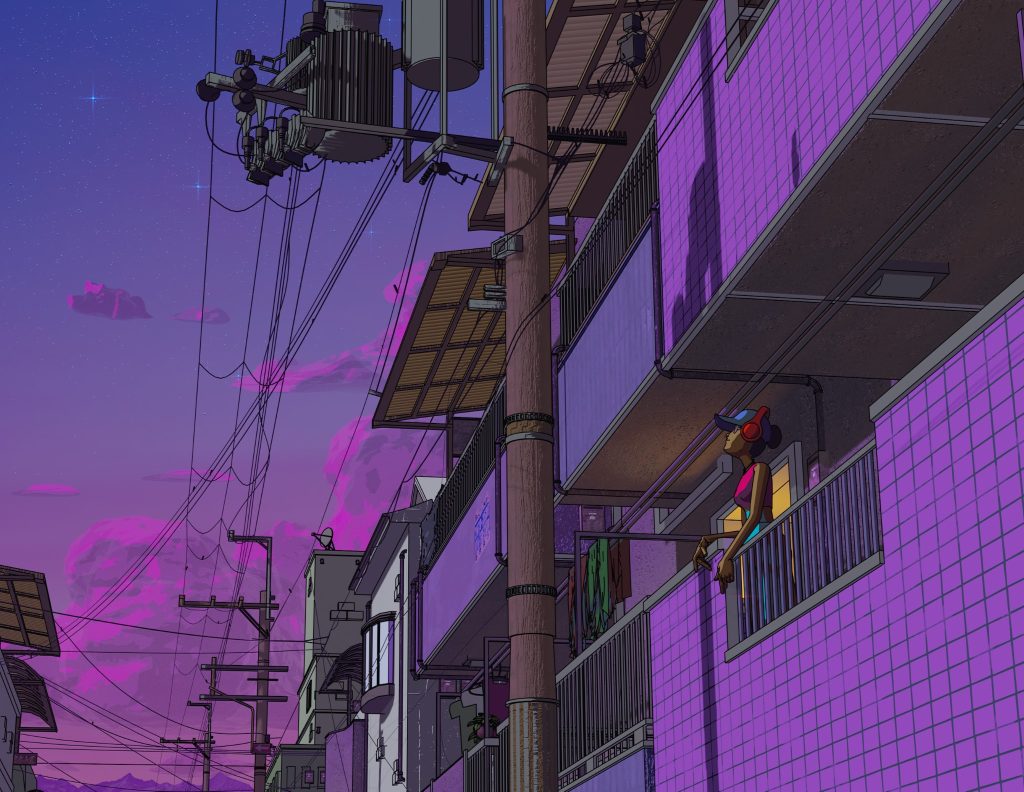
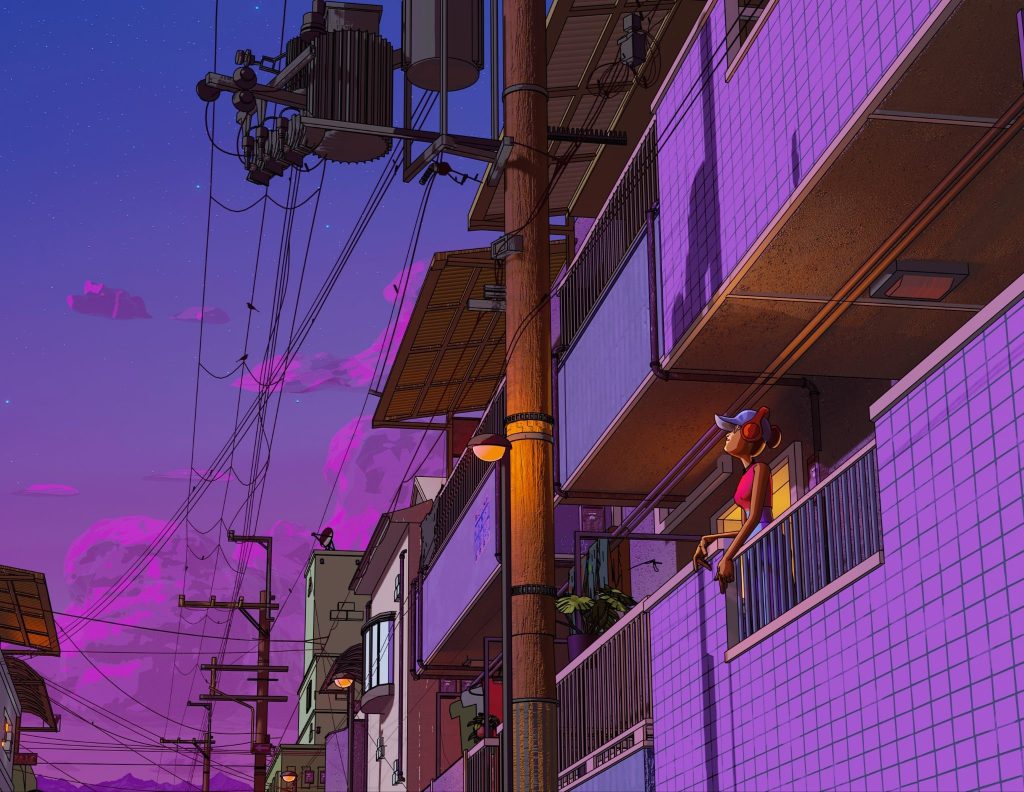
This particular scene was done for a group at my university that gathers artists to develop works around a specific theme and then sells prints of those works in support of a non-profit. The theme for this work was "Nurture the Soul," and my goal was to depict a moment of peaceful solitude.
PROCESS
Almost all of the work for this scene was done in Blender. The first thing I did after coming up with the idea for my scene was to look at color schemes. I decided on the popular pink, purple, and orange tones you see in a lot of lo-fi works.
REFERENCES
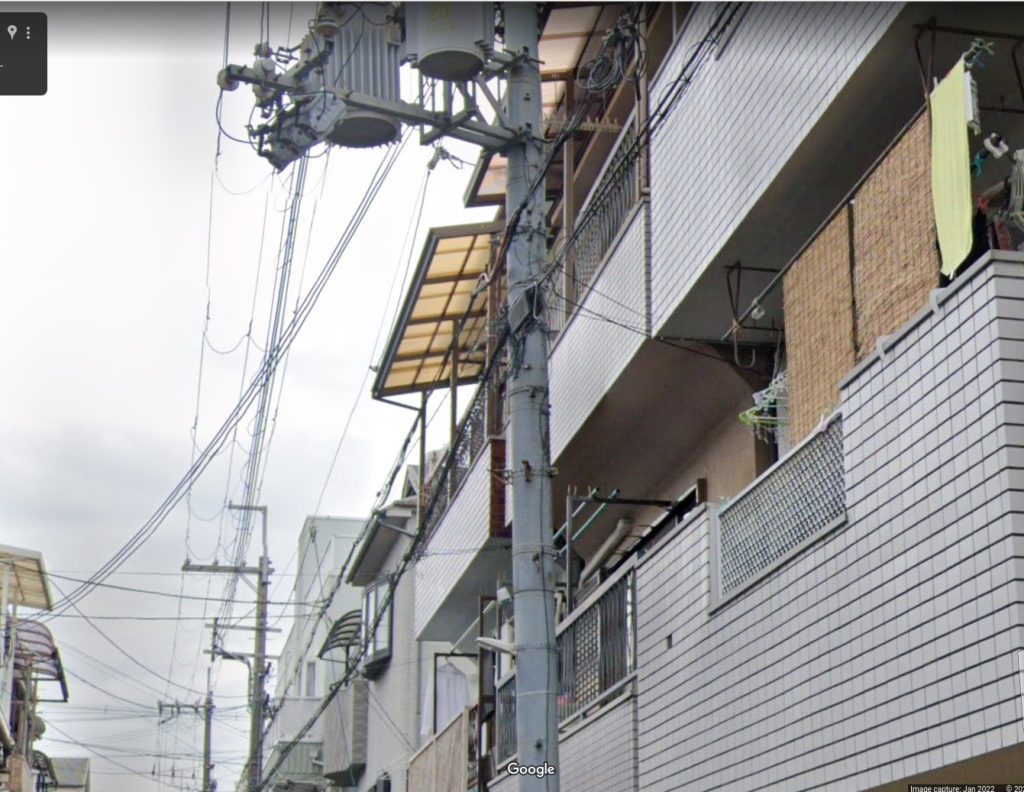
After that, I needed to decide on a location, a step I would often get stuck on in the past. It's immensely difficult to conjure up a location out of thin air, and I often struggle with blending reference images to create a single scene. But luckily, there is no shortage of locations here on Earth, and with Google Street View, you can almost always find something that fits your desires.
I wanted to implement Japanese architecture, so I dropped down into Osaka, Japan, and started looking through the streets and alleyways, trying to find a location I liked. Eventually, I found the angle above.
MODELING
Now I was almost ready to begin modeling this scene. The issue was that it's nearly impossible to line up Blender's camera with this exact angle, otherwise, you'd be stuck tweaking focal lengths and rotations for hours. I used the free software FSpy to help figure out all these calculations for me.
Simply input some axes and focal points, and your work is done. Blender has an external add-on that allows you to import FSpy extensions and set up the orientation and focal lengths for you, so this is what I did.
Overall, this process saves many hours, and I would recommend it if you are attempting to model off of a reference image in this manner. I began modeling by blocking out the main shapes.
Just using basic cubes, cylinders, and spheres to generate meshes that I would use to help define my color tones and lighting scheme. Nothing too advanced here, it's as simple as it looks.
MATERIAL
This point in development is usually reserved for setting up lighting. Lighting is one of, if not the most important parts of creating a scene. It can be a difference-maker and will fix sloppy modeling and materials.
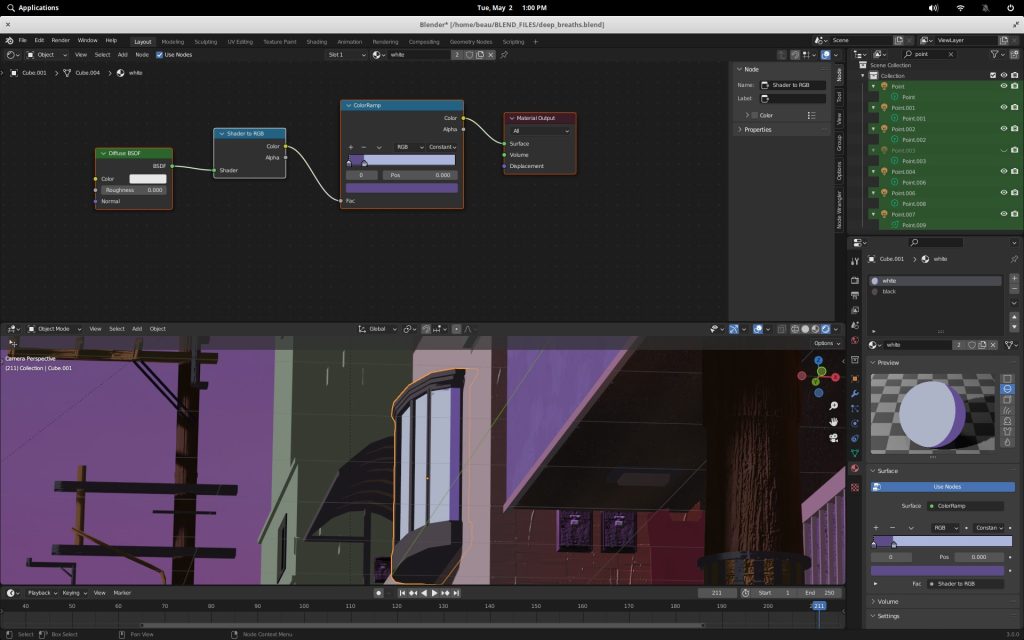
However, the technique I'm using for material renders most of my lighting choices incorrectly. Cell shading in Blender EEVEE effectively decides the lighting for you, though it requires some light source for it to function properly. Here's the simple node setup for the white colors.
The lighting itself isn't actually purple and blue, but the material is forced to those color tones regardless. The Color Ramp node decides the threshold for which parts of a mesh will be purple (areas that receive less direct light) and which will be blue (areas that receive more). Setting the ramp type to 'constant' makes this a hard cutoff and creates that cell-shaded look.
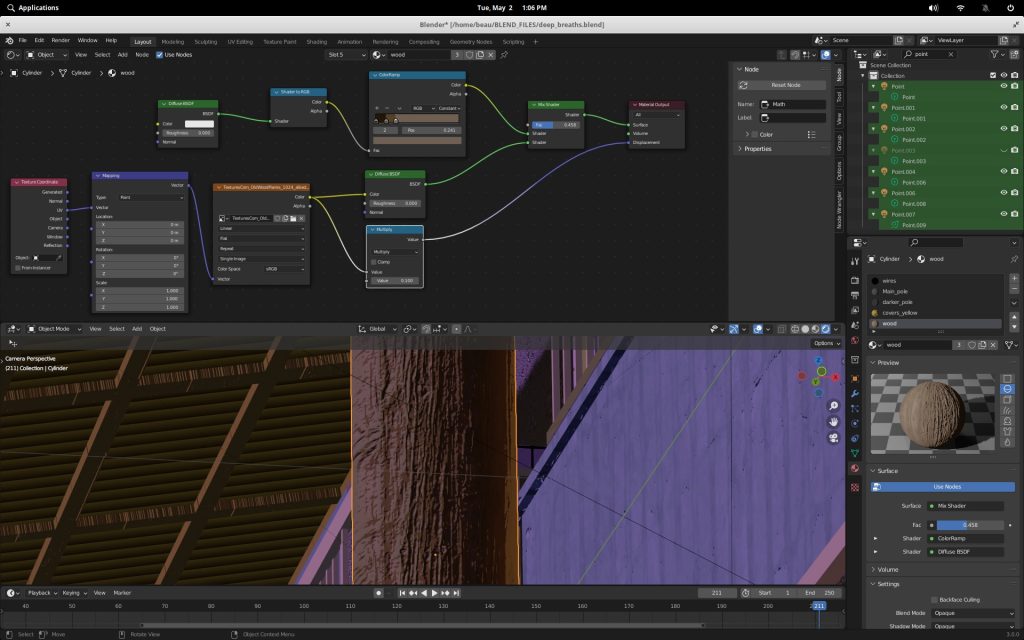
It's important to note that each material should be tweaked to your specifications since you can't rely on lighting and shadow calculations to be done for you. Here is an example of one of the slightly more complex materials with the same concept.
You can see I added more dimensions to the cell shading, and I mixed it with a diffuse node to create some more noticeable lighting interaction later on when I add street lamps. This is the same technique used on the main character to create highlights on the face and hair. Striking the balance between completely cell-shaded and realism is hard and is something I'm still working to perfect.
LIGHTING
Lighting didn't need to be complicated for this scene as it was essentially being 'faked'. However, there are some important things to get right.
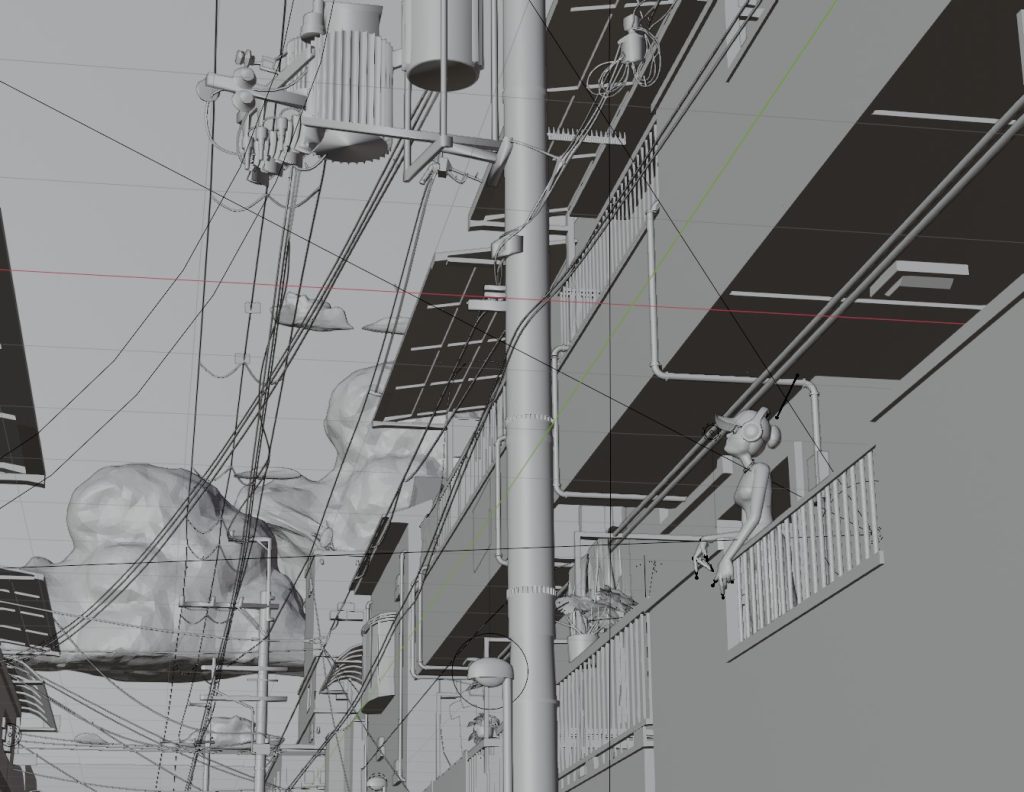
Here is the scene with complete cell shading, and no light sources allowed to interact.
You can see it looks dull and dark. Not to worry, I can add in some lighting and diffuse effects to the character and to the poles to spice it up.
This was an older version of the scene, and I toned it down for the final cut, but you can see the effect that letting some light bounce off the objects in the scene will have while still maintaining its cell-shaded feel. The lights in this scene are just four point lamps (on the street lights and in the doorway) and a spot lamp (placed behind the character for the rim lighting), but they make a world of difference.
With the lighting and basic materials set up, I can add the character and fill the scene with details. A quick overview of some basic elements is summarized below.
CLOUDS
The clouds are sculpted spheres using the snake hook tool to get the shape I wanted, and using cell shading for the materials.
WIRES
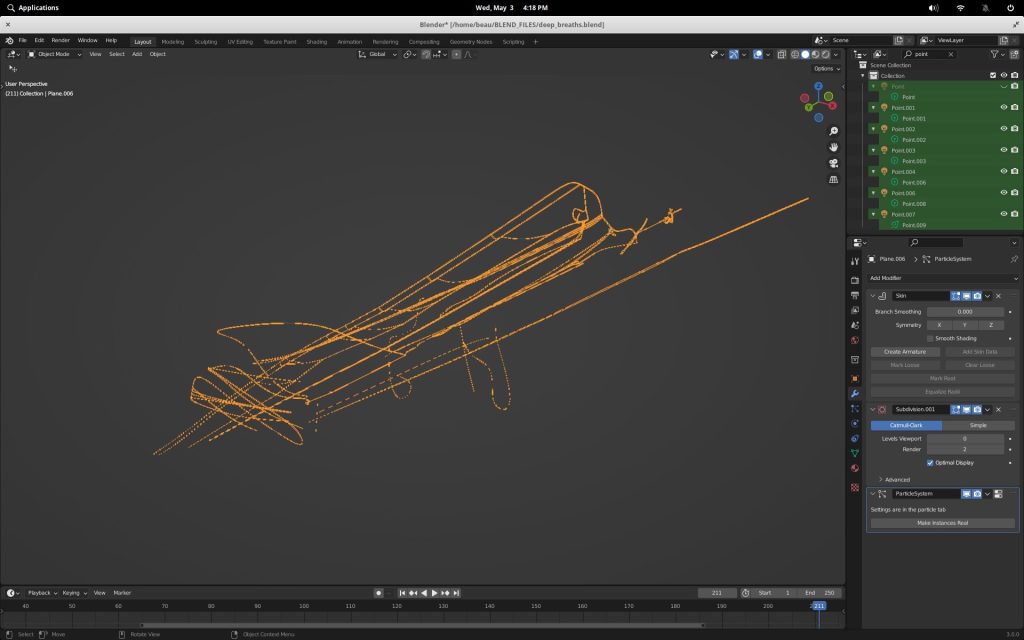
The wires were added by adding in a single vertex with a skin modifier and continuously extruding along the lines in the reference image.
The rest of the small details were added using basic shapes. It was important to add just enough complexity that the scene was interesting to look at, but not too much that it would be overwhelming. It's crucial for composition purposes that one leaves decently sized empty spaces for the eye to rest, which is why I opted to leave a lot of the walls blank. Positioning detail throughout a scene is just as important as nailing the quantity of detail.
CHARACTER
The character was edited from a base mesh downloaded from Mixamo. They provide great rigged characters that are easy to pose, but generally don't fit my exact desires, so I edit the mesh quite heavily.
After all the pieces were in place, I rendered, did some simple color correction, and called it done!
RENDER - Deep Breaths
Thank you so much for reading this. I hope you learned something useful!
Have a nice day!
About the Artist
Beau Chapman, a 3D artist in Austin, TX. He is currently a student at the University of Texas at Austin.


