
INTRODUCTION
My name is Jeremy Andzembe Diagne, and I'm a 3D character artist from Kyiv, Ukraine. I always loved drawing when I was a kid. I drew using traditional and digital methods, but my father introduced me to 3D graphics when I was 19 years old, and it was love at first sight. He changed my life!
My first 3D program was Blender version 2.49, and I was self-taught when there weren't as many tutorials on YouTube as there are now. I am self-taught and didn't take any classes to learn; this eventually taught me to look for solutions on my own. Now I work in the computer games industry, and my favorite tool for work is Blender.
INSPIRATION
My inspiration, of course, was the Netflix TV show "Arcane." I really liked Mel's character design and personality. The team at Riot did a really good job on her image, and I decided to try and re-imagine her with a little more realism.
It was important for me to give myself a new challenge and create a character from the world of Arcane besides Jinx, who is the most popular character. I wanted to combine all the knowledge and experience I had accumulated over time and create a character using new tools in Blender that I had mastered.
COMPUTER HARDWARE
Here is a little bit about my hardware,
I use a MSI GP76 Leopard laptop with an 11th gen Intel(R) Core i7-11800H 2.30GHZ processor, and an NVIDIA GeForce RTX 3080 with 8GB of GPU RAM. Additionally, I have 32GB of RAM.
TOOLS
I used ZBrush for sculpting and Substance Painter for texturing. Then, I used Blender for the rest, which includes micro detailing, grooming, UV editing, modeling, rendering, and compositing. I also used Photoshop to polish some renders.
REFERENCES
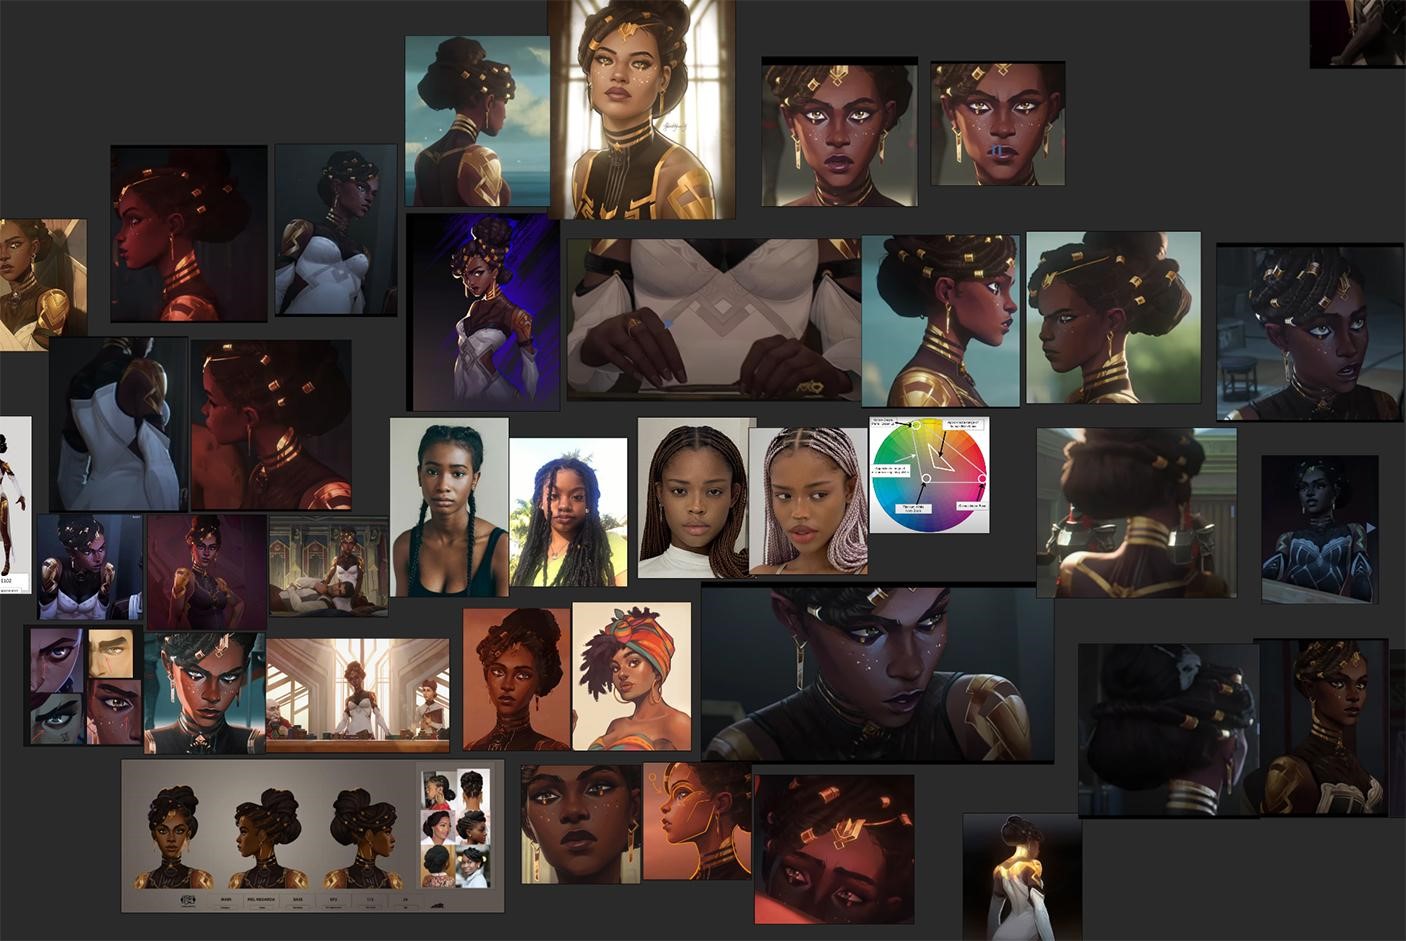
Work starts with collecting references. I searched for a lot of scenes with Mel and made prints from different angles and lighting, as well as freely available work by other artists. When you look at the film from a professional perspective, you start to notice many new details that you don't see when watching it normally.
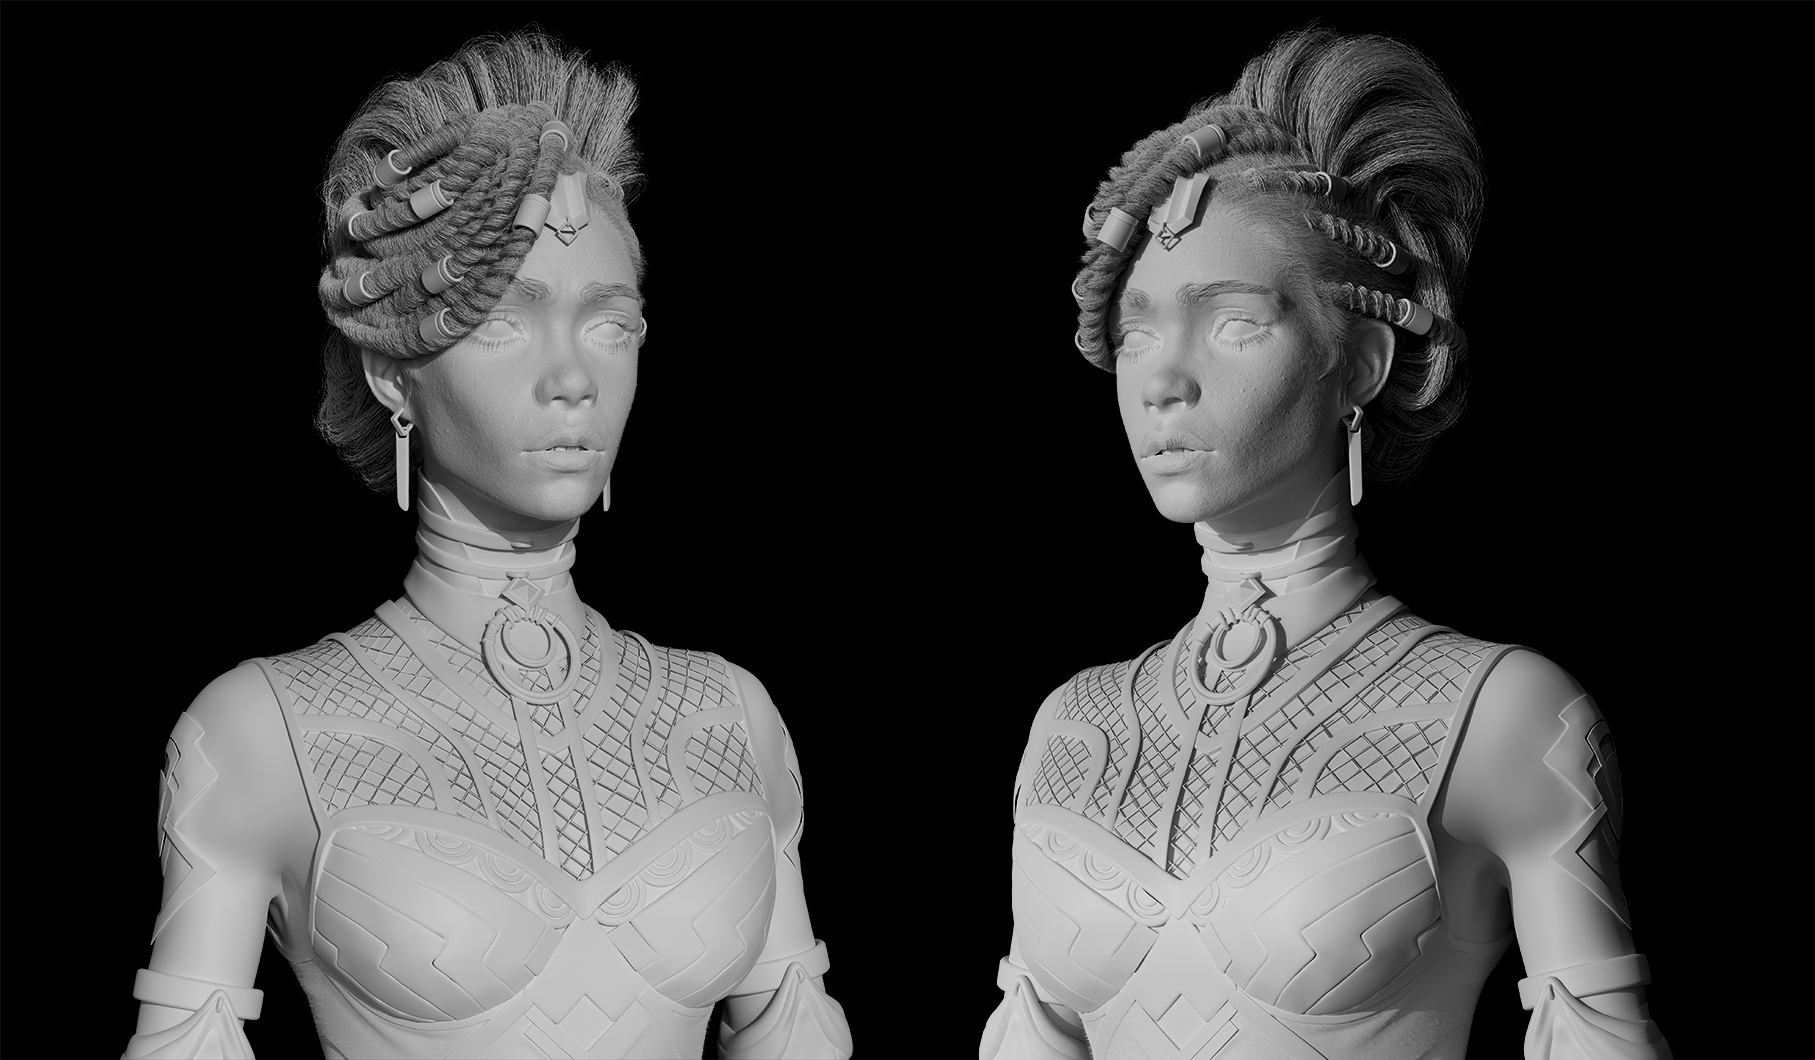
SCULPTING
For personal projects, I always like to do everything from scratch. I took a simple sphere as a basis and started with the head. It is important for me to get into character and follow the forms and shapes. I stick to the rule of going from general to specific.
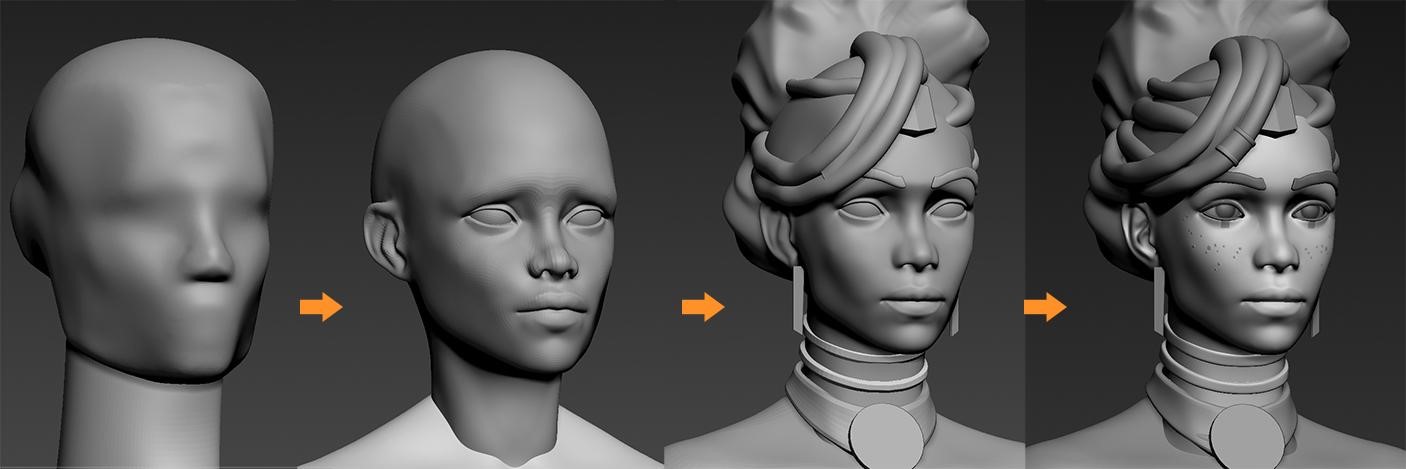
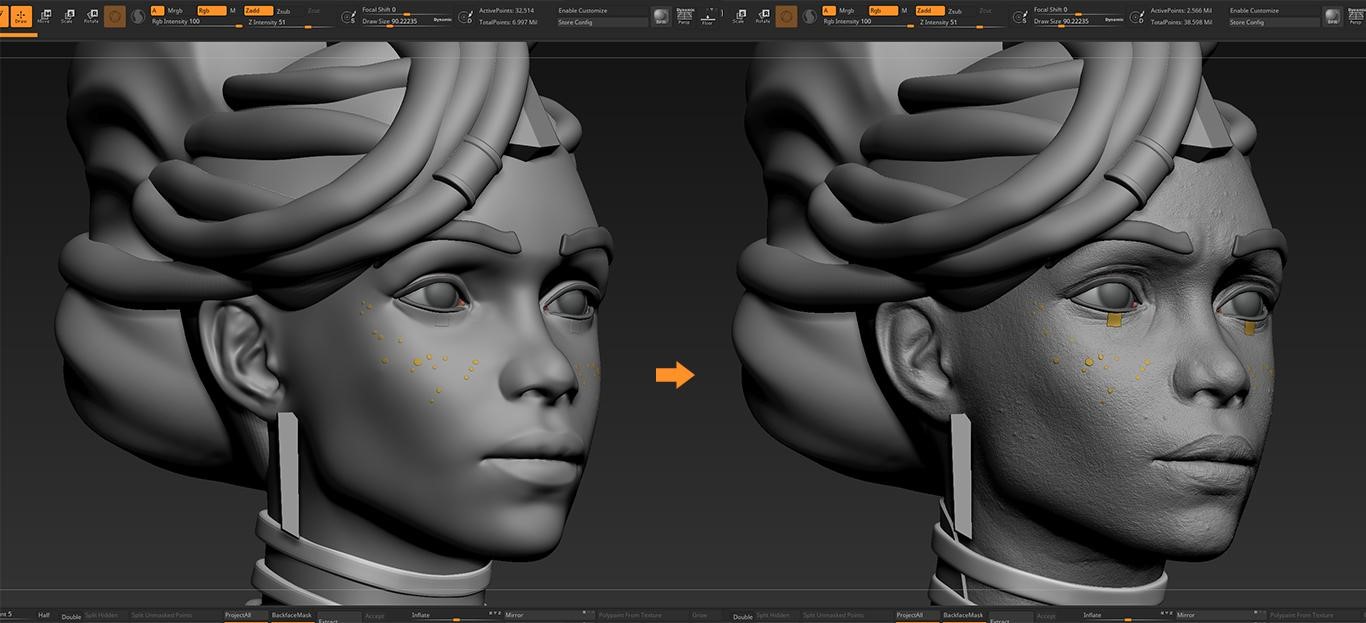
Once I understand the larger shapes I've created, then I can proceed to the details, which provide relief to the eyes. The next goal was to add wrinkles, pores, and micro details to the face. To avoid sculpting all the details by hand, I used the XYZ texture and projected it into Blender.
After working on the face in detail, I moved on to the rest of the body and clothing. I added color and appropriate materials to enhance the character's appearance.
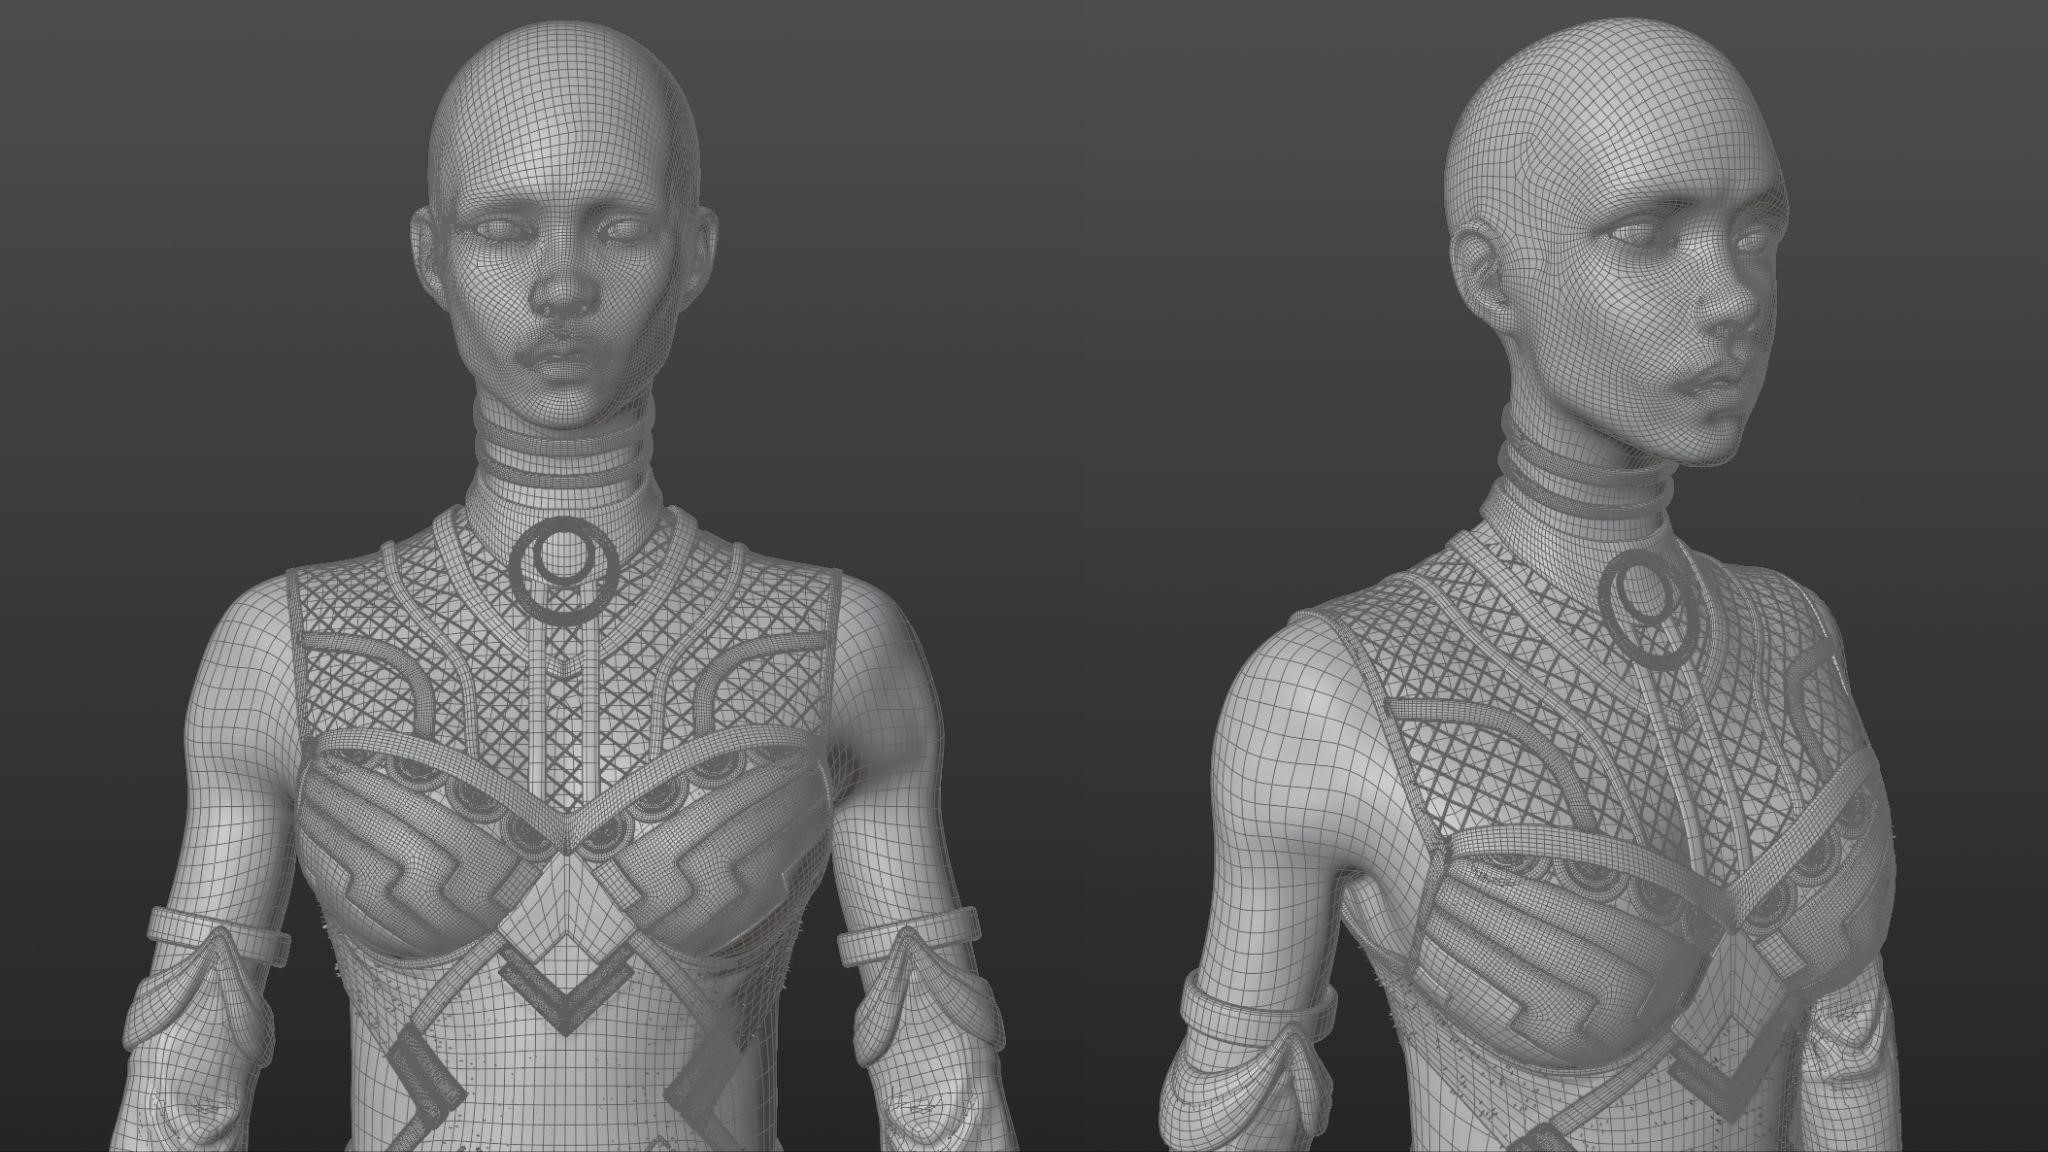
RETOPOLOGY
I used Blender for retopology, handling the entire outfit and accessories. I then completed the UV unwrapping process and added some subdivisions to retain certain details and transfer displacement maps to the cloth, preserving folds and wrinkles.
DETAILS
I exported the ZBrush display card for further work in Blender, which preserved all the character's details while reducing file size during the process.

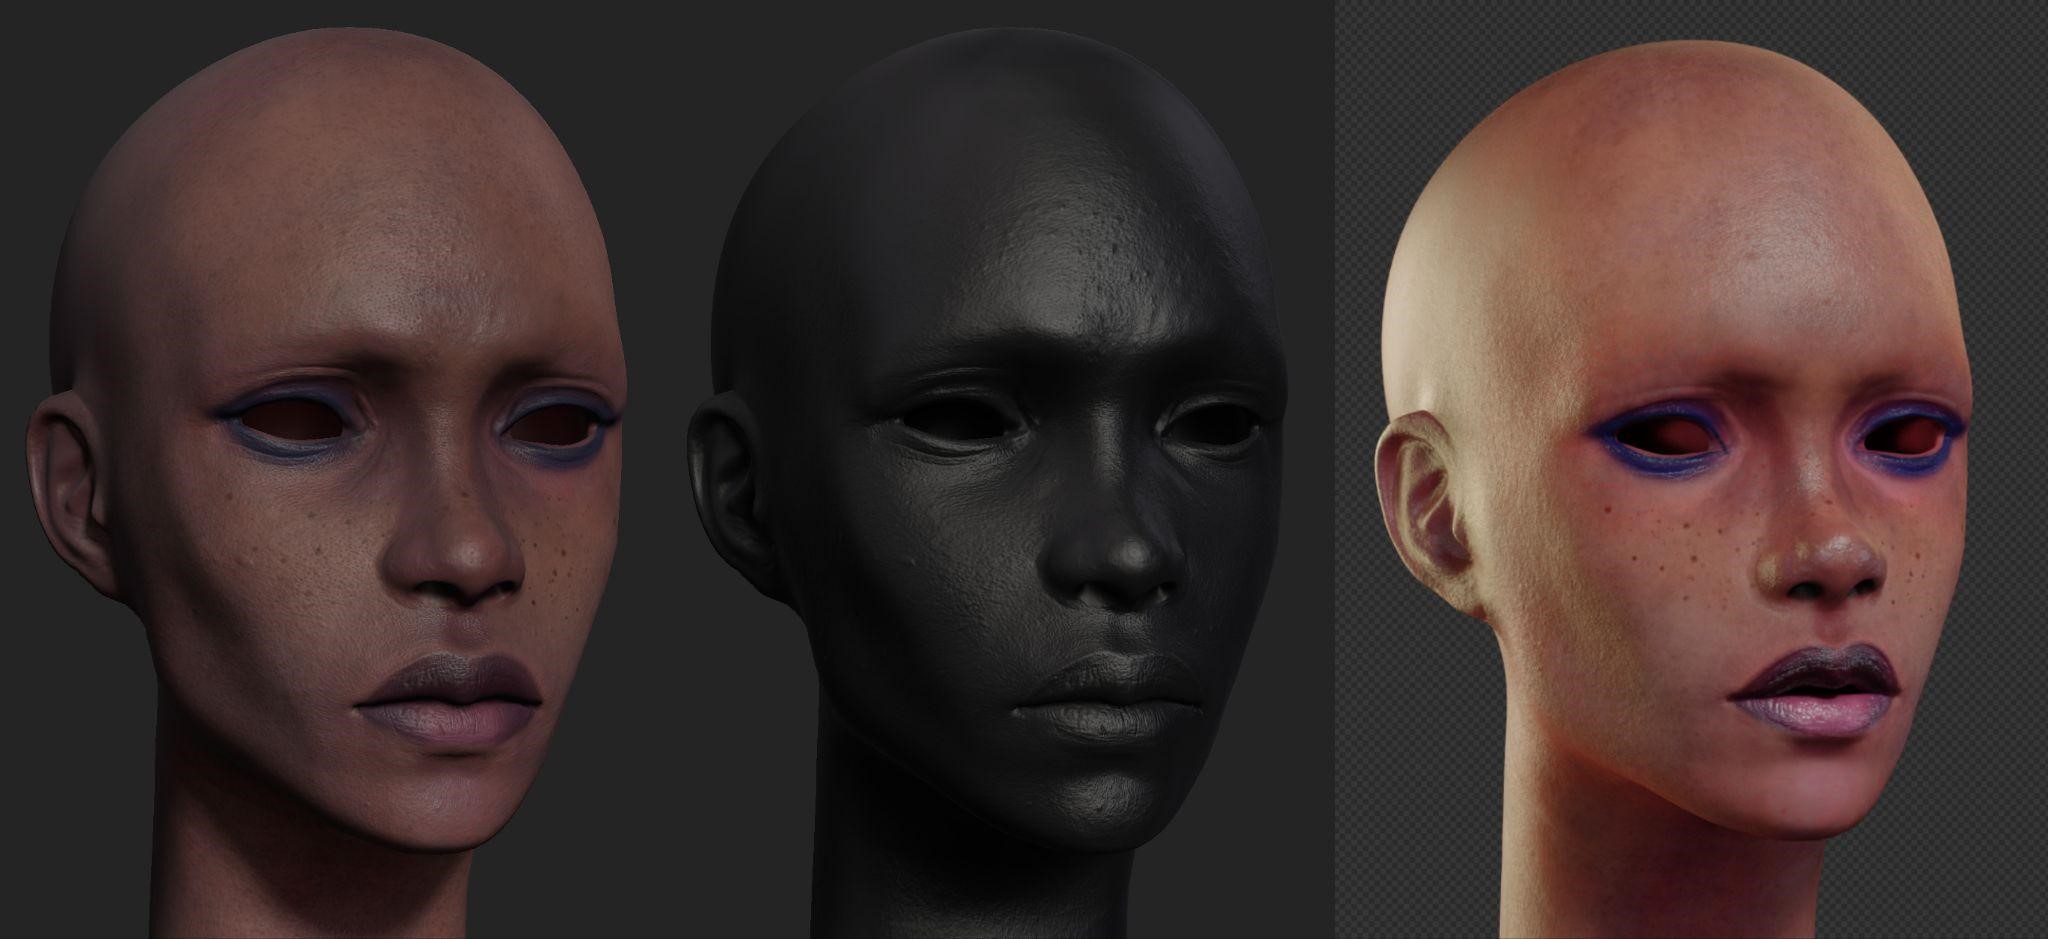
TEXTURES
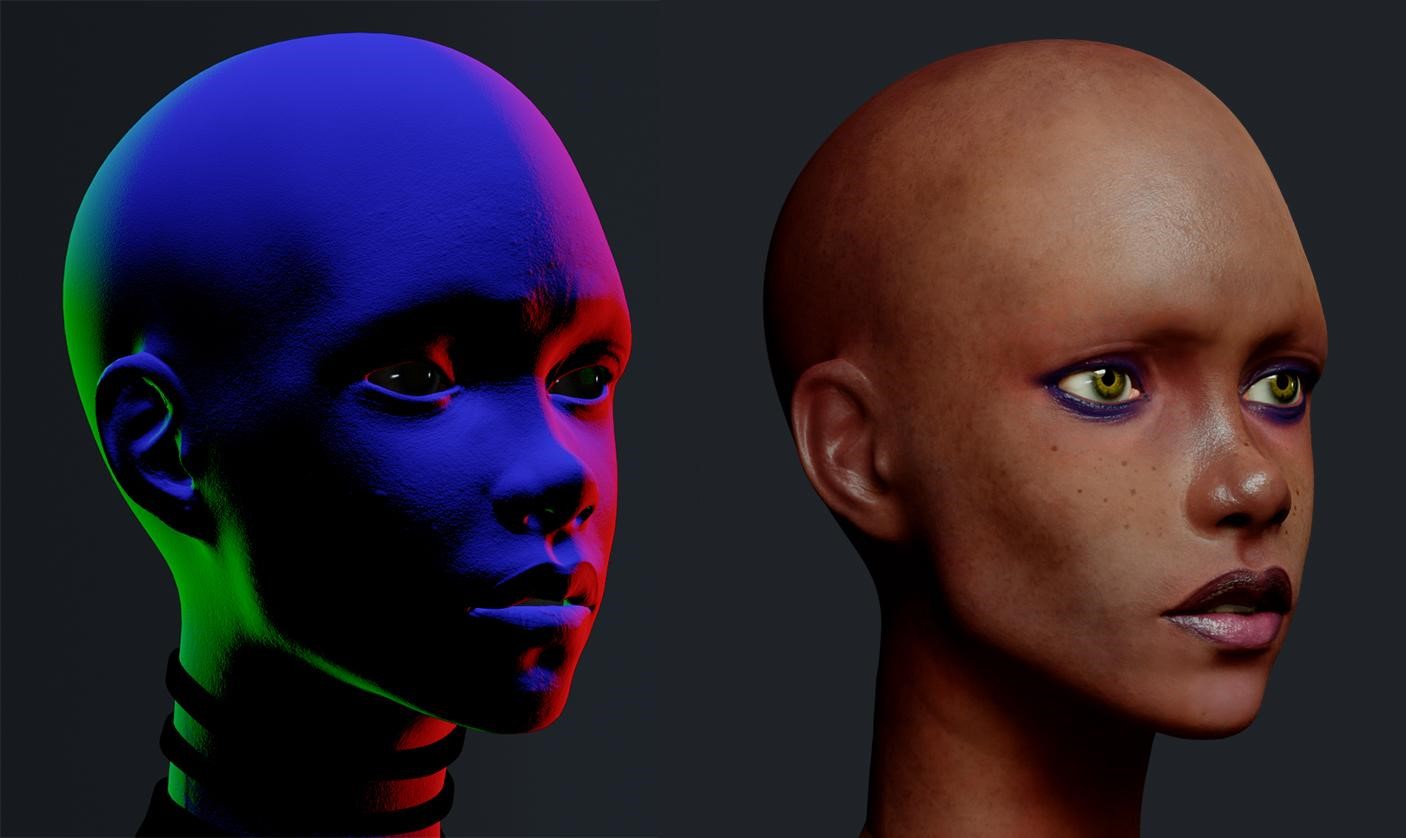
I created the skin and clothing textures in Substance Painter, where I also adjusted the roughness.

I painted the SSS Mask in Blender, which is essentially the scattering color map used for Subsurface Color in the Skin Shader.
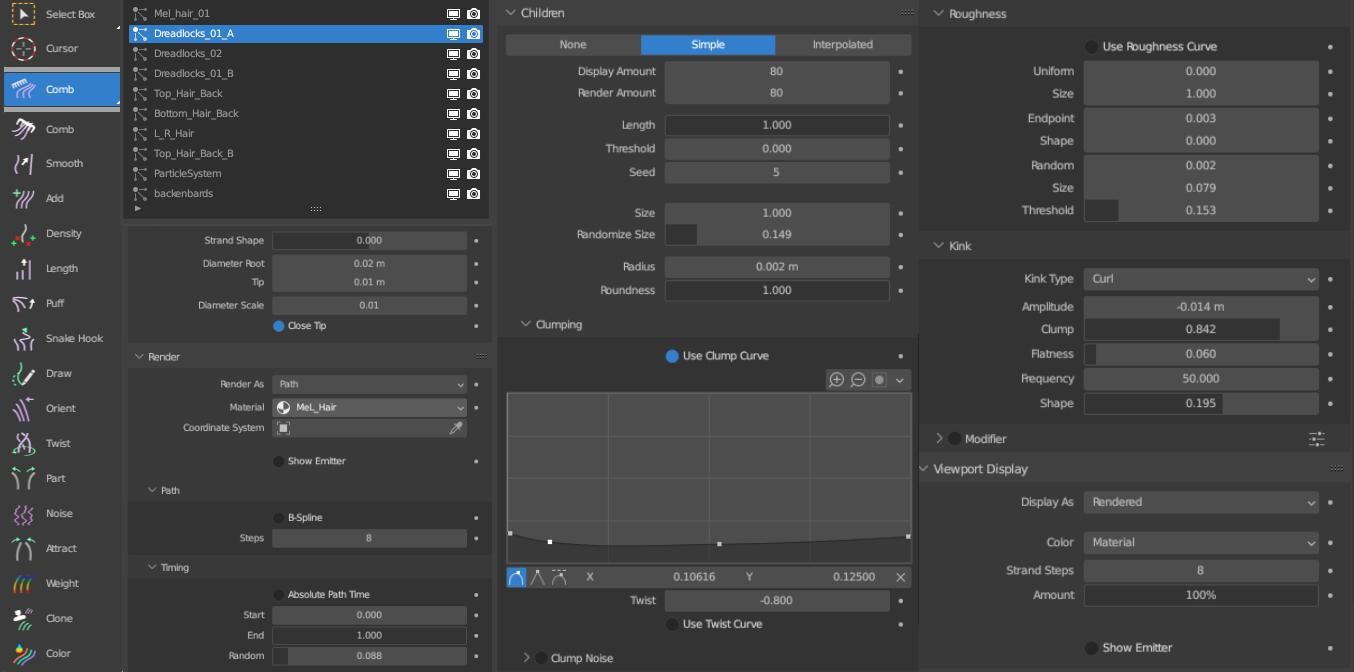
HAIR
I used the VFX Grace addon, which is a paid tool but significantly speeds up hair work. I utilized several tools within the addon for hair combing and styling.
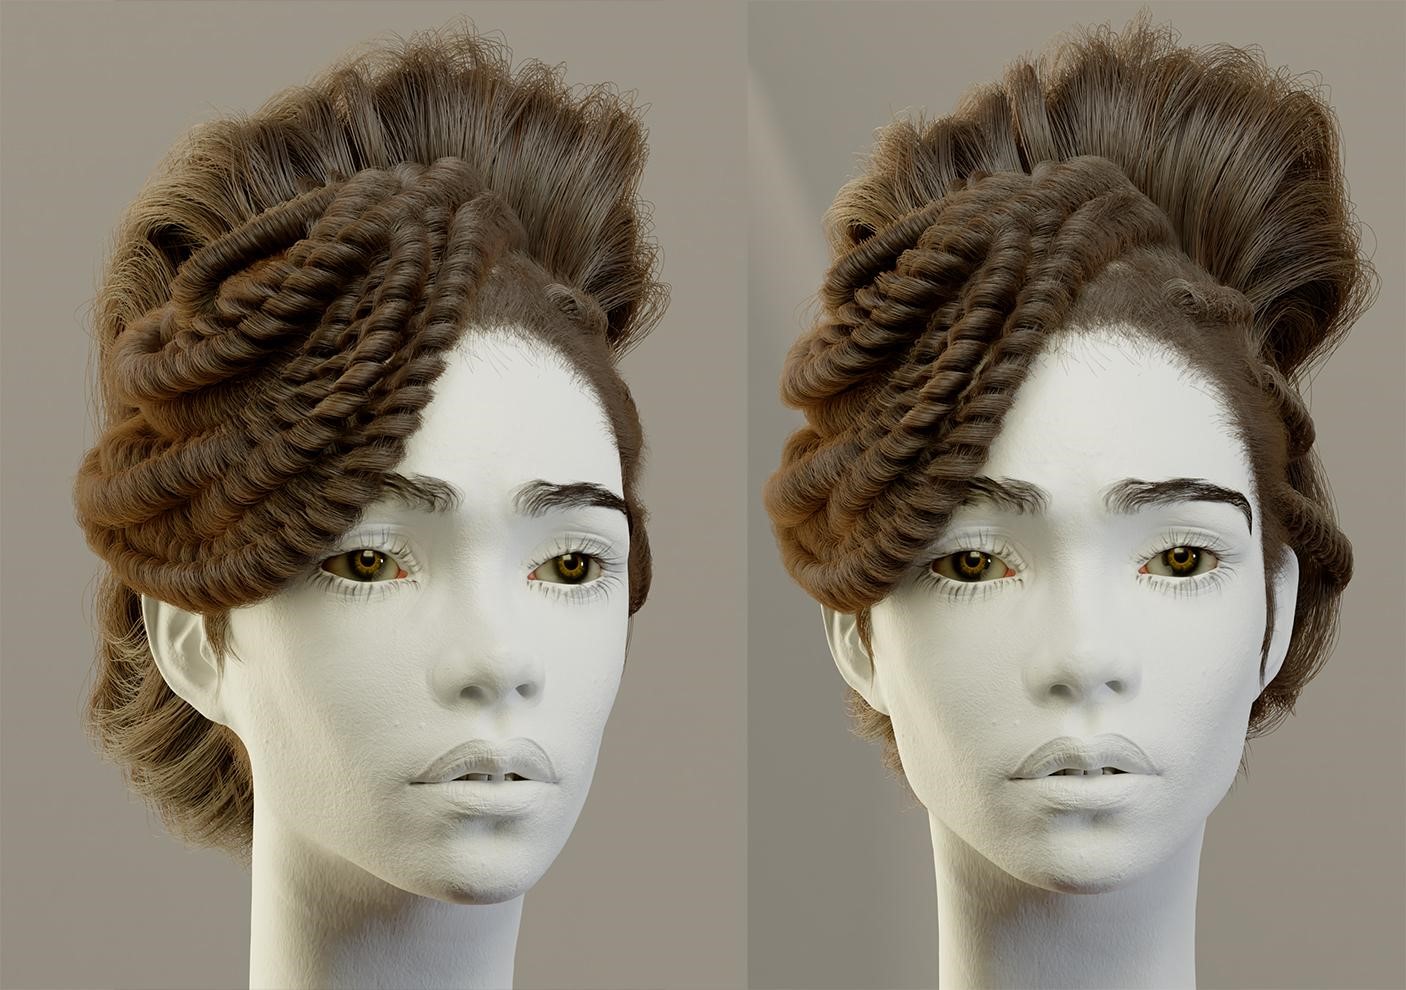
To maintain organization in my work, I created a slot for each type of hair in one modifier window, making it easier for me to switch between slots. As usual, I created a base for hair extensions, meaning I made a scalp and divided it into groups of hair bundles.
MATERIAL
For creating the materials, I decided to use the parametric method. I achieved color variations and pupil patterns for the eyes and skin using the node shader system.
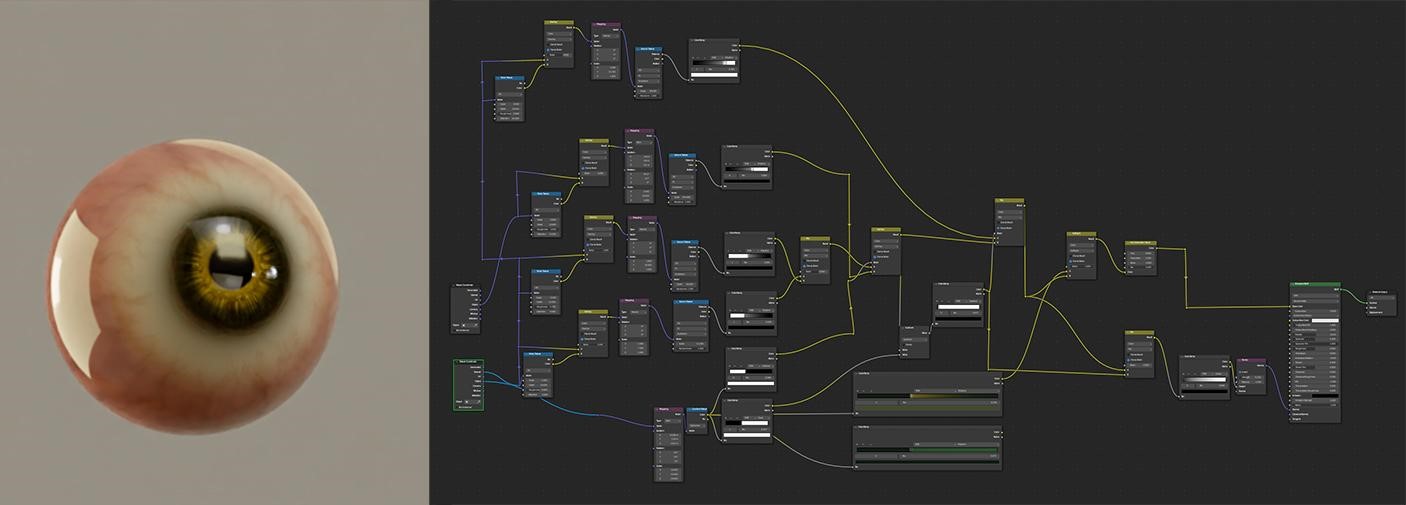
Additionally, I incorporated node normals to add pore details to the skin.
This allowed me to adjust the scale and intensity at any time.

LIGHTING
I used several lights for this scene and an HDRI with minimal intensity. To achieve soft shadows and light without harsh transitions, I combined an area light with a plane that had transparency and translucency applied. I prefer using multiple light sources for fill, draw, and contrast.
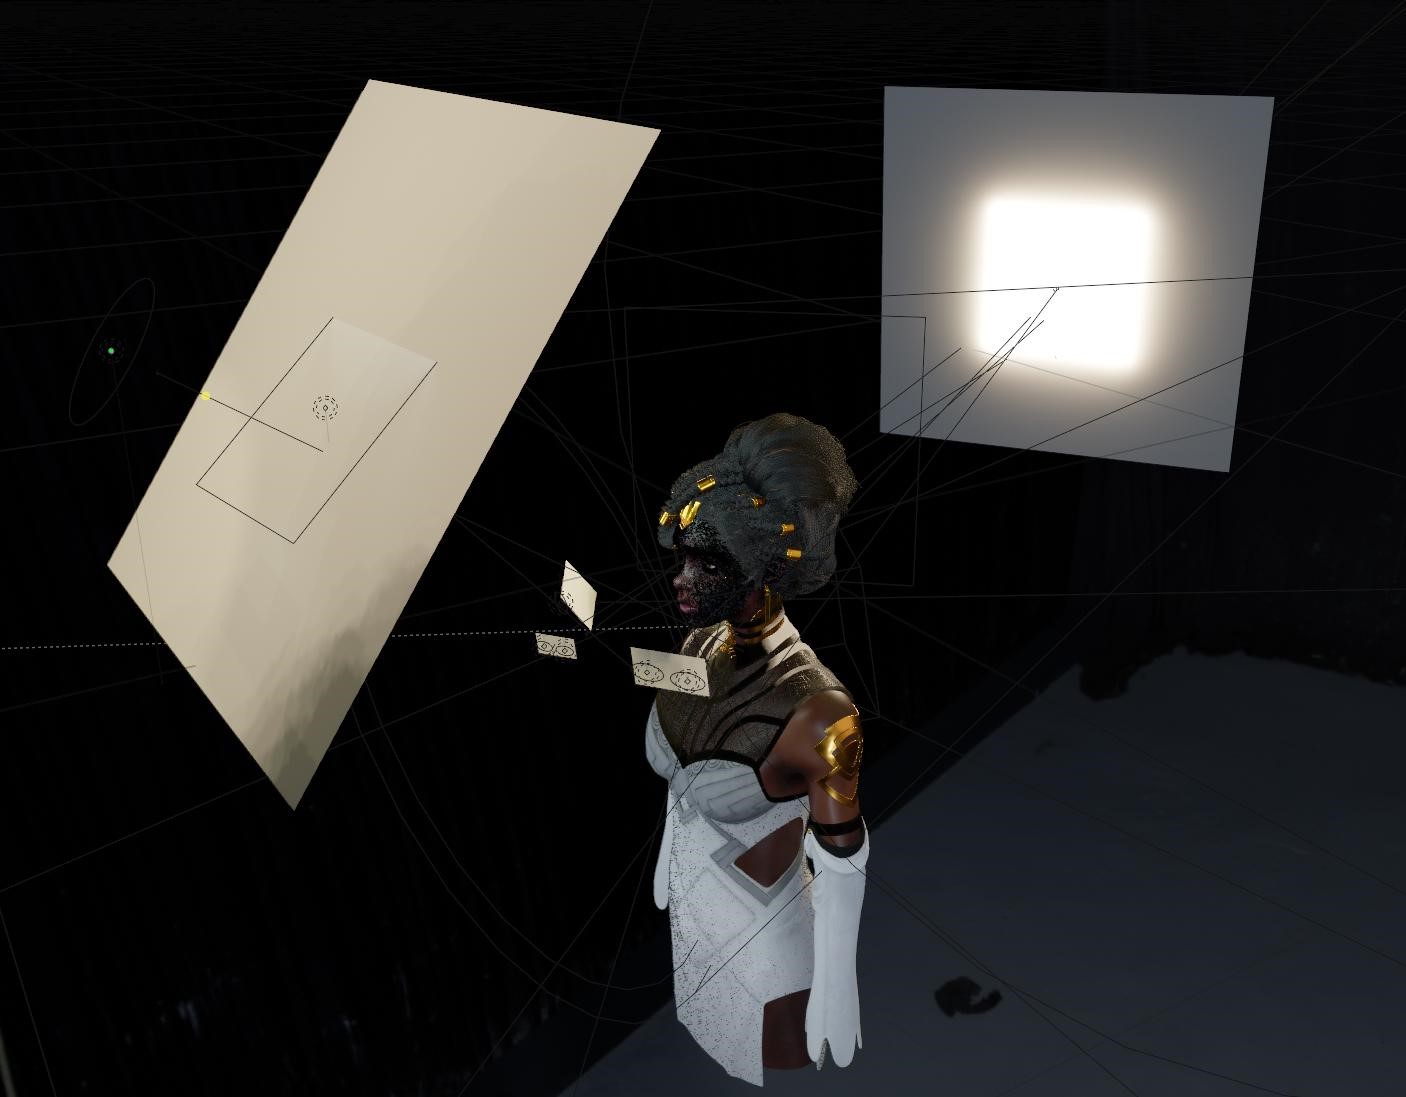
My photography skills came in handy for this project, and I was quite pleased with the result.
RENDERING
I rendered the scene in Blender's rendering engine, Cycles, with 1024 samples. I used the Optix denoiser and a resolution of 2048 x 2048, scaled to 250%. It took approximately 20-25 minutes on my 3080 GPU.
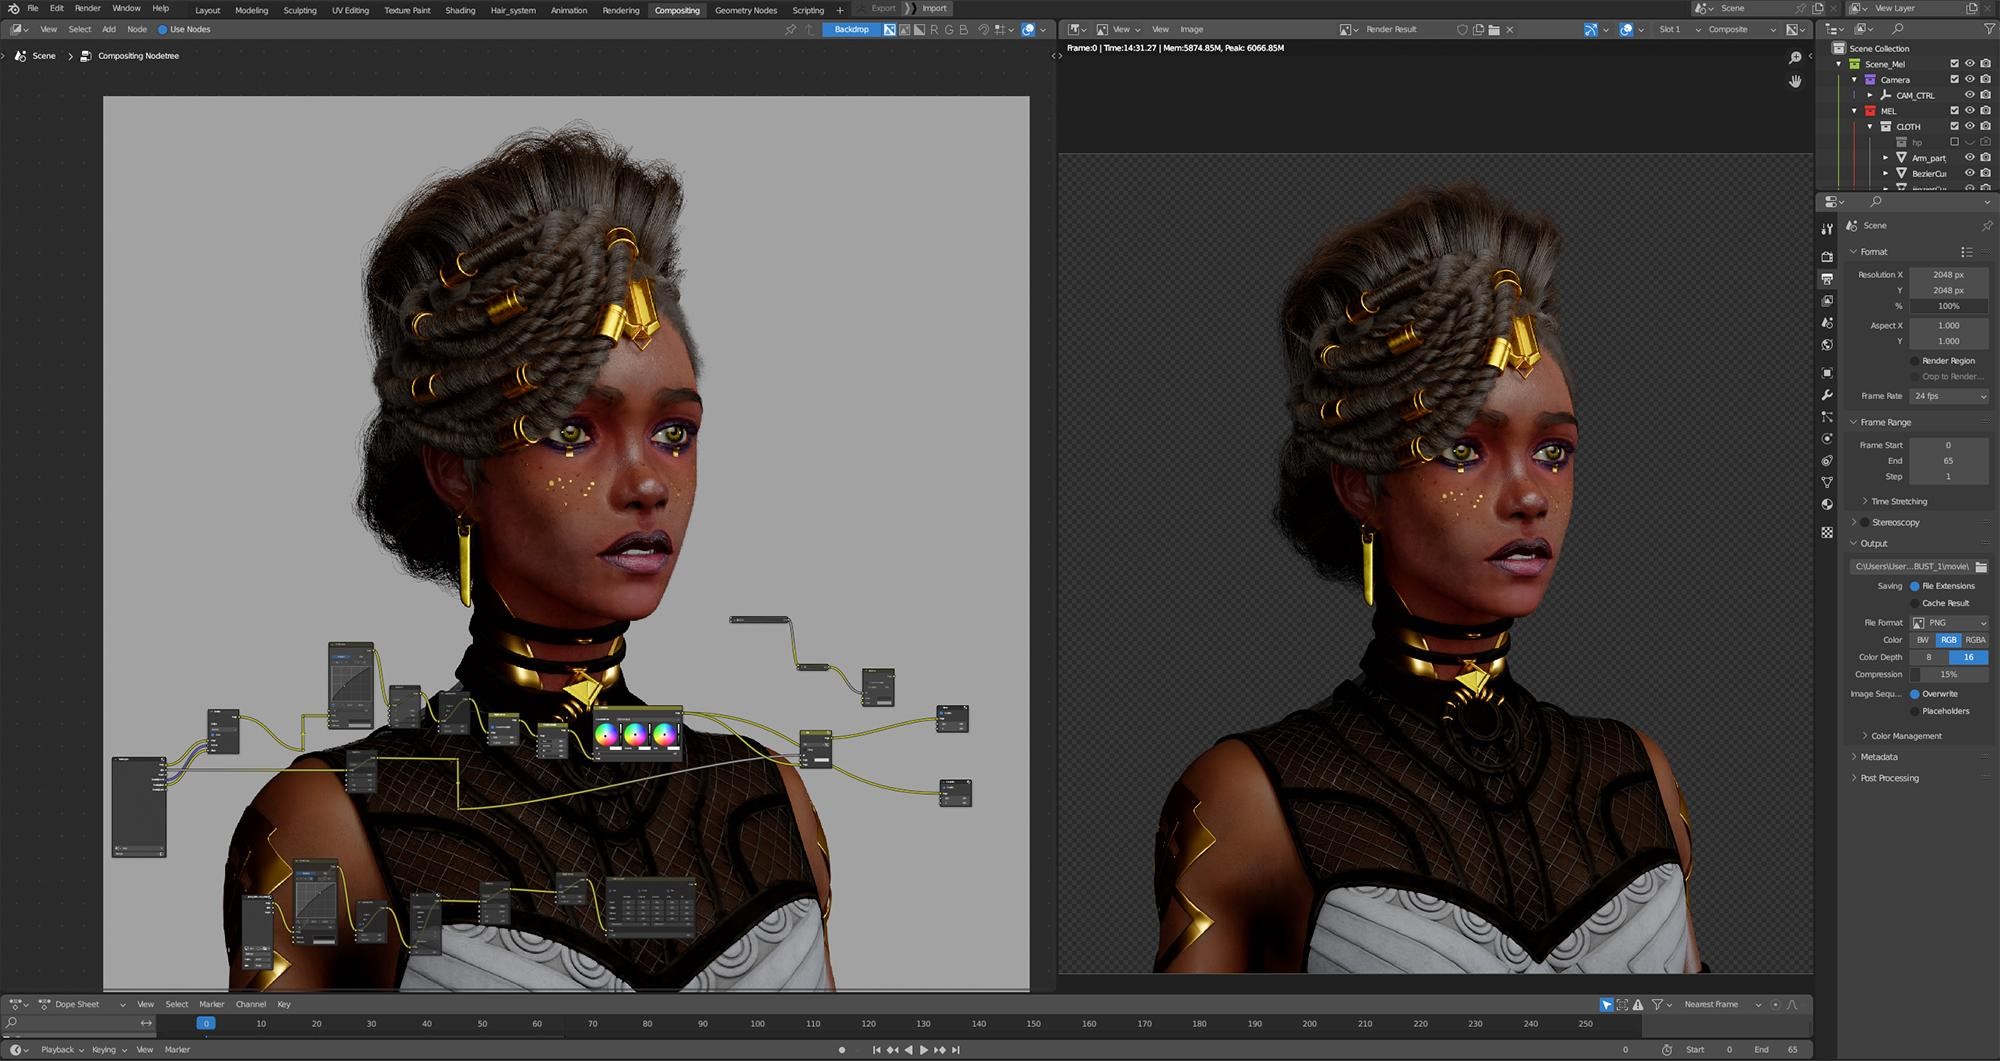
COMPOSITION
I rendered the output with transparency in Blender so that I could add the background later. I performed the composition and final touches within Blender. I added a radial gradient for the background and applied effects such as chromatic aberration, sharpness, grain, and a subtle glow.
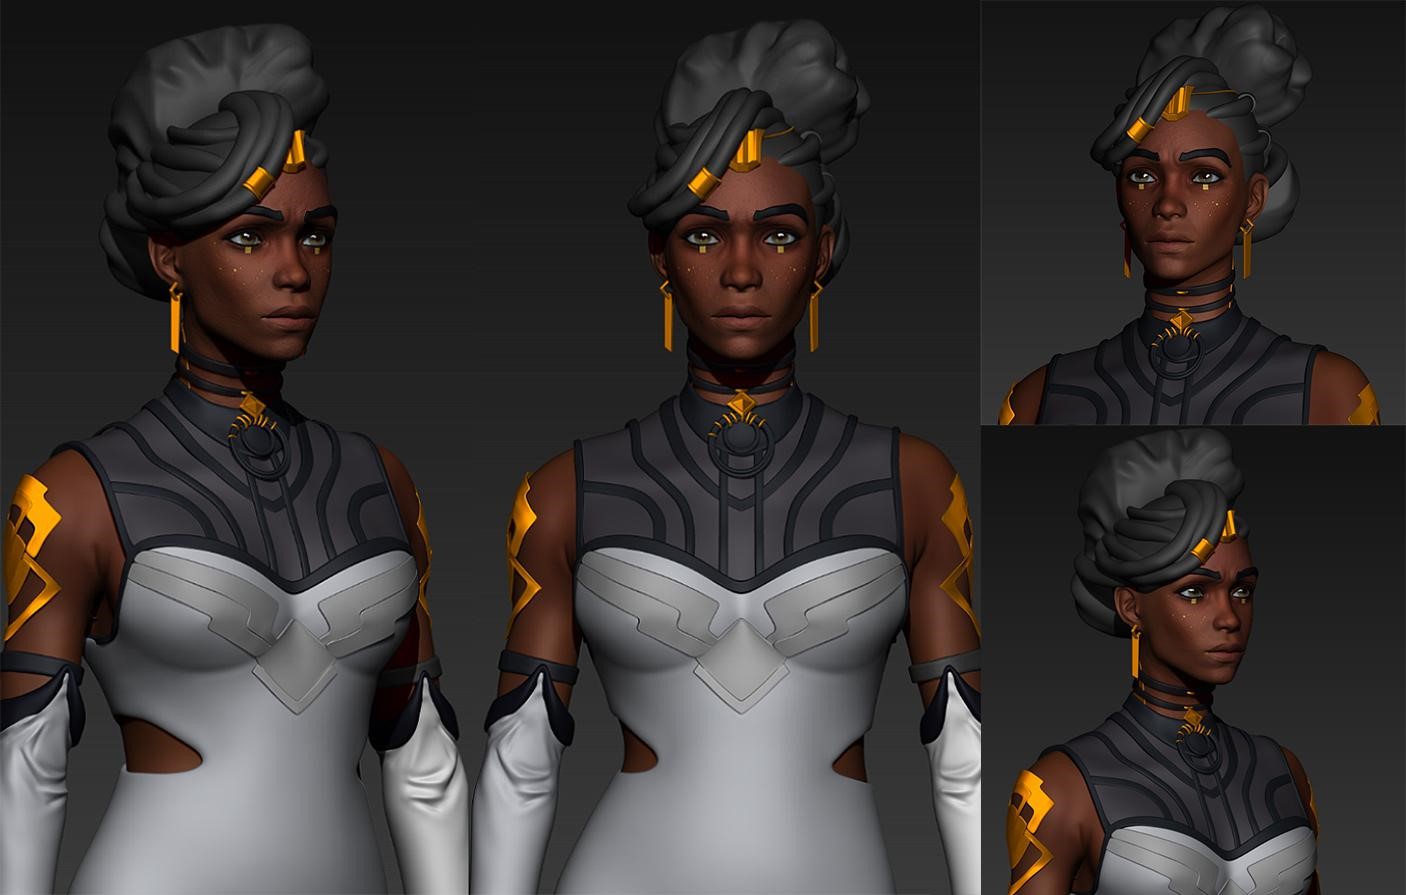
RENDER - Mel Medarda
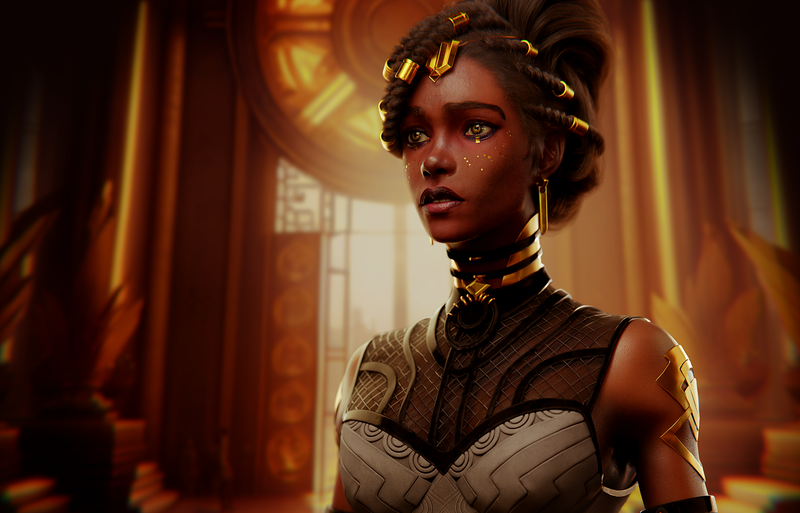
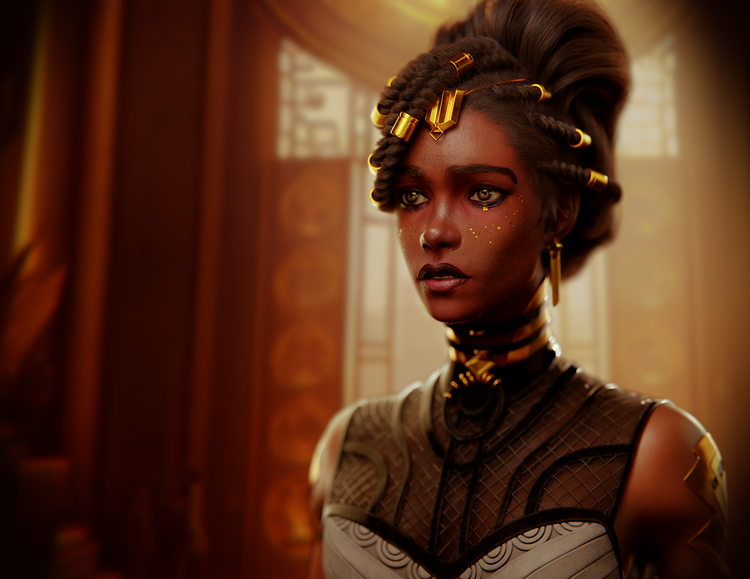
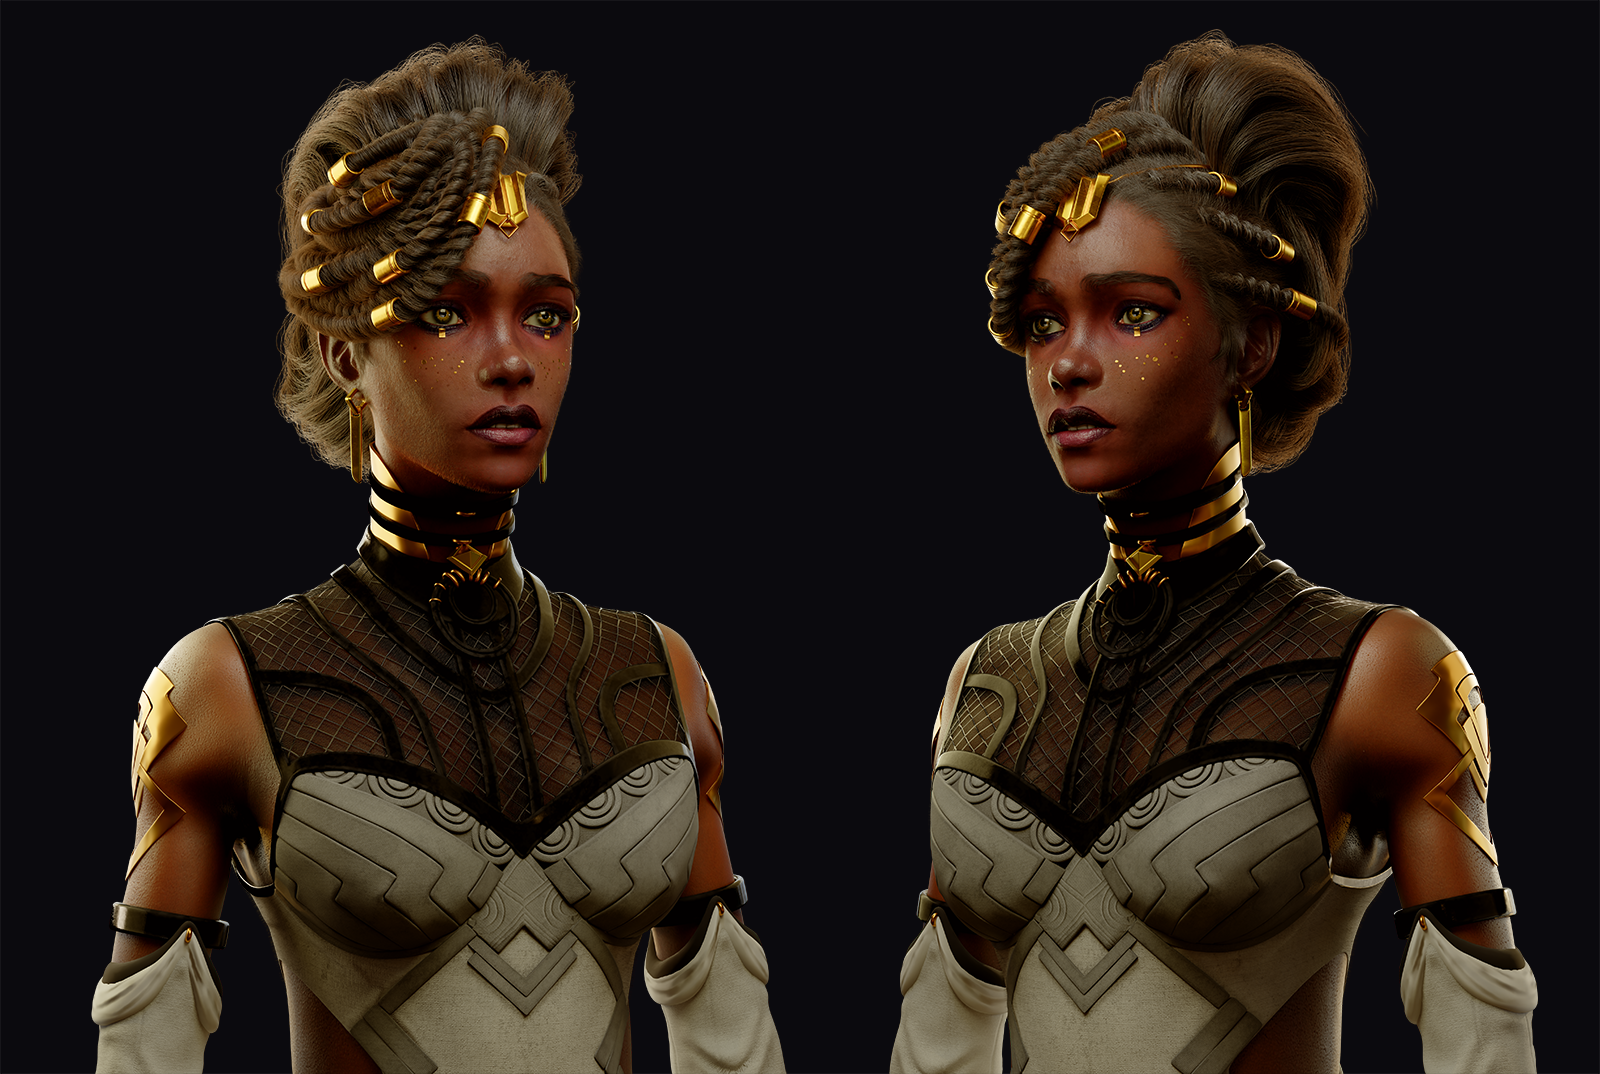
I am extremely satisfied with the final result this time because, after a long time, I was able to achieve a portrait that closely resembles the likeness I intended.
Thank you for reading. Feel free to ask any questions, and if you like my work, follow me on social media. Have a good day!
About the Artist
Jeremy Andzembe Diagne, is a self-taught 3d character artist from Kyiv, Ukraine.

3 Comments
Awesome!
SUPER!!!WELL DONE
Amazing Job. Your character is incredibly realistic.