Behind the Scenes: Temple Bay
INTRODUCTION
Hi! I’m a 35-year-old 3D enthusiast from the Czech Republic. My passion is mostly environments and hard surface props. I’ve been using Blender since version 2.79 and I’m completely self-taught.
This is my second article on Blender Nation. The previous article was on my artwork Old Gas Station 1966.
INSPIRATION
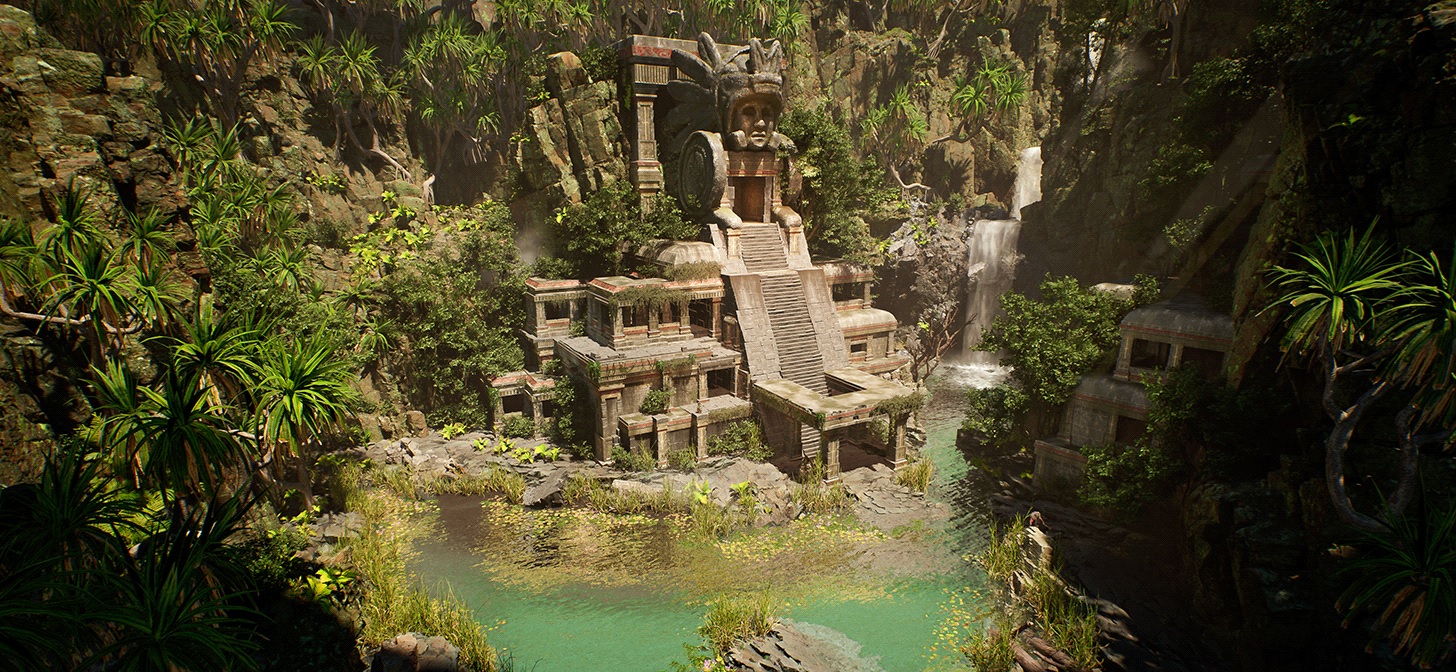
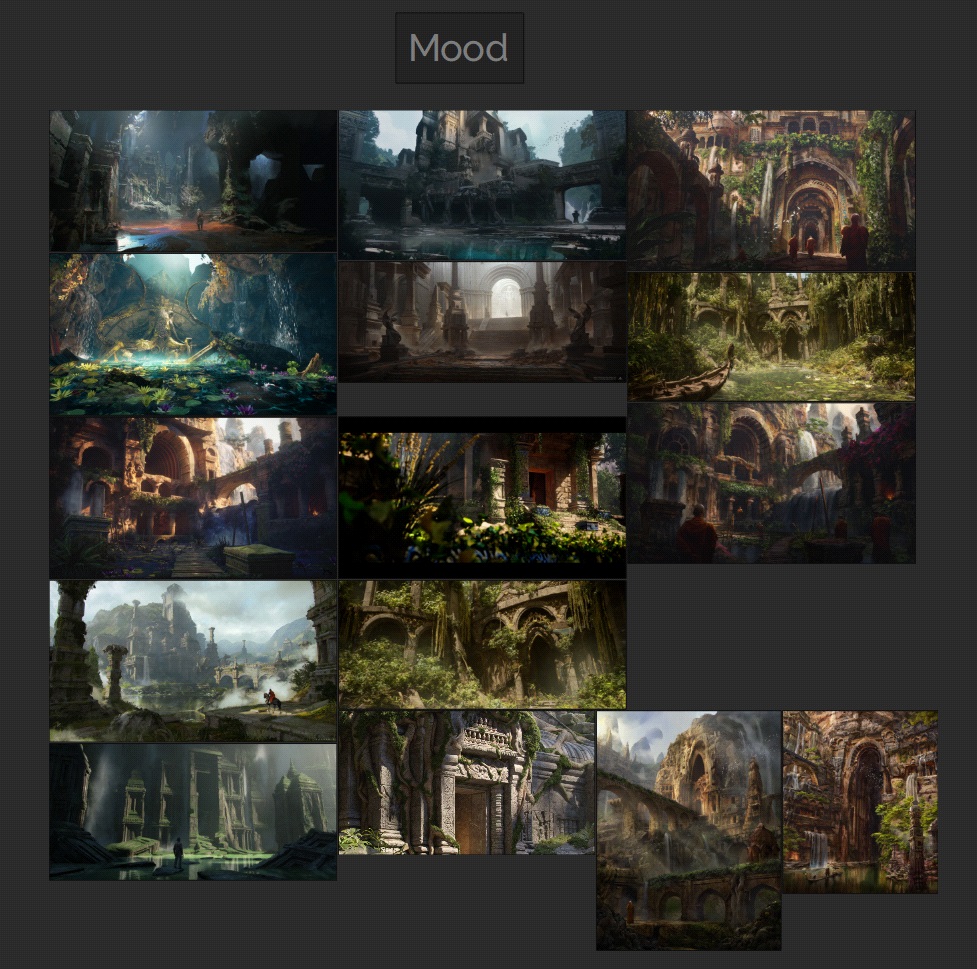
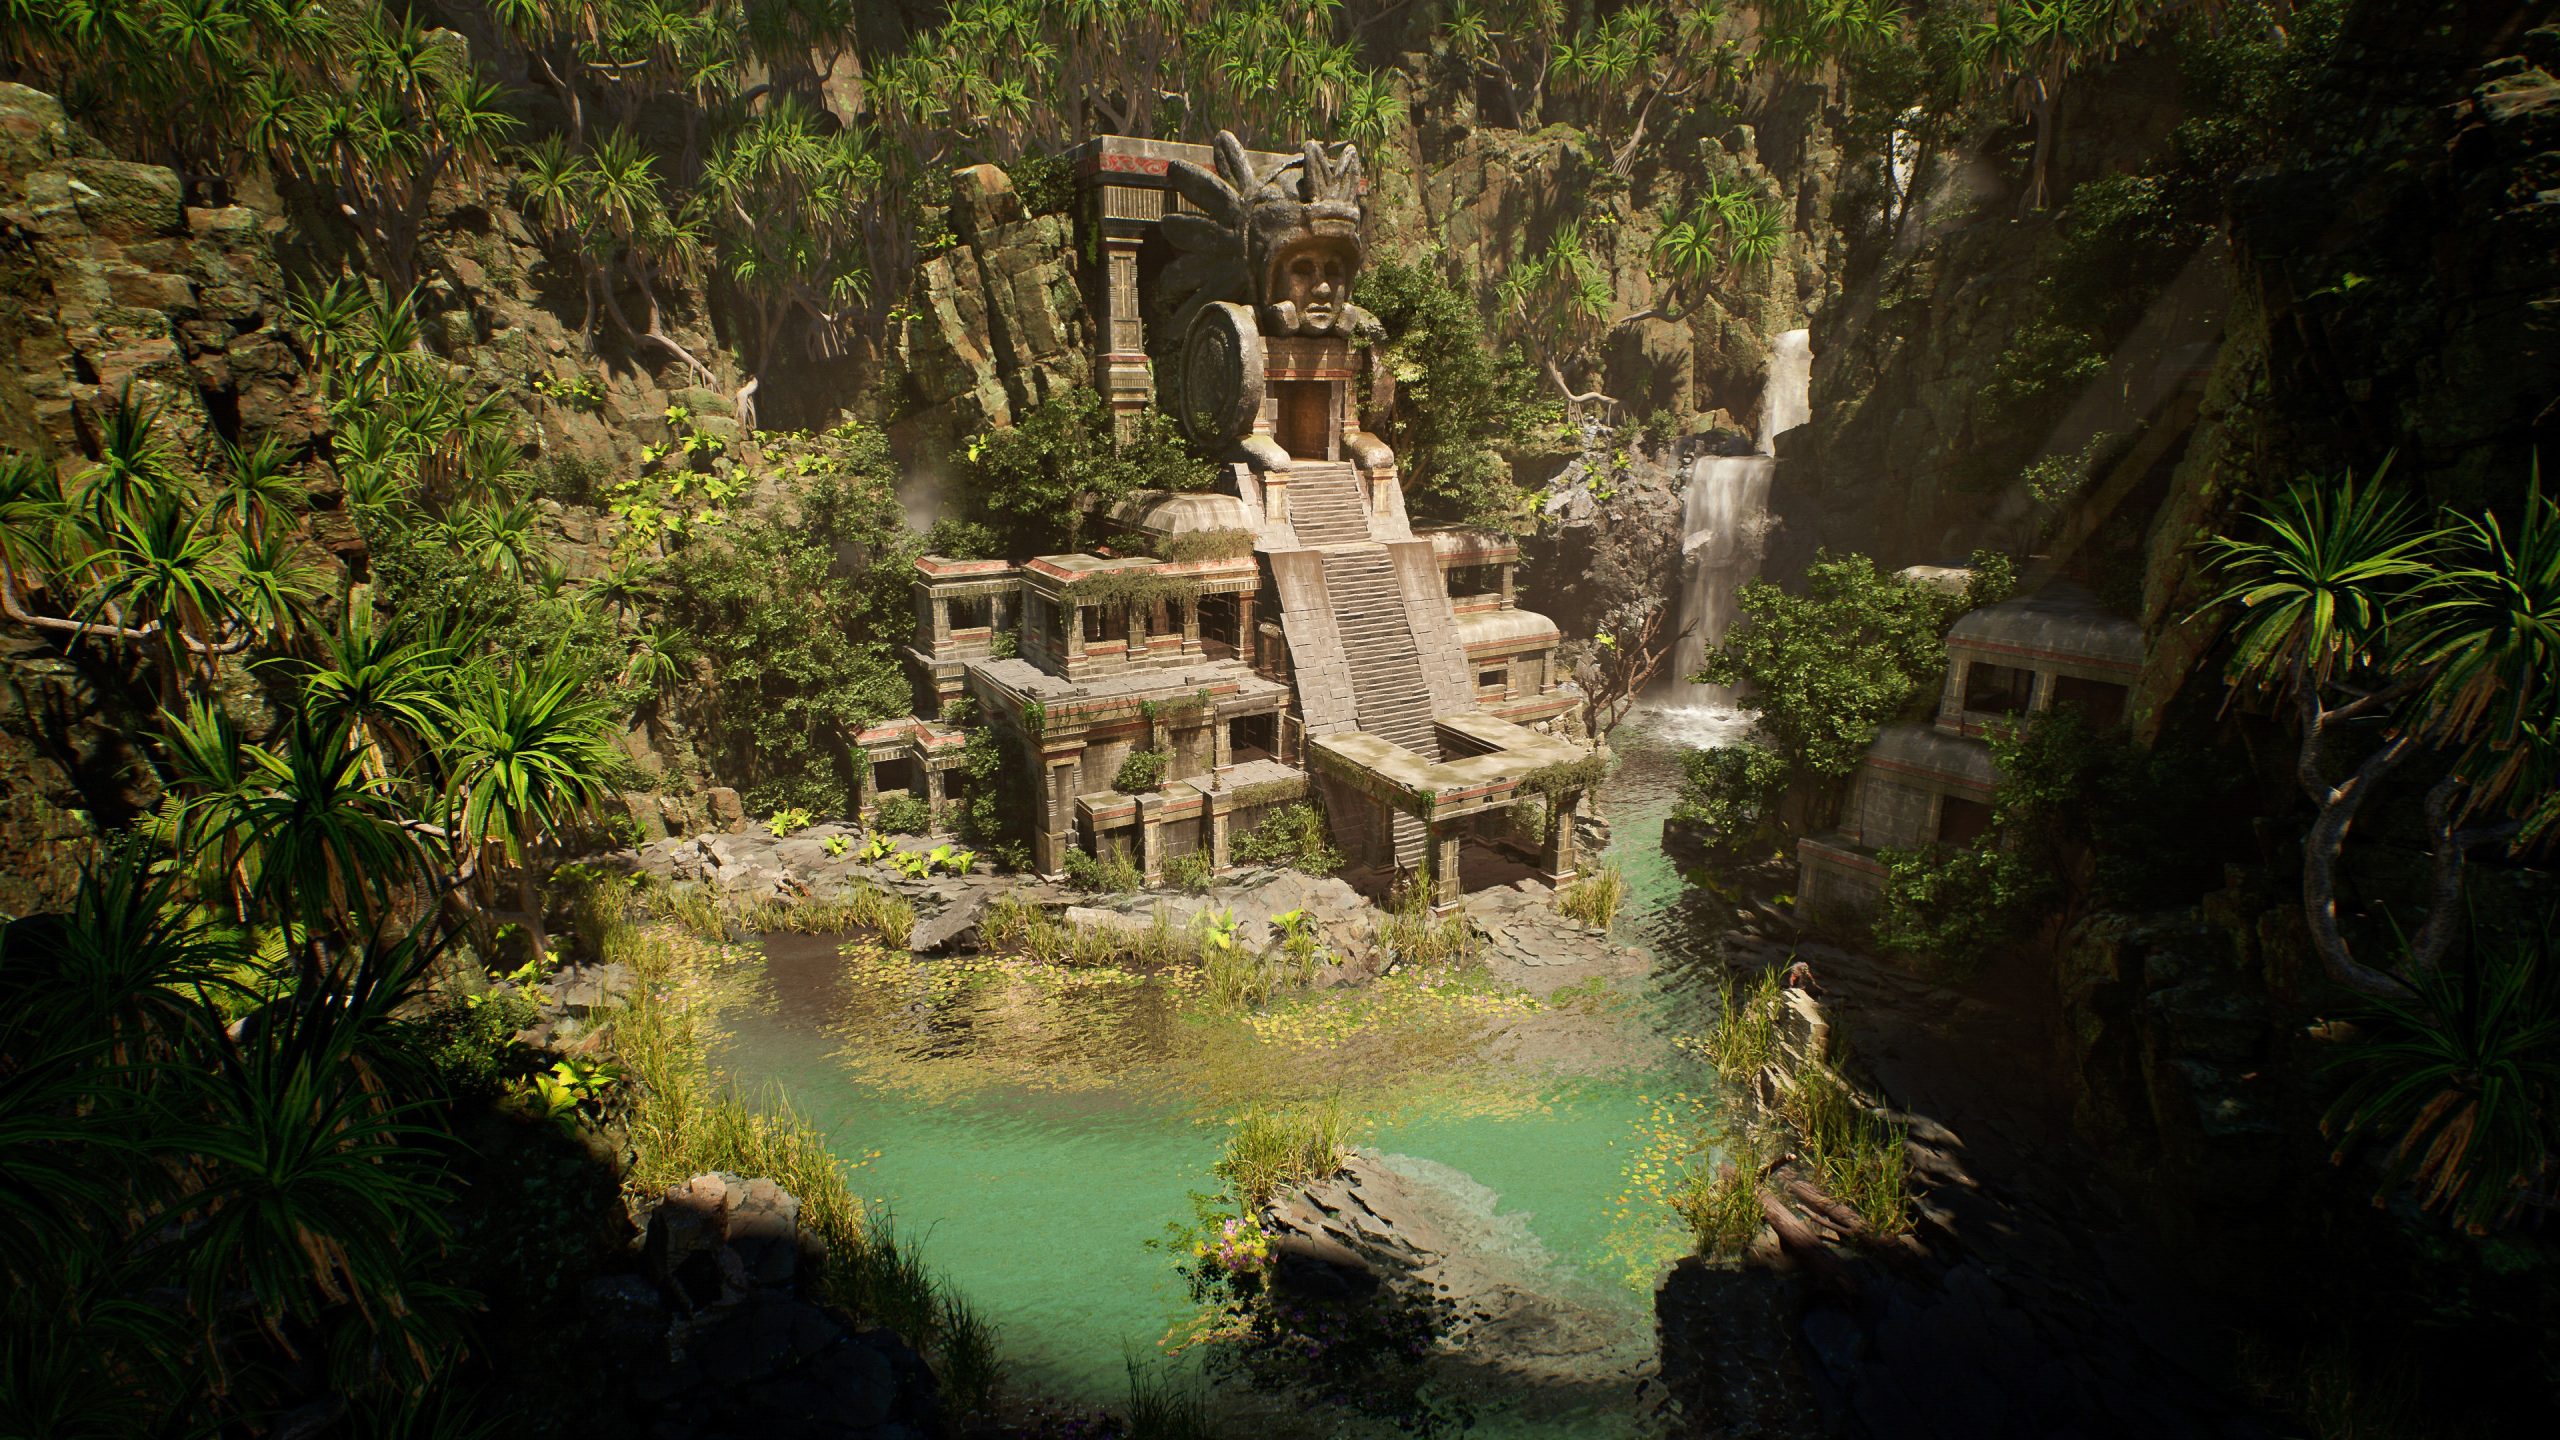
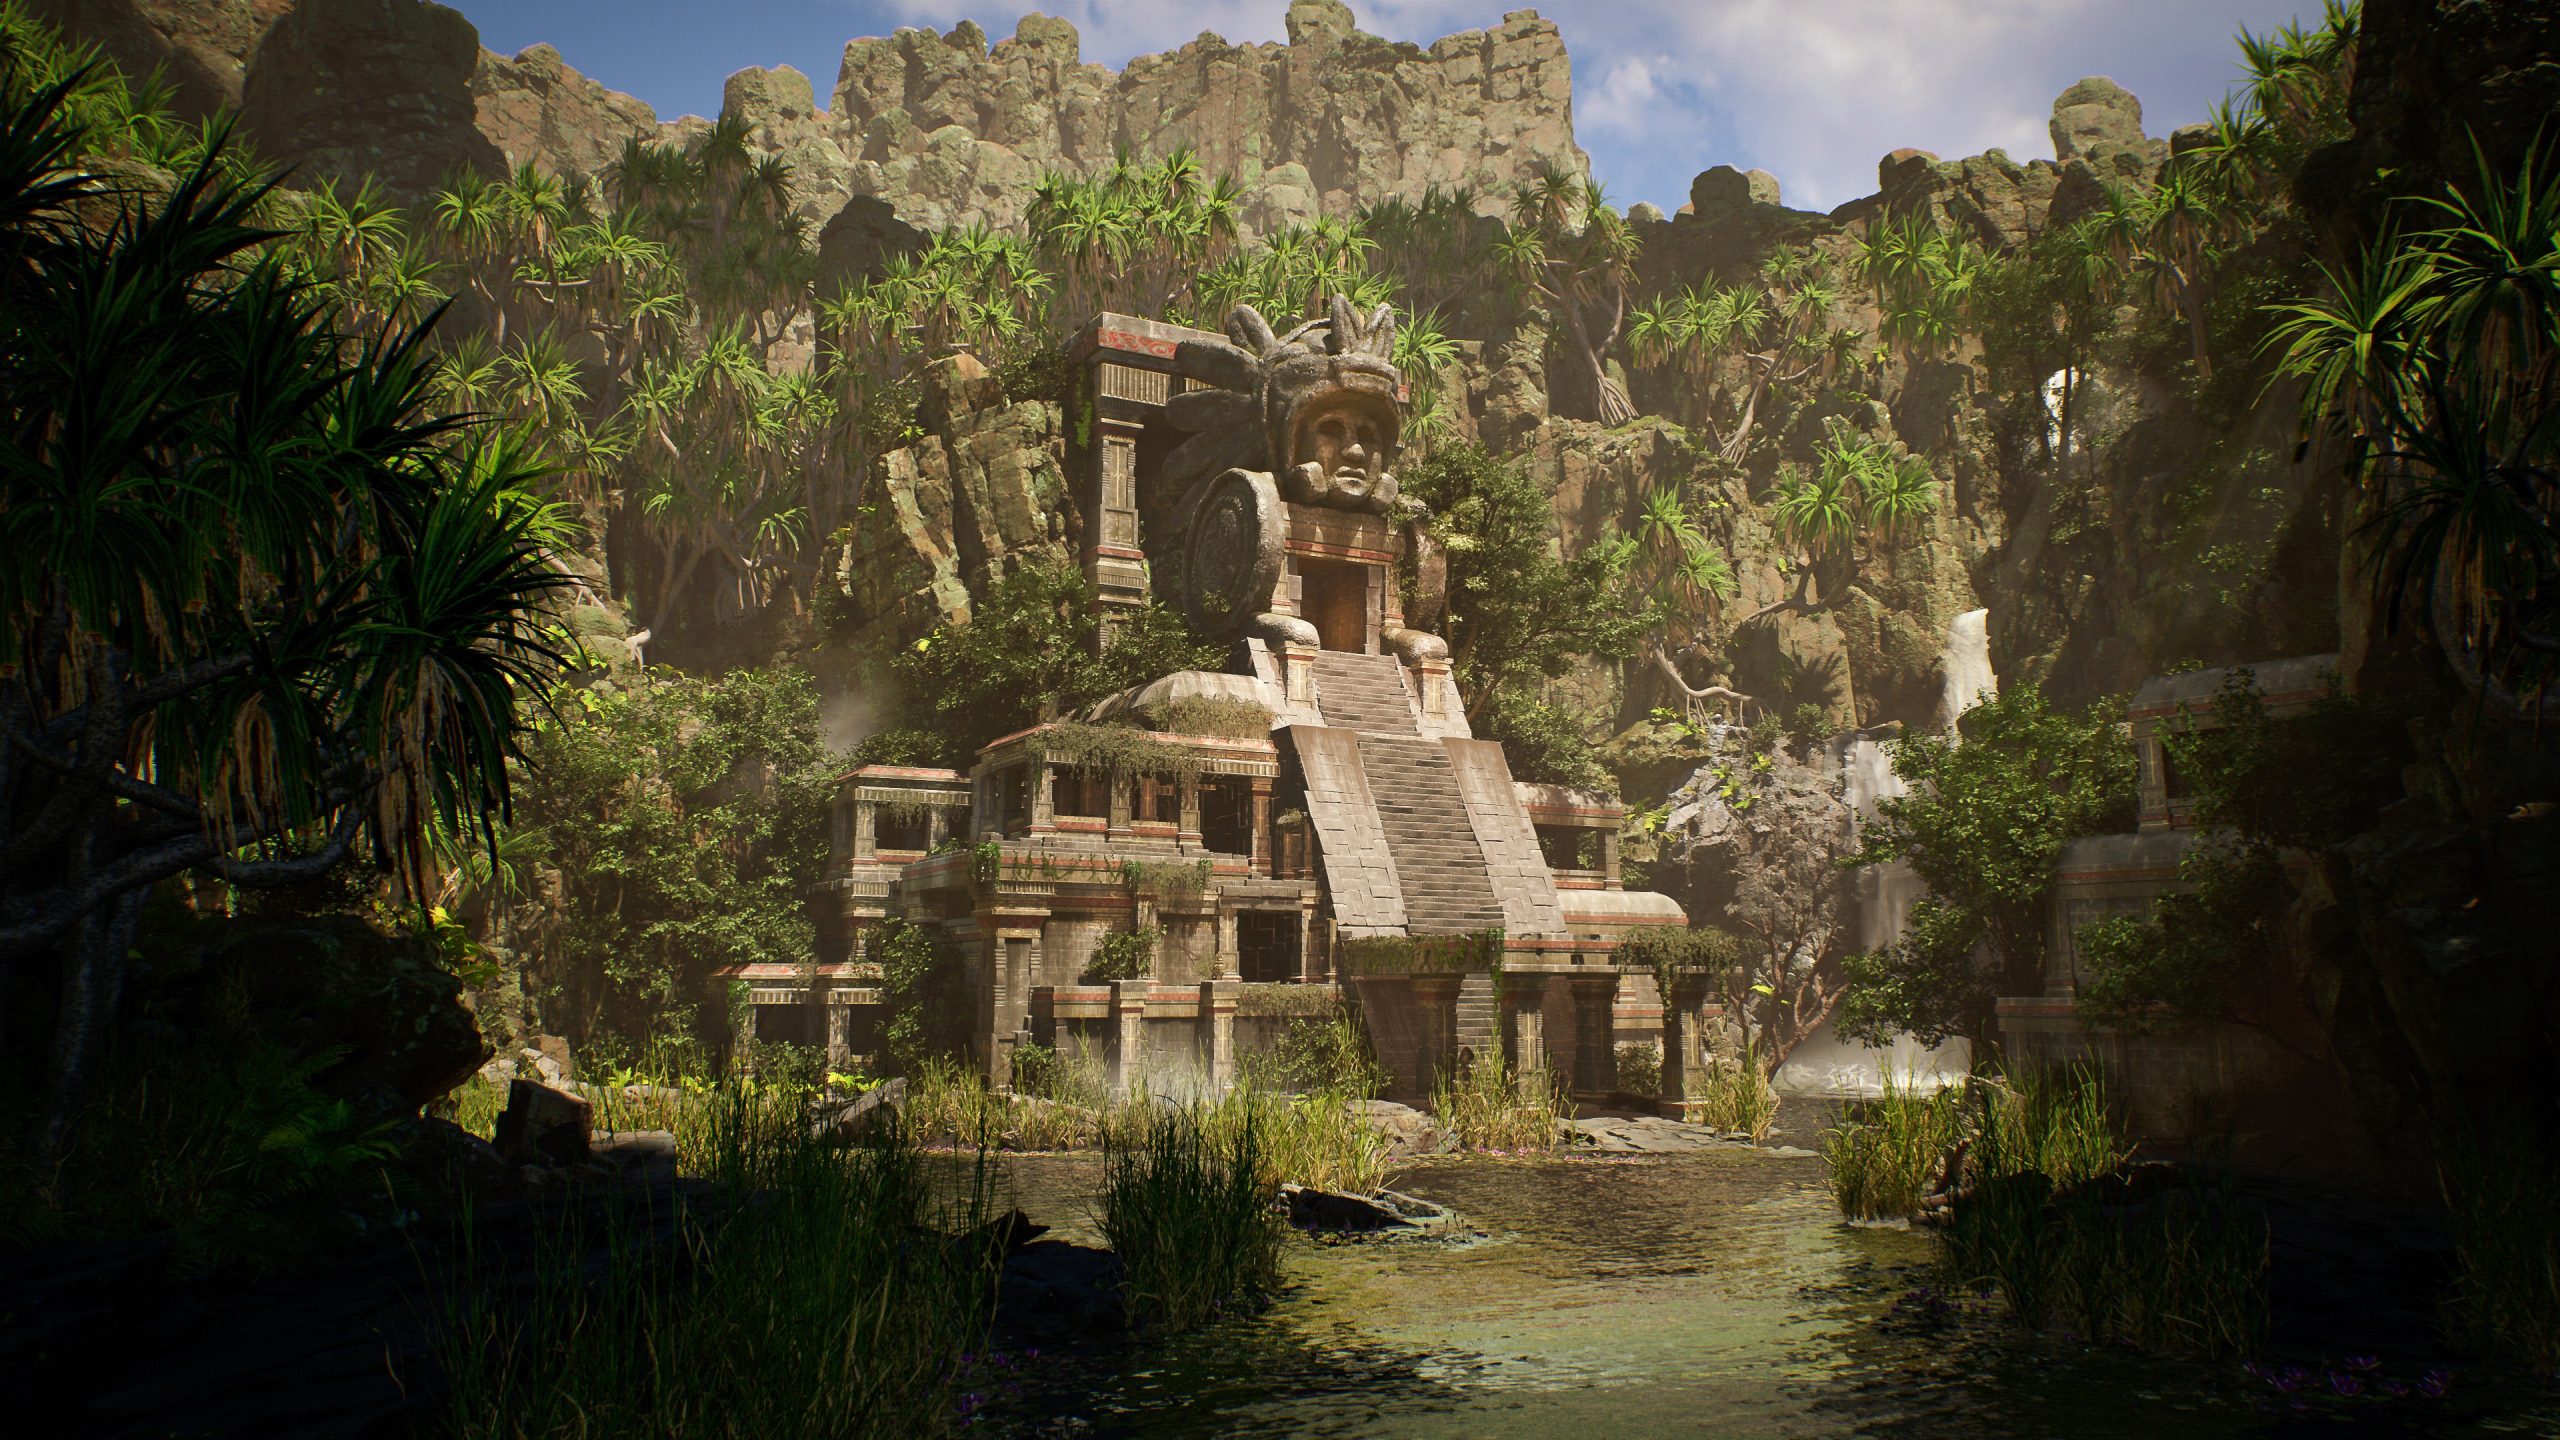
For this artwork, I had an old pyramid/ziggurat temple in mind. I imagined it as a piece of jungle, bordered by cliffs with some water and waterfalls, palms and trees.
I looked at some pictures mainly on Artstation to get an overall atmosphere and with this in mind, I waited a few days to create a mental picture of the scene.
BLOCK-OUT
After that, I blocked out the scene with basic shapes in Blender to see if it felt right to me.
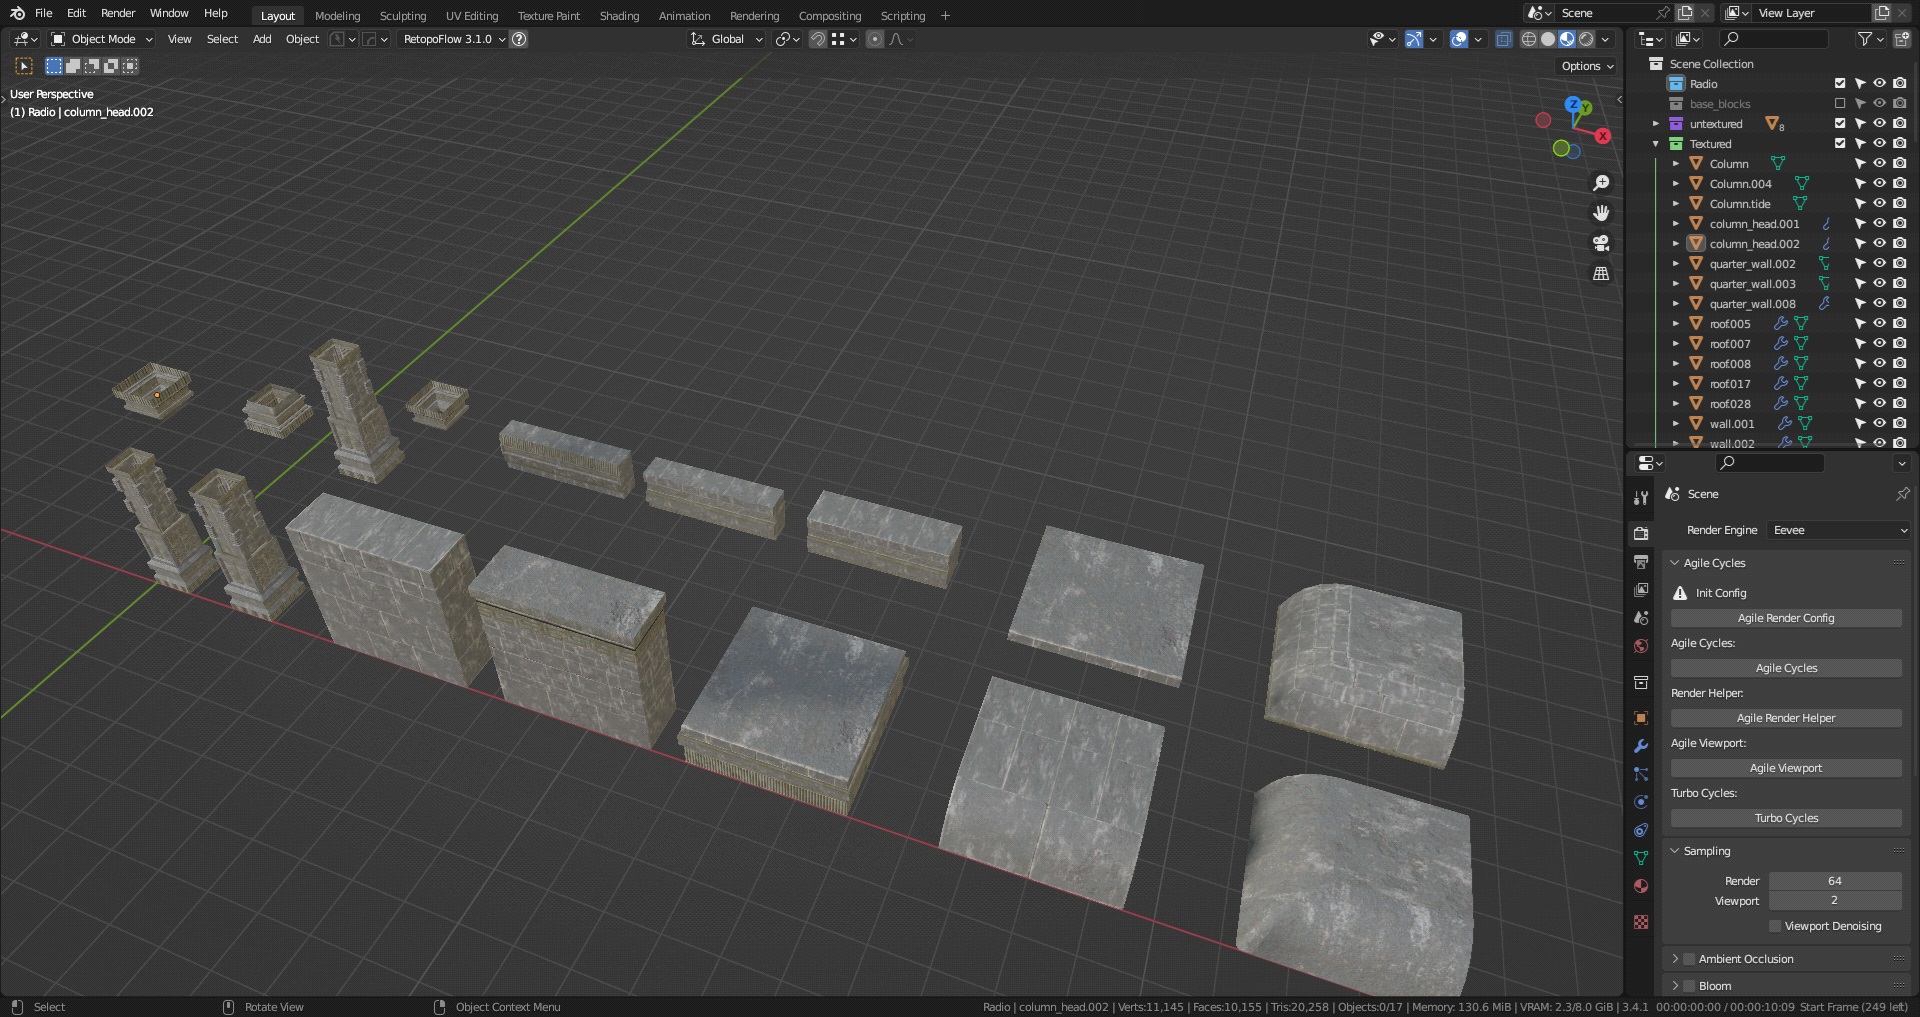
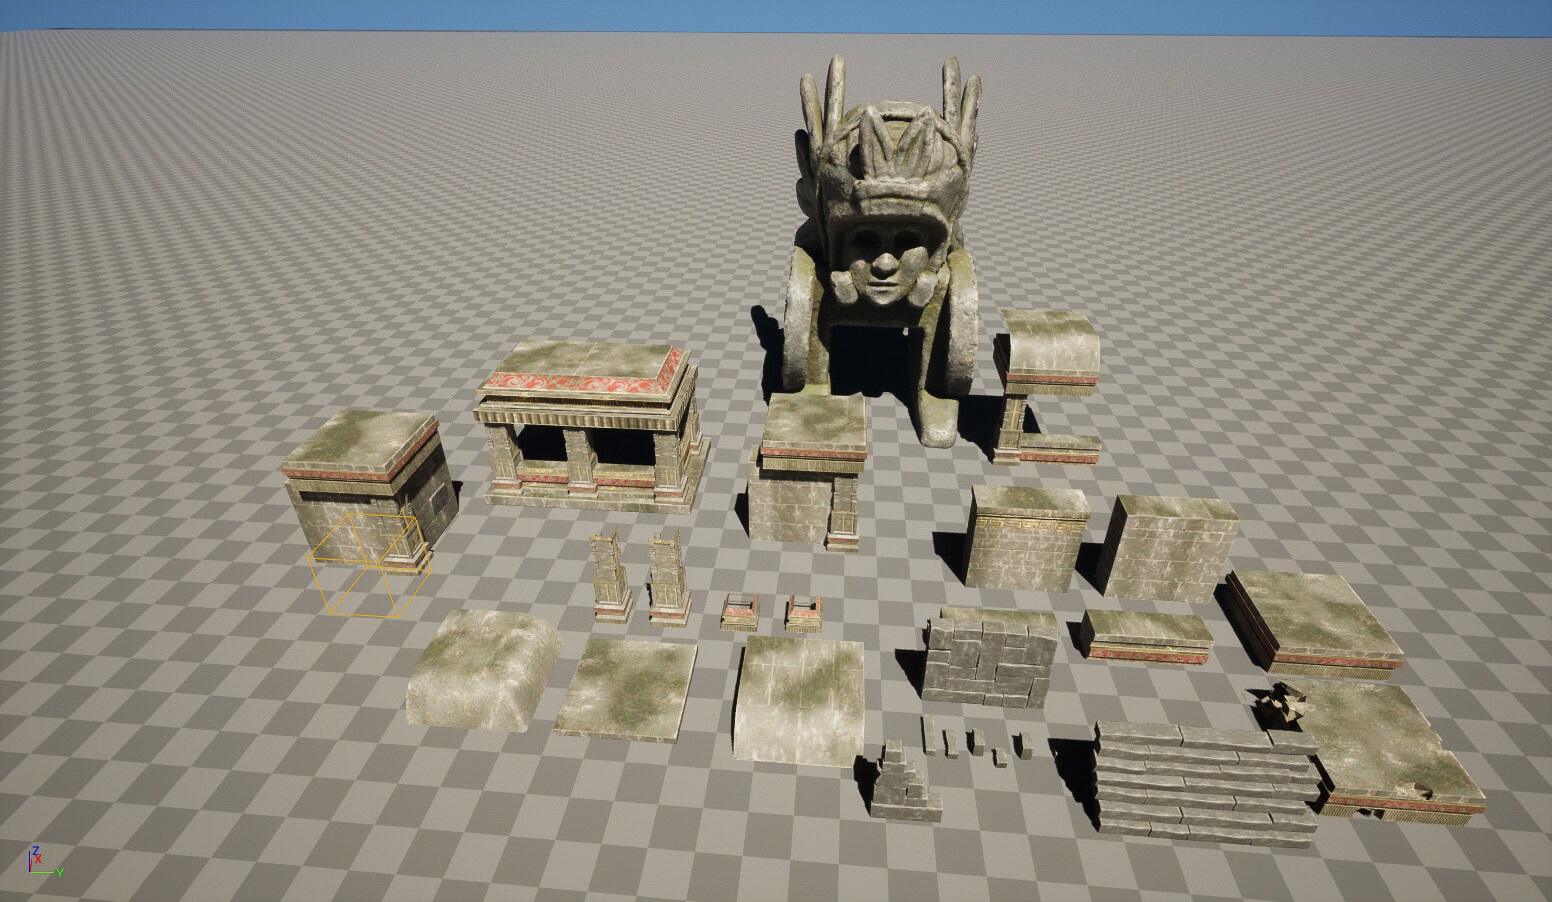
PROPS
I knew it would be very tedious to build such a complex scene with unique assets, so I decided to make it with modular pieces textured with trim sheets.
Modeled props:
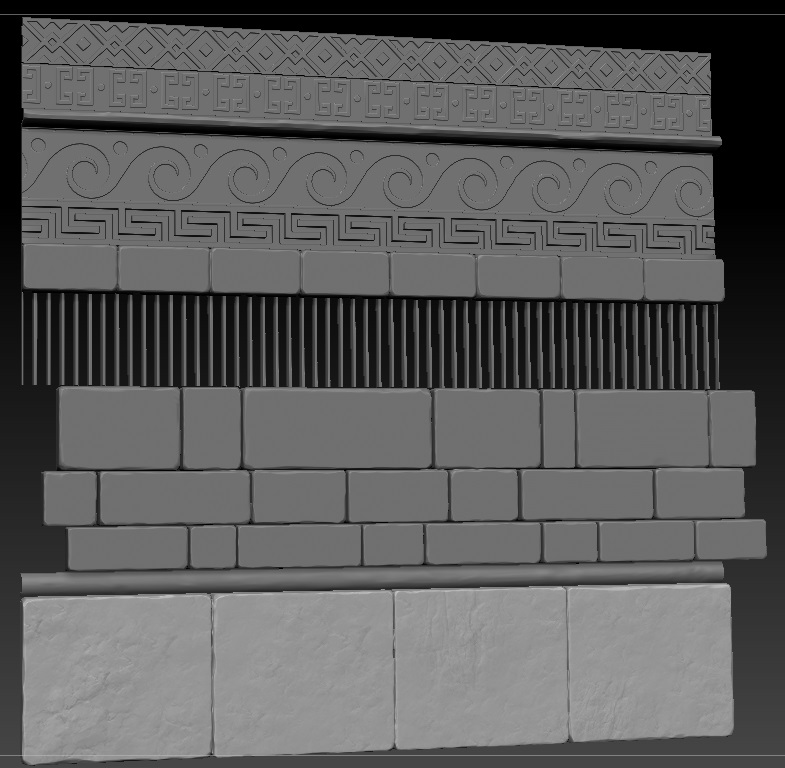
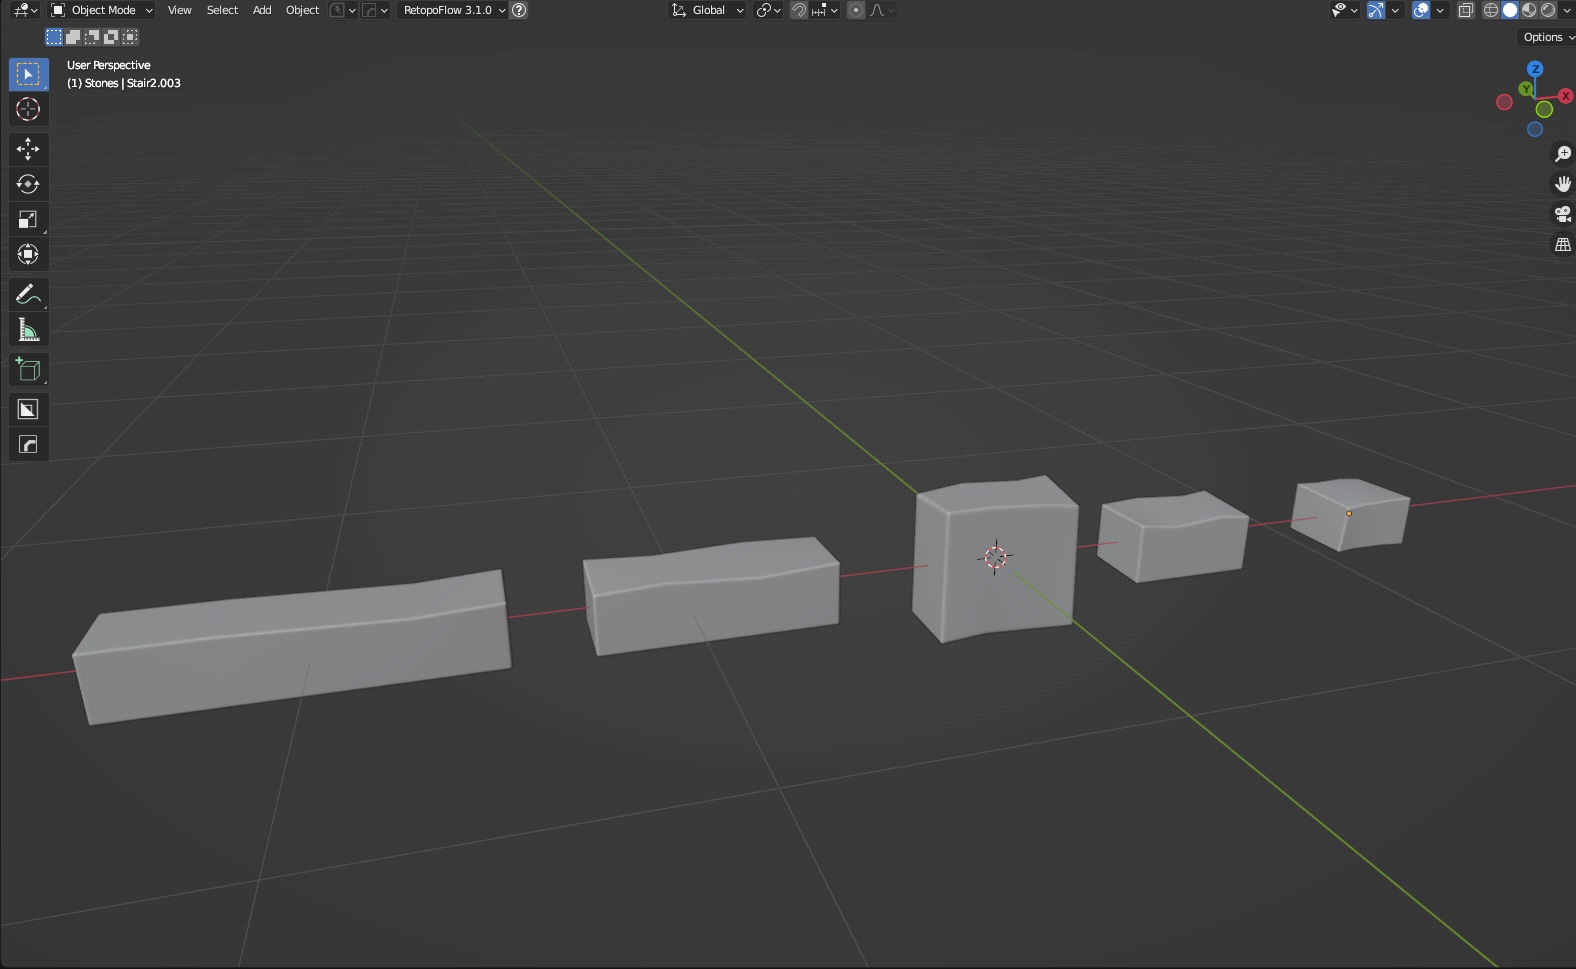
This is the base shape for my trim sheet made in Blender.

That I exported into Zbrush and sculpted a high-resolution version.
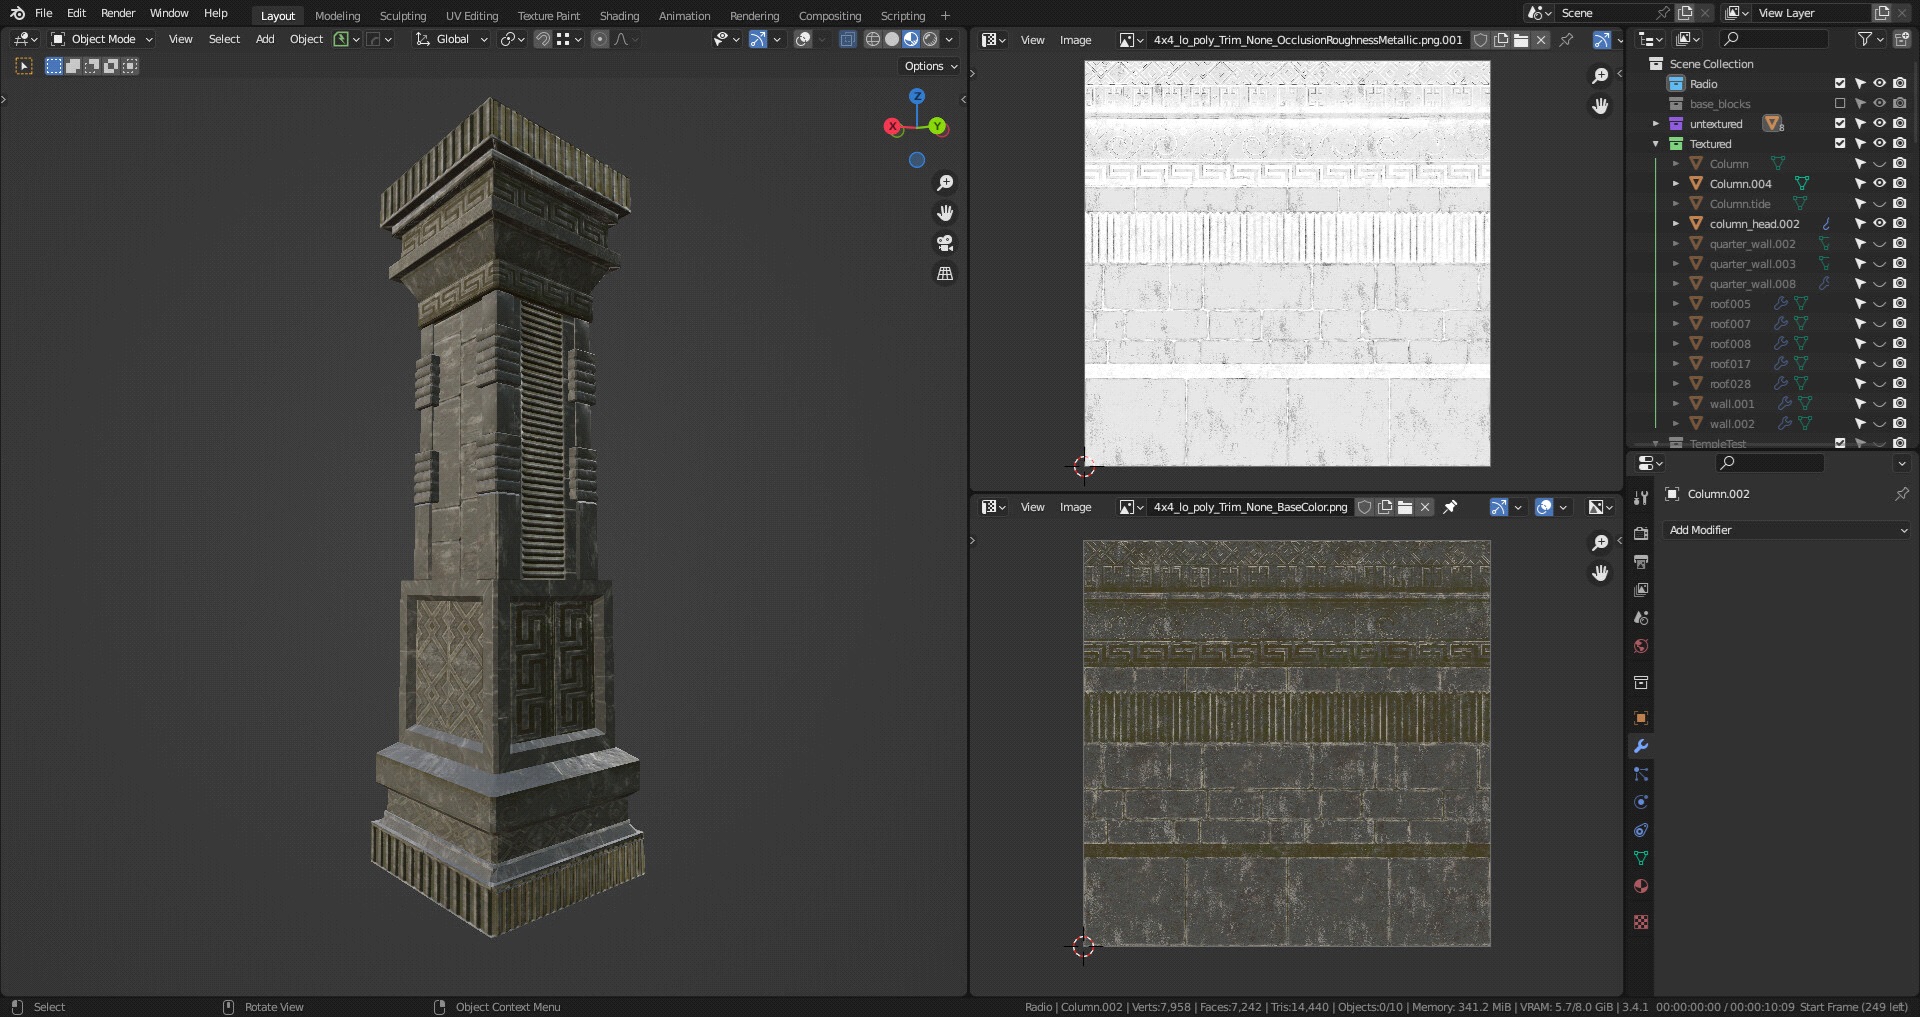
TEXTURING
Then, I imported it into Substance Painter and baked the map onto a plane.

This is a textured prop with a trim sheet:
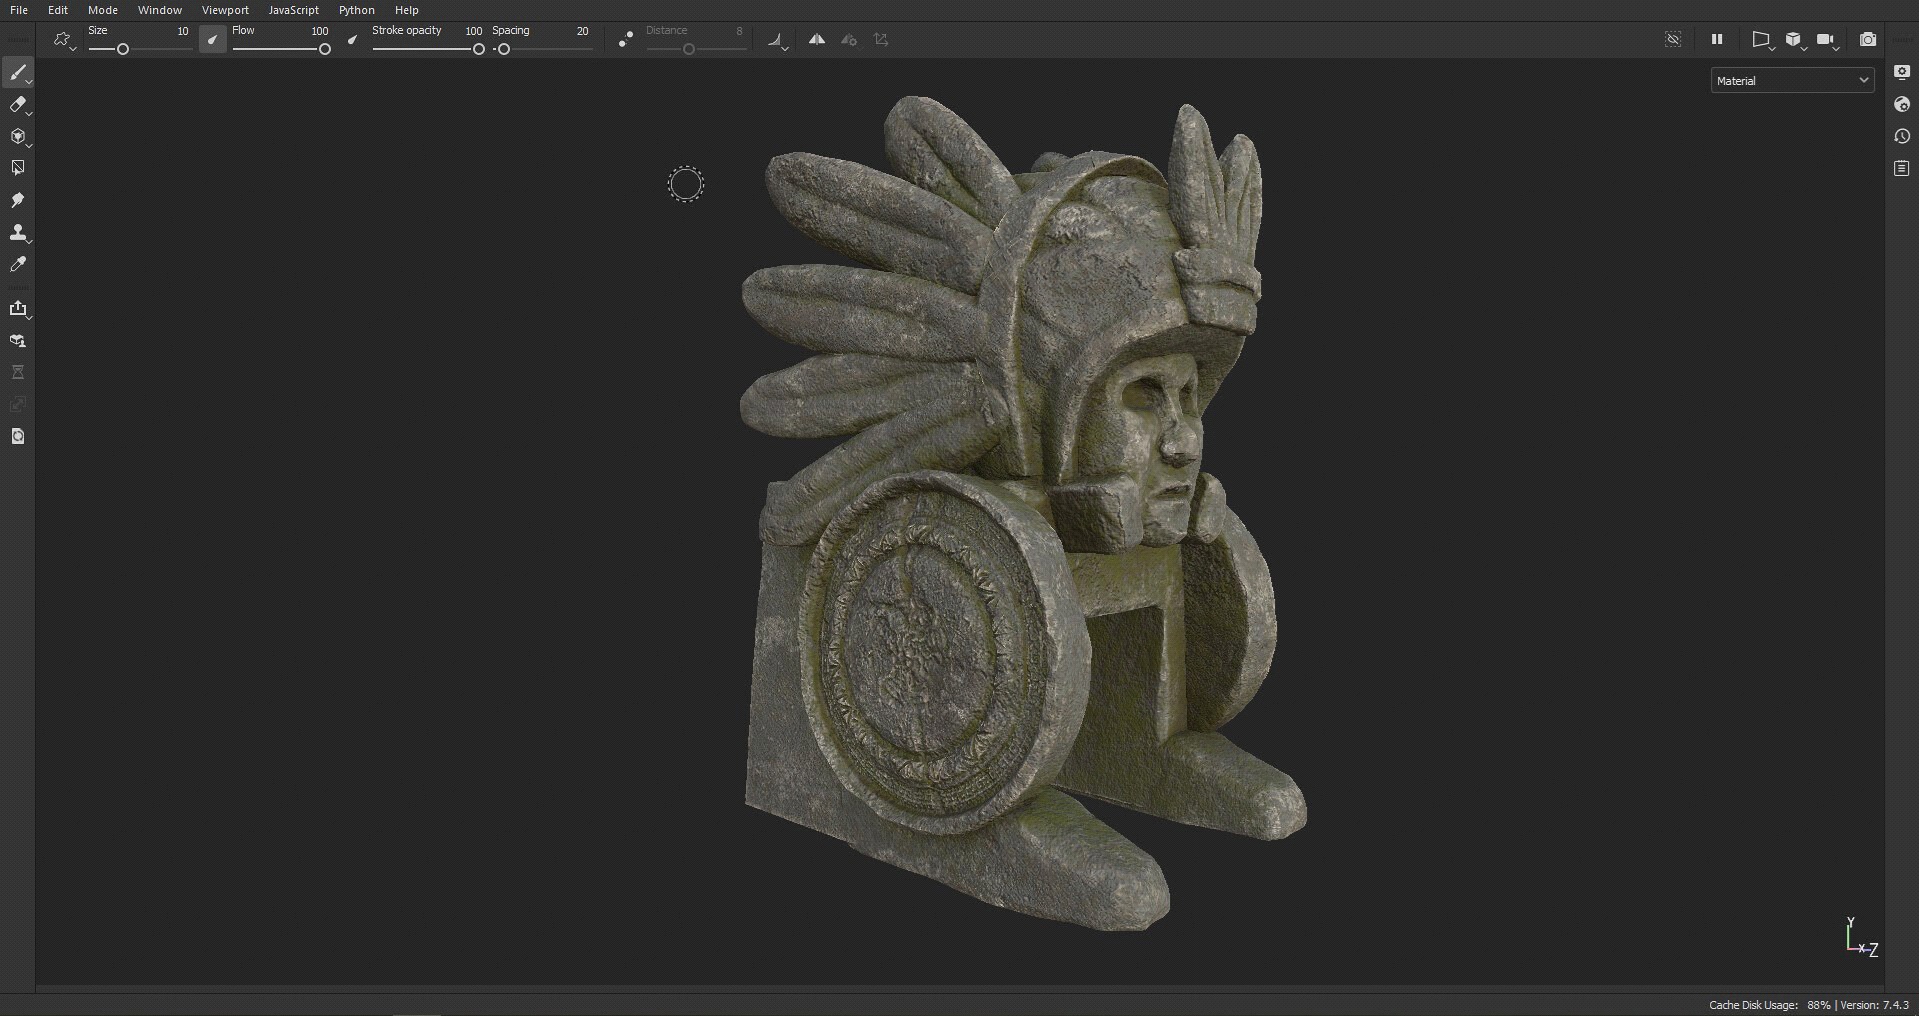
I also envisioned the entrance of the temple as a type of Indian head, so I created one using a similar workflow. The base model was made in Blender, sculpted in Zbrush, and textured/baked in Substance Painter.
I also made a few bricks with the same technique, which I later assembled into a packed level instance in Unreal Engine and used for assembling ziggurat stairs/walls.
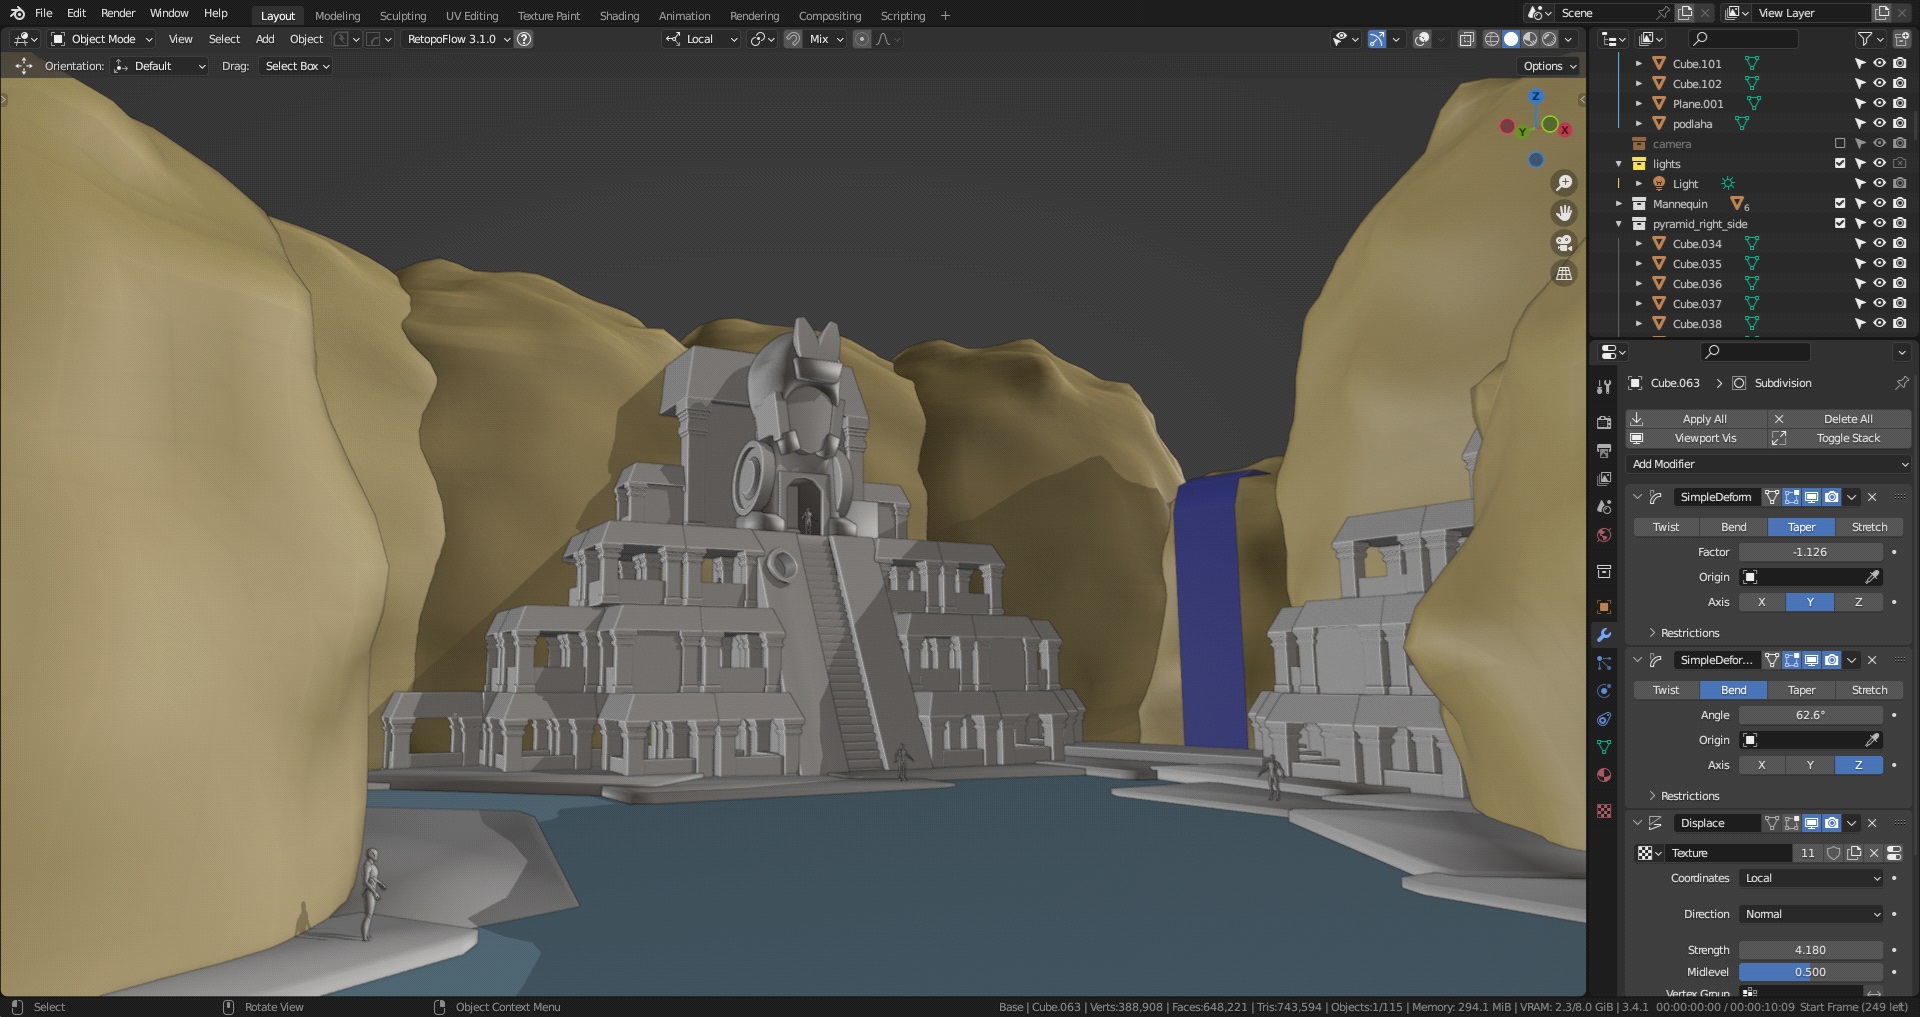
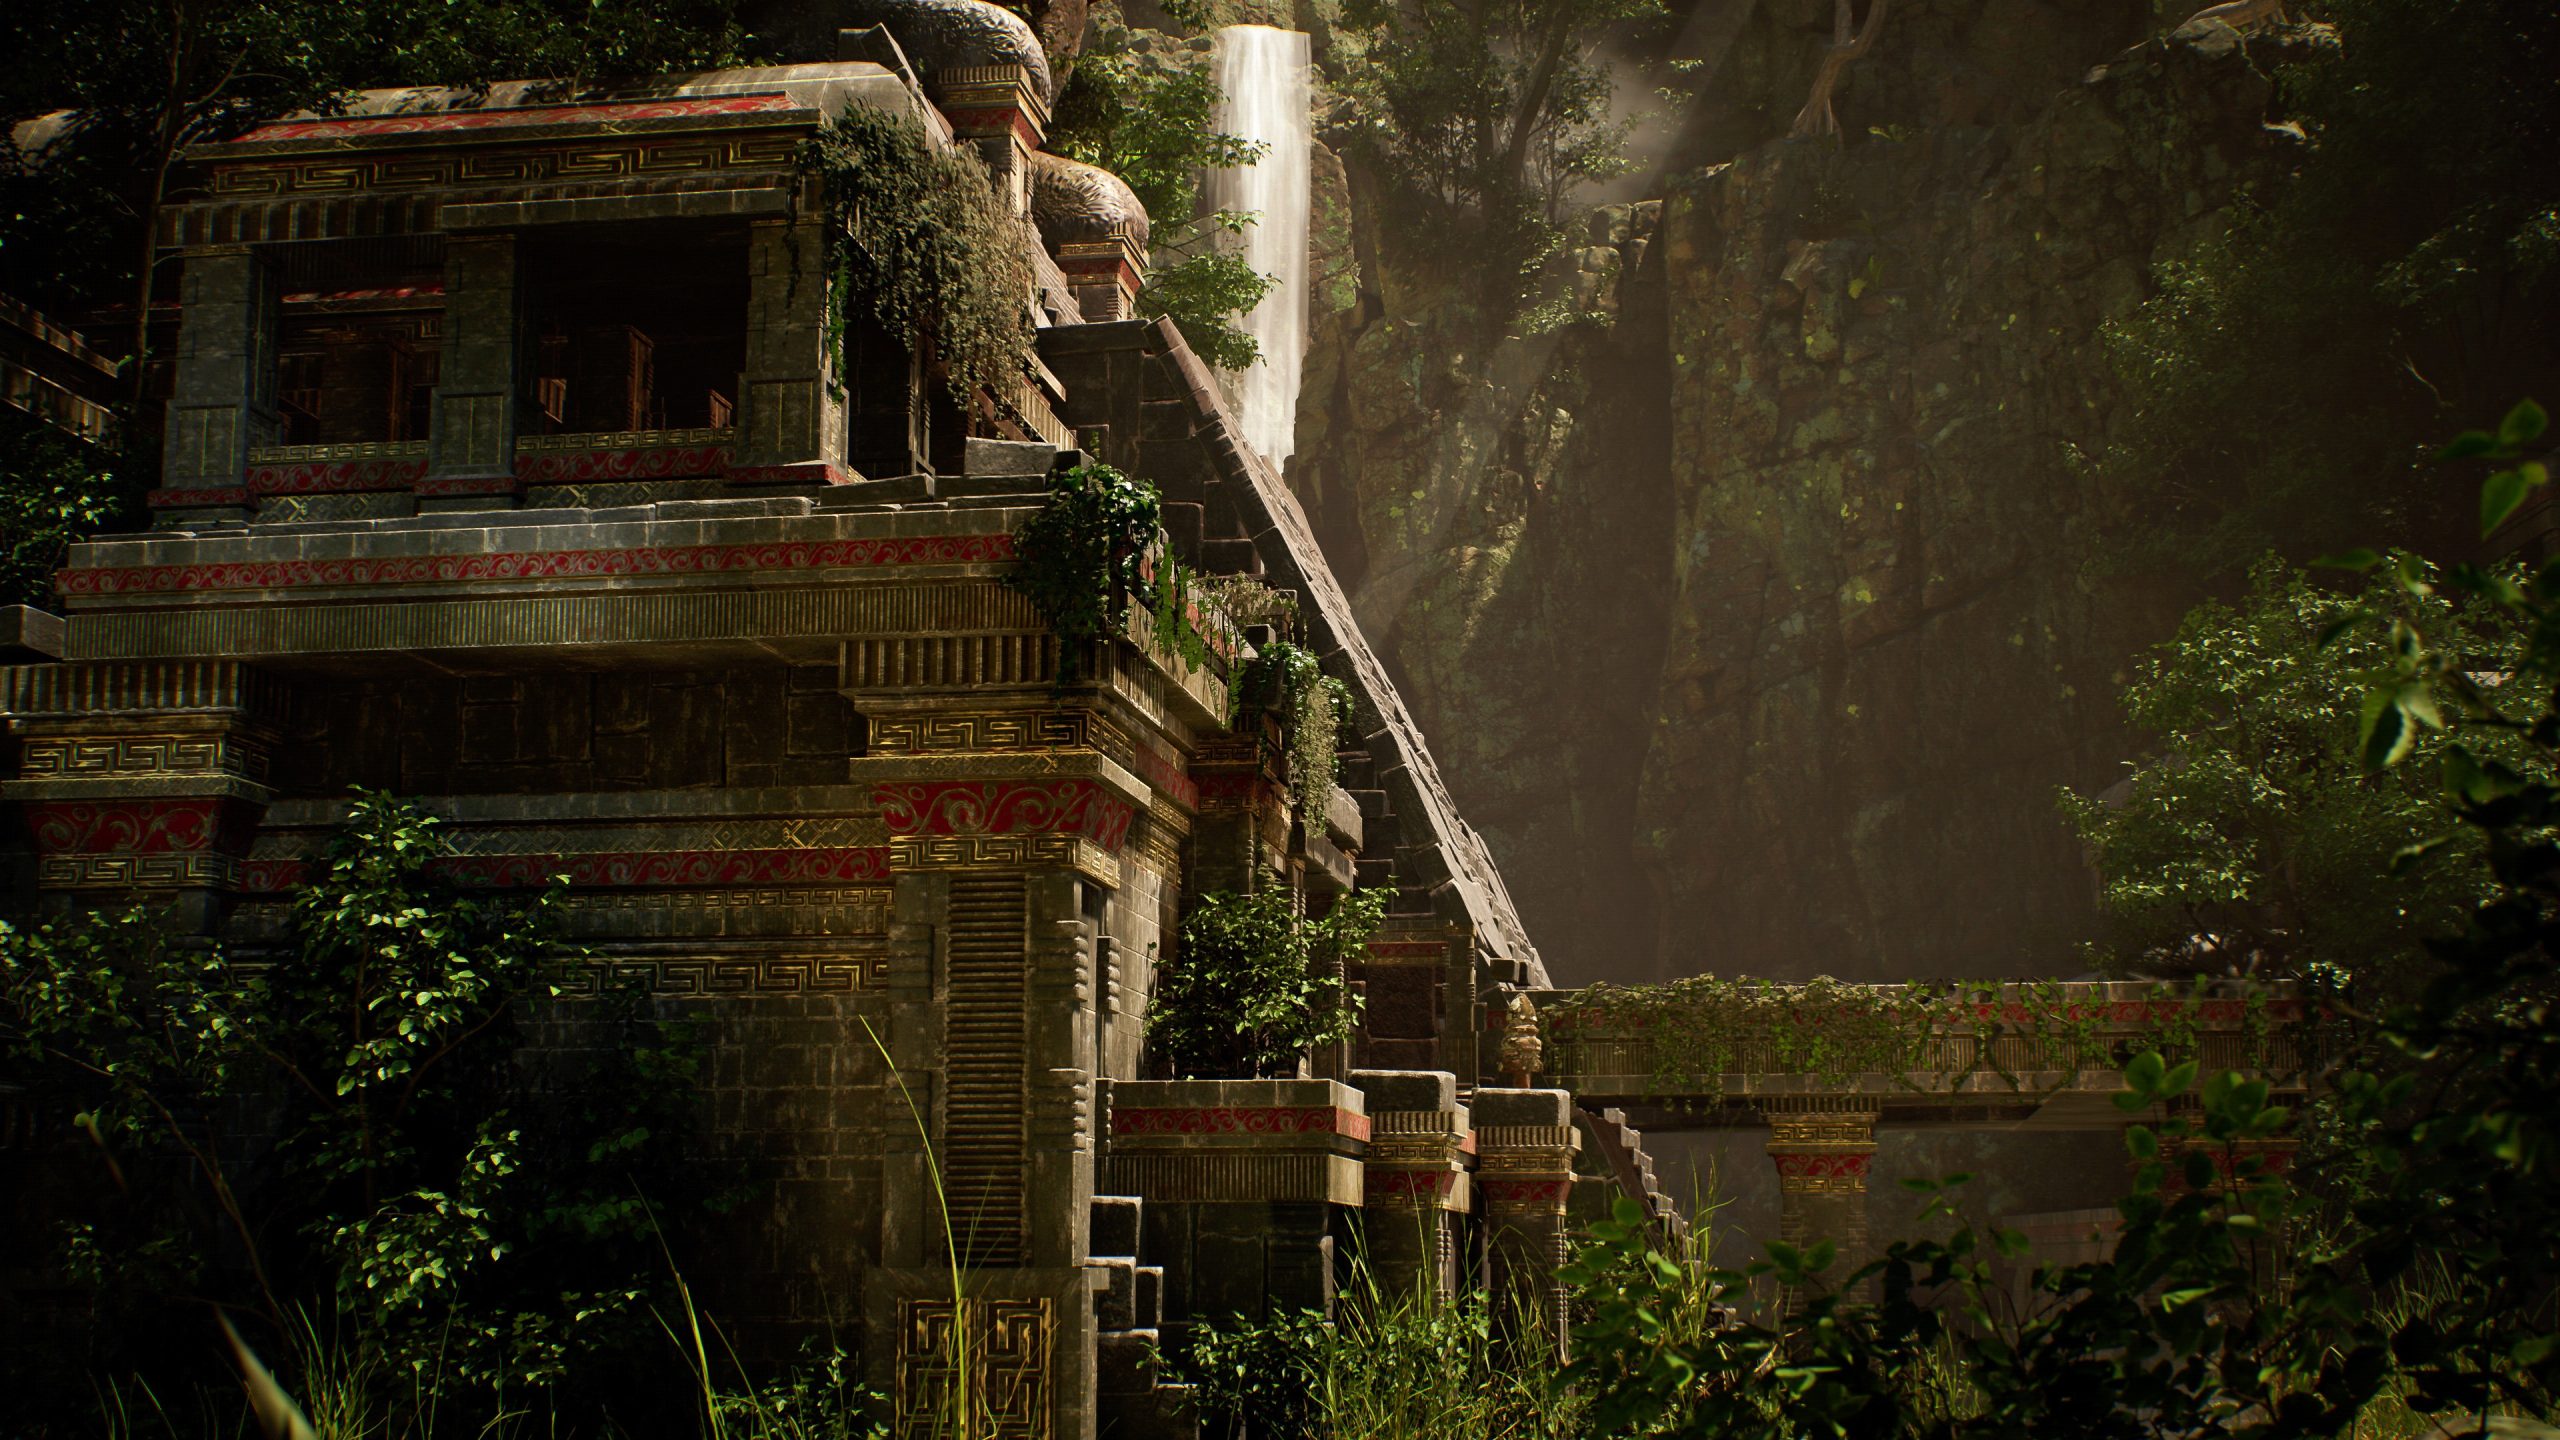
UNREAL ENGINE
The props were assembled in Unreal Engine 5.
In the right bottom corner, you can see one damaged prop. For this, I tried a technique from this tutorial:
The rest of the process was just assembling pieces in Unreal Engine to fit the overall shape. I also imported some foliage and stuff from other projects, Unreal Marketplace, or Quixel Bridge. I created some materials or tweaked existing ones, like the water shader. I used some basic Unreal Engine content water and added caustics, ripples, adjusted color near the surface, etc.
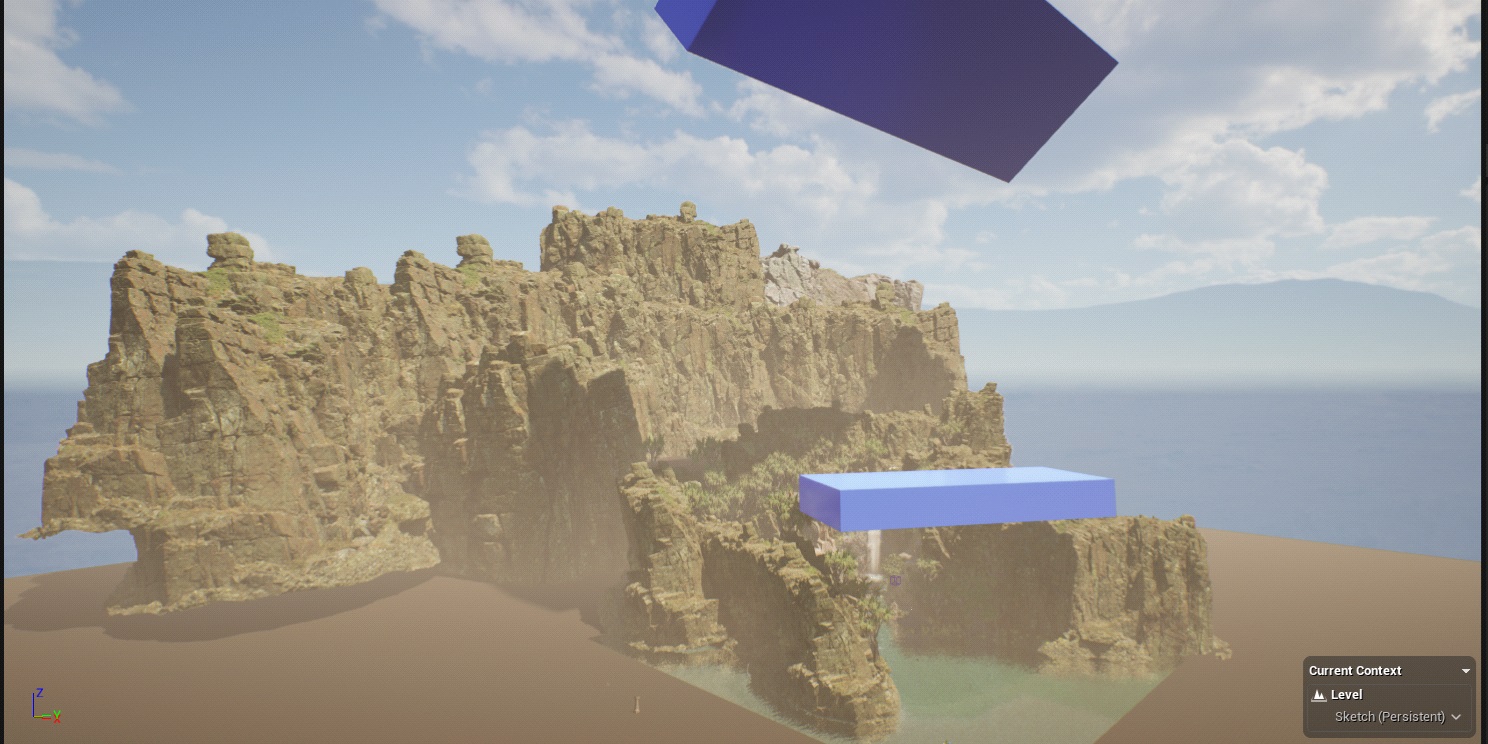
For the lighting in Unreal Engine, I used some HDRIs from Poly Heaven in combination with UE light system. I added some point and rectangular lights to emphasize some dark spots, but on the other hand, for the dark vignette effect in front and in the background, I added two big cubic shapes to cast the desired shadow.
ANIMATION
All the work, including some short animations, can be viewed on my Artstation page.
I also created animated sequences in UE, utilizing Nanite and Lumen technology and rendered them with ACES color grading. With the help of this tutorial:
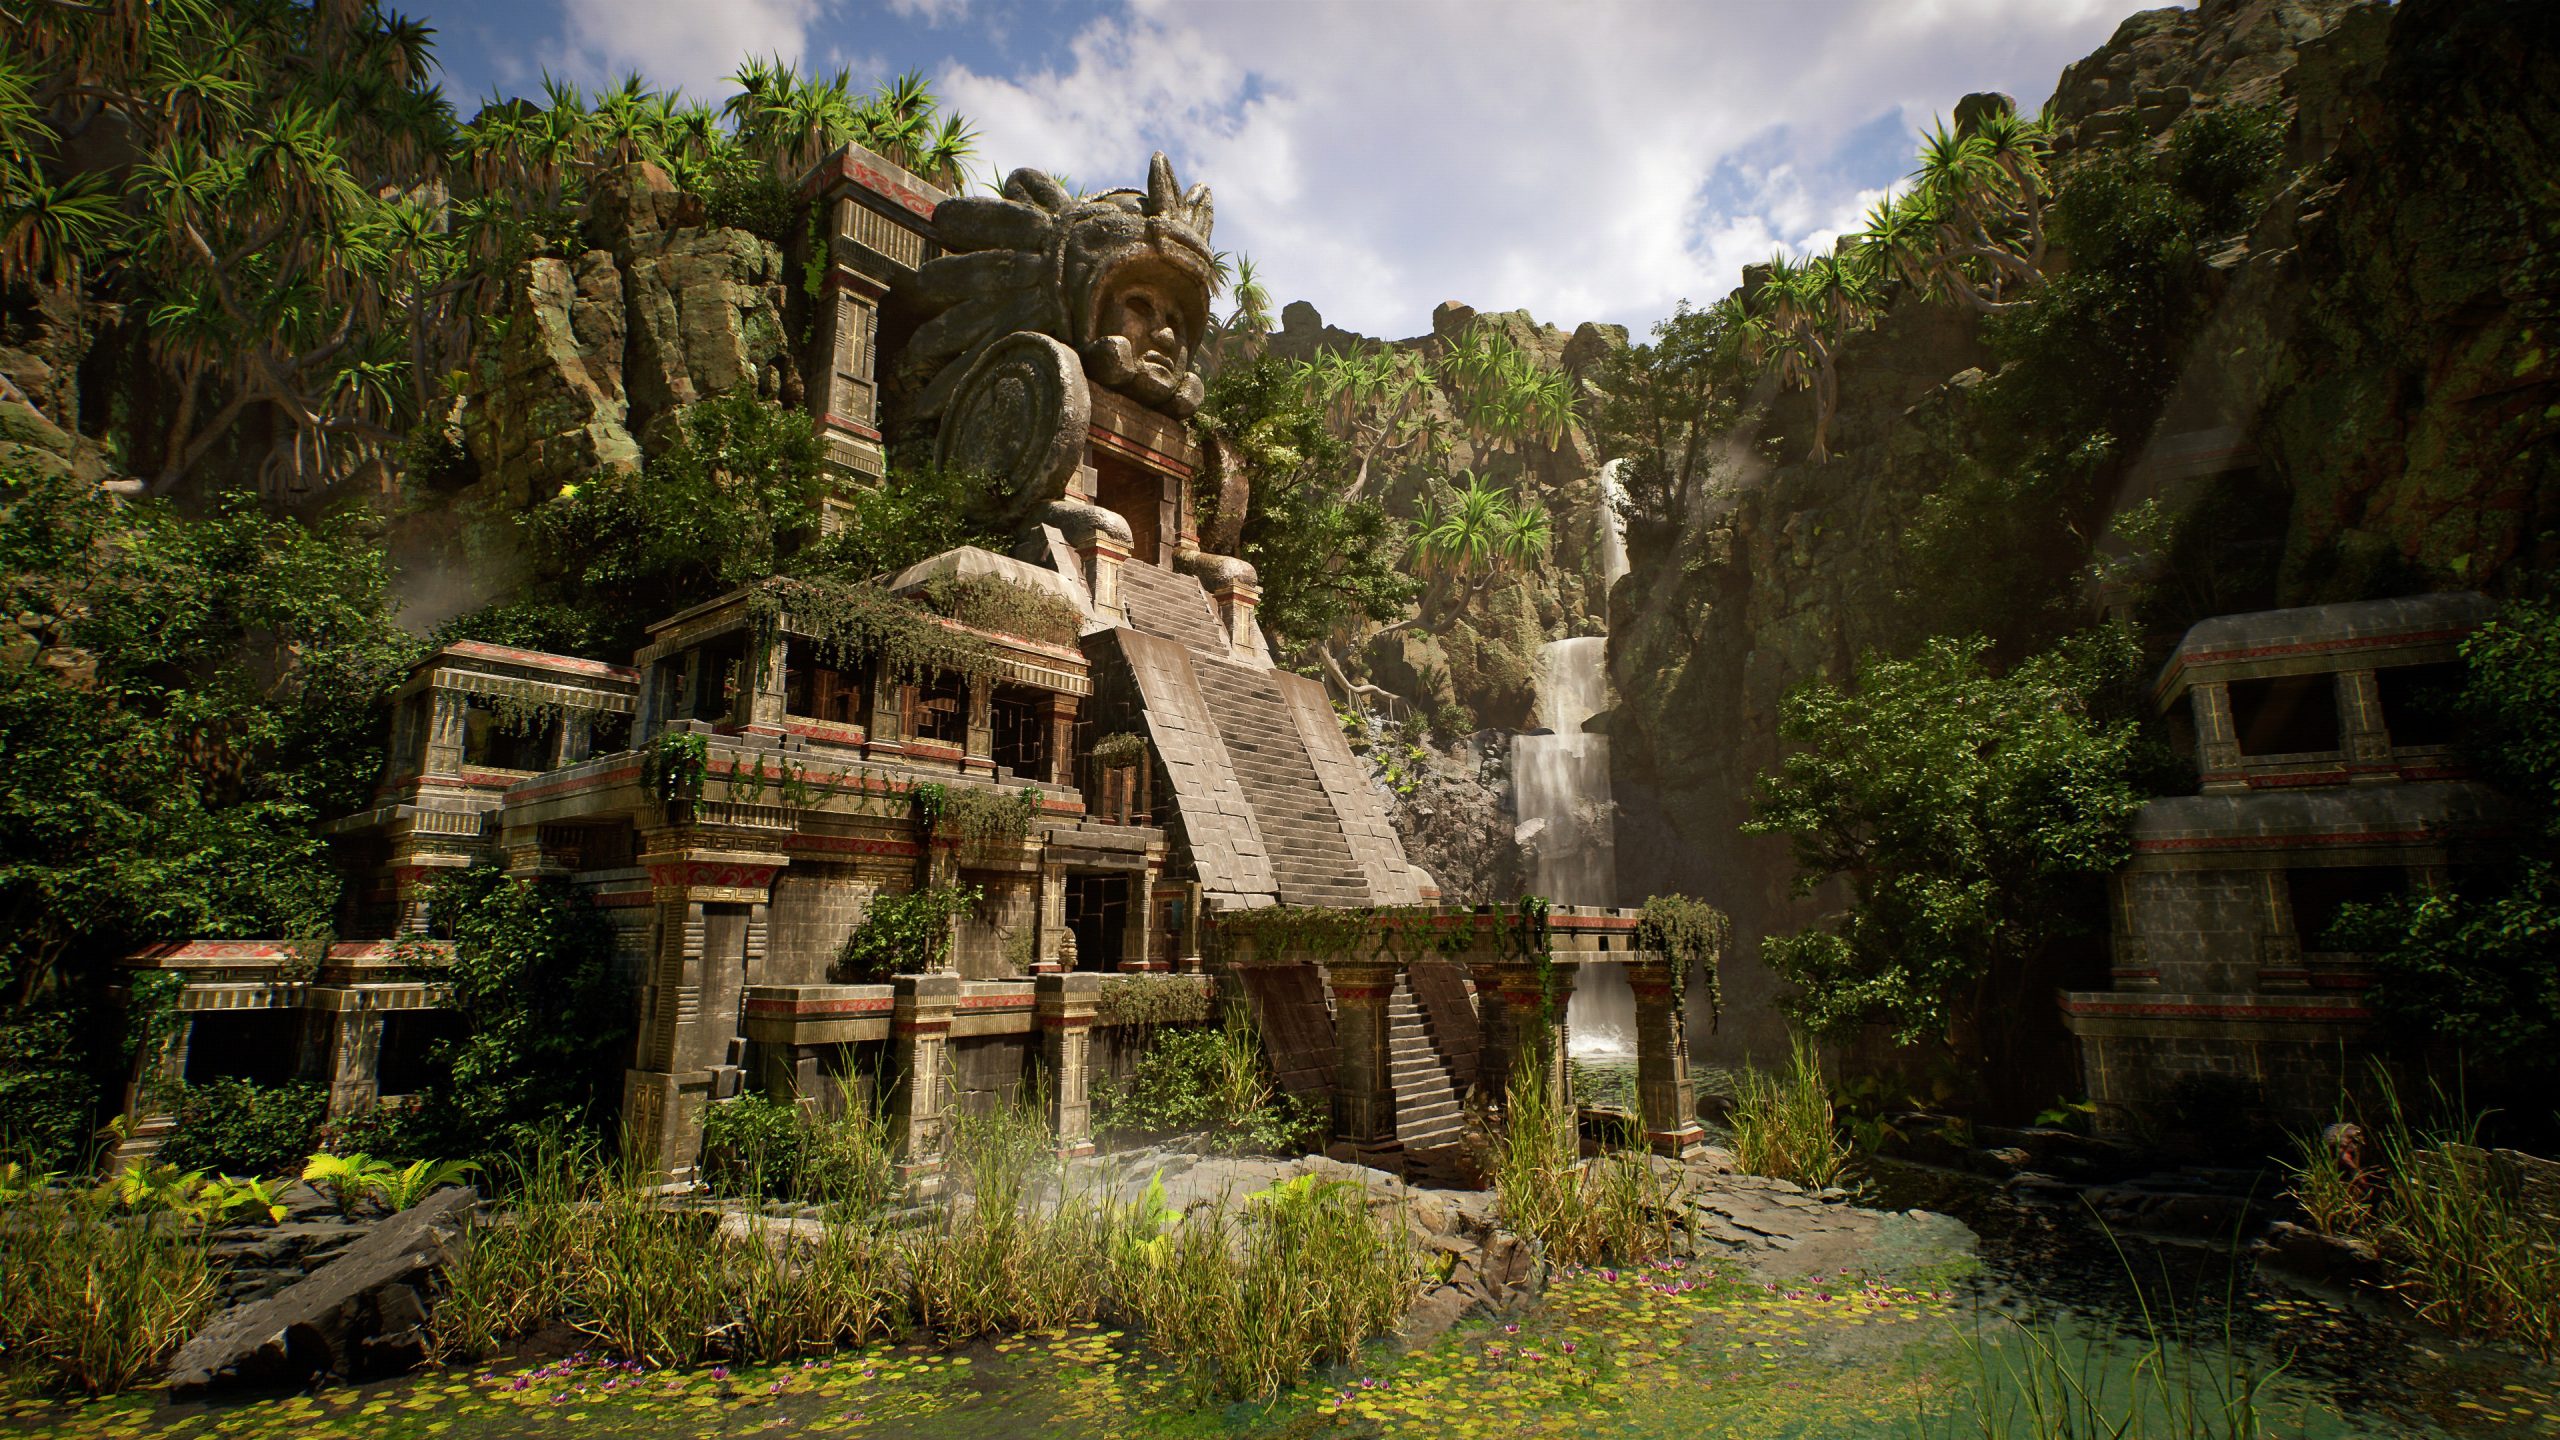
TEMPLE BAY
Sequence 1:
Sequence 2:
Sequence 3:
I downloaded the Khaimera character from the Unreal Engine marketplace and used their animations.
Thank you for your time, I hope you enjoyed reading this article and learned something useful from it.
Have a nice day!
About the Artist
Jindřich Patík, an environment artist from the Czech Republic, currently working at an advertising agency.


