
INTRODUCTION
Hi there! I'm Nabihah. I'm an 18-year-old self-taught 3D artist based in the Netherlands. I started learning Blender in early 2021, when my high school went fully online for the second time due to COVID-19, and I wanted to learn a new hobby to pass the time. For the first year or so, I played with Blender on and off, but I wasn't quite serious about it until a few months ago.
I had no prior experience as an artist, but I grew to love working with Blender and learned quite a bit about it through YouTube tutorials as well as the wonderful Blender community on Reddit.
INSPIRATION
Although I tried a lot of different art styles over the past months, designing photorealistic interiors has been the most interesting and fun experience for me yet. My motivation and inspiration for interiors mostly came from reference photos on Pinterest or even, at times, interior design subreddits.
The inspiration for "Rainy Morning" came in a similar way. I gathered ideas from different references and tied them together in one cohesive scene. Sometimes I added in stuff I remembered seeing in a photograph weeks ago, even if I could no longer find the image!
PROCESS
Developing an ideal workflow that worked best for me was a crucial step towards improving my work. Here are some of the steps I usually took.
BLOCK-OUT
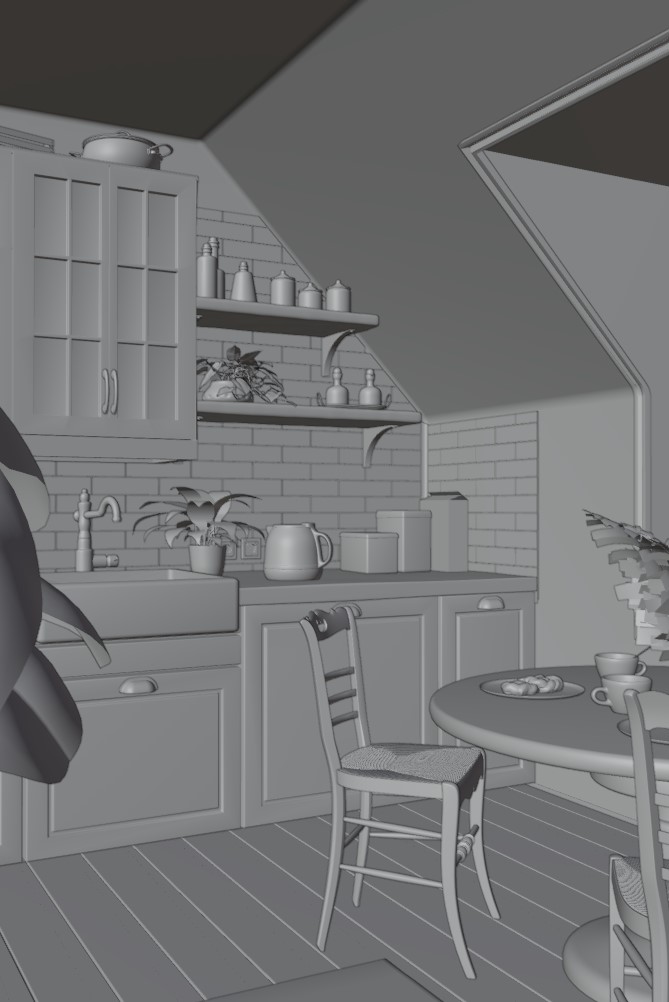
Although it was simple enough to model an entire kitchen and decide on different camera settings afterwards, I personally liked to set up the camera size and angle and block out the basic scene with generic shapes such as cubes and cylinders.
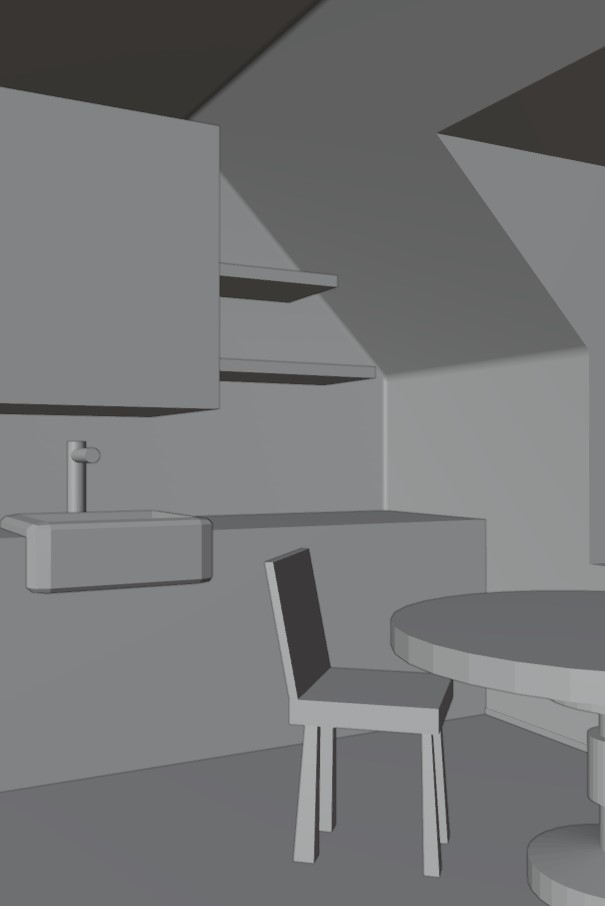
This didn't have to be anything accurate, as you can see below, I even used the simplest of cubes to almost "sketch out" how I wanted a particular chair to look or where I wanted it to be.
LIGHTING
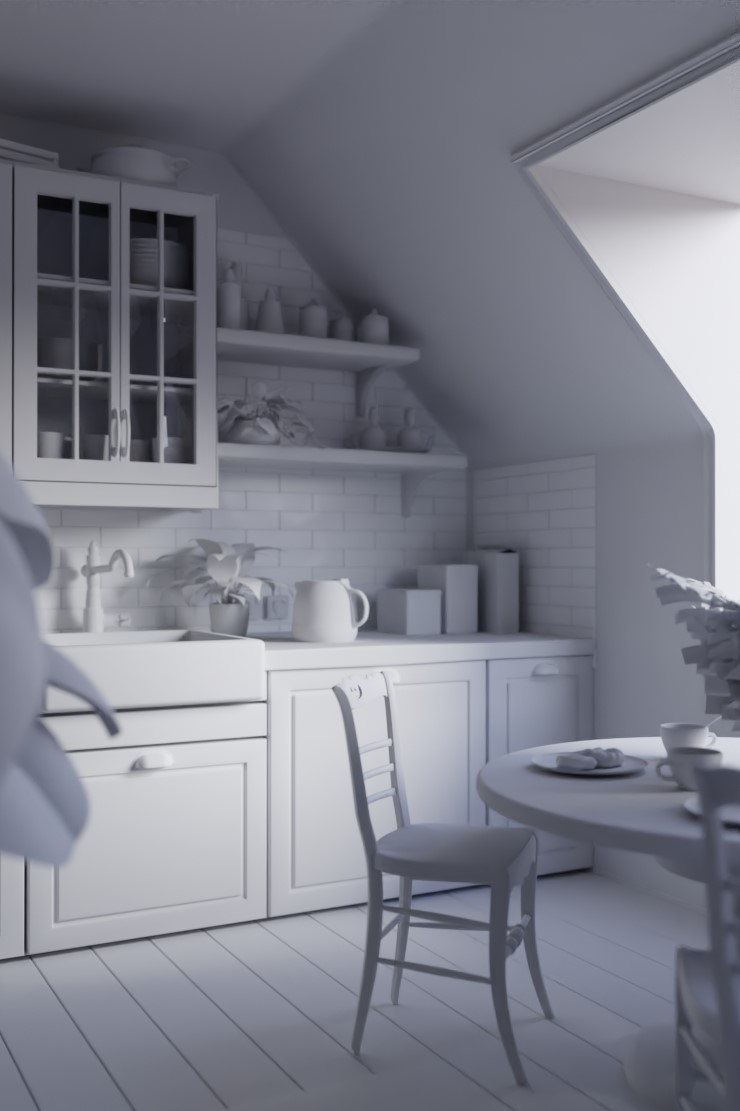
I like to figure out the lighting in my renders early on. Similar to blocking out the scene, this is generally just to give a rough idea of what the final render will look like. While I usually like to go for nice sunny lighting to showcase the interiors, I wanted this scene to look like a cloudy morning where the sun was out but covered by clouds.
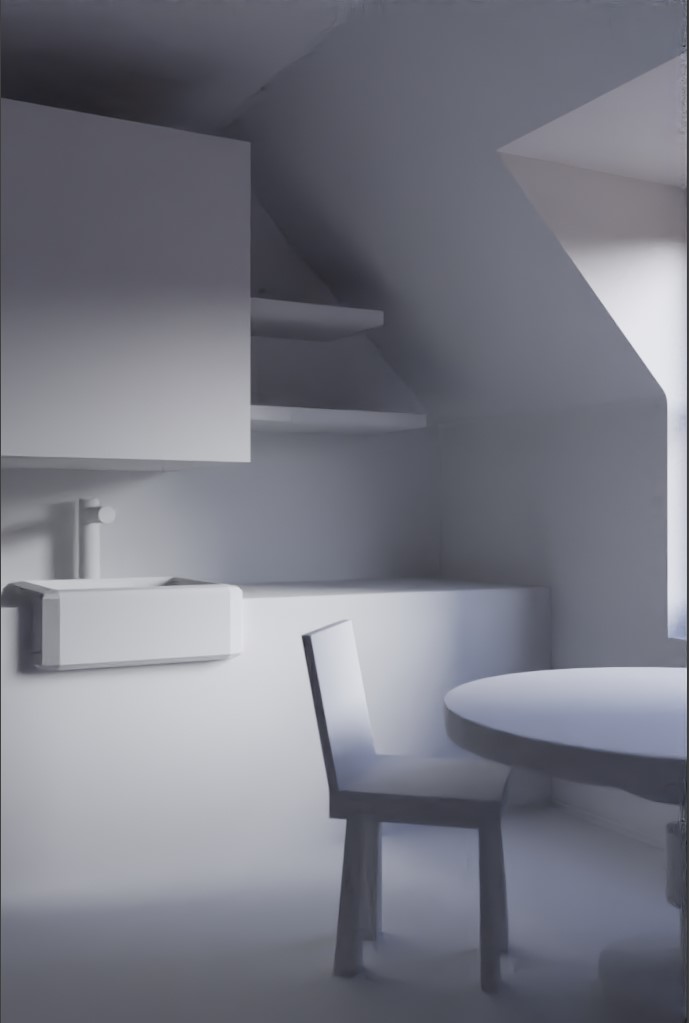
To achieve this, I first used my favorite HDRI from PolyHaven and paired it with a standard sun lamp with a very light blue color and strength of about 4, playing around with the rotation until I got lighting I was happy with.
MODELING
The modeling of the main furniture is a fun way to just be creative and add as many or as little details as needed for your scene. For this scene, I had a general aesthetic and theme in mind, yet I generally just started modeling and coming up with ideas about what to make on the fly.
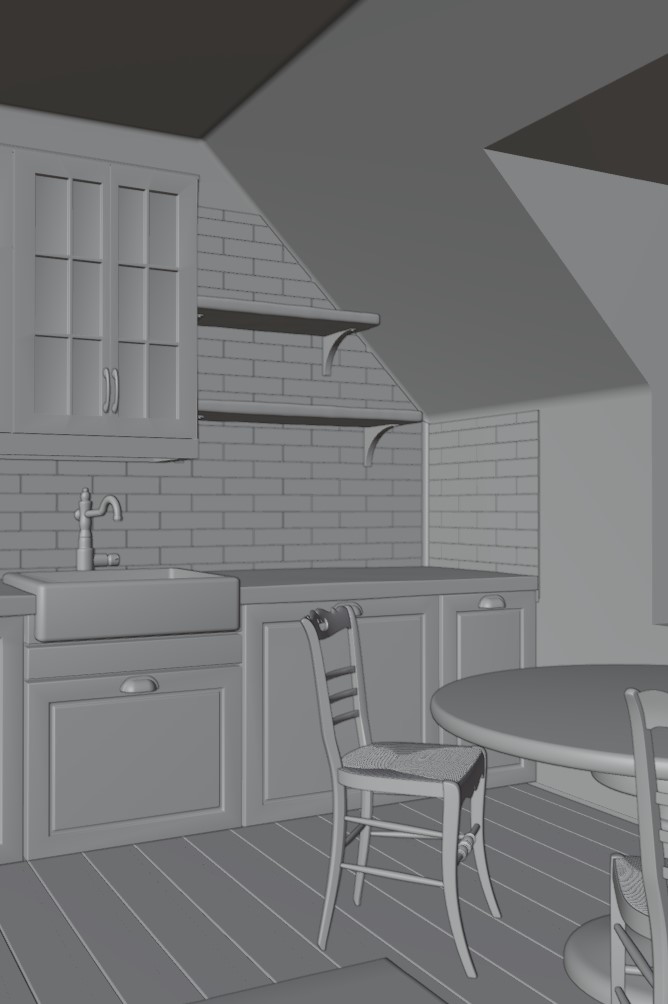
Most of the furniture in this scene required simple hard surface modeling tools such as adding loop cuts and extruding. For wooden elements such as the countertop and shelves I prefer to have a more organic feel, and this was achieved by subdividing the mesh and adding a displace modifier with a large-scale and low-strength cloud texture.
TEXTURING
Texturing is an incredibly important step to achieving the photorealistic look. For this scene I mainly used PBR textures from my own archive I have gathered, most of them being from ambientCG (formerly known as CC0 Textures) or Poliigon.

To get a more worn out look, I added surface imperfections using image or noise textures, controlled using a color ramp and added onto the roughness and bump values of the original textures. I took my time with this to make sure I had the right amount of imperfections (making sure not to overdo it), especially on the kitchen counter, ceramic sink, and wooden floor.
DECORATING
One of the final steps in creating this scene is adding accessories and decorations to make it appear lived-in, in order to tell a story and provide the viewer with various details to observe. Similar to modeling, I was creative with this step and experimented with different design options until I found ones I liked.
Many objects, such as the tin boxes, coffee pot, and cups, were modeled and textured by me. The plants and pastries were imported from different add-ons such as Blender Kit (free) and Botaniq (paid), which I both highly recommend.
OPTIMIZING
The last step of my workflow involves optimizing the scene for rendering. This includes taking several steps, such as reducing the number of light paths and decreasing the resolution of any PBR textures that are not highly visible in the image. This is especially important for the HDRI resolution, as the sky is not visible at this particular angle.
RAINY MORNING

A LITLLE EXTRA STEP!
A fun extra step I like to take after completing my scenes is creating an isometric view of the room. Since most of the scene is already made, it's relatively simple to accomplish. I begin by repositioning the camera to have an orthographic view and adding any additional furniture or accessories to make the isometric view more appealing.
For lighting in the new view, I simply reduce the strength of the HDRI to a small value of about 0.005 to maintain the dark and gloomy ambiance. Instead of creating a glass window, I change its material to a light-blue emission plane. Finally, I add an empty object in the center of the scene and use it to set the depth of field for the camera, adjusting the f-stop to give the room a more miniature feel.

And Viola! An isometric view to showcase all the interesting details of the scene.
Thanks for reading, and feel free to ask me anything. Have a great day!
About the Artist
Nabihah Zaheer, a 18-year-old self-taught 3D artist from the Netherlands. Currently studying Aerospace Engineering at the Technical University of Delft
1 Comment
Hello Nabihah
at the outset, many many hearty congratulations for such a nice scene. It is really appreciable work you have done. Pls clear one thing what is f-stop.