
Behind the Scenes: Manpower
INTRODUCTION
Hello! My name is Grant Brown, a self-taught 3D artist from Scotland currently residing in Lithuania. I have been honing my skills in Blender since January 2020.
INSPIRATION
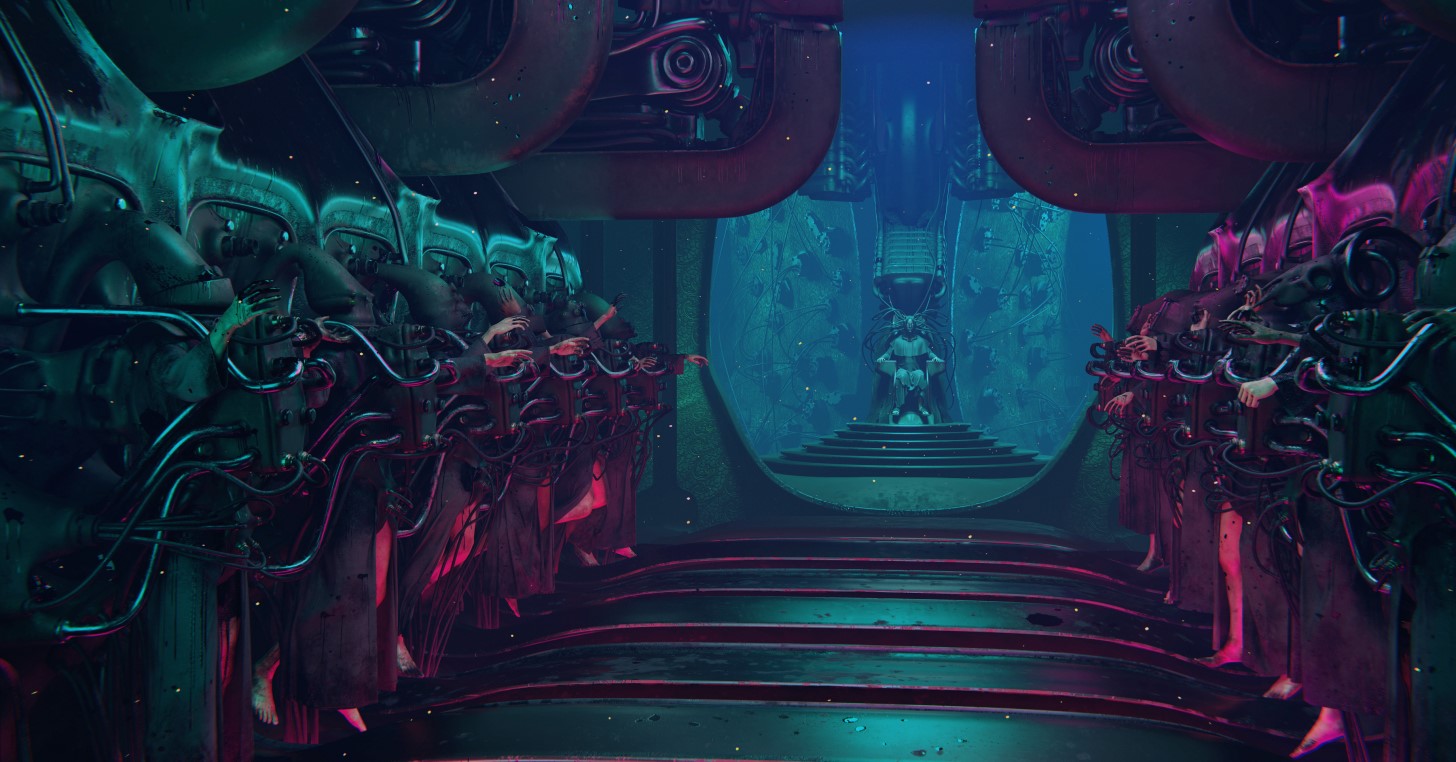
The inspiration for this work is not entirely clear to me. I have previously created works featuring “Diesel Priests” and had certain ideas in mind, such as the central throne, wire hallways, and engine harnesses.
Due to my condition of aphantasia, I don’t visualize images in my mind but instead, I work by feeling and allowing the smaller details to develop as I progress with the poster.
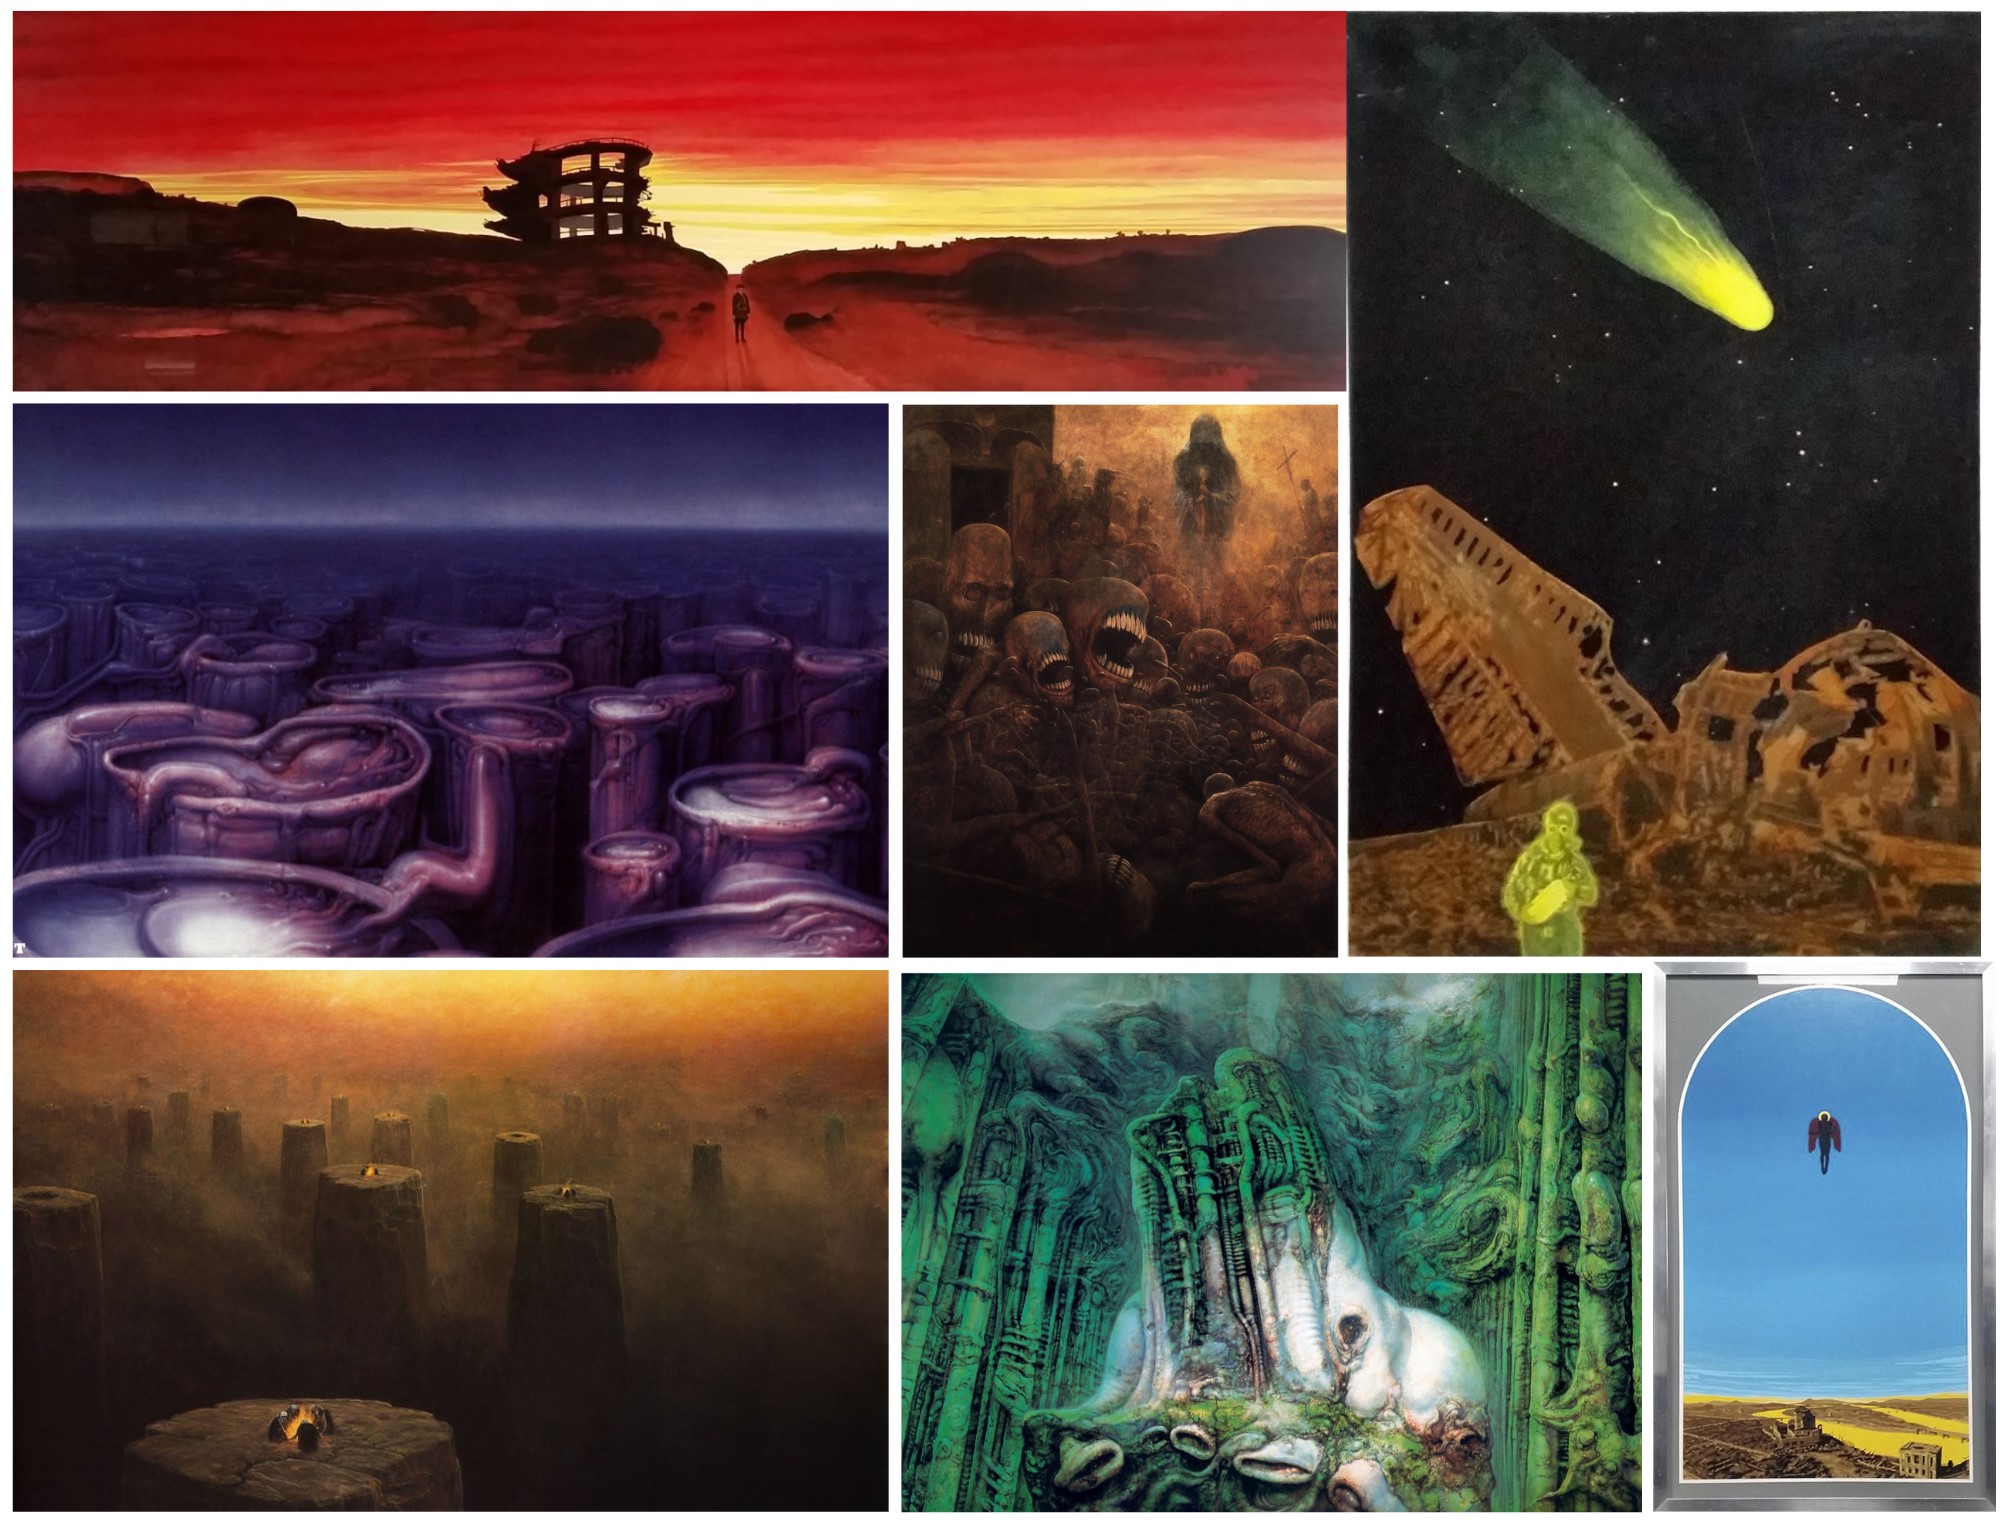
My inspiration is drawn from the works of H. R. Giger, Zdzisław Beksiński, and Terry Illot (whose works are provided below as examples, however, none were specifically used as inspiration for this work).
PROCESS
For creating this work, I utilized Blender 3.3 for modeling, UV unwrapping, lighting, and rendering. I also utilized a trial version of Marvelous Designer to design the clothing. The final texturing was done using Adobe Substance 3D Painter.
My setup is decent but not top-of-the-line, consisting of an i5-11600K 3.90GHz processor, 32GB of RAM, and a Geforce RTX 3060 12GB graphics card.
LAYOUT / SKETCH
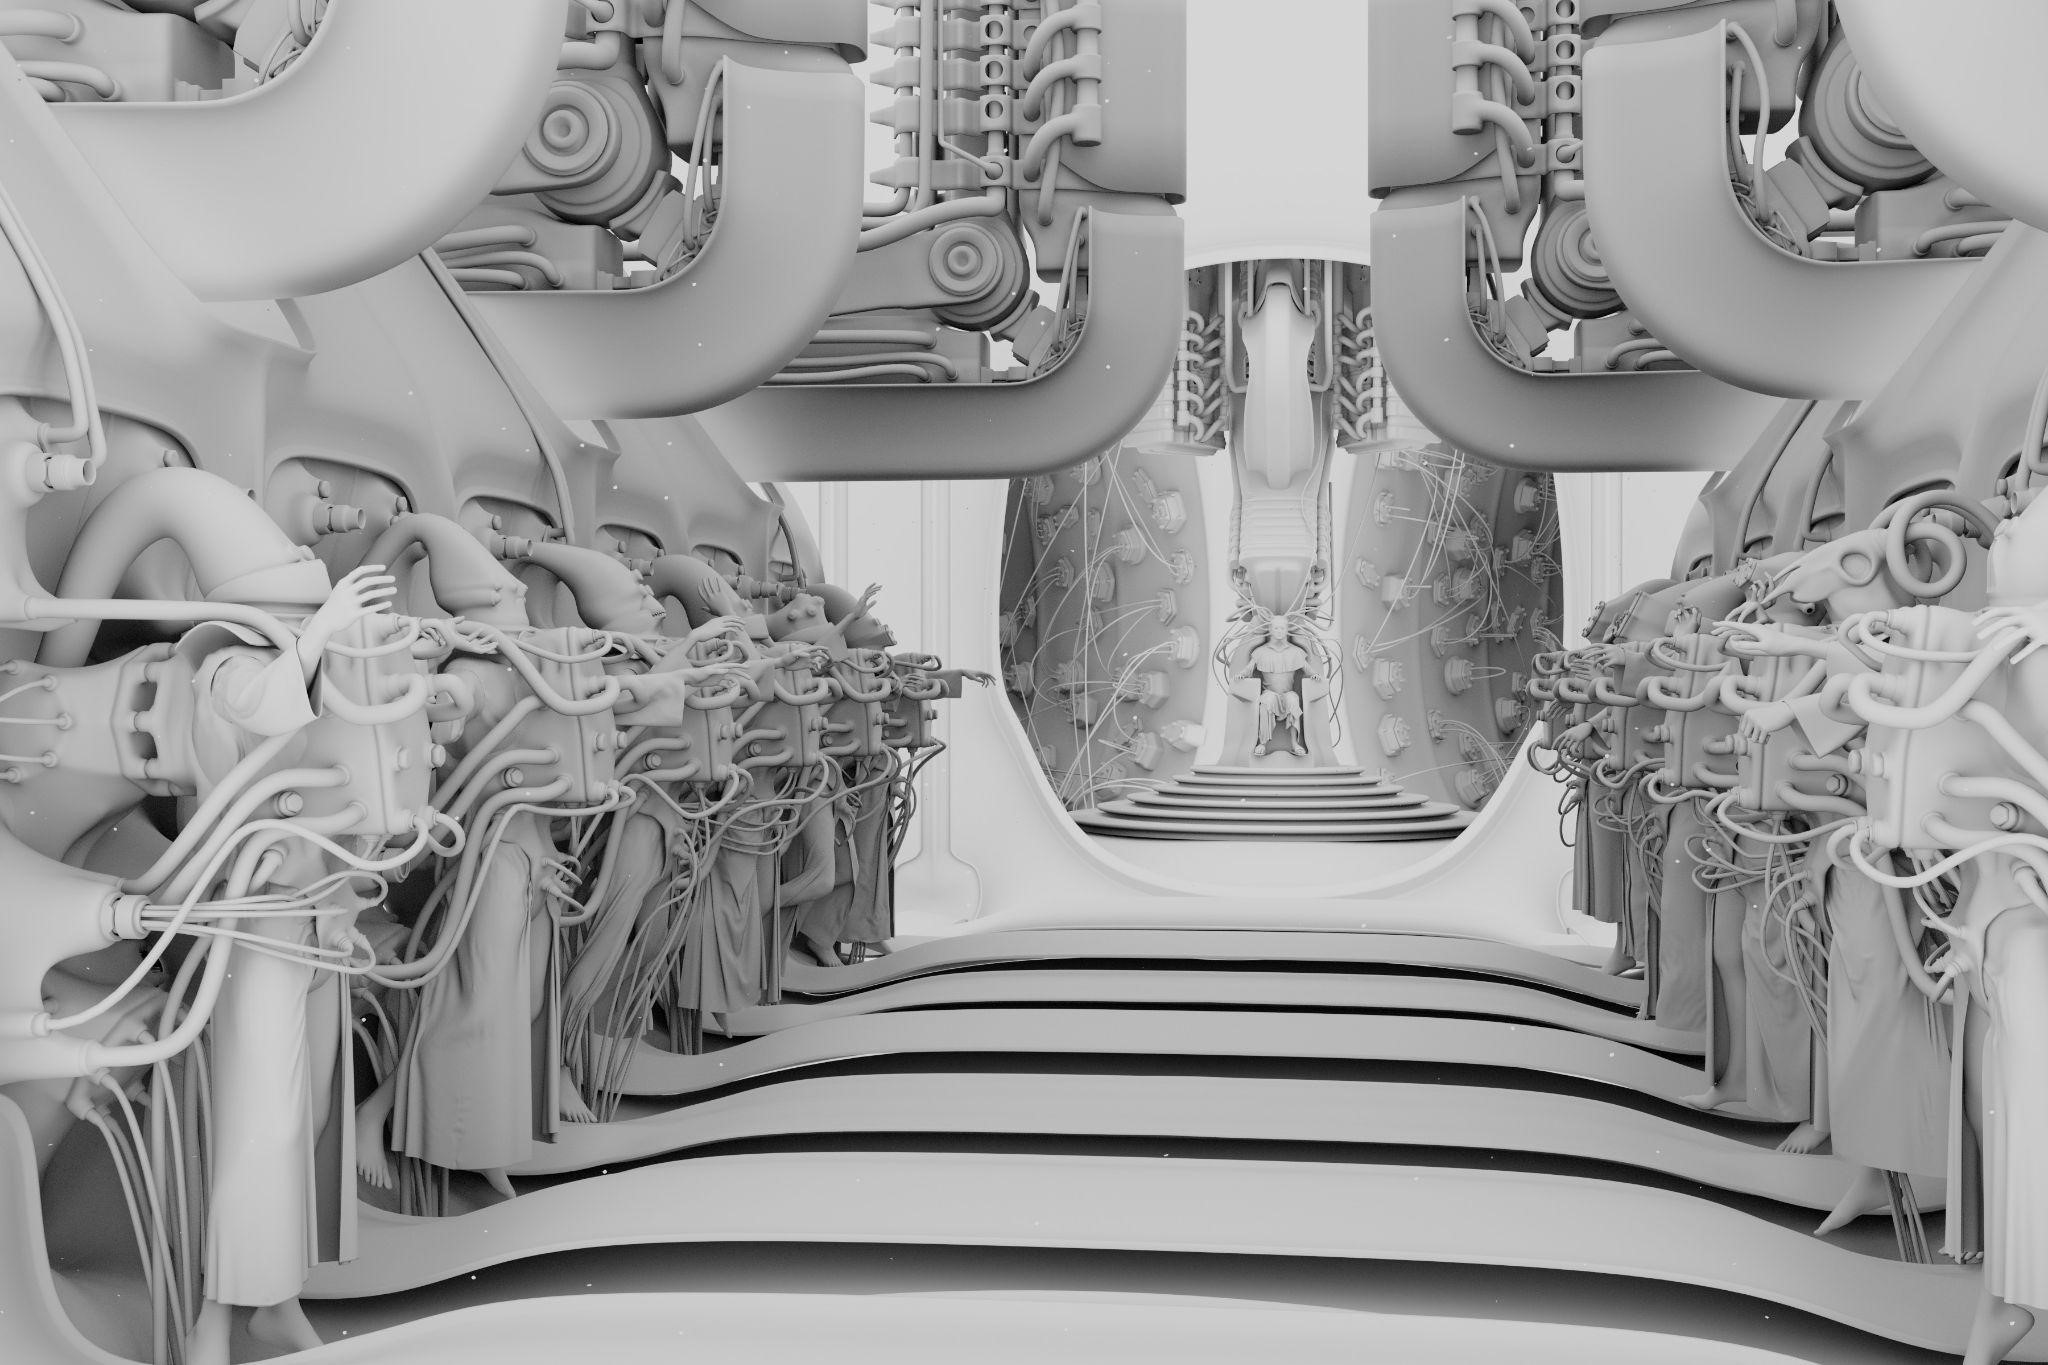
I begin the creation of my posters with a quick sketch, focusing on capturing the basic shapes and a few key details. I then determine the placement and poses of the human figures, using the Human Generator v3 addon to create base meshes. I then refine the rough shapes, such as the side walls and tubular hallways, before finalizing the camera placement and framing of the image.
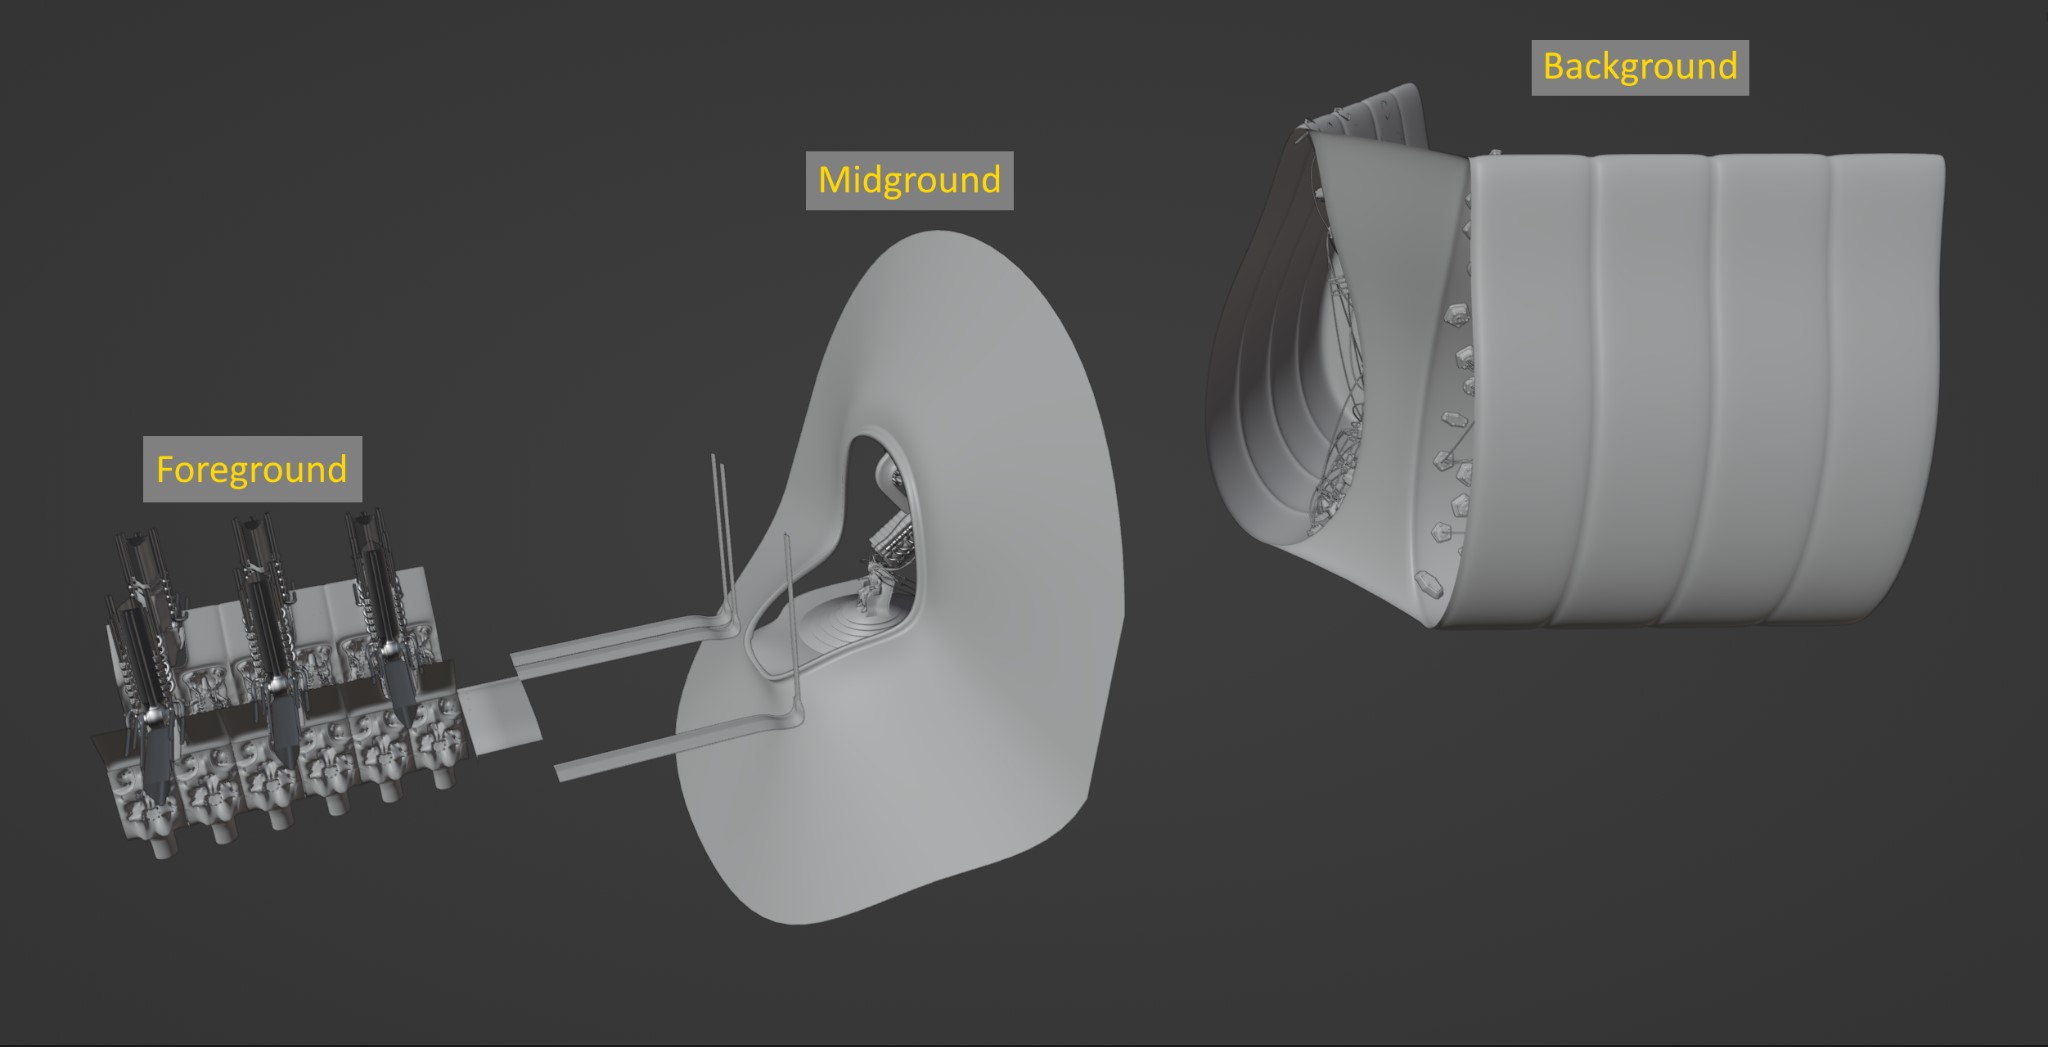
To create depth in the scene, I separated the elements into foreground, middle-ground, and background. This allows me to more effectively control the lighting in specific regions without affecting other elements.
MODELLING
I frequently use a small set of modifiers, such as subdivision surface, smooth (corrective), and decimate (unsubdivide), for organic modeling. I often mirror symmetrical objects to reduce manual editing. I apply and reapply modifiers multiple times at different stages until I am satisfied with the look.
Additionally, I frequently use the Loop tools > Circle and Mesh Tools > Edge Tools > Offset tools. These are invaluable for creating various pipe openings and rims while maintaining a smooth cast metal look. I focus primarily on the major shapes and let the details evolve as I model.
While it may not be the most efficient method, I enjoy the challenge of creating objects with as few parts as possible.
I model all assets in full, paying attention to making them make sense in 3D space. I typically work this way for several reasons:
- assets are easier to reuse in other scenes/contexts
- assets can be moved closer to the camera without remodeling
- it is easier to work from high poly to low poly
- at poster scales, it is often less demanding to work with real geometry and smaller textures compared to the other way around

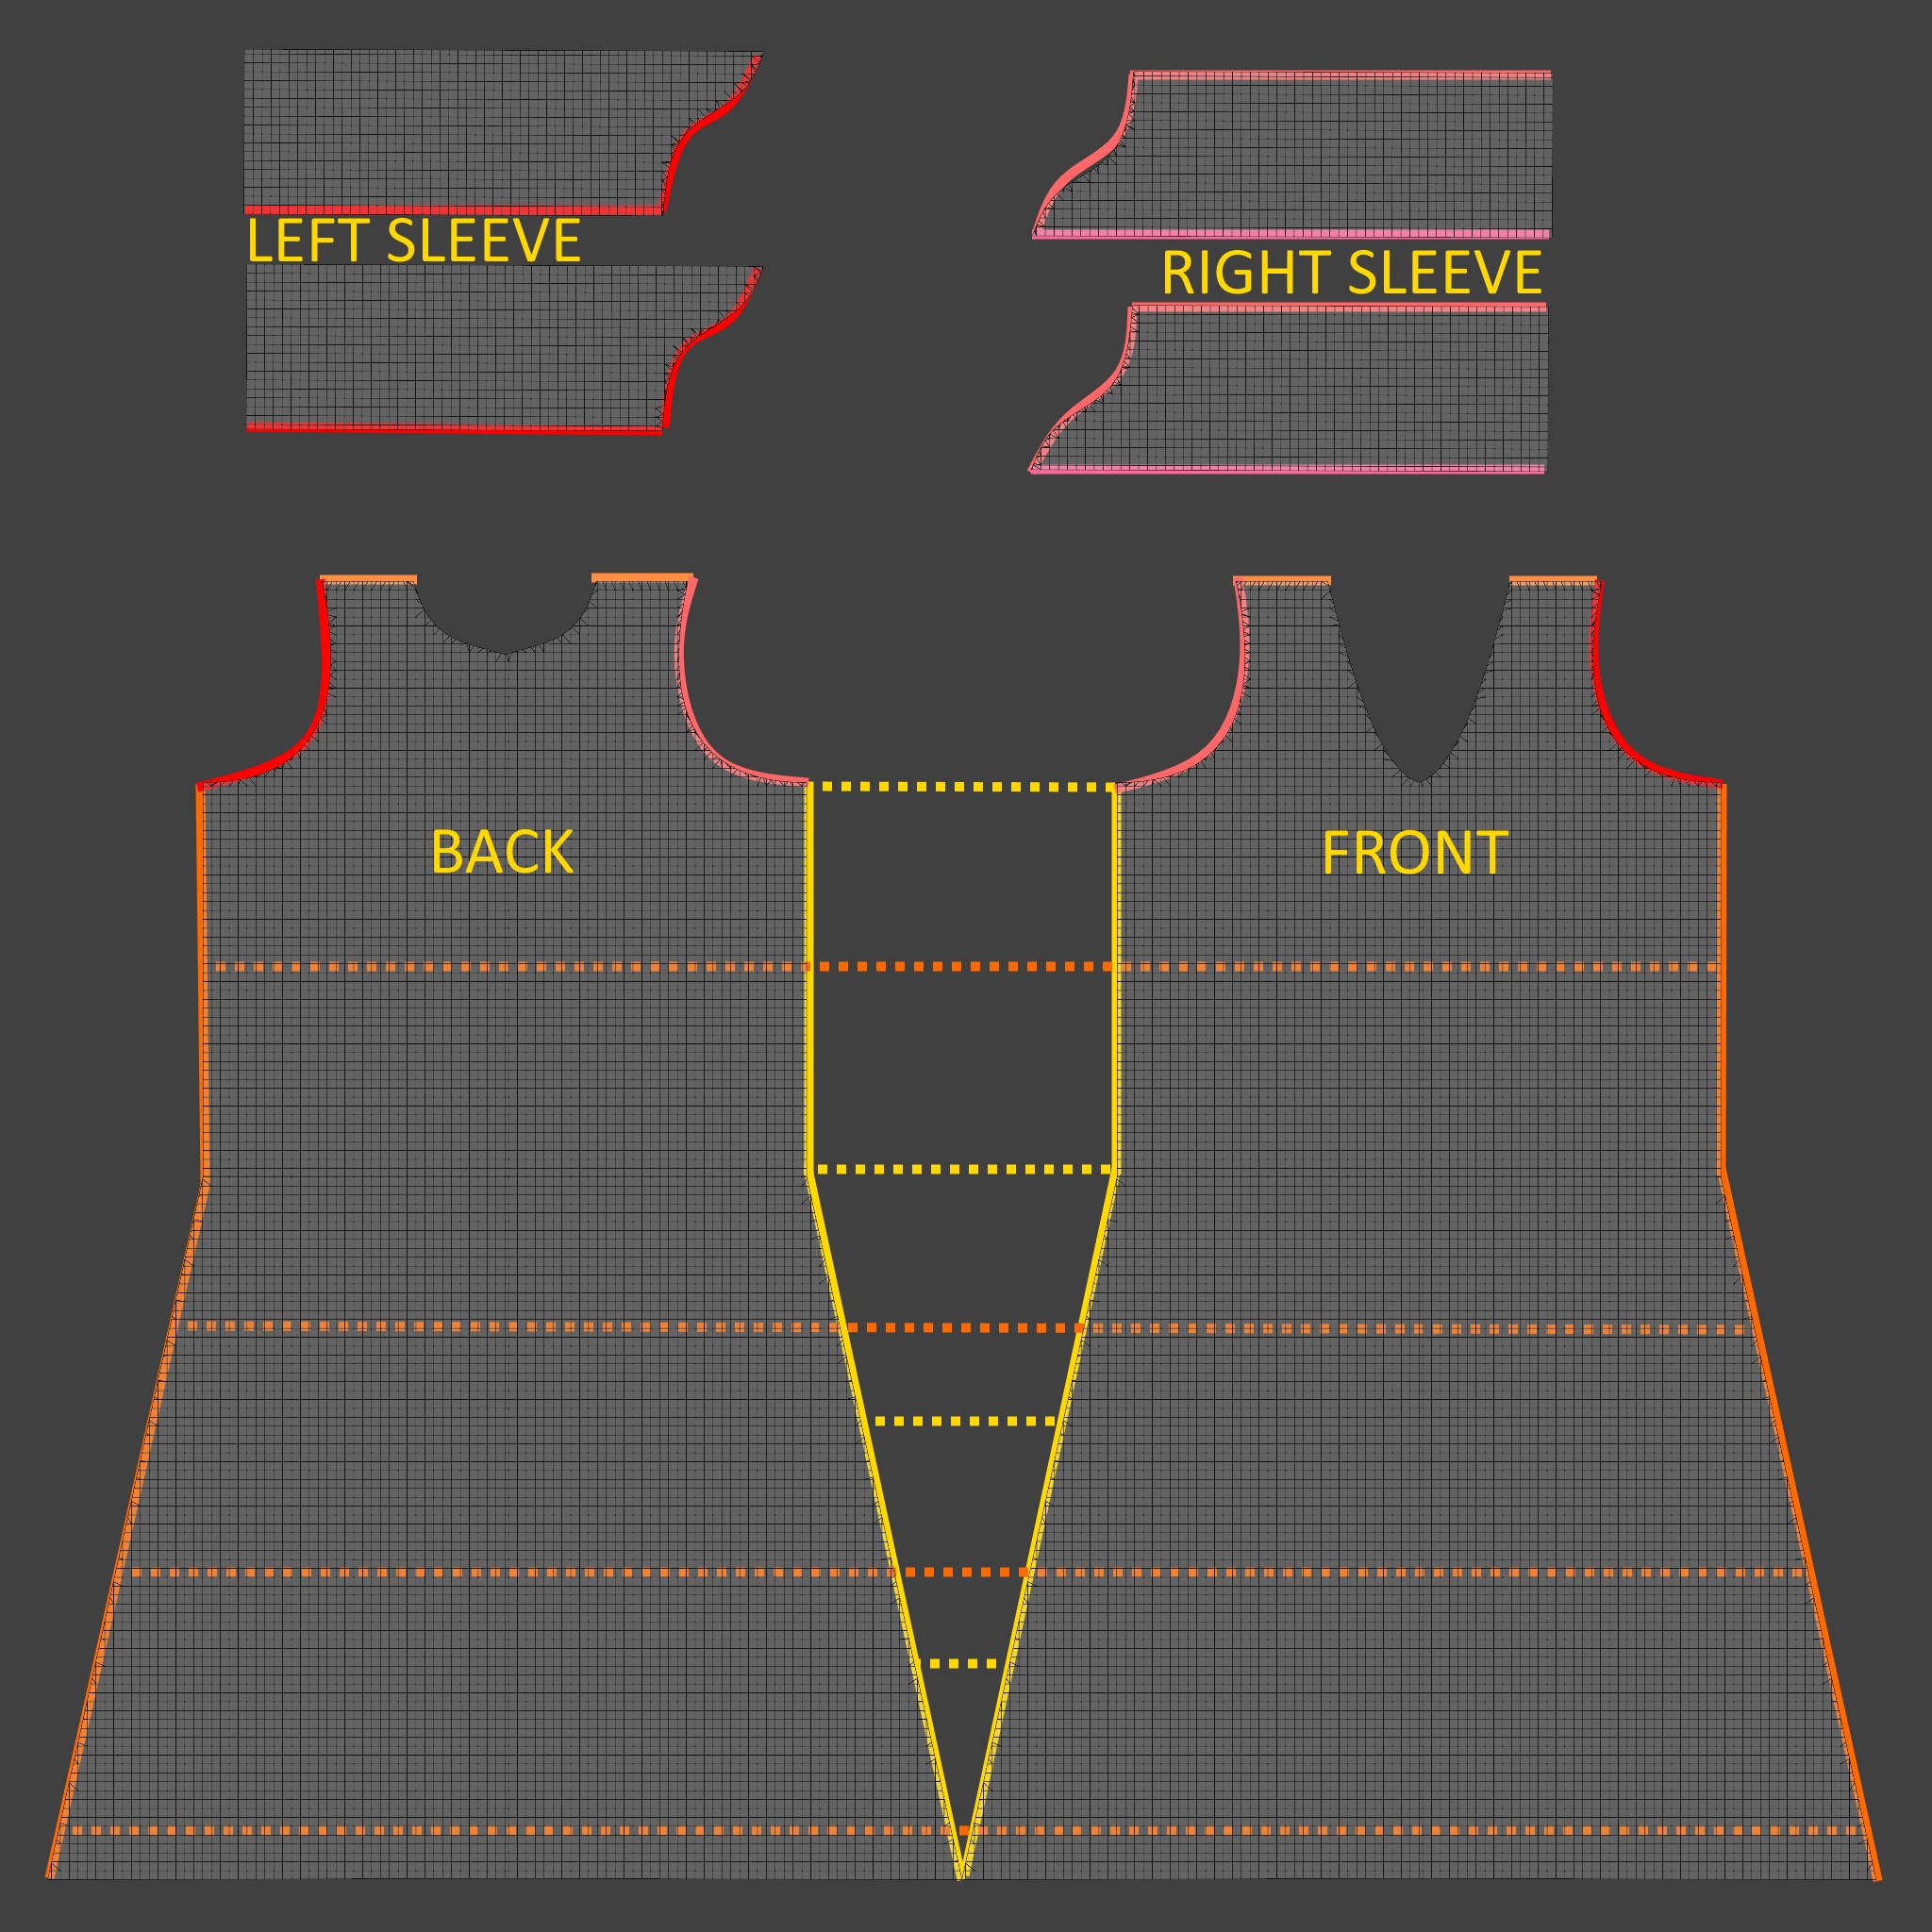
I optimized this scene wherever possible by removing geometry that was not visible to the camera, scaling down textures, etc. The robes were modeled using cassock robe patterns that were drawn over in Marvelous Designer. I imported the engine harnesses and their occupants for collision and let the fabric simulate around them in a realistic manner.
Although you can do this in Blender, it takes a lot longer and I find the automatic topology and UV layout tools in Marvelous Designer more convenient.
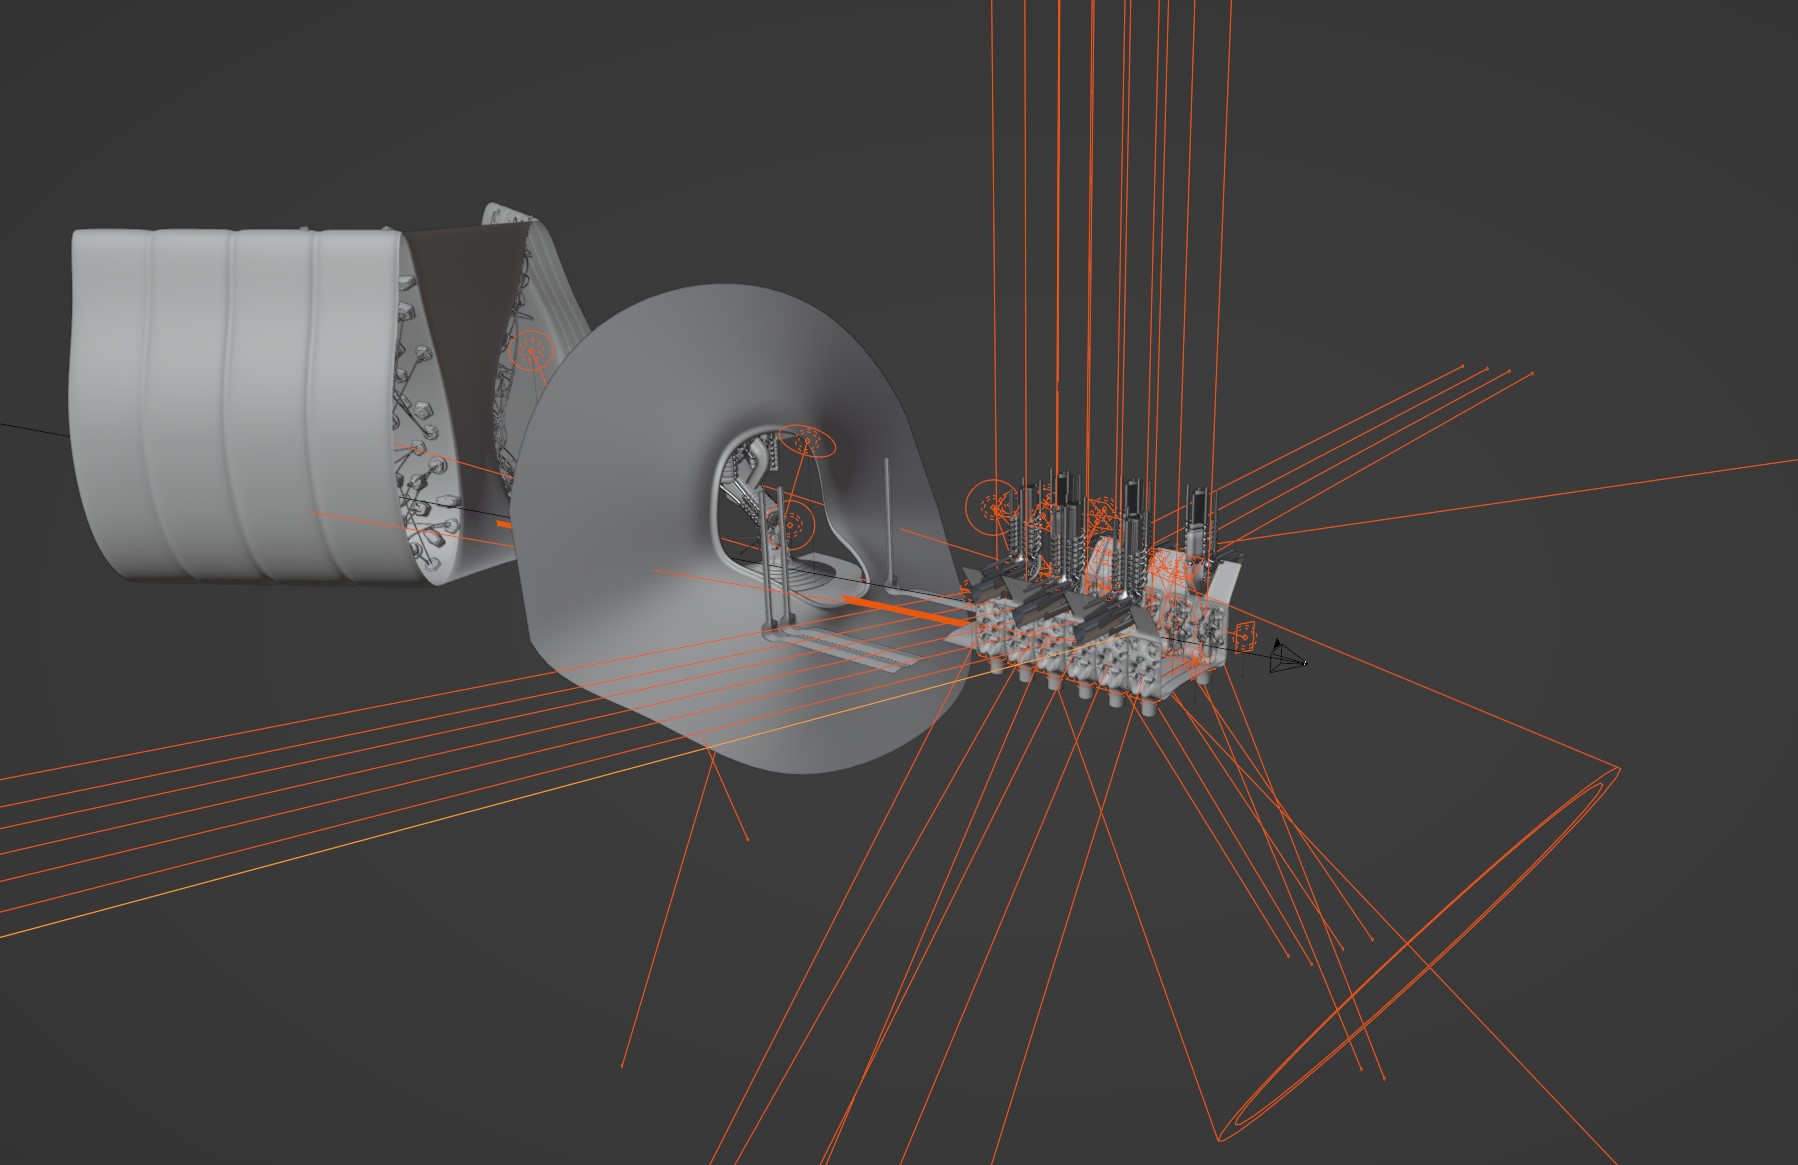
PROCEDURAL MODELING
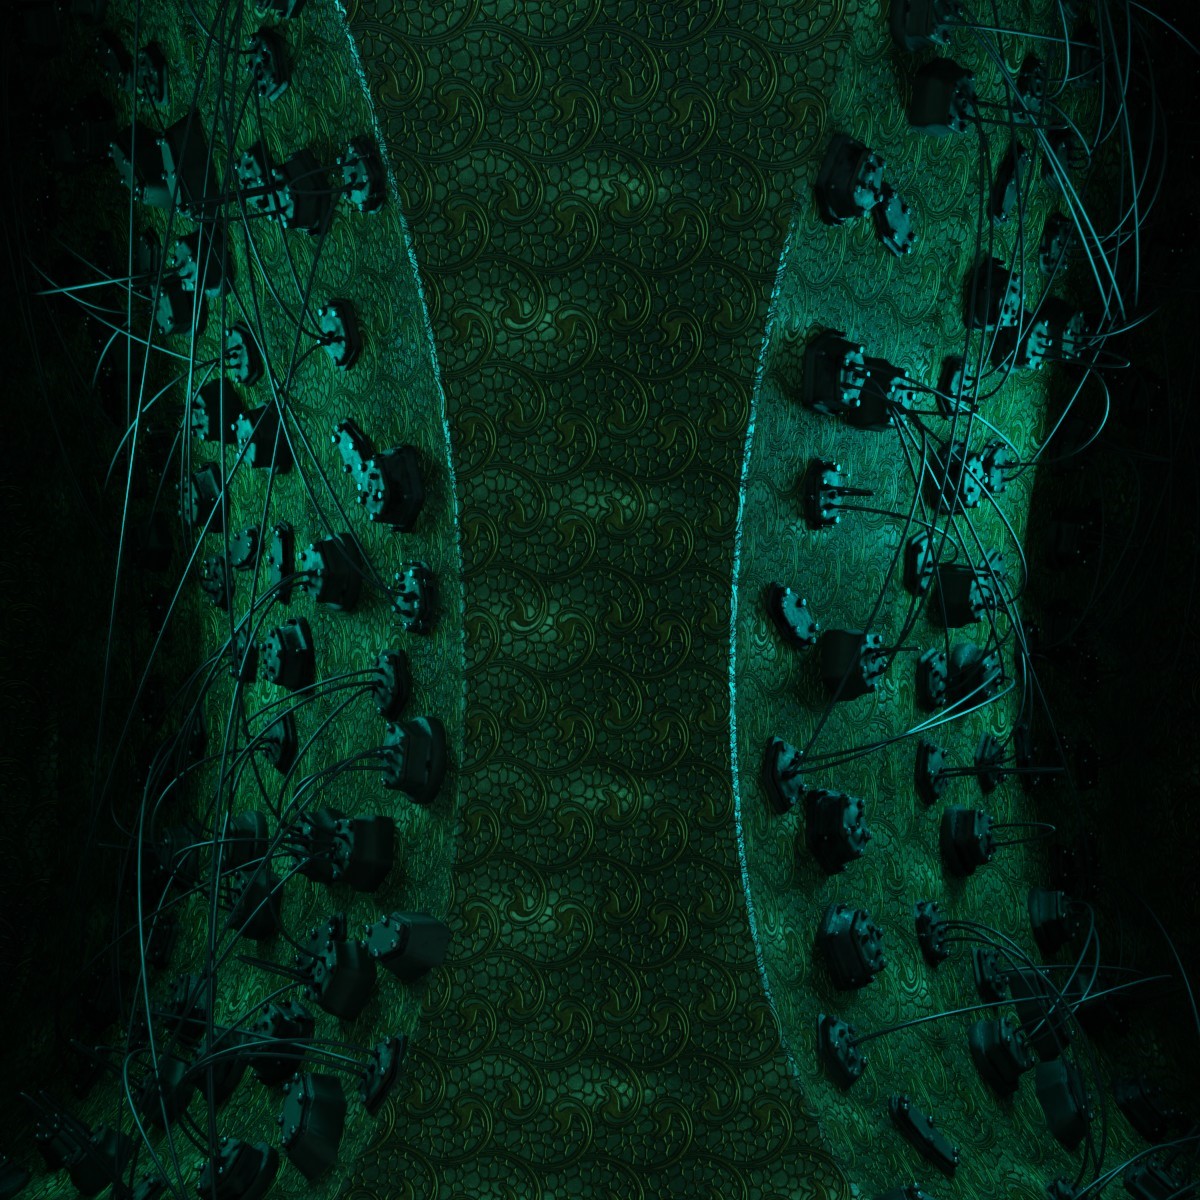
I use geometry nodes quite frequently in my work, and the main use of them here was to generate the background wires that randomly connect to the metal plates.
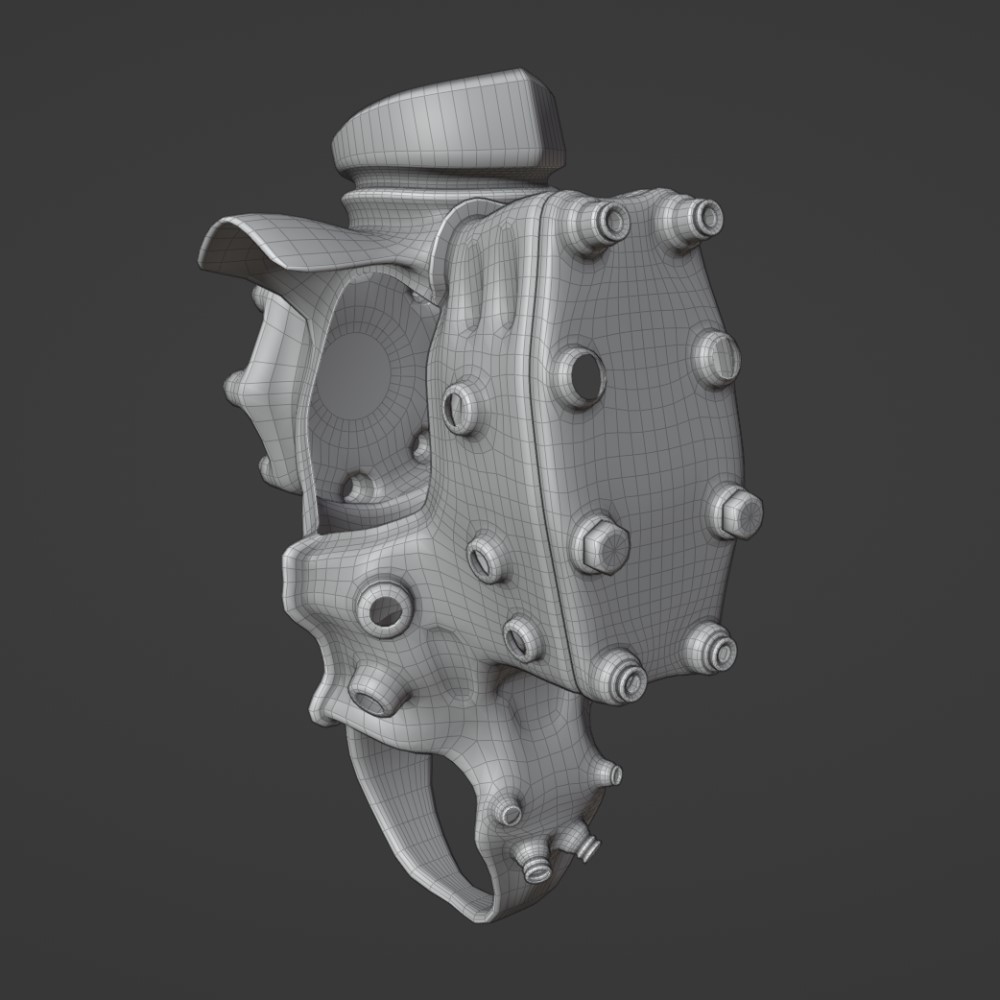
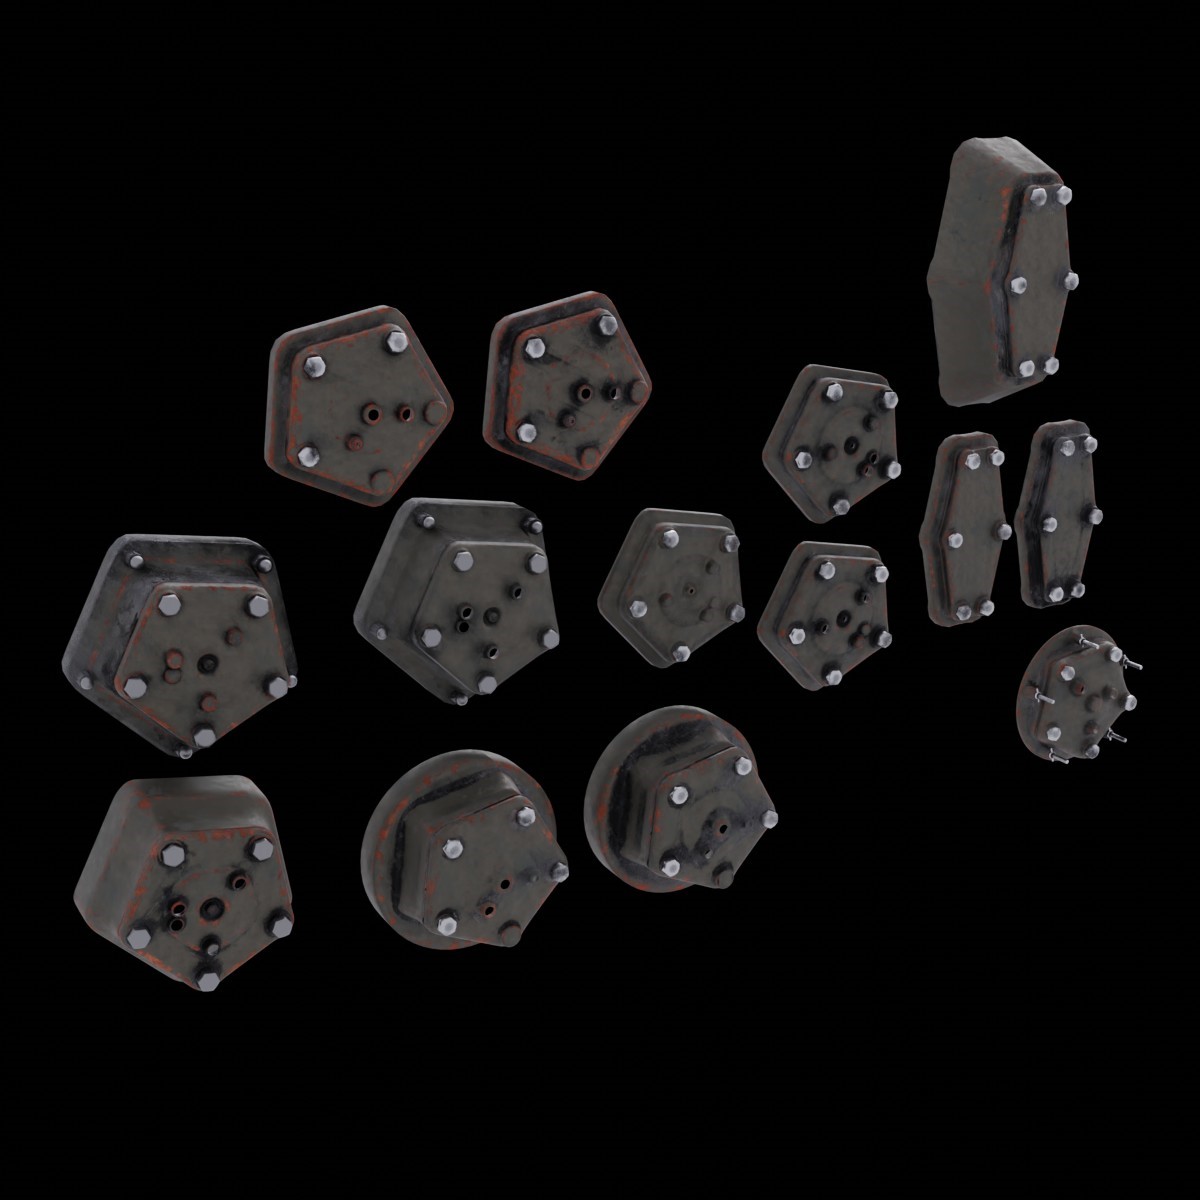
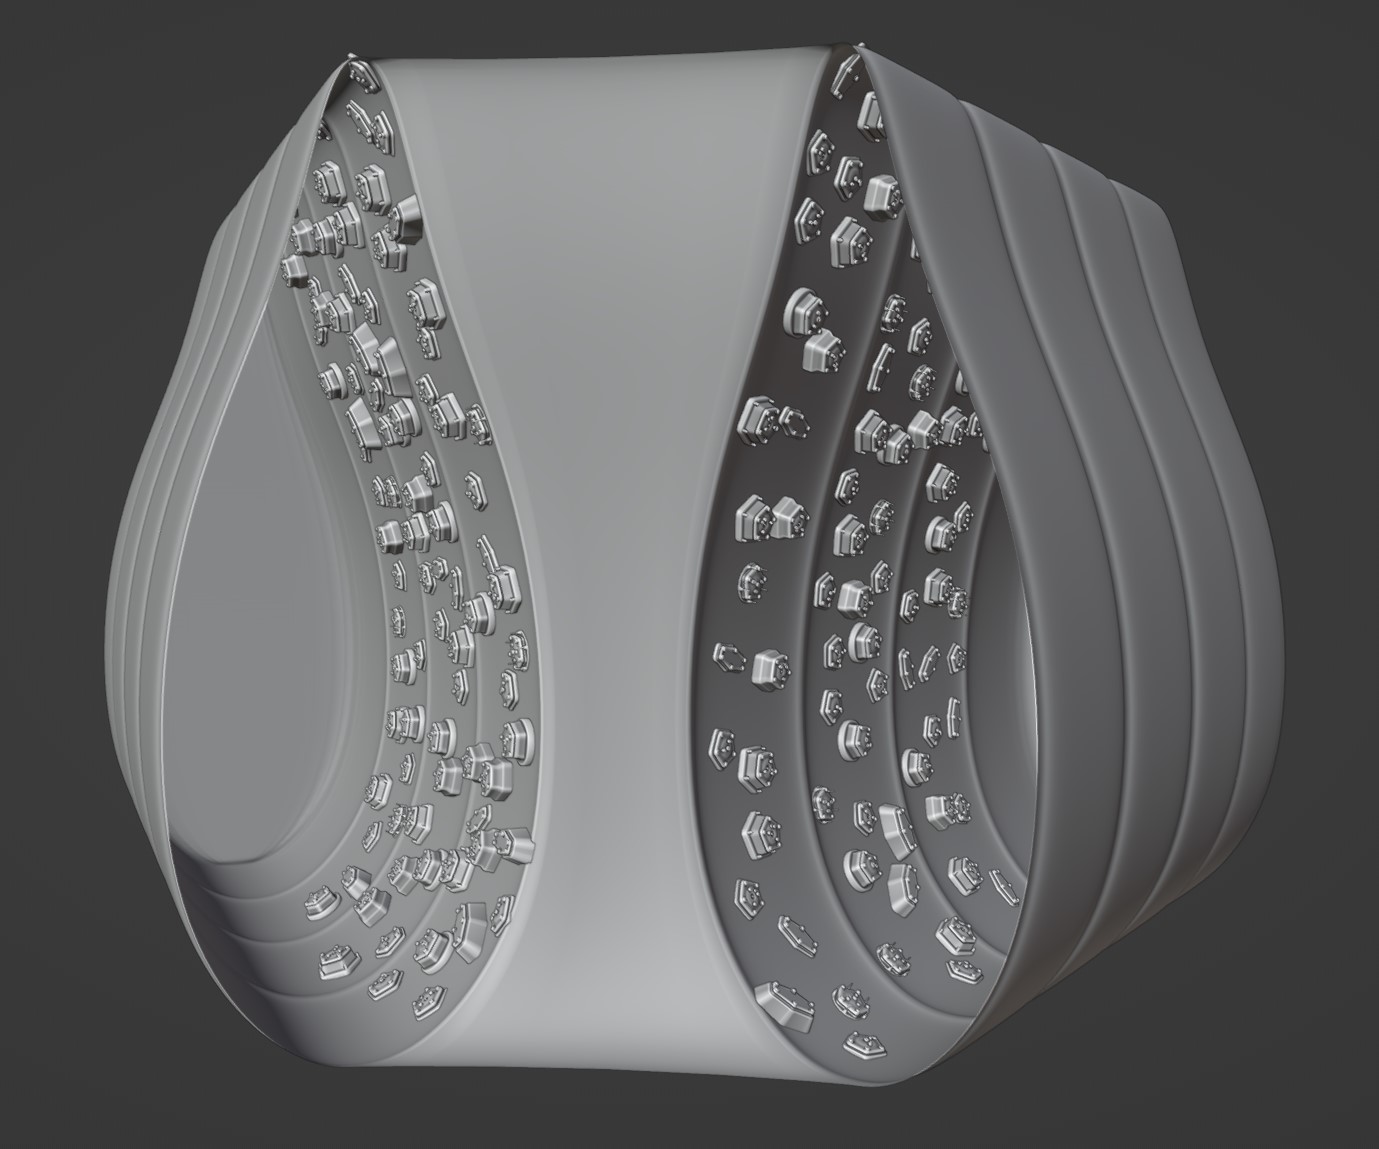
To create these, I first modeled a collection of pentagonal/hexagonal plates with wire attachment holes:
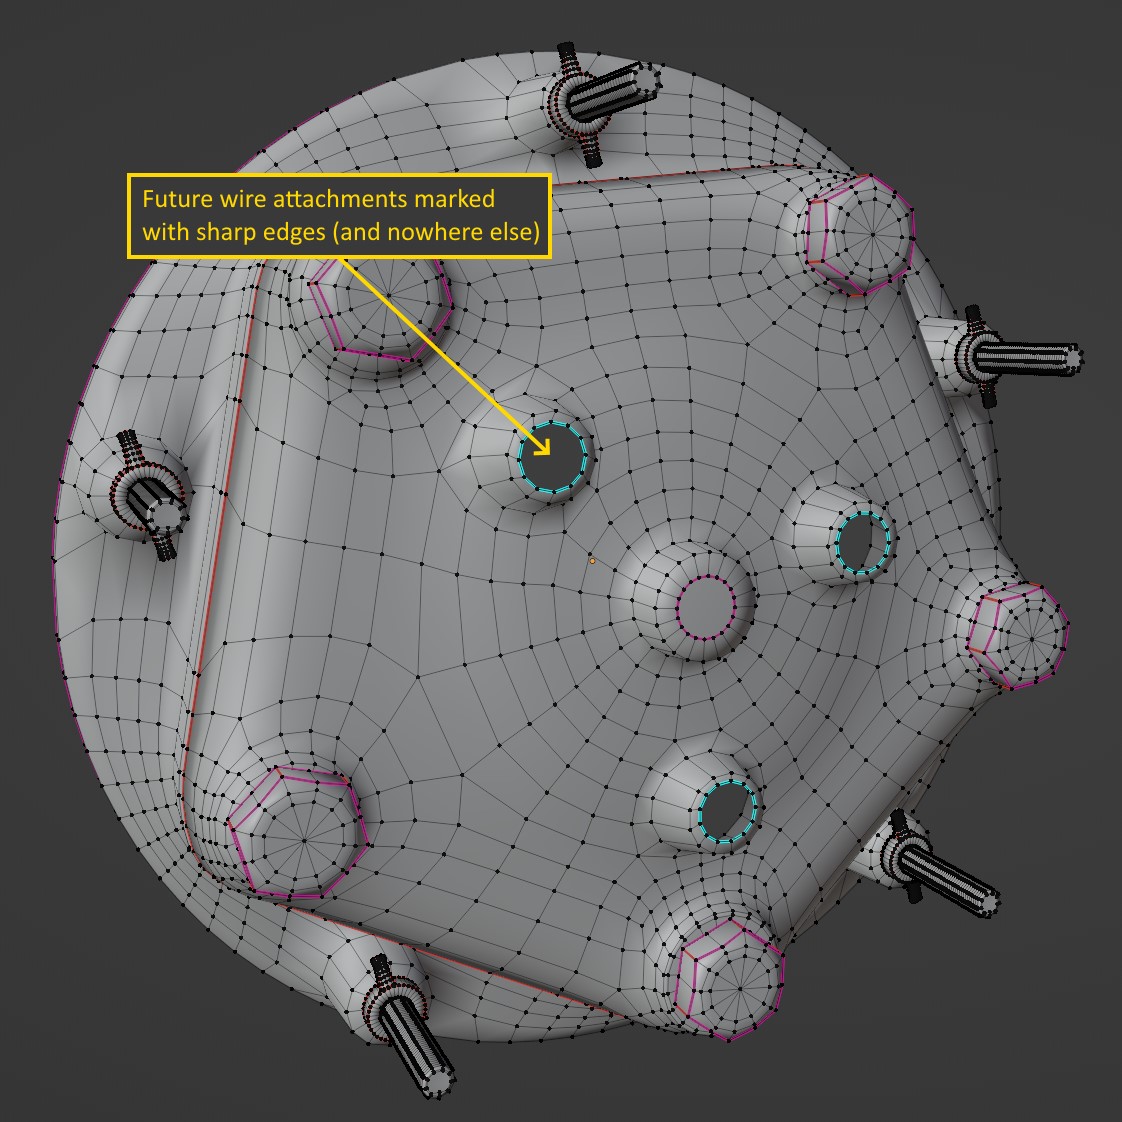
All of the wire openings were marked with sharp edges so I could select them later. I couldn’t use vertex groups for this due to a reason I’ll explain later.
I then scattered these plates on the tubular hallways, using a vertex group to control where they were instanced.
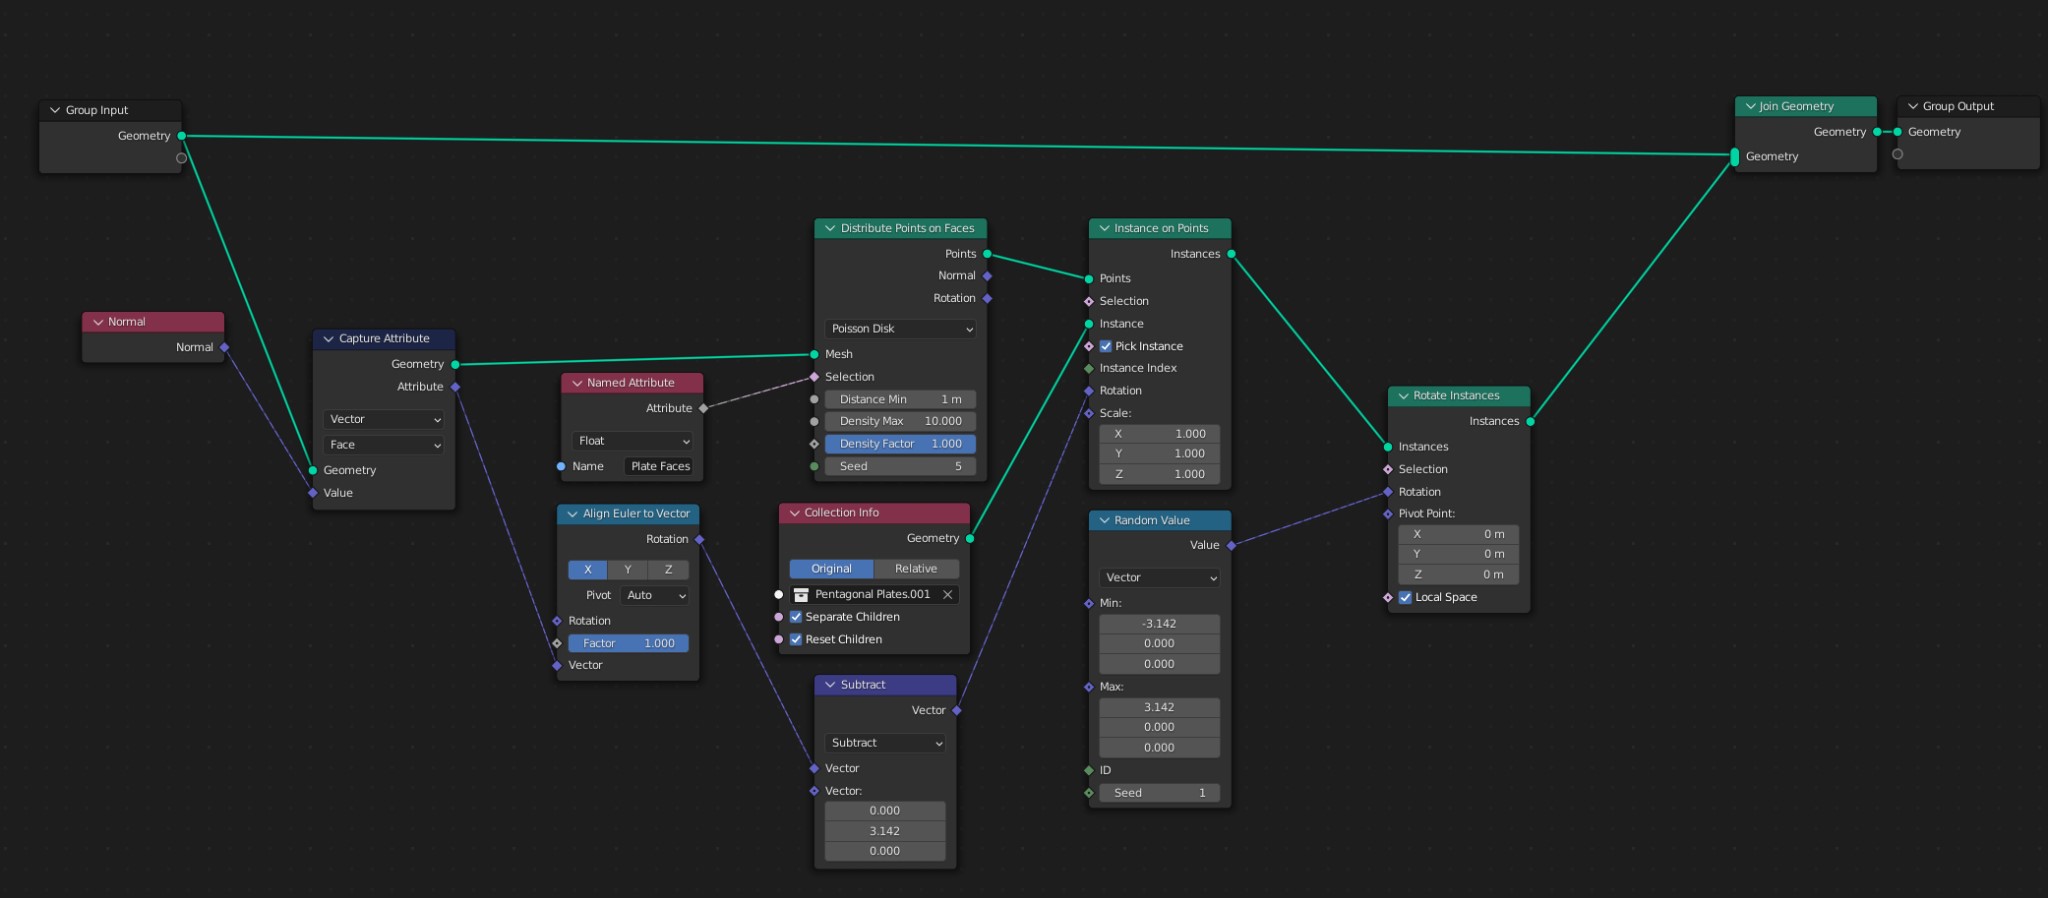
The random wire generation was a bit beyond me, so I asked for assistance at the BlenderArtists forum. After help from geometry node experts, we were able to make the following setup:
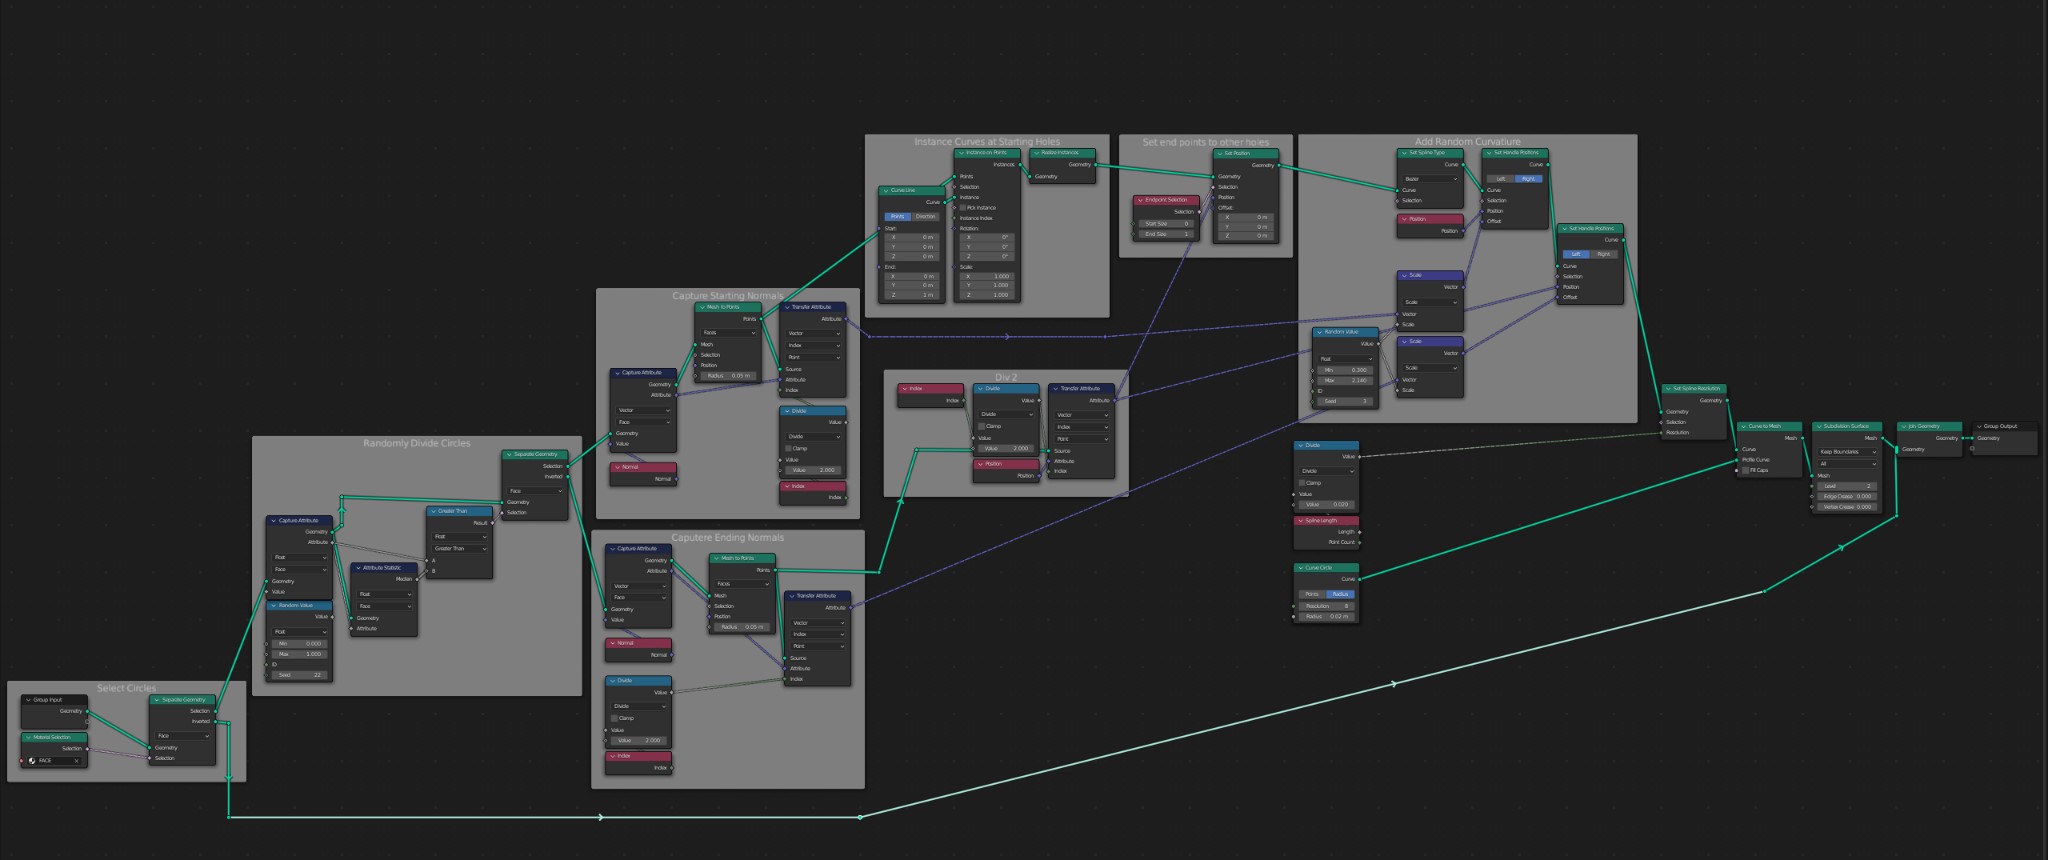
How this works:
- Mark the faces where you want curves to link with a specific material (e.g. “FACE” in my setup).
- The selected faces are randomly divided into two groups representing the start and end points of curves, and their normals are stored.
- The rotation of each curve handle is aligned to the face normal, and curves are instanced between random pairs of start and end points.
- Instanced curves are given random extra curvature, before being resampled for smoother curves and given some profile geometry.
As this method relies on selecting faces, I needed to convert my instanced pentagonal plate into a mesh first. This is why I marked the edges of the wire openings. This data is carried forward through the node setup, whilst a vertex group would be lost. This made selecting the wire openings simple (select>select sharp edges). These were filled to create faces and then separated from the pentagonal plates mesh.
For further control where wires started and ended, I split the faces into groups of different materials (Face1, Face2, Face3, etc.) and then duplicated the node trees so that each was looking for a different material (Face1, Face2, etc.). I converted the instanced cables to meshes and manually edited them as required, as well as deleting geometry invisible to the camera.
Lastly, I copied this back into my main scene so that I could use the instanced pentagonal plates rather than the mesh versions. It was a lot of work for a small detail, but this was an important part of my initial idea for this scene that I wanted to realize.
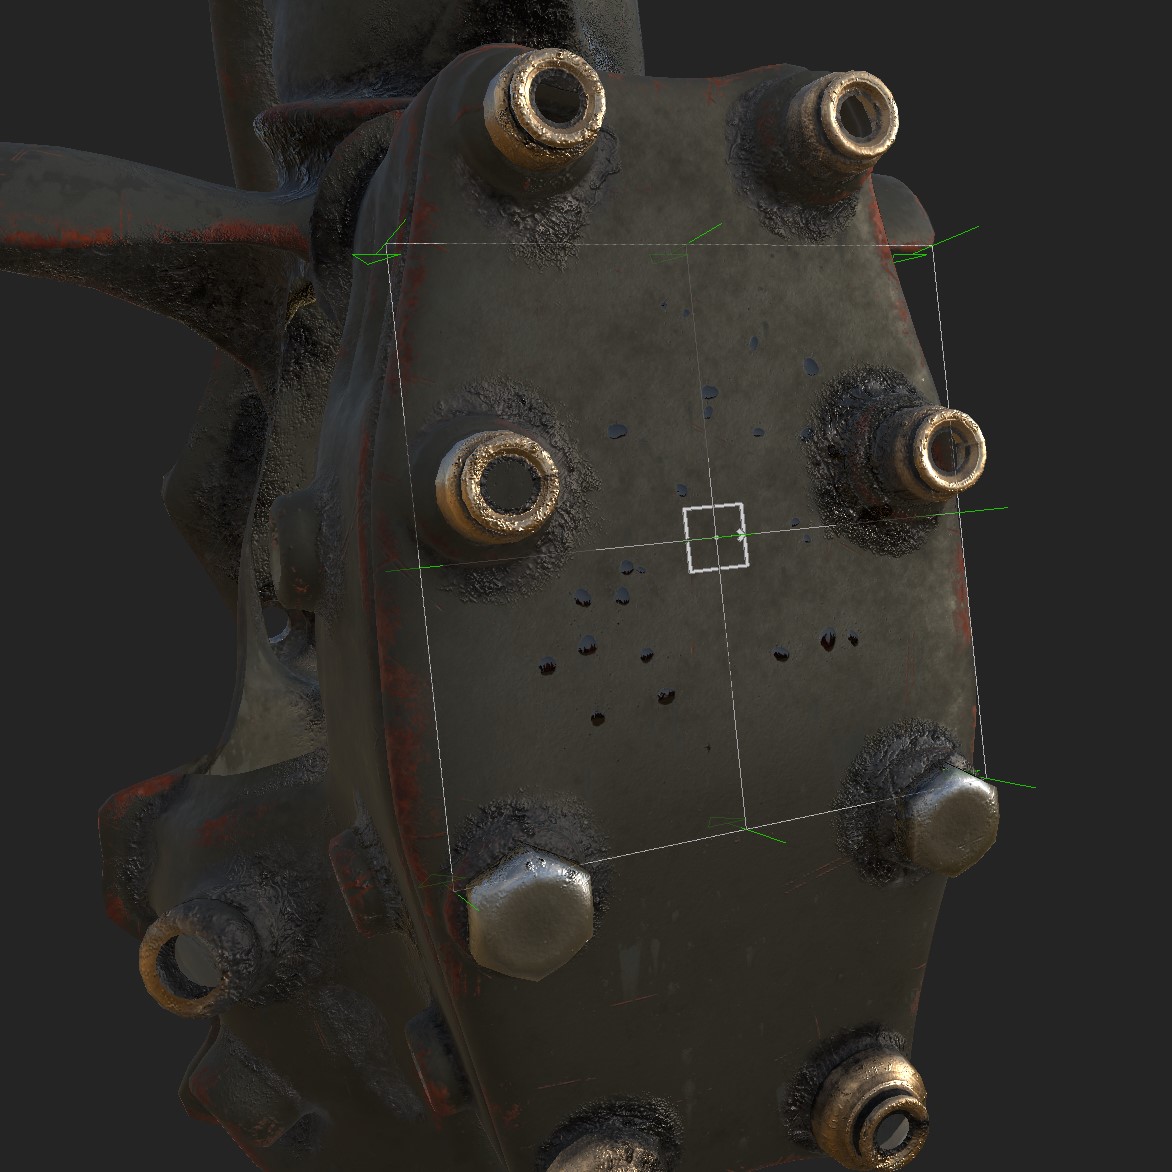
TEXTURING
My initial attempts to texture this in Blender did not achieve the look I wanted and as a result I took a break from this work at this stage, a little stumped as to how to proceed. Luckily in the intervening time, I was able to try Substance 3D Painter and I quickly realized this was the way to go.
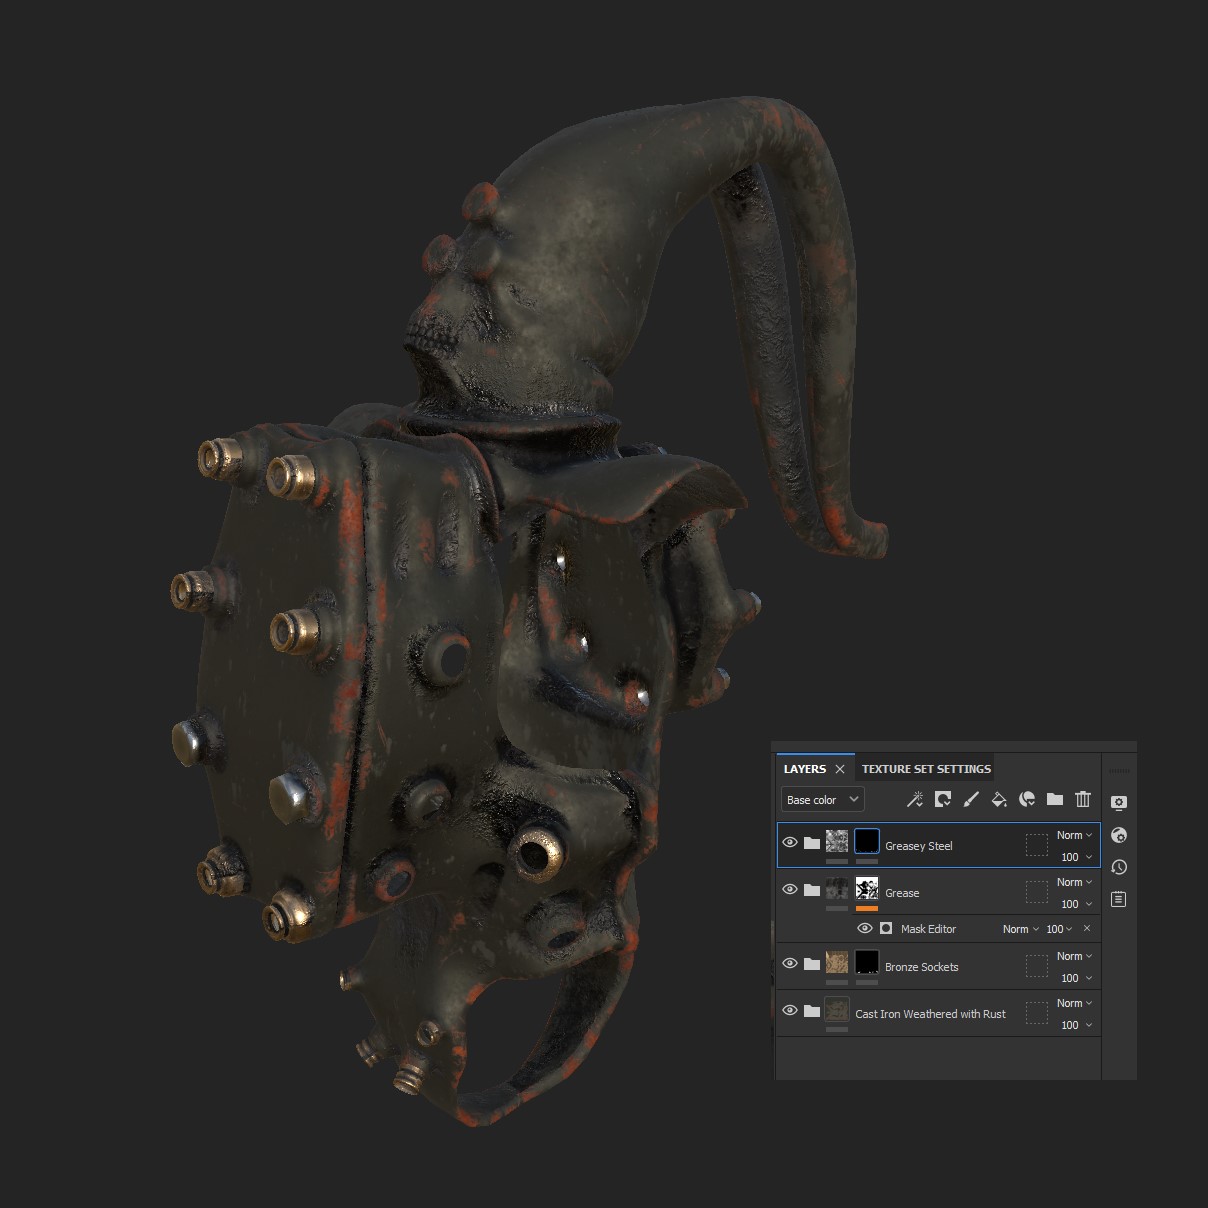
I made use of multiple layers of textures/smart materials with masks to achieve my desired grimey look. Blood decals were used to create the various oil drips and runs.
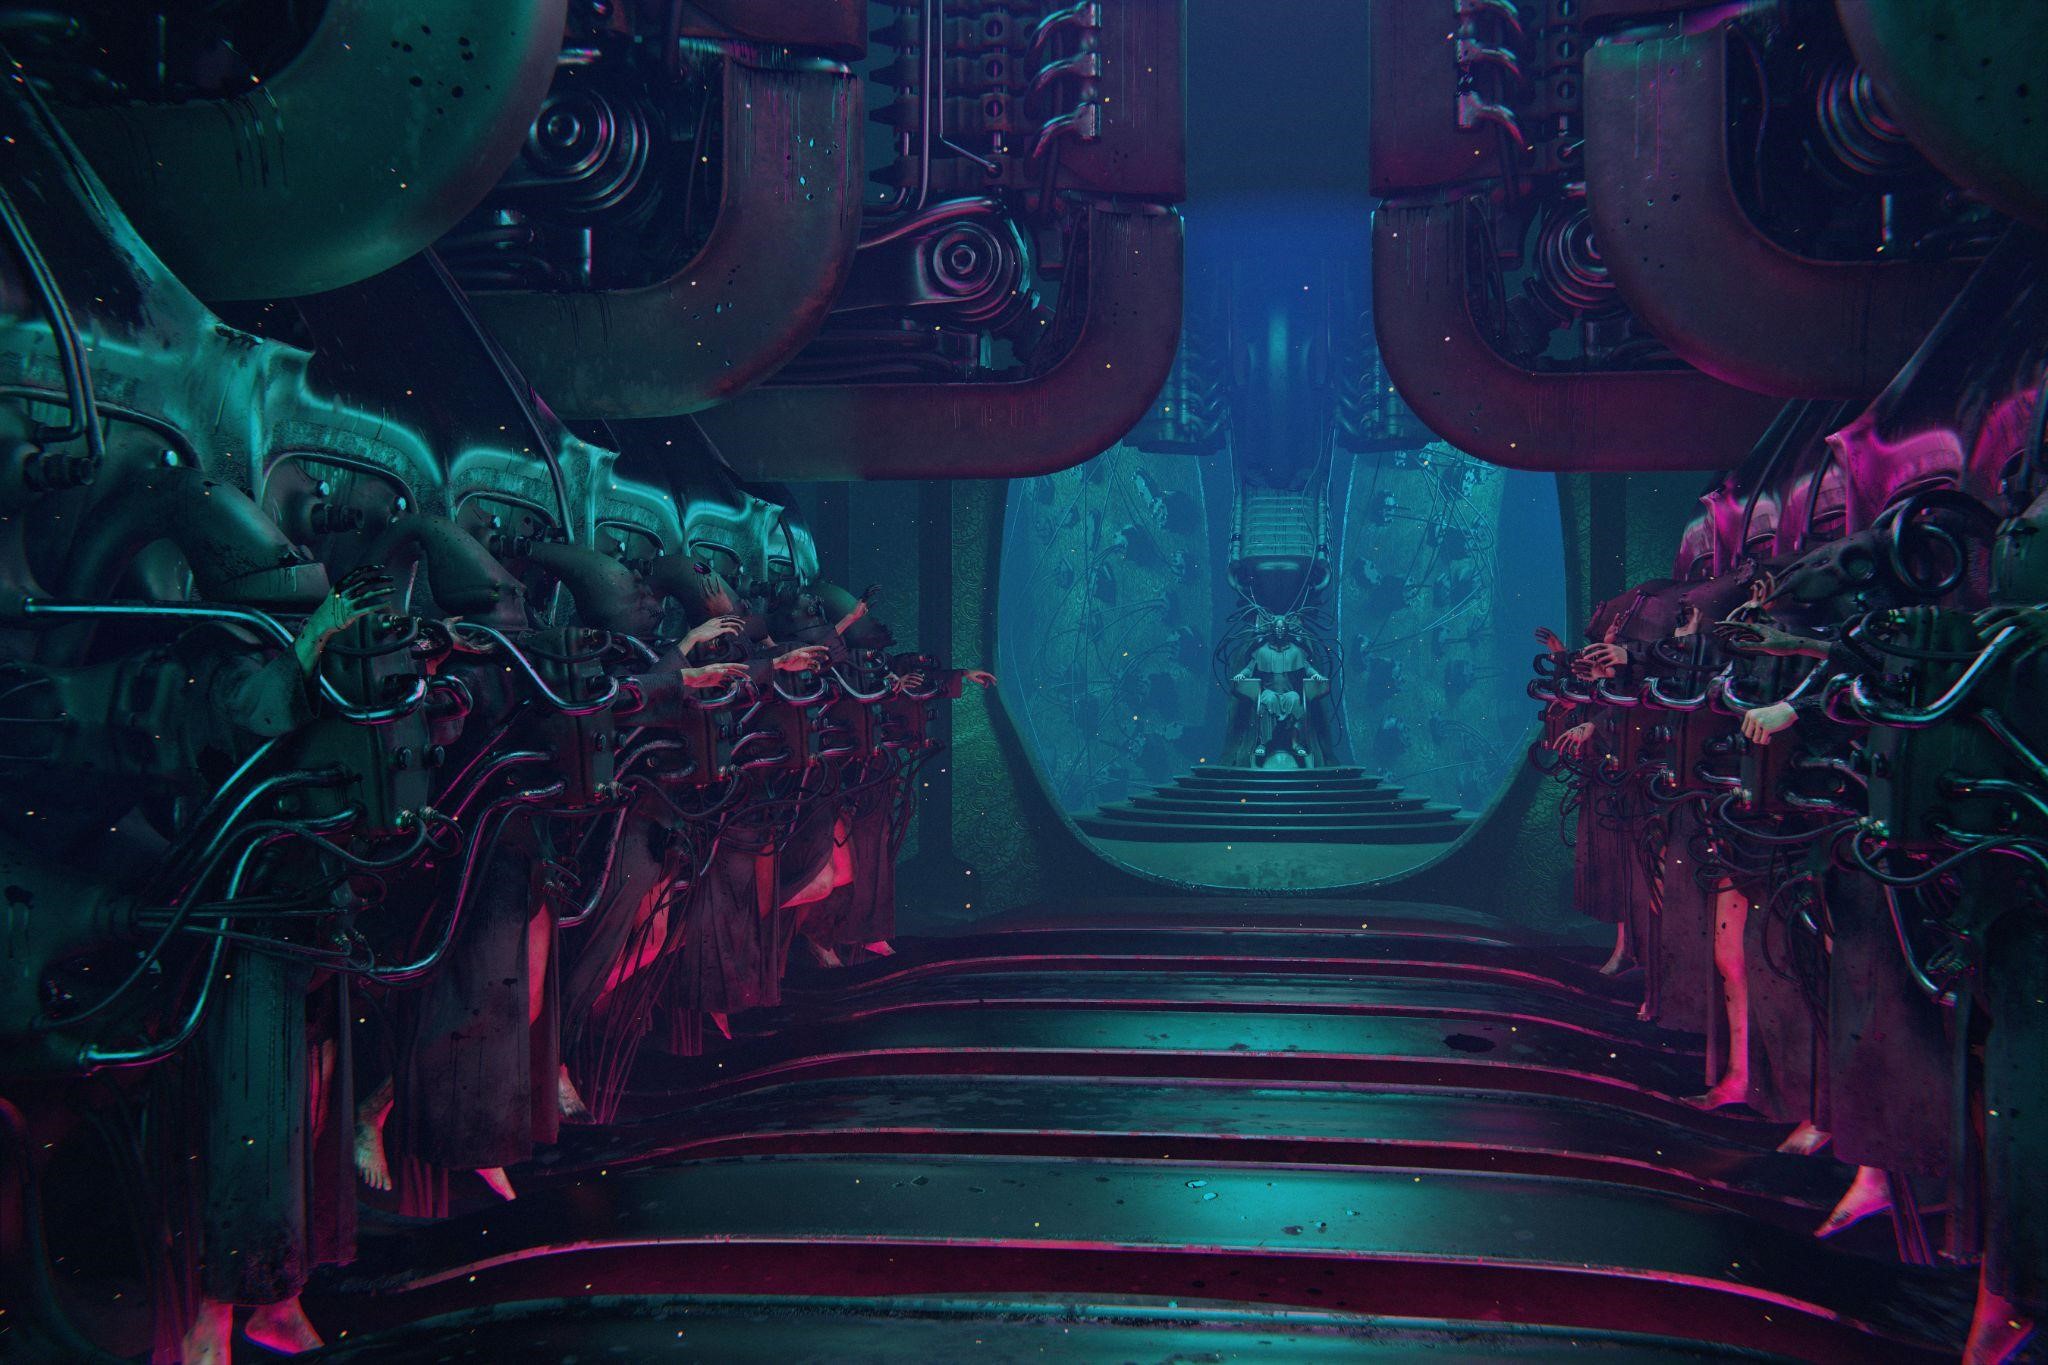
LIGHTING AND RENDER
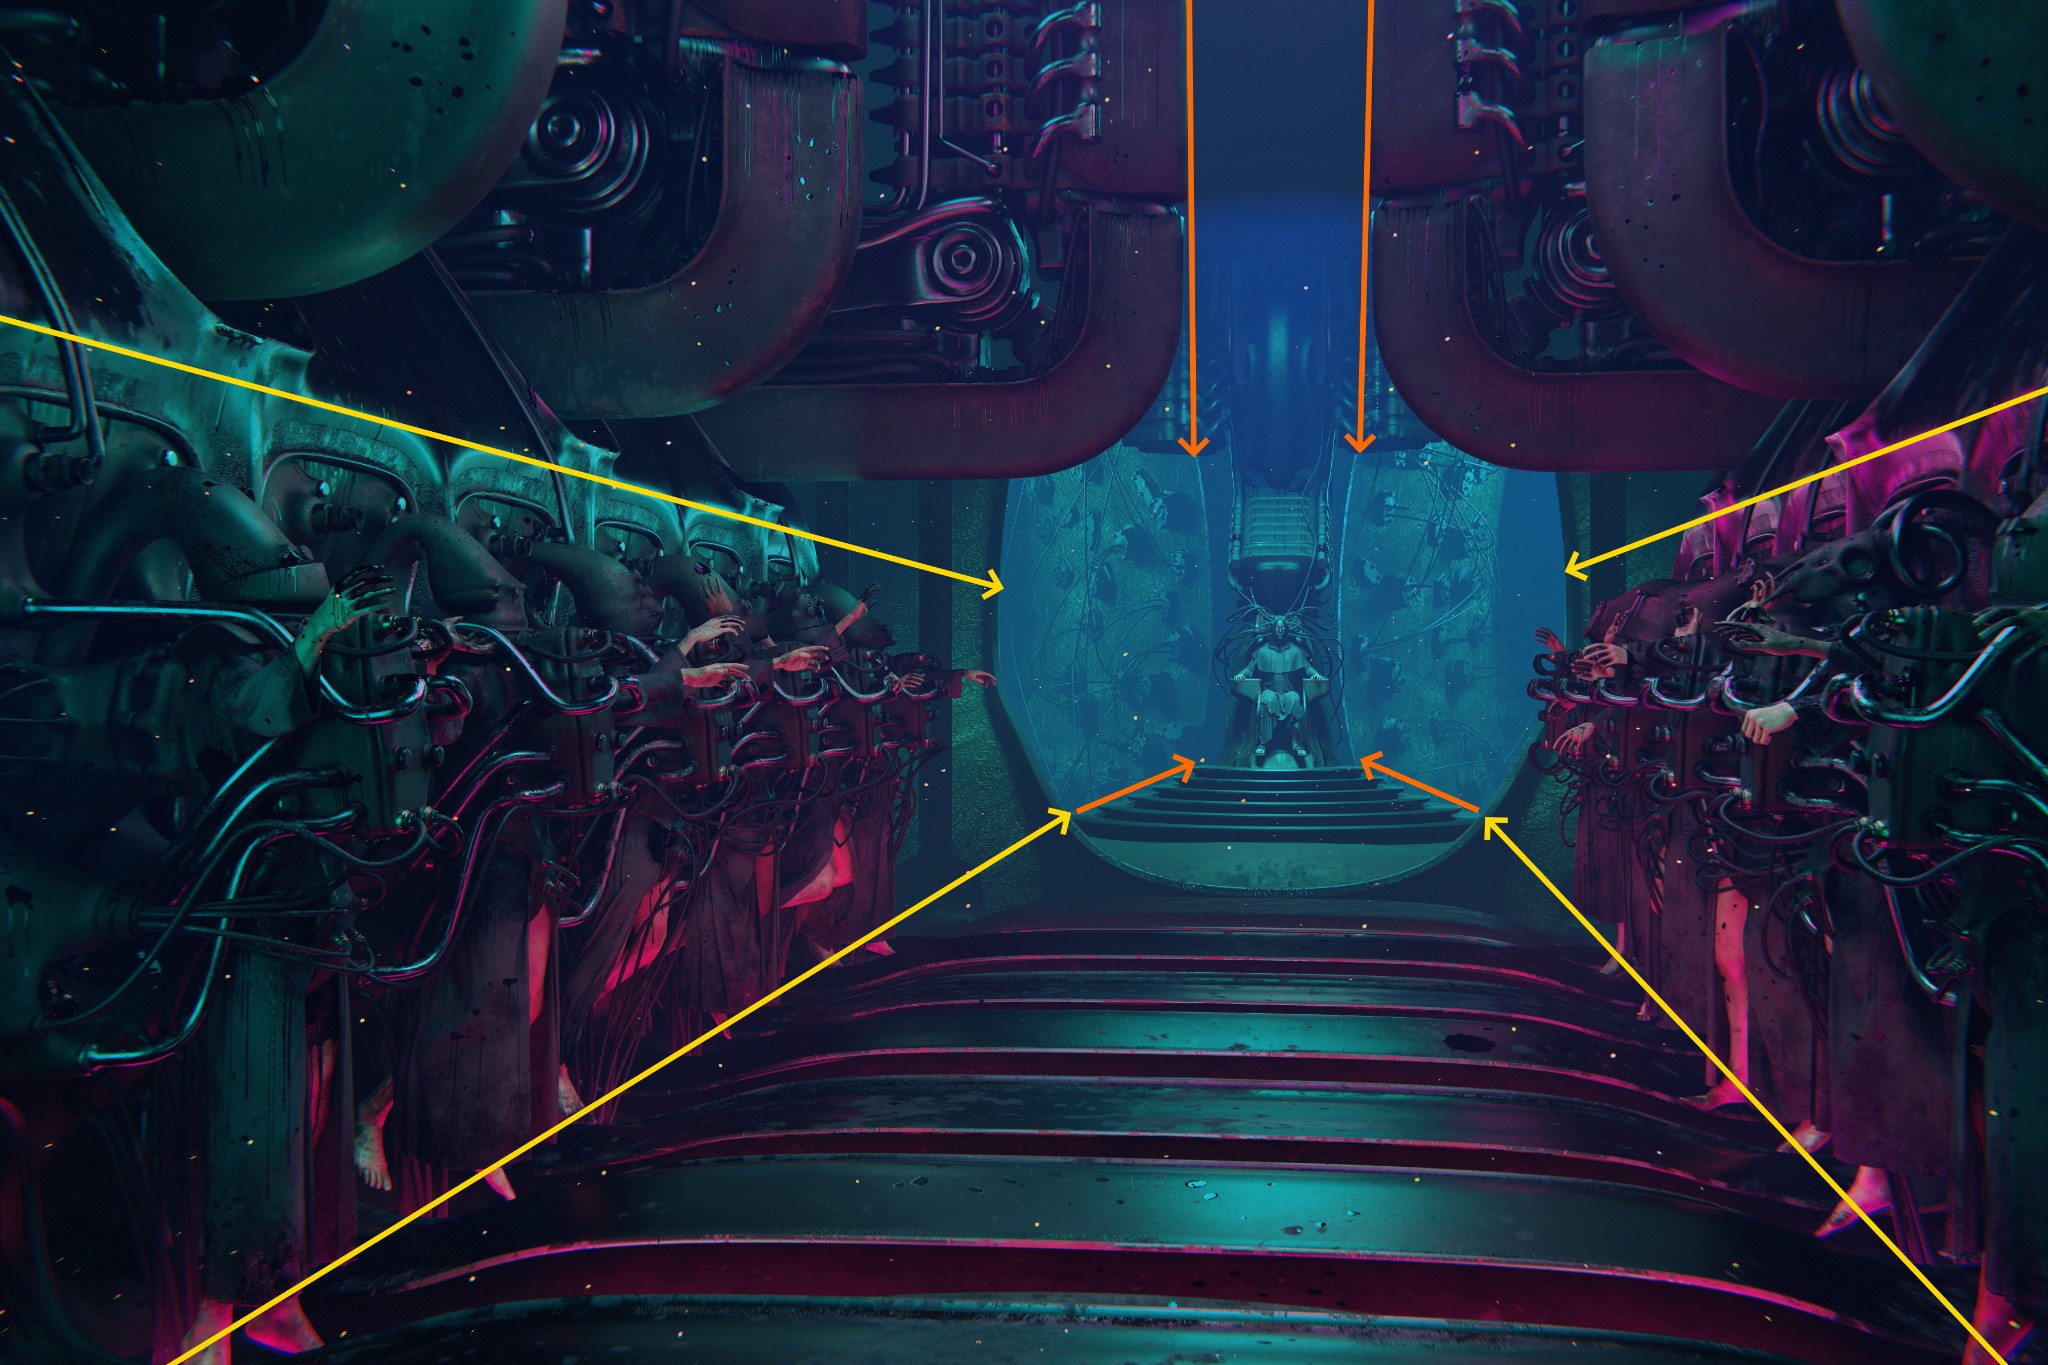
The lighting went through a number of revisions to obtain the final look as my initial attempts went against the composition and made it difficult to know where to look. I went with a bold lighting scheme inspired by vaporwave palettes as a nice contrast to the dark cast iron and steel.
I used a low strength HDRI for some basic global illumination along with a principled volume to help give the scene a little more depth.

I also used many area and spot lamps to control the lighting more finely and pick out specific edge highlights. I have no secrets here—just a lot of manual tweaking until I thought it looked good.
Some of these lamps also needed to have their ray visibility changed. This is a handy thing to remember if you end up with weird blotches of color in your final render that you don’t want.

The final image was rendered at poster size (14400x9600px) via a Concierge Render. For scenes like this, a render farm is usually cheaper than leaving my PC running for a day.
Post-processing was relatively simple—some lens blur, a little contrast and color correction, image sharpening, and some grain noise.
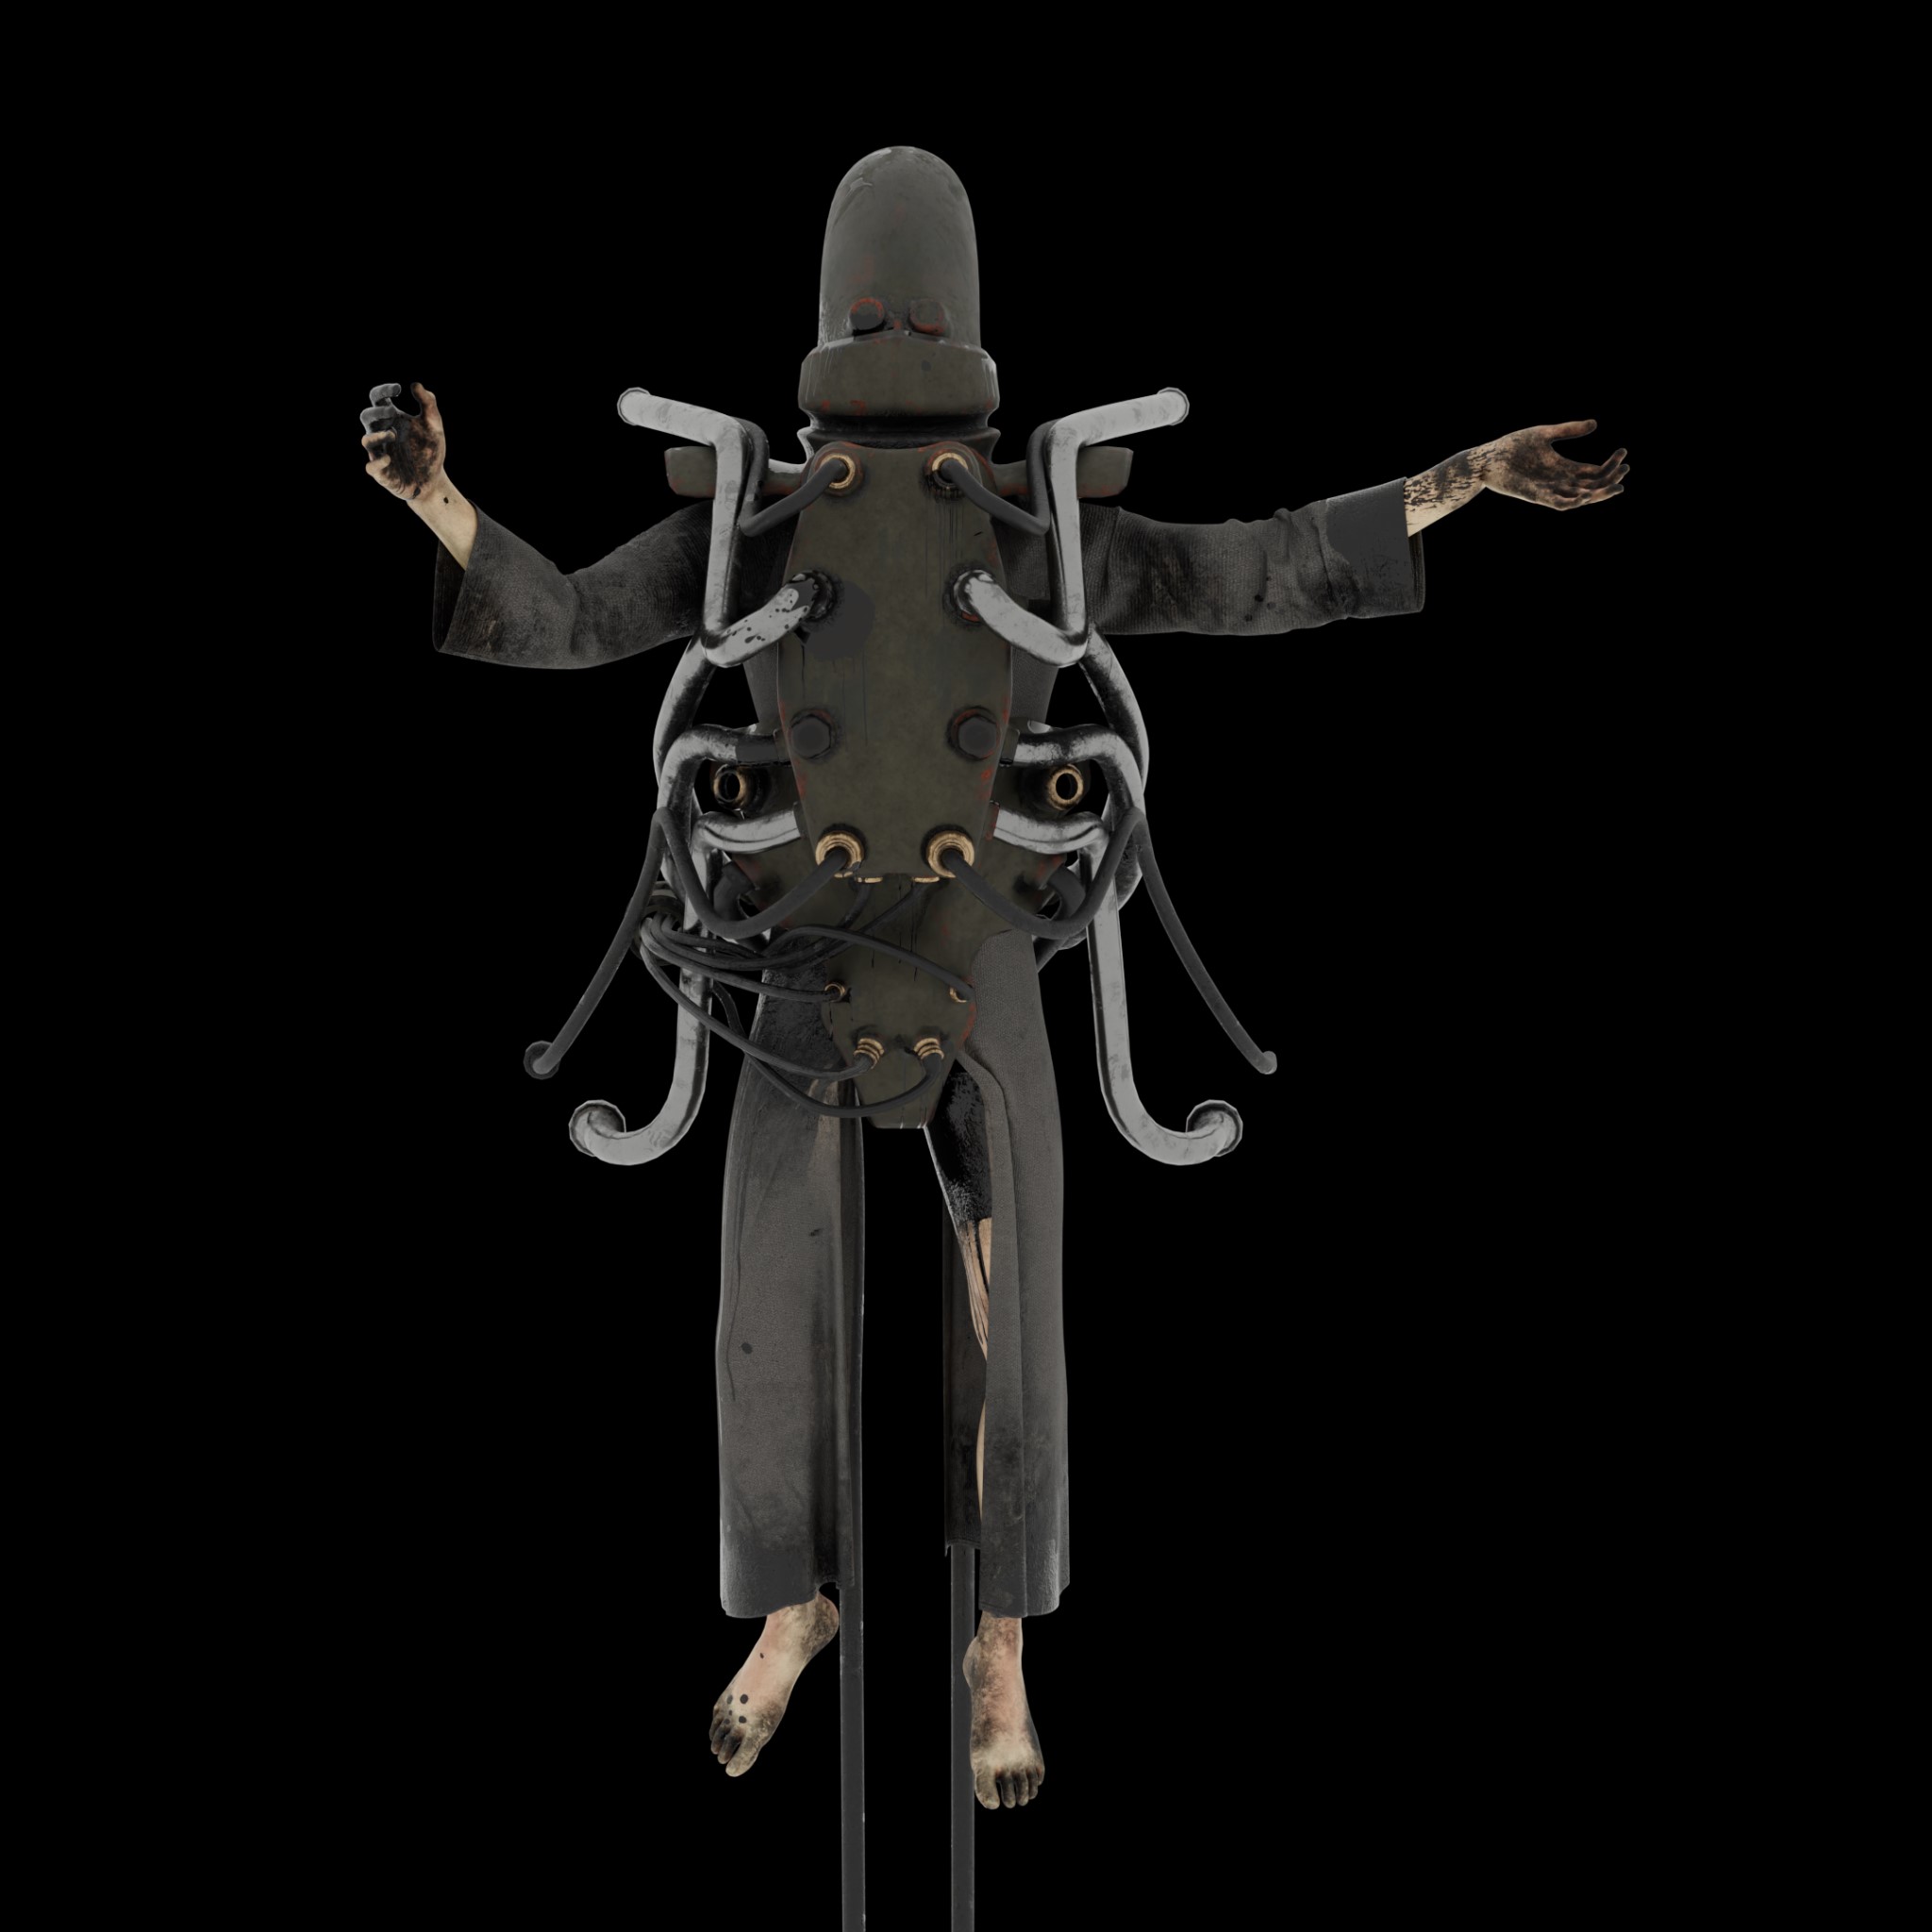
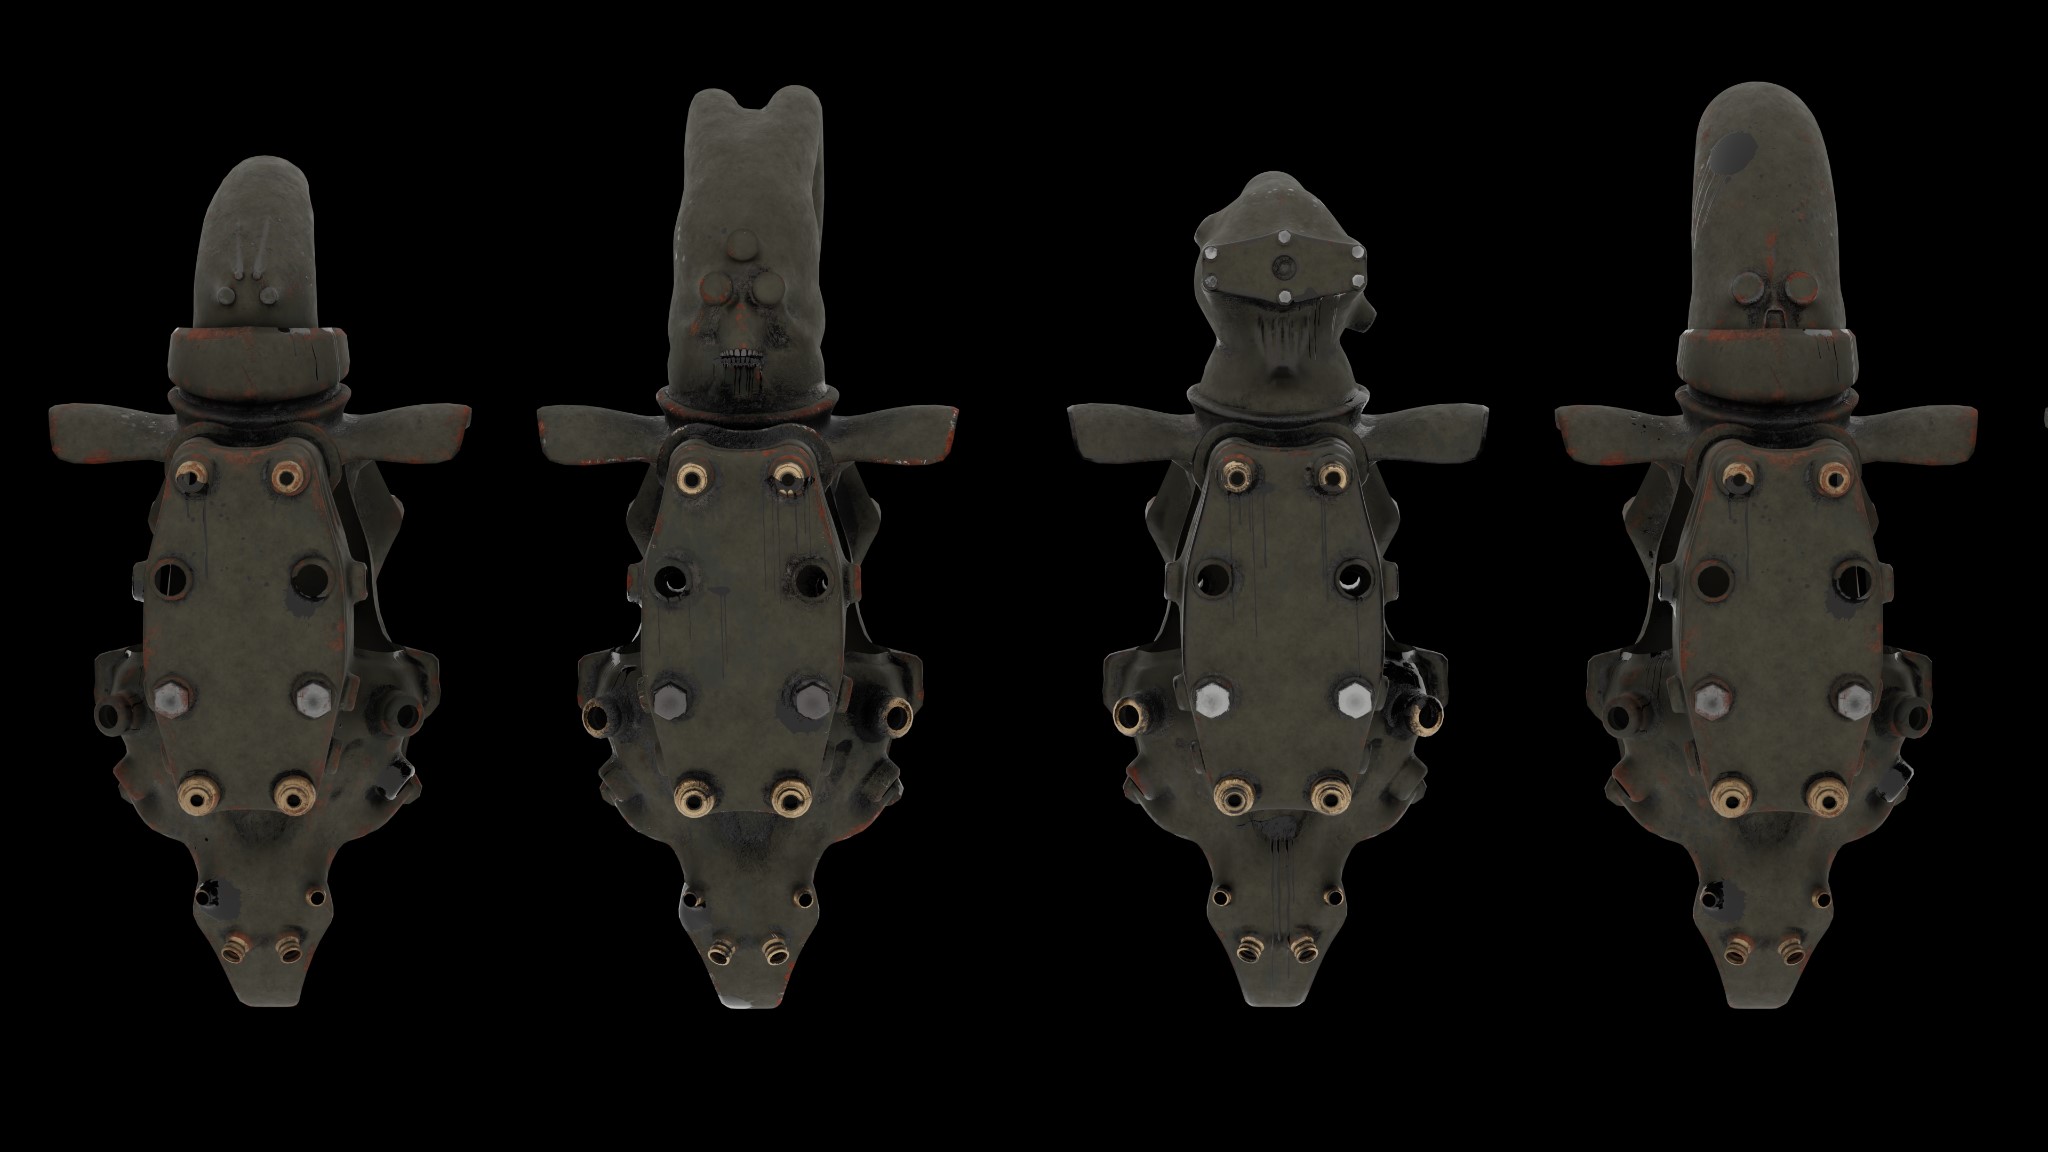
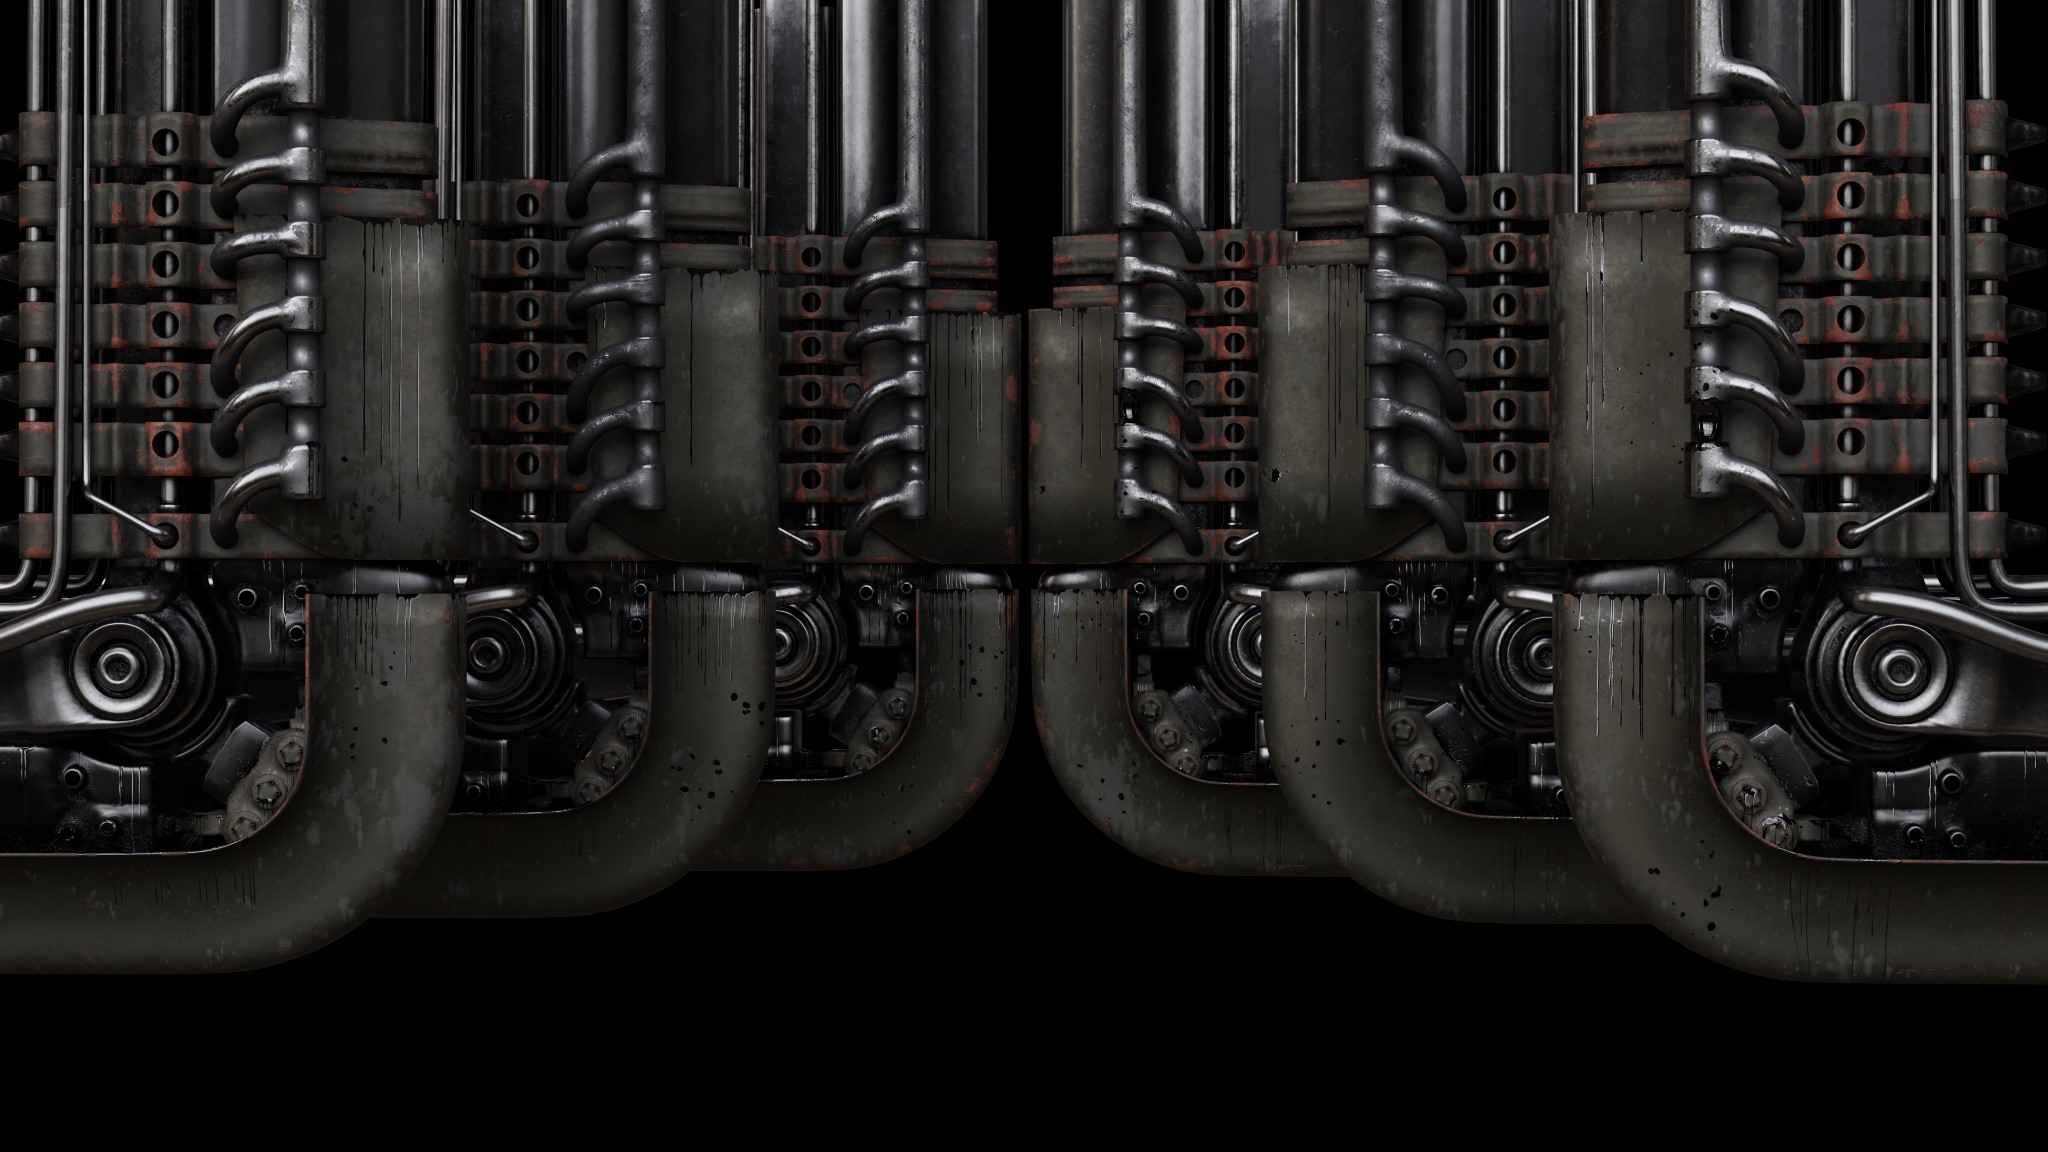
MANPOWER

Portraits of some harnesses, helmets and upper engine pillar assets.
That’s it! I hope you like it and found the process interesting!
Thanks for reading my article and have a nice day!
About the Artist

Grant R. Brown, an aspiring 3D artist from Lithuania.


