
Behind the Scenes: Anne Character-Study
INTRODUCTION
Hey there! My name is Steve Miller. I’m a 3D generalist and I’ve worked my way up to the position of Creative Director at Secret Location in Toronto, Canada. I’ve had the opportunity to work on a variety of projects for TV, film, and immersive media like virtual reality. One thing that’s been fortunate for me is that I’ve been able to use Blender in all of my work over the years.
INSPIRATION
I’ve had the privilege of working with some extremely talented character artists over the years, so with some recent spare time, I wanted to see if I could develop my own skills in that area a bit. Here, you can see the first steps of that journey, warts and all!
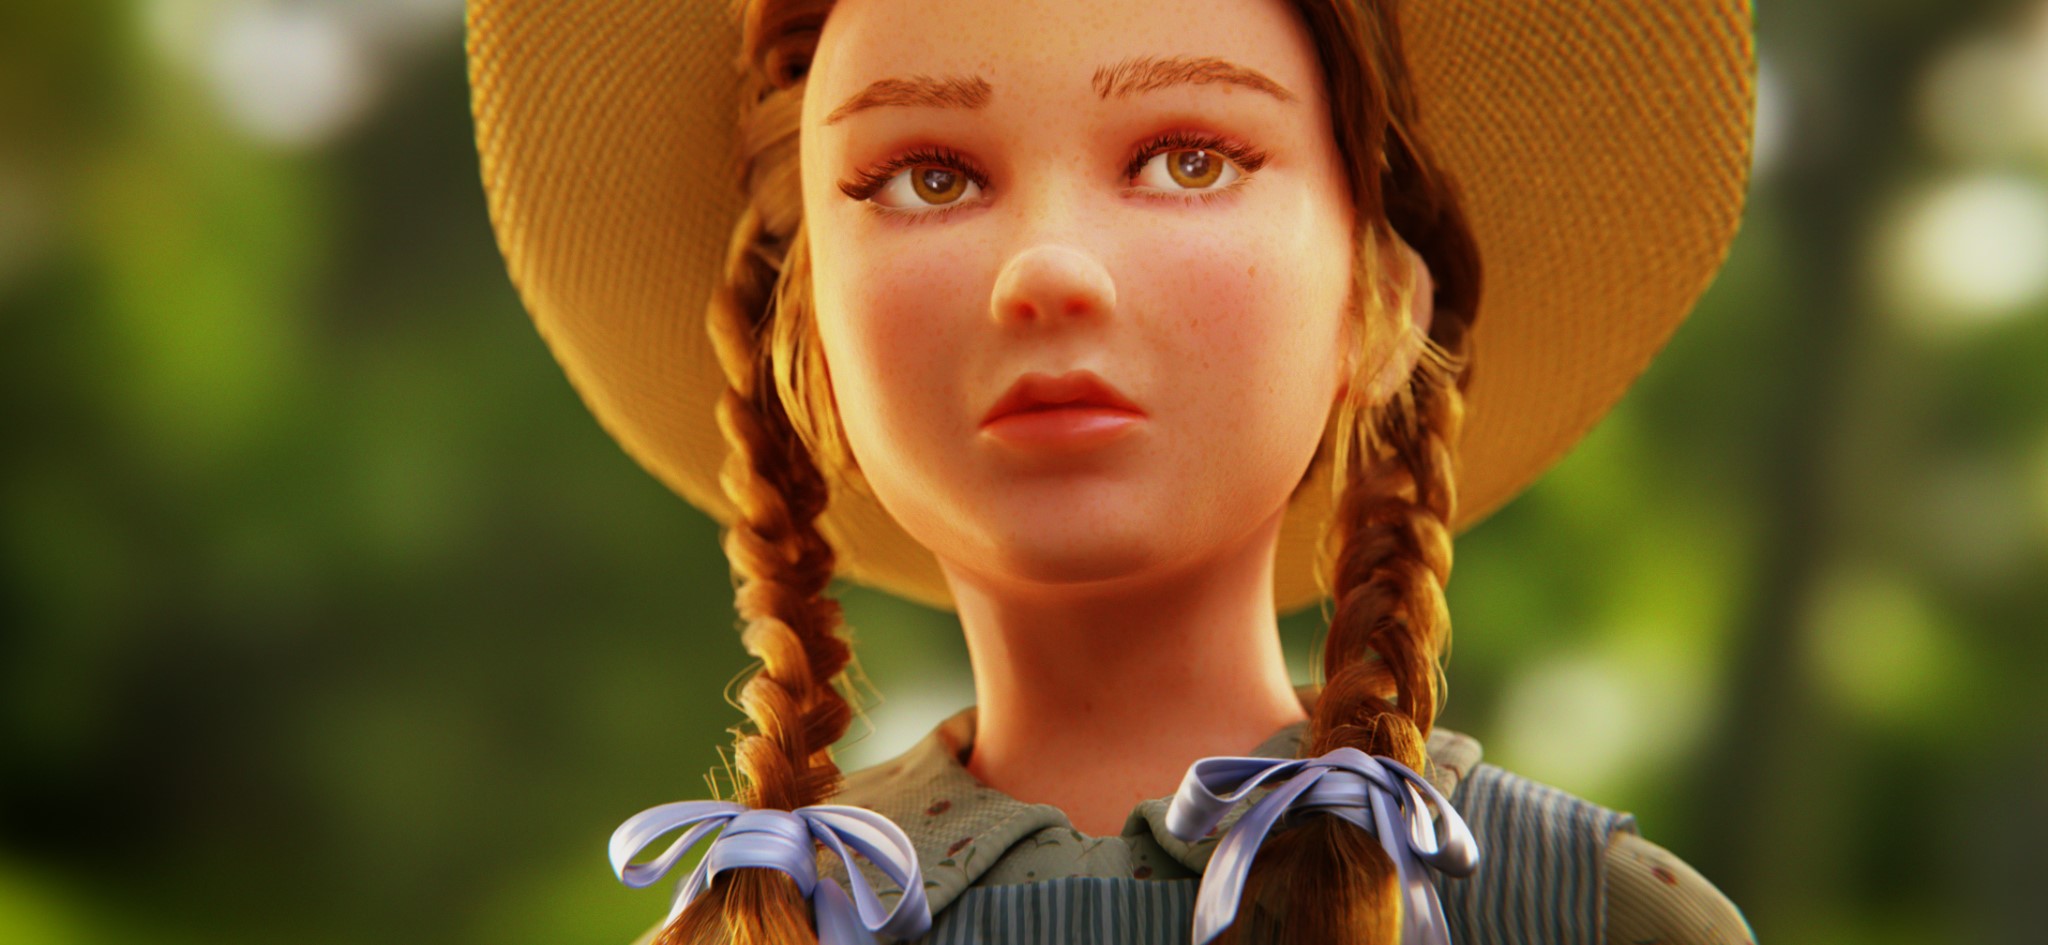
As an 80s child, I love the analog feel of media from that time period, so I decided to try my hand at a portrait of a character from that era. Anne of Green Gables is a Canadian institution and a series I remember watching growing up; although, I’ve got a nostalgia-fueled list of characters I’d like to try next!
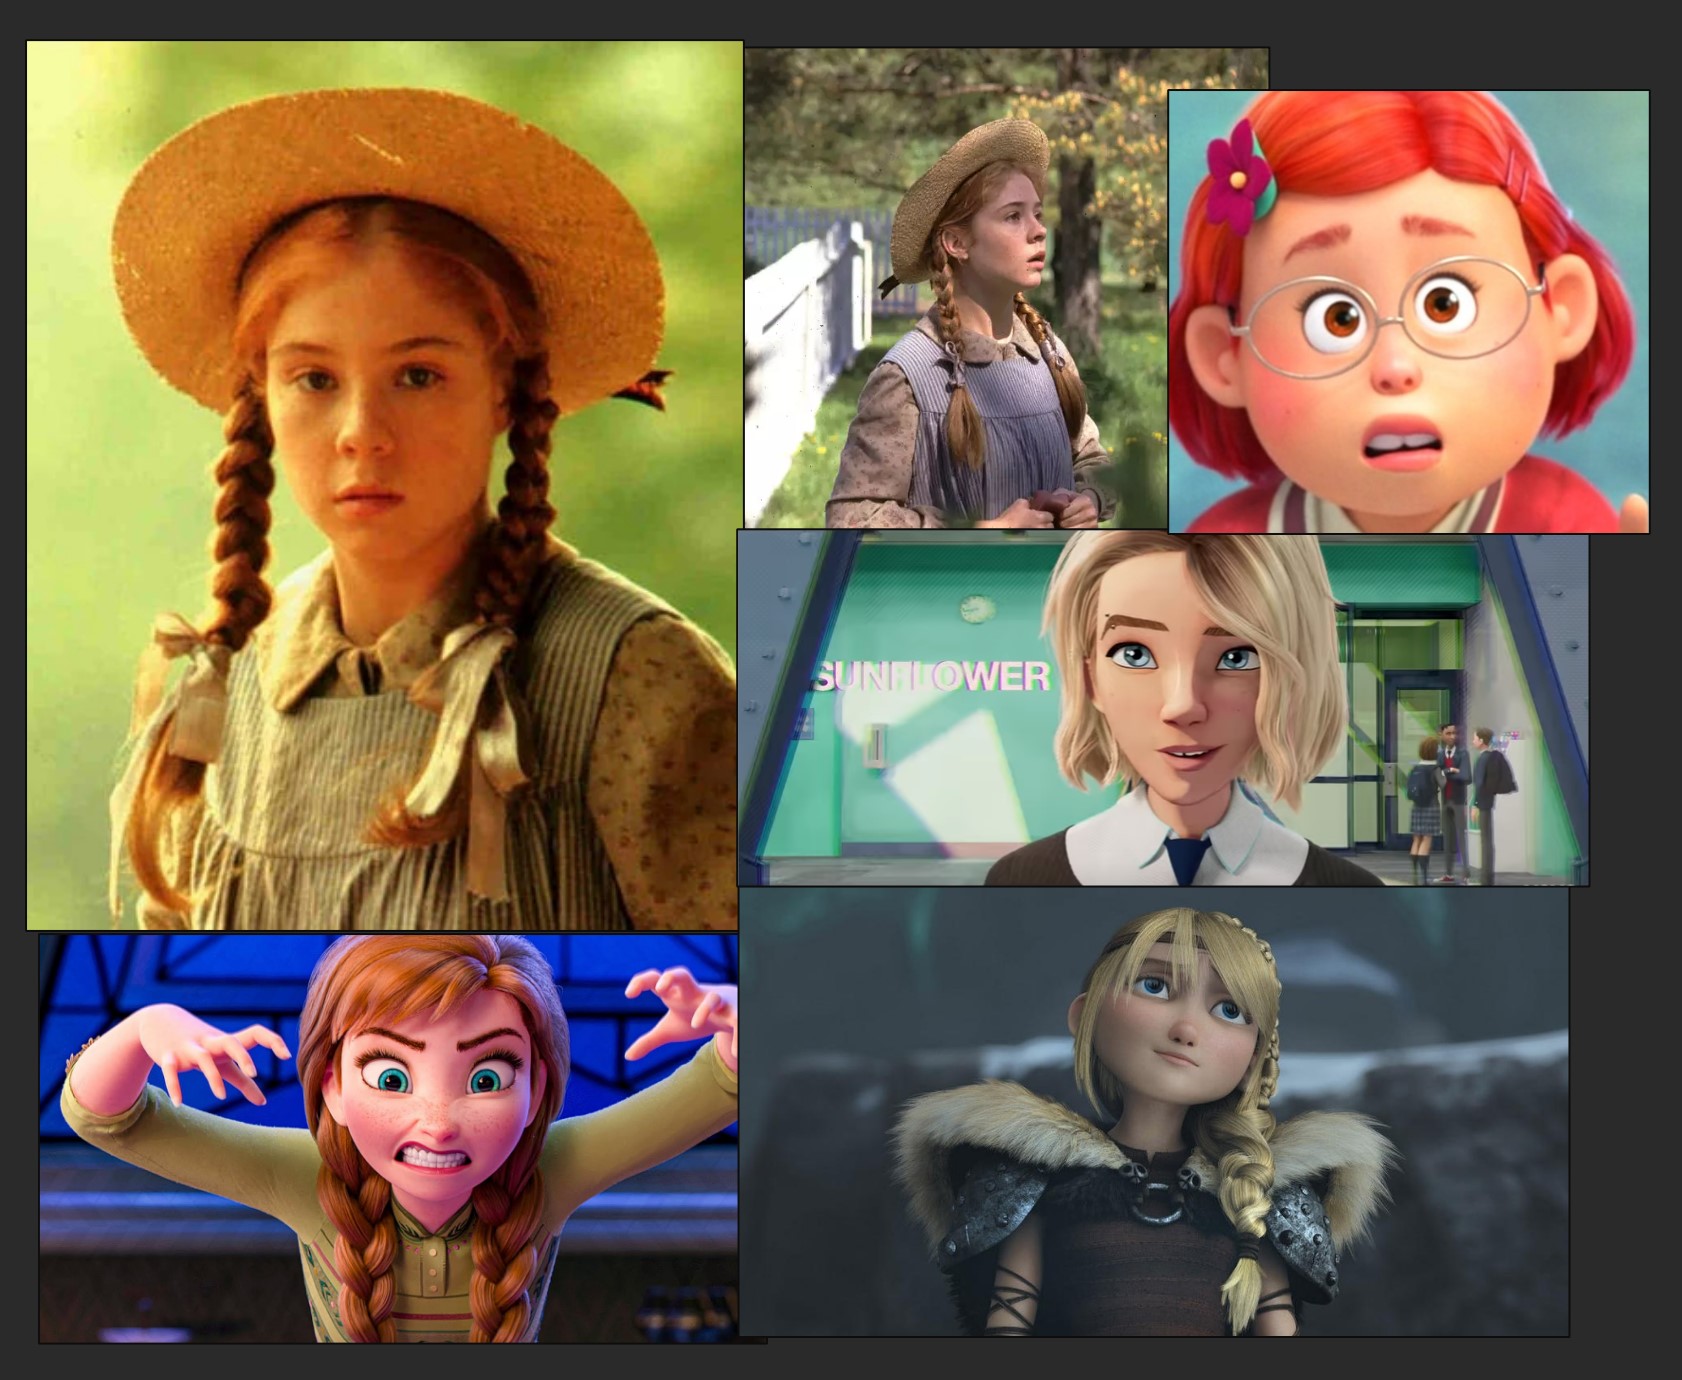
I started with a quick reference board, including photo references of Anne, along with a few CG characters from Disney, Pixar, DreamWorks, and Sony for a few stylistic approaches.
HEAD SCULPT
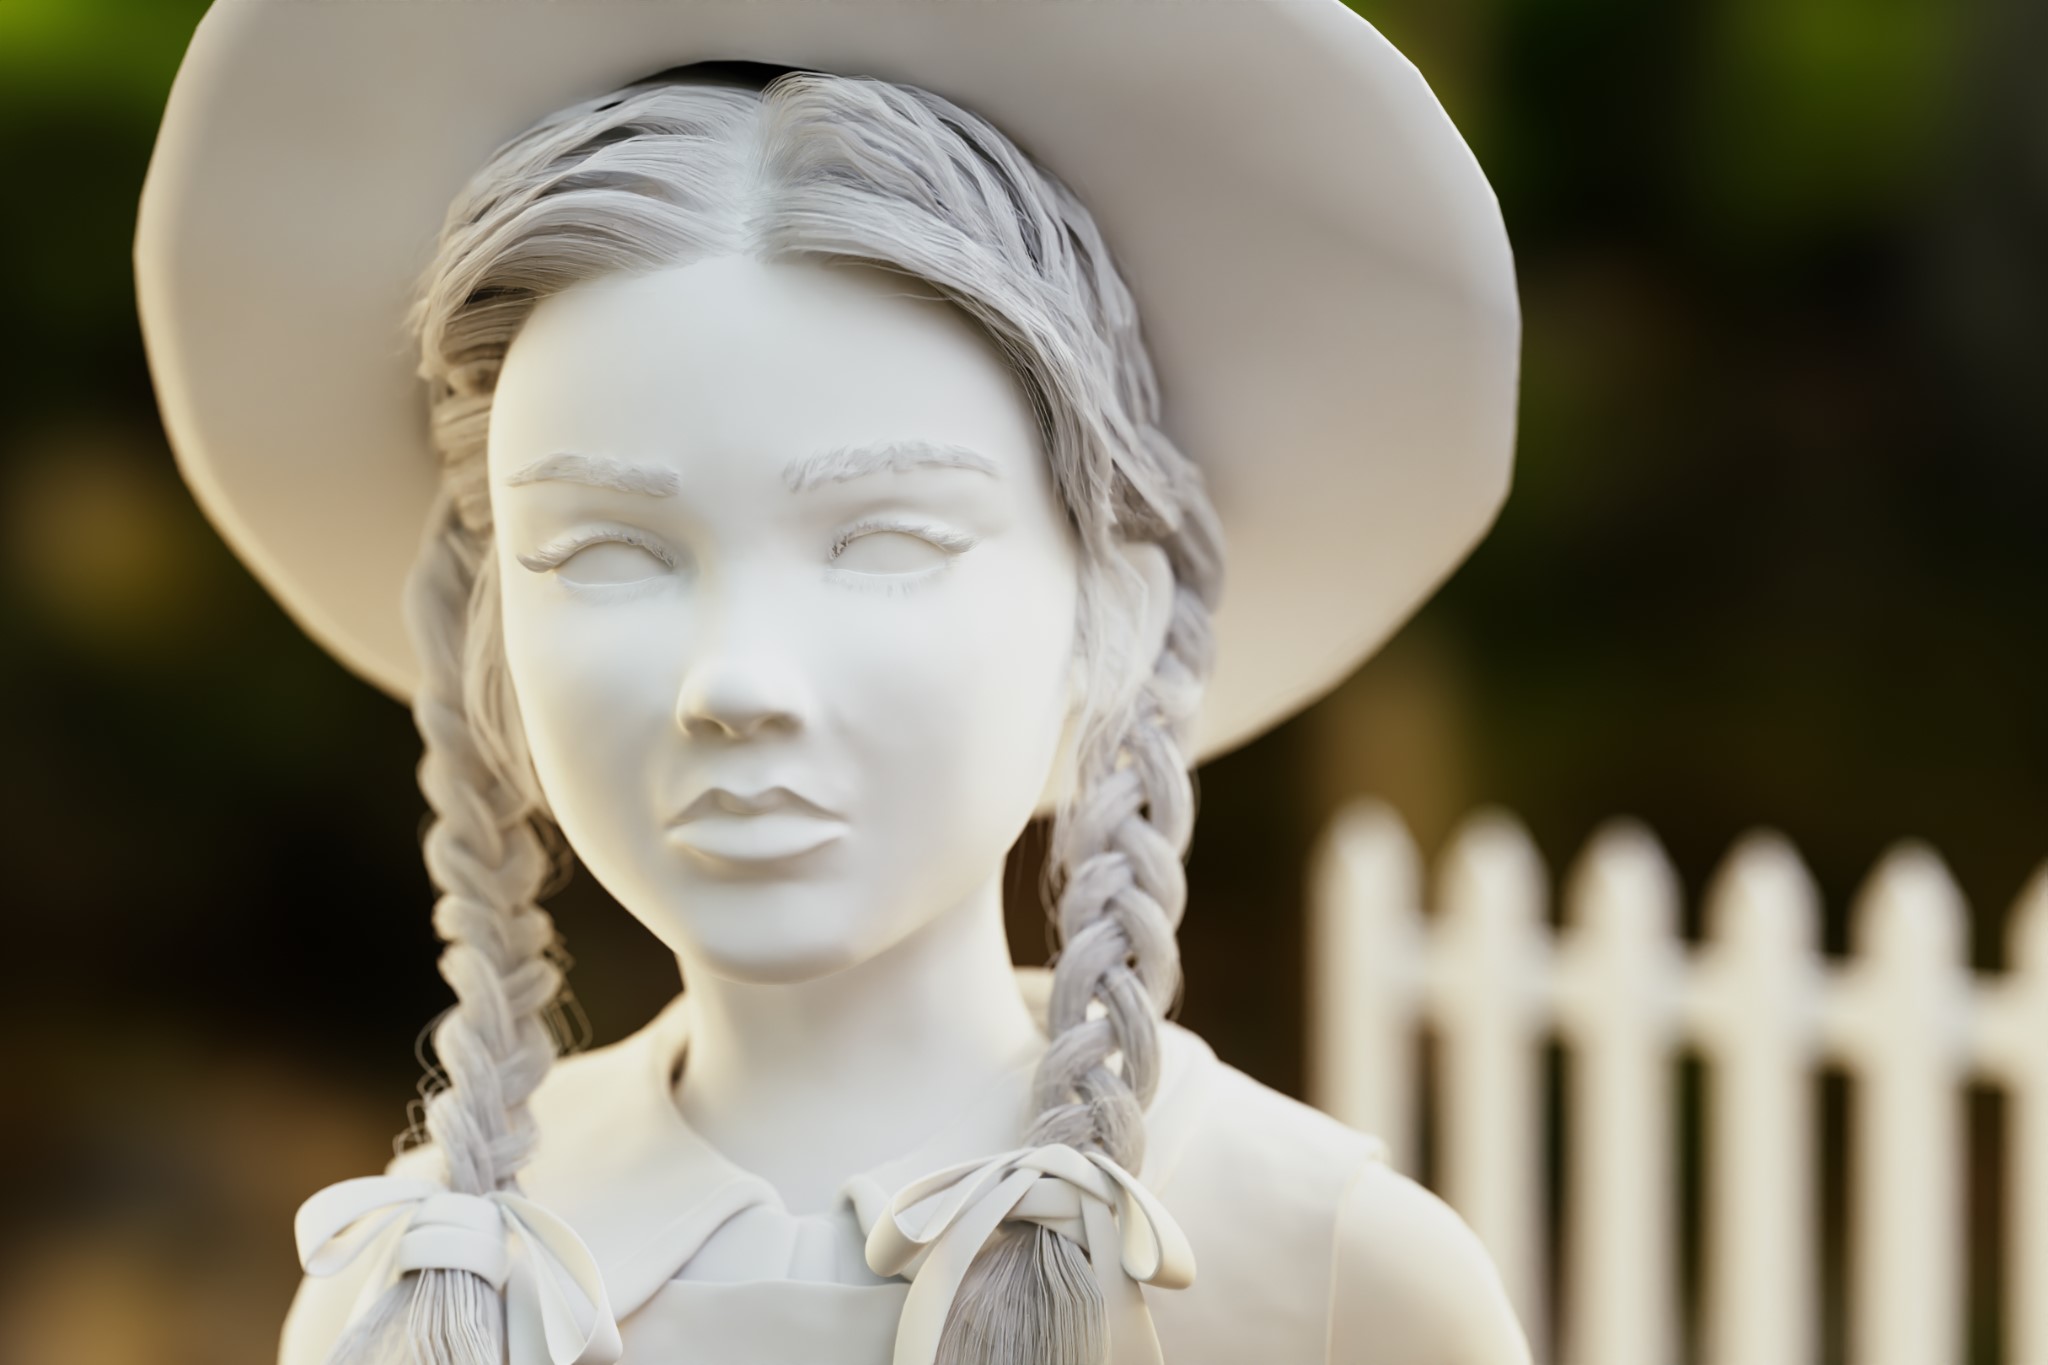
I’m not sure if everyone’s sculpt goes through an ugly stage, but mine certainly did. At first, it was just to get the main ideas roughed in. I added placeholder meshes for eyeballs, eyelashes, and eyebrows quite early on. I find it’s hard to judge appeal (or lack thereof!) without those things. I tried to keep the forms relatively soft as I’m no anatomy expert, and the more hyper-detailed I went, the more uncanny I figured it would become.
I also threw on the start of a vertex painted skin texture and some Voronoi procedural freckles. I even added in some basic lighting to approximate the main reference. I’ve heard others say this too, but I find it helpful to jump around a bit when creating, so you don’t get frustrated or stuck overworking any single thing.

EYES
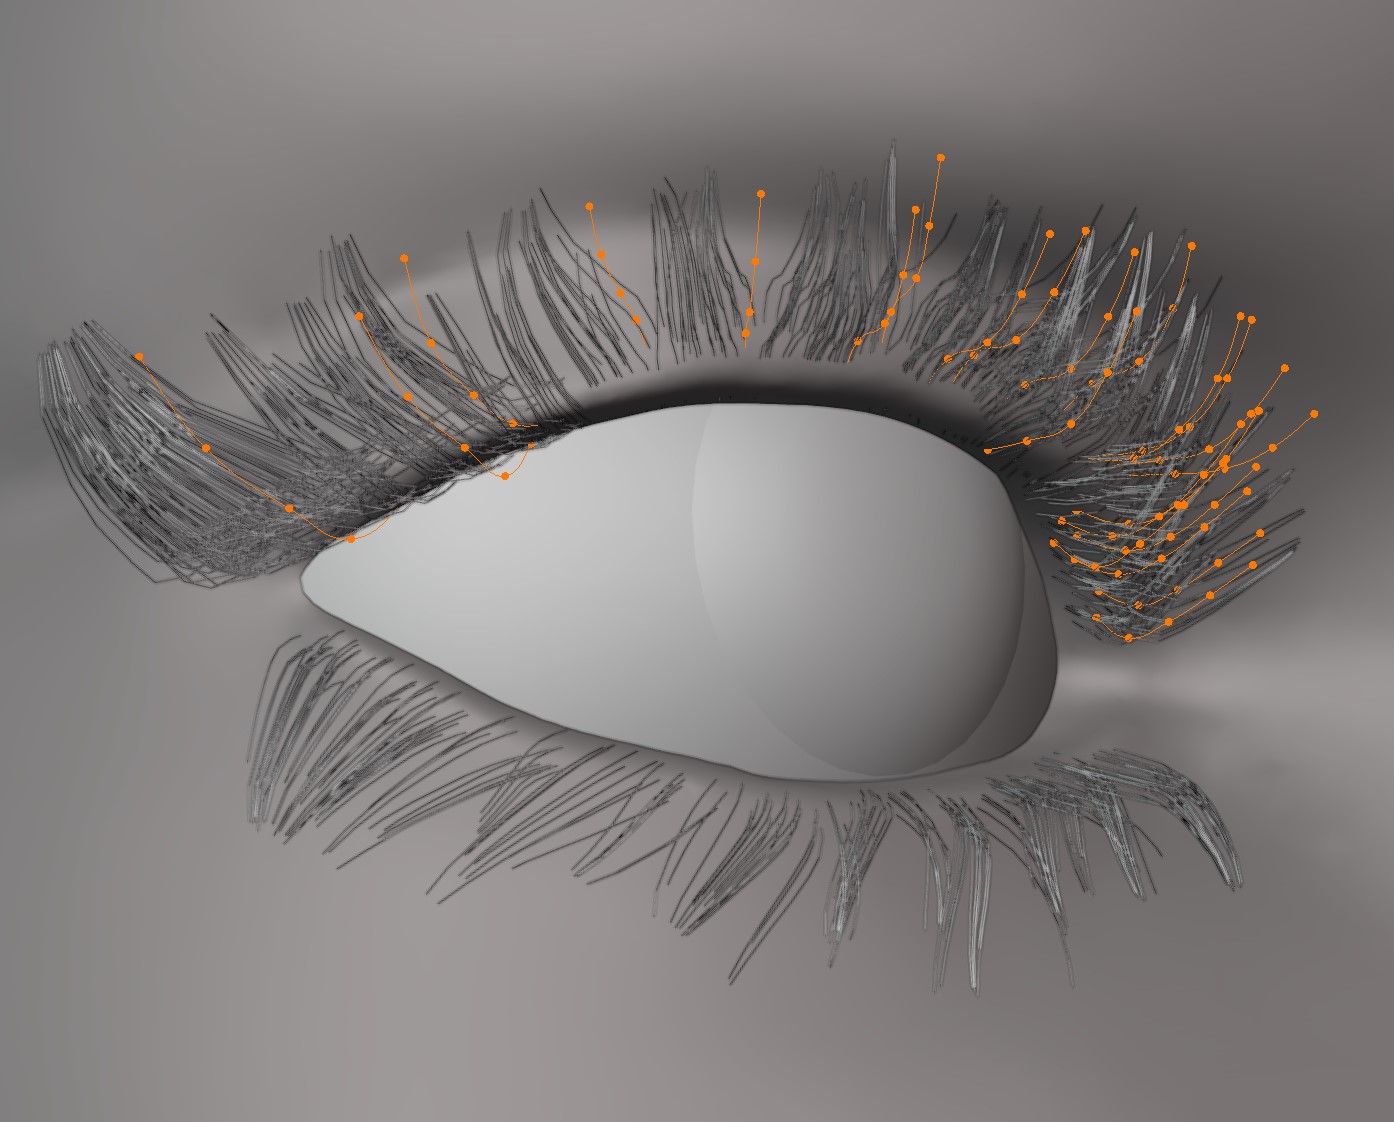
Next, I dove a bit further into the eyes, hoping that would help capture the ‘soul’ of the character. The material is fully procedural, and I again focused on the elements I felt added appeal rather than harsh realism. The way they approached eyes in Spider-Verse was a definite inspiration. I also made sure to add an eye light for that little glint!

OUTFIT
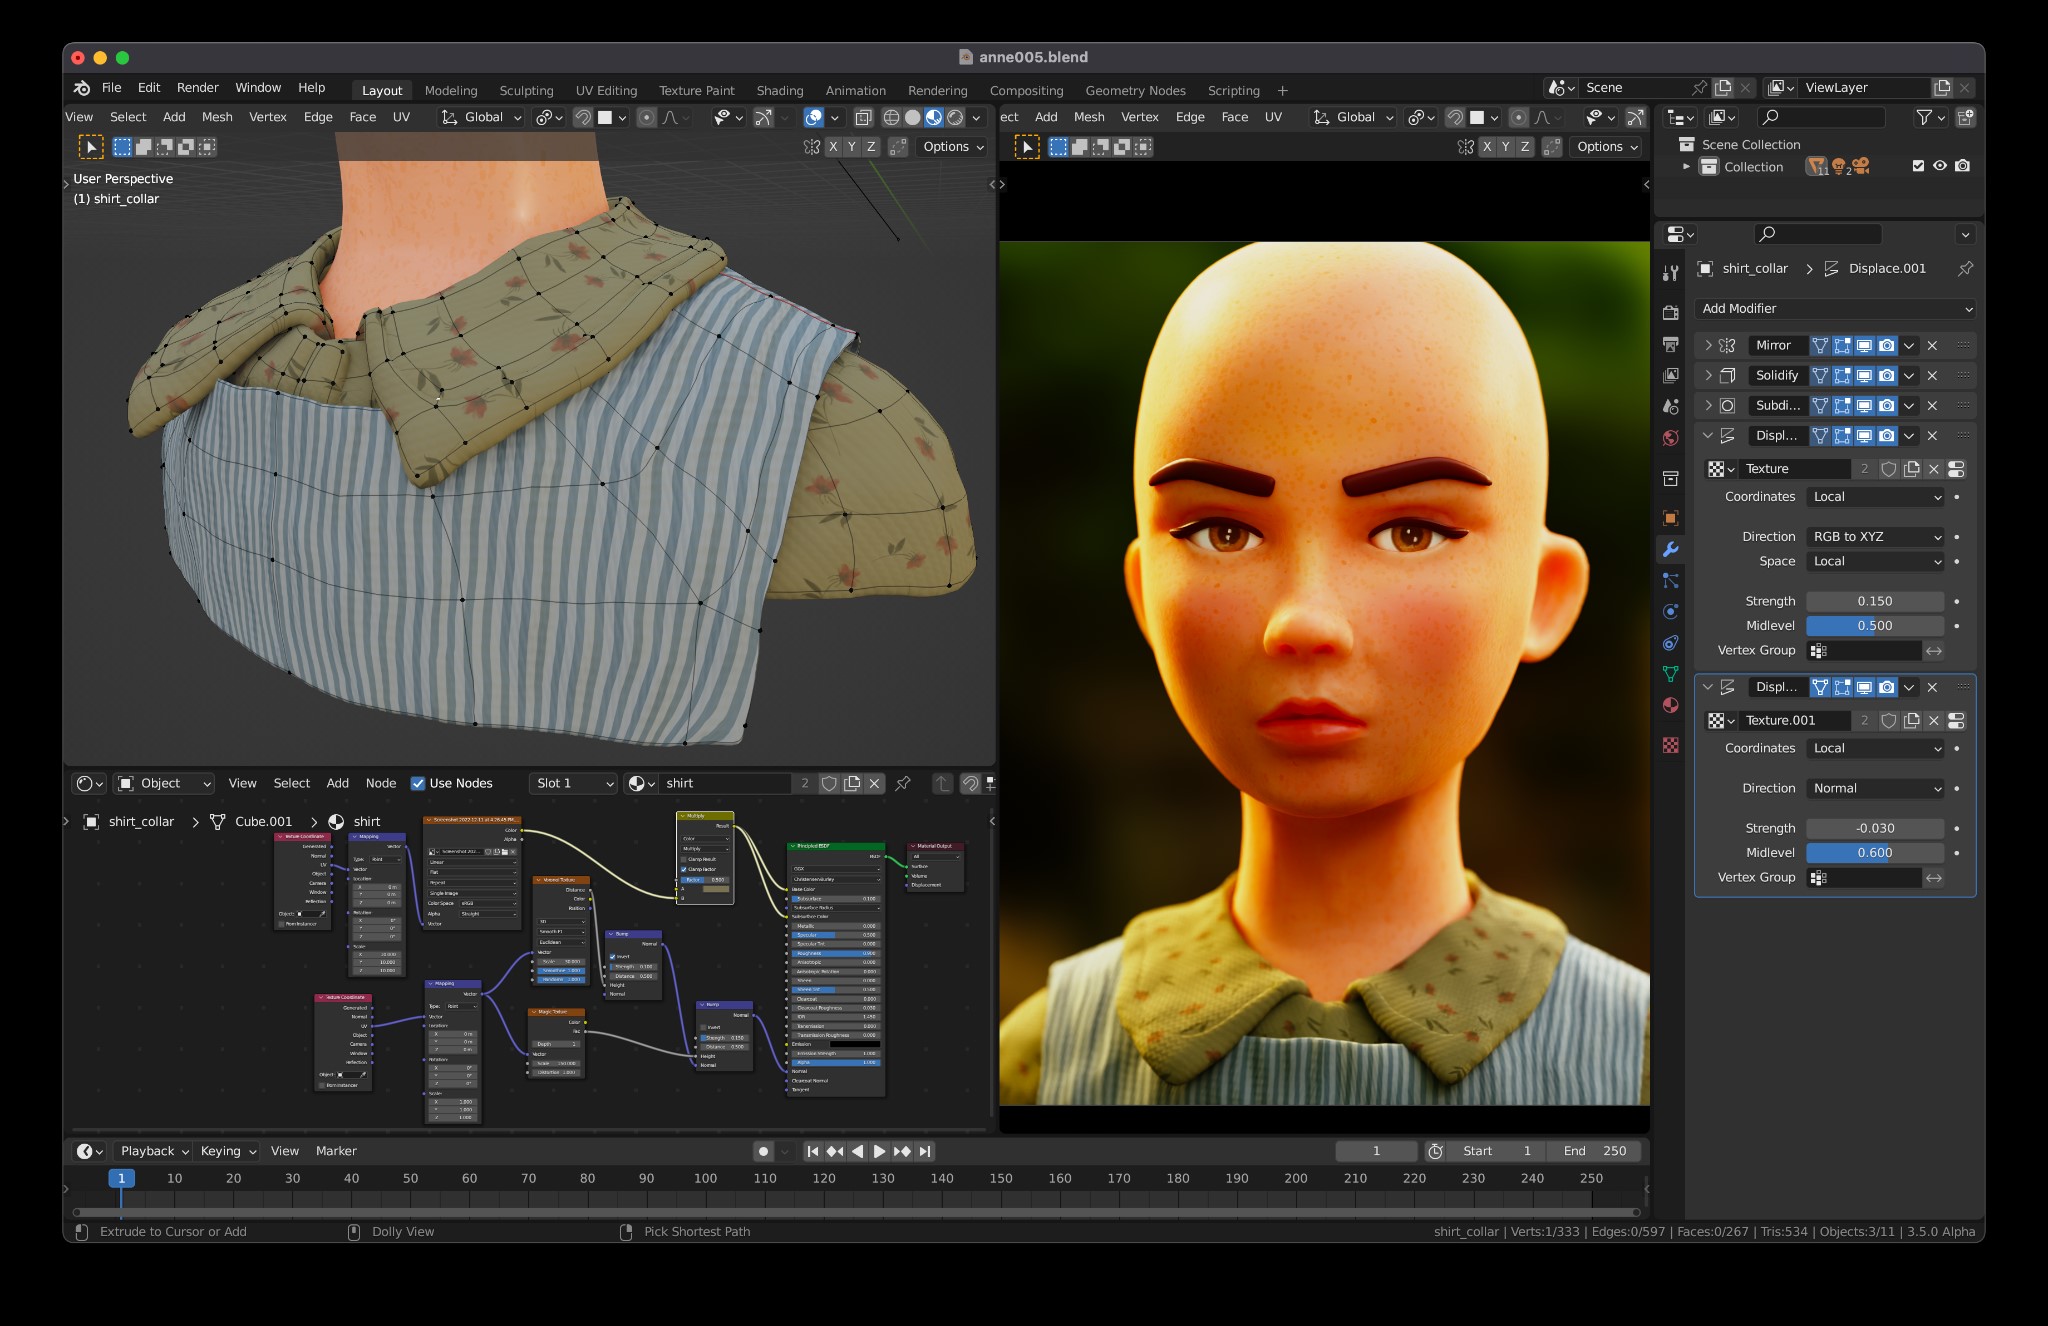
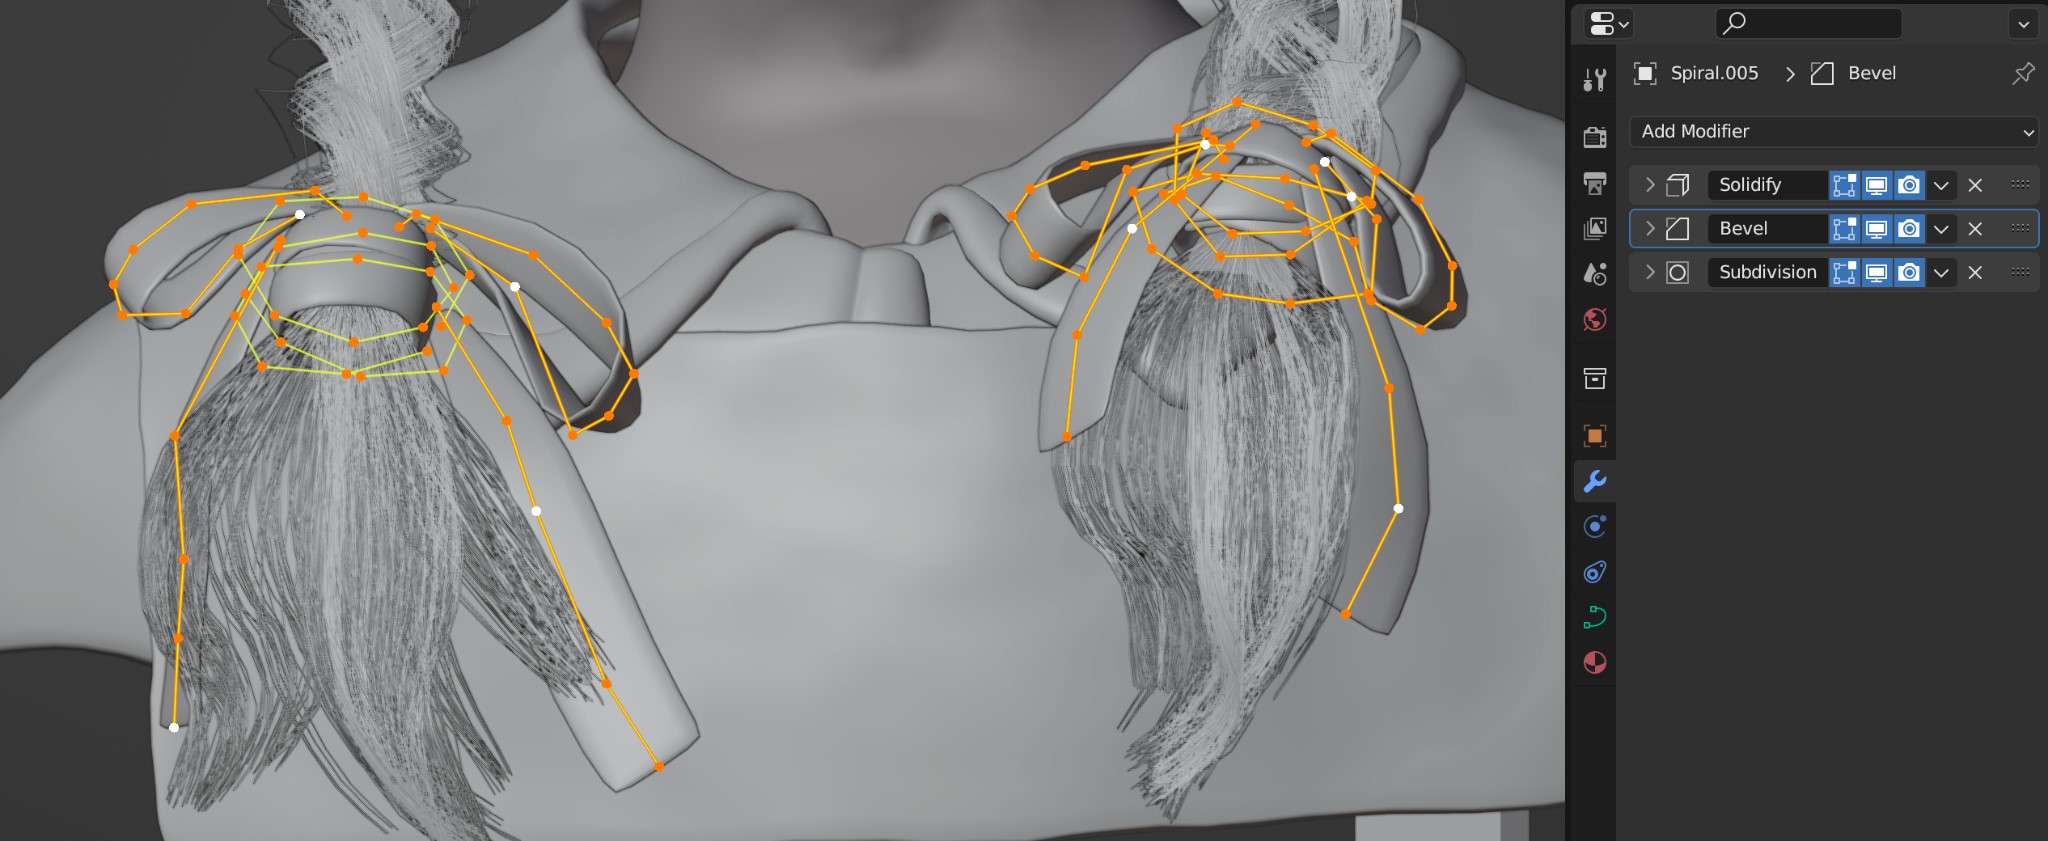
I moved onto the visible parts of the outfit next. This was relatively straightforward subdivision modeling. I made use of face snapping and shrinkwrap to conform to the underlying torso sculpt, and then used the solidify modifier to replicate the heavy cloth.
Lastly, I added some imperfections via a noise texture displacement. The materials are mostly procedural, using the ‘magic’ texture to roughly imply a fabric weave, and the ‘wave’ texture to create the blue stripes.
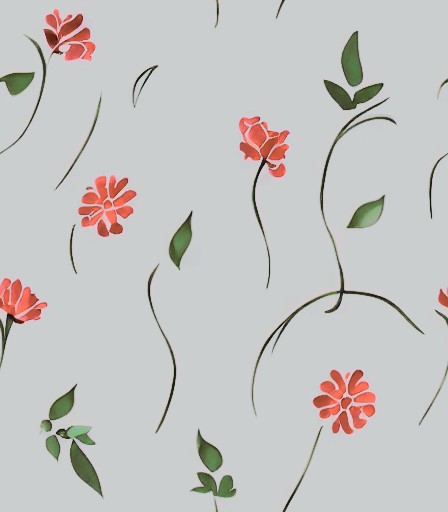
I initially used a placeholder texture for the floral pattern, figuring I might just paint my own version in Procreate at a later point.
However, what I eventually did was use the Dream Textures add-on to replicate something close enough. AI stuff can be contentious, but I figured I would make use of it for this small aspect just so I was keeping familiar with how the tools could be incorporated into workflows. Some example outputs I got using a mix of a text prompt and the reference texture as input:

HAIR
Originally, I thought I would take the opportunity to try out Blender’s recently revamped hair system.
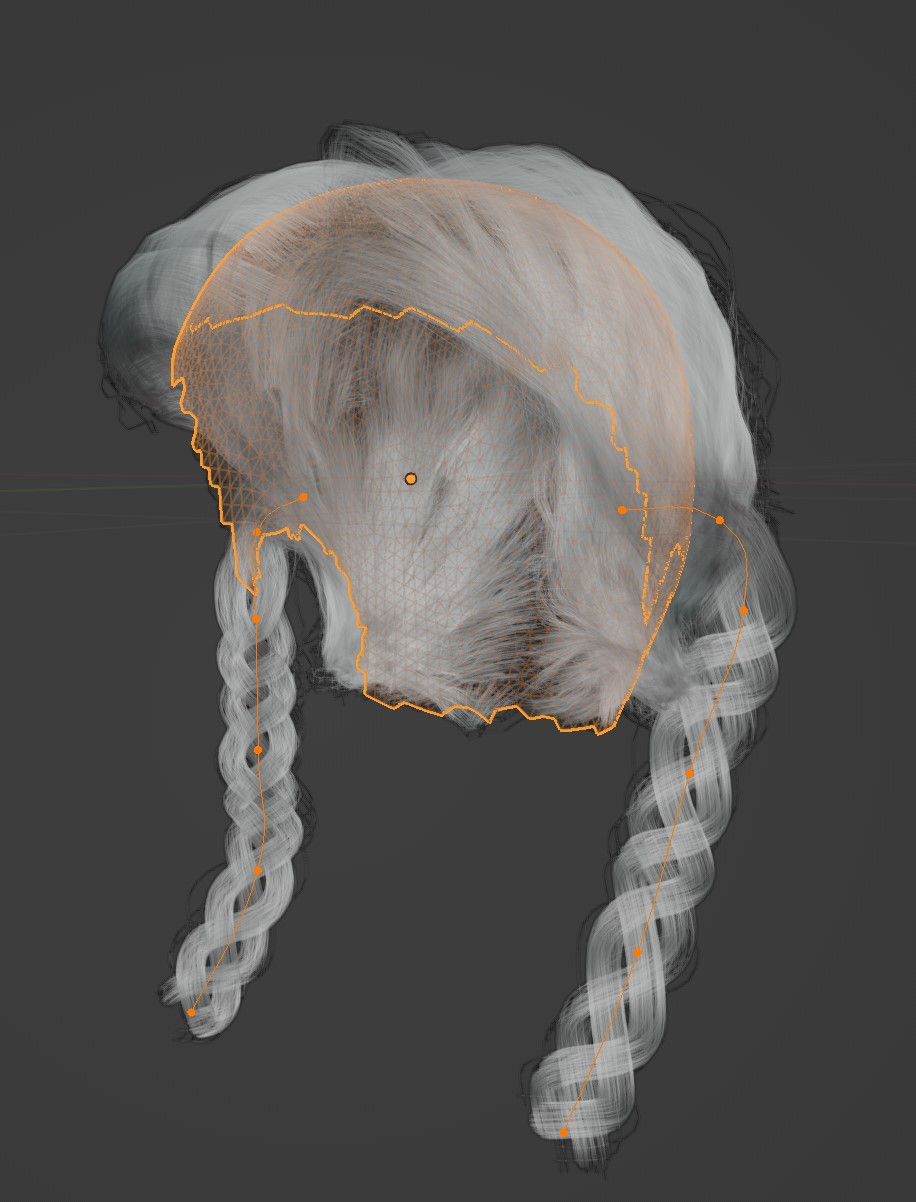
However, making braids using the old particle hair system with its ‘kink’ options was too tempting. I extracted a haircap from the head sculpt and made individual particle hair systems for both sides of the part and the braids.
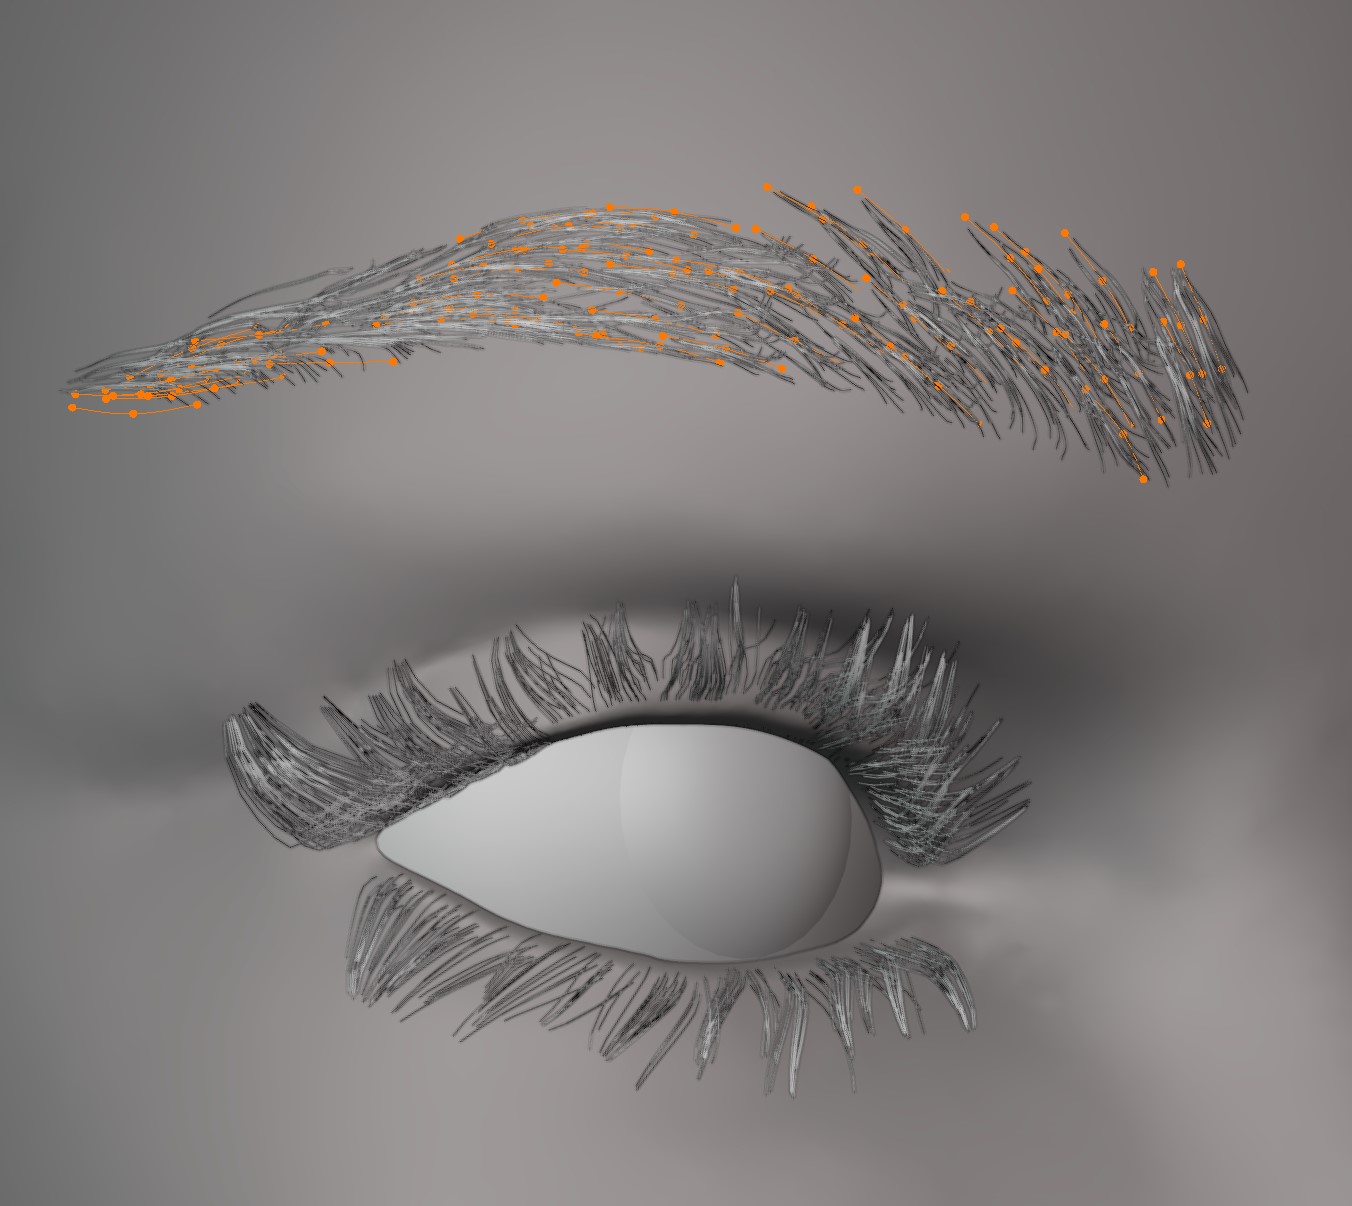
I also converted the mesh lashes and eyebrows to particle systems.
Ironically, the braids still proved challenging to art direct the orientation of their weaving pattern. To my knowledge, there isn’t a way to set the ’tilt’ of a particle hair curve the way you would a regular curve. Maybe braids will ultimately become easier with geometry node hair, where you have more ‘under the hood’ control of things!
I made sure to fully utilize the various particle hair roughness options to keep things from being too CG-perfect and to add flyaways.
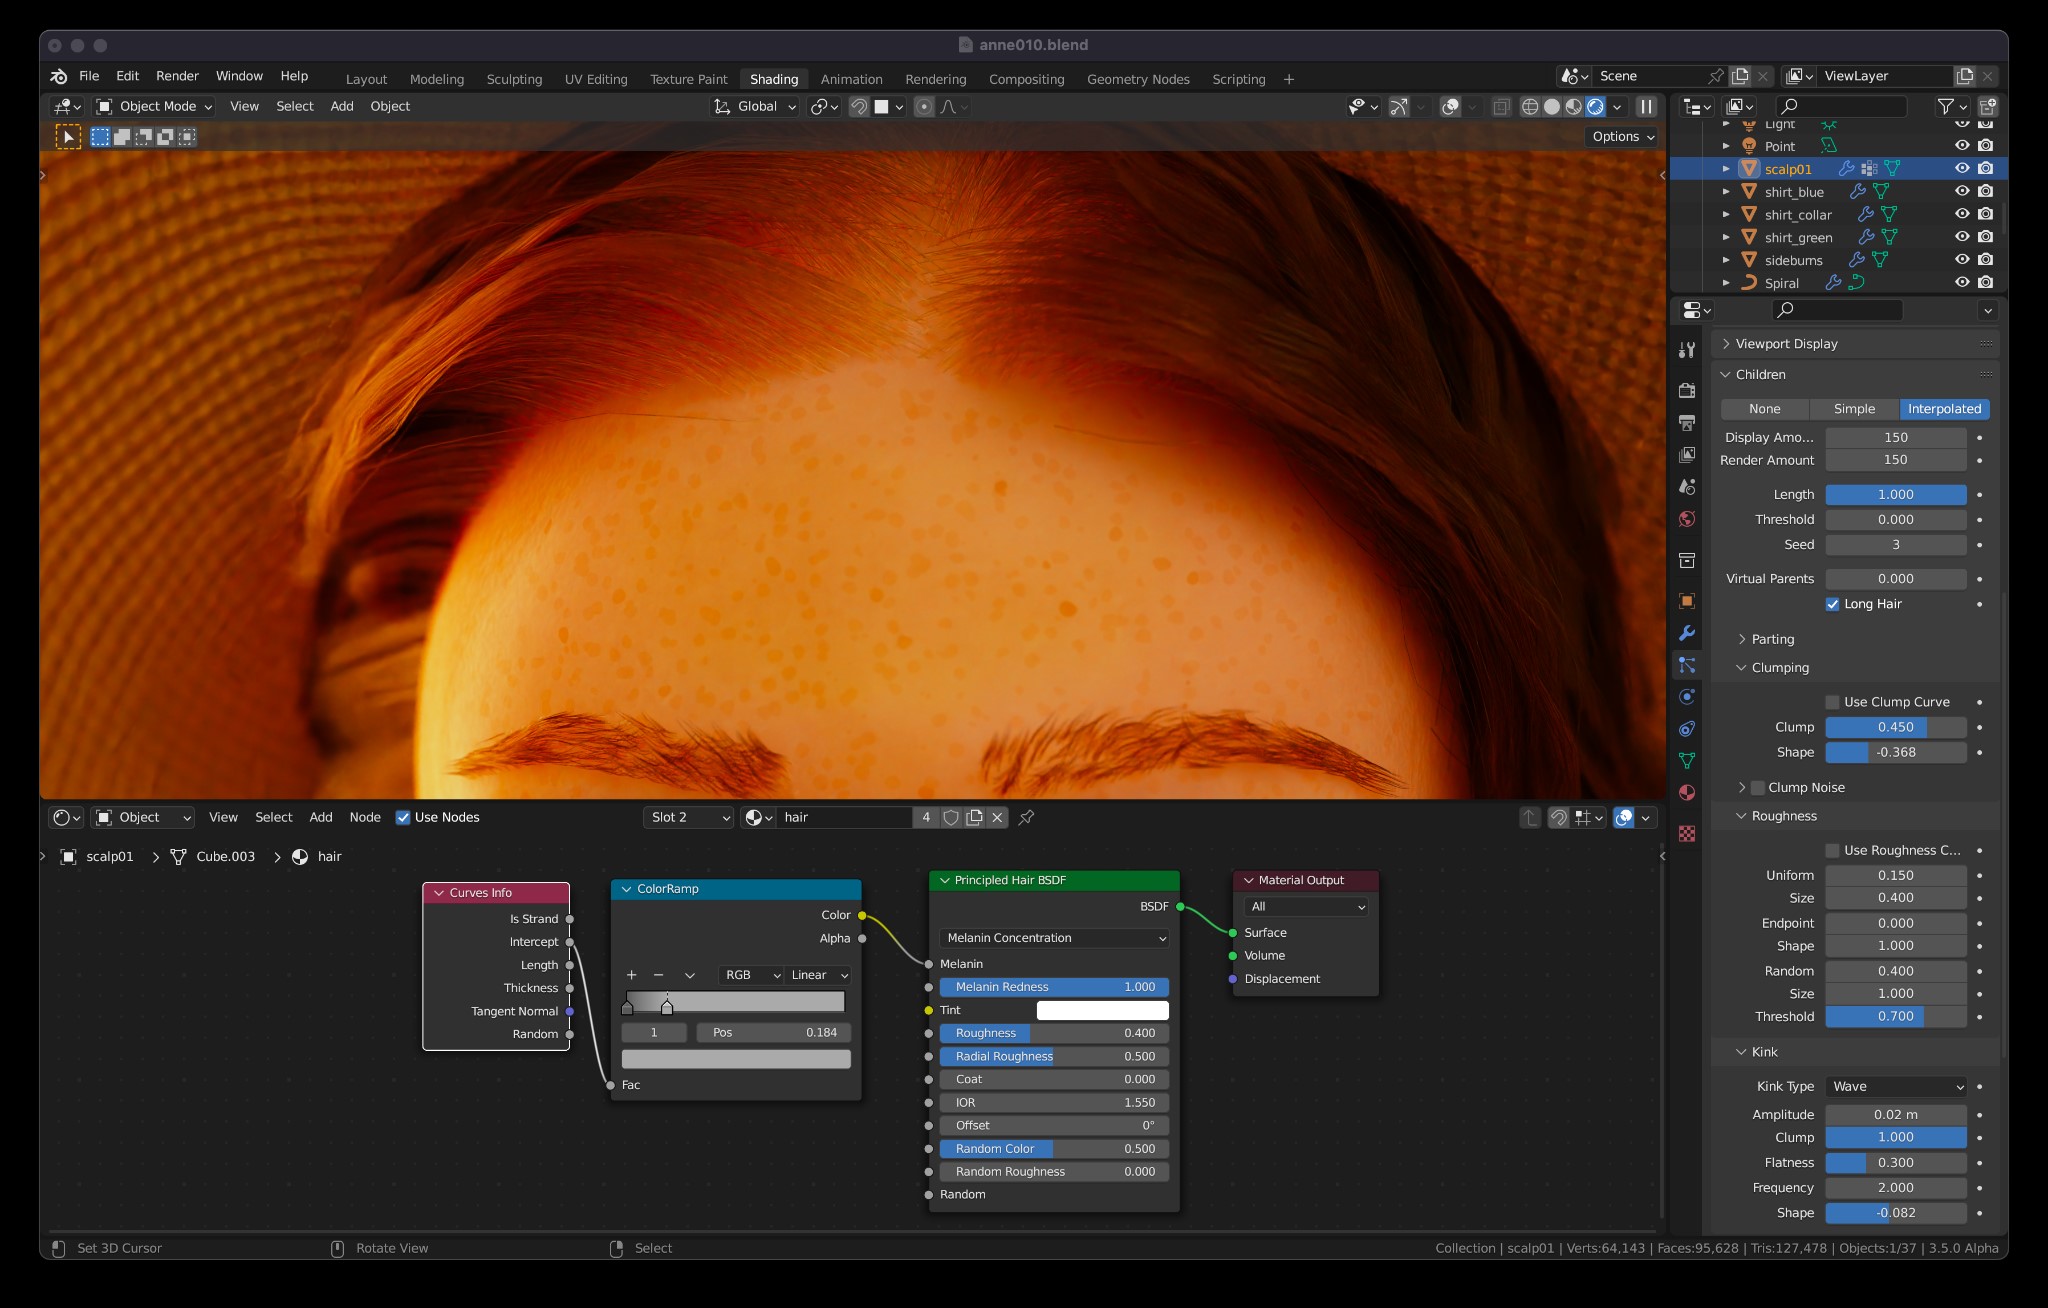
The hair material is just the principled hair shader with curve intercept used to control the melanin value to be more blonde near the roots, helping ease the transition to the scalp.
FINALIZING
After a quick model and material for her hat (which probably could have been much better, but I wanted to wrap things up), I felt like I had enough that I could step back and evaluate the piece as a whole.
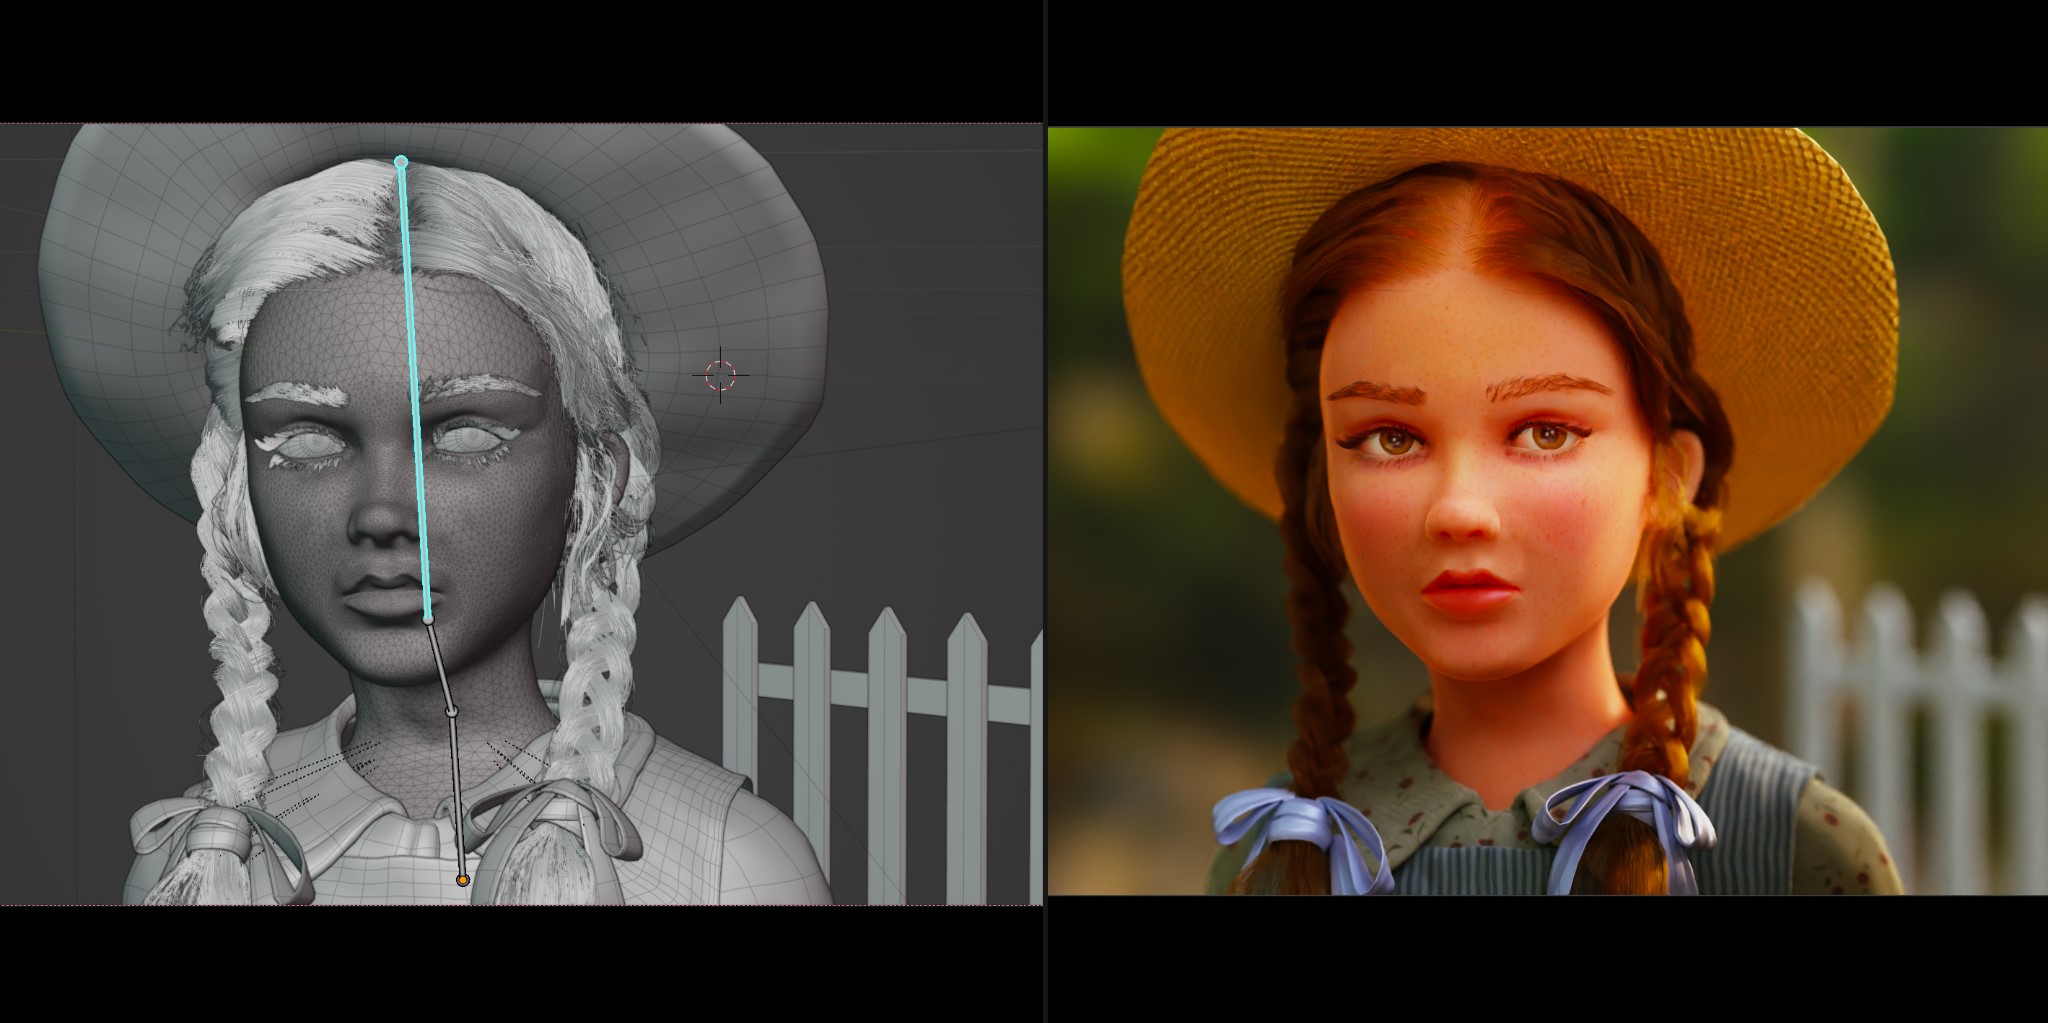
Something felt off about the face proportions, so I went back into sculpt mode and nudged things around to try to improve it. It’s worth noting at this point that I’d somewhat abandoned the idea of getting a great likeness; I just wanted it to feel nice in its own right. This is an area I’d really like to progress more in future projects.

Finishing touches to the character included the curve-based bows at the end of the braids, and creating a simple armature for a less stiff posture.
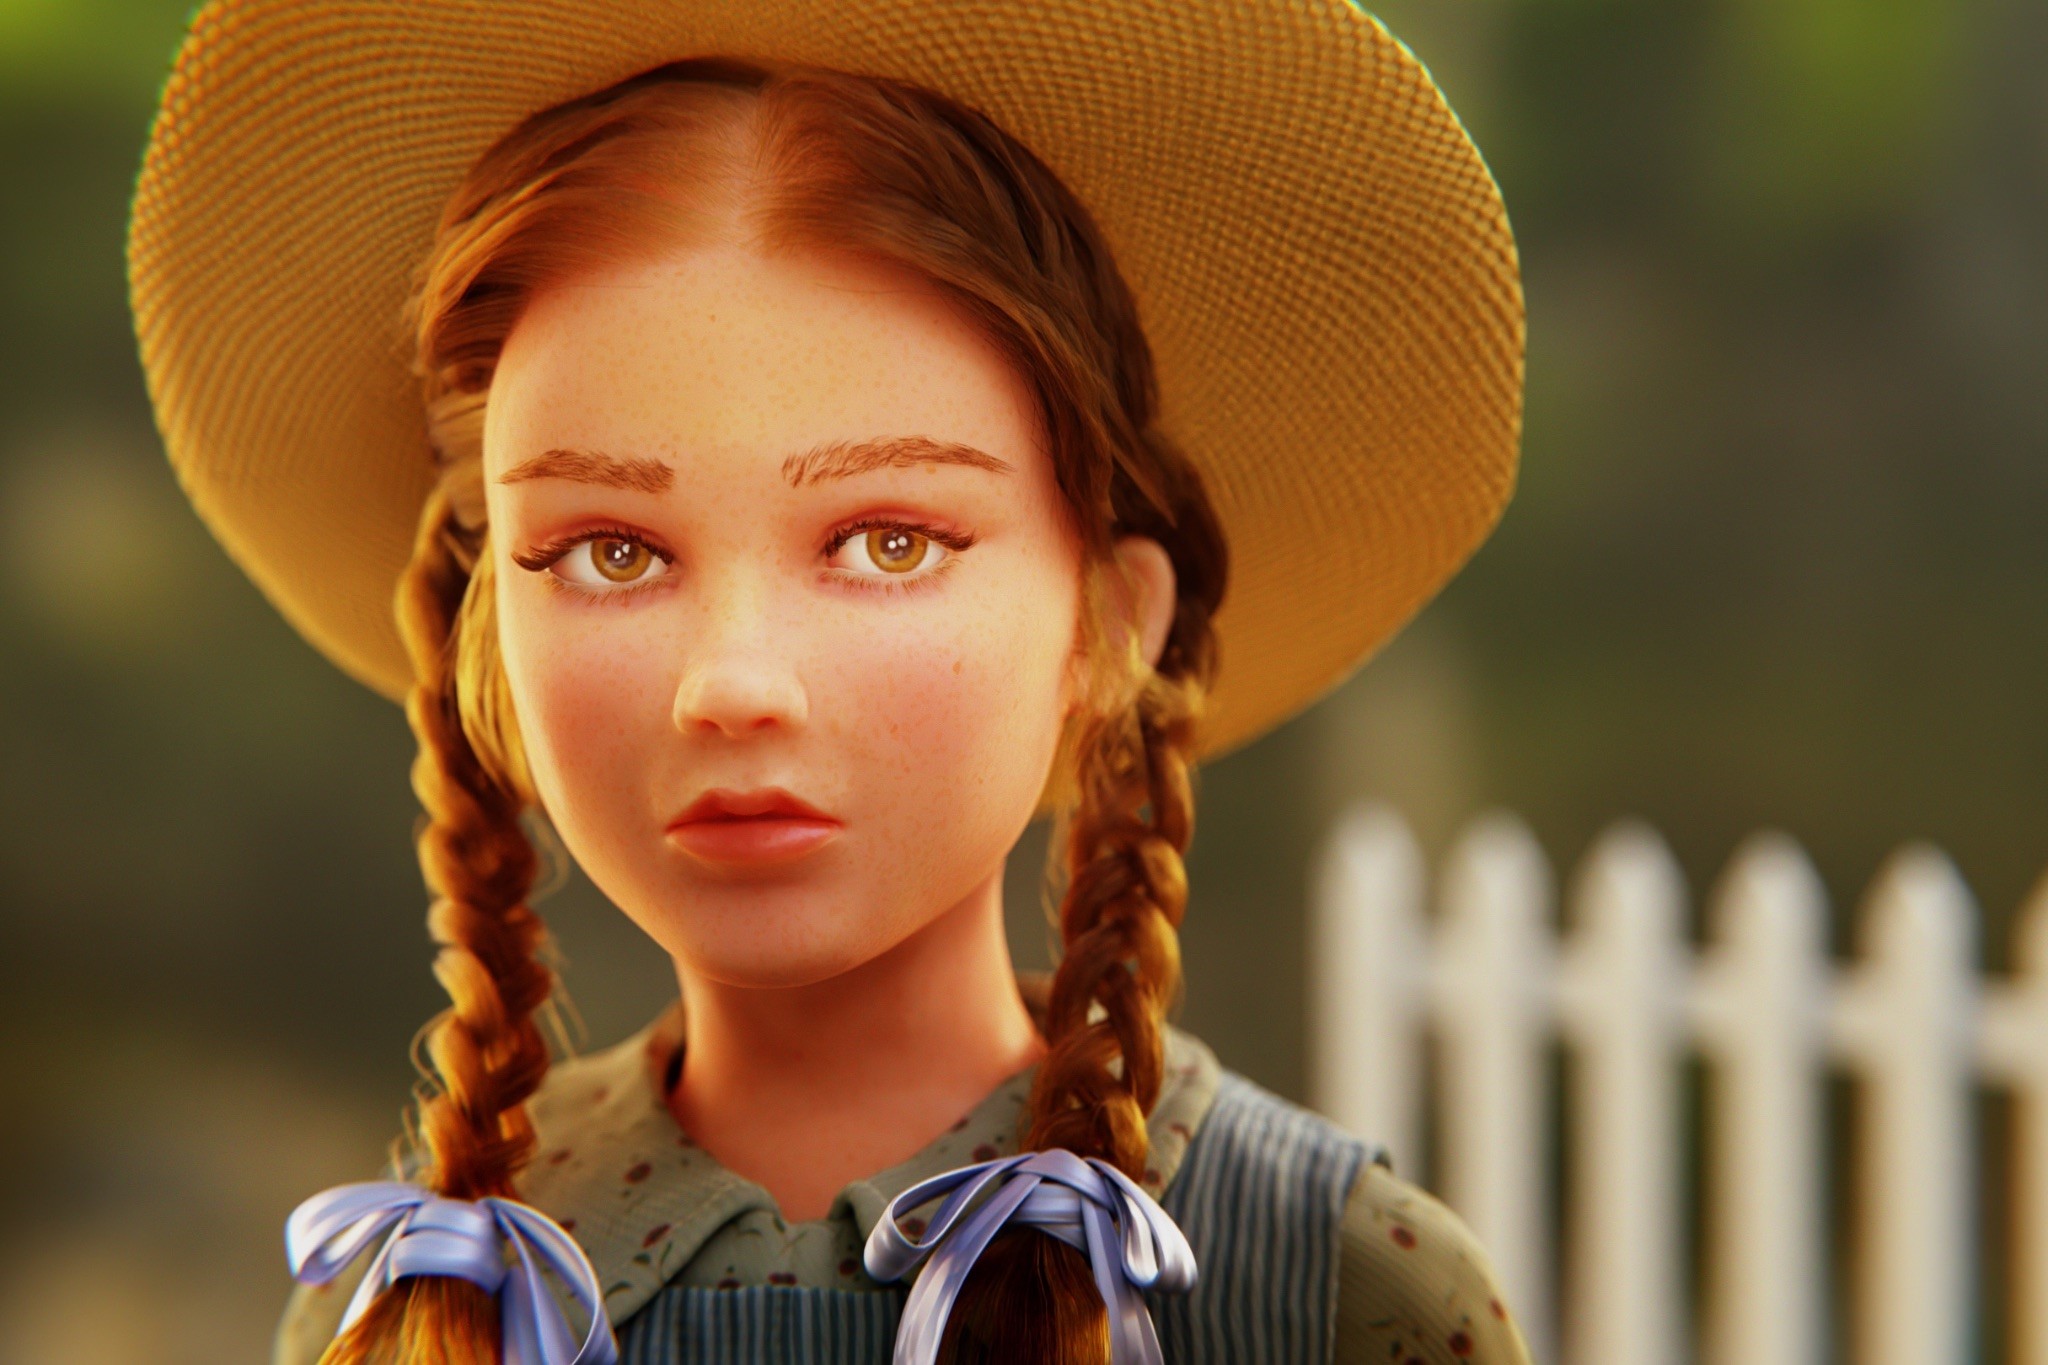
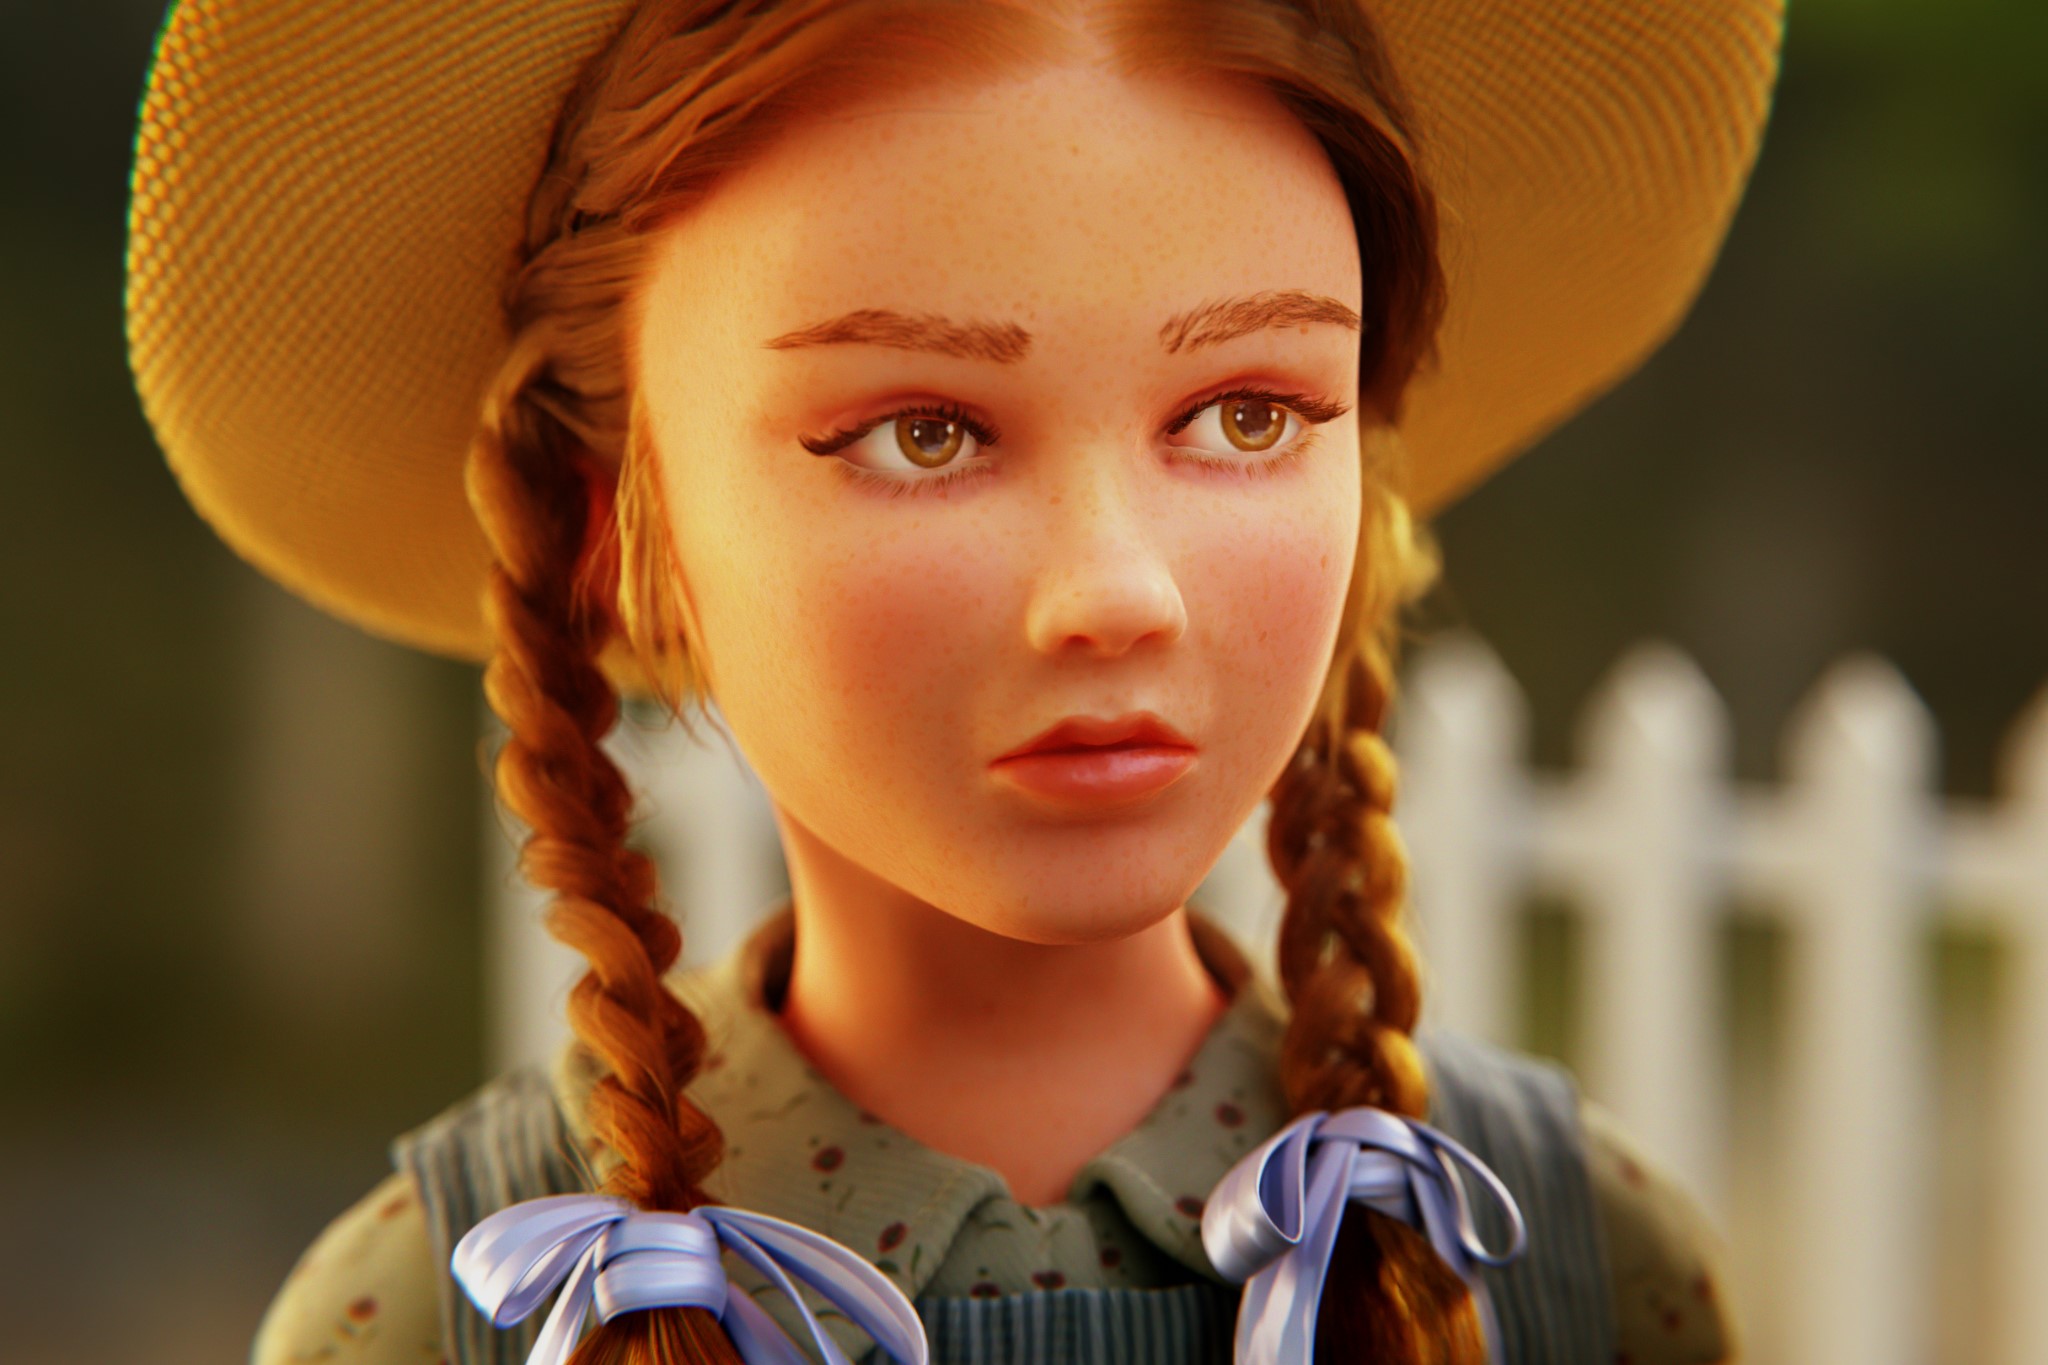
The final steps were adding a white fence to suggest the Green Gables property, some final lighting tweaks, and compositing in a hint of grain and dispersion to suggest older film stock.
And with that, I figured I would call it done.
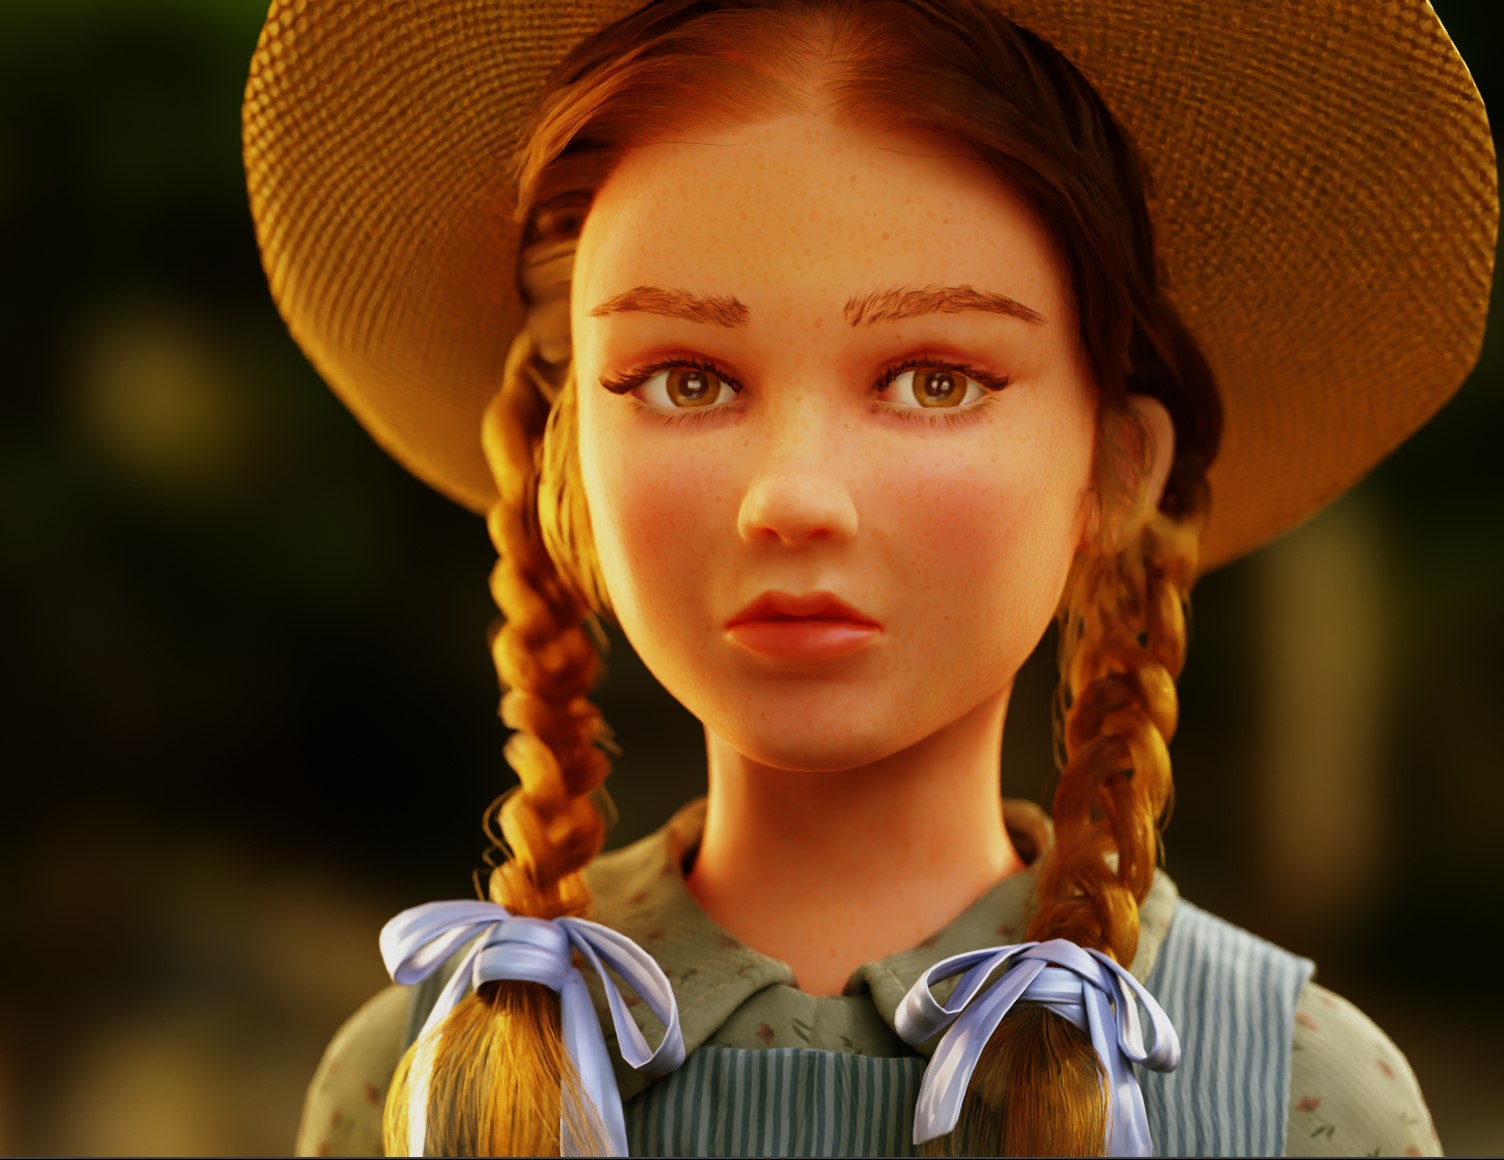
ANNE CHARACTER-STUDY

Thanks for the opportunity to share! I hope this breakdown was of some interest!
About the Artist
Steve Miller, a 3D generalist and creative director from Toronto, Canada.


