

INTRODUCTION
Hello, my name is Haider Subhi and I am a freelance CG artist from Baghdad, Iraq, currently living in Istanbul, Türkiye.
As a freelance CG artist with over seven years of experience, I have had the opportunity to work on a variety of projects and hone my skills in the field. My journey in 3D began when I was a child and had always dreamed of creating movies in the style of Pixar. This dream, along with a desire to expand my career opportunities beyond graphic design, led me to pursue a career in 3D.
I initially learned to use Maya and Cinema 4D as part of my workflow, but about two years ago, a friend suggested that I try Blender. At the time, I was hesitant because I had heard mixed reviews about the software. However, I decided to give it a chance and was pleasantly surprised by its capabilities and the support of the Blender community. Today, Blender is my go-to software for 3D work, with the exception of certain tasks that may require the use of other programs.
Throughout my career, I have had the opportunity to work on a wide range of projects, including character design, animation, motion graphics, etc. I am always eager to learn new techniques and software to improve my skills and stay up-to-date in the industry.
INSPIRATION
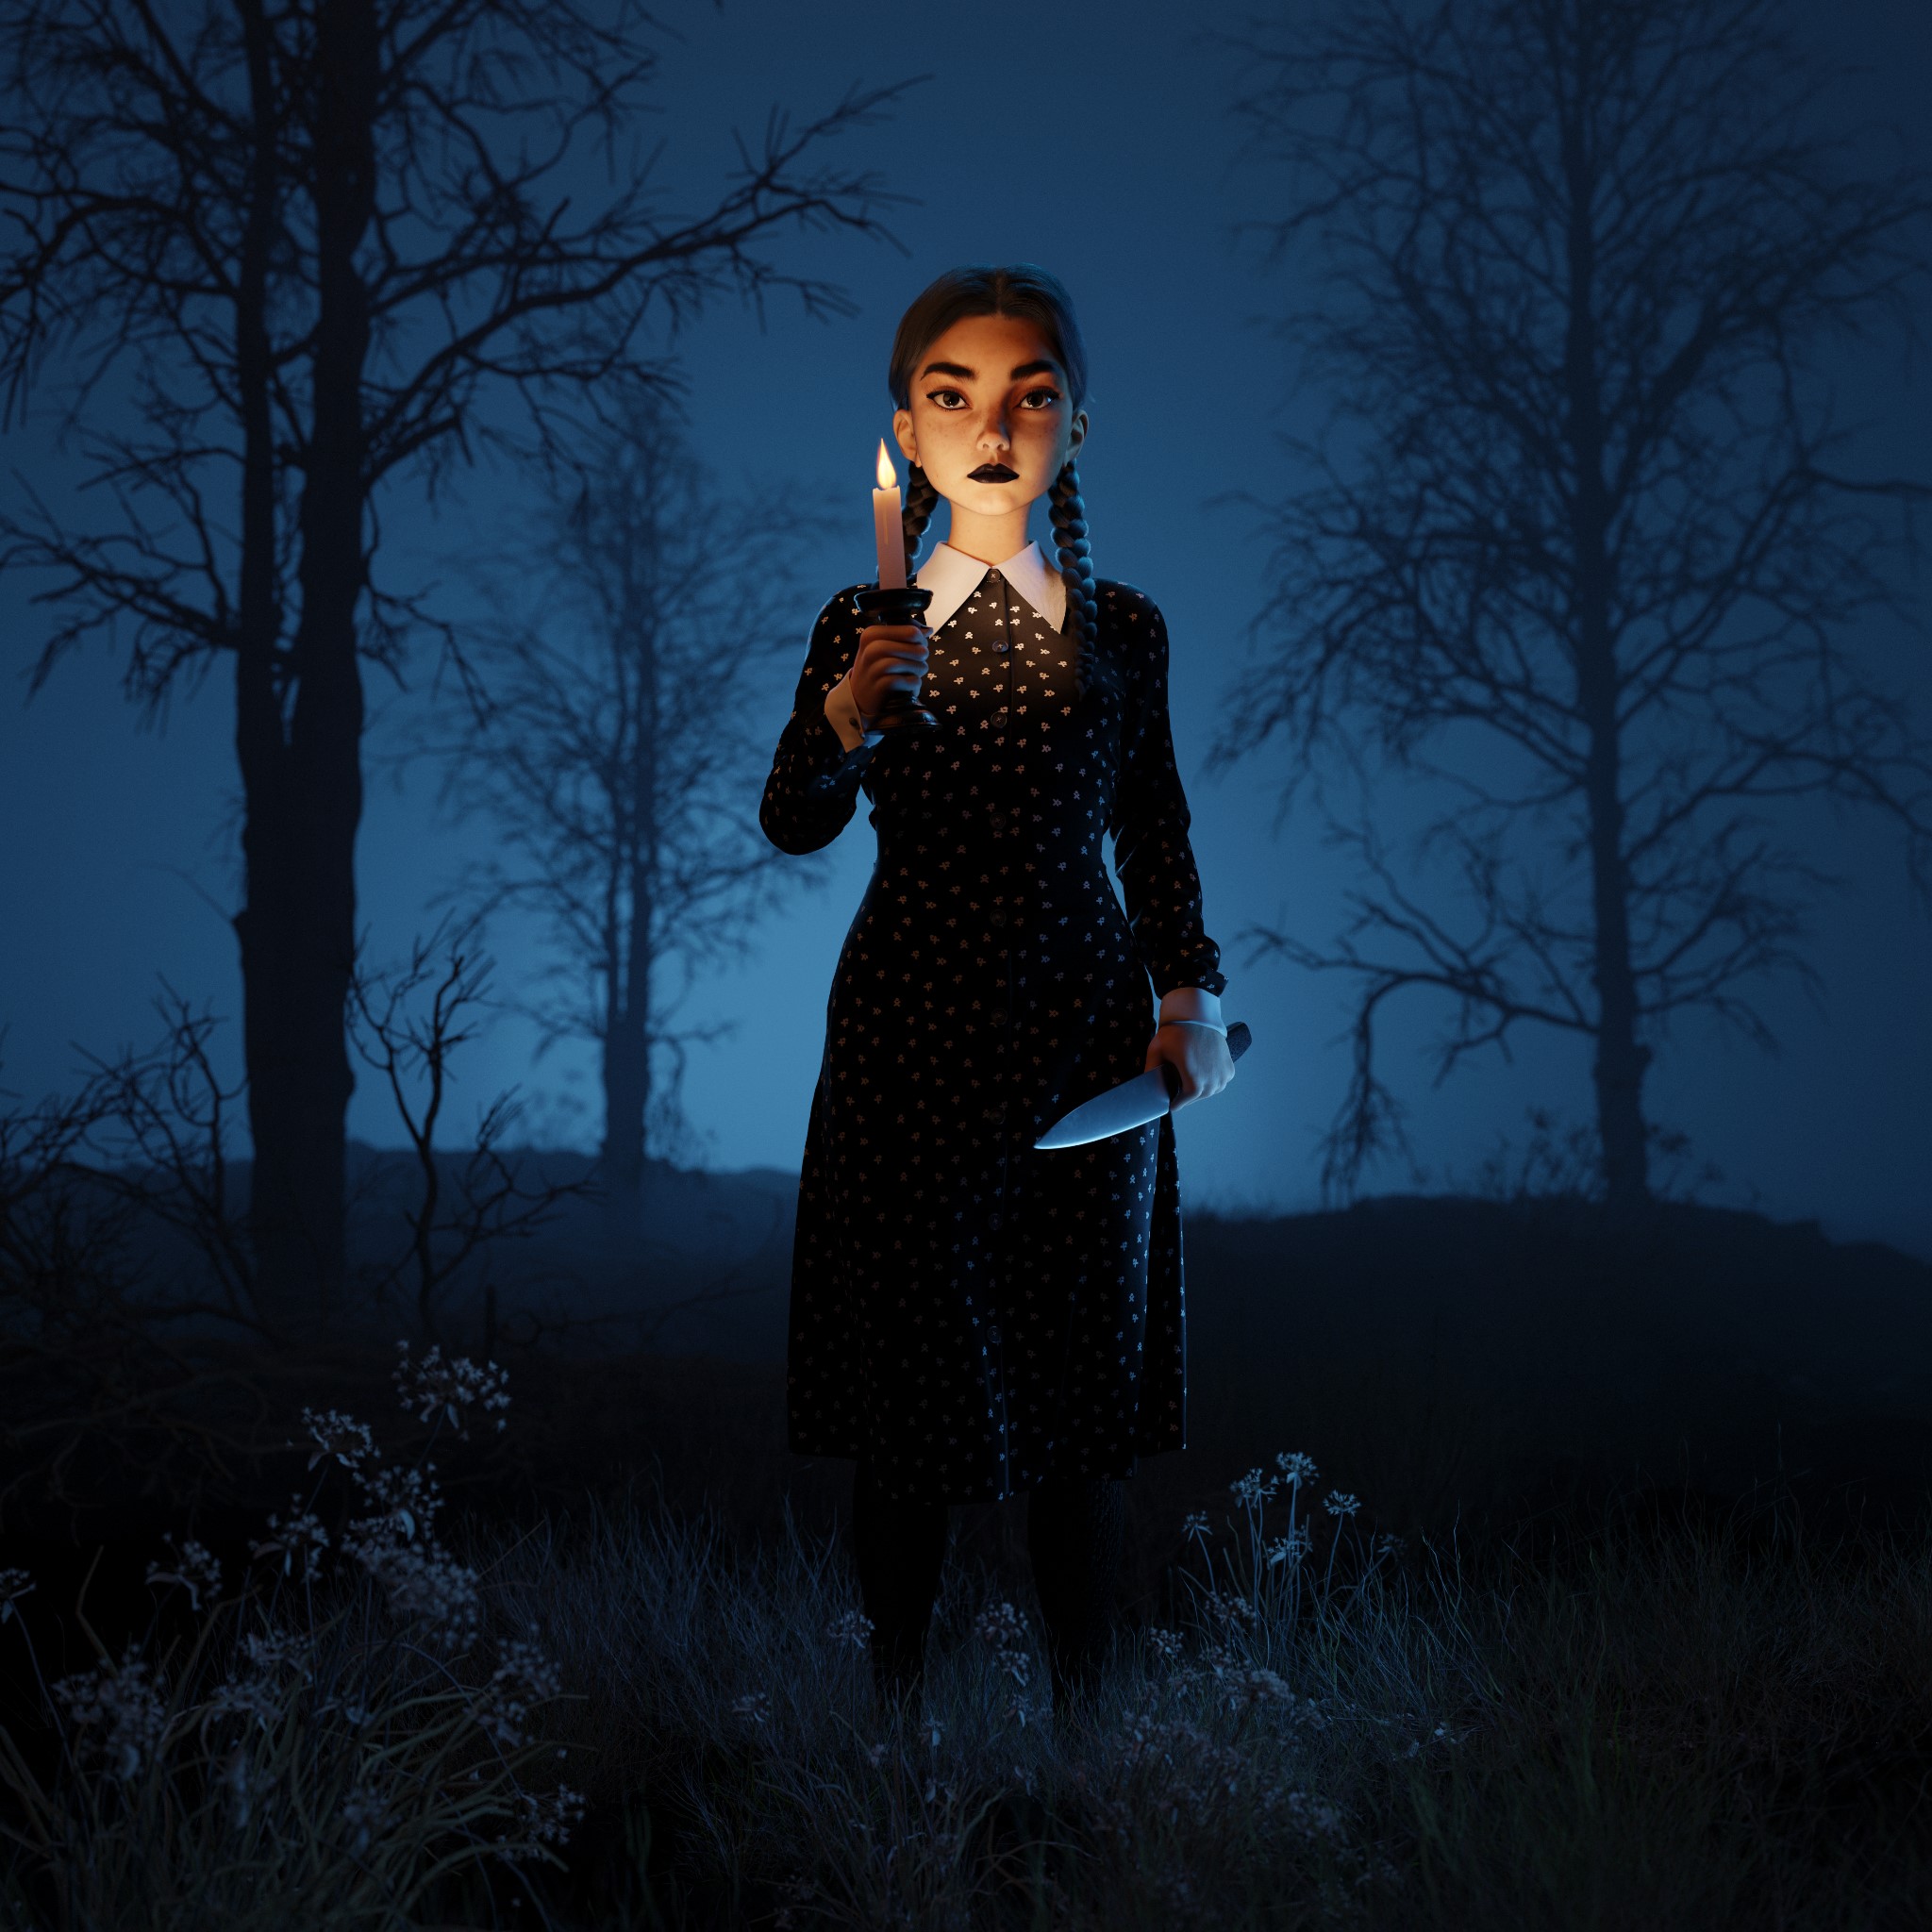
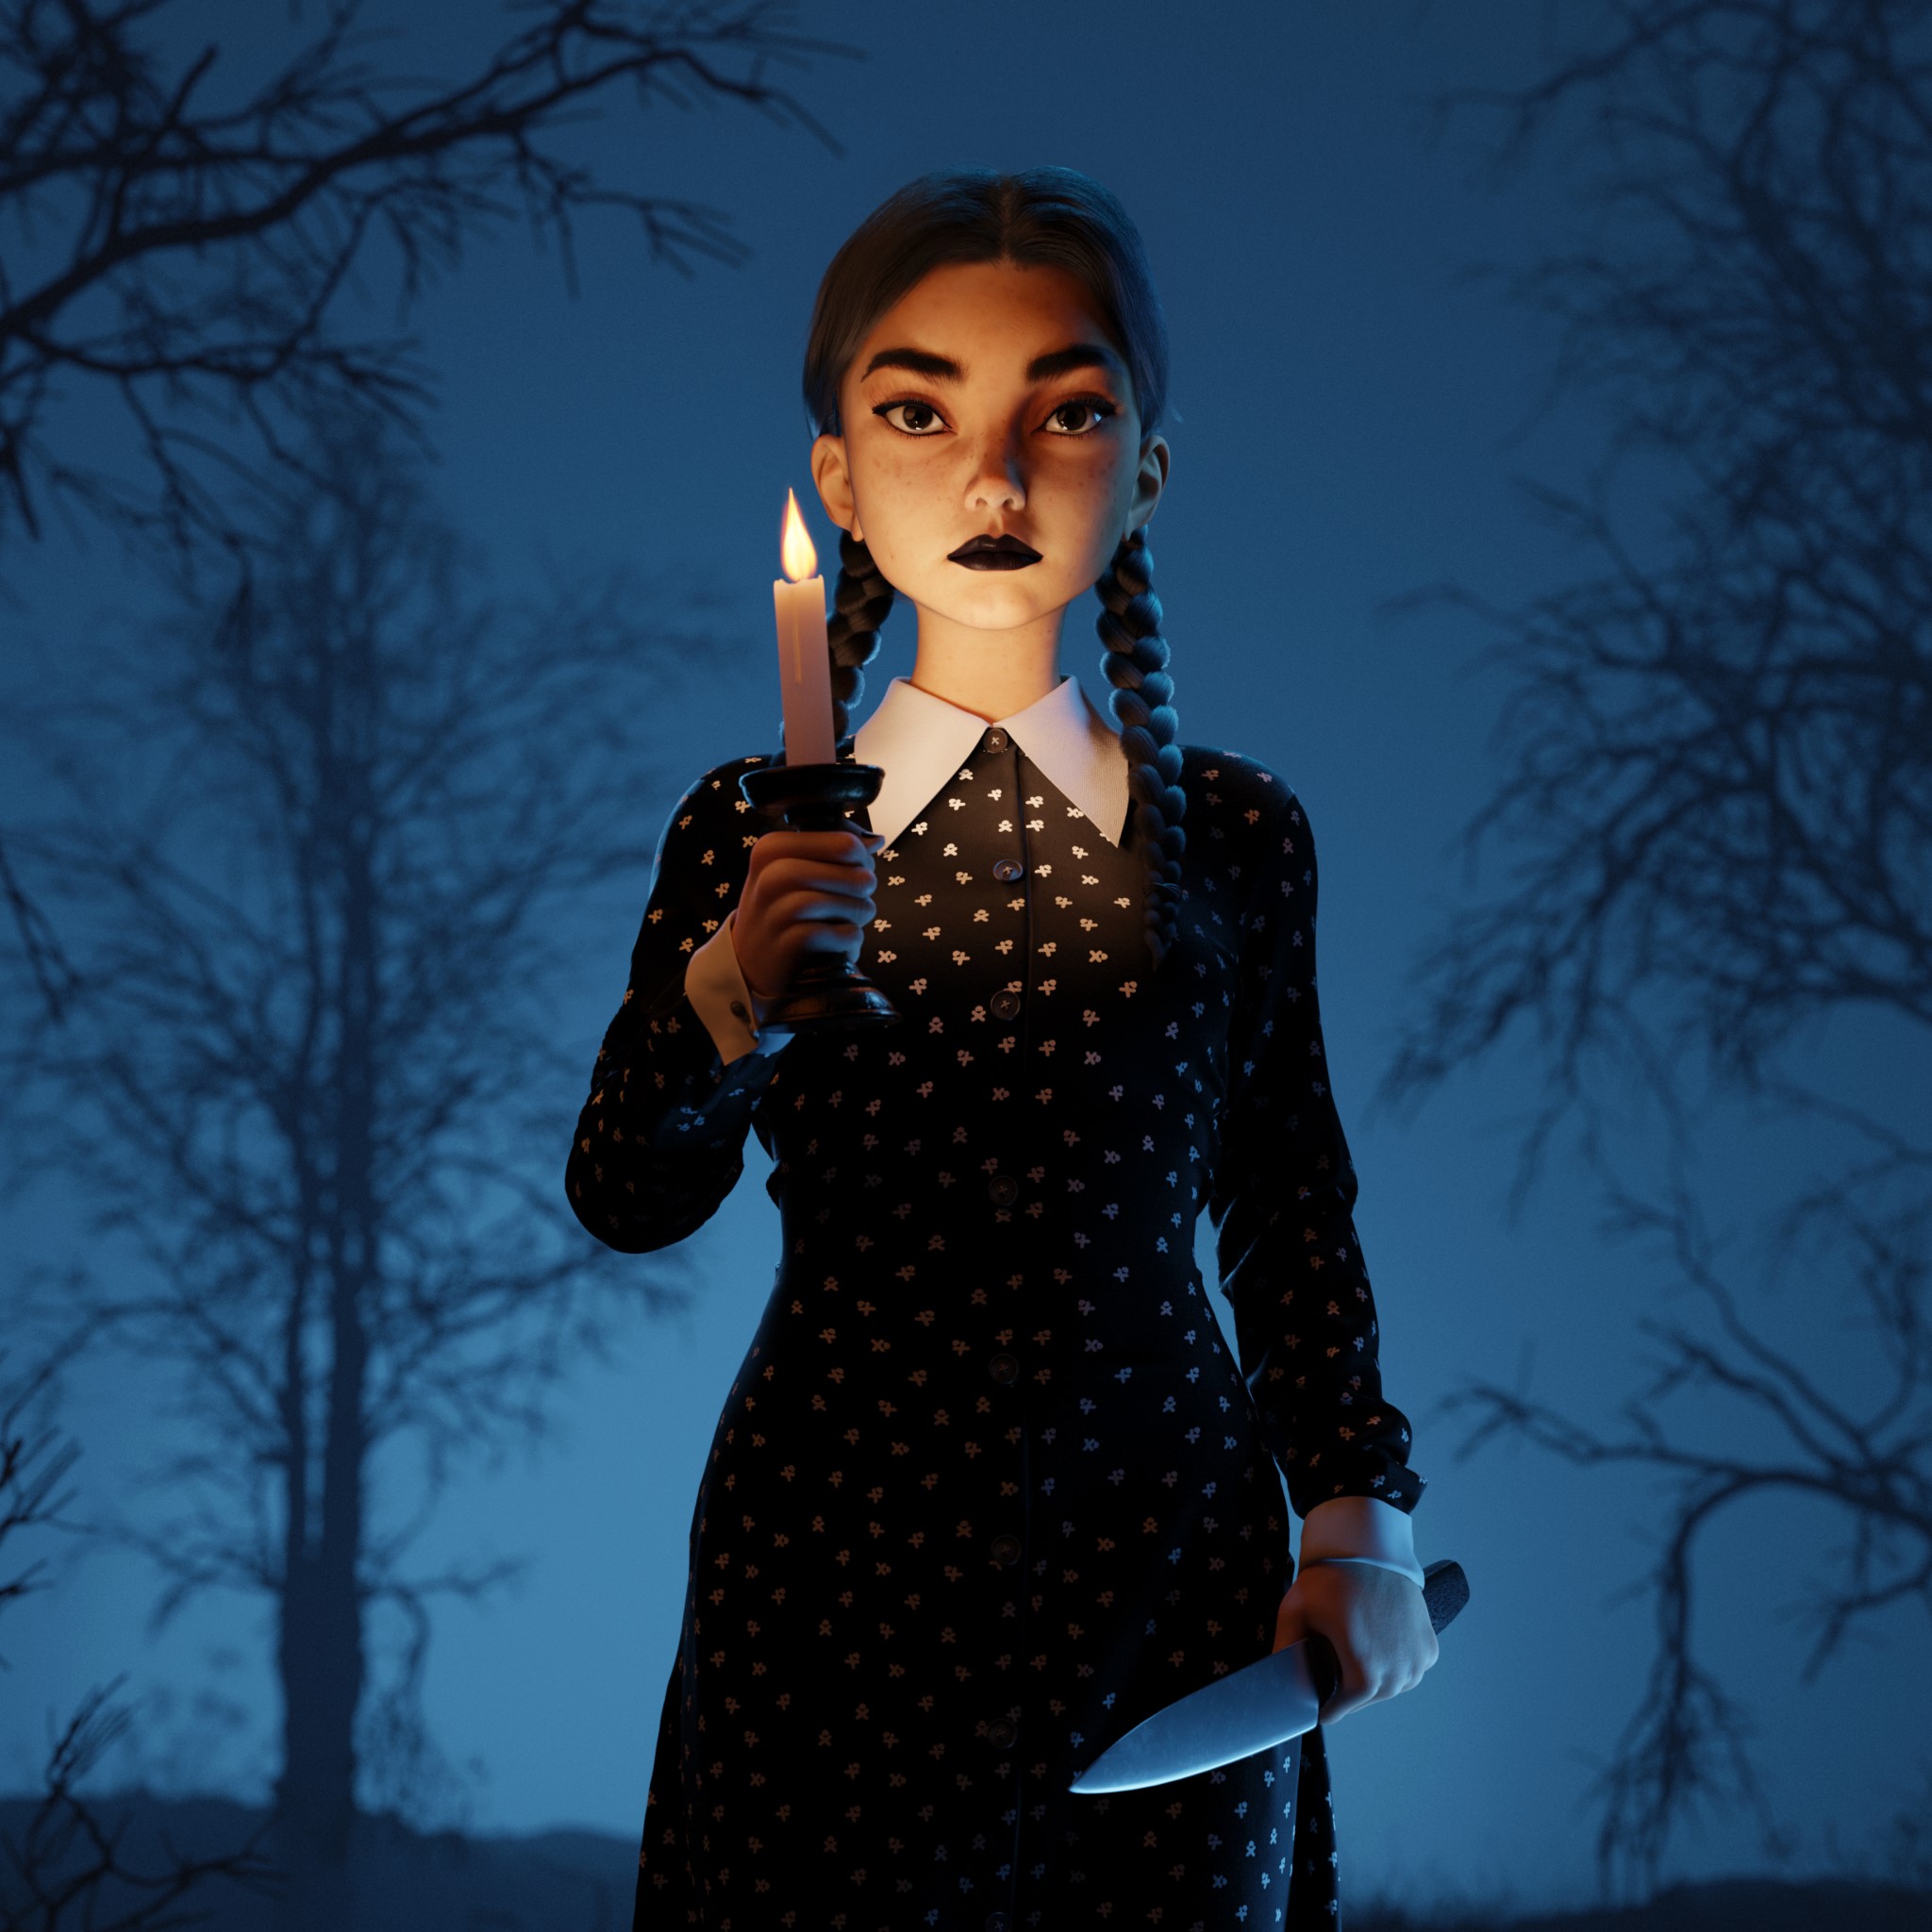
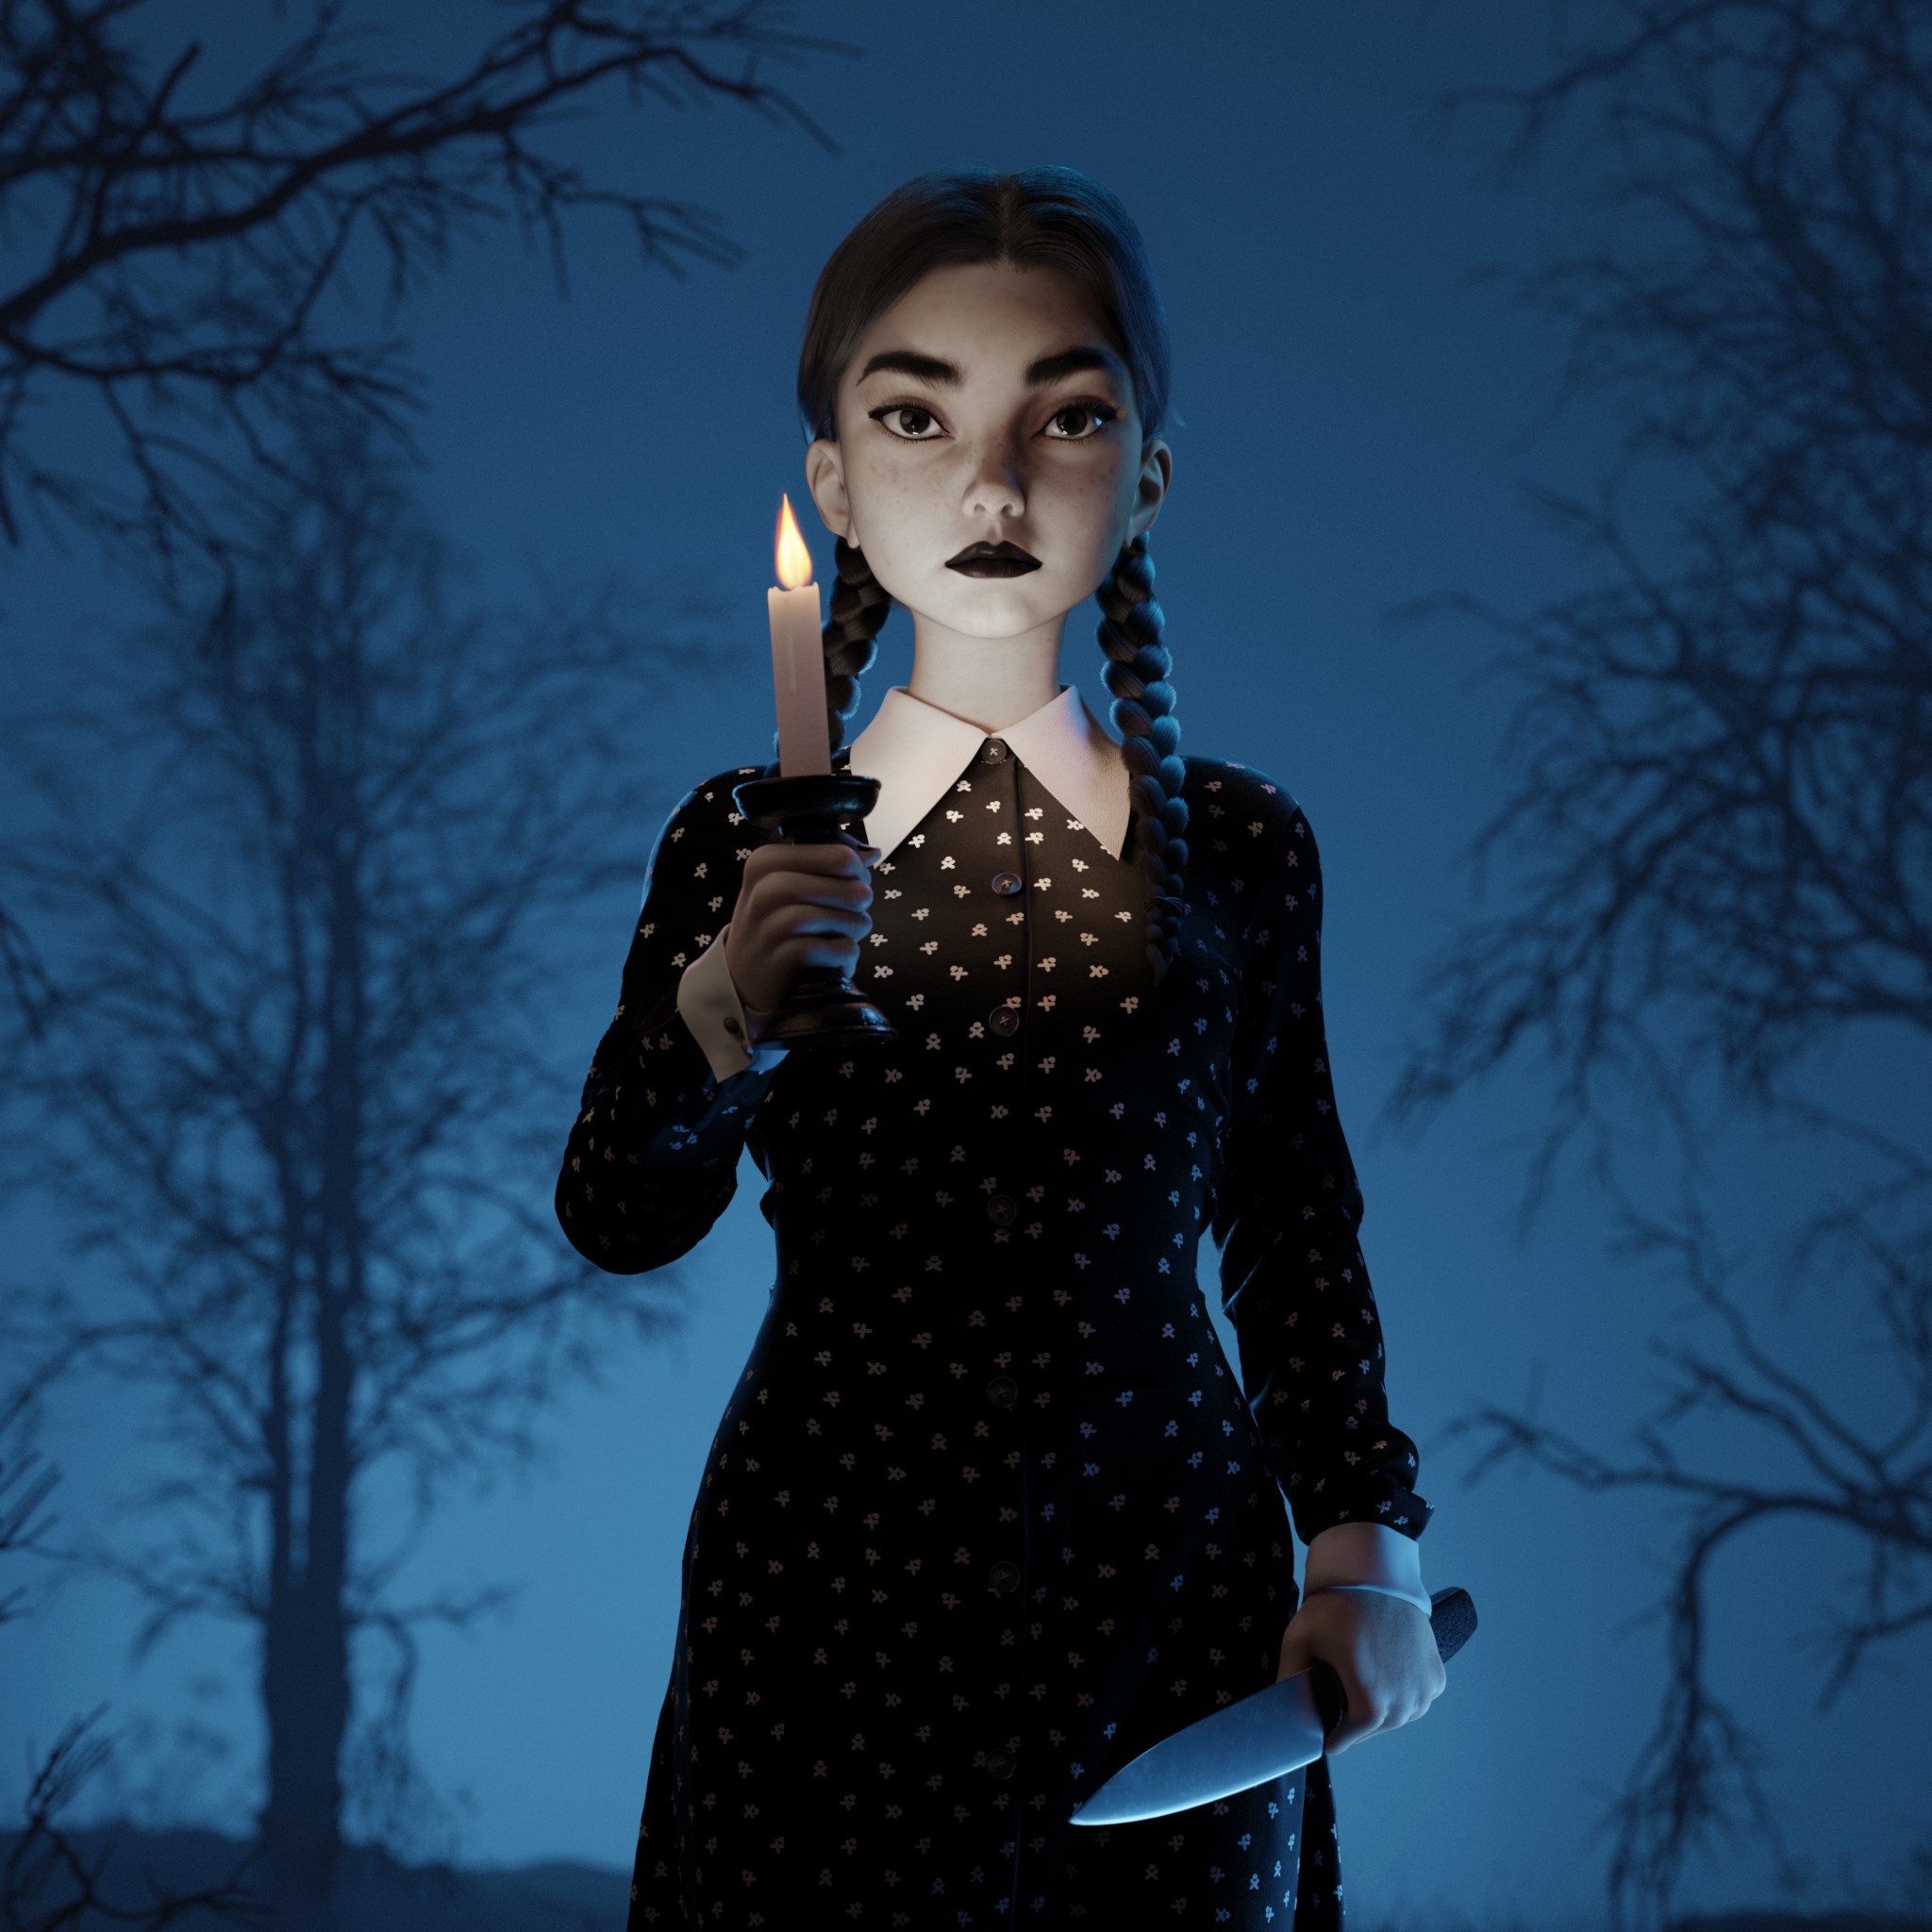
As an artist, I often spend a significant amount of time seeking inspiration and finding good references for my work. However, for my latest project, I knew exactly what I wanted to create from the start. As a fan of the Addams family story, I decided to create a fan art piece featuring Wednesday Addams in my own style while still maintaining some of the key features of the original character such as her clothing and hair.
To help me with the placement of references, I used the PureRef program and gathered a variety of references from Pinterest. Overall, the process of creating this project was smooth and enjoyable.

PROCESS
Softwares:
- Blender 3.4
- Marvelous designer (clothes)
- Affinity photo (post-production)
- Cycles render
- PureRef
Add-ons:
MODELING
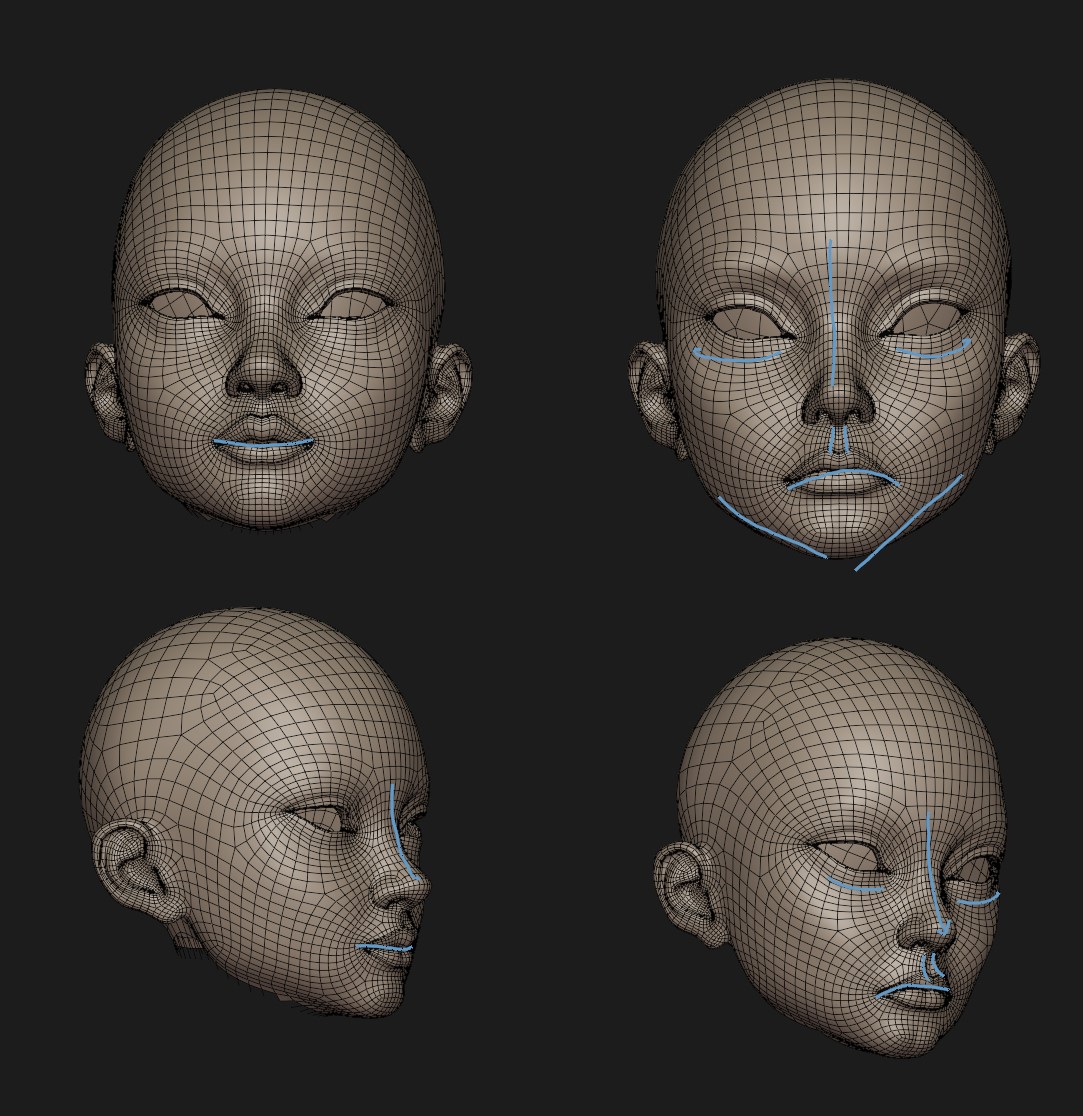
In the process of creating this project, I began by focusing on the face of the character. I wanted to capture a specific emotion, conveying sadness, anger, and cold-heartedness all at once. To achieve this, I carefully crafted the main facial features, paying close attention to details such as the shape of the eyebrows, the curve of the lips, and the intensity of the gaze. This was a challenging task, as it required me to balance multiple conflicting emotions and convey them through subtle changes in the character's appearance.
However, with careful planning and attention to detail, I was able to create a face that accurately conveyed the desired emotion and set the tone for the rest of the project.
As a personal project, I wanted to ensure that I was able to complete my project efficiently and effectively. To do this, I decided to use a base mesh, which allowed me to quickly establish the basic structure of the model and move on to more important aspects of the piece. This time-saving technique allowed me to focus on refining the details and adding the necessary finishing touches to the project.
Since this particular model was not intended to have complex animations, I also chose to use a simple rigging method. This allowed me to focus on creating a high-quality model without getting bogged down in the technical details of setting up a more complex rig. By streamlining my workflow in this way, I was able to complete the project efficiently and effectively, resulting in a final product that met my high standards of quality.
HAIR
One of the most challenging parts was styling the hair. I initially experimented with various add-ons, but none of them produced the desired result. As a result, I decided to use Blender's built-in hair system instead. This proved to be a more effective solution, and I was able to achieve the desired look by dividing the hair into three distinct sections. This helped me to better manage the hair and achieve the desired shape.

CLOTHING
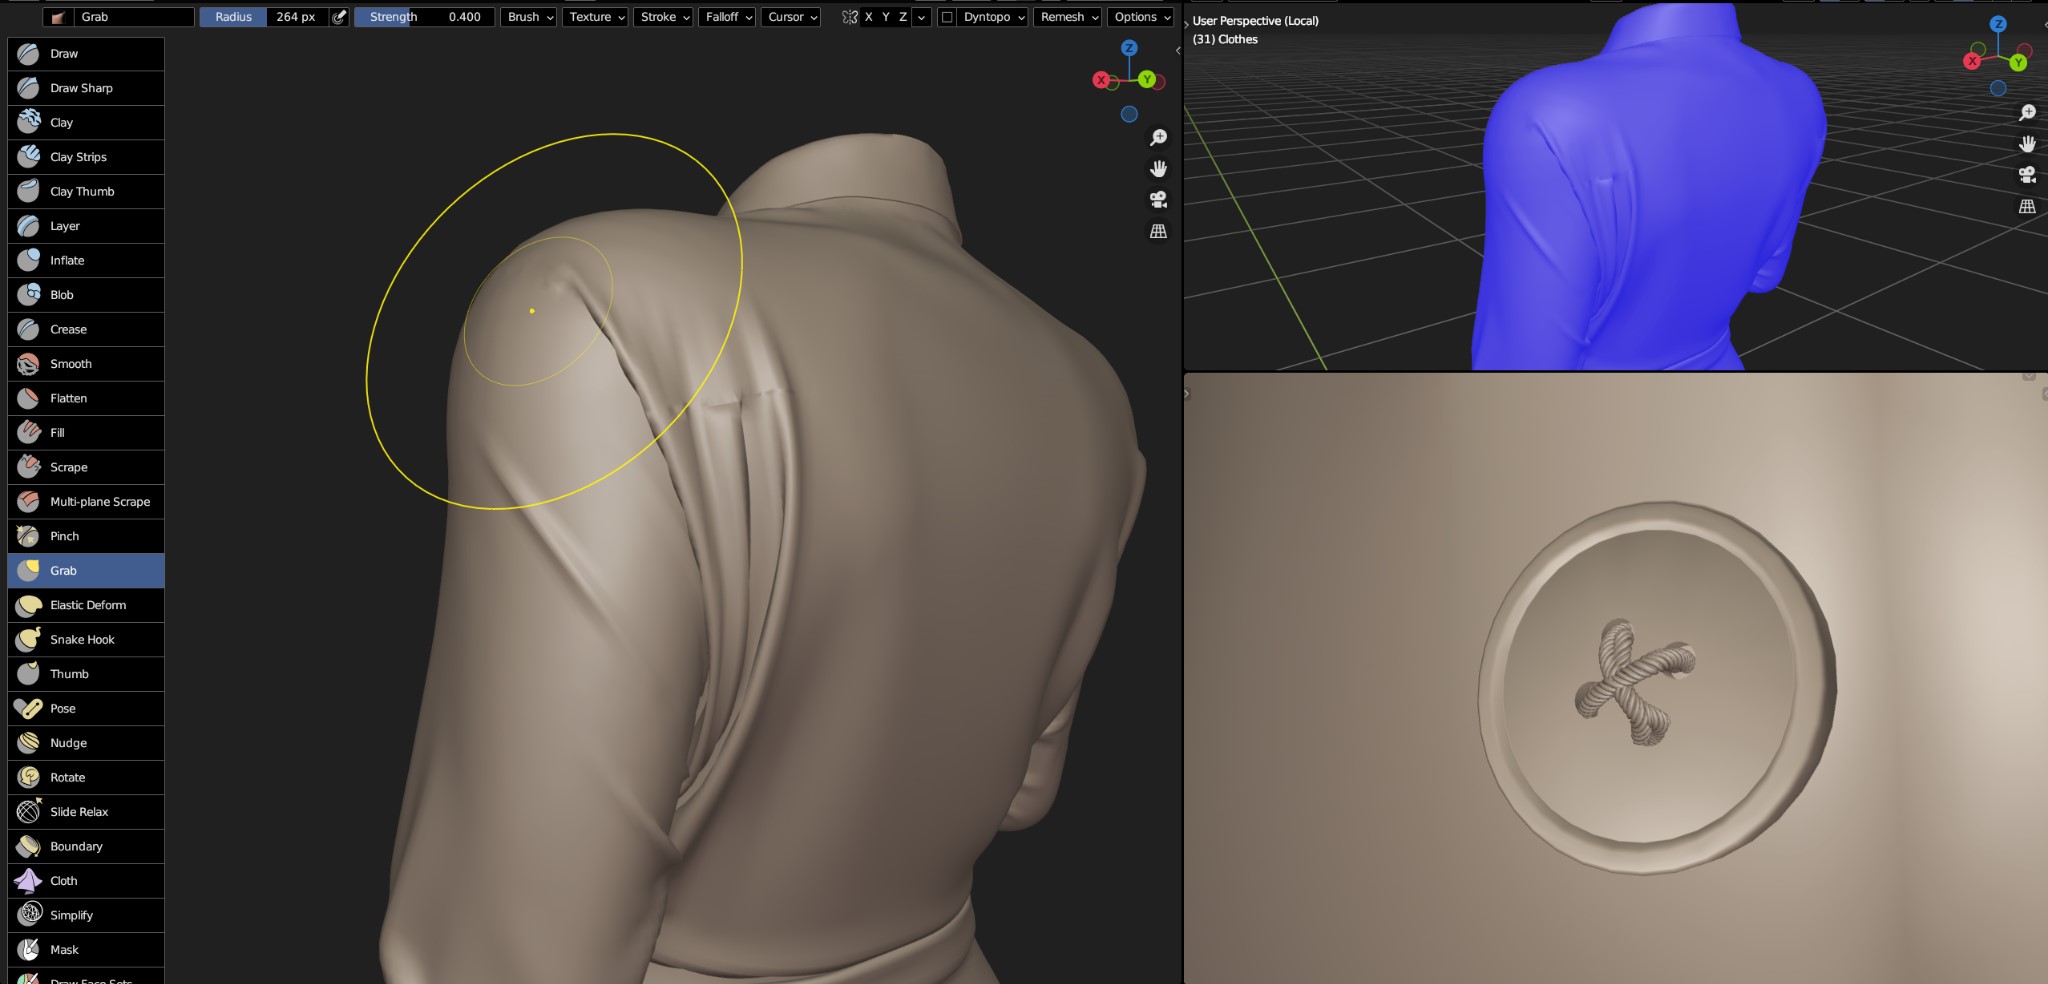
For clothing I used Marvelous Designer. I started with simple garments to make a unique dress with a very large collar and long sleeves.

After I finished with Marvelous Designer, I exported the file to FBX format and I started to add some details in Blender and make some modifications.
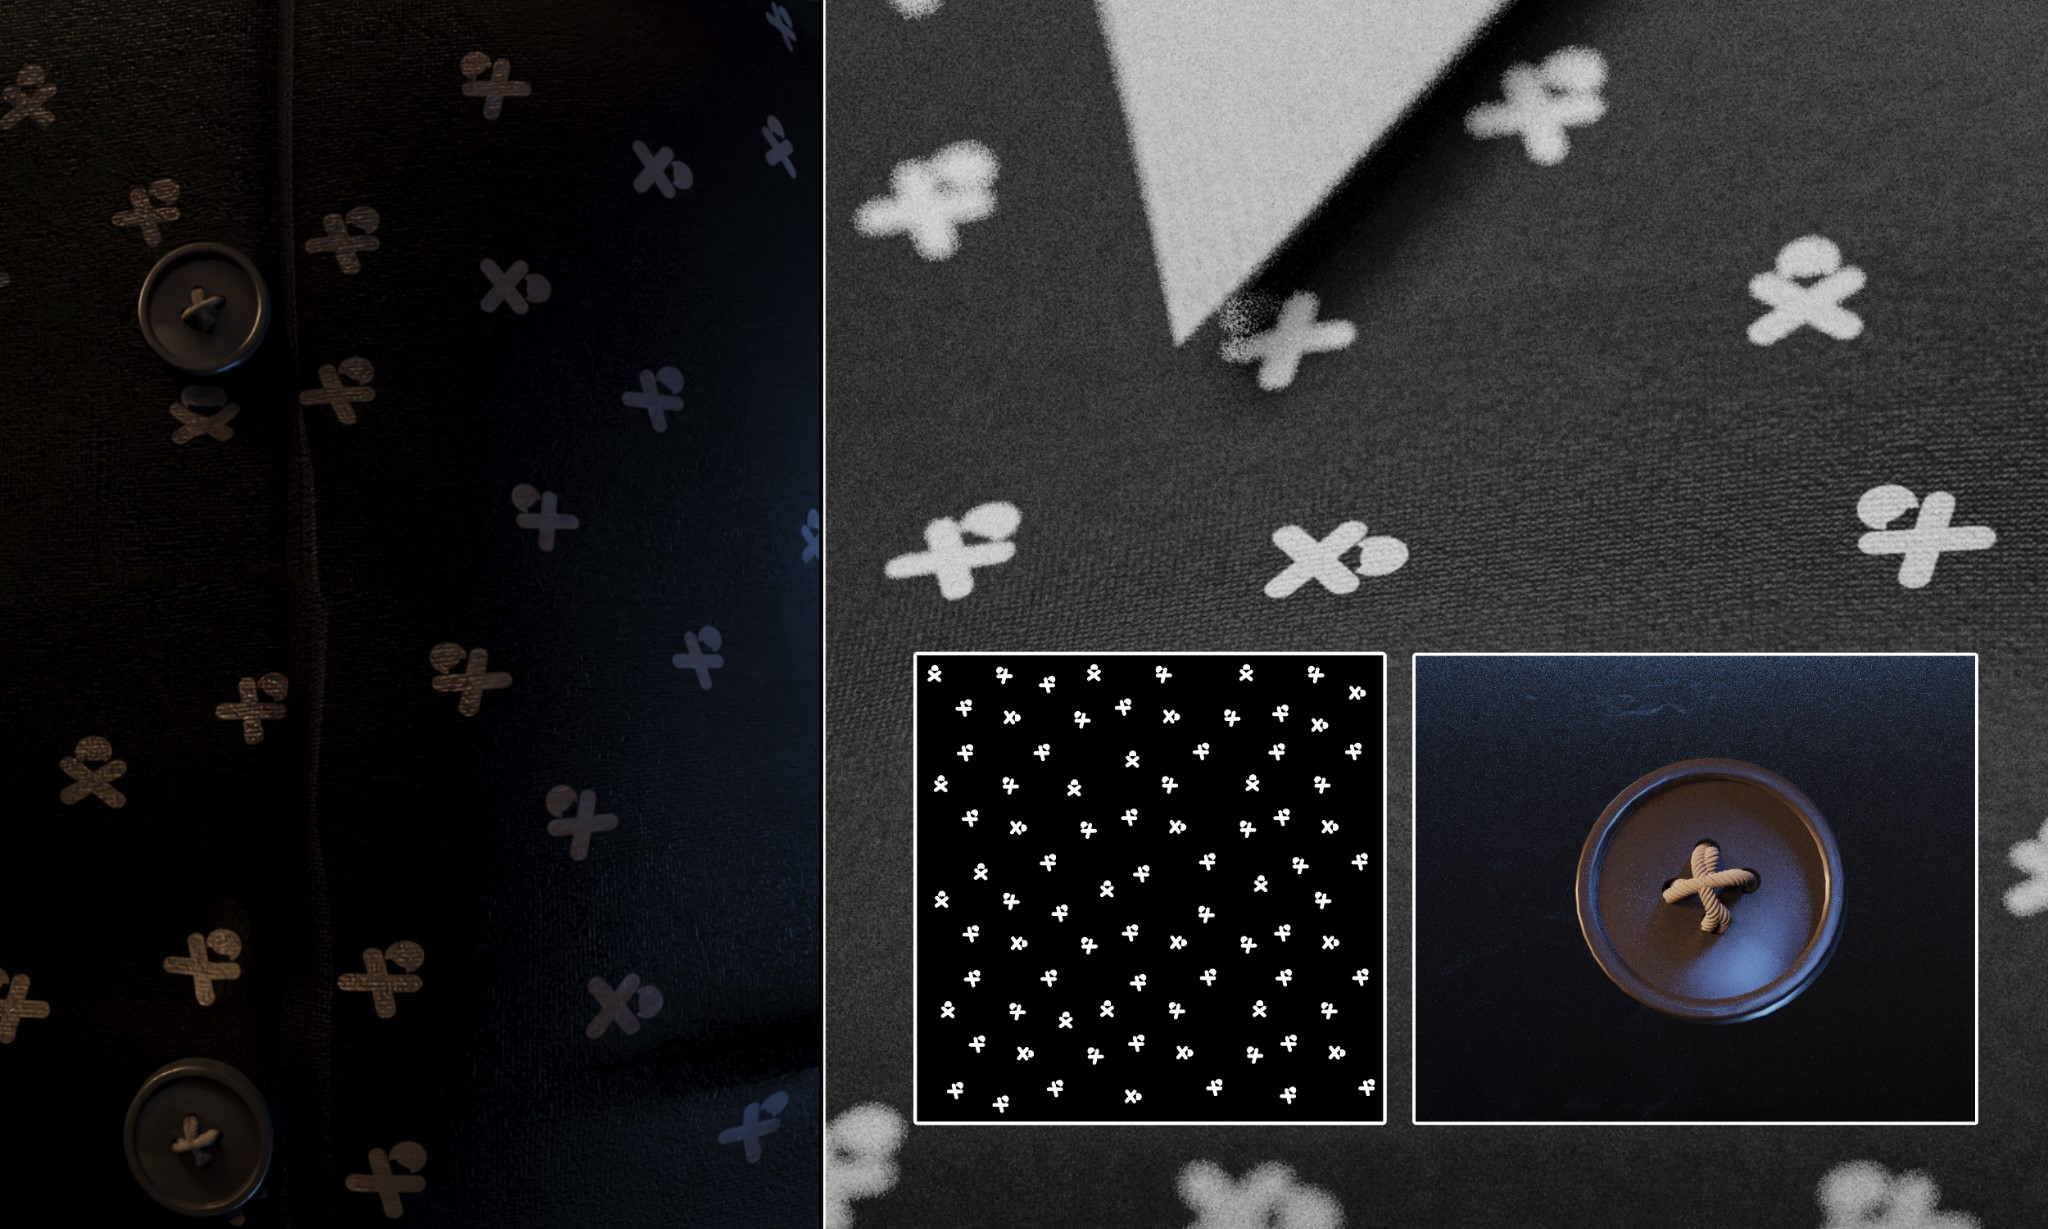
The dress texturing part was very straightforward. I made a simple pattern in Affinity photo, and I used fabric normal and displacement maps.
LIGHTING
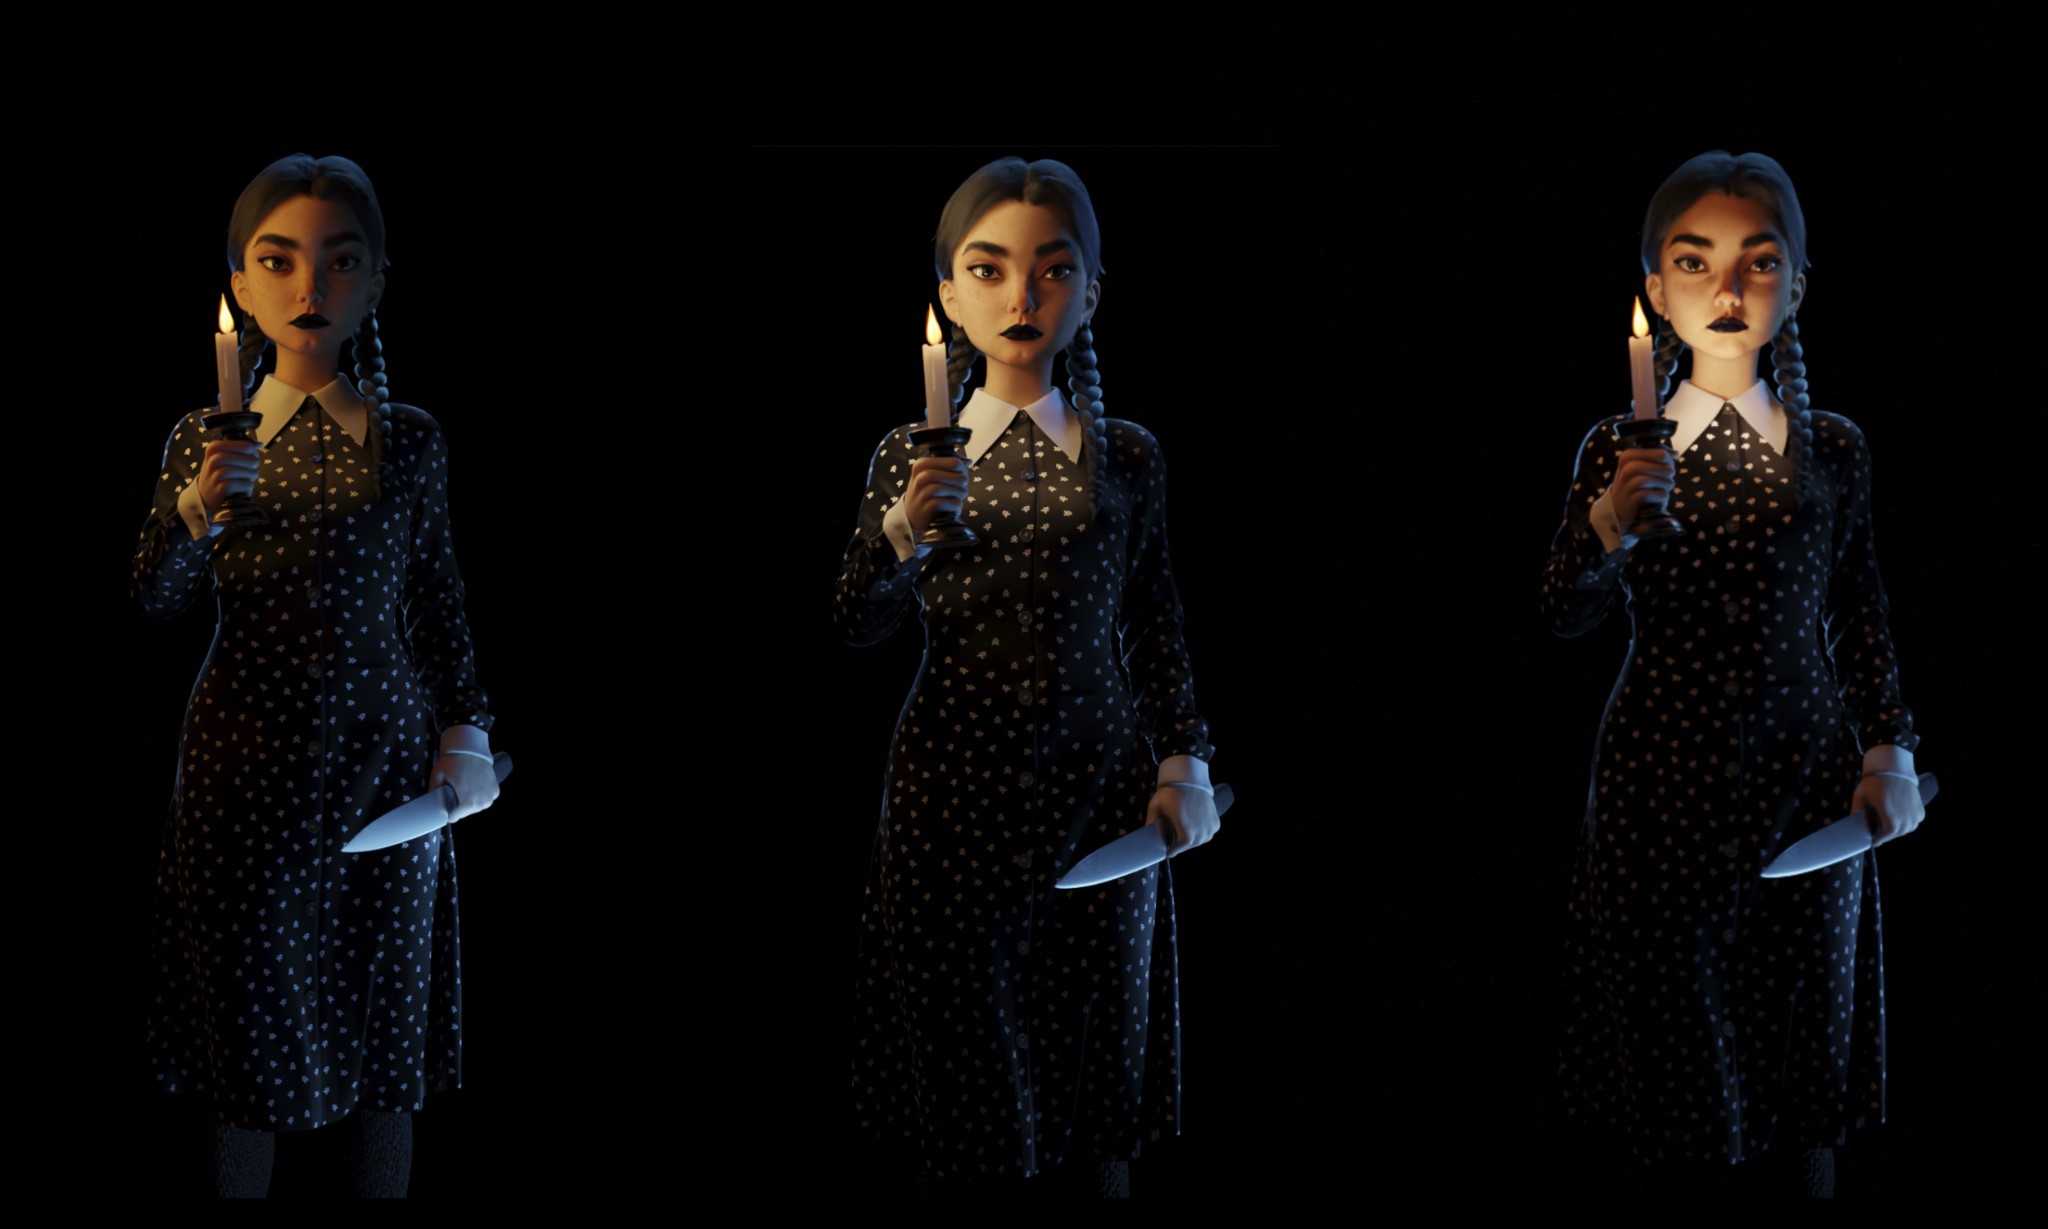
Lighting played a critical role in creating the desired mood and atmosphere in this project, so I dedicated a significant amount of time to finding the right look.
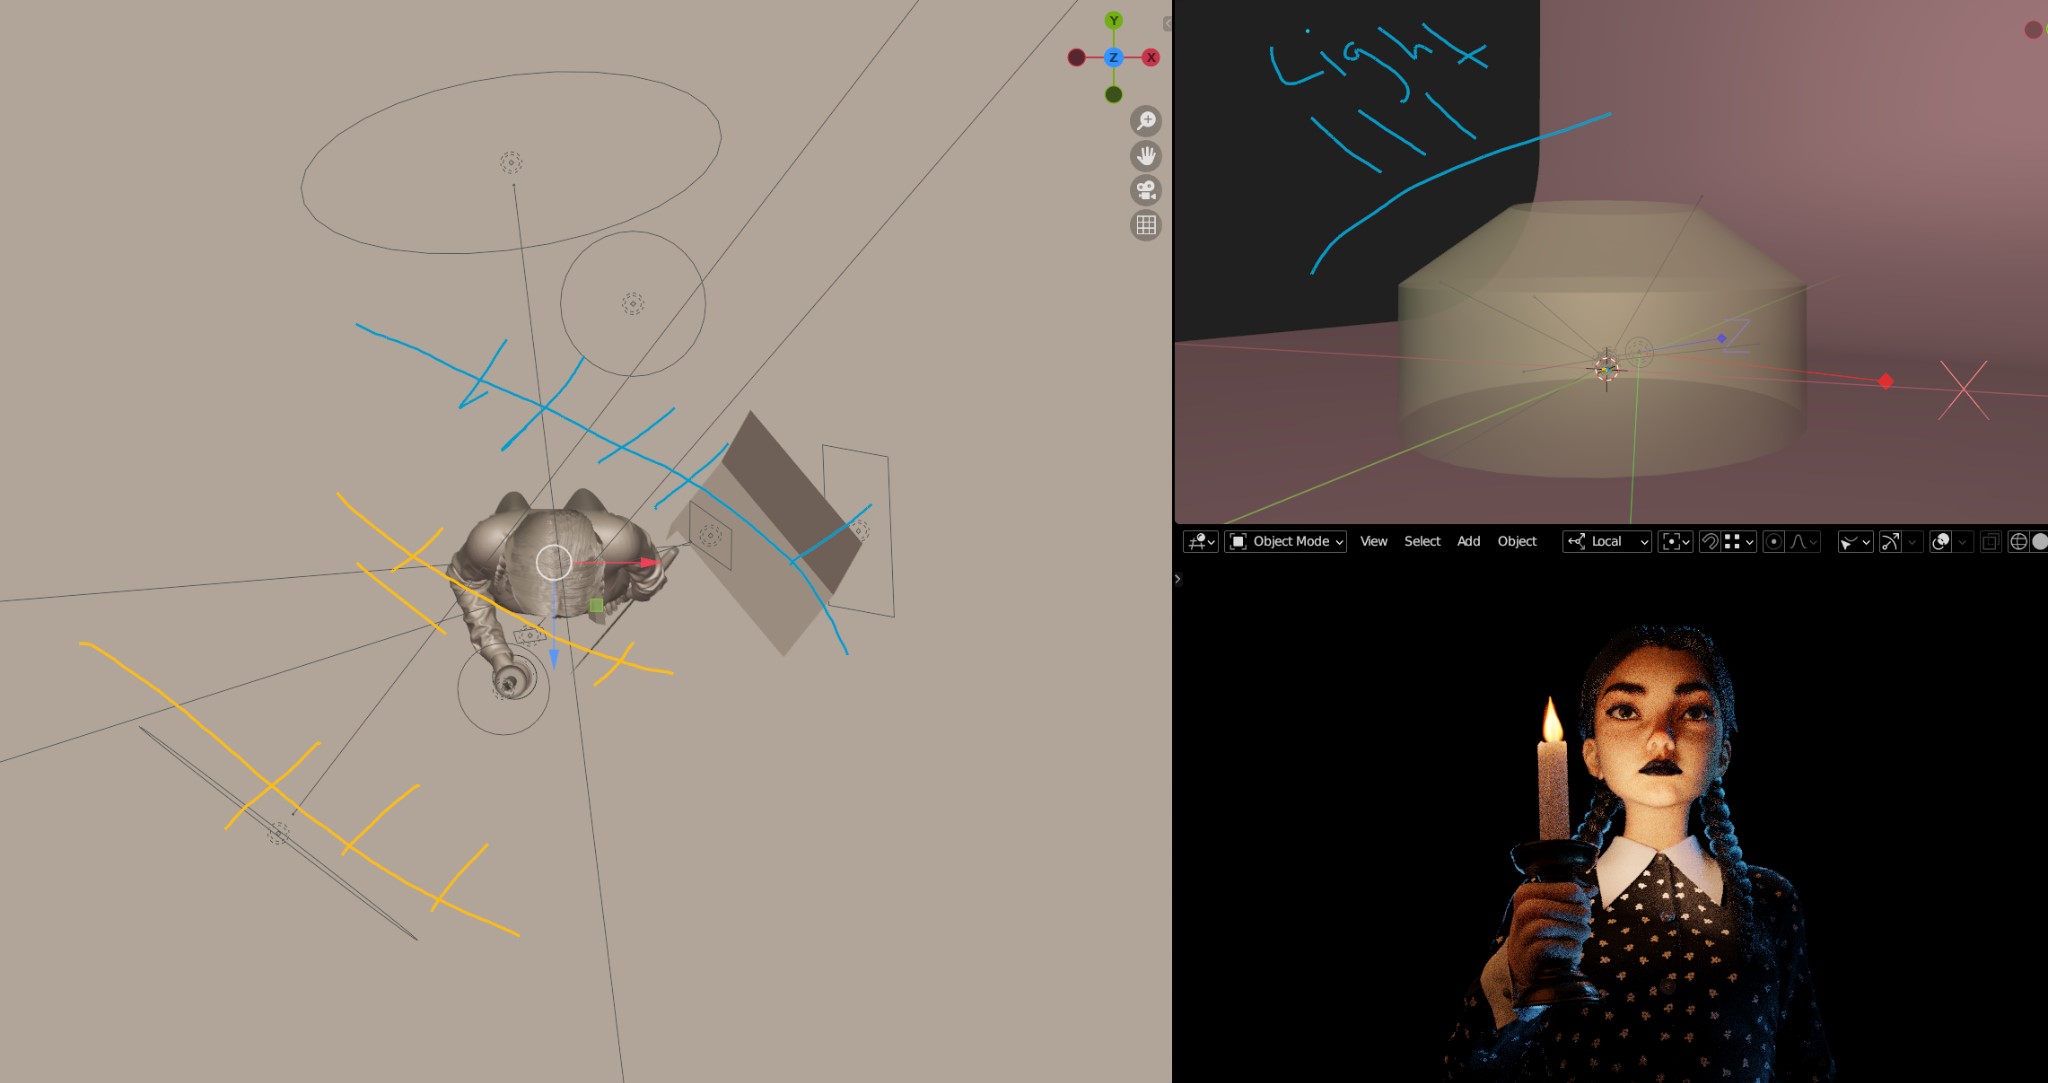
I experimented with various lighting techniques and angles, taking the time to carefully consider how each option would affect the overall appearance of the piece.
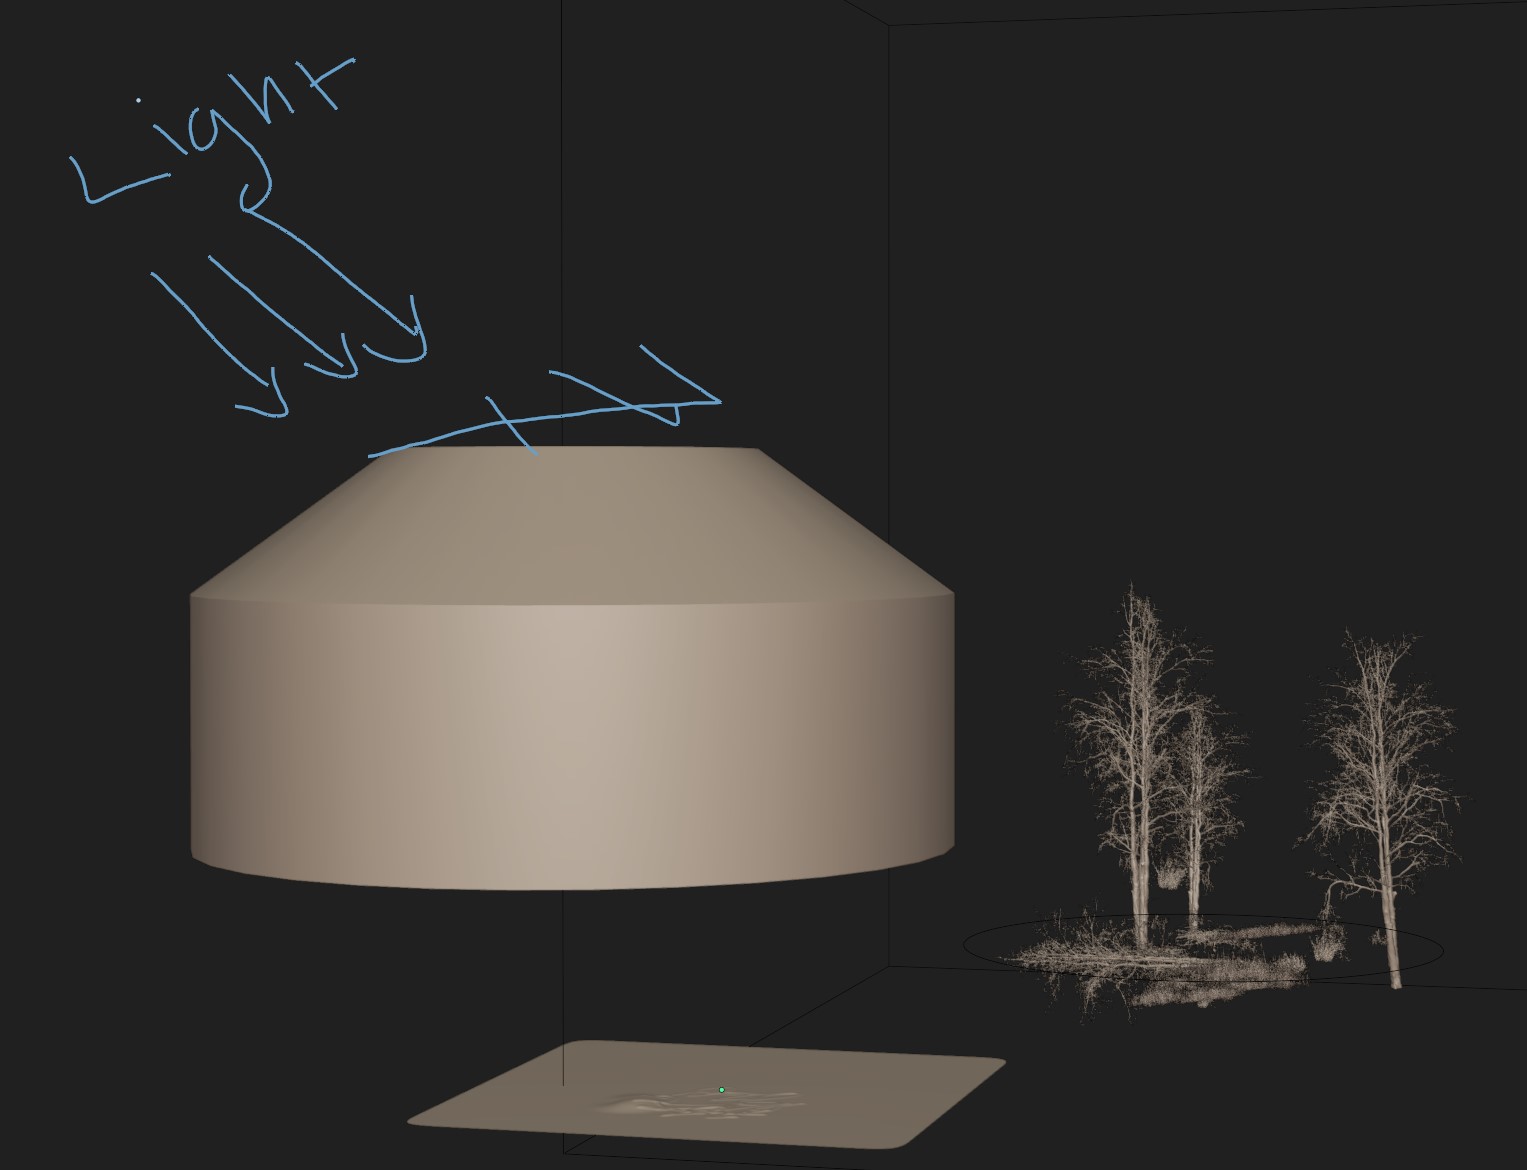
Ultimately, I was able to find a lighting setup that effectively conveyed the desired mood and enhanced the visual appeal of the project. This process took time and patience, but the final result was worth the effort.
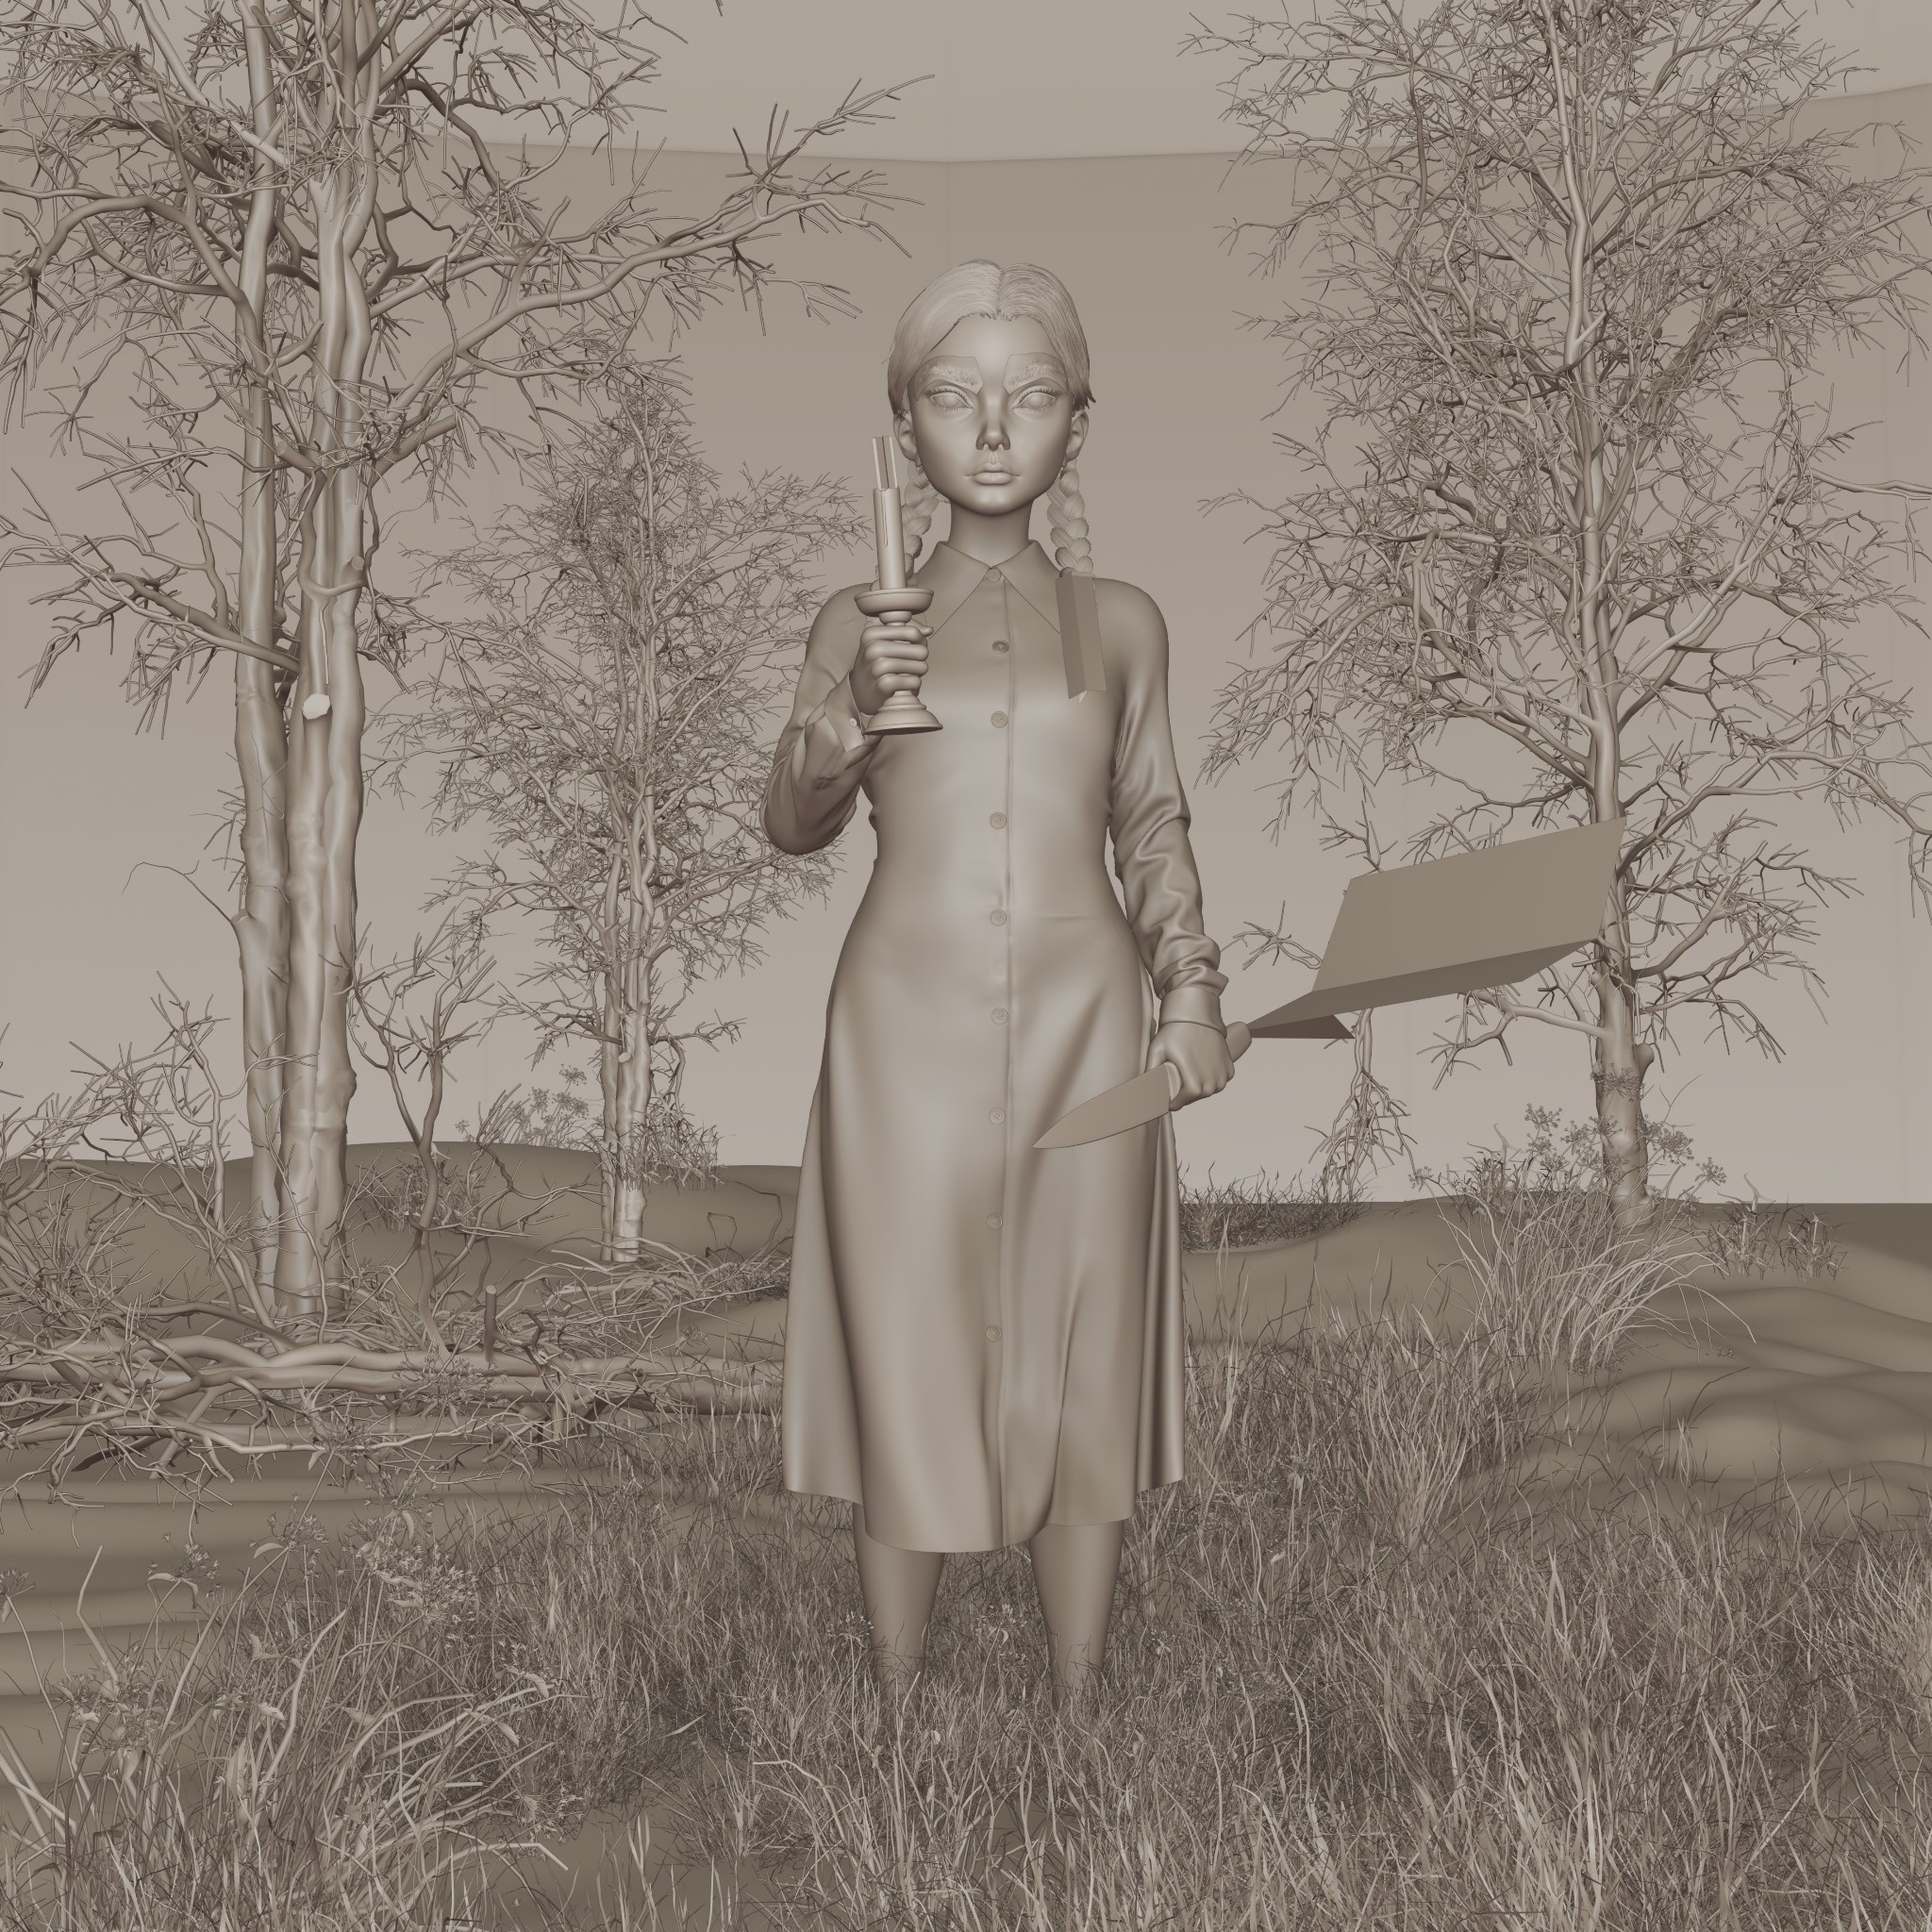
BACKGROUND
For the background, I kept things simple by using a plane with a displacement map. I then used sculpting tools to add some subtle details and texture to the surface. To create the desired night atmosphere in the forest, I added trees, grass, and volume fog to the scene. These elements helped to set the stage and establish the overall mood and ambiance of the piece. Although these elements may not be the most complex or attention-grabbing elements of the project, they played an important role in creating a cohesive and immersive final product.

Before the final render, here is a clay render.
It was so much fun working on this project and a rewarding experience for me. I hope you like it!
WEDNESDAY ADAMS

And that's pretty much it! Thank you for reading this article.
Have a nice day!
About the Artist

Haider Subhi, a freelance CG artist from Bagdad, Iraq. Currently living in Istanbul, Türkiye.
1 Comment
This is simply mind blowing... OMG