Behind the Scenes: Comuta Car

INTRODUCTION
Hello there, my name is Bohdan Lvov. I’m a 3D artist from Zaporizhzhia, Ukraine. For the last 15 years, I’ve been doing A LOT of 3D, 2D, and CG in general and in various capacities and forms. This is not only the work, but something personal and fulfilling for me. This is the way I’m expressing myself and communicating with the world, the fire that keeps my heart going.
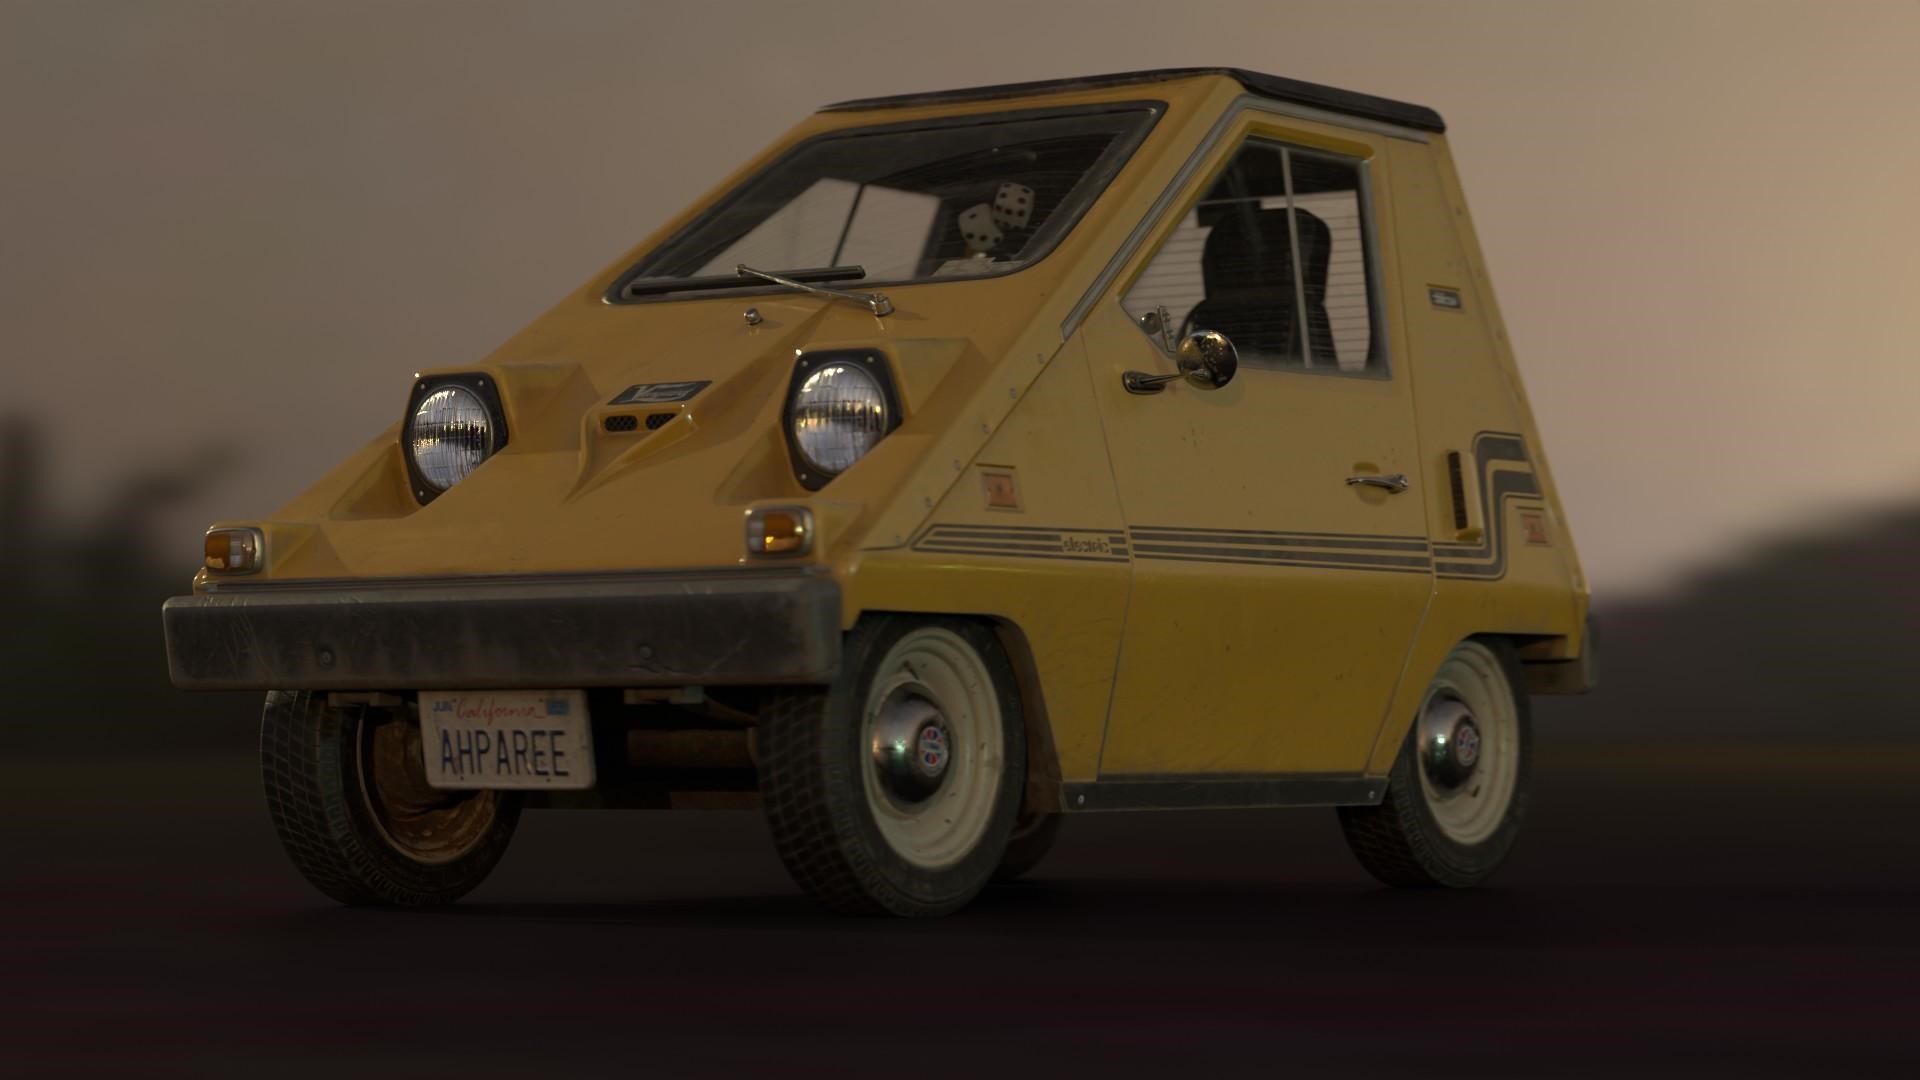
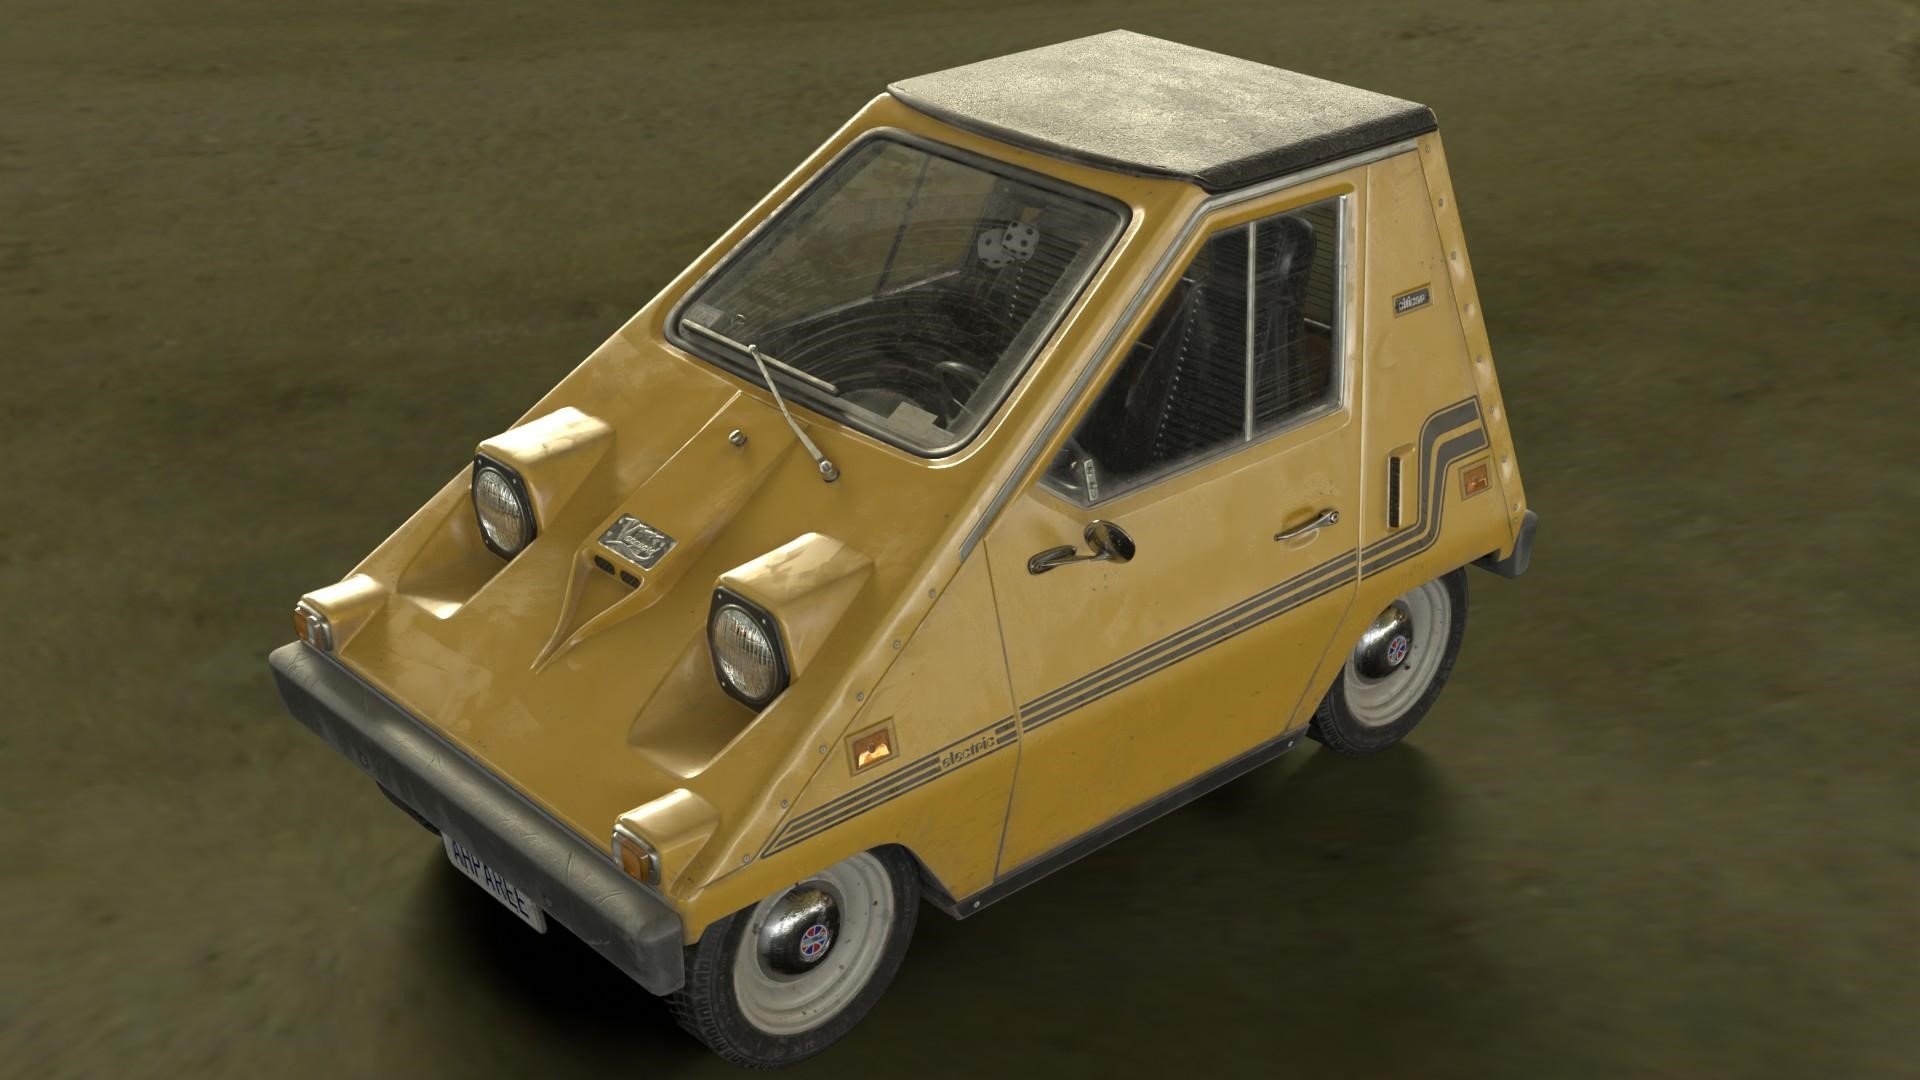
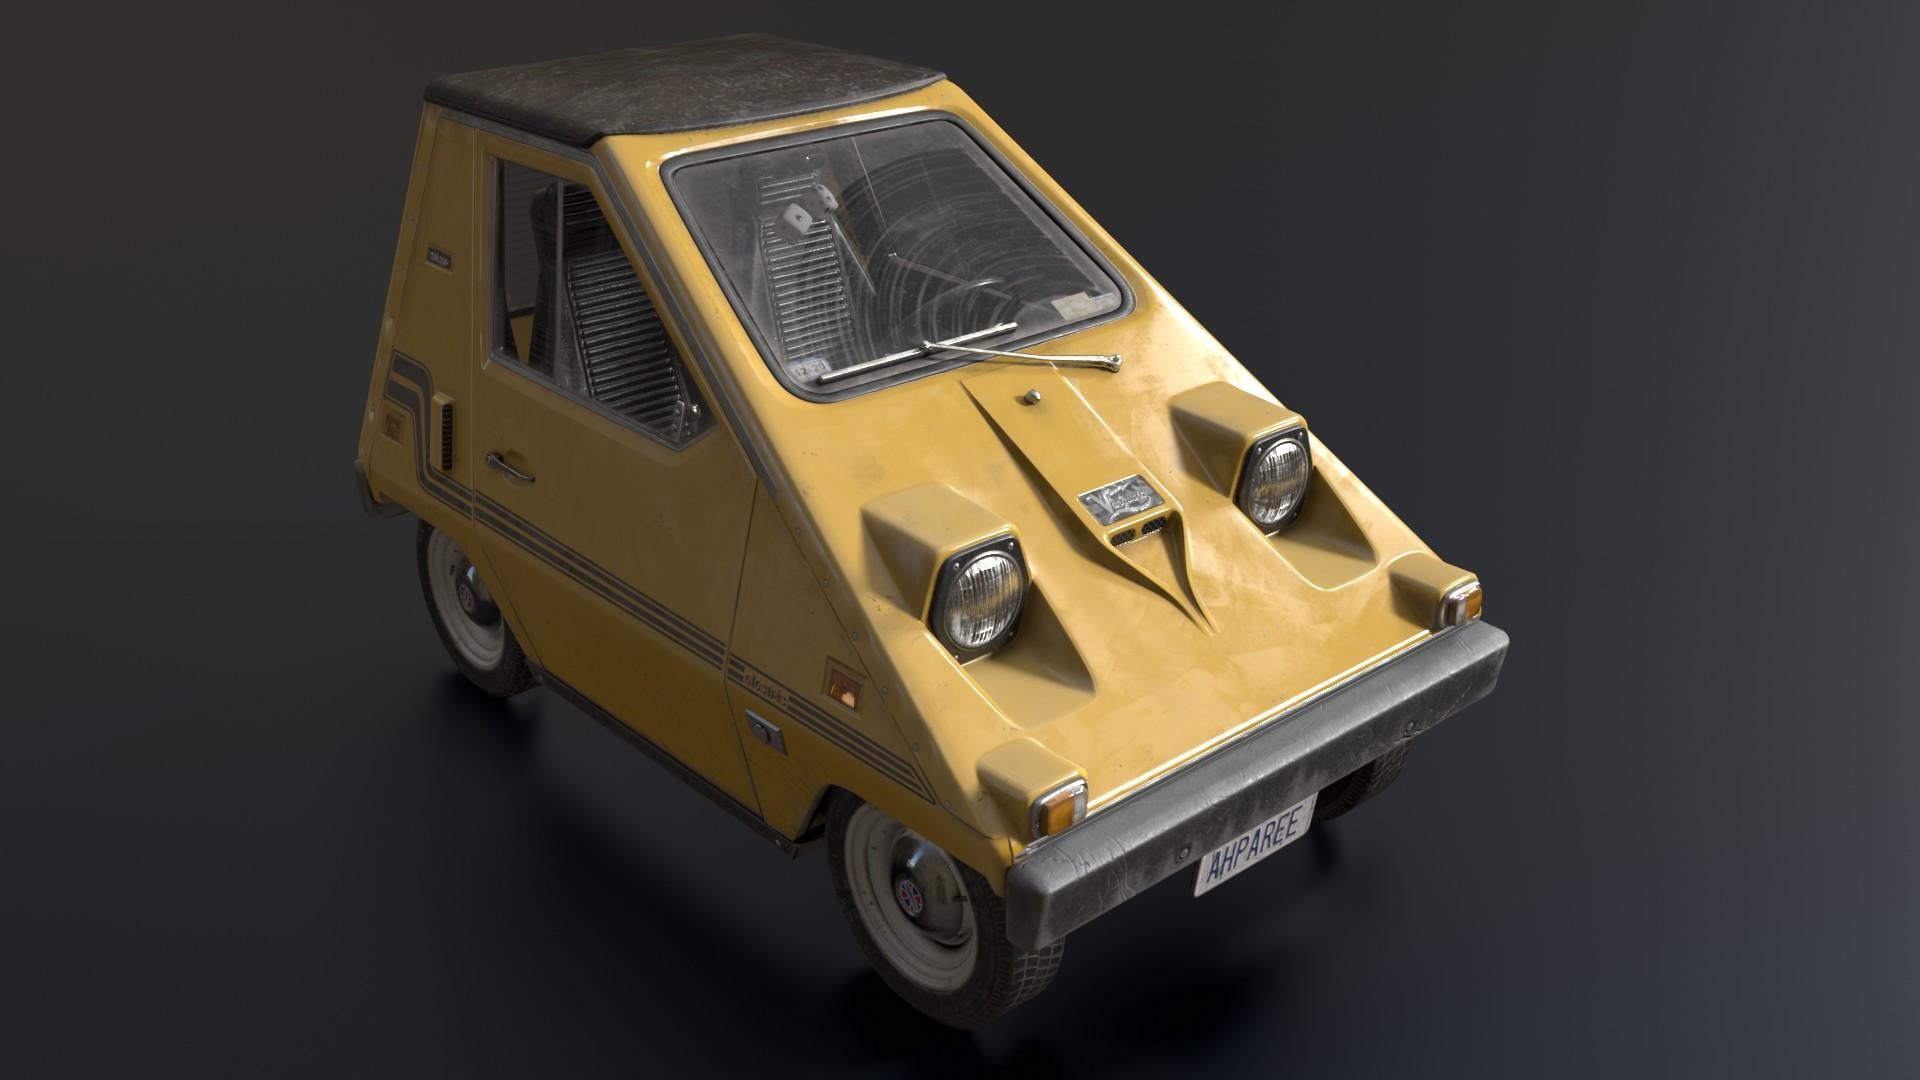
One small step for a legless vehicle…
For years, I wanted to model a bizarre, but cool car—Vanguard Citicar, aka Comuta car in later years. It has a very interesting story under its hood, but more importantly, it doesn’t look like an ordinary car at all—it’s almost as if it was devised by the mind of the late Syd Mead for some sci-fi epic.
And the best impression I had was from Robert Dunn of Aging Wheels, who told every bit of first-hand experience of driving Citicar. It’s really important to learn your stuff before starting modeling. For example, I learned from Dunn that Citicars are actually made of plastic, and it affected the way I’ve textured the whole vehicle. I mean, it would be REALLY WEIRD to have rust on the plastic parts.
In the beginning, there was a Viewplane…
Everyone who has at least entertained the thought of modeling cars knows that the first thing you have to do is to find a blueprint. This is exactly what I did and failed miserably: in the whole vast cosmos of the internet, there wasn’t a single blueprint of this legendary car! As an experienced artist, my only weapon in this fight was a degree in eyeballing and belief in the better outcome. A few wobbly photos and a lot of hope is not usually enough to perform tasks such monumental, but it did work out for me.
But seriously though, don’t do it unless you absolutely have to. In that case, DO it, but pay maximum attention. It’s really easy to fall in crevices between different perspectives of the photos, different lenses, and the light conditions up to the point when all of the proportions would fall apart and the vehicle becomes unrecognizable.
Using AI…
“AI” is not a flashy, trendy word in my pipeline these days, it’s a trusty workhorse that allows me to use photo references on previously unimaginable scale. Recently, I’ve discovered Real-ESRGAN, a brilliant open source solution for enhancing images up to four times.
It works great for making references much bigger and easier to rely on and ACTUALLY see all the details despite the original image being very small and compressed:
After its imminent arrival, Real-ESRGAN reshaped and drastically improved my workflow, allowing me to screengrab a frame from a tiny video, cut even tinier fragments from it, and then make a huge alpha map out of them within seconds and with the effort close to none.

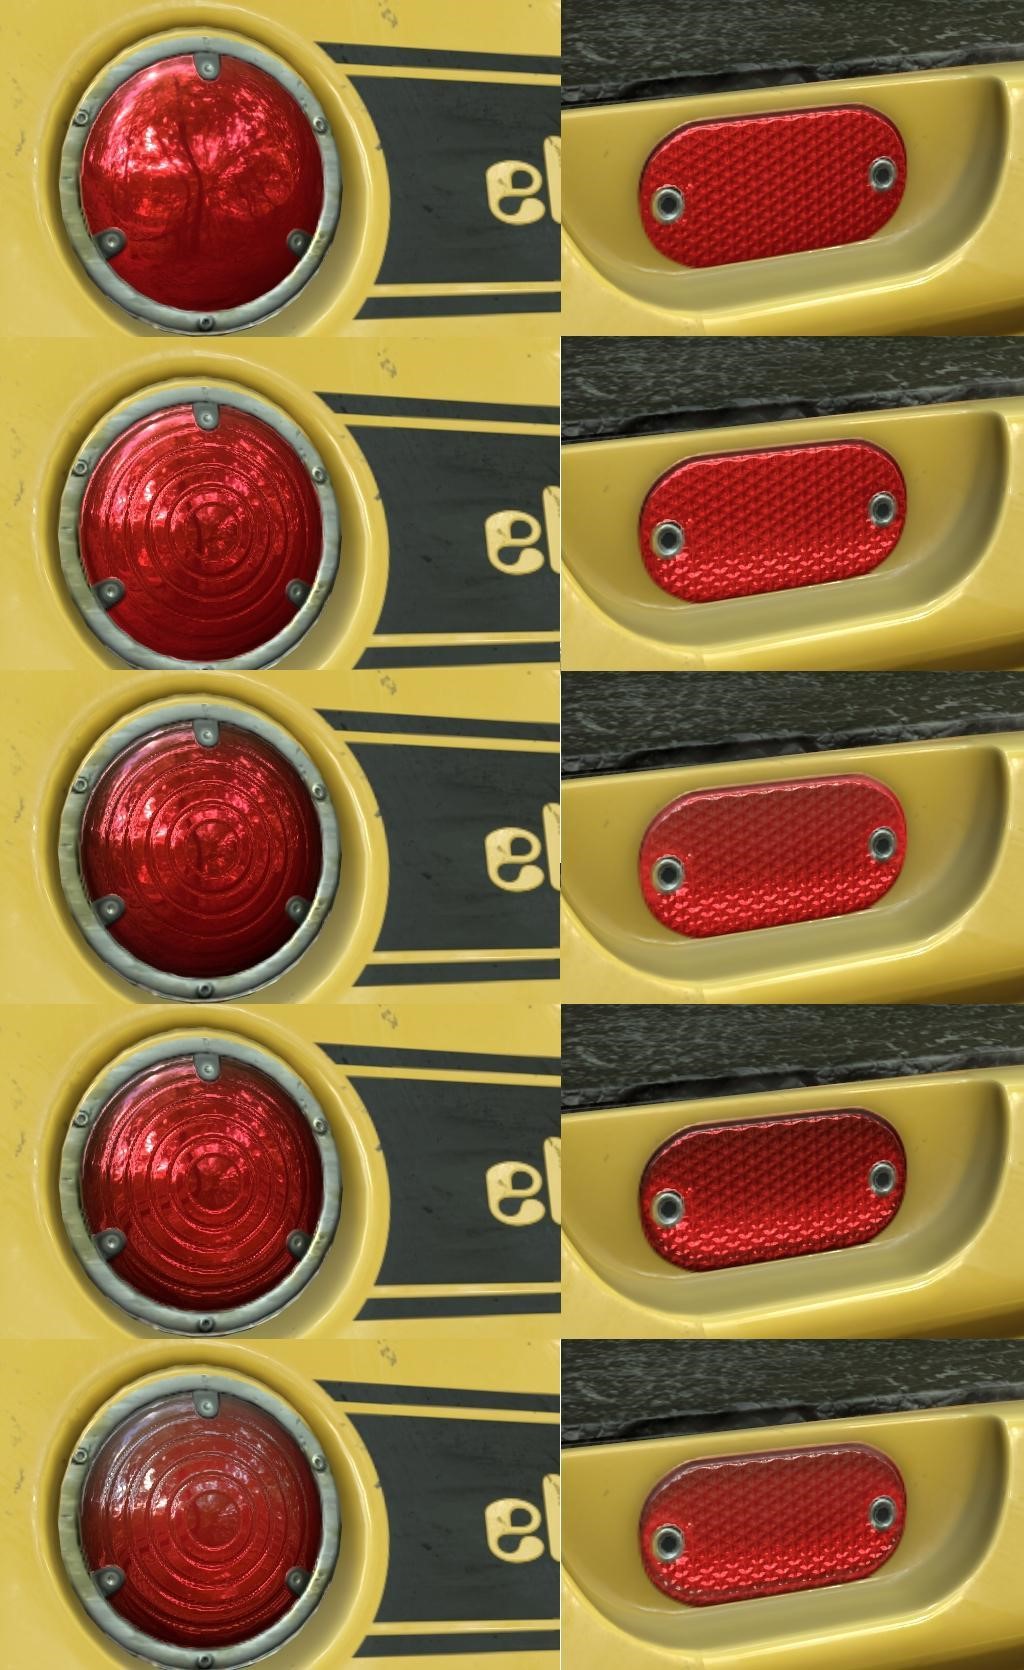
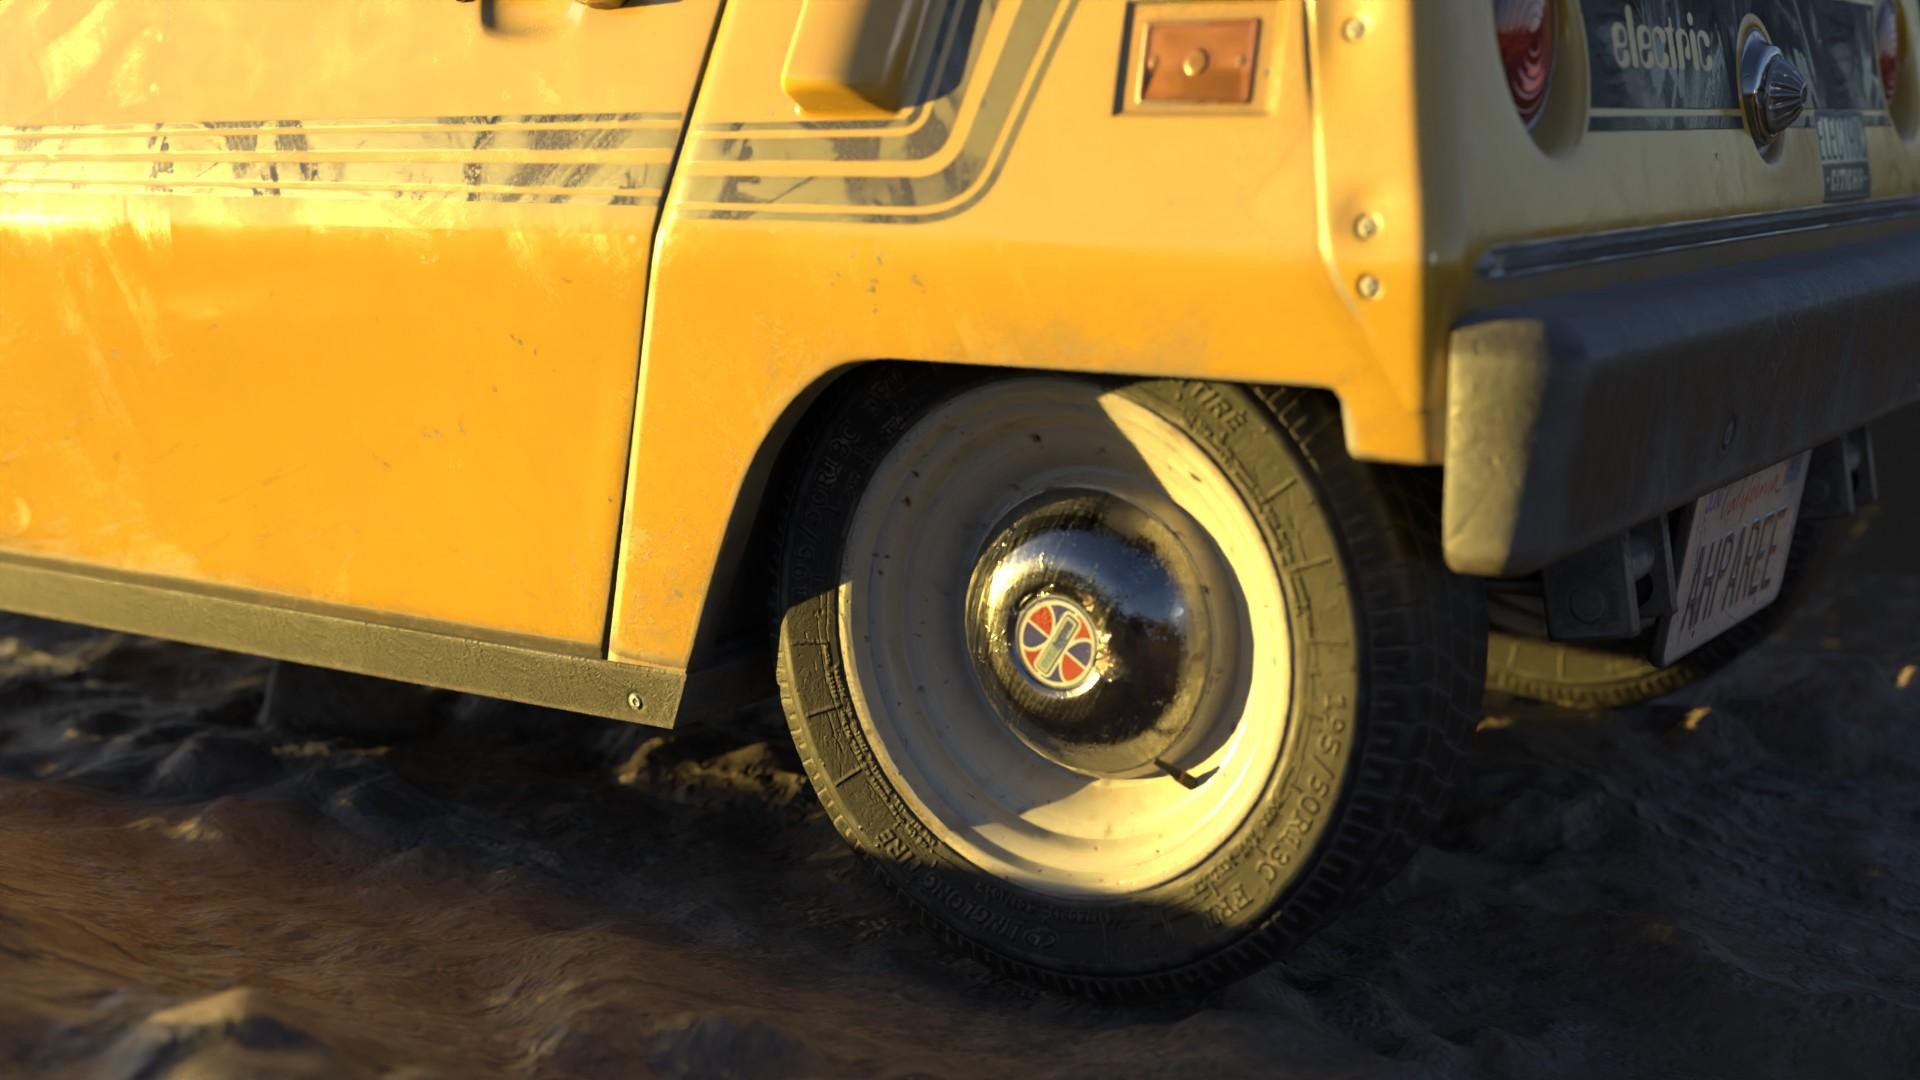
It works unfathomably well even with colored patches. As you can see, the only place where I could find this specific Sebring-Vanguard logo is a photo of the original wheel cap on some internet auction.
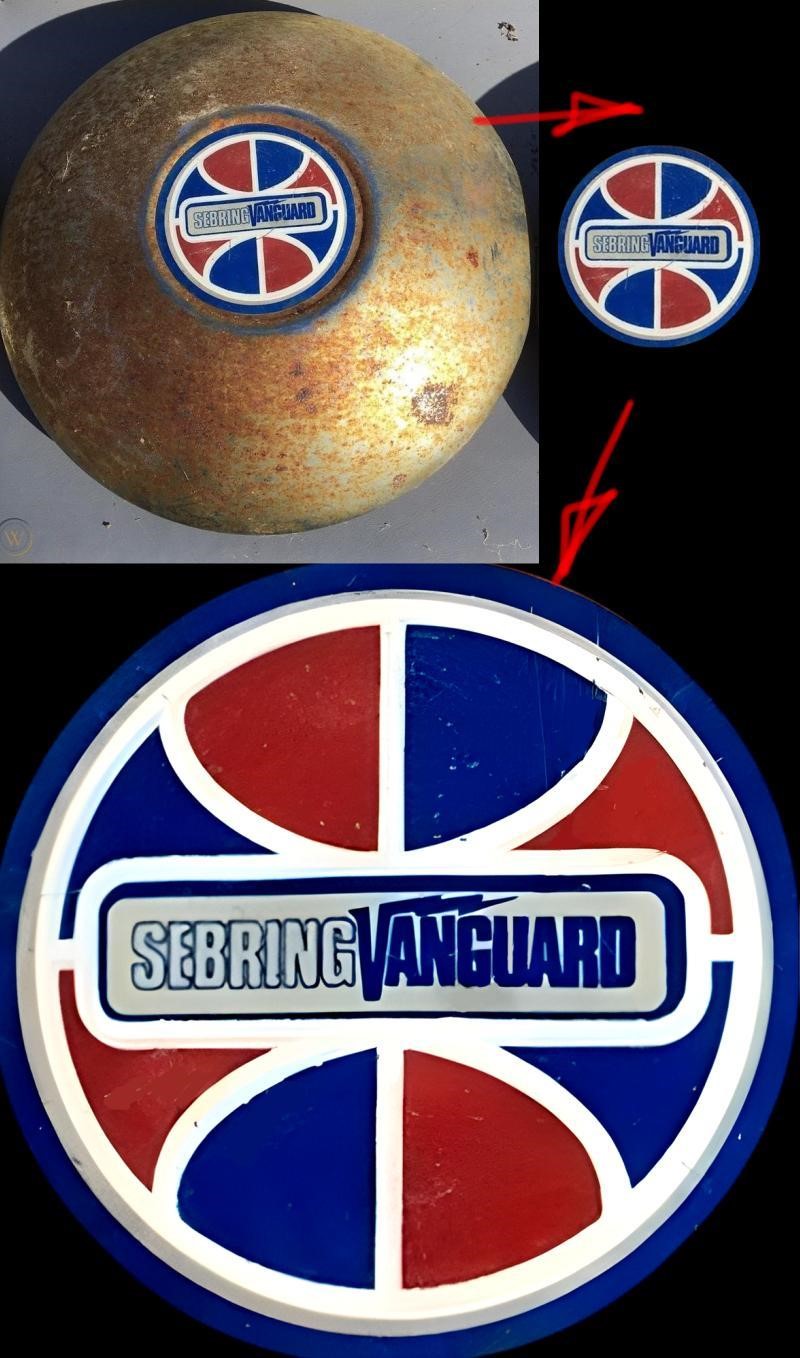
Usually, making a mockup of the logo like this would take a while. That’s just because the best case scenario of using this fragment as a reference is to overlay the logo over it and rebuild a desirable image from scratch. Fortunately, with the help of AI, the only thing I had to do manually is to get rid of perspective, and fix some glaring issues and too noticeable scratches. Sure, an image built from the ground up would be much more clear and precise, but some organic artifacts are actually what one needs the most when texturing a weathered asset. And AI is helping to preserve those qualities.
I love to live in the future!
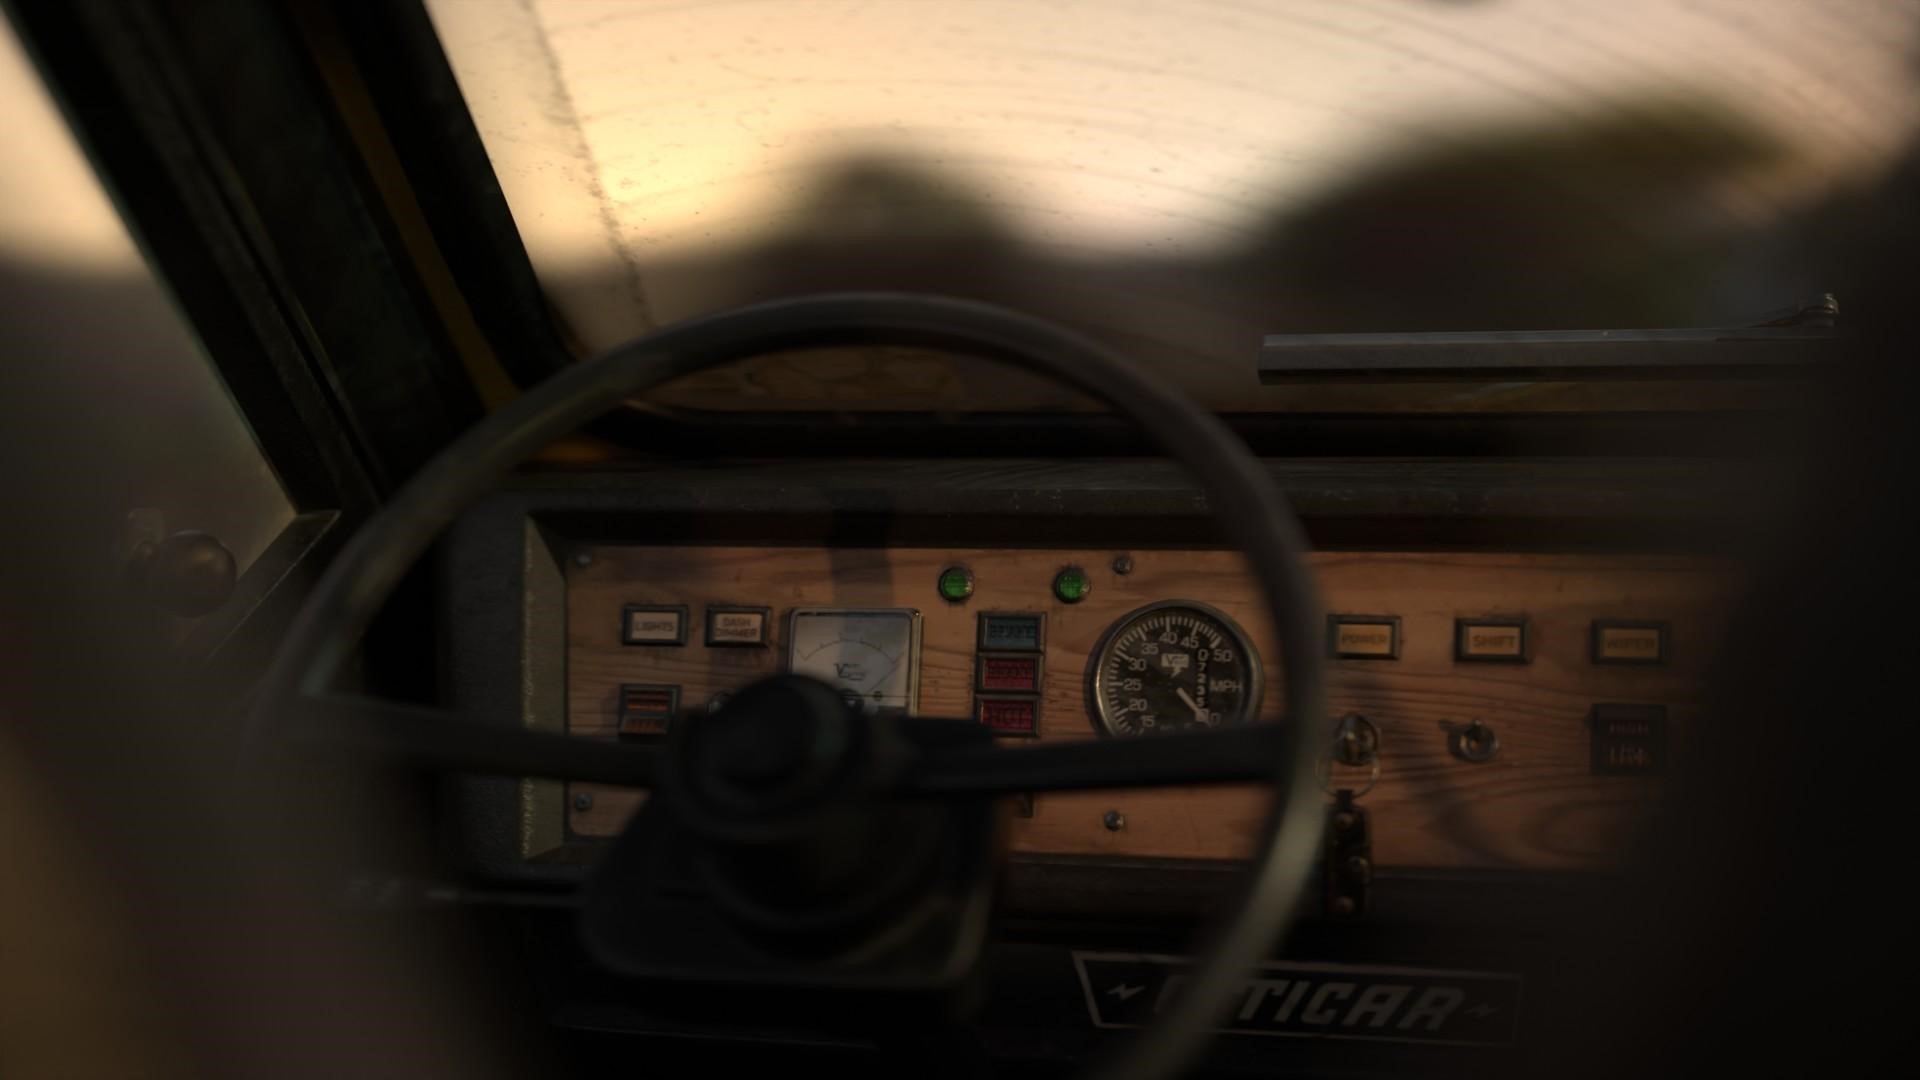
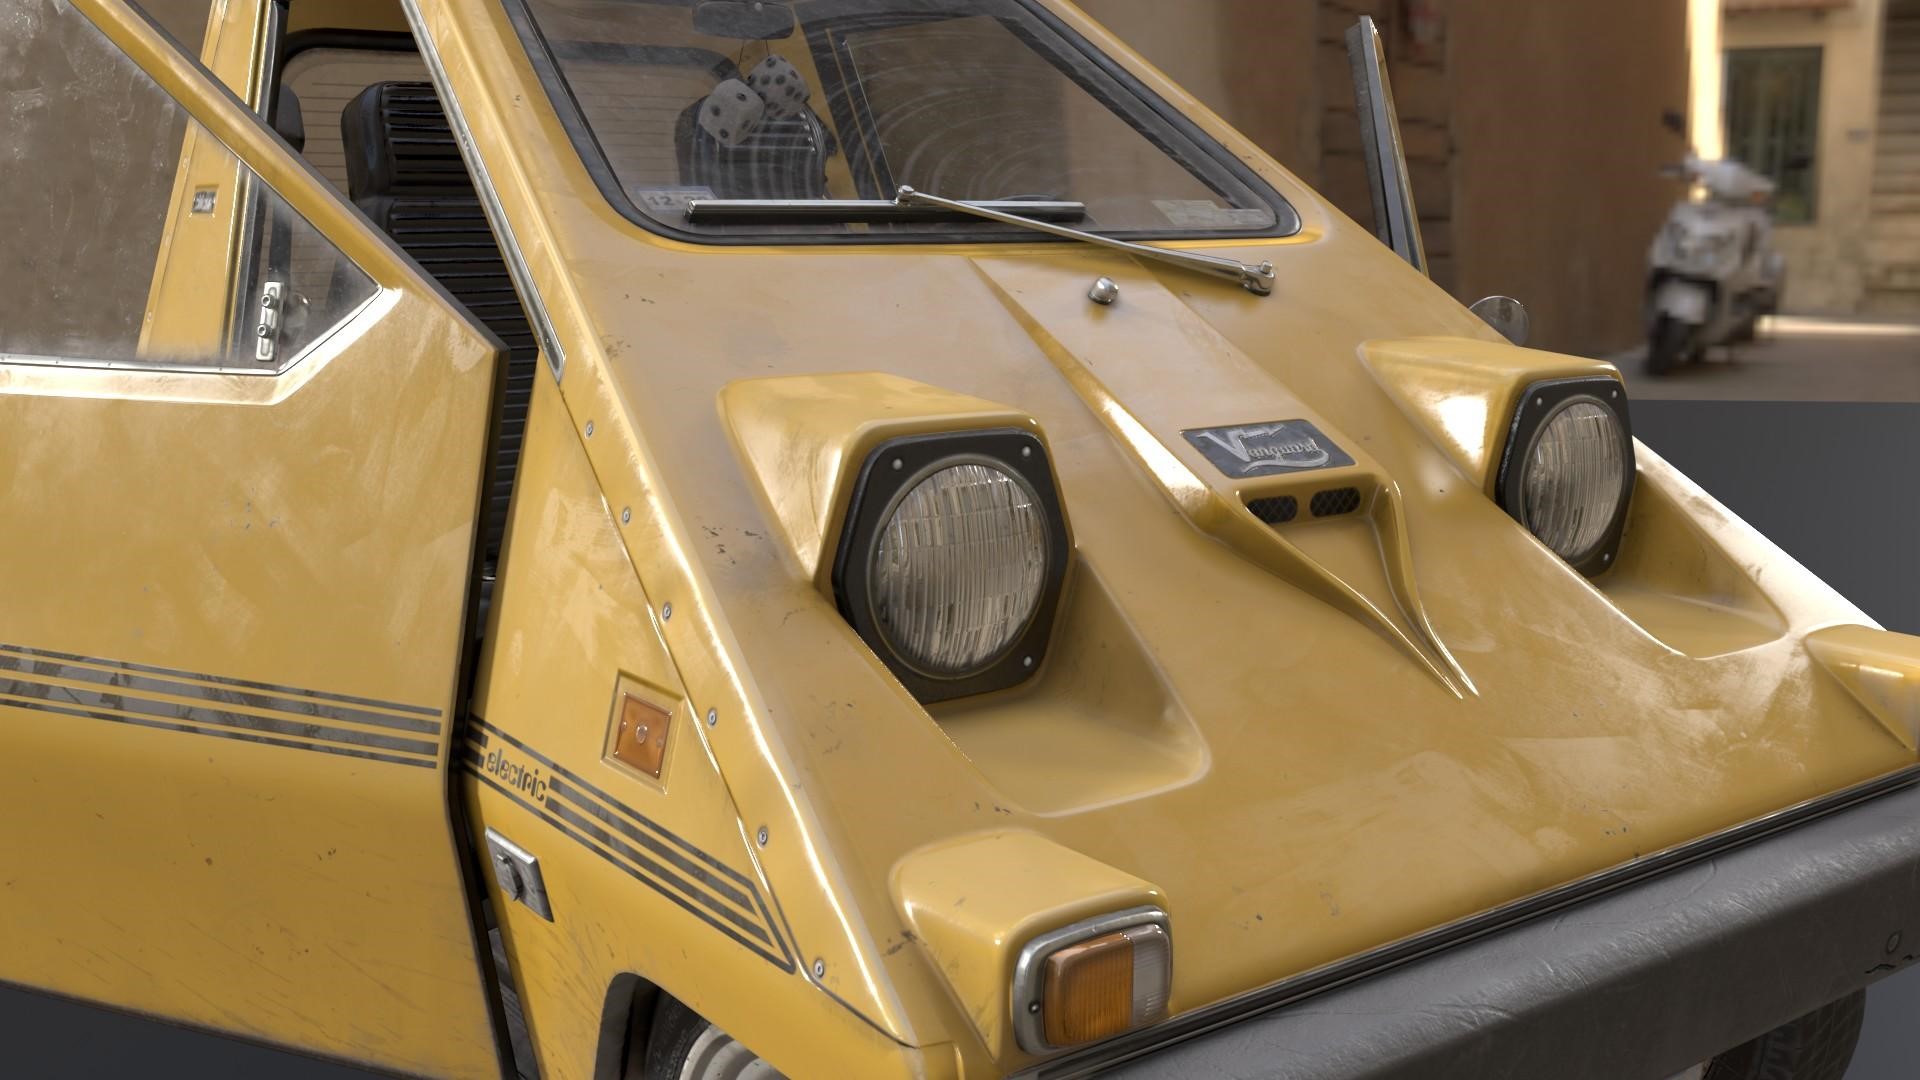
Multi-dimensional headlights…
A few years back, Andrii Mykhailov posted a fantastic tutorial on how to add depth for headlights cheaply without additional hassle. No new shaders, no new geo, no down payment or even a card number are required which is wild, considering how good this approach is. It’s been unparalleled for years and it’s no wonder, since Andrii’s one of the best real time vehicle modelers on the planet right now.
I took the freedom to modify this brilliant technique a little:
First of all, rings were drawn on the circular backlights, just as they present themselves on the original car. The second stage was to make a fake occluding shadow to make it look like a shadow which is really casted by geometry. The third step was superimposing the bottom part of the inverted normal with the flipped Y channel, just as in Andrii’s tutorial.
And the chef’s kiss was making the top part non-metallic and slightly darker on the base color channel than the original metal part. It makes sense even physically. Think about it: the cap of the headlight is made of plastic so it has to behave like one, but the shiny cone underneath is made of chrome which has electric properties.
This simple trick allows the headlight to look like it was composed out of different materials which is exactly what I’m going after.
The precision degree…
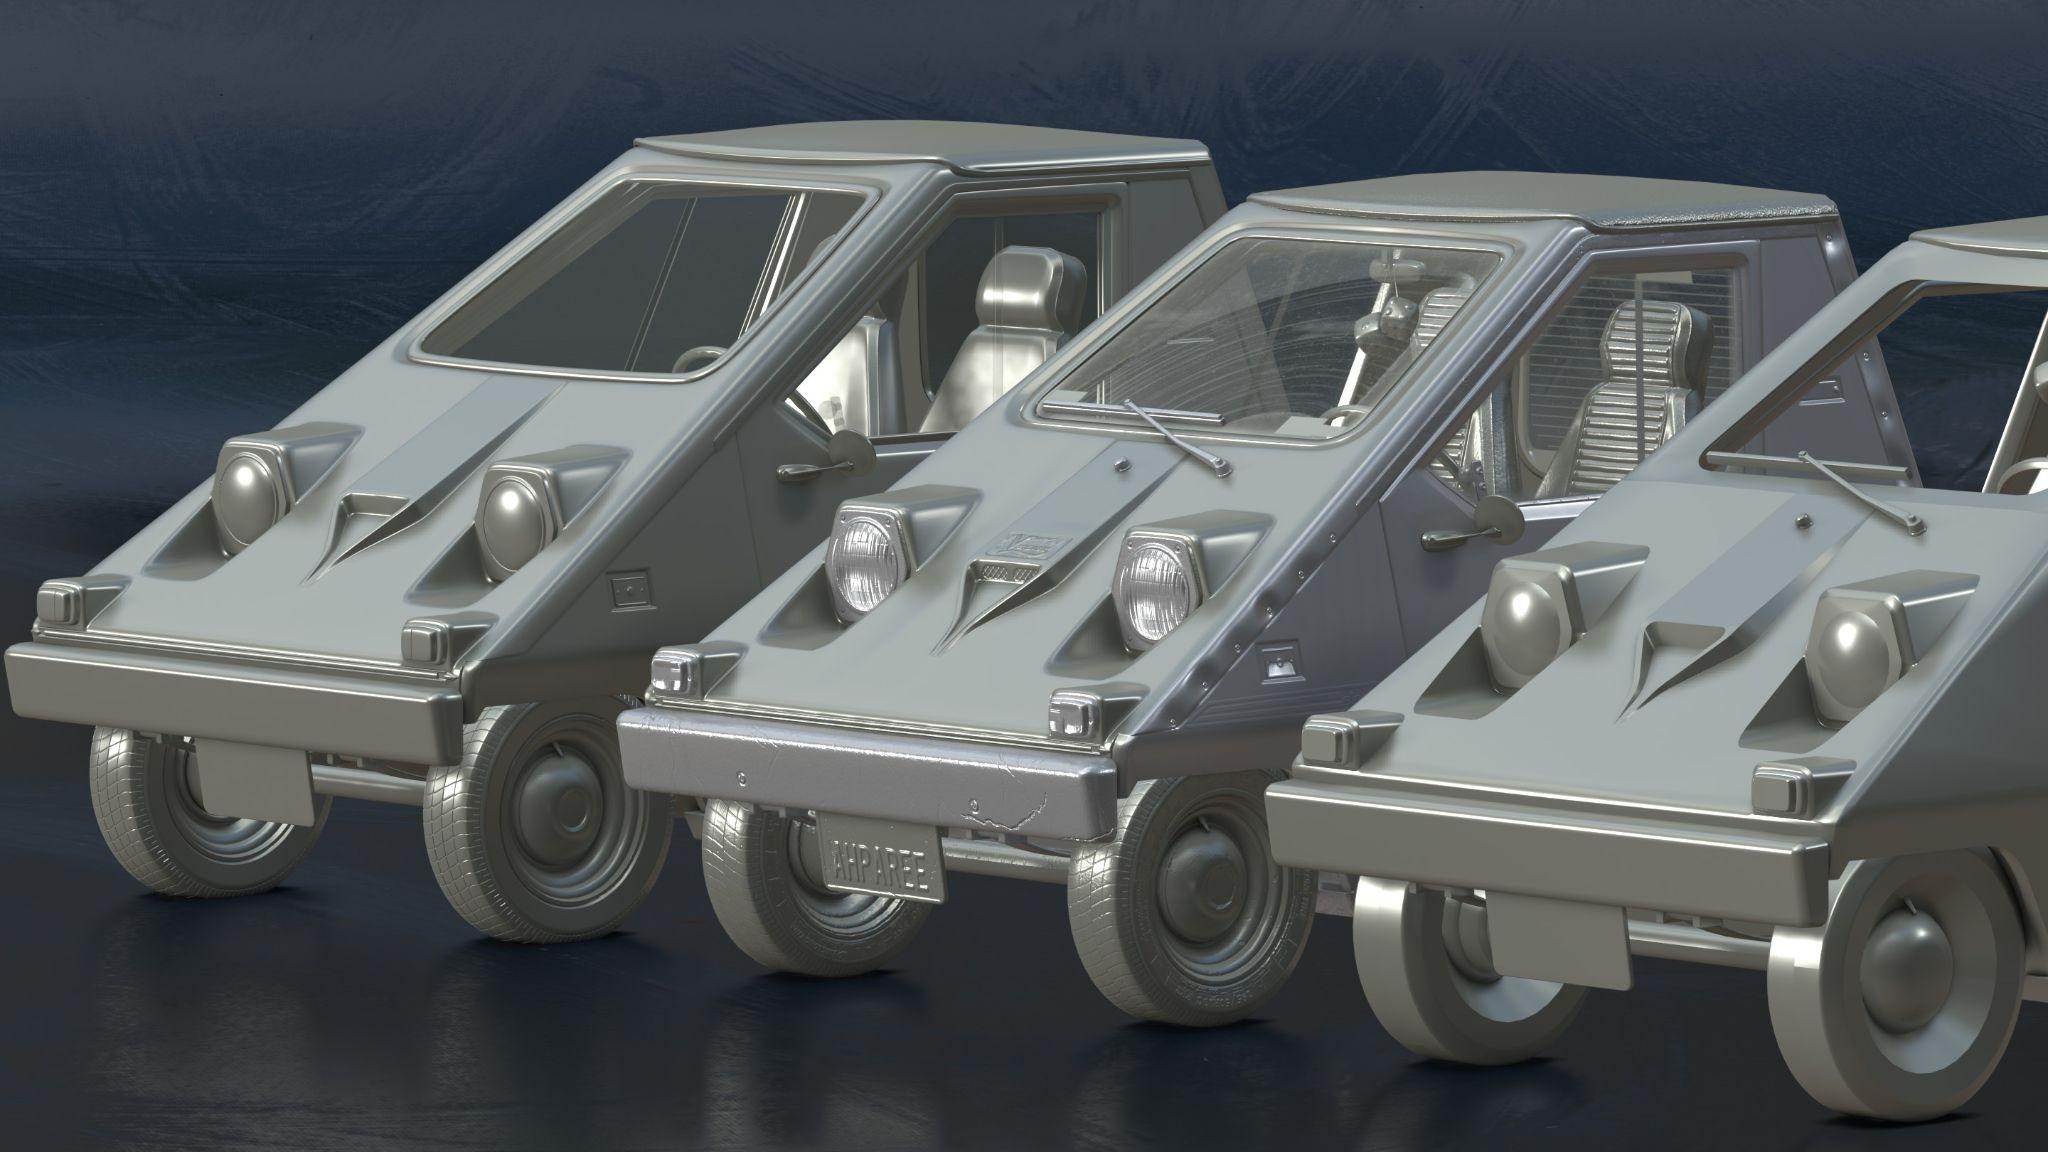
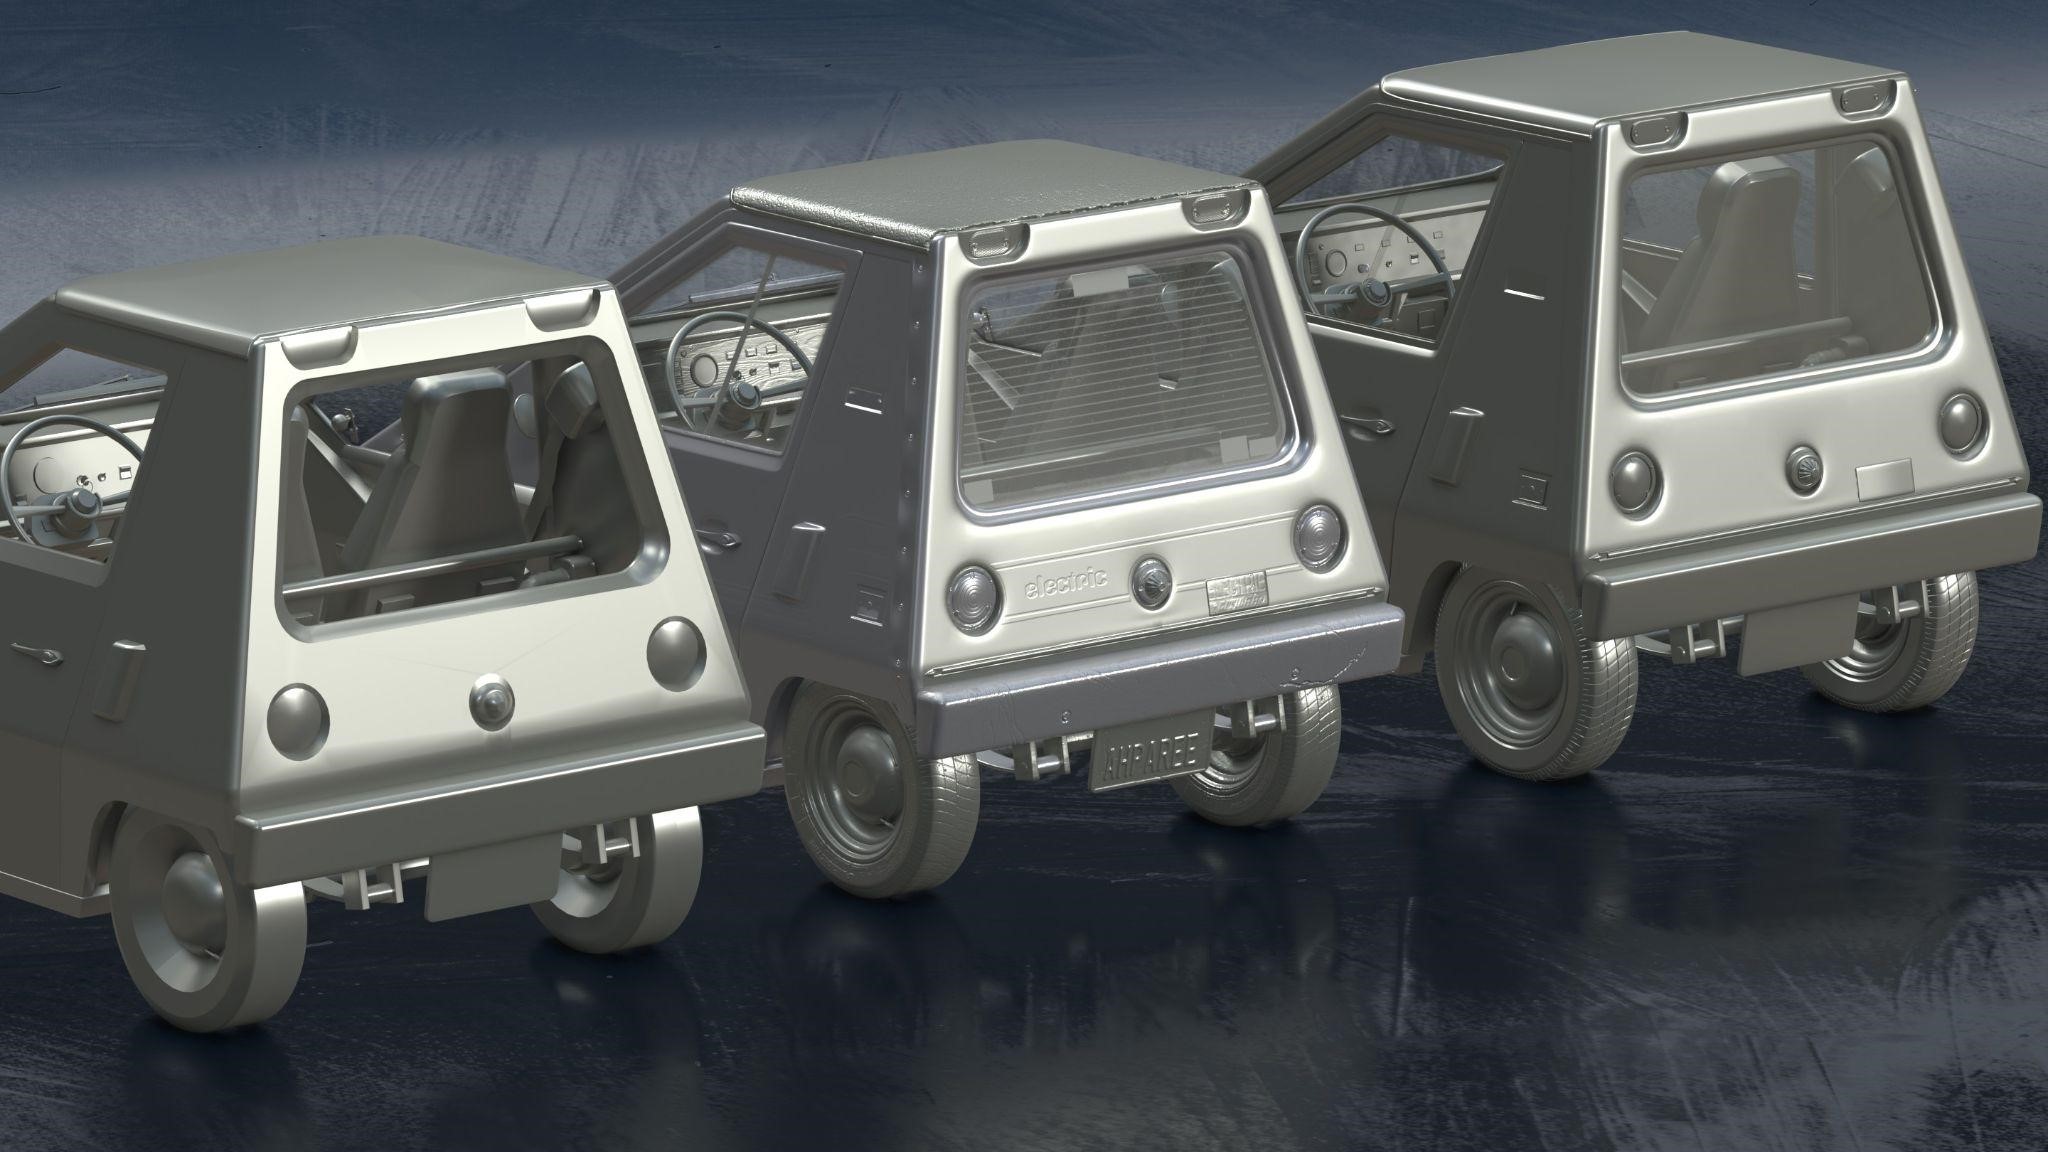
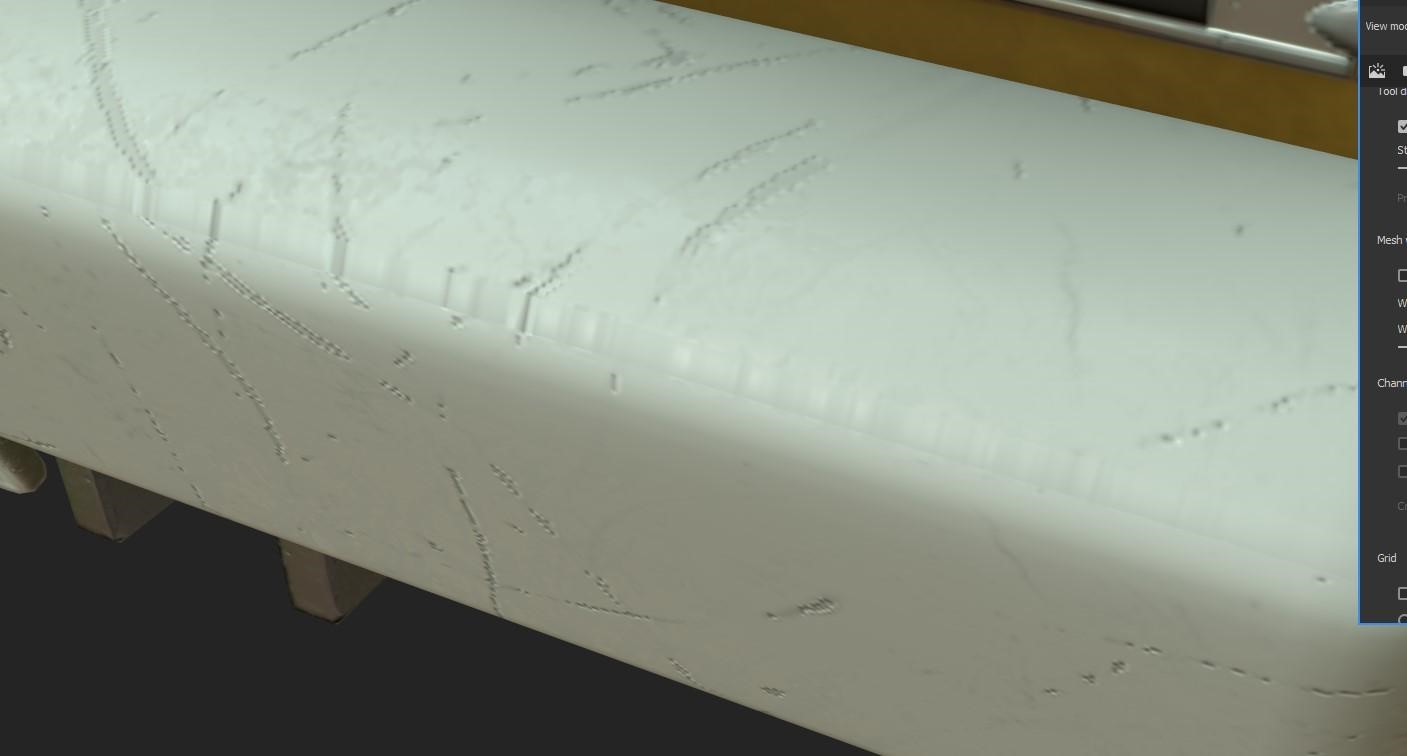
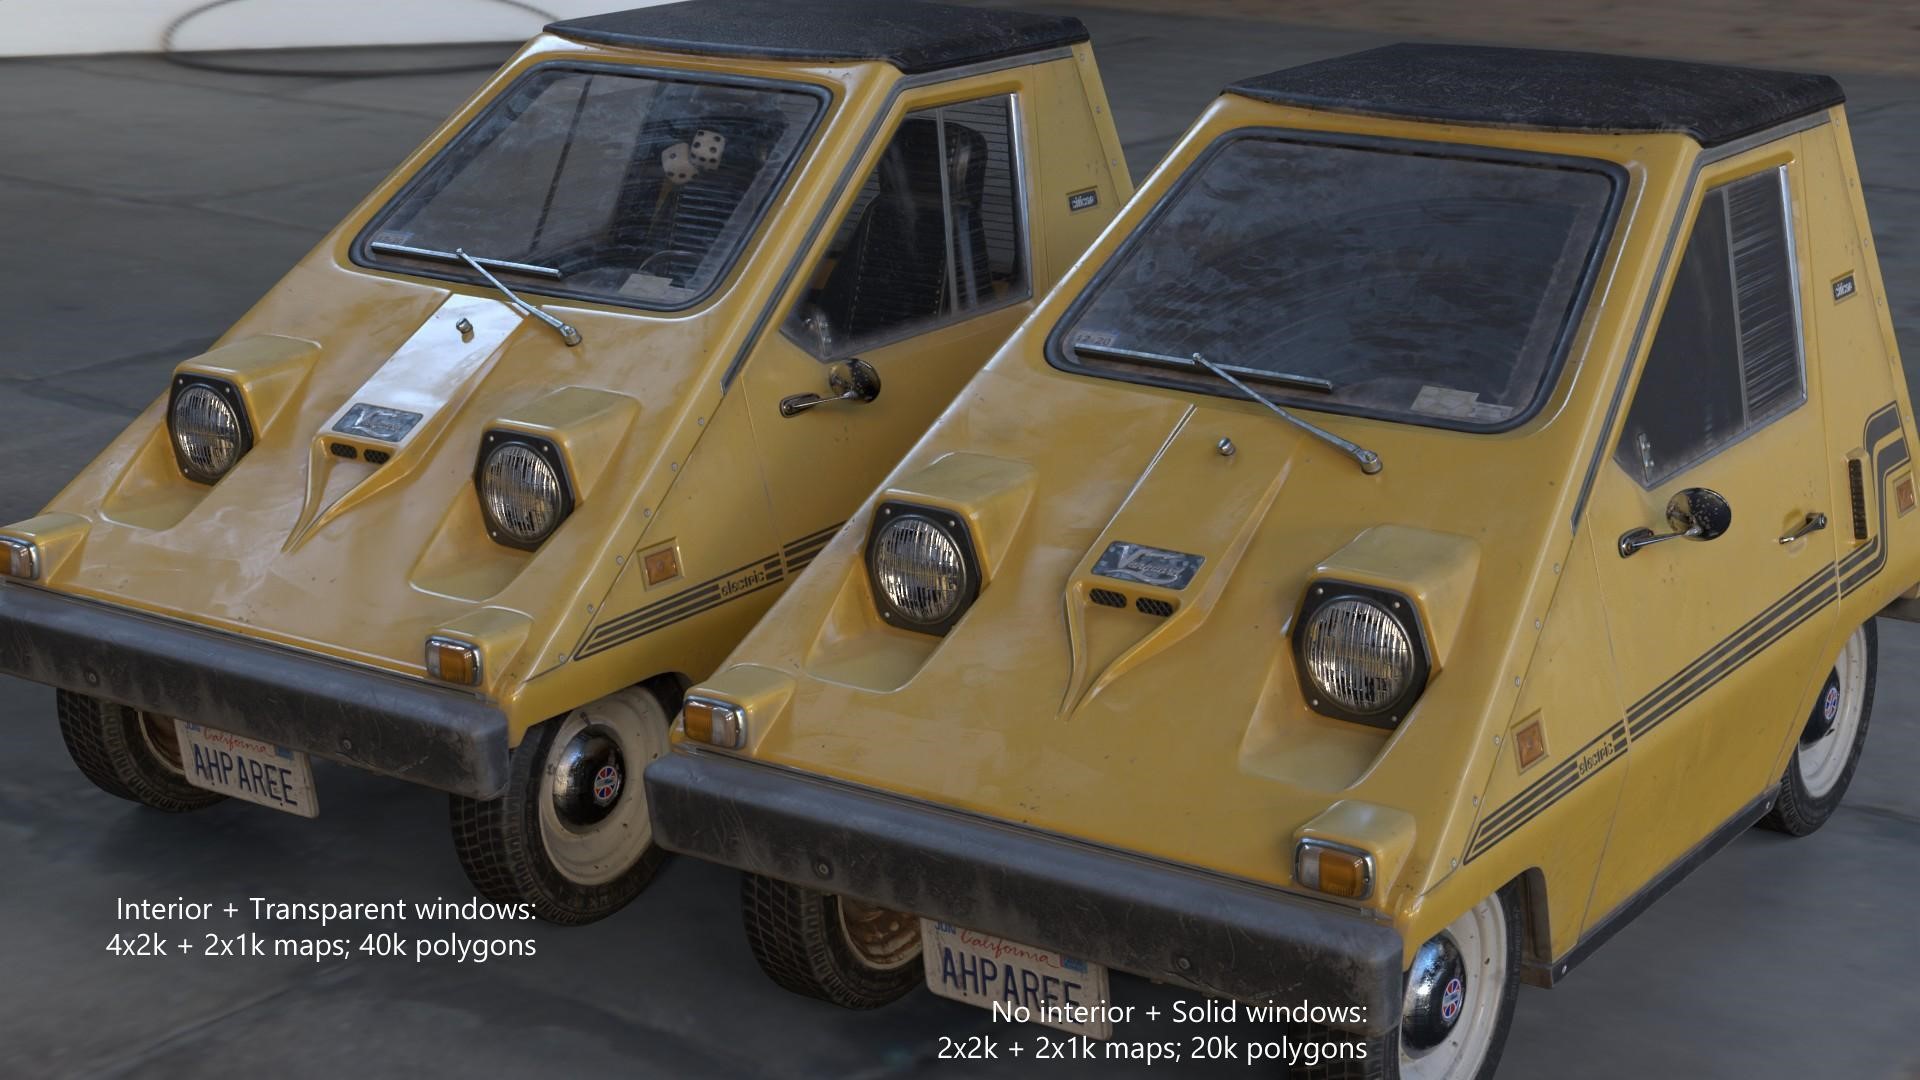
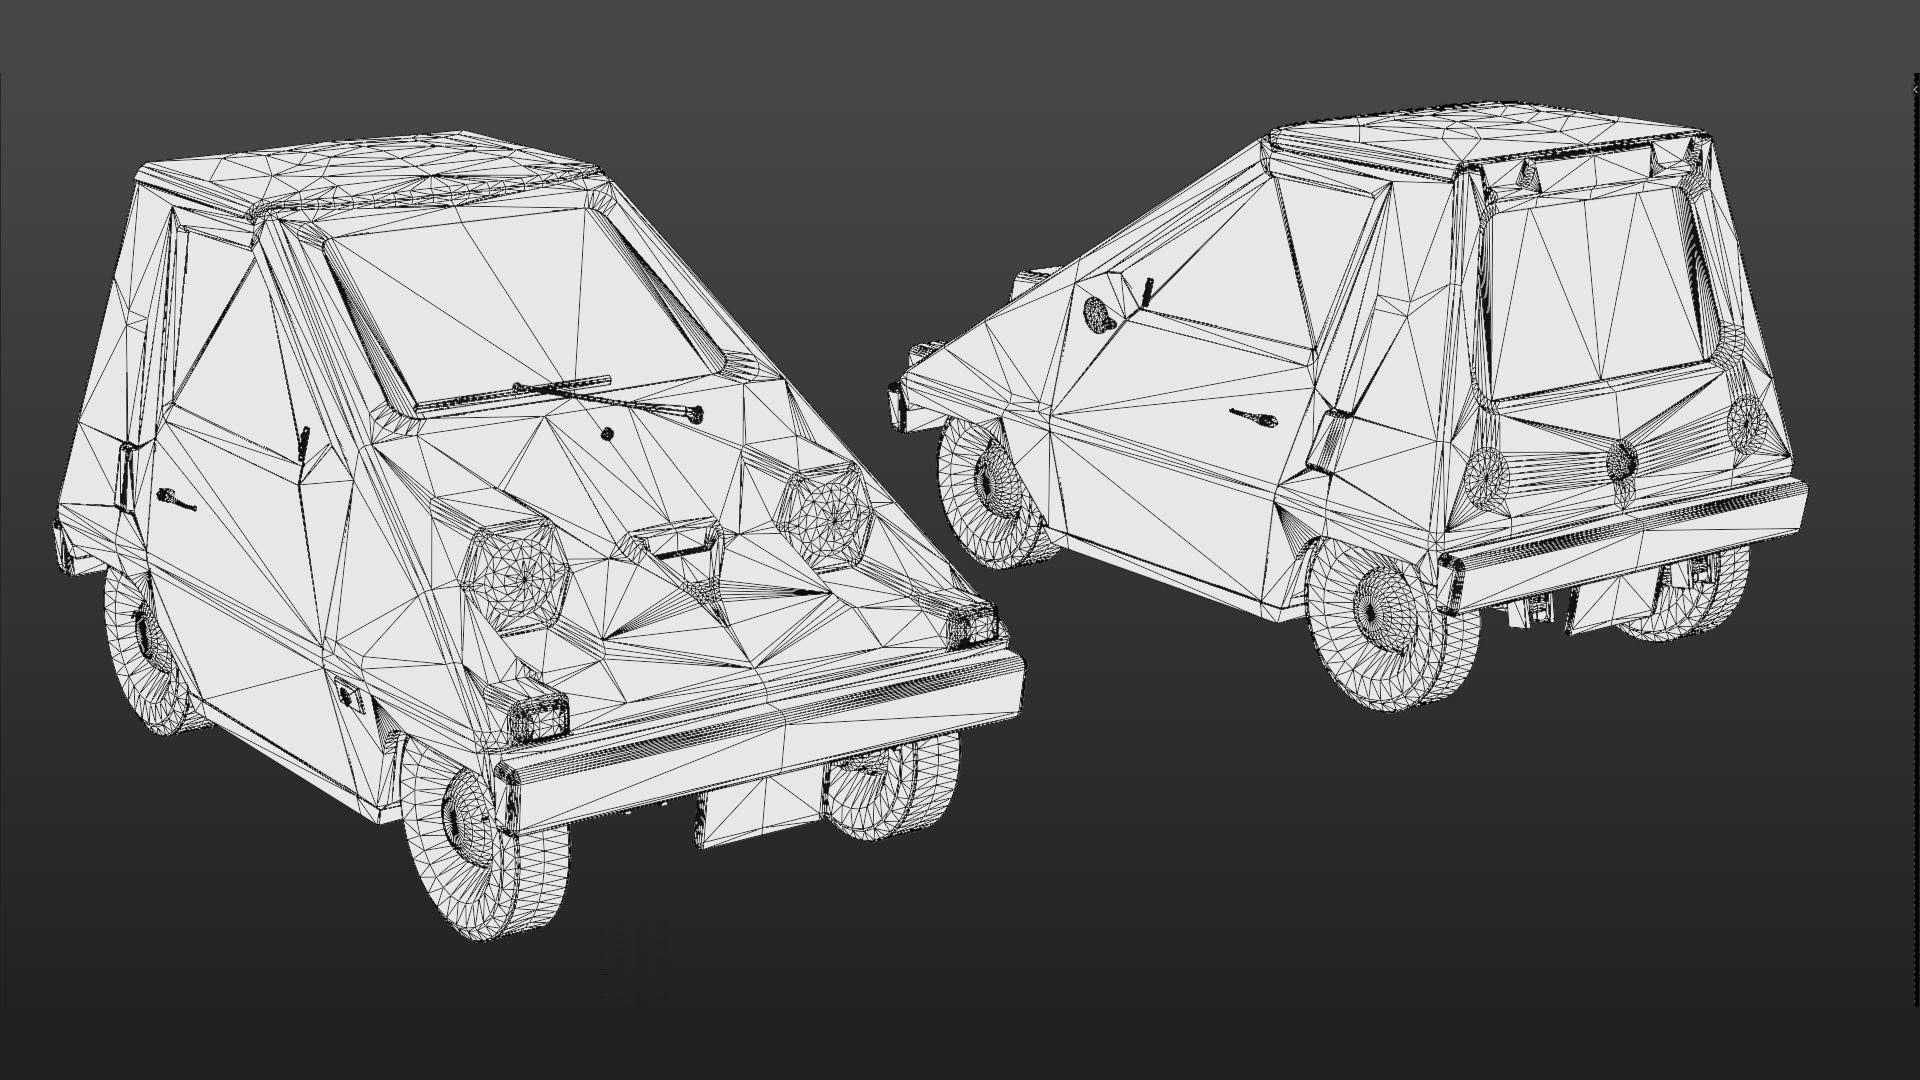
The most important thing for me is to stop. And that’s not an easy task at times. That’s why it’s so crucial to find your limit and model only what needs to be modeled, not a tiny bolt more. For this particular project, I decided to stop on the middle frequency and not to proceed to smaller details, like screwheads or wobbles on the plastic itself. They were painted during texturing.
Take a look at this comparison. The left one is the original high poly, the right one is the low poly without baked and painted details, and the middle one is low poly with all the fancy stuff applied.


It is really important to know when to stop, otherwise not a single project would ever be finished. It’s like Leonardo da Vinci said: Art is never finished, only abandoned.
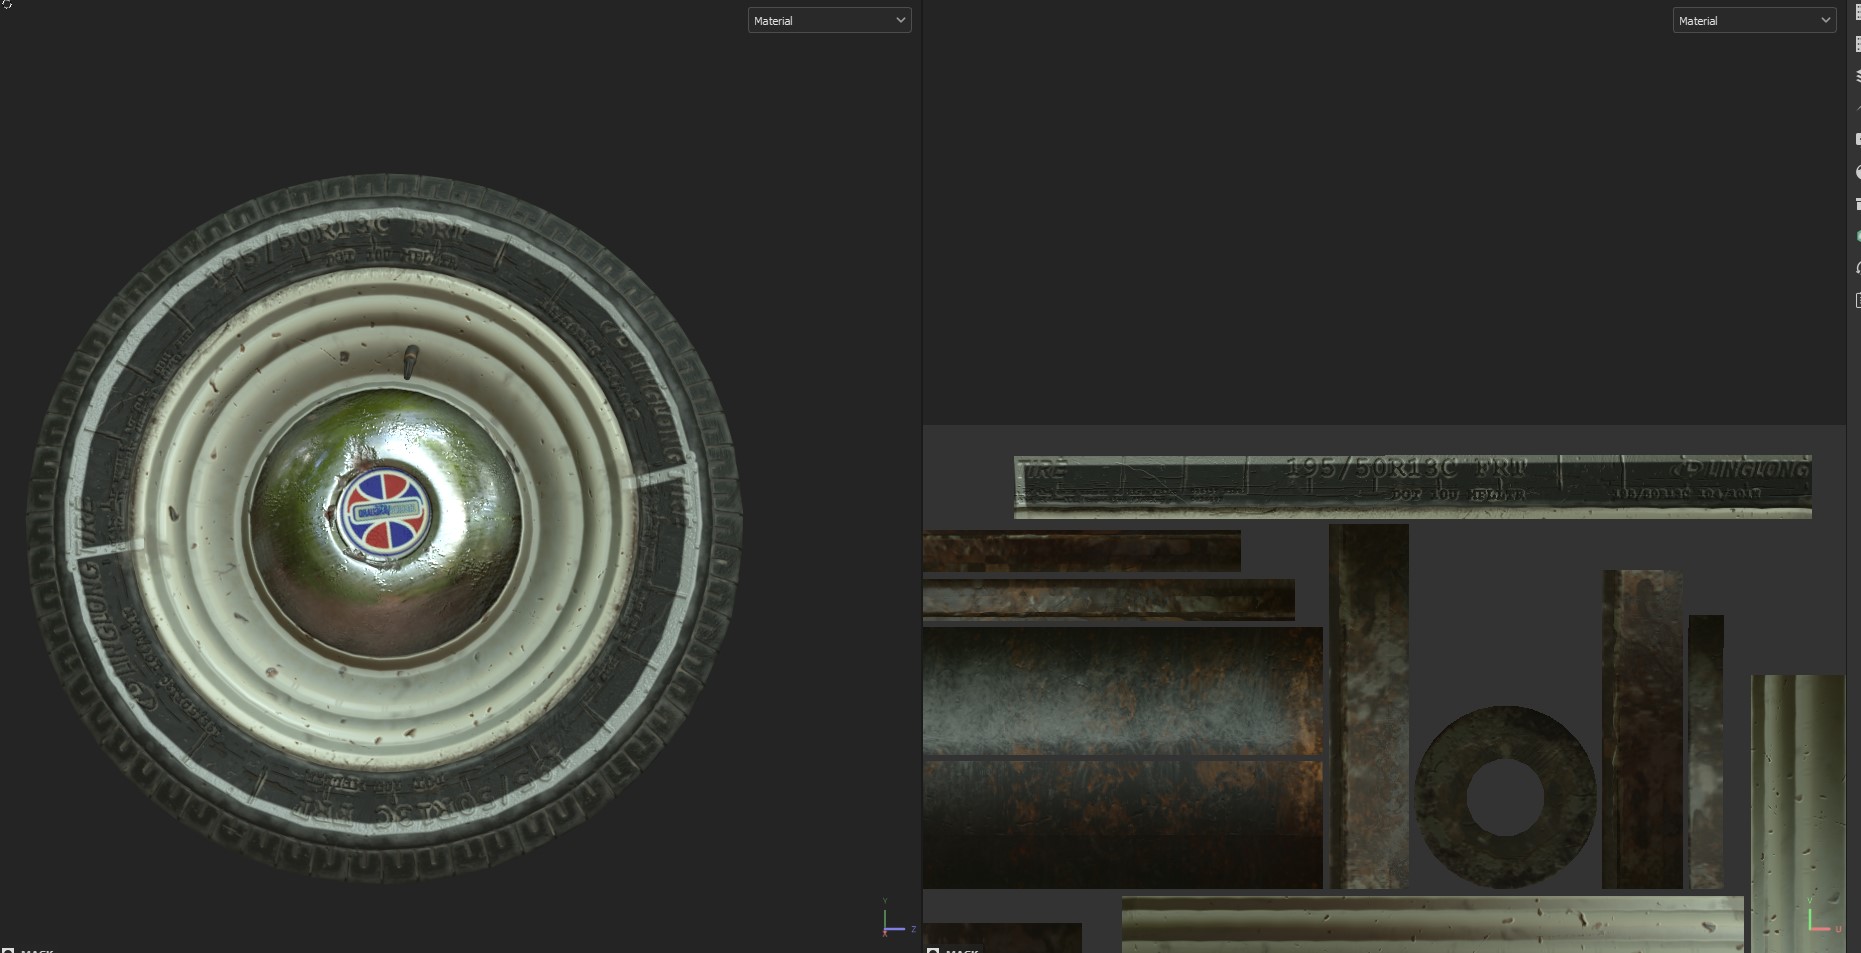
In the thick of it…
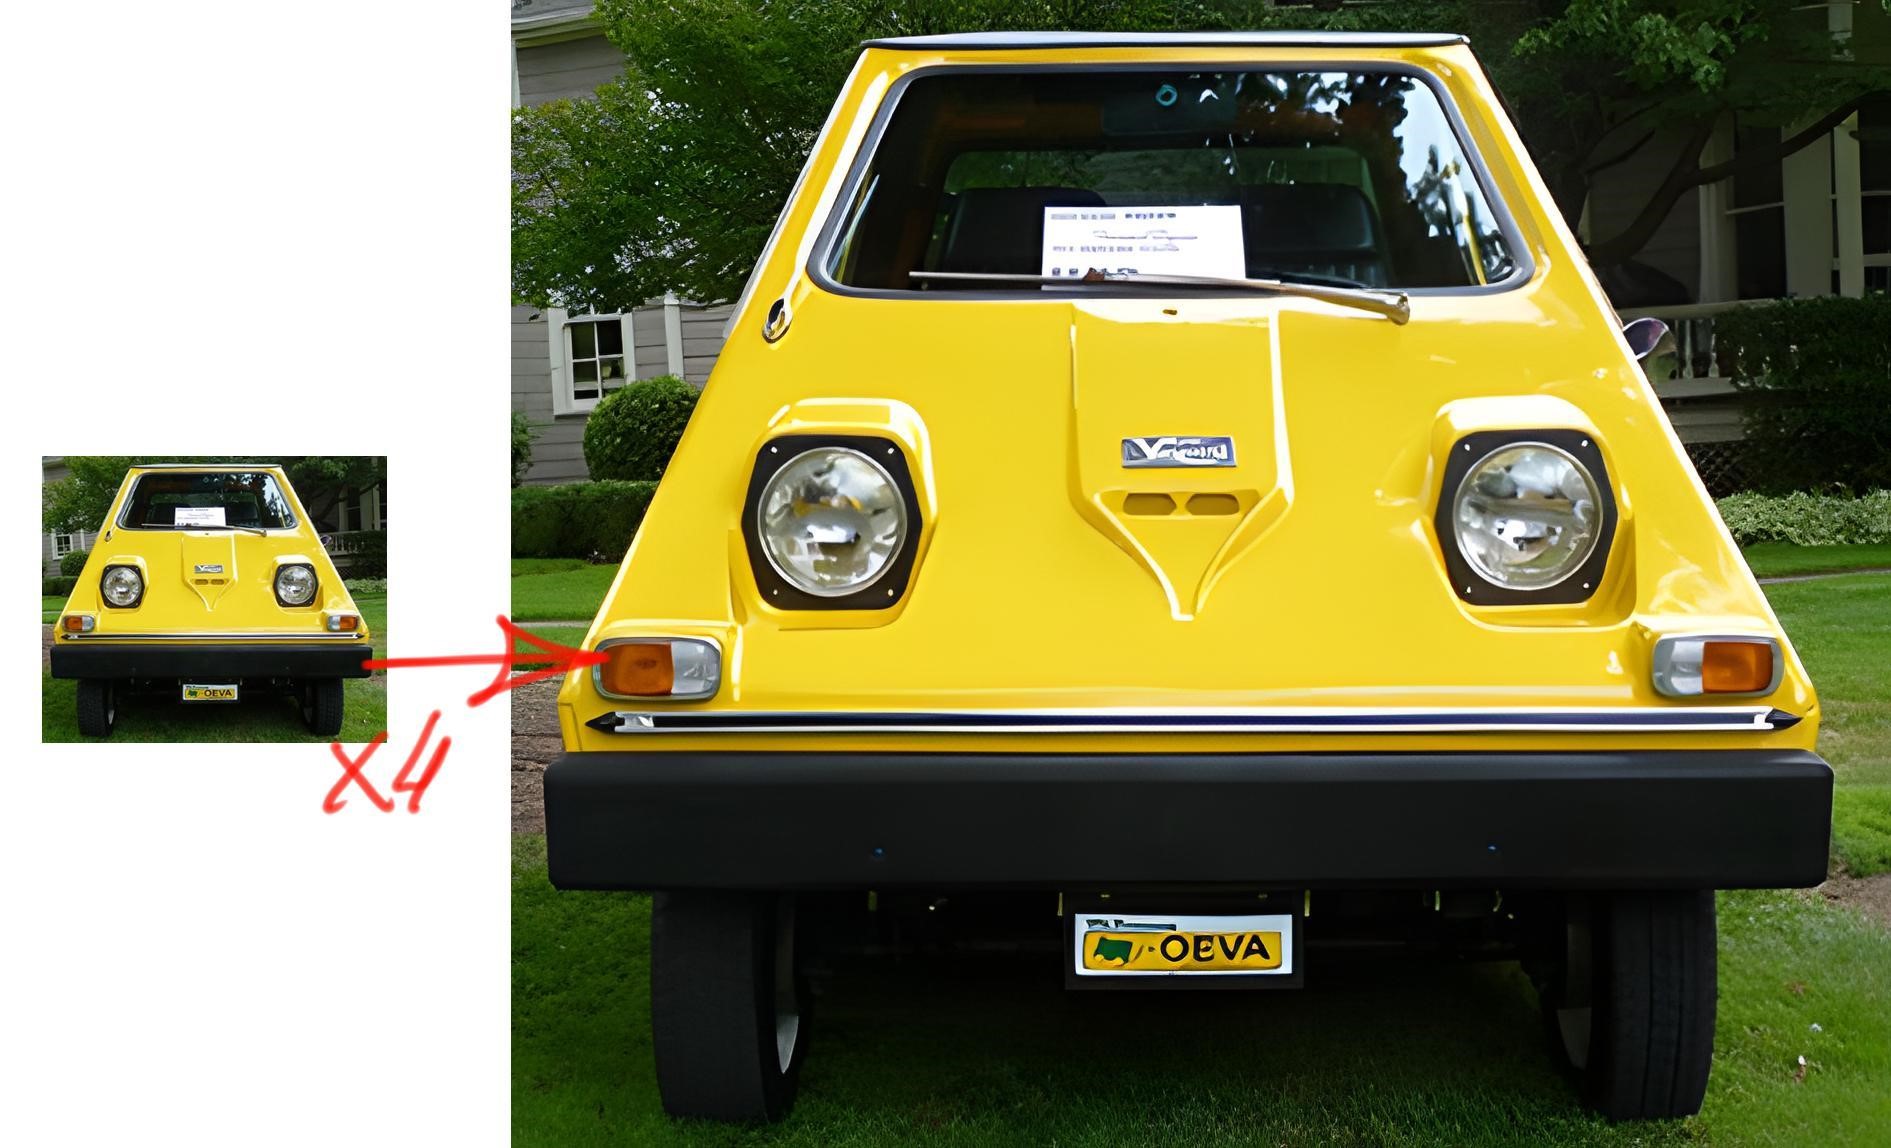
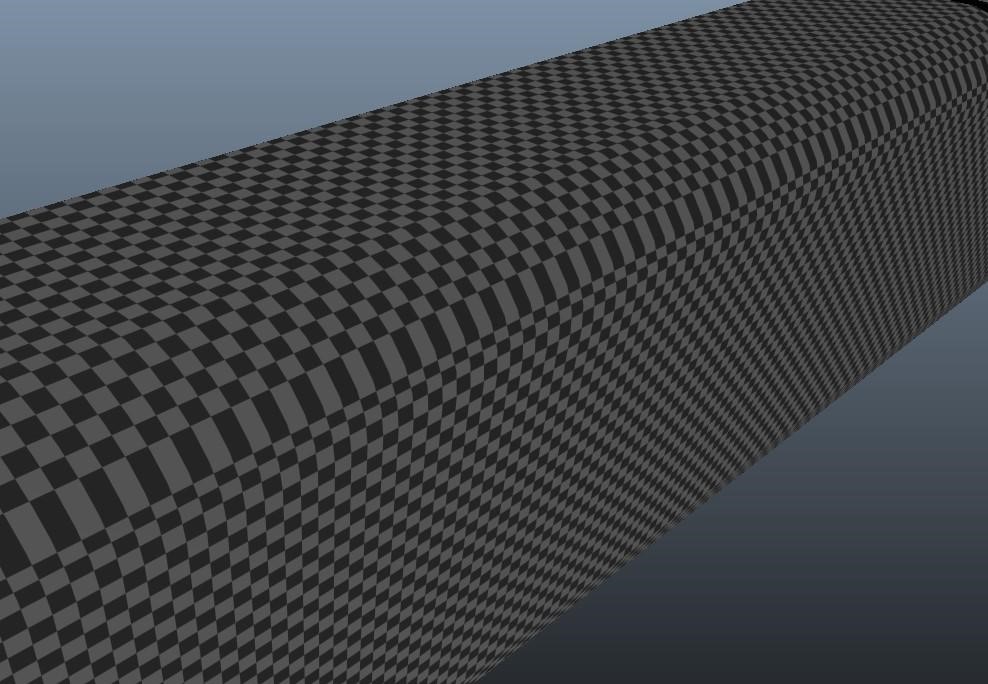
This is a low poly model after all. As anything, texture space is also limited, so not a single pixel should be wasted. That’s why I’ve used overlapping extensively. As you can see on the image below, the whole tire is divided into four parts, which are corresponding to each other and shifted around the Y axis. This allowed me to tighten up the texel density to a factor of 4. Effectively having a 1k texture, I’m getting the sharpness and detail equal to non-overlapping 4k texture.
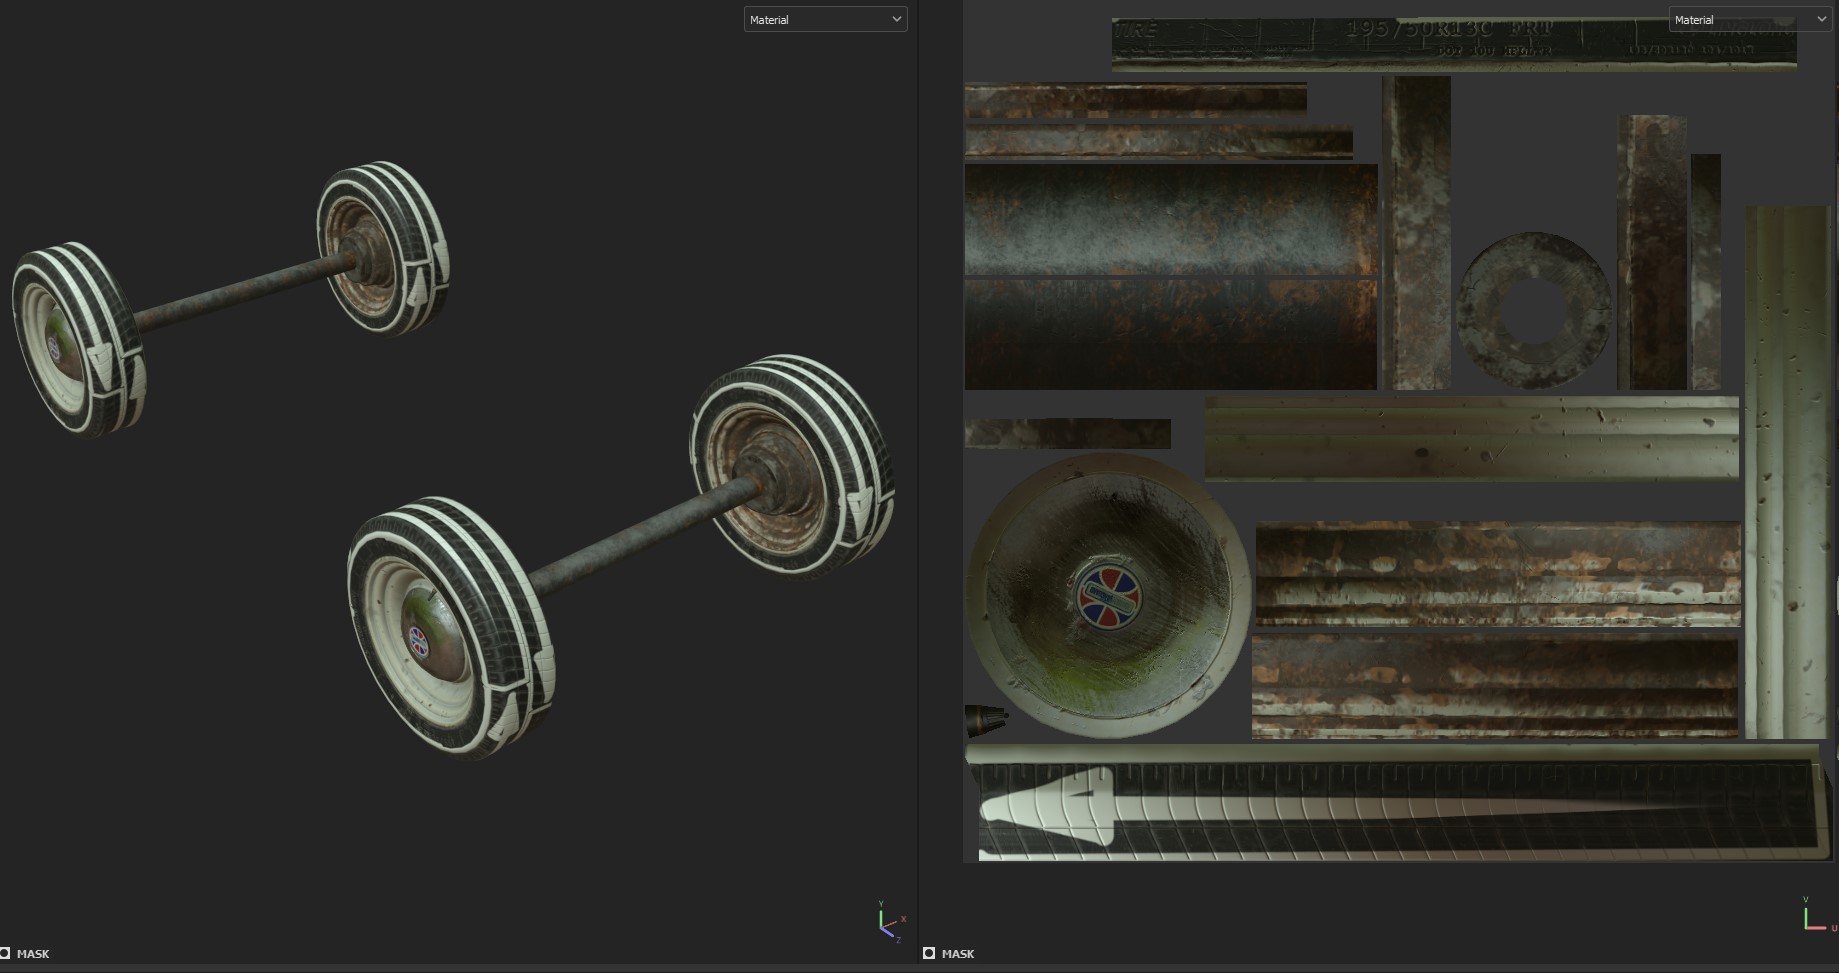
Exactly the same principle is applied to the side plane of the wheel. What I really like to do is to put a sign or a logo in the middle of the seam, and it is especially easy if the logo consists of two words. It really helps to sell the illusion of seamlessness.
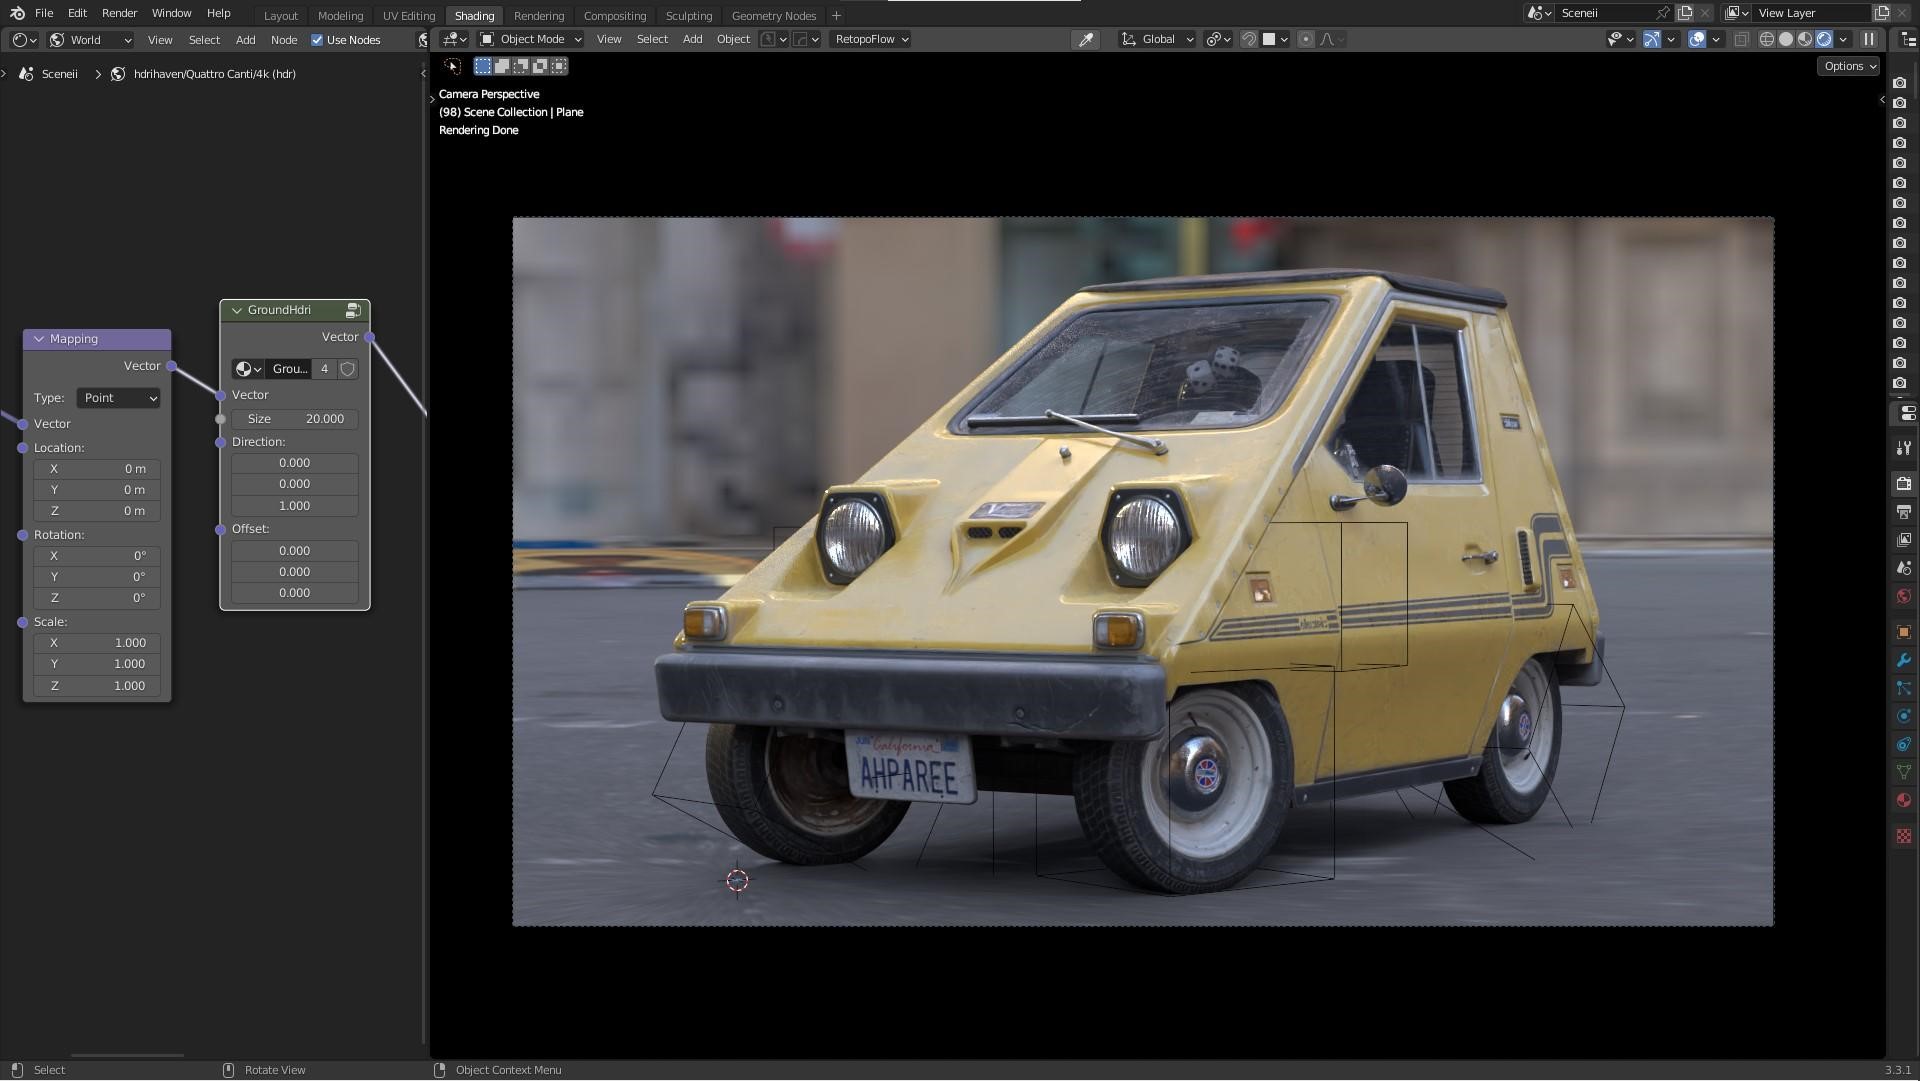
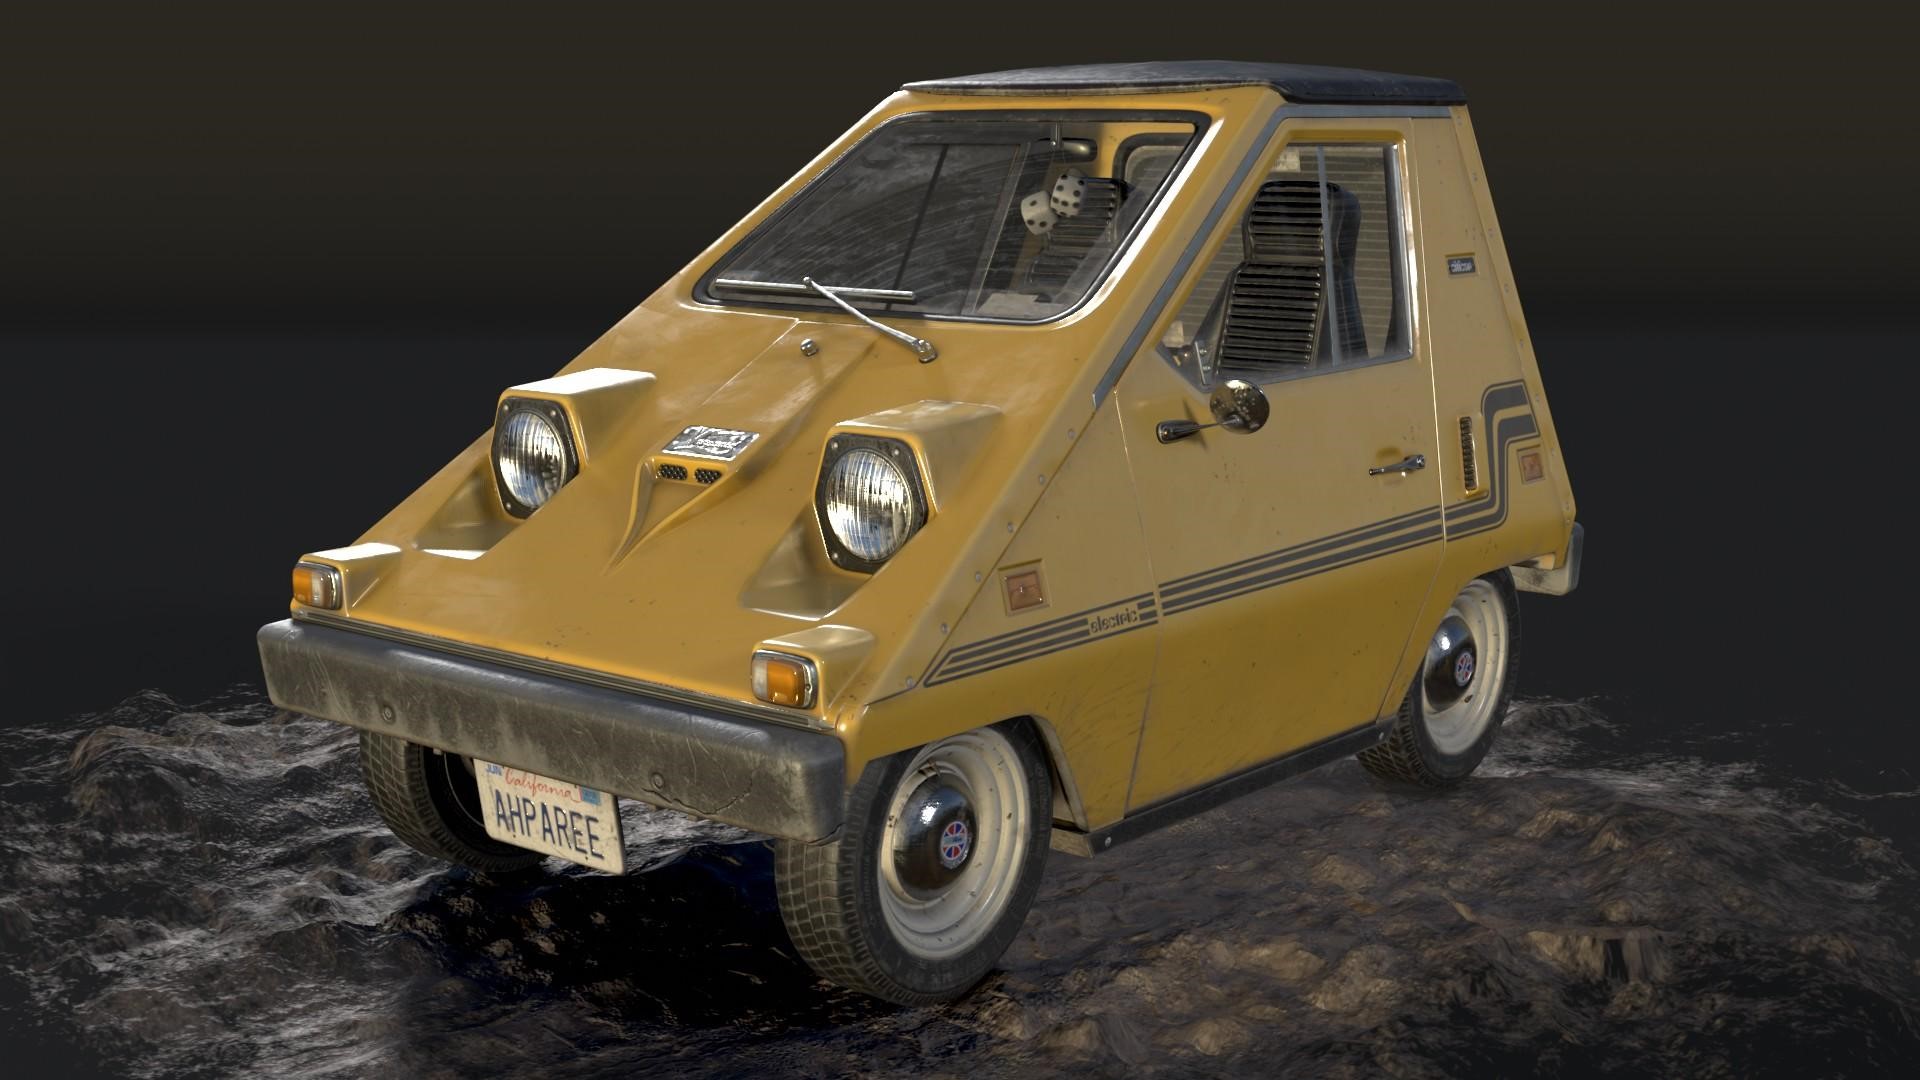
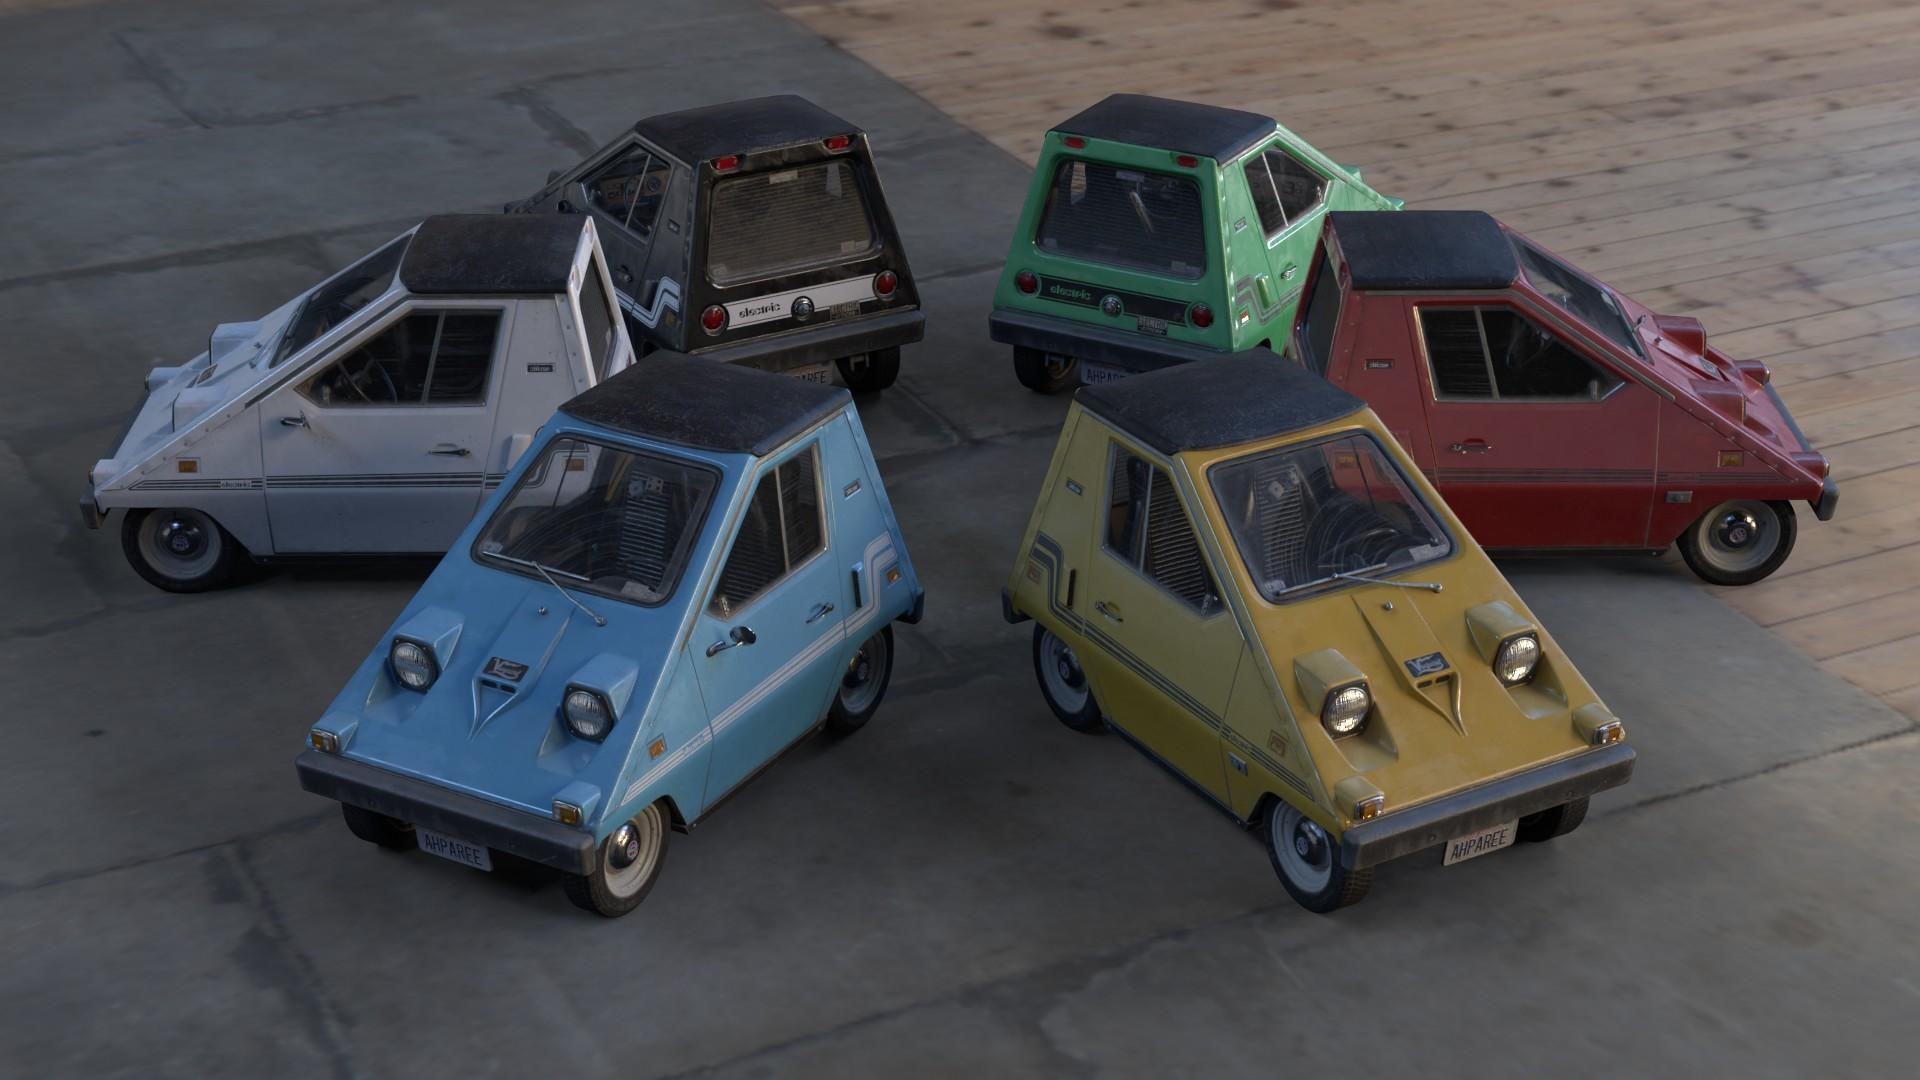
Pushing to the limit…
For final renderings, I’ve used Lily Surface Scraper very extensively. It provides a fantastic way to set up HDRI with a ground plane within seconds, allowing me to iterate through the final look really fast and effortlessly. As my dear friend Mary Duhon likes to say: ”Any sufficiently advanced HDRI is indistinguishable from magic.” I completely agree with this stance of hers, so here’s a few quick experiments with different environments:

As you have probably noticed, most of the stills are rendered in Cycles, but animations are rendered in Eevee. PBR setup and ease of use of both render engines in Blender allowed me to switch between them really quickly, without the necessity to change the setup of the scene or the materials. This way, I was able to take advantage of such a diverse ecosystem and use the advantages of them both.
Ironing the UVs out…
Like many Blender users, I’m relying on UVPackmaster to, well, pack the intestines of my models.
At the moment of writing this article, it is unable to work with two UV sets at the same time, so what I did was pack into two UDIM’s and then just manually moving second part into 0-1 space, assigning different material to it beforehand.

Prepare for unforeseen consequences…
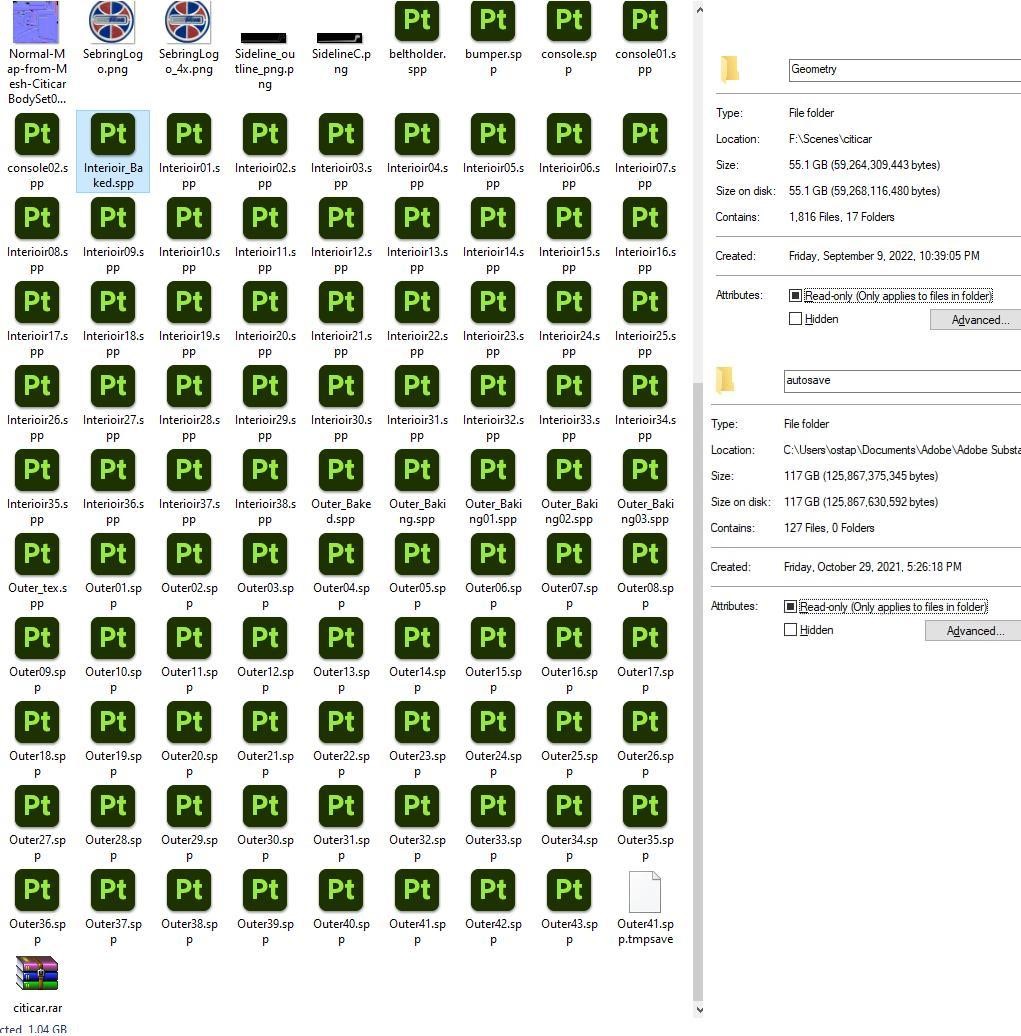
Being a resident of Zaporizhizha and Ukraine in general during the times of war is adding its own complexities. For example, just today, while I’m writing this article, something like 12 rockets hit the power grid within a few kilometers from me. Sure thing, after 9 months of war and constant shelling, one would start to kinda get used to it. Unlike the software which doesn’t care what’s happening all around, it takes its time to write a file. Even today, with blazingly fast SSDs, it takes a few seconds to write a 1 gigabyte file of a texturing project and it is extremely easy to lose hours of work. That’s why I’m a huge fan of autosaves and consequal saving.
Power went off a bazillion times only while I was writing this article, and twice as much while I was actually making the thing. 80 gigabytes of regular saves and 117 gigs of autosaves was the only way to save the project intact.
How I Learned to Stop Worrying and Love the Fallibility…
At the end of the day, not a single project ever goes as smoothly as planned in the first place. Take a look at this issue with the bumper: some edges on UVs have got merged and I’ve noticed it way down the road when texturing was nearly finished. It’s a small issue that could be ignored, but I took my time to learn from this mistake and fix it, and that’s the important part.
COMUTA CAR


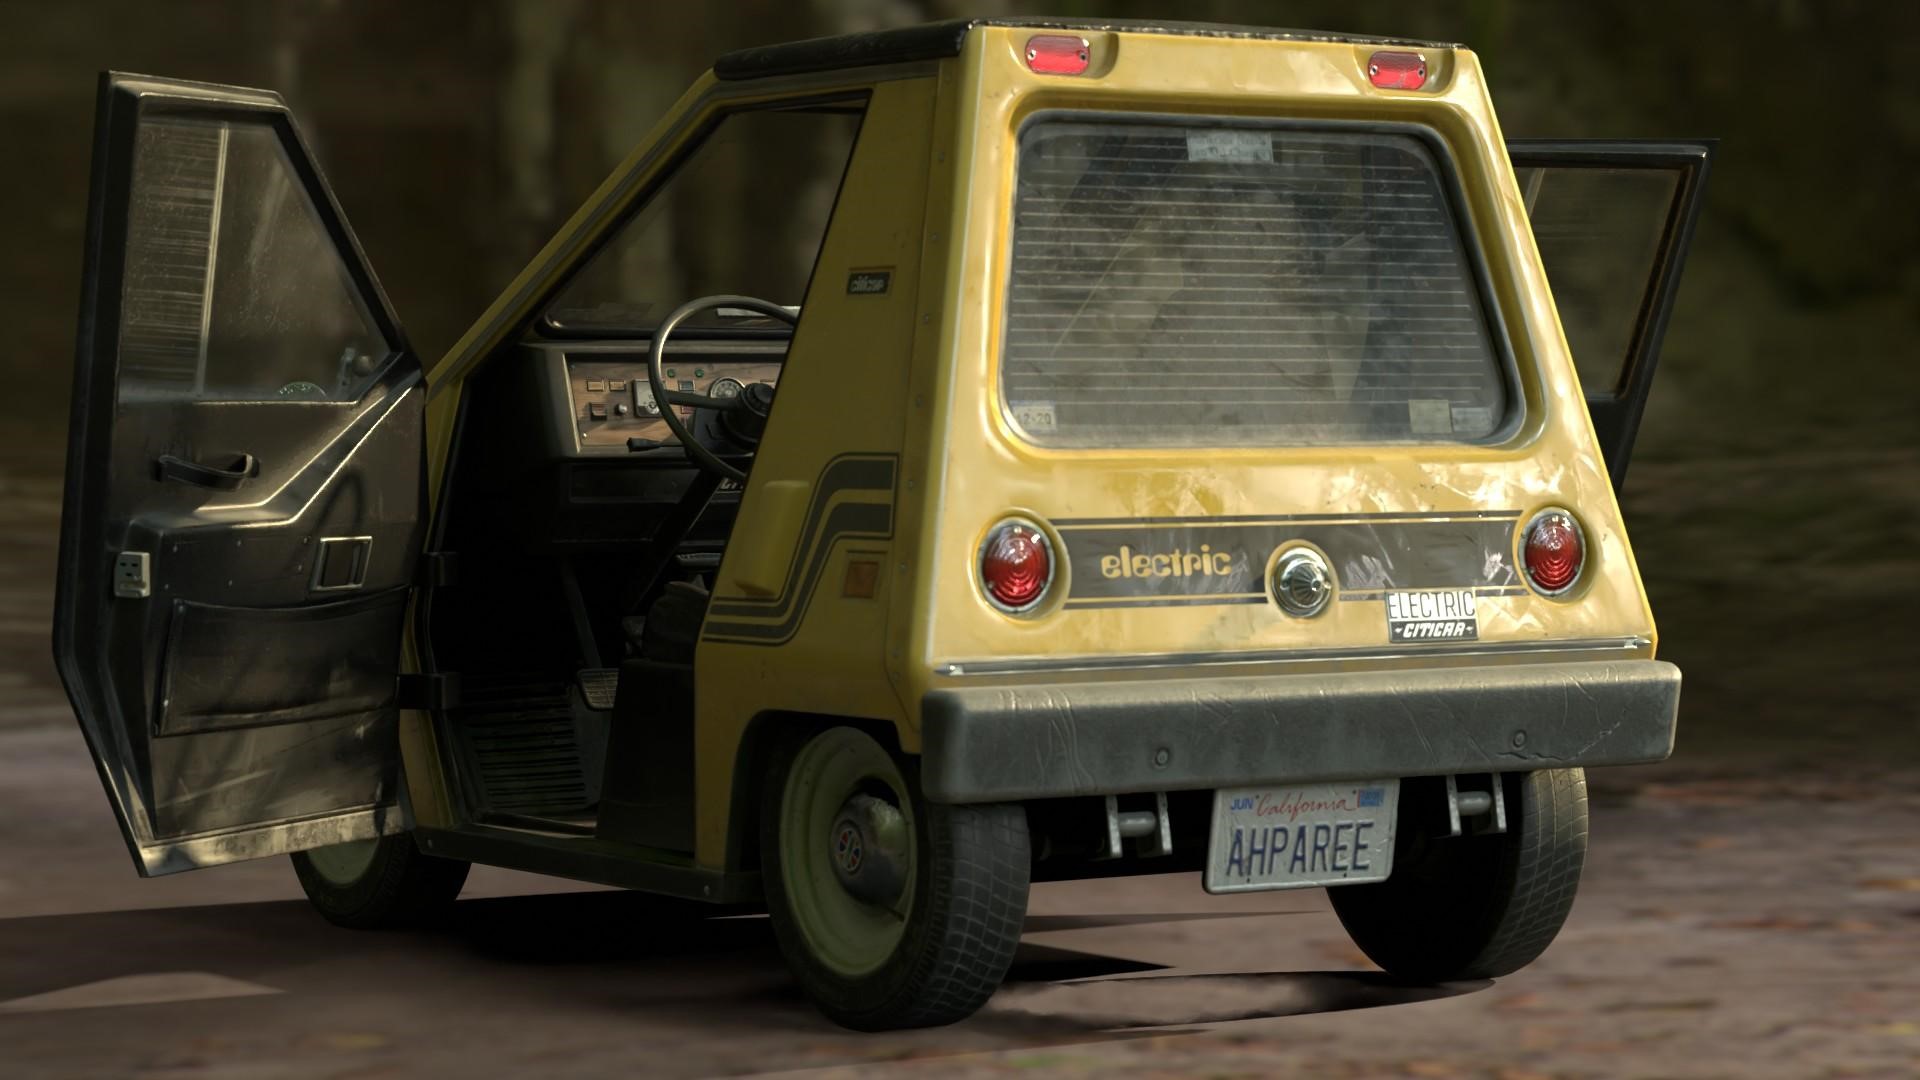
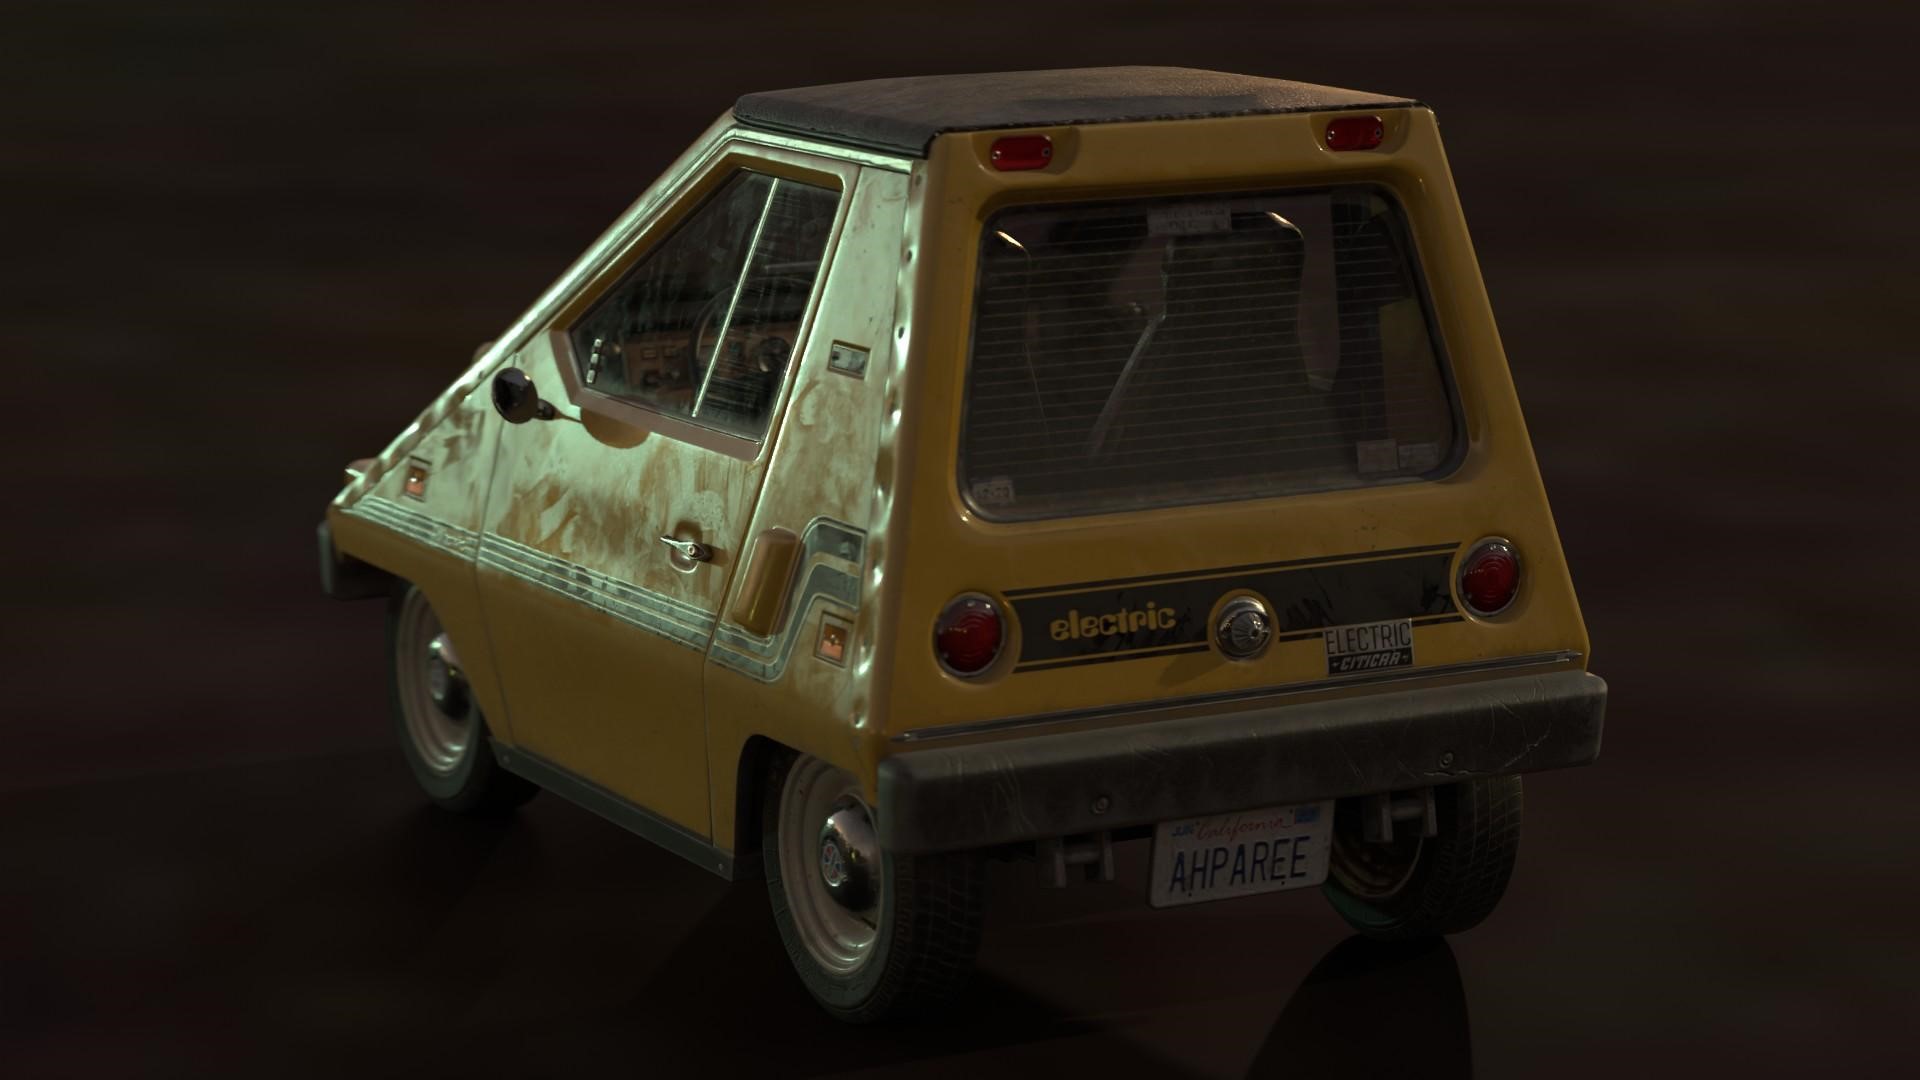
The Lasting Impression…
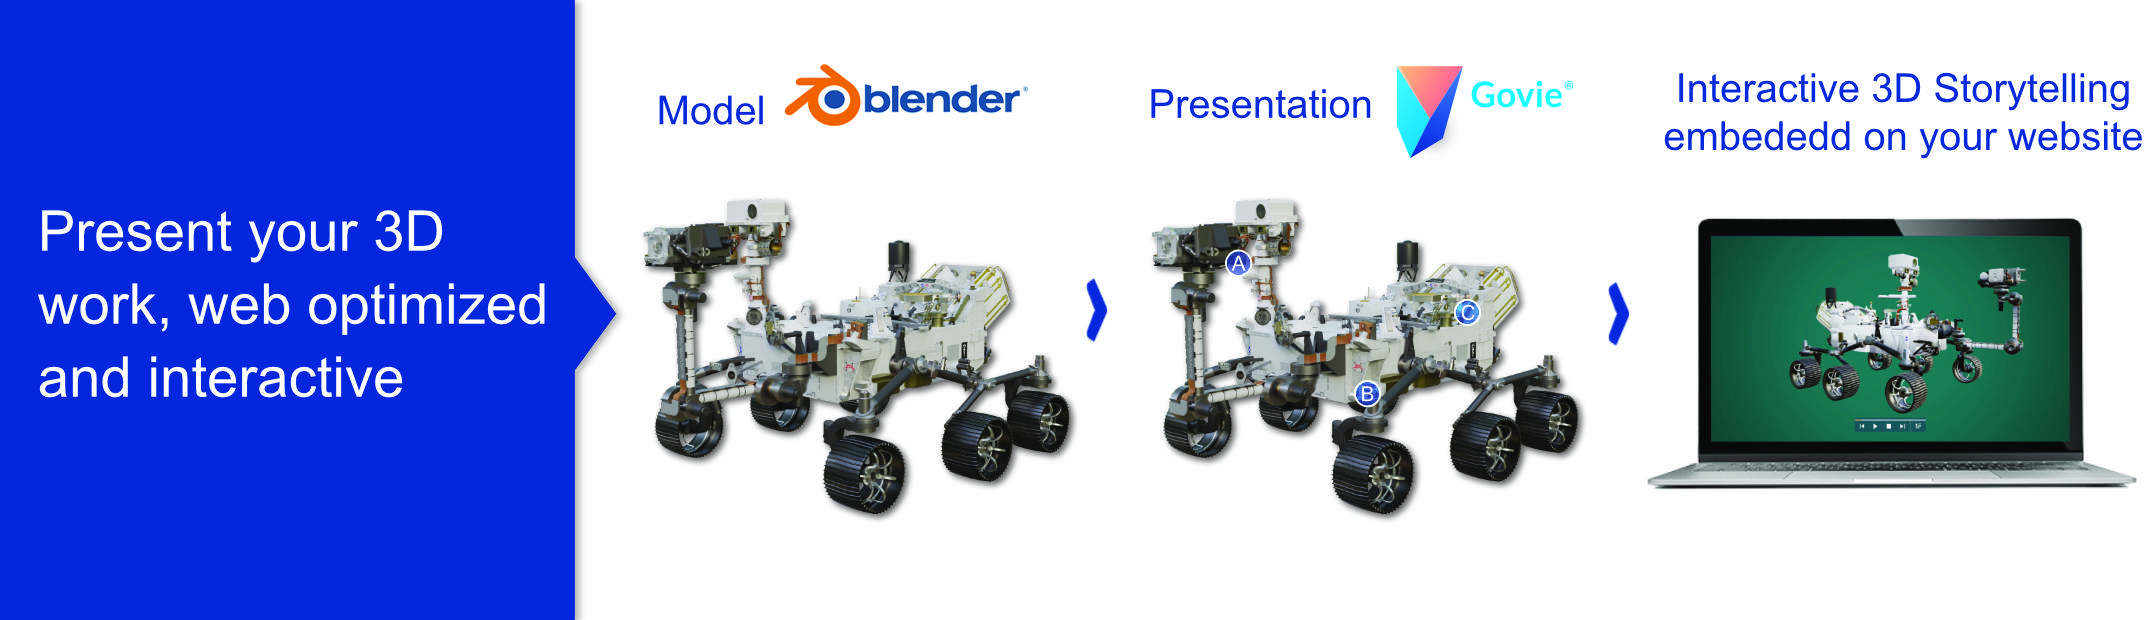
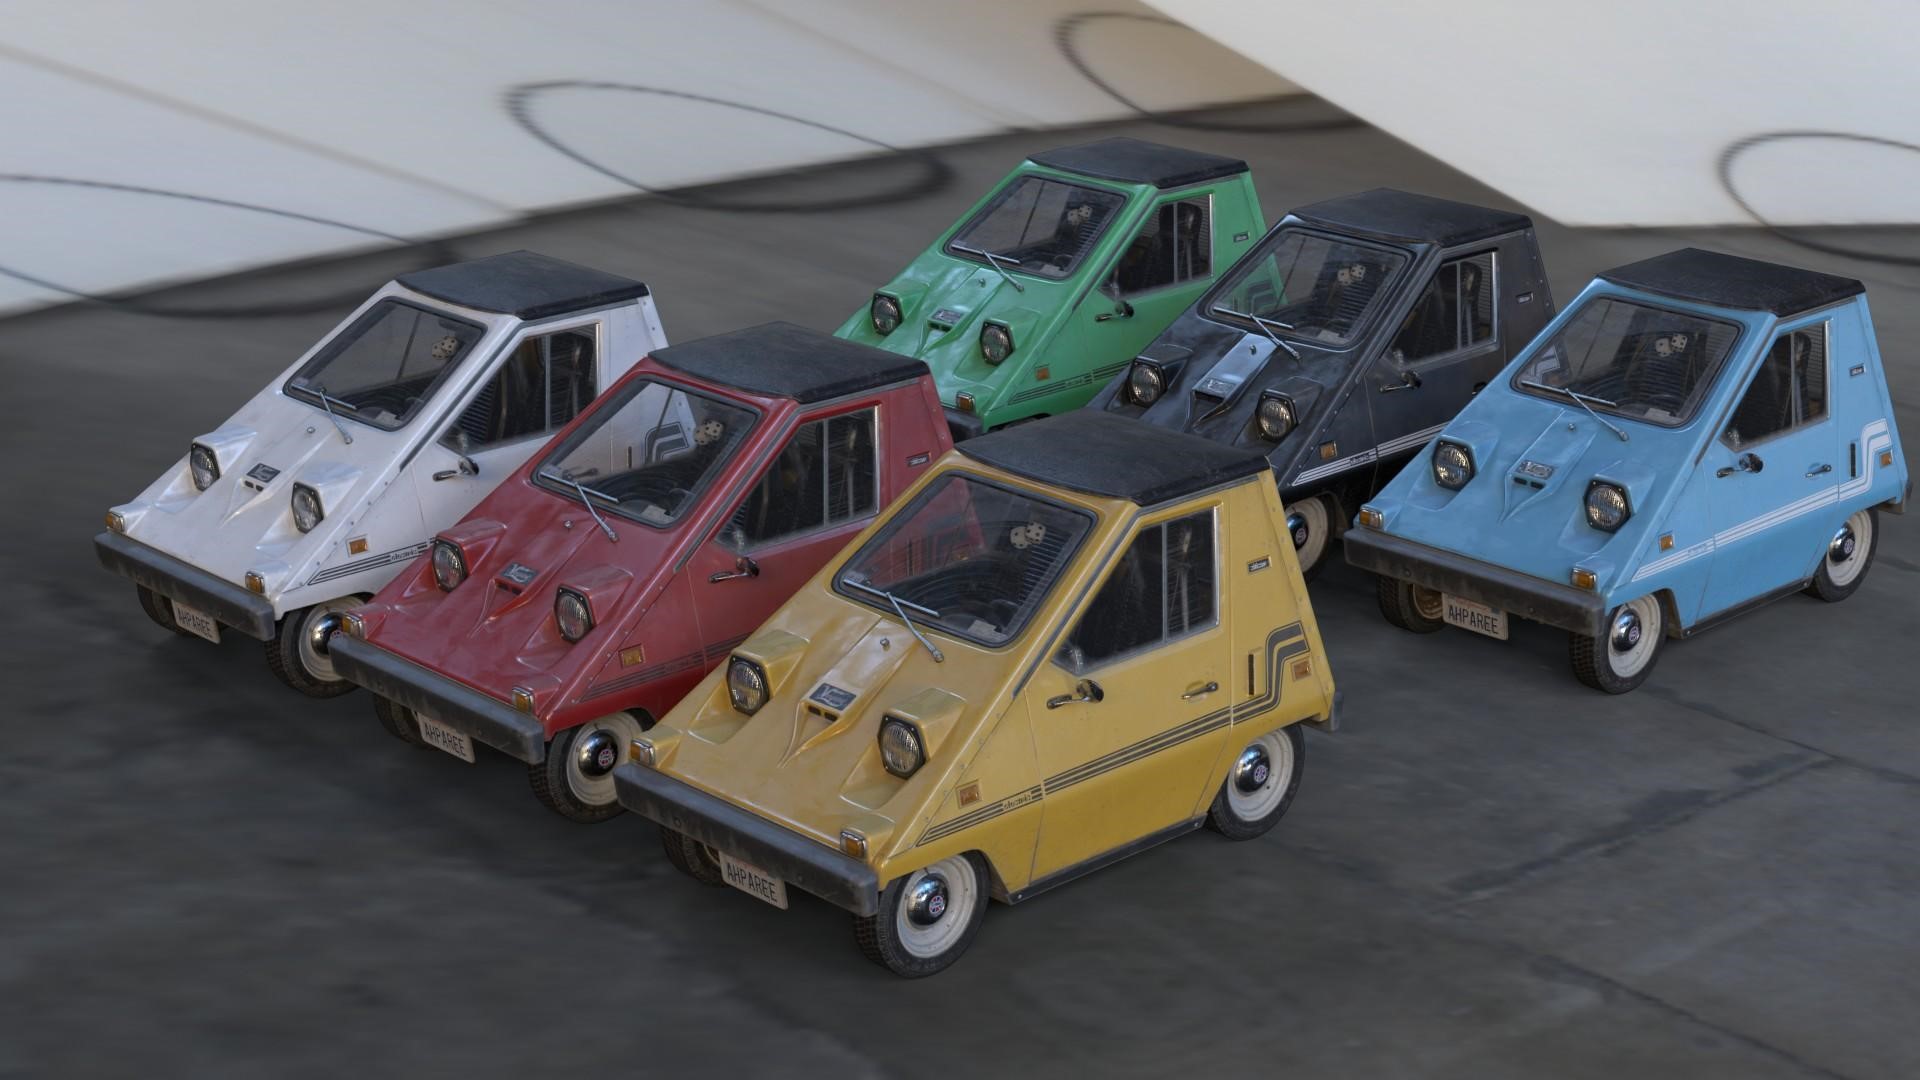
It’s always important to showcase the model properly, because what’s the point of it all if not to show how it shines?

Video shots of Sebring-Vanguard…
Who is this Bohdan person anyway?
Bohdan Lvov, a freelance 3D artist by day and full time resident of Zaporizhzhya, Ukraine, which is 30 km from the frontline, thus under constant attack by the Russian Federation. And even that is unable to stop me from making art even for a minute!
I’m tipping my fedora to y’all, folks.
Thank you!
About the Artist

Bohdan Lvov, a freelance 3D artist from Zaporizhzhya, Ukraine.


