

INTRODUCTION
Hi! My name is Icaro Carvalho and I'm a Brazilian 3D generalist.
Since I was a child, I've been passionate about 3D games and animations, and discovered Blender while studying photography. It was only then that I discovered the gigantic universe that is computer graphics.
Being Brazilian, my dream of working with games in a big studio was always a distant wish that I still craved. But with Blender, I managed to combine the love I have for photography and the love I have for games.
I became self-taught in Blender, thanks to the Blender community and their great knowledge shared on the internet. Then I started developing stylized 3D portraits for my Instagram.
A lot of these portraits are photos of real people, amazing movie stills, and 2D art that I find on Instagram.
INSPIRATION
I won't have much to say about this stage. I saw a really cool photo, got in touch with the girl in the photo, Bianca Vitória, and asked if I could use this photo to make a stylized portrait.
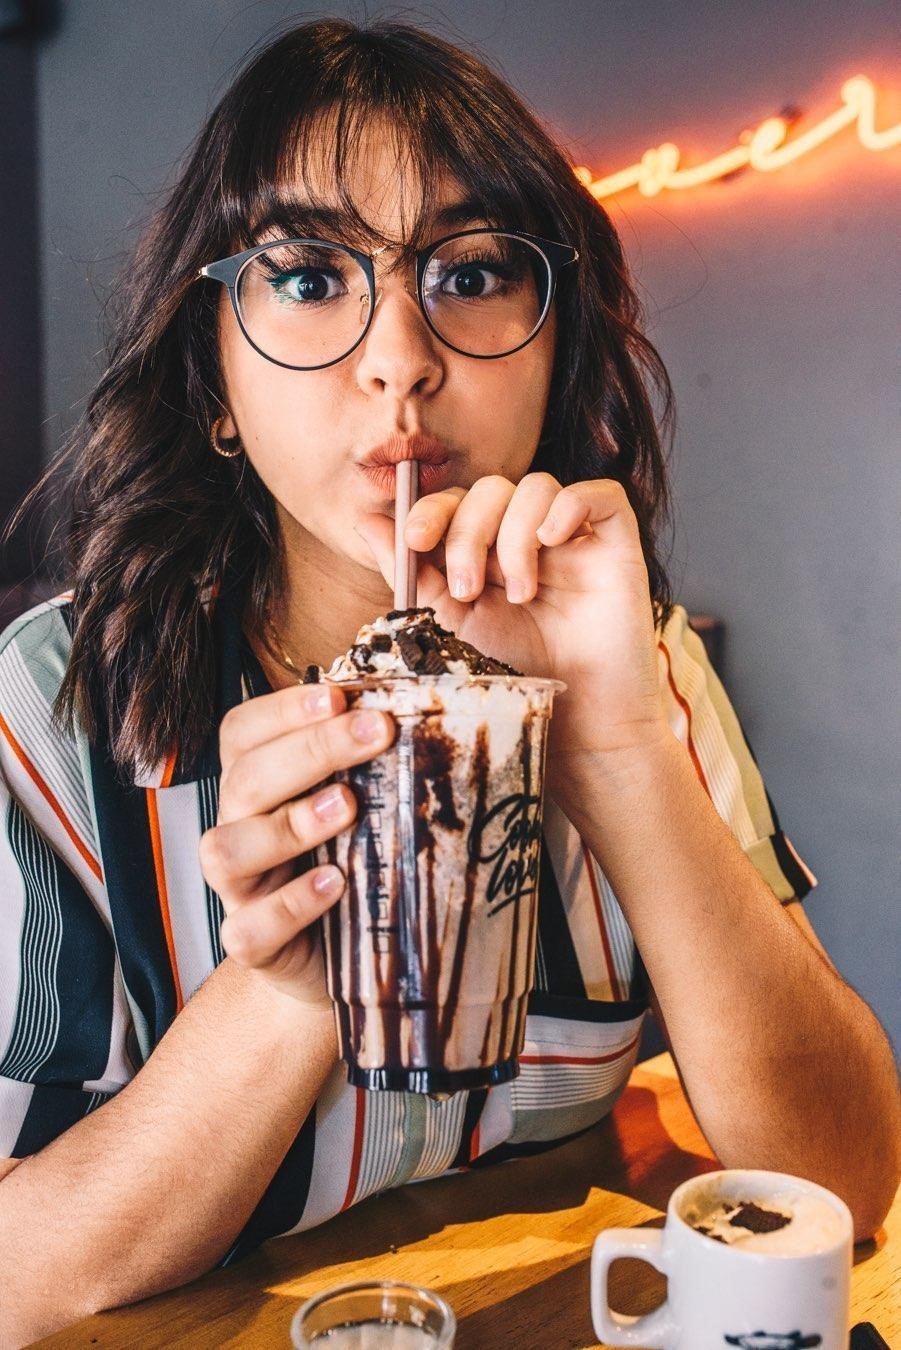
That was the photo, she was super nice and even sent me the photo with a good quality.
REFERENCES
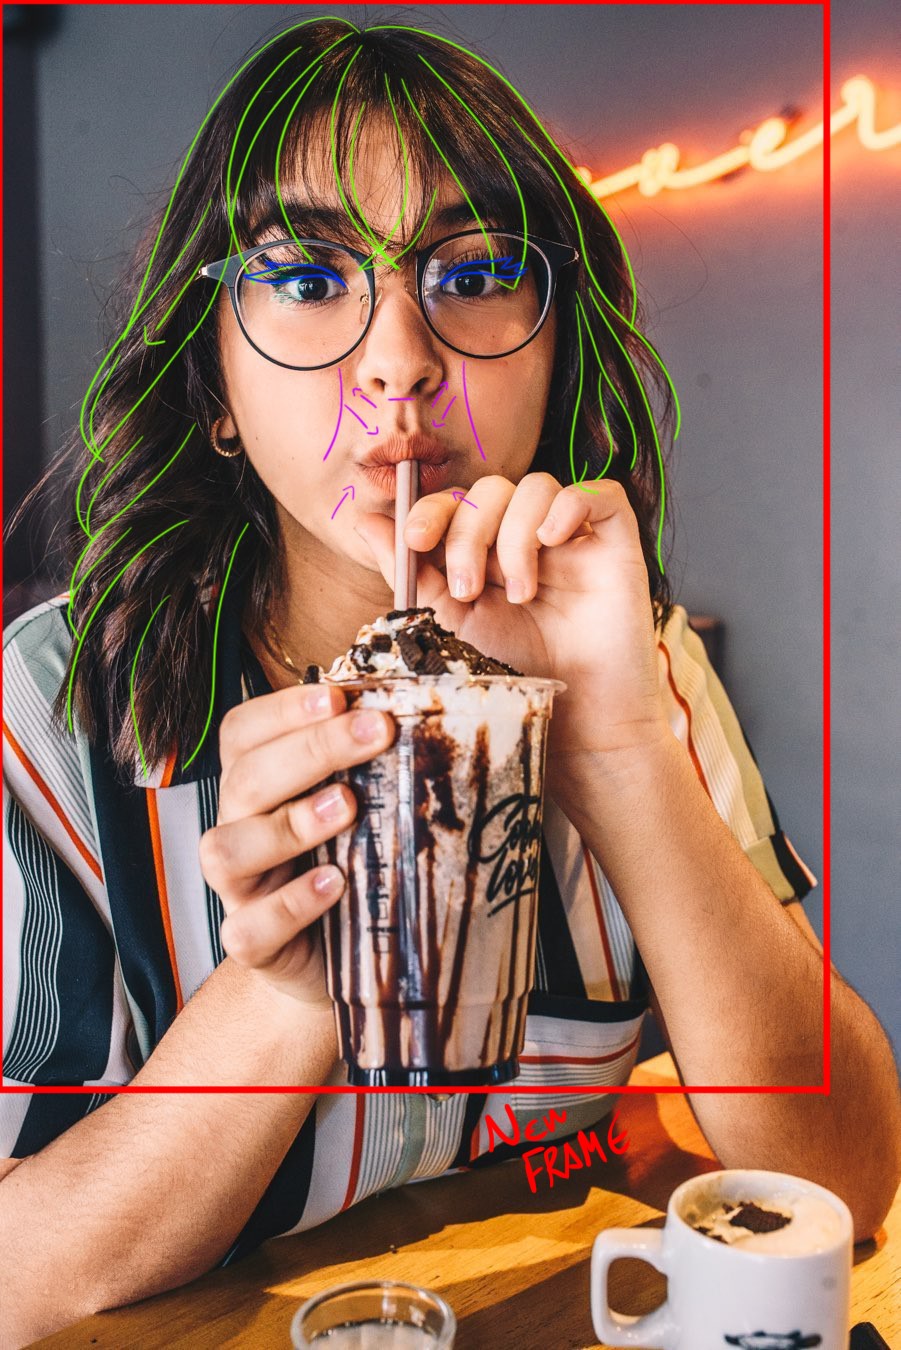
I took a look at the reference (I often reframe the image, see the hair flow direction, understand the expression, etc.)
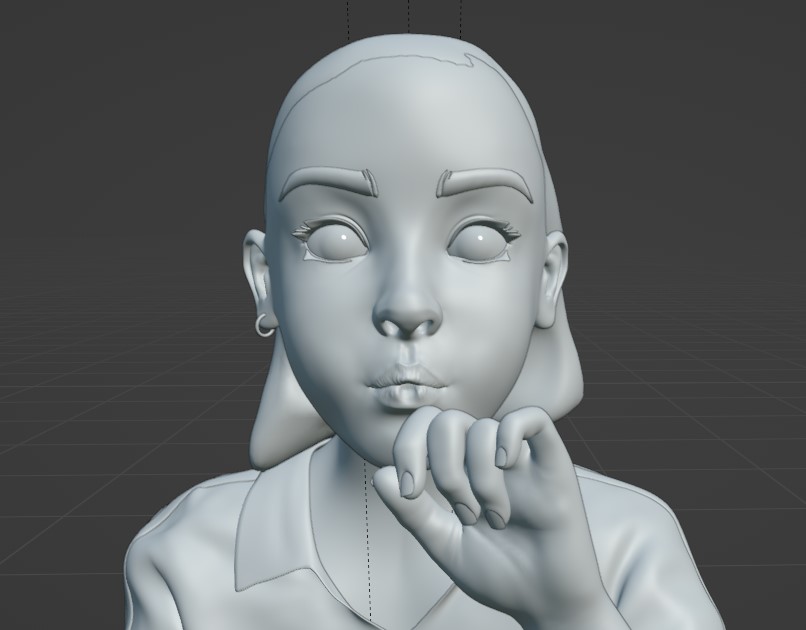
I started the portrait with a base model I created a few months ago that had everything I needed.
Shader for the skin with masks and colors. (Sorry that you had to see this mess).
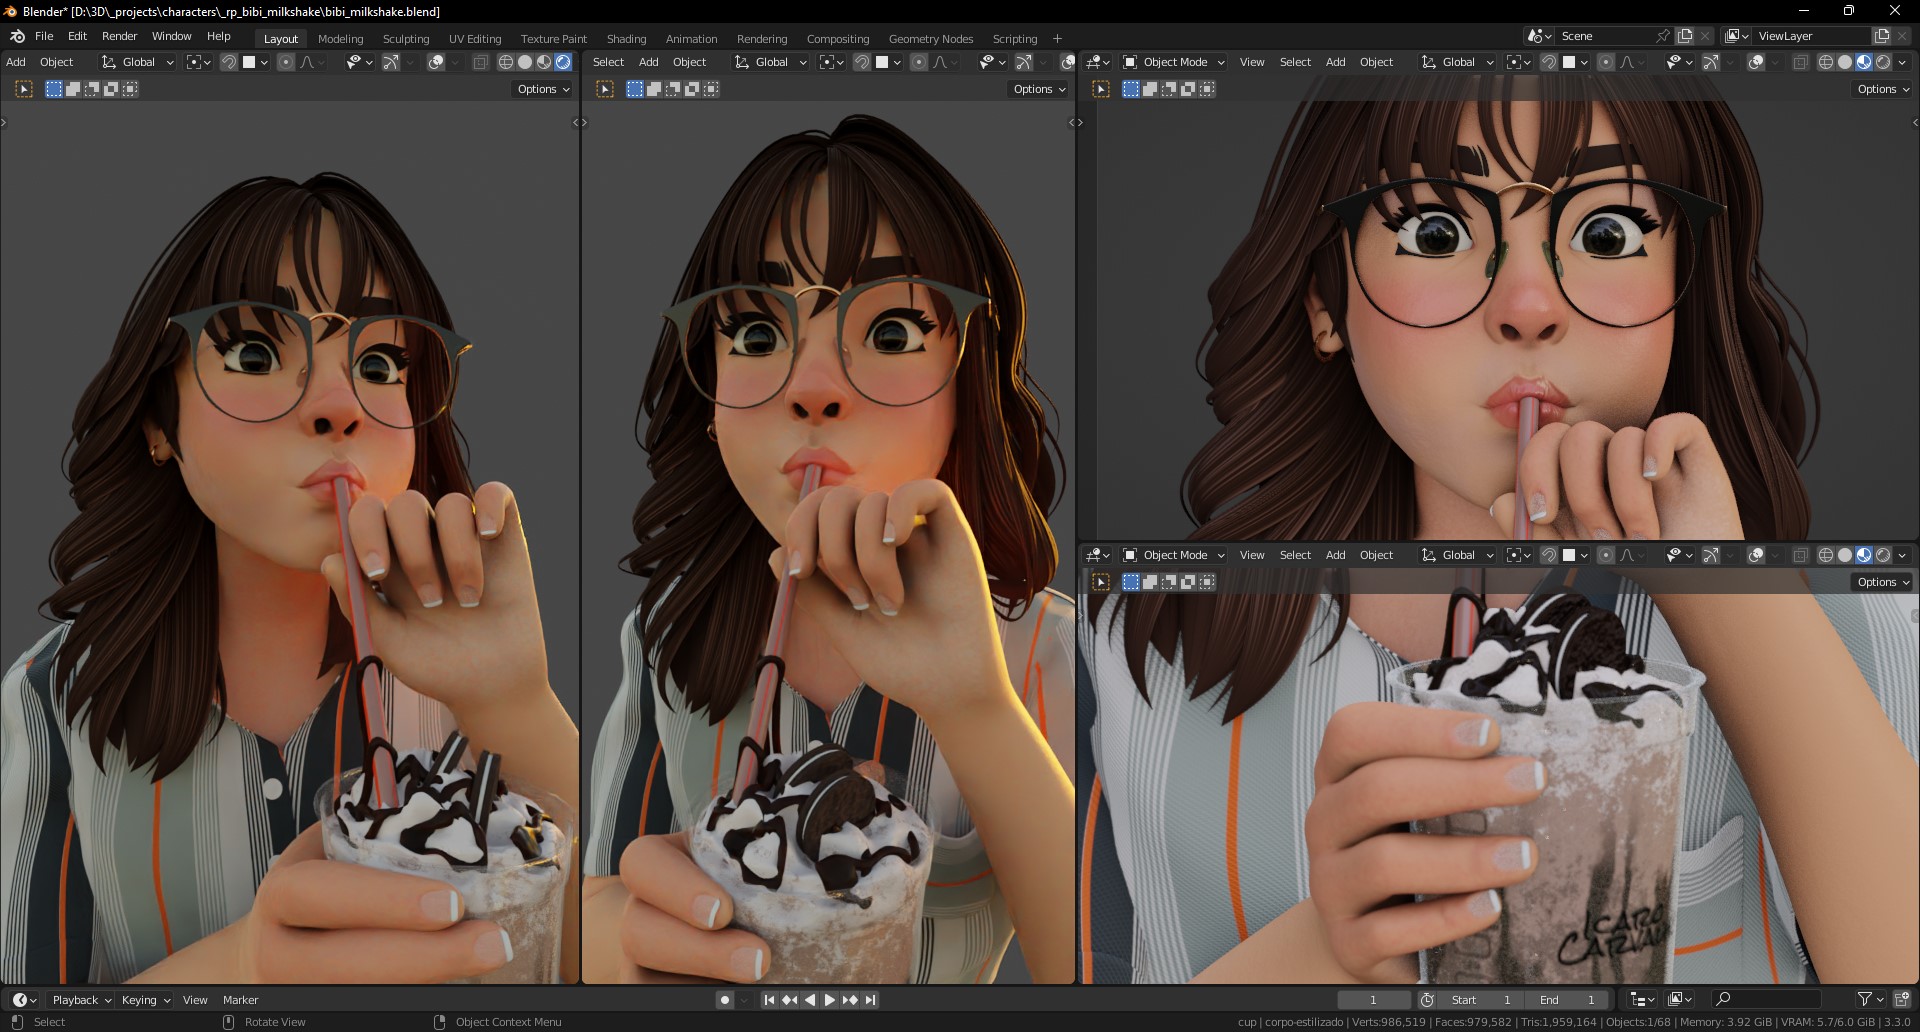
For the eye, I used Auto Eye (https://a.blendernation.com/go/go.php?src=BN&url=https://blendermarket.com/products/auto-eye), which is, without a doubt, the best add-on purchase I've ever made.
BODY MODELING
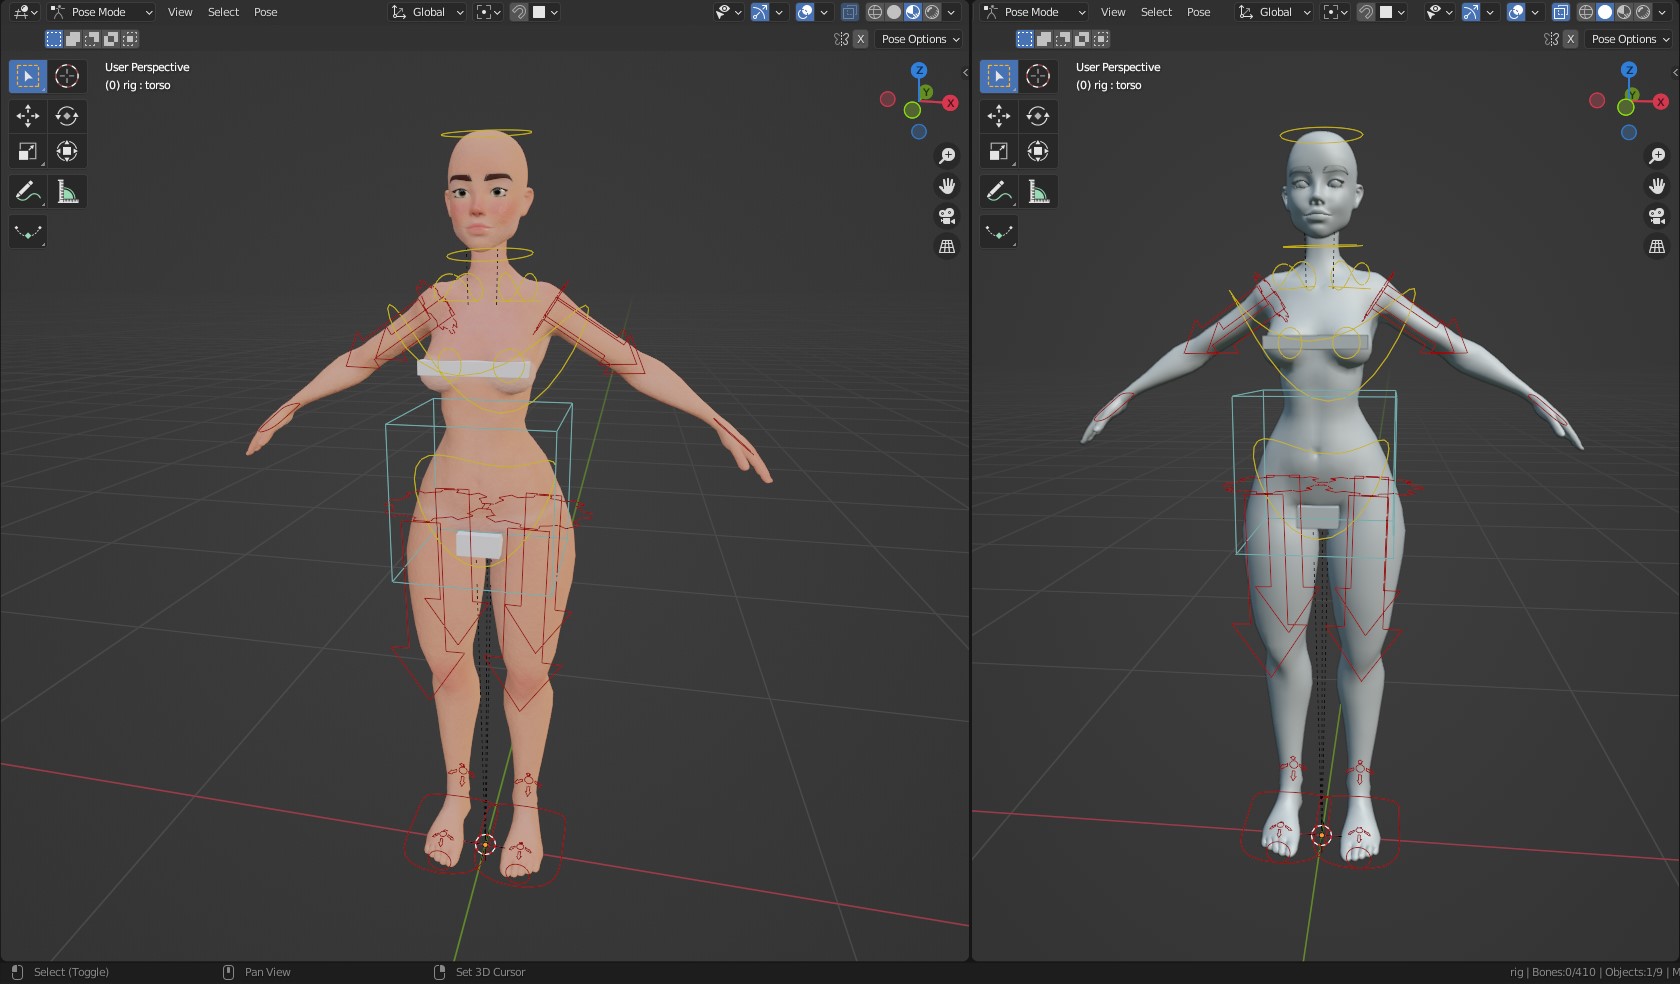
As I had the body figured out, I used the Multires Modifier for anything that I needed to sculpt.

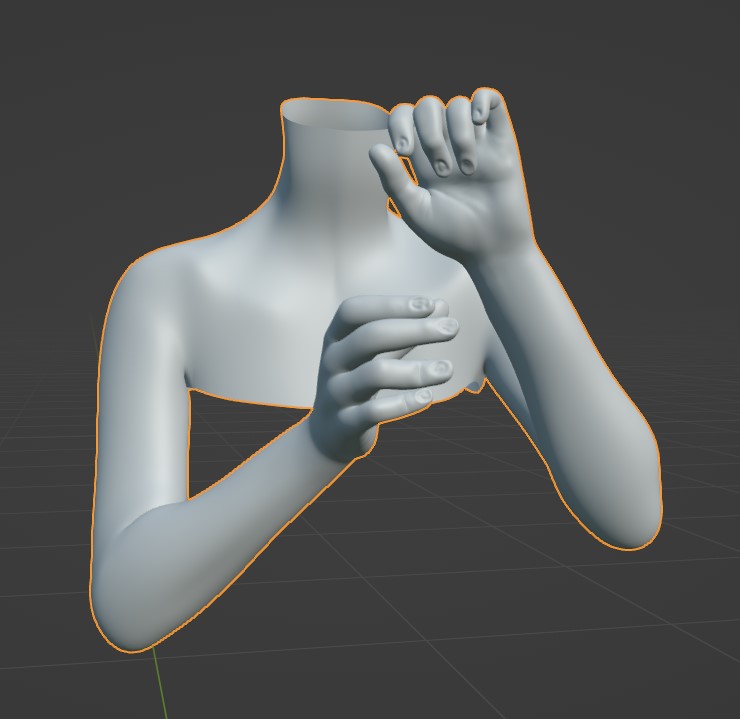
And for the body, I made the pose in the rig and deleted the mesh on the body that I didn’t need. And in this case, I didn’t need to adjust any proportion for the body.

After that, I applied the Armature Modifier and started to sculpt with the multires.
For the eyebrows and eyelashes, I had the simplest plane with some modifiers on :q


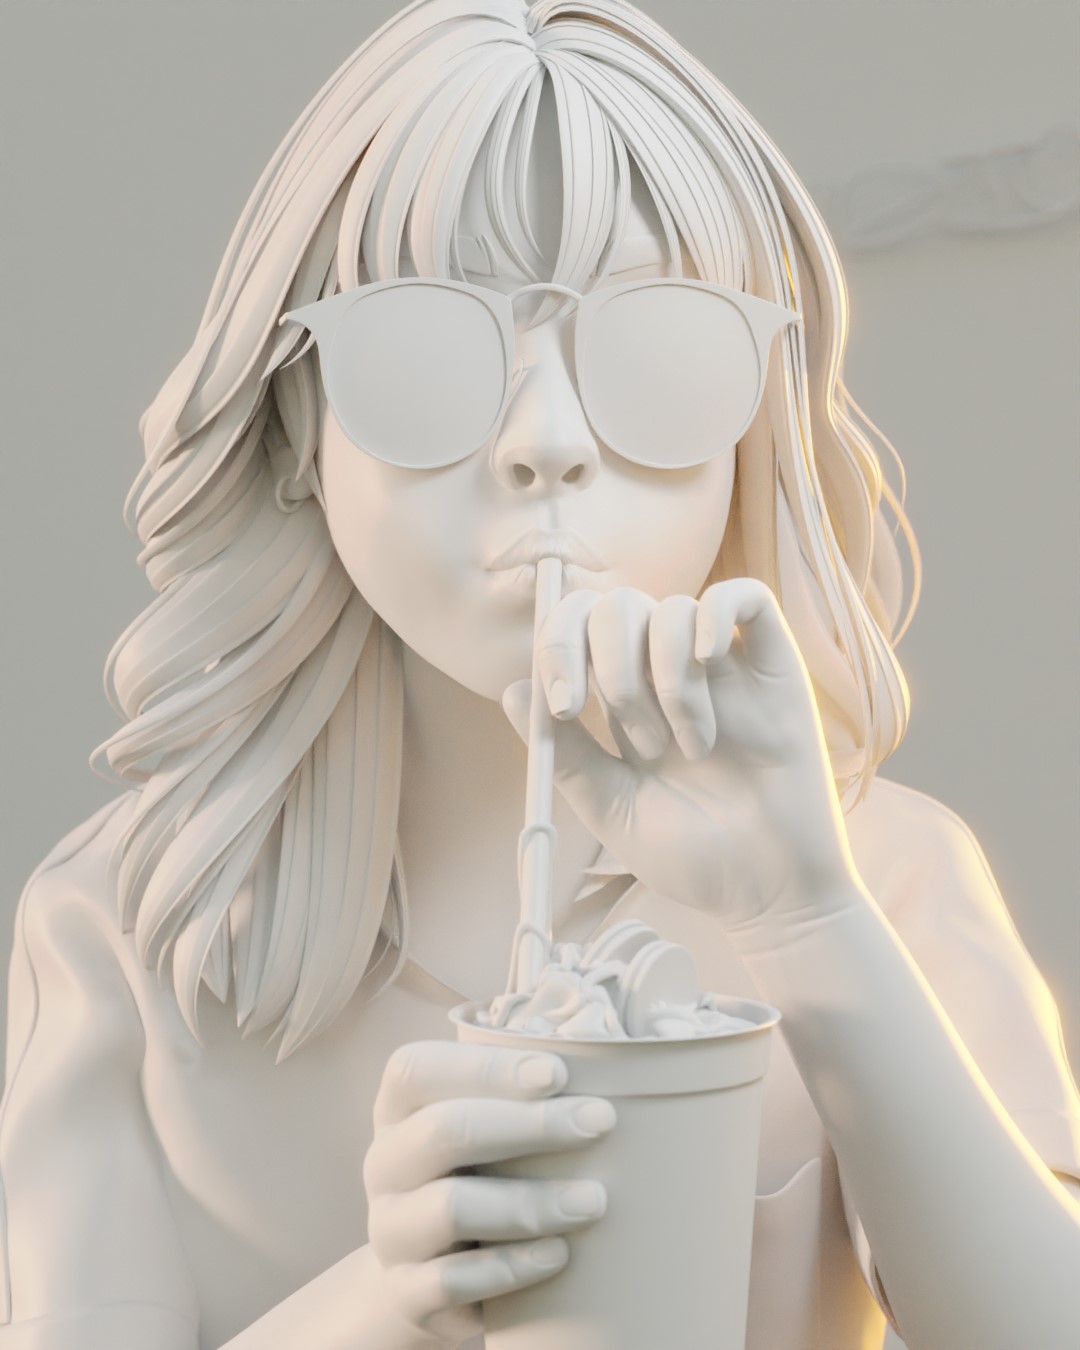
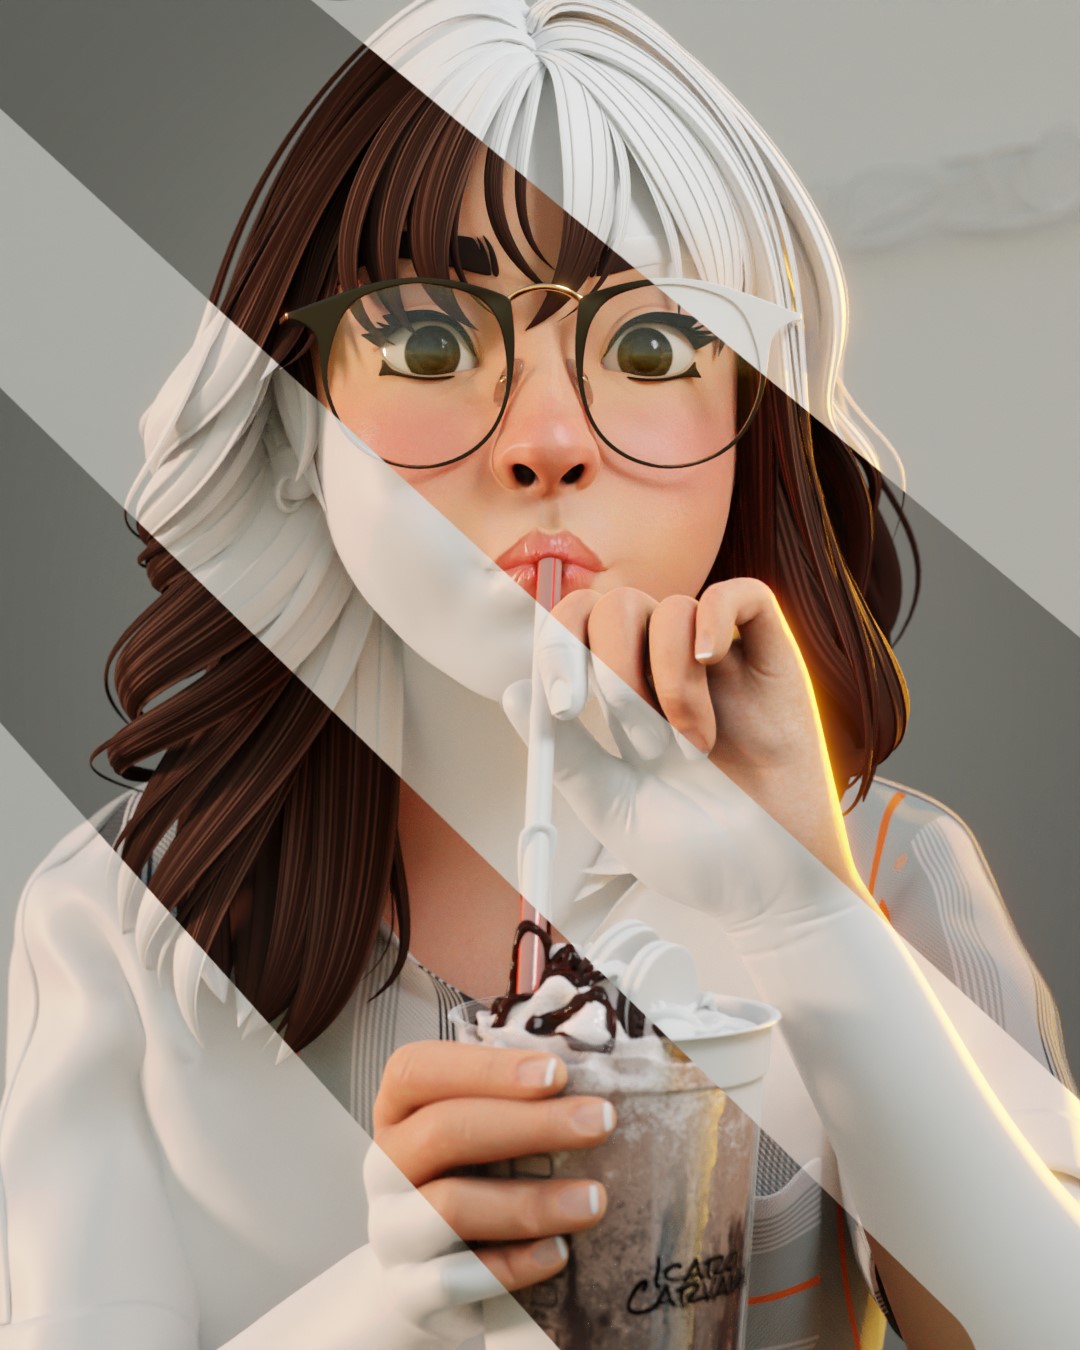
And this is what we have:

For the clothes, I just modeled simple eyeglasses, earrings, and a shirt. Everything else was already in the pose.
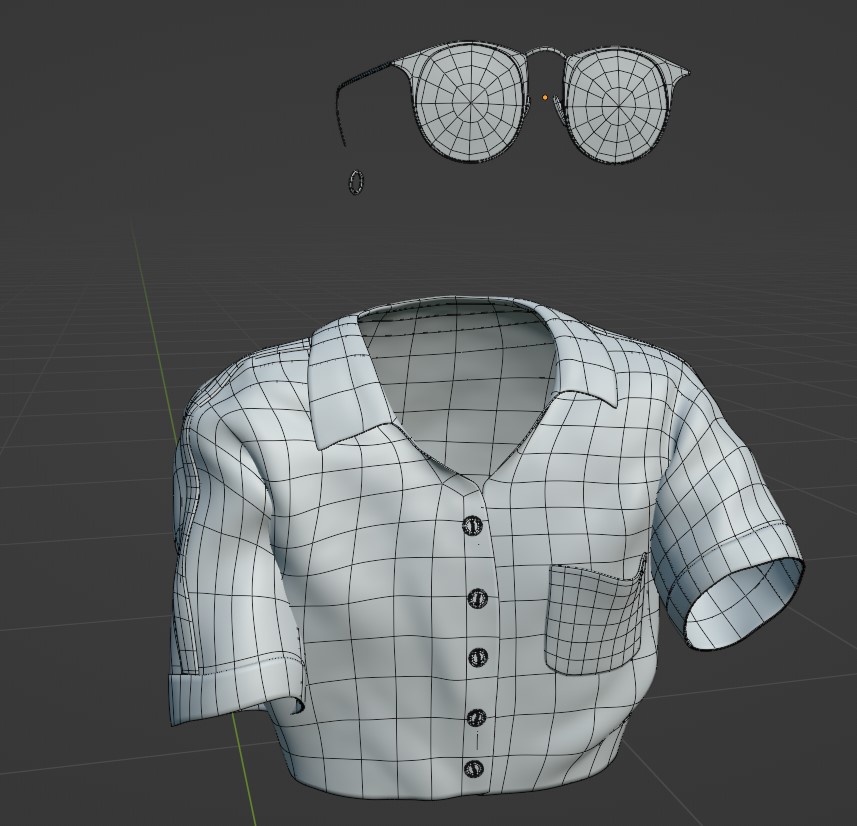
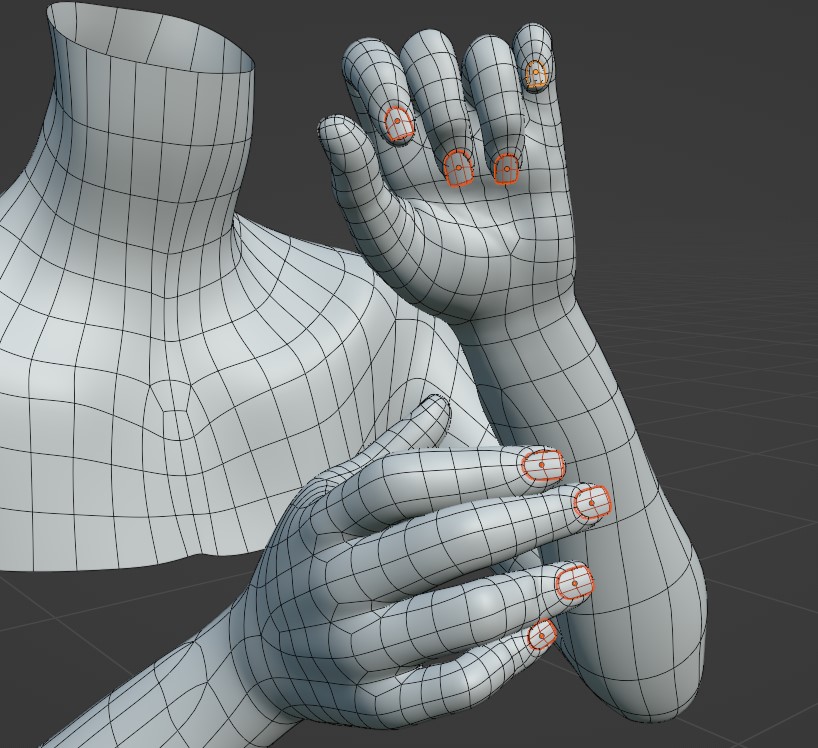
Then I made some nails for her body. It’s a thing that nobody cares about but if it isn't there, people will miss it.
HAIR
For me, the hair is one of the most important parts of the portrait because it defines the silhouette, direction, and personality of the portrait.
It can dictate whether the portrait is going to be bad, good, or wonderful.
I like to work with a base mesh, which will cover part or all of the character's scalp. It's usually not a cool thing to see.
Yeah… you shouldn’t be seeing this.
I used path curves to make the strands of hair, with another curve for the strands’ profile.


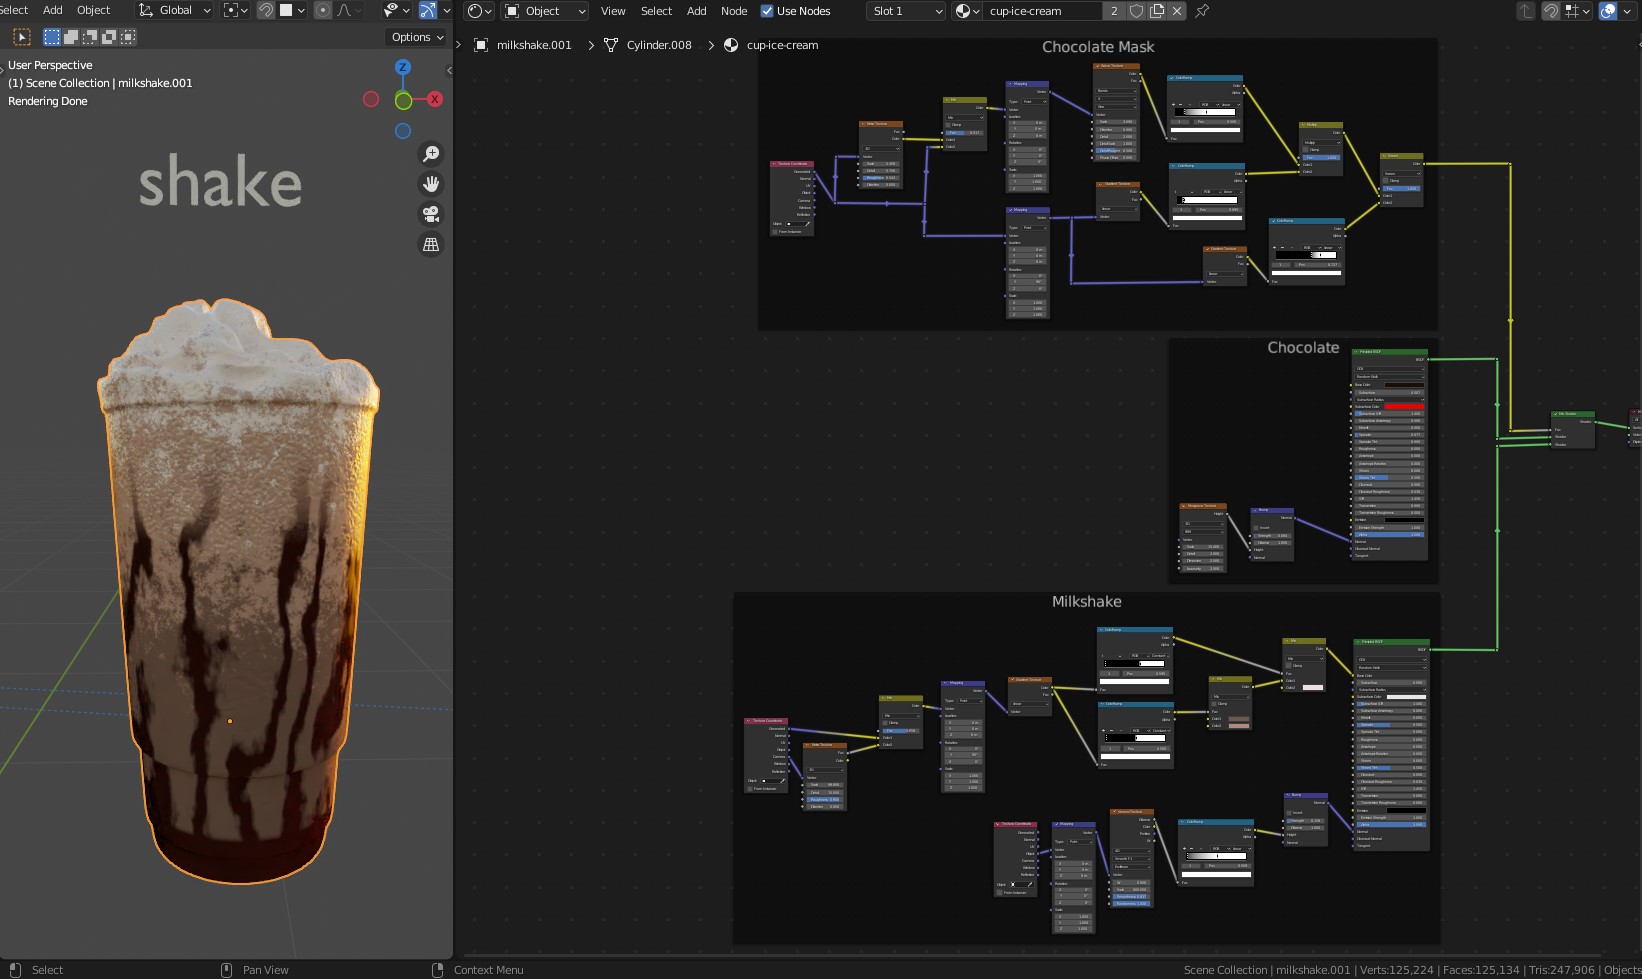
MILKSHAKE
The milkshake was a challenge for me.

I started with the cup.
I made the shake from the cup, used curves to make the topping, and cylinders with a little modeling for the cookies and straw.

The straw isn’t transparent, it has the milkshake’s color on it.
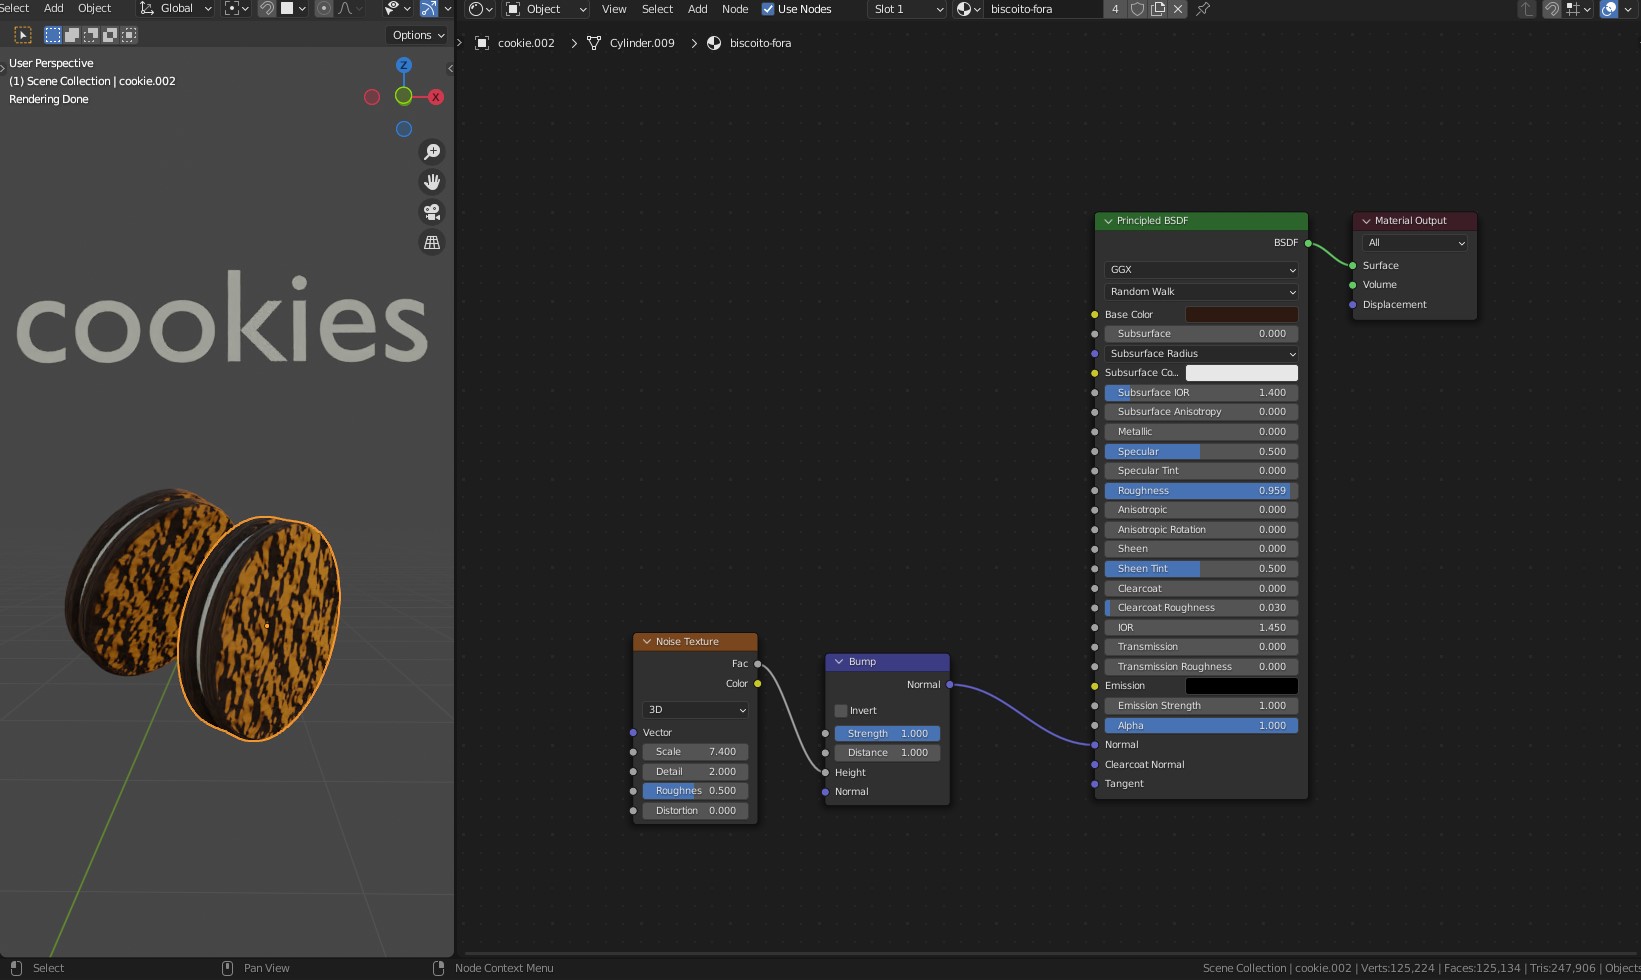
The cookies are objects that only work in the context, far from the camera.
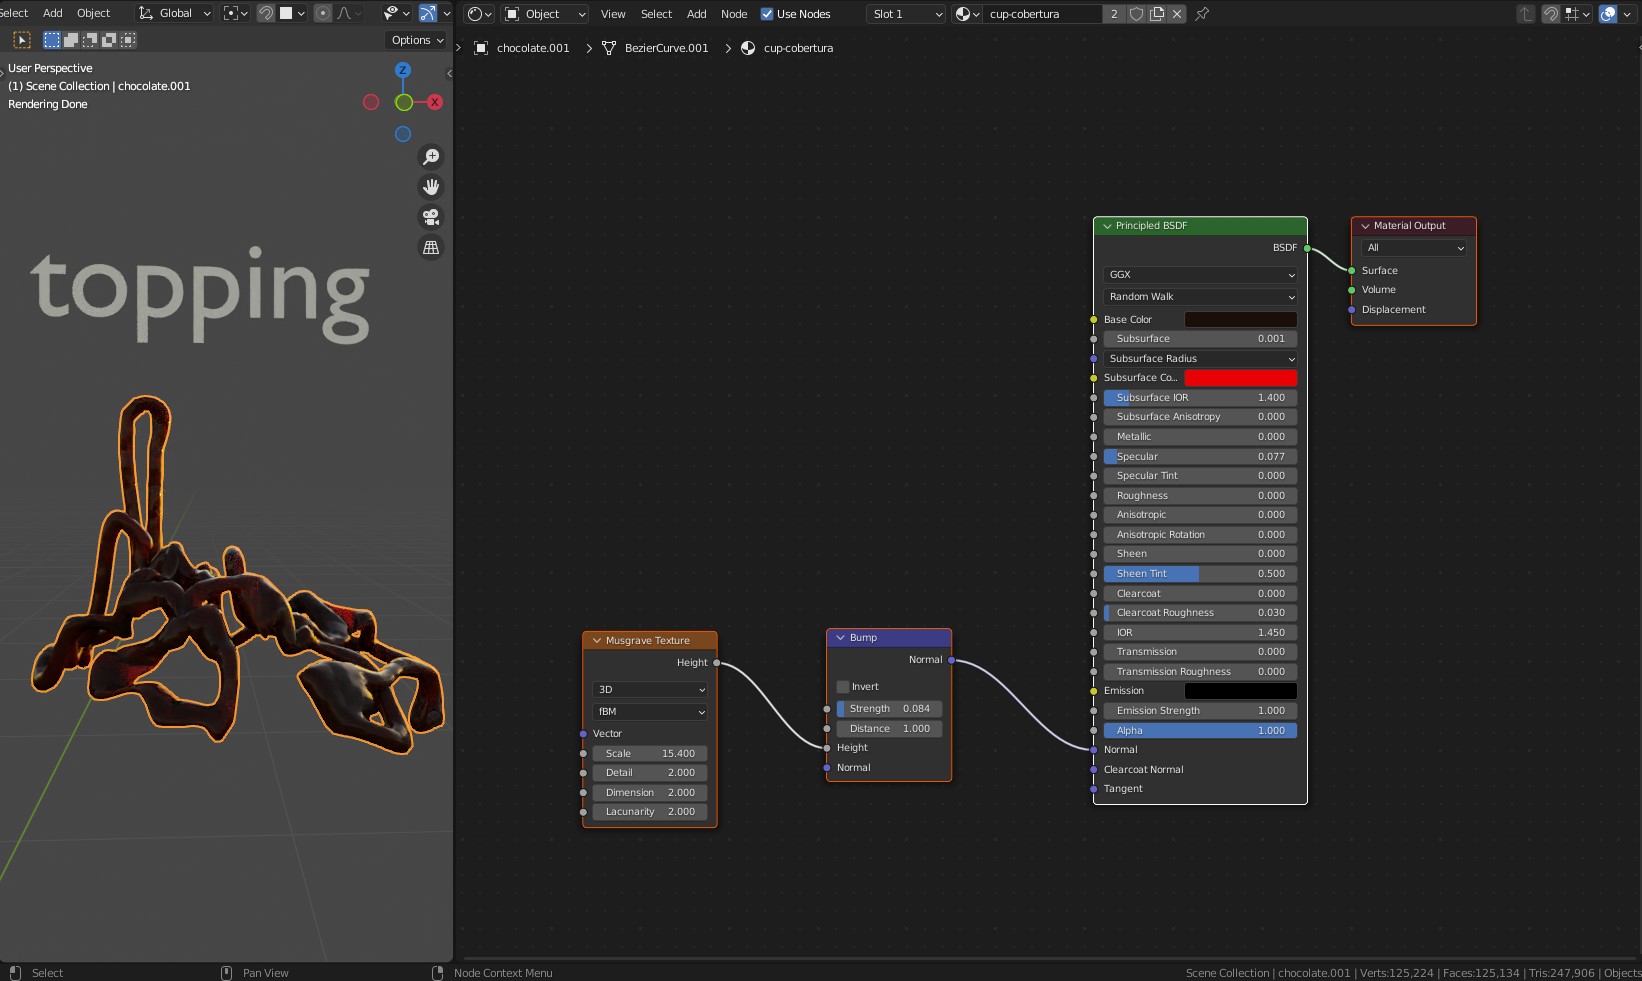
The toppings are a really simple material too. The secret is “love”... and SSS.
Another one of my messy shaders. This one was really a challenge.
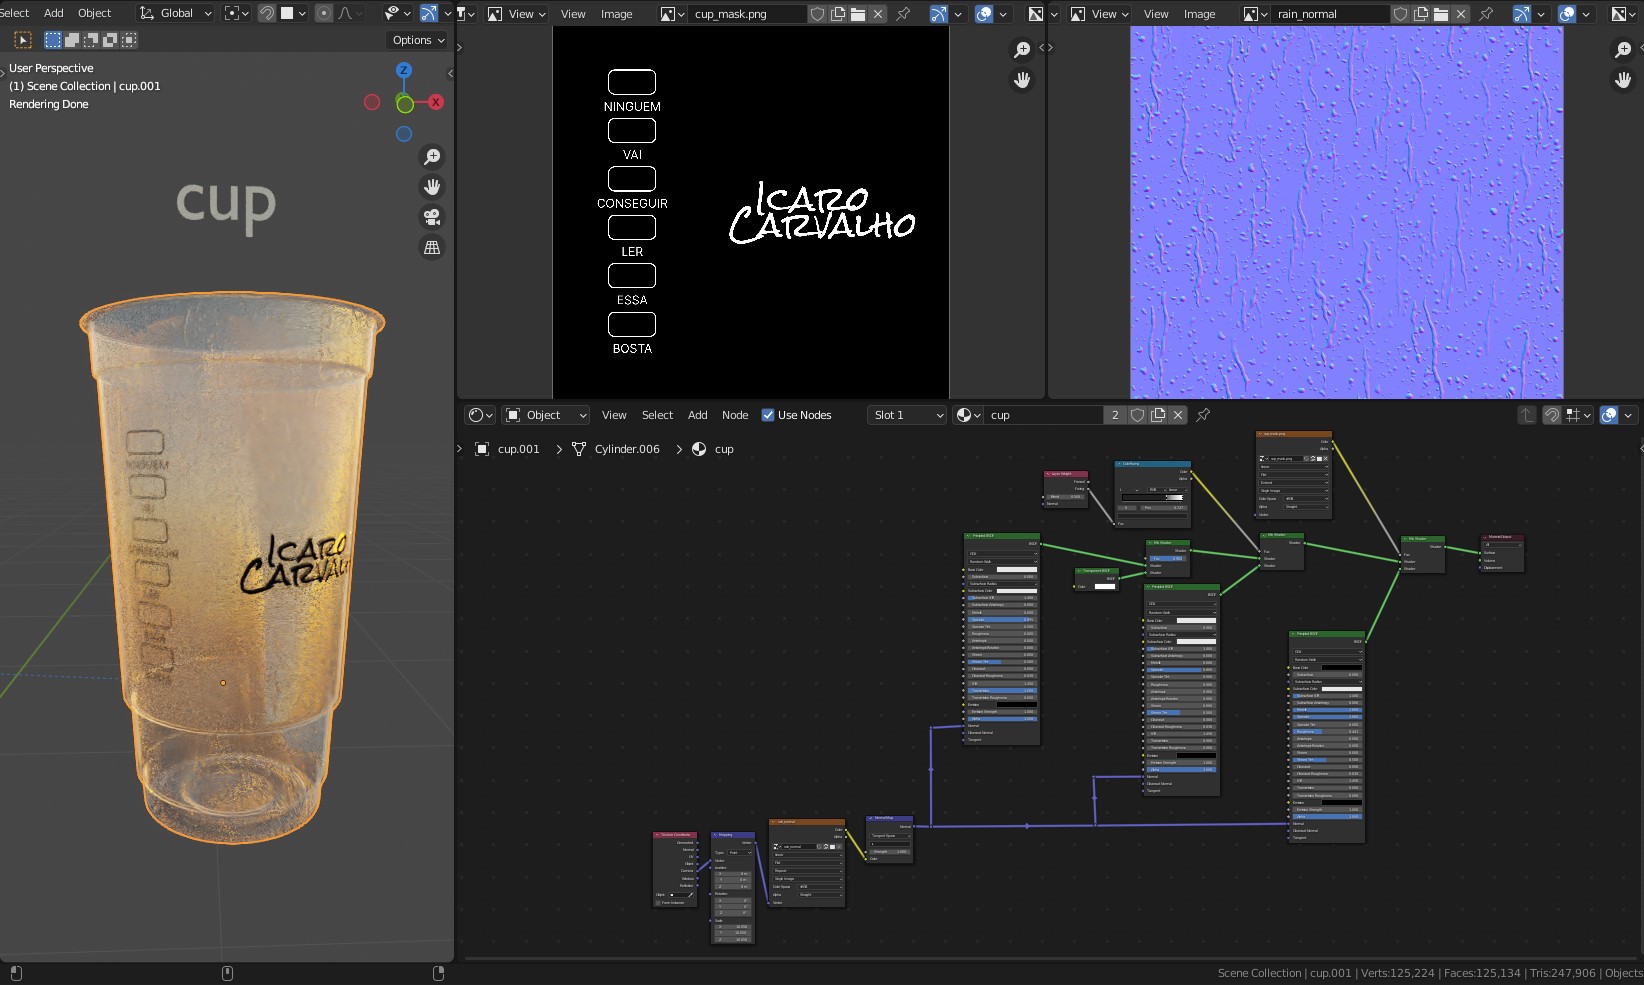
And the cup with an alpha that I did for it. (The texture says “NO ONE IS GOING TO READ THIS SH*T” in Portuguese, guess the joke is on me now.)
I won’t use another topic just to talk about the materials for the character and clothes. Every material, besides the skin that I talked about in the beginning, is pretty much standard.

The only thing that I gave more attention to was this pattern I created for the shirt.

And this little shader for the nails with a gradient.
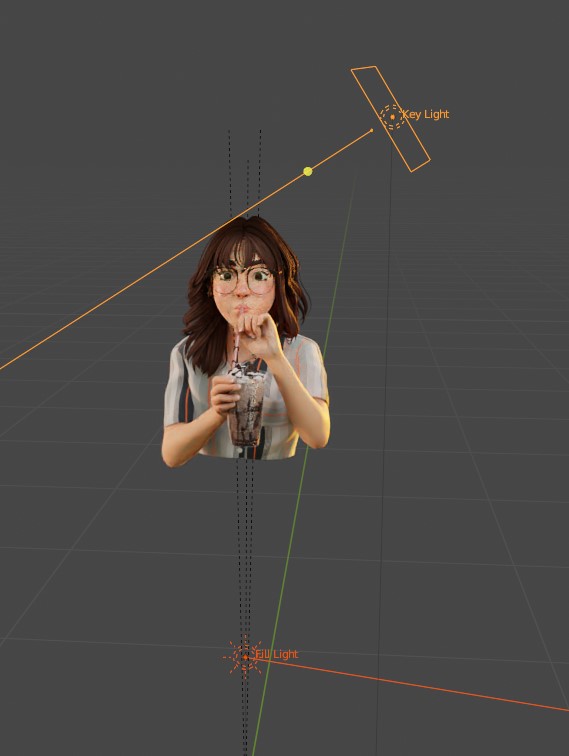
LIGHTING AND RENDER
This is one of my favorite steps on the pipeline—maybe this comes from my photography vein. And the first thing that I noticed while I was learning 3D is: 3D shadows can be real dark, and there’s no such thing in the real world.
To fix that, I used a Sky Texture with a really low strength in the World Light.
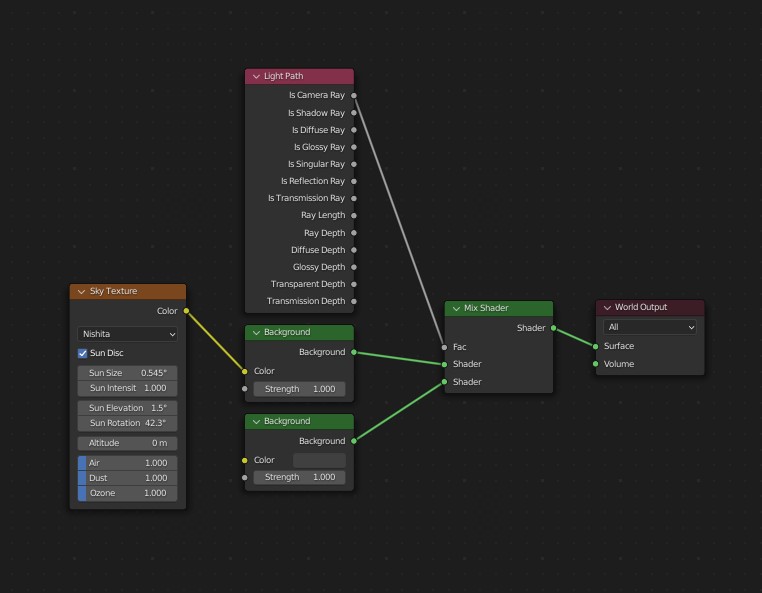
This setup makes the world light to be not visible for the camera.
The World Light already gave me this cool rim light. So, I only needed a Key Light and a Fill Light.
And the final steps:
- I created a structure to be the background wall, which helped bounce the light around.
- I used a curve to create that little neon light, just to make the scene a little more interesting.


And those are the camera settings that I like to use in portraits. The F-Stop and Distance in the Depth of Field depends on the scene.
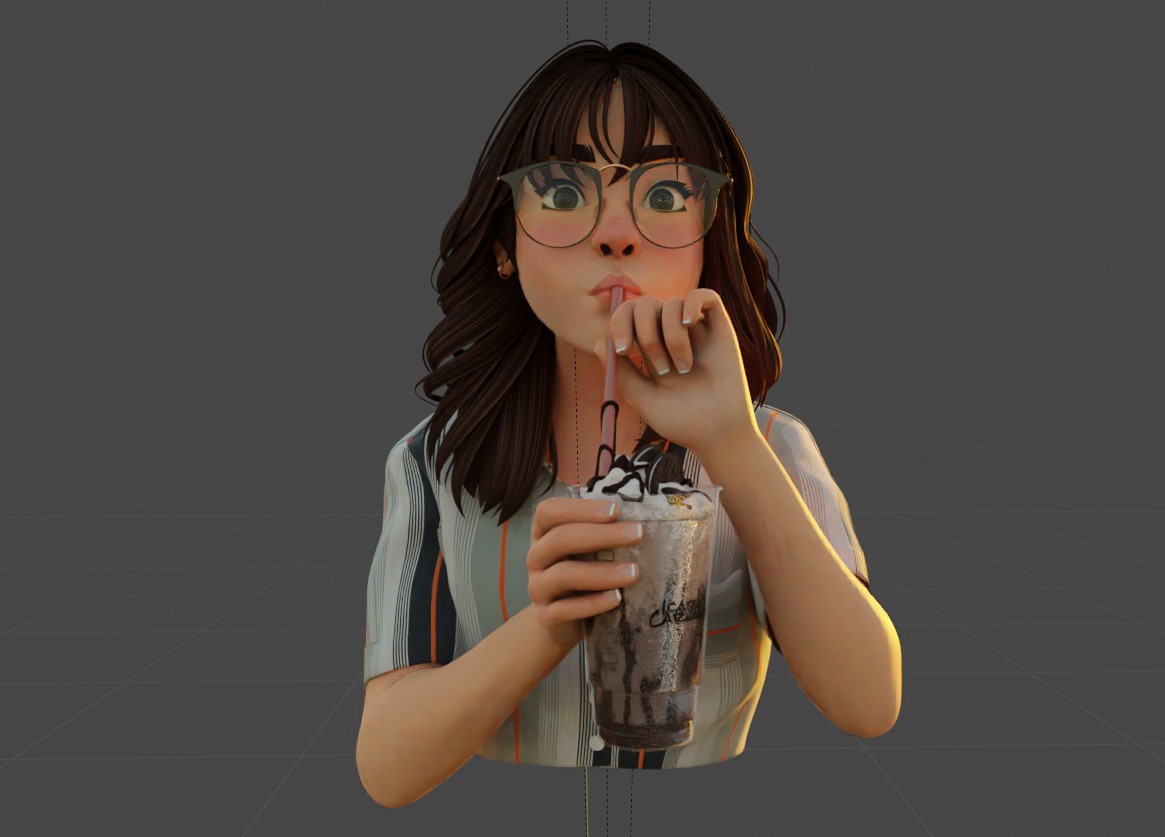
PORTRAIT: BIBIVITONA
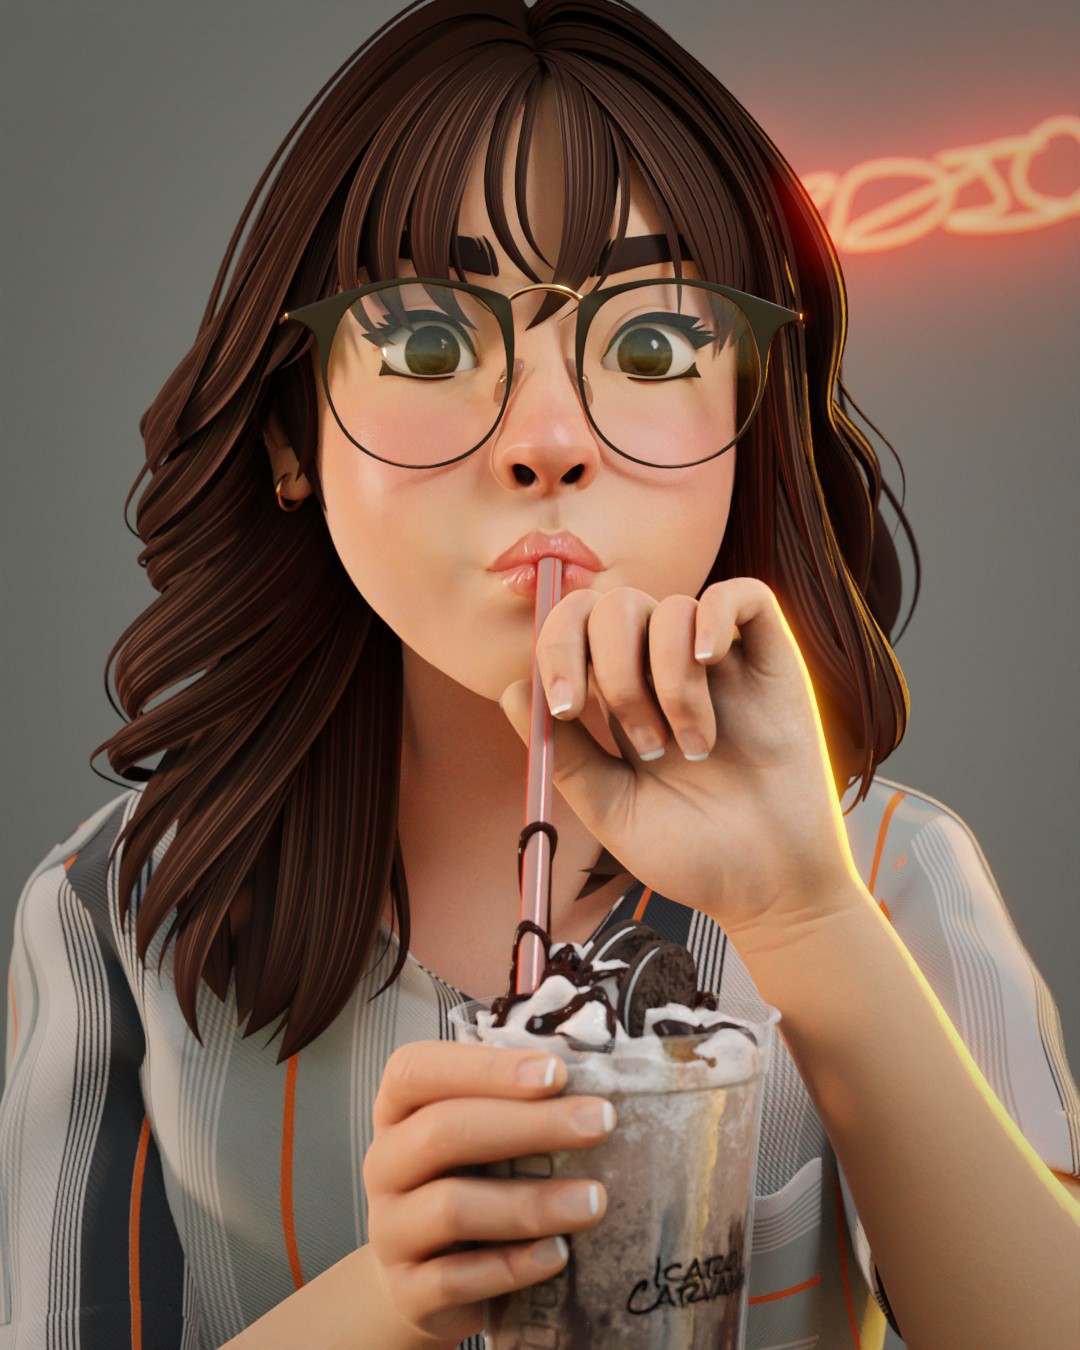
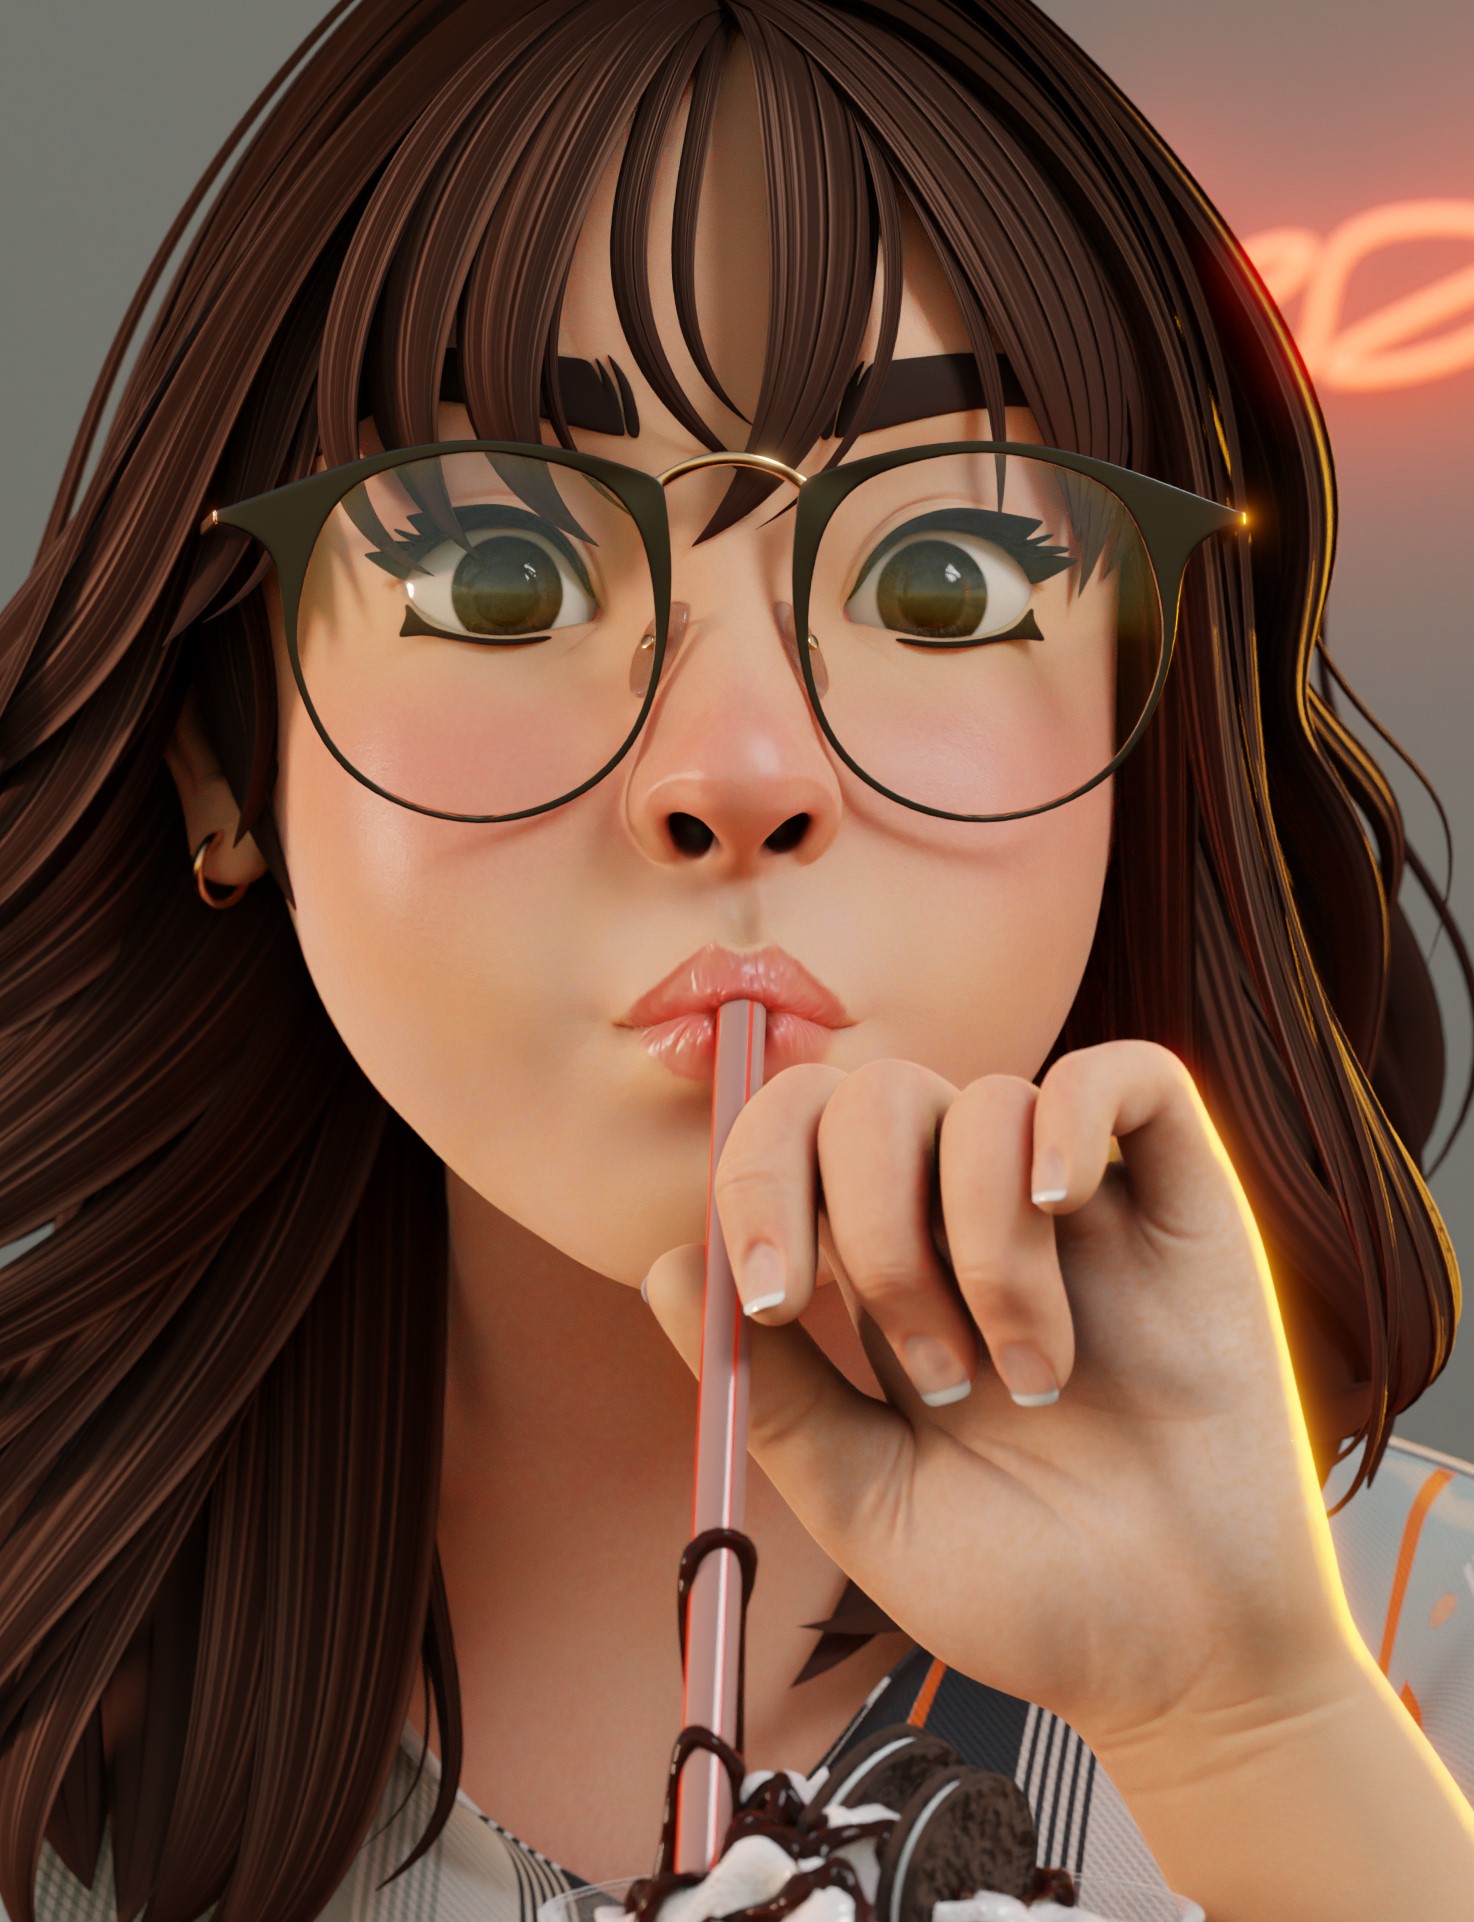
And there you have it!
Thank you so much for reading this article. You can find more of my work on Instagram and Artstation. Have a nice day!
About the Artist
Icaro Carvalho, a self-taught 3D artist from Brazil, passionate about gaming and photography.
2 Comments
Awesome.
c'est Cool forme moi s'il te plais